Transcripts
1. Introduction: Spring is a wonderful season
to enjoy the beauty of nature and express your
creativity through painting. If you have always wanted
to paint flowers but felt intimidated by the
complexity and detail, then this class is
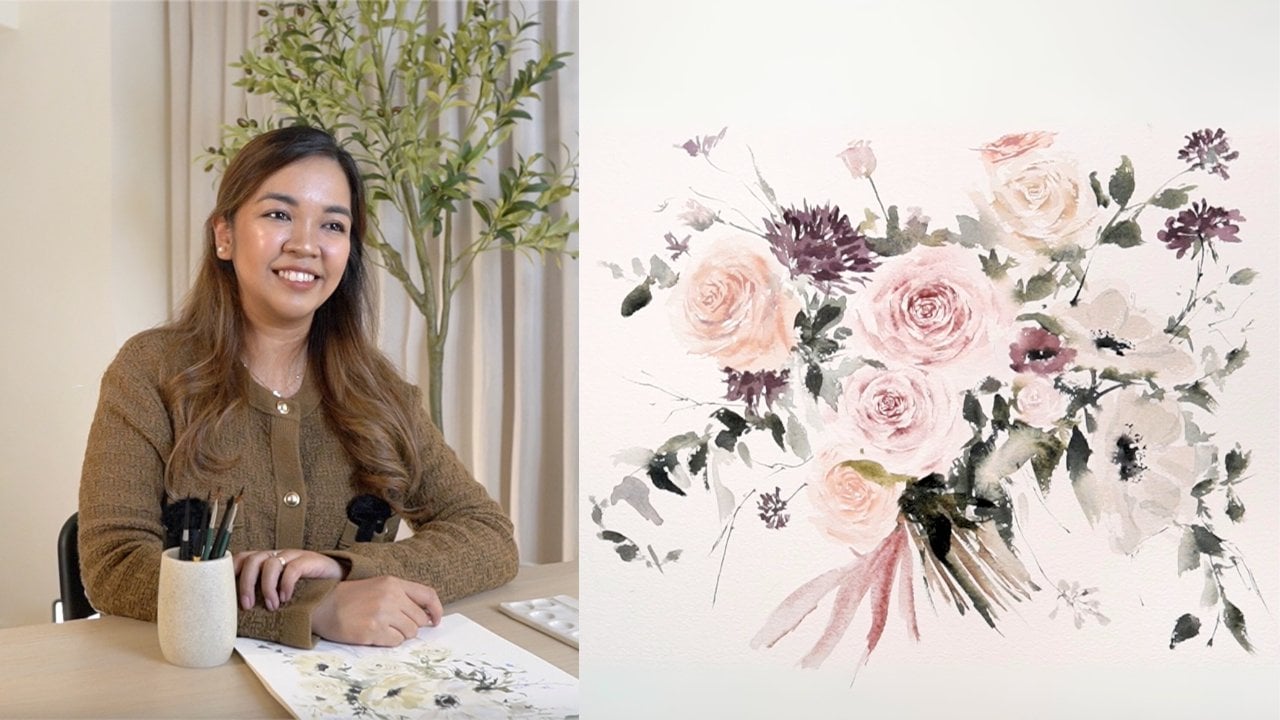
perfect for you. Hi. My name is Jenny Flores. I'm a painter, calligrapher, and a skilled hair top
teacher from the Philippines. Over the past eight years, I've had the privilege
of teaching thousands of students both in
person and online. I've partnered with different
brands and companies to teach painting and collaborated with brands through
social media. I love flowers, and
that's the reason why they've always been my
favorite subject to paint. In this class, you will learn the basics of water
color paintings, such as supplies
that you'll need, color mixing, and of
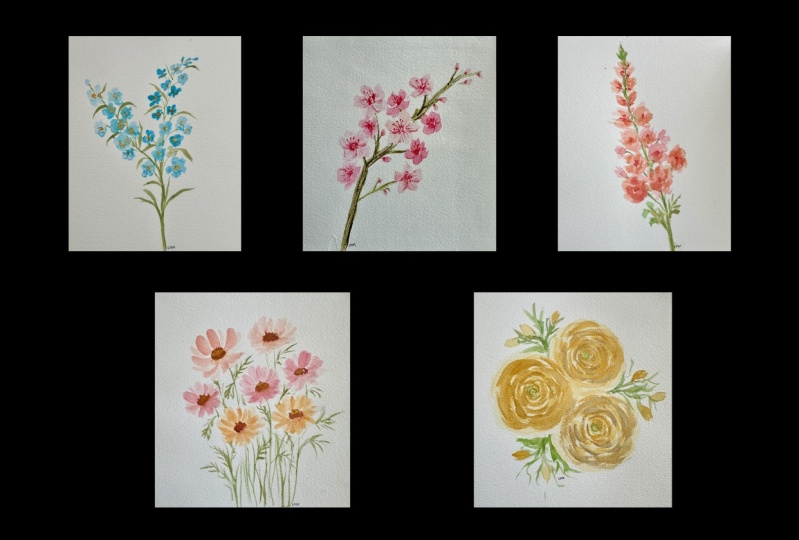
course, brushtrokes. You'll also learn how to paint five easy to paint
spring flowers, such as cherry blossoms, cosmos, ranunculus, forget me
nuts, and snap dragons. Of course, we'll do it in a
loose and expressive style, which I super duper love. These flowers are perfect
for beginners and anyone who wants to add some
floral flare to their art. Will learn how to create
different shapes, textures, and effects
with your brush, how to use light and shadows to create depth and dimension, and how to combine
different colors and tones to create
harmony and contest. By the end of this class, you will have five lovely
paintings that you can frame, gift or use for other projects. This class is for
beginners and students who want to learn how to paint
flowers in a loose style, but don't know where to start. So are you ready to unlesh your creativity and paint
some spring flowers? If yes, then pick up your brush, and let's get started.
2. Supplies: In this section, I
will walk you through the different supplies that I will be using in this class. Let's begin with colors. We will have five
projects for this class, so that means we will
need a bit a lot of colors to make all our projects lovely and at the
same time accurate. Before I forget, if you
want to alter some of the color combination for the
paintings that we will do, feel free to do so. So for this class, I'll specifically use the
following colors. I always use professional
grade water colors in tubes because they
contain more pigment, which is really good in
preserving the color and quality of your artwork
even after years. But if you're a
beginner, of course, you are very much allowed to use student grade watercolor paints. I'll be using a couple of
brushes from silver brush limited in various shapes
and sizes for our projects. We'll be using different
brushes in this class, but you are not required to have all of them to
complete the projects. For the brushes, these are
the brushes that I'll use. For the paper, I'll use the Bau Hong Academy
watercolor paper. While you can use
any paper that's currently available
with you at the moment, using a high quality 100%
cotton watercolor paper will really help you get a high quality result
that you definitely want. Bau Hong is a 100% cotton
cold press watercolor paper in 300 GSM. This is a cheaper alternative to other brands like arches
in fabrian artistico. In painting using water color, it's important to have
some tissue paper nearby, as well as a cup of
water so you can clean your brush while
changing colors. Last thing that we need
is a mixing palette. I use a ceramic
palette because it's easier to clean what a
plastic palette will do. You can comment at the
discussion section if you have any questions
about the supplies. I am more than willing to
help you in this area. As we discuss our
topics further, I will share with you some tips about the supplies as well as alternatives that you can use on your
painting journey. Now, let's go to our next topic.
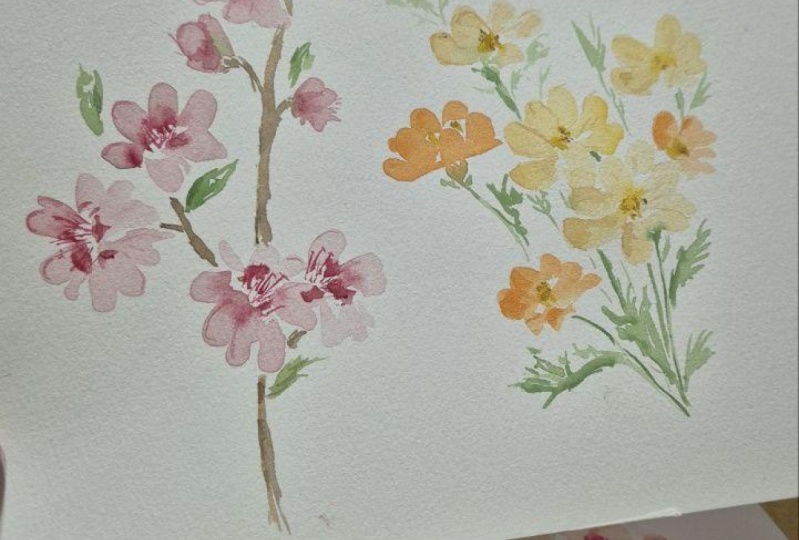
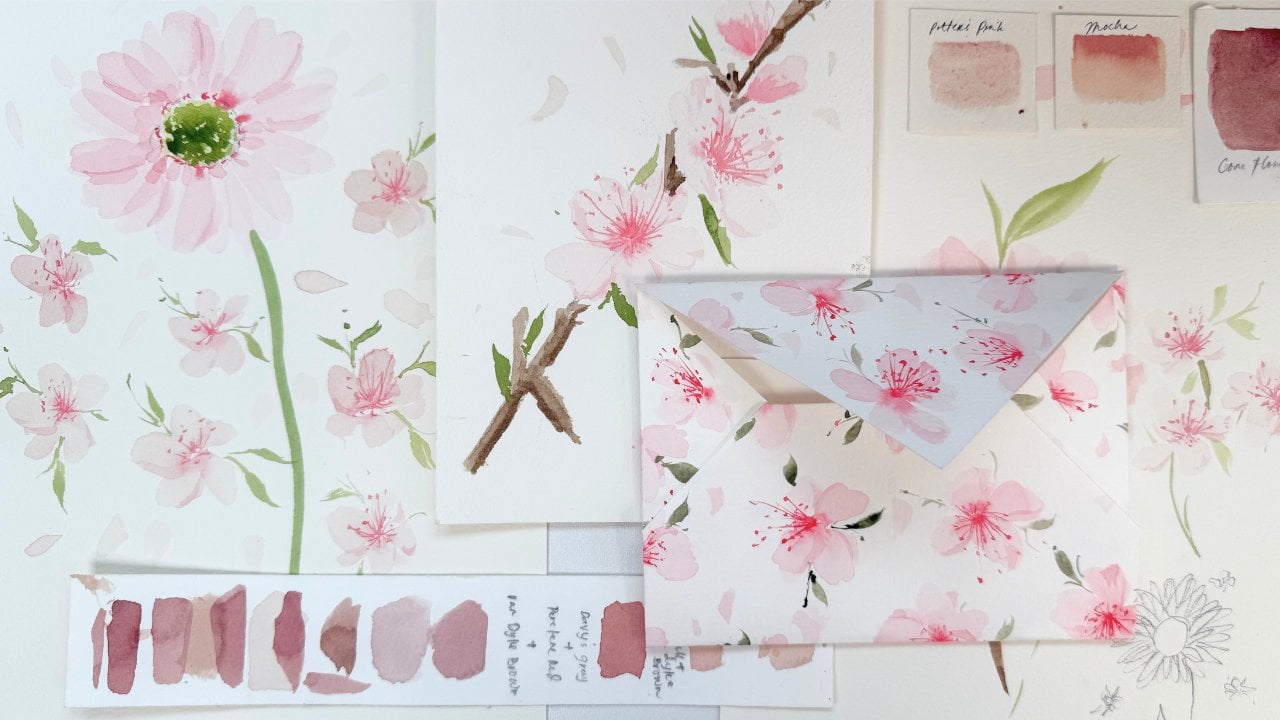
3. Cherry Blossom: Cherry blossoms
stand out as one of the most beautiful flowers to capture on Canvas during
the spring season. Their delicate appearance and mesmerizing sight
of their petals, gently falling
from the branches, create a truly enchanting scene. Given their short
lived presence, about just one week, painting cherry blossoms offers a wonderful opportunity to immortalize their beauty and
create lasting memories. In this lesson, we're
going to discuss the basic strokes that a small
filbert brush can create, which you can use to paint the petals of your
cherry blossoms. We'll also go through some of the basic watercolor techniques like wet on wet and wet on dry. L et's go and start painting. I will be using a filbert brush. This one is specifically called val crescent brush and
size tree over eight. As you notice, I'm just doing flat strokes and a little
bit of side strokes here. That's how we do the base
of a cherry blossom. Now, while this
layer is still wet, I'm going to get a
concentrated mixture of the color that I am using, which is, by the way,
is potters pink. And for the next cherry blossom, I'm just going to
do the same stroke. So flat strokes combined with a little bit
of side strokes. As you notice here, I'm using a very light mixture of
the color that I am using, and that is because
a cherry blossom has a very light and delicate
shade for its petals. So we want to also express that delicate feeling
on our painting. I'm adding the concentrated
mixture on the center again. If you don't have
the same color that I am using, that's totally fine, you can get any shade of pink, and just do the same process. Use a very light or very
muted concentration of the color that you're using, just add a lot of
water on the color. And then for the center, get a very pigmented mixture. Meaning, don't add a lot
of water on your brush, remove excess water
so that you can get a very concentrated mixture of the color that you're using. I am using a 100%
watercolor paper. That's why my paint
isn't drying that fast, but if you are using a 25% cotton or something
that is not 100%, I suggest that each time
you paint the petal, you add the concentrated mixture on the center immediately. I have here my size
to round brush, and using the same shade
of color as my petals. I am adding this tiny thin
lines around my petals. This is just to give an
effect on my petals, but this is actually not an essential step
on our painting. Notice that I'm not really
tracing each of my petal, but rather adding this
detail on some of the petals just to give
a shadow effect on them. Now, time to create a
cherry blossom branch. I'm using the tip of my
size eight round brush, and I'm just quickly dragging
it to create the strokes. Make sure to add a bit of broken lines to
serve as highlights. By the way, I'm using
bandy brown for this one. Back to my filbert brush, I'm adding a few cherry
blossom buds on some areas. This will serve as those
flowers that hasn't bloom yet. I'm using the same
color as the petal, and now I'm switching to my size two round
brush and adding concentrated mixture
of the color that I use on the bottom of
this cherry blossom buds. Now to our next
element, the leaves. I'm using a size two
round brush here, and for the color, I'm using
my favorite undersea green. And I'm just pressing and then quickly lifting my brush
to create the leaves. As I always tell my students, you don't really need to create perfect leaves when
painting in loose style. As long as it's green, and it's something like a triangular shape or
diamond, anything actually. As long as it's green, it will always be seen by
your audience as a leaf. Our base is almost done, so we're just going to
finish off this painting. Now I'm adding falling petals. So I'm using the same
color as my base, but feel free to
add a little bit of water on your mixture, just to make some of
them even lighter. To add the most important part of the cherry
blossom, the center. So I am using a
size to round bush. And I'm just adding tiny lines and dots on the center
of my cherry blossom. When creating this,
make sure to add different length
of lines and dots, just to create variation and to make it look even
more realistic, I want you to add it on
upward direction only. If you want to add
something going down, I suggest that you
just make it small or short rather than
making it long also, just to create a
certain look that the cherry blossom
are facing upward. Do the last one.
I'm very excited to see the work that you have
created for our first project, so make sure to upload it on the project and resource
section of our class. Thank you so much
for joining me, and I'm excited to see
it on our next project.
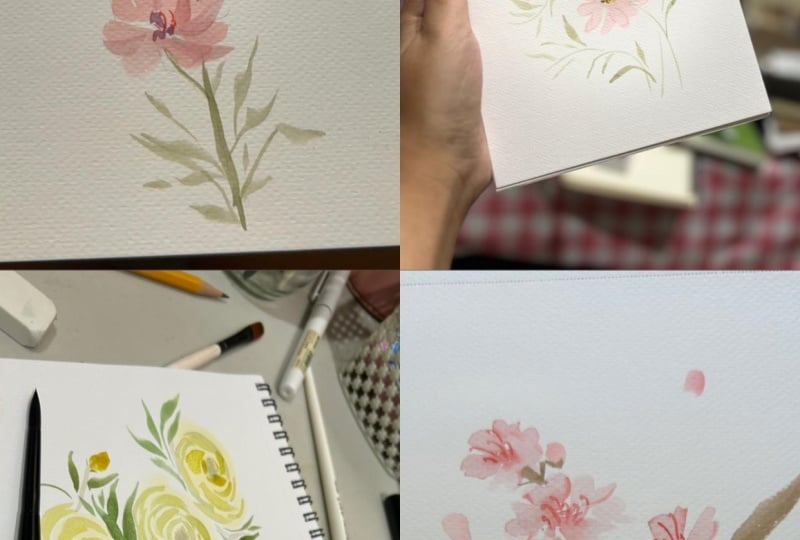
4. Cosmos: R For our next project, we are going to paint this
beautiful cosmos composition. We'll start by
painting the base and exercising the flat stroke
over filer brush even more. And in this project, we're
also going to exercise the bleeding water color effect by adding it to our petals, stems, and floral center. This is my favorite subject for this class, so let's begin. Using my oval crescent brush, I'm creating flat strokes and just dragging it to the
center of my flower. I'm using a light mixture first, but as I move forward, I'm mixing a few petals with concentrated mixture
of my color. I'm using Moca for the
color, by the way. Continue doing the same process for the rest of your cosmos. Make sure to refer
to a reference photo so you'll know where
to add the petals. Notice that as I add
darker tonal values, some of the colors bleed
through the light tones, and it create a
very nice effect. For the last cosmos, I'm going to make it
small and inside of you. Immediately adding
the stem using my round brush so that the
co will bleed a little. Make sure that your
petals are not extremely wet when doing this
to avoid bleeding. Just the right
amount of wetness. While waiting for my petals
to completely dry up, let's add a few leaves first. If you've seen a cosmos
flower in real life already, you would know that
they have long leaves that are very cute, let's add those on our painting. Just create a stroke as
if you're making lines. I suggest that you use
different tonal values of green for your leaves and paint them
all over your composition. It will really make your
painting look more lively. Let's add the second
layer of petals. You may use a mixture
that's a bit more concentrated to create a
shadow effect for your flower. Make sure to add
the second layer on one side of the flower only, so you won't overdo the process. Using the same mixture add thin curvy lines on
some of the petals. Don't add this on
all of the petals, so it won't look
like you trace them. I can add a darker shade on this area just to emphasize it. Now I'm switching to yellow och in a concentrated mixture, and I'm adding a circular
center for my cosmos. I love adding a bit of white space and a few dots
to create highlights. To emphasize the core, I'm adding Van **** Brown on some of the areas to create
a shadow effect on the center of my flower. We are almost done. I'm just adding a
few finishing touch. And we are finally done. I love how our
project turned out, and I'm so excited to see yours. Make sure to upload yours
on our project section. So I'll see you on
our next video.
5. Ranunculus: A For our next project, we will paint these
beautiful nonclus flowers. I love nonces, and when I saw them during my spring
visit in Korea, I really fell in love with
their delicate beauty. And this project we'll start by painting the
vase of the flower. We'll do the leaves necks
and apply leading technique. After that, we will do
wet andro technique and add shadows on our flower
to bring out the petals. We'll finish off by re
establishing the details. I'm so excited to see your
project, so let's begin. Using my filer brush in a very light tonal value
of our yellow ochre, let's paint the vase
of our nancols. You'll notice that I'm not
making clean circles here, but rather I'm adding
a bit of perfection on this base so that it will
look realistic and not flat. While the base is still wet, but of course, not too wet, let's add a dot of green in the center using a
small round brush. My base is still wet for
me to add the shadows, so for now, let's
add some leaves. I'm using a mixture of size and size eight
round brush here, and I'm adding the
leaves all over my. If you're unsure where
to add your leaves, check out a reference
image for your guide. Let's also add a bit of fillers. You may use pink
or blue for this, but I prefer using a concentrated shade of
yellow ochre instead. My base is still wet, so I'm going to add
a few more leaves. Time to add the shadows. I'm just creating
sea strokes that are getting bigger as we go
further away from the center. Here's a closer look so
you can see it better. I'm also adding a bit of thin strokes to mix
with the sea strokes. This will create more
petals for ranunculus. I am mainly using a
darker tonal value for our yellow ocher, but if you want to soften the look of some
of your shadows, you can add in water to
your brush and add it to the edge of the strokes
to soften the strokes. I only added the
shadow in one side of my flower to
create an angled. Time to add the shadow
for our second flower. This time, I make
it in aerial view, so all the sides of our
base will have the shadow. Same procedure, Sea
strokes that are getting longer as we go
further away from the center. Don't forget to mix a little bit of tin strokes,
every now and then. This layer is already die, so I'm going to re
establish the shadows. Sometimes when water color
dries up, it gets lighter, so it's best to re check
your work once in a while, to see if you need to add another layer of
detail to your work. Let's go to the third one. We will make it similar
to the second flower. It's an aerial view, and all of the parts of
the base will get shadows. I always make sure to soften the edge of some of
the shadows that I do, so it will look soft. It also makes the painting
more dimensional if you do it. Let's wait for those
flowers to dry up. For now, let's finish our
work by adding more details. I'm going to add more
leaves here and there. Then a bit of shadow for our fillers using a darker
shade of yellow ochre. I'm also going to add some
leaves for our fillers. And I think I need to re establish some of the
parts of our incul. And we are done that's quick
for a composition like this. I'm sure your work
looks amazing. So make sure to upload your project on the
project section. I can't wait to see them. See in our next video.
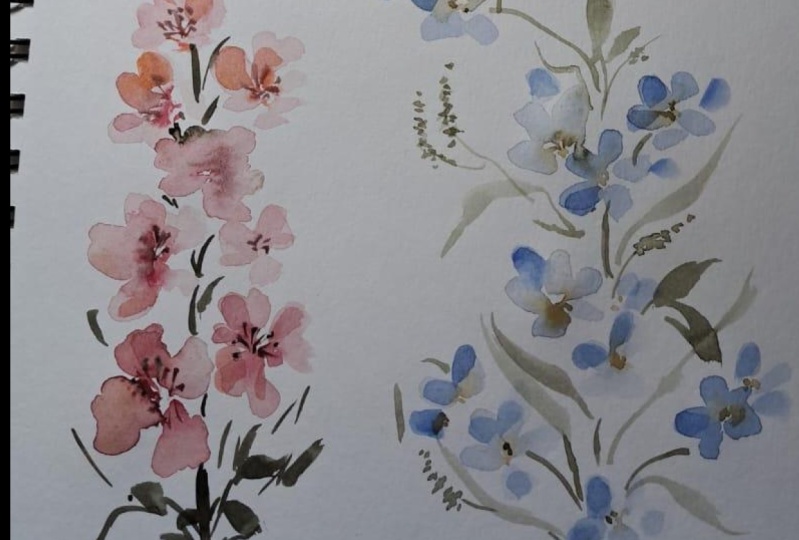
6. Snapdagon: Snap dragons known for
their vibrant colors and unique appearance are charming
flowers native to Europe, North America, and North Africa. Their blooms resembling
a dragon's mouth come in various shades
from pink to purple. Popular for gardens
and bouquets, snap dragons attract
pollinators and bloom from spring to fall and sunny
to partially shaded areas. Their versatility
and whimsical beauty make them beloved by
gardeners worldwide. Today, I'm excited to paint this single snap dragon
composition with you. We will use a combination of
acudon burnt, orange, mocha, and magenta for
each of the petal, which mimics the beauty of one of the famous
snap dragon colors. We'll begin this lesson by
gently sketching the flower. Then we will start
painting the base and allow the colors
to bleed gently. We'll add the stem next, and finally, the
shadows and details. Let's take it easy
with our sketch. I'm starting by lightly
sketching the outlines of the petals just to get the
sense of where they will be. Nothing too detailed
at this point, just rough shapes and sizes. Now for the petals themselves, and mixing up a
combination of nacrod, burnt orange, and mocha. This mix gives a nice warm tone that's perfect for
a snap dragon. When applying the petals, I'm using a mix of
flat inside strokes of my filbert brush to give them
a natural textured look. And remember, don't worry about fly blending
the colors together. Leaving some areas with distinct color variations
add and interest or flowers. As you notice, after I laid
down the base of my petals, I'm adding some depth
and enriches to them. While the petals is still wet, I am grabbing some magenta and delicately brushing it to
certain parts of the petal. This technique
allows the colors to blend and bleed
together beautifully, creating beautiful subtle
variations in and tone. It's the details that really
bring our flowers to life. As we continue adding petals, let's kip things interesting by varying these
shapes and sizes. Each flower should have
its own unique character, so don't be afraid
to experiment. Try altering the
number of petals on each flower to create a sense
of natural irregularity. Some flowers might have
fewer petals suggesting they have been battered by the wind or hidden
beneath the others. And don't forget to mix things
up with our color palette. Add more mocot, some
flowers or go for a peer nacdon burnt orange for
a vibrant pop of color. And remember, our
bleeding technique, feel free to swap
out the magenta for nacdon burnt orange
in some areas. It's all about
playing around with these three colors to achieve the loc you want.
Oh, one more thing. I almost forgot to mention. Make sure the flowers
at the bottom part of your snap dragon are slightly larger than
the upper portion. This asymmetry adds a touch of realism to our composition. Now it's time to give our
snap dragon its stem. Grabbing my trusty
size eight run brush and dipping it into the
color under sea green. We're ready to create a
sturdy base for our flower. I'll carefully paint the stem, making sure to keep it
nice and slightly crooked. Remember, nature isn't perfect. So don't worry too
much about making it straight or
perfectly straight. A little curve here and there just adds a character
to your painting. Also, guys, I intentionally made the bottom section thicker
than the upper part. This mimics the
natural growth pattern of a reverence flower, adding a touch to realism again. Now, don't be alarm with. Some of the greens bleed
a little to your petals. This create an organic
field to our artwork, so giving it a sense
of unity and harmony. Embrace those happy
accidents, guys. On the upper part of the stem, I'll delicately paint some
handful small flowers. These little blooms add terns and balance
on her composition, filling the top part
of our snap dragon. In addition to flowers, they also include
some floral buds just beginning to unfurl. Again, I'm mixing
different colors for the buds and flowers
to create variation. Let's connect the
additional flowers to the rest of our snap dragon. Now, for the finishing touch, to truly bring our
snap agon to life, and mixing up a concentrated
blend of mocha and carefully applying it to
the areas of the petals. This strategic addition
of shadow and depth will give our snap Jagon a three
dimensional appearance, ensuring it doesn't look like
flat or two dimensional. By focusing the mixture on
certain areas of the petals, we are able to create subtle
variation in tone and shade, the natural play of
light and shadows. For our final detail, let's add a touch of magenta
to the center of the flower. This by vent will draw the eye and a pop of color
to our composition. Additionally, we'll
use a round brush to create this delicate
lines and dots, adding sense of movement and
whimsy to our snap dragon. As an optional finishing touch, consider adding a
few small leaves at the base of your snap dragon. This little foliage accent, not only add beauty, but also help ground or flower. And there we have it. Snap dragon is now complete. Remember to take a photo of your masterpiece and share
it in our class section. I can't wait to see your. See here on our next video.
7. Foreget Me Not: I. For our next spring flower, it is a simple, yet attractive, small flower called
forget me not. We are going to
begin our project by painting the base of our flower, and then we're going
to shape it up to the general shape
of our composition. And then we're going to add
the leaves and then fillers, and then we're going to
finish up by filling the empty spaces with some
more flowers and fillers. This is an easy, yet a very nice project where
you can practice strokes, wet on wet techniques, as well as your patience in
painting, something small. I'm very excited to see what you'll create,
so let's begin. Using a small filbert brush. I'm using my silver silk
88 oval crescent brush. Let's do some flat inside
strokes to create or flower. I'm using manganese
blue U for this. And as you notice, I'm
combining light and darker tonal values for the same
color in just one flower. I'm also not completing
all the petals for each flower to create an illusion that some
petals had already fallen. As you notice while
the base is still wet, I added a few dots of
yellow ocher on the center, but make sure to still leave
a little bit of white space in the middle to maintain the original look
of a forget me. Let's continue the process
by adding some more base. Again, make sure to check our reference image to know the proper placement
of our subject. Gonna add the yellow
center for this batch. Make sure to maintain
a little bit of white space in the middle.
Don't forget that. Using the color under sea green and my size four round brush, I will add the stem
of my forget me not. I'm just gonna make a line
and connect to the flower. It's okay if the color
bleeds a little. Now, let's add some leaves too. Continue connecting
the flowers using the stem up until
the top flowers. And then let's add
more leaves as needed. Okay. I'm just going to
add more leaves here. Now that we have the general
shape of our composition, we can now add more flowers to fill in the space
around our base. Add some flowers using the same process
that we had earlier. Adding some yellow center. Creating a flower like this, which has a lot of the
same set of flowers. Takes a little while, and sometimes it gets boring, but as you notice, while creating a composition, you also get to practice
painting the same flowers. So it's a win win for you. So you get to create
something that you can frame, but you also get to practice. So it's nice to paint something like
this once in a while. For this part, we will add some fillers using a very
light mixture of green. Just create tiny dots
in a shape of a corn. Then using a darker
shade of green, add depth to this
flor by adding some more tiny on one side only. Another part that we should add debt on are the
petals of our flower, using a concentrated
mixture of our color, which is Manganese blue hue, add a stroke on one or two
petals of your forget me nots. See how this process add more
life to your composition. Look. So it already has depth, and it really gave a lot of life on our
simple composition. Time to finish off our project. Let's add more leaves and
fillers to the empty spaces. You may follow what
I'm doing here, but I also encourage
you to inject your own creativity
on this part. And that is it for our forget me not project. We are done. So don't forget to
snap a photo of your work and upload it
to our project section. See you on our next video. O.
8. Final Thoughts: We are done. Thank
you so much for joining me and well done
for finishing the lessons. I hope you found this last useful and learned
something new. Most importantly, I hope
you learned the beauty of loose floral water color and enjoy the process of
painting spring flowers. I encourage you to practice more and apply the
lessons that you learned today on the next floral artworks that
you will create. I am very excited to see the projects that
you have created. So please take some photos of your paintings and aplo them into the project
section of our class. If you found this class helpful, I hope you can leave a review
in the review section, and let me know if this
class met your expectations, what you enjoyed the most, and what can be improved. This is very valuable and helpful to me as
your instructor, so please don't skip this part. Also, don't forget to follow
me here on Skillshare so you'll get notified about my upcoming classes
and giveaways. Speaking of giveaways, we are currently
having a giveaway. Head over to the project
and resource section to know the details and how you
can win our exciting prizes. Lastly, feel free to share your project on Instagram
and Instagram Stories and tag me at Jenny Floris Art and Skillshare's
Instagram at Skillshare. I will surely share your
work with my community. I hope you love this class
and learn something new. Thank you so much for joining, and I'm very excited to see
you in the next one. Bye.
 Jenny Flores Art, Top Teacher | Watercolor & Gouache