Transcripts
1. Intro: welcome in this class. I'll demonstrate various ways to angle and grip your brush so you can create delicate, graceful leaves. And trust me, you'll be able to execute these elegant strokes in a matter of minutes. Oh, then walk you through my process of creating twisting I appealing vines and branches and finally showing you how to put it all together. So you'll have a beautiful finished art piece and was just a few simple additional techniques. I'll show you how to bring that piece toe life even more. This class is designed with the beginner and intermediate artist in mind. You have access to over 20 detailed handouts that give you very specific examples of the brushstrokes, leaves, vines and branches. If you're able to print these before class, I encourage you to do so, but it's not required. I will be showing you some of them throughout the lessons. I will only be using the wedge brush, but if you have a triangle brush that will absolutely work. Teoh, a dagger brush, which is not as thick, can also be used and can provide some of the same results. By the end of class, you'll have a beautiful finished piece featuring your unique design of leaves, vines and branches. I encourage you all to upload your projects in the class gallery for all of us to enjoy and be inspired by. I look forward to painting with you today. Hi there. I'm Jen Sweeney, a self taught artist from Ohio. And if you've ever been captivated by the graceful and gentle flow of leaves, vines and branches and wanted to recreate that look in watercolor, I look forward toa walking alongside you today in class and doing just that. So grab your supplies and let's head on over to the next lesson and I'll see you there soon .
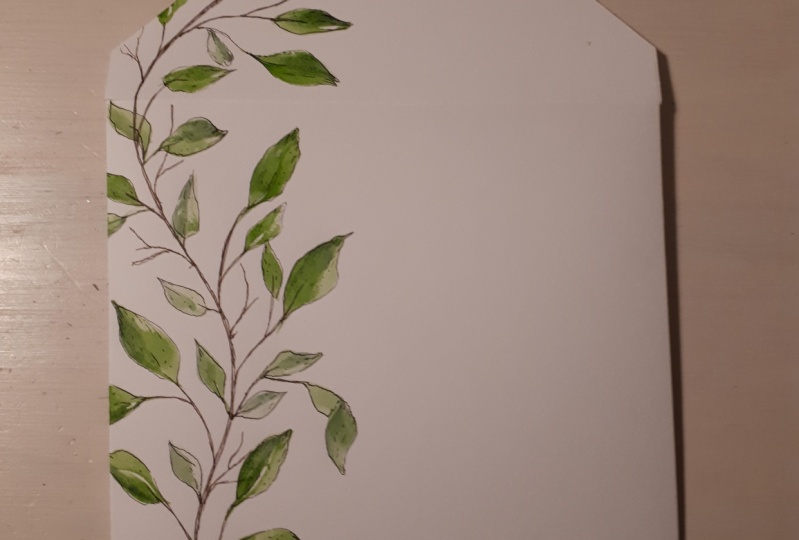
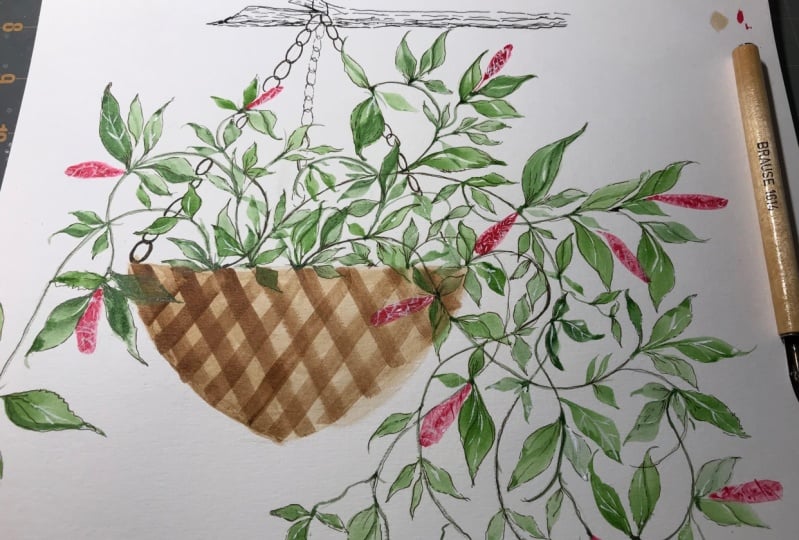
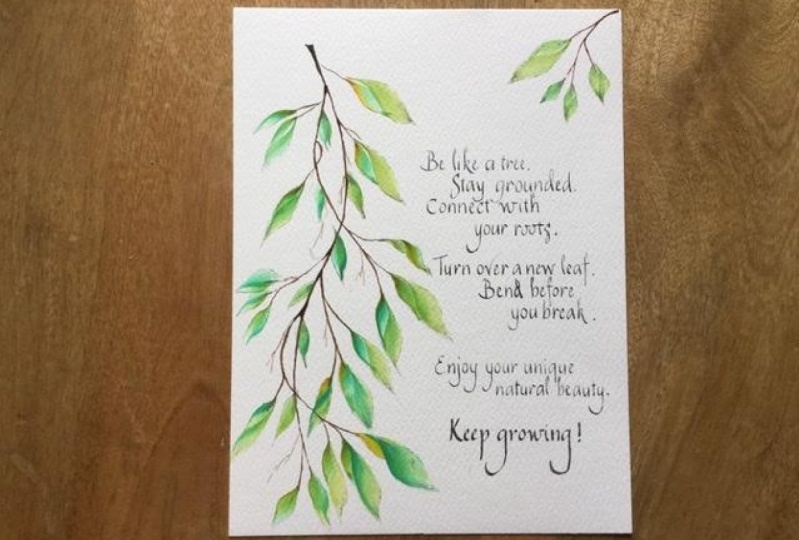
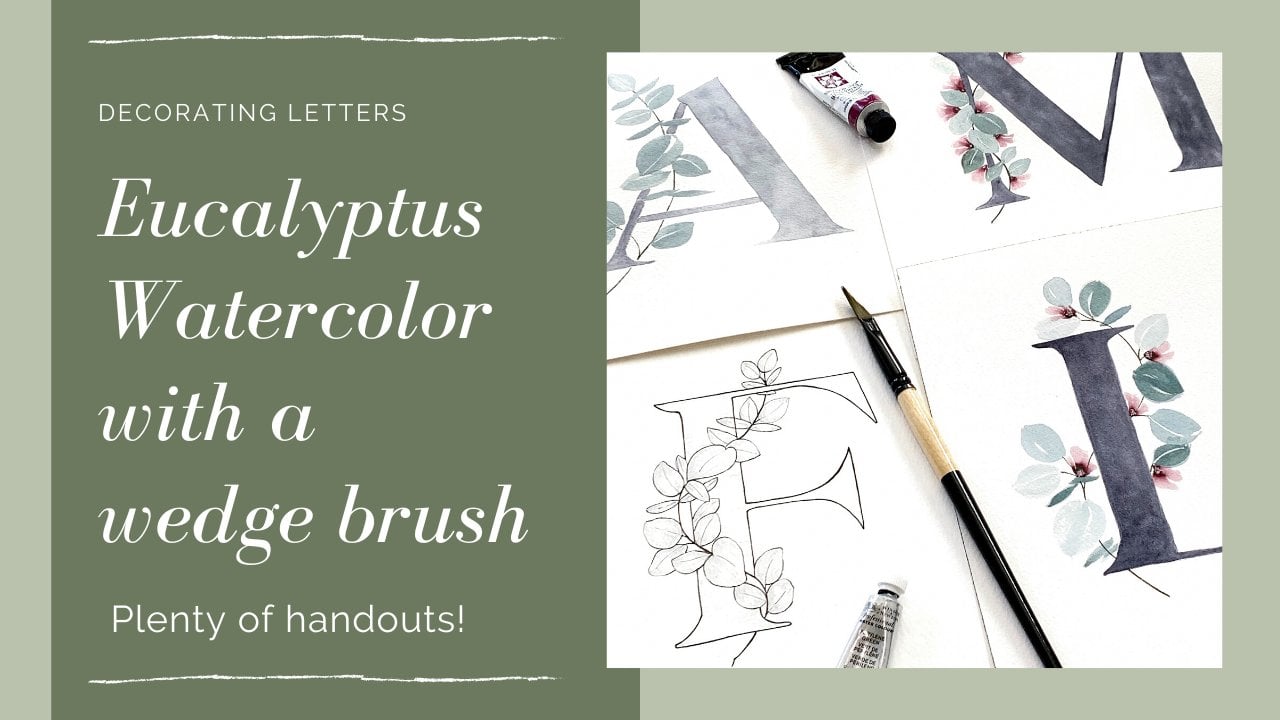
2. Class Project: Okay, so for the class project, I wanted to go ahead and give you a heads up about that before we dive into the lessons. So for your project, I do encourage you to upload these into the class Project gallery for all of us to enjoy and see what you'll be doing. I encourage you to choose from one of the templates or certainly come up with one of your own combinations. So any kind of combination of leaves and branches, leaves and vines just leaves. Whatever you want to dio Teoh, make your own unique art piece. If you want to frame that, have it as a stand alone project or added to other items. I would love to see that to just a few examples I have here just a decorated envelope. Maybe you want to enhance one of your lettering pieces added to an envelope for an insert journal pages. Or, if you want to just walk around the house like I did, grab some items just to paint on feel free to do so. I would love to see your projects. Just have fun with it, enjoy and cannot wait to see what you all come up with. So let's head on over to the next lesson
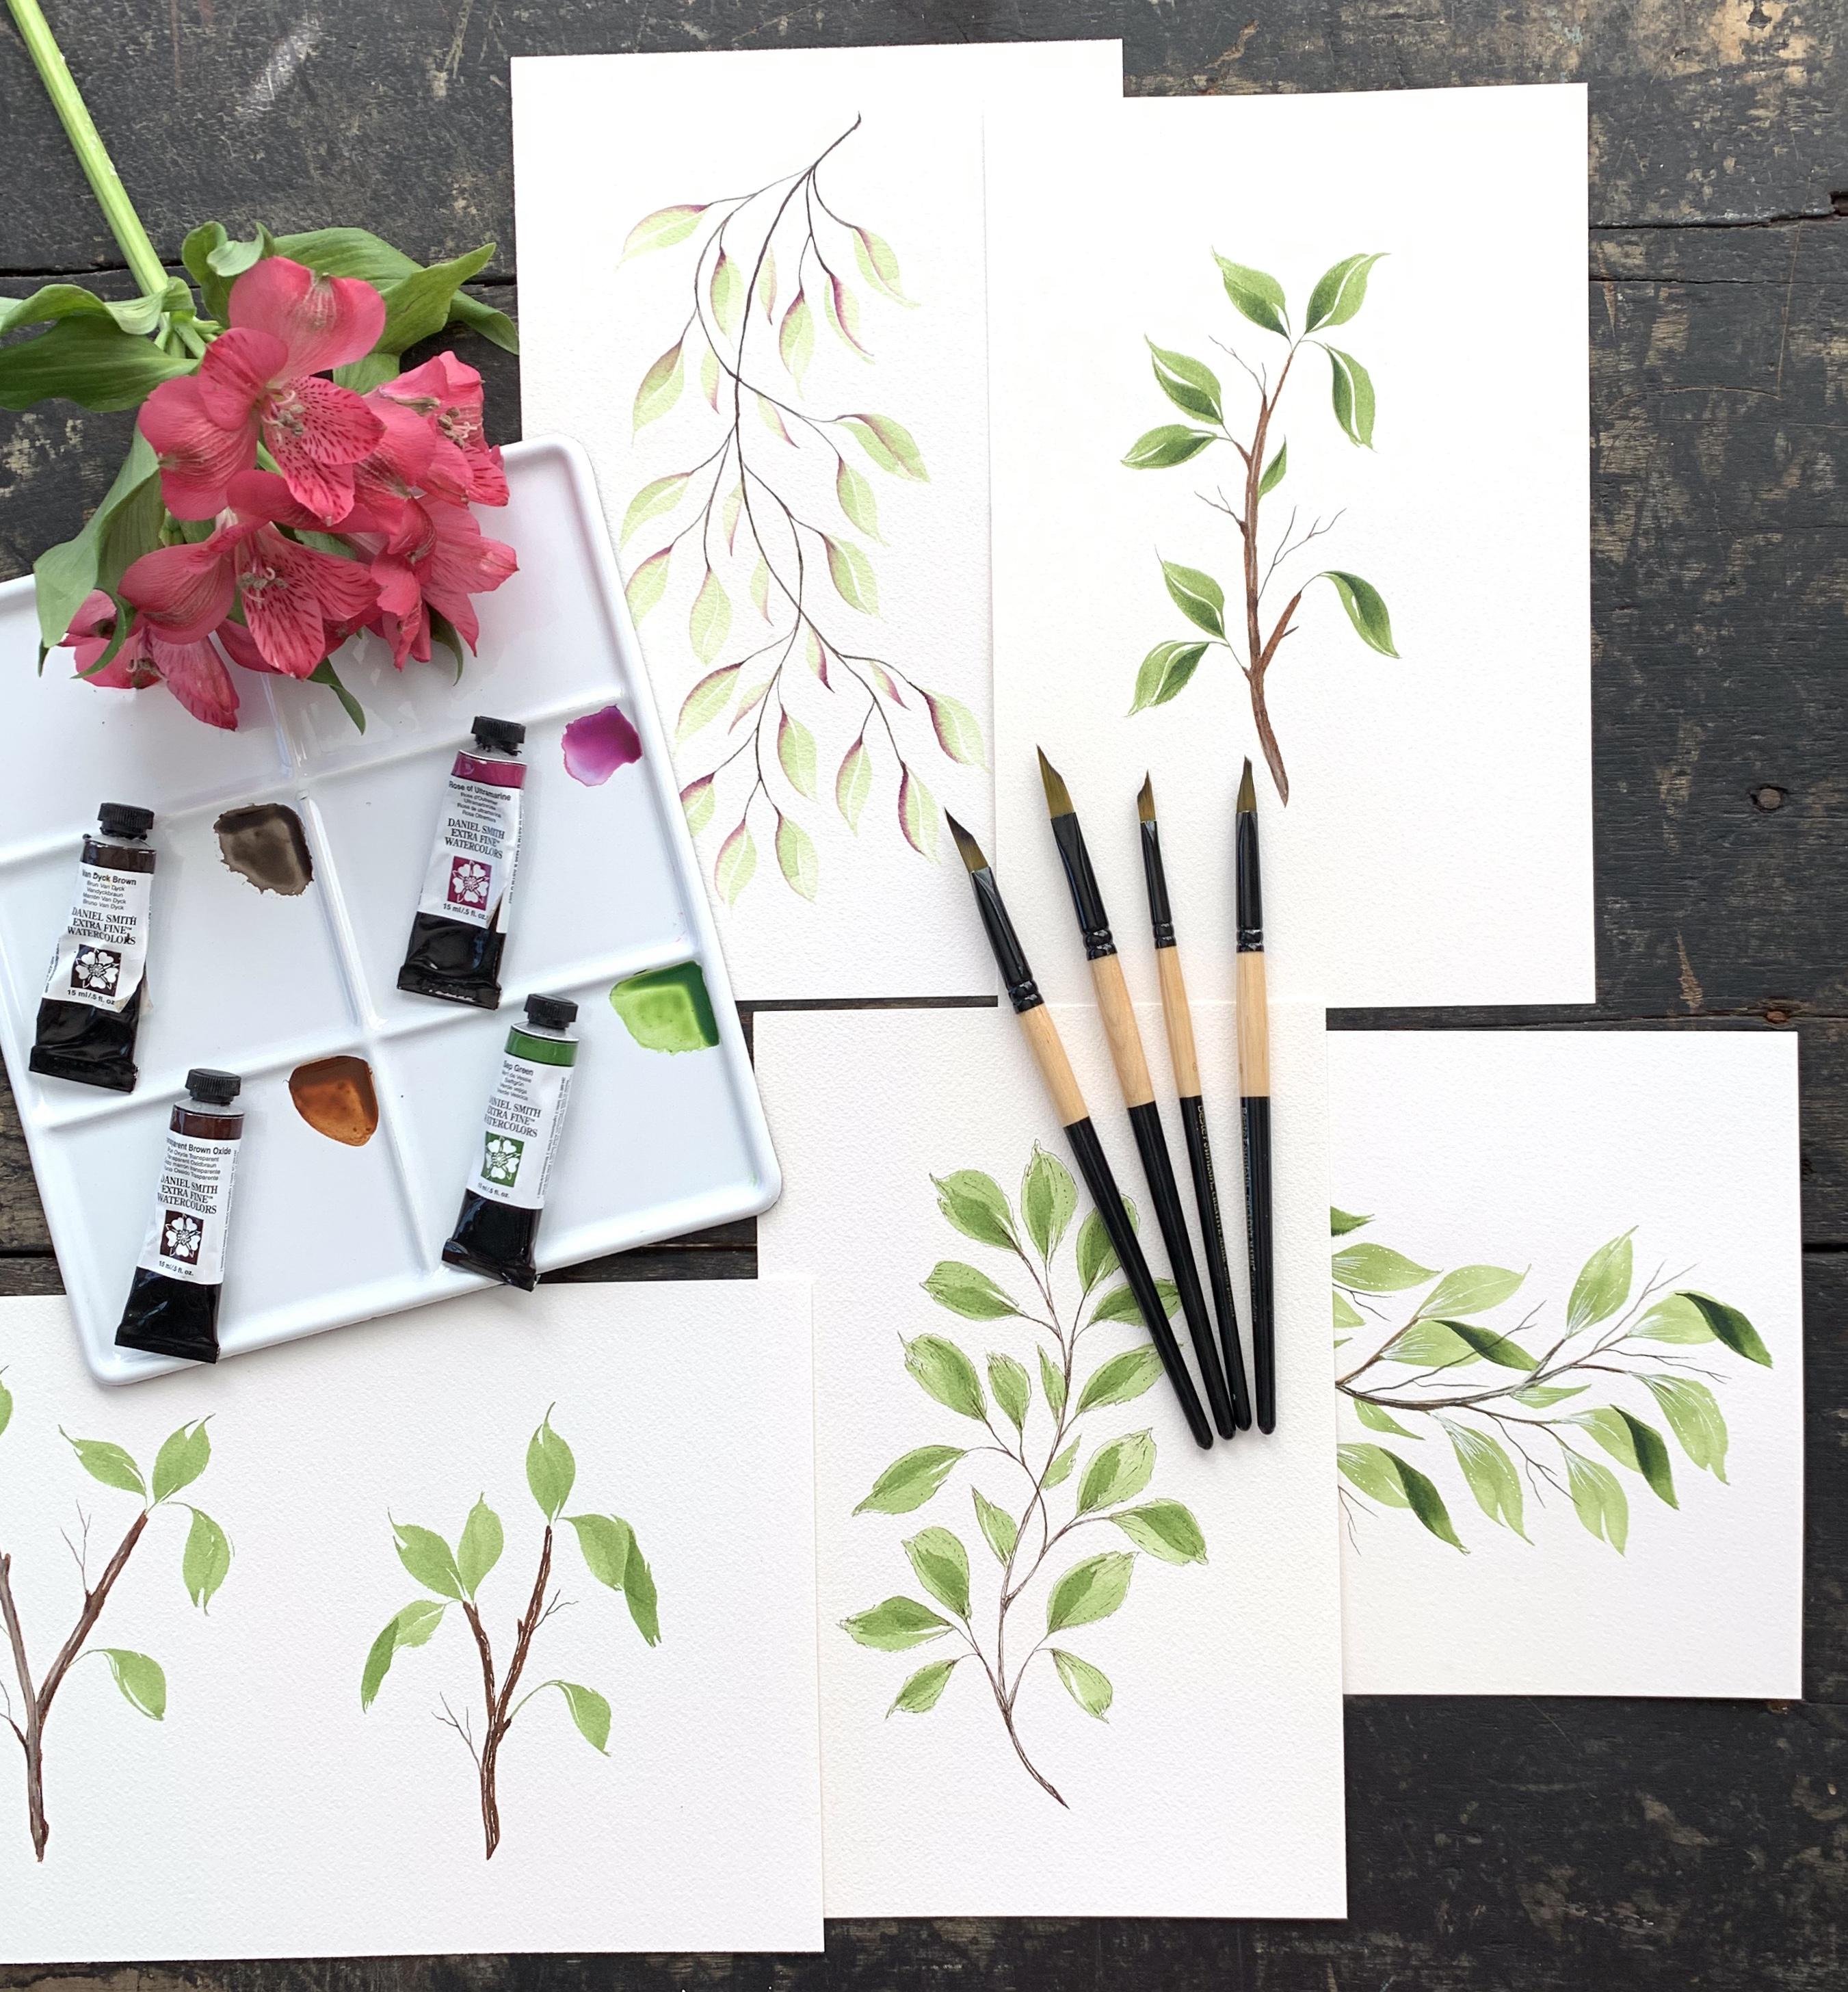
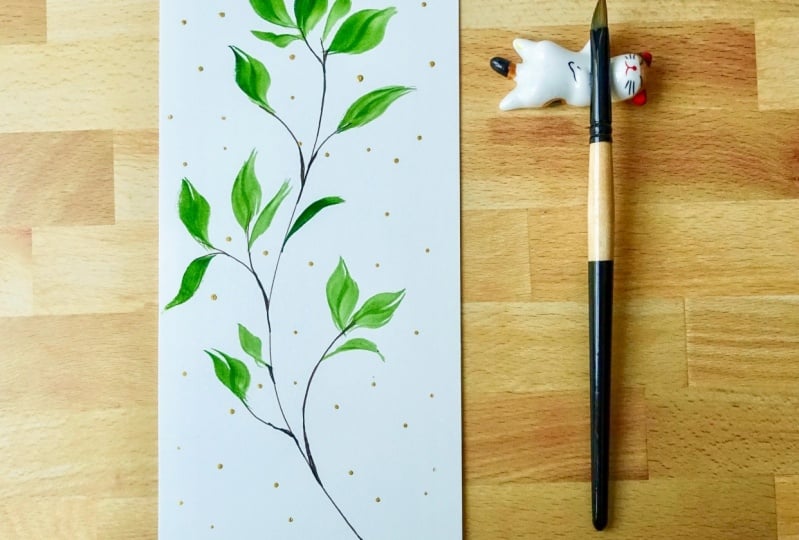
3. Supplies: so the supply she'll need for class your wedge brush and any size you have will be fine. You don't need to have all four I have here a size 68 10 and 16. Most often, I'm grabbing the eight and 10 if you have a triangle brush. That will certainly do the job, too. And I have included in the supply list where you can purchase either the wedge or the silver triangle. Brush micron pens for outlining or watercolor work. I have sizes 003005 and 01 both in black and see pia, but you don't need to have those sizes or those colors. Just whatever you have on hand for outlining will be great paper towels and I have made available several pdf's. And if you can print those off before class, that would be great. If not, don't worry about it. I will be pulling these in in reviewing those as we go through the different lessons for class, I'll be using SAP Green. You don't need these exact colors or this brand just whatever you have on hand rows of Ultra Marine. I use that just a little bit when I double load the wedge brush, I want to show you what that effect looks like. Two different Brown's. I'll be using transparent brown oxide and Van dyke brown. Grab a palette, have to water jars ready to go, and then you're watercolor paper. I usually use arches, cold pressed, £140. I really like the quality of this paper. It is pricey, but certainly feel free to cut this down to size. And you can use the back of your watercolor paper, too. Cancer in Excel is also a nice option to use and a few other products that I will be using . You don't necessarily have to have these on hand, but I just want to show you what I do with these. Doctor Ph. Martin's bleed proof white. A white jelly roll pen, a green brush marker. This one is from Zig Cora Taqi and I have a number two liner brush, and I'll be doing a little bit of work on the Can Seuin Excel Black Drawing Paper. So grab your supplies and I'll see you in the next lesson
4. Brush Strokes Part 1: Okay, So what we'll do in this lesson is practice a few general strokes, but mainly practice the strokes I use for making leaves. Wanted to spend just a few minutes talking about these brushes. If you have a dagger brush, feel free to use that. I won't be using this one in class, but it tends to give you the same results. But take a look at the difference here. So with the wedge in the triangle, you've got this nice triangle wedge shape in this full belly of a brush. Their the dagger has a belly of the brush to, of course, but it's just not as thick as Thea other, too. So as we go through this, you'll quickly see that the basic strokes for my leaves is generally the same. But what changes and what I believe gives the leave character is where you place the tip of the brush as you start your stroke, how you grip your brush, how you execute the stroke itself. If you use one or two strokes for the leaf, if you leave any white space and certainly the leaf size, and whether or not you double load your brush are all things that would add dimension and character to your finished piece. So let's dive into this so I can show you what I'm talking about. We're going to start with a few general strokes now. This isn't everything a wedge can do. But I'm just giving you a few examples here. And as we go through some of the handouts, you'll see the clock here, and that's going to represent these numbers will represent where I placed the tip of my brush. So just in this example here my tip is going to be at the 12 oclock position, and I'm just gonna pull straight back to get that fine line. And then here's medium pressure, heavy pressure. What a full side stroke looks like starting the tip at nine o'clock 77 o'clock for the vine shaped there and you'll hear me say to a lot land push and lift, and that's going to refer to as we lander brush pushed down and pull back up. So let's go through some of these here, so I've got my pain. My pain is pretty thick, so I'm gonna add a little bit more water here and a lot of times I dab on a paper towel because the belly of this brush can get very saturated. So just starting the tip at 12 o'clock comes straight down to your chest and then a fuller stroke. Uneven, fuller one. So this is the size 16 and I wanted to use the bigger ones so you could see all that it can dio. So the side full stroke gives a great, fantastic wide stroke there. So if we start the tip again at nine o'clock, I kind of do this away. The effect and really the main point is free to experiment with this brush and discover what you're really capable of doing. With that. It's just so much fun. I really feel like this brush has been a game changer for me. So if we point the tip at seven, we just go up and down, up and down, and a lot of times you'll see that I'm letting the fatty part of my hand glide across the brush. That's just a good stabilizer for me, and also you'll see, sometimes I'm doing finger motions or whole hand motions, depending on what type of stroke I want to get so those were just a few very basic examples of what you can accomplish with the wedge brush brush. So those were just a few examples of what you can accomplish with the wedge brush. Very simple. And just as you go up and down bearing the pressure of your strokes, you're going to get the's just wonderful. Wonderful strokes with this wedge brush. Now, starting with this hand out here with 12 o'clock, what we're going to do is put our brush at the 12 oclock position, push out to the left and pull back up will practice a two stroke as well. 12 o'clock. Come around the same way. Go back to the 12 o'clock, lift your brush up a little bit more perpendicular and do that second stroke, and I like to leave that white space in there. Sometimes that gives a nice character to your leaf. Now this one is a little bit awkward. Also a 12 o'clock stroke, but you're gonna push out to the right side and come back in. So let's demonstrate what that looks like. So here we are, starting 12 oclock and coming down when I'm using Arches paper today, cold pressed £140 so land push and left to do that one again land push lift to get that second stroke. Come, come very close. Stay close and follow it around when we go the other way at 12 o'clock says what it looks like and it gives you a little bit of that folded over. Look, do that one again. If you wanted to add a second stroke, could do that as well, another very common stroke that I do. I start at the six oclock position. It's just a natural fit for me, and it just feels very familiar and comfortable to me. So starting at six, pushing back out to the left side and up same way with the two stroke six o'clock, push out to the left and up and then do the same thing on the other side. Tip is pointing right to my belly. Second stroke coming close. Follow it around. You don't have to leave that white space if you don't want Teoh, just think it at some nice character. So essentially, this is the same as the 12 o'clock, obviously just flipped around at six. So when we started the six and turn out to the right side. Here's what we get kind of that same folded over leaf look. So I definitely want you to practice sees and just enjoy the process as we go through this . It's just a lot of fun making these leaves and really could do this all day long. So if we look at the one o'clock, this one is a little bit awkward cause you're really getting that wedge brush over to the one o'clock pushing around to the left side and pulling up. So when we do our second stroke here, start back at the one oclock position. But we're gonna shake the brush a little bit. Okay, so let's try that one. Have all the way over to the one oclock come around nice and gentle, that second stroke back at one oclock. But given Nyssa wiggle to the brush so that gives a beautiful leaf shape there. I really like how that looks. I hope you guys are enjoying this. This is just a lot of fun to make thes and just to come up with different ways to use this brush. Okay, let's move on to five oclock position again. Another one A little bit awkward because you're swinging all the way around here, where the tip of your brush five oclock swing out to the left and up and same with the second stroke. 1st 1 again, five oclock out up, and then the 2nd 1 is going to be a little bit lighter, moving your brush up more perpendicular stretch all the way around That could see how I just do a little bit of hand motion. My heel of the hand is just stabilized on the paper and just keeping my fingers tight. And that's a whole hand motion motion up that way. Just a little flick of the wrist at the end there. If you like that part of it. If you don't, you can close it off a little bit more. So the second stroke right next to it. Okay,
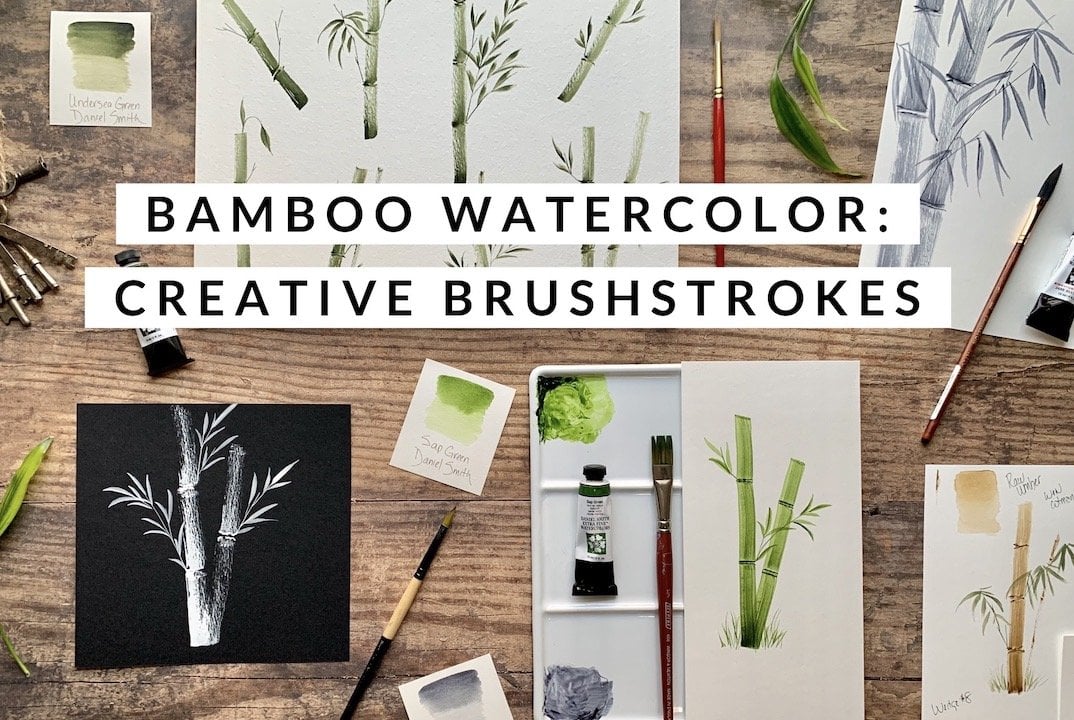
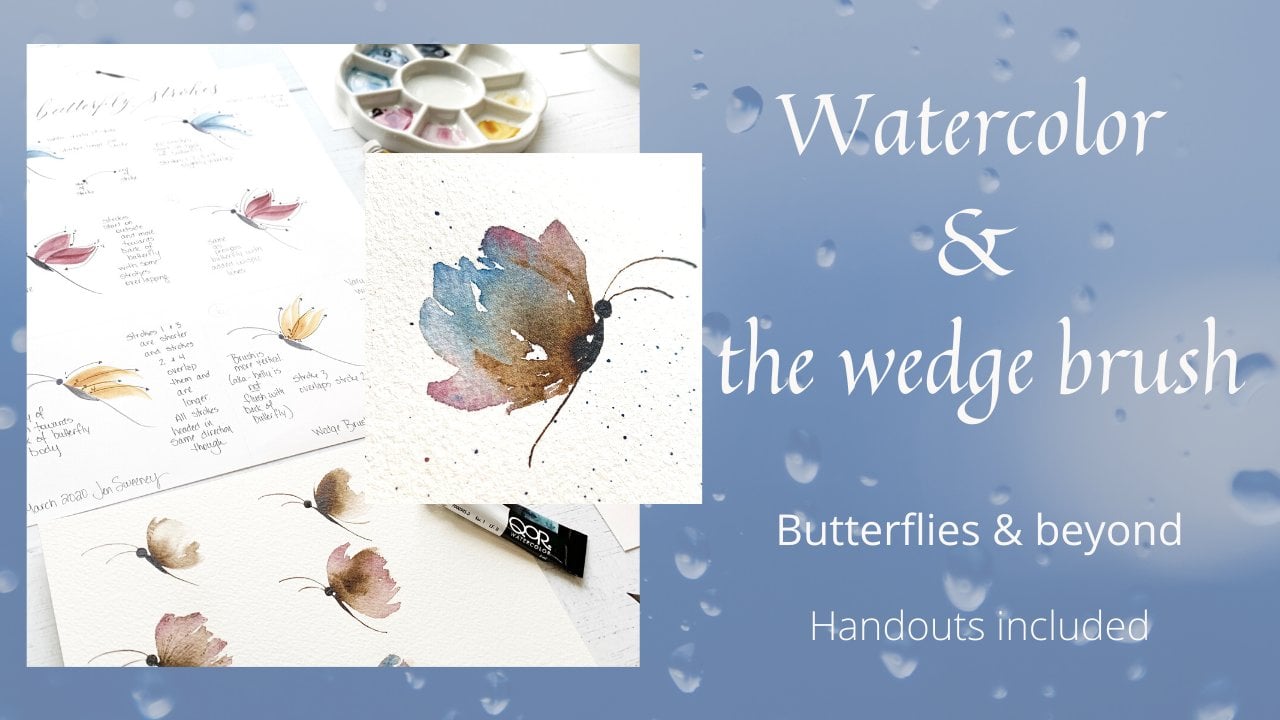
5. Brush Strokes Part 2, + Bonus: So the next 19 oclock You're getting the hang of this here, pointing the tip at nine o'clock pushing up and over another way you could do that. Nine o'clock, push up and over. Okay, Same way with the two stroke nine oclock over and down. You can add the second stroke underneath that, or you can actually add it on the top there to whatever you prefer. So I want to show you with this one. What double loading your leaf looks like. And how to do that. I love this. Look, it just gives such a beautiful contrast of color there. Either you can use the two different colors or double load with the same color. Someone tried to pull this in here and show you how I do that. I don't get more water in here. I want to lighten the screen up a bit. Really? Dab that on the paper towel. Then you just point the tip right down into the more concentrated area of the pigment. I can see already there's a glob on the end there, so I'm just gonna tep that off a little bit. So nine oclock land push and left I just really enjoy how that looks. Sometimes you can get a couple strokes out of out of it. Make sure you wash your brush in between with having those two colors on their We did the same color to check that one out. And that second stroke on the top, if you want, are on the bottom. All right, So I think you're getting the hang of this. Take some time and just practice the different strokes, The different grips the different positions and just see what you can come up with and have fun with that because you can just see here like this example. You just start off with the stem, push and lift. And here's that second stroke. Same here. A little stem. So you're about it. The nine o'clock pushing up and over and we'll go through this a lot more at the end of the last lesson where we put this all together in the second stroke right here. This one. If you wanted to come down on a stem here about it, that one oclock position, land, push and lift, then what kind of shake for that 2nd 1? Adding some micron outline is always fun to Dio and then this one. This is where I've done the stroke, small leaf and then more concentrated pigment on that side. When we try to show you that right here, that's the first stroke. You're getting some darker pigment pat off a little bit excess and then start right here about the middle of that leaf and come over, and that gives it that very cool, folded, bended Look, Here's just a couple more examples. This one down here is the most common stroke with the wedge brush that I've seen. Of course, the leaves are very common to, but the flower is very, very common, and I'm hoping to have more classes in the future that go over. A lot more about this struck, but I wanted to stick with just the leaves at this point. But the way that should do that, let me show you that real quick, get some more water in here. So again it's just more or less that double loading again hap off some excess. And then if I just dip back into the concentrated part and then basically gonna land and then just shake that brush around definitely not one of the best ones I've done, but gives you the idea of what? That what that looks like. Okay, So I wanted to share with you a few of the pieces that I've done that. Once you learn these basic strokes, you can really do all kinds of things with them. So you can see on this one here. Thes air. Just simple. One strokes of the wedge brush, different directions. This is all one stroke of the wedge brush. I just drew a circle and then you just start adding different colors. The light colors first, and then you darken up is you go. But as you can see, this is just one stroke here. And I just did that all the way around. Same with this 1 to 1 stroke. And then I just outlined a bit with micron. Easier said than done. I know, But once you practice and you're comfortable with some composition, then you really, really enjoy creating unique pieces. So that stroke I talked about that side stroke, that full belly side stroke. That's exactly how I did this. Bamboo. Very cool. Very easy to dio. And then what? I did for the side leaves here actually flipped the brush over where the belly of the brush is facing up. And I'm just using the backside of that brush. And as I just come up, get my hand is planted. And then I just add more pressure at the end there. And this is that flower stroke that I was talking about at the end added some extra details again. These leaves double loaded, very simple or some double strokes there and this one as well. Drew the center, added some brown and some micron dots there. And then this was just one stroke going all the way around 34 Little strokes here. Same way that I did. That flower just kind of shaken it around double loaded. But that's just a few examples that I wanted to share with you. And like I said, hopefully in the next couple classes that I come up with, I wanna share a little bit more detail about how to make some of these pieces so I could talk about this all day long. But let's head on over to the next lesson. As we learn about constructing vines and branches
6. Constructing 3 vines: as we start these lessons, have your palate and supplies prepped and ready to go. As we paint together, you can use your handouts for reference. If you have them, we'll start with the basic structure of three separate fines and then three branches after that, and we'll build these up step by step and at some fun details as the lessons progress. I do have five separate pieces of watercolor paper cut to about a seven by 10 size, so we're aiming for good. I appeal will be mindful of the directional flow of your vines and branches because that will for the most part determined the direction of your leaves. I'm really looking forward to seeing what you guys create. So gentle flowing curves, or what I like to go for your eye is drawn to symmetrically balanced but not a perfect look . Then it's pulled towards the details after it sees the full composition. And finally the eye is really drawn towards the literalist, tiny details. So let's get started. We'll do an upright fine using the 01 micron at the six oclock position. Just a gentle s curve up gliding up the page. I like to add a little not your broken off end at the bottom, and then I start to darken up the main stem. I probably should have used a larger size micron, but I'll just stick with this one to just take some time to darken in that main stem. Then I like to say, Build off the bump. The lower left bump of divine in the upper right bump is a natural place for me to add the first stems, and you always want to darken and where the smaller stems branch off to give it more interest in depth and how I do that, it's start on the main stem just below that offshoot and merge upward to meet the smaller stem. Is your darkening it in? Then I like to do a twisting crossover stem to fill in what I call the valleys of the vine or the indented parts. So I feel in the valley, and then I build off of that darkening in that base there and always be thinking about this symmetrical look of your piece. You can see how the darkened parts at the base of those offshoots already give. Give it a less flat looking appearance. Take a little time to dark in this in. - There's still white space, but I don't want to overdo it at this point, so we'll leave this one alone and move on to a sideways vine. I'm using my transparent brown oxide. We'll start at the nine oclock position to a wavy curve using whole hand motion. I'm always turning my paper sideways to, so definitely make it comfortable for you, starting to build off the the bump and light pressure with just the tip. Let's do another crossover stem and then build off of that, just darkening the main stem and I hope you can see. But now my brushes actually flipped in. The belly is facing up towards me, and I'm using a little heavier pressure here. Take your time to darken it in, and sometimes these don't look like too much at the beginning. But don't give up. This is where I always second guess myself, and I want to start over, but stick with it. These take time to build up. Okay, let's move on. No, I did go ahead and sketch this one using the template from the handouts, and I know We're moving quickly, so please feel free to pause this and sketch it out if you'd like. I'm using Van Dyke brown again. The belly of my brush is facing up. It's an awkward feel at first, but you'll get used to it. It's really helpful to do it this way, using light pressure, but I want this main stem a little bit thicker than if just using the tip and have patients with this. Take your time, just darkening it in a bit more, and I'll erase these pencil marks off camera once it's dried. - If you wanted to use a micron for this to, you could certainly do that. Sometimes that's just a little bit easier. - The's crossover stems can get a little tricky. I just gentle pressure. Moving your paper as you need Teoh and finds, I would say, are more or less a supporting actor in your piece because I feel that leaves air really the star of the show. So don't overthink it, but getting the basic fine shape is key. I'm not following my sketch exactly, but really pretty close and don't go too far with these offshoots. Keep them fairly contained and always think about the direction your vine is going still with plenty of space. But don't overthink it right now. Let's move on to our branches next.
7. Constructing 3 branches: I'll be making two smaller branches here, starting with my transparent brown oxide, always dabbing the belly of the brush in this fun trick. Again, I'm flipping my brush so that the belly is facing up toward me. Plant your brush at six o'clock and use a little heavier pressure with this. Another fun trick I like to do is press it down occasionally to make those little notches and then get a little less thick at the top. I apologize for my hand in the way here, keeping my hand planted on the paper at a little detail along the way. - Okay , let's start a 2nd 1 Same starting position. Same motions. Push for those notches. But you don't want to overdo the details just yet. - Want to grab some Van Dyke brown to darken it up a bit? You just want to drop this in. You wanna vary up the color so it adds interest, and it doesn't look flat. But actually, in the final lesson now, I'm gonna show you how to lighten up certain parts of the branch to make it even a little bit more realistic. - So we're gonna move on to the single branch here in just a minute, starting back down at the six Oclock position, using the transparent brown oxide. I don't want this perfectly straight. Either it's getting finer, is you? Get to the tip. We'll just do one small off. Shoot here a few more details and dropping in some darker brown, and then we'll be done with it. And then will be time to add the leaves to our vines and branches. You don't need too much to make thes realistic to.
8. Adding Leaves to vines, part 1: Okay, so we'll start with our upward vine mixing my sap green, loading my brush and dabbing it off. And I like to do a test. Leave to on scrap paper to see if it's too wet or too dry. Then, using all the strokes we first practiced, start adding them to your stems and feel free to experiment into a single stroke. Leave for do the double strokes. That's your call. Move your paper around as you need to. I tend to go about 1/3 or almost halfway into the stem with the tip of my brush and really be thinking of all the possibilities for changing up your leave colors. But for now, I'm only demonstrating with green, closing up the leaves a little bit more on this one, but feel free to leave more white space in the middle of the two strokes. - So I do want to fill in these white spaces, and you do want some white space. But look for an equally weighted composition on another one here. So thinking about I appeal, remember the rule of threes. The eye is drawn toe odd numbers, So clusters of three or five or something like that is good to shoot for, but don't think it. It has to be done that way. It's not a steadfast rule, just a few filler leaves with a single stroke here or double struck, whichever you prefer just to fill in a little bit of the gaps there. Okay, still more to do to bring it to life. But let's leave it alone for now. Back to our sideways branch, we're gonna do the same thing with the leaves and keeping it in the directional flow of the vine. - This one can get a little tricky because it's a fairly tight composition, and it's fine to have your leaves overlap. That gives it a nice appearance to, but just be mindful of the size of them. You don't want crashing into each other too much, and this overall composition is just a little bit tighter. Look for me, but I still enjoy it, so making those leaves bend is certainly gonna add interest. So I start about halfway on the leaf with a darker pigment and use a single stroke to cover that part of the leaf and just doing a few toe to just spice it up. a bit. - I think I need a few more stems. Take a chance and add Add some more here, - think of feeling a little more and then I need to make myself stop so we can move on to our downward vine. And that one had to be in a different lesson. That file was just too big. And feel free to experiment with the single stroke or the double stroke and leaving white space in between or not This again is just gonna let your own creativity flow. And I look forward to seeing your projects in the class gallery. Just a little filler leaves and then we'll wrap this one up.
9. Adding leaves to vines, part 2: So with this one, I want to do a double loaded brush. So I have some water down sap green and some thicker rows of ultra Marine. Always dab the belly here, too, because this can get to be a muddy mess pretty quickly, and I rents between almost every stroke. It's like to do another test stroke, so I'm just going to do a single stroke to begin with, and I'll come back later and add a single color second stroke and a rinsing and dabbing and going back to the two colors just really important to rinse in between, because I guess at this, this can just be, ah, hot mess. After a while, - I just kind of curved my brush around as I do this to just a little a little twist, and I am going to do this all the way around, but I'll speed it up a bit because this can. This can get painfully long. Sometimes you can see I have to pull in some more green as you go, but keep it light and just add more water as you need to. - You will get this speeded up here to move things along I want to add a second stroke of just the light green. So when I try to match this as closely as I can, but it is not the end of the world if it's not the same. And since it's just going to be the same stroke all the way around, I'll speed this up a little bit here, too. Just graceful, gentle strokes all the way around. - And for the final touches on this one, it's gonna be very basic because I want to keep this piece light and airy. Let's move on to our branches after this.
10. Adding leaves to branches: just gonna add a few leaves to these branches and I like to add a thin little green line is the leaf is coming out of the branch and have some curving and turning to keep it interesting. So step back and always take a look to see where you might need to add leaves again to keep it balanced again. We're not done with these little guys, so hang with me to the end so you can see some of the finishing touches that really doesn't take much to keep these little branches interesting. There are a lot of fun fun to make. I think I do want to darken up thes stems before moving on, though to so dropping in a little bit darker paint to add a little more life to these stems. But again, in the final final part, Will dio even a fun little trick. Thio Thio Add more character and dimension to it. Remember to flip your brush upside down, have the belly facing up, and since that belly of the brush holds so much paint, he really gets several strokes out of it. Okay, Final branch we're getting there. Trust me, I've had a gazillion failed attempts at vines and branches, so it definitely takes time. But stick with it and give yourself some grace. Is your learning this and put your own spin on it, too? Always with anything. If it gets too tedious, step away and take a break. I want to leave a little more white space in between these strokes on this branch that another little one here it's filling in a few more to balance it out, and then we'll head on over and put the finishing touches on our work.
11. Finishing touches on vines: Okay, so we've made it to the final finishing touches. And I did want to tell you I added one more leaf here. I just thought it looked a little bare. So for this one, I want to do some micron outlining, and I'm using the 005 sepia micron. I'm gonna do this all around all of the leaves, the way I like to do. This is really just let them microns skip around the outline of the leaf. I definitely don't want to do it perfectly. I just do a soft outline skipping around the leaf, letting the micron glide across the paper, - not speed this up a little since it's exactly the same technique all the way around. So now go in and add some migrant highlights to the leaf itself. Remember to go in the direction of the leaf. Adding a few little dots will add some interest. Maybe have your own favorite way to outline your work. So again, please feel free to do it, how you like and what you enjoy most. If you like a bolder outline, go ahead and do that. If you like to keep it soft, that's an option if you like to do some bold and some gentle, definitely do that, but just make it your own, so we'll save some time here, too, and speed this part up. - So one last final touch. Add in some darker sap green. For contrast, I think it looks just a little flat, as it is so, adding that extra dark green will give it some some nice contrast. It's just a one stroke addition to the leaves you can add it to all the leaves are just a few whatever you prefer, just something else to keep the I interested. Okay, so we'll call this one done, but use your creativity to enhance this even more if you like. And now we'll move on to our sideways vine. So for this one, grabbing my white jelly world pen and adding some highlights toe. Lighten it up a bit, and it's pretty much the same. Same thing I did with the Micron. I just like this softness. This adds to the peace, just gives a subtle highlight to the leaves, and it's just it's a really easy fund tool to use so light, not the branches in the jelly world, too so it takes away that flat brown look and gives it a softer, more realistic look started. Speeded up toe. Move things along there. And one more enhancement I like to do with these mines is grab my dagger brush and using the dark brown. I like to add some tiny branches or twigs for some more. I appeal and this little brushes fantastic for doing that. Use a light touch and a gentle flicking motion at the end. So looking at the see if and where you'd want to add another one, these can get overdone pretty quick. So just be mindful of how many little twigs you add. So finish up and we'll move on to our downward vine. Since I want this one to be lightened area, all I'm going to do is add a few little filler leaves with a double loaded brush and turning my paper again just makes it easier for me and these little fillers air. Really, all you need, sometimes less, is more right. I have totally overworked so many pieces, and I'm learning to just let it breathe sometimes double loading. This brush is just too fun, but you gotta have patience with it and make sure you're rinsing the brush often because I'm right handed. It's easier to do the stroke on the right side of the vine as opposed to the left side, but it takes just a little bit of practice. You'll get it. I like that because they are smaller and they fill in some of the white space. That's truly all the enhancement you really need sometimes. So let's head on over and finish our branches.
12. Finishing touches on branches and Bonus: So with their two little branches here, I'm using the bleed proof white and my dagger brush. I have diluted the bleed proof white with a little water, and this is where we'll lighten up the main stem to give it some contrast, a little heavy, a little bold right off the bat. But hang with me will soften this up of it. Rinse off my brush and just with a damp brush, start to smooth it out a bit. Do go over the several times, and when I do, some of the brown gets reactivated a bit and tones down the white. It's very forgiving, so you can add darker brown. Add more Y go back and forth to get it to just how you want it toe look like to darken up by the notches and where the branches break off. So with the jelly roll. Same thing. Lay a few marks down and will soften it a bit with the dagger. But this one I want to leave a little more rough looking as compared to the 1st 1 So the last touches to add those fun, little extra stems or twigs or offshoots. Whatever we want to call them. I apologize for my hand being in the way again. - Well , just make a few folded leaves on this one, and then we'll move on to our single branch and finish that one up, just like the contrast that this darker green gives on the folded leaves. So what had some darker sap green to the leaves? Just a one stroke addition all the way around. I do hope you take some time to really get to play around with the brush because it is so fun finding out new ways you can use it. I use this brush so much, and I absolutely love it. So let's lighten up the stem just like we did before. And this does dry fairly quickly. So you don't want to let it sit on there too long and just go ahead and get in there with your damp dagger brush and start to spread that out. - Just go back in and add a few darker areas and then be done with the stem, - just adding a few little extras here to give it that final pop. So stick around after this when I have one more fun piece, I want to show you next, and then class will come to a close. So this is just a fun and easy relaxing bind with the bleed proof white on the cancer Excel black drawing paper. I love this white for so many reasons, Whether it's for painting or for calligraphy, it really does a fantastic job. It just glides on this paper so smoothly I probably wouldn't uses for a finished piece of art. But it is just fun to play around with. And here again are all the simple leave strokes we've done throughout the class. As simple as it is, I just love the beauty that you can create with this brush. Just be free with this and have fun. I mean, that's the whole point of this, right? I would encourage you all to discover what you love and really work hard at it. Give yourself time and grace to grow and learn new things. It takes time. And in this fast paced world, it's so so easy to feel like Everyone is passing us by at lightning speed. But remember the very first time you tried to paint or draw? We all know how our first pieces looked and look how far you've come. You've come so far. We all start somewhere, and I guarantee that if you keep at it, stay consistent and determine you will learn and you will grow and you will make progress. There was a time I didn't even know what a wedge brush. Waas. Remember why you decided to create in the first place? Maybe it's for fun or for therapy or relax ation or maybe all of the above. Creating beautiful things is really a gift in a privilege, and I firmly believe that each of us are fully capable of tapping into our strengths and our inner artist and can and should express our own unique creativity. That's exactly why this world needs your art. Onley. You can create like you don't worry about what everyone else is doing. It's great to be inspired by other artists, but never compare. Easier said than done. I know, but it's truly paralyzing and defeating to our creativity. When we do that, do what you love, do it well and always be ready to stretch yourself to take risks and learn new things. Don't let fear hold you back or drag you down. Use it to your advantage and be brave to take that next step in your journey. Don't look back. Just keep moving forward and focus on what's right in front of you. Make that next move. Make that move today. Time goes by way to quickly toe let these opportunities pass us by. I truly hope you've enjoyed this class and can walk away with having learned something new . Thank you for being here. It has been my joy and my honor to serve you in this class, so get out there and paint and create beautiful things and have an awesome day.
13. Thank you: Hey, guys, I just want to say thank you. Thank you so much for hanging out with me in class. I really appreciate that. You've chosen to spend some of your valuable time here. I'd like to invite you back for more classes in the future. Where will study and learn even more ways. You can create beautiful things with this brush. So take care, enjoy the journey. And I hope to see you again here soon.
 Jen Sweeney, Watercolor, Calligraphy, Cycling