Wakasa Imaushi (Tokyo Revengers) Inspired Earrings | Kate Chystykova | Skillshare

Playback Speed


1.0x


  • 0.5x
  • 0.75x
  • 1x (Normal)
  • 1.25x
  • 1.5x
  • 1.75x
  • 2x

Wakasa Imaushi (Tokyo Revengers) Inspired Earrings

teacher avatar Kate Chystykova, Craft Addicted

Watch this class and thousands more

Get unlimited access to every class
Taught by industry leaders & working professionals
Topics include illustration, design, photography, and more

Watch this class and thousands more

Get unlimited access to every class
Taught by industry leaders & working professionals
Topics include illustration, design, photography, and more

Lessons in This Class

    • 1.

      Introduction

      1:42

    • 2.

      3 Wakasa's earring ideas

      1:33

    • 3.

      Wakasa #1 Cord Earring. Materials and Supplies

      0:45

    • 4.

      Wakasa #1 Cord Earring. Making Process

      3:01

    • 5.

      Wakasa #2 Eye Pin Earring. Materials and Supplies

      0:23

    • 6.

      Wakasa #2 Eye pin Earring. Making process

      2:26

    • 7.

      Wakasa #3 Small beads. Materials and Supplies

      0:19

    • 8.

      Wakasa #3 Small beads. Making process

      1:29

    • 9.

      Wakasa's Earrings Final Look

      0:47

  • --
  • Beginner level
  • Intermediate level
  • Advanced level
  • All levels

Community Generated

The level is determined by a majority opinion of students who have reviewed this class. The teacher's recommendation is shown until at least 5 student responses are collected.

1,181

Students

1

Project

About This Class

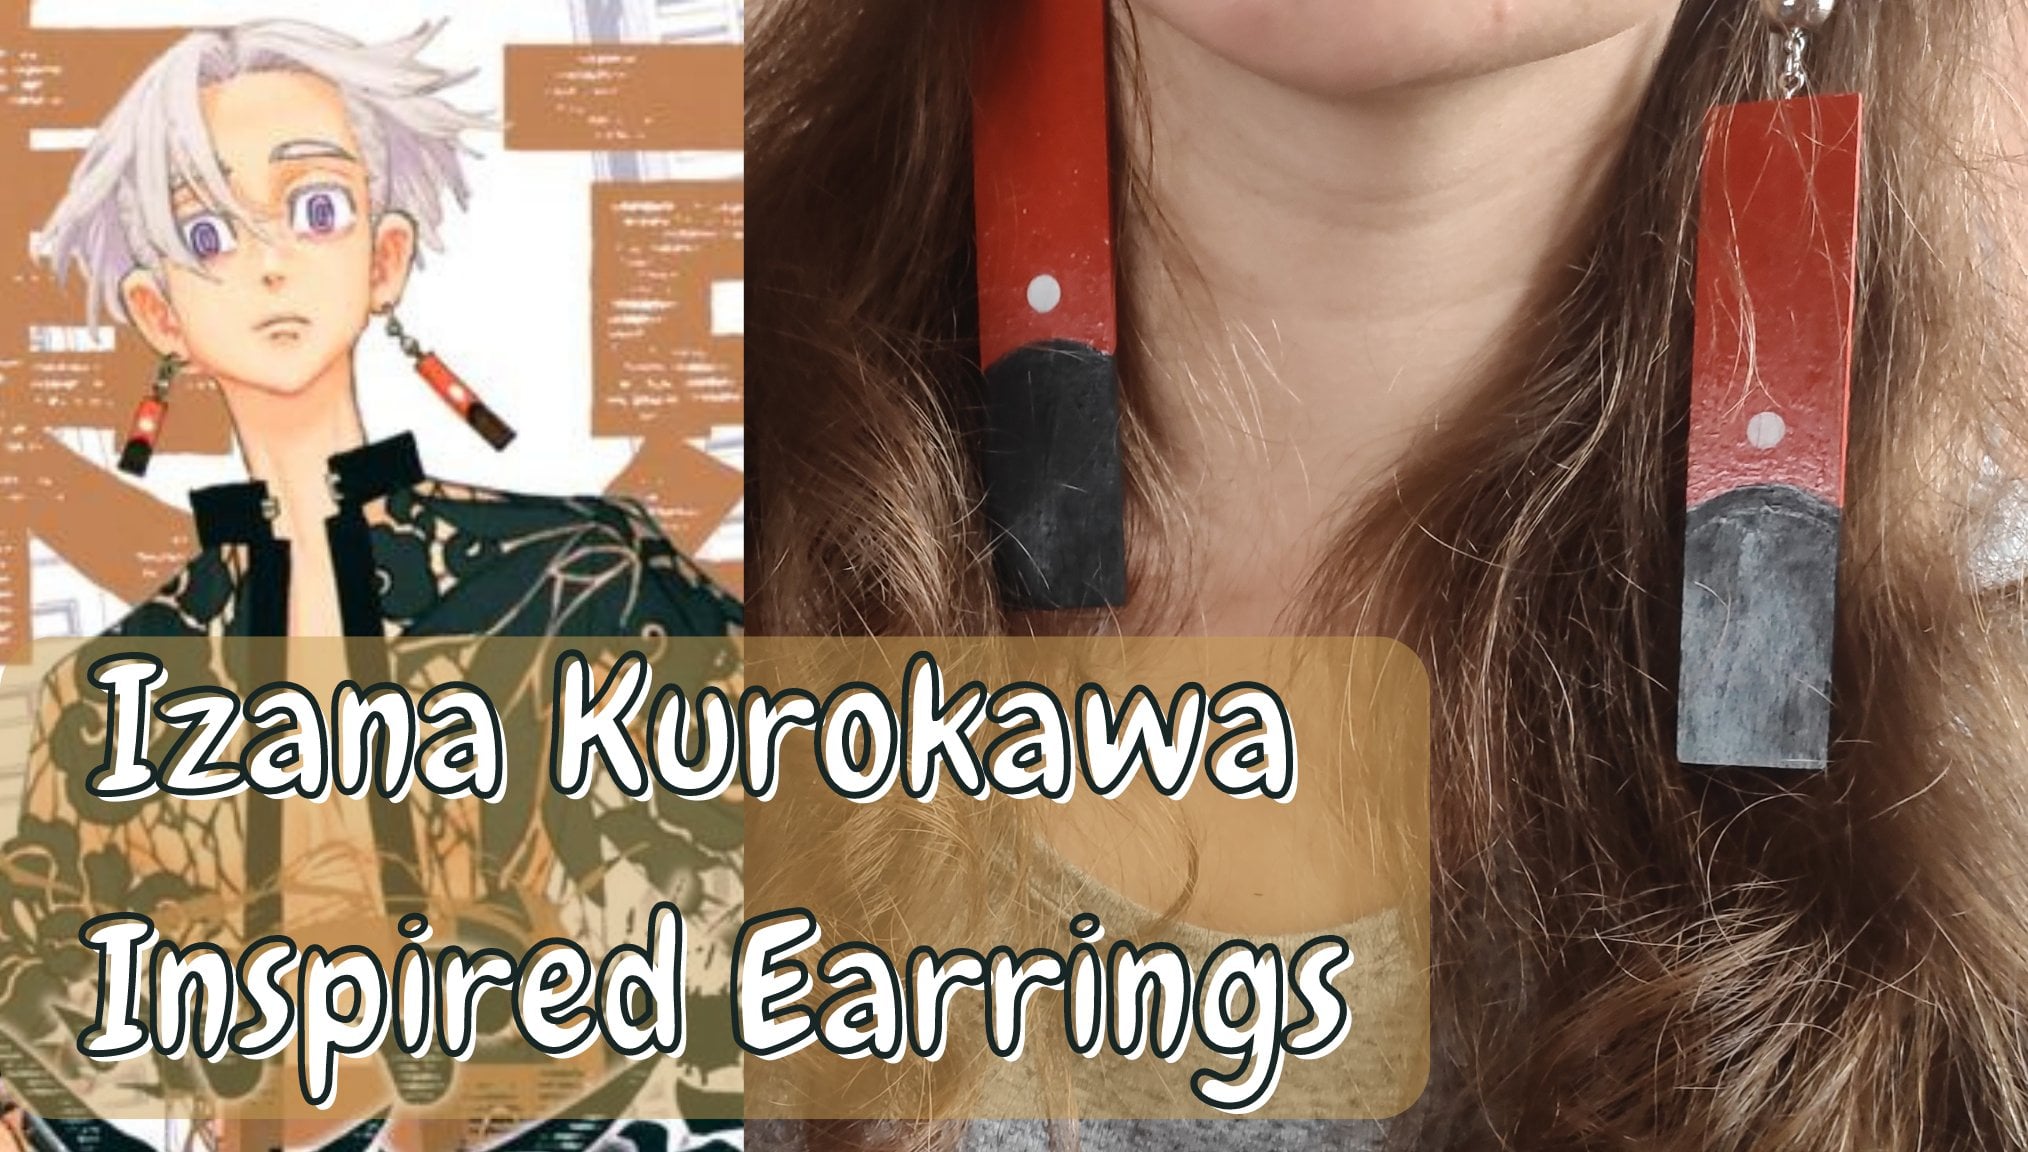
This course is for all Tokyo Revengers lovers! 

I'm going to show you how you can make earrings similar to Wakasa Imaushi from the anime/manga.

Many of the characters have their unique style and Wakasa's earring is not an exception

Material and Supplies for each earring (Double the materials if you want a pair of earrings)

Option #1

  1. 3 round black beads
  2. 1 half-ball post earring with loop
  3. black cord
  4. scissors
  5. pliers (optional) 
  6. glue (optional) 
  7. 1 jump ring (optional) 

Option #2

  1. 3 round black beads
  2. 1 half-ball post earring with loop
  3. 2 eye pins
  4. 1 head pin
  5. pliers 
  6. cutter pliers 
  7. 1 jump ring  

Option #3

  1. 3 round black beads
  2. 1 half-ball post earring with loop
  3. 2 small black beads
  4. 1 head pin
  5. pliers
  6. cutter pliers 

Meet Your Teacher

Teacher Profile Image

Kate Chystykova

Craft Addicted

Teacher
Level: Beginner

Class Ratings

Expectations Met?
    Exceeded!
  • 0%
  • Yes
  • 0%
  • Somewhat
  • 0%
  • Not really
  • 0%

Why Join Skillshare?

Take award-winning Skillshare Original Classes

Each class has short lessons, hands-on projects

Your membership supports Skillshare teachers

Learn From Anywhere

Take classes on the go with the Skillshare app. Stream or download to watch on the plane, the subway, or wherever you learn best.

Transcripts

1. Introduction: Hello, I'm Catherine and welcome to my class. Have you ever wanted Samson's at your favorite character has clothes, jewelry, or accessories, whatever it is. I know this struggle. It's not usually easy to find something from your favorite TV series of film in your local shops or even already eaten the lion in your country. That's when we can do white symmetric overdue wine, is that you can make anything you want. You just need your time and to buy some materials that can cause cheaper than buying a finished product. And you can have fun with your project and your DALYs. You can make it more unique and suitable for your style, for your lifestyle. Just by adding some details. If you took your Avengers Mongol hour, you should know that loads of characters has a unique style and a unique earrings. In this tutorial, I'm gonna show you how you can make of our classes, earrings, symbol and cute. However, I will show you a few options how you can make them. Even if you're not familiar with Monday, you can still make these cute black bead earrings, or you can choose whatever color you want. Let's get started. 2. 3 Wakasa's earring ideas: Next, I'm going to show you three different ideas of earrings as it looks similar to what causes. I used Mancha pictures as a reference. Sometimes his urine looks slightly different from other pictures. When I look at these photos, it looks like there are pins or maybe tiny beads, buttons, some pictures. It really looks like they're awesome. Beat all maybe correct notes. But in this picture, it seems like the urine is made only with Beats. That's why did these videos in three different options versions of the urine. Number one, using a code number to use an IP, and number three, using small bits. Mostly used manga pictures as a reference. I made all my earrings in black. However, if you look at these official colored manga pages, you'd see is it causes urine is red or orange. So it's up to you to choose whatever color you want. Now let's start the tutorial. 3. Wakasa #1 Cord Earring. Materials and Supplies: For the first option of workhouses, urine unit one, hook your wire or any other urine finding thin black beep chord, three round black beads. You also need scissors to cut the cord. These are optional supplies you might need, but they're not absolutely necessary. You can use something else and old or needle pliers, glue and jump purine. 4. Wakasa #1 Cord Earring. Making Process: Take your card. I recommend you to use a longer cord so it will be easier for you to make this urine because I struggled with this short. Tie it firmly. Cancer rest if you need. You can also prevent the cold getting loose simply by burning it. But be careful Visa lighter or ask adults for help. Use an ally to Burns a flame five, 10 mm away. One bit through, make another not near as a beat. You can use an 02, gets a note to go exactly where you want it, slide in, say, 0 and pull it. Diet firmly. Repeat the same process with the second beat. Put it through and make a note. Here you can see my mistake and why you shouldn't cut your collared shirt. It will be harder to make notes and assemble everything. Tie it firmly. Puts the court throws the last beat. When you are about to mix the last note, you need to pull your cord through the urine loop as well. Then makes a final naught zed way. You can connect every sin, die, it thermally. To secure it, you can use glue, wait till it dries. Cards the rest of the code. You can also use the jump ring to connect some beads to the urine finding. 5. Wakasa #2 Eye Pin Earring. Materials and Supplies: For this IP version, the unit one hat pin, two pins. Make sure you take them alone enough to put through a beat and make a loop. One, hook, EL wire or any urine, finding. Three around black beads, around nose pliers and suppliers. 6. Wakasa #2 Eye pin Earring. Making process: Take a pin and bullets through it, beat the short piece of subpoena. You don't need. Make a loop. We select a whipping part. Before you close the loop. Putin. After all, I replaced my short IP no longer one could say I've been through another beat. Cut this short piece of the pin. You don't need. Make a loop and potent, I repeat the same process with the last beat. This time when you make a loop with the leftover bean part, would you even finding on the loop and close it, make sure all the loops are closed. 7. Wakasa #3 Small beads. Materials and Supplies: For this version, unit three round black beads to small black beads. One year in finding one loan had been around nose pliers. 8. Wakasa #3 Small beads. Making process: This urine is very easy to make. Take a hat pin at a big beads and a small one. Continue adding yellow beads around nose pliers, bends the top of the head pin into a loop. Close the loop firmly, take the urine, finding, open it slope, and connect these two pieces together. Finally, close the loop. 9. Wakasa's Earrings Final Look: The final look of all the three earrings, in my opinion, urine waste not corresponds more to Bokassa style and to wipe. But maybe I'm wrong. I love the urine, these beads. And I'm thinking of making us a one. As for me, this version is more elegant than others and it was easiest for me. I hope you enjoyed this tutorial. I'm looking forward to seeing your projects, your earrings. Don't forget to post them.