Transcripts
1. Introduction: Welcome to the start of your video journey: Welcome all and thank you so much for taking an interest in this amazing course. I create cool mastering, a video production using just your phone. Now, these stock with to get your head around. Camera angles lie in ops literally just with star in order to create something professional. Well, fear not because you're in a perfect place. Led step-by-step. How to go from clueless creates a video Maslow. Now my name is Simon, enough trained hundreds of people to become just that started off like you're curious, what inexperienced now found the best way to learn was literally just to pick up a camera and have a go. But I'm not myself. You're gonna learn the ins and outs of video production in a matter of hours. A brace yourself. There's a lot to get through, but I promise it'll be worth opinion. So each section is broken up this easy to follow. We're going to start off with the foundations of video best-practices, leading on to planning and executing a video strategy, filming techniques, editing. And then we're going to finish up by making your very own documentary as a route for with the power of I don't believe me. Well, just to prove my point, everything you see in this workshop, I'm going to capture on my phone tablet. Now remember, if you've got any questions now hopefully, by the end that is caused, all of that will be answered. And if not, you can contact me or make me not just gets died.
2. An introduction to video: So an introduction to video. Now, what is video? How do you actually define it? Now the easiest way to say this is video is essentially a multimedia source that combines a sequence of images to form a moving picture. And this is normally accompanied by audio. Now video is used for the recording, the copy in the playback, the broad cost and a display of visual media. Makes sense? I hope so. Now the next question you probably all she herself is not an hour video is how does it actually work? Now, in simple terms, the eye of the camera, better known as the lens, focuses light and color onto a thymus on this, convert this into an electronic signal, which can then be stored on a tape or any other form of device which is going to store your media content.
3. How effective is video?: Now, again, just looking at this as a foundational piece, how does video affect us in our day-to-day lives, not just for entertainment, but for business as well. Now, since video was invented has been used to mark your messages and stories to the masses. The Internet changed everything. And video has had an increasing effect on how people connect with businesses around the world. Now by 2022, the average person will spend 100 minutes every single day watching online videos. 96% increase in click-through rate if you have a video attached to an e-mail. And here it is. Over 100% Azra acid at 100%, more videos are shared compared to text and images combined. So you can see the amazing appeal it has for people to start using more and more video content in their businesses. 93% of companies claim they got a new cost and the because of the content that they used on social media. And 90 percent of consumers watch video on their mobile phones and their tablets. So you can see just from these numbers that drastic change and how we consume content and the effect it has when working with our relationship with other brands. Now it's evident that mobile content is on the rise of just explain that. But it's very, very little sign of slowing down, if anything it getting better. Now how can you best use your phone to produce great content? That's the question. We all want to know that this course will cover just that. But in the meantime, let's have a look at some great examples. Now we'll look at three examples of best uses, looking at low content, reports and advertising. Now if we look in our blogs and tutorials, essentially it's like a behind the scenes of inner life off. It can even be a behind the scenes of your business or your brand. Now YouTube, Casey, nice, that has motor, well million subscribers from his online content. Now, Vox is popular for its documentary style videos. Much of their content includes mobile footage, which is extracted from interviews around the world. And they have over 9 million subscribers online. Now, Vodafone Vaux, he produced an advert entirely from home using mobile four-inch during the COVID-19 pandemic. And they reached thousands of years in the UK.
4. Before you pick up a camera: Now, don't be too eager to pick up a camera and start filming before you know what you're doing. We're making content. What are the questions that you should be asking yourself? The first thing is, who is your target audience? Now this is very important because it will determine how you structure your entire project. A video target as senior business owner will look a lot different. Video target at preschool students. That's the first thing to think about. Second thing is, what is your video's purpose? Now if you don't have a clear understanding of why you're even doing the video. The truth is, you shouldn't even be doing. Now if there is no clear goal to the content that you're creating, you run the risk of it not doing as well as you hope. Where will it be distributed? Now, overlooking this means that you can end up creating more work for yourself then you need to. Now, is it going to be on YouTube? Is it going to be on DVD? Is again or be on TV, IGTV, et cetera. All of these platforms have their own specific requirements. So be in a video format or aspect ratio, which we'll cover later. You just need to understand where your end product is going to be shown. Resources available. Now, ask yourself, is it even possible? Now, does it fit into your financial or time constraints? If you've only got two days to do this and you have no money to do it. Can you pull off? The idea is that you want to pull off, that's what you need to ask yourself. Do you have the resources to use third-party material such as music or images or stock footage. You may need to use these to help produce your content. And if you don't have permission to use it, you may end up with a problem later on. Style or video type. Now, what kind of video are you going for? What's the style? Is a, a vlog? Is the a documentary? Is it humorous? Is it serious? Is a bubbly? Is it cartoonish with lots of graphics? You need to think about what you're going to be doing on the style you're going to be doing it in. So research into examples of other styles that you like and see what works best for your audience. So bearing in mind this course is all about mastery, not all film in using your phone. What formats can you implement into using your phone? Now? Well, to be honest, the world is your oyster. You'll be surprised what content you can create using your phone, whether it's movies, documentaries, interviews, adverse, the list goes on. But it comes down to two very important things, your resources and your creativity. But let's be honest, how likely are you to create a full length Hollywood movie from your phone? So let's look at a few common formats that work wealthy. Interviews. Now there are many forms of an interview, but our most common is a face-to-face discussion where generally one-person poses questions to a guest. Reports. Now essentially it's like a presentation on screen about a particular topic or event. Now this can be a highlight about the event. It can be a how-to video, or it can be a video. Review. Live streams or Bayesian think about this one. Streaming video over the Internet is viewed in real time. Now, it's used for immediate reporting of information, as well as having direct contact with your viewers for engagement. Vlogs. Now essentially this is like a video block. Block. It's a regular outlet talking about the ongoing of a particular person or a brand.
5. Marketing strategies: So a good market strategy can be the difference between success and failure. Now start with our understanding of where your content fits into the larger world of video and how you wish your audience to consume that content. Now once you can figure out your target audiences, consumer habits becomes a lot easier to execute your plan. So understand your audience. Sometimes it can take quite a while to get an understanding of who actually consume your content. And it may not always be who you 40 awards. So if so, how do you redirect your content to your audience's needs? Those are the few things you need to think about. Now here's a list. Do you research in advance and look for similar content or successful? Why did it do well? Look at your competitors. What are they doing effectively? Create a customer persona. What does your typical consumer look like? Monitor comments and engagements. This is important. What they say and what are they doing in relation to your content? You can conduct surveys and ask questions and keep an eye on insights and analytics. What does the data tell you about who is consuming your content? Who, what, when, where, why, how. So to get traction with video, you need to build a relationship with your audiences. That's a fact. And to build these relationships, you need to be a constant presence in their lives. Not just when a campaign is live or when you have an announcement to make. If you want to create a channel with a series of videos to engage your audience, think about how your content will fit into this strategy. Hub. Hero hygiene is a marketing plan by UT. Now, it helps in categorizing video schedules on the platform. You can use this as a means to plan your regular and not so regular content for a year. At the bottom we have hygiene now this is your everyday contents such as your did you knows and you're how twos essentially is the explainer or description videos you find so often in your Google searches. In the middle is hub. Now this is your regular continent. You gift your audiences. It should be sent at around your audiences, passion and interests. That can be anything from for leadership pieces to a day in a life off. At the top is Hero. Your Super Bowl moment, your big brand new idea or your campaign. Often a one-off piece of content you put your heart and your soul into for the moment. One of the easiest and most organic ways to get your content out there is to make it searchable and sharable. If nobody can find it and nobody likes it enough to share, you won't reach the audiences you intend to. Now let's look at why people share content in first-place. People share content because they believe is a reflection of who they are. Sometimes we share helpful content because it makes us look helpful. We also shared emotional attention-grabbing content because it helps us to get noticed. Sometimes we share opinion a content because we want to show everyone what groups we belong to. Now the headline is what most people see first is the headline that makes a piece of content stand up, gets shared and go viral or not. So hint at something interesting. Leave out just enough detail to get your readers interested without falling into the clickbait trap. For example, something like this new core door design is changing the game. It might get an audience is interested in knowing exactly how that hypothetical call DOR works. Other than the headline, the image, or fun. Now in a massive reason, people will choose to watch your content. Use fontanelles related to the title. You can use big bold text and I'll always help it to stand up. Now the last thing is tags. Now some people use it and some people don't waste. Definitely still a useful tool. I'm sure you are well-aware of hashtags, but using these on your videos can help make them a lot more searchable. Peg sentences you think people in Google will associate with your content. There are many great tools to help with this, such as Google Trends.
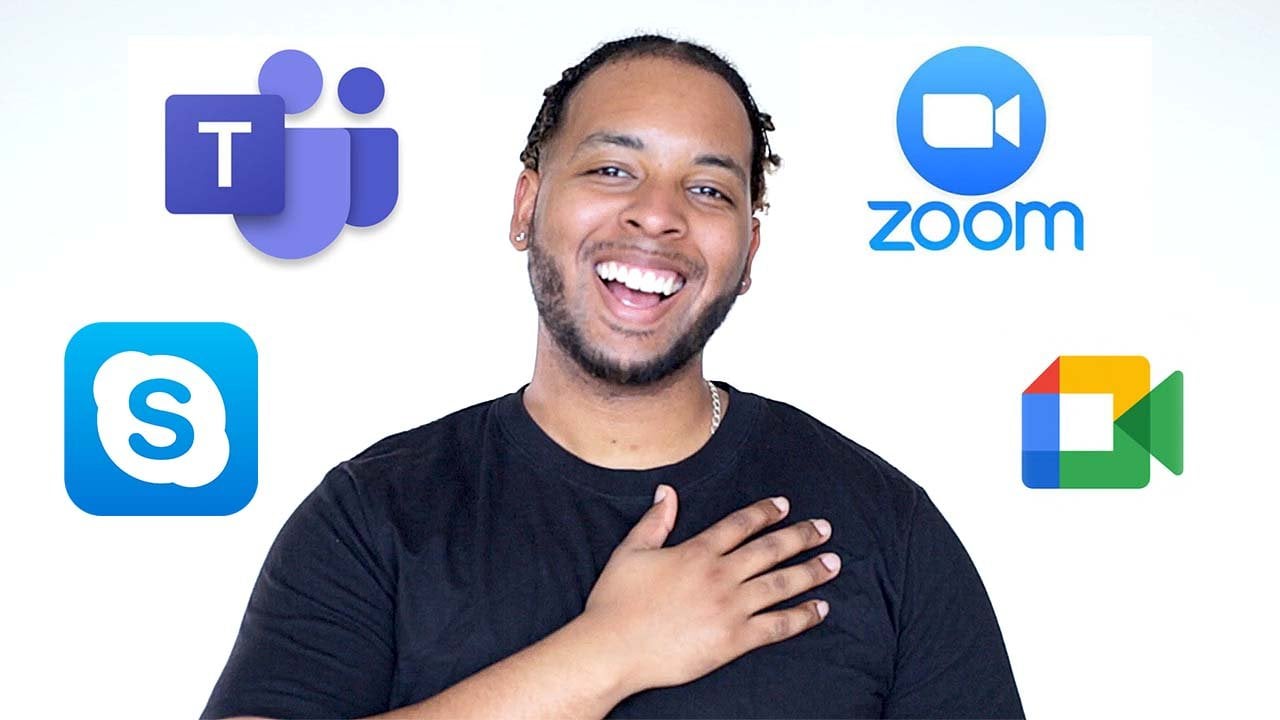
6. Video distribution: Where is your contact go in once it's done? Now, again, you've got a couple of things you can look up, which is physical media like a DVD is becoming a bit of a rarity in the modern age of streaming. But DVD still do have their place specifically, if you're trying to make physical cells, making hard copies the archive, or even hold in large video files that can be protected from piracy. Hosting platforms such as YouTube and Vimeo have become the industry standard for digital content. We spend over 80% of video content we consume on video platforms because of his own demanded pill. We can watch what we want when we want content having a global reach. So now we can watch where we want to. Social media. I'm sure you know about this one. Similar to hosting platforms, social media does have its benefits and its accessible at a moment's notice. However, one of the biggest differences with content for social media is that it's a lot shorter and it meets the needs of your consumers a lot faster on an app hosting platform that haven't on the mondo pill. Social media content is often for the moment, with so many posts being created minute-by-minute. Chances are if you don't see the content within 24 hours, you may not see at all.
7. The anatomy of a camera: Now let's break down what a typical camera looks like and its main components. There is a lot, but I'm going to simplify it for you. And the first thing is your viewfinder or your screen. Now most cameras will calm movie screen or viewfinder us. You can actually preview your recording. It will be a bit difficult to be able to know where you're capturing if you can't see. Now the lens is something I brought up earlier, and this is essentially the eye of your camera. This is used to focus the image and it's made up of light and color, which focuses this onto a sensor. Now your sensor, every camera has this. It converts the light from the lens into an electronic signal so it can be seen as an image microphone. Some cameras actually don't have this, most do. And it helps to capture the sound along with your visual image. Media storage. Now this stores your video information, which essentially is compound of your audio from your microphone, your video from the sensor. And some metadata. Metadata is essentially additional information in relation to that video. And that could be time it was taken. It could be the location it was taken on. It could be the settings that it would record it on.
8. Technical basics of video: I had a couple of technical basics that you all should know. Now, when we're looking at 25 FPS, or 10 ADP or 16 by 9. What does it all mean? What is it too much? But I'll make it very simple for you. Now, video is a series of still images that when viewed in an order at a certain speed, gives the appearance of motion. But how big does the image needs to be? How fast do the images need to change? Well, this is where these numbers start to make a bit more sense. Now, FPS is the speed of which consecutive images cool frames. A pay on screen. Essentially, if you see on your camera, it says 10 FPS. That essentially means you record in 10 frames per second. Now we'll break this down a little bit less. Aspect ratio is the proportional relationship between an image's width and height. Essentially describes an image is shape. For example, a squares image will have an aspect ratio of one by one, since the height and the width are exactly the same. Now it will still be represented if you call it two by two or four by four or five by five is representing the fact that your height and your weight by exactly the same, which means you'll have a square image. Now resolution is a measurement of pixels. Pixel with a smooth part of an image. Think of it like a Lego piece. More pieces you have, the more detailed your structure will become. So essentially, the higher the resolution, the larger and a more detailed images. Now ten API simply means that the height of the image is 1, 0, 0, 0, 0, 0, 80 pixels. But the paint does not stand for pixels. Just to be clear. It means is a progressive video chart and explain a little bit more about this in a sec.
9. Understanding Resolution: So put simply resolution is the size of the video or better yet the amount of detail saved into a video file. Now by default, this is normally set to 10 ADP, which is great for online news. But if you need to display your media on larger screens, it may be worth recording out for K, which is 4 thousand pixels, so that it still looks good when a scaled-up. Just bear in mind, the bigger the video, obviously the mood, memory and space is going to take up.
10. Understanding Frames per second (FPS): So just to give a little bit more insight into what FPS is, FPS is the amount of frames captured within 1 second. Now 25 FPS is the UK standard because it's the lowest amount of frames you can capture in a video before it starts to look a bit stuttering. Higher frame rates on the country make the video look a lot smoother. Now, a high FPS also benefits creators who want to record in slow motion. As essentially the more frames you'd have in a second, the more you can slow it down by before you start to become lottery again. As an example, if you film at a 100 frames per second, you can slow it down by about four times. So essentially your clip is now at 25 frames per second. A 100 divided by 4 equals 25. Fulfillment 500 frames per second. You can slow it down by 20 times. So the higher the number, the more you can slow your image down by.
11. Why use a phone?: So as we've already established, mobile phones can be a great tool in your video production toolkit. But just like any camera, it has its disadvantages. And it has these advantages. Being a great content creator isn't about happiness best kit. It's about having the right kit and knowing how to use the resources that you have available to get the best results possible. Now when it comes to traditional video cameras, mobile phones have many advantages, but no one comma could do. In a professional camera, you will find that you have features such as Jen locks the sync up the video cameras and nuclear devices. You have a high HDMI or SDI outputs to connect cameras to external one is, and you have other things where you can connect it to camera switches and other flexibility for audio and video controls. So let's go through a few specific advantages and disadvantages of using a mobile phone. Now samir limitations or it hasn't basic control. So it's very simple. You point out what you want to capture and you hit record. But it gives you very little flexibility when you need it. It has a fixed lens. Now most phones only have one lens, so you can't change the look of your video. It has a small sense of because it's a small device. But this also in turn means that your image can be low quality. High power consumption, complex tasks, Latin recording video is very draining on your battery. And the audio isn't great. You can expect much from a microphone, which is the size of a pinhole. But there are advantages to using a phone. It's compact and it's lightweight, which means it's easy to carry around when you need them and there's no hassle. It's user-friendly. It may be a disadvantage that is basic in its controls, but it's also easy to use and manage. Its versatile with so many apps and accessories to use, it becomes a versatile all in one device. And it's discrete and nobody blinks twice when you're holding your phone in your hand, says, great, fulfill me, move out and drawing attention and audience.
12. Setting up your phone to be video ready: So let's look at a couple of things in regards to setting up your phone. Now memory is the first thing we need to think about. The last thing you want to happen in the middle of recording is your phone messages pop up, say in running our space. In an ideal circumstance, you want at least one gigabyte or freespace on your phone before you even start recording. Apps, videos, and archive media, take up the majority of space on your phone. So recommendation is to save these TO cloud drive if possible. We'll see combat these up and then cleared them from your phone. You can find out how much space you have on your phone, from your phone settings. Clean the lens, now gives you a lens, a white paper cloth. You'll be surprised that difference that clean lens can make turn on airplane mode now terminus and will prevent any interruptions during filming. The last thing you want is some cooling. You just as you're capturing the perfect shot. Now that she is probably the most important thing, the life of your battery is the be-all, end-all of your production. You can't feel managing your camera battery's dead. And believe me, record it takes up a lot of juice. So make sure you have bacteria 100% before you start filming. Turn off all connectivity such as your Bluetooth, your GPS, your WiFi, your Fuji, disable all notifications and turn down the screen brightness as low as possible. Also, if you have power saving mode, enable it and bring up charge or power bank would be just in case. So just to give it a clarity with these phones that ends on what they mean. As default, it would generally be set to 10 ADP at 25 FPS. And it's good for general mobile uses, all for doing content for the Internet. Now if you want something a little bit low res, whether you're doing it just specifically for e-mail purposes or you're doing it for just testing purposes or your run enough space, you may want to go for 720 P at 25 FPS, as he's good for mobile use. And it takes up a lot less space. On a counter to that. If you want something high reds, you're going to be looking at something which is four k at 25 FPS. Maybe even something higher in terms of his frame rate is good for high-quality videos on TVs or mixed with other cameras. Now, just to be clear, if you're looking for something which is a lot smoother in motion, or you actually want to shoot slow motion content. You're going to be looking at high frame rates does have a 60 FPS or a 100 FPS. Capturing videos in slow motion, or for videos that have a lot more movements such as sports events.
13. How to make your videos look professional: I bet the pot you looking forward to the most. Thankfully, all of the things that we've planned for can now come to fruition. We're going to pick up a cameras and get to work. But what are the things that we need to bear in mind to give up videos that professional look. As you know, you're in the right place. So let's get to it.
14. The four steps to professional video: So your audience value, quality content first and foremost. For to get your contents that are expected for professional videos need to have a series of things. Most importantly, these four elements, stability, making sure that your footage is nice and steady. Composition. So frame in your shots in a creative way. Lighting. So using light as a tool to paint your canvas and audio, making sure you can hear everything clearly.
15. Stability: Remove the camera shake: Now nobody likes shaky footage is the first thing that people notice and immediately give the perception of a rookie camera operator. To look more professional, you want to bring some stability into your footage so the audience can stay focused on what you want to show them. With that in mind, avoid too much movement. Unless you have the recommended equipment to help. There is no substitute for good tripod and this should be used at a minimum to make your shot stable. There are some other items you can use such as a selfie stick, a mono pod, or Gimbels. If you don't have a tripod, what else can be done to help produce the camera shake? Now, going handheld is the most common way to record. Voice, the most difficult to perfect. Avoid Firehose in. Use both hands and lock your elbows into your body for stability. You can even lean on a wall to stop yourself from shaking. And if you have an anti shake or stabilization function on your phone, it may be worth using this to the speed at which the camera moves is also very important. Quick moving shots run the risk of being shaky. Boy, it doesn't allow the viewer to take him what you're actually trying to show them. So record at least five seconds that your starting point hold for another five seconds at your finishing point. So you have enough time to create transitions and cotton points in the edit later. So let's look at a couple of tools for stability. You've got tripods which is essentially free legged to give a maximum stability. I'm minimum surface area. It's hands-free and has a long operation time. Now if you're using a selfie stick, these are lightweight. They can be used for small cameras. A short operation time as it requires you to hold it in your hand. Monopeds, a lot tripods bought them 10. They only have a single leg, and this helps minimize surface area is called one-point of stability was still requires hand operation, is good for someone constantly moving around as it's small and it's lightweight. Now a gimbal, I'm sure you've seen loads of these flying around these days is perfect to minimize shape during move in shorts, but it does require operation would be a hands.
16. Composition: Framing your shots: Now framing shots is another element in making your foot more professional. Have you ever watched a video and just had this annoyance at the fact that the camera was cotton off the person's head or slightly out-of-focus. Now, composition is subjective because it all comes down to the style that you're going for and the feeling you want to project to your audience. There are many rules when it comes to how you frame your shots. But like many rules, these can be bent depending on what you're looking for. Although I would advise getting comfortable with most been proven to work first before you start experimenting. Now short variation is the source of your video. It helps convey your story to the audience. So mix it up with close ups, wide shots, low angle, high angle, and a bit of movement with pans and tilts. If you're having a wide shot, a usually helps to establish a scene. It can be very revealing to the audience. A close-up is to help pick up detail and create a motion. Low angles make the subject appear larger. Dominant high angle makes the subject appear small and inferior. When you're doing pans and tilts. This helps shift the perspective. It's great for transitioning or following movement. Pov is essentially your point of view from the subject. So we touched on Aspect Ratio and distribution briefly. Why would suggest is getting into the habit of filming in landscape unless you're specifically working on a portrait project. Now the reason for this is Phil Maine landscape for one is a standard for video, excluding some social platforms. Almost every video hosting site B, YouTube, Facebook, Vimeo, IGTV, landscape video. And it will fit for screens on phones, televisions and computer monitors. Film it in portrait automatically limits you to distribute your own platforms that support portrait video. And they can add bonds to either side of your video when playing on a natively landscape video player or screen. Don't Zoom, please. Unless you need to do for a specific look or move. I would avoid zoom in on mobile phones for stop. Two reasons. When using a mobile phone and on some compact cameras, they have a digital zoom, which essentially means the camera fakes the look of zooming by just cropping in on the image. And this is why when you zoom in too much, it can get our belly and grainy. So my suggestion is if you need to get physically closer to someone, just move closer. The second reason is zoom in often isn't smooth. You can lose focus and it can be shaky and just look plain bat. So until you have the skills and the resources to do it properly, just don't do it. Now, the 180 degree rule. Now this is an important rule to bear in mind when using multiple cameras or from film in multiple angles. Imagine a line split in your subject in half. You want to film your shorts or one side of that line as crossing and will result in a drastic change in screen placement, which can be unsettling for your audience. So as an example, if you're filming a person walking in-frame from left to right, by reposition your camera on offer sided align. It now appears as if the person is moving from right to left, even though they're still moving in the same direction. So caught in between these two charts in an edit can make you look confusing to the audience. Because one moment they're moving from left to right. And the next movement and moving from right to left, rule of thirds. Now, have you ever seen a grid on your camera when you're taking a pitch on wondered what step 4, while essentially holds two purposes. One is for helping to position your focal point. Now, there are four points where the lines cross each other and Nissan known as your points of interest. Framing your subjects around one of these four points creates more interest in your shots. Now secondly, the lines also act as a reference to balance or make sure your image is level. Look in space. So this refers to the space you give a person on screen when they are looking away from camera. Now the closer you look into the lens at a more engaging you all with your audience. If you don't want your subject to look at audience, for example, during an interview, you should get your subject to look just off camera. We have the space in the frame in front of them. Now focus points are markers to set what you want in a frame focused. Now this helps draw your audience's eyes toward particular part of the screen. Now when this is set to auto, which most cameras have essentially focuses on most in the central frame or what is shown in highest contrast. Basically what's most noticeable. Manual focus is obviously handy for those moments when the focus doesn't quite stay where you want it to. Now when using a mobile phone, you can unlock your focus points by holding your finger on the screen. The distance between the nearest service elements in a scene appear to be in-focus in an image is known as your depth of field. Having a shallow depth of field means that other than the focal point, little else in the image is in-focus. A deep debt fulfilled means that a lot more of the image is in focus from your main focal point. So as an example, with a shallow depth of field, which I can set the focus point to be on these apples, for example, and everything else in front or behind will be blurred. Now if I use a deep depth fulfilled, although I have selected the focus point on apples, I can still clearly see the cops, the plates, and everything else around it.
17. Lighting: Painting your canvas: Any basic law itself starts with free points of light. This doesn't necessarily mean you need free physical lens. Your main source could be the sun or a camera let, using free points of light helps remove any unwanted shadows and make sure your subjects stand out from the background. One position in your light sources, the key light is commonly placed either to the left or right of your camera. Then your key law is your main light source used to light your subject and it's the brightest of your free light sources. Your fill light is your secondary light source used to fill in any shadows caused as a result of your main key light. And then your third layer is known as your hair light or your backlight, used to help separate the subject from the background. Now the main thing you want to avoid is complete buckling. And this is what you often see in bad conference calls with a main light source is actually behind the subject, thus causing a silhouette. And this isn't good in many circumstances because when someone backlit that come with can no longer pick up any detail in the person's face. Not a biggest light source you can use it. Obviously the sun is bright, covers a large surface area and this free. A few handy piece of equipment to aid in creating yourself would be IVR camera light or tall. Now reflectors are small, lightweight, and don't run any power. You can simply reuse a light source and reflect it into a new position. Exposure is how much light sensor of the camera is exposed to. Now some cameras have a general exposure set into adjust the brightness of the image. Whereas others that are more complex using free points of exposure control, such as ISO and aperture. Now, auto exposure is January way sit on your phones. But this can be locked by holding your finger on the point of the screen you wish to be exposed correctly. Now the exposure can then be adjusted by selecting the exposure by person on screen. And then slide your finger up or down to make the image brighter or darker. White balance. Now, our eyes naturally adjust to different types of light to make whites look white. Now cameras are not so good at doing this. And so white balance has to be set now using something like a white piece of paper as a reference and either adjust in changing the red or the blue to get the contrast balanced you need. You can also use preset such as cloudy or daylight. Again, average white balance for that particular environment.
18. Audio: Can we hear you loud and clear?: Now, audio is something not to be overlooked when it comes to creating high-quality content, you can be forgiven if the video is in the best quality, but if the audio is bad, even while you're watching something like a big-budget Hollywood movie, you're likely to just get fed up and stop watching. Suggest like cameras. There's no one like that does it all. There are several microphone that you can use to help in the shoot in environments that you're in. You've got a handheld which is used for groups of people to suppress background noise. You've got a lapel or clipped Mike used for a single person. Clean, is clear and is hidden. A boom or shotgun mike is a directional microphone, often placed directly on a camera or a boom pole to help pick up all you're in direction the microphone is facing. Now, all you're monitoring is definitely going to be important. Don't just assume that it's going to sound good. It's worth keeping an ear on audio when you're recording, if you can, during the recording. Now you can have the use like an audio splitter that can help so you can actually record in and listen out. Or the easiest solution is to do a test record, play it back, make sure it sounds okay, and then continue recording after. So this is audio from the camera phone itself. Obviously, as you can hear, there is a little bit distance between myself and the camera. So what you wanna do to get a little bit of a clearer audio is get closer to the camera. So I'm just going to step a little bit closer, just you can hear me a little bit clearer. Now you have to be aware of this. Obviously, if you're shooting in a noisy environment, is going to be quite difficult to pick up the voice, the subject. So just bear that in mind when using the onboard mic. So hopefully you can hear, I'm now using the lapel microphone pick Mike. And this is good for having single person on camera. It's very small and discreet, and it also picks up sound from all around me so I can kind of turn around to my head and have a conversation over here and it should pick up everything quite clearly. So as you can see, I'm now using the reporter or handheld microphone. And this is really good for doing interviews with, say for example, several people like a group. It's really good for canceling out backward, known as, but you have to be aware of where you're holding the microphone. Obviously, if you're too close, there was onDestroy. And obviously if you're too far away. So just be aware as well. This is it requires operations. So if you're holding a microphone with one hand and you're doing something else with the other hand, you are kinda limited with what you're doing. So just bear in mind.
19. Video editing: The basics using Rush: You're almost there. Most people overlook this stage edited. Now, arguably this is the make or break of your production. If you're editing is done really well, you can hide some of the mistakes that you may have made during the recording process. Counter to that, if you were recording was done really well when you're editing is slack, you may miss the mark on your impact, your video. So let's make sure that you guys get into running for video of the year. Shall we?
20. Basic editing techniques: Now we'll get into the fun bit now of editing. Here's a couple of basic things that can be useful for your production. Cotton to action. Now it's common for a videographer to use this trick when I want the viewer to focus on the action. The action such as a door opening or person Jumpin, can trigger a shift in camera angle and focus. Now this engages the viewer and cues then need to pay attention to this scene. Now call away gives depth to the story by shifting the focus from the characters. I'm placing it on the scene. Now this creates context. It can be used as a reference point. If someone is talking about cause, you want to see them as they're being mentioned. They can also be used to change the time and the tone of the scene. For example, using a shot of leaves fall into establish a change in the season. Now fading in and fading out is pretty self-explanatory. You fade out long and you fade in and novel. And this implies a passage of time. Most often lack night today or someone fallen asleep. But it can be a bit jarring if not used properly. You don't really want to use this type of standard applications. Now an L cut or j is incredibly common, but you've probably never heard of it. They get the name from how the clips line up in the editing software. And L is used when you want to have audio from clip a, continue when B comes in. Now, j is an opposite cock. Pretty much every documentary interview ever seen uses L and J cuts throughout. Finally, in the right song can be sought a tedious task. Trust me, I know it needs to be derived live. It needs to be the right tone. It leaves to be the right tempo. And finding something which is free and does that is very tricky. By using a wrong music can give your video a completely different fill, and it can actually disconnect between the visuals and audio, which leave your audience a little bit confused. Imagine watching a Stephen King thriller with all of the audio of Sound of Music, it wouldn't make any sense. So music is very important.
21. Introducing adobe rush: Now like many Basic Editor, Adobe Rush give you the ability to edit videos without the complexity. Most of these digital edges are classed as NLP or non-linear editors, which basically means is non-destructive. And the original video is not modified during the course of the EDM process. So you can undo as many changes as you wish. Adobe Rush unfortunately, isn't a free software, but can be purchased for a low payment or is included in the Creative Cloud subscription. Now you may question wild recommend a software which is a free. Well, let's look into my reasons and then we can jump into the ins and outs of the software. There are many free software programs, but they tend to be free for a reason. Either they add a limit on the length of video, the amount of videos you can make, or they add Walmart, so animated logos onto your videos. That's fine for practice in, but not necessarily ideal if you want to make something bespoke. Not a benefit of Rosch Is that easy to use. It can be used with Adobe Premiere Pro and Adobe Stock, which has lots of presets and is designed for social content. Multiple video tracks, it can be used, which is very useful, and it's available on both a Windows machine and a Mac. Now the limitations of Russia's oversee that it's not free is paid. There isn't any key frame in, so you can't create any custom animations. And it has a little bit of slow rendering time. My second recommendation for editors would be iMovie, although this one is actually free and really good, is only specific to Mac users.
22. Adobe Rush run-through: To start create a new project. The window you are presented with would be the media browser. We can select all the clips, images, and audio to use in your video project. Media is added to your project in an order that you select them. So bear this in mind. The first and the last clip that you pick will be the first analog clip to show in your video. You can adjust these later. But remember to give your project a name. The easy identify amongst projects in the future. When you're done, click Create. The blue button on the left allows you to add to your current project for media titles of voiceovers. The box icon reveals all the assets currently in your video project. The main window you'll be working from is your preview window with plays back all of your media content from your editing timeline. You can scrub through this by moving the blue dot or the playhead lecture. The preview window is the option button where you can select which aspect ratio you want to use for your project if a landscape trade or square. The bottom part of the screen is where you locate the editing timeline, where your video sequence is created. And from here, you could do things such as split using the scissor tool and duplicate using the Copy tool, as well as move and delete your hips. Shortening or lengthening eclipse is as easy as pulling the handles from the start or the end of each clip. The expand audio icon allows you to see the audio on each clip and make edits to the audio separately. The truck control icon allows you to lock, mute and hide tracks of video or audio. Additional fine tune into your video can be done with the adjustments on the right. For me, you can add graphic overlays, crop, and filters, transitions, and adjust the audio. Default titles can be added using the plus icon for if you want to edit preset titles and styles, this can be found with the adjustment tabs on the right. Edit your text by double-clicking and selecting the Edit tab and change the font size, color, and more. Just like a video or image, you can reposition, scale, rotate, or trim your title from the timeline. Although this contains many titles from here, you can also find other overlays to use in your project, such as animated transitions. Transitions can be added to the start and or between clips by dragging and dropping. Before applying filters to give your video a specific look, you need to first select the clip you wish to edit, and then either choose from the preset or create your own the Edit tab. The intensity of the loops can be increased or decreased with the slider below. The Audio tab allows you to control volume levels of your audio. In advance. You can select audio Doc, which is especially useful for music because it will automatically drop in volume with another piece of audio, such as someone's speaking is introduced. Transform gives you the flexibility to reposition, scale, and rotate your clips, as well as crop them to give them a specific look, such as using split screens. Bear in mind with Rosh. You can have up to four trucks of video at once. And whatever clip is placed on the top layer is the one that will be shown. Correct. Any mistakes using the undo or reading bottom. Once you're happy with your edit, use the Share tab to export your video, even locally to store the final projects on your device or upload directly to social media platforms by signing in and filling in the information to post online.
23. End of class project: This is your final hurdle and this is to prove your worth and show your skills as a video master. Okay, well, I'm not expecting you to suddenly make a Spielberg movie as if anything. You have the education, but now you need to put in the practice and prepare. But with that in mind, let's see where you go. Use the skill in the last three modules to create your own documentary. Now let's make it easy by picking a topic that you're familiar with. You. Now I want you to create a free 25 minutes story about you, your life, your history, your ambitions, be creative as possible. You can pull in family members to do interviews and use old photos and videos of references. Now experiment with different camera techniques. And remember to stick to the narrative that you are trying to convey.
 Simon Charles, Helping people become better