Transcripts
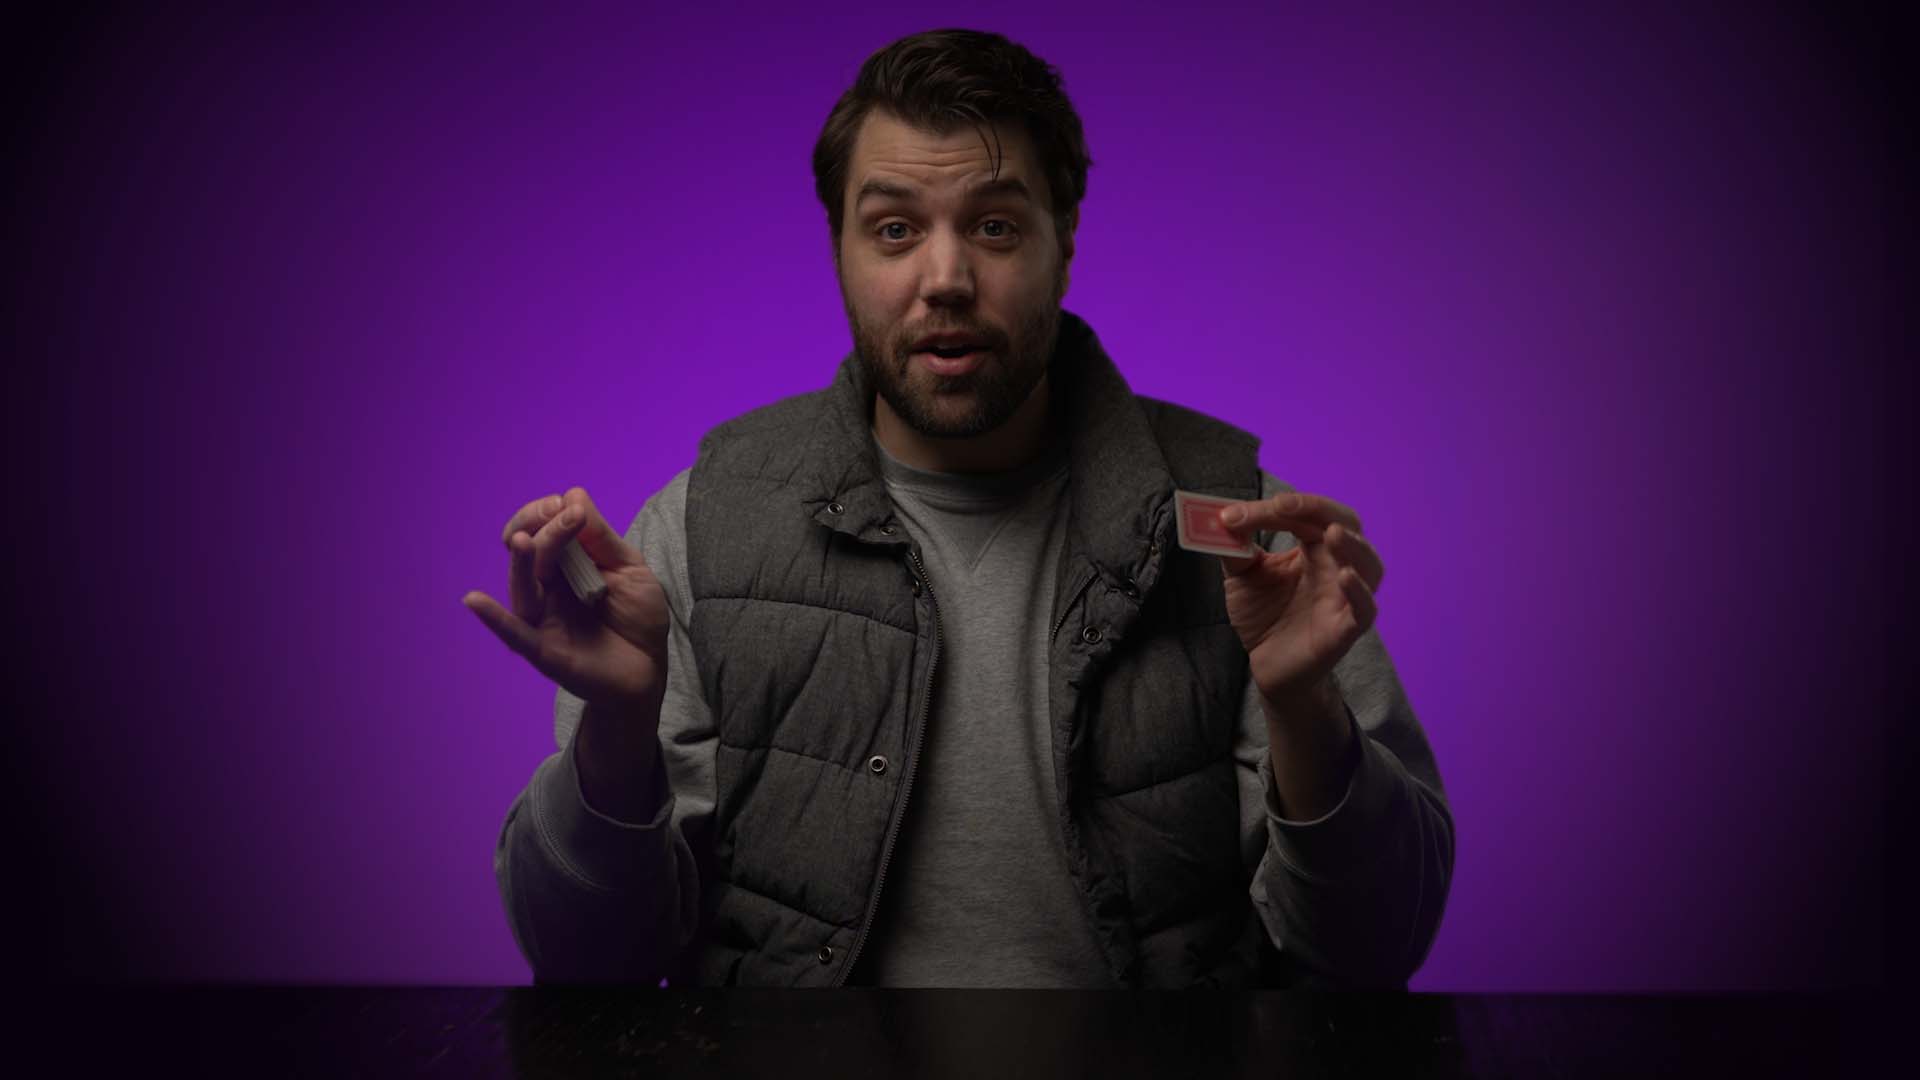
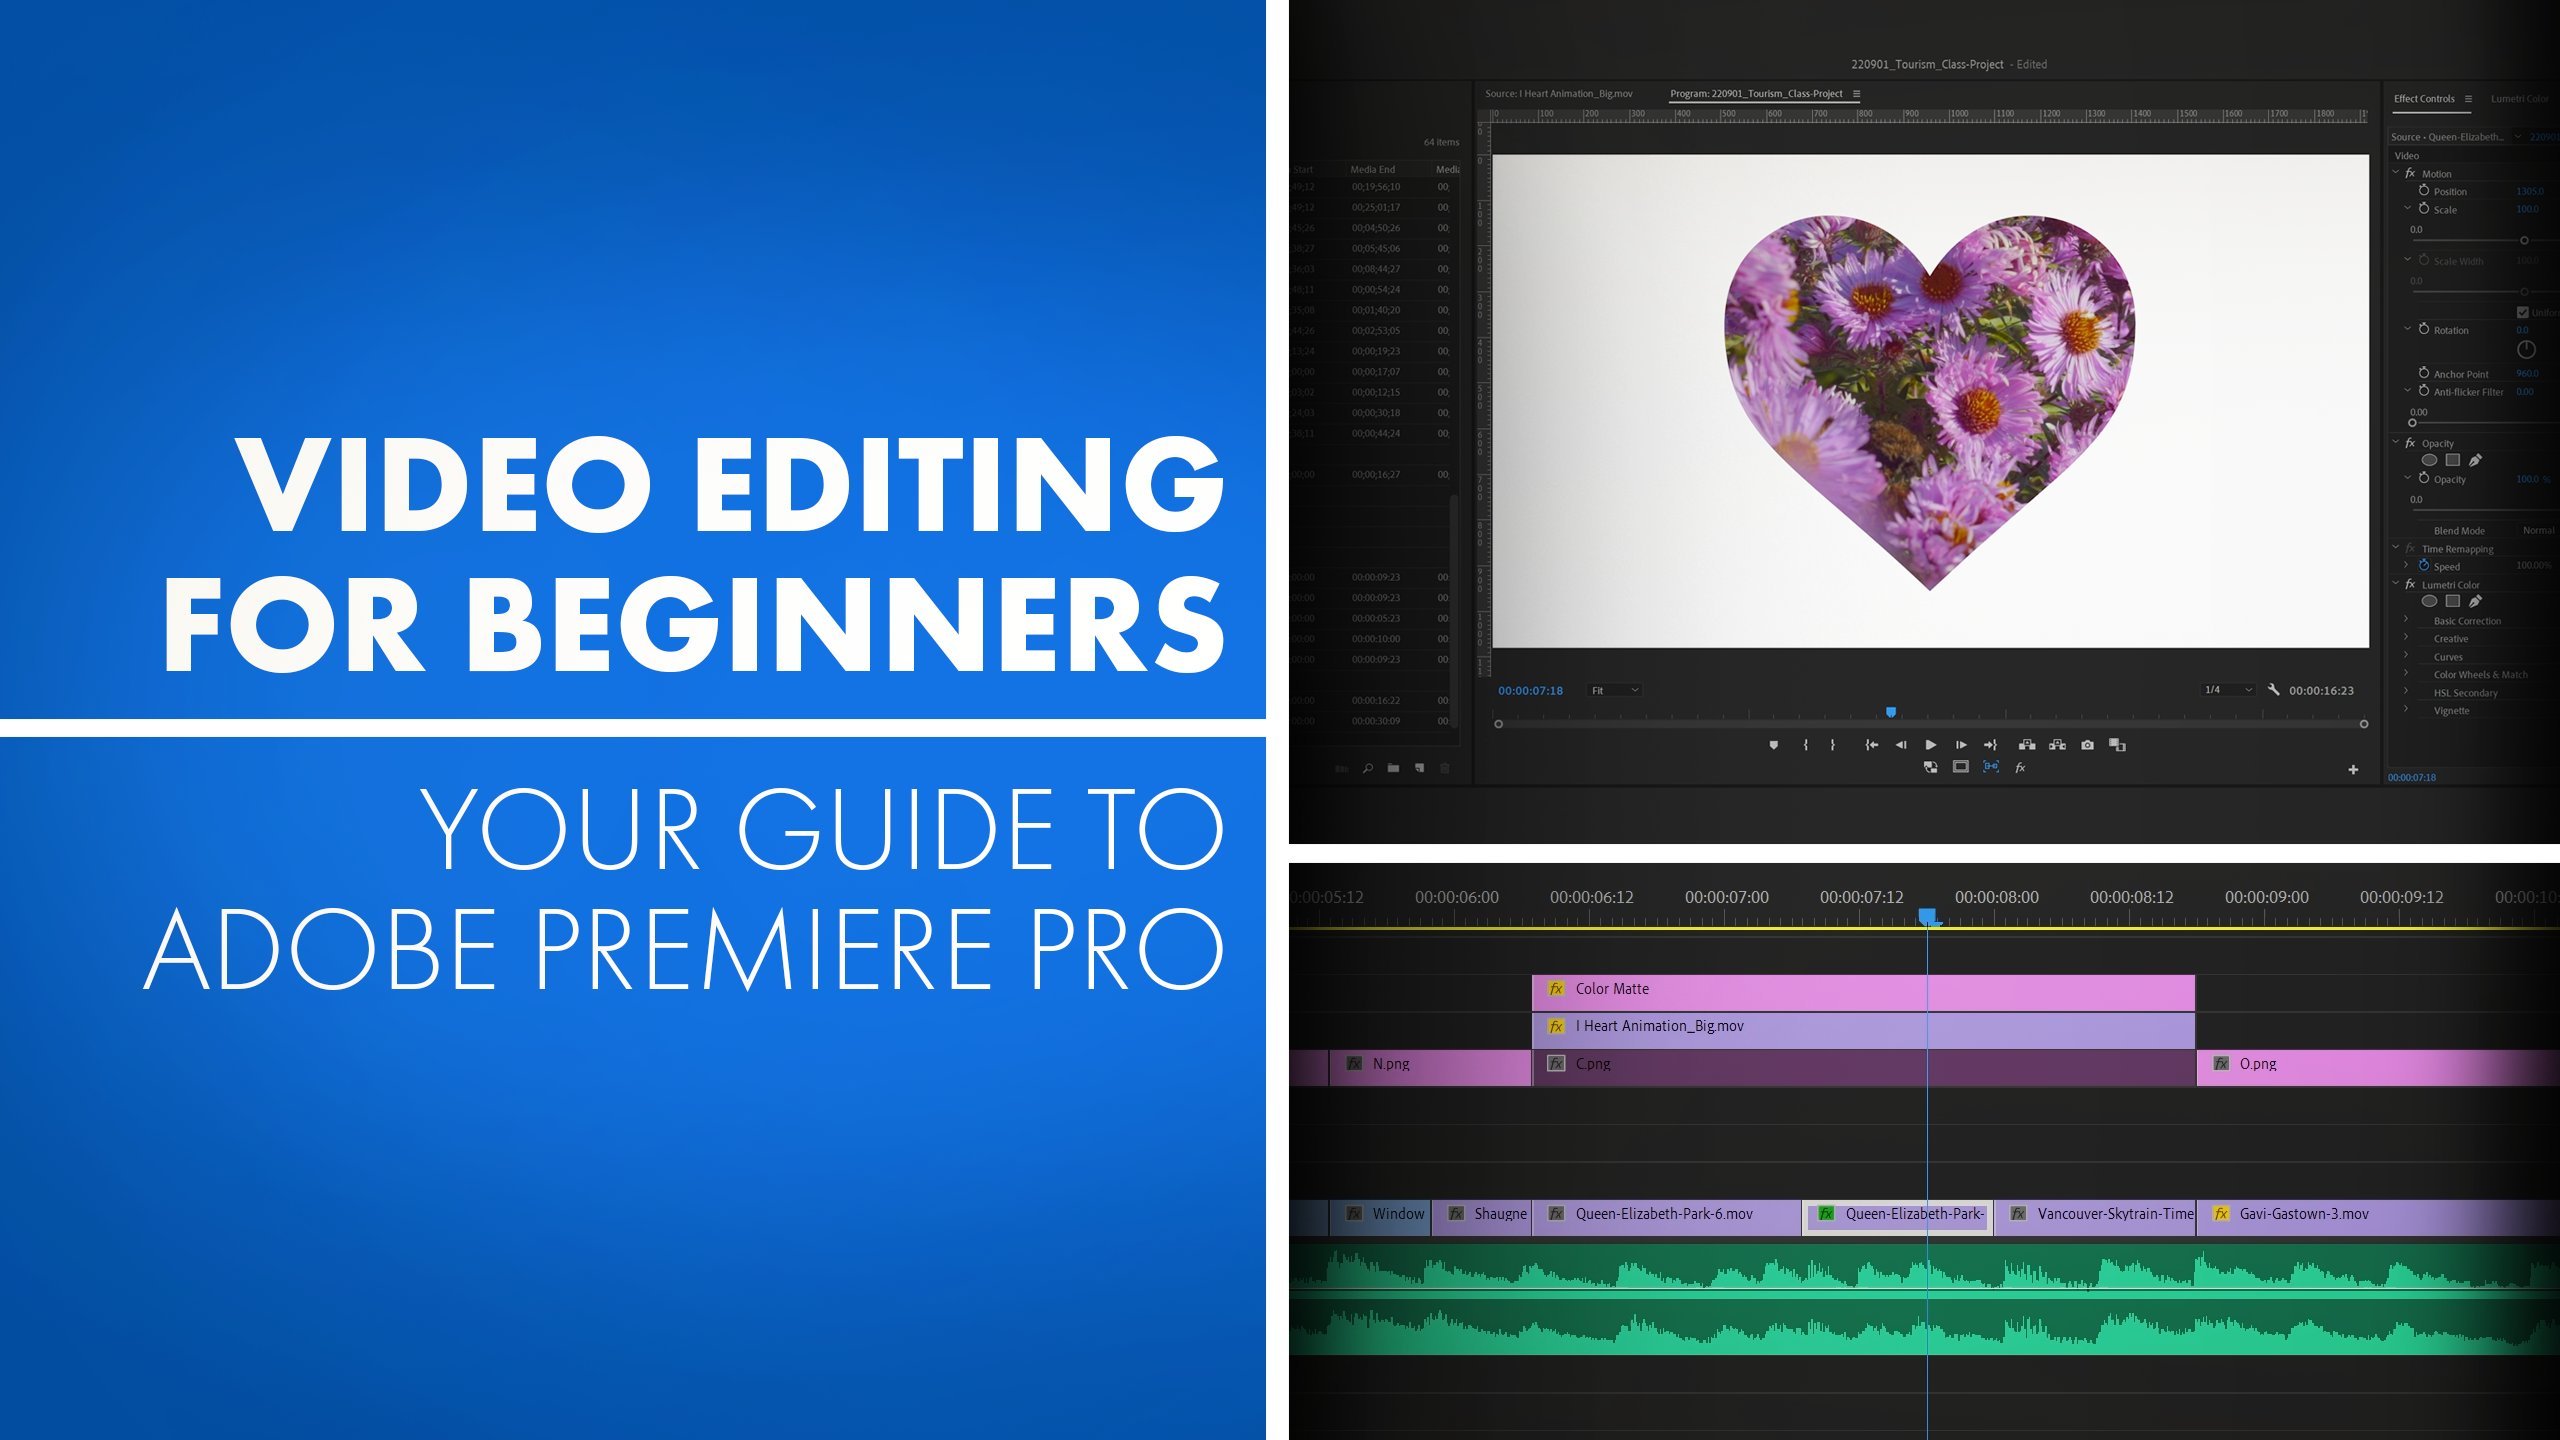
1. Class Introduction: [MUSIC] As video editors,
we're like magicians. Watch my hands closely. I'll take this ace of hearts, put it in the
middle of the deck, and I'll shake it to the top. There it is, not bad. When a magician
performs a great trick, you don't notice a
sleight of hand. You don't notice any of the smooth transitions employed
to make the trick work, but what magicians
do best is guide the audience's attention
using misdirection. Of course, I don't
know how to do any of these fancy card tricks, but I was able to
create sleight of hand, misdirection, doing the thing I do know how to do,
which is to edit. Hi, I'm Sean Deakin,
filmmaker and editor, and I want to teach
you the techniques to create a smooth edit. A smooth edit contains a number of video editing techniques. In this class, we're going
to focus on how to create smooth visual connections
between shots. This includes smooth
editing principles, creating smooth edits
and transitions, smooth movement,
cinematic motion blur, and practical editing
techniques that you can apply to your
very own project. Our class project is a short and exciting
ad for a vodka brand. This is not necessarily
a step by step tutorial. You're going to have
a lot of freedom to use the learn
techniques to create your very own edit and in
your own creative way. This course is for
intermediate video editors, and it's recommended
that you have a basic understanding
of how to edit. We will be using Premiere Pro and After
Effects for this project. That being said,
there's a lot of video editing techniques that any skill level can learn from, and apply to any
editing program. If you don't want to
use After Effects, you can still complete a
project within Premiere. The techniques learned in this class will build
upon the foundation of your editing abilities
and give you the skills to create smooth
edits and transitions. This time, no video
editing tricks. Ace of hearts in the
middle of the deck, and shake it up. [MUSIC]
2. Class Project: Thank you so much for
taking this class. I'm super excited about
this class project because it's short and
snappy and there's tons of room to
experiment here and to test out smooth
editing techniques. Let's get into it.
Our class project is a short ad for
a vodka company. The company, however,
is not real. I completely made it up, so we have complete
creative control over what we can do with this. That also means that if you end up creating
your own project, you can post it on your own
socials where ever you want, so long as it's just
for personal use. I just ask that you'd credit the course and myself so that other people can
discover and take the class and create their
own project as well. I will be quite specific about
how I work with this ad, but feel free to edit it in any way you're
inspired to see fit. You can change the colors, you can change the length,
you can make five second ad, a one minute ad, you can make whatever
you want with this. But I highly encourage
you to keep it simple. Don't over complicate it
because it can get out of hand. This is not a tutorial where you need to follow
along with every step, but the techniques and
processes learned will be very applicable to
any project you work on. I'm going to do my
best to illustrate techniques and the
process through my own project without
getting too much into details because it's not necessarily a follow
along tutorial. Go ahead, download
the assets included and load them up in Premiere Pro to get familiar with them. A reminder, this is an
intermediate course and the project can range in difficulty depending on what
you decide to do with it, from very simple to
extremely advanced, you will need some experience with editing and Premiere Pro. Having a basic
understanding of how Premiere Pro works and
keyframes is a plus. We're also going to jump
into After Effects, make adjustments to movements
and finish our project. I'll be a bit more specific in guiding through After Effects, but again, some experience
there is a plus. If you happen to be somewhat After Effects adverse, like me, there is the option to finish your project in Premiere Pro, but there's just
not enough time in this class to go
through that process. However, a lot of the things
that we'll go through in After Effects will be
applicable to Premiere Pro. If you are getting stuck with any of the techniques or ideas, please feel free to ask
in the discussion's tab. One final technical
thing to know, I use an electronic Lazy Susan that wasn't
the most efficient, so be aware that at some point in some of the bottle
rotation shots, the Lazy Susan briefly stops for a moment and then
speeds up again, so you may want to
cut around that. Before we get into the
smooth editing techniques, we are going to talk about how to tell the story of the brand.
3. Telling The Story of the Brand: [MUSIC] You can
usually save yourself a lot of headaches when beginning a project at it by looking towards
the creative brief. A creative brief is basically a list of creative
constraints that help guide your creative
decision-making in a project and telling
the story of a brand. But what happens when you
don't have a creative brief? In our case, we do not
have a creative brief. That adds an extra
level of challenge. Again to be super clear, this is a completely
made up brand. Don't be confused, I'm just emailing myself, doing a role-play essentially. It's meant to be fun,
informative, and educational. This is the first
email we got from the marketing team itself on what kind of ad
they're looking for. It looks like they're
a brand new brand. They don't have a
lot of details, but they do mention that
they're looking for an ad between 10-30 seconds. Also, it's an ad for vodka. We know our audience
needs to be 18 or over, or 21 and over depending
on where you live. The other thing
we have available attached is this online ad. We have the bottle here,
the name, and the slogan, open your mind, and a short blurb about the drink
and company itself. Already with this little
amounts of information, we have some idea of what the company is and
what they stand for. Now, I've already
given this some thought before even
filming the short ad, and I created this
ad itself too. I already know what
I was going for, so I know it's cheating. First, if I don't have enough information and I don't feel confident
starting to edit, I will ask questions. I'll ask, what's the
purpose of the project? What's the goal of the project? What's the point?
What do we want the audience to do
after watching it? What kind of tone? What do they want the
audience to feel? Is it supposed to
be lighthearted, is it supposed to be serious? How long is the edit? This of course helps
you save time. Only editing to the
length that you need. Where's it going to go? Is it going to go online? Is
going to go in the theater? Is it going to go,
where's it going to go? Then sometimes I'll ask, who's the target audience. But a lot of the
times you can just go with the information they give you and come up
with your own conclusions. Let's hit "Send" and
great, we got a response. As you can see here, the
marketing team doesn't know exactly what they
want. That's okay. In cases like this, they just want you to
give them something. When you do that,
then they realize oh, actually we want this, or they realize
that's brilliant. Yes, that's exactly what we wanted and they'll
take credit for that. Let's hit "Send." I've gone ahead and I've
quickly put together and edit according to the length
requirement for this ad. Of course, I'll
usually do this after I view all footage and
choose my selects. The edit is boring. There's nothing exciting
about it really, but it's a good place to
start and it gives you an idea of how things
are cutting together, but it lacks character. It doesn't fulfill the
purpose of the brand. What I mean by this is
that the only thing that's recognizable in this
product is the logo, then the brand colors really. We need to start layering
in some edits, some effect, some ideas to emulate the brand, to illustrate the brand, because the brand itself has
its own life and character. We can figure it out by
looking at the attributes of the company and mimic those attributes through
editing techniques. The first step, naturally, you're going to start
to get ideas as a reading email as you're
reviewing footage. It's important to take note of these ideas and
keep them in mind. Right away the name gave
it away for me, Vrtigo, which is what some
might experience with imbalance suggests that we can possibly alter the
camera angle to illustrate the brand through motion
by creating rotations, or probably the most obvious
idea would be to create a Vrtigo shot and post to show perspective
in a unique way. This also speaks to
having conversation. The vertical shot gives you this unique perspective that's constantly changing
through out its movement. That contributes to the
company's mission about being open and receptive to
different ideas and opinions. Then also we have this
hint here where it says, conversations both
serious and lighthearted, which could contribute to the overall tone
of this project. This little bit of information
about the company, we can start to shape some
ideas of how to edit this. How would you create
edits that are serious and playful that
is based on conversation? Well, you could think about the pacing of a conversation, how that might include
interruptions. Maybe it flows really well. Maybe that's the pacing. Or if we think about
conversation as an effect, you might think about a
mirroring effect of some sort. Because when two people
in a conversation, they're listening
and responding, listening and responding. Maybe the mirroring effect can emulate two different people
finding common ground. I know this could
sound ridiculous, but this is what it's about. You're trying to create meaning from the few details you have. It will help you come up
with some ideas right away that you can implement
and test out right away. I would even just start throwing these clips in the
timeline before you even have a rough edit together and test out some
of these ideas. See which ones stick, see which ones feel good, that you're excited about, that feel right for the project, that feel right for the brand, and take note of those things. Eventually you'll find a
direction through that. Listen to your first instincts
even if it sounds weird. Don't worry about
getting it right. We're in the exploration phase. You can get it wrong. Just start with that
idea and let it evolve from there
and work with it. For instance, my first instinct was to use 80s synth music for this because it felt
like I wanted to hit that nostalgia
of the product. [MUSIC] The problem
ended up being that I chose music with specific lyrics that didn't quite fit the brand. I like the track, I
wanted it to work, but I couldn't quite find
another track that had that same feel and didn't
contain such specific lyrics. I just ditch that idea. I I wanted the Vrtigo
effect to work. For a variety of reasons it just didn't quite work
the way I wanted to. You could still
probably make it work, but I ended up letting go of that idea even though
it would have been so perfect because
the brand name is Vrtigo and the
shot is Vrtigo. Well, you can't win them all. It's not really helpful to
commit to every single idea, you'll get a mash of
different effects. The edit will become
unfocused and the audience will be confused as to what you're trying
to do with the edit. If you have star wipes
and fades and heck, let's throw some venetian
blind transitions in there, and then maybe some
colorization effects, and you add those
all into the edit, it's going to be a mess. My suggestion, stick to
a few different ideas that really work well together and serve the purpose
of your edit. For example, in my project edit, I've stuck mostly to
digital movements and speed ramps and also through in the odd invisible edit to keep that sense of flow moving
throughout the edit. One other important
thing to note, the animated rotations
are probably some of the most
noticeable movements, but I didn't use it
on every single edit. I wanted it to maintain
its specialness and its importance when it
came to the brand itself. I tried to mostly emphasized
this movement around the hero or bottle product shots so that it brought
more attention to the brand. Using an effect too much
can reduce the meaning of the effect and create
predictability in your edit. Now, in some cases when
it's such a short project, you need to establish the
style quickly so then it could be useful to use an effect
on every single clip. Now that I have all these ideas, I can start applying them to my rough edit and really create
a character to this edit. A reminder, make sure that your sequence is set
to 1920 by 1080, so that you can make full use of digital movements without
losing detail in the image. Of course, after adjusting
your sequence settings, all your 4K clips will exceed the frame size of
your sequence settings. To gesture clips to
match the frame size, you can manually
scale each clip down, or manually scale
one clip down to 50 percent and copy paste attributes to the
rest of the clips, ensuring that
motion is selected. But the fastest way is to
simply select all the clips, right-click, and select
"Set to Frame Size." Using the Set to Frame Size
function will automatically scale down your chosen clips
to the sequence frame size, which is exactly half the
size of our 4K clips. Recap, we can add
life to the edit by looking at the character
of the brand itself. These character attributes
can then be translated into editing style through
different editing techniques. You don't need to use every
idea and definitions, otherwise you run the risk of your edit becoming unfocused. In the next lesson,
we're going to talk about matching on action.
4. Matching/Cutting on Action: [MUSIC] Cutting on action
or matching on action is a practical way to
create a smooth cut. Matching on action
typically refers to two different
shots cut together on the action of a
character or an object. You can even cut on
camera movement. Basically, so long as
you are cutting on the movement or
action or motion, you're going to
have an easier time hiding that edit
from the audience. By matching on action, you are creating a visual
bridge between shots. It distracts the
viewer from the edit, because they're focused
on the movement that connects the two
different shots together. As you cut together a
rough draft of your story, look for ways to connect
the shots through movement. Also try to stick to
cutting between clips with similar movement
and direction. Otherwise it may
be a drying edit. As I was going
through my own edit, I found these two shots that I think are going to
cut great together. We have the movement
of the cap and the movement of the ice
attracting our eye, and when we connect
them together, match them on action, we're already going
to have something super smooth to look at. It's as simple as that. In addition to matching on
action or cutting on action, also look for eye
trace opportunities. The eye trace technique
refers to where the audience is looking within the frame at any given time. Our eyes are most attracted
to human features. The eyes bright colors, areas of high contrast,
text and movement. Our project edit features
mostly movement, contrast, texts
and bright colors. Again, because we have 4K footage within
the 1080P timeline, we can readjust the
position, scale, and rotation of our clips
without losing detail. Of course, the purpose
for this is so that we can create our
own movement within each shot to create smooth
cuts and smooth transitions. Keep these things in mind
with each edit you make. From this cut, our eye
trace point is here, and then in the next cut,
our eye trace point is way down here at the
bottom of the glass. But because of the moving ice, our brain is tricked into
following this movement of the cap and down
with this ice cube. We have succeeded in
matching on action, but not necessarily
on eye trace. We can even extend that
edit out a bit as well. I might even have it just
about exit the frame. A quick side note, you might have heard
that you should wait for the moving object within the shot to leave the
shot before making a cut. But you don't always
have to do that, because the cap is moving so fast and we're
cutting on action, we can get away with
cuts that don't necessarily follow the
rules of continuity. Now I've scaled up on our frame and adjusted
the position. We're working with eye trace
a bit better in this way, because the ice cube lands into our eye trace
point very quickly. Your eyes don't have to adjust position between
these two shots. If you did want to
manipulate the frame to adjust for eye trace a bit
better, you can do that. In this case, I think
the composition of this close shot
isn't that great. It's too asymmetrical to
me and it's harder to identify that it is a glass
when it's so close up, it could even be a vase or
some other glass container. I don't like that
composition that much. The match on action works so well that eye trace doesn't make as much of a difference in distracting your
eye from the cut. But let's go back to that. One myth about
using eye trace is that you need to cut
from one shot to the next and have whatever
your eye is attracted to within the identical
position of your next shot. But that's not always the case, because our reaction
time isn't that fast. It's not like we see a shot and we immediately know
what we're looking at. In this case, the ice
is moving so fast and getting to our eye trace point within three or four frames, our eyes are barely adjusting to the next shot before we have a chance to see what's going on. Actually in some cases you
want your eye trace point to fall into the next shot
and its eye trace point. To recap, matching on action
or cutting on action, is when you cut on
the movement of one shot to the movement
of the next shot. The movements don't necessarily need to be moving in
a unilateral way, but if they are moving
in the same direction, it's a lot easier for
your eye to follow. If you can create more
effective eye trace with your cut on action, then in theory, your edits
will be even smoother. But don't compromise
the composition or the story of your edit or your clip just because
you can achieve eye trace by recomposing
your shot and post. Sometimes cutting on action is adequate to hide the edits
and to create a smooth cut.
5. Creating Smooth Movement: [MUSIC] In this lesson, we will learn how to gain
more control and customization over
your digital movements using keyframes. One of the biggest mistakes made when keyframing graphics, or animation, or anything moving is to use only linear
interpolation. When we are talking about live action or
animated graphics, interpolation is what happens
between the keyframes. Interpolation is how
your software determines the values between these points. For example, let's say we're animating this purple square. We will animate the scale, so we'll create a keyframe
at the beginning of our clip and move to the
end and create another key, and because I want to
animate this from 0-100, let's move to our
first keyframe. Set that to zero, and by default we get this linear interpolation
between our keyframes, which starts abruptly
and ends abruptly. It's a constant speed throughout the entirety
of the animation. Now if we want to see what's
visually going on here, we can click on this triangle to the left of our scale property, and now it opens up
this mess right here. To get a better view of
what's going on here, we can click on
this thin gray line at the bottom of
our velocity graph, and this other thin gray
line on our value graph. There are two graphs, two different ways to see what's going on with
our animation visually. We have the value graph up here, which measures value over time, and the speed graph down here, which measures speed over time. If we move from left to right, depending on where
a playhead is, it's intersecting with our
value line right here, and you can see it's moving in a linear fashion from
0-100 at a constant rate. Look down at our speed graph, we can see here our
velocity is at zero. But once we get to our
first keyframe, bam, we're at a speed
that is remaining constant throughout the
entirety of the animation. This type of movement doesn't look or feel organic or real really in any way
because I don't think there's anything in nature
that moves this way. Even mechanical movements have some speed variation
and character to them. That doesn't mean you can't
use linear interpolation. Just keep in mind
the type of look it offers and that it doesn't
look the most natural. To create realistic movement, we need to change the
interpolation mode. The most obvious place to start, and maybe you're already
doing this is to change your interpolation to
ease out or ease in. You right-click on the keyframe, click on ''Ease Out''
when an animation begins and ''Ease In''
when an animation ends. Now we've changed our
interpolation from linear to having Bezier curves. Any curve you create within the value graph is
considered a Bezier curve. The ease in and ease
out functions are just very specific types of curves available in
the keyframe menu. With this now we've
achieved very smooth in and out animations. Our speed graph
has also changed. You can see we're
starting at zero, ramping up to max
speed right here, and then slowing
down back to zero. So the value graph is
different in that it measures the value over
time rather than speed. The steeper the slope, the faster the movement, whereas the shallower slopes, the movement is much slower. It's great because now you have two different ways to look at the information of what's going on between your keyframes. Just using ease out, ease in Bezier curves is the quickest way to get smooth organic movement
when keyframing, and sometimes these
easy ease presets aren't enough for
your animation, and to get more
customization and control over what you're doing, you can just simply adjust
the handles on your own. Make sure when you're
adjusting these handles that you have automatic range
re-scaling selected. Otherwise, portions of your graph are going
to go out of view. When you're adjusting the
handles on your animation, you can see our value graph and our speed graph is changing, and we can get some
really interesting looks just by messing around
with the curves. You might have had this
issue where you set your keyframe at zero and your second keyframe at a 100
and you're thinking, okay, it's going
to go from 0-100. But then you play it back, and it's like, "Wow, okay. [LAUGHTER] We scale beyond
our second keyframe." When you're not looking
at the animation graph, it's very frustrating
because you're seeing, wait a second, my first
keyframe is set to 100 and my second
keyframes at zero. What's going on here? This
doesn't make any sense, and it's because you're
not looking at what's going on visually when you
just see the keyframes. If you want to avoid this kind
of behavior, it's simple. Just keep your curves between these two imaginary
horizontal lines and you will be fine. The order of operations that make the most
sense to me is just to rough out your animation
first with linear keyframes, then add your eases, your Bezier curves,
and then go into your graph and smooth
everything out, get the speed and the
timing the way you want it. You get way more customization, and the look is a
lot more unique to each and every
project you take on. What I would
recommend that you do now is to experiment with animation curves and see what kind of unique movements
you can come up with. Edit the value graph
where it's possible, it's not possible to edit the value graph on position
within Premiere Pro, and I'll explain why you can't
do that in a later lesson. But don't get too far ahead with your own project before
watching the next lessons because they will
help you decide the best workflow for
your desired outcome. Recap, using Bezier
curves eases, gives you a more organic
look to your movements. To get even more control and customization over
your movements, open up your animation graph and make adjustments from there. Remember, the speed graph
and the value graph are two different ways of conveying information with your
movements interpolation. There's absolutely nothing wrong with using Bezier curves, ease in, ease out, but it's good to know how
to use this function, so when you're in a situation
where you need to adjust your eases more
specifically, you can. [MUSIC]
6. Motion Blur: [MUSIC] To make your
movements look even more realistic and your
edits even smoother, we'll need to add motion blur. When watching movies, we expect to see a
certain quality of motion blur within camera
movements and moving objects. Being able to recreate
similar motion blur within our own project will help sell the movements and the
edits more effectively. Now typically, you might
open up After Effects, slap on some keyframes, then enable motion blur, and this is a fine workflow, especially for projects with
more complex movements. But in some cases, you may have a few simple
animated movements, you don't necessarily want to move everything over
to After Effects. In this case, to keep things
simple and mostly easy, more on that later, we can
use the Transform effect. It's important for
this lesson that your sequence settings
match your clip settings. Don't worry, it's going to
make sense in the next lesson. But for now, if you
want to follow along and test these ideas out, I suggest creating
a new sequence that matches your clip settings. Let's add the Transform effect. Click on your layer, navigate
to the Effects panel, type in transform, then you'll notice that
there's two transform effects. The only difference from
what I can tell is that one has the Uniform
Scale checkbox unchecked and the other has the Uniform Scale
checkbox checked. [LAUGHTER] There's not a huge
difference between the two, I don't know why they need to
have two, but this effect, I'm going to warn you, is a
bit glitchy in some cases. Because we want our
scale to stay uniform, we'll delete this
first effect and stick to the second
Transform effect. You'll notice right away that, the Transform effect has all the same properties
as our motion effects. The only difference is that
we have the ability to change the skew of our cube and we
can adjust the shutter angle. You might have wondered what
shutter angle really means. You see it and you think
what's this arbitrary number? I have explained this before in my class in
film-making techniques, so I'll give you
the close notes. The lower or smaller
the shutter angle, the less motion blur
will be present. The higher or wider
the shutter angle, the more motion blur. This is because the
longer the light hits the sensor or film on a camera, the longer the exposure
will be capturing more movement within
an individual frame. The sweet spot for cinematic
motion blur is 180 degrees. You don't need to stick to 180 degrees shutter if you
prefer more or less blur, but just know that a 180
degrees shutter angle will yield results that
look closest to the movies. Now that you understand
what a shutter angle is, you can make a much more
informed choice when dialing in the type of motion
blur you're going for. For us, it makes the most sense to stick
to a 180 degrees shutter because the project was shot
on a 180 degrees shutter. The motion blur of our movements will be the most
realistic and stay the most true to what was shot by sticking to a 180
degrees shutter angle. De-select Use Composition's
Shutter Angle because we don't have a composition
within Premiere Pro determining what the
shutter angle already is. Set our shutter angle to 180. Once we do this, any of the keyframe
movements that we apply within our Transform effect
will contain motion blur. Let's test this out by adding
a keyframe to our position. Let's just move this
actually over here, we'll move a bit further, and then move that
all the way there. Move the keyframes
closer together to increase the
speed of movement. Now you can see it.
[inaudible] We pause it. You can see the motion
blur within our cube. We turn it all the way
to 0. No motion blur. Click it all the way to 360, you get an intense amount of
motion blur, but remember, you want to stick to a realistic cinematic
looking motion blur. Stick to 180 degree shutter, or stick to the shutter that
the project was shot on, most likely a 180
degrees shutter. The motion blur now gives us a much more realistic
look to our movements and any digital movements we
apply within our project will match the motion blur of the movements that
were done in camera. For sampling, you could
stick to bilinear. All this means is the computer
is using less processing, but the quality of the
motion blur isn't as smooth. However, when you
change it to bicubic, the computer is processing
more information which should result in a higher-quality
smoother motion blur. But for the most part, I
don't notice a difference. You might notice a difference in the project
you're working on, and if that's the
case and you need the highest-quality,
stick to bicubic. I haven't done any
tests on this, so I don't know how much
more effective it is, but I would say go with the better quality of the two
depending on your project. To recap, if you want to sell your digital movements
to the audience, you need to add motion blur. The higher your
shutter angle is, the more motion blur you'll get, the lower your shutter angle is, you'll get less motion blur. For that filmic look, stick to a 180 degrees
shutter angle, or just match your
shutter angle to whatever the shutter angle
the project was shot with. You can achieve
motion blur using the Transform effect
within Premiere Pro. Just be careful, because
it can be a bit glitchy. For simple movements, projects, text animations, it's great, but for more complex
projects and movements, I would suggest finishing
your project within After Effects and enabling
motion blur there.
7. Premiere Pro VS After Effects: Now that you have a
better idea of how to create organic,
realistic movement, I want to make sure that you understand the pros and cons of using Adobe Premiere Pro
versus After Effects. [MUSIC] I would push to use the Transform effect
when you're creating simple animations
within Premiere Pro, this might be text effects. For instance, for my classes, I use the Transform effect for my titles because they're
simple and to create an After Effects project
and then add motion blur to my texts effects and then
have to change the text. Then if I have a
typo on, I have to change it again that I
have to go back into After Effects and it just takes so much more time to do that. For footage that matches
your sequence settings, It's a great effect
that enables you to quickly achieve After Effects looking animations within
Premiere Pro quickly and without having to open up After Effects in
the first place. But I'm going to say it
does have its drawbacks. The biggest downside to
using Adobe Premiere Pro for custom keyframing is that it's not the most user-friendly. You may find yourself adjusting the animation graph window constantly as you make adjustments to movements
between two shots. You can't snap these
handles in place, and there aren't as many graph
viewing options available. Also you can see with
the position property, we only have the
ability to animate the velocity graph and
not the value graph. Whereas in Adobe After Effects, we have this ability. At the moment when you're using 4K clips within a
1080p timeline, it can get very
glitchy to work with the problem with Forky clips
within a 1080p timeline, using the transform effect
is that you get these wonky anchor points when altering
the rotation property. Once you do match
the 4K clipped to a 1080p anchor point by adjusting the position
and the anchor, then great, it spins at
the center of the clip. But then eventually they
get the strange glitch where when I stopped
playing back the footage, the frame will
jump and position. The only way to get
accurate representation of the effect is to render the clips with the
Transform effect, which isn't a very
practical solution when adding and
adjusting keyframes. If Adobe fixes this
effect and maybe makes the animation graphs within
Premiere Pro a bit easier to work with I would consider
using the transform effect for projects with 1080p sequences
containing 4K clips. If you want to stick to using Premiere Pro's transform
tool and it not be glitchy, then stick to using your 4K clips within a
four-course sequence, or use your 1080p clips
within a 1080p sequence. Keep in mind that if you go
above 100 percent scale, you will lose quality
in your image. If you are doing
animated movements, that doesn't mean you can't
push past 100 percent. Just keep in mind that when
you push past 100 percent, you're losing quality
in your image. This doesn't matter
as much if you are strictly using scale as
part of a transition. For example, in this
project that I completed completely using the transform
tool in Premiere Pro, I've stuck to using scale
only on my transitions. This way, the viewer can
see what's happening during shots and can see the full
quality of the image. But during the transitions the
movements are happening so fast that the quality degradation
doesn't matter as much. Considering the turnaround time, the amounts of different cuts I had to make for this project. Considering that the
clips were 1920 by 1080, it made the most sense to create these transitions
within Premiere Pro. After Effects also
has its benefits, less glitchy, easier
to work with, and you can also create
your 4K sequence within a 1080p timeline, utilizing
digital re-framing. When you're creating
digital rotations, you'll see less of the crop when you're pushed further in. But of course, After Effects
takes time to learn. It's easy for your projects, become very complex and take more time to require
more computer power. You'll need to visualize
more of the movement within Premiere Pro before moving
things over to After Effects, you don't want to work
too far ahead and start adding eases
to your animation because After Effects
doesn't interpret these interpolation
changes properly. So you're going to
have to tweak it in After Effects anyway, stick to linear interpolation
with Premiere Pro, rough out the look and the
feel and the movements, so you can adjust your
edits with the movements themselves and then adjust the amount of ease
within After Effects. Or you can make those
easy adjustments within Premiere Pro, then retweek within
After Effects. Either way, you're
going to have to make those adjustments
within After Effects. If you want to take
full advantage of your 4k clips within
a 1080p timeline. [LAUGHTER] Now that you have all of the options
in front of you, you can decide what's the right workflow
for your project. To recap, Premiere Pro and the transform effect is great when you're working
with simple movements, simple animations, and
when you're working with clips that match your
sequence settings. If you want to digitally push into the frame without losing detail and not worry as much
about the crop on the clips, then you'll want to
use your 4K clips within a 1080p sequence. But then it's
recommended that you shift things over
to After Effects. But of course it adds an
extra level of complexity. Unfortunately, when importing
your Premiere project, After Effects will not interpret
Bezier curves properly. It's recommended to visualize your project within Premiere
Pro using linear keyframes, then Create Custom curves and finish your project
within After Effects. All right, before we
head into After Effects, we're going to
explore how to bridge two shots together
using composition, action, and keyframe
to movement.
8. Creating a Smooth Transition: In a lot of cases, you'll
have opportunities to cut on action
between two shots. But there are also be times
where you want to connect two different shots
together that at first glance might not
seem to connect very well. I want to connect
this lime splash shot with this final product shot and already you can tell that this hero shot has
this dolly out move, but our lime shot doesn't
have any movement besides the lime falling in and then splashes of
vodka everywhere. Already, by looking
at this shot, I know I'm going to
have to match on action with this glass and utilize
a digital zoom-out. I noticed right away
that we're already achieving some composition
matching as well because we have this
cylinder-like shape here with the glass and the reflection and when we hit the next shot, we have this cylinder
shape of this bottle. The match cut is where
you cut to match the composition or action of two different shots
and technically, the match cuts real
purpose is to bridge together two separate scenes. If you can find a
way to also match the compositional elements
from one shot to the next, you'll also be making use
of the eye trace technique, which adds an extra element of smooth editing and
meaning to your edit. We can do a bit of
tweaking to match these two shots together
a bit more and obviously, we're already achieving
eye trace because the viewer's eye presumably
would be in the center of the frame because
it's the focal point of this composition from
that shot to this one, we're already pretty much on
the label and we can move it around a bit to utilize eye
trace a bit more effectively. To match these
shots a bit better, what I'm going to do is, take our glass shot and move
it up to Layer 2 and we'll just open up this layer so
we can access our opacity. Before I adjust my opacity, I'm going to extend
the clip over our bottle clip and I'm going
to take the opacity down so that we can get an onion skin or an overlap look and we can see here that already
it's pretty good. But because I'm a perfectionist, I want to make it
look even better and what I can see here
too is that actually, the bottle shot
is a bit crooked. We'll fix that by
adjusting our rotation. Then I'm also going to
increase the scale of the bottle to match the
scale of the class. Now we have something that is matching already
a lot better and I'm going to put
in on the bottle dolling out at this
point right here. Also what I want to do before I move forward with
this shot is make sure that the shot is centered and I can tell right
now that it's not. I know this is getting
very nitpicky, but because it's
supposed to be centered shot and it's not
quite centered, I don't want to give
any opportunity for the audience
to be distracted. I want the focus to be on
the story of this brand. I'll click on ''My program
monitor'', navigate to view. I have show guides enabled, but there are no guides, so I'll show my rulers and then I can click
on the ''Rulers'', drag them to the
center, which is 960, and what we can do is you can right-click on your ''Guide'', click ''Edit guide''
and if you want to get even more specific, type in 960 for
half of our frame. We can also do the
same by clicking a ''Horizontal guide'' from
the top down to 540. Now we can see the
sensor of a frame. We now know the adjustments
we need to make to our bottle and our glass to make sure that
they're centered. The quick side note about Guides here is that you can also use Guides as a helpful
tool to achieve eye trace. Using your Guides, you can find your eye tracepoint from one shot and match
it to the next shot. I'm going to turn my
opacity back up to 100, and I'm going to
make an edit here. That is where the cut happens. I'm already noticing that
the vertical vodka label isn't quite centered either and it looks a bit
strange to me, so I might just move it down a bit and I could see
there's the crop, so I don't want to
get that far down. Even there, it
looks a lot better. We're matching on
composition with these shapes and now we
want to match on action. Now, before I just start
adding keyframes to this clip, I need to determine where
I want the cut to be. Because I do like this movement here and I want to
cut on the movement, I don't want to
zoom out right here because the excitement
of the shot is right around here where all this vodka is
just spilling out. If I wait to create the
movement after that, vodkas already spilled out, we've missed the high
point of that clip. I want this edit to be exciting, I want it to keep moving. What I'll do is I'll
make an edit right around here where there's still a lot of movement
within the shot. Then I'll connect the
two shots together. [MUSIC] Because we have a dolly outshot on our
vertical vodka hero shot, but we don't have a dolly
here out on our glass shot. Well, you've guessed
it. We have to create a digital zoom-out
with our glass shot. We can add a few keyframes. One at the end,
move a few frames over and add an
additional keyframe. Then we'll zoom in on the first keyframe so
that we're creating a digital zoom out like this. Play it back and
you'll notice that the bottle isn't zooming
out at the same speed. We can either match the glass to the bottle speed or to make this edit even
more effective. What I'll do is I'll
increase the speed of the bottle dolly out by
creating a digital zoom out. This is more effective
because with a faster speed, the audience needs
to have a faster reaction time to catch the cut. At a keyframe at the
beginning of the hero shot on scale and
I'll also add one on position because we
will need to adjust the composition of the
bottle shot as we zoom out. We'll add keyframes
a few frames later. Zoom out on this
shot of it more, adjust the composition
so that we have no crop showing and
let's play it back. We've enhanced the shot, but then you can see now we have that jarring bump in the
bottle shot right here. I think we can
smooth that out with some bezier curves on our
final tweak and if not, we'll have to make
tweaks later on anyway. Because it's harder to
track faster movements, increasing the speed of
the movement connecting each shot will do a better
job hiding the edit. To just the speed of our shots, we can either use
our bezier curves or we can change the distance
between our keyframes. Ultimately, you'll do a
combination of both but because we're not adjusting
our bezier curves, I will just reduce the
distance of our keyframes. I'll take a look
at the cut again. Right now it feels like
the bottle is a bit slow, so I'll adjust the
keyframes there. It looks a bit better,
and I know we don't have that much room to move this keyframe in on
this class shot, but I'm going to just move
it in just a bit more. Awesome. That's
looking a lot better. Recap, we're always looking for these opportunities
to connect two shots together through movement and matching
composition. While paying attention
to eye trace, match the composition
or the eye tracepoint by adjusting your opacity
to onion skin layers, and of course, there are
other ways to do this, such as using your guides
or user mouse cursor to get a rough idea of eye trace while toggling back and forth
between each shot. Matching both the quality of movement and matching
the speed will give you a smoother transition from shot to shot and remember once you add motion blur and do some final tweaking
within aftereffects, it's going to look a lot better. [MUSIC]
9. Time Remapping: These two shots both
contain camera movement, one being a dolly out and
one being a dolly in. With some work, we could connect these two shots using time
remapping or speed ramping. [MUSIC] Time remapping or speed ramping is a way to speed up or slow
down your clip. This can be used in
practical ways or storytelling ways to
make an edit work, timing wise to
dramatize the shot, to quickly get
through a sequence. There's so many different
ways to use speed ramps. But in this particular case, I'm going to show you how
to use a speed ramp as a tool to transition
between two shots. We need to match this dolly out shot to this dolly in shot. To do that, I'm going to
right-click on this clip. Select speed/duration
or the hotkey control, our command R, select
reverse speed. Now I'll play it back
and it's very slow, the connecting speed
isn't correct, but we can fix that
with speed ramps. To access time remapping, you can right-click on this little effects
icon down here, navigate down to time
remapping, select speed. Now you'll see we have
this bar in the middle, which we can click and drag to increase the speed or
decrease the speed. Select P for the pen tool and
click a point on the graph. I'm going to switch back
to my selection tool using hockey V and then click and
drag open these handles. Now I have these two
handles available, which allows me to
create a speed ramp. If I move this side
of the clip up, you'll see we're
creating a speed ramp. We're going from real-time to 317 percent and we can just increase
this just a bit more. Maybe we'll go to
like 720 and make sure your handles are affecting the actual dolly movement. You can see the clip is moving all over the
place and that's just because we are manipulating
the time of the clip. It's going to shorten
and lengthen in time depending on how we
manipulate these handles. I'll just play this back. You can see we slowly speedup. It's not perfect, but it's something and now we can do
the same with this shot here. Right-click on the effects icon. Select time remapping speed, hit P for the Pen tool. Extend the handles open and then create another speed
ramp on this side, because I want the speed
to match from this shot, which is 721 percent
to this shot. I know the dollies aren't
exactly matching in speed. But they're close enough
that I think if I adjust this to match the outgoing
speed of my other speed ramp, we'll get something
pretty close. There we go. All right. Let's play it back. All right, so we do have a little
bit of a jump here. I'll make a cut there because I think it's just getting
up to speed there. Then we also have a little
bit of a low on this shot. The name of the game
here is to make sure you're cutting at the
height of the action. If you don't, then you're
going to get that low and it's going to kill the energy
between the two shots. We have one shot slowly
ramping up to high speed. The faster the
speed and the shot, the easier it is
to hide the edit. We're also cutting
at the height of the speed or the height of the action of the shot and then connecting that to the
height of the action of the next shot and the fastest
part of the next shot. Boom. In the previous lesson, I talked about cutting on
the height of the action. That was an important
principle when cutting that vodka splash shot
to the hero shot. We want to cut on the
height of the action because we don't want the energy or the
flow just to be killed in the middle of an edit, you want each edit to
add to the next one. Cutting on the height of
the action is important in keeping that energy
flowing from shot to shot. An additional thing we can
do to smooth out these ramps even more is to add Bezier
curves to the ramps. Click on the handle, this will
reveal additional handles. Click on either handle, you can move your mouse left and right to adjust the
amount of curve. We get an ease out and then ramp in the
middle and then ease in or a completely crazy
jump in the middle. As you adjusted your speed ramp, your clip will move all over the place and
rather than pulling the clip out and clicking and dragging
the edge of the clip, I would suggest using the
slip tool, using hot key, Y, it will just slip the
entire clip over. The bit of tweaking,
we could actually make the movement even smoother. One final tip about
speed ramps and I'm sorry if this is obvious
when you're speeding up, it's totally fine to
crank up the speed. If you do decide to
slow things down, make sure you're
not going beneath your clip's frame rate or you
may get as stuttered look. So to recap, speed ramping
is where you increase or decrease the speed for
storytelling purposes, for practical reasons
and in this case, and we covered how
to use speed ramping to connect two different
shots together. The faster the speed on the cut, typically the smoother
the edit will be. Make sure you're cutting on
the height of the action to maximize the effect
of speed ramps. Also think about combining your speed ramps with digital
movement and of course, enabling motion blur on your
digital movements as well. All these elements combined, you can create some very
smooth transitions. All right, so now I want you to take all these different
ideas that we've discussed up to this point and try to incorporate
them into your edit. Get a rough cut done with your general linear keyframes for movement and then
in the next lesson, we're going to take
that rough cut and import it into After Effects.
10. Importing Premiere Projects into After Effects: I finished an edit
where I've created the basic look of what I'm
going for. Take a look. [MUSIC] It's still a bit rough
around the edges with the movement,
but that's okay. At this stage, all
we're doing is roughing out the movement with
linear keyframes, because we know that
After Effects isn't going to interpret
Bezier curves. If you really need to, you can always make
some small tweaks to your clips within
After Effects. But other than that,
this is pretty much the general
structure of my story. The final Bezier tweaks will
happen in After Effects along with any masking or
maybe even motion graphics. One thing which might
seem a bit strange to do, but we'll make a
lot more sense once you open up your
After Effects project is to set all your clips on
two separate video layers. [MUSIC] Just move all
of this up, that up. Now each piece of video
gets its own layer. I would also suggest
using keyframes for your fades in your audio rather than default
audio dissolves. Again, I'll explain the reason
why later in this lesson. We'll save our project and
head into After Effects. Because we want to import
our Adobe Premiere project, navigate up to File, Import, Import Adobe
Premiere Project. Select your Class Project, Open, and then here we have the
Premiere Pro importer window. Select Sequences. It'll show all of your
working sequences, including your nests, so
it can get overwhelming. You don't need to
import them all. Just select the sequence that
is your working sequence. Make sure to also
import your audio. Now you'll see here
that it populates our Adobe After
Effects project panel with all of our footage, and it keeps all of
the folders open, which is not necessary,
so I'll close them. [MUSIC] Then we have our
project sequence right here. As you can see, it's taken the project sequence and converted it to an After
Effects composition. After Effects works
with compositions which is the equivalent of
sequences in Premiere Pro. After double-clicking to
open up the composition, you can see here now why I chose to place all of my clips
on separate layers, because that's the way
After Effects works. It works in layers. If I had all my Premiere
Pro clips the way they were before, it
gets a bit messy. For using default audio
transitions like this, it'll import into After
Effects as its own transition, which will make your
After Effects project a lot more confusing to look at. This way, it's easier
to take everything in. I can see here that I have
all of my audio clips. If I really want to,
I can select them, right-click on the label
and change them all, and do the same with
my video clips, and change them all to
something completely different. You can also see that we
have these pre-comps, which is the equivalent of
a nest in Premiere Pro. I can select all of my
pre-comps in After Effects, select the Label and change those to a
different color as well. Now I can see even
more clearly what's going on in my
After Effects comp. To recap, before importing
your Premiere project, make sure you set all of your media onto separate layers, so when you import
into After Effects, your timeline is a bit
easier on the eyes. Use keyframes for your video and audio fades rather than default transitions to cut down on additional unwanted
layers in After Effects. Make sure to take advantage of the labels in After Effects, just that much easier to
look at because trust me, After Effects can
get very complex. [MUSIC]
11. Adjusting Bezier Curves in After Effects: We'll start by animating
this movement right here. Navigate to the layer and click on the little
triangle to the left. Open up transform. You'll see here that we have these transform
properties available, which are very similar to
the ones available within Premier Pro under the
Effects Controls tab. To zoom in to get a better
view of our keyframes, we can click on this
little magnifier down here and drag that. You can see these first few
keyframes a bit easier. To access the animation graph, click on the graph
icon located here. When we select that, we
get our graph editor. But we don't see anything
right now because we don't have any of our key framed
properties highlighted. Once you highlight it,
then you'll see, okay, we have our scale
property in graph form, and we can also Shift-click on our rotation property to
enable the graph view of multiple properties
and their keyframes. If you prefer using
the speed graph, you can select this
list icon down here to reveal your
graph viewing options. At this point, I don't want
to use the speed graph, so I'll continue using
the value graph. If this is too overwhelming to see all of these
keyframes all at once, then just work with one
property at a time. We can start with scale. Hold Option or Alt as
you click this first, this will allow you to drag a
handle out of the keyframe. In this case, I want
the digital zoom out. Tap it very quickly and then
slowly ease in at the end. Remember, because this
is the value graph, the steeper the curve
the faster the movement. Because we are
digitally zooming out, our curve is moving downward,
decreasing in scale. I'll have the first
keyframe drop very dramatically and
then add a handle to the second keyframe to add
that very gradual ease in. Option Alt, click and drag. What it can do as
well is hold Shift to constrain these handles
to this graph line. That's great because
we don't want these lines to look like this, because then we run
into this problem where the Bezier curve exceeds the value of the
second keyframe, giving you that boomerang
or bungee jump look. Make sure you're
holding Shift so that the Bezier curve doesn't exceed your second keyframe value. You might have noticed that
as I'm adjusting the curves, the graph is
automatically keeping each keyframe from leaving the top or the
bottom of the graph. That's because I have my
auto zoom graph height toggled on. If you'd like to see
all your keyframes at once within the graph editor, click on the "Fit All
Graphs to View icon". I'm happy with
this type of ease, but I can tell already that four frames is not
going to cut it. I'm going to want
to move everything over a bit so the
ease is more gradual. I'll move the keyframe over. Now again we run
into this problem, so I'll just make
some adjustments. Now I have the quality of movement that I'm looking
for on our scale property. Now I'll create a
very similar curve on my rotation property. In this case, because I
want one fluid rotation and zoom out at the same time, it's important that
my keyframes are on the exact same frame so that
the movement is synchronous. Hold Option Alt
and drag a handle. I'll do the same
with this point. Hold Shift to constrain the points on the
horizontal axis. There now we have a similar
looking curve but you can see here our rotation over
extends itself just slightly. Again, we know where that
strange look is coming from. Selecting only the
rotation property, we can see it's coming
from the Bezier curve exceeding the value of
the second keyframe. Once you have your keyframes
on the same frame in your timeline and each property
having similar curvature, then it's just about tweaking the duration of the movement itself until you get
the look you want. After working
through your curves, you may notice that you want to readjust some of your clips. You may notice that
they might not have been timed properly. Or as you add curves, you realize that the
timing may need to change. Hold Control or Command as you click and drag
the play head. [NOISE] Not only will you be scrubbing
through the visuals, you'll also get
an audio preview, which will allow you to
take your music into consideration when re-timing
and nudging your clips. As you're working
through your animations, you'll probably find
yourself moving between two different shots quite frequently to make sure that the animation
is matching up. If you want to quickly access
your active keyframes, you can click on your
"Layer," then hit the U key to reveal the properties with all
your active keyframes. You can also access individual properties quickly
by typing P for position, S for scale, R for rotation, and A for anchor point. To recap, user your graph
editor to adjust your curves. To avoid overwhelm, animate one property at a time. Make sure the keyframes from any of your active properties match up to maintain
synchronous movement. I didn't mention
this in this lesson, but you could also
use your Easy Ease icon button here to create a curve on all your keyframes at once and then
adjust from there. [MUSIC]
12. Motion Blur in After Effects: At this point, it's a good
idea to enable motion blur. Motion blur will dramatically change the look of
your movements and the additional blur allows
us to more easily create a smooth transition between two shots containing movement. You can find the motion
blur icon to the left of the graph editor icon click
on it to enable motion blur. But motion blur won't
work unless you toggled the motion blur
switch on each layer, Controller and Command aids to select all of your
layers at once, and then select the
motion blur switch to toggle all of your
layers on at once. Shift Command A or Control
Command A to deselect all. After enabling motion blur, you can get away with bigger
and quicker movements because the fine
details of the image are blurred and we
only have to focus on this blurr blob rather
than the fine details. There's less to
interpret visually. To make adjustments to
your shutter angle, navigate to your
composition Right-click, select Composition Settings and in the composition
settings window, click on the "Advanced Tab"
and you can see here that we have this motion blur section right here and look at that. Our shutter angle by default is set to 180 and you can even adjust it in after
effects to 720 degrees, which creates some
wild motion blur. I wouldn't recommend
this necessarily because our footage was shot at a
180 degree shutter angle. But the option is here, you can make adjustments,
which is very cool. Switch that back to 180. One other thing that I
didn't notice until now, our first shot, the scale is
increased, which is strange. I'm not sure how that
happened, but to fix this, we can Double-Click on
our free comp or nest, "Select" our nested
shot and tap S for scale to open just
the scale property. You can see here that it's at 100 percent we want it
to be at 50 percent. Now it looks like what it does within our premier project. After enabling motion blur, I've increased the difference in scale and rotation between my key frames to
enhance the intensity in drama of the shot
and movement itself. To recap, when
enabling motion blur, it's even easier
to hide our edits because the increased
motion blur makes it more difficult to focus on any given point in the frame between the
connecting shots. You may also find that you
can dramatize their movements a lot more with the
newly added motion blur.
13. Separate Dimensions: [MUSIC] Now, it's time
to tackle our next shot. What's different about this shot is that we are now dealing with a new property,
the position property. When you click on this and load it up into the graph editor, you can see that we have two
separate graphs and that's because position has
an x and a y value. When you are dealing
with position, you're dealing with
both these coordinates. When trying to add a curve on our position graph,
it doesn't work. But you can right-click
and keyframe, Easy Ease In, Easy Ease, you can add that, but there's no way to
customize the curve at all. That's because both the
x and y coordinates are connected. We can't adjust them individually
when they're connected. To separate the x and y values, you can right-click on
your Position property, and right here, select
Separate Dimensions. Now we have the ability to customize our x position
and y position. Hold the option, click and drag, and create our curve.
14. Smooth Movement Quick Tips: [MUSIC] It's easy to get
overwhelmed by the graph editor, especially when you're animating multiple properties
simultaneously. This can lead to
common mistakes that have somewhat simple solutions. If you're noticing movement continuing through one
property but not another, this can mean that you
haven't matched up your outgoing and
incoming keyframes. In this shot, I was so invested in getting the movement
to look right, but I overlooked the
outgoing keyframes, and somehow they ended
up on separate frames. Make sure your keyframes are on the same frame to ensure
synchronous movement. In this combination of shots, I've introduced more complex
rotations into the mix, and I'm connecting
two similar shots. When connecting
two similar shots, it can be helpful to match anchor points
from shot to shot. In this shot, from
the wide bottle pour shot to the close one, our anchor point
is by default in the center of the
frame for each shot. We don't necessarily know
where this anchor point is in relation to the bottle when comparing
these two shots. But if you animate your
anchor point to lock onto a specific portion of an object from one
shot to the next, you might find it easier
when matching rotations. In these two shots, I've matched my anchor point to this little lip in the
neck of the bottle. That helped make sure
that my rotation was consistent
from shot to shot, matching my rotation animations, and then only having to really worry about my
position and scale. If you're viewing every animated properties
curves at once, not necessarily getting
an accurate picture of what is going on
with each curve, try to animate one
curve at a time. You can also use the scroll
wheel on your mouse while holding control to zoom
further into the graph editor. This won't be
possible unless you have auto zoom graph
height disabled. Clicking and holding
the middle mouse button will also allow you to quickly access the hand tool to click and drag and
adjust your view. If you notice specific
movement in your project that doesn't quite look right, another thing you
could do is to look at how many keyframes you're
using to achieve the movement. More keyframes doesn't
necessarily mean better. It can easily over-complicate things and make your movements
end up looking worse, especially if you aren't
a full-time animator, try simplifying your movements
and using less keyframes. To recap, if you're having
problems with your movements, make sure your keyframes
are matched up. Match those anchor
points between similar shots for easier
rotation animation. Adjust your graph use so you get an accurate idea of what's
going on with each property. Also try using less keyframes. [MUSIC]
15. Invisible Edits: The invisible edit is the
one that you don't see, and that's what makes it
such a powerful technique when wanting to create
seamless transitions. Invisible edits can be
used in a number of ways, to get together many shots
to appear as one long take. It can also be used to connect two different shots or
scenes together seamlessly. The invisible cut is also
a practical way to cut together challenging
shots that would be very difficult to
do in one take. I would highly
recommend you check out this editor's work. His name is Eddie Hamilton
and he's frequently done movies like this where
there's invisible edits, speed ramps and recreates a lot of different types of
digital movement either to get a feeling across or to connect two different
shots together seamlessly. When creating an invisible edit, a mask is your best friend. All we're doing is adding
masks to our various layers to seamlessly splice
together the two shots. Let's start with this shot here. Make sure to first
click on your layer, click on the "Shape Tool", located in the toolbar. If you click and hold,
you can see there's a variety of shapes
you can choose from. But I'll choose the
Ellipse tool because I want to mask out the
bottom of this glass, which has a similar shape. If the layer you're
working on is not enabled, all you'll end up doing is
creating a shape layer, so make sure that your
layer is enabled. There's no need in having
the reflection in the shot, so click and drag. While I'm dragging, I can hold the space bar to move
the whole shape around, or I can hold Shift to constrain the scale,
width and height. Just going to try
to get the shape of the bottom of that
glass, and I'll let go. Selecting the point, I can use the handles
to complete that shape. If I move backward
in my timeline, you can see that I'm
cropping off the whole shot, so I'll move my mask up. Because I need a better
view of my entire mask, I can use the scroll wheel
on my mouse to zoom out with my view and adjust
my mask from here. Zoom back in, and now I
have quite a good cut. The only problem is
the cut is very harsh, it's very hard, what we can do is soften that up
with some feathering. I'll click on my layer, if
you don't see the mask layer, you can hit "M" for mask, that'll bring up the mask layer. I'll just toggle this triangle so I can see the rest
of the properties, navigate to Feather and
feather it out quite a bit. After adding feathering,
I'm noticing that we can see some of the
reflection of the glass, so I'll tuck in our
mask just a bit. It's okay if the
feathering is happening at the bottom of our glass
because with the motion blur, it's going to smooth
it out even more. Plus you only see the mask
during the transition. Now I'll go to this
clip and add a mask. Because we have a
vignette, we have a darker color purple on
the edge of our clip here, and on the edge of
our clip right here. What we can do is create a
solid for our background so we don't see any
transparency in our shot. Before we do that, I'm going to add a mask to our
lime drop shot. Click on my lime drop shot, and then again click on the
shape layer and add the mask. Now I'm just going to scrub
through frame-by-frame, making sure that my clip
isn't cropping and it is. I'll switch to my
selection tool, select each part of my mask. I don't want to cut
out that lime drop, just going to round
this out a bit more so that it matches the
vignette a bit better. What I also think
I will do is add an animation to this mask so that we get a
smoother transition. Start my mask here, type M on your layer
for mask path, create a keyframe, move
forward on your timeline, and then I'll click and
drag just this point, increase this a bit as well. Let's take a look. Now
let's add the feathering. Since my mask layer is selected, I could type F for feather, maybe up to 400. Don't be afraid to crank
that feathering up. Yes, I think this works okay. To deal with the transparency, we'll add a new solid and
recreate the purple background. Let's go back up to Layer, New, Solid and then use the eyedropper to select a
color close to the edge, because we want the edge of our mask to match
the solid color. Our solid is now on top
of all of our layers. I'll zoom out of my sequence by holding option and
using the scroll wheel, and close this solid layer in to match our glass pour shot. I'll also just move
this layer beneath the shots that we don't want
to see transparency on. Now let's take a look here. Now you can see what
our solid is doing. If I turn it off,
turn it back on, I can see that the
color is just a bit brighter than the edge
of our frame here, which is not something
we really want. What I'll do is redrop this color so it more closely
matches the background. This just takes a
bit of tweaking, until you get
something that works. There, that's not bad. If it looks okay without
your motion blur, then you know you're
in a good place. Because now when we enable
our motion blur again, it's going to become
even more seamless. [MUSIC] Not bad. To recap, the invisible cut is the unseen cut that connects
two different shots, scenes, and can
be used to create the appearance of one long take. [BACKGROUND] Of course,
it's a great tool for cutting together long sequences that otherwise wouldn't be able to be
done within one shot. When creating your
own invisible edits, the mask is your best friend. Keyframe your mask
path as necessary, and also make sure to provide generous feathering to blend together the shots and
the connecting shots. Again, motion blur will help solve the invisible
edit as well. [MUSIC]
16. After Effects Project and Export Settings: When you're ready to export your projects from
After Effects, there are a few
settings you'll want to change to ensure the
highest quality output. The first is to switch our After Effects project bit depth. Bit depth refers to the color information that
is stored in an image. The lower the bit depth, the
more you'll be able to see the steps between the
colors or banding, and the higher the bit depth, the smoother the
color gradation. An After Effects by default is set to eight
bits per channel, and because we're dealing with all these vignettes and
intricate gradients, it's important that you set
your project's bit depth to something higher than eight bits per channel, preferably 32. Any type of smooth
color gradation, like a vignette,
can easily cause banding if the bit
depth is too low. To change your After Effects
project's bit depth, click on this little
icon right here, it says 8 BPC, eight bits per channel, which opens up our project
settings and our color tab. We'll change this
from eight bits per channel to 32 bits per channel. Now, I'll click Okay, and also makes sure that your workspace is where
you want it to end. My project wants to end probably
more around 13 seconds. You'll notice too that
after switching to 32 bits After Effects
will run even slower. Working in eight bits per
channel is helpful to keep your effects and
edits running smoothly. Just make sure to
change it back to a higher bit rate
upon final export. Now let's move up
to File export, add to Render Queue. Then you can click
on the Output module here to change some settings. We'll stick to QuickTime format, but we're going to change
our format options, and change Apple
ProRes 422 to DNxHR. I just prefer this
Kodak over quick time specifically because
I feel from my tests that the gradients and
vignettes ends up having better results and reduces the potential banding
in our final export. It's very important to
also change this from 8 bit to10 bit because we showed this project in 10 bit
and we're not using any graphics or
anything like that, 10-bit will give
us good results. Click Okay, I'm good with
that, and I'll click Okay. Choose your location where
you want to output to , and hit Render. To recap, working in 8-bit
mode is great when wanting to keep your computer running smoothly while you're
working on your project. Just make sure to change
it upon final export to a higher bit depth to
avoid any banding issues. Of course, this is more of a problem with a
project like this where there are heavy vignettes
and very fine gradients. When exporting,
ensure that you're at a higher bit depth
than eight bits.
17. Final Recap & Thank You!: Congratulations on
finishing the class. I hope you had a lot of
fun creating this project, and I can't wait to see
what you've come up with. Of course, there are tons of things that make
up a smooth edit. In this class, we've
mainly gone over the visual elements,
the visual transitions. Of course, before we even
went into those smooth edits, we talked about how
to tell the story of the brand and this
is so important. Story is the foundation
for your edit, look for ways to
match on action or cut on action between two shots. Make sure you're not just
using linear keyframes, try using eases for more
natural-looking movement. Don't just rely on those
easy ease hotkeys. Make sure you're
adjusting your graphs, get that custom look and feel. For an even smoother edit
enable motion blur either by using the transform effect or importing your project
into After Effects. In addition to these techniques, we can also match composition and try to find ways to match composition and action together while also keeping in mind, iTrace, speed ramps along
with invisible edits are also great practical ways
to create a smooth edit. If you have a project ready, don't hesitate to upload it, we can't wait to see it and
it will help other people post their own projects and
be inspired by your work. Thank you so much for taking my class and I'd really
appreciate it if you followed my profile for new class releases
and giveaways. If you found value
out of this class or you have critical
feedback to give me, I would love to hear it. Please leave a review, it
helps me learn and grow in my own teaching and provide
better content for you. Thank you so much for taking
this class and remember, story is your guide. Wait, we forgot to
send in our project. Let's do that. Here's
an edit for review. Looking forward
to hear from you. Piece out, send. We got an email back
pretty quickly. Touch on the edit looks great. We have a few smaller visions. No, we got a lot of work to do.