Transcripts
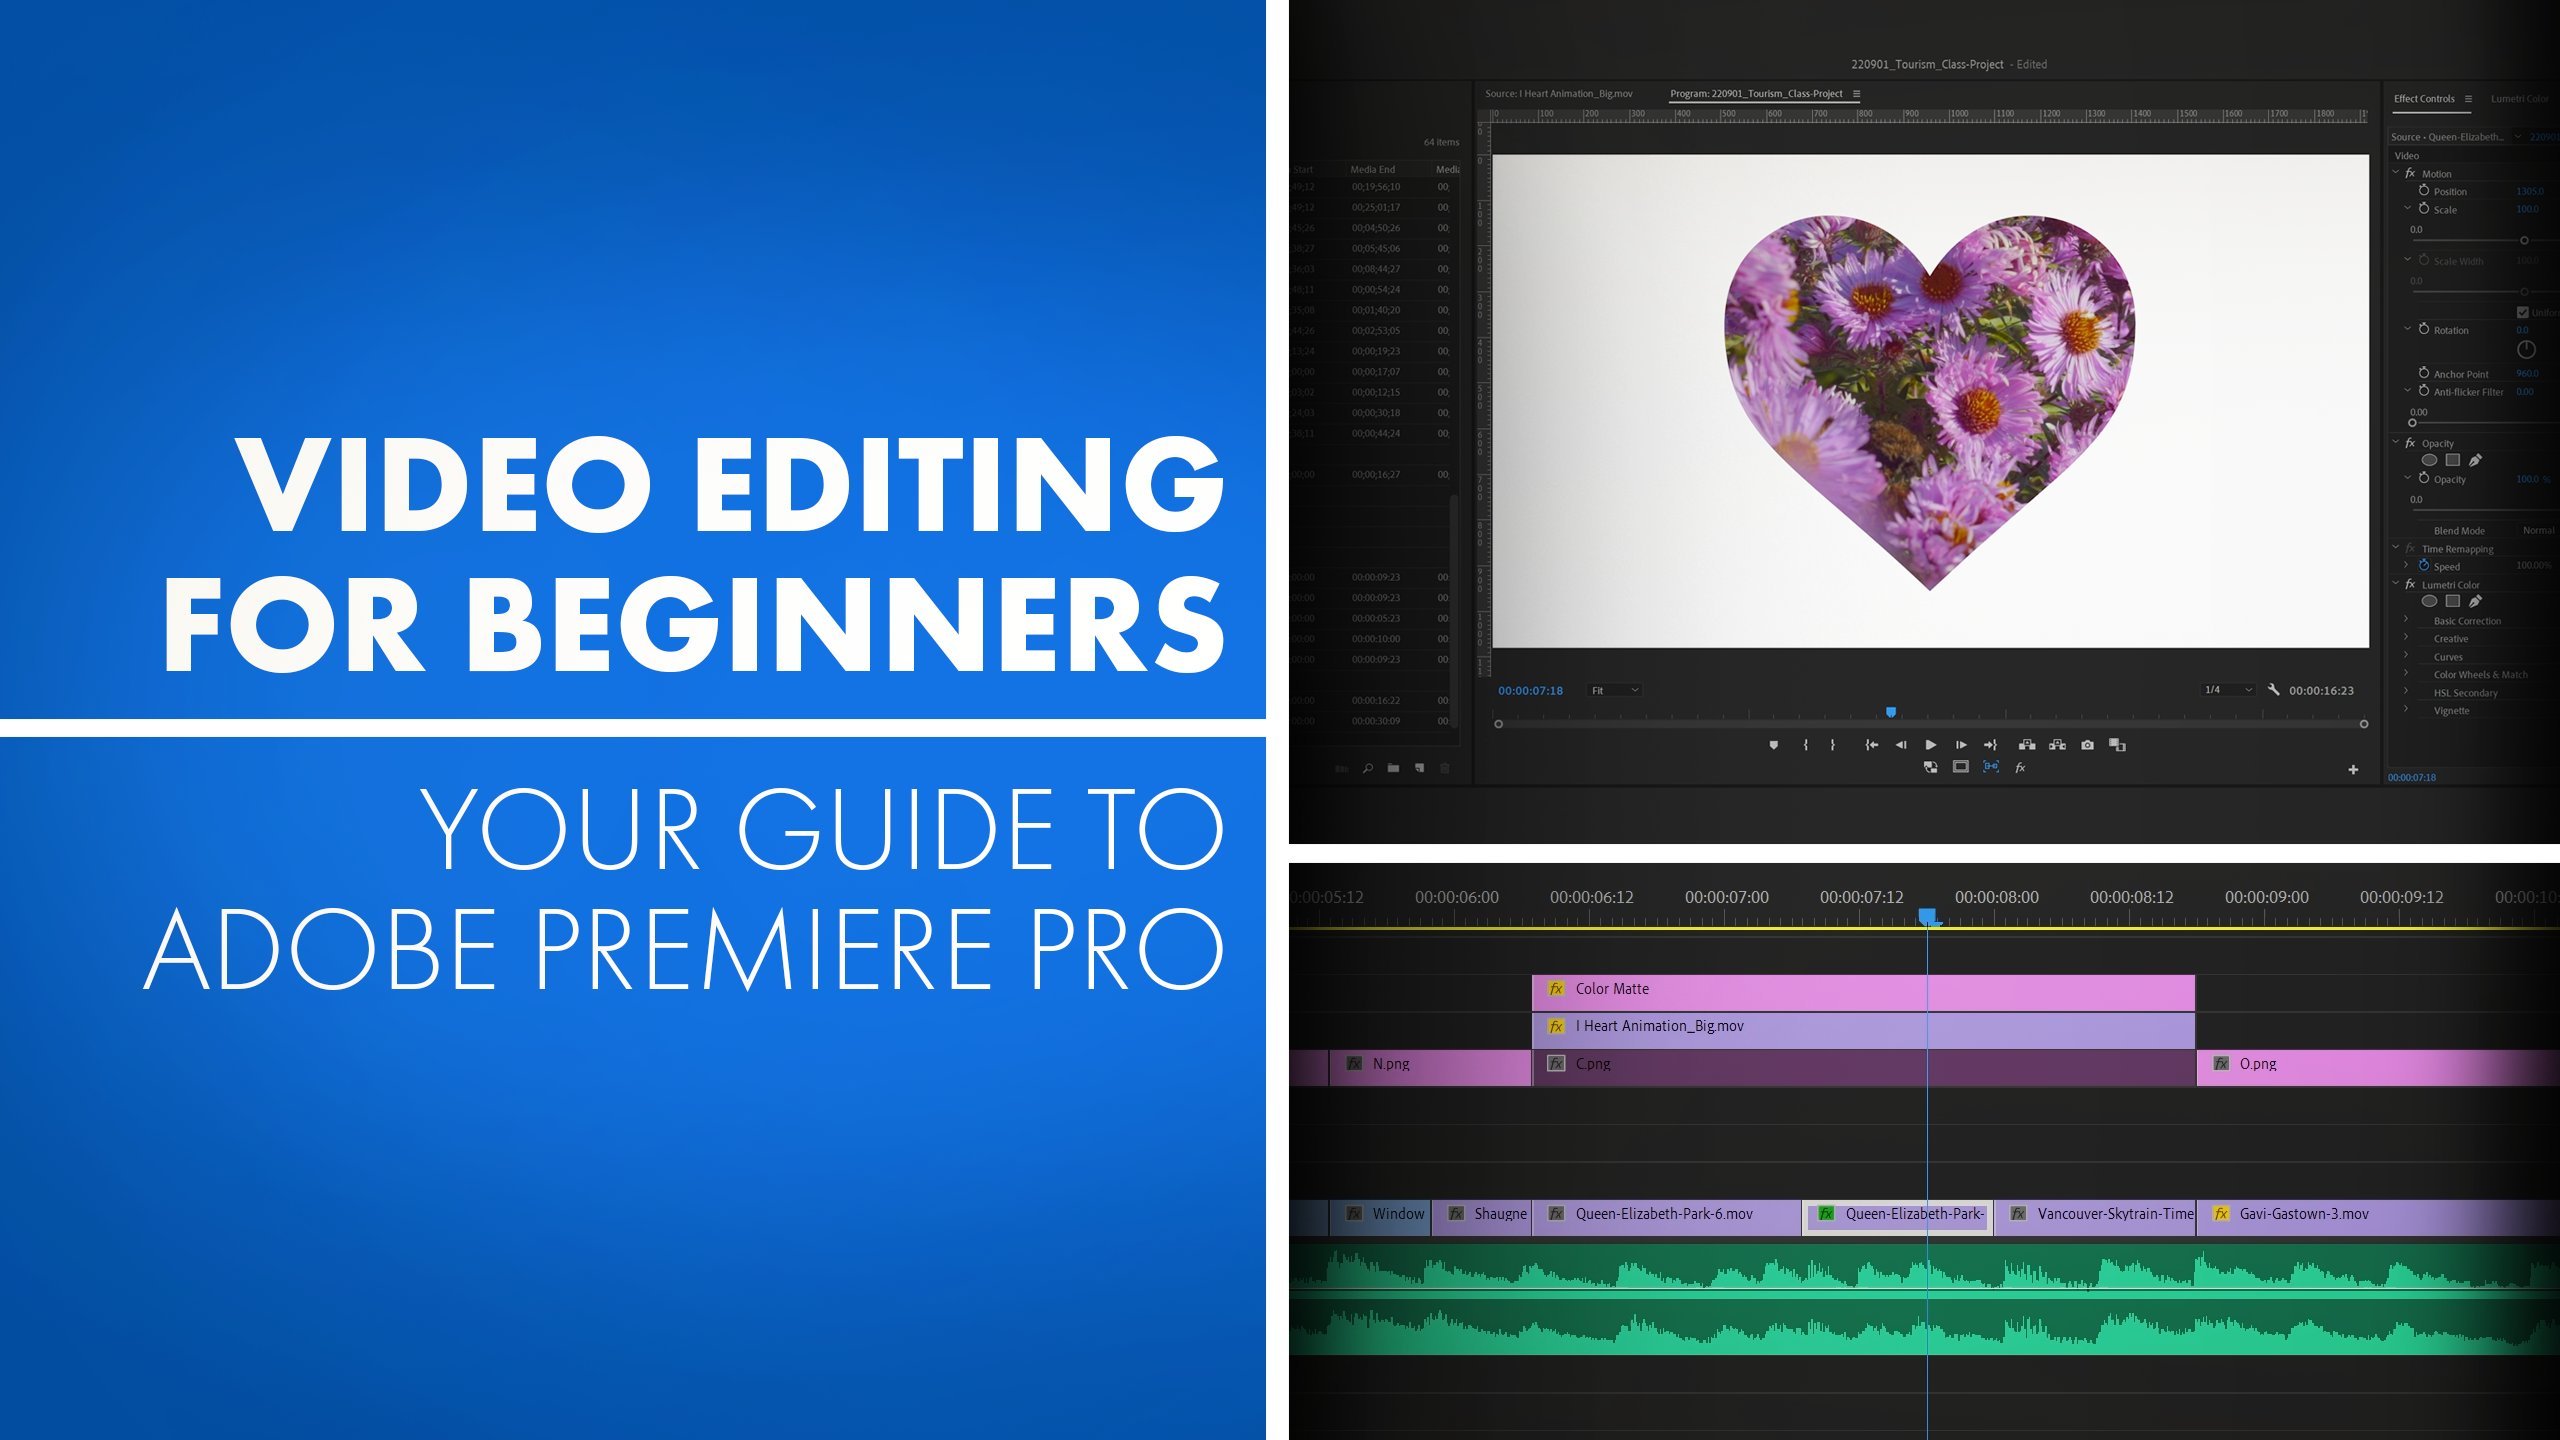
1. Class Introduction, let's go!: As video editors, part of our job is to create an invisible edit, a smooth, seamless viewing experience that helps communicate an idea, a story, sell a product, or to promote brand. All while connecting emotionally to an audience. How exactly do we do this successfully? Hi, I'm Sean Dykink. I live in Vancouver, Canada and I've been making videos for just over 10 years. Video editing has always been something that I gravitated to. When I started, I didn't know why I made certain editing choices. But eventually I knew after trial and error that they worked. Little did I know I was tapping into video editing techniques. If you struggle with the WHY behind whether edit is good or bad, look no further. I'm here to teach you video editing techniques for a successful edit. Gain an understanding of how story shapes an edit. learn audio editing techniques for seamless sound edits. Learn video editing techniques that connect the audience emotionally to your story. We will do all this by creating a 30 second music video trailer. You'll have tons of footage to choose from. You have endless creativity in how you choose to tell the story. If you have a project you're currently working on, I encourage you to also open up that project and apply what you learn as you go. Completing this course will help you approach any edit with more confidence. You'll be backed up with a greater knowledge of video editing techniques to help sharpen your decision-making process and critical problem-solving abilities. This class is for beginners and intermediates. It is recommended that you have some knowledge of how to use a chosen video editing program. However, there are a lot of video editing techniques explored that do not require you to follow along with the class project. For intermediates, you might already know how to use an editing program. You'd like to brush up on your knowledge of video editing techniques. Maybe you're aware of some of them but are open to seeing them from a new perspective. I will be using Premiere Pro to demonstrate these techniques and recommend using this program. However, these are big ideas that apply to any editing program in any project you're working on. Don't be shy if you prefer to use another program. Let's go ahead and give your editing a boost with this Practical Guide on video editing techniques. Click the lesson. The next one... It's just... Somewhere down there. Go ahead. Okay, you're still here. Well, what are you waiting for? Just click the lesson. Come on. Okay. I'll just sit here then. I got all day. Okay. I don't have all day. Just click on the lesson below.
2. Class Project: I'm very excited that you chose to join me in this class. We're going to get started with our class project, which is a 30-second music video trailer. This is from a project that I filmed and edited. What's great about this project or any music video really, is that you have the content already. You have the music, which is the story, which guides most of our editing decisions. Another great thing about music videos is that the rhythm is already there. You've got the music, so it's going to help inform your decision making in the edit. Go ahead and download the clips, take a look at them, review them, if you have any ideas, that are sparking your imagination of how you might edit this, write it down. It'll probably evolve, it'll probably change. This is part of the process. Be willing to be open to creative changes. Always ask yourself, what if i tried this? What if I tried that? Don't get stuck in one way of thinking. If you have ideas, test them out. If you get feedback that changes those ideas, let it change them. Stay open to the process. If you can be open to those changes, it's going to make your job so much easier. As our skills evolve, our taste evolve and our edits will change. If you're using Premiere Pro, feel free to download the project files as well. I'd recommend you use Premiere Pro because I'm using it for this class. But if you prefer to use a different program and a better and a different program, use that program. It's going to be less cut here, do this, do that, although there will be some of that. Most of it will be big ideas that you can apply to any project and any program you're working in. With that being said, I encourage you, if you have another project you're working on, maybe for a client or a friend or a personal project, work on that project. If you're feeling ambitious, take on your personal project and take on the music video trailer and at the end of the class, post both of them up for feedback. My goal is to teach you video editing technique, so that you can apply it to your own working process, to any project or any program you work in. So with that being said, let's get started.
3. Set the Foundation for Your Edit Using Story: When you begin editing a project, it can be very intimidating to know where to start. That is where the story of your project comes into play and helps guide your editing decisions early on. In this lesson, we are going to learn what story we are telling and why. If you know what story you are telling and why you are telling it, it will help you immensely when you are editing the project. A Story has a beginning, a middle and an end, and it has the ability to connect with an audience emotionally. What I like to do is describe in a sentence or two story I'm trying to tell with the footage I have. This helps me stay focused on my task, to avoid wasting time and to communicate effectively. I'll also identify the beginning, the middle, and the end of the story, and where certain story elements might fit in within that story. This helps me organize my clips, and it will help me lay out in assembly or rough edit very quickly. With this music video project, we already have the story, which is the song. The story for this project was a girl dances in the spotlight. This is also the starting point of our adventure in the default black-box studio room. As she explores her outer world or the alternate locations, and also the middle of our story. She begins to let her inner world takeover more, which is shown by the red backdrop. The red backdrop was used to signify her inner world, which is more seductive and assertive. That red backdrop takes over more and her character changes, and that is the end of the story. In the music video trailer, you are telling the same story, but in a condensed format. To tell this condensed story, we start with the black box studio, then we move to the exploration phase, which is multiple locations. Because her character is really changing as she discovers her inner world, we can flick her in the red backdrops slowly and then eventually let it take over the frame and gets the more intense red backdrop moments such as the slow-motion. Remember, this is just the first edit. We are following the rough structure of the story elements. As editors, you have your own unique view of how the story should be told. You can rearrange these elements accordingly. The idea here is not to get it right. Rearrange these story elements to what you feel the story is or could be. The idea here is just to come up with your own interpretation of what the story is so that you have a framework to guide your editing choices. Now that you understand what the story is, it is time to identify the objectives and the overall goal of the project. Why are you telling the story? What are you trying to say with it? Are you trying to influence people to get healthy, to buy a product, to subscribe? Maybe you are trying to get donations. Whatever it may be, we need to identify what the goal is so that we can create objectives to get to that goal. When it came to this music video, we wanted the viewer to get interested in the music and to eventually follow the artist, and we attempted to define smaller objectives to reach that overall goal. For instance, we wanted to hype the audience up. We wanted the audience to be mesmerized by all the locations of the dancing. We also wanted to keep their attention. We wanted to feature the artists, but we did not want that to overpower the video and feel like a performance piece exclusively. Every one of these objectives in some way points to our overall goal. The overall goal and objectives help us determine our editing decisions. Let's go back to those objectives. We wanted to hype people up. So we used quicker cuts. We wanted people to feel mesmerized and captivated by the dancing and locations, so we use match cuts to help the viewer bounced from one image to the next quickly. It almost looks like a little bit the magical because the body is flowing from one location to the next. In this lesson, we identified what the story we are telling is and why we are telling it with our objectives and our goal. As editors, we all have different creative outlooks. So do not be afraid to tell the story in your own way. Next time you watch a show or commercial, or whatever, try to identify what the story is and what the purpose of the story is. Are they trying to sell you on a product? Are they trying to get you to change your mind about something? Think about these things. Since this is a music video, we are going to edit the music first. In the next lesson, we are going to choose the parts of the song that serve our story the best.
4. Editing Music to Serve the Story: In this lesson, we're going to be editing down our music into a condensed music video trailer format. Since the music tells a story of a project, will start with editing music first. We know what the story is for the full length music video. It remains the same for this trailer. The purpose is similar to the full-length video, but the overall goal will be somewhat different. We want the audience to become interested in watching the full video after the song and similarly, checking out the rest of the artist's work. The edit will also be used on social media. A shorter piece is what we're aiming for. All right, so let's start by laying down the audio track. Let's also open up your waveforms so you can see what you're editing. It's a great visual representation of the music. Normally I'd figure out what's the best part of the track? What tells a story of the track the best? Then I'll figure out how to end it so that we can cut this trailer to around 30 seconds or so. They usually requires cutting two sections of the same track together. We do this so that our project remains coherent, so that we can choose the best parts of the song. This will make the piece shorter and we'll be able to have more flexibility on which parts of the song we want to choose the highlight. This is what I landed on right here. Make a cut here at 55:22. What I like about this part of the track is that it tells a story of the song and lyrics, and it starts off slow. We have a bit of build up and then it drops the beat. There's some peaks and valleys already in the song. You always want to be thinking about how to take your audience on a journey from point A to B, it's never a static beat. It has ups and downs, quick pacing, slow pacing. You want to choose interesting unique parts of the song and always remember to be telling the story at the same time. Now the beat drops and then the song continues like this for a while now, so we want to cut to something else. Let's keep playing it though to see where we want to end this. All right, so we'll go ahead and end this part of the track right here. If you were to go to the end of the song just to entertain the idea like maybe we want to end on the end of the song. Here's the end of the song, and you know what? Sometimes in an edit, I try to incorporate the ending or the true ending of the song into the music edit. But in this case I feel like the song dips down in energy, and to me it just doesn't feel like it should end energetically downward. If that makes any sense. I want the audience to leave hyped, full of energy. Remember, we want the audience to be hyped after they watch this. We want to end on an energetically high note, so full of energy. I found this part of the song at 1:27:22. The reason why I like this is because there's lots of interesting sounds going on, the track changes in tone and it also tells the story, I just want to watch you shine baby. Sounds funny with the music coming from my mouth. I like how DJ ends this part of the song, saying go. It's almost like a call to action like go, go watch the full video. You might think I'm looking into this too much, but we're here to sprinkling little details wherever we can and justify the story we're telling to each their own. There's plenty of options to choose from. This is what I chose and this is what I think worked well, but you probably have a different idea. Everyone has different ideas, so go for it. Try something different. Now, I'm going to take the portions that we decided we wanted to keep. We'll just label them so we could see and we'll delete the rest of the clip. Now let's listen to this cut together and that ends up leaving our full audio for the trailer to around 33 seconds, which is a great start. Now it's time for a recap of what we've learned in this lesson. Pick the part of the song that tells a story of the best. Don't forget about the little details, they add meaning to your edit. When you can find meaning in the little details, the more nuanced edit will be. It'll make it more interesting. The small details add color to your work. Even if the audience doesn't pick up on all those small details, there's something to be said about how we take things in on a subconscious level. Take the audience on a journey. Any edit you're working on needs to have an interesting and exciting beginning, middle, and end with lots of peaks, lots of valleys, lots of twists and turns always keep your audience guessing where they edit is going. In this case, we chose part.
5. Connecting Music Tracks Using Rhythm: In this lesson, I'm going to teach you how to connect two separate sections of our music together using rhythm. We need to do this so that our music sounds like one unified track. Do you remember an elementary school? In music class, your teacher would teach you timing of music by using claps and taught ta, ta, tt, ta. I remember that, and it taught me a lot about how to count a beat of music, and we're going to essentially use the same techniques that they taught us in music class right now. Now, let's take a look at the song and start to count the beat. I'm going to just double-click on the timeline so we could see what's going on. Well, even open up the wave forms a bit more. Now, we're going to listen to the track and try to identify the beat. Boom, boom, boom. All ready naturally you're going to be able to pick up the beat. The next thing to do would be to count the beat, 1 and 2 and 3 and 4 and 1 and 2 and 3 and 4 so there's four beats per measure. Let's play it again and I'll show you 1 and 2 and 3 and 4 and 1 and 2 and 3 and 4 and 1 and 2, and you can figure out the first beat, the second beat, and the third beat, the fourth beat of each measure. That's going to be extremely helpful when you're trying to cut down music and cut multiple parts of the same track together. Another great way to mark the beat is to add markers to every quarter note and even every eighth note. So let's click on the clip and count the beat with markers 1 and 2 and 3 and 4 and 1 and 2 and 3 and 4 and 1 and so you get the point. Let's count the end of the track here, 1 and 2 and 3 and 4 and 1 and 2 and 3 and 4 and 1. Okay. Now, let's count the second part of the track. Let's just extend this a bit so we have some lead up, 1 and 2 and 3 and 4 and 1 and 2 and 3. Okay, good. We have the parts that we want to connect to the beat. The beat is mapped out with the markers, let's figure this out here. Let's extend this, Oh, I missed a beat, there we go. You got to feel the music, so this is the beat we want to end on right here. You can see the beat with the waveform here. We're ending this clip right at the beginning of this beat, and this is also beat one. This part of the track is also beat one, 1 and 2 and 3 and you want to match the beat of each track together. Beat one of each track goes together, beat two of each track goes together, and so on and so forth. Let's put these first beats together, it needs some work, and his last lyric is cut off. If we just move this clip down and we will extend this, let's just take a listen to this soloed. Still going to fly, he says that we want that to wring out a bit. You could hear him breathe, so let's just pull it back a bit. Let's take a listen, this comes in just a bit early. Let's nudge of the clip over one frame. Yeah, that sounds way better, meaning this just takes time and practice to get the correct timing right. You might even need to get someone to listen to it and say, hey, this is sounding right. There will be times when you added something together and it'll sound right at the moment and the next day you'll be like, what was I thinking? That's totally fine, it's just part of the process. Let's listen to this again. That connects really well, it's still need some work, but it's sounding very good, and here is the recap. Use markers to map out the beat of the music tracks. When you're cutting two separate parts of the same track together, make sure you're either cutting on the first beat, second beat, third beat, or fourth beat of each track so that the music cuts together seamlessly, and then the music flows at the right timing. Open up that audio so you can see the wave forms, it's a visual representation of the beat and it makes it so much easier when editing audio. If you haven't finished everything on that audio, go ahead and do that now, and I'll see you in the next lesson. Where we're going to learn how to edit our audio on the zero point.
6. Editing Audio on the Zero Point: In this lesson, we're going to smooth out the music, and talk about why you might be experiencing clicks and pops in your audio. Let's start with this audio editing technique. Always add fades on all your audio. Let me explain why. Every audio track has what are called samples, and these samples look like waves. These waves ascend and descend past the zero point, which is located here. Now, if you were to cut this audio at the top of the wave here and play it back, you'd get a pop in the audio. If you were to cut on the zero point or the point where the wave is center, you won't hear the pop. Now I'm going to show you how to add fades to your audio in a snap. I set up my audio transitions to be two frame dissolves and in Premiere, you would do this by going to Edit, Preferences, Timeline. Then you can see here, Audio Transition Default Duration. I set it to two frames, click "Okay", and then I need to set up my hotkey, so I have quick access to that default audio transition. So go to Edit, Keyboard Shortcuts, and then type in the search bar right here, Apply Audio Transition. You can see here I've set my hotkey to Y, whatever you want, just make sure you set it because you're going to use this a lot. Click "Okay". This will allow us to add audio dissolves quickly to all our audio. In any project you're working on, you can just select all, press the "Hotkey" for the default audio transition, and then you'll get audio transitions on every part of your audio really quickly. It's great for preventing audio pops and smoothing out your audio very quickly. Let's take a listen. It's already sounding smoother, but we can still tweak the audio from here. Now we can go in and extend are across resolves, to get the sound that we want. So what I'm looking for here, let's solo this. I want to take out his breath, because you could hear he is still breathing in a bit. But I also want to make it feel like this clip is ending as smoothly as possible. So I could even just move it back a bit. Maybe I'll just do this, tone it down a bit. Yeah, I'm okay with that. Then I'll solo my next clip and see if that sounds okay. I think I cut off his word a bit here, so let's just pull it back a bit. Let's pull it back a bit more. So we're getting the whole word in there now, but I still feel like it could smooth out a bit more, so let's try this. Let's try pulling it back a bit more. Yeah, that sounds good I think. Let's unsolo our second audio track and listen to the whole piece. Yeah, nice. In this lesson we learned the importance of using fades on all our audio, ensuring that we're always editing on the zero point to avoid clicks or pops. Also remember to set your default audio transition hotkey so that you can add audio transitions very quickly.Join me in the next lesson where we're going to learn about reverb and its flexibility in audio editing.
7. Reverb for Flexible Music Editing: Now we have this ending. It's just not working. Our ending still sounds rough. Why did I choose to end on this beat? Well again, it's full of energy and it keeps our overall piece short and snappy. Even though it seems like a small detail, I believe that it [inaudible] at our objectives and overall goal. One way to deal with the awkward ending is to add reverb to the end of our track. It'll help the music feel more conclusive and almost as if it's a natural ending to the song. Let's find the portion where we want to reverb out, which will be the end of our clip. Let's take a listen. When DJ says "Go", we'll just end it there. Just tweak that a bit. Good. That will ring out nicely. Now let's select that portion of the clip, copy paste, and place it on to track three. Now click on window, Audio Track Mixer to open up the audio track mixer window. Audio one, two, and three corresponds to track one, two, and three in our timeline. In Premiere, I add the reverb to the audio track mixer. This way, I only need to create my parameters once, and any audio, on this specific track, has those same filters applied. Click on this triangle and click on Reverb, Studio Reverb, and then Edit Effects. Now I'm not going to go into a lot of detail on how to edit these effects because that could be a whole video in itself. Plus I don't really have the expertise, I just know how to make it sound good with experimentation. Now click on Presets. Let's go to Great Hall. We want lots of reverb to make it ring out nicely. We'll make the room size 100, so it's nice and big; add some early reflections to the audio, take the width up. We want to make it as big and booming as possible. We'll take the dry mix down to zero percent and bump the wet mix up to a 100 percent, so we don't hear any of the original source audio, and we're just hearing the effects of the applied filter. Now the play head is stopping at this part because it thinks this is the end of the project even though we have reverb applied to this. We want to hear the reverb, so let's duplicate the bottom clip, drag it over, and this will become the new end of the project. This will just be a temporary fix so we can hear our reverb ring out. That's quite booming. Let's just do some more tweaking. Go ahead and add as much or as little reverb as you'd like, just make sure it sounds conclusive. If you'd rather just copy what I'm doing here, that's totally fine. Here are the parameters. Now I still think that this duplicated portion of the clip includes too much of the audio before DJ says "Go", so I'm going to cut that out and add an audio transition. Using reverb is a great way to end [inaudible] when you don't have a natural ending to a song or if we prefer a different part of the song altogether. Go ahead and finish editing that reverb. In the next lesson, we're going to learn about how you can use music to cue your audience.
8. Cueing Your Audience With Music: In the last lesson we used reverb to unify our track and to end it in an awkward spot. We also unintentionally, cued the audience with the reverberation. In this lesson, I'm going to talk about that concept and the benefits of using this technique. Let's look at the end of the edited music video trailer. In this case, the reverberation signals the end of the video. It amplifies and brings focus to the text. All that you see on the screen are the words, out now. If you think I'm overanalyzing this, that's fine but let's take a look at the end of the video with the music fading out. This works as well in its own way but it doesn't bring as much focus to the text, which supports our overall goal. Musical cues are also a great way to signal mood changes, move from happy to sad, or move from one idea to another, or even from one song to another. Here's an example from my Skillshare intro. Hear a story to sell a product or to promote brand. How exactly do we do this successfully? You can see here that I start serious and then the music reverbs out and transitions to a different mood, a different idea, a new thought and then the music kicks back in to introduce the title of the video. The idea here is that the music is signaling the audience with reverb to indicate a mood change or a new idea. It helps the audience ease into a new mood, ease into a new idea. I did this again at the end of the video to enhance the comedy of the situation. On video editing techniques. Click the lesson. The next one, it's just somewhere down there. Go ahead. The sound reverbs out adding emphasis to the room noise and the awkwardness of sitting alone in silence. The music kicks in again to cue the audience into thinking that I'm going to sit there all day. Okay. I'll just sit here then. I got all day. The music cues the audience to believe that a new thought or idea is happening and it makes you wonder, is there more to this video? Okay, I don't have all day. Just click on the lesson below. But then of course, I shut the video down, the music reverbs out and it's funny because, I trick the audience into thinking that the video is going to go on forever. At least maybe, some of the audience. Use music in your video to cue an audience of a new idea, a new thought, a new mood. Music cues can help highlight the structure of your edit and make it easier to follow. You can be as obvious or subtle as you'd like to when editing your music. Remember, the music serves your story. Go ahead and finish finessing that audio and in the next lesson, we'll talk about the different types of video edits.
9. Video Edits Part 1: In this lesson, we're going to begin to discuss video edits. Understanding when and why you would use certain edits, will help you through the entire editing process. Video edits are like magic. They can hide mistakes, make you feel a certain way about a person, product or thing. They help restructure stories and they move stories forward. I'm going to sound like a broken record here. We use video edits to tell a story and to move the viewer emotionally. Powerful storytelling can create a strong emotional response and cause the viewer to be inspired to learn something new, to be compelled to change in some way, or compelled to do something. Our stories can change people, which is why they are worth telling. The reason we choose some edits over others is to serve the purpose of the story. That being said, the majority of the time we want to be creating an invisible edit, so our audience can be immersed in the emotion of the story and not taken out of the story by jarring edits. With that being said, let's get into it. The standard cut. This cut is exactly what it sounds like. It's just a cut from one shot to another. It's great for moving the story forward and revealing new information by showing a new perspective. Cutting on action. What we are doing here is cutting from one shot to another, while a subject is in motion. The movement of the character or object causes the viewer to focus on and follow the movement, making the edit less jarring. You can cut on small actions too. A number of these cuts are cutting on action and essentially it's the character. It draws the audience deeper into the story. The jump cut. The jump cut is when we cut from one part of a clip to another part of the same clip, hence jump cut. You can also cut from one shot to another shot that is of a similar angle to get the same effect. It's a great way to cut in action quickly to show the passage of time, that expediency and energy to a scene. It also can be used to highlight a character's emotional reality, like making that anxiety inducing phone call or having a mental breakdown. This is often used in action movies and it can be very subtle. Jump cuts help bring a flow to the action and also emphasizes the violence of the scene. Time remapping. Timely mapping is when you speed up or slow down a shot. Speeding up a shot on an edit is a great way to hide a cut. When slowing down in sped up shot, it creates more emphasis on the shot you choose to slow down on, allowing you to see a scene or object in detail. You can also speed up a shot to quickly get to the next action in the sequence. Sometimes, this effect, combined with jump cuts can feel somewhat unnatural and make character seem superhuman. The J and L cut. The J and L cuts are named after the shape of the cut only audio and video in your timeline. They're audio-based edits, meaning that you hear the audio from one-shot, continue on to the next shot, or you hear the audio from the next shot., before you see the video. The J cut creates anticipation and it's a great way to transition from one scene to another. I'm afraid what you're describing is schizophrenia. No, it's not schizophrenia. Perhaps most importantly, this technique draws attention to important story details, like in this scene transition where Neo's alarm clock from the next scene is heard beeping before we see it. It shows that Neo is still stuck in the matrix and needs to be woken up to the real-world. With the L cut, the audio of a current clip continues on through to the next clip. It's a great way to show what a subject is talking about, to show visuals over their dialogue. That's a lot. Yeah. You didn't just print the tusa from that thing, we printed a lot of jewels. Like the J cut, the L cut also draws attention to important story details. I call her, and she's changed her number, so I walked over to Anda Garty to get her something. I thought, give her an early Valentine. Both J and L cuts are used frequently when two characters are talking to one another. It can create a seamless flow to the dialogue. Wait, is this real? Yes. Okay. Then wait, I apologize, okay? I have to go study. Monica. Yes. I'm sorry, I mean it. When J and L cuts are not used in a dialogue scene, it can feel more like a transaction or impersonal. You're two hours late. I know, it's my fault. You got the money? Two grand. As you can see, these simple video edits can be used in a number of ways for effective storytelling. We will get back into more video edits. But before we do that, let's get started on the visual aspect of our project by choosing selects.
10. Choosing Selects: The first part of the process of any edit is to review all the footage in its entirety and then choose the best portions of those clips, which are called selects. Doing this gives us a bird's eye view of which clips might fit best in the project edit. It makes the amount of footage way more manageable when we begin to edit our project. In a way, choosing selects is the beginning of our rough edit. There are different approaches when it comes to choosing selects, mine is simple. I'll begin by clicking and dragging each of my individual footage folders into their own sequence. Click on each folder and drag it down to the paper icon down here. It'll create a new sequence with all of my clips in the order that they're organized in folder. The new sequence can be found in the folder that was used to create the new sequence. I'll rename my selects sequences by adding the word selects at the end of my sequence title and then move it to my sequences folder. I watch through all the footage and as I'm reviewing the footage, if I say anything I like or a part that I think that could tell the story well, I'll cut that portion out and move it up to the second track in my timeline. All the cup portions above will be my selects, and all the clips below are clips that I know I probably won't use or they can be used later to solve a problem I might be having. In this case, most of the best takes are already cut for you. You can go ahead and choose selects from the footage that doesn't need to be synced with the music. When it comes to the performance and dance pieces, they need to be synced to the music. What I might suggest for those clips is to keep them as is, take note of the locations you'd like best or performances you like best. But for now, hold off on setting in and out points or making cuts on the performance and dance pieces. I'll explain this more when we get to the rough edit lesson. Go ahead and create your selects sequences from your footage, then go through all the footage that does not need to be synced to the music and choose your selects. Also, don't forget to take note of your favorite dance location shots and performance shots. This process will make the edit a lot easier to manage. In the next lesson, we're going to go through more video edits.
11. Video Edits Part 2: In this lesson, we are going to explore more video edits. The montage. The montage is a technique where a series of shots are cut together to show a passing of time. You can show a character's journey from one point to another, or to show a changing character over time. It could be a stylistic choice or to drive home a point. There are many ways to use montage. The cross dissolve. The cross dissolve is mainly used to show a passing of time. A lot of beginner editors will use cross dissolves on every edit. Don't do this. Be intentional with every chosen edit, fade in and out. Feeds are typically used to begin a scene or a movie and to end a scene or a movie. It's also a great option to cut to black to end the scene and to cut from black to begin a scene. Cutaways and inserts. A cutaway is when the editor cuts away to a shot that does not belong in the same space or time of the current scene. For example, this could be a flashback or shot of something that character is thinking about or talking about. Cutaways give us the ability to see the inner world of the character. They also can be used to remind the audience of important pieces of the story and create significance. An insert is when you've cut to another shot within the same space and time of the same scene. It could be something with characters holding or more detailed shot of someone completing an action. Inserts are a great way to help the audience understand the scene overall by showing more detail and information. Inserts build on the world of the story by showing the intricate details of the scene. Cross-cutting and parallel editing. Cross-cutting is when the editor, cuts between two separate sequences happening at the same time. It's often used to build tension in sequence, but can often draw parallels between the two scenes. Like in this scene from Snatch. In one sequence, we have two dogs chasing a rabbit and then this other sequence happening simultaneously with two henchmen chasing Tyrone. Match cut. A match cut is when we cut from one shot to another, where both shots match in composition or action. In a music video, we rely heavily on match cuts to blend our locations together, mostly through the action and placement of our dancer. During moments of location exploration, we get a sense of the characters mostly grounded and her movements as its surroundings change. This also allows for quick shot changes because the dancer doesn't move from position, making the edit easier to follow. The match cut can also be audible like this. Or matching a word to the action, like in this example from Hot Fuzz. No, I mean, which one do you want to watch first? You are pulling my leg. [Noise]. The match cut bridges two shots together and can create meaning. The invisible cut. The invisible cut is such a magical cut to me and it's so satisfying when it's done correctly. The invisible cut it's invisible. You are not supposed to see where the cut is. This allows for a long looking takes and seamless transitions between scenes. It can also be used to show the passage of time. In movies like Birdman and 1917. They keep the impression that these are one take movies, but they are littered with cuts brilliantly hidden throughout the film. smash cut. This is where I have differences of opinions. I don't actually think a smash cut is its own cuts. This is about to go off. I think depending on the context a Smash cut, can just be a regular cut or a cutaway, or an insert or a match cut, let me just call it the smash technique. This is a technique used to go from calm to intense. A human heart is such a mystery. Or intends to call them. Really, it depends on the contrast between the two separate shots and where you make the cut point. It's abrupt and it gets your attention. Now we've just gone through all the video edits and it's super exciting to see how we can apply these ideas to any edit we are working on. Remember, every cut you make is intentional. It should serve the story, and the overall goal of the story, and the objectives that reach that goal. Now let's get back to our main project and start on our rough edit.
12. Creating the Project Rough Edit: Now it's time to get started in a rough cut. This is a very important part of the process because it helps us see our footage, cut together in a logical sequence or beginning, middle, and end. It gives us a place to start from. We have something tangible that we can work with. In the rough edit, we're simply laying down the structure of the story. Remember in lesson 1, we discussed the story of this project. So we have a beginning, a middle, and an end to guide our rough edit. In the beginning, our main character starts in the Black box studio. We might start with that shot. In the middle, she explores multiple locations and discovers her inner self, which is represented by the red backdrop. We might go to multiple locations and then flicker in the red background. Then eventually, we can use a slow motion to show the inner self and its full form. Then in the end, she finds balance. This could be a mix of the locations, the Black box studio, maybe the performance pieces and all the other bureau we have all in one. This is just an idea of what the rough structure can be, but it's a straightforward step-by-step process that's easy to follow. When I begin to edit the project, I'll set up two separate timelines. I'll open up both timelines at the same time. The one above will be my selects and the one below will be my main sequence. When you start editing your first rough edit, click and drag the whole clip down to your main timeline. Sync the clip with the music track. All the performance pieces and dance pieces are synced at the endpoint with the music. It should be as simple as clicking and dragging into the timeline. Once your clips are synced, delete the music track from the clip, delete the parts from the clip that you don't think you will be using, and then repeat the process. Put the overlays in a slow motion, they don't need to be in sync. We can place these clips anywhere we like. One other thing to mention, we also need to include the artist's name, The Castons, the name of the track, Spotlight, and the featured dancer, Joyce Nguyen. You might place these at the beginning of the video. Then perhaps at the end of the video, we can include a call to action, such as out now or whatever you think sounds good. Don't feel limited to placing these graphical elements, if you have other ideas of where they might go on the timeline, give it a shot. Go ahead and create your own graphical elements. Use animation, different fonts, or you could use the PNG files I've included in the project assets folder. Getting clips on the timeline and getting a really rough cut is such a good way to just start with something. It's imperfect, but it's a place to start. Go ahead and use the beginning, middle, and end of the story as a map to layout your preferred clips and graphical elements. In the next lesson, we're going to learn about pacing and rhythm.
13. Pacing & Rhythm: In this lesson, we are going to talk about pacing and rhythm. Like music, the stories we tell on the screen have different tempos, beats, and overall rhythm. They take the viewer on a journey. Let's talk about these ideas in more detail. First. Pacing. Hey. Hey. Pacing is the timing of cuts. It could be the length of a shot, How is it going. Good. Thanks, you? Good. Good. Yeah. Really good. Good. It could be the space between dialogue, or the space held in the moment before something happens. You look great. Thank you. It could be slow at points or fast, or somewhere in between. Rhythm is the result of pacing. All the different cuts, beats, moments, spaces between dialogue and action, create an overall rhythm to a video. Pacing is like a roller coaster, you want moments of speed, excitement, energy. You also want moments of slow anticipation, tension, a moment to breathe. Pacing can help an audience interpret or feel moments in the story as they are intended. Ask yourself this. What does this story I'm telling call for?What does this scene call for? You clearly want me to say something. Maybe we're trying to achieve anticipation, intention in the pauses. I just. We're waiting for an answer. So we don't cut. I'm going to bed. The character is left with the answer he doesn't want. So we don't cut. Maybe it's an argument. The pacing of the edits mimics the back-and-forth of the dialogue. Everybody knew you're pissed off. Seriously, that's how you want to start this conversation. Oh I'm sorry, how would you like me to start the conversation? Don't even worry about it. Right. So that you can bring it up by three months from now. You are an ass sometimes. Oh, am an ass. Because I want to talk to you. Because you know I don't want to do this right now and you won't let it go. The story dictates the pacing. A really good example of pacing is from the movie Baby Driver. The movie is heavily influenced by its musical track and follows the rhythm of the music. Everything is wonderfully timed out, but not to the point of predictability. There are moments of anticipation in the car chases with slow buildup, then explosive energy. Your heart is pounding out of your chest from the miraculous escape as baby pulls into a safe parking lot, we're rewarded with a long shot as a break from the blistering pace, we get a chance to breathe, but we're still left feeling the tension of knowing that we still aren't quite safe from the police after the getaway. If you want to get a really good sense of pace and rhythm watch Baby Driver. So what are some practical ways to know when to make a cut? With a music video, we have the rhythm of a song to determine the pacing of the edits. The eighth notes,the quarter notes,the half notes, the whole notes, and full measures of the song can be used to map out cuts and give us a variety of links to our edit. This could be one way to approach pacing. We aren't just cutting to the beat. Pacing and rhythm is very much based on feeling the edit too. With music-based edits it makes it much easier to feel the cut because it's similar to feeling the music. But when it comes to dialogue scenes or scenes that don't have any elements that are obviously guiding the tempo, it could be a more intuitive process where you need to feel the rhythm of the dialogue of the narration, or the person talking to camera. One way I do this is by simply playing back the clip and then hitting the space bar to stop the clip when I feel the edit should be made. I'll continue with this process until it feels right. You might take a break from the scene and re-watch it, realizing that the pace is still off, then you'd re cut and repeat the process until it feels right. So that being said, another technique might be for a scene without any music, you might just add music that feel suitable to the scene to inspire a different understanding of the scene and what its pacing might be, and to experiment and make informed edits. The opposite can be true as well. By just turning off all your audio altogether you aren't using audible cues at all. In fact, you're using movement of the actors or the scene. The movement of their eyes, of their hands and perhaps even more subtle instinctual decisions you might make based off if not being able to hear anything. In fact, the majority of the way I edit, even with music and sound enabled, is looking at the movements of the actor or the movement of the thing or a camera. Those movements have their own pace and rhythm and can hint at possible cutting points. I might also nudge a clip around, frame-by-frame and then play it back until it feels right. This obviously includes a lot of experimentation and trial and error. This can be super frustrating to some of you, but it is more of a feeling thing. You might have to take a break and re watch it, get someone to watch it for you and get their feel of, is the pacing right? Does this feel right? There isn't a formula, so just keep practicing. So to summarize this lesson, pacing is the timing of cuts and also the timing of moments between actions and dialogue. Even sound effects and visual effects can be included in this. Rhythm is the overall result of pacing, this all takes practice. Go back into your edit and check the pacing again. Does it feel right? Or you can wait until we get to the last lesson on refining the edit. Before we hop into that, we're going to go to Lesson 12. Eye trace.
14. Eye Trace: When editing a story, we want to create a smooth visual experience for the audience. In this lesson, we're going to talk about a technique called the eye trace, which does exactly that. When watching a movie, our eyes are drawn to specific parts of the image. Most likely is a character's eyes, the movement in the frame, or perhaps a brightly colored object. Eye trace is a technique used to direct the viewers eye from one part of the image to another, or from one shot to another. This scene we're watching is incredibly smooth. Your gaze doesn't have to move far from one part of the frame on the first shot, to the next part of the frame on the next shot. My eyes are tracking the signs, landing on the eyes, and then tracking the signs, and then go into the text, and then back to the eyes. There's a natural flow to the eye movement. As editors, we don't have much control over what the viewer looks at in a continuous shot of movement. That is the director's choice. But in the edit, we have much more control over where the viewer looks. In an image, our eyes are typically drawn towards the face of another person, the movement of an action or the camera, and the color and contrast, and the composition. We can use this information to help us determine which part of the frame an audience might be drawn to. This can help us make an informed edit. In our music video, the majority of the time we're drawn to the dancers movement and her face, because she's in the same relative position throughout the sequence, we have achieved eye trace. We follow her movements from one frame to the next effortlessly. Because this video uses a lot of similar shots to achieve its magical style, you'll get a lot of clips connecting with eye trace. Are there are other ways to do this? Think of some other creative edits that can guide the eye. You'll always be able to use eye trace all the time. Don't necessarily want to, don't force it, if it sacrifices the emotion, coherence, or rhythm of the story. The eye trace technique is another tool to use to guide the viewer's attention to certain story elements. Remember, we're drawn to faces, movement, color and contrast, and above all, we are drawn to searching for meaning within the frame. What are some creative and meaningful ways that you can use eye trace in your edit, without sacrificing the emotion, clarity, and rhythm of your story? In the next lesson, we'll talk about refining our edit.
15. Refining the Rough Edit: Refining the rough edit brings our story to life. Using some of the learned editing techniques we can bring meaning and visual flow to our project. Now is our chance to experiment and give some different editing ideas of try. Ask yourself this. Have fun, experiment with pacing, try different edits, rearrange the structure of the shots. As I'm editing, I'm always quickly going through these three steps in my head. Step 1, I review the edit and ask myself what's working? What's not working? Identify the problems that need to be solved. For example, something's not quite right with these cuts here, can't quite figure out what it is. So playback slowly. It looks funny because the movements aren't matching from one cuts to the next. That leads me to Step 2, I attempt to solve the problems within the edit using editing techniques. Problem I'm facing here is that the cut on the action isn't quite on a proper part of the action. What some readjustments can make sure that the flow from one clip follows into the next clip? Here we go. It's better. Now, on the second clip, I just had a feeling to cover it there. The reaction happens quite quickly, like shambles bounces out of that move. But I'm okay with that for now. Let's watch YouTube clips back. It looks pretty good. Then she lens here in this strange way. I'm going to have to go back and do something about that. Maybe you're having pacing issues. Use what you've learned from the pacing and rhythm video and apply those principles. Maybe an edit from one shot to another is jarring, but not because of a cut on action, but because of an eye trace problem. What are some creative ways you can guide the viewer's eye to make them look where you want them to? We're constantly going through those two steps, identifying problems and then solving them using editing technique. Step 3, if I can't figure out what's wrong with the edit or I'm still not happy with it. I'll revisit the experimentation phase. I'll continue cycling through these steps until I feel happy with the edit and structure. Step 4, eventually I'll get feedback through this process. It helps solve problems you don't notice or problems that you have trouble solving. Now, it's time for you to experiment with your own edit. After landing on an edit you're content with, identify what possible problems the edit might have, what editing techniques might solve these problems. Post your work and progress or your finished piece. Have fun, experiment, try new things. Good luck.
16. Final Recap and Thank you!: Yes. You made it. I
hope you made it. Did you finish it? I really hope you finished the project. We've covered a
ton of techniques. So if you're still
having trouble understanding some
of the concepts. Or if you need a
quick reference, go back and rewatch
some of the lessons. Ask a question in the
comments section. Maybe there's someone there who knows the answer. I might. I will try to answer the
question in a timely manner. It's time for the final recap. One, the story of your
project guides the edit. Identify what story
you're telling the beginning middle and end
and while you're telling it, the objectives and overall goal. Two, take your audience on the journey with
your audio and video. Choose the parts
that tell the story best and have most
emotional impact. Three, count the beat of
the music track to cut one and two and
three and four and connect different sections
together seamlessly. Four, edit audio on the
zero point by using two frame audio dissolves as a starting point on
every audio transition. This will eliminate
all clicks and pops. Five, reverb is a great tool
for flexible audio editing, especially when editing a music track at
an awkward point. Six, use music to your audience. Music can signal mood changes, new thoughts and ideas and make certain parts of an
edit easier to follow. Seven. When used with purpose, video cuts and
transitions can help tell your story and move an
audience emotionally. Eight. Make your edit more manageable by choosing selects
that tell your story best. Nine, use the beginning, middle and end of
your project story to quickly lay out a rough edit. Ten, Pacing a project properly can help
communicate story, emotions, and ideas to an
audience as they are intended. Pacing and rhythm is
very feeling based and takes time and experience
to tap into 11. Direct the viewer's
attention using eye trace. Remember to
prioritize the story, its emotional resonance,
and its rhythm first. 12, identify problems within the edit and solve them
using editing techniques. You're solving trouble, 13. Ask yourself, what
if Experiment, play, have fun, be
open to new ideas. I'm going to sound like a
broken record one last time. Story is your guide. When in doubt, turn to the story of your
project for the answer. Now it's time for
the big reveal. Upload your projects to the project gallery page so that we can all see
your amazing work. I can't wait to see the creativity and the ideas that you put into
these projects. And if you have
personal projects that you worked on
alongside this class, upload those so we
can see how you applied the editing techniques
to real world work. If you like this class
and found it valuable, please leave your review
and recommend it to a friend or someone you know who might find value
out of it as well. Also, make sure you follow my
profile to stay up to date. We've learned a lot of
video editing techniques, but there's still so
much more to learn. Okay. A huge thank you to you for participating
in this class and posting your finished
project. Thank you. We'll see you soon.
 Sean Dykink, Story is your guide