Transcripts
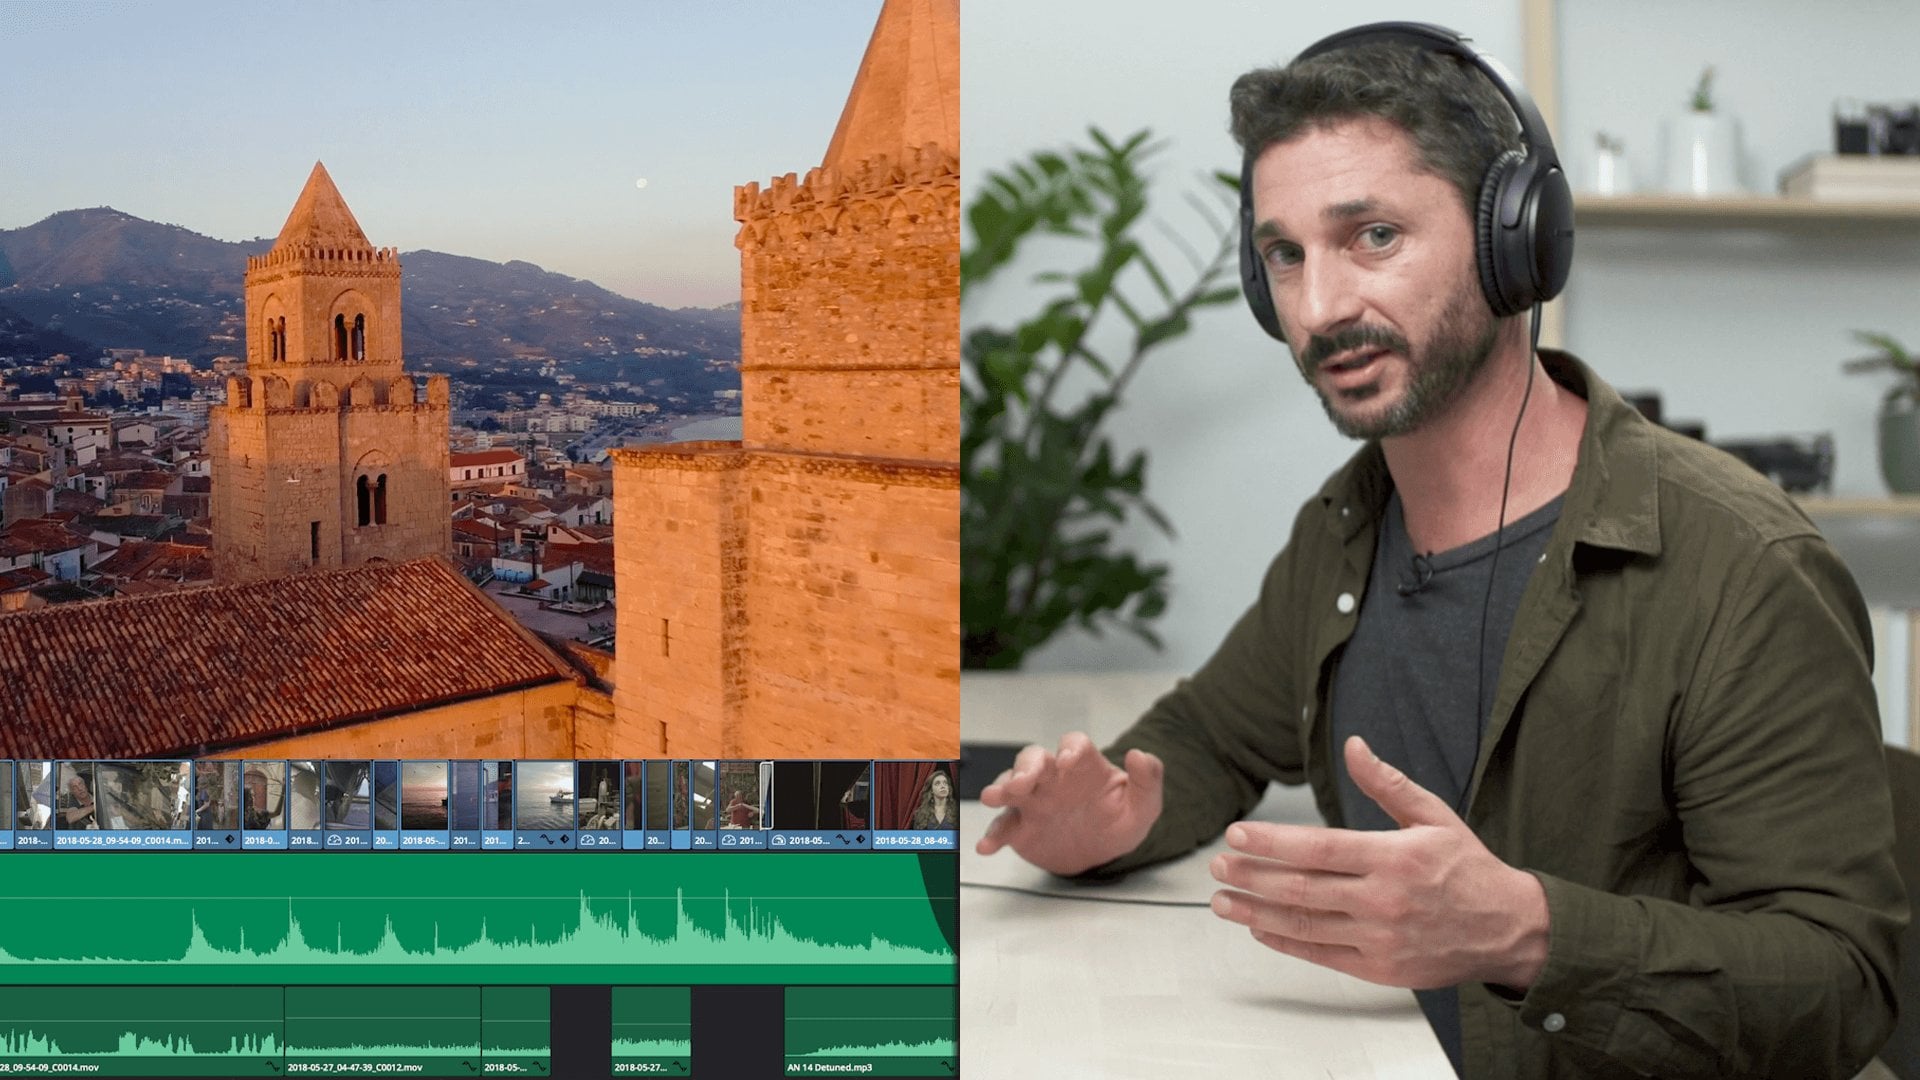
1. Introduction : Hi, my name is Oliver Astrologo. I am a film director. Watching my films, you have the feeling that the camera is constantly moving and never stops. All different location of places are perfectly visually connected using some seamless transition. In this Skillshare class, I'm going to explain how to put into practice some of these techniques using a software that is called DaVinci Resolve. In this class, we are diving into two some of the most important functionalities of DaVinci Resolve and we will learn how to use them at their best. You will learn how to improve your footage by using some advanced stabilization techniques. Then we will dive in into the transition. We will make them completely seamless, effectively blended with the editing. Finally, we will use masking and compositing in the same way that this is done in the large film productions. It has been over five years that I'm using DaVinci Resolve for editing my videos and I really love this software. You don't need to be a pro in order to start in this class. You just need a laptop, a computer, and DaVinci Resolve. DaVinci Resolve is free and available to download now from the Blackmagic website. Of course, you need a footage as well. If you never did footage, you can use the footage that I am going to provide you with the material of these classes. Follow me in this class and you will learn some techniques. But remember, it's not the gear, it's not the software that elevates your project, it's the creativity, it's what you got in your mind. Software, computers, everything is just a tool, an extension of your creativity in order to make this process easier and quicker to do. Are you ready to start? Let's go.
2. About Post-Production: The software that we
are going to use in this KSA class is
called DaVinci Resolve. I assume that you already
got confidence with it. If you haven't done it yet, I suggest you to go to
the Black Magic website, download it, and start exploring the different functionalities. One thing that I really love about DaVinci Resolve
is the fact that you get all the tools
that you need for the post production inside
one single software. You can switch between
different editing modes. This one, the edit mode is
the most common used is the same tool that usually get when you're using
premiere or Final Cut Pro. But in the DaVinci
Resolve you get some additional tools that are really, really interesting. For example, you
get the color tool. Color tool is probably the features that I mostly
love about the software. In my view, the DaVinci
Resolve is offering one of the most powerful tool for the color grading on the market. One important thing that
you need to bear in mind when you are using
the DaVinci Resolve. Usually, if you come from
Premier Pro or Final Cut, when you need to do the
post production and you need to apply some
very specific effects, for example, the masking, or maybe do some
bit of compositing, you do everything in
the edit interface. While in DaVinci Resolve, the most advanced effects like the color grading but
also the masking, any other compositing
and specific effects, they can be done using the
color interface or the fusion. Fusion is in a certain way the equivalent of after effects. We are not going to use
these functionalities inside DaVinci Resolve today. This class will be mainly
focused on the transition. We don't need these
tools as well. If you need to learn more
about DaVinci Resolve, I will suggest you check out my Skill Share class about
the boss production, where I go deeper
in all the aspects, all the functionalities that
DaVinci Resolve is offering. Also, I give you some insight about the creative process that is behind the editing of some
of my most popular videos. If you haven't done it yet, I suggest you go to the Black
Magic website downloaded your free version of DaVinci Resolve and start
making practice with this. In the next lesson, we are
diving into the practice, and we are going to
enhance footage by applying some in
access stabilization.
3. Step 1: Tracking and Stabilization: Sometimes it happens
that there is some material that
is very pretty, is very interesting,
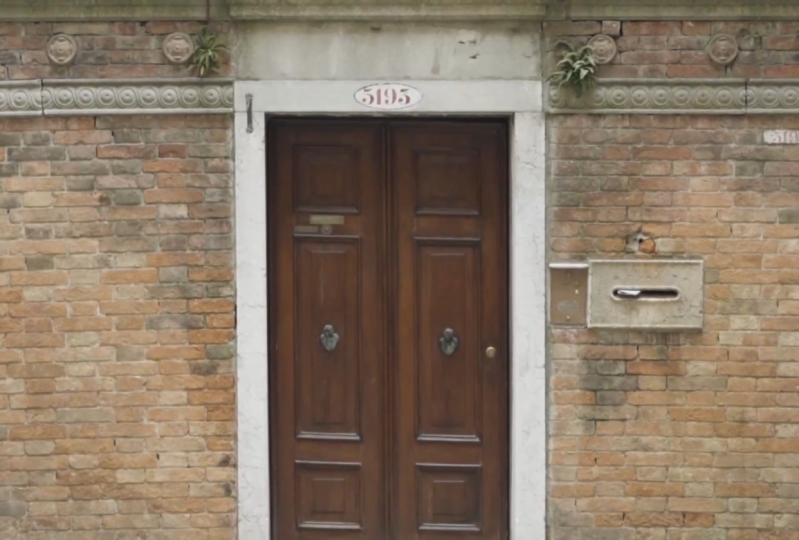
but it is imperfect. For example, I've
been in Venice, I shoot this camera movement
with a gamble to the door. It doesn't look very smooth. How we can fix this one? When you're using a
traditional software, you just need to toggle
stabilizer here. In the Venice solve you get three different way of
stabilizing your footage, perspective, similarity
of translation. There isn't a specific mode
that works at it best. You need just to
try them and see which one give the best
result in your clip. Let's try, for example,
perspective and apply some stabilization.
It looks better. It's definitely look better, but it's still not perfect. In the color table, we get some interesting tool for
doing the post production. My favorite one is the
tracking stabilizer. I managed using the
tracking stabilizer to fix some materials that was completely unusable
and he made miracles. Let's switch if you read
under in the tracker, open the tracker panel. You need to choose if you
haven't done yet from window, switch to stabilizer
here from this panel. Then you need to pick the classic stabilizer
functionality inside this context menu. There's one more thing to do. You need to switch
to point tracker. Now we activated the
tracking stabilizer. There is one thing that
you need to do is to add a tracking point. A tracking point is where
the software should look for the movements in order to track and stabilize
the movement. In order to make it effective, you need to move
the tracking ponter on something that has
a strong contrast. For example, the handle of the door in this case could make a job because it's
a bright element, and it's easy for
the software to understand also to
track the movement. Also, you need to be sure that you are at the first frame. You just need to scrub here
and set the first frame. We just need to start
the tracking forward. Just to click this button
and activate the tracking. It ups and sometimes that the software maybe
miss the target, but you just need to
reposition the cross on the right point here
in order to fix. You can use the back and forward key buttons
in order to see, and then re click again on
the truck forward button. Once we have done, we just
need to click on stabilize. As you can see, now, when the software is applying
the stabilization, you will see, for example, that the image looks very crop. This is normal because software, in order to keep the element of subject perfectly centered, it needs to crop the image. In order to avoid the crop, we just need to toggle the zoom checkbox and
click on stabilize again. Now, it looks smoother. As you can see, when the camera is moving
back and forward, that you see this black
border on the side. We just need to use the
traditional reposition the framing in order to avoid and reduce the
black border on the sides. We just need to go
on the first frame, set a key frame here
in the position, and then we need to scrub
the timeline to the end. You need to reposition the window on the
center of the screen. You might need to do this in the middle as well, for example. You can maybe reposition here. As you can see now, the footage
is perfectly stabilized. If you see, for example,
this little jump, probably, there was something
in the tracking error that was not perfect. If you still have some
black borders on the edges, you just need to zoom in a bit. We can try to speed the ramp. It looks much better. Let's see before to
see the difference. Before, after. If you're using Premier
Pro of final card, in order to get the same result, you need to move and you need to do the post production using
another external software. For example, you need
to use after effects, using the tradition
clock in after effects. Everything individual resolve is integrated into
the same software. I will invite you to download
the footage here from the material class and maybe
try to make some practice. In the next class,
we are going to use the stabilized footage and we are going to think
about the transition.
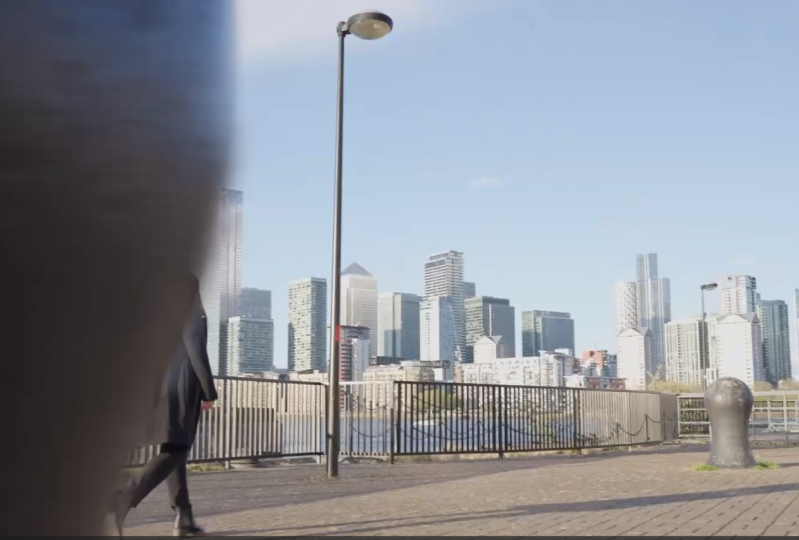
4. Step 2: Creative Transitions: Before diving into any specific transition, we need to put everything together in the edit in a way that it looks completely seamless. According to the camera movement, I follow at this clip where the camera is moving toward the door with this shoot that has been done in another completely different location in another moment. Just putting everything together, it really looks very cool because it looks like the camera is moving through the door. Now, it's time to improve it. What we can do here is when the camera is getting close to the door, open the door and create a very nice transition, giving the effect of the door is open. We need to align the two different clips on two separate tracks of the timeline, and any nudge and move the indoor scene few seconds before in order to find the right position. Now, you need to move as far as the timeline when the camera is very close to the door. I just need to duplicate this clip and create a copy of it on another track. The clip that is positioned in the upper track will be the left door and the clip that is positioned under would be the right door. Now, we are using a very simple tool that is called cropping. I temporarily disabled the video track here, and I use the crop lights in order to crop the door here. I may need that to add a little bit of softness, 987 to make things clear. Now, let's do the same thing on the right door on the second track, so let's disable this track temporarily. We need to enable this one, and I need to crop left in this case. Let's use the same number that we used to crop the other door in the crop left slider. It's 987. Can you see? We might need to adjust the cropping because this is too much. Eventually, we can. Brilliant. Now, we need to animate the doors. This is very clever trick. We need to find a place where the camera is very close to the doors. I might need to slightly zoom in the frame of the door. What you need to do is go here. I need to go on the position, I set a keyframe here, and it's also to set a position keyframe also on the right door. Let's set a keyframe here as well. Now, let's move to the end and we set another keyframe for the position. We just need to animate the door. This will be the right door that is open in the right. Let's go back and repeat the same for the other door, and we animate the position of the left door. Let's see if it works. The camera is moving here and the door is opening and getting inside the other room. In order to make the effect more realistic, we need to add a sound. The sound effects, they are used to amplify and also to give up stronger perception of something that is going to happen. Let's move it here. Let's open the Media Pool and go in the sounds and I go out this door sound. This one. We move the sound here. We just need to nudge it. Brilliant. There is another tool in [inaudible] that will help me to make this more authentic. Let's go to the left door video track. We need to set the keyframe on the yaw. The yaw allows me to change the yaw or the fusion, giving the feeling that the door is stealthy, we need to set it to zero, then we need to move to the last keyframe and move the yaw to the maximum. We repeat the same thing on the other video track and set a negative number for the yaw, since the yaw is in the other side. Let's see. Now, we can, for example, get all the material, click with the right button and put everything inside a new compound clip. Now that everything inside the compound clip, we can also play with the speed ramping and adjust a bit the timing. Higher speed points here and need to add the speed point here. The speed at which the door are opening is good for me, but I would like you to make the moment when the camera is approaching to the door a bit faster. I just need to speed up this part and then we make faster also the other part. Now, we need to adjust the speed ramping count. Speed ramping is another technique often used when you need to make some transition. When you speed up and make it even faster, you make eventually some less noticeable. With the speed ramping, sometimes you can fix something that it does look perfectly authentic. Never abuse with the speed ramping, always try and affect something that looks authentic even without the speed ramping. Know bad. This is a very simple but effective transition and give it to the spectator the feeling that the camera is effectively entering inside the door. It's also nice to see that we use some very simple tools like the cropping and the yaw tools that are available here in the specter without using any advanced masking something very complicated. Just using the cropping, we managed to create an effect that's usually using the traditional post-production requires maybe to move to another software, do some of bit of masking. You need someone to start with it. In just a few minutes, we managed to create it. Taking the footage that is available here within the Skillshare materials and try to make something creative using this kind of transition. In the next class, we are going to make things even more fancier by using some advanced masking effects.
5. Step 3: Advanced Masking: If we need to achieve
some advanced effects. Of course, the standard
tools that usually get inside the spectra of
the visual resolve, they are not enough. Sometimes you need
to mask objects or elements that have a
very specific shape. For example, in the
previous lesson, we use the door as element
for making the transition. Here we are using this object that is passing in
front of the camera, and we are going to
make a mask around this object in order
to get these effects. First thing, as usual, we need to align the different
clips on the tam line. We need to find the right
moment to make the transition. Then we need to switch to the color interface in
the vitual resolve. We need to create a
mask here and cut this part of in order to
create this seamless effect. Before start, we need
to do an Alpha channel. Alpha channel is
just an instruction that tell Davin should resolve the color that we are going
to a an Alpha output. We just need to right click
here in an empty space inside the nodes panel and
pick the Alpha output. Then we need to connect this blue dots with
the Alpha per channel. We need to switch
to the mask panel to the window panel here. We need to drive our mask. My suggestion is to
find a moment where the object that is passing
from the camera is here and incenting
in the middle of the screen in order to
have a bit of space to understand the timate it we are going to
pick the pen tool. The pen tool allows you to drove the mask around the
place you want to cover. Add some points and create
a fall of the shape. I'm driving a mask around all the elements that they want to cut away from the frame. I need to close the shape. Now, as you can see,
the masking on side, close the shape is not
in the right side. I just need to invert the mask. In order to invert the mask, you need to click here. Here, I can control
if the mask is hiding or showing
the specific part of the frame which
I'm applying it to. Now it's time to add
some key frames. The key frames panel is usually hidden in very
intro itself so you need to click here and
toggle the keyframe frames. Then we need to click here in order to toggle on
the automatic keyframing. We need to add a keyframe. In order to add a key frame, we just need to slightly move the mask or maybe touch a point. This will togll activated
the automatic frame. We have a set of the
first key frame. Once we have added
the first key frame, we need to move one
frame forward and back. This is probably the most
boring part because if we want to create and also
to make it very seamless, we need, for example, to move the mask to add few
more key frame. We are going to
move the mask here. Always try to make the transition
completely seamless and completely invisible
for the people that are watching your videos. If you change the softness, you need to change
on every key frame. I need to add the same softness on the
keyframe that we had before. Let's going forward to
the end and move here. Usually, three,
four different key frame should be enough in order to cover the entire video. Finally, we need to do one last key frame
to hide complete mask. Let's repeat also the same thing on the previous key frame. One more. If we go back and forward using them, we can see how the
mask is applied. Let's go back to the editing panel and
see if the mask worked. If you need, for example, to mask some specific
movement or you need to create a more
realistic effect, that's the way to do the right
masking in the insurance. You can download this footage
from the classes materials, and you can start practicing
with the masking, and also you can put
all the things that they teach during this
lesson into the practice. I would like to see how you are approaching
this transition. As mentioned before, try to experiment with it
and try, for example, to combine and to use this transition with
the other footage that you made by your own. If you don't have a camera, you can even use
your mobile phone or any other candle tool that is
capable of shooting video. You don't need any professional
equipment to do that. See you in the next lesson because we are
going to talk about another interesting thing
that is decomposing. decompositing consisting in merging together different pips, footage images in something
that looks a single element.
6. Step 4: Compositing: In the Previous
lessons, we discussed the fundamentals for making
some interesting transition. First, using the basic
tools in the vitual solve, and then we use some
advanced masking techniques. Now we are trying
the compositing. In a nutshell, the
difference between compositing and editing
is very simple. Editing is a movie, a video that is composited
by different clips together. Compositing is a single
image that you get in a video that is composing using different
sources like images, photographers, footage, any other stuff that could be useful for
making the effects. We are going to use
the compositing to create a very
seamless transition from this footage that is composited by two
different clips that have the same
camera movement. I would like to achieve
another interesting effort. I'm going to cut through the hole of the window and
make them transparent. This is a very common technique that I use mostly in my videos. In my dross video, for example, I use these techniques twice. I know that there is a
time consuming process, so you don't need to
do it by yourself. You can just download
the images that has already been processed inside
the classes materials. You just need to get
the file window.png. Let's bring the file that has really been processed
on the timeline. Let's close to media pool. Let's change the zoom
mere in the spectra. We can make it shorter. Go one frame back
and we zoom in here. Can you see that the
glasses are transparent? We can also animate
the position. Let's go to the first frame. Let's put the position
to zero. Here we are. Maybe we can let the indoor scene start
a few frames later. We are the fade in. Let's see how everything
is going together. The camera is getting close. Now, we need to make it
a bit more realistic by changing the speed match the speed of the
camera animation to the window images
with the speed of the camera that is moving
inside the indoor scene. There are two ways to do that. The trickiest one
is to play with the cars here in the
venture resolve. The best thing in my view is to nest this clip inside
a new compound clip, and then using the speed ramping tool
controlling the speed. We just need to
make this faster. We need also to make this
curve a little smoother. Definitely works. Now the effect looks
very realistic. Is not just the transition itself that make
your video fancier, is way that you are
thinking your shots. Let's see a practical example. Here, I just did the
same under movement. The way that I put all the
clips together by matching, for example, the steps,
the way that they work and make the
transition more realistic. When the two clips are perfectly
merged together in time, by simply matching in this case, the position on my foot
here on the ground, that is what makes something very fancy
and very regional. That was the final
part of this class. Let's see for the final
fats in the next class.
7. Final Thoughts: Depositing was the final part of this class. I hope you liked the way that I used very simple things, very simple techniques in order to achieve something that looks very professional and very nice. Feel free to post your piece of work and try to also use the materials that everybody with this class used to create something that is different and looks different. [inaudible] the footage, fancy around the camera movements, everybody probably will also result in something that is more professional. Next time that you are taking your camera, you're going around somewhere, think about the transition in advance. The transition are just something that you need to add on top to make things smoother, fancier. Next time you are watching a video of mine, try to figure out how I made some specific transition and also try to figure out which of the techniques that I have explained today I have used in order to obtain realistic effect. Thank you everybody for watching. See you in the next Skillshare class.
 Oliver Astrologo, Film Director & Photographer