Transcripts
1. Introduction: Hello everyone. I'm Halise, a digital storyteller,
filmmaker, and creative entrepreneur. I love using my camera to document my life and
tell stories online. And I love editing everything I create in Adobe Premiere Pro. But sometimes though, you just want to create
something quick without diving all the way into an industry standard
non linear editor. And that's where Adobe
Express comes in. For this class, I'm going
to give you an overview of all the video
features available in Adobe Express that are
now at your fingertips. With a few simple clicks, we'll create short
digital videos using the all in one editor. I'll show you how to build
content from scratch and how to work from the plethora of templates
that Adobe Express offers. Will also include some
different elements including dynamic texts,
shapes and vectors. And we'll even dabble in some generative AI
using Adobe Firefly, which is actually now integrated directly into Adobe Express. Finally, I'll show
you how to schedule your content across
platforms as well. This class will be ideal for in house or freelance
social media managers, content creators who don't need the full non linear editor
like Adobe Premier Pro. And also small medium
business owners who are handling their brands, video content, and
online presence. To take this class and follow along with me as I move
through the lessons, you'll need a free
Adobe Express. However, if you want to
unlock all of the features, I'd recommend
upgrading to premium. If you can swing
it. No pressure. If you already have a full
creative cloud account, congratulations, Adobe
Express is included. You don't need to
do anything else. As with other lessons and classes I've created
in the past, I'll provide a few
assets for you to download and
follow along with me. You don't need to use my
assets if you don't want to. I just find it's easier to follow along when we're
all doing the same thing. So remember we'll be using Adobe Express strictly from a video point of
view for this class, even though Adobe Express
can do so much more. This one is just about
video in Adobe Express. Thanks again for showing
interest in this class. I'm lise, let's get started.
2. Class Project: All right, welcome back.
I'm Halise. You're you. For our class project, we're
going to attempt to make 68 pieces of content for a
small composting company. Yes, indeed. We're going to be
the in house social media managers of food scraps. Over on my Youtube channel, I went to visit a
composting company based in San Antonio, Texas called Compost Queens to learn all about the
composting process. While editing that video though, I pulled out little moments from the video and raw
footage and just kind of set them aside
for social posting. So I acted as my own
in house editor. And now together
we're going to act as the in house or freelance social media manager
who has received those assets and wants to create social
content around them. Together, we're going to
walk through making a real a Youtube short or
Tiktok from scratch, and also using a template. We're going to make a
carousel post as well. We're even going to incorporate
voice over and music. I'm also going to show you
some new video features like Adobe Expresses closed captions feature as well on
the non video side, because yes, we will dabble in the non video side
just a little bit. We're going to create some
Youtube thumbnail options and even a podcast cover too. So again, really showing a wide range of
things you can do in Adobe Express from a
video focused mindset, but dabbling just
a little bit in some of the other
popular features. So if you haven't already,
go ahead and download my assets so we can get started.
I'll see you over there.
3. The Landing Page: Welcome to the first
lesson. It is a quick one. Hopefully you have downloaded the assets I have provided,
so you can follow along. We are now going to
tour the landing page when you first get
into Adobe Express, For those of you with a
Creative Cloud account, this is what it looks like when you log into Creative Cloud. And if you're trying to
get to express literally, you just hit the
Express button and it'll show up as a
new browser for you. Likewise, if you don't have a creative cloud
account, no worries. You can just type
in New Express, Adobe.com here at the top. And that'll bring you
also to Adobe Express. You can also use this to
sign up for Adobe Express. If you want to become a premium
member here at the top, just click through and
then you can access it. I have a full Creative
Cloud account, so I'm already a premium member. Now let's tour the
landing page real quick. So when you first land onto
the Adobe Express site, it's going to look more or less like this at the very top. These are the organizational
tabs that'll kind of help you thumb through the types of things you might
want to create. Again, we're focusing on
video for this class. So if we hit the video tab, you'll see now it
repopulates a lot of different template
sizes that we may need. It also lets us see
some quick video that we might want as well, which can be very helpful. And then if we keep moving down, it moves onto a few
different video templates, which there are a ton of. And again, we'll
kind of mess with these a little bit more
in a later lesson. Finally, if you keep
scrolling down further, we come to our Adobe Stock
videos that you can use. Again, if you're
a premium member, a lot of these will
be available to you, just part of your account. But if you're not,
you might need to pay an extra fee to
access some of them. And then the more you
keep using Adobe Express, the more it starts
to know about you. So if we click on my four tab, you can notice a lot of it, again, is kind of more video focused based on all
the things I've done, with a bit more
emphasis on some of the NAI features because I
have used them a couple times. So take a second tour the landing page and
get familiar with it. Something else
worth noting is at the top there is a
good old search bar. You know, we love a
good search on an app. So you can start to delineate different
types of things you would like it to search
for and then type in keywords to see what pops up. This will prove helpful
in a later lesson. Now, if for some
reason you don't see your preferred template
here on this bar, you can also head over to the plus key here in the corner. And when you click
on it, it starts to show you different
suggested sizes. It also will show you
different sizes for other types of content
you might want to create. You know, I see things
here like a book cover, bottle label certificate. There's so much you can do in Adobe Express outside
of the video sphere. So take a look at this. Familiarize yourself
with some of the different aspect ratios and things that you can actually design with pre built
templates that are the correct pixel size
for you here in Express. Another thing worth
noting is your stuff. As you build things out, it will populate here. So for example, if
I go to brands, my personal logos
and everything I do is already created and
added into Express. So for my production
company stumble, well, I have a lot of
different logo sizes. How does Ascend is a
podcast that I co produce. All of that stuff
is here already. I've just added it to my
Adobe Express account. This can be really
helpful for, again, your social media managers out there and you small
business owners out there who are going to be using Express to tell
your story online. You can start to add
your colors, your fonts, all of that kind of
stuff into Express already and have it built
in and ready to go. This can be very, very helpful, so check this out
and you can also separate it like you can
have different brands. Like for me, you
know, I've put all of my brands together into one folder because
there aren't that many. But again, if you're a
freelance social media manager, maybe you have multiple
brands that you work with. You can start to
separate those brands out for yourself as well. And then finally, if
we keep scrolling down on this left bar over here, we come to the scheduler. We're going to go over
this in a later lesson, actually scheduling some
of the stuff we create. But I want to just acknowledge that that is where it's located here in the main landing
page of Adobe Express. Again, this is kind of just a quick overview of
the landing page, so that way you can kind of familiarize yourself
with what it looks like when you first
log in onto Adobe Express. In the next lesson though, we're going to hop right into it and create our first
reel from scratch. I can't wait to get into
it again one more time. If you haven't already, go ahead and download the assets I've
provided to you if you want to follow along with me
and I'll see you over there.
4. Build A Reel From Scratch: Welcome officially to our first. First like real lesson, like we're not playing
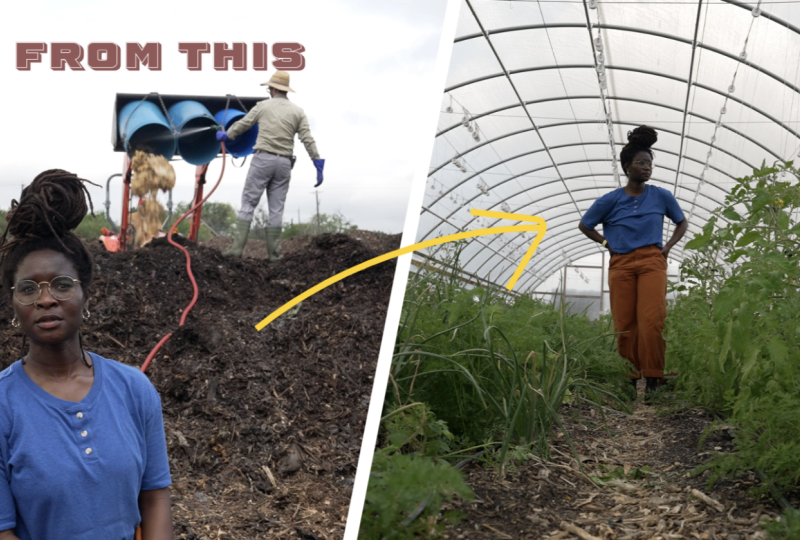
games anymore. We're going to make something. We are going to build a real
from scratch and it's going to be a how to compost video. We're going to start
off super simple, so again, we're on our
Adobe Express main page. We're going to Instagram
real create from scratch. So when we hit that, we are now moved into the all
in one editor. Everything you create
in Adobe Express happens in this area
on the left side. You'll see now our sidebar has changed a little bit from
the landing page version. We now have templates
that we can access media. And by media we're meaning
photos, videos, and audio. Again, more about that in a bit. Text, any kind of text. We want to add elements as
well and within elements. So many different things you can mess around with in here. Backgrounds, shapes,
icons definitely utilize the search bar built into this area of
Adobe Express as well. Grades is relatively new. You can create different photo
layouts and just kind of add different assets
into them and be able to manipulate
them further. Something else that's new to Adobe Express as well
is different add ons. So definitely poke around here. If you're someone that's really on your productivity game, you know there's a lot
of different add ons that are built into
Adobe Express, Dropbox, built into
Express as well now. And then finally, premium. Once again, I'm a
premium member already, so I already have access to it. Now we are making a
real from scratch. You notice that when we hit it, we are in a vertical
workspace here. It's already picked the right dimensions for us
and everything. I want to just add in one of the pieces of media content that
I provided to you. So I'm hitting the media button
and then I'm going to go to video and I'm going to
upload from my device. I'm going to now add in composting process
and hit open again. This is a video that went on my main Youtube channel that I shot in four K. So it's going to be natively horizontal, right? It's not going to
natively be vertical. But you'll notice
once it's completely loaded into express, a few things have changed. One, this video is now
represented in our sort of makeshift timeline that we have here on the
bottom of the screen. So if you've messed around in
Adobe Premiere Pro before, or even if you've messed around with things
like, I don't know, cap cut, other sorts
of quick editors. This should kind of feel
somewhat familiar to you. Each video asset
that you add into Adobe Express is
represented within a scene. And for some reason, if this is not showing up for you and it looks
something like this, instead hit Edit, Timeline
and it should appear. You can also zoom in and
out here at the bottom. And you can also change the percentage if you so choose. That's
another way to do it. Aside from just using the
slider to view in and out. The first thing I
want to do is I want to make this
the correct size. And I can do that a
couple of different ways. The easiest way you
can head over to here where it says Fill video
and hit that boom. It immediately stretches it
out to fit within the frame. Or another thing you
can do is you can easily just drag to
whatever size you want. So this is actually a
series of clips that I just strung together while
editing the main video again, so pretending that I'm
the editor and now I'm the social media
manager working with this super
rough sequence of clips that the editor put
together for me, right? And it's showing how to
compost essentially. And this looks
pretty good, right? But we want to kind
of speed it up. Right now it's sitting
at 36 seconds, which in the world of the
Internet is far too long. So we're going to just
create some simple cuts to speed this up. I'm thinking, especially here, where it takes me
a while to kind of put the different food
scraps into the bin. There are two ways you
can create a cut or break up a video clip
in Adobe Express. Wherever the playhead
is, you can hit S on your keyboard,
that'll create a cut. Or you can also just move your playhead to
wherever you want and then click the three dots in the corner and hit Split, and that'll also create a cut. I want to get the
run time of this down to like 18 seconds. It doesn't need to be this long. So I want to make
a cut right here. Let's make a little cut
right there, split. I want to get rid of
this whole thing. I don't need it, so we're
just going to delete it. And then we can create a
little cut again split. And then, let's see,
I, I like the leaves. I just wanted to like action
shots, like just moving. Another way you can adjust
the duration of clips is by hovering over the edges
of the different clips, and then just scooting down to however long or short
you want them to be. You notice how when I did that, the timeline immediately
shrunk to match. So another thing I want to do is I want to come to
the beginning here. And I want to make this real, actually seem like
it's loopable. So what I'm going to do is
this first clip of me putting the compost into the car to then take to
the dumping area. I'm going to trim, right. There. And I'm going to take this, this clip specifically. And I'm going to
rearrange it. I'm going to put it all the
way at the end. This will make
sense in a minute. And you notice I'm
just clicking, holding, dragging to the end. It's that easy to
rearrange things. I see we still have a
little bit of me there. So we're going to adjust
it like so there we go. And then we're also going to trim that because we don't need, it's just a bucket in a
shot, we don't need that. All right, let's play. Cool. Put some meats. Nice. So we took a video that
was originally about 36, 38, almost 40 seconds. Got it down to like 24 seconds. That's feeling more
appropriate for the Internet for sure.
Now let's add some text. So I went over to the text
tab and I'm just going to move my playhead to be
back in the beginning. And we're going to hit Add Text. When we do that brings just up a standard text box,
nothing amazing. But here's where we can start to have some good old
fashioned fun, if you will. So editing text in Adobe Express is very
simple, very easy. You'll notice whenever you
click on something new, a new asset within
Adobe Express, this secondary menu changes and adjusts to be whatever it
is you're about to work in. So when I clicked on the video, now we got all of the
video adjustments and effects that we can add. When I click on this text
box we've just created, it then adjusts again to now show us all the different
text effects we can do. I want this first one to
say simply how to compost. And you can tell right
now it's a hard, we can't really
see it very well. Let's change the color
to white perfect, just so we can have a better
idea what we're looking at. And then let's kind
of change our font. I'm really loving this font called Barber. I just like it. But something else you can do, You can also make us around
with the recommendations that Adobe Express will make to you based on whatever
you're doing. So you can literally hit
that refresh button and see what font it throws out at you that it
thinks will work well. Definitely give it a
try. It's worth it. But for now, I'm
going to stick with my Barber font because
I really like it. You should be able
to have access to this font as well
inside Adobe Express. Now something I really
like to do and utilize a lot here in Express is
the dynamic text layout. I love this because what
it does is it takes the text and however you
move the bounding box, it adjusts the text dynamically fit within
that new bounding box. So we're going to put our
text right about here. How to compost.
And then something else I want to do right
now, it just is there. And you can see if we
look at our timeline, it's there for the
duration of the scene. So what I want to do now is I actually want
to animate it in, you know, really, really quick simple animation.
Nothing crazy. So what I'm going to do
is I'm going to go to animation and I'm going
to go to the Inn. I'm going to let it bungee in. And if I want to, I can make, you know, adjustments
to that bungee. How much does it bungee? Which
direction does it bungee? And then I'm actually going
to have it bunge out as well, because I think that
is always good. Something else we can
do is if we click the Show Layer timing
button here at the bottom. We also now see our text
represented above our scene, so we can see how long it
lasts. So now guess what. Just as we did with
our video clips, we can do with our text clips, we can adjust the
duration of our text. How long does it show
up in this scene? Specifically, we've
done our first text. Let's see how it goes. Perfect. So now
that we know how to add video clips to our
all in one editor and we also know how to
add text to our all in one editor and add some
animation if we want to. I'm going to go through
and add the rest of the text to our reel
of how to compost. And then we're going
to pop in and see what we've created to your bin. Perfect, I like that. I'm going to change
our color to be white and change it
to dynamic, love it. I'm going to try to put it
roughly in the same space. Animation, Bunge in Bunge out. Just the timing a little bit. Now when I get to
the scene where I'm sprinkling these flakes, that's where we're going
to add our next text, which will be add Bokashi to your Bin Bunge
animated out. Cool. Then our final scene where I'm putting the compost
into the car. Again, we want this reel
to seem like it's playing on a loop or if people
are watching it on Youtube shorts. Same thing. It'll kind of keep playing
if they decide to play it again and feel like it never ended and we're going to
change our ticks to say, and that we're going to make
it white like we have been. And we're going
to animate it in. But I don't think we're
going to animate it out. Let's see. Hit the play button. Yeah, and that's because then it'll replay and
it'll say how to compost. Eh, so that'll be fun. All right, so let's play our creation so far and
see what we've got. How to compost. Get your
Pacashi know, okay? Add your food
scraps to your bin. Cool. So then we go,
We're adding scraps. Adding scraps, ooh, old cheese. Mm, food scraps. Add your Pacashi to your bin. Amazing. And that's
when we play it again. It'll come up as how to compost. Eh, Okay, so there we go. We've made it seem like it's always going to be
loopable and running. Now let's take it
a step further. Let's add some music. So if you have a
premium account with Adobe Express heading
over to media, you can then go to audio and you'll see we have tons of
music that we can choose from. Even if you don't have premium, the music can still
be available to you. You just might have to pay an additional fee to
access some of it. So we're going to
go with lo fi beat. Let's see we got here. So we've got some lo
fi beat options here. We're just going to go with
our second option here. So if I just hit it, it is now represented in
our timeline down below. So now I'm kind of like
making some final adjustments because I really want the music to kind of sort of line up. Yes, yes. And then I see that I could hear the music about
to swell and I want it to go right down. Yes. Now, really quickly,
let's pretend that we need to send this
off to get approved, maybe by the company
themselves that we are the freelance social
media manager of. That's something that's
really easy to do. If you want to share
your work with someone, literally just come
up here to invite. And then from here you
can share in a few ways, you can add their e mail. So let's say I want to
share this with Leslie. Leslie is an editor I
work with all the time. And I'm going to let her know, here is my reel
on how to compost for the class Intro
to Adobe Express. And then you can also
start to do a few things. So if I want, I can let Leslie have access to this
completely and fully. So when she gets it on her end, she'll be able to have
the full interface of everything I'm doing here and be able to move things
around as she wants to. Or if you're someone who likes to be in control
of all things, like me, you can make it so
the person can only comment. So that way they can just leave little notes literally on
the frame and give feedback. So a really amazing
collaborative tool within Adobe Express. Final thing I want to do with this is I want to rename it. So let's rename this Intro to
express real from scratch. Just like that, really simple. All I had to do was click
and it becomes editable. And with that, we have created our first real from scratch. Again, I have provided this video clip for you to follow along and
create this as well. If you want to pick
a different font, mess around with the
other animations, you want to do a different song, go for it, the world
is your oyster. So in the next lesson,
we're going to create another piece
of vertical content. But this time we're not going
to create it from scratch, we're going to create it from a template, one of the many, many templates available
in Adobe Express. And we're also going to
start to mix some of the different media
types together in Adobe Express as well.
I'll see you over there.
5. Create A Reel Template: In the last lesson, we
created a real from scratch. Now let's create one
from a template. Adobe Express has a
ton of free templates available to get the full range of all the templates
available to you though, you'll need a premium account or a full Adobe
Creative Cloud account. But even so, 399 have
some great stuff too. For our template,
we're going to go over the three benefits of composting using Bakashi style composting. Which is like those
flakes that you saw on the first lesson I was
putting on the food. That stuff actually
helps those scraps break down in this
really interesting way. Are you into composting yet?
You should be. Here we go. First things first,
we're actually going to use the search bar up
at the top search bar. We're going to twill down and
switch this to templates. And then we're going
to type in tutorial. And you'll see when we do
that brings up a multitude of different templates that
you can now utilize across all the different
things that are available to you
on Adobe Express. That includes photo templates, video templates,
that includes things like brochure templates as well. Like all that kind of stuff, you see, it's all kind of
mixed in here together. And then if we go to
our left side here, we can start to make different options based on
what we're looking for. So again, you know,
we can go free again for those y'all who don't
have a premium account. This will be your
buddy right here. So now we're just going
to keep it on all. And then we're just going to
video here at the bottom. And you'll see when
we do that, you know there's a variety
of different types, but we're more or less in a vertical atmosphere
at this point. And again, note how many
templates are available to you. There's like so many
you can choose from. Go ahead and try to
find this one though. This specific template is the one we're going
to work from. And I'm picking it again because I believe it should be free. Okay. It should be a free
template available to you. You don't need a premium
account to use it. So when I click on
it, you'll notice we hop right back into
the all in one editor. But now, unlike when we
started from scratch, when we hop back in,
the template is now there and all the scenes
are broken up for us. We can actually
click through and start to check out different
things, et cetera. And I picked this
template because it's giving us that
simple sort of like kind of listing out things for an IG
real Youtube short. I think this could work
for stories as well. Now that we're working
in a template, there's something else
I want to show you. And it's kind of an extension of touring the landing page. So before when you were touring the landing
page, you know, you saw that I had my colors
built in to my branding. I also had my logos, et cetera. And talked about if you are
a social media manager, you could do that for
yourself as well. Something else I think is really great is
that you can pick color themes for the
different content you create here in
Adobe Express as well. And a theme is always just up here in the
left hand corner. So I'm going to hit it, it
ends up bringing up a list of all these different themes
that you can start to utilize. So again, we are the social media managers
for our composting company. So let's just type
in like earth tones. Okay, We start to get a lot
of earthy looking colors. I like this one
actually. I like that they threw a little
maroon in this one. But obviously, you know, there's a lot here
to choose from. And this is all powered
by Adobe color. Worth noting. Let's
go with this one. And when I click it, it's
going to now implement this color theme
into our template. With one click, boom. You can see that
our whole time line is transitioning and changing, implementing into
the color theme. And it actually
looks pretty good. Something else worth
noting as well is the background color
when you click on it. Now your page theme. So that color theme we picked
is now represented here. And then additional
supplemental colors are recommended to you here. This is the page
theme that I picked. Secondary colors are
here for you as well. Again, this can be so helpful
when just trying to create, you know, a piece
of content that has a seamless look
and feel to it. Pick a page theme, color, theme, go for it, and then
just like go to town. And so now with a
few simple clicks, let's adjust this first page. So again, this is a template, so obviously we don't
want to use this video, but we can easily
swap it out, okay? When you click on
any asset that's available to you in
the all in one editor, our left hand tool bar
starts to change and adjust to be able to give you those parameters for
said piece of asset. Here we're going to
go on this button right here to the hit
the replace button. And we're going to
upload from device with this first clip. I want you to pick
backache clips. Now you'll immediately
notice, right? Remember I shot that whole video in 16 by nine, so horizontal. But when it came and
replaced the clip, it already is in the nine by 16. This template has built
in a designated crop which you can adjust yourself. All you have to do is
highlight said video clip, go to the crop tool and then build out the
crop how you want it. So maybe if you wanted
to be a circle, you could do that triangle. You could do that, you know. The world, your oyster.
Really have fun with it. One thing I do want to note in this is that the
video clip that I told you to pick is
actually quite long when you click on it and then you
come down to the time line. You can see here how
the video clip actually technically extends
past the scene. And I actually want
to not include any of this section of me opening the bin in this video
clip. I don't want that. So all I'm going to do is click my video and I'm just
going to drag it down to include the section of the
video that I want which is essentially when the flakes are in
the frame, you know. So let's play this real quick. Perfect. Yeah, that's
great, that's what I want. So let's update our text. All right, so I'm going
to type here and why, again, we're
pretending that we're the composting company,
why we use Bakashi. Okay, now this font
is just, okay, I feel like we're really onto something with
our Barber font, so I'm going to put
it there and I'm also going to make it dynamic
because you'll know me. I love some dynamic text
for this bottom one. I'm going to switch it to
three composting benefits. And I like the animation that they've used to
bring it in and out. I think it's really
simple. It's really straightforward.
The video is nice. Now, something else
I could do is say I felt like the text was hard
to read for some reason. You know, I could add a
simple shadow if I want to, like a classic shadow
or a haze behind it. But again, I don't really
think it needs any of that. But those are options as well. Now let's do our second frame. So this is going to
be our first tip. I would say that our first
tip will be with Bakashi. You can actually compost
all solid food waste. So that's actually something about Bakashi that's
really interesting while I pick our font
here and then Dynamic, and then I want it to
be more like that. Let's change this bottom one to be meat and dairy products. So again, we're going to
switch out this photo. We're going to hit
the replace button. And now we're going to
utilize Adobe Stock. That is again embedded
into Adobe Express. Now again, I have
a premium account, so whatever I find I can use. So I'm just going
to put food scraps. Let's see what I find. Ooh perf. A lot of different options here. I think this one actually works. Let's see what we have so
far why we use Bokashi. Three, composting benefits. One, you can compost
all solid food waste. On our second rule,
I'm going to go to our background color and
I'm just going to pick another one from within our
color theme that we chose. All right, so our second
one, less smelly. You know, composting
can get quite smelly. So fermentation helps
to reduce odors. I'm letting express do a lot
of the design work for me and I'm also using all of the guidelines when
I move around. It kind of locks things
into place for me as well. Utilizing all of that
for our second photo, smelly trash, see what we
get? It's giving stock. I'm kind of here
for it, you know. Sometimes it is kind of good to be just like ridiculous
with it, you know? Let's go with this one. This is a premium because
it has a little crown. But let's go with it and then let's adjust the placement of the photo using adjusting it within the crop that's created 'cause it going to
actually like the crop. So all I did was
just scoot it over a little bit and click away so I can see where it's at now. Moving right along. So
that's our second tip. Third tip minimizes pests. Again, we're going
to adjust our font, And then we're obviously
not talking about make up, we're going to put no
bugs, exclamation point. Let's adjust our photo, and we're going to type in bugs on trash. What
does that give us? Ooh, other gross
things. Ooh, that is. I think people who have kept their trash inside too
long know that one though. Maybe. So maybe.
Let's go with that. I do like the color
contrast we're getting here and then
our final frame. Again, this feels too
close in background color, so I'm going to click
on the background and I just want it to be. Let's go, we haven't
had this one yet. Then we can invert the text. We can just invert the text, so we can just pick
another color from our page theme that we picked for our text
for readability. And that's what we'll do. This
will be like a bonus tip. Again, change our
font bonus tip, make it centered, increase
the microbiology of the soil. And I'm going to
scoot this in because sometimes I want to
make sure it's not too. And then I'm going to make
it a little bit smaller. There we go. I changed it to 50. Then again, she's a lovely lady, but she's not who
we're looking for. We're going to take that
same Bokashi clip again. Once again we're going to pick the nice buttery B roll section and then let's adjust the footage to
actually, there we go. I think we just need to
adjust placement a little bit now. Let's see
what we got here. Yeah, so just like that, we have used a template to create a quick 123
with your composting. So let's play it
back and see what we got why we use Bakashi. Three composting benefits. One, you can compost
all solid food waste. Two, less meli. Three, minimizes pests. And four bonus tip increase
the microbiology of the soil. That whole situation, again, is around 17 seconds. So this could work
in an IG stories. This could be a
standalone IG reel. We could put some music
under it if we want to, or it could also be a Tiktok. It could also be
a Youtube short. So let's go ahead
and rename this. Why Bokashi? Three tips. So that way we've got it renamed
and ready to go. If you want to go back
into this lesson and rewatch certain sections to follow along with me, feel free. Remember, the clip I used
for this is Bokashiclips. That's the one I used and I used it at the beginning
and at the end. The rest is actually Adobe stock images that I
used within Adobe Express. Throw in some different
keywords now that you more or less know what Bakashi
is and have fun with it. So for the next lesson, what we're going to
do is we're actually going to create a carousel post. Because carousel posts are
great for boosting engagement, especially on Instagram.
We're going to create that. We're going to mix some media together as well over there. And it's going to
be all about how hot the composting piles get. Okay? Which is actually
quite fascinating. Okay. It's riveting stuff.
I'll see you over there.
6. Create A Carousel Post: Hello again. Now we are going to create a carousel
post for Instagram. You'll notice how with
each thing we're creating, through the lessons, we're
adding more and more elements. This is going to
be no different. We're going to add
even more stuff. Now, Carousel post can
actually be really great for engaging with people
and creating more content. Because you never quite
know what page of the post of the carousel post the algorithm will
throw to the person, which will then
make them activate and swipe to the beginning
to see the whole thing. Carousel post can be
a really great tool for your creating
arsenal, if you will. So to hop right into
creating a carousel post, what we're first going
to do is we're actually going to hit the social media
button here at the top. And then probably the first one here will be what you need. Instagram Square Post, and we're going to hit
Create from Scratch. So when we do that, we
get our perfect square, which is what we need
for a carousel post. You can do carousel posts
of different sizes, but for what we're doing, we'll just be using the square. So right now our post
only has one page, page, one of one. So what we're going to do is we're going to
add more pages. I'm going to show
you how to do that. In the top right corner, we're going to hit this
little View All Pages button. And when we do, we now
see every page that is available to us for
this particular piece of content we're making,
which is just one. Now the way we add
more is we just hit the plus sign and
it will then make a new page that is the same size and dimensions
as the previous page. You can keep going pretty far, or if you want to have pages in a post that are different sizes, for whatever reason
you can do that. You can actually go to this plus sign up here and
click Add a New Page. And then you can choose
Custom size and go from there to create a different
size page if you want to. But again, this is
our carousel post, so we want all the pages
to be the same size. So now that we've
done that, let's go ahead and click on
the first page. And for this post we're
going to talk about how hot the piles
get constantly, just re using and re upping
everything we're creating. Right? So we're going to
type in earth tones again. We're going to pick a new,
actually not even new. We're going to pick
the same theme we had before and we're going to
engage that theme now. So we have it throughout
the rest of the post. So color theme, ready to go? I like this background. Let's start off really
simple with some text. Composting is hot. So we have our text here. Again, we know what
font we like, right? Barber, we know we
like it dynamic. Right now I want to just
like add to the text a bit. And now we're going
to start messing around with the elements that are built into Adobe Press. And we're going to
keep it simple. We're not even going to
go super crazy with this, but let's head over to shapes and let's do just
like a simple square. And I'm going to pick the square up and move it and just kind of make it more or less
where the text is. Now you'll notice it's covering the text. We can't read it. So before we were working from the all in one editor for video, you saw that we were working in that timeline in the bottom. But when we start
adding elements, text, things like that on
top of each other, they then appear on the
right side here as layers. If you're familiar
with Adobe Photoshop, for example, it's kind
of got the same idea. So right now the square is
on top of our text layer, that's why we can't
see our text. So what I'm going
to do is I'm just going to take the square layer and drag it below
our text layer. And now you'll see our
text comes through. So think of it as a two
D flat space that you are then putting things on
top of. That's how it works. And again, this
activates when we're not doing anything in
relation to video. Now with the square selected, you see a few things
can change for us here. We can start to mess around
with things like a border, which actually kind
of like we can decide if we even
want a fill at all. Maybe we don't, you know, and maybe that's
what we end up with. Again, play around with it. Opacity. We can mess with
the opacity a little bit. You can also mess
with the blend modes. And similar to text, you can mess around with
the animation as well. You can animate the
square in and out, have it loop, all
that kind of stuff. I like this so far because
on the bottom half, we're going to add some video. So let's go to Media. And I want you to pull
in our Smoky piles clip. Now you see we have
everything activated. So our timeline now
is activated again. The timeline is for when we
add video assets to a page. And then all of our
static assets as well as our video actually are
all on this right side. So we can decide how things are layered on
top of each other. And again, you're seeing how we keep adding more
and more elements. It gets more and more complex
but still manageable. So I want to take our piles
clip and I want to actually make it to where it fills up most of the bottom
of this frame. So we're having like a
really dynamic frame here. And there we go.
Composting is hot. You know, this is
a carousel post. So we only ever need
things to be up for like three to 5 seconds. Like this scene, this moment doesn't need to
be terribly long. So let's go ahead and
just have it there. So I'm just moving the playhead so I can kind of
see where it ends. And then I'm going to
adjust the clip length just by clicking and dragging
to where I want it play. Perfect. All right,
so that's page one, our carousel post. Now let's do page
two. For page two, we're going to reiterate
that it's hot, right? We're just going to
have some fun with it. So I'm picking one of the
additional colors in here. And then I'm going to upload that same clip again added here. Let's make it a
little bit smaller. Let's put it more or
less in the center, but not completely center, but just like a little
below center, I think. Then I want to make it
maybe a smitch smaller. There we go. So I'm having the playhead go to
where I want it to be, just so it's easier to trim. Perfect. Again, this
doesn't need to be long. So I'm going to play through and I think that's good enough. Like I just, I want
the audience to see the steam coming
off of the pile. Cool 4.4 seconds, not too long. Something I like to do with my branding and my
style of creating content is I like to put like drastic drop
shadows on things. The way I would do that with
this is I would just go to elements again and I would
take another square. I would make the square more or less the size of the video. More or less like it
doesn't need to be perfect, but more or less the
same size of the video. Then you see, all I did was like go just slightly slanted
down, that's it, Boop. And then I'm going
to change the color. I want it to be white. And then I'm just going to drag it now under my video
just like that. We have a really simple
sort of basic drop shadow, harsh drop shadow on the video. And then we're going
to add some text. So okay, here we go. We started off with composting is hot. See the engaging pot pile? Cool. And then the next
one literally close up, so we can see that steam
coming off of the pile. Right? All right, so
we've finished two of our five pages, next page. So with this one, I
want to kind of show y'all how you can
start to play around with a different blend modes here for different pieces of
media that you add as well. So again, that Smoky Piles
clip, we're still using it, but what we're doing
now is we're just picking a different
part of that same clip. Okay, so we're going
to scroll through, we're going to scrub through, and we're going to scrub
till we get to here. All right. And then we're
going to adjust again. You can either trim, you can
either split, there we go. You can either split
it is the keyboard shortcut or you can just drag
and trim like I just did. That's probably enough
to get the point across. I think that's going to be
like four or 5 seconds. It is perfect. Now we're going to
make this full size, so fill the screen, fill video and then our
background color again, we're going to pick one of them. Let's go with this
one. Now, again, it's the background
color, but I made the video cover the
whole background. So like what are we doing? Well, we're heading over
to the blend mode, okay? And we're going to
screen it. Do we want that or do
we want multiply? Ooh, multiply is interesting. Maybe. Do I want
the opacity full? I think I want the
opacity to be 100. I like that. I like that.
So we have our video. We blended it to make it look like interesting to have
that sort of color tone. Basically, it's taking
the background color we used and it's multiplying
it through the video. Now what we're going to
do is we're going to add some text again. Piles can reach over 150. If you ever wanted
to know how to type the degree symbol on a Mac, it's option shift
eight. There we go. There we're going to put it
like right in the center, smackdab in the center. All there we are. What we got so far,
composting is hot. Literally piles can reach
over 150 degrees Fahrenheit. All right, Now for
this fourth one, we're going to use a different shot that I've provided for you. We're going to use
temperature piles. And we are going to fast
forward till we get to actually seeing the
temperature okay again, we're going to scoot our clip down until we see our
temperature gauge. I want it like right
when it starts. Perfect. Don't need a lot. Okay, just need a
couple seconds. We're going to fill it up
again, fill the video. We're going to adjust it over
just a little bit to make sure that the temperature gauge is always more or less centered. I'm going to pick a
lighter background color this time. Let's do screen. Yes, I like that better screen. And then once again,
we're going to add our text and go higher heat. Boom, that's what I
want for this last one, we're going to make it
about learning more. Our last piece of video
clip we're going to use is the aerial compost
piles. Throwing it in. We're going to fill
the video and then we're going to
blend it to screen. It's just the decision you
just make on the spot. You just do, it feels right,
You know what I'm saying? Nice Again, we don't need much. Do I want to animate
this sin? I think I do. Yeah, just a little b. We don't even need it to bunge out. Just like that, we created
a super engaging carousel. Post composting is hot. Literally, piles can reach
over 150 degrees Fahrenheit. Higher heat kills pathogens. You know, we threw in a
little fat little figure. It's really that easy like. All right, so one
thing I want to note with this carousel post in particular is when it comes
to time to post this, you know, there's a few
ways you can do it. One, we're going to talk about scheduling posts in a later
lesson. That's coming up. So yes, but also in case you're someone who
maybe just wants to download what you create
right onto your phone, right to your computer,
whatever it may be. I want to make sure you download something like this correctly. What you would want to do is you would want to download all of the pages and then you would also actually want
it to be an MP four. You would not want
it to be a PNG because the videos won't play. An MP four is a video file. And you can see it's already
recommending that you do it as an MP four because it knows that there's
video files in there. So it won't you be able to plan. But I just want to make sure
that is said and known. And again, you can
decide if you want to do just the selected
page or all pages. And then you would just
hit Download and it would start it in
the background. And what it'll do is it'll send you a zip file and zip it, all the separate
little videos it's creating for each of our separate pages will
be in there for you. Just like that. You
can create something, throw it onto your phone
if you just prefer to post in app directly rather
than using the scheduler. All right, so we're moving
and grooving, okay. Productivity is at
an all time high. We have now created
three pieces of content. I repeat three pieces of content for our
composting company. We're basically social
media, extraordinary. In our next lesson though, what we're fitting to do,
it's going to be great. We're going to actually
move away from video, we're going to move away a
little bit from all of that. And we're going to
explore utilizing some NAI features to create some interesting
thumbnails and covers. I'm going to show
you how you can do a lot in Adobe
Express to alter an image without
necessarily needing to open Photoshop or light
room. Let's go. I'll see you over there.
7. Thumbnails & Gen Ai: Okay, I know this class is all about video, Adobe Express. And it is. But you always have to market your video with
an engaging thumbnail. Otherwise, who's going to watch all the hard work you put into
making the video content? Okay, thumbnails are important. So let's get into Adobe Express and make a few thumbnails. Adobe Express is
essentially Photoshop and Light Room Light. And I'm going to show you
a few things you can do with photos or still
images to enhance them. And we're also going to touch on a little bit of
in AI excitement. So let's get right into this. Currently, there are
a few different ways that you can use Adobe Fry Fly, which is built into
Adobe Express. The first way is text to image, where you can literally
type in a prompt. And then it will
create an image in a certain style and look
based on your prompt. The second is text
effects, where you can, again, describe what you
want the text to look like. And then it will
generate that text, whatever it is to look that way. And then two things that
are kind of relatively new to Adobe Express as
of filming this class. Anyway, of course,
they're always adding things, changing things. Text to template is
currently in beta. This is only for
making templates that are still images or
still templates. Maybe it's something like,
help me design a flyer for my five year old's birthday
and it's astronaut themed. Boom. It'll kind of put together a template
for you based on that. And then finally,
generative fill. This one is where you
can actually remove and change things within an
image relatively easily. Those are the four ways
currently that you can use Adobe Firefly in Adobe Express, we're going to focus on two. We're going to focus
on the text effects, and then we're also going to
focus on the text to image. So let's hop into
it now and create a thumbnail using
the text effects. So we're an Adobe Express and I'm going to come up
to the top social media. And when I do, it's
going to bring up, again, a lot of the different standards that we'll
probably need. And we're going to go
to Youtube thumbnail, and we're going to go
create from scratch. So again, this brings up the exact size we need to
create a Youtube thumbnail. Now the first thing
we're going to do is we're going to
add two photos. So these are just interesting
stills that I pulled from. Again, that long form compost video that I
did on my channel. I want you to pull in this
image and this image and boom, they're bringing them both in. So I want to do a
starting off here, going here kind of thing. So the first thing
I'm going to do is I'm going to like loosely drag them to the sides of
the image that I want. To the sides of the canvas, if you will, that I want. So I want this one
here, ish, right? And then why you need
to pull the other one out of the way?
Huh? There we go. I want this one to be
here more or less, and I wanted to wear, Obviously, all of this is more or less
on this side of the frame. Then what I'm going
to do is I'm, and I'm going to crop it
in an interesting way. Usually you'll see the crop is just like, straight
down the middle. But again, we have these
interesting crop features and tools here in Adobe Express. So I'm going to crop this
image to be parallelogrammy. I'm going to scoot
our crop over to more or less be about halfway
of the entire page. And then I'm going to hit, okay, that's more in the way here. That's about halfway perf. Then I'm going to take
our second image, and I'm going to drag
it to now take up that other side and
adjust it accordingly. Holding the shift key, I'm clicking to have both
images selected now. And I just held the
shift key for that. I just want to like make sure
we're relatively center, that feels pretty good
and I'm clicking away. Nice. So that was easy. Now I want to just slightly
adjust color on this. You know, I want to just do some quick photo
adjustments, Quick tweaks. Adobe Express is essentially
like light room, light. So I'm just going to go to
the adjustments tab here. And if you've experimented
with light room, if you are a
photography enthusiast, a lot of these parameters
here and the adjustments for this photo should look
pretty familiar to you. I know me personally,
I like to up the contrast on
things when possible. And then I kind of want to calm the highlights
down a little bit. And when I did that, you'll
notice we need to adjust our crop a little bit because we can see the edge of
the frame right here. So that helped. So knowing that, let's adjust our crop to be all the way
covering the frame. Perfect. Ooh, I actually
know I like the shadows. Yes. And then for this one, I want to go to adjustments again and again with this one. I actually really
like how it looks. I wonder if it's more
about upping the contrast. Yeah, there we go. Contrast. Contrast. But then don't
want to lose my bright. Yeah, yeah, yeah. And
I'm just eyeballing it. Nothing crazy, you know? So now we have our two
images. This looks great. Now I want to make our middle
be a little more defined so you can really tell that
it's two separate images. Right? So again, I'm going
to use our elements. I'm just going to go into
shapes, pick a square. And I am going to make it relatively skinny
and long again, I want it to stay
pretty skinny, boop. I'm going to use this
to kind of rotate it. Ah, there we go. Perfect. And then I'm
going to change it to be white because I think
that just stands out more. Okay, so now we've
like delineated between the two images
a little better. And then, you know,
super simple text. Let's do all right, from this. And then let's pick something in our colors that
we've been using. Of course, we're
making it dynamic because hello, who are we? Click away, there
we go, from this. And then we're going
to it with a two this. And you know what we're going
to do. We're just going to highlight this
layer right here. Command C, control C
on a PC, command V, control V, duplicate of
it and drag it over. We're working smarter, not harder at this point
in the lessons now. All right, and then
we're going to go, we're going to adjust
it a little bit, and then we need to hit it with a different color. Love it. And let's get it with an arrow. You know how they do
the little arrow thing sometimes. Let's
throw that in there. So we're going to go to elements and then
we're just going to search arrow and
see what comes up. Look at this, that is. And it landed in
the perfect spot. I love that. Now it's black, which is kind of hard to see. But let's see what we can do. Can we change that? Oh, we can straight
up change the color. I'm really loving. There we go, I really want to show up, and I'm making the border
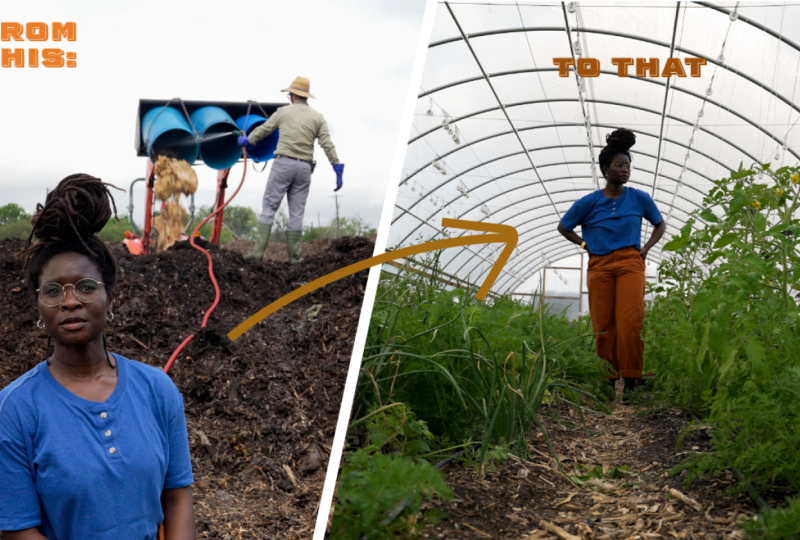
thicker. And so there you go. In a few simple
clicks we have now created from this to
this kind of thumbnail. It's giving. Engagement giving. Is that compost behind, or
is that trash behind her? What? I want to
watch this video, so now let's make another
thumbnail option. I'm literally going in here
and just creating a new page, because I'm going to call this whole situation just
like thumbnail options, you know, a new page here. Again, let's pull in one of these stills from the
video that I provided to you. Let's pull in this one again, and then let's go ahead and have it fill the page. Perfect. So now I want to kind of show all what's really neat
about Adobe Express, which is the integration
of Adobe Firefly. So in the text area, we're going to play around
with the text effects built into Adobe Express
using Adobe Firefly. So when you go to the text
button on the left side, of course it brings up all the different texts you can search. But at the very bottom
it says text Effects. So we're going to
click on it and you'll see we have
all these different, already created
three D text effects that you can mess around with. But we actually want to
create our own text effects. So I'm going to hit Add Text, and then I'm going to
change it to Compost. And then I am now going
to go to Text Effects. So this is where you can go to actually start integrating
into Adobe Firefly. And I want to type in like
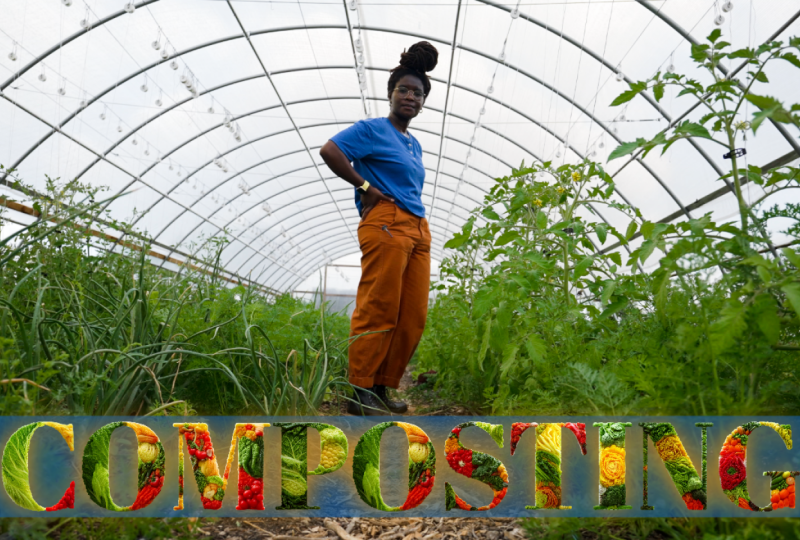
golden dirt and veggie tubles. Let's see what we get. Oh, instead of golden, I think that's confusing it. Let's go yellow, yellow
dirt and vegetables. And you'll notice
it's doing it in the style of the barber
font we've been using. Now that may or may
not be what you want. You can start to play around
with using a different font, like maybe I just want to use this Acumen Pro font because I just think
it'll be a little better, you know, for the shape of the letters with Adobe Firefly. Interesting composting.
What about, so I have it set to realistic? We can also play
around with some of the different styles that are available to us
through Adobe Firefly. And again, I just
like put in a prompt and it's like making
text with that. So what about Ooh, embellished? What
does that mean? Ooh, that's interesting, this is interesting,
this is quirky. And then you can
see the results. You can start to
pick different ones. I like this 11 thing I will know is if you're
playing around with Adobe Firefly and something looks a little off,
a little wonky. Make sure to let them
know what the thumbs up, thumbs down or red flag. Because you know with all
of these types of things, they're always trying
to work on it, improve it, et cetera. And so giving that
real time feedback is actually very helpful. You start generating
things and then you're like, well
what if I tweak this? And what if I tweak you? See I kind of like loose
better. I like that way better. Okay, final thing I
want to do with this, I want to also now
add a little shadow. Yes. To help with visibility, got to go black. Yes. So we've created two
Youtube thumbnails. One just altering images
and using the sort of built in Photoshop and light room light features here
in Adobe Express. The second one using NAI, text effects from Adobe Firefly. Now I want to create
a podcast cover completely using Adobe Firefly. So I'm going to go
up to this plus sign instead of just creating
another thumbnail. That's. Completely horizontal. I want to create a custom
size thumbnail because we're going to pretend that
this is a podcast cover. Let's say we're turning
the video I created into a podcast episode
of something as well. So for podcast cover is
at least on Spotify, it's 3,000 by 3,000 pixels. I just kind of know that
because I have a few podcasts. So add page, boom. We're
going to double click. So we go in there, now we're
going to head over to media. And if you go to the media tab, all you have to do is
hit text to image. And again, this is
a podcast cover, so we want it to be square, So we're going to hit Square. Now when you do that,
you'll see it's just going to bring up a square prompt. And this is their sort
of text to image icon. Because we haven't
typed anything yet. I want to go ahead and have
this be the size of our page, so perfect, then let's type out what we want
our image to be. So this is all about composting, this is all about
richness of the soil, all that kind of fun stuff. Let's type in
something like a woman holding soil with vegetables, fruits floating around
her in the amosphere. And currently we have it on art. Let's leave it there and let's
see what happens, y'all, This one's interesting.
I like this one. So to get to this one, I picked the style wire
frame and cartoon, and then I let it generate a couple times before
it got to this. Let's see this one. I'm really liking this
one, so that was fun. Now let's say we needed to maybe resize this one
to be, I don't know, an IG cover or like a still frame cover to promote
the longer Youtube video. We can do that really
easily in Express. So let's double
click on this one. And you'll notice the Resize
button here in the corner. And literally we
can just go through and click the options
that we want. And then hit
Duplicate and Resize. Boom, it quickly resize them to be the correct size that
we needed for both things. It even took a stab at putting the text right about
where we would want it. And then from there, you
know, we can come in and make some quick adjustments just to get it exactly
where we want it. And maybe with this
version I would put it like right in the
center, who knows? So that way it's not, you know, getting covered up by any language or something like that. But either way, resizing
and express done easy. So we've created
multiple thumbnails of different sizes using
the resize feature. We've created two
unique thumbnails for a platform like Youtube. Also a completely original
image using Adobe Firefly. We've covered a lot in this. Again, go through, play
around, have some fun. And I will see you
in the next lesson because we're starting
to wind down. The next thing we're going to do is we're actually
going to create a Tiktok from scratch and
we're going to use voice over. It's going to be great.
I'll see you over there.
8. Create A TikTok From Scratch & Use VO: Okay, welcome back.
So, so far we've focused on Youtube
and Instagram. But now I want to transition
to Tiktok a little bit. Tik Tok is more where
you go to just exist, you know, and show all the multiplicities
of your existence. So for this lesson, the clips I'll be using I
have not provided, but y'all can still follow along and understand everything
that's going on. In this clip, it's going to be someone that works at the
facility talking about contamination because that is a pretty important thing
when it comes to composting. When people put
the wrong stuff in the bins and then they actually have to go
through and find them. The number two
things that we find consistently winner all
around is rubber gloves. I mean latex
nitrogen gloves from all the food workers at some
of our commercial clients. But number two spot for most
things found silverware, This is sitting at 55 seconds, a bit too long to make the
point we want to make. So we're going to
like cut it down super fast because
that's what we do. Upper gloves, I mean
latex nitrogen gloves from number two spot for most
things found silverware. So I go around every time we
open, so it's super rough. I'm now going to go through and make sure everything looks pretty good and is full
screen for most things, found its silverware perfect. And then we do this one, and as you can see, I've hit some pay dirt
which won't pay us in dirt. Perfect. Looks like that'd be like a quick
tiktok, you know of. Like the things that make it a bummer to
compost sometimes. Hey, don't leave
silverware in your barrel. Now another thing that I
think happens a lot in the vertical video sphere
is using voice over. So maybe instead of
having him talk, because maybe he takes
too long and we're trying to get to the
meat and potatoes of the topic because we all know our attention spans are
not what they used to be, especially now here
on the internet. So let's add some voiceover
to make this super easy. So I went over to media audio and then literally there
is an option here, record voiceover. You just need to
allow permissions. And then from there you
can pick your microphone. If you have a
microphone plugged into your computer, you
can plug it in. If you have a phone, you
can use your phone as the recording device as
well or you can just, you know, your computers built
in audio if you want to. I'm just going to use the
computers built in audio, just know that it
might not be the best. I'm going to hit record and
I'm going to just start talking and let's see
what we can get here. I'm just going to roll on it. We're just going to try it out. You know, the biggest
struggle we have here at our composting company
is contamination. Workers don't leave your rubber gloves in
the compost bin. They don't go there.
Latex does not biodegrade and also silverware. Make sure those
are getting busted and not ending up in
our compost piles. Please. Thank you, because we're trying to save the Earth. Boom. And now you see my
voice over is available. So let's see how we sound. Contamination. The
biggest struggle we have here at our
company. Alright. So we're still hearing his audio in the background.
We don't want that. So what we're going to do on each video clip is we're going to click on it and then we're going to head over to the
volume and we're just goning to hit mute and so that way his audio isn't playing
and we just hear what mine is that I've recorded. All right, so we've muted
all of them. Let's play. The biggest struggle
we have here at our composting company
is contamination. Workers don't leave your rubber gloves in
the compost bin. They don't go
there. Latex is not biodegrade and also silverware. Make sure those
are getting busted and not ending up in our
compost piles. Please. And thank you, because we're trying to save the
Earth and this is our Tiktok from
scratch, using Vio. See? And just like that, Ila make a few cuts,
add some voice over. Bought a bing, but a
boom, have it go out. I would export this out
using the download button. Post it to Tiktok.
And the next lesson, I'm going to show you
one more new thing. Adobe Express also
does closed captions. I'm going to quickly
go through it and then we're going to start
scheduling some stuff. Y'all we're moving and grooving, are we talking about this, Are you talking about
this for a second? I mean, we can go
ahead and fade out, but like let's talk about it. Like we're doing
so much together, it's kind of insane.
9. Closed Captions In Adobe Express: This one's going to
be pretty short, sweet and straight to the point. As an instructor, if you will, as someone who has taken the time to put
together this course for you on Adobe Express in
video, in Adobe Express. I feel like I just
need to tell you about the caption video
feature in Adobe Express. Okay, it's relatively new. It's getting better
with each iteration. But I feel like I wouldn't
be a good instructor if I didn't at least mention it to you and show you how it works just quickly.
Like just quickly. Because I want you to succeed and I want
you to use the tools, you know, use the tools for me. It shows up right here in
the suggested quick actions. If for some reason it
doesn't show up for you there, go to video. And I am very sure, Video quick actions, it'll
show up there for you. So let's go ahead
and click on it. When you click on
it, it brings open a completely new window. Now I'm going to drop a clip into it that
is relatively short. Something I will say about
this feature as of the time of filming this class and producing this class,
it works well. I will say that for
every minute of content, it takes about a minute
and a half of it to generate the captions
for that content. So keep that in mind. Also, as you can see,
it says right here, you can only put a
file that goes up to one gig and 5 minutes. So keep that in mind
as you move through. As you can see, though, a lot of languages are
already available. Adobe is constantly adding more. Stay on the lookout. They're
always working on it. So let me go ahead
and add a video that I think will be
kind of fun to have it caption and we're just
going to watch it go. Uploading media, you can
literally see it working. I love these little graphics. All right, so as you can see, it has now added
some captions to the video and we can actually play it back and
see what we've got. I hate fish days. It's always nice to start
off the morning with two large Starbucks
coffee grind barrels smells way better than fish
barrels. That was my comment. He is such a fun
person. All right. One caption was a little off it. Thought it said her. He
said her. When really? He said, uh, so we
can go ahead and very quickly change it. Uh, and you'll notice adjusted very fast
and then the rest of it pretty accurate. I think he said coffee barrels
grind barrels technically. So let's go ahead and
fix that real quick. Just come in here and
put that grind barrels. Those are what our
captions look like. But if we wanted, we could create block captions. Let's
see what that looks like. I hate fish days. It's always nice to start off the morning with two lard, cool. Or we could do loud. I don't know what loud
looks like. Oh, that's fun. Some of these are new,
these weren't here before, so I am seeing them
for the first time. So like you, I hate fish days. It's always nice to start
off the morning with two large Starbucks coffee
grind barrels. Oh wow. That's actually really neat.
Okay, let's do this one. I know I've seen
variations of this. Ls smells way better
than fish barrels. Oh, all right, let's
go with this one. I think it's fine. We can also customize the color
if we want to. Interesting. Okay,
now from here we can either download
this video directly as it is now with the
captions built in. Or we can now open it in
our all in one editor. And guess what, when we start
showing our layer timing. I hate fish date. The text now shows up as layer timing To start
off the more here. So let's say we want
to now resize this to go on something like an
Instagram, real boop. It's now resized and
we can take our video. I hate fish days. It's always nice to
start and mess with it. And so there you go. This is something I
just really wanted to show you all that's
available in Adobe Express. Are there other alternatives
you can use out there? Definitely. But I felt like as your instructor
for this class, I would be remiss, if you will, to not at least show you
that it is an option. And of course, as Adobe Express keeps
getting better and better, the captions will get
better and better as well. Especially the
amount of languages. I think that's the
thing that's the most exciting is they're getting really good
with the languages and the amount of languages
that they offer. All right, so now that we've covered that in the next lesson, which will be the
final lesson before we conclude our wonderful
time together, which I have enjoyed me myself, I've enjoyed it, I
hope you have too. We are going to go over
scheduling in Adobe Express. You can schedule out posts across a variety of
different platforms. And it works really well. So we're going to go over
that in our next lesson. I will see you over there.
10. Scheduling: All right y'all, we have
created so much content. Like, can we talk
about it for a second? Can we talk about
it for a second? We create a lot of stuff, but obviously none of that matters if we aren't
posting it right. The whole point of this
is to post it somewhere. So in this lesson, we're going to go
all over scheduling. And to start off, there's
a few ways to get to the scheduler within
Adobe Express. The first way is when you're
on the main page here, just hitting the
schedule button, that'll bring up the scheduler. There's a variety
of different ways that the scheduler can show up. The main way is calendar view. You can also have
it show up by week. And to get to where
you can manage your connections across different
social media platforms, you just come up to
the right corner and hit Manage Connections There. You'll see all the
different platforms you can log into so you
can start posting. So something that's really exciting is you
can actually post directly to Tiktok in here,
which is really interesting. Adobe has worked
very closely with Tiktok specifically
to make sure that it does not hinder your
performance if you post directly from Adobe
Express into Tiktok. So I can't speak for all
the other platforms, but I know for Tiktok
for sure it's handled. That being said, connect
everything you want to connect. And then you can just
start scheduling. You can start from
scratch, from a new post. So maybe it's
something you already created and you just
want to drag and drop it in and
schedule it for later. You can do that. And
then you can also pick which platforms
you want it to go to or let's say you've been creating things in Adobe Express and you want to
now schedule them, then I would recommend
the best way to do that is to actually go back
to whatever you've created. So let's start with this one. This was our post where
it's a carousel post. So let's start off with this carousel post
we created, right? We want to share the whole carousel post to our Instagram. So the first thing
we're going to do is we're going
to come over to the Select All button here in the corner and
click all of them. And then we're
going to hit Share. From there we're
going to go Schedule, because we actually
want to use the schedule and schedule
it for later. Now you'll see here, it's already starting to upload everything we created
to be ready to go. And this is just
like a soft launch. Upload. Okay. It's not
actually posting anything, it's just a soft launch. I'm going to pick Instagram, we're going to make
it a post from here. You'll see again, everything is still uploading in
the background. I can add my caption and then something else
that's interesting. You can also put
like what you want your first Instagram comment
to be if you so choose. And then from there
we can hit schedule. So once you do that, you can schedule it
whenever you want. Let's say I want to
schedule it for next week at 04:30 P.M. Yeah. Then I would hit schedule. Now this post is ready to go. It's literally that simple. If I want to go and see that
it's ready to go, Again, heading over to the
schedule button, let's switch it to be
the month view and boom, there it is, scheduled. It lets me know in what app and when it's
planning to go live. Okay, let's do this one. This was our Y we Bakashi post. Let's share again and let's schedule this
one to go to Tikta. So I can either publish it
right now or I can schedule, I want to schedule for
later because I just like that does Bakashi though. I mean, obviously
you're going to be a great social media manager and come up with way
better captions than me. But here we are. We already have a post coming
out on the toy net. You know, let's have
them both come out on the same day so you all can
see what that looks like. And this one's going to come
out at 04:34 P.M. Nice. All right, so it's
up and ready to go. Hits schedule. Boom. It's that simple.
Let's go check it out, make sure it's there and
you can see everything. Both of our posts are there
scheduled, ready to go. Something else that I think
is really interesting is that you can store ideas
as unscheduled posts, so as you're building
out content as well, if there ever is something
that you know for sure, eventually you will
post somewhere, you can drag and drop
your post over there. So let's say, you know
what, I changed my mind. I actually don't want
to post this yet. I don't quite know when
I want to post it, but I know it's ready to go. I love the caption. Everything is updated,
everything's good. I just don't quite know
when I want it to go live. You can just move it over
to the unscheduled posts. And again, this is like a space where ideas can just live. Like you've completely
built out what you want. Captions are good,
everything's good. You just aren't quite sure, you know, when you
want it to go live. So you can just throw
things over there as well. One thing I really like
about the scheduler is that it makes it so easy to
just move things around. Once you have created the
content you wanted to create, put the information in,
you can just literally drag and move things
around just so easy. Now say you have
built some content maybe on your phone
directly. Fine, that's cool. And you want to still use the scheduler that's
built into Adobe Express. Maybe because it's for approval. Once again, you're part
of a team, et cetera. You can always just create
new posts from scratch, drag and drop them into here. Essentially can be
a space where you can upload media in content. You've cut yourself,
maybe on something else, you can just upload, have
it scheduled and be there. And not necessarily have to go through all of
the building that we've done in Adobe Express if you don't want to or need to. The scheduler is pretty
straightforward though. You know, again, week
view, month view, store ideas over here by
using this button to bring it open and you can manage your
connections in the corner. If you have any issues
connecting different accounts, make sure to read through the article that
they've provided. Gives a lot more insights. I know with some social
media platforms, they require you to have a
certain kind of account. Is it a business account,
is it a creator account, blah blah blah,
things like that. So if you're having some issues with connecting
different accounts, make sure to read up on the page to make sure that you know, you're doing whatever
it is you need to do to get it to work the
way you want it to work. Because every app has its
red tape, if you will. And so with that, real quick, can we take a minute and
reflect on what we've done? Like we've created a
reel from scratch. We've created a reel
from a template. We've created a
Tiktok from scratch. We've added voice over music. So many things. We've created two different
Youtube thumbnails. We created a completely new
thumbnail from scratch. We have done a lot
in Adobe Express in not too much time, but alas. The time has come for
this class to end. It is with a heavy
heart that I will see you in our
conclusion lesson. I hope we have enjoyed
our time together. I know I've enjoyed
my time with you. I can't speak for you, but I've enjoyed being
here with you. I'll see you in the next lesson.
11. Conclusion: Wow, and just like
that we're done. We've created so much
content together. Let's recap Using a longer video that's available to watch
on my Youtube channel. We broke it up into
different short clips for social media
using Adobe Express. We took a quick tour
of the interface to familiarize ourselves
before jumping in and creating what reels from scratch and
using a template. We learned the new all in one editor added some
music voice over, and utilized different
design features like text elements and animations. We tapped into Adobe Fire
Fli, utilized their new I, text image and text effects, and also created thumbnails
for Youtube without ever having to open Adobe
Photoshop or light Room. Finally, we went through
scheduling our post to go on social media because otherwise, what was
all of this for? Thank you so much for
taking this class with me, and I hope I gave
you some food for thought as you experiment
with Adobe Express for video. And of course, beyond,
if you decided to follow along with me using the content type provided
or your own. Let me see your work.
Okay, tag me on socials at Hali.p4 or Adjlis on Youtube. Likewise, if you're
watching on skill share, don't forget to share your
creations in the community. Again, I'm Halise, endeavoring
to persevere, as always. And I'll see you when I see you.