Transcripts
1. Introduction: Who doesn't like good mail? There's nothing quite
like the joy of opening your mailbox and
seeing something inside with your name
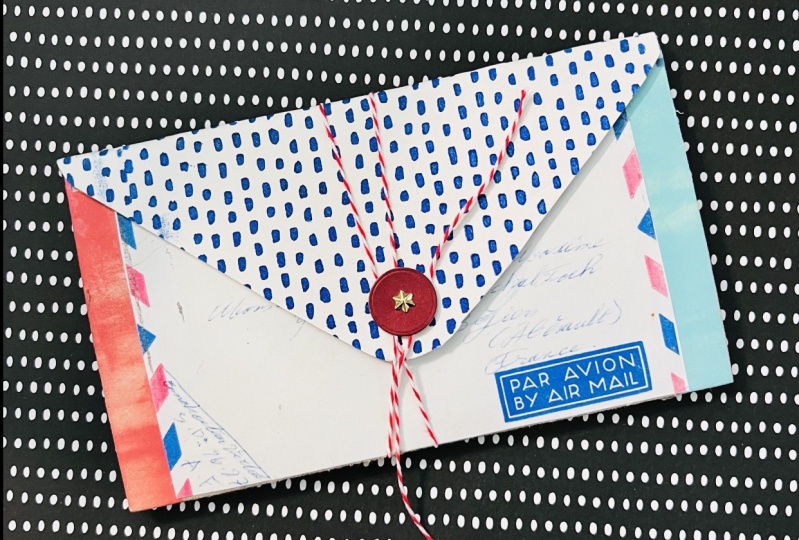
handwritten on it. But did you know you can create a stunning
piece of mail art like this using simple tools and
ordinary household paper? Hi, I'm Bel Mills, a book artist living outside Washington DC and I love
to show people how to make extraordinary handmade books and mail art out of the ordinary paper they
have around the house. With just a cereal box, papers, scissors,
ruler and glue, you can make a piece
of jaw dropping mailer to impress and delight
your family and friends. For the last six years, I've been teaching people
up-cycled book arts, which is the art of taking
ordinary household paper like cereal boxes, lunch sacks, and envelopes, and
turning them into beautiful handmade journals
and creative postal art. I've taught it a variety of museums and art
centers including the Nevada Museum of Art and the Smithsonian
National Postal Museum. Being born in the 1970s, I grew up using the postal
service as we all did. Letters for me were
a lifeline to help me stay connected to family and friends while I was
away at college. Today, I'm going
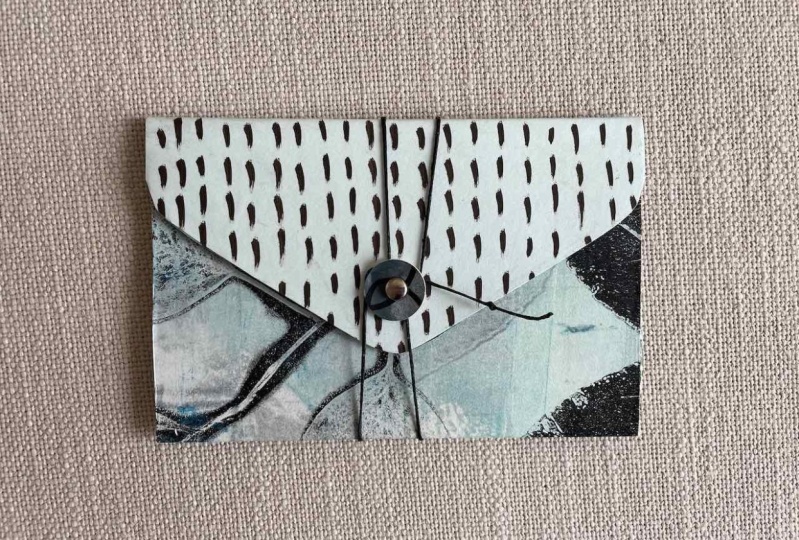
to show you how to make a piece of
mail art called the pleated letter by re-purposing
an ordinary cereal box. Along the way, you'll learn key bookbinding concepts
that will help you avoid common mishaps in all your future paper
crafting endeavors. You'll learn two unique features that are particular
to this project, including the fold-out
pleated message and a button and string closure. I'm most excited about this
class because I love showing people clever and
beautiful ways to reuse their household paper and
I love that this project, even though it looks fancy, is accessible to everyone. If you're looking
for fun ways to connect with your
favorite people, or you'd like a new way to re-purpose paper that you
have around the house. Or even if you're a
seasoned mail artists looking for new
inspiration and designs, this class is for you. Let's make some mail.
2. Class Orientation: In this orientation, I'm
going to go over the project, what's special about it, and the tools and materials
you'll need to make it. Our project today is
special because it is both mail art and naked
mail. What is mail art? Mail art is any piece
of mail that's been enhanced or embellished
through artful design. Mail art also has
a colorful history dating all the way back to the beginning of
the 20th century. Naked mail, on the other hand, is anything sent
through the mail without an envelope
or other packaging. Naked mail can be as simple as a postcard or as
sassy as a sombrero. With a securely
affixed address label, many objects can travel
through the mail. Just be sure to take them to your local post office and let them determine the postage. For now, let's talk
about our class project. We're going to be making a three-dimensional
mail art structure called the pleated letter, consisting of a
cardboard envelope with a cleverly folded
message attached. This is the perfect project
for beginners as it only requires the basic
skills of measuring, cutting, folding,
and using adhesives. The main steps you'll take
to complete your project include trimming your cereal
box into an envelope shape, covering your envelope
in pattern paper, and then creating and
attaching your message. The materials we'll be using include an ordinary cereal box, patterned card stock, a piece of resume
paper or copy paper, glue stick, or
double-sided tape. Optional materials
that will make your project stand out
include washi tape, paper fasteners, baker's twine, 5/8 inch circular paper
punch, and collage paper. Other optional tools include
a 12x12 cutting mat, a craft knife, and
a bone folder for which you can substitute a
plastic spoon or a fat marker. In the next video, we'll
begin our project by trimming our cereal
box down to size.
3. Trimming Your Cereal Box: We're ready to
start our project. In this first video, I'm going to show you how
to flatten out and trim your Cheerios box so that
it's ready for upcycling. We're ready to get started. We have our Cheerios box here, we have a ruler
and a craft knife. At our first step is
just going to be to open all the flaps
of our Cheerios box, I've done that already
as you can tell, there is normally some glue here that you need to pry out. Then we're going to
lay our box flat, and we're going to
go ahead and cut these flaps off with our knife. Now, we're going through two
layers of cardboard here, so it's probably going to take more than one pass of our knife, and you want to keep in mind to really keep
some pressure up on your ruler hands
so that the box doesn't slide around
while you're cutting it. There's one side,
flaps are gone. Now we're going to work
on the other side. Pressing hard on my ruler, keeping my knife up against the ruler to get
a nice straight cut. Now we have a Cheerios
box that looks like this. Our next step is
going to be to find the seam that connects the box. You can see here
I've found it right here and you just need to go ahead and open that up so
that we can lay our box flat. Here we go. We're
going to open this up, and now we have a few more flaps that we need to get rid of. We basically want to isolate
the two faces of the box. Our next step is going to be to trim this piece of cardboard. This Cheerios box happens
to be almost exactly 11 inches long on its own. Now we've got this to 11. Our next step is going to be to cut the width to six
and three-quarters. You might have these
little bumps on the edges of your Cheerios
box that come from where the folded corner of the box was actually going
to go ahead and take those off first because I don't
want any bumps in my letter. Taking those out. Now I'm
going to measure like I did before this time I'm measuring the short edge and I'm going to mark it
six and three-quarters. You could also use if
you have a cutting mat, the measuring grid
on your cutting mat to measure and cut. Now if you don't
have a craft knife, I'm going to quickly
demonstrate how to get your box down to size without using a
knife, just using scissors. Now, in this case, we're going to open
up the scene first. You might need a little help
from my scissors already. Then we're simply going to use our scissors to cut along these edges and
remove all the flaps, instead of using the
knife and the ruler. There we go and
now when it comes time to cutting the
thorough to size, if I don't have a knife, I'm going to measure
to 11 inches. Make a mark on both
sides with my pencil. Then instead of cutting
directly with my knife, I'm going to make a mark, and now I cut on that mark. If I can do the same with the six and
three-quarters for some, just going to cut,
have a little bit of a bump on this side that
I'm going to cut off. Now, my edges, as you can see when I cut, are not as precise,
but it's all good. Again, instead of
cutting with a knife, I'm going to align
the two points up, draw a line like that. Might check it on my grid here. If I align the bottom of this
up with the grid on my mat, then I can see that these two points both
intersect a line so I'm good. That's it. All done. This is the size of cardboard that's going
to make our structure it is 11 inches long and six and
three-quarters inches wide. Now that we have our Cheerios
box trimmed to size, in next video, we'll be solving the mystery
of paper grain. This quality of paper is all
important and respecting it is the key to getting good results in all
your paper projects.
4. Solving the Mystery of Paper Grain: In this video, we'll be discussing a mysterious
quality of paper known as paper grain and why
it's important to identify the grain of your
paper before you fold it. What is paper grain? Paper grain is an invisible
quality of paper. Now on handmade paper,
the paper fibers, as you can see when you look at a piece of
handmade paper, are oriented every which way. They are not lining up at all. But if we were to
look at a piece of manufactured
paper very closely, it would look very much like these two pieces of
corrugated card stock. This piece of corrugated
card stock gives you an idea of what it is for paper
to be grained vertically. We call this grained
long because the paper fibers line up with
the long edge of the paper. Now this piece of card
stock on the other hand, shows you what it
looks like when the paper fibers are
oriented horizontally. If we had a piece
of paper that was grained like this
card stock shows this will be called
grain short because the paper fibers are parallel with the short
end of the paper. Paper grain matters for
folding and for gluing. If we look at this
piece of paper that is demonstrating
grain long, if we fold this paper with
the grain, obviously, it is very amenable to being
folded in that direction. Now, with this piece of
paper that's grain short, if we try to fold it, we get, first of all, a very crooked fold doesn't
want to fold straight. We also get breaking
of the fibers because we're folding against the direction that
they're laying in. Obviously, if you fold a
very thin piece of paper, say a piece of copy
paper against the grain, you're not going to get
this level of cracking, but you will get resistance and your pages will not want to
lay flat once they're folded, they will want to pop open. The thicker a piece of paper is, the firmer its
commitment to the grain. Since we are working with cardboard from our cereal boxes, paper grain is something that we really need to pay attention to. Principle 1 is that
paper is going to want to fold in agreement
with its grain. Number 2 is water. All paper warps when
exposed to water and the way it warps is
determined by the grain. This paper is grained
along and as you can see, that causes it to
warp role or roll up along its long dimension. Anytime you apply a wet glue to a piece of paper
that has grained along, it is going to put some
tension on itself, in this way it's going to curl. Now this is a very
thin piece of paper, it's quite dramatic, but even with a thick
piece of cardboard, there is a subtle bending
which will affect the look of your finished product if you don't match the
grains of your paper. Let's quickly see now what happens with
this piece of paper. This is a piece of
paper that's grained short wants to fold in the opposite direction as
the one that's grained long. But we don't have to get our paper wet in order
to determine the grain. In fact, you probably don't
want to get your paper wet. The way that we determine grain when we have
a piece of cardboard like this is simply by pulling the ends of the
cardboard towards us. I pull these short ends and
then I pull these long ends. I can see, and I'm sure
you can see as well. I get much more resistance
when I'm pulling in this direction than when I'm pulling
in this direction. Now that is partly due to
the fact that this is long, I get more leverage,
but even if I were to make this
into a shorter piece, if I were to bend it
down on this side, I can still bend it much easier than I can
in this direction. This piece of cardboard
wants to be bent like this, wants to be folded like this. Now, interestingly enough, and this is why I am teaching
you about paper grain, the box itself originally,
if you remember, was folded along
its long dimension. This was one of the
corners of the box. That's another reason why it's important to identify
paper grain, particularly when
you're upcycling, because you cannot assume
that the main folds of a box are necessarily in
agreement with the paper grain. Now, it's somewhat of
a mystery to me as to why most boxes you'll find
are folded against the grain. But I believe it's because the most important
folds for this box are the top folds because these are the folds that
are being opened and closed that are being
repeatedly stressed on the boxes open and close. These are the ones that
need to be the strongest. We did it. We have solved
the mystery of paper grain. We now know that this piece of cardboard that
we're going to be making our envelope from wants to be folded in this direction
because it is grained short. Luckily, I already took
that into account. This is indeed the
direction that we will be folding our cardboard
box in the next video.
5. Folding Your Cereal Box: Welcome back. In this video, I'm going to show
you how to fold your cereal box to convert it into an envelope
shape for mailing. Our first step is going
to be to make a mark on our cereal box four inches up from one of the short sides. I'm measuring here with my ruler and make a
mark with my pencil. Then I'm going to take the cereal box and I'm not going to be
precious about this. All I'm going to do is I'm going to keep an eye on this mark, and I'm just going
to start folding, and I'm going to work
it with my fingers to make sure that the fold
is right on that mark. Pinch it a little bit. Now to make sure that this
fold ends up straight, I'm going to make sure
that this corner is also lined up with the
edge of my box. Once I have those two lined up, I'm going to work the fold
down to the other side. First I'll do it with my fingers and I'll do
it with a bone folder. If you don't have a bone folder, you can use lots of things. You can use the sharpie marker, you can use a plastic spoon. You don't have to buy any fancy equipment
right off the bat. Now our top flap fold is
going to be done very simply. We're not even going to measure, we're just going to eyeball. We want to leave a little
bit of breathing room here at the top of this flap. We're just simply
going to fold it over. Just again, pushing down
with our fingers first, making sure these corners
are lined up with the edges, and then getting
whatever we're using as a bone folder and
smoothing it out. Now I need to cut this
flap so that it has the nice pointed look that I want
to have for my envelope. The good news is we all probably have a multitude of
envelopes around our house, old birthday card envelopes, business reply envelopes that we get every day in the mail, and we can use these
flaps as templates for our flaps here to make sure that they have a nice shape. I'll just put it here. Just eyeballing about where
I think the middle is. I'm not going to get
too fussy about this. I'm just going to
draw the shape, just trace it on there. Perfect. Now I can cut
it out with my scissors. This is a great way to just
get a nice professional look. Remembering that
you have lots of manufactured items around
your house that already have perfect shapes
on them that you can use to trace
onto your projects. There we go. Very nice. Now we've got our
envelope shape. Well that was easy.
Now it's time to cover the printed side of our cereal box with
pattern paper. But first, we need to
learn about adhesives. Choosing the right adhesive
for your paper project is crucial if you want
to avoid warping. In the next video, I'll walk you through
all the options
6. Choosing Your Adhesive: In this video, you're going
to learn how your choice of adhesive can make or break
your finished paper project. Adhesives are so important
when we're dealing with paper. They matter because the water in our adhesives causes
paper to bend and warp, and the wetter the
adhesives are, the more we have to
manage the warping. Now, there are two
solutions for warping. One is to always
match the grains of the paper that we're gluing and to let them dry under
weight overnight. So if we look back again
on these two pieces, we cannot glue these
two together like so because the grains are
perpendicular to one another. So if we glued these
two pieces of paper, we would need to
glue them like this. So let's have a look
at what happens if you don't match the grains in glued paper projects
with wet glue. I'm just going to get these
out of the way for a minute. We'll talk about
these more later. But I have two samples
here I wanted to show you. This is two pieces of cardboard, one that's been glued with the grains not
matching as you can see and this one has been glued
with the grains matching. You can tell because
the picture is the same on both sides. Now, the one where the grains are not matching,
when I lay it down, you can see that it rocks back and forth because it's got a pretty
good warp in it. This one on the other hand, is beautifully perfectly flat. You might be able to see the bend when you're
looking at it this way. Now, this might not look
like a big bend to you, but in the context
of a book project, it really does
make a difference. Here is an example of a book
that I was working on with some jelly prints on cereal box. And you can see that
that little bit of warping really just made
the project unacceptable. It really looks pretty awful. Here's another example. This gives you a really good
sense actually of what paper does when it's glued against the grain and that's it twists. You can see the twist
pretty well in this one. No amount of weighing this down will get rid
of the warping. Believe me, I've tried. I've put books under weight for days and when I
would take them out, they would look
flat as a board and within a few minutes they would start to
twist right up again. So this is why paper
grain is really important and why you
ignore it at your peril. Now, when you're working with found materials as we
do when we upcycle, you will sometimes find yourself in situations where you want to glue two things together
without the grains matching. For example, you might
have a pretty piece of paper in your collection that you'd like to put
on the cover of a book. Now, books always have the
grains running parallel to the spine because of the way that the
pages are folded. So if I want to put
this on the cover, I find out when I start to bend this piece of
scrap of paper, and this is true almost
always for scrapbook paper. Don't ask me why. But this scrapbook paper is not grained in a way that agrees with the
writing on the front. So if I want to use this
and have it agree with the grain of my book boards and all the other
paper that I'm using, I need to turn it on its side. So what do I do if I have a
piece of paper like this, or a piece of cardboard or something else that
I want to adhere to a another piece of paper
but I can't agree with the grain and keep it aesthetically the way
I want it to look? The solution in this case
is to use a dry adhesive, and that is exactly
what it sounds like. It's an adhesive that
has very little water present and it is
in essence a tape. So let's look at our options. These are two dry adhesive
sheets that I use frequently. This one, it looks like the
brand is scrapbook adhesive. It is a 12 by 12 inch
adhesive sheet that has paper on either side and I'll be demonstrating
how to use these later. This is another brand
called Artist tac. Also this one is larger. This is, so you can see, 11 by 17 size adhesive sheets. These are readily
available on the Internet. So this is for when you need
to adhere something large, like for example that
piece of scrapbook paper onto another piece of paper without the grains in agreement. Now, some other
things that we can use for smaller pieces of paper, you can bring back our
adhesives over here. We have, of course, regular double-sided tape like this one that has
a cellophane core. I really like this Scor-Tape. This is also
available online and it is extremely adhering. So for something
like a book cover that's going to get a
lot of wear and tear, this is another option
that you can use. For very small items, I like to use these Glue Dots. They look a lot like a little
dot of clear gel on paper. But it's a very dry adhesive
that causes no warping. Of course, we also have tape runners and this one
is still in its packaging, but this is a double-sided
tape runner that you can use to deposit double-sided adhesive
on all your projects. These are examples of
completely dry adhesives that you can use without any
worry of warping at all. Then we move to
the middle ground, which is glue sticks. We have on the very dry end, this scotch wrinkle-free
glue stick, which is a very low
moisture glue stick, and causes not only
no wrinkling but no discernible warping
at all, I have found. Then I also have this
standard Avery glue stick. This is just your regular
run-of-the-mill glue stick. A quite dry, but still
has enough moisture in there that it can sometimes cause a
little bit of warping, not very much, but
just a little. Then of course, on the very
wet end of the spectrum, I only have these in
giant containers, but here's this PVA glue. This is a white glue. It's essentially the same
as your Elmer's glue, which I also have here. It's just a higher quality. So depending on the project
that I'm working on, how long did I intend
for it to last, I'll either use
Elmer's glue or if it's something that I want to
last longer, I'll use this. It also stays
flexible over time. Of course, I don't use it
from this giant bottle. I tend to decant it into one of these little
squirt bottles that you use for condiments and I literally apply it on my
projects like ketchup. So to sum up, your
choice of adhesive is extremely important when it
comes to your paper projects. If you want to avoid as
much warping as you can, you have two options. Always match the grains
of your paper and let the glue dry under
weight is one. The second is to use dry adhesives if your
grains do not match. Now that you understand the
importance of adhesives, in the next video, you're going to learn
the proper technique for attaching patterned paper
to your mail art project
7. Adhering Your Patterned Paper: Welcome back. In this video, we're going to be
using adhesives to attach patterned paper
to our envelope form. When it comes to pattern paper, we have a lot of
options to choose from. Here are some examples. You can use some scrap of paper with different
patterns on it. You can use photocopies
of letters, photocopies of the
outsides of envelopes. You can also use the original vintage
envelopes, if you like. But I tend not to do that
just because the paper is so delicate and won't really
hold up to being exposed, at least not on the outside
of one of these envelopes. Here's a jelly print. This is another example of paper or pattern paper
that you can use. Some of my favorite
papers to use are just card stock that I have
embellished with a stencil. This is just acrylic
paint on card stock. There is tensile in this case, this has ink that I've brushed through a stencil
onto an index card. Then of course,
there is the variety of used books that you can find that often have
great patterns in them. I've marked some pages here. Look at this amazing paper, this would make a great pattern on the inside of
this envelope form. Here's another
beautiful pattern. Another one here, nice
black and white pattern. This page has a beautiful
colored pattern that you could apply. Whenever pattern
paper you choose as long as the grain works, which we're going to
discuss again in a minute, then it's a match. The limiting factors
are just the thickness, like I said, and also the grain. Let's get back to that. I think I'm going to use these two pieces of
paper in my project. We've already determined
that the grain of our cereal box runs
shorts in this direction. When we apply these pieces
of paper to our project, we need to make
sure that they're grained in the same way. I need to decide does it go this way or does it go this way? Now, if I were using completely dry adhesive, it
wouldn't matter. Today I'm going to
be using glue stick, so I am going to pay
attention to that. But I have also done this
project with double-sided tape. You can also do that if
you don't want to worry about the paper
grade so let's see. When I bend this paper,
it doesn't really want to bend in this direction. Here we go. It really
likes to bend this way. I need to put it
in this direction so that the folds of
these two match up. I'm going to start out by
applying this glue stick. I'm going to apply
it from this fold, what's flat fold
down to the bottom. I start by putting a frame of glue all the
way around the outside. Then I go and fill it in like
I'm coloring with a marker. Filling all that end. We will take the paper, we will make sure I'm pushing it all the way up to the fold. Smoothen out. Now if you have a bone folder, this is a great
moment to use it. Make sure that glue adheres. If you happen to have a brayer, one of these for applying ink to plates you
can also use that. For that matter, you can put the lid on your glue stick
and use a glue stick. Now before we waited too long, we want to make sure that
we get the bend into this. We get the fold, need to teach this new
pattern paper to fold. I'm using my hand to work make sure that paper is sticking in that fold
is I rework the fold. That looks great. Now
I'm going to trim off this excess paper. Perfect. It's always exciting when you start to see
it come together. Now it's time for
this inner flap. I decided to use this yellow. We're going to proceed very
much like we did before. We're going to apply
the glue stick. Actually, I think I
might use this one. Slightly more subdued. We'll go through the
same process here. We'll just put this
glue stick on. Make sure we get
it all on center. You want to make sure you
push this new piece of paper, write up all the
way to the edge. You know what? We didn't check our grain here. I'm
going to pull it out. We need to make sure, that's going this
way, so we're good. Trust me, I've learned
in one too many times that paper grain
really does matter. When you put a lot of
work into a project, you don't want all
that work to go out the window the last minute. Now we're just trimming
with our scissors. There we go. I like that. Now, if at this point you
wanted to take a break, lay this flat on a table, put a heavy book on top of
it and let it sit overnight, that would not be a bad idea. I'm going to go
ahead and continue. But it always helps
the project to give it a little bit more time
to adhere overnight. Congratulations. Now you've learned the
secret to adhering paper to cardboard
with no warping. In the next video, we're going to finish
attaching paper to the outside of our envelope.
8. Finishing the Envelope: With the techniques of attaching paper to cardboard well in hand. In this video, we're
going to finish decorating the exterior
of our mail art project. Now, I have some things
here that I've been looking at to finish off this envelope, I have some vintage envelopes
that I photocopied. I have some security patterned
paper which I also like. I have more of the
stencil paper. Originally, I thought
I would use this one, but I think that I like this one so much that I am going to put it on the outside
of the flap as well. I'm going to apply
the glue stick. Make sure you get it
nice, even coverage. You don't want it to be
beating up or gliding up, but you do want there to
be a good amount on there, especially when
you're gluing things that are quite heavy together. In fact, if you're using glue stick with papers that
are on the heavy side, if you have a little
water Spitzer around, that really makes a difference. It helps with the adhering, and I haven't really found that it contributes to any
additional warping. If you live in the desert
and you use glue stick, that's also a great tip
because I find that when the glue stick just
dries out very quickly, it can just pop off for a
couple of hours later shrinks, I think when it's drying and
then next thing you know, the paper you glued on, it's just popping
right back off. Right now. It's time to trim. Now, for the outside
I'm thinking, Oh, I really like
those together. I'm just going to cut this out. Now I decide, okay, do I want this signature
at the bottom to show? I could trim it
here at the top or I could trim this part
off at the bottom. I think I'll trim the bottom. You can also do this
with your fingers. It's make a mark. Know that you have
that mark on there, you can either cut it with
your scissors or you can locate your ruler
and your knife, and you can just
trim it like so. I didn't check the
grain on this. So let's see what this is. This one is not grain short. Well, it's grain short
according to this. But we need it since
this folds this way, we need this to fold
this way as well, and it doesn't want to do that. I'm going to apply
this with tape. Or I could use the
double-sided adhesive sheets and show you how that works. Here's a piece of the I
was showing you earlier. What you need to do
is you need to find a corner of this and
start to peel it apart. Isn't enough space. Now, once you've determined
which side is sticky, so this is the sticky side and this is the non-sticky side. You're going to lay
your piece in on the sticky side because
you want it to pick up some of that sticky goodness. Now we're going to
cover it up again. Get bone folder or whatever
we're using to burnish. The step is pretty important. Especially depending on the
piece of sheet that you used. Some in here very readily and some need a
little bit more work. I find that the needs a little bit more love
to get it to really hold. I'm just going to cut this out. The one to put this
back for later project. Now, I'm going to turn this, it's going to get my scissors
a little bit gluey again, but I'm going to trim this last bits paper off
because I don't want any extra gluey
paper hanging around. Basically, what you
do when you're using these double-sided
adhesive sheets as you're creating a giant sticker, which warms my heart because
I am a former sticker lover. When I was in elementary school It was all about the stickers. See here. Here we go. All right, so now I'm separating the second
piece of paper. I don't know if you
can see that, but it is depositing all of that stickiness onto
my decorative paper. I can throw that away and
save it for wastepaper. Now, I'm going to
very carefully, I'm just going to this trying to get it
right in the center, right up against that top edge. We're going to worry too much
because I'm going to put washi tape on these
two outer edges. You could leave it like that. If you wanted to. You
could leave the cardboard. I will probably add
some washi tape. I really loved that.
I can spend this. See how this is doing now. This is exactly what tends
to happen when we bend this because this is also a
joint for the paper. The paper can just flip up
right there a little bit. Now, there's two ways
that you can solve this. You can, with the first piece of paper that you apply
have it, go over, go pass the fold and then lay the other one on top
of it so that you can't see any box there when it lifts up or you can get a little
bit of wet glue. We're not using wet
glue in this project, but it is okay in small
amounts, just here and there. I'm using tacky glue because it's super thick
and super sticky. I'm just going to put a little
bit of it on my finger. I'm not going to get fancy with my tools here and I'm just
going to dab it in there. Now, once I've done this, we're going to need to leave it alone for a little while
because this tacky glue PVA is exceptional
as an adhesive, but it does need a
little bit of time. I'm going to use my bone folder
to smooth that back down. There's some extra glue. I'm just going to wipe up. I've glued that down and
you might get a little bit of that rolls up
there on the edge. Now, we're just
going to leave that. We're not going to fuss with
it anymore because it's on the damp side and it
might start to tear. Now, we're going to work
on our outside again. Now I've gathered some washi
tapes that I can use here. Now, as for the back, it's really up to you. If you had a second photocopy
of the same envelope, you could put that
on the back or a different copy of a
different envelope. But this is where you're
going to put your address. I don't think that you
want to put anything to something with writing on it that's going to get
confused with your writing. I'm probably going to leave
this one blank to be honest. When I'm doing an
upcycled project, I do like to leave
one little spot exposed or maybe a bigger spot as the case might be to suggest, sort of hint at the origins
of the project and show you that we started with just an ordinary piece
of cardboard like this. I'm going to leave
that as it is. Now that our envelope
is finished, we've come to the
moment of creating the message for the
inside of our structure. In the next video,
I'll show you how.
9. Preparing Your Message: Well, mail isn't mail
without a message, and in this video
we'll be crafting the correspondence for
a piece of mail art. I'll be discussing
two different ways to do this, handwritten
and typewritten. Now, here is the paper
that I've collected to discuss when it comes to
handwriting and type writing. This is some old
second-hand laser and premium coffee paper that's
got some cotton fiber, it's got a little bit of
a two tier finish to it. I think this would be
ideal for type writing. Now, for writing with a pen, I like my paper to be absolutely wonderfully
smooth because then my pen glides along better and there's no
skipping or scratching. I'm going to start with
this one since I'll be talking about the
handwritten letter first. That's because just from
a design perspective, all of my patterns inside here are very geometrical, rigid. I have a grid, I
have these lines. I feel like in order to
provide some contrast, it will look very nice
if the message inside here has some nice organic
flowing handwriting. That's what I'm going to be
working on for this one. You can of course, also use just your
regular old office paper, copy paper, especially if you're just starting out
and you don't want to go and get anything fancier,
that's perfectly acceptable. Before we start, we
need to remember that our finished product is
going to be pleated. As we said, pleated letter
we're going to pull, it's going to extend so the pleats go in this
direction vertically. Again, we need to check the
grain of our paper and make sure that if we fold our paper this way it will be
agreeing with the grain. One tip and you do
want to check on this, but for the most part, manufactured eight by 10 paper is going to be grained long. Which this one is not. Look at that. I know why. This is paper that I buy 11 by 17 to use for my journals, so I want it to fold this
way to have a journal size. See, I'm so glad that I checked. This then is going to
want to go this way, rather than that way, which makes it slightly more complicated, but
that's all right. We're going to want 8.5 in this direction and 3.5
in this direction. Those are the dimensions
that we want. Now, I'll just point out if
the paper were grained long, it would be super easy because
it's already 8.5 wide. Then in that case we would
just need to cut to 3.5 long. But since we're using what
we know about paper grain, we're going to have to
cut that 8.5 ourselves. Now, I've got this 8.5 wide. Now, I need it to be 3.5 this way in terms of the length, so let's measure that out. [inaudible] since we need two of these, we can actually use, we'll do it down here so I
don't see my pencil marks. We can use this piece of
paper to mark our second one. Hope I did that right. Feeling a little weird about that, because I'm not used
to doing and all looks it's fine, we're
fine. We're good. That's good. Now, we've got our two
pieces of paper. It's okay if they're
not perfect, this is a handmade
object after all. I'm going to go ahead and
write this letter now. We all know how to
write a letter, but here are just a few tips. Again, smooth paper is very nice for handwritten letters. Also, you want to make
sure that you keep your margins on the
edges pretty small. Once we pleat our paper, that's going to contract
the message even more. If it goes pretty close to
the edges, it looks best. Lastly, you might
want to practice on a similarly sized piece
of copy paper first, to make sure that
your message fits. Now, if you've decided to
typewrite your message, you're going to want to proceed a little bit differently, don't cut the paper first. Your first step is going
to be to mark one edge of the paper at one inch
intervals along the edge. You can do that with
your cutting mat or you can do it with a ruler. That way while I'm
typing my message, I can see how many
inches I've gone. Remembering always that
each part of the message is going to be 3.5 inches long. We might even put a circle, I'm going to put a little
circle here to say that's where I've
gotten to the 3.5 mark and then feed this into
your typewriter and you can type out your
message and keep track of how many inches
down you've gone. Your message is ready to go. In the next video, I'll be showing you how
to pleat your message to create the interactive
feature for your letter.
10. Pleating Your Message: Welcome back. In this video, I'm going to show
you how to create the interactive folds
for your pleaded letter. So here I've got my
two message pieces. The way that we put in
the plates is that first, we create a hamburger fold. It's very important with
all of these folds that we really make sure that
they're well creased. After we've gotten that one
fold right in the middle, we're going to
take side edge and fold it right up
against that fold. Again, really crease it in. Same for the other side. We have four panels here. Now we're going
to take the folds that go away from us and these
are known as valley folds. I have two valley folds here and one mountain fold and I'm
going to reverse the valley folds so that I have three mountain folds instead of a mountain and two valleys. Now I have something
that looks like this. Now this is where
the pleading comes in and this part is a little
bit less precise.precise. You're just going to grab
the first fold between your fingers and just grab
them the same amount. You can even use if you
have your cutting mat, use the grid on
your cutting mat to keep everything
wind up and square. You're going to
grab just a pinch, which ends up being
maybe half an inch, maybe a little bit less and then you're
going to push that over the top and fold it down. Now we're going to
get our second fold. Do the same thing. Give it a pinch, push it over the top, hold it down. Now our final fold, pinch fold. Now we're going to go back, really work those folds in. This time you're
going to want to go both the back and the front so there's
message number 1. Now let's do the second part. We'll start again
the hamburger fold. We don't have to
reverse the folds if we actually flip the paper over before we do folding
the ends into the middle. This, actually, we
do it this way, we naturally get
three mountain folds. Make sure those are off. Well creased. We are here again with
the three folds for panels and now we're going to put our pleats
in, it's pinched. Now we can bring them together and
see how we did. Usually mine are
slightly different. Yes, my bottom one is slightly
wider than the top one. Well, I think actually
I'm just going to leave it because once you've creased the folds in it's really quite
hard to change. I think once this is in here and you know
what else I can do, I can scoot this over and
put a little bit more. I can wash tape to
finish that side. That is how we pleat the letter. Your message is folded and
ready for the next step. In this next video, I'm going to show you
a variety of ways to attach your message to
your envelope structure.
11. Attaching your Message: One of the defining qualities
of naked mail is that the envelope and the letter
are one and the same. In this video, we're going
be learning how to attach our message to the envelope form to make it all one piece. Now, since I already used washi tape on the
outside of the letter, I'm going to go
ahead and stick with those for the inside. I'll put this in
place and as before, I don't usually take
the washi tape off of the roll when they
put it on something. Looks straight. I like to have the
bottom one pull in the opposite direction
as the top one. I'll be putting washi
tape on this side. I wanted to point out
what I'm doing here. Since this washi tape add
some width to the message, I'm going to align
this edge up with the washi tape edge
because I know washi tape is also going to
add some width to this side. That way they still look
like they're the same size. There we have it. If once you've attached these, you feel like one looks
crooked or it's a bit too far over to the side like
this one for example, I think can be moved. Nice thing about washi tape is that right after you apply it, it's still easy to lift
without damaging your paper. I'm going to back that up
a bit from where it was. Your message is now
firmly in place, but you still need a way to keep your envelope closed on
route to its destination. In the next video, I'll
be showing you how to create a button and string
closure from scratch.
12. Buttoning it Up: Now you're naked mail will
need to stay close during its journey to protect the
pleaded letter inside. In this video, I'll be
demonstrating how to make an old-fashioned
button and string closure, which will keep your letter closed while preserving
the envelope. Now your naked mail is going to have to stay closed on it's journey to protect this
delicate pleated letter inside. The simplest method is
to use a button and string closure if you don't
want to damage your letter. If you don't have
a paper fastener, which is the specialized part that's required to make
a button and string, then my best advice
would be to apply a very strong double-sided
tape up here to the flap. Well, not just the point, the whole edge of
your flap here, and then really burnish it down. Now that of course, is going to damage the
letter when it's opened, which would be a shame. My advice is to get
yourself some fasteners. They don't have to decorative. You can get some really
cheap brass ones like this from an office supply
store or Target or Walmart or what have you
for very little money. The other piece of equipment
that is handy to have is a hole punch
and this punches, I think this is a
three-eighths inch circle, not a hole punch,
a circle punch. To make the button for
the button and string, I'm going to use
this brown piece of leftover file folder
to make my button. I like it because this is
already pretty bright in terms of colors so the
next element I add, I wanted it to be on
the neutral side. Again, there's two
ways to do this. You can take your hole punch. Sorry, this isn't a hole punch, this is a circle punch and it's about three-eighths
of an inch, and you can cut your
circle or you can use, let's say the end
of your glue stick. Trace around it with a pencil, and then cut that out with your scissors so that's
option number 2. I'm going to go
ahead since I have the hole punch and
use this hole punch. Our next step is to put a hole in the center
of this paper circle. There's a variety of ways
that we can do this. The way I usually
do it is to use an awl which is a
bookbinding tool, also a leather work tool that's used to make
holes and things. It has a pretty sharp point. You can also use a thick needle. If you have a seam
ripper, you can use that. I think you could probably use this very thin knitting needle
as well to make a hole. I'm just centering and then I'm just going
to poke on through. There we go. Now, I need to decide where it's
going to go on the front of my envelope and
I'm going to make a little mark with my pencil, and then I'm going to make
a hole in the envelope. Again using whatever I have, I'm using an awl. Now we can put
these two together and fasten it together
with our paper fastener. Decide maybe I like the gold better than this
other one. Let's see. Now I think I will
use the ones that look like screws on the top. Actually, you know what? I think I have some
star-shaped paper fasteners so I think I might
try one of these. Actually I don't think I
have tried this before. I'm just going to take the
prongs that are now in the closed position and I'm going to stick it
through my circle, then I'm going to stick
it through the flap. Now I'm just going to open those prongs on this other side. See how I like that. That's cute. That's very nice. Since I'm not going
to be putting any embellishment
over this fastener, I think I'm going to
use a postage stamp instead to embellish the
inside of this flap. I like this one here. It picks up on the red from
the body at the envelope. Most put some glue
stick on there. I'm also thinking about putting another
cancellation stamp. It's always nice to have
a stamp that overlaps both your postage
and the background and this is a piece of acetate. This is clear plastic that I
have stamped onto and let me see if I can get more of a white background that
you can see it on. But I have stamped using
a stays on alcohol ink that won't smudge when you really stamp any
glossy surface with it. We've put a bunch of
my cancellation stamps onto this piece
of clear acetate. Then I can use it to audition different possibilities
by holding them over my stamp to help me figure
out which look I like best. I think for me it's either
between these wavy lines. I also really like
this London one. I think I might pick that. For now I'll go get that stamp. Now this part of course
is purely optional. I realized that I didn't have these things
on the supply list. These are really just
extra embellishments to make your mail a
little fancier if you happen to have the
supplies on hand. This is a unmounted stamp, it's actually just I mounted
it on some foam on my own. This is the London
cancellation stamp. I'm just going to attach it
to this acrylic block I have. Here I have some dark brown ink. Just going to pad it. Then I'm just going to apply it. This is rubber so I can
press down pretty hard. There we go. I like that. That adds a nice little extra
something to our letter. Got distracted with
my decorations here, but we are actually
in the process of creating our button,
the string closure. Let's continue with that. I have a couple of different
options for string here. This is just a very
dark red string. That looks nice. Then I also have this
striped bakers twine. I have a real soft
spot for bakers twine and once you
probably already know if you've seen any of the projects
that I post online. I don't think I'm going to
be able to help myself. I'm not even sure that the
bakers twine looks the best, but it's just what I like best so I'm
going to go with it. Again I'm not going to
cut a piece from this. I'm simply going to take the bakers twine,
I'm going to wrap it. Same, let me go down. I'm going to wrap
it around the shank of this button where the
fastener prongs are, and I'm going to tie a knot
that leaves a little tail. Now you can choose to trim
this tail if you'd like. Take a little pair
of scissors and trim it or you can just leave it, which I usually do. Now I'm going to wrap around, I'm going to catch the button
and then come back down and catch the button again,
and then I trim. Sometimes I put a little knot in the string that
actually moves, that wraps and unwraps so that I know which one to grab
when I'm ready to open it, so I'll go over that again
in case that was confusing. We nodded around this twice. We're going to go
around and then come back the bottom and
catch it again. There you have it,
it's ready to go. Now at this point, you might be wondering how the postal
service is going to deal with your letter that has string wrapped all around
the outside of it. Well, in the next video, I'm going to be
explaining all the postal rules and
regulations that you need to follow to ensure that your letter
will arrive safely
13. Ensuring Your Mail Art Arrives: Nearly every time I've
posted a picture of a letter with a button and string closure on social media, somebody has chimed
in to tell me that it will never
go through the mail. Well, I'm here to
tell you it will. You just have to
know the rules and regulations of the
Postal Service. They actually have
lines written into their regulations that deal specifically with
button and strings. In this video, I'm going to explain all the rules and
regulations that apply, not just to button
and string closures, but to all the mail art that she might send
in the future. Let's start with the basics. Here I've got Forever Stamps. As most of you
probably already know, these Forever Stamps you
buy at today's prices, and then you can continue to use them on your mail forever more, regardless of increases
in postal rates. We also have these non
machinable surcharge stamps. I'll be getting
into exactly what these are in a little bit. But these today cost $1.03 each. Again, regardless of rate increases for non
machinery will mail, you will be able to use
these stamps ongoingly. Then we have our tiny
denomination stamps. These unfortunately do not
stand the test of inflation, but they are sometimes
necessary for mail art. We've got here are $0.10 Stamps. We've got $0.05. This is a $0.01 Stamp, $0.02 and so forth. The lazy mail artists guide to postage contains one single
rule, and it's this. If you're mail art weighs
less than an ounce, an ounce or less, use
two Forever Stamps. It doesn't matter
if it's got clasps, if it's got buttons and strings, wax seals, oddly shaped, lumpy, bumpy, two Forever
Stamps will cover you. One caveat about the
two Forever Stamp rule. In most cases, you will
be giving the US Postal Service a small donation
equal to about $0.23, which doesn't bother
me because I loved the postal service and I
don't want them to go away. But if you're
interested in applying only precise postage
to your mail art, then you'll want to just
continue listening. Another caveat is
that unfortunately, our pleaded letter does
not weigh an ounce or less so it gets a little bit more complicated
for this project. Two forever Stamps
is not enough. How much postage does the
plated letter require? Well, it requires
$1.27 and sadly, two forever Stamps at $0.63
each or only valued at $1.26. Now, I prefer to
believe that they didn't do this on purpose, but it is what it is. You are $ 0.01 Short
with two Forever Stamps. This pleaded letter project
that weighs over an ounce. If we want to get exact postage, we can do two forever
Stamps and $0.01 stamp to make up that $0.01 that we're missing
with the two Forever Stamps. We can also do if we
want to be exact, one non machinable surcharge
stamp worth $1.03 plus a $0.24 additional
ounce stamp and that will get us exactly up
to the $27 that we need. Now if you don't have
specialty postage, like the $0.01 stamp, the extra ounce, or the
non-machinable surcharge. Don't worry, there
are other options. You can also just put three Forever Stamps
on the plated letter. Now this will include a
donation to the post office, $0.62 if you go that route. Or you can do three
postcard stamps. If you have those on hand. That gets you a little bit
closer to the right amount. But you'll still be doing a
17 set donation to the USPS. Here are three, are actually four different methods
that you can use to get the correct postage
for your plated letter. If you aren't interested
in learning about postage for projects other
than the plated letter, you can go ahead and stop
watching now, however, for those of you
who are ready to geek out, there is more. Now you might be wondering, is it even possible to send mail art with just a
single Forever Stamp? The answer is yes. Yes, it is. If you have for example, a letter that's
artfully embellish, but it's a standard size. It's nice and flexible. It's under an ounce. This can easily mail
as you can see, that it did mail with a
single forever Stamp. Now with postcards, you're
looking at similar issues. You need them to
be standard size and you need them
to be flexible. Whatever embellishment
you put on the postcard needs to be
nice and smooth and flat. There can't be anything lumpy, bumpy or hanging off. Also, if you collaged your postcard in such a way
that it makes it stiff, like this one has glue on it that makes it very
difficult to bend. This now enters the non
machinable realm of mail art. This can't go
through the machine, so you'll be needing a non-machinable postage
stamp on there. Also something like this that's made a very thick cardboard like serial box and also has something like a
3D element on it. Also non-machinable. You'll be requiring a non-
machinable surcharge stamp. That brings us to the
topic of what are the factors that might
cause your mail art, either a letter or a postcard to require more than
one forever stamp? Some of them are for example, if your letter or your
postcard is square, that makes it non -machinable. Also, if it is
bumpy, for example, if it has a button and string closure or let's
say it has a wax seal. Those things also make it non -machinable level
if it is rigid. Here I have something
that's very stiff. Also makes it non -machinable. Or if I were to take
something like this and address it in a
vertical direction, put my address on this way, instead of this way, that would also make it non-machinable. All letters and postcards with these features fall into the
non-machinable category and they will cost $1.03
for up to one ounce. If I were to mail a letter
that had for example, this button and
string closure on it, I would need a non-machinable
surcharge stamp valued at $1.03. Alternatively, I could
use two forever Stamps. That would put me $0.23 over. But if that's all I had on hand, that would work perfectly fine. You can also, if you'd like
to do precise postage, use one forever stamp
and four of these $0.10 stamps to
make up the extra $0.40 for
non-machinable postage. Finally, size does
matter to the USPS. Let's talk about
that for a minute. The minimum size for a letter, and actually also
for a postcard, we cannot get any
smaller than five inches wide by three and half inches tall for both letters
and for postcards, that is the minimum
size to be able to travel through the mail. Now for postcards, the maximum size to
not have to require more than one postcard stamp is four and a quarter
by six inches wide. If you get any larger than that, you will be paying
the letter rate. You will apply a
letter stamp rather than a postcard stamp. Now, coming back again
to letter as heroes, the smallest size we
were talking about, now here is the largest size. We are allowed all the
way up to 6 and 1/8 tall by 11.5 wide. I have to say I don't
think I've ever seen and envelope this big
just for comparison. I think this is the
biggest envelope that I have and it's quite a
bit smaller than this. I think this is about a six by nine and just to
give also a point of comparison for
these sizes here is like a typical security
envelope size. You can see the smallest
is smaller than that. While the largest, as I said, is probably bigger than
anything you would ever meet. In fact, I think he
would have to hand make your own envelope out of very large paper to get
a letter this large. Now, I just realized, I did forget to mention one detail when we
were discussing factors that would cause your mail art to require a non-machinable
surcharge stamp. I mentioned letters or
postcards that were square or any other odd
or irregular shape. We've talked about
things that were rigid or addressed vertically, and then also things
that are lumpy or bumpy. I think I grouped
those two qualities together when in fact
they are different and I wanted to just call
your attention to that. When I talk about mail
art, that's bumpy. This is what I'm talking about. Either something
that has a feature that protrudes above the surface of the card or the letter. Also a button and
shrink closure, that's something that is bumpy. Lumpy is a different issue. Lumpy is when
there's something in sign a letter that causes it to become a lump in
the middle so that the thickness of the
letter is very uneven. That is the other
factor that will cause your letters to
be non-machinable. Now I do believe we've covered all of the relevant factors. Let me just leave you
with two main points. The first is the rule of thumb. If you have a standard
sized letter that is less than an
ounce and it doesn't matter how fancy it is, what decorations or
embellishments you have on it. It's less than an ounce
and it's a standard size, two forever stamps
will cover you. You will be supplying a little bit of a
donation to the USPS, but you will definitely
have enough postage. The second rule of thumb is
simply that more is more. When you've put as
much work as you probably will into
a mail art piece, you don't want to risk that it won't arrive at
it's destination. Putting more postage
is just like a guarantee to ensure that your mail art
will arrive safely. Just a third rule, if I can add one, and
that's simply have fun. Well, now that you know
all the rules that apply to naked mail, your mail art is ready
for the mailbox, but before you go, I
have two bonus videos. In the next video, I'm going to be showing you how to turn your plated letter into a piece of mail
art inspired collage?
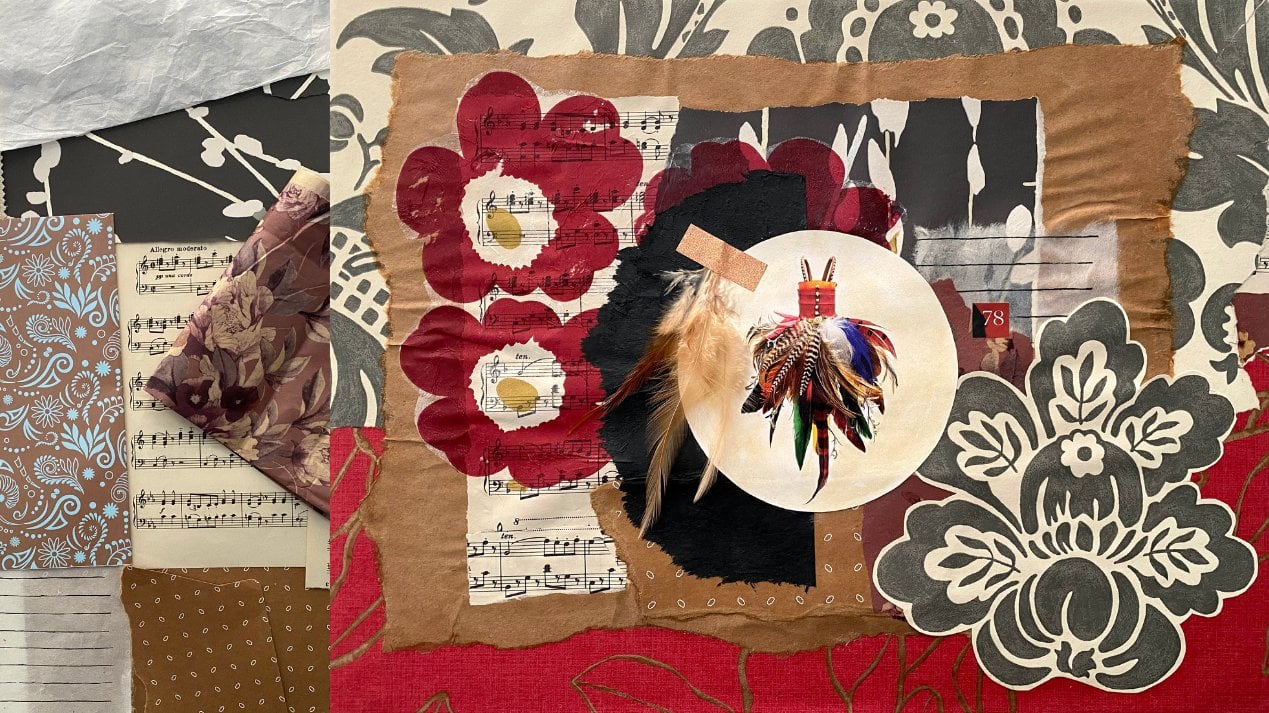
14. Collage Bonus: Welcome back. In this lesson, I'm going to be
showing you how to turn your pleated letter from a written message into
a collage piece of artwork. Now, unlike the other videos, this one doesn't
have any talking. It's just all doing. I start with my plane panels, a pile of collage images
and a glue stick, and I just make it
up as I go along. So grab a hot drink, sit back, and enjoy. Well, I hope you enjoyed watching the transformation of our pleated letter into a
collaged piece of mail art. But wait, there's more. In the next video, I'm going
to show you how to turn our cardboard envelope into a housing for a pop-up structure
15. Pop Up Bonus: Well, if you were
already convinced that this mailer structure
is super versatile. In this video, we're
going to learn how to turn it into
a pop-up structure. I'm going to show you how
to create a variation on the pleated letter and this one actually is
not pleated at all, but it is folded. Some people call us
an exploding page. It's also called the
Turkish map fold. We're going to learn how to
create this fold and how to mount it into our
envelope structure. This is the process for
creating our Turkish map fold. Now the first thing
that we want to do, is fold on a diagonal. Match your two points together. Smooth out the diagonal fold, furnish it with your bone folder or whatever other
snapping tool you have. Then we're going to do it
on the other diagonals. We're going to have
basically an x through the middle of the square. Now, we're going
to flip it over, well, it's neither a hot dog nor a hamburger fold
because it's a square, so we're just going
to fold it in half. The regular way, no diagonals. Now you'll see that if
you let your paper go, since we flip this
over to do this fold, it almost creates a bowl. It's telling you already what
shape it wants to go into. You just got to pull
these towards each other and then collapse it down. I'll show you that again in
case that was confusing. Cool. You got this bowl-looking
shape, a square bowl. You're going to pull these
two points into each other, these two folds until
they're touching, and then you're going to
collapse the whole thing down. Now we've got a triangle. Now, the final
part is to fold in these corners and we're not
really going to measure, we're just going to fold, just eyeballing it
until it looks like basically we have an
equilateral triangle here. This distance is equal
to this distance. That's where we're
going to want to fold. If it's slightly off, it is not a problem. This is an imprecise
and a process here. That looks better. Then we're going to
turn it over and do it the same on the other side. We can use the first fold
to work out the second one. We want to make sure that
these are all furnished. It's going to help out a lot
later if these creases are very worked over. I
like that. This one. Now, what we're going to
do is we're going to take these points that we just made, these little triangles,
and we are going to turn them inside out. This is called an
inside reverse fold. We're going to open it up. We're going to push it in, and then we're
going to refold it. I'm going to do that four
times that you can see. We're opening this up. We're taking the point, pulling it towards us
to reverse that middle folds and then we're making sure that those two
side folds come together. Here, we've all done. It
helps too if you want to just work this back-and-forth
before you start because that gets those side fold as to
where they all go. Either way. There we go. That's actually easier to
look for that together. Again, we work this
fold back and forth, we finally pull this
one in, reverse it. There we go. Well, we're getting
a little bit of cracking, we've talked about that
shortly, but that's okay. We're not going to be
concerned about that with this project
because there's no way to other schools going every which
way in this project, so you can't really
pick and choose. That is it. Look at that. There we've got our
exploding page. Now, if we take one of our envelope structures and I've just glued some papers
inside of this one. We can glue this end. Now I feel like this
might need to be cut down a little bit because it
does go a little bit over the fold for the flap. Let's go ahead and open this up. It's basically all the edges where the [NOISE] reverse folds are that we need to
trim back a little bit. I'm just going to pull it back. What is that? Probably a little less
than a quarter of an inch. Let's start there
and see how it goes. Split make this. This is experimental, I'm not actually completely sure that this is going to
work. But let's see. You might have to trim on both sides. I don't
know what I'm doing. Yes, we do have to
trim on both sides. Actually, we can do the second
trimming just like this. We put our ruler even with the paper that's
already trimmed. We put our ruler even with that. Then we're just
going to trim these other bits that are
now sticking out. A little bit of trial
and error here. A little bit of trial and
error never hurt anyone. I am going to go ahead and
go with this one instead. Get back to our plan to
pick out some washi tape. Now, it's a matter of figuring out how we'd like
to decorate everything. We can do it in sections. We can cut out triangles of different colored paper to
cover up some of these spots. Then we can also put pop-up. As you can see on this one, anywhere where there
is an inward fold, you can put an image that's
hanging off the edge and then it has a pop-up
effect like these stamps here. I hope you can see
the stamp here, then this one are both popped up as well as these ones
down here and of course, the woman's face and the
typewriter are also protruding. Those are the opportunities
that we have. But first, well, let's see what paper
we have to work with. Some of the things
I think about when I'm creating a collage like this is having
a focal point, which is what this guy is here. He's bigger pretty much than everything else in this collage. Your eye knows to
start with him, and then you can move around to some of the other elements. Still not completely
happy with this, but like I said, this
is about the timeline. It's a good thing
to just let it go, set it down, come back to it tomorrow, and
see what you think. Well, that was fun. Now
you've learned how to take your mail art project in
three different directions, but you won't want to
miss the next video where we're going to go over
everything we've learned
16. Conclusion: You did it. You're
ready to send a doze of joy and delight to your family and friends
with your pleated letter, but more than that,
you're ready to embark on future
paper projects with all the knowledge and
techniques that you need to produce
professional results. Always keeping paper grain
in mind in the future, you can proceed with confidence knowing that your projects will have no cracking
and no warping, but I hope the key
takeaway for you from this class is that mail art is easy to make and fun to send. Please don't forget
to post pictures of your project for
all of us to enjoy. Goodbye and happy mailing.