Transcripts
1. Trailer : And, Have you ever sat
down to do some lettering, and suddenly every single letter feels like a life decision? Yeah, same. In this class, we're going to do things
a little differently. We are going to unwind with words and take a more relaxed, low pressure approach to letting one where you can actually
enjoy the process and maybe even use
it as a way to slow down and express
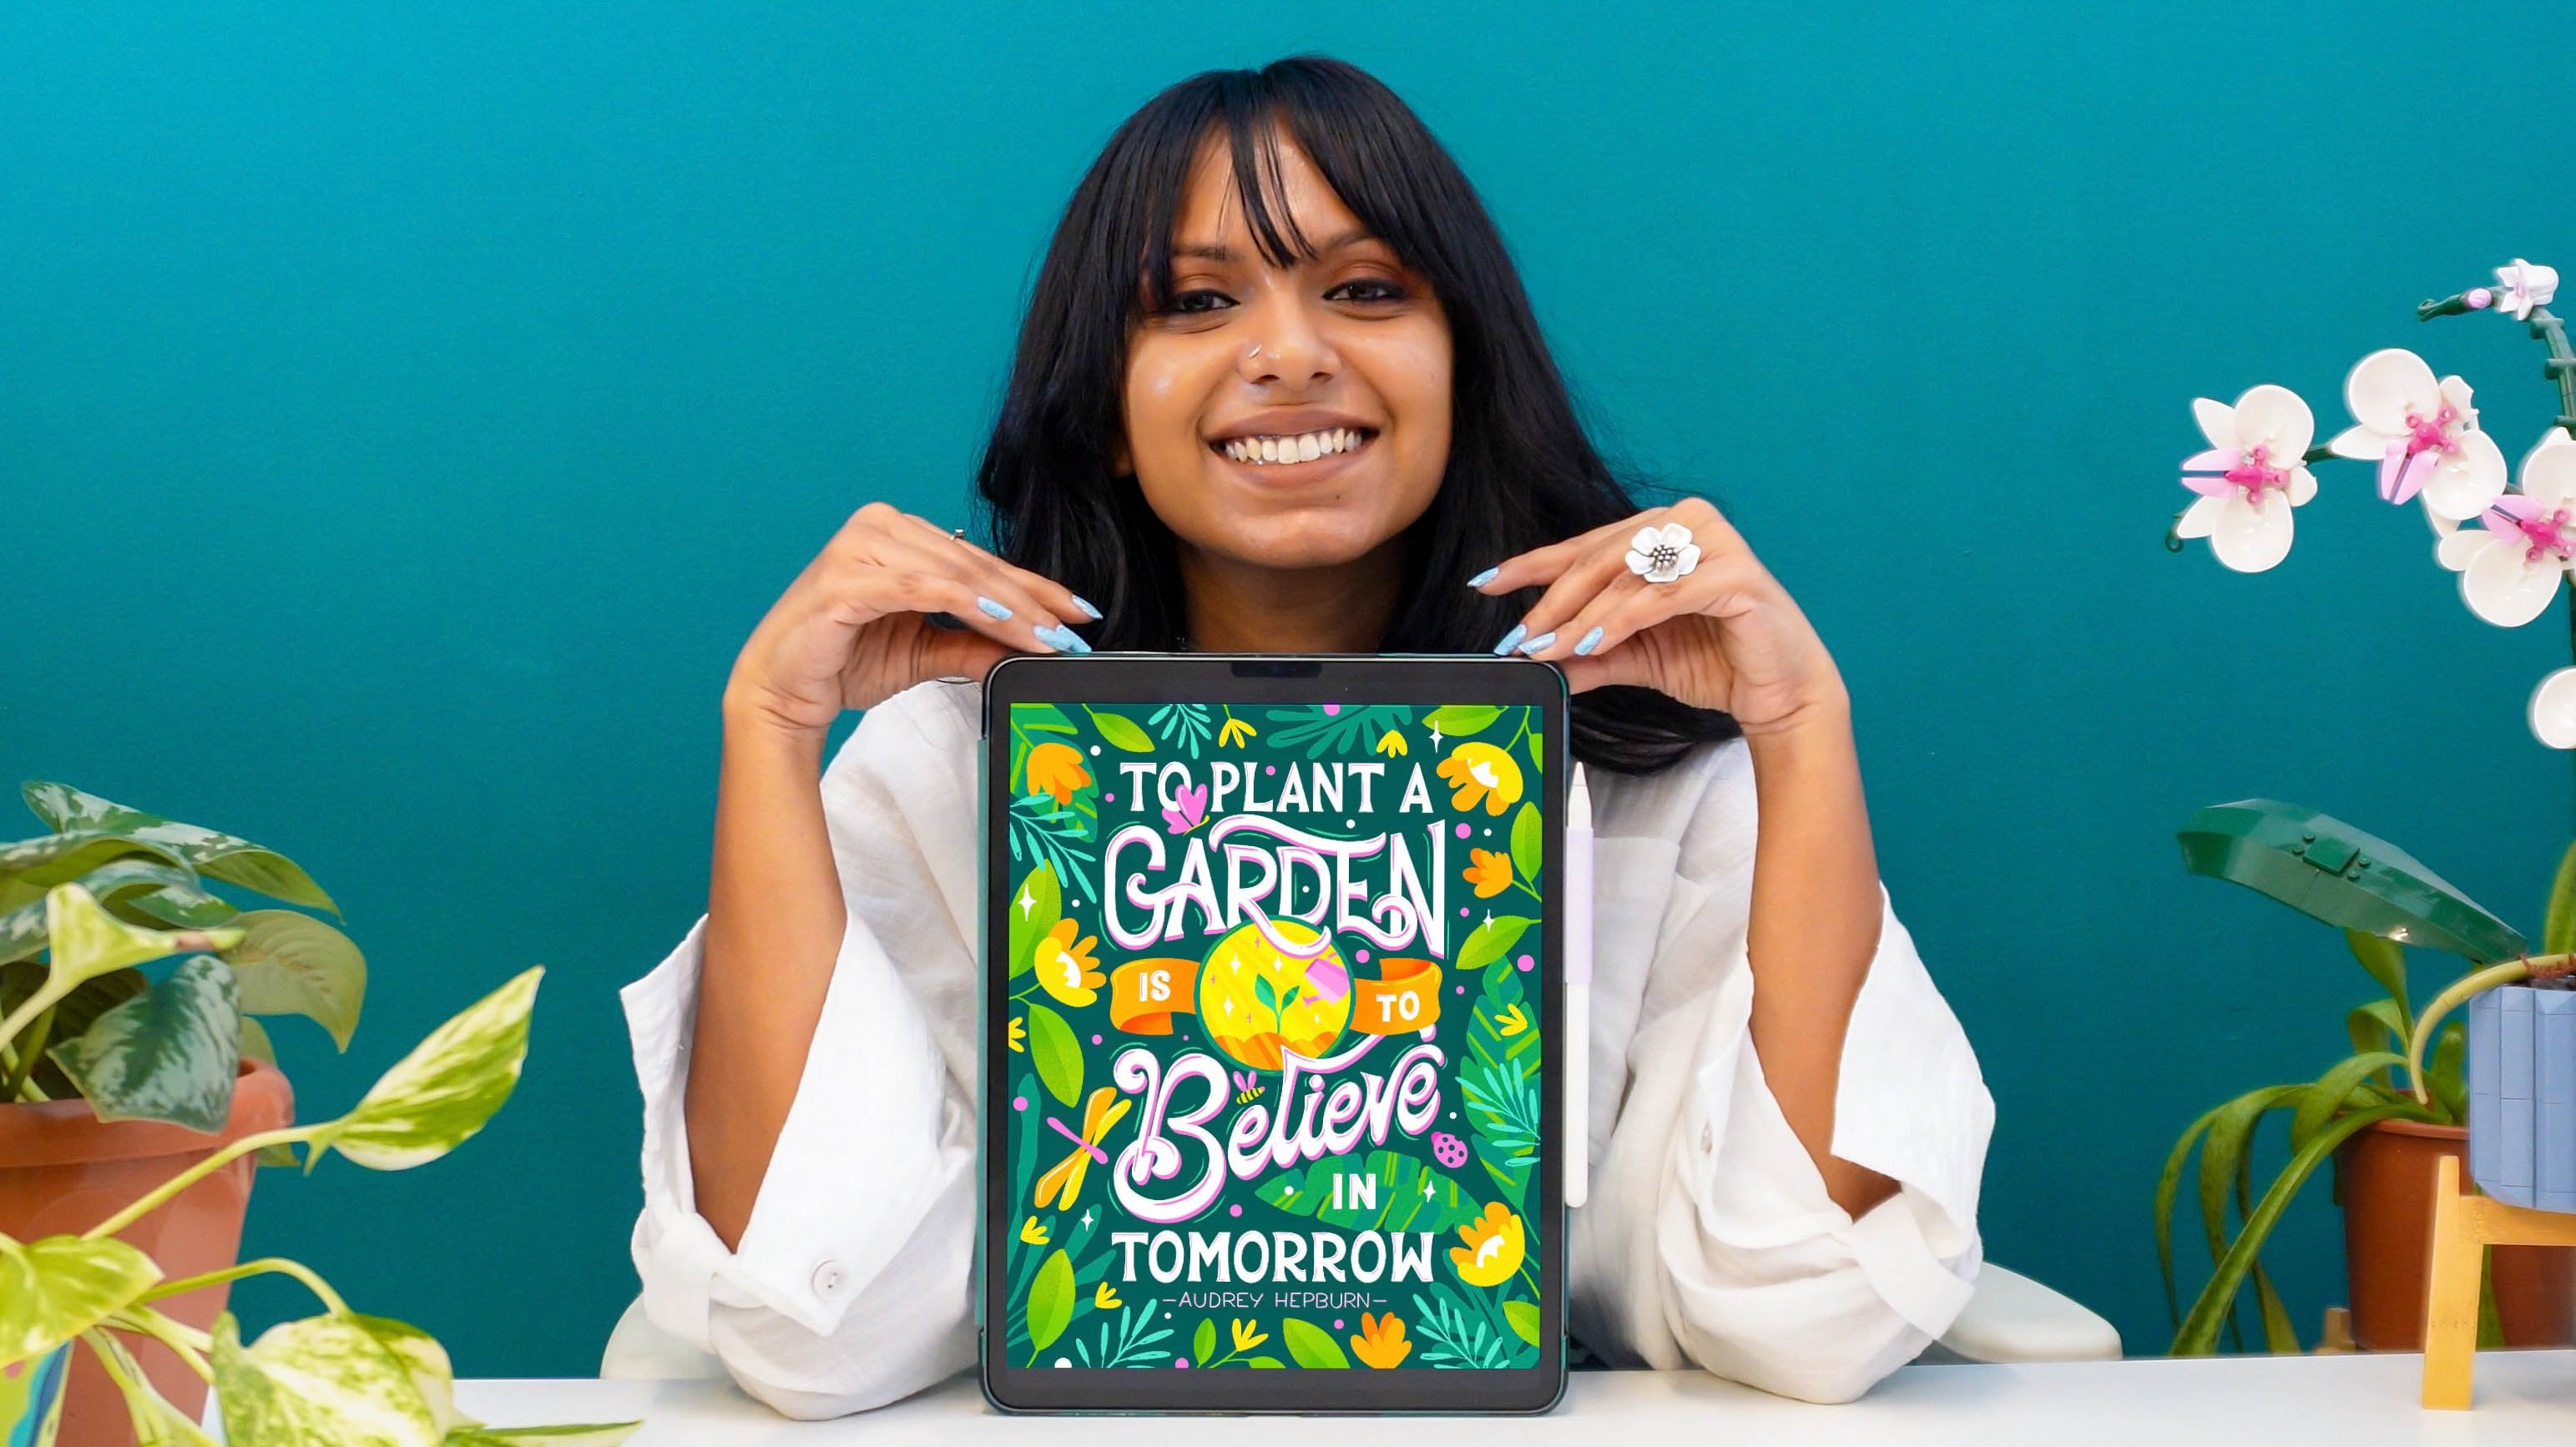
what you're feeling. Hi, I'm Vinitha, a
lettering artist, illustrator, and top
teacher here on Skillshare. I've worked on
client projects with brands like audible
and Trader Joe's, and my work has
been published in books like typism
and Women of Type. But beyond all of that, letting has always been a way
for me to process thought, capture feelings, and come
back to myself creatively, especially on days when I
feel stuck or overwhelmed. And honestly, my brain is not
that different from yours. It loves to overthink. I loves to second guess. It loves to zoom into one tiny
curve and panic about it. So over time, I've had to
very intentionally teach myself not to overthink while creating for
the sake of creating. And that's exactly what
I'm sharing with you here. In this class, I'll
walk you through a lettering piece
from start to finish, and I'll talk you through what's going on in my head
as I'm drawing. Not just what I'm doing, but how I'm choosing to move forward instead
of getting stuck. Because once you
start noticing that, you can begin to shift your
own thought processes, too. This isn't about doing
things perfectly. It's about learning
how to keep going and let your words take shape even
when they're not perfect. By the end of this class,
you'll have a simple, go to way to unwind,
draw more freely, and gently get better at lettering without
all the pressure. And if you want
to, this can even become a chill creative habit, something you come back to
whenever you want to reset, slow down or just
draw for yourself. This class is for beginners,
hobbyists, and honestly, anyone who's ever
wanted to get out of their head and draw
words more freely. You don't need anything fancy, just something to draw with
and something to draw on. So if you're ready to quiet the overthinking and
just draw your words, I'd love to have you in class. Let's unwind with
words together. H.
2. Overview & Class Project: I'm really excited
to have you join me. Welcome to Unwind With Words. I hope this becomes a
space where you can relax, play, and reconnect
with your creativity. In this lesson, I'll walk you through how the
class is structured, what your class project is, and the materials you'll
need to get started on it. So here's how the
class will flow. We'll begin by
talking a little bit about why this
approach works and how it helps you both unwind and get better at lettering
without overthinking. Then we'll move into
choosing your word, keeping things quick,
intuitive, and pressure free. And after that, I'll
take you through a full demo where I create
a single word lettering piece from start to finish using this intentionally chill
intuitive approach. I'll be using my
three step process, starting with a skeleton sketch, then moving into
a refined sketch, and finally adding
color and details. This is essentially the
same framework I use when I'm working on more polished
lettering projects, even for client work, just with a few additional
steps in those cases. But here, what really
matters is how we approach each step in
a low pressure way. Also, I just want
to say, this demo is only one example
in one style. There are so many
different ways you could approach this depending
on your word, your style, your colors, your tools, all of that. So many possibilities. So instead of trying to
show every possibility, what I really want is
to give you a peek into my thinking process
and how I let myself create Letwin pieces
without overthinking. That's the main takeaway I'd love for you to have
from this class. Now, as for your
project for this class, you'll be creating
your own Letwin piece using the same approach. You'll start by picking a
word without overthinking it. Then you'll sketch it out
as a simple skeleton, refine the shapes
of your letters, and finally add any color, personality or
details you'd like. That's really all
there is to it. If you can, I recommend working analog just so
you don't get caught in the undo cycle or
feel tempted to keep tweaking things endlessly
with digital drawing. But if you prefer
working digitally, that's completely fine, too. Just give yourself some
constraints that will help you use it like
a traditional medium. And remember, this
project is something you don't have to show
anyone if you don't want to. It can absolutely just be a
personal exercise for you. Seeing it like that will help take some of the pressure off. But if you do feel
comfortable sharing, I'd love to see what you
create in the project gallery. You can upload your final piece, work in progress stages, or even just talk a little bit about your experience,
trying this out. To make the most of this class, you can think of
this as something you come back to more than once. You might use it as a creative
reset when you're feeling stuck or turn it into a
small regular practice, whatever works best for you. You could do one every
day, once a week, or even once a month or whenever you need
a creative reset. Even a small consistent practice like this can make a big
difference over time. In terms of materials, you really don't need
anything fancy. You can use whatever you have at hand and feel
comfortable with. Even just a pen or pencil and a piece of paper
is more than enough. Some examples of medium
you could use are fine liner pens,
colored pencils, watercolors, gauche
paints, acrylic paints, or acrylic paint markers, or a combination
of some of these. It's really less about
the specific medium and more about letting yourself
create without pressure. So whatever medium lets
you do that best works. Like I mentioned, although traditional or analog mediums are what I recommend
for this project, you may also go digital if that's what you're
comfortable with. Just remember not to
undo too much or let yourself get bogged down by the endless brush
and color options. For my demo for this class, I'll be using half a
sheet of paper from a Kansan Excel mixed
media sketchbook, and I'm planning on deciding on specific color mediums
and tools as I go, depending on how
the piece evolves. One suggestion I have is to
keep your piece fairly small. Working small makes it feel more manageable and helps
you get a quick win. That's it, try not
to go too tiny or overly detailed that can
get frustrating, as well. I'd say somewhere
between an A six and A five size would
be a great balance. Alright, so that's everything
you need to get started. In the next lesson, we'll take a closer look at
why this approach works and how it helps you create more freely
and confidently.
3. Why This Works: In this class, we're
going to go over a very low pressure but high impact approach
to unwinding with and getting
better at ledging. Before I jump into the
details of the how, I want to talk about the
why, why this works. Firstly, pressure can be
a block to creativity, the pressure to create,
to create well, to create fast, to
create perfectly. We're going to try and
free ourselves from that pressure because when there's no expectation
of perfection, your brain naturally relaxes. Which makes you more likely to take risks and try new ideas. Perfectionism often stops
people from even starting. This last gives you
permission to be messy. What I've noticed is that when you stop trying to
make something good, you actually make more
interesting work. Some of the outcomes of these exercises might feel flawed. Every piece you create
this way may not feel like something you're
immensely proud of, but you will be quietly
teaching your brain to relax and eventually come up with cool stuff that you
are in fact proud of. So this is about the process, not just the outcome, right? Secondly, this builds momentum. The goal is to keep your
hand and your mind moving. Moving forward to the next step rather than overthinking
each decision. There is a place for
carefully thought out design. I'm not saying
there isn't, but in this activity, that's
not our approach. Because to be able to do that, you also need to be able to create freely and
trust your instincts. We're trying to use momentum
to reduce overthinking, because even imperfect lines are better than
frozen hesitation. We're training
ourselves to improve our confidence and to
trust our instincts, both of which can be
improved with momentum. This is also a very easily
repeatable activity. At whatever pace and
frequency that works for you. You can do it before a
project as a warm up, to get yourself out
of a creative block, as a weekly or daily practice. Whatever the cadence you choose,
repetition builds skill. Over time, what you'll
realize is that you are improving just
without the pressure. Every time you draw a word,
you're refining shapes, you're understanding
spacing, developing rhythm, and your own creative process. So, in a way, this is
practice disguised display. This exercise is also
great for you emotionally. The human brain loves that feeling of
accomplishing something. Actually following through
and finishing a piece builds confidence and
reduces intimidation around lettering over time. Also, this is a great way
to express yourself while slowly building your
lettering skills cause words are powerful. They are less abstract than
other forms of visual art. Lettering can be a direct
outpour from the heart. It doesn't have to
be, but it can. And it can be so
helpful when you really need to process
emotions and feelings. Creating something
around a word that you really deeply feel
about in the moment and truly getting lost in it is a meditative feeling that has therapeutic
effects on the mind. I say this from first
hand experience. Very often when I
do this exercise, it is also a form of releasing myself from some kind
of emotional prison. Our minds can fixate on stuff, and just getting even
one word out on paper can help free up space for
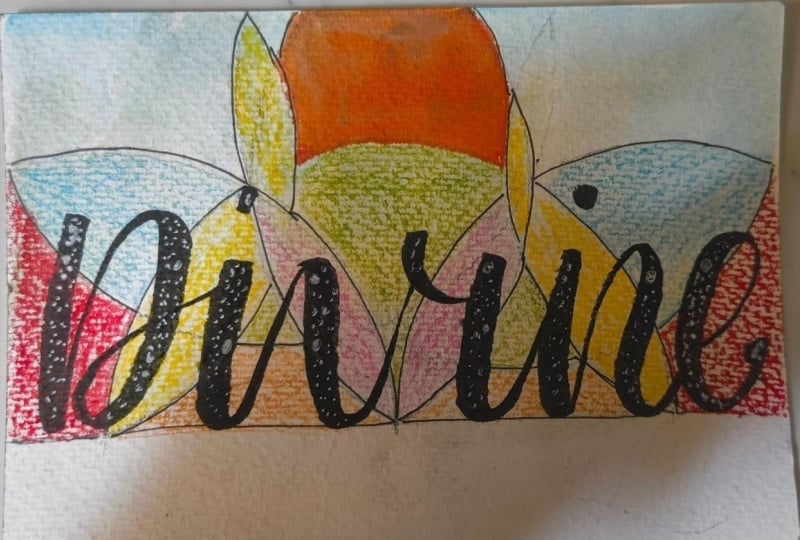
more regulated thoughts. Look at this one. This is
in fact the first word, at least from adulthood
that I can recall just sitting with and drawing
out, following my heart. This was in 2017 way
before I started by professional etching journey or even actually etching
consistently as a hobby. I was just super
overwhelmed with the frustration of continuously fighting to be a priority. I got tired of bringing
up the word in conversation without
ever feeling heard. So I just picked up the
sketchbook and drew the word out. I let my instinct
drive each detail. I meditated on the
word as I drew. I didn't know at the time if
it would work, but it did. It helped me process and
regulate and years later, remind myself of that difficult
day that I got through. Do I see scope for improvement
as I look back at this? Of course, I do so much. But that's not what
this is about. This piece reminds me of
how I helped myself in a difficult time and also how I unknowingly sparked a whole
career path in lettering. I also do this exercise
when I feel stuck, creatively or mentally drained. Just giving myself
permission to create messy, truthful words just
works sometimes. And that's what I want
to pass on to you. This is not about
making your best work. It's about making freely. All this to say
that we're trying to equip ourselves with a tool, not a one time exercise. Cool. So I'll see you in the next lesson where we'll
talk about choosing a word.
4. Choosing Your Word: Before getting into
the actual letting, we need to identify
a word, right? Let me give you some tips and insights into picking
a word that works. So in order to pick
a word that works, just pick a word. Any word. Really? I know how that sounds, 'cause why do we have a lesson dedicated to choosing
your word then? 'Cause even if it's
just any word, I know just how
daunting it can feel, and I want to handhold
you in the process. It's easy to say pick any word, but it can sometimes feel crippling to just
decide on a word. I still go through so much overthinking when I have to
decide on what to letter. I have to actively tell myself
to just commit to a word. So, trust me, I fail you. So the most important thing
is to not overthink it. It should be quick
and intuitive. One thing I really want
to emphasize on is do not overthink about how
you're going to illustrate it or
interpret it visually. Now is not the time for that. Right now, you
have just one job. Pick a word and stick with it. That's all. Okay. Your word doesn't have to be
deep or meaningful. It doesn't need to be profound, aesthetic, or Instagram worthy. It can be completely random, simple, and even silly. One strategy is to just go with the first word that comes to
mind that feels interesting. But sometimes your brain doesn't
quite cooperate. I know. If your brain is doing tricks on you and not letting
you settle on a word, then here are some prompts for you to come up with a word. Think about how you're
feeling right here right now, what is the first feeling
that comes to mind? You can even use
a feelings wheel to help you identify feelings or think about how you want to feel versus how you're
feeling right now. Or it could be random
everyday words like coffee, window, plant. You could even look at
a word search book or even the book you're
currently reading to find a word that
stands out to you. You could look at song lyrics or your own journal entries. Or use a random word generator to look up fun quirky words. Your options are endless
and inspiration is everywhere thankfully
words are all around us, which can make
this overwhelming. But the key, again, is to keep it quick and intuitive and to just come it without
overthinking it. And guess what? If somehow you think
you picked wrong, you can always do another one. Right? If you don't
like the word, you can always try another one. But I recommend you do that only after giving this a
shot and actually following through
with your first word till the end. Give it a chance. That's all I'm
saying. And remember, this isn't your only chance. It's just one round.
So no need to feel pressured into making
a perfect decision. The truth is, it
does not matter. The word itself matters
less than the fact that you have a word selected.
Does that make sense? I also have one
more tip for you. If you come across multiple
interesting words, just note them down
in your Notes app or wherever you can revisit the next time you need a word. That way you don't
feel like you're abandoning an interesting word, and you have some ready
to go for the next time. Yeah. So go ahead
and take a word, and I'll see you in
the next lesson where we'll jump right into
sketching it out.
5. Skeleton Sketch: To create our lettering piece, the very first step we'll
start with is sketching. And specifically,
we'll start with what I call a skeleton sketch, which is exactly what it sounds like the bones of our letters, the basic structure around which the letters
will be formed. This step will
really help us make some very basic but
important decisions about the letching
we're about to create. Like, what is the general
layout of the piece? Where on the page
will my word be? What kind of letters will I
draw upper case, lower case, a mix of both, script style
versus block letters. Will they overlap each
other or be spaced out? Will they follow a specific
angle, these type of things? So let's get right to it,
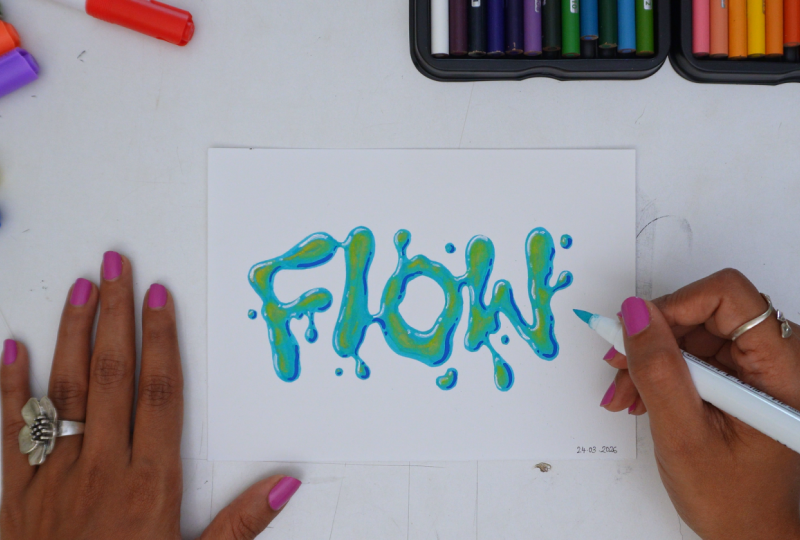
and you'll see what I mean. By the way, the word
I've picked for today's demo is flow. So let's see how I'm
going to go about creating a skeleton
sketch for flow. I'll just start by writing
down the word here. Just like that.
Okay, nothing fancy. Just writing it down in
simple block letters. It helps me to just have
the word in front of me versus in my head
to see the letters, count the letters, and basically just to have it in
front of me visually. Then I'll start thinking
about the actual lettering. I feel like I want
to incorporate some flowy aspect to this. Maybe something liquidy, something that represents
a liquid form. So that's there on my
mind. What can I do? We know we're starting off
with a skeleton sketch, right, which is the basic form, the basic structure
of our letters. So that's our first step. I'm going to keep this kind
of very loose and very free. I'll just start off with an F that's a little bit
tilted to this side. Just like that. And then I want the letters to be sort
of connected to each other, but not in the classic
script style way. So we can do maybe
a smaller case L like that, and then an O. Actually, I want to
leave some more space between the letters so that there's room to flesh them out around these
skeleton lines, bring in those liquidy forms. So I'm just going to space
it out a little bit more. Okay. And then an
O, maybe like this. Okay, there's not enough
space for the W now. I'm just going to
erase the whole thing and nudge everything to
the left a bit more, just to center the
word on the page. And then we'll do
the same thing. Just move it a
little bit more to this side, just like that. Then the L can go
somewhere here. The O goes here, and then we have the W
like this right here. Yeah. I'll just darken these lines so that you can
see them better on camera. I just went with
what I normally do, which is keep the lines as light as possible
while sketching. But of course, you need
to see them clearly. So I'm just darkening
the lines a bit. Yeah. Much better. Okay,
so this is it. This is a skeleton
sketch for this piece. That's a very simple but
very powerful in helping us make some basic decisions and moving us forward
to the next step. In the next lesson, we'll
refine this skeleton sketch by drawing the actual
shapes of our letters. Oh
6. Refined Sketch: We have the basic structure of our letting done,
and in this lesson, we're going to refine
it by fleshing out the actual shapes of our
letters around the skeleton. Now, what I'm thinking
I'll do is try and bring this nice liquidly juicy
effect to my letters. So I'm going to draw around these lines
with that in mind. Just some nice smooth, curvy shapes around
our skeleton lines. Nice and organic. I'm making the ends a little
bit more rounded and thick. Just like that.
Yeah. So similarly, we'll do that with
all the letters. That's the L done. Now
on the O, as well. Notice how I'm intentionally
trying to pull the shape away from
being a perfect circle. Okay, so that's both the outer and
inner circles of the O. And now for the W, wherever there's less space
between the letters, we'll try and keep it thin or
close to the skeleton line. And when there's more
space, we can get the shapes to extend
out a bit more. All right. Now, just to avoid any confusion and to get a better visual idea
of what's going on, I'm just going to erase
all the skeleton lines. You don't have to, but I
think it helps to just see everything more clearly and also to get cleaner
results in the end. We don't need this
skeleton anymore. It served its purpose in being the structure around which
we draw our letters, right? So we can safely go ahead
and erase that now. And then we'll just take a good look at how
everything is looking. Like here, I think I can redraw this curve to look
more like this. And we'll just fill in any gaps that may have come
from the erasing. Yeah. I feel like
there's more gap here than on this side than
between the F and the L. So maybe we can extend this
outward a little bit more. Just like that. And then we'll
get rid of the old lines. That looks better. Now, remember, I
said, I'd like to get the letters to sort of connect with each
other a little bit. So let's try and bring that in. We can maybe do something like this to connect the F
and the L like that. The L and the O can
connect sort of here. And again, between
the O and the W. Just like that. Okay. And again,
we'll just get rid of these extra lines to really see what it looks like
more than anything else. I feel like something
about this curve is still not working for me.
Let me try that again. Yeah. Yeah, I think
that looks better. I think it'll also
be cool to add some splashes or some drips. So maybe around here, we can add a little bit
of a sort of a splash. Just like this, extending
out from the W, and then maybe sort
of a little aftermath of the splash next
to it like this. And a little drop like that. Two, maybe? Yeah. Similarly, we can do one like
this, maybe around here, a smaller one, and some bulges
on either side of that. So it looks more flowy. Here, we can do one
because we already have, like, a little flowing
out situation here. So we can do a little
bit of a blob here, a nice imperfect blob. We can have a little
splash over here, maybe. Not really loving
how that's looking. So let's see. We can do
one in this space here. Yeah, that's much better. Maybe one can go in
this space up here. Okay, so we have a
legibility problem here. That makes it look like
an R and not an L, so we can't do that. Maybe something here instead. And then maybe a splash
from here, just like that. Yeah. So remember to constantly make sure you can
still read the word clearly cause lettering has
to be legible in the end. Otherwise, it's
pointless, right? I mean, it's just random shapes at that point if
you can't read it. So that's one thing you want
to keep in mind. Alright. And then we'll just add
some little circles as drops here and there. And that looks good to me. Okay, so we have our
letters all fleshed out, and this here is
our refined sketch. So now we have an
even clearer idea of what our letters
will look like. We just need to now finish it by bringing it to life using
our medium of choice, which is what we'll do
in the next lesson.
7. Bringing It to Life: Our last step in our
lettering process is to finish the piece off. I'm going to add some color
to bring this sketch to life, but that doesn't
mean you have to. You can keep the
piece black and white or just use the pencil itself to finish it by adding details and personality if
that's what you prefer. This step is less
about the colors and the specific details and more about taking
the lettering piece to a point where it
looks done to you. With how my flow piece
has evolved so far, I feel like adding color with some brush tip acrylic paint markers would be a
good fit for this. So that's what I'm going to use. I'll just lighten
my pencil lines a little bit using the eraser. Before going in with the
acrylic paint markers, just to get cleaner results. I typically don't
sketch so dark, or if I do, I lighten it
a tad before I add color. A kneadable eraser would
do this job much better. I have one, but it's
not within reach, and I don't feel like getting
up to go dog for it right now because I want to stay in the flow P very much intended. Okay, so that's ready. Now, I know I want to use
acrylic paint markers, but I don't know what colors
I'll use yet. Let's see. I'm going to just test out some colors on a
scrap piece of paper, just to see how they look
against each other. Yes. Okay. I think we
have our colors. Okay. So these will
be our midtones. This will be for the shadows, and these for the highlights. Yeah. So first, we'll
start with this one. This will be our
primary midtone color. So I'm just going to
paint the entire thing with this colour. Very simple. I'll start by going over
the outlines like that. We have our sketch to guide us, but I'm also giving
myself the liberty to deviate from it a bit
if I feel like it. That's the outlines for F done, and now I'll just fill it in. Yeah, so we do that
with the entire word. It doesn't look perfect. You
can see the markers strokes, but it still looks handmade
and beautiful human made. All right, so that's
our base color done. Next, I'll go in with this darker blue to do some shadows. I'm going to assume
the light source is on the top left corner, so the shadows will be opposite. So on the bottom right side. Just as a general guide,
you don't have to be too precise or realistic
about the shadow positions. But generally, we're going to aim at placing them like that. So I'll target the
bottom right areas of the letters and go in a little bit away from the edge and follow the
curve just like that. Yeah. This just brings
in some dimension. Plus, introducing another
color makes it look more fun. We're not touching
the opposite side, the top left parts at all. See how it's already
more visually interesting with this
one additional step. So yeah, just like
that, I'm going to carry on and add shadows
to the whole thing. H. Okay. So this looks like a good place to
stop with the shadows. If we feel like adding more, we can always come
back to it later. But for now, this feels good. Now we'll go in and add one more color to the
mid tone areas. It's not really required, but I think it would make it look more fun, so I
want to try that. I'm going to go in with
this yellowish green color, and I'll just color in sort of the middle
sections with this. So roughly in the
central thick areas mostly, just like that. Not too much, little
touches here and there. Now, I'm actually
questioning this decision if I'm gonna be honest about
what's going on in my mind. I'm wondering if I'm making this look more dull by doing this. But I'm going to try and trust the process and
see where it goes. If it doesn't work out, then I would have learned
a lesson, right? If it doesn't look nice, then next time I'll know
not to do this. That's all. Either way,
we'll see how this goes. Yeah. Okay, so that's that. And now I'm going to pick up the yellow color to
do some highlights. So again, we said
the light source is on the top left side, right? So just like we did the shadows
towards the bottom right, we're going to do
the highlights on the top left, just like this. Oh, it doesn't really look very different from
the previous color. So this color is not really working as a
highlight for this. Let's try and see if
this is working better. Better, yes, but not
enough contrast, I think. Okay, so it looks like white
is the better way to go. Let's see. Yeah. Yeah, I
think this looks better. I'll wait for these
parts to dry a little bit before going
over it with white. I'll just add highlights
to the other areas. Using little strokes and dots. You can do this now as well. Okay. Just like this. So we're bringing in some
more dimension by doing this. I'm not very happy with
the contrast here, but it's definitely helping. Can you see how it looks like it's reflecting
light a bit more? Okay, so that's done, and this is where
we're at right now. I like it, but not very happy with the
contrast of colors. So I need to get a little more creative and see
what else I can do. I wanted to bring
in some yellow, but that didn't really work out. So maybe I'll try a
yellow colored pencil and see if that's
going to help me bring out some yellows. Yeah, that's looking
more yellowy and nice. Let me see. Maybe I
can also bring in a green to blend these
two a little bit more. Yeah. I like that. Okay, so I'll come
back to the yellow. I want to just use a little
bit of green to just blend the yellow into the
blue and also make it a little bit more vibrant. I was concerned that the colors were getting dulled down a bit because of how the paint markers were
interacting with each other. So this is helping
to change that. What I'm doing here is just adding some green to blend out the parts where the
yellowish green marker is meeting the teal. Yeah. So I'll just do that
to the whole thing. These colored pencils were
completely unplanned. I was just planning to use
the acrylic paint markers. But just based on how
things turned out differently than what I had envisioned, I'm just adapting. I happen to have the colored
pencils within reach, and they came to my rescue
and helping me make this pop. I do sometimes use
colored pencils to add dimension and details to
my acrylic marker pieces, but my brain typically
things along a one medium path somehow. I'm slowly trying
to change that and be more open to a
mixed media approach, especially with these kind of projects where I'm just playing and discovering along the
way. Alright? So I like that. Some very subtle difference, but I like how that's looking. And I think the yellow is going to enhance that pop even more. So I'm just going
to bring in a touch of yellow to these
areas as well. Yes, that looks good to me. And now as a last step, I'm going to use a
white gel pen like this to just make the highlights
a little bit more vivid. So I'm just going over
the previous white lines I drew with this pen now. Yeah. That's much better, right? I feel really good about
this piece right now, and I feel this is
at a good place for me to call it done now. So yeah, this is my final piece. What do you think? I also
like to date these pieces, so I'll use a small pen and
write today's date here. Yeah, that's it. And there we have it. My flow
lettering feels done to me, and I'm actually
really loving it. I'm so glad I stuck with it and trusted the process
at one point, I did regret my decisions and kind of wanted
to give up, right? And I've seen this
happen so many times. Sometimes, yes, it does not end up as great as
you envision it. But most of the time,
you'll end up with being glad you stuck with it and push through to the finish line. So moral of the story is
try and finish your piece, even if you feel like
giving up in between, okay? So, now it's your turn. Go ahead and create a skeleton sketch for the word
you picked out, refine the sketch by fleshing out the shapes of your letters, and then finish it up with some details that feel like you. I'll see you in the next lesson
with some final thoughts. Yes.
8. Final Thoughts: Before we wrap up,
I just want to say, I'm so proud of you for
taking the time to do this. Whether you created one piece, tried a few variations, or even just showed up and watched the class,
that still counts. Showing up for your creativity
is not always easy. So well done. If there's one thing I hope you take away from this class, it's this. You don't have to wait for the perfect idea or wait for
perfect skills to create. You can just start with a
word and let it unfold. This practice is
something you can come back to as
often as you'd like. You could use it
whenever you feel stuck, when you're overwhelmed and just want to get something
out of your head, as a little weekly or monthly
unwind with words movement, or even as a daily practice, if you want to really build
your letching skills, it's completely up to you. The more often you do it, the more you'll start to
notice your letching improve. And more importantly, how much easier it becomes
to just begin. But at the same time, try not to turn this into something
you have to do. We're not adding more pressure here, we're taking it away. Okay. If you enjoyed this class, I'd really appreciate it if
you could leave a review. It helps more students
find the class, and it also helps me create
better content for you. You can also check out
my other classes here on Skillshare if you'd
like to keep exploring, letting and illustration in
a fun, approachable way. Don't forget to follow
me here on Skillshare to be notified right away when
I publish a new class. And if you'd like
to stay connected, you can find me on Instagram where I share most of my work, process, and little creative
experiments like this. Thank you so much for being here and for spending
this time with me. Until next time for
bye and Happy creating
 Vinitha Mammen, Illustrator | Lettering Artist