Transcripts
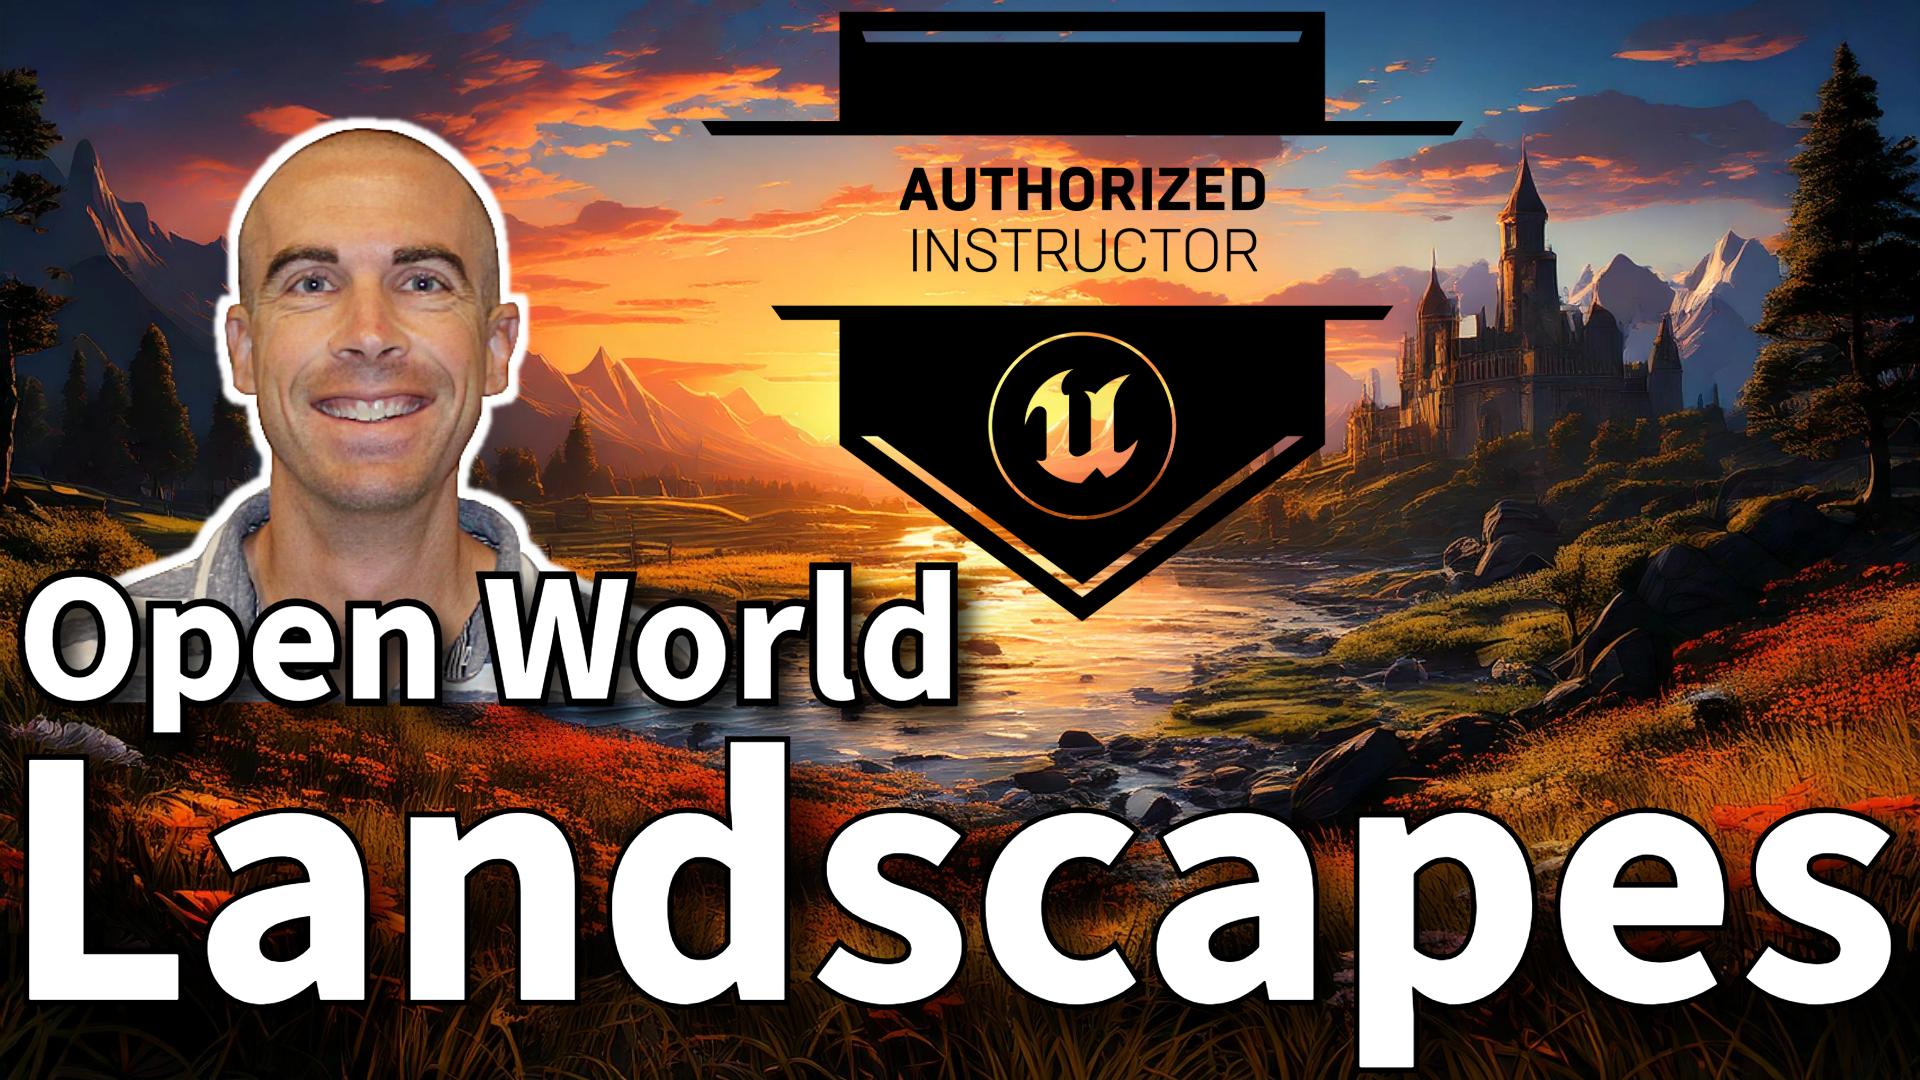
1. Course Promo: Want to create breathtaking
open world landscapes in Unreil Engine five. You're in the right
place. No coating and no prior experience needed. Hi, I'm Greg Wondra, a game industry veteran with
12 years of experience, and I've been teaching
Unreal Engine since 2016. Inside we'll cover how to build and sculpt landscapes
from scratch. We'll learn how to paint
textures like grass, rock, and snow onto
that landscape. We'll add realistic
foliage, rocks, and water. We'll create cinematic
good rays for stunning visuals
and so much more. This course is for everyone, whether you're just
starting out or you're an experienced dev looking to refine your landscaping skills. Ready to bring your
gaming worlds to life, we'll join the thousands
of students who have already started their unreal
engine journey with me. Let's create something
incredible together.
2. Create Project: All right, we're going to go
ahead and get started here, creating a brand new project from the Epic Games Launcher. So let's come under UnreL Engine along the left hand side. Along the top, we're
going to choose Library. And as of today's date, we're going to create a project
using Unreal Engine 5.5. Feel free to use the latest
version of the engine. You can get new engine
versions by clicking this plus button right up here. I'm going to click Launch. And after a bit of time, you will be presented with
the unreal Project browser. Along the left hand
side, let's go ahead and choose games. And for this project,
we're going to be using the third person template. First person would
probably be fine, as well, but let's
go third person, and we are going to give
our project a name, and that can be done
in the lower right. So let's call this
open world landscape. Open world landscape. It's not going to like
white spaces here, and you get to choose
a project location. Now, it's probably good
practice to do it on one drive. My one drive sometimes
has problems, so I'm going to save
it on the desktop, and that'll be fine for me, but choose a location where
you would like to save it. Then after that, go ahead, leave all these the same
as they are by default. And let's go ahead and create. Now after what seems a
little bit of a wait, you are presented
with unreal engine. And let me just walk you through the interface a little bit
here if you are new to this. In the upper right, you will see you have open
world landscape. That's the name of your
project right up there. Along the upper left, you've got various options. I'm going to come under window, and I'm going to load
a layout right away. I'm going to do the UE
four classic layout. This is the layout that
I'm going to be rolling with for most of this project. I'm going to dismiss this new plugins available down here. We've got our view
port right here. We are open automatically to the third person map down here. We've got our content browser, which is where we're
going to be able to bring in various assets. And along the upper right,
we've got our outliner panel. This lists all the various
actors that make up our level. Whenever we select an
object in our level, we have some details that
we can change about it. Alright, so we've got our
Unreal Engine project created. Now let's go about
creating some landscapes.
3. Create Default Landscape: Welcome back. In this video, we are going to create
our very first landscape. Actually, we're going
to create two of them, and we're going to be
creating and working on a variety of
landscapes here just to show you some various
options available to you. Currently, we are in this
default third person map. I'm going to direct
you to the File option right up here in the upper left. Clicking on File. We want to
create a brand new level. Hot key for this is Control plus N. And when
we click on that, it's going to give us the
option to create a new level. Now, one of the options
here that I will select is this
open world option. So with that selected, go
ahead and click Create. And you are going to find that
you are given a landscape, along with a sky right
from the get go here, which is pretty great. Now, this map is
currently untitled. If I go to save it, I can give it a name and
choose where I would like to save it down
in my content browser. Soon as I click on that
little save icon, it says, Okay, you'd like to
save this level. Where would you like to save it? I'm going to save it
in my starter content Maps folder and I'm going to
give this a name right away, and I'm just going to call
this default landscape. And I'll go ahead and save that. And you'll see that once I say that that's
going to change the name of this file right up in the upper left
to default landscape. Now, if I want to ensure that this is the
landscape that I see, the next time I close out of my engine and then
open it back up, I can go under settings,
project settings. And I'm just going to dock my project settings along the top. If I go under maps in modes and I go to
Editor Startup Map, I can change that from
a third person map to my default landscape map, which I see right
here in my listing. So I'll just change it to that. That'll ensure that the
next time I open up unreal, it'll open it up to this map. Now, while we are here, I also want to point this out that because we
created our project using a third person template here in our project settings, maps and modes, if I expand out my default game mode
and selected game mode, when I go to play my game, I will be controlling
this default pawn class. That is my BP third
person character, just to show you where all this content lives
in my content browser. If you click any of these
folders right here and I'll click right here for
my third person character. That'll show you that this
third person content has been added to my content
browser because that was my default project
that I wanted to start, a third person project. And so this is a
character that I will be controlling
when I click Play. And when I click Play,
I will spawn in right here at this player start actor. I'm not going to see
this icon at all, but let's go ahead
and give that a try just so you can see
how this works. So I've just click Play. You can see how I've
spawned into this landscape here and I can use the WAS
and D keys to move around. And if I press Escape, I'll gain control of my mouse once again. I
will have exited out. And just so you know, you
can click Play right here, but these three dots right here, you can change your
playback settings. Right now, I'm choosing to
play in the selected Viewport. You can choose to play in a
new Editor window as well, which I often like. So that's what that
looks like. Alright? I'm going to go
ahead and out here. Okay, so this is one way to go about creating
a landscape. And if you look over
in your outliner, you'll notice that we
have a landscape asset. And if I click open this
drop down triangle, this landscape asset consists of all these landscape
streaming proxies. These are basically the
parts of the landscape, and I just double
clicked on one of that make up the entirety
of the landscape. So if I'm holding down my right mouse button here
in the Viewport, you can use WAS and
D to fly around, score wheel in and
out to change how fast you're flying
around your level. So again, if I
double click any of these landscape
streaming proxies, you can see which section of the landscape that
is referring to. We'll talk about these
more in a little bit, but just know that you've
got a landscape actor that consists of all these
landscape streaming proxies. You'll also notice that
we have a nice sky. When you create a
brand new level, choosing this open world option, you automatically
have these guys a directional light actor. I'm going to double click
on that. That's going to act like your sunlight
in the level. All of these icons right here are stacked
atop one another. Let me just bring out my
directional light actor. That's going to act
like the sunlight, and you can see the
sun right back there. If I hold down the
Control and key, I can actually move my mouse around to control
the sun back there, the angle of the sun
you dip it below, it's going to be
eternal darkness. Alternatively, if you
rotate this actor, I'm just going to
press the space bar to toggle between movement mode. It doesn't matter where you
place this in the level. Rotate. And scaling mode, which isn't really
going to matter here, you can rotate the direction
of the sun as well. So control in L will allow you to control
the angle of your sun here or tapping that space
bar or the W E in arches, or any of these along the viewport will allow you
to modify the location, rotation, and scale
of a given actor. So that's the
directional light actor. We've got an exponential height fog actor
right here as well. You got some parameters that we can play around
with that as well. Sky Atmosphere, skylight, sky
sphere, volumetric Cloud. These all come along for the ride when you
create a landscape, choosing the file new
level open world option. Now again, we'll talk a little bit more about these later on, but this is one way you can go about creating
a landscape. Now, in the next video, we're going to show how you can create a landscape from scratch.
We'll see you there.
4. Create New Landscape: In this video, we
are going to be creating a landscape
from scratch, but I also wanted to show
how we could dive back into our project once we have closed
out of the Unreal editor. And so between videos here, I did close out of the editor
by clicking on the X button in the far upper right
of the Unreal Engine. Here in the Epic Games Launcher, I've got Unreal engine
selected along the left. Selecting library along the top. Here is my open world
Landscape project. Now, I'm seeing this
preview because prior to recording this video, I was diving and doing a test run for what we're
about to do here. You probably see a different
image. That's fine. But there is my
project. I'm going to double click on this
to open it back up. And now you can see, once
Unreal Engine is back open, it automatically opened my
default landscape map asset. And the reason it did this is because in our project settings, I went to maps and modes, and it automatically
opened up whatever I had slotted as my editor startup map here, the
default landscape. And by the way, if I
click on this folder, it'll show that this is
an actual level asset that lives in this Maps folder here in the content browser. Okay, so I showed how we could create a map by
coming under file, new level, and choosing
this open world option. That's what this world
is back here right now. But what if we really wanted
to start from scratch? What if we chose this
empty open world option? So let's go ahead and do
this and then click Create. And now all we see
is a black void, and we have, once again,
an untitled level. Well, what we need to do here is under our modes menu
in the far upper left, we need to check and open
up the landscape mode, which is shift into
to get into that. Now, landscape mode does
consist of several tabs here. We've got a managed
tab, a sculpt tab, and a paint tab, and we will
be talking about all these. But by default, it's going
to open it to manage, and it's going to
be prompting us to create a brand new level. Now, we've got two
different ways that we can create a landscape, create new and import from file. We will be doing an import
from file in the next video, but for this one, we are going
to be creating brand new. We're going to leave
these options as default here at the top,
enable edit layers. Yes. Keep that checked. For material, this
is going to be the default surface type, if you will, that we
want on our landscape. Now, there is a material
in our starter content. If I go under materials, these are like the coat of paint that you can apply to surfaces. And I like this ground grass. So if I select this, I can drag and drop this right
up here into this slot. Alternatively, I
could have clicked right here and found
it by searching for. But let's go ahead and populate our initial landscape
here with grass. We've got some scale settings that we're going to
leave alone right now, and now we've got
these other settings here known as section size, section per component, number
of components, et cetera. Now, if I zoom way on back, I see a preview of what
we're about to create. Now if you change some
of these options, you'll see essentially what
they are set up to do, and I'm zoomed way out. Now, as you can see,
number of components, eight by eight, you can see one, two, three, four, five, six, seven, eight squares
by eight squares. That refers to this number
of components right here. Sections per
component, one by one, and you've got two by two
different ways to kind of divvy up how you're
going to create your landscape,
number of components. You know, you could
change one to be bigger than the other, so you could have a really
long landscape like this. I'm going to go with all the
default options right here. And then I'm going to go
ahead and click Create. Now, once I do that, I
have transitioned out of this landscape managed mode
into landscape sculpt mode. Now, in a few videos time here, we are going to talk
about sculpting mode in ways we can terraform
our landscape. But I want to deal with
the next thing here, which is how do we add
a sky to our level? Currently, all I see in my
outliner is a landscape. We just added one. And if I
click this dropdown triangle, you can see I've got these
landscape streaming proxies, and if I double click on them, it shows where these various
landscape streaming proxies exist here in the
landscape asset itself. But now let's go
ahead and address how do we get a sky out here? Well, the quickest
way to do that is to come under a window, and we've got this option
for ENV Light Mixer. That stands for
environment Light Mixer. And if we just bring on this
window, it's real simple. We've got some buttons right
here to create a skylight, directional light
sky atmosphere, volumetric cloud and height fog. So we can just click
on each of these, one, two, three, four and five. And now you can see, we've got a sky. You can choose to leave
this panel on or not. Sometimes I like to dock it down next to my content browser. And now for each of
these various actors, a directional light,
skylight, et cetera, you can see that they are now all added here in my outliner, and I can adjust various
parameters about them here in my
Environment Light Mixer. I'm not going to do that now. We can do another video
on that later on. But you'll notice
that right now, these are grade out
here in my outliner, and that's because I am
currently in landscape mode. If I did want to double click
on them and select them, I would have to
transition out of landscape mode back
into selection mode, which is shift in one. That is our default mode here. So if I do that,
then I could say, double click on one
of these actors. Let's double click on my
directional light actor. And these are all stacked
atop one another. Let me just lift it up into the air by left
clicking on it. And so there you can
see, once again, I could tap the space
bar to rotate it. There's my sun. Or, once again, Control and L and
moving my mouse is a more elegant way to move that sunlight around.
Alright, great. So this is a second
way to create a landscape and a way to
create one from scratch. Let's go ahead and
save this level. So I'll click this save button in the far upper
left right up here. I'll save it in that
same maps folder, and I'm going to call
this created landscape. And go ahead and click
Save here as well. Right? In this video, we created a landscape
and Sky from scratch. In the next video, I will
show how we can go about importing a landscape from
somewhere in the world. Before we finish out this video, however, let's show how
we can save our project. If you come under file
in the far upper left. Choosing to save all
Control Shift and S is something I like to get students in a habit of doing. So make sure you go
ahead and do that and we'll see you all
in the next video.
5. Import Landscape: Welcome back. In this video, our goal is to create and import a height map to instantly recreate the contours of
a real world landscape. Now, this is a good,
sort of cheaty way to get a quick start on
creating a landscape, a realistic looking one. And to facilitate
this discussion, we need to talk
about what the heck a height map is that I
just referenced earlier. Well, a height map is something
that looks like this. This may look familiar to you. Australia a height map is simply a gray scale image which is used to generate
three D terrain, and it uses the pixel colors
to determine the topography. So the way this works
is when you import an image such as
this into unreal, the whiter the pixel, the higher the elevation. So these would be the
high parts of Australia. The blacker the pixel, the lower the elevation. So you can see the
surrounding area of the ocean would be
the lowest portion. Now you've got some various
shades of gray in between, so the whiter the white,
the higher the high, the blacker the black,
the lower the low. Now, instead of
importing in this one, we're going to actually sample a real portion of the world, so you get to customize
this a little bit. Let me go ahead
and minimize this. And for this, I like to use a website called tan
Gram Height Mapper. Using your left mouse button, you can pan around, scroll wheel to Zoom on
up and we're going to sample a real world
section of the globe. Now I live in the United States, so I'm going to
come somewhere in the southern California region
where I'm at right now, and I live somewhere around here in
Bakersfield, California. And here's the
Mount Whitney area, the highest of high area
in the United States. And I live in the
central Valley in the smog Valley so that'll
be the lows of low. Now to sample this, and this is a pretty
good section, get some highs, some lows. All we need to do is
export this image. So there's an Export
button right over here. Click on that, and as
soon as we click on that, it's going to download that. And I can navigate
to where this is on my computer by simply
clicking on this folder. And let me just bring that on, and so my image should
look like this. You'll notice this
is a PNG file. Double clicking on this. You can see my sampling that
it just exported. Alright, so now let's
bring this into Unreal. G to out here real quickly. Move this off to the
side, bring on Unreal. And I'll create a
brand new map here, so file new level, go to go to empty open world and create and to get
to landscape mode, we're going to come
under selection mode. Landscape, shifting two
would get you there. And before we had created a new landscape by
having this selected. This time we're
going to ensure that under landscape managed new, we're going to import
from file right here. Now I'm going to clear
out the sample image that I had prior
to recording this. And I'm going to slot in. I'm going to search
for that file that I just exported from Tangram
clicking on these three dots. There is my height Map. And I'll leave everything
here the same as before. However, I am going to be
customizing the scale. Now, by default,
this scale is 100. Prior to shooting this
video, I did a dry run. I want to set this
to 20 because I found that when I import
some images like this, a Z height that is scaled to 100 is rather extreme,
way too extreme. So I'm going to set this to 20. I'll leave the material
as ground grass. Everything else here I'm
going to leave the same. I'll automatically generate a height resolution
there for you, go ahead and click Import. Now it's going to
ask me to save this, so I will call this California. That's going to be my map
name in the Maps folder. And it's going to
take a moment here to import this height Map. Now, as soon as that's finished, we can't see anything here
for a couple of reasons. First, being, we
don't have any light. So using our environment
Light Mixer, and if you don't have this tab open from earlier in the course, come under Window
Environment Light Mixer to turn that panel on. I'm going to add my skylight,
my directional light, sky atmosphere cloud and fog I still don't see
anything, though, and that's because
over in my outliner, if I expand out that landscape
that I had just imported, all of my landscape streaming
proxies here are unloaded. So I'm going to jump temporarily
out of landscape mode, go back into selection mode. So that way, I can select my very first streaming
proxy here in the outliner, select that, scroll on down, hold down the Shift key, and then I'm going to
select this last one. All these are
listed as unloaded. So now all I need to do is right click and I'm going
to force load. And now you can see what the
train roughly looks like. Again, this isn't
going to be perfect. It's going to need a little bit of
massaging, if you will. But this is essentially
what I have just imported. Let me just click off of here so you can see that
a little bit better. And I'll kind of
compare this with that image that I just sampled. Not Australia, but rather let me bring this
off. So there you go. You can see the low
spots right here, the Central Valley
of California, that is expressed right here, and the higher mountain range, the Sierra Nevadas, that is expressed right here in my map. So does a pretty good job. Once again, this is just meant to serve as a starting point. But you'll also find
some flaws here as well. You'll see some
stuff such as this. We can get rid of
that, and we will do so in an upcoming
video or two here, but it's not a bad
starting point. Now, just to show you how
you can re scale this, if I was to go ahead and
select in my outliner, the landscape itself,
you see here, we've got our scale
setting set to 20. If I had left that at 100, let me just set that to
100 and press Enter. You're going to get something
that looks way too extreme. So I find that playing with
that Z setting will give you a much more accurate depiction of what this would
actually look like. Play around with that
to get the terrain as bumpy or is not as you'd like. And so there you have it.
We have just imported in a height map to help us get started in creating a landscape. Not a bad sort of cheaty
way to get a head start. Now, there's going
to be one final way I'm going to show you how you can get a working landscape
going for you in Unreal. But before we get to that video, we need to talk
about world Ptition in the next one.
We'll see you there.
6. World Partition: Welcome. Before I show
you one more way to get in and working with
a landscape in Unreal, I thought it would be
appropriate to talk about world partition and its role with landscapes
in Unreal Engine. Now, those of you that
are a little bit more astute may have noticed
in the last video that I had a couple of tabs over on the right hand side next
to my details panel here, a world settings tab and
a world partition tab. We're going to be diving into these a little bit
in this video, but I want to show how
to get these panels on since this is going to be
the focus of this video. So to find a world partition
and world settings tab, couple of ways you can get
your world settings tab, you can either come under
settings and choose world settings
right from here in the upper right alternatively, if you come in the upper
left under Window, you can find world
settings right there. You can see it's
checked on, meaning, it is in our editor here. And the world partition tab that we're going to be working
with a little bit here, you can get that by coming under world Partition world
partition Editor. Now, once you've
got a layout for your editor here
that you're really happy with, by the way, you can save your layout
by saving your layout as, and then the next
time you come into Unreal, you could
load your layout. So I saved one as Greg's layout. And so whenever I come in and I want to load my layout,
just come under here. Reg's layout. So there's a nice little tidbit
of information. Alright. So world Partition is the automatic data
management and distance based level
streaming system in Unreal. And the way this system
works is it stores our world in a single
persistent level file. And then it subdivides the space into streamable grid cells. Now, to really show this off, I'm going to jump into a new level that we
created earlier, the California level that
we left off last video. And I can actually
jump to that by coming under file recent levels, and there's my California level. It's a brand new day, so I jump back into this
default level by start. So here I am in California, my imported landscape, if you will, and I
don't see anything. So the first thing
to point out here is when you come into a level such as this and you don't see anything, come under
your outliner. Look at your landscape.
There it is. Let's break out this into
its subdivided components. So these are the landscape
streaming proxies. These are all these
sections of landscape that it automatically divided
our landscape into. And you can see that
they are all unloaded. Now, if I come under
world partition, I can see that I've got these two landscape
region actors. These are these landscape
region actors right here. Now, in world partition, I can hold down the
right mouse button to kind of pan around like this,
scroll wheel in and out. And an easy way to get all these landscape streaming proxies to load in so that we see something is you can left click and drag right here in
your world partition window, left click and drag around everything and then simply right click and do Load
region from selection. And as soon as you
do that, Boom, all your landscape streaming
proxies now appear. Now, if you're
wondering where each of these landscape
streaming proxies actually exist in
the greater context of your landscape,
in your outliner, if you simply come along the left hand side next
to each streaming proxy, you can click this eyeball icon, toggle it on or off to see
where exactly that exists. Like so. Like, so. What I really want to show
off in this video is how these landscape
streaming proxies stream in or out based upon
your distance from them. So I'm going to use
the right mouse button and W A S and D, and I'm going to scroll wheel up while I'm doing this
so I fly faster. Scroll wheeling back will
make you fly slower. It changes that value in the upper right, by the way,
while you're doing that. I'm coming to a far end
of my landscape here. Now, if I was to simulate my game and I
can do that right here, Alton S will
simulate it as well. You can see how only this
section of the landscape is in. And as I kind of fly on
down here, new sections, new patches of my
landscape appear, and they appear as I
get closer to them. So that's how the
streaming system works. Now, why does it work this way? Well, for this, we're going to dive into our project settings. Let me quit out of
here really quickly. If I go under my
project settings, you can access that by
coming under Window, sorry, rather edit
project settings. And we come under
maps and modes. Now, the pawn, the character that we are controlling
in our level, if we were to play, is this
third person character. And the player
controller that is associated with
that is right here, this player controller
right here. Now, player
controller blueprints attach themselves
to a player pawn, just as a player pawn, you could think of,
like, a puppet. Think of the player
controller class as the puppet strings
that's attached to it. Inside of this blueprint, there are some checkboxes related to this whole
world partition setup. And just to show
this off further, I'm going to go into
the player class and section here and I'm going to create a new
player controller, clicking on this plus button. And I will store this, I guess, in my third person
Blueprints folder, and I'm just going to call
this PC for player Controller. Underscore my player
Controller. And press Save. And inside of this player
controller class blueprint, let me just dock
this along the top. If I've got class defaults
selected right here and I simply type in
world at the very top, we can see that this
player controller by default is enabled as
a streaming source. So once again, think of
the player controller as the puppet strings that control your pawn, your character. So it is automatically associated and connected
to your character. So wherever your character goes, this comes along
for the ride, even though you don't see
anything visually. So this serves as our
streaming source. That box is checked. So wherever our character goes, that's essentially our
streaming source for what sections of the
landscape are going to be streamed in or out based upon our character's
proximity to them. Go ahead and say this quickly. And inside of our
project settings, we can see this
player controller now associated with our project. Let me go back into my level. And now I want to show how
we can manipulate the range at which we see some patches
of our landscape here, the various landscape
streaming proxies. Now, for this, you can come
under the world Settings tab. And inside of here, we've got a whole section for
world partition setup. And as you can see, enabled
streaming is turned on, as it is when you create a landscape or
import a landscape. It will be by default. Now, we've got this show grid preview checkbox
right down here. Let's go ahead and turn
this on and down below, you can set a debug color. So let me set it to
something very bright, like a bright green, something
like that, and click Okay. If I fly up high here, I'm going to go a bird's eview. See that white dot? That is essentially right below
where my camera is here. And if I flying up, you
see a couple of things. That halo, there is my range. It's a little bit tough to see, but I'm trying to circle it
with my mouse cursor here. So that is my loading
range right here. So whatever that touches, it's going to stream
in those sections, those landscape
streaming proxies. So whatever it touches. So you can see it barely
touches this patch right here, but it will load that
in as it will for this, but it doesn't quite touch that, so it's not going
to load that in. Now, if I fly on down, and I go ahead and
simulate my game. I could play it as well, but simulating is a little
bit easier to see this. I should see that I see up to this portion where my mouse
cursor is of my landscape. And anything beyond here I should not see. It
should be streamed out. So here we go. And you can see it actually touched a little bit of the
corner right there. Anything beyond that line
right there is streamed out. And as I kind of fly forward, new sections will stream in as I get in
proximity to them. Now, you can change
this range, obviously. So if you wanted
to make it so that things load in from
a further range, just increase this loading
range right down here. You can put your mouse cursor down here and expand
it out like so. Or you can simply punch in a new number so
I could punch in a number like 80,000
right down there. And now you can see if
I simulate my game. It's got a little bit
more distance before that lands streams in or out. Now, this is good for keeping your game
running performantly. So that begs the question, how performant is
our game running? Well, I'm going to go ahead
and stop the game here. You can actually
show your frames per second by clicking right
up here in your viewport, and you've got this show FPS. Let's go ahead and turn that on. And when that's on
in our Viewport, you can see your frames
per second right here. I like to have that on. When
you simulate your game, you can see how it's
affecting things. Go ahead and stop here.
Now, what do you do about those landmarks that you want to appear no matter what? I mean, what if I had
some giant tower, like in Breath of the Wild that I didn't want
it to stream out? What could I do about
a situation like that? Well, I'm gonna place an actor way over on this other end of my
landscape right now. Let me just bring
in a basic shape. Gonna go with a basic cube. Let me just drop
this on down here. And with that selected,
right now, it's super tiny, I'm going to hit the R key on my keyboard to bring
on my scaling tool, and I'm just gonna
make it super big. And Super Tom just
gonna grab that handle. And I will tap the W K back up here and put
this way up high. So now you can see
my streaming range, that greenish area, if you will, doesn't reach as
far as that tower. So if I was to simulate, that tower streams out, as well. How can I make it so
that that tower is immune to this loading range? Well, there is a way to do that. Go ahead and click Stop here. If I have that actor
selected, cube, and I go to my details
panel and I type in load I can uncheck This
is spatially loaded. Now, by default,
whenever you place an actor in any of these
landscape streaming proxies, it'll stream in or
out based upon if the landscape streaming proxy it is on is streamed in or out. I can have this ignore
it by unchecking this. And now what'll happen
is if I simulate my game, that'll appear, even though the landscape
streaming proxy itself beneath it has disappeared because
it's not streamed in yet. Now, if I was to check this box, it is spatially loaded, I turn that back on again
and simulate my game. I can see it disappears. Check it back out,
Simulate. I reappears. So that's essentially
the basics of world partition and how the
streaming system works. Your playable character has a player controller blueprint
associated with that. And this association with this enabled streaming source
is basically going to load in those sections of landscape based upon if you
are within range of those. And again, you can
set your range right here from the
world settings. Show that grid and
set your range. Now, a few more
things here about world partition before
we end this video, I'm going to go ahead and
click on his tab once again. Your arrow right down here. See that arrow right there. That represents you as you fly around. So
this is good to know. As you can see, it's
going to pivot around as you fly around your
map. It's good to know. If you were to right click in any section of your map here, you could play from here
or move your camera here. Play from here. I'll play
from that exact spot. You can see over in your world
partition tab over there, I've now turned into
an orange arrow as I'm pivoting
my camera around. You can click, double
left click anywhere to jump immediately to that
section of your world. And I also want to point out here that in my world partition, if I had something like
that cube selected, I could click on this button
to focus on that selection. I'll jump right where it is. You've also got some
other options here, like a show button where you
can show grid coordinates. I don't find this super useful, but it labels different
coordinates in your level. These don't actually
associate with these numbers. You can also show your
mouse coordinates, which I do find handy
once in a while. And you've also got this
build option right here. Build World Partition
Editor Minimap is a nice thing to do, and I will do it
to end this video. Now the reason I save
this for last is because this can take
a little bit of time. And what it does is instead of this sort of ugly looking view, it'll actually make
this into a nice looking minimap that reflects
your landscape here. So I'll finish the
video off here. Go ahead and do that, as well, and that will finish up our discussion on world partition. See you all in the next video.
7. Pre Built Landscape: Alright, welcome back. Up to
this point in the course, I've shown a few
different ways that we can go about creating
a landscape. We had the file
new level option, and we created an open world, and that's our default landscape that you see in the
background here. We also went and created a landscape by going
into landscape mode, and we explored the two ways in here in landscape manage mode. Under the new option, you can create new. And that was our created
landscape level right here. And we also imported
one from a file, and that was our
California level. Go back and view those
videos if you want to see those methods on how
to create a landscape. In this video, we're
going to show off one more way to
create a landscape. And really, I shouldn't say create because
we're going to be cheating a little bit by
using a pre existing one, and that's fine, especially
when you're getting used to all the landscape
and foliage tools. So we're going to be adding a content pack to
show you how you can work with a pre built landscape and here in our content browser, we want to open up something
called the fab tab. Now, you see this here
in my content browser. If you don't see this little
button right down here, what you want to do is
come under Edit, plugins, and you want to
search for fab now, fab plugin is where
you can go to add all kinds of additional
content to your projects. So with this checked, if it's not already,
you can check it, and down here, it may
prompt you to restart it. If it's already checked and it's not prompting you for a
restart, you're good to go. But if it's not checked, check it and restart your engine. What that'll do is it will add this fab button to
your content browser. And when you click on that, it'll open up a brand new tab. Now, within this
tab, we're going to be searching for a content pack, and the name of
this is going to be MW Landscape and I'll
search for that. And it's gonna be
this guy right here. It's gonna be called MW
Landscape Auto Material. And I can just zoom
on that a little bit, so if you want to
see the name of it, that's what it's going to
be called right there. So what I'm going to
be showing you in this video is how to work
with a preexisting landscape. Now, if this content pack is not available at the time
of your viewing this, I'm sure there will be other
content packs that will do similar to what
we're going to be demonstrating right here. Now, once you have added this content pack or found
this content pack within fab, the way you get this into your content browser
is by clicking on it, you can click on add to Project. And then in doing so,
it'll begin to add those project files to
your content browser. You should see a
little progress bar appear in the lower right. So I'll go ahead and
initiate this now. And you can see it's starting to add this to this project. I have this added
to another project, and I'll rejoin you
after this is completed. Okay, with that now completed
back in my content browser, I can see that I've got this MW landscape automateial folder, and inside of this, there's
going to be more folders. I'm going to jump to the
map folder inside of here, and here are some
preexisting levels that you can use as a starting point for
your own landscape. You've got a mountain range, an island and a desert, and I'll just go inside of the mountain range,
double clicking on this. I'm not going to save any of what I've got here going
on my default landscape. I didn't really
make any changes. Okay, we can see that the map has finished loading
up in the background. I'm just going to clear out of this error message for now, so clicking on this X button. Now, let's just poke around
and see what we've got here. I'm just going to peel this down holding down the
right mouse button. I'm going to press the E key on the keyboard just to rise up. And as you can see, it's quite a beautiful looking landscape
right out of the box. Now, I want to point out how
this is constructed and some things you need to know
about if you want to work with this as
your base landscape. For starters, note
that in the outliner, we have currently just
one landscape actor, and it's selected right
here and you can see it outlined there in yellow. And you may be wondering,
well, what the heck is all those mountains I'm seeing beyond that patch of highlighted
yellow right there? Well, these are actually
static meshes right up above. And so if I was to click on
each of those individually, you can see how these have
been placed individually, and they've been
sort of melded into the scene to create a
sort of seamless look. And so if we were to hide
all of these static meshes, let me just hold down
Shift and left click. And hide them by clicking
on these eyeball icons. You can see that the only
actual landscape actor itself is this guy
right in the middle. All the rest are kind of
meant as background scenery. Now, that is going to be really
handy information to know when we start talking
about landscape, sculpting and painting. Because these are
static mesh actors, we cannot sculpt or paint
these particular actors, at least not using
the landscape tools. And for that, we're
going to be working with just this section
right in here. So just note that
static mesh actors, they are different
from landscape actors. The landscape actors, which
this course is focused on, we can do things to this
that we cannot do with these static mesh
actors that are used mainly just for
background ambience. Now, one thing
that is similar to the other landscapes that
we have built thus far, as simple as they may be, is that this uses the lighting
system here in Unreal. We've got a directional
light actor, exponential height fog,
we've got sky atmosphere, skylight, volumetric
cloud, all the things you can find in your environment
light mixer tab. And once again, the
way we got that with our other landscapes
was clicking under Window Environment
Light Mixer, then those were
simply buttons that you clicked to add
to your level. Now, one thing you
may notice that is different about
this landscape versus the other ones thus
far is we don't have any landscape streaming
proxies underneath it. In fact, if you look under
the world partition tab, it says, World Partition
is disabled for this map. So how do we turn this
into a world partition? Well, if I come under tools
here in the far upper left, in the tools Dropdown, we've got at the very
bottom Convert level. So if we click on this,
we need to search for that map inside of our MW
Landscape Auto material folder. Under Maps, there's my Landscape
Mountain Range example. Click Open. And then in this
dialog that pops up, let's just say convert in place. Check that box and click
Okay, and then save. And so after having done that convert level,
my engine crashed, and as I got back into
my level editor here, I went back into
file recent levels and got back into my
Mountain Range example. Now I can see World Partition
has some stuff down here, but a lot of it is
unloaded right now. So let's go ahead
and load this in, including all of our
landscape streaming proxies. So I'm going to select
this first one. Hold down Shift and
select the bottom one, right click on that, and
I'm going to force load. Right. And now I've
got a landscape subdivided into
streaming proxies. Now my mountain static meshes
are currently unloaded, so I'm going to try to
load those in as well, select, hold down ship
and choose that one. Then I'll right click and try to force load these as well. And if you see
anything else here, you can force load
those in once again. I've got a color checker here, which I'm not even
sure what that is. But that's another way. Alternatively, down here
in World Partition, what we could have
done is just zoomed on back, left clicked, dragged. And then we could have done a
load region from selection. I'm going to go ahead and say this right away by
coming under file, and I like to save all Control, Shift and S is the hot
key for doing that. Get to know that guy right
there. Control Shift ins. And one thing I will
do between videos here is I am going to come under
World partition and build, and I want to build that minimap because I like to see something a little
bit more graphic. But now, before I
end this video, I actually want to jump out
to my file recent levels, my California level, where I did build that minimap in
between some videos, and I'm not sure if I showed
you the result of that, so I'm just going to hop
back into there quickly. And I can see what this
minimap currently looks like. Now, this is a pretty
boring looking minimap simply because we don't have a whole lot of character to this minimap outside of let
me just double click here. So undulations right there. Like, we've got very little
color variety in here. But that's to come in the upcoming videos where
we are going to start to get into sculpting our landscape and
painting our landscape. Before we do that, we've
got one more video here on working with
landscape creation, adding and deleting sections. So we'll see you over
in the next video.
8. Add & Delete Sections: Welcome back. In this video, I'm going to show
how you can add or delete sections of
your landscape. And for this one, I'm
going to be working inside of my California level, my imported landscape,
although this lesson will apply to any created
landscape that you have. So here's the deal.
You've imported in a landscape such as this, and maybe you've got
some unsightly areas such as this over here. Doesn't look like much. How can you get rid of
this? Well, you can get rid of this by coming
into landscape mode. Right up in the upper
left clicking on this drop down or shift and two will get you
into landscape mode. And the reason I'm throwing this lesson here is because
we've been talking about landscape creation and all that's done under
the managed tab. And in this managed tab, we also have the ability to add or delete sections
of our landscape. I'm going to start
off with delete here. So by selecting this, if I now mouse over on
top of my landscape, you can see how I have
this orangish square. Deleting it's easy,
simply left click. Left click. Left click Delete. Now, you can actually
make your brush size here a little bit
bigger in the details. It says my brush size is one. But if I was to set this
to say two, press Enter. It makes it a little
bit bigger so you can delete out larger sections. Now, it doesn't have to be over the entirety of the landscape. You can have part your brush
size over the landscape. Like, right now,
I've got half of it. Left click, it'll delete
out sections like so. So adding is done in
much the same way. So instead of deleting,
just click Add, and you can alter your brush size to be
bigger or smaller. This is done in
squares sections. I usually like to keep this
at a brush size of one. And as you kind of go over
the edge of your landscape, you'll see this green
preview up here, all you got to do is just left click to add to your landscape. You'll notice that
I need to be next to an existing
section of landscape. I can't just kind of come
out in the empty void here, so it's got to
connect to something. And again, you can
set your landscape brush size here for
your add to be a little bit bigger to add many sections at
once if you like. And there you have it.
There is adding and subtracting sections
of your landscape. Just be sure to save
after you've done so. That'll do it all
for this one, guys. See you in the next one.
9. Sculpting Overview: Welcome. In this video, we are briefly going to
talk about sculpting mode within the Unreal
Engine Landscape toolset. Now to do this, I
obviously need to be in landscape
mode. So here we go. Shift two will get
you in there if you forgot how to kick the
engine into landscape mode. And within landscape mode, we are presented with
three different tabs up at the top here. We've got a managed
tab where we have created landscapes and
added and deleted sections. Sculpting tab is where
you want to go to find various tools to
terraform your landscape. That is to raise and lower it, to create mountains,
valleys, that kind of thing. Although I should say
these sculpting tools are not great for
creating mountains. Hills are a much better use
of these sculpting tools. Now, we'll demonstrate some of these sculpting tools in greater
depth in the next video, but this is going to
give a quick overview of how this essentially works. So let me just back up here. It's worth pointing out that these landscape sculpting tools, these will only work
on a landscape actor, any of these landscape
streaming proxies. Once again, this landscape auto material, this
mountain range, this consists of
a landscape with landscape streaming proxies
right here in the middle, and it's surrounded by these various mountaine
static mesh actors, these guys on the perimeter. So these landscape
sculpting tools cannot affect these
static mesh actors. Now, we've only got one landscape actor
in our level here, and thus it knows that this is the landscape that we
are looking to sculpt. If we had a second or a
third landscape out here, you would see another
option here for which landscape actor
you're looking to sculpt. But here's your various tools. Your base one is
the sculpting tool. And the way this
works is you've got this little spotlight icon, if you will, and this represents
your sculpting brush. And to raise the landscape, all you need to do is hold
down your left mouse button. And you can vary how quickly it raises the
landscape here by adjusting your tool strength in the left hand
column over here. Bigger numbers equal
greater results. And while I'm here,
I also want to point out that we've got a brush size. You can see the size of my spotlight right
there was rather small. You can actually
increase this as well by sliding this
over to the right. Now, it looks like this
is the maximum size. And again, I'm just holding down the left mouse button
to raise a terrain. However, you can actually
punch in a bigger number. In fact, if I was to
click in this field, I could put in a value. I always go with 70,000,
then press Enter, and that shows you the actual maximum size of your brush,
something rather huge. So if you left click,
you can raise up a whole section of
terrain at one time. Not very much recommended. I'll just do Control Z to undo that little bit
of sculpting there. And I'm going to set my brush
size back down smaller. Now, you see I'm clicking in this brush size field over
on the left hand side, and I'm sliding it to
the left and right. You've also got some hot keys
that will do this as well. So let me just kind of spotlight
my brush right here and show you that if you hold
down any of the bracket keys, these are the bracket
keys directly to the right of the P
key on your keyboard, you can increase or decrease
the size of your brush. Now with this sculpting brush, holding down the left
mouse button raises the terrain and holding down shift and left clicking
will lower the terrain. You're going to find
that holding down the left mouse button and
then holding down shift and left mouse buttoning with these various tools do the
opposite kinds of things. Now, one more thing I
wanted to talk about briefly here before
I ended this video, all these various tools have a tool strength
and a brush size. Let's talk about this
brush fall off, as well. Now, what we've got here with my brush is two
different circles, the inner circle and
the outer circle. The inner circle is
where the brush will do its effect to 100% of
what it's meant to do. In this case, if I hold
down the left mouse button, it's going to raise the terrain. From the edge of
the inner circle to the edge of the outer circle, that effect is
going to taper off. So if I just hold down the
left mouse button right here, you can see how it raises the terrain right
there in the middle, but how it fell off
towards the perimeter. Now, you can change
this fall off effect by once again clicking in here and dragging you can see if you go with
the value of like 0.9, now you've got a
very small center of full effect and
a large fall off. So holding down
left mouse button, you've got a little bit
more gentle of a slope. Like so. Whereas, if I come to some other
terrain right here, I'm going to change my brush
fall off to be much smaller. In fact, I'll make it so
that there's none at all. When there's none
at all, essentially the circles overlap, and now if I left click, you can see it's got
a very drastic effect going all the way to the edge. I don't necessarily
recommend that. Setting these back to
their default value is as simple as clicking on
these back buttons here, and that is a quick primer of sculpting mode within unreal. In the next video, we'll talk more specifically
about what each of these various tools
can do. We'll see you there.
10. Sculpting Tools: Alright, welcome
back. In this video, we are going to be talking about the various sculpting tools available to you here
in landscape mode. Now, it is a different
day from when I last recorded the
previous video. And when I went
back into Unreal, I got this message here in my landscape auto
material level. If you get something like
this error message like this, the way you can fix this
is simply by clicking on this save modified
landscape link, and you will get a pop up such as this thing like, Yeah,
do you want to save this? Say save selected? And then
you should be good to go. So let's go ahead and
exit out of here. Now, I'm going to be doing
most of my demonstrations here in my landscape automial
Mountain Range world. And I'm simply
gonna be doing this because as I sculpt
the landscape, it's going to make it
look kind of cool because this landscape has a specialized material
associated with it. Now, we haven't gotten to
landscape materials yet, and we will but know that as we are sculpting
this landscape, because of the material
associated with this landscape, and I'll just show
you this briefly. This is the landscape
material applied to this. That's the coat of
paint on our landscape. It's automatically going
to apply rock, snow, grass, that kind of thing,
depending on the slope, the height, that sort of thing. All we are focused
upon within this video is simply how to
terraform our landscape. That is to raise and
lower the landscape, the various tools
associated with that. Now, if I jump back out
of landscape mode and go into selection mode
before I get started here, it is worth mentioning
that, again, this whole level does not
consist of a landscape actor. I cannot sculpt
this entire level. And once again, you can
see this by selecting your landscape here in your outliner and all
the streaming proxies. And I'm in selection mode, so I'm going to hold
down Shift left click. And now you can see the
sculptb portion of this level. All the rest of this level consists of static mesh actors. These mountains, the ones that are highlighted here in yellow, and they kind of blend
together, I cannot sculpt. Only this middle portion here. Okay, so jumping back
into landscape mode, I'll do Shift and two to jump directly back
into that right there. And I'm going to start off
with my flattened tool first. I'm going to go a little
bit out of order. So that's going to be
this guy right up here. Flatten tool. Let's go
ahead and select that guy. And with this tool, wherever you initially click
in the landscape, it will flatten
it to that level. So if I was to left click on
top of this snowy plateau, and let me just
increase the size of my brush by pressing
the bracket keys, the right bracket
key on my keyboard, you can see I increase
my brush size. If I begin left clicking
right here and I hold down left click using the
default tool strength, it is going to automatically flatten all the
terrain around it. If I was to sample
a lower section of the landscape, like, say, down in this valley here
and hold down left click, it'll flatten it
to that landscape. Now, the reason it is
showing water is because the way this material is
designed at a certain level, when you flatten the terrain, it'll automatically
turn it into water. I'll reveal more the
details about how that works when we get to talking
about landscape materials. So a couple of other
wrinkles that you'll want to know about when working
with the flattened tool, you can actually
specify height that you flattened to by
checking this box for flattened target
and then specifying a height in unreal units that you'd like to
flatten towards. So if I type in a value like
5,000 here, press Enter. Now as I mouse over
my landscape here, you see this little
cloud up above it. And if you look really closely, let me just zoom
on up right there, you can see that that is the preview of the height
that I would flatten to. So with that flattened target, if I left click right now, you're going to see it's
going to automatically flatten to that value height. Okay, now I'm going
to uncheck that. Another little wrinkle
that I like to use here is use slope flatten. So if I check this, and I was to find a slope
that I would like to sample, I can flatten to
that slope angle. So if I come over here
something like this and I left click right about
here at that slope angle, you can see how it's going
to flatten it to that angle, which is pretty nice, indeed, if you want to have a little
bit of a mountain ridge. Okay, the next tool I'm
going to jump to here is the noise tool right here. And this is a great tool
to use if you just want to add some random undulations
to your landscape. Now I'm going to make
my brush size bigger than what is seemingly
the max value here, even though it
looks like that is the maximum value that I can
put in for the brush size, if you were to punch in a
number like, say, 50,000, then press Enter,
and I will 50,000. It'll actually
make it that size. Now, with the noise tool, you get to decide how much strength that
you want with this. The bigger the strength,
the more the noise. And this is going to add
some random undulations. If we have noise mode as both, it'll randomly undulate
it up and down. You can also noise it up, which is add or
subtract, which is down. So I'm going to do both here. Try to find a spot
kind of in the middle here and simply left
click one time. And you can see how it
wrinkled it up there a little bit, random undulations. And if you go a
lot more extreme, let me crank up my
tool strength here to one and left click
a couple times. You can see that
you get some really wacky results very quickly. Now, you can do Control
Z if you don't like what you just did with your last brush
stroke or two here. Once again, the
noise tool is great for adding some
random undulations. Now, if the undulations
are too extreme, you can bring on your
smooth tool right up here. And I like to set most of these tools to their default
value, so I will 0.3. And let me just set
my brush size down to something much
smaller like that. This is great for
smoothing out rough areas. It's a little bit too jaggy. So fuse to left click right about here and smooth this out, you can see it is going to smooth out the entire landscape. And again, you can
have more or less of an effect if you increase or
decrease that tool strength. Okay, the next tool I'm
going to jump to here is going to be this
hydro erosion tool. Let me bring on an
image here to show you what the hydro erosion
tool can do for you. This is a picture of a
real world landscape, and you can see
that this mountain is carved with water over many, many, many years,
rain falling atop it, and then draining down, filtering down through
these channels, cutting these grooves into
the side of a mountain. Now, that's essentially what the hydro erosion tool
can do here in Unreal. Now, you won't see much of an effect using this
particular brush. If you try to use it over
relatively flat terrain, I like to say that
this tool is good for accentuating the cuts, the grooves that already exist
inside of your mountain. I like to say that this
tool exists to accentuate the grooves that are already cut into the side
of your landscape. So let me just try
to find an area of my landscape here that
has some undulations, some grooves and whatnot. And with my hydro
erosion tool selected, and most of these are pretty
much their default values. Let me just shrink down the
brush size a little bit. I'm actually going to increase
the tool strength here, maybe just a little bit more. And now if I was to hold
down the left mouse button, you can see how it's
cutting in these channels, these grooves into the
side of the mountain. Now, you've got a
few other settings here that are meant to
increase the amount of simulated rain that falls on the landscape
and whatnot, the iterations, all meant
to accentuate the amount of rain that is falling on the mountain and
creating these channels. But I find the default settings pretty good outside
of the tool strength. That's the only one you ever
really seem to need to use. Now, you can overdo it a
little bit with this brush, so I try not to use it too
much because it can make your landscape a little hard
for a character to navigate, but it is there to
be used if you like. Next, I'm going to come over
to the erosion tool and I'm going to set
my tool strength back to its default value there. Now, this is really good for transferring a higher portion of your landscape to the lower portions
of your landscape. However, you get to decide how
exactly it is transferred. You've got this noise mode setting underneath
your erosion tool and you've got the option
to lower rays or both. I usually like both when
I'm transferring some soil, if you will, some ground
from one area to another. So again, with this tool,
imagine you just have a bulldozer and you've got
a upper section like this, and you just kind
of want to start moving it on down
into this value. So again, with your brush size, I'm going to go right
about here at this ridge. I'm going to hold down
the left mouse button. You can see how it's
kind of transferring the upper portions to the lower
portions of my landscape. Now, I find this pretty good for creating a sort of
flattish mountain range. And for getting rid of
these very drastic slopes. Now, when you do this, and it's a little bit tough to see, given this landscape material
applied to this landscape, it can leave these sort of weird circular ridges all over. You're starting to see
a few of them appear back here. Now, how do
you deal with that? Because sure you
like the transfer of land from upper
area to lower area. But if you want to
get rid of some of these weird
patterns and whatnot, this is where the
smooth tool can be used in conjunction
with the erosion tool. And if I smooth this
out a little bit, you can get rid of
that weird sort of artifacting
happening right there. All right, next, I'm going
to jump to the Ramp tool, and this is kind of fun to use. With the Ramp tool selected, you can create a
ramp that goes from one area of your
landscape to another. Now, with it selected to use it, all you simply need to do is left click to create
the start of your ramp, as denoted by this
Mountaine icon right there. And then you need to click again to determine where
your ramp should end. So I'm going to click
right about here and boom. I see a little
ramp preview here, and you can move these
little mountain icons around to determine where exactly you'd like
your ramp to go. Like so. Now, you
see some lines here. The inner line is where the ramp is going to
be completely flat. And then it's going to be completely flat
from about here. And this is your fall off area right there
and right there, where it's going to taper off. Now, you can control
this over in the details panel with
your ramp width, like so. And your side fall off, making that skinnier
or more narrow. Now, when you're
happy with all this, all you need to do
is click this add ramp button and it'll fill in the landscape
and create that ramp. And I can even leave
these two mountain icons out here and move them around and say I want a
ramp from there to there, add another ramp, et
cetera, I'll fill it in. However, if you want
to start over fresh, simply click Reset, and then you get to start the
process all over again. Left click to set
one ramp point, my starting point,
and then left click again to add your
ending point, add Ramp. Now going back into
our list of tools, I'm going to choose the
sculpting tool that you saw me demonstrate a little
bit in the last video. This is kind of like your
default sculpting brush. And just to demonstrate, once again, holding down
the left mouse button, I can raise a train, shift and holding down the
left mouse button, I can lower the terrain. Again, you can control Z to undo any action
that you just did. That's a pretty good brush to
reach for when you're just looking to create some
undulations in your landscape. And I always like
to tell students usually your goal
isn't to try to create realistic
looking mountain ranges with your
landscape actor. In fact, for most nrungin
games that I've seen, let me just bring
on an image here. This is from Star Ocean the
Divine Force on PS five. Uses Unreal engine. This is an open world landscape. And really, when I'm looking
at an image like this, the area that I'm kind of
mousing over right here, this is all the landscape
actor that has been terraformed from one end to the other gentle
rolling hills. That's typically
what you're shooting for with these landscape
sculpting tools. Things like these spires, these are static meshes
added to the landscape. Then your trees and grass,
that's the foliage. We'll be talking about how to add that later on in the course. And if you see
some of these rock formations along the
side right here, those are static
meshes, as well. So don't try to
make the tools do things that they're
not great at doing. I always like to tell
students try to make the landscape actually just
have some undulating terrain. Don't try to force
making mountains. Although with this
landscape material, trying to make realistic
looking mountains is actually kind of possible. With the other levels
that we've created here, it's going to be
much more difficult, but we will explore
those options as well. Now, I do want to end this video talking about these
options right up here, the brush type and
brush fall off that are available for a lot of these
different sculpting tools. I'm talking about
these guys right here. Now, when it pertains to
sculpting your landscape, really, I only
ever use this one. When we get to
landscape painting. I will use that guy, the
Alpha Brush right here. These other two rarely ever
find any use for those. Now, your brush fall off, you can think of this
as a marker tip. By default, it's sort
of this rounded tip, but you can choose some
of these other options. I encourage you to experiment
with those as well. And with that guys, that's going to wrap up our discussion on the sculpting tools
in Unreal Engine. We'll see you in the next one.
11. Alpha Brush Sculpting: Wouldn't it be cool if sculpting your landscape was as simple as holding down your
left mouse button, and then something like that would appear a
night's mountain range? If you said yes to that, then Alpha Brush
Sculpting may be for you. Now, to make use of sculpting your landscape with
this cool technique, we are simply making use of this Alpha Brush option over in the Landscape
sculpting tools. I got my sculpting brush. Before we were sculpting with
a simple circular brush, in this lesson,
we're going to learn how to use an Alpha brush. Now, how we got a result like this,
like a mountain range, that's going to be all
down to whatever texture and imported height map texture such as this that you utilize. This is essentially a
black and white texture that can be used to
sculpt your landscape. White areas represent
higher areas. The black areas
represent lower areas. And the various shades
of gray in between, those indicate the areas
between the low and high spots, depending on how white
or black that pixel is. Now, where do you get
these nice textures? Well, attached to this course, I have some samples
that you can try out. Now, I've already imported
them into my content browser, and I imported them
into this directory, my MW Landscape auto material Textures
folder right there. That's the one right
there. And once again, you can find some
sample textures in the course materials. I have them in this
folder right now. When I downloaded them, they're sculpt one, two, and three. If you hold down control,
you can select all those, and then left click and drag and drop those into a folder
of your choosing. Now, these other two, this
Alpha brush one and two, these are going to
come later on in the course when we get
to Alpha Brush Painting. But once you have these added
to your content browser, it is as simple as saving them. Click Save all after
you've imported them. Then with your sculpting, brush selected, Sculpting, make sure you've got
Alpha Brush selected. And then go ahead and slot in
a texture of your choosing. Now, I've got my brush
eyes cranked up to 20,000. Once again, if you
click in this field, you can override the
supposed max limit of 81 92, I believe,
is the limit. 20,000, I find is pretty good. You don't need to change
a texture channel, and a tool strength I find
of 0.1 is pretty good because if I was to set this much higher and then hold
down the left mouse button, it just raises it up a little
bit too fast for my liking. So I like something like 0.1, although Dealers Choice on that. Now, one little foible that
you probably should know about as you look at
this texture right here, and you see the white spots are the areas that are going
to create high pixels. Here with my preview
here in my landscape, those white areas
turn out to be black. Little confusing. I know, but that's just the way it is. Now, you'll note that as I'm moving my mouse cursor around, this is not rotating at all. I could hold down the
left mouse button and do something like this as I
drag it across my landscape. You could also do this where you check this box for auto rotate. And then as you're
moving your mouse throughout your landscape, you can see how it's
kind of adjusting. It's auto rotating your brush. So I'm just holding
down left click, releasing, holding down
left, click, releasing. So you can do
something like that, hit Control Z here a few times. Now, you can slot these
into plays here by either dragging and dropping
them from here in your content browser
up to the details. Alternatively,
with one selected, you can click right here to use that selected asset from
the content browser, so I could change
that out like so. Or in the drop down right here, you could click on this and
you could search for it. There's sculpt 03, my third one. And there you go. You can
also use this in reverse. So if I hold down
Shift and Left Click, I can create a
little depression. That looks quite nice, indeed. So know that you can
kind of mix and match. Once again, Left
Click is to raise up, hold down Shift and left
click to push down. And you can obviously combine
these various brushes to create interesting
results that can kind of blend into one
another, if you will. Here's number one, et cetera. And, guys, that's gonna
do it all for this one. Alpha Brush Sculpting. We'll
see you in the next one.
12. Landscape Layers: Welcome back, everyone.
In this video, we are going to be talking
about landscape layers, and this is a good time to be having this discussion because the whole concept of landscape layers affects
both landscape sculpting, which is what we've just
had a couple of videos on, as well as landscape painting, which is what we're
going to just be talking about here in
a few videos times. Now, I'm currently within
my landscape of California. This was an imported landscape. And you may remember
when I created this particular landscape or
rather when I imported it, we had done this
importing from File, and this checkbox Enable
Edit Layers was checked. Now, this is important
to note because if I go to our sculpting
tab right up here, down below, I see an
edit layers section, and we've got this layer
that we can sculpt on. When we are sculpting
our landscape, this is the layer that
we are sculpting upon. And just to show this quickly, I'm going to increase the size of my sculpting brush here, kind of go down to
this flattish section. If I just hold down
the left mouse button, you can see I'm
raising that terrain. Now if you are familiar
with the concept of layers from other
programs like Photoshop, this should be second
nature to you. I'm going to go ahead and add another layer to
our landscape here. Clicking on this plus button
is how I can do this. From this pop up box, let's just choose the
landscape edit layer. We'll talk about layer splines
later on in the course. I'll click Select here. This is good to
name it layer one. If you right click on this, you can rename it to something else. You can delete it, et cetera. But now, note that this
is our highlighted layer. This is the layer that if we
sculpt, we'll be sculpting. So if I was to hold down the Shift key and left
click and sculpt, I'm kind of flattening
this terrain right here. But note, the effects of this
are applied to layer one. If I was to hide this layer by clicking this eyeball icon, you can see that the mountains that I had erased reappear. So let me unhide this. Essentially, what I'm
seeing right now, this was sculpted in
my base layer here. This was sculpted
here with layer one is a combination
of the two layers. You can see that if I
hide my first layer here, the default layer by clicking
on that eyeball icon, everything goes away
because everything was originally sculpted or rather
imported with that layer. Let me just turn that back on. Now, you've got these
Alpha values here, which is essentially how much as a percentage you want to
see this particular effect. So 1.0 means 100%, so you could click
in here and kind of drag this to the left. And as I'm doing this, it's kind of stuttering a little bit. You can see how if I
change this all the way down to let me just
put it down to zero. It's stuttering
quite badly here. And then press Enter it
creates a flattish landscape. You can actually invert this. If I did a negative one and press Enter, it would
show that effect of my imported the
landscape only in the exact opposite direction,
essentially mirrored. Okay, let me go
ahead and set that back to a value of
one once again. Likewise, I could take
my layer one here, the one that I just added here and change the Alpha
value of this, maybe to change to
something like 0.5. And now you can see it lessens
the effect right there. So from one to negative one, you can see different
effects here. That is essentially 50% of
what I currently had sculpted. Let me go ahead and
set that back to one. And so what I'm
seeing right now is a combination of the two layers. Now, it's really
tricky when you're working with layers
such as this to be accidentally sculpting or painting in a layer
that you didn't mean to because
whichever one you have selected here
is the active layer. That's the one you're
going to be effect. A way to ensure that
you are working in a given layer is
to lock that layer. So if I was to click this
little lock icon right here, it says this layer is locked, and you must unlock it before
you can work on this layer. That is a good way
to prevent you from accidentally sculpting in
layer that you didn't mean to. So you can see, right now, my
particular brush is in red, meaning I cannot affect
this particular layer. However, I can select
this layer below it. It's unlocked, meaning
I can affect it. And now I could just hold down the left mouse button
and sculpt that up. So you can use these
locks to prevent you from accidentally affecting a layer
that you didn't mean to. Let me just go ahead and
unlock this quickly. Now, this begs the question, why would we even want
additional layers here? Well, it's a non destructive way to add some variation
to your level, maybe to play around with some concepts and see
how you like it. So for example,
here in layer one, maybe I said to myself, back here, oh, you
know, wouldn't a mountain be kind of cool? So you left click and you
sculpt it, and you're like, Yeah, maybe a plateau, like that would
look pretty cool. Now, because I applied
that to layer one, I can see the results
of this right here, but if I wanted to
get rid of that, I could just hide this
out and see what it would look like without that effect. This is with both
layers combined. Yeah, I like that
plateau or no, I don't. Now, while I am currently sculpting on these
two different layers, when we get to
landscape painting, which is applying a coat
of paint, you know, grass, dirt, sand to these
various landscape components, the same concept will apply, and I'll show you
that when we get over to the landscape
painting lessons. Just know that whichever
layer you have selected, that is the one you will
be sculpting or painting, you know, applying dirt, grass, sand, things like that. Now, you can actually reorder these layers if
you just come over here. You can lift it up and drag
one on top of the other, and you can see I just
reordered them right there. In your right click menu, you can rename them or delete them out. You
can hide them, as well. You've also got this
little garbage can icon where you can delete
the layer entirely. It will prompt you
just to be sure. So go ahead and click here. And so now I'm back
to just one layer. Now, once again, I did
want to point out that when we created this
particular landscape, we imported this one. We had this checkbox checked. Likewise, we had
created an earlier map. If I come under File, recent levels, our
created landscape, when we created that landscape, we did also have this enable
Edit layers checked as well. So both of those would
use the layers system. Right now, I'm going to jump to our landscape Automateial
mountain range example, and I could either double click on this here
to jump to it. Although I have this
under File recent levels, there's my landscape automal mountain range example level. I'm not going to save any of the changes that I made here. And once again, if you come
to a map such as this, and you're presented with
some error messages, just go ahead and
click this save modified, and we can
save it right there. And once that's completed,
I can clear this out. Now, let me just go
ahead and hide all of the surrounding
mountain range meshes that these guys right up
here, holding down Shift. I'll hide them all. So we have just our
landscape right here. And I'm going to do
shift in two to jump into our landscape mode up here. Now one thing you
will notice about these pre existing maps is that these were created
without the layer system. We do not have the option to add another landscape layer
here to sculpt the pond. In fact, when we go about painting this
particular landscape, you'll see that how the painting works in this
particular landscape is going to be different from the other few landscapes
that we've created, our imported
California landscape, as well as some of the
other created landscapes that we already have
going for once again, I just wanted to show you
two different examples here. So just be aware that
this one does not have the layer
system going for it. So with that, we've given a quick rundown as to what
landscape layers even are. They affect landscape sculpting
and painting if, in fact, the enable Edit Layers
option is turned on when you create or
import a landscape. So with that, we have shown off landscape layers and how
they work with Unreal. They can affect your
sculpting layers as well as your painting layers, which we are going to get to in the next few videos. So
we'll see you there.
13. Landscape Material: Welcome back, everyone.
In this video, we are going to be talking
about landscape materials. Now, landscape material is
a specialized material that allows us to paint various
textures onto our landscape, and it's going to serve
as a replacement for this landscape material
right down here in the details panel that is applied to all of our
landscape streaming proxies. Now, you may have recalled that when we created
a landscape, here in our managed table
I just jump over to here. When we created and
imported from File, we created a landscape
that was using this default ground
grass material found in the starter content
pack as the tool tip shows. Now, this was just a placeholder
just to get us started, but wouldn't it be
nice if we could paint our landscape
with some sand and some dirt and maybe
even some cobblestone to create a pathway,
that kind of thing. Well, in order to
do that, we need to create a specialized material. Now, because doing this is
a long arduous process, we're going to cheat
a little bit here by copying some code and then pasting it into a material that we create here
in the engine. So what type of code are
we going to be copying? Well, I have this attached to the course files
for you to access. There's a couple of
different files here to locate one of these
is going to be called Landscape no tiling. Another is going to be
called M Landscape simple. These are two versions of essentially the same
landscape material. Now, when you open this
up, and I'll start with my landscape no tiling, I'm just going to
double click on this text document
to open it up. And once again, you
should be able to find this attached to the course. This is going to look like
a whole bunch of nonsense. Now, what this is is going to be the code that's
going to be used to make our landscape material. How are we going to work this?
Well, we're going to click anywhere in this text
file. Click anywhere. Do Control A to
highlight everything. Then Control C to copy. Next, I'm going to come down into our content browser here. And I will go into our material section here under the MW Landscape auto material. I'm going to right click in some empty space over
in our content browser. We're going to create a brand
new material right there, and I will call this
Underscore Landscape. Underscore No tiling. Believe that's what I called it. No tiling. And then press Enter. Then we're going
to double click on this material to open it up. Now, remember, let
me just go ahead and dock this across
the top here. Now, remember, back here
in our text document, we highlighted all this
code, and we copied it. Now, if we scroll wheel on back, that'll zoom us way out as we can see
from the Zoom level. I'm going to hold down
the right mouse button and kind of pan over
to the side here. And then I'm just going
to do Control V right about here to paste
in all that code. Now, this looks
highly intimidating, which is why we are
taking a shortcut here. But we just need to wire in a few wires into our
master material node, which is this guy right here. And then we will be good to go. So you're going to want to
position this node right here, which is going to give
us the final results for our material right here
down into this position. Okay, first things first with our master material
node selected here over in the details panel. We want to ensure that our material domain
here is surface. However, we want to change
our blend mode to masked. And the shading model
should be default lid. If I just zoom zoom up on that, that's what we should have here. Okay, so make sure
you've got that with your master material
nodes selected. Then over here, I'm just going to zoom
mine up a little bit. We've got a couple of
landscape layer blend nodes. There's one up top, and then
there's one at the bottom. This bottom one,
we're going to plug into this normal input. These are textures that
are going to give all of our various other
textures some depth. These are normal maps. This
landscape layer blend node, we're going to plug
into base color. That's going to give color to all of our various surfaces. We've got things like mud and grass and dirt
and stuff in there. Okay. And then you've got
these three nodes right here. You can left click and
highlight them all, like so and then
move them around. And we're going to
plug this top value of zero into metallic and specular. We're going to plug
in this value of one into our roughness input. And this landscape
visibility mask, this is going to
allow us to poke some holes to create some
caves into our landscape. We're going to be
plugging this into this opacity mask input. Okay, and then with that, you shouldn't have to
do anything else here. I'm just going to left
click and drag and just move these
over a little bit. These nodes will come into
play later on in the course. Go ahead and click Save. Now, after you have
saved this material, we need to apply it
to our landscape. So I'm going to go
back to our level here, my California level. And now I want to apply
this to my landscape, my base landscape right up here. So I'm going to choose
my base landscape, and all I need to do to
apply this is drag and drop this right here where
it says landscape material. Now, it's going
to take a second. It's going to turn kind
of this darkish color. A couple of things I want
to point out here before we continue is with this
material selected, we could have clicked
this little arrow right here to slot
in that landscape. Also, we could have found
this particular material by clicking on this dropdown
and searching for it here. So there's a few ways you could have gotten this into this slot. Now, you want to
also make sure that this landscape material
is slotted in for all your various landscape
streaming proxies that make up your
landscape actor. So if I was to choose this
first proxy right here, you should see that it is automatically applied because we applied it to our
base landscape. But a mistake sometimes
the students make because they may have a streaming
proxy selected, and then they just apply this to their landscape
material right here. They essentially override
the landscape material from their base landscape.
So don't do that. So that is the process for
making a landscape material, albeit a very cheaty
kind of process. If I step on back here in
our landscape material, you can see that this consists
of a whole lot of nodes. Now, this process for
creating this landscape, you can replicate by
doing the same thing with this landscape simple
I open this up, you can copy all this
and paste it inside of another material
that you've created. And in fact, I will do
that between videos. It's the exact same process. But before we end this video, I want to jump to my level here. Jump out of my
landscape manage mode. I am in landscape
mode and I wanted to jump over to paint mode. And so for the next few videos, this is where we
will be spending the majority of our time
in landscape paint mode. We're going to end
the video here, but between videos here, go ahead and see if you can't
recreate another version of our landscape material only this time using the
landscape simple code, using the same process
as we just did with our landscape no tiling code. Alright, that'll do it
all for this one, guys. We'll see you in the next one.
14. Landscape Painting: Welcome back. In this video, our goal is to utilize our applied landscape
material to begin painting the surface
of our landscape. Now, we left off in the last
video with our M underscore landscape no tiling material applied to our landscape actor. And because we applied
it to that actor, it did apply to all of our various landscape
streaming proxies as well. Now, before we get to painting, I did want to point out that I did create that second material, that second landscape
material, the simple version. Now, these are essentially
identical in terms of the types of textures
that we're going to be able to paint onto the
surface of our landscape. However, I just wanted to open up both of these briefly just to show you how they differ.
Here is my simple. It looks a little bit more simple in terms of
the node setup. And in fact, the one main
difference that this will have as opposed to this
no tiling landscape one that we apply
to our landscape is this one is set up
to lessen the amount of tiling that you might see in your landscape when we start painting on these
various textures. This one's a little bit
simpler in terms of setup. But essentially, they are set up exactly the same way.
Here's my simple one. You can see all the inputs
from the layer blend nodes down here and up there are
plugged into the same inputs. This is set to be
masked, as well, and everything else here is
set up the exact same way. Okay, so landscape painting. Let's jump back to my
California level here. And the first thing
I need to do under landscape paint is come right down here where
it says, target layers. And we've got this small little button right
here where it says, create layers from
assigned materials. We're going to click on this, and when we do, we're going to see these
various layers appear. We've got mud, grass, gravel path, rock,
snow, cobblestone. Let me just zoom up on
that so you can see those a little bit
more clearly here. Now, these correspond to the actual named layers inside
of our landscape material. And let me just jump into my landscape, no
tiling material. Now, if I go up to my
landscape blend node, you can see I've got mud, grass, gravel path, rock, et cetera. This corresponds right there, that corresponds to
the named layers here in our target layer section of our painting section of
the landscape tools. Okay, the next thing that
we need to do before we can begin
painting, mud, grass, or gravel or any of these
other layers here is to click on each of
these plus buttons, and I'm going to start
off with my mud here. And I need to create a
landscape info object. So I'm going to click
Wit blended Layer, this top option right here. And it's going to ask me to save this newly created asset into
a folder of my choosing, or it's going to auto
create one here. So I'm going to leave
this name mud layer info, and I'm going to click Save. Now, essentially what these
assets are is they save the paint data for these various layers
that we're going to be painting onto
our landscape. And you can see as
soon as we have this mud layer info
object created, it automatically
turned the rest of my landscape here into mud. I need to do this
for each of these, so I'm going to do that quickly. Wight blended layer, save
gravel, way blended layer. It's gonna be the same process for each and every one of these. If you want to fast
forward the video here, you can be my guest. Save. Rock, save Snow, save and cobblestone. Wight blended layer, save. Now, if you look down below
in our content browser, you can see that it has created all these landscape layer assets and put it in this directory. Let's go ahead and
save these right away by clicking on
this Save All button. And all my landscape
streaming proxies need to be saved as well
because now there's mud painted on all of them. Okay, now let's begin
to paint our landscape. This is as simple
as clicking on one of these layer thumbnails,
such as grass. And then I'm going to zoom
on up to my landscape here, holding down the WK WAS and D, and I'm scroll
wheeling in and out to fly faster or slower. And now with my grass
layer selected, if I simply left click, you're going to start to see
this checkerboard pattern in the beginning when
you start painting a brand new layer,
that's normal. Don't freak out. You can
see how holding down the left mouse button will
paint that given layer. Now, if you want to erase this, all you need to do
is simply hold down Shift and left click and
you will erase that. So whatever you
have selected here, left click to paint, hold down shift, and
left click to erase. Now, just as before, you do have a brush size here
that you can fiddle with, like so, and you can change
your brush fall off as well. Maybe go something
a little bit more like that I hire or fall off, so it sort of tapers off. So you can see now as
I'm painting this, I'm just left clicking
here gently and quickly. It's strong in the
middle, but it starts to fade as it gets
closer to the edge. Now, the strength
setting is going to be how quickly it's
going to apply that. So if I crank this all the
way up here in left click, it adds it almost immediately
with just one click, like so, and you can see how it fades as we get
to the perimeter. You can paint this on
your mountains as well. Now, this might be
annoying to have to go around and paint everything
in your landscape. Maybe you want to
start off with grass. So is there a quick way to apply a given layer to the entire landscape?
Well, yes, there is. If I was to right click
on my grass right here, I could fill the entire layer. So let's go ahead and do that. And now everything is grass. Likewise, I could right
click on this and clear the layer to
rid it of grass. Now I'm back to
my default state. Let's go ahead and add
mud to our layer here. Let's fill it entirely with mud. And I'm going to
go ahead and set my brush size back down
a little bit smaller, maybe something closer
to the 5,000 range and set my tool strength
back to its default. Now, on students get
in and start painting, they usually do something like this where maybe
they'll start off with some grass and they'll kind of paint
that in the valley here, like, so I'm just holding
down the left mouse button. And then maybe they want to add some kind of a
path through here, so they'll choose
their cobblestone, and maybe they'll make a
path right in the middle. Let me just reduce
my brush size here. And, you know, they're
kind of painting a path. And once again, whenever you
start painting a new layer, it's going to do that
thing where it turns everything gray
for just a moment while it's preparing
the shaders, as you can see in the
lower right down there. And I'm going to actually up my tool strength
here quite a bit. And so now if I fly
on up, you can see, essentially what I've got cobblestone mixed in
with a little grass. It's got a nice little
fading effect there as well. Now, once again, in order
to get this nice sort of transition fading from one layer grass to
another cobblestone, you're really gonna
want to play with this brush fall off as you're painting one of
these alongside of another. Now let's go to our
mountain range. You might go something like
this where you're like, Well, mountains are made
of rock, so I'm going to choose some rock here. I'm going to increase my
brush size quite a bit. And once again, when
you start painting, it's gonna turn this sort of checkerboardi sort of material before it then starts
to apply the rocks. And, again, this doesn't look great right
from the get go. In fact, my engine
is stuttering. It's not just your
camera when you start to paint this on,
something like that. Then you say to yourself, well, you know, at the
top of mountains, typically, there's some snow, so I'm going to go ahead
and shoo some snow. I'm going to reduce
my brush size here. I'm going to set my tool
strength back to its default, and I'll just sprinkle
some snow along the top. So you start to left click, turns that checkerboardi
sort of material along the top while it's preparing the shaders down
below until finally, it starts adding some
snow along the top. Now, this is not great snow because if you've ever
looked at a mountain range, snow is usually a
little bit more patchy. And this is just kind of
blobbing it on, not great. Now in the next video,
we're going to make use of something called
an Alpha brush where we can sort of splotch
on snow in any one of these various layers in a more
realistic looking manner. So with this particular
brush that we're using right now,
our circular brush, it's not great for
instances like these where you're trying to
sprinkle some snow on the top of a mountain range. No, not at all. It is good
for things like this, maybe painting some grass
down in your valley. Now, very recently, we had a video dedicated to talking
about landscape layers. And if you notice, right now, I only have one landscape
layer that I'm painting upon. However, I could create a brand
new landscape layer here. Let me go ahead and click
this plus button to add one. I'll choose landscape
Edit layer, select. And I will call this new
layer that was just applied. Let me just right click
on it to rename it. I will call this my snow layer. And now note that this is
currently the selected one. So let me go ahead and
choose some snow here. Now, any painting that I do on this one is going to be
applied to that layer. And it's not just your
video, it's stuttering. Once again, because the shaders are being prepared down
in the lower right, you can see how
it's going to take a little moment before it can render this in
okay. There we go. It's smoothed out. So now if
I was to hide this layer, the snow would disappear, reveal it, and it
will show once again. A value of 1.0 means show
that in full effect. 100% it's normal effect. If I was to set to
something like 0.2, and press Enter, you
can see it's fading it out by essentially 80%. So this is a good non destructive
way to experiment with some concepts and see if you like those additional results, those added results, these two layers combine with one another to
see your final result. But once again, you
can show or hide that by clicking on this
little eyeball icon. Just make sure that
you've got the layer selected that you actually
want to be working within. So this is the very basics
of painting your landscape. Now, once again, I have the no tiling landscape material
applied to this. Go ahead and select
my landscape here. This is the landscape, no tiling landscape material. And it's called that no tiling because you don't see too much tiling going on with my grass
here or the cobblestone. There are some textures
within that material that kind of break up any
tiling that you might see. You can experiment
with the landscape, simple material as well
to see how they differ, but essentially they have
the exact same layers. I'm going to go ahead and save this and I want to jump over to our landscape auto material mountain range example because this particular
landscape does not have the same sort of landscape
material applied to it. That one's going to work
a little bit different. So let's jump over
there quickly. Okay, so here we are in our landscape auto
material level. I'm just going to go
ahead and do Shift and two to jump into
landscape mode. And here I am in paint mode. And as you can see, I do
not have that same sort of setup over here in
the layers section. Let me go ahead and select
my landscape over here. That's the landscape
folder. I need to select my landscape actor. Now, this has a completely different landscape
material applied to it. Let me just double click on this little thumbnail icon right down here to open this up. I'll dock this across the top. And right over here
in the details panel, I'm going to right
click right where it says parameter groups. I'm going to expand all. And you can see that there are many different
properties that make up this specially designed
landscape material. Now, I want to come under the water section in
particular because we've got this MW water Max world
position of negative 3,000. And I'm pointing this
one out specifically, let me just zoom up
on it so you can see that in greater focus
under the water section. This check box is checked on so that you can
edit that property. It's currently at
negative 3,000. If I was to go back
to my landscape, and instead of painting
but I go to sculpt, and then I choose
my flatten tool. I'm going to set my
flattened target right here to be negative 3,000, negative 3,000, like so. And then I'm going to zoom
on down here a little bit. And maybe in this
region right here, I'm going to left
click and you can see, as I flatten things
what is revealed, but a little water. A little bit of a glistening
pond, if you will. Now, if I was to go a
little bit lower than this, let's go negative 4,000. That effect is going to
take place yet. Left click. Now we see it a little
bit deeper, if you will. Essentially, what
is happening with this particular landscape
material is it is designed in such a way given the depth of something or
the angle of something, it's going to automatically
apply water or grass or dirt or rock,
that kind of thing. So really, you don't have any control like you
normally do here in your landscape paint mode under the layer section
to determine which particular surface that
you'd like to paint, rock, snow, that kind of thing. That is all driven by this particular landscape
material itself, and it's specifically
designed in such a way that given
the height of something, the angle of
something, et cetera, it's automatically going to
apply snow, rock, et cetera. So essentially, when you
sculpt and I'll just try to raise the terrain here a
little bit by left clicking, it's automatically applying different
surface types to it, depending on the height,
the angle, et cetera. So this is a little bit
more of a simple way to get a cool looking
landscape going. It's going to decide
based on other factors what particular surface should be applied to your landscape. Maybe that's the
approach you want to go, or maybe you want to go more the customizable
route like we had in our previous
California level with our custom made
landscape materials. Dealer's choice there,
but I just wanted to point out those two differences. With that, we're
going to wrap up our discussion about
landscape painting. Once again, with this pre
made landscape level here. This one is going to determine the surfaces based
upon various factors. The other one our
California level, the layer, the surface
type, the snow, gravel, grass,
that kind of thing is going to be up
to you to paint. That'll do it all
for this one, guys. We'll see you in the next one.
15. Alpha Brush Painting: In this video, we
are going to explore Alpha brush painting
our landscape. In the last video, we did get some painting of
our landscape done, albeit with a circular brush. That is what this guy
is at the very top. Of our paint mode.
We're going to be exploring this
one right here, that little star icon. That's Alpha brush painting. And what this is really good
for is adding some variety to your landscape to make it look a little
bit more realistic. Now, to help with
this, we're going to import in a couple of textures. So let me go and raise up
my content browser here. I'm going to be putting
these textures inside of this textures folder inside of this MW Landscapes
automateial folder. Dealer's choice where you
would like to put this, but you should find this
attached to the course. And these two files that
I am talking about right here are Alpha brush
one and Alpha Bush two. So you will find these resources
attached to the course. I'm just going to
drag and drop both of these down into my
content browser. Let me go ahead and
get this folder out of the way. Here they are. The asterisks mean
they need to be saved, so I shall do so by
clicking Save All. Save all. And I'm just going
to bring my Alpha brush one into this texture slot
for my brush settings. Let me just expand this out. I can drag and
drop that up here. With that selected in
the content browser, I could have clicked
on that little arrow right there to use selected asset from the content browser. Alternatively, I could have
clicked right there and sought it out via
that drop down list, but this is just fine. Now, you'll notice
when you look at my cursor inside
of my landscape, it is sort of this
rectangular shape. It's a little bit hard to see. And it is rotating
automatically. Now, the reason it is
rotating automatically is because I have this auto
rotate option checked on. If I check that off, I would just be moving this steady square around
the landscape. I like it on, however. Now, before I begin
to paint here, I'm going to make sure that
I've got my snow selected, and I'm also going
to be painting this atop my snow layer. Now, the way that this
particular brush works is if you've ever spray
painted through a stencil, that's essentially what
we're gonna be doing here. You can consider this
texture as the piece of paper or cardboard that you're going to be spray
painting through. And these as your
various spray cans. In this case, I'm going to
be spraying some white, some snow through this piece
of paper or cardboard. So if I was to just simply left click and hold down
my left mouse button, you can see how it's spray
painting it on there, like so. Now it's doing a little
faint right now. That's because my strength
is turned down to 0.3. If I was to crank this
up all the way to one, a simple click or two should sprinkle some of the
snow onto my landscape. So I'm just going to give
it one click here, bam, and you can see how
sprinkling this onto our landscape,
bam, bam, bam. Now notice I'm not changing
my texture channel here. The red channel is just fine. I'm essentially spray painting that snow right there through the white areas of that texture that you're seeing right there, that
little preview. Now, obviously this
is good for something like the top of your
mountain range right here. Bam, bam, bam, just kind of sprinkling it
on, dusting it on. And if this is a little
too splotchy for you, you can try your other Alpha brush that
we have available. So let's try Alpha brush number two. I'm going to select it. And this time, I'm going to
slot this in by clicking on this little tiny arrow that says use selected acid from
the content browser. Boom. So with that slotted in and my tool strength at one, you can see how one click can kind of sprinkle that
onto my landscape. Now, I usually
don't like to leave that tool strength too high. Usually, I like to
kind of dust it on a little bit at a
time, but you can see, as I'm kind of going into this more top down
bird's eye view, how it's auto rotating. And so think of those
little black areas as these sort of holes that you are spray
painting through. Very nice indeed. Alright, so that
is how you can use an Alpha brush to
paint your landscape. And once again,
this will work for anything that you got here. I find it really good
for things like snow. That'll do it all
for this one, guys. We'll see you in the next one.
16. Caves: Welcome back, everyone.
In this video, we are going to learn how to
make caves in our landscape. Now, it's not going to
be a full fledged cave. In fact, caves require a good
bit of work, but rather, we're going to be talking
about how to poke a hole in our landscape in
which we can make a cave. Now, in order to do
this, we actually are going to be in our
sculpting tools, which then begs the
question, why didn't we cover this when we were talking about
landscape sculpting. The reason for that is
because in order to poke a hole in our landscape, we actually had to set up our
landscape material first. Now, if you remember,
right, here with our landscape selected
over in the Details panel, we have our landscape
material set to landscape no tiling,
right down there. And if you double click
on that thumbnail icon, why don't you just go ahead and jump in there so I can
show you what is going on inside of here that's
going to enable us to poke a hole in our landscape. Now, I've got this
landscape material open along the top here. You might remember
this monstrosity. If I zoom up on our master
material node here, note that over in
the details panel, we had the blend
mode set to mask. And we had this landscape
visibility node plugged into this opacity mask. Now, the reason I'm mentioning this is because this setup right here is what's going
to enable us to poke a hole in our landscape. That setup right there. So jumping back to
my California level, we're going to jump into the
landscape sculpting tools, and this time, we're going to be focused on this visibility tool. This is going to be the
one that's going to allow us to poke a hole
in our landscape, and it simply works
by left clicking, and it's going to turn gray and checkerboardi when
we first start this. And that's how you can poke
a hole into your landscape. It's not just your
video stuttering. It's stuttering
because it's preparing the shader down in
the lower right. And now that may look
a little unsightly. So if you want to
fill in the hole, just hold down Shift
and left click, and then you can fill
that right back in. Now, your fall off is not really going to matter
at all for this. Left click pokes in the hole, shift in left click,
fills it back in. If you're going to
be creating a cave, it probably helps to
have a little bit of a smooth surface. So I would do something
like this first where I'd bring on
my smooth tool, maybe smooth out my
mountainside here a little bit. And this is just conceptually
what I would do. Okay? Then I would go to my
visibility tool right here. Once again, that is the
one you want to choose the visibility tool
to poke a hole in your landscape in the
sculpting tool section. And then you can left click
to start poking that hole in. Now, this is where it's going
to take a little bit of work for you to create
a nice looking cave. And we'll flesh this out a little bit further as we
get deeper into the course. But obviously, that does not
look like a cave at all. So we'd probably want
to populate this with some rocks
around the outside. And we'll get to doing
that when we talk about our foliage
tools coming up. And you also want to have
something for the player to navigate on so that they
don't fall through the world. Because if I was to right
click right here and play from here, there's my character. And unfortunately, I can
run them right off the map, which is not a great landscape. So what you'd want to do
for something like this is to create some sort of an
entryway into your landscape. So jumping out of
landscape mode, sorry, not into my landscape, but into the cave, I'm
just going to bring on a simple basic shape
right over here. I got my Place Actors panel. If you don't see this
place actors panel, you can click on
this box right here, go to Place Actors panel.
I've got my shapes. I'm going to bring in a cube, and then you can just
shape it accordingly. This is my movement tool. If I just tap the space
bar a couple times, I can go to scale mode. You can scale this up like so. You can rotate it like so, and you can see
how you could just kind of position
something to serve as a sort of entryway
into your tunnel. Now, this obviously would
require a good deal of work, and I'm not going to waste
your time with that right now, but conceptually, this is how
you could go about creating the beginnings of a
cave. Visibility tool. Once again, you
can find it under landscape sculpting right
there at the visibility tool. This will only work if
your landscape material, that guy right there
assigned to your landscape has this landscape
visibility mask plugged into your opacity mask. Alright, guys, that's going
to do it all for this one. We will see you in the next one.
17. Foliage Mode Overview: Alright. In this section of the course, we're going to learn how to use foliage mode so that we can
populate our landscape with things like trees or maybe some grass or maybe some flowers
or maybe some rocks. Pretty much any mesh
that you can think of. Now, there is a lot of nuance to cover here,
so let's dive right in.
18. Foliage Assets: Alright, to aid us
significantly in this discussion of how
to use foliage mode, it would be really
helpful if we had some nice looking assets to place inside
of our landscape. And for that, we're going
to be headed to fab, where you can see it right down here in my content browser. You can find the fab
button right here. Go ahead and click on that, and that should open up a
brand new tab for you all. The fab tab is where
you want to go to add content to your project. Inside of here, once you've
clicked on that fab button, you can find different
categories of assets. If I was to click on this little hamburger icon right here, I could discover all sorts of different categories of content. However, I'm just
going to search for Landscape Pro because I am seeking out this
particular content pack called Landscape
Pro two point oh. I've used this before,
and I find this to be a really good one to use when we're talking
about foliage. As you can see, it's got some nice pine
trees, some grass, some rocks, some flowers, that kind of thing that we can utilize in our
landscape up here. So to add this to our project, all we need to do is click on this blue add to project button. And if you get a pop
up such as this, asset not compatible with the most recent version of
the engine, that's fine. Just click on this drop down and choose the most
recent version. And then go ahead and
click Add to Project. On the lower right,
you're going to see this starting to get added
to your project. And eventually, this
is going to add some new folders to
our content browser. Now, before I pause the video, because this is going
to take a little while, I just wanted to mention
that if you wanted to add various other content
packs to your project now, that would be a
good time to do so. Once again, upon your
viewing of this video whenever that may be
LanscpP two point oh, maybe it's pulled from Fab. Maybe it's not. I have no
idea what the future holds. But you want to look
for a content pack that has something like this. And if you are searching, you probably want
some free content. So just use the filters
over on the right, just set your price to free. And then you can seek out some various content packs
that have some trees, bushes, those kinds of meshes. Alright, with that,
I'm going to pause the video here and wait
for this to download, and I'll resume once that
is finished. All right. Excellent. So now this content has been added to
our content browser, and I can see it by jumping
over to our content browser. It is in this folder called STF, and if I was to expand
this folder out, you can see it has a
lot of subfolders. I'm also going to recommend
that going forward here, you bring on a couple
of filters to help with placing some assets
into our foliage mode, which we'll be doing in
the next few videos here. Make sure that you have on by clicking on this little
filter button right here. Your static mesh filter on, and you can see I've
got that right here, as well as under the foliage category,
static mesh foliage. And you can see I've got
that right here as well. I'm just going to
go ahead and with my STF folder selected, make sure that I am
filtering by static meshes. So this is going to find
any static mesh assets that live in this folder or any of the folders that
exist underneath it. So you can see we've got
some rocks, some trees, some grass, bushes, ferns, flowers, things of that sort. Alright, so we're in a good
position for the next video, so we'll end this
video right now. That is how you can
grab some content from fab to make use of in foliage mode. See
you in the next one.
19. Foliage Palette: Alright, our next step in the
process here is to populate our foliage palette with various assets that
we would like to paint into our landscape. Now, it says drop foliage here, and what it's really looking for is a static mesh foliage asset, and I'll show you where you
can add those in just a bit. However, I just wanted to
point out that you can create the needed static mesh
foliage assets by simply dragging and dropping a static
mesh asset into this area. I'm going to demonstrate
this by simply grabbing this SM Bush
oh one right here, and you could really choose
any of these static meshes. So I'm just going to left
click and drag this into this area where it now
says foliage type. Now, as soon as I try to drop a static mesh into this
area, it's going to say, Hey, what you actually
wanted to add was a static mesh foliage asset. Let's go ahead and create
one of these for you. So that's what it's
going to be doing, and it's going to
be looking to save this created static
mesh foliage asset into a given directory. I'm going to say
it's fine to put it in that directory and
click Save right here. And if I mouse over this, I can see that that is the
name of the new asset. And by the way, if I was to right click
on this thumbnail, I could show where
this lives now that asset in the content browser so I could
click on that. And there it is SM Bush
oh one foliage type. And I also wanted to
point out here that if I was to right click on this, I could simply
remove this as well. So I could remove
that from my list, and I could get it back by simply clicking on
this plus button or by dragging and dropping this static
mesh foliage into here. So let's go ahead
and explore that. I'll drag and drop
this right in there. It knows it is a
static mesh foliage. So, boom, it adds it in there. However, if I was
to remove this, I could simply find it by
clicking on this plus foliage, typing in Bush 01, and there I can
add it back again. Now, you'll notice
that when I mouse over this thumbnail
image, it is checked, meaning if I was to paint
this out in my level, this is my paint bubble
brush, if you will. Left clicking will add it. Holding down shipped and left
clicking will remove it. And it would paint it because
this foliage is checked. Now, if I had this
unchecked and I tried to paint this in my landscape by holding down the
left mouse button, it would not paint it. In fact, because this is the only bit of foliage
in my palette area, it recognizes that there's
nothing I can paint, and so I don't even
see a bubble brush. Let me just turn this back on. Additionally, I
could right click on this and deactivate that, and that's the same
thing as unchecking it. So checking it activates it. Unchecking it deactivates it. Now, you'll notice that
with this foliage actor selected down below are a bunch of details
associated with it. I'm going to break this out into several videos in the upcoming
portion of the course. So just ignore that for now. We're just going
to be focusing on this foliage palette for now. Next, I just want to add a few more foliages
to my list here. So with my STF folder selected, I'm going to filter by
static mesh foliage. And once again, these
are static mesh foliage actors that
are already created, so I don't have to drag and drop static mesh in here to
create them already. And I'm gonna look
for a pine tree. How about pine 02? That's gonna be good. Just
gonna drag that up here. Let's get some grass, as well. There's some grass group 01. Sure. We'll drag and
drop that up there, as well. And let's see. I want to add a flower, as
well. There's one right there. Yeah, that will do. We'll add a flower.
And how about a rock? Maybe this cliff Rock 03. Alright, so now we've got
several foliages if you will, in my palette area. And you can see they all have
their own thumbnail image. As we select any one of these, there will be some details down below that we'll be
able to fiddle with. And again, I'm going
to break that out into separate videos
of themselves. But note, all of
these are checked. Well, actually,
none of these are checked except for my bush. Meaning if I was to paint
this into my landscape, that would be the only foliage
that would get painted. Anything that is not checked
would not get painted. So I could actually
paint multiples of these at a time by checking
them all on. Now, typically, I do not
like this thumbnail view because I can only
see that check if I am mousing over it. I typically like to put my palette area here
into List View. But before I do that,
I just wanted to point out that you can change the scale of your
thumbnail images with that gear icon right there. However, I'm going to kick
it into List view right now, and this is the view that
I vastly prefer because it allows me to see
every foliage type that I have checked on. Meaning that if I
were to paint it, it would paint
that foliage type. Lastly, we've got this
button right here. Where I can hide details for these selected
foliage types. So right now I've got my flower group foliage type selected, and you can see all the details down below related to that. I could hide that out by simply clicking on that or showing it. That's like an on
and off button. This count value next
to each foliage type, we'll keep track of how
many instances that is how many copies of each of these foliages is painted
into your landscape. We'll explore that more
in the next video. But for now, guys, that's
going to do it for the foliage palette
and how to get some assets right in there.
See you guys in the next one.
20. Paint Tool: Alright, we are now
in a position to paint some foliage
in our landscape. Before I do, I want to kick
out this foliage type Pine oh two because having some problems getting this one to
paint into my level. So I'm gonna kick that one
out right away, remove it. And I'm actually going to
go into my content browser, do a search for
my static meshes, and I'm going to create
a whole new foliage type out of Pine oh two. There is Pine oh two. So I'm just going to
left click and drag, and I'm going to
create a brand new foliage type for that
guy because that is the foliage that I would like to
experiment with first. Alright, to paint these
foliages within your landscape, first of all, make sure
you have it checked. However, I am going to uncheck everything except my pine trees. And with my pines selected, I'm going to immediately
change my density down from 100 to a value of two. Now, I will be exploring all these parameters in
greater detail upcoming. However, I wanted to do this right now because
a value of 100, it's going to be a very
thick covering of trees, and I don't want to
kill this system here. So let's set that
down right away. What you see once again in your level editor here
is your bubble brush. The size of this is dictated right up here
in the brush options. You can move that slider to
the right or left. Like, so. Alternatively, by holding
down the bracket keys, those are the keys directly to the right of the P
key on your keyboard. Left bracket will reduce the
size of your brush by 5%. Right bracket will
increase it by 5%. To paint this in your landscape, all you got to do is hold down the left mouse button and drag it around
like this, release. And there you go.
You got some trees. And here in your palette area, it'll show you how many
instances you currently have. I've got 679 right now. Simple enough, right? To delete my trees here if I
did not like them. All I would need
to do is hold down the Shift key and then
left click. Like so. Now you can see left
click and drag to paint. As soon as I hold
down the Shift key, it immediately goes from paint
to erase, paint to erase. I'm just toggling the
shift key on and off. Next, we will focus
our discussion about what are these
two guys right here, my paint and erase density right below my brush size
in the brush options. Well, paint density
is sort of like a master control density for whichever foliage types
you have selected here. Let me show you what I mean with just my pines painted out here. So let me go ahead and
delete these right away. Like, so I'm down
to zero instances. Okay, I've got this value, too. If I was to set this
to one, that is, like, an additional density
setting on top of my initial pine
density setting. So now if I was to hold down the left mouse button and
drag and then release, you can see it's got a thicker
smattering of pine trees. Let me just delete right here. If I was to set this
to a value of like 0.1 and then left click
drag and release, you can see it is a
sparse smattering. Ease density is a
similar concept. When this is set to zero, when you hold down Shift and
then left click and erase, you're going to erase everything that your bubble brush covers. However, let me just undo that. And I'm going to paint
some more on here. However, left click drag. If I was to set my eras density to something
like, I don't know, 0.7, you're basically saying, I don't want to erase them all. In fact, leave a decent
number of them out here. So now if I hold down Shift and left click and try to erase, it's only erasing a few. So personally, I like to leave
the erase density at zero, and paint density
of 0.5 is usually fine for me as a master
density setting. I usually like to control how many instances I'm
painting down here by adjusting the
density setting for each particular foliage type
that I have checked on. Okay, so I've just been
painting pine trees so far just to show that you can paint multiples of these
at a given time. I'm going to reduce my
brush size right here. I'll turn on grass and
flowers and bushes, as well. I'll leave my cliff
rock unchecked. And now, if I was to
zoom up on an area right over here and left
click and drag, you will see I will
not only be painting pine trees but also
bushes and grass, and there's probably some
flowers down there as well. Indeed, there are. So that is how you can paint multiple
foliage types at once. Now, something to be aware of with this particular
level, and again, I'm using this landscape auto material mountain
range example is this particular
landscape already had some grasses and rocks
out here to begin with. So don't get confused
between what you are painting and what already
came on the landscape. And note that we did
paint some bushes, flowers, grass, and
pine on this landscape. Alright, so that's
the very basics for using the paint tool. Left click to paint on whatever foliage types
you have checked. Hold down Shift
and left click to erase whatever foliage
types you have checked. Guys, I'll do it
all for this one. See you win the next one.
21. Foliage Painting Settings: In this video, we are
going to be focused on talking about the
various parameters under the painting category for a given selected foliage
type here in foliage mode. That's going to be
this collection of parameters right here. And for this discussion, I'm going to keep it
to just one mesh. So know that I've
got a pine tree selected here in
my foliage panel, I'm going to go with a
brush size of 5,000. Now, you saw me in a
previous video ready fiddle with the density setting here. So currently my pine density setting right down
here is set to two. And what that's going to
mean is when I paint with my bubble brush by holding
down the left mouse button, once I release,
it's gonna appear. I'm going to get a density,
something like that. That's still pretty dense. If I was to increase
this to say 50, it's going to give me a much more concentrated
smattering of trees. So left click and drag. And you can see I've got
many, many more trees. Now, no matter your density, you can end up with a
situation where you've got some trees that are too close
together for your liking. In fact, if you
zoom in down here, you get some trees that
are really close together. Navigating a character
through spaces like that is probably not feasible. So what you can do
here is when you're painting on your foliage is specify a radius in which
another tree cannot violate. Let me show you what I mean. I'm going to go back and erase all these trees here,
at least some of them. So holding down shift, I'm gonna hold down left mouse
but and erase a bunch. I'm going to set my density
to something like ten, and I'm going to set
my radius to something like I'll say something
big, like 800. So a density of ten is a pretty dense concentration
of trees here, but with a radius of 800, I'm ensuring that no tree is within 800 unreal
units of another tree. So if I was to left
click and drag, you can see I'm getting
some trees out here, but none of them are
too close together. There is good spacing
between these all. In fact, there's at
least 800 unreal units between trees. Kind of nice. Okay, the other parameter here that I wanted
to talk about here in the painting settings
is the scale setting. Now, currently, our
scaling is set to be uniform, which is nice. And what that's going to
allow us to do is specify a men and a max range. Now, currently, this
is set to one and one, meaning that every tree
is going to be 100%. You can think of these
like percentage. Of their usual mesh size. Now, obviously, trees, when
you find them in real life, they're not all exactly
the same size as a tree, unless it's like a Christmas tree farm or
something like that. So what you can do is specify
a range that you would like your trees to be
in when you were spraying them all around
your landscape here. And it's going to
do that uniformly, meaning it's going to scale
it uniformly in the X, Y, and Z dimensions. Note that under this
scaling setting, instead of scaling
this uniformly, you could scale this in
any given axes right here, like just X and Y, X, Z, et cetera Uniform, I like to do. Free is if you want to have them random in the
X, Y, and Z scales. But again, I like to
usually go uniform. So with that, set to uniform, I'm going to set my min
value to something like 0.5 and my max value
to something like 2.5, so half the usual size and up to 2.5 times its usual size. And now, if I was
to paint trees with these same density and
radius settings over here, left click and drag, you can see I get a
variety of sizes, which looks a lot
more realistic. Alright, and if you
don't like any of your settings here
and you want to go back to the defaults, you can always click on these
back buttons right here, and then I'll set you back
to the default values. Alright, guys, that's
going to do it for our discussion on
the painting settings. See you in the next one.
22. Foliage Placement Settings: Alright, next, we're going to
be focused on talking about these placement settings for a given foliage type
here in foliage mode. And just like with the painting
settings right up above, these placement settings
determine the rules for how this foliage appears
within the landscape. Now, in this category, we've got these various
parameters to fiddle with. And I'm going to start with
this aligned to normal. This is checked on by default. And what this means is
that with it checked on, your foliage meshes are
going to grow essentially perpendicular out of the surface that
they were placed upon. In fact, I can see a tree right over here that is
respecting that rule. You see this tree growing perpendicular out of the surface
that it was placed upon? Same with these
trees right here. Once again, that is because
of that aligned to normal. If you don't want that, what
you can do is uncheck that, and I usually like to
leave that unchecked. And you can see
with a checked on, we get an aligned max angle
that is available to you. With a checked off,
that goes away. Once again, I usually like to have this
checked off because most foliage reaches
straight up for the sky. And also with that checked off, I usually like to set
a random pitch angle. Now, I'll get to that
in just a moment, but let me show you
with a line normal off. If I was to then put some trees on this
side of the landscape, let me just decrease my
brush size here quite a bit. And I'll set my density
to something like two. And now if I was to
left click and drag, you can see that these trees are not growing perpendicular
out of the landscape. They're growing a little
bit more realistically, reaching straight
up for the sky. Now, you probably
don't want them all tilted and aiming
straight up for the sky. So that's where this random
pitch angle comes in. So I usually like to set
this to something like 15. But just to show you
exactly what this does, I'm going to set it to
something kind of severe at first, something like 45. And what I'm basically
specifying here is that trees can be angled up to 45
degrees in any direction. So let me try to place this on somewhat flat ground over here. And so if I was to
left click and drag, you can see some trees
are going straight, but some of them are quite bent, up to a maximum
angle of 45 degrees. So random means random. It means up to 45 degrees. Okay, let me go
ahead and set that back to something more regular. Ten. Now, this random yaw essentially means that
each tree is going to be twisted from a top down angle in a given direction, a
different direction. With this unchecked, if I was
to smatter on some trees, like so, you can
see that they're all angled the exact same way. Doesn't look super realistic. Let me just control Z that. With that checked
on, it'll all be twisted facing different angles. Something a little
bit more realistic. So I usually like to
have that checked on. Now, this ground slope angle, this specifies the
steepness of slope that your trees are eligible
to be painted upon. What this is currently
saying is that any angle between zero degrees
and 45 degrees, yes, this can be painted upon. However, if any slope gets
greater than 45 degrees, even if you try to paint this on that slope, it won't do it. So let me come over to the side of one of these
mountains over here, and this gets pretty
steep right in here. So you can see if I kind of
lead up to that steep slope, and try to paint up there, okay? So I'm gonna hold down
the left mouse button and it's painting some trees. Let me just increase the
density here a little bit, too. Not that crazy.
Something like 20. So left click and drag. And then as soon as I get up to the side of this mountain, there are spots where
it's relatively flat, and it actually does find some flat spots
up to 45 degrees. But anything steeper,
it will not. And once again, it will find
some spots here and there. So if I try to paint
this on the side, you can see it won't do it
on that really steep spot, but on these flatter
areas, it will do it. So if you do want
to have, you know, some really ridiculous trees growing out of the
side of your mount, you could set this max
ground slope angle up to 90 and that would allow you to place it up onto a
vertical surface, including stuff as
ridiculous as that. So left clicking right
there, you can see, indeed, it will actually
grow it out of the side. Once again, not ideal. Now, that's going to
lead me to talk about our next set of parameters
right here, our Z offset. This is essentially,
how much do you want to offset your given
meshes up or down? Now, this is currently
set to a range of zero, zero, and it gives
you this range so that you can have
some randomness here. But this is useful for if you want your trees,
in this case, to be buried in the ground a little bit more or with
a little variation. So let me show you what I mean. If I was to set our Z offset
here to something like negative 50 to positive 50, let me also reduce
my concentration of trees from 20 down
to something like two. Now if I was to left click and drag and kind of zoom
up on some of these, you can see that this
tree is actually floating a little bit because I have an offset set to
a maximum of 50, meaning it can be up in the Z
axis up to 50 unreal units. Conversely, it could be buried up to 50 unreal units as well. Just to go a little bit
more extreme with that, let me do negative 200 to
positive 200. And left click. And you can see
some of these trees are buried a little bit
deeper into the ground. Which again, maybe is what you're going for
if you want, like, trees that look
like they're buried in an avalanche or
something like that. Maybe you paint a snowy
surface onto the ground. Some of those are a little
bit deeper into the ground. So again, you can have
some variation as to how deep your tree
trunks are buried. Alright. The next set of parameters I'm going to
be talking about here in the last set of
parameters is going to be this height parameter. Again, you've got a
min and a max range, and it is very generous. Essentially, what
this specifies is a height range in
unreal units where, in this case, these tree meshes are eligible to be painted. So not only do you have an angle eligibility
for your trees, but you also have a height,
an elevation eligibility. So this allows us to paint trees in very low valleys and
very high mountaintops. But once again, this is a depth or in elevation in unreal units. Now, if I was to jump out of
foliage mode here quickly, go back to selection mode and select my landscape
actor right here, it's talking about
this Z location. So by default, my landscape actor itself
is set to that height, a height of 100 unreal
units. Negate these. Now, once again, your
landscape here can have some undulations
some mountaintops, some valleys, et cetera. So if you ever find yourself painting and you're wondering, Hey, why am I trying to paint these trees and they're
just not showing up? It could be because you are violating that placement height setting for your
given selected mesh. I have found a lot of confusion with students
when it comes to that. Sometimes they try painting it, and it just won't
show up because they're violating
their height setting. Now, this is really useful for painting something
like a tree line. In nature, there are
tree lines in which trees will grow up to a certain
elevation but no higher. So if you want to ensure
that, in this case, say, pine trees can only go up to this point on the
mountain, well, you can set a maximum
height eligibility where it'll automatically
cut you off. Alright, so that's going to
wrap up our discussion about the placement rules for
a given foliage type. For trees, I usually like
to do a min and a max of, like, negative 50
and positive 50. I usually like to have
a line to normal off, a random pitch angle of
about ten random yaw on. And usually for my
ground slope angle, at least for trees, I usually like to
go between zero and about 30 degrees,
something like that. Guys, that'll do it
off for this one. See you in the next one.
23. Foliage Instance Settings: Alright, welcome
back. In this video, we are going to be talking about the instance
category of settings as it relates to painting
a particular foliage type. Once again, I'm using
my pine foliage type, and we're talking
about this category of settings right down here,
the instant settings. And in particular,
in this video, we're going to be
talking about call distance shadows and collisions. So let's get right to it. Let's talk about
an easy one here, our cast shadow checkbox
with a checked on. Obviously, the foliage type does cast a shadow
in your environment. You'll probably want this
checked on for something like a pine tree that's nice and tall and obviously cast shadow. With this checked off, then obviously it will
not cast a shadow. Now, as you can see this
cast shadow checkbox, if it's turned off,
it's going to gray out all the parameters
underneath it. This is like your
master shadow control. Now, this is not a discussion
talking about lighting. But essentially, you've got different types of shadows that can be cast from
dynamic to static. Dynamic shadows cast when there are moving
lights like your sun, static shadows are shadows from when you have static
lights in your level. I'm going to turn this back on. But now, why would you ever
want to have this turned off? Well, for performance reasons. Let's just say you have
a few million instances of your flowers or grass groups
out in your environment. Well, that can impact your
performance, your frame rate. So for your smaller
foliage types, you probably want
to have shadows turned off because you
wouldn't even really notice that they're casting a shadow for larger foliage
types such as this, you will want it turned on. We'll hone in on
this a little bit more when we talk
about optimization. We've got a full
video dedicated to that in just a few
videos time here. Next, let's talk
about this parameter called cull distance. Currently, it is set to a men in a max range of zero and zero. What this essentially does
is it allows you to specify a distance at which a given foliage type will
no longer be rendered in. Now, once again, this is
another performance technique and you see this in games like Breath of the Wild in which Link is moving
about a landscape. And if you're
paying attention in a game like Breath of the Wild, tiny grass instances will
appear close to Link. But as you move
throughout the landscape, the edge of that grass cuts off and that's due to
a cull distance setting. Now, to show this in full
effect here in my level, I'm going to change to some other value than
zero for the max value. When this is set to a min and a max value
of zero and zero, that means you're going
to see these instances no matter how far away. They may exist in
your landscape. Now I'm going to zoom
on down here a little bit and watch what happens to these instances as I specify a max call distance
that's very close by to me. If I set a max value of something like 50
and press Enter, suddenly, all of them
seem to disappear. Essentially, what I'm stating
here is only render in these pine trees if they are within 50 unreal units
of my camera here, which obviously is nothing. Now, let me go ahead
and set this to a value of 500 and see if
any are within 500. No, not yet. How about 1,000? Press Enter. 2000.
Press Enter again. And I see one appearing
off to the side here. How about 5,000? Some more. And you can see
if I start to fly forward or drive forward
a little bit here, Instances will start
appearing when they get within 5,000
unreal units of my camera. Let me just raise
up the camera a little bit here and
also back it up. 5,000, anything that gets beyond 5,000 is
going to disappear. Now, once again, you
probably don't want to do this effect for larger pieces
of foliage like trees, but for grass, flowers, absolutely, 'cause you
don't need to render in grass or flowers when it's, like, you know, 50,000 unreal units away
from your camera. Let me set this to a value
of like 10,000 max value. And there you go. As I mouse wheel forward a little
bit, they start to appear. For a call distance,
I usually always leave the minimum
distance at zero, and the max value is
what I tend to adjust. Okay, the last one
I want to hone in on is this collision preset. Now, currently, it is
set to no collision. I want to just scroll
up here briefly. In my mesh category, I collapse a couple of the
categories right here. I'm going to double click on my thumbnail for my SM pine two. What that's going to do
is it's going to open up my static mesh editor.
That's my pine tree. And if I come under this
show button right here, I can show simple collision and this green outline shows me the collision that is
surrounding my tree. And if I scroll down in
the details panel here, I can see under the
collision preset right here that here the
collision is set to block all, meaning, yes, this tree should
block my player character. Now I'm going to jump into my
level really quickly here. And as you can see, with my pine foliage
type here selected, it is referencing that mesh, but down below here in
my instant settings, the collision preset is
set to no collision. Now, what I'm going
to do is I'm going to temporarily hop out
of my foliage mode, go to selection mode. I'm going to right
click right about here and I'm going to
choose to play from here. Now, there is my default
third person character, and what you can see
is that right now, I go right through that tree. It is ignoring the collision set on the mesh itself because it's set to block all and it's respecting the collision
setting I have for this. Let me do shift in
three in foliage mode. Under the instant
setting, my pine tree, even though it's
referencing that mesh, the collision preset is
set to no collision. Now, if I go ahead
and change this from no collision to block all, then I need to jump out of
foliage mode, once again, go back to selection
mode so that I can right click and play from here. Now, if I try to run
through that tree, you can see that it
blocks me just fine. Those are the three
main settings that I wanted to cover here in foliage mode under the
instance settings. You've got shadow for toggling
on and off the shadow. You got call distance to specify a distance at which you will
see this given foliage type. Once again, zero, zero means you will see it
from any distance. Currently, my pine trees
are set to be called out at a distance beyond
10,000 unreal units. And last but not least, you've
got this collision setting to turn on or off collision
for a given foliage type. You probably want to
have no collision for things like grass and flowers, but for trees, obviously, you do want to
collide with those. Guys, that'll do it
all for this one, we will see you in the next one.
24. Single Instance Mode: Welcome back in. This video, we are going to be talking about single instance mode here
in our foliage mode. Now, currently,
up to this point, we've been focused on
our paint brush here. This one, we're going to
be focused on this guy right here, single
instance mode. Now, you can get to it by clicking on this box right here. However, you could
also get to it by clicking on that
box right there. So you uncheck it in one spot. I'll unselected there. You got two ways to get
into single instance mode. Now what the heck is
single instance mode? Well, it changes your paint
bubble brush into this tiny, tiny, tiny, little green
brush, if you will. And what it'll do
is it will give you a single instance of whatever
you have selected here. And this is great
for just smattering on a single instance
of whatever you want. So if I wanted a pine tree here, just bam, boom, you got a
pine tree. Pine tree there. Bam. Got a pine tree. Now, once again, you
got to be careful of your various settings
that you have here, placement settings
in particular. And in particular, your ground slope angle
and your height, because if I try
to single instance this on a steep
slope such as this, I'm left clicking, can't do it. However, if I was to go
somewhere right here, a little flatter,
bam, bam, bam, bam. And once again, it's
going to look directly where the slope angle
is right beneath it. So I'm trying to click in certain spots right here,
it's not going to do it. If I find something
a little flatter, Bam, I'll place it just fine. Now, a little bit of nuance here with single instance mode
that you should know about. Here in our painting settings, you've got a couple of settings related to single instance mode. You've got this single
instance mode override radius. That is currently checked off. And once you check this on, you will turn on single
instance mode radius. So let's go ahead
and explore that. But for that, I'm
going to want to kind of come to some
flat ground here. So as you can see, with
single instance mode on, I could play some trees
really close to one another. I could go bam right
there, and then maybe, like, bam right there,
bam right there. With this single instance mode override radius checked on, you can then specify a radius. Let me go something like 200 so that you can see my single instance bubble brush getting a little bit bigger. That shows the radius
which will surround my single instance and in which I cannot place
another instance. If I was to click here, bam, a tree is going to appear
right in the middle of it. If I go a little bit
over to the side, you can see my green bubble
brush is overlapping that. I'm trying to left
click. I can't add one. However, if I was to go outside of the bounds of that Boom, it's allowing me to
add another one. So just know that
that is a thing. Another bit of nuance here to understand is way up
above where we've got single instance mode checked on right here where it
says, All selected. We have the option
to go through all selected or cycle
through selected. Now, in order to see
this in full effect, I need to check on my
different foliage types here. So check, check, check. I've got four different
types here selected, bush, flower, grass, and pine. I'm going to set my single instance mode
override radius here. I'm going to set that
toggle that back off. And so with all selected, if I was to find an empty spot, maybe right over here, if I was to left
click, it's going to put everything overlapping
each other at once, so I can see some grass there. So tree, there's flour. No super attractive, but if you wanted to have multiple
things painted at once, I mean, you could do that. If you change this to something like cycle through selected, what that'll do is
every time you click, this time I get a
bush, this time, I got a flower, tiny
flower, but there it is. The next time, some grass
and then my pine tree. Bush, flower, grass, pine tree. Now, what is this useful for? Well, let's just say that
you were wanting to just, you know, smatter some trees
all around your landscape. You could have in
your palette area maybe five different
versions of trees. And if you had those five
different trees selected, if you had cycle
through selected here selected under
single instance mode, you could do, like,
tree one, tree two, tree three, tree
four, et cetera. Very nice for that
kind of variety. Now, I really wanted to show this single instance mode off. Here in my California level, you remember where I ripped
that hole into my landscape. For a cave, this is a great
use of single instance mode. Currently in my foliage palette, I've got four different rocks. I've got my ground slope angle set to a max of 90 degrees. I've got some scaling
variety for my rocks, set to a min of one
and a max of 2.5. So give me some
different rock sizes. I have a line to normal, checked off, got
random yaw checked on. I am going to be doing single instance cycle
through selected, so it's going to go one, two, three, four, et cetera. And now to create
the mouth of a cave, all we need to do in single
instance mode is just click around until I've got a whole bunch of rocks around
the mouth of this cave. And it obscures this weird tearing that
I've got going on. I probably should have scaled up my rocks a little
bit more here. But you can see how you can kind of start creating
the mouth of a cave, obscuring that weird tear that occurs when you're tearing
through the landscape itself. Guys, that's how you do it. Single instance
mode, super useful. And also combining
it with how you can create the mouth of a
cave, something like this. Guys, that'll do it
all for this one. We'll see you in the next one.
25. Foliage Mode Filters: In this video, we are
going to be talking about foliage mode filters right
here within foliage mode. Now, conceptually, these are
pretty easy to understand. You've got a series
of checkboxes, and they essentially
determine what you are able and eligible to
paint foliage upon. Now, let's explore
these all one by one. We've got landscape, static
mesh, BSP, and foliage. I'm going to ignore translucent because these four
are the big ones. First of all, we've
got landscape checked, meaning that we
are able to paint foliage a top of a
landscape actor. Now, I'm currently
in single mode. I've got my pine tree selected as the one to place
an instance upon. This is a landscape
actor right below me, so if I was just
simply left click, I would see a pine tree appear. No problem. With this unchecked, if I tried to place a pine tree, I'm left clicking,
nothing happens. Okay. Next, let's test this
out with a static mesh actor. I'm going to turn a landscape
back on before I forget. This log I found within my content drawer right
here, my STF folder. By the way, a content drawer can be accessed by holding down Control and space bar,
toggle that on and off. That works just like
the content browser. I found this SM dead tree right there in that pathway that you see at the top of the tool tip. It's in the STF folder. Now, I did not paint
this in as foliage. Instead, I dragged and dropped this static mesh
asset into my level. Now, currently, in my filters area right up here,
it says, Yes, I can paint, in my case, this pine foliage atop
that static mesh. So let's go ahead
and give us a try. I'm going to try
to place it right on top of the log there, left click and bam,
you get a tree. Now, if I try to paint on the side of this log right here, it's not doing it,
and that's because my slope angle is too steep. If I continue to left click, left click, left
click, left click, left click, suddenly it
flattens out enough where I can place a pine tree on
top of that static mesh. Now, of course, even if I have this checked off
for static meshes, if I was to click right about
here and try to paint one, I cannot do so. So static meshes, yes or no, can you paint foliage atop of them? Let me
turn that back on. Now, BSP, what this is is this actor I've got sticking out of my
cliff side right here. I'm going to jump temporarily
out of foliage mode because this can be a little bit confusing if you're not familiar with working
with the engine. BSP refers to these
geometry actors that you can place
in your level. And you can find these under
the Place Actors panel, which if you didn't know,
you can turn that on by clicking this little
plus button right here. You got Place Actors
panel right there. Additionally, if you
come under window, you can turn on or off your place actors
panel right there. With geometry
selected, you've got different geometry brushes that you can add to your level. This is a geometry box
brush that I've sized up. And if I select it here, I can see it is considered
a box brush. It's a geometry brush. And this is considered BSP
geometry here in foliage mode. So if you see this BSP checkbox, what's that talking about? Well, it's talking about
these geometry brushes. So once again, with
that checked on, I've got my pine tree
selected right here. If I was to click on this, I can paint trees atop that
with this clicked off. Now if I try to click
on it, nothing appears. That's what that's referring to. Next, note that between
some videos here, I did add a few cliff rock
foliage types to my level, one, two, and three. Now I've got my foliage
type pine selected. Currently, my filters
right up here, I have foliage unchecked. Am I allowed to paint
one foliage type, in this case, a pine
tree on top of a rock? Because this cliff rock is in and of itself
a foliage type. Well, currently,
it is unchecked, meaning I shouldn't be
able to do it, right? Well, if I left click right
about here on top of my rock, but wait, something a
little weird has occurred. It looks like my tree
is inside the rock, and that is because it is. It kind of ignored my
click on the surface of the rock here and went
down to the landscape, and that is what is
actually placed upon. So it's going to look a
little bit weird there. Now, if I was to turn on this filter for foliage,
I'm basically saying, yes, I can place one foliage
type, in this case, a pine tree on top of a
cliff rock foliage type. So now if I was to left
click right about here, and you can see my
single instance little bubble brush up here. Now if I was to left click, that trees actually going
to be atop the rock. So with this unchecked, if I left click
on the rock here, it's going to go
right through it down to the landscape
right below. But with this checked,
I can place it right atop that cliff
rock foliage type. So there you have
it the foliage mode filters that you need to
know about landscape, static mesh, BSP, which is these geometry
brushes right up here, and foliage types themselves. And these check boxes simply act as yes and no checkboxes. Are you eligible to
paint upon them or not? Guys, that'll do it
all for this video, see you in the next one.
26. Fill Tool: Welcome back, everyone.
In this video, we are going to explore the fill tool here
in foliage mode. So let's jump out
of our paint tool and into the fill tool. And as you can see from
the tool tip there, it says that this will fill the selected target
with foliage, that fill tool right up there. So let's go ahead and choose it. Now, as soon as I did
that, you'll notice, going from paint mode
to film mode that all of these brush options
are going to go away. So here we go in film mode. And also I want to point out
that for this demonstration, I've got my flower
group selected. I did change my
density here with my flower group
selected to be 500. I've also adjusted my scaling
just a little bit here. I left the uniform
scaling in place. Min of one, a max of two, just to add a little
flower variety. Also, I did want to
point out before I clicked on my landscape that I did set the ground slope
angle rules as such. Up to a maximum
angle of 15 degrees. So note that those are
my rules in place. With all that set,
all I need to do is just click on my
landscape one time. And suddenly, I've added 241,000 instances of this
flower group to my landscape. And as you can see,
I've got a little bit of flower scale variety, a little bit, some
taller than others. And also, it did respect
that ground slope angle. You don't see the flowers
growing on this steeper slope. So that's a real
quick and easy way to fill your landscape with
a selected foliage type. Alright, guys, that'll
do it all for this one. See you in the next one.
27. Reapply Tool: All right. Welcome
back. In this video, we are going to be talking about the reapply tool right
up here in foliage mode. Now, the reapply
tool can be used to reapply some settings for a given foliage type
without erasing the foliage type outright
and then replacing it. It's a way to just say, Hey, I like my foliage
type placements, but I just want to set
some new settings for it. So take a look at my
pine trees out here. They're all roughly
the same size, and I've got this one growing out of the side
here perpendicular. That one looks like it
is aligned to normal. Let's just say I wanted
to adjust some of the parameters associated
with this pine tree. So what I'd want to do here is reach for that reapply tool. So I'm going to
select it right now. And what this is going to do with my selected foliage type, you see down here
in the settings, you've got various
parameters all grade out with checkboxes
right next to them. Now, what you want to
do here is check on any setting that you want to set new settings
or parameters for. And then with our paintbrush, we can paint over
that existing foliage and reapply the updated setting. So let me show you what I mean. The most obvious here
is going to be scale, so I'm going to check this
scale setting on right here. I'm going to leave
it at uniform, but it exposes this scale
X. I'm going to set my min value to be 0.5 and
my max value to be three. So I'm basically saying I
want some tree variety. Even though it says
uniform scaling, know that the only scale value that it presents
to you is scale X. It's going to apply this to the Y and Z scale of
our trees as well. Okay, so I want to apply
that to all my trees. I also do want to ensure that
my align to normal right here is checked off for every
instance of my pine trees. It looks like that
one was placed while that was checked on. So I want to ensure
that that is off. And now, just with
those two settings, I can now use my bubble brush
holding down left click, and I can reapply
these settings to the existing instances
of these trees. So as you can see, I'm just holding down the
left mouse button, and as I'm mousing over the various instances of the tree, it is scaling it randomly. Any of these trees that
are growing perpendicular, maybe out of the side
of the mountain here, left clicking, I'm just holding down left click, left click. I'm holding down left
click, et cetera. Now, I wouldn't have to rub my brush over the landscape
like I'm doing now. I could just size
up my brush size to be super big to make
this happen instantly, but I just want you to
see that as I'm holding down the left mouse button. It is scaling. It's reapplying those
updated settings to every instance
here of my tree.
28. Save Foliage Settings: If I was to right click on
a given foliage type here, I can browse to this in
the content browser. I've got my pine 02. Okay. Now if I was
to double click on this static mesh foliage
asset to open it up, let me just dock it
across the top here. Actually, let me not dock it across the top so that
I can compare the two. You can see that my
settings here in the foliage type asset match the settings here found in
the foliage mode itself. Let me just jump out of the reapply mode just to
the basic paint mode. You can see I've
got a density of two set here in foliage mode. That corresponds to the density here in the foliage
type asset itself. And here in the foliage
type asset itself, if I was to change
it to something like three and press Enter, you can see how it updated it here within foliage mode itself. And maybe here in
foliage mode itself, I could change that density type to say five and press Enter. I updated not only here, but in the foliage
type asset itself. So you change it in one place, it's going to change
it in the other place. So if I was to save it here
in the foliage type asset, it's going to show that that
is now saved down here. Let me go ahead and
set this back to two here in foliage mode two. You can see that
change reflected here. And if I click here to
save this foliage asset, you'll notice that this
ends up saved as well. That asterisk will go away. Alright, and there you have it. Changing the parameters in
one area, in this case, foliage mode will
change it in the other, in the foliage type. Guys, that'll do it
off for this one. We'll see you in the next one.
29. Selection Tools: Welcome. In this video, we are going to be talking about the various selection tools
at the top of foliage mode. And I'm going to
start things off by selecting this select
button right up at the top. And what this allows me
to do is simply select any instance of my
foliage here in my level, and I'm going to
choose this pine tree that I've strategically
bent over. And with that selected,
you can see I bring on the translation widget. And so what this might be used for is something like
this where maybe you've got some piece of foliage in your level that you
want to correct, and you don't even
need to have it selected in your palette
panel right here, but simply click on it
with the Select tool. And then with this, I
could hit the space bar, bring on my rotational tools, and I could rotate it that
way or this way and stand it. Back up. Maybe I want to
bury it in the ground a little bit, something like that. So that is a reason you may
want to use the Select tool. Next, we've got this all
selector right here. It selects all foliage. So if I click on this,
you can see that every foliage type in
my level is selected. Now, this can be
useful if you wanted to mass delete everything
in your level. That's maybe a case where
you might want to use it. Simply tap the delete key. And everything goes
away, let me just do controlled Z to
bring it all back. And to get out of this, I
could simply choose this D select all foliage instances
right up at the top. Next, we've got this in
valid button right up here, and this will select
any what are labeled as invalid foliage instances. Now, what in the heck
would this be useful for? If the original mesh upon which a foliage type is based upon has been
deleted, for example, say this pine tree mesh was deleted from
our project well, then that would label this
foliage type as invalid. And so a way that you
could quickly identify any invalid foliage types in your level would be to simply click on this invalid
button right up here. Another case where
a foliage type could be considered
invalid is if you place that foliage type
on a section of landscape that no longer exists. Remember, through your
landscape manage tools, you can add or delete out
sections of your landscape. Let's assume that you added
a section of landscape, maybe painted some of these
pine trees atop them, and then you decided to delete out that
section of landscape. Well, in that case,
the pine tree that was existing on that now deleted
section of landscape, would be considered invalid. Next, let's talk about
this Lasso tool, and this is probably
the most useful out of all the various selection tools that we've talked
about right up here. With this, you will
have a bubble brush present in your
level so long as you have one of your foliage
types here selected. There I've got pine
trees selected. What this allows
you to do is Lasso. That is essentially label any given foliage types that
you would like to select. So if I simply hold down
the left mouse button, you can see that I am selecting whatever tree instances that I'm touching with
my bubble brush. And then with those selected, you can see I've got this translation widget
right out here. I could simply move them
all up into the air. Maybe I wanted to rotate them. I'm just going to do
Control Z to set that back. Maybe I'd want to scale them all up in size,
just those few. Maybe I just want to
delete all those. Those are all uses
for the Lasso tool. Let me just do Control
Z to bring that back. So out of all these
selection tools, the Lasso one is probably the one you're gonna get
the most mileage out of. It's great for just
rounding up a selection of foliage and maybe
scaling them up in size, maybe moving them,
that sort of thing. Alright, guys, that's gonna
do it all for this one. See you in the next one.
30. Grass Types: In this video, we are going to show off another way to populate your landscape with foliage using something
called grass types. Now, conceptually, the way
this works is you paint on one of your various layers here in landscape painting mode. And then depending on the
layer that you painted, in my case, it's
going to be grass. It's going to automatically populate any area that
I painted with grass with various meshes that I set
up via a grass type asset. So let's explore how this works. Now for this, I'm in my
created landscape level, and between videos here, I did associate my landscape no tiling material as my landscape material
associated with my landscape. You can see that
setup right over here with my landscape selected. Right there is my
landscape material. Now, you're going to
want to go ahead and double click on this guy to open it up because we're going to be exploring how to
set up grass types. In fact, most of the work's
already been done for you. Alright, so with that
landscape material open, and I have it open
right across the top, we're going to ignore the majority of this
monstrosity before you and instead focus our attention on this
node setup right here. We've got this
landscape grass node, and in it are three landscape
layer sample nodes, and they're all labeled
grass, path, and mud. And that corresponds to grass, path and mud that I can
paint on my landscape. Now, going back to my
landscape material, what I want to do in order to associate some meshes with a given painted on layer is with this landscape grass
note selected. Over in the details
panel, if I zoom on up, each of these has an
associated grass type asset that we can slot and
associate with them. Now, currently, this is set to none because we haven't
created any yet. So we're going to click
on this little drop down right here in order
to create a grass type. So right here under Grass type, clicking on this
little dropdown. At the top of this
dropdown list is going to be a landscape Grass
type creation option. I'm going to go ahead
and click on that. It's going to ask me to save this new asset into a
folder of our choosing. I'm going to right click on my MW landscape auto material, and I'm going to create a new
folder called Grass types. And with that created, I'm going to give this a
name of GT Underscore Grass. And then I'll go
ahead and save this. You see that asset
now populating our grass type asset right here. However, this asset is empty, so we need to open it up. Now, I could open it up by simply double clicking on
that thumbnail right there. However, if I click right there, I can browse to where this asset is in the content browser. There it is. And if
I double click on it or just tap the space
bar, I will open it up. There it is. Currently,
this is an empty asset. So we're going to associate
three meshes with this. The way that we can do
that is clicking on this tiny plus button
right here to add an element to our grass
Array, one, two, and three. I'm going to right
click right next to where it says grass varieties right up at the top right here
to expand all selections. And now you can
see for each entry into this grass varieties array, we can add a grass mesh. Now, this is a little
misleading because this does not have to be grass. It can be any static
mesh of your choosing. However, I will slot in the following meshes
for Index zero here, I'm going to type in grass, and I'm going to
associate Grass group. Grass group 01 with that. I'm going to set
my grass density right away to a value like 2000 2000, something like that. Oh, it's gonna cap
me at thousand. That's fine. I'm also going
to set my call distance. My call distance
to something like 20,000 I'm going to have some random scaling
here so you can see you can set some properties
associated with each of these. I'm going to set
uniform scaling, but the min scale
is going to be two, and the max scale
will set to be three, so some tall grass. I do have random
rotation checked on aligned to surface for grass. Yeah, I'll leave that
on. That's fine. For Index one, I'm going
to add some flowers. So let's go ahead and
search for some flowers. Flower flower group. I'll do this first flower
group right there, SM flower group 01. Let me zoom up on
that so you can see the name a little bit
clear if you like. I'm going to set the grass
density down a little bit. So something like 100 for that. And again, scaling,
I'll set it between a value of 0.5 to two. And I will leave random rotation in line to surface
checked, as well. Then down below for this
grass mesh, index two. I'm going to set this to pine. I'll do pine 02. And here for the grass density, it should essentially be called mesh density because that's
what you're specifying here. I'm going to set this to
something low like 0.5. I'm gonna also set
the cull distance for these trees to
be something like 50,000 because I don't
want these to cull out until we get our camera
very far away from it. Scaling, I'm going to
set the scale to be one. And actually, let me set
it to be 0.5 to two. And for this, I'm going
to say random rotation, although I do not want it to
align to surface, otherwise, we're gonna have trees
growing perpendicularly out of the side of our
mountainsides right there. So I'm gonna leave that
unchecked for the trees. And yeah, I like that
for scaling for trees. That seems to be a
pretty good range. Now, I think I did forget to set a culling distance for
my flowers up here. So for my flowers, I'm going to set the
end call distance. Again, I'm not
changing the start. I'll change the end to
something like 30,000. Alright. With that, you can play around with
those settings. I'm just going to click
Save right up at the top. And now I can see in my material that grass type is associated
with my grass paint layer. You can see that right
there. However, if I go to my created landscape, I don't see anything. I don't see any
meshes whatsoever. What's going on.
Well, that's because I have not updated my material. So clicking back on my material, I can update it by clicking this Apply button
right up at the top. However, I'm going to click Save right up here
because that's going to not only apply the
changes to this material, but also save it as well. So let's go ahead and
do a two for one. Save this asset right away. And after I do that, returning to my
created landscape, now I can see foliage populating wherever I have painted
grass into this landscape. Isn't that quite nice? Now, just to show you how this works when I paint this on, because I had this landscape
already consisting of grass. I'm going to right click on my grass paint layer right
here and I'm going to clear the layer but now I've got nothing painted
onto my landscape. What I'm going to do
now is select my mud. I'm going to right
click on my mud, and I'm going to fill
the entire landscape with a mud coating. And now I'm going
to go ahead and select my grass once again. I'm going to set my
brush size to be a little bit bigger, and
I'll check this out. Wherever I paint grass
in my landscape, I'm just holding down
the left mouse button. It'll populate that section
with the grass type associated with it within
the landscape material, which I think is pretty awesome. So once again, wherever
I paint grass, it is going to associate that grass with this grass type and thus put on those meshes. So now you can see
you can follow a similar process here with currently our path layer
as well as our mud layer. Now, I called this field because in a few
videos time here, I'm going to set up what
looks to be a field on top of our mud layer
by creating a grass type, but that one's going to be set
up a little bit different. But know that you can extend this process to our path
layer here, as well. That's all set up for you. So now a question you may
be asking yourself is, what's the right
process for adding foliage or meshes
into your landscape? Should you use foliage mode or should you use grass
types instead? And I suppose the right
answer there is, A, either whatever you prefer and or B, combination of the two. I typically like to have a
grass type for something like my grass layer just
to kind of give me a base smattering of
foliage wherever, in my case, I have grass. And then I go into foliage mode, and I can add some meshes using foliage mode that are different
than the standard grass, trees, flowers, et cetera. So a combination of the two
I find to be quite nice. But experiment and find out
what works best for you. Guys, that'll do it
all for this one. See you in the next one.
31. Fields: In this video, we are going
to learn how to make fields, and this will be as
simple as creating a grass type like we did
in the last video and associating it with a paint
layer of our choosing so that when we paint on
that layer of our choosing, walla we get a field of
whatever mesh type we like. Alright, to create
our field here, just a quick reminder that
our landscape actor up here in the outliner
has this M landscape, no tiling landscape material
associated with it. And once again, this is
going to be important because we need to
dive inside of here to create that grass type
needed to create this field. So if you double click on
that, you can open this up. Got to open across the top. And once again, we are focused
on these nodes right here. In the last video, we
created a grass type, and we associated it
with our grass layer. In this video, we are once again going to be creating
another grass type, although we are going
to be associating it with our mud layer. Now with this landscape
grass node selected, note that I have it saying
field right down here. Now, I have it saying field down here because I'm going to be creating a grass
type that's going to resemble a field. And here with this
landscape layer sample, note that I do have this
labeled as the mud layer. I'm saying that
when I paint mud, I wanted to have this grass type associated with my
field right here. I could have easily have
called this mud, as well. This is just a label. It doesn't really matter
what you call this. I could call it hamburgers
if I really wanted to. Okay, let's create
this grass type. Go to click right down here and we're going to create
a landscape grass type. And once again, we
will put this in my grass types folder that I created in
the previous video. I will call this GT
underscore field and press Enter to say that. I could simply double click
on that thumbnail image there to open up
this grass type. There it is. And I'm going to add one element to
this grass type. So clicking on this
plus button one time, I'm going to open
up this indice. And for my grass mesh, and again, it's a little bit misleading because this
does not have to be grass. There is an asset that I'm
thinking of this Sarge plant. This is in that STF
series of folders. I'm going to go with
that guy right there. However, you can create a field of any static
mesh that you want. Heck, you could have a field of chairs or statues if
you really wanted to, any static mesh
of your choosing. But that's the one
I'm going to choose. This SM large plant. Now, I'm going to adjust the scale of this
really quickly. So scale down here. I'm going to change
the min and the max. I'll set them to
be five and five. This is a pretty small plant. So I do want these all to be uniform in size, five and five. I don't even want
any scale variety. I am not going to align to surface to ensure that these are going straight
up into the air. I'll set my end call distance for these to be something like, I don't know, 30,000,
something like that. And the density, you can
play around with this, but I find that a density
of something like 50 creates a pretty
realistic looking field. Of course, you can come back in here and fiddle
around with that. Now, the key for
making this look like a field is this
placement jitter. By default, this is at one. If we set this down to zero, that is going to be
what you want in order to make this
look like a field. Having use grid checked on, which it already is, and then placement jitter set to zero. With this, I'm going
to go ahead and save. Once again, to review
our density here is 50. Use grid is checked on. Placement jitter is zero. I've got my end call
distance at 30,000. I've unchecked a
line to surface. And with that saved, if
I look in my landscape, I've got mud
covering everywhere, but once again, whoops, Control Z accidentally
painted there. I don't see any field
populating my mud layer at all. And once again, the reason
for that is because back in my M landscape, no tiling I have not
updated this material. I've got this GT field now associated with my
mud paint layer. I need to simply click
Save right here. And now, if I go back to
my created landscape, we can see I've got a field of those large plants covering
everywhere in my landscape. And once again, it cuts off
back there because I've got my call distance
set to 30,000. But that looks
pretty good, right? Now, in order to
demonstrate that we can paint mud fresh
on our landscapes, and then our GT field
grass type will immediately populate it
with a field of plants, I went ahead and I cleared
my entire landscape here of mud by right clicking on it
and cleared the layer. I also did the same with my
grass layer here as well, by right clicking and
clearing the layer. Then I right clicked on my path right here
and filled the layer. Right now, my entire level here is filled with
this path layer. Also, sometimes you might find some wonkiness where
even after you do that, your field or one of your other grass types
will still remain. In order to deal
with that, sometimes here in your landscape material, you just simply
have to clear out the grass type and
re slot it back in. I just did that
between cuts here. I'm going to associate
my GT field. With my mud layer once again. So with this node selected, I just associated that GT
field with this field label, and that is associated with
my mud painting layer. I'm going to go ahead and save. Now, back here in my
created landscape, if I choose mud, I'll zoom on down a little bit. If I simply left click, you'll get that gray
checkerboard for just a moment. I'm holding down my
left click as soon as I release you can see it will put that field wherever I have painted in the mud and that
looks pretty nice. Now, if you find those
crops too close together, you can come into
your field type or your grass type field and just
change the grass density. If I want something
like ten instead and click Save back in my landscape, you can see how it spreads
them out a little bit further. So play around with
those parameters. I like that a lot,
guys. Great job. Alright, that'll do
it all for this one. See you in the next one.
32. Foliage Optimization: Now, we all like
games that run at a very high and
smooth frame rate. But it's all too
easy when working with landscapes and
placing a lot of foliage out in your
landscapes that suddenly your frame
rate starts to tank. In this video, we're going to be talking about
ways that you can improve the performance of
your open world landscape. And to help facilitate
this discussion, I'm going to direct you
down to Fab right away. And if you forgot
how to get there, here in the content browser, there is your fab button. Click on that and it'll
open up this fab tab. There's a constant pack in here. I'd like you to go ahead
and grab right from the get go because
we're going to be exploring some trees and maybe some other
foliage inside of it to help tank our frame rate. The one that I'm talking
about here is going to be called Procedural Nature Pack. And it is this guy right here. That guy right there. So
with that discovered in Fab, it is a free pack, by the way. Search for free, why, don't you? I'm going to click on that. And then here I am going
to add to Project. Now, once I do this,
it's going to ask me to select the most recent
compatible version. And so from this drop down list, I will choose 5.4, and I'm going to add to Project. Now, this is going to take
a moment to download, so I'm going to pause video here and rejoin you when
this is finished. Alright, so that nature pack has finished getting added
to my content browser. Now the reason I
sought this one out is because I was
aware that there is a static mesh inside of this nature pack called
Large Tree With Roots. Now, check this out. You
can see it in the tool tip. This particular mesh consists
of a whole lot of polygons. And if you add too many
of these to your scene, it can absolutely tank your frame rate. So
let's prove this out. I'm going to bring on my frame rate display here
in my Viewport, and I can do that by clicking on this hamburger icon
in the upper left. And I've got this
show FPS option, Control Shift and H.
We'll also bring that on. So with that checked on, over along the right
here in my view port, you can see it displayed
right up there. Let me zoom up on it
or actually freeze it. You've got two numbers. The top number is your FPS
at your frames per second, which most of you
are familiar with. The bottom number is your
time in milliseconds. That is the time between
frames being rendered. But for most of you, that top number is the
most important one. So I'm currently running this landscape auto
material level at about 76 77 frames per
second. Not too bad. Now, what I've done
here is I have taken my large tree with roots, and I've made a foliage type out of it here in foliage mode. So let's go ahead and paint
some of these in here. With this tree selected, my brush is relatively small. I'll put my density down
to something like 20. This is still going to be a
pretty high concentration, just one click here. And you can see that
I've only added 45, and my frame rate is
already down to 42. Let me just go ahead
and click again. And now I'm down to
29 frames per second. And that's only with 92
of these in my level. And you can see and understand that as I
click more and more, it's just tanking my frame rate. So, what if I really
like this tree, and what if I want to have a
lot of them in my landscape? How do I get around
this? And how do I get some performance back? Well, for this, we can
turn on something called Nanite for this particular
tree mesh down here. In Layman's Serum, Nant is a special system in
unreal that lets you use super detailed
three D models without slowing down your game. And so what we can
do here is turn on Nanite for this
particular three D model. And the way that we can
check if it's on or off for a given mesh, and again, we want to do this
on the mesh itself, not the foliage type, is you can RClick on it. And in your Right Click menu, at the very top, you've
got this Nanite option. This checkbox tells you
if it is on or off, and this is where we can
enable it or disable it. So currently it is disabled. So what I'm going to do
is right click on that, go to Nanite and I am
going to enable it. And then I'll go ahead
and save that right away, Control S to save that.
And I'll check this out. I immediately but my
frames per second back up to almost 50
frames per second. And also check this out. If I now mouse over this
static mesh for my large tree, you can see that
that triangle count is now greatly reduced. Now it's down to
17,000 per tree, which is still a lot,
but it's a lot less than the 100,000 plus count. Alright? And so there
you have it, guys. That's a real quick and easy way to get some performance back in your landscape level
if you're working with foliage that is
not very performant.
33. Water Plugin: All right. So in this
section of the course, we're going to be
exploring some of the optional water tools that
we can add to our project. However, before I add
this water plug in, I just wanted to point out and clarify once again that here in this landscape automateial
mountain range example, we are using this
landscape material. And if I double
click on this one, this was the one that
already came on this level. So if I double click on this, I've got it opened up over here. The water in this level is
going to work a little bit differently than the water plug in that we're about to add. Once again, with this
particular landscape material, water showing up is a product of these settings within
this water material. And you can play around
with some of these. But essentially, when you flatten the landscape
to a given height, and I'm just going to flatten
this current water level right here using my
landscape sculpting tools, we will get more water. Like so. Now, the water tools
that we're about to use in our other maps, they're going to work a
little bit differently. So let's go ahead
and add those tools. Right up at the top,
under our edit option, we've got the option to bring on the plugins menu
and inside of here, do a search for water. And what we are seeking out are these experimental water tools. So I'm going to check this on. As soon as I check this, it's going to give us a little
bit of a warning here. Are you sure you want to enable to plug in? We will say yes. And it will prompt you to
restart the unreal editor. So go ahead and do
that by clicking this Restart now in
the lower right. I'll save all those changes
that I made to my level here. And after our editor restarts, I went to my California level because this is
where I'd like to demonstrate my water tools. Up here in my Place
Actors panel, if I do a search for water, we will now find that
we have access to these actors that we
did not have before. Now, if you cannot find
your Place actors panel, I suggest you come right
here under this plus button. You can bring on your Place
Actors panel right there. Or if you come up to the
top where it says window, you can toggle on or off your Place Actors panel
right from there. Alright, we're in a good
position for our next video. Water plugin is now enabled.
We'll see you there.
34. Oceans: All right. And so
with the water plug in added to our project, I'm going to go ahead and add a water body ocean to
my California level. It's as simple as dragging and dropping from the
place actor panel. And as soon as I do this, you're going to notice
that my level's going to start looking a
little bit funny, and this is where a lot
of students start to freak out, so just relax. We'll fix it all
up here in time. But before we do that, take note over here in the outliner, as we added, actually, more than just the
water body ocean actor. We also added this water
zone actor right below it. Now, the water zone actor is a key component of
the water system. It defines how the water's going to interact
with the environment, and it acts as a global volume that controls water
related effects. For one, it's going to
define the water areas. Two, it's also going to control
some water interaction. That's going to be the
blending between things like rivers and lakes and
oceans, all that kind of thing. And the third thing
that it does is it also helps optimize
performance by limiting the amount of water
calculations to only what is within
the water zone. Know that it does some
important stuff that you don't really need to
worry about for right now. Alright, we're going
to go ahead and select our water body ocean
and attempt to make my landscape come on back because right now
it looks pretty ugly. So with that selected, over in the Details panel, I'd like to draw
your attention to this parameter right down here. It's called effect Landscapes. And by default,
it is checked on. And note that if we
were to uncheck it, and I'll uncheck it right now, that a lot of our landscape
seems to come on back, and you're like,
Well, that's better. Why don't we just
leave it that way? Well, we're actually
going to check it back on and then affect our
water body ocean here a little bit more to
sort of fine tune how this ocean is going to look when surrounding
our landscape here. Now note right away
that with this checked off down here
in the details panel, we also have grade out some parameters here in
this terrain section. Now, I'm going to want to
have access to some of these. So in order to get
these to come back on, I need to make sure
that this is checked. So I'm going to go ahead
and check this back on. Once again, our
landscape is going to look temporarily horrible, but bear with me. Alright, so the first thing
I guess I'll mention here is with this water body ocean selected over in
the Details panel, know that you can move
the location around, including the up and
down, the Z location. So if you do want to move this
up or down in your level, and I'll just grab that
blue handle right now, drag it up, and then I'll
do Control Z to undo that. You can affect that that
I'm just dragging it down. Control Z to undo that. Yes, you can. However,
I am going to leave it. Now, also with this water
body ocean actor selected, you'll notice that from
a 10,000 foot view here, you see some of these
white dots right there, right there, and right there. And there's another
one right up here, which is a little
bit tough to see. These defined, there it
is, are spline points. Essentially, the points that make up are water body ocean. And we can move these around, as I will do with
this one selected, moving it around, like so. And you can see, as we're
starting to move it around, some of our landscape
comes back. That one's a little bit
tough to grab here. Let me go ahead
and grab this one. But we can also add more of
these because by default, you're given four of these. What I like to do is I try to essentially shape
this around the area of the landscape that I
would like to be displayed. Okay, so now I've got
kind of a wider swath here of points kind
of pointing out. If I wanted to add
another one here, all I would need to do is
with a spine point selected, hold down the Alt key. Alt, left click and
drag, add another one. And so you can kind of
do something like this where you could boat in maybe
a little bit right there, like so, move this around. And maybe I want to add
another spine point. So again, Alt left key, left click, not
left key and drag. You can create all kinds
of interesting shapes. So go ahead and do that now. I'm just going to kind
of fast forward through this process as I do this
with my own landscape. Mm. Alright, so we're not going to worry
about being perfect, but generally speaking,
you want to shape your ocean so that it surrounds your landscape,
something like this. Now note that I do have a spine
point selected down here, and with a spine point selected, down in the details panel, I am seeing spine
related parameters. Now, I actually
just want to have my water body
component selected, and this is one that I want
to focus on right now. And I want to come under the terrain section and note that when I've got
effects landscape checked on, I also have access to these
water height map setting. So I'm going to dig
inside of here. Now, with these
open and available, I'm going to explore this effect under the effects category. So water height map
settings, effects. And then we've got this
blurring category. And you've got this
blur shaped checkbox. By default, it is checked on. And with it checked off, let me get a little bit closer to my shoreline right down here. With it checked off, can see how it sort
of blends that more gradually into the landscape. So that's probably one
of the first settings that you want to go to
with it checked on, it's going to have a sharp
drop off with it checked off, you're going to have a
smoother transition. Okay, the next set of parameters
I would like to send you to are under the water height
map settings, curl noise. We're going to expand that out. And what this can do is it
can add a little character to your shoreline so that it's
not so flat and boring here. So wrinkles, if you
will. Now you've got this curl amount
of one and two. All you really need to do is fiddle around with
curl one amount, and just a small
setting we'll do here. I'll set it to
something like 0.5. Press Enter, and you can
see it's going to add some character to our shoreline. If you go from a 10,000 foot view, you
can see what that does. If I go to something like 0.1, it's just going to
add a little bit of character along the side, which actually think
subtle is better. If you went and set a value
of something like two, it's going to get
a lot more crazy. So experiment with that. This one, small values will
have pretty big changes. So I think I'm going to
go something like 0.1. Just adds a few little in and
outs to my shoreline there. Okay, the next area
I'd like to head to is this curve setting
area under terrain. Let's expand this out. And some parameters you may
want to play around with are the channel edge offset
currently at negative 1,000, a value of negative 2000. If I set that you can see
how it sort of offsets the edge here from my spine point a little
bit further out. I'll reset that back to zero. If I go back to where
it was negative 1,000. You can see
where that's at. Channel depth currently at 2000, if I was to set it
to something like 20 you can see how suddenly there
is no depth right there. If I set it to
something like 5,000, it sets it to a steeper
drop off, if you will. So I'm going to go back
to something like 2000 so that it is a more gradual
drop off from the shoreline. And then curve
ramp with if I was to simply go in here and pull this to the left
and right, once again, you can add some character
to your shoreline as well by specifying how
much of a ramp or drop off you're going to
get from your shoreline. Into the water itself. So those are the basics of working with a
water body ocean. Now, if you get this
warning in the upper right, you can simply click on this Mark dirty and it'll bring it up to date,
and that'll go away. Play around with some
more of those parameters to get the character
that you want. But once again, after you
bring in a water body ocean, click on these spine points. Hold down to left click
and drag to drag out a few more spine points
so that you can sort of specify a shoreline
for your ocean. Alright, guys, that's going
to do it all for this one. See you in the next one.
35. Lakes: All right. Now that we've
got an ocean in place, let's go ahead and explore
adding a lake next. So in our place Actors
panel, searching for water, let's drag and drop a water
body lake into our level. And I guess I'll place it
right about here on top of these mountains and
notice that when I do, it will flatten those mountains, and that is because with
this lake actor selected, over in the details panel, I do have that effects
landscape checkbox checked on as it is by default. Now, once again, maybe this is not what you
wanted to have happen. So if you uncheck it, you will see that
you are essentially wrapping some lake water
around the mountains. So dealer's choice on how
you want to manage that. But for the majority
of this video, I will have it checked on. Now, before we get to adding some spline points
to our lake here, I just wanted to
point out that with this water body lake
selected, you can move it up. You can move it down, et cetera. So if you wanted
to place this into a little indentation that you sculpted into your landscape, you could certainly do that. But now I'm going
to check this box on for Effects Landscape. Once again, you're
going to see it flatten those mountains right there and automatically
terraform the land around it. Let me add a few spine points. So once again, holding
down the Alt key with one of these spine
points selected, go to hold down Alt,
left click and drag. You can see we can add more
points to our lake like so. Select Spine point, Alt, left click and drag. Now, I did want
to point out that with any of these
spine points selected, you do have these
tangent handles right here and right here
that you can pull on, and they're a little bit
tricky, and there I've got one. So you can kind of
move those around to shape the lake to your
liking a little bit more, sort of fine tuning
those curves. Also, if you regret any of
your spine point decisions, let me just add
another one here, and you decide, You know what? I don't like that spine point. With it selected, you can hit that delete key
and get rid of it. Okay, let's go over to the
details panel once again. Now note I've got my water
lake actor selected. However, I've got one of the spine points, it's
self selected. So I'm seeing spline
specific settings. I'm going to choose the
water body component itself. And I want to come
back under the terrain setting so
that we can fill around with some of these
water height map settings. Let's go ahead and expand this out under the effects.
Let's expand that out. Let's expand out the fall off settings because
we're going to be playing with some of
those in a little bit. But I want to start off in
water height map settings, effects blurring, just like
we did with our ocean. I'm going to zoom on up to this point right about
here in our lake, you can see this sharp
cut off right here. Now, if I unchecked blur shape, you can see how it adds a
little padding around it. Also, if I kind of
zoom on back here, it's sort of flattened
everything else out around it so it can fit
in a little bit neater. So with that checked on,
with it checked off. So I'm going to leave
this checked off. And then I'm also going
to take my lake here, and I'm just going to set it on down here a
little bit lower, something like that, maybe. Okay, so now I've
got Blur shape off. Next under the
fall off settings, note that we've got two
different fall off modes. We've got angle, and
we've got width. So with angle, it's
currently set to a fall off angle of 45 degrees. And what that is essentially
specifying right here. Let's go ahead and play
with this fall off angle. So if I left click in
here and drag it out, let's go to something like 15. You can see how it's
going to flatten this angle a lot
more to 15 degrees. If I wanted it a
little bit steeper, I could set it the
opposite way to something like almost 70. So that allows you to
fine tune essentially the angle sloping
into your landscape. Alright, I'm going to go ahead
and set that back to 45. In fact, let me set it
to something like 15. So that's the angle
fall off mode. Now, you can change this up. So instead of fall
off mode being angle, you could set it to be width. As soon as I change it to width, this fall off angle is
going to be grade out because that's specific to
the angle fall off mode, and fall off width
becomes active. With this, if we can set
this bigger or smaller, you can see how it's sort of flattening out the landscape. It's adding more width
to the landscape. I was set this to
something like 50, it's gonna be a lot tighter
on the edge of my lake, which obviously
doesn't look good. If I set the fall off
with something bigger, I'll set it to
something like 3,000. You'd get something like that, which I think looks pretty nice. The edge offset has to do with this offset around the
spine points itself. If I was to set
this to something like 50 and press Enter, you can see how
it's tighter along the spine points right here, something bigger, like 1,000. You can see how it
pushes it back out. I actually kind of liked
it at that 50 value, so I will do just that. Next, you can experiment with your curl noise settings right here under the
effects category. And once again, this can add
a little bit of character to your shoreline and
your lake in general can sort of reshape it
in interesting ways. Smaller values is
probably better. So if I was to set
this to a value like 0.15 and press Enter, it just kind of reshapes
it here a little bit. You can also play around
with this curl one tiling. You can see if you left
click in here and sort of drag around and then release, you can get some
really interesting looking settings like that. I tend to not go too
crazy with this, so I'm going to set this all back to essentially
where it was at, and I'll just keep it a
basic shape such as this. Something to note
with this water is in the rendering section
of your water body lake, you do have something known as an underwater post
process material. So if your character ever navigates this landscape
and goes underwater, it will have this tinge of blue, and that's going
to be due to this underwater post
process material. I also sometimes have
some students that like to change the color
of the water itself. Maybe they don't want
this color of blue. You can change that by coming
into the water material, this water material lake associated with this
water body lake. Just double click
on this thumbnail. And this will bring you to
this water body lake material. A lot of parameters here to play around with to
expand them all, I'm just going to right click
right here and expand all. And in order to adjust
any of these parameters, you've got some foam
parameters, for example, that you can play with some
fluid parameters, et cetera. You simply need to check
it on to enable it, and then you can plug
in some new values. So you can see there's
a whole ton of stuff here to play
around with, like so. Now, if you did want to mess with the color of
your water here, come under global
vector parameter values where we've got this absorption. I'm going to turn this on. And what you can do is click on this little color
bar right here, and I'm going to save this
as the default color. So if I was to left click
and drag right here, I can save that color. However, I'm going to pick a new one for right now and say, maybe I wanted some
greenish water or something like that. I'm just moving that
color wheel down there, clicking Okay. Click and Save. And with that new
color now saved, if we were to go
back to our level, we now have Green Lake Water. So, guys, that is the basics of working with the water lake. Go ahead and add as many of those as you
like to your level. That'll do it all for this one. We'll see you in the next one.
36. Rivers: Alright. In this video, we're going to add
a water body River, and I'm going to connect it from our lake to our
ocean back there. And these are pretty
great because they blend in pretty seamlessly. So here, my place actors panel, Water Body River, go ahead and left click and drag
one of these out. You can see the preview, that spline line right there. And that point right there
that I'm grabbing onto, I'm going to place that right around the base of
my lake right here. And what I want to do is
turn this river around. So I'm going to angle it right away by bringing on
my rotational tool, tapping the space bar one time. I'm just going to
left click and drag. Now, it is worth
pointing out here that that river starts out at
wherever this river icon is. So once again, if
you're looking to join your lake and your river, place your first spine
point of your river, kind of butting up against your lake,
something like that. And you can see that water
blends in fairly nicely. Now, just like the
ocean and the lake, this water body river is
affecting the landscape, as we can see down here
in our details panel. Before I get to any
of that, however, I do want to add some
more spline points here so that I can snake our river all the
way to the ocean. I could grab any one
of these spine points once again and move it
around to where I like. But to add more spline points, and for this, I'm
going to add them to the end of the river. I'm going to kind of go to
the top down view like this. I'm going to select that, and I'm going to hold down Alt, left click and drag. And you can bend these to
snake it into the ocean. Alt, left click and drag. Alt, left click and drag. I'm just moving that
one a little bit, and I will do Alt
left click and drag, Alt, left click and drag. And for each of these
new spine points, I'm releasing the Alt key so
that I can set a new one, move that one right
here a little bit. And then I'll do
one more Alt left click and drag out
into my ocean, something like
that. There we go. Now, the cool thing about
this river is for one, this does not have to act
like a realistic river. You could actually have
this going uphill. So if I was to grab this
spine point right here, I could technically lift
it up into the air, and the landscape will fill
in underneath it like so. And you can have something
ridiculous like that, but let me just do
Control Z to undo that. Now, I'm actually going to
start off here talking about these spine points
because for this river, you have some interesting
spine point settings that you can set
unique to each point, each spine point in your river. So I've got this one
selected right here. And now let's look over
in the details panel. Underneath the
selected point area, we've got this water drop down. If you click this open, you've got some real
interesting settings. You can set the depth, the width, and the
velocity of your river. These are the three main
ones I like to play with. So let's go with
River width first. That's going to set the width
of the river at that point. So if you want it
wider at this point, maybe set it to
something like 5,000. If you want it narrower,
maybe something like 500, you can see how each
point along the river can be set to be
narrower or wider. Okay, I'm going to set
that to a value of, like, maybe 3,000 right there. Now, also, you're
seeing the water flowing here from right to left. That is dictated by this
velocity parameter, and you can set this
per spine point. Now, currently, they're
all set to 128, but if I wanted this point of the river to appear like
it's flowing faster, I could set it to be
something like 500, and you'll notice that
it's flowing faster. I could even set
this in reverse, negative 500 pressing Enter. So you could have some real interesting effects
where it's flowing backwards at that spine point and then flowing forward
from the other spine point, and in the middle, just
kind of stands still. So just know that
that is a thing and you can make that happen. I'll set that back to 128. You've also got
the ability to set the river depth at any point, so I could set this to
something like 1,000, and you can see the
water at this point is going to be
deeper, apparently. If I was to set this to something like ten
and press Enter, suddenly, it's a lot shallower. So, yes, you can set your
depth at each spine point. And again, these can be
set per spine point. Now, if you'd like
to mast set them, I'll set this is
something like 200, all you need to do is hold down Control and then select
multiple spine points. So you can have in my case, I've got three spine
points selected, and then you could set them
all to be similar values. So if I wanted the velocity, all those three
points to be 300, that's the way that I can
set them to be all at 300. Okay, next, I'm going to select
my water body component, as opposed to a spine component
for my water body river. So that's the entire
river itself. Now, once again,
with that selected, under the rendering category, you could double click on
your water material here to change the color of your
river water if you wanted to. And as you saw before, when I kind of flew
into the river, it's got this post
process going on as well. This right here, this post
process underwater material. This is what's
setting the bluish tint when you're underwater. Now, what I want to do
is come on down here. Scrolling down to the
terrain settings. These are going to start
looking very familiar. Once again. You've got effect landscape. By
default, it's on. You can turn that on or off. I usually, once again,
like to start off in water height map settings
under effects. Blurring. I usually like to
turn blur shape off. Kind of creates a
smoother transition. And, of course, you've got your curl noise settings that
you can play around with. I usually don't play
around with these too much when it's
pertaining to a river. You've got some fall
off settings here, like we had with our lake that you could
play around with, setting a fall off mode
by width or by angle. Play around with
those to your liking. And yeah, so that is a good way to add a
river to your level. The basics are placing
it in your level, adding some spline
points, moving it around, and then joining bodies of water together like a
lake to an ocean. Alright, guys, that's going
to do it off for this one. We'll see you in the next one.
37. Waterfalls: Okay, next, I thought
it would be cool to add a waterfall
to our level here. So I'm going to head down to our content browser
and access fab. And inside of our fab tab, I have a content pack in mind that I'd like to
add to get started here. In the search bar, I'm simply
going to do a search for water materials and press Enter. And this is the pack that I
am looking for right here. Now, depending on when you're viewing this particular course, this may be here,
maybe it's not. And if it's not, that's fine. You could seek out
a similar pack. But this is the one that
I'm going to be using for this demonstration on
how to add a waterfall. So this water materials pack, I'm going to click on this. I'm going to click Add
to Project right here. And as soon as I
do, it's going to say asset is not compatible, but choose the closest
alternate version. So I will choose the most recent version of
the engine 5.4. And I will click Add to Project. Once again, this will take a
little bit of time to add, so I will pause
the video here and rejoin when this is
finished. All right. And with the water
materials pack added, we can aim to build
something like this, a nice waterfall
flowing into a pond. Now, I did do a
considerable amount of work here between cuts. So I'm just going to
show you essentially the process for creating
this waterfall. And obviously, you don't have to do it exactly as I do it. But here's just one
way to go about it. For starters, I'd like
to draw your attention down into the water
materials folder. It consists of subfolders, and I'm in the mesh folder. You've got a couple of
waterfall meshes here, and I'm currently using
this SM waterfall base right in front of you in
this perspective viewport. Now, yours probably isn't colored as light
of a tint of blue, but all I did is I essentially
pulled one of these in, and I sized it up accordingly. And then with the material associated with this waterfall, I double clicked
on that material, and I changed out the
color associated with this waterfall by clicking on this node right here for color. It's plugged into base color. And then as a value, I plugged in those as my R, G, B, and a value. So if you'd like to play along, that's how I got that color
of water right there. Now, as for my setup
here back in my level, I did use the landscape
sculpting tools to sculpt a flat elevated area, and then I placed a river
spline right on top of it. You can see this is a
water body river and I simply had it starting
here in no man's land, if you will, and I
just shaped it to occupy this area leading
up into my waterfall mesh. Now, I did actually accelerate the velocity of this last
spine point for my river, so it looks like the river
accelerates into it. Then I went about placing some of these rocks
using foliage mode. Went into foliage mode. And with some cliff
rocks here selected, I went into single
instance mode, and here I'm combining
techniques here, and I placed some of
these rocks around to sort of obscure some
of these rough edges, including this
transition from my river spline to the
waterfall mesh itself. Now down below here,
you're going to see a water splashing sort of effect. Now, this is achieved
through some of the particle effects in this
water materials folder. If you go down to particles, you've got these water
splashes and this water foam. Now, I'm just going to tap
the G key on my keyboard. The G key toggles on and
off the editor icons. And you can see, I've got Oops, I am in foliage mode right here. Let me go into selection mode. You can see I've got various of these particles
placed around. I've got one of these foam. This is sort of the radiating foaming effect
that you're seeing. I just size it up accordingly. And then I've got a
bunch of these smaller. They're a little bit tricky to select water splash
particle effects. And I did size
these up and placed them all around, et cetera. Now, something I did
want to point out as you're working with
something like this, like your waterfall is if you're having a hard
time selecting this, if you come under settings
in the far upper right, you've got this allow
translucent selection. And the hot key for
this is the T key. And again, you can find
that under settings. Allow translucent selection.
That is the T key. And currently, I have it
on. If I press the Tiki and toggle it off and let me just select off of
here for a moment. And then I try to
select my waterfall, I can't select it because
it's translucent. However, you can see that right now because
I did tap the Tiki. If I tap the Tiki again, turn that back on,
as I have right now, it does make those meshes with water based on
them easier to select. Now, down below here, all
I did is I sculpted it. I used my landscape. Sculpting tools to sculpt down a depression
in my landscape. I literally held down
the shift key using the sculpting tool
and just kind of indented the
landscape right here. And then for my lake here, I'm actually using a
different method to create a lake than this lake over here. And I just wanted to
show that you can use different methods
for creating a lake. For this particular
lake, in selection mode, in my place actors panel, I place one of these geometry
box brushes into my level. I'm just going to go
ahead and select this. It is a box brush, as you can see in my
outliner, right up here. And then what I did is I place this M water
ocean material onto it. And that I found in the stared
content materials folder, there is an ocean material
right in here, right there. And then I just size this up. You can see this box
brush has been sized, and it's actually occupying this entire area
of my landscape. I sort of lowered this
down into the indentation that I sculpted out using my
landscape sculpting tools. Now, it's worth noting that for whatever material you have
on a box brush such as this, you can adjust the
scale of your material. You can also rotate it and you can also pan it in
one direction or another. And I also want to point out
here for this box brush, I didn't actually scale
up the actor itself. Instead, I went under
the brush settings and sized up my box brush
by setting in some X, Y, and Z dimensions. So you can see, using a
variety of techniques here, you can create a nice looking
waterfall such as this. It takes a little
bit of time, but here I did use my
landscape sculpting. I did some landscape
painting all around, painting on some grass and a
little rock along the side. I use a foliage tool to place some of these
rocks all around. I play some particles at the base here to
sell the effect of this waterfall mesh
dropping down into a lake. Note that this lake I
created differently. I use a geometry brush and
placed a material on it. Now, it's worth noting
that if I fly in here, this does not have that
bluish underwater effect that this lake over here has. So just wanted to show off
some different techniques here without boring you with the process of going
through that myself. Guys, hopefully that accurately conveys how to add a
waterfall to your level. You've got different
waterfall meshes here to choose from, a thicker one, and
a thinner one. You've also got a variety of
other messages that you can use to create a river, a
lake, that sort of thing. And you've got a whole bunch
of different water materials that you can play around
with inside of here. And if you don't like the
color of any of these waters, you can usually dig
inside the material and change out the color of
your water through nodes, typically looking
something like that. Alright, guys, that's
gonna do all for this one. We'll see you in the next one.
38. Floating Objects: In this video, we're going to make it so that we have
some objects that can float in the water
and even float down the stream and be carried away by the current
or crowned ashore. Let's get right to it.
To get started here, we're going to access our fab tab from the
content browser. Click on that fab
button right there. And in the fab tab, we're going
to seek out a pack called the Advanced Village Pack.
Press Enter on that. And the one I'm
going to be seeking out for this video and videos come is this guy right here, Advanced
Village Pack. Click on that. Thumbnail image is going to look
something like this. Now, again, depending on
when you're viewing this, maybe this will be
available, maybe not. If it's not available,
don't freak out. You can try out
other content packs. I'm simply seeking
out a static mesh, in this case, a barrel
from this pack. And in future videos,
I'm going to be seeking a fence piece here to create
a landscape spline fence. But for now, let's go
ahead and grab this, add the project, and
go ahead and agree, sign your life away
for Epi games. Click that button, say accept and if you see
asset not compatible, you can still make
it compatible. It's just saying
it's not compatible with my latest version
of the engine, but if you choose the most
recent compatible version, that should add it just
fine to your project. Once again, if this is not available at the time
of your viewing, try another content pack. We simply need a
static mesh asset to get this object to float. This is going to take a
moment to download here, so I will resume once
this is finished. Alright, that Advanced
Village Pack is finished adding to
my content browser, as we can see here. See it consists of other
folders inside of there. Now I'm going to be seeking out a static mesh inside of here. So with my static mesh
filter turned on, you can see it is
turned on right there. I'm going to turn
on this filter. The barrel is what I'm going to use inside of an asset
that I'm about to create, known as an actor
class blueprint. And because it is going
to be a blueprint, I am going to add it to this blueprints folder inside of the Advanced Village Pack. Go ahead and navigate here, and we're going to uncheck
our static mesh filter. And I'm going to right
click in some empty space, go to Blueprint class, and I want to create an
actor class Blueprint, because this floating
actor is going to be one that I'm going to be
placing into the world. So this top one right
here, it's an actor. It's going to prompt
me to give it a name. I'll call it BP Underscore
floating underscore barrel, because mine's going
to be a barrel. Let's double click on
this asset to open it. I will dock it right
across the top here. Now, this course obviously is
not focused on blueprints, so just gave a very
quick overview. A blueprint can consist
of some components. If we were building a car, a car would consist of wheels, headlight, to steering
wheel, et cetera. You could view those
components right here. And then the event graph
is where you can put script related to
your blueprint. Although we're not going to be worried about that in this one. There's my five second primer. Okay, we're going
to add a couple of components here in our Viewport. The first one that we are
going to add is a static mesh. So click on this Add button
right up at the top. We're going to add a
static mesh component. I will simply rename it Barrel because it's
going to be a barrel. And over on the right hand side, it asks for us to slot
in a static mesh. I'm going to click on this
drop down, type in Barrel. And I can find that
SM barrel asset that lives inside of that
advanced Village folder. There it is. Zooming on back here in
the viewport a little bit. The next thing that I'm
going to do in order to make this actor float
like we wanted to, I'm actually going
to drag and drop this on top of this
default scene root. The default scene root is
nothing more than the place, the point in space here that any other components
are attached to. I'm going to make this barrel
the root by left clicking, dragging on top of the
default scene root like this, and it's going to be the
lone root right up here. So that's all we've
got at this point. Very important that we get that step done in order to make this actor float
like we want it to. Next, in our components panel, I'm going to add
one more component. I'm going to type in boyo for Ban C. I want to add a
Boy and C component. This is critical to
make this barrel float. Now, we are going to
do some work with this buoyanc component
selected just a little bit, but go ahead and select
your barrel one more time. I forgot one very
important thing. I need to make sure that
with this barrel component, this static mesh selected, that we check this box
for simulate physics. Very important you do that
so that this barrel can bob inside of a watery body. Simulating physics, so to speak. Okay, next, check your
Boy and C component right here. Go ahead
and select that. And over in the Details panel, we are going to click on
this plus button where it says Buoyanc Data pontoons. So click this plus button. That's like adding an inflatable to this component,
making it float. We're adding floaties,
if you will, to this barrel to help it float. Next, let's check open
this ind Dex zero. This is kind of the location
where we would like to place this floaty
relative to our barrel. Now, currently, the
relative location is zero, zero, zero, so it would essentially place it at the location of that
barrel right there. Let me go back and select
my buoyancy right here. But if you want to offset the location of this invisible
inflatable, you could. And also, you can
make the size of this inflatable that you can't
see here bigger or smaller, depending on that radius size. That is in unreal units. Okay, just wanted to
show that off quickly. Next, we need to make
sure that we've got some checkboxes checked
over in the details panel. And the ones we need to make
sure that we have checked are apply drag forces in water, check, apply river forces
that is already checked. Down here, we've got three
of them I want to check. Always allow lateral push, allow current when
moving fast upstream, check and apply downstream
angular rotation. Check, check, and check. And
then last but not least, make sure that we've got this Auto activate checkbox checked. Very important you have
that one checked, as well. With all that completed,
go ahead and click, Compile and save right up here. And then next, what we're
going to do is we're going to return back to
our level here, and I like to simulate
these in a river. You could do this
lake here as well, and by the way, this
is worth pointing out. It's got to be a water body
lake or a water body ocean or a water body river using that water system
to test this out, do not try to place this barrel above this sort of quasi lake
that we placed over here. It will not work. So make sure that we go ahead and place this kind of where
we want it in a river. We're going to watch this
thing float down the stream, which I think is going
to be kind of cool. So go ahead and drag this in, and we want to drag this
above a little bit like this. And then if we go ahead
and simulate our game by clicking right up
here to simulate this, we can see Uh oh. Things don't seem to
work. Now, why is that? Let's go ahead and
stop the game here. Now, if you're finding
this to be the case, the first thing you should do
is check the collision of, in this case, your water body, so I'm going to
select my river here. And over in the details panel, I'm going to scroll on down
under the collision settings. And currently, I've got
collision preset set to block A. Uh oh. Can't have that, can we? Let's go ahead and set
this to overlap all. Whoops. I checked the
wrong checkbox there. Collision presets
currently set to custom. Let's set that to
overlap all dynamic. That's going to
make it so that any other object type here, such as my barrel, let me go ahead and
select my barrel, come under the
collision settings. The collision settings
for my barrel, this is labeled as
a physics body. So here with my
water body River, my physics body is
set to overlap this. And now if I was to simulate my game by clicking
this simulate button, you can see that it is now floating and moving
throughout the river. Like so. Now, a few things that we can
aim to adjust here. Let's go back into our
floating barrel blueprint. And now let's select
our buoyancy and let's adjust the position
of our pontoon here. Let's raise it up 50
unreal units. Like so. Also, with my barrel selected, we can simulate this
and make it seem lighter by overriding
our mass in Kg. With it unchecked, it'll
try to figure out what the kilogram size
or the kilograms should be based on the
mass of this object. But we can override
this so I could check this and make
it seem lighter. I'll set that to 50,
as well. Go ahead. We'll compile and save this. Go back into our level, and
we'll simulate once again. Simulate. And now you can see it floats a little
bit higher, if you will. And that barrel seems
a little bit lighter. Now, also to show this off
in an even cooler light, I'm going to change the
velocity of my river here. And once again, to change
the velocity of your river, you want to select your
river spline points. There's one, and I'll
just up the velocity to be 500 right at that
point in the river. So you're seeing it flowing a little bit more quickly there. And let me go ahead and move this down the river
just a little bit. And I'll go ahead and
duplicate this, as well. Alt, left click and drag.
I will simulate this. Now we've got two barrels gonna be floating on
down the river here. And you can see they start to pick up the
paste there a little bit, and that one might get grounded ashore just a little
bit. But there you go. There you have a very
quick primer on how you can make things float in your water river bodies and your water lake and your
water ocean body, as well. Our simple setup here is
to add a static mesh, make it the root, add
a buoyancy component, and then fiddle
with your buoyanc components so that you're happy with an offset with
a pontoon or two or three. You could add multiples and that you check those relevant boxes. Guys, that's gonna do
it off for this one, we will see you in the next one.
39. Spline Road: In this video, we're going to learn how to create
something called a landscape spine
and then populate it with some meshes in order to
create something like this, a roadway that bends and curves and goes up and down
within your landscape. Alright, to get started here, we are going to head into fab, and we're going to add
another content pack. In fab, do a search
for rural Australia. The reason I'm seeking
this one out is because it has a nice section of road. Here it is that I would like to use to
make a nice roadway. There it is rural Australia. Now, once again, at the
time of your viewing this, maybe this pack is
available, maybe not. If not, fear not because there
are other packs that you could use that have a section
of roadway within them. And if not, we can explore using something from our starter content to help us out, as well. Okay, let's go ahead
and add to project. Once again, sign your
life away to Epic Games. Never fear, except choose the most recent compatible
version for you. If you get this pop up, I'm going to choose 5.4. That's the most recent for me. Choose the most recent for you. I will click Add to Project. This will now get these downloading and adding them
to my content browser. So I'm going to
pause video here and rejoin you when
this is finished. Okay, that rural
Australia pack has now been added to
my content browser. You can see that if you
click it open here, it contains some subfolders. With this rural Australia
folder selected, I'm going to filter
by static mesh here. And with this right here, I'm going to type
in the word road. Now, I've got a couple
of road meshes here, but I'm going to be
specifically using this one to create
our spine road. So before we even
get to that, let's define what a spline even is. In computer graphics, a
spline is a smooth curve that runs through a
series of given points. Now, in order to add this
spline to our landscape, we need to jump into
landscape mode. So right up here in
our mode selector, we can go to landscape. Shift and two will get
you there as well. So I'll head there right now. And in our managed tab, you're going to want to
make sure you've got this splines button
here selected. Now, before I even jump over
into creating a spline, I want to point out that I am in my landscape automateial
mountain range example. This was the pre existing
landscape, if you will. I'm going to be adding
one to this map, but I'll also add one to
my California map as well, because I want to point
out some differences here. Here, with this given level, this landscape automal
mountain range example, if I was to go into
the sculpt tab, you don't see anything here
for the various layers. You'll remember back from my California level
that I created, you can create
multiple layers here. We don't have that going
on here in this map. Now, just log that away in your brain right
now because we're going to come back to that
when I create one of these inside of our
California level. The reason I even
mentioned that is because oftentimes when you
create a landscape, you reserve splines
in their own layer. Once again, this doesn't
have that going on, so we're just going to
skip over that for now. We're going to head
to our Manage tab, and with our splines
selected right here, I'm going to come to sort of an overhead type view,
something like this. And I'm going to create
a very basic road. And the way I can do this is by holding down the Control key, and I'm going to left click. And when I do that, I'm
going to add this sort of the mountainee type
icon right there. That's the start of my roadway, the start of my spine. And the way this
works is continuing to hold down control, I can add more spline points. So I'm holding down control
and just left clicking. Don't worry about
it kind of clipping through the mountainside
right there, holding down control,
left clicking, holding down control
and left clicking. I'll kind of snake this around. Like, so and you might
want to have a little bit more of an overhead
type view like this, control, control, control. And I'll create a very
simple kind of loop here. Control, control, control. And you usually don't want to be too sharp with your benz. You can select
these spline points and reposition
them, if you will. But I'm going to
make a circle here, and I can do that
by clicking back on this beginning spline
point to close the loop. So that mountain
icon right there, holding down
Control, left click. And I've just closed the loop. Now, just to show
that you can move around any of these
given points, you can select any of
these mountain icons, like so, and you can
move it around, like so. Now, this green
preview is just that. It is a preview. It is
not the road itself. If I was to drop in
and play my level, I would not see that. Now, a little bit of
terminology here. These different
mountain icons here, these are referred to as
spline control points. So right up here
on the left where you see control points, select all control
points or segments. Those mountain icons, those
are the control points. Now, the segments, they are the section between
the control points. So segment would be from
essentially here to here. So control points, right there. Segments are these
areas right here in between the areas between
the control points. Now, in order for me to populate
this spine with meshes, what I'm going to do is
over in the left hand side where I've got my landscape spine control
points selected. I've got it selected
right there. I could individually select a section as well.
Doesn't matter. I want to do is
select all segments, not control points,
all segments. So it doesn't really matter
right now if I've got a segment or a control
point selected, I can select all segments.
So I'm going to do that. Now, you can see if I kind
of get an overhead preview. Everything is highlighted,
my entire spine, all segments of my spine. And what I'm going
to do is right here under landscape spl meshes, I've got this plus button. This is where I can add a spline mesh to populate
this entire spine. So I'm going to click
on this plus button to add an indice. And you can add
multiple indices to have multiple meshes
occupy your spine here. And inside of here, where
I've got this mesh, I'm going to find that road mesh that I got from the
Australia Pack. And specifically, I'm going
to use this SModSpineO. So as soon as I click on this, give the engine a moment
here to prepare the shaders, and you can already see
that this is beginning to populate the entire spline
with these sections of road. Now, as you can see, we've got a few problems
going on at the moment. One of them being that we've got foliage popping
through our roadway, which is not as desired. So how you would fix that
up would be to go into your foliage mode and you just erase that given foliage
type popping through. So I can see I've got
some flowers right there. So if I was to select
my flower group, and I was to get out of
single instance mode. There's my bubble
brush. I can hold down Shift Left click, and I can clear the roadway that's one way you can deal with
issues such as that. Next, I'm going to jump back
into landscape mode here. And I just want to point
out that you can select your various spine
control points here and you can
move them around, lift it up and down so that it doesn't intersect through
the landscape like this. You can't even rotate them, hit the space bar, you can
rotate it like this, as well. But for this
particular landscape, because we don't have various
landscape layers here, and I'm just jumping over
to sculpting tab right now. You're going to need to
fine tune the sculpting of your landscape in order to make it so you don't have
these weird gaps. So if you need to raise or lower the landscape or raise and lower and angle the spine
itself to match the landscape, you're going to have
to do that manually, which kind of sucks. You may have noticed
that, you've got in this managed tab, you've got this
splines option that, we've got this option here to deform the landscapes to spine. So it should automatically
deform it, right? So if I click this, it should just automatically fill it in. Well, no, that's not
going to do it here. That's going to be
demonstrated here in our next demonstration
in our California level. So I just want to
point that out here in this particular landscape
auto material level. If you do want to have
a road spine like this, you can certainly do it, and you can certainly add
this road spine. Just going to take a little
bit more work for you, given how this is originally constructed in terms of
sculpting your landscape and then pivoting your
landscape spine points so that they don't
intersect weird like that. Okay, I'm just going to
say this out quickly, and we're going to jump over
to my California level. Okay, here I am back in my California level where
I've got my water system, my floating barrels,
waterfall, cave, et cetera. Let's go ahead and add in a
landscape spline from here. So let me jump into
landscape mode. And you can see this particular
level that we created this landscape that we created is using the layers system. And once again, we were using
this to have things like a distinct snow layer where we could paint
just snow on that layer, and then we could
toggle it off and on. You can see it off in the
distance there so that it layers on that layer
without destroying the layer. It's kind of like, Hey,
what does this look like with snow without
snow, et cetera? I'm going to be adding
a brand new layer here by clicking on
this plus button. It's going to ask you to pick a landscape edit layer class. We'll choose this bottom one for landscape edit layer
splines because this one is going to be
reserved for splines. We'll say select and it
already calls it splines, and you can see it's got this
fancy looking icon on it so that it is reserved just
for landscape splines. Alright, with my spline
layers selected here, let me go ahead and add those control points from
an angle such as this. So holding down the control key, I will left click. Left click. Left
click. Left click. Left click. Left click. Left click. Do one more maybe
off in the distance there. Left click. There is my spine. I'm not going to
connect the ends. And then over in the
details panel, again, it doesn't matter if you've got a control point or
a segment selected. I'm going to choose
all segments. I'll add a single spline mesher by clicking this plus button. Expand out that indice. I'm going to do a
search for rod. And I accidentally hit
Capslock that's fine. And there I've added my
spline mesh. All right. Now, if I was to select one of these and I'm
just going to tap the space bar to bring on
my movement widget here, I'm going to raise it up in
the air and check this out. It's automatically
going to populate the gap between it by
raising up the landscape. It recognizes that
this is a spine layer, so it knows what
we're trying to do. So it's going to just
fill it in underneath, which is pretty great. Likewise, you can move
these down, as well. So if I was just like
this guy and just kind of move it on down
and then release, it's not going to
be perfect here. So how can you deal with
situations like this? Well, I've got this
spine point selected, and with a spine point selected, you've got various parameters
that you can play with. And one of the ones you have here is a mesh vertical offset. So if I was to set this to be something like 200
and press Enter, you can see you can raise up your mesh from the
landscape itself. So note that for any
Control point or segment, you may have some parameters that you can play around with. Now, note that when
you are wanting to fiddle with your
road such as this, and say you wanted to
change out the mesh, you didn't like this one,
you want to make sure that you've got all segments selected because you
could change out the mesh for just an individual
segment if you wanted to. So let me just change this
out to something else. I'm going to go to segments. And let's say we wanted
to add some other mesh, and let's choose something maybe from the Advanced Village pack. Let's see what we got for
static meshes inside of there. And let's just say we wanted, I don't know, this bridge piece. Just go to drag that
in there so you can see how it
formats it like so. Now that's probably not how
you want your road to look, but you could make it
look something like that. And note that you can change out the forward axis axis for this, so it doesn't have
to be the X axis. You could change it
to be the Y axis, and it'll flip it
something like that. So it doesn't all
have to be one way. Also, I could once again add
another spline mesh here. So if I click this
plus button and add an element one right here
in element index one, I can add that road back here, and now it's going to randomize
which meshes are where. So you can see most of this is that rural Australia
road but you can see if I keep
forwarding like this, I've got some
sections of my road that are consisting of this
bridge piece here as well. So there you have it.
That's your basics for working with a landscape spine. Specifically, in this case, a roadway and note that
it is cordoned off into its own landscape spline layer here in your created level. Yes, you can add them to
that preexisting level, you just can't separate
it out by its own layer. Alright, guys, that's going
to do it off for this one. See you in the next one.
40. Spline Fence: In this video, we
are going to create a nice looking fence such as this using the
landscape spline tool, and you can see that our
fence is going to be populated with a
variety of meshes. Alright. For this spline fence, I'm going to be using these static mesh fence pieces found in the Advanced
Village Pack. And you can see that with the Advanced Village
Pack selected, I am filtering by static meshes so that I can find
these more quickly. Once again, if you forgot how to bring on your list
of filters here, right here in your
content browser, you can check on and off
various filters that you'd like to have available to you here in the content browser. Also take note that I am
currently in landscape mode. Once again, shift and
two we'll get you there. Inside of landscape mode, I've got the managed
tab selected, and I've also got my splines
button here selected, I'm going to be adding
this spline fence to my spins layer. See the previous video on how to add a spline layer
to your landscape. With that set up, I'm going to go ahead and add
some spline points here and I'm going
to put this fence along the side of my road here. So once again, holding
down the Control key, once you see your mouse cursor turn into this plus button, you can click to
add a spline point. There is a Mountain icon, and I'm going to hold
down Control again, select it again, and I'm just going to move over
step by step here, holding down
Control, left click. And if your mouse cursor ever turns back into a
pointer like this, you want to just
right click here in the viewport to ensure that
it is that plus symbol, control, click once again. I'll do this a few more times. Control and click and control click and maybe one more
time right over here. Control click. Now, if you ever click off this, like I've just done right now and you're like,
You know what? I'd like to extend
that spine further. All you need to do is select
this last Control point, and then you can extend
it from there by simply holding down Control
once again and left clicking, and you'll extend from
that last selected point. You'll know if
your control point is selected because
it's this highlighted, kind of a lighter color as
opposed to this darker color. Okay, so for this, just like we did
with our road here, what we want to do is select all the segments that
make up our spine here. A couple of ways we
can do that is we can choose all these segments
by clicking right here in the tool settings or with any of these control points or segments selected here with your spine
over in the Details panel. Currently, I've got that
spline point selected. I can choose to select
all connected segments. And just like we did
in the last video now with all these
segments selected, I can add some landscape
spline meshes. I'm going to click
this four times, one, two, three, and four. And the reason I'm doing
that is because I've got four mesh fences here that I'd like to populate this spline. Now, if I come over
to my landscape Spline Meshes and I right click right next to where
it says Spline meshes, I can expand all to expand
all the indices here. Now I just need to slot
in these various meshes. For this first one,
I'm just going to left click and drag my variation one. Whoops. That went away, how I can get that back is to simply go back into
selection mode, seek out my spline once again. This is spline actor two. I could rename this right up
here by right clicking Edit, rename, and I could just
call this my spine fence. And with that selected, I'm going to go back into landscape mode. And
let me go ahead. Select one of these
spline points, select all segments once again. Let me try this one more time. Left click and drag.
Boom, right in there. Now, this is going to look
rather ugly to begin with. Don't freak out. Let me slot in a second
fence piece here. Left click and drag. Let me go ahead and slot
in a third fence piece. Left click and drag
into Index two here. And then last but not
least index three. Let's slot in this
fourth one, like so. Now, if I kind of
zoom on back here, you can see that it randomizes which fence piece is
populating the splind. You don't get any
fine control going this method over
which fence piece, which fence mesh ends up where. So just know that. That's one of the weaknesses
of this system. But now let's go ahead and fix the issue that these
are way too big. The reason that these are
so big is because we've got this scale to width checkbox checked for
each of these indices. Just go ahead and uncheck scale to width for each of these. For each indice. And
once you do that, uncheck scale to width here, and uncheck scale to width
for our last one here. Then when we fly up, we can see that our fence
looks a lot nicer, like so. And now, once again, you can click on any of these
control points. And if I tap the space
bar, I could lift this up. Now, before I lift this up,
I want to make sure that I turn off my grid up here, my grid movement settings. Currently, I had it set to snap settings turning on
increments of 10,000. And if I just lift this up, the landscape will terraform
to go right underneath it, as well, which is kind of handy. But there you have it. You
have a very nice spine fence. And again, if you wanted to continue this in any direction, simply go ahead select
that spine point. I've got selected right there. And if I hold down the
control key and left click, I can add another spline point. And look, it's auto
populating it with the fence meshes that we
had set up previously. Alright, so there
you have it, guys. That is how you can add a
spline fence to your landscape.
41. Spline Meshes: Now, up to this point in our discussion about
landscape splines, we've populated
the entire spine, the entire pathway with meshes. In this video, we're
going to explore how you can use landscape spins to populate just the landscape spine control
points with meshes. And it's really good for instances like this
where you want to have meshes in a
pattern of sorts, but with gaps in between. So, you know, if you've got a driver driving along
the Australian outback, you can warn them
every few meters that death by
kangaroo is imminent. Now, what I'm about to show
you is going to be good for placing trees along a driveway, maybe benches along a pathway, maybe utility poles every hundred yards or
something like that. Essentially, this
technique can be used anywhere where you
want some meshes, populating along a pathway, but you want to have some
gaps between those meshes. Alright, to get started here, note that I have my rural
Australia pack selected. I'm filtering by static meshes, and here is my SM kangaroo sign. So let's populate
a landscape spline with kangaroo signs because, you know, you got to watch
out for those kangaroos. Here I am in the landscape
manage tab landscape mode. I've got my splines
button selected. I have my splines
layer selected. And just as we've done before, to add some spine points here, I'm simply going to
hold down control. I'm going to left
click. I'm going to hold down Control
and left click again. Now, if you don't see any
of these icons right now, that's because you could
have game view on. Tapping that G key we'll
toggle game view on and off, meaning that you are
toggling on and off the various unreal
engine editor icons and wire frames and all that
kind of stuff on and off. So if you don't see those
spine control points, that could be the reason why. I'm going to add
a few more here, holding down
Control, left click. Once again, you got to
see that plus button, not your mouse right here. But once you have one spline control point selected and you
see a plus button, your mouse cursor is in
plus button fashion, you can click again to add
another Control Point. So I'll add just
a few more here. Control, left click in
Control and left click. And now this is where we're going to differentiate between our road and our fence and what we're going to be
doing in this video. Before we had selected our spline segments over
in the right hand panel, note that I've got a
spline Control Point selected and I can choose to select either all connected
control points or segments. We did segments before for
the road and the fence. This time, we're going to select all connected control points. That are these mountain icons.
I'm going to select those. Now, down below, I can associate a mesh to populate each
of these control points. For this, I'm going to be using this kangaroo sign
so I'm going to left click and drag this over in
the details panel, like so. And now you can see
that I've added these signs where every
control point exists. Now note, I currently do have all these control points
selected, and with that, I want to rotate all these because you
can see these signs are not exactly facing any
drivers going down the road. So what I can do
here is scroll on up and for the rotation setting, I can rotate along the Z axis that's currently
set to multiple values. And for this, you're
just going to want to find the value that
works for you. So if I was to say something like 90 degrees and press Enter, you can see that all of them
are going to be turning. Maybe I can go with
something like 200, et cetera, 50, 60, 70. You can see for each rotation, it's setting it to some angle. Now, you could select one
of these individually. I'm going to try to
rotate this a little bit. So you can see how
you can rotate these all individually
if you like. Maybe that one's this
way, maybe this one, somebody really twisted, they shot it with a bullet
or something like that, and it's like that,
and it's like that. So you have the variation for how you want to
fine tune these. And, of course, you can play these where you want
by selecting them individually and moving it around to where
you want it to be. So note, this is a
landscape spline. The only difference between this and the road and
the fence is that we are populating these
spline control points with meshes instead of
these segments themselves. And once again, you won't see these icons at all if you are actually
playing your levels. If I was to click in
some empty space, I need to jump out of
landscape mode here. Let me go to Selection Mode. Right click Play from here. You see all those nice signs, and you do not see those
spline control points at all. So that's a real quick
and easy way to add some meshes to your landscape that are kind of in
an organized fashion. So you can consider maybe some road signs like that
it would make sense, maybe some utility poles, maybe a row of trees or some
benches in a cityscape, all kinds of possible
uses for that. Alright, guys, that's gonna
do it all for this one. See you in the next one.
42. Character Movement: So this next lesson has
nothing to do with how to sculpt or paint our landscape
or how to add foliage, but rather this lesson
has everything to do with how our character interacts
with the landscape. Through years of
teaching this course, I've learned that
students eventually come to a point where they
want to customize what angle of slope they want to allow their
character to walk up. So you can see here I've got a rather steep
mountain ahead of me. My character can walk
up this angle of slope. However, when it gets too steep, they eventually come
to a screeching halt. So how can you customize what angle of slope a
character can walk up? Let's go ahead and
escape out of here. I'm going to minimize my
viewport here, and by the way, you can go in and out of immersive mode by
using the F 11 key. However, I'm just going
to click on this button in the far upper
right of my viewport. And for starters here, I want to navigate to our
project settings. There's a couple of ways from the editor here that we can
access our project settings. Either this settings button in the far upper right, project
settings right there, or in the far upper left, we've got this edit button, and we can access our project
settings here as well. Either way, we'll get
you there. Now inside of our project settings tab, I want to direct you to
the maps and modes option. And inside of here, we are interested in
our default pawn class, this guy right here. This is the character that
we are currently playing as when we are playing in our editor when
we're playing our game. Now, this is our third
person character. And if you want to figure out how to navigate to this asset, you've got this folder
button right here. This will browse to that asset within our content browser. So if I click on
this, it'll show us in the content browser where
this asset is located, our BP third person character. Now I'm going to double
click on this to open it up. However, with it
selected like this, the space bar would also
allow you to open it up. I'm just going to dock this
across the top, like so. Now, inside of this
character blueprint, I'm just going to click
on the Viewport tab here so that I can
see our character. We've currently got this giant grid going right
through our character, and that's because
my grid setting is right up here are
set really high. I'm going to set
that down to 100. So it looks a little
bit more normal. And what I'm going to
do is I'm going to select this character
movement component. Now, this is a
component that is very specific to this class, a blueprint, a character
class blueprint. Now, this component determines the movement characteristics
about our character here. And specifically related to this discussion on
walkable slope angles, and I want to direct
your attention down here under the character
movement walking settings. Our current walkable floor
angle is almost 45 degrees. So you can see that
right down here. So if you want to allow your character to walk
up steeper slopes, that is the parameter
that you are looking for. Now, if you set this to
something like 90 degrees, you're essentially going to say, I'm allowing my character
to walk up a vertical wall. So just because that's fun, I'm going to go ahead and
save that change here. I go to go back to my level. I'm going to go
somewhere close to the base of my landscape here. Right click. I'm going
to play from here. And I'll just F 11 this to
full screen it. There we go. And as I'm walking up to the base of this
very steep pitch, you can see that
our character can now ridiculously
walk straight up. So that is the parameter to change your
walkable floor angle. Now, while we're here, I thought I'd also point out that
this is where you can find some other very
useful settings and another one that
you're really going to want to hone in on, I am sure is this
max walk speed. Now, it says max walk speed, but this is
essentially the speed that your character can travel. So currently, mine is set to
500 centimeters a second. So if you wanted to double that, something like 1,000
and press Enter, and I will click Play
right from here. And I'll click F 11. Whoops. Let me just go. Let me just do a play from my view
port right here. I was playing for my
player start actor, and let me go to this
walkable floor angle, huh, 'cause
everything's walkable for me. Right click,
play from here. Now I'm going to be
traversing twice as fast, a little
bit faster here. And obviously, of
course, I can go straight up that mountain.
So there you have it. So parameters that
undoubtedly you will want to play with as you are working
with your landscape. The first of those being the walkable floor
angle right there. And the second being the
Max Walkspeed right there. And again, that is in your
character class blueprint. And we've got the character
movement components selected. And once again, in
your project settings, that is where you go to
set whatever character you are controlling in
your landscape level. And for us, that is
in maps and modes, the third person character. Alright, guys, that's going
to do it all for this one. We'll see you in the next one.
43. God Rays: In this video, we are going to learn how to create
good ray so that we can have some cool
light shafts filtering through our foliage. Getting this sweet effect
working in your game is simple. Simply make sure you've got
the directional light actors selected either in the level itself or within your outliner. With that selected, come under the details panel and scroll on down till you get to this light shaft section
of parameters. And you're going to
find one here for light shaft bloom. Go
ahead and check that on. And if your directional light is positioned in such a way a
little bit more overhead, you're not going to
see any good rays just yet we need to
position our light in such a way that we have
essentially the sun off in the distance and some
foliage blocking the sun. So remember, the
directional light actor is our sun in the sky. Now, I could simply
rotate it around. However, I like to hold down Control and
L in my viewport. Now, first, I'm going to
use my right mouse button just to show that I am in my viewport moving
it around like this. I do Control plus L
with my left hand. That's going to bring on this
little sundial thing that's going to allow me to move
my mouse and position, rotate this directional
light actor. And if I get it in such a place there I am moving it
down between the clouds, I'm going to go
right about there, and then I will release, and I'm going to left
click in my level. There we go. So now you can see I've got that directional
light actor here. Let me select it back
in the outliner. And we've got some good
rays right from the get go. So that's simple enough.
That's simply just checking that box for
light shaft bloom. But there are some parameters
that you can play around with to accentuate
or dull this effect, and you can see that
right there as I'm moving around like that. You've got this bloom scale. Go ahead and play around
with that to either lessen or greater that effect. I'll set it back to 0.2. You've got this bloom max
brightness that you can set to limit how much of an
effect that is. Bloom tint. If you wanted to make this a little bit more, I don't know, orangish or bluish, if
you got an icy world, something like that,
you can help accentuate the feel of your sun filtering through the
foliage like that. I'll go something maybe
slightly yellow like that. And also, you've simply got the intensity of your
directional light in general. So you can really kind
of help accentuate this effect by just how
overall bright your light is. But I'll set that to 0.8. And likewise, you can also set the color of your
sunlight here as well. Now, this is not
necessarily the bloom, but just the color of the overall lighting
of your sunlight. So if you wanted to
have, I don't know, a bluish light or a pinkish
light or a greenish light, you could certainly
do that as well, and that will affect
the filtering of the good rays, as well. Let me just go ahead and cancel
that. There you have it. That is a real simple way to add some good
rays to your level. As a nice effect, indeed. Go ahead and play around with those parameters and
find something you like.
44. Localized Fog: All right. In this video, we're going to learn how to add some fog to our landscape, and I'm not talking about our exponential height
fog actor here. You can add some fog via the exponential height fog
actor by selecting it and increasing the fog density
slider to something like that. That looks like my
local Bakersfield. Awful, I know. What
we are going to be discussing in
this video is how do you add some localized fog? You know, fog that
you might see in lower elevations,
something like that. Now this is going
to be done through something called an
actor class blueprint. It's going to involve a
little bit of scripting. But this is going
to be really cool because we're going to
build the thing one time. I've got a copy
of it right here. We're going to be able to
drag it into our level. It is going to be cubish in shape or rather
rectangular in shape, squarish in shape, et cetera. And then via some settings that we've exposed in the editor, we're going to be able to
change the strength of the fog, making it more or
less prominent. We're going to be able to change the size of the fog so
I can make it taller, if I wanted to a column of
fog. Or it can make it longer. And we can also change
the color of the fog. And we've set up a color
picker right here, so if you wanted to
have some green fog, something like that, you
could certainly do that. Alright, so that's
what we're in for for this video. All right. The first step in creating
this localized fog is to have your exponential
t fog actor selected within your level. I like to select it from the outliner itself. That's
the easiest way for me. If you do not have an
exponential Height fog actor existing in your level, you could add one from
your Place Actors panel. You could bring on
the Place Actors panel by clicking right here. There's Place Actors panel. And within the
Place Actors panel, select VX or search for it. You are seeking out an
exponential Height fog actor. Simply drag and drop one
of these in your level. Now, with one of these in your level and with it selected, down in the details panel, do a search for volumetric. I just did a search
for volume and make sure you've got
volumetric fog checked. Very important
that you have that checked. That is
step number one. Step number two for us is going to be to create a material. Now, I'm going to be
creating this material in my starter content
materials folder. Put it in some similar folder like that where it makes sense. I'm going to right
click into empty space in my right click menu,
create a material. It's going to prompt
me to give it a name, and I will call
mine for material. Underscore volumetric. Fog. And with that selected,
I'm going to double click on it to open
it up right away. And inside of here,
I'm going to be adding a couple of nodes in
just a little bit. However, the first
thing I want to do is with this master
material node selected, this one that already
exists out here, I'm going to change the
material domain over here in the details panel from
surface to volume, and I'm going to
change the blend mode from opaque to additive. So that's a very important step. Once again, with either this master
material node selected or no nodes selected over
here in the details panel, make sure that you've
got these two set. Okay, so the next thing
here in our material graph, I'm going to be adding
a couple of nodes. Right click in some empty space. The first one we're going
to be seeking out is known as a vector parameter node. This node is going to prompt
me to give it a name. I'm going to call it fog color. And that'll be important for
a little bit later on in this video in which we
communicate with this node, and we actually get to decide what color we would
like our fog to be. This is just going to be
the setup for our fog. Now, a vector
parameter node such as this has some float values, R, G, and B, three float values. That is numbers with
a decimal point, red, green, and blue. Now, you could hard set some RGB values in here to
give it a default color. However, if you click on this
little color picker bar, if you will, I'm going
to click on that. And I'm going to set it to be something
like I don't know, kind of a lightish blue color, something like that,
and I'll click Okay. I'm just going to hold down
Control and score wheel in, and I'm going to
plug in this top pin into this Elbdo input, and that's going to give me
a base color for our fog. Once again, we're going
to be changing this in a blueprint that we're going to be setting up here
in a little bit. So this is just
the setup for it. Next, I need to right click in some empty
space down here, and I'm going to add a
scalar parameter node, scalar parameter. There we go. This allows us to input a single number into our
master material node here. First, I need to
give this a name. I'm going to call it extinction, and you'll see why a
little bit later on here. And I'll give this a
default value of one, sure. And I'm going to plug this into our extinction input. Like so. So we've got two named
nodes, fog color. That's a vector parameter node. This is a scalar parameter node plugged into our master
material node here. I'm going to go ahead and
save this right away. All right, next step,
let's head on back to our main level editor here, and I will create
a new blueprint. Once again, I'll do this in
my started content folder. I'll go started
content Blueprints. I'm going to right click in some empty space
right down here. I'm going to create a brand
new blueprint class of the actor variety
because this is going to be one I'm going to
place into the world. And it's going to prompt
me to give this a name, and I will call
this how about BP underscore localized
underscore Fog. All right. And with
that selected, if I tap the space bar,
it'll open it right up. And I'm going to add a
component right away. I will add a cube. So clicking this ad button, I'll click a cube, and I'll scroll on back a little
bit here in the Viewport. And now with this cube selected, I'm going to assign
a material to it, and the material that
I'm going to assign to it is my volumetric fog, the one that we were
just working on. Don't be alarmed. This will
turn invisible like this. Next, I'm also going
to make it so that we cannot collide with this cube. This cube is going to
represent our fog space. So I'm going to scroll down here under the collision section where it says collision preset, set that to be no collision because you do not want
to collide with your fog. Next, here in the
My Blueprint panel, I'm going to create three variables that
we're going to be using in just a little
one, two, and three. I just click that plus
button three times. I'll go back and
select this top one, and I'm going to going to adjust the variable attributes in the details panel right up
over on the upper right. This first one I will
call extinction. I'm going to change the
variable type here to be a float that is a number
with a decimal point. I'm going to check this
box for instance editable, meaning that we will
be able to edit this particular variable
from the level editor. We'll see that in a little bit. And if I compile this, I'm going to give this
a default value of 0.5. The next variable
I'm going to select right down here in the
My Blueprints panel. Once again, I will give it a name here in the
details panel. I'll call this one
fog color FOG color. The variable type, the type of information that this
will contain is going to be a linear color right here
where it says structure, I'm going to choose
linear color like so. Once again, I will
compile the blueprint. To give a default value, I'm going to expand
this out like so. And I will change this
to be, I don't know, 0.6 0.8 and we'll go one and then one for the Alpha value,
something like that. Compile this once again. I'll
make that error go away. Oh, I will also check this box for instance
edible so that we can change our fog color once we place this blueprint
into our level. And then the last variable right here, I'm going to select. I'm going to give us a new name. This is going to be fog area. This will be a vector parameter. And I will also check this
box for instance, editable, and I will also compile
the blueprint to give us a default area. I will put in 50 by 50 by three. Okay, now to make this
all work together, we're going to set
up some code in our construction script
tab right up here. Now, we've got two
different tabs. We've got this event graph tab where you can set up some code, some script that runs during runtime while
the game is playing. However, we're
going to be setting up some script that will affect this blueprint
during designer time or rather before the
game is running. This will allow us
to make some changes to some of our variables here, and what it'll do
is it'll update this blueprint in
our level editor before the game is running. So you'll see that here
in just a little bit. Okay, the way that this is
going to work is I'm going to drag in my fog area variable. I'm going to say get that. And the reason I want to get
that is because I want to set the world scale three D for my cube to match
that fog area. So I'm gonna drag in a
reference to my cube here. I'm gonna put that down here. Gonna drag out of my cube, and I'm going to do
a search for set world scale three D. Now, if I'm moving a
little fast here, it's just because I'm trying to finish this video
in the time limit. This is a function node, and what it'll do is it'll give this particular actor or rather component this
cube a new scale, the new scale is going
to be determined by the information inside
of that variable. Ha. Next, I'm going to
drag out of this cube, and I'm going to type in
set vector parameter. On materials. So you remember in
our volumetric fog, we created a vector
parameter called fog color, and I'm going to actually copy this parameter name
right down here. I'm going to hit
Control C to copy that. It new that we are trying to set a vector parameter that is a new parameter for this
property right here, and I can specify that
property right here. Whoops. I want to
paste that fog color in to that right there, make sure you get
rid of the nun. So I'm basically
communicating with this material placed on
this cube and saying, Hey, I want to impact this
parameter right here. Let's hook in our
execution wire like so. And now the parameter that I would like to feed this value the color value I'd like
to feed this is going to come from our fog color. So drag this in. We're
going to get it. I'm going to go like this. I'm going to break this color. It'll break it out into
RGB values like this. And the way that I can
have this flow into this, which is seeking a vector
value is I can drag backwards off of this
and type in Me vector. Make vector node. And now
if we plug R into the X, the G, into the Y, and the B into the Z, that'll feed us the R, G, and B values into that
parameter right there, the fog color parameter. So to essentially be
reading in this color that we specify through to this fog color parameter right here into our material that
is applied to our cube. All right, Zoom in on
back here a little bit. The last thing I
want to do is drag out of my cube here
one more time in the setup and type in set scalar parameter
value on materials. Go to wire this in like so, make sure you wire that in. Our parameter name
here is going to be extinction that we're going to get from this
scalar parameter node, and once again,
you can copy that. I'll control see
that right there. Ctrol V that to paste
it right there, and the parameter value
that I would like to feed this is going to be determined by the contents
of this variable. So just plug that in there. So I'm going to compile
this and save this, and this is going to
be our final setup. Now, what we need to do is place this blueprint into our level. Now, the way this is designed, this is kind of a cube shape, so I want to find kind of an
indentation in my landscape, sort of a value like this. I'm going to go ahead and drag this localized fog blueprint down into this area
and check it out. That is pretty nice, indeed. Now, if I raise it above
the landscape a little bit, you can see it is cube in shape. But with this
blueprint selected, you can see we've got access
to all of those variables, extinction, fog
color and fog area right here from
our details panel. And once again, the reason
that these variables are exposed here in the level
editor with that blueprint selected is because we
checked these boxes for instance edible for each
of these variables. Instance edible is
the equivalent of these eyeball icons being on. So if I check this off, it'll actually uncheck that for the instance
edible. Check it on. I ticks it on, like so. And now you can see back
here in our level Editor, I could change the extinction. Could kind of make it
fade in and out more. That's essentially how
visible is the fog. I'll go something
like 0.12 there. Fog color, I could click on this to change the color of the fog. You're seeing it update in the viewport. I'll
just cancel that. And then the fog area,
you can make it bigger or smaller in any of
the various axes. So that's how this is designed. It is cubish in shape. It's great for placing down into a little valley depression
like that, and there you go. You got some localized fog
that I think looks quite nice. Alright, guys, that'll
do it off for this one. We'll see you in the next one.
45. Level Track: In this video, we're going
to add a little bit of ambient sound to
accompany our landscape. Now, what I'm going
to be adding is a looping track that's going to sound like
some birds tweeting, some wind blowing,
that kind of thing. However, note that if
you wanted to have some background music to
accompany your landscape, the same methodology
would apply. So with my level tab open
here, my California level, I'm going to come
up along the top here and right where we see this button that's got kind of this three node icon on it, I can click on this, and what I want to
do is I want to open my level blueprint. So the method once
again for doing that click on that and
open level Blueprint. Now the level
Blueprint is specific to this level and
this level only, and it's where you
can add script, that is some code that will
apply only to this level. So if you have another
level called Nevada, it will not apply to there. Now, what you see here are
a couple of event nodes waiting for you to hook some
functionality up to them, and they exist here because
they are commonly used. I'm going to delete out
this event tick right here. However, I am going to make use of this event
begin play node. Now, if you hold down the
Control key and Scowll in, you can increase your
Zoom level here, which I like to do. And what I want to do is
drag off of here and simply bring in a play
sound two D node. A two D sound is one
that is not localized, it's not specific to
any point in space. This is great for menu music or just some ambient sounds or
music, that kind of thing. And what I'm going to do is
I'm going to slot in a sound. Now, the sound that
I do want to slot in here could be picked
from this list, like so. However, if you
select a sound within your content browser
and I've got my starter content
audio folder selected, I'm going to choose this
starter background music, and I can actually click
on this play button. You can try that out to
hear what it sounds like, but I'm just going to
slot it in right here. Note that I do have it
selected right here. And with that selected,
if I click right here, it will slot in that sound. Now, it's worth noting that this function node does
have this little down arrow here so you can access
some additional options, collapse, and expand that. So we can increase or decrease
the volume of the sound. We can pitch it up or down
a little bit, et cetera. These are usually the only
two I ever play with. But there we go. We've
slotted in a sound. Let's go ahead and compile this. This makes sure that
our script is good to go and it is and then save. And so now if we were to
go back into our level, I can right click
play from here, and I should be able
to hear that sound anywhere throughout this level. Now, once again,
if it's not loud enough for you, you can
escape out of here, go back into your
level blueprint, and you can increase the
volume straight from here. So let's try going
twice as loud. Pile save, go ahead and right click once
again and play from here. And obviously, if you
don't like that track, and you want to go with
something a little bit more musical,
you certainly can. Just simply swap that out. Instead of some starter
background sound, you've got a default
music track in here. Here's my starter music cue. Not great. But you
could try that out. And just to show that
I could slot that in, selected, slot that in. I'll change the volume
multiplier down to one and then compile. Say once again, I'll
just play from here, right click Play from here. And now you've got
some background music. Before we wrap up this video, I wanted to show
that we can import our own sound into
the content browser, and I have a few in
my Downloads folder on my computer. I've
got this Erie loop. That's a wavefle and
this desert wind. It's an MP three file. So all you need to do
to import these into the content browser is simply find them in your file explorer. I'm just going to
hold down Control to select both of these, and then I'm going to
drag and drop them from my folder into
my content browser. And there they are.
Those asterisks mean that they need to be saved. I could right click on them
to save them that way. Control plus as will save them. Or I could simply
click this Save All button to save anything
that needs saving. I'll click Save selected. And I know you're dying to hear these sound like, so here we go. Desert wind. Kind of
quiet, Erie loop. Not exactly appropriate
for this level, but you get the point. Now, if you ever did
want to increase the default sound for one
of these imported sounds, all you need to do is double
click on one of these files. Let's do the desert
wind right here. And there's your volume setting, so I could change the default
volume from one, two, we'll say three,
something like that, and then just go ahead, save
it out, then close it out. Then come back to our
content browser. Play it. A little bit louder. Alright,
and there you have it. A really easy way to
add some music or ambient sounds to the background
of your landscape level.
46. Ambient Sounds: In this video, we're
going to learn how to place and
edit ambient sound actors so that we
can hear sounds like this waterfall here
only when we get within range because
you don't want to be hearing a guy like that when you're on the
other side of the map, only when you're up close to it. Alright, to start with, I just wanted to point
out that I've got my content folder selected
in my content browser, and I'm currently
filtering to access sound wave or sound C files. I've got these filters on, and I got these to
appear in my list of filters by clicking right
here coming under Audio, and then I checked on
SoundC and sound wave. Now, this lesson is not
about sound assets at all, but just to give a quick primer, a sound waves just
the raw audio file. A sound Q can take in sound wave files and
modify them in some way. So if I was to just open
up this smoke sound wave, there's just some
parameters related to that smoke audio acid itself. Like I can check it to
make it loop or not. A smoke Q, however, if I open that up, it, it actually references
a sound wave and it's also looping
it here as well, but you've also got some other nodes that
you could hook up to it to modify that
sound in some way. So just a very
quick primer there. Now, the reason that
I'm even filtering by sound wave or sound files
is because these are the guides that you
can place within your level and then you can
specify some parameters in the details panel
to make it so that that sound can only be heard
within a given radius. Now, I've got a waterfall
here and I don't have a waterfall
sound, so to speak, at least one's not
listed as however, if I was to turn on this starter wind
sound, I don't know. I kind of think it
sounds like a waterfall. So we're going to use this as
our waterfall sound effect. And obviously, you don't want to hear this anywhere
in your map. You only want to hear
it when you're close to this waterfall. So
this is how you do it. You simply drag and drop one of these files like my
starter wind here, starter wind six somewhere in close proximity
of the waterfall. I'll kind of place it
right about there. That place in my level, I'm just going to tap the F
key F two frame up on it, and it's got this a speaker type of icon associated with it. I'm just going to lift
this up into the air a little bit just to make it
a little bit easier to see. You'll notice over in the
outliner that this is labeled as an
ambient sound actor. Now, it doesn't really
matter if I place a sound wave file or let me just place
a light Q right here, a sound C file. They're both going to
have that a speaker icon, but they're both listed
as ambient sound actors. Let me go ahead and
delete this one. Okay, with this starter wind ambient sound actor selected, over in the details panel, you got some properties that you can modify about this sound, including a volume multiplier, a pitch multiplier, et cetera. But I want to draw
your attention down here under the
attenuation settings. I'm going to check this box
for override attenuation. Now, as soon as I do this, it's going to make some of
these other properties appear. So let me just zoom on
what I just did there. Under attenuation, I just
checked that box on, and it made these guys appear. Now, what these parameters
are going to do is give us a shape in which we
can hear the audio. And we've got this inner
radius in which we'll hear the volume of this
sound at 100%, and then a fall off distance. That is a range in
which it will gradually get quieter and quieter until
it fades off completely, and then we can't
hear it anymore. So let's zoom on back here in my level editor to
kind of show this. So you can see right now
around this speakery icon, let me just peel this on down. I've got this
orange wire sphere. That is the inner radius
in which I would hear this audio at 100% volume. Now, if I zoom on back
here a little bit, I've got this bigger
orange sphere. Now, if I walk my character
inside of the sphere, I will begin to hear it. And as I progressively get
closer and closer and closer, there's the edge of my
orange sphere right there. I'll start to hear it
right here, and then as I get closer and
closer and closer, I will hear it at 100% volume. At which point, if I was
to back away, quieter, quieter and quieter until eventually I can't
hear it anymore. So I like this shape
a lot, actually. But just so you know, you've got this attenuation
shape drop down. You can actually pick
some different shapes. You can choose a box
shape if you want. Maybe you want this sound to
fit into a squarish room. Maybe a capsule shape, if you're inside of a
tunnel, that kind of thing. But for this, I'm going to
go with a spherical shape. I'm also going to increase my inner radius there from 400. Let's go to about 1,000. Now, as soon as I
press enter here, you're going to see that
not only get bigger, but also the fall off distance
gets pushed out, as well. So just know that. If you're increasing or decreasing
the radius size, that fall off distance is
going to be adjusted as well because let me just kind of click in here and
shrink or expand this. Fall off distance
is distance from the inner radius boundary until the edge of the fall
off distance itself. So I'm going to go once again, a valley of something
like 1,000. Okay, let me kind of zoom on back here and get
to the outer bounds. Now, I am going to play
from here and then kind of walk into this and get
close to the waterfall. But just so you know,
between videos here, I actually did modify my
ambient level track here. In filtering, I did find a rural Australia audio
track one and two. And inside of my
level blueprint, I actually made it so
that on Event begin play, I'm playing that rural
Australia One sound. So I did change things a
little bit between videos. Alright, here we go. Right
clicking, empty space. I will play from here. There
we go, everything is in. You hear that rural audio
sound rural Australia. Okay, I'm not going to walk in. I'm going to gradually hear that waterfall effect get
louder and louder. Now, I did make this water
so that I can walk upon it. Hearing it get louder still. I did a poor job placing those water splash V
effects, but that's okay. So you're hearing
it at about 100% volume now and obviously, as I get further
and further away. It gets quieter and quieter until you can no longer
hear it anymore. So that is the usual way that I go about adding
some ambient audio to regions of my landscape and also containing it within a given
area of your landscape. Now, I just wanted
to point out here in my Place actors panel
along the left hand side. And once again, if you
don't have this panel, you can access it by
clicking right up here and bringing on
a Place actors panel. You can also do a
search for ambient, and there it is
ambient sound and place an empty ambient
sound within your level. So let me just do
that to show that you can I'll drop it right down
there. I'll raise it up. You can see over in
the details panel, let me just tap the F
key to frame that up. I could slot in a sound
of my choosing as well, and I could slot in
a sound cue like this fire cue here or I could slot in a sound wayfle
like my starter birds. Now, you saw with this sound cue that if you place that in there, some of these will have a range already in them like that. Note, however, that
you can override it, as well by clicking right there. So note that that is overridable if one already has
a range specified. I'm going to go back
to my starter birds here and place that in. Let me scroll it up.
Start birds, like so. And so you can have some
overlapping sounds as well. I'm going to kind of zoom
on back here a little bit because I do want some birds in my little foresty area here. I'm going to override
that attenuation. It will go something like that. So now if I was to right click in some empty
space, play from here. Everything renders in
gonna hear some birds. And as we get closer, the waterfall is well.
47. Audio Volume (Reverb): In this video, I'm going to demonstrate how audio volumes, such as the sphere here
can be utilized in unreal to create distinct
sound zones within a map. And just to show you
this, I'm going to right click in some empty
space, play from here. Outside of my cave, you're going to hear a
rushing waterfall of sorts. However, when I go
inside of the cave, that's going to be
greatly dampened, and we're going to hear
this torch crack alec. Also, we can have some cool
echoing effect like this. Went inside of our cave as well. All right, before we get started talking about audio
volumes here, I just wanted to point
out a few things related to the setup
that you see before you. For starters, this is
my California level. This is my imported landscape that I imported way
earlier in the course. This particular landscape
has this landscape, no tiling material applied. It is the landscape
material that we applied way earlier in
the course as well. And if I double click on
this thumbnail image, it was through this landscape visibility
mask that we were able to carve out a cave
in our landscape. Now, I also wanted to point
out while we are here within our landscape
material that you can, and I did do this
between videos, you can check this box to make
this a two sided material. If you click Save there, what that enabled me to
do between videos here, let me just zoom up while I'm stuttering here is to
make it so that we have a second side to our material so that on the
underside of our material, we can see that as well so that when we walk into our cave, we're not just staring
up at blue sky. Also to simplify
our discussion and keep it focused on audio
volumes for right now, I wanted to point out
that between videos here, I did disable the level
track that was playing in the background because
I want to keep our discussion focused on
our audio volumes here, and I don't want
to get distracted with any background music. So what I did is
between videos here, I went here, in open
level blueprints, I clicked on those three
nodes icon right up there, and in my level blueprint, I just disabled on Event Begin play the playing
of this two D sound, this rural Australia track. And I just snipped that
wire by holding down the Alt key in left
clicking to snip that wire. Alright, so just want to
get that out of the way. Let's get to working
with audio volumes. Now, once again, I want to have some unique audio properties on the inside of this cave. So to do this, over in my Place
Actors panel, once again, you can bring that on
by clicking right here. Place Actors panel. We can search for
audio and we can find an audio volume to drag and drop into our
level like this. Now, it's going to start off as this sort of
smalleish cube shape. And again, I can focus up on this by just tapping the F key. It's kind of hard to
see in the video here, but it's got this
orangish outline. Over in the details panel, we can see various details
that we can modify about this. And the first thing
I want to do is modify the brush shape. Currently, it is set to box, but if you click
on this drop down, you've got various brush shapes. I'm going to choose this
tetrahedron builder right there. That's going to give
this sort of an odd, sort of a I don't know, dice, like 20 sided
di look right there. Now, you can change
how many sides there are to this dice, if you will, by changing the tessellation
setting right here. So I'm gonna crank this up
to be something like four, maybe five, five will make
it even rounder still. So if you really want to fit
that into a rounded space, but know that you have
control over the size and shape of your audio volume. I'm going to also
adjust the radius right here by simply
clicking in here. And then just
adjusting that number. And you can punch
in a hard number. I might go something
like 3,000, like so. And then you can position
this accordingly. I'm not going to worry
about being Uber precise. And again, I'm going to
be okay if this is a little bit outside of
the mouth of my cave, and it doesn't have to extend
all the way to the top because I'm not worried about my character navigating
all the way to the top. So you can size that
and fit that into the size of your
cave as you see fit. Next, over in the Details panel with this audio volume selected, we've got some reverb
settings that we can apply. And if I click on
this reverb effect, this drop down right here, you can find a variety
of effects that are in. Look at the pathway
there in my tooltip. The engine pathway. Now, if you don't have engine content showing at this point, you can click on this
little gear icon and you can ensure that you
are showing engine content. That would be the
same, by the way, showing engine content as
if you clicked down in your content browser
right here under settings and you
showed engine content. Do you want to have
access to these guys, so I highly recommend
it for this stage. So for a reverb effect, this is the echoing type of effect that you would like
to apply within here. I'm going to click
this dropdown, and I'm going to search
for one called Cave. If you were to double
click on this effect, it's got various settings
associated with it, like how you want the audio to be processed
within that volume. We're not going to cover how
to create one of these right away because we
have a whole bunch of them already made for us. Let me just exit out of
here. Go back to my level. Now, right below this, we've got a volume setting that is
currently set to 0.5. I'm going to set it to be 1.0. Next, we're going to be running a quick demonstration here. And for this, I'm going to be accessing those engine
content folders. So ensure once again that
you've got show engine content. And down here under
our engine content folders within the
content browser, I'm going to click Engine. We're going to go
under VR editor towards the bottom
here, VR editor. Inside of here, we're
going to go under sounds. And you can see
this pathway right up at the top here if
you're feeling lost. And here we're going to
go under this UI folder. Now there is a sound
in here called click on Button Q. I'm going to double
click on this really quickly to point something out. This is our very
simple sound Q asset. It takes in this wave
file right here. Let me just go ahead
and click back on the speaker icon because I want to see the settings
right over here. Firstly, I'm going to jack up
the volume multiplier here. I'm going to set this to be two and you can hear what this sounds like if I
click this play Que. You can see it firing off there. And now, one more
thing I'm going to do while I'm here
is I'm going to check this box for
override attenuation. Very important that
you have that checked. Now note that for any sound
cue assets such as this, you need to have that
box checked in order for this sound cue asset to be
affected by the reverb asset, that cave asset that is set within our audio
volume right here. But let's just go back, click
on this and click Save. Go back to our
California level here. Next, I'm going to set up a very simple script within
our level blueprint. Once again, clicking on this
little button right here. It's got the three nodes on it. You can go there,
open level blueprint. And it'll open up
that same name tab, only it's going to be blue. And I'm just going to hold
down the right mouse button, and I'm going to add a simple
script inside of here. I'm going to right click
in some empty space, and I'm just going to
type in the seven, the number seven because I'm going to add a
keyboard event for when I tap the seven
key on my keyboard. I want to drag out of
here and I'm going to play sound at location. This is going to allow
us to play sound at a given location
within the world. Now for the sound,
I'm going to choose. If I click right there, it's going to use the asset that I had selected in
the content browser. That was my click on Button Q. You can see I had that
selected alternatively, you could search for that by
clicking on this dropdown, but that is the one that
we're going to be using. And now the location for this, we're going
to go like this. I'm going to right click
in some empty space, get player character. You're going to seek out a get player
character node that's going to get your
playable character, your mannequin man or
woman within the level. And then if we drag out of this, we want to get actor location. And that'll return the X, Y, and Z location
of our character. So we're going to use
that as the place to play that sound. Let's go ahead and compile here, make sure that our
script looks good. And now we're going to
go inside of our level, and I'm just going
to peel this back, and we're going to
attempt to hear this when we are outside
of the cave versus inside. So I'm going to right click at some empty space
right about here. Wait for all this to load in here and note that I am outside the mouth
of my cave here. We got all that
grass in the way. Okay, so if I was to tap
the seven key right here, you don't hear any
reverb at all. It's a very subtle effect. But now when I go inside of
the cave to hear this effect, it's important to
note that this camera that's following your character must be inside of the cave. It's not the character itself, but rather the camera
following your character. So I should be
inside of it right now tapping the seven key here. You do hear that little
bit of a reverbing sound. So that shows that reverb effect for our audio volume
here at work.
48. Audio Volume (Ambient Zone): Okay, next, I want to show off these ambient zone settings inside of our audio
volume actor here. And for this demonstration, I'm going to firstly
create a sound cue asset, and this will be instructive on how you can create a
sound cue, as well. I'm going to scroll on up under my starter content audio folder. Now, in a previous video, I use this starter win six sound wave file
for my waterfall, and I kind of like that sound. So I'm going to
pretend like there's a waterfall outside
of this cave. Spoiler alert, there's not. But what I'm going to do is
right click on this asset, and in my right click menu, I have the ability to
create a Q using that sound Wayfle as the wayfle
for this Q asset. So I'm going to do
this, create Q. It's going to automatically
create a sound Q asset. It's going to give it
that name just with the Q appended at the end of it. And if I open this up, you can see that
this sound Q asset is taking in that wave sound. Now, while we're here, I
want to ensure that this is nice and loud, maybe
exaggeratedly so. So I'm going to
increase our volume multiplier from 0.75 to two. And again, if you clicked
off of this speaker icon, maybe you had this
wave player selected. Click on that speaker
icon and you can select your volume
multiplier. Set that to two. Let's go ahead and save that. Next, I'm going to come back
to my California level here, and I'm just going
to drag and drop this Q somewhere outside
of our audio volume. I'm just going to drag and drop it somewhere in here like this. I'm going to raise
it up nice and high. Now, that speaker icon
is a little bit small, so we can make it bigger over
in the details panel if I do a search for Billboard. We can increase the size of that speaker icon like
so, nice and big. Now, that's only going to increase the size of the icon so that you can identify
within your level easy. Sometimes I like to do that
for demonstrations like this. Okay, so that's going to be the sound asset that I'm
going to be using to demonstrate these audio zones
inside of our audio volume. Essentially, what I'm aiming to do is make it so that I can hear this particular sound when I'm outside of the volume, but then when I go inside of it, I can't hear it anymore. Now, in order to make these
ambient zone settings work, I need to access
an asset known as our master sound class asset inside of our project settings. Now, I've got my project
settings tab open along the top, but if you want to access it, edit, project settings
will get you there. Alternatively, settings, project settings, that'll
get you there as well. Two ways to open up
project settings. Inside of here along
the left hand side, under the engine category, go ahead and choose audio, and this is where we can find
the default sound class, the master sound class asset. If you double click on
this guy to open it up, think of this as, like, your master audio asset that controls all the other
audio within your project, a big one being you know, your overall volume level for
everything in your project. Yeah, that would
be where you could affect everything
in one fell swoop. However, I want to
direct your attention to this apply ambient
volumes checkbox. It is not checked right now. Now, in order to turn on those parameters that
I'm talking about with the audio volume asset, we want to check this box on. So make sure you check that on for your master
sound class asset. We're going to save
that, and then we're going to jump back to our level. With that checked,
we can now fiddle with these ambient zone
settings with our audio volume. So what I'm going to do
here is I'm going to set my exterior volume here to be zero and my exterior
time here to be two. Now, this exterior
volume controls the desired volume of sounds
outside of the audio volume. So that when our player is inside of this audio volume,
we are essentially saying, Hey, any outside or
exterior sounds, we want their volume
to be set to zero. Now, this exterior time, this is going to be the
time duration in which that change is going to be happening over the
course of 2 seconds. So it's not going to be jarring. It's not going to
be too abrupt where suddenly you hear it
and suddenly you don't, let's go ahead and
give us a play test. But before I do, I
wanted to dive back into my sound cue asset
here that I just created because I
forgot one thing, and I needed to select
my wave player here. Want to make sure that this is a looping sound right away. Go ahead and save
that so that it doesn't cut out after
17 seconds or so. Now I'm gonna right
click Play from here. And everything's
gonna be loading in. And you can hear that
rushing waterfall. I'm going to dive
into our cave and suddenly over the
course of 2 seconds, that waterfall sound
of sorts cuts out. Let me exit our volume. Suddenly, it just comes
rushing right back. Alright, now let's
try this in reverse, and I'm going to select my
audio volume once again. So I had this waterfall
on the outside. Let's add a sound on the inside. For this, I'm gonna dive under started
content blueprints. And I've got this
blueprint effect fire. I'm going to place
this on the inside of my audio volume here,
somewhat near the middle. So Blueprint effect fire. Dragon drop that
in here like this. And you can see there is an audio volume of
sorts attached to this. I'm going to dive inside
of this blueprint class. And what's happening here is
inside of this blueprint, we have not only the
effect of some fire, but we also have this
audio component. And that is what's
specifying the range at which we would hear
this torch of sorts. Acacin. And now
what I'm going to do is I'm going to go back
to my California level. And with this audio
volume selected, scroll on down once again. I'm going to modify my
ambient zone settings here a little bit. What I'm going to do
is I'm going to leave these exterior settings,
the volume and the time. However, I am going to fiddle
with the interior volume. I'm going to set
this to be zero, and I'm going to set the
interior time to be, actually, I'll leave
that at zerot five. 0.5 is probably right for that. Okay, now, note the
interior volume controls the desired volume of sounds inside of
the audio volume here when the player is outside. Thus, with this setup that we
currently have, the player, you are only going to
hear this, I guess, I'd call it a waterfall sound when we are outside
of the volume. And we will only
hear that fire sound when we are inside
of the audio volume. Okay? Let's go ahead
and give a try and get a right click right here.
We're going to play from here. Everything loading in. Okay you hear that
rushing waterfall. So now I'm going to go
inside of my volume, and I'm gonna make sure I
get my camera inside here. Alright, we no longer hear
that rushing waterfall. And when I get close
to this fire that's crackckin right
there, we hear that. Go back outside. Suddenly,
the waterfall kicks back in. Now, if we did want to
hear a little bit of our rushing waterfall from inside of our audio volume
here, that's simple enough. We can just simply modify the parameters for our
audio volume here. Let's go ahead and make it so that with our audio
volume selected, our exterior volume, instead of being completely zeroed out, we changed it to
something like 0.5. And likewise, if we want
to hear a little bit of that fire effect outside
of our volume here, well, firstly, I'm going to
choose the audio component. Peeling that back here
in the details panel. I can see those orange
radii right there. I'm just going to go ahead
and choose my fire audio. Let me just override the
attenuation from here, and I'll just make that
a little bit bigger. The inner radius, we'll make
that a little bit bigger. So now you can see it extends beyond the audio
volume right here. Let me go ahead and select
my audio volume once again. And I will change the interior
volume wind to be 0.5. So then we should hear the
interior volume source a little bit from the outside. Alright, let's go
ahead and play that. Right click. Play from here. Hearing that rushing waterfall, let me just full screen it here. Me full immersive effect. And once I go
inside of the cave, the rushing waterfall
is going to tamper down quite a bit while
the torch picks up. Then if we go on out, I can still hear
the torch a bit. While the rushing waterfall
comes rushing back. Alright, guys, that's gonna
do it all for this one. We'll see you in the next one.
49. Good Sky: In this video, we are
going to learn how to add the Good sky blueprint
class actor from Fab so that we can
quickly and easily add a customized sky
to our landscape. This will give you the ability
to add a day night cycle, and you can customize some sun, moon, and star settings. You can even make
a storm occur in your level if you would like some lightning
flashes and whatnot. So let's get right to it. Alright, so we're going to add our good sky content to
our content browser here. And you can get this
by coming under Fab. And here is my fab tab open. Now, I've already added this, but where you can find
it in fab is just simply type in
GoodSky There it is. And you click on that and go
ahead and add to project. Now, as soon as you
do that, coming back to your content browser, you should see this folder
right here for GoodSky. You can color this.
I'm going to right click on this and
I'll set a color to it to make it obvious where this is
in our content browser. Color it maybe
something like blue. Sure. And under here, we're going to go
under blueprint. Now, this whole system, the star of it is this
BP Good sky actor. So I'm going to go ahead and add this to my California level here by simply dragging and
dropping it into my level. Now, I simply need to tap the G Key in order to
see my various icons. There it is. You're going to see this sort of sundial thing. It's going to say
sunrise in the East. And now, it's worth pointing out here over in my outliner, I have various sky actors that
I put inside of a folder, here they are
directional light actor, fog, sky atmosphere,
skylight, volumetric Cloud. These were all added at the beginning portion
of this course. And I did this under the
Environment Light Mixer, if you remember under Window
Environment Light Mixer, there were buttons associated
with each of these actors, and you simply added them by clicking on the
respective buttons, and they're added to your level. Now, we can retain
some of these actors, but with our Good sky,
we can get rid of our volumetric
Cloud because it's already got some
clouds baked into it. So I'm going to do that
now. I'm going to just simply right click on
my volumetric Cloud. And I could come under Edit, delete or simply tap in that delete key,
we'll get rid of it. And with that, I'll leave the
rest of these here for now, though, I'm going
to come back to these in just a little bit. I am going to take my
good Sky, however, and just go ahead
and drag and drop it into my sky folder so that it's nice and neat in there
so I can collapse that folder or expand
it as desired. Okay, so now one of the first things you're
going to notice here is that it suddenly became nighttime.
We got the stars out. And the reason for that is with our good sky actors selected. Over in the details panel, we've got this enabled time
of day, and it's checked on. Chances are you are going
to want it checked on, but currently our
time of day is zero. So this goes 0-24, 24 hours in a day. And you can see that sundial, that graphical sundial
reflecting the position of the sun as I move this
slider back and forth. Now, if I was to go right about there and then kind of
fly over in my level, I should be able to see the sun, and there it is right up there. So essentially, this is
9:00 in the morning. You've got some
various sun settings that you can play
around with here, if I was to scroll on down here I've got my
sky effect sun stars. I could change the
size of the sun. Like so. I could change the brightness of
the sun. Like so. Now, this is only going to increase the glow
around the sun. This is not actually going to brighten up
your level at all. I'll get to talking about that
in just a little bit here. I'm going to go back
to the default values. Now, coming back up here a little bit towards the
top of the settings, the sky global settings, I want to talk about
this sky effect setting. Right now, we've got sun and stars from custom
mode, time of day. I'm going to click on this.
You got various options here. I'm going to recommend
that for now you go sun stars and moon. Go ahead and click on that. And now, what I'm going to do is once again play around with
my various times of day. The benefit of this one
with the moon is that we should see the moon appear
straight up overhead. So now you saw me fiddle with
some of the sun settings, but if I go on down below here, now you can fiddle with
the moon settings as well. You've got your moon size. Like so. Moon brightness. Like, so again, that's just kind of the halo
around the moon. That's not actually
going to enhance the lighting in your level. You've also got this
moon move where you can click in here and kind of
reposition where the moon is, as well as this moon
eclipse intensity. Now, this goes between
either zero or one. Now, if I click and
turn it to one, I'm going to enable
these eclipse settings, essentially that
crescent moon setting, and now you've enabled this. You can change how much of
an eclipse there is like so, smiley face, or even the
angle of that crescent. Likewise, right up above, we've got the sky
effect, sun and stars. You can change the
brightness of the stars. Again, I'm just clicking in
these fields and just moving my mouse cursor to the left
and right. Set that back. Star UVtile. I can move this, like so to kind of reposition. Star fall off intensity. I could go something
like 0.4 there, just kind of creates a
sort of a blinky effect. And you can obviously adjust the color of any of
this stuff as well. Okay, I'm gonna go back
up to my time of day settings instead it to
something maybe 11:00 there. Now I'm going to
focus on the clouds. We've got this sky clouds style. And what I can do
here is actually, I'm going to click
on this search bar up here and simply type in clouds and Skycloud style
is one of the options. So I've got various cumulus cloud formations
that I can choose. And within these, I can even choose how much cloud do I want? Do I want it to be
very slight, like so, or do I want it to be a
little bit heavier, like, super heavy, which I
don't think that's all that heavy,
but there you go. Okay, I'm going to get
rid of my search here. Now, let's go back
to our sky effect. And instead, this time,
I'm going to choose Storm. Maybe some of you
want a stormy night. There you go. You got some
lightning strikes all around. And if I scroll on down
where you can adjust some of these settings are
your sky effect storm. You got the lightning
brightness. You can really crank that up, like, so a little
bit ridiculous. You can also change the
color of your lightning as well as the frequency if you really want to
put on a light show. Alright, I'm going to go
ahead and set that back from storm back to sun,
star and moon. No, you've also got
some other settings here that I haven't really
filled around with. I could randomize
some settings here by simply clicking on
some of these guys. These essentially
act like a button. They're not a
checkbox of source. Essentially a button to alter
your settings at random. Now, if you wanted to set
up a day night cycle, there are some
settings right here in the Good sky actor that can
help you out right away. It's under Sky Beta. All you need to do
is click this box, and right below it is an
associated parameter. How long is a day in the
game, and that's in minutes. So with that checked, if I was to simply right click, go in and play, you will see the day eventually
turn into night. However, note that while this is happening and our
sun should be setting somewhere over
yonder, There we go. That the shadows of our
character don't actually move. So to fix that, what
we would want to do is go back up and
select our Good sky actor, and we need to associate our directional light
with our Good sky actor. And that can be done in
the parameter right up above where we've got this
directional light actor. I'm going to go ahead and
select this drop down, choose our lone
directional light actor. Now, as soon as I do this, I can now jump back in and play. Let me go ahead, right
click and play from here. And you should notice the
shadow of my character there adjusting as my son is
panning across the sky. And once again, here it comes. But you'll notice that it
gets a little bit dark. So what can you do
when the stars come out and you don't want to
be in complete darkness? Well, let me go
ahead and escape. Here's how you can combat that. Simply add another directional
light actor to your scene, so I'm just going to
go ahead and do that. And I'm just going
to point this one downward from a top down
angle with this selected. I'm just going to set the
rotation here to be zero, negative 90 like so. They're just pointing
straight down. And so as to not get confused, I'm just going to simply
click on this hit F two. I'll call this my we'll
call it moon for moonlight. And now I would
also like to place this moon actor within
my sky up here, so I'm just going
to drag and drop this right up into
my sky folder. I'll call my
directional light actor so I don't get confused here, my original one sun. I'm going to go back to
my moon here and I'm going to set my intensity here. Instead of an intensity of ten, I'll set it to be like one. And also, if you
wanted your sunlight, the one that is actually associated with our
Good sky actor, let me go ahead and select
Good sky once again. You can see that updated
name for my sun. My first directional
light actor. If I wanted to adjust how
intense my sunlight was, I could adjust the
intensity of my sun. So I'm just going to go
something kind of crazy now. Maybe I'll go like a
value of five for that. So now, if I jump
back in and play, play from here, you
can see that sun is panning across the sky because
my shadow is adjusting. It's very bright when
the sun is overhead. I'll wait till the sun sets. And then that is where the moon directional light
actor will come into play. Here it comes. We'll deal with that
warning message here in just a moment. So now it's dark out, but
we've got a little moonlight. And obviously, I could adjust that intensity of the
moonlight to be much less, so it's not quite so bright out. Now, you see that error
message up on screen where it says multiple directional
light actors are competing. I'll escape. Simple way to fix
this is simply go back up. I'll select one of my
directional light actors, simply type in shading
into the search bar, and this forward
shading priority, just set this to a
value of one and boom, that error message goes away. And so there you have it.
That is how you can work with the Godsky actor
within your landscape. Lot of parameters we could
have adjusted there, but play with those to
your heart's content. Guys, that'll do it
off for this one, we'll see you in the next one.
50. Map Transitions: In this video, I'm going to show how with a little
bit of scripting magic, we can make it so that by
overlapping a trigger volume, we can transition from
one map to another. Alright, so my plan
here is to walk into this cave here in
my California level. And then when my character
overlaps a trigger volume, I'm going to transition to
my Mountain example map. Now, for this setup, I need to ensure that I have a player start actor in my level. Now, the players Start actor is the spot where we would spawn in if I did not do a right
click Play from here, but rather just click
Play along the top. And you can find a
player start actor in your place Actors panel. Once again, Place Actors
panel can be added right over here by clicking on this plus
button, Place Actors panel. And under the basic tab, you've got a player start actor. Let's go ahead and drag and
drop this into our level. And then if I just tap the
F key to fly up on that, I can see that it's
indicated by this capsule, as well as this controller icon, and this blue arrow, not the one going up and down, but this one right here, that indicates your
character's facing. So if you tap the space bar, bring in your rotational tool, I'm going to have
my character spawn in kind of facing the
mouth of the cave. Okay, the next thing I'm
going to do here is add a trigger sphere inside
of my cave here. So in my basic tab, I've also got access to a trigger box or
a trigger sphere. They can do the same thing. One is just shaped like a box. One is shaped like a sphere. What the heck, I'll
choose a sphere. I'll drag and drop
this into my cave. And I'm going to kind
of put this around the area of my fire. So I've got a visual as to
where this is going to be. Now, with this guy selected, let me just zoom up on it. You can see it's kind
of small down there. In the details panel,
I've got a sphere radius, so let me go ahead and
increase the size of this to sort of envelop
the flame there. A little bit hard to
see. There it is. I can also increase
the line thickness here just to make it more prominent and easy to see here in the
editor, and so I shall. And if I want to make this visible while I'm playing
the game, you know, just for testing purposes, I can scroll on down in where it says actor hidden in game. I'm going to uncheck
this, you know, just for the time being
for testing purposes so that I can actually
see this trigger volume. If you're to transition
from one map to another, you probably want to obscure your trigger volume
with some sort of a particle effect or maybe, you know, have your
character walk through a door,
that kind of thing. But for our purposes,
this is going to be fine. Proof of concept. Okay, now, with this trigger
sphere selected, make sure you have it selected, we're going to go into
our level blueprint to add a little bit of
scripting so we can transition out of
our California map to another map when
we overlap this. And you can access your level
blueprint by clicking on this three node icon along the
top, open level blueprint. I've got mine open
along the top. And what I would like to do
is I'm going to hold down the right mouse button and go to a new spot here in
my event graph. This is where we can
add some scripts, some code, if you will. Once again, scroll wheel
will zoom you in and out. Holding down Control and scroll wheel will get
you some extra Zoom. And if I right click
in some empty space, I can add an event for
that trigger sphere. And if I expand this
out, go to collision, I want to do an add on
actor begin overlap. So let me just zoom up on
that so you can see it. In the right click menu, that's the guy that I'm looking
for right there. I want something
to happen when I begin to overlap
this. Right click? Okay, begin overlap. Now, what I want to
do is check to see if the other actor is
my player character. So I'm going to right
click in some empty space. There's a few ways I
could go about this, but I'm going to go with a generic G player
character node. So I just right click
Get player character. Now, with this node, we can compare it against
the other actors. So if I drag out of
the other actor pin right here and I tap
in the equal sign, I'm going to bring
this operator's equal symbol right here. What this allows me to do is
plug one into the top end, one into the bottom end. And essentially what
we're doing here is when we overlap this
trigger volume, it'll output who the
other actor was. If the other actor was
my player character, if they are equal, then I'm going to bring
in a branch node. Go to right click,
bring in a branch node. This guy right here. This takes in a true false condition. We're going to go like so, and our flow is going
to be something overlaps a trigger sphere. It's going to output who
was the other actor, the other entity that overlapped
it. Was that equal to? Is it the player
character? We're finding out if that is true or false. If that is true or false, it's going to be determined by what it outputs right here. And if it is true that
the other actor that overlapped the trigger sphere is a player character, we're
going to do something. We're going to open
up a new level. If it's false, we're
going to do nothing. These are called
execution wires. It makes one node,
execute the next. This is our event node. Event nodes are in red. Okay, now what I'm going
to do is I'm going to right click in some
empty space right here, and I'm going to
type in open level, open level by object reference. This is a function node. It performs some function. In this case, it's going
to open up a new level. Now I'm going to say
if this is true, we're going to open
up a new level and which level would
we like to open? I'm going to type in Mountain. And that's the one that
I want to navigate to my landscape auto material,
Mountain Range example. So I'm going to click
that right there, and that's going to be
our final script setup here in our level blueprint. Now, it's important
to note here that if you want to spawn in at a given spot within your level that you're navigating to that
you're opening up, it's a good idea that
inside of that level, you also add a player start actor one of these
guys right here. Now, before I started
shooting this video, I did ensure that I had one
placed within that level. So I'm going to go
ahead and save here. If I come under this file
menu at the very top, I could save the current level, but I like to get in the
habit of saving all, control, shift, and ***.
We'll do just that. Or you can click on this
from the file Dropdown. And now instead of right
clicking and playing from here, I'm just going to click
on this play button, and that's going to cause
me to spawn in right here. Let's go ahead and
give this a try. Okay, everything is
loading in here. You can see that trigger
sphere inside of the cave. And we just navigate
right to it. There I've transitioned
from one map to the next. And there you have it,
guys. Not a bad day's work. That'll do it all for
this one. We'll see you in the next one.
51. Level Bookmarks: Setting level bookmarks is easy, and it can be a huge timesaver. Step number one is to identify some points of interest around your map that you
want to come back to. Maybe it's an area of
your map that you haven't quite finished yet and you want to do some
further work on. There's a few ways that you
can set level bookmarks, and the first way is the
manual way, the hard way, and that is to come underneath your Viewport options in
the far upper left here, clicking on this hamburger icon. And if you scroll on down, you'll come to a section
labeled bookmarks, where you can set a bookmark, and you can click on any of
these to set a bookmark, that is to mark this point, this camera angle in your level at which
you can fly back to. So how it works is you
can set a level bookmark and it's showing the ten
possible bookmarks that you can set Bookmark zero
through bookmark nine. You could click on
any of these to set a bookmark or using the
hotkey combination, you can set up to ten bookmarks. So Control plus zero
will set bookmark zero. Control plus one will set
bookmark one, et cetera. Now, this is the manual
way of doing it, and it's not the way
that I typically do it. I typically just go the Hot
key route, and so I will. Now, if I want to mark this
point in my level right here, again, the camera
angle matters as well. I'm just holding down
the right mouse button. I'm going to click
Control plus zero. And I can see in
the lower right, it says, save bookmark zero. Let me fly to another
spot around my level. Maybe my waterfall. My waterfall right here. Let me do Control plus seven. You can see I've saved
that bookmark right here, and then let me fly to one
more spot in my level, maybe kind of an overview of my entire
California level here. And for this, I'll do
Control plus eight. Control plus eight, you can see that level
bookmark right there. And now I'll even
full screen this at 11 to fly quickly to
any of those bookmarks, all you got to do is press
the corresponding key. So if I tap the zero key, it'll fly me up to where
I have bookmark zero. If I tap the seven key, it'll fly me up to
my waterfall view. And if I tap number eight, it'll fly me to
bookmark number eight. Now, you can override
any of these. So note that this is my
Control plus eight bookmark. If I zoom up on my
road right down here and maybe I want to
make this my new bookmark, I'm going to do
Control plus eight. Right there, it saves
that as a bookmark. So now if I fly way
far away, like so, and I want to jump quickly
back to that area of my level, all you got to do is tap
that a key and boom. There I am. I highly recommend the use
of level bookmarks, especially when
we're working with gigantic open worlds
such as this. Control plus number key
will set that bookmark. Then after it's set, simply tap that number key to fly
back to that spot. Then I'll do it all
for this one, guys. See you in the next one.
 Greg Wondra, Unreal Authorized Instructor