Transcripts
1. Introduction: I recently heard the quote, the way you talk to
yourself matters. And it really struck
a chord with me. If I'm being honest, I
have grappled with how I talk about myself and
it never felt good. This quote prompted me to
take action to change that, and I'm here to share
those actions with you. Hi, I'm Tammy De Silva, a service designer
behind my business, Loopla from sunny
Brisbane, Australia. I license my artwork
to companies, sell products
featuring my designs. And I'm an educator mentor
and Adobe Express ambassador. Now this class is a
little bit different from my typical
creative offerings, but it has been a
game changer for me, so I knew it was something
I wanted to share. We're going to
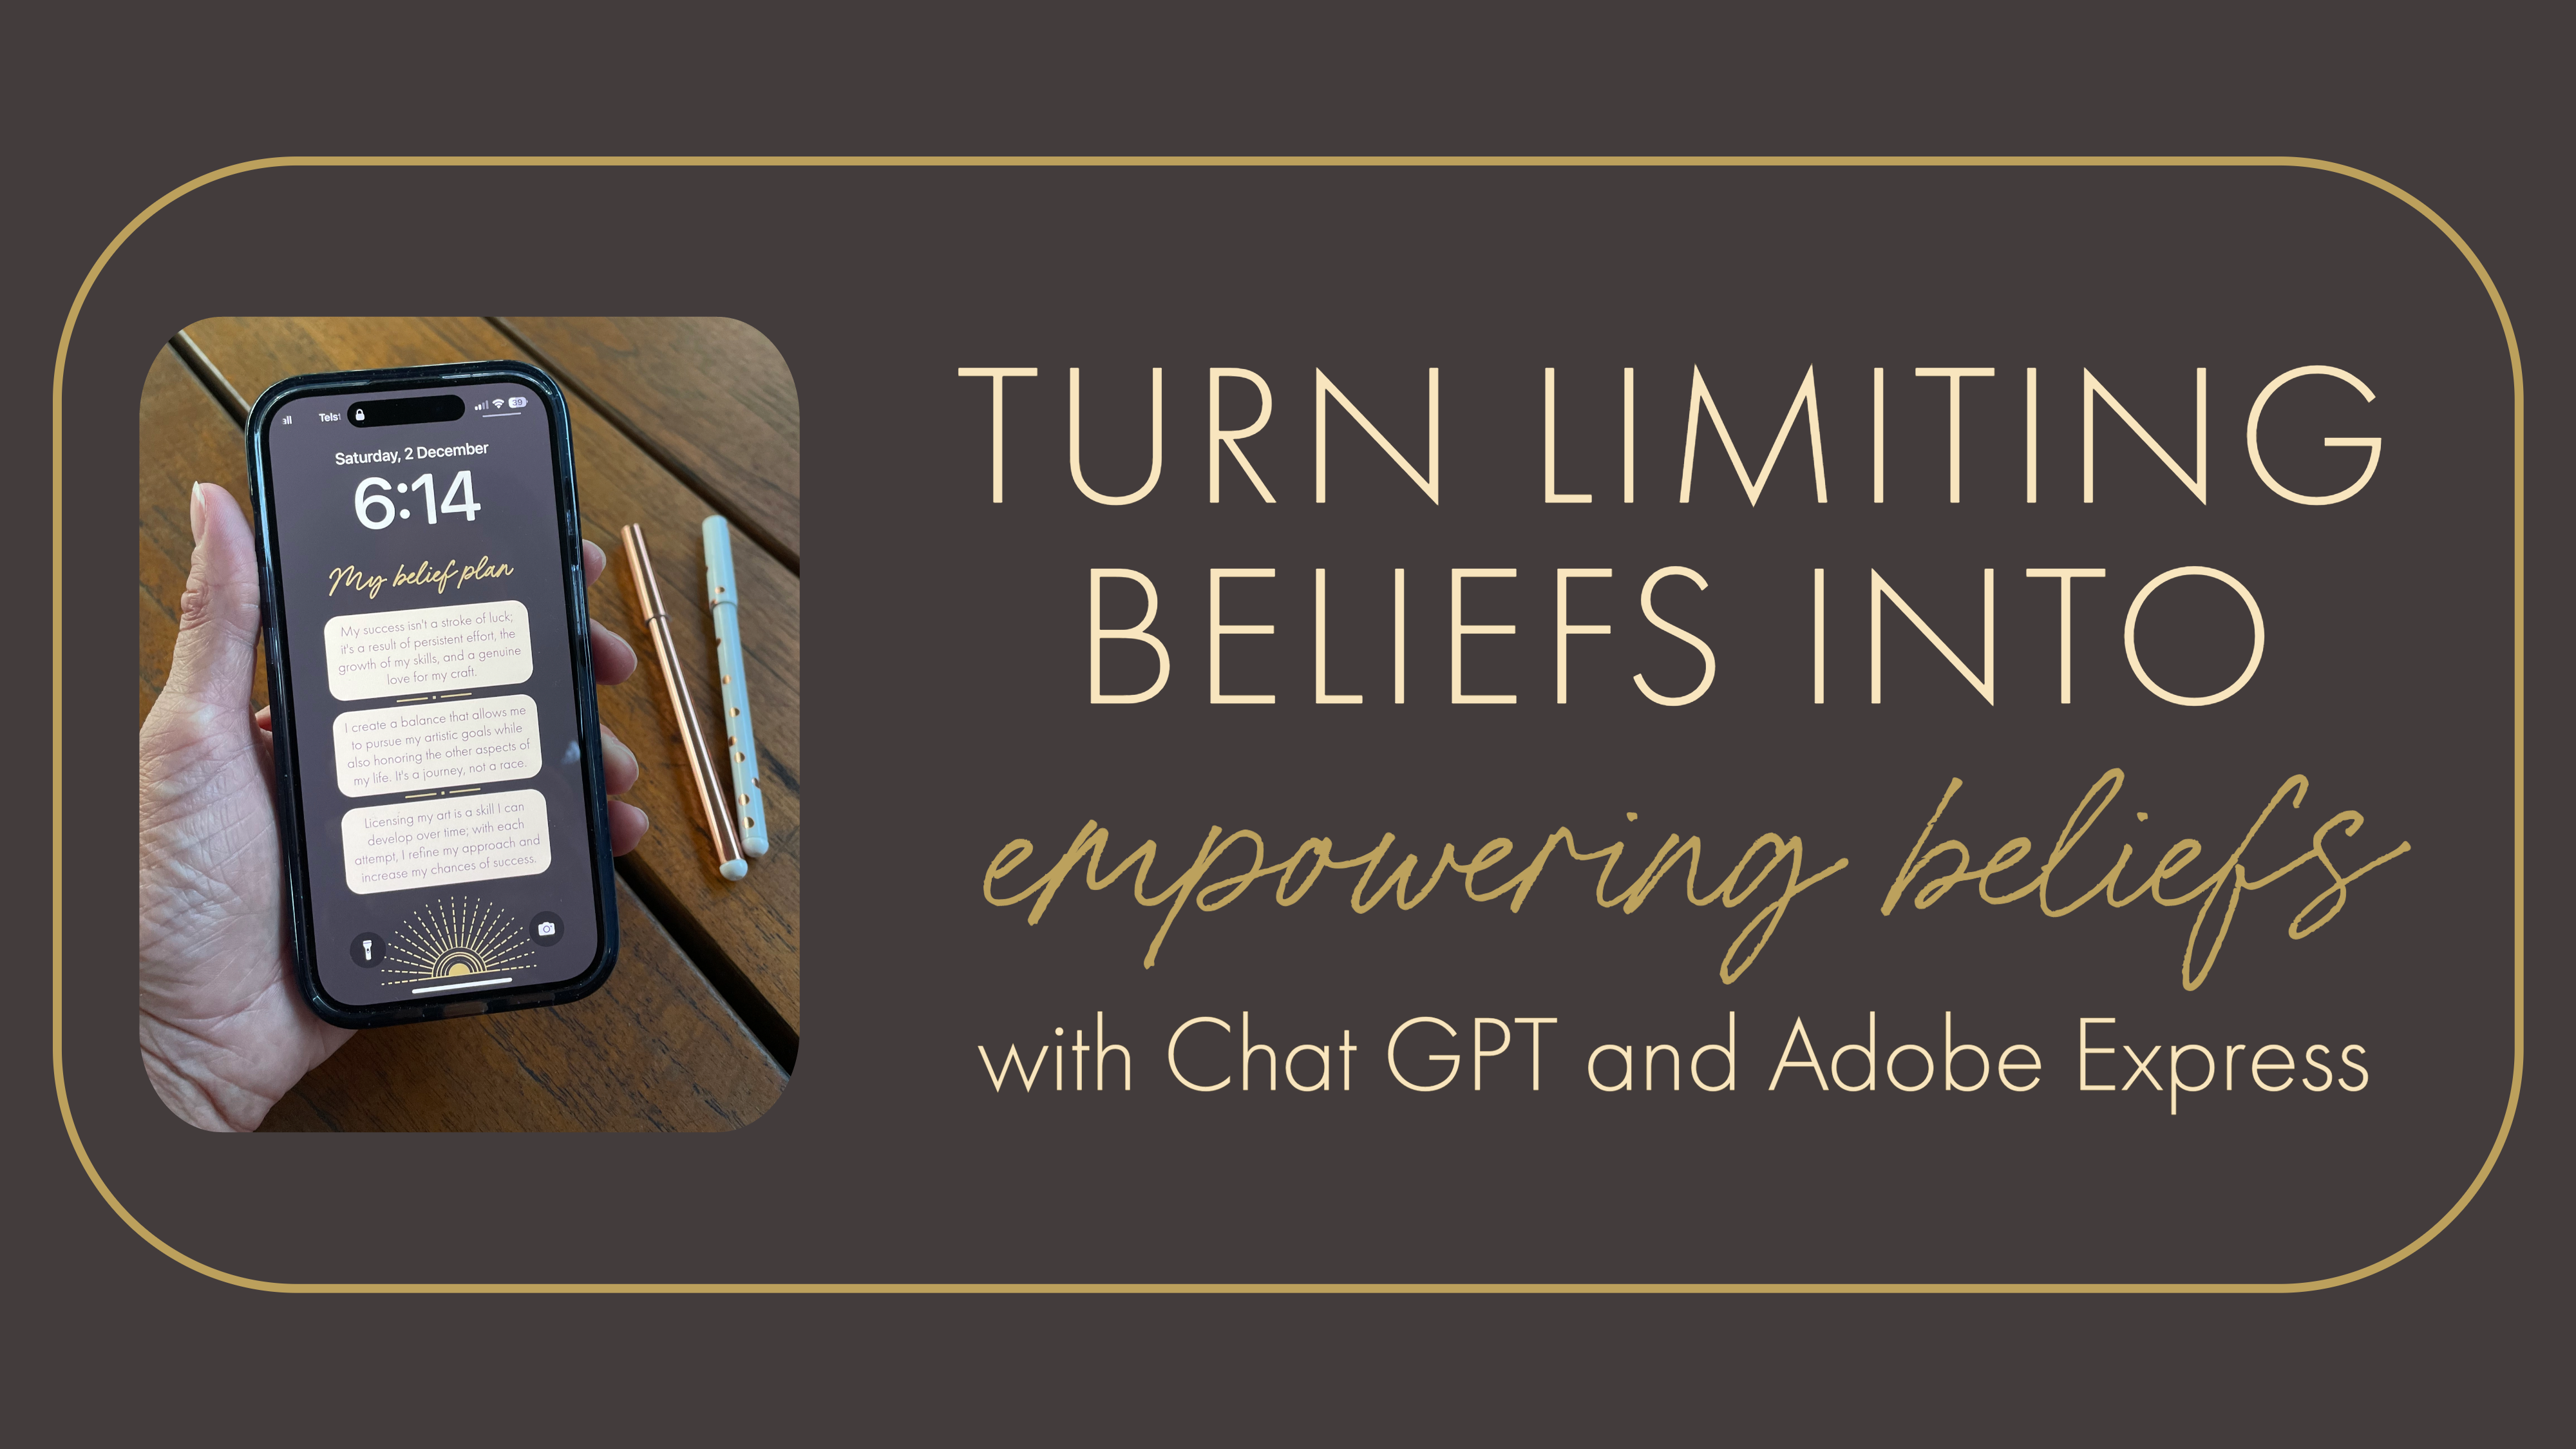
talk about beliefs and creating a belief plan. A belief plan is like
a roadmap to challenge and transform those
negative self talk moments. It's a way to nurture a kinder, more compassionate in a dialogue which aligns with the wisdom
of that quote I shared. I'm going to show you
how easy it is to create a belief plan
using the power of Chat, GPT, and Adobe Express. I'm going to give examples
relating to being an artist, but this class is
applicable to anyone in both a professional
and a personal capacity. All you need is a free
account with Chat, GPT, and Adobe Express.
Let's dive in.
2. Class Project: For the class project, I'm going to guide you through
five lessons on creating your belief plan and taking
action based on that plan. Firstly, we'll understand what a limiting belief is versus
an empowering belief. We'll talk a bit more about
belief plans and then we'll spend some time listing
our limiting beliefs. Taking three of those
limiting beliefs, we'll flip them and create
empowering beliefs. Trust me, I know it's tricky, especially if you've
been holding yourself back so much by your
limiting beliefs, that it's hard to
even consider on the flip side what an
empowering belief could be. This is where the power
of Chat GPT comes in with our newly
formed belief plan. We'll then create a graphic
in Adobe Express to enable us to keep
our belief plan in a visible place
that we see daily, such as our phone lock screen
or on our bedroom wall. We'll then wrap things up by creating an evidence
list where we can record the actions that we take relating to
our belief plan. If you don't have a chat GPT or Adobe Express account
yet, no worries. Your first step is to create a free account for both.
Let's get started.
3. Limiting Beliefs vs Empowering Beliefs: I've got a little story
to share with you first. When I first quit out of
my 20 year IT career and decided that I was going to pursue my own surface
design business, I struggled to tell people
that I was an artist. I was doing the work,
people could see what I was doing and
sharing on social media. But for over a year,
they kept asking me when I was getting
a job, a "real" job. It really annoyed me that people weren't
taking me seriously. And aside from the usual
societal disbelief that you can in fact support
yourself as an artist, I didn't believe myself that
I actually was an artist. And this was clearly
evident to others as well. When I realized this
was what was happening, I slowly started to tell
people that I am an artist. You know what? The
more I did it, the more confident
I was in saying it, and it felt really good. Then of course, I stopped
getting asked that question. This is just one
story that shows how believing in yourself can
make the world of difference. If I had kept listening to
them and my inner voice, I wouldn't be where I am today. All right, let's talk about limiting beliefs versus
empowering beliefs. Limiting beliefs are those sneaky thoughts
that hold us back, like thinking we're
not good enough or that success is
reserved for others. It's when you convince yourself that you can't do something, maybe because of past
experiences or self doubt. It's like building a
little fence around your capabilities and it really
can be quite exhausting. On the flip side, empowering beliefs are the
cheerleaders in our head. They're the thoughts
that lift us up, boost our confidence, and make us feel like we can
conquer anything. Instead of saying, I can't,
I'm not good enough. It's all about saying I can give it a go and
see what happens. A belief plan then, is
the way that we address those limiting
beliefs and replace them with more empowering
and positive ones. This then enables us to take action towards goals
we want to achieve. Your belief plan isn't about slathering on a forced layer of sunshine or sketching out plans that seem like they might
belong in a fantasy novel. It needs to feel genuine to you, even if you're not
quite there yet. Just like when I was starting out in my service
design business. You want to include beliefs that you are still
learning to believe. So that they will
inspire you to take actions towards results you
are wanting to achieve. A belief plan is something you want to read every single day. You want to make those
impairing beliefs your repetitive thoughts, rather than those
that limit you. If you find those limiting
beliefs sneaking back into your thoughts every
now and then, it's okay. What's important is that the impairing beliefs are
in your thoughts the most, you're the boss of your
beliefs after all.
4. Identify Your Limiting Beliefs: All right, let's dive into identifying those limiting
beliefs for your belief plan. Here are some tips
to get you started. Reflect on challenges. Think about areas
in your life where you face challenges or setbacks. What thought held you back? Listen to your inner dialogue. Pay attention to yourself talk What do you tell yourself when faced with a difficult
situation or decision? Explore past criticism. Reflect on past criticisms
or negative feedback. Are there recurring themes or statements that
linger in your mind? Examine areas of
procrastination. Identify tasks or goals
you've been putting off. What thoughts or beliefs are associated with your
procrastination. Journaling. Set aside
dedicated time for journaling. Write freely about your
thoughts, fears, and doubts. This can unearth hidden
limiting beliefs. It's perfectly normal
if you encounter some resistance or discomfort
during this expiration too. It's a sign that
you're uncovering layers that are ready
for transformation. And if it stirs up some
emotions, that's okay. If it feels intense, take breaks and maybe even share your thoughts with a
trusted friend or mentor. Embracing this challenge
is a powerful step towards creating a belief plan that really aligns with you. Remember that you're
navigating your way to positive change and
that's commendable. Once you've got your list, pick the three that pop up
in your thoughts the most. And I'll meet you
in the next lesson.
5. Create Empowering Beliefs with ChatGPT : We're now going to reframe our top three
limiting beliefs into empowering ones using
the power of chat GPT. If you're not familiar
with chat GPT, it's a language model
developed by Open AI. The key feature of chat GPT is its ability to generate human like responses
to text prompts. When using chat GPT, you can think of it like
talking to a friend. If you approach it with
a conversational tone, it tends to response in a more casual and
approachable manner. This can make the
interaction feel a little more natural
and comfortable. Now, just like when
chatting with a friend, the clearer you are with them, the more precise a
response you will get. If you rephrase your question, it may understand what
you're asking even better. The benefits of using chat
GPT for this exercise are it can introduce fresh perspectives that you
might not have considered, as it's been trained using a diverse range
of Internet text. It operates without emotional
bias or attachment. It provides a quick
and efficient way to generate multiple
suggestions. Chat GPT also allows for
an iterative process. If the initial suggestions
don't quite gel with you, you can refine your
prompts and ask for more until you get suggestions
that resonate with you. Before asking chat GPT, you need to think about
what your prompt is, what your tone and language
is that you want it to use, how many suggestions
you want it to give you An example of how to ask chat GPT to give you
an empowering belief for your limiting belief is: Please generate ten empowering beliefs in a positive and
uplifting tone. In response to my
limiting belief, I pitched my artwork
for licensing and got rejections or
no response at all. I'm not good enough
to license my work. The prompt is asking for an empowering belief in response to the provided
limiting belief. The tone you've asked for is in a positive and uplifting manner. You've asked for ten
suggestions so that you can try and find one that
resonates the most with you. If there aren't
any that resonate with you in the provided list, you can ask it to give you ten more or perhaps you like
one of the responses, but the wording isn't
quite right for you yet. You can then ask it to
reword the number for that suggestion and give
you ten examples more. For example, I quite
like number one. Give me ten more
like number one. If you're not liking the tone or language or certain
words it's using, tell it and ask it to reword it. You might like to then
take the best response and reword it further into language
that feels good for you. Once you've done that,
you can even ask Chat GPT what it thinks of your
updated empowering belief. There's some positive confirmation
in what you've chosen. Go ahead and do this process for your three limiting beliefs so that you will then have
three empowering beliefs to use in your belief plan.
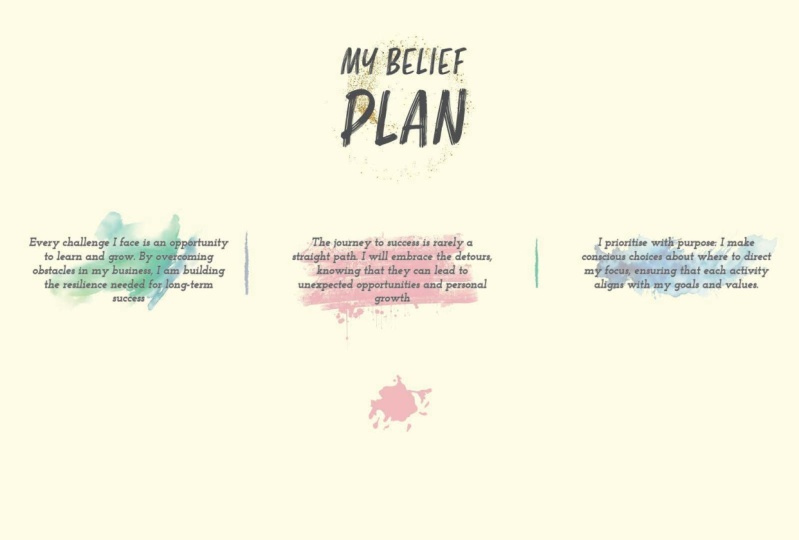
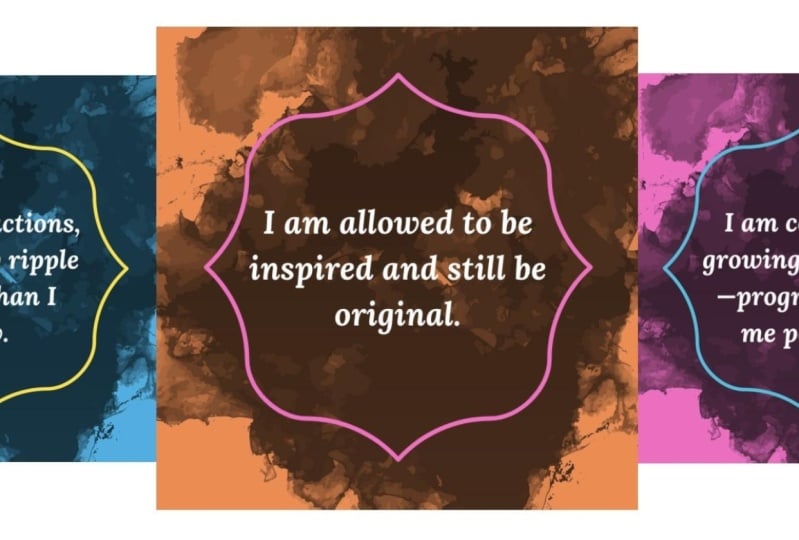
6. Create Your Belief Plan with Adobe Express: Now that we've determined what our three empowering beliefs
are for our belief plan, we're going to create a graphic with them using Adobe Express. This will enable us to
put our belief plan in a visible and accessible place that we can see daily
while looking nice too, of course. This might be on your phone or computer
lock screen, on the wall beside your computer, near your coffee maker,
or on your mirror. If you're not familiar
with Adobe Express, it's a one stop solution for creating professional
looking graphics, videos, and animations with zero design experience required. If you're completely
new to Adobe Express, you might like to
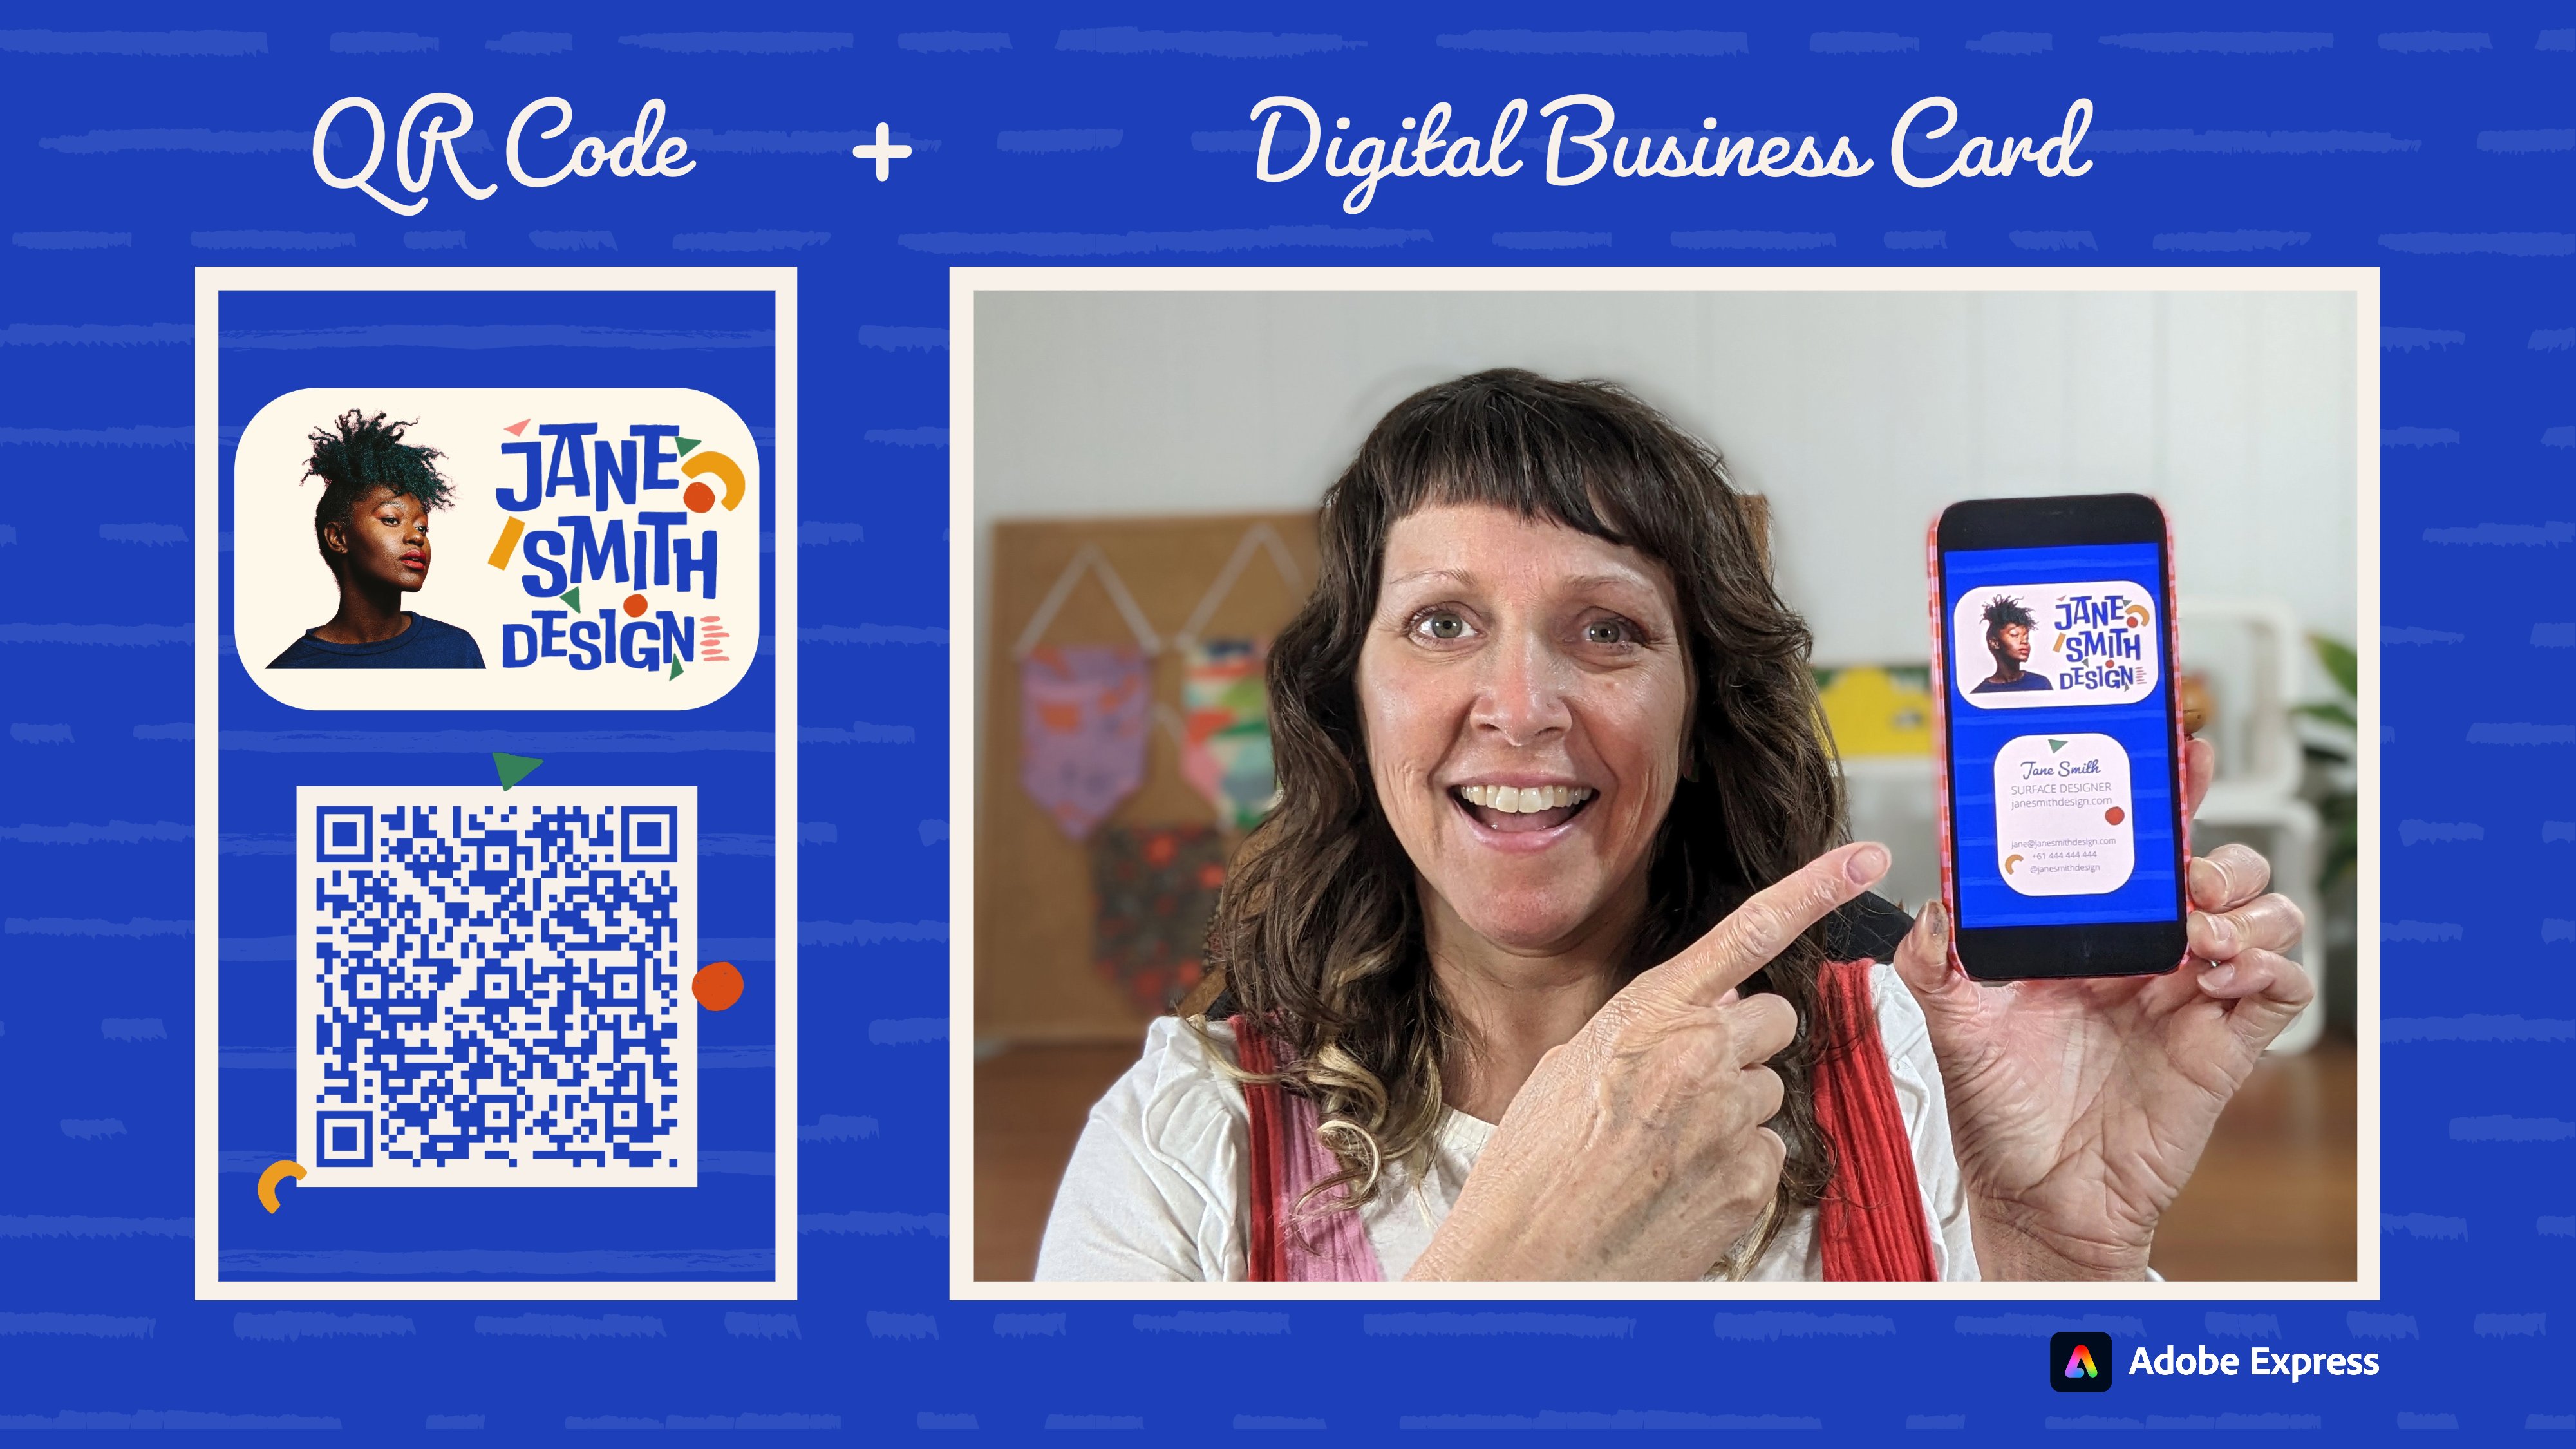
also watch my class. Create a Digital
Business Card with Adobe Express where I spend some more time
going over the basics. Let's start creating
our belief plan. Now I'm using a
premium Adobe Express account as I have a Creative
Cloud subscription. But everything that we'll do can be done with a free plan. Now I want to create my graphic for a phone
lock screen first. And Instagram Story size
is a great general size for phones using the
9/16 aspect ratio. We've got Instagram story here. When you hover over it, you can see you have the option to create from scratch
or browse templates. In this example, I'm going
to create from scratch because it's a fairly compact space
that I'm working with. And I've got a fair
bit of text to put in with my three
empowering beliefs. I want to keep it fairly simple. Before I start doing anything, I'm going to name my
project and the page, I can have multiple
pages within a project. First up, we go to
the top left corner. Click in there and I will name my project Belief
Plan. And that's renamed now. You can see here, I can add a title for each
page that I add in my project. So I'm going to do this one
for my iphone lock screen. I'm going to add a
background color. Now as I have a premium account, I am able to store my color palette for
my brand in a library. If you have the free account. However, you can
manually enter in the hex code for each
swatch that you have, or you can go ahead and pick this basic selection
of swatches here. All right. I'm going
to go ahead and pick this brown background. First up, I want to add a title,
My Belief Plan. On the left hand side here, you can see we've got text. We can just add text
straight up or we can utilize any of
the text templates. Again, I want to keep
it fairly simple. I'm going to just add
some text straight up. My Belief Plan. If
I tap to the side. I now get the text options
panel appearing here. I think I want to make the font something
cursive or handwritten. If we click on more fonts, the bottom here, we can actually see different
categories of fonts. I can look under cursive. What else is in here? We've also got a wedding. We can see some
different ones here. Now, because I'm on
the premium plan, you can see the different
fonts that have the premium icon beside them
versus ones that don't, that are on the free plane. Now, I already know a font that I want to use
that is a free font, Allura, so I can go ahead
and type that in. I also want to change the color to be something
a little softer. I'll move this up to the
top, make it a bit bigger. If I drag out on the bounding
box here in the corner, I can scale that up a bit. Now when I'm moving this around, you can see that this
pink line has appeared. That's showing me that it's centered in the
middle, perfectly there. I can also, while I've
got this selected, go to the top and
click on a line. You can see center is grayed out because it's
already centered. But you can use the alignment options
here to do that as well. Actually, I think I'm
going to change that into more mustard golden color. All right, next I want to add some text for my three
empowering beliefs. Click Add your text. I'm now going to paste my
first Empowering Belief in. If we tap away, we can then change the
font for that again, If I go to more fonts, I'm going to pick
this Cairo font. We expand that, we can see
the different options. And I might try the light option Now
that I've selected that, I think I want that to
be a little bit lighter. Let's go to the
dropdown menu here. I can pick extra light. I also want to make this
quite a bit smaller. Okay, great, there's
our first one. Now I want to add the second and the third
Empowering Beliefs. I'm going to duplicate
in the top left. We've got the duplicate
button in our text panel. Can drag that down. I'm just going to copy my
next second Empowering Belief. I'll select all of that. Paste it in. I'm going
to duplicate that again, select all of that,
and copy my third. Now in order to make
these stand out as three separate pieces of text, I'm going to add a rectangle
behind each belief. To do that, we click on the left hand side panel
and pick elements. Here we've got design assets, backgrounds and
shapes. I want shapes. I'll click a rectangle. Now you can see that
that's put it on over the top of our text on
the right hand side here, we've got our layers panel. This button here expands and
collapses our layers panel. If we want to move a layer, we tap hold and drag it down. I also want to change the color. Now you can see instead of our text panel
on the side here, we've got all the options
for our rectangle shape. I'm going to make
that a lighter color. I don't want to move that one. Let me click on the layer
and I'll drag that. I'm just going to drag out
the shape to nicely fit that. I think I might soften it by
adding some rounded corners again from my shape
panel for my rectangle. In order to make that
a bit more readable, I might change that font to the same as my
background color. I could also come into custom and copy that text code so that I can then apply it to the
other ones afterwards as well. I'm just going to
speed this up while I move around and line the
three Empowering Beliefs. Perfect. Now I think I might add something down the
bottom, a graphic. Maybe I will add a sun that feels I'll go
through my elements, design assets and type in sun and I'll just
scroll through. Okay, I'm going to go with
that one that to the bottom, that a little bit bigger. Again, I'm going to center that there alignment guideline to make sure that's in the center. While this is a similar color, it's not the same golden color that I've used as my title. What I can do because
this is actually an image rather than
a shape or text. I don't have the feel option to change the color in
this image panel here, but there's a
workaround for that. I can go to Effects in Duotone. I'll click on Custom. I'll click on Shadows. If I click on this Eye
Dropper tool again, I can go over to my font and
pick that color out there. There's my hex code. I'm also going to do the
same for the highlights. Now you can see that's slightly brighter and it's the
same color as our title. Now I think I also want to separate
these a little bit more. Maybe adding a line in between them will help just
separate them more. If I head over back to elements, go to shapes and I'll search
for line one is quite good. I'm going to move
that in the middle. I need to distribute the spacing here and I might make that
same golden mustard color. I should still have
that in my, Yes, can paste that color in. You can see here I've
got border thickness. I can also change the type
of line that it is as well. Reduce that down a little bit. Awesome. So there we have a graphic for our
phone lock screen. Something to keep in mind, however, is on our
phone lock screen, we often have a widget such as for the date and the time we
need to make space for that. At the top, I'm going
to duplicate this. If I head over to the top right, I'll click Add
duplicate, Iphone phone lock, screen spaced. I'll rename that page. I'm going to select
all of my objects here and I'm just going
to scale all of it down. I'll center it by just
leaving the space. It then just gives us some
options and we can move it around once we bring
it onto our phone. Next up, I'm also going
to duplicate this to create another version for
my IMac Screen Desktop. Will go ahead a duplicate. First up, I want
to go to Resize. Now I know that my
27 inch IMac screen, the dimensions are
2,560 for the width, and the height is 1,440 not in proportion
because I want to change it from a portrait
to landscape size. A quick resize. Now it's a matter of moving our elements around to fit this larger space. I need to rename this
page to be for IMac Now, we've really easily
changed our first graphic. We can scroll back and look
at the different pages. We created this one first we created a modified version
allowing for a widget. And then I've created another
version for my IMac Desktop. Wasn't that easy to create a quick graphic
in Adobe Express. When you're ready, you can
click the download button, download the selected
pages or all the pages, and put it on your devices or print it out wherever
you'd like to put it. Make time to read it every
day or more often as needed. You might like to do this at the same time that you do
something else every day, like drinking a cup of coffee
or brushing your teeth. This will make it easier to
remember to do it each day. Just like when you
repetitively tell yourself limiting thoughts and it starts to think it's true, you're now on the way to repetitively telling
your brain these empowering thoughts and it will also start to think those
are true now instead.
7. Create an Evidence List: The next step is to put your
belief plan into action. No matter how well written
your belief plan is, it's only effective if it
inspires you to take action. Creating and maintaining
an evidence list is a powerful complement
to your belief plan. The more evidence you
have for a belief, the more strongly
you will believe it. It's also a great reminder of your capabilities
and strengths. Just like when I first shyly started telling people
I was an artist, at first I didn't
quite believe it. The more I said it
to people and the more work I did in
growing my business, the more I believed it, the more others did too. Now, an evidence list is a collection of
specific instances that serve as proof or validation of the empowering
beliefs that you hold. It's a tangible record of
your successes, achievements, and positive experiences that reinforce your belief system. The benefits of having
an evidence list are: It boosts confidence. Reviewing your past successes remind you of your capabilities, boost your confidence and reinforces a
positive self image. Counteracts doubts. When
self doubt creeps in, having a list of
concrete evidence counteracts those
doubts and challenges providing a reality check.
Celebrate your wins. Your evidence list becomes a
source of celebrating wins. Celebrating successes,
even the small ones, contribute to a positive mindset and fuels motivation
for future actions. Reflection on growth, it becomes a great reflective tool
for measuring your growth, showcasing the
transformation brought about by your belief plan. Now, when creating
your evidence list, be sure to specify the
details such as the project, the skills you use, any
recognition received, or personal growth experience. It's also important to update it regularly. As you
achieve new milestones, get it into the habit
of updating your list. Some example entries. I successfully licensed my
artwork for a product line. I collaborated
with a company and my designs were featured
in their product range. I received positive
customer reviews and increased exposure. Personal triumph. I
overcame self doubt, hosted my own online workshop. Despite my initial hesitations, I organized and conducted
an online workshop, and the participants
provided positive feedback. It boosted my confidence
in teaching. Or a creative milestone completed a challenging project
ahead of schedule, managed to finish the project
a week before the deadline, showcasing and effective
time management and creative efficiency. Now it's good to
have a dedicated place to write them down, Whether that be in a journal, in your planner, or even in
the notes app in your phone.
8. Final Thoughts: Well done for taking
a positive step to believing in yourself
and driving change. The belief plan that
you created serves as a roadmap for a brighter
and more empowering future. It's important to remember
to practice self compassion. Be kind and patient with yourself throughout
this process. Changing deep seated
beliefs takes time and effort as you continue
your journey. Remember that belief plans
are dynamic and adaptable. If you have any questions
or need further guidance, don't hesitate to reach out. In the discussion section. I'm here to help
and support you. If you feel comfortable, feel free to share
your belief plan in the project gallery. By putting your belief
plan out into the world. You're not only celebrating your commitment to
positive change, but also creating a space
for shared inspiration. Now before we wrap up, I would love it if you could leave a review for this class. Your feedback will help
me improve and it really fuels my passion to bring you
more classes in the future. Let's stay connected. Follow me to get updates on new classes. Or sign up to my
newsletter to get tips and follow my
creative adventures. Plus don't forget to
explore my other classes. Finally, let's make
a pack together. A pack to be gentler with
ourselves to replace self criticism with
self compassion. I'll see you next time.
9. Need more?: Hey, friends, are you
feeling stuck or need some fresh insights to tackle a challenge in your
creative business? I'm offering one on one
sessions through Skillshare. Why not join me for
a focused call where we'll dive deep into
your specific challenge. I have experience
in art licensing, director customer sales, and wholesale, markets
or craft fairs depending on where you're based, in person and online
workshops and more. Or maybe you need technical
assistance with creating repeat patterns in Adobe
Illustrator or Procreate. We'll work together to break
down your challenge and brainstorm practical solutions
tailored to your needs. No fluff, just
actionable advise. To book in, you'll find the link below or head over
to my profile page. I look forward to
working with you soon.
 Tammy De Zilva, Surface Designer | Educator | Mentor