Transcripts
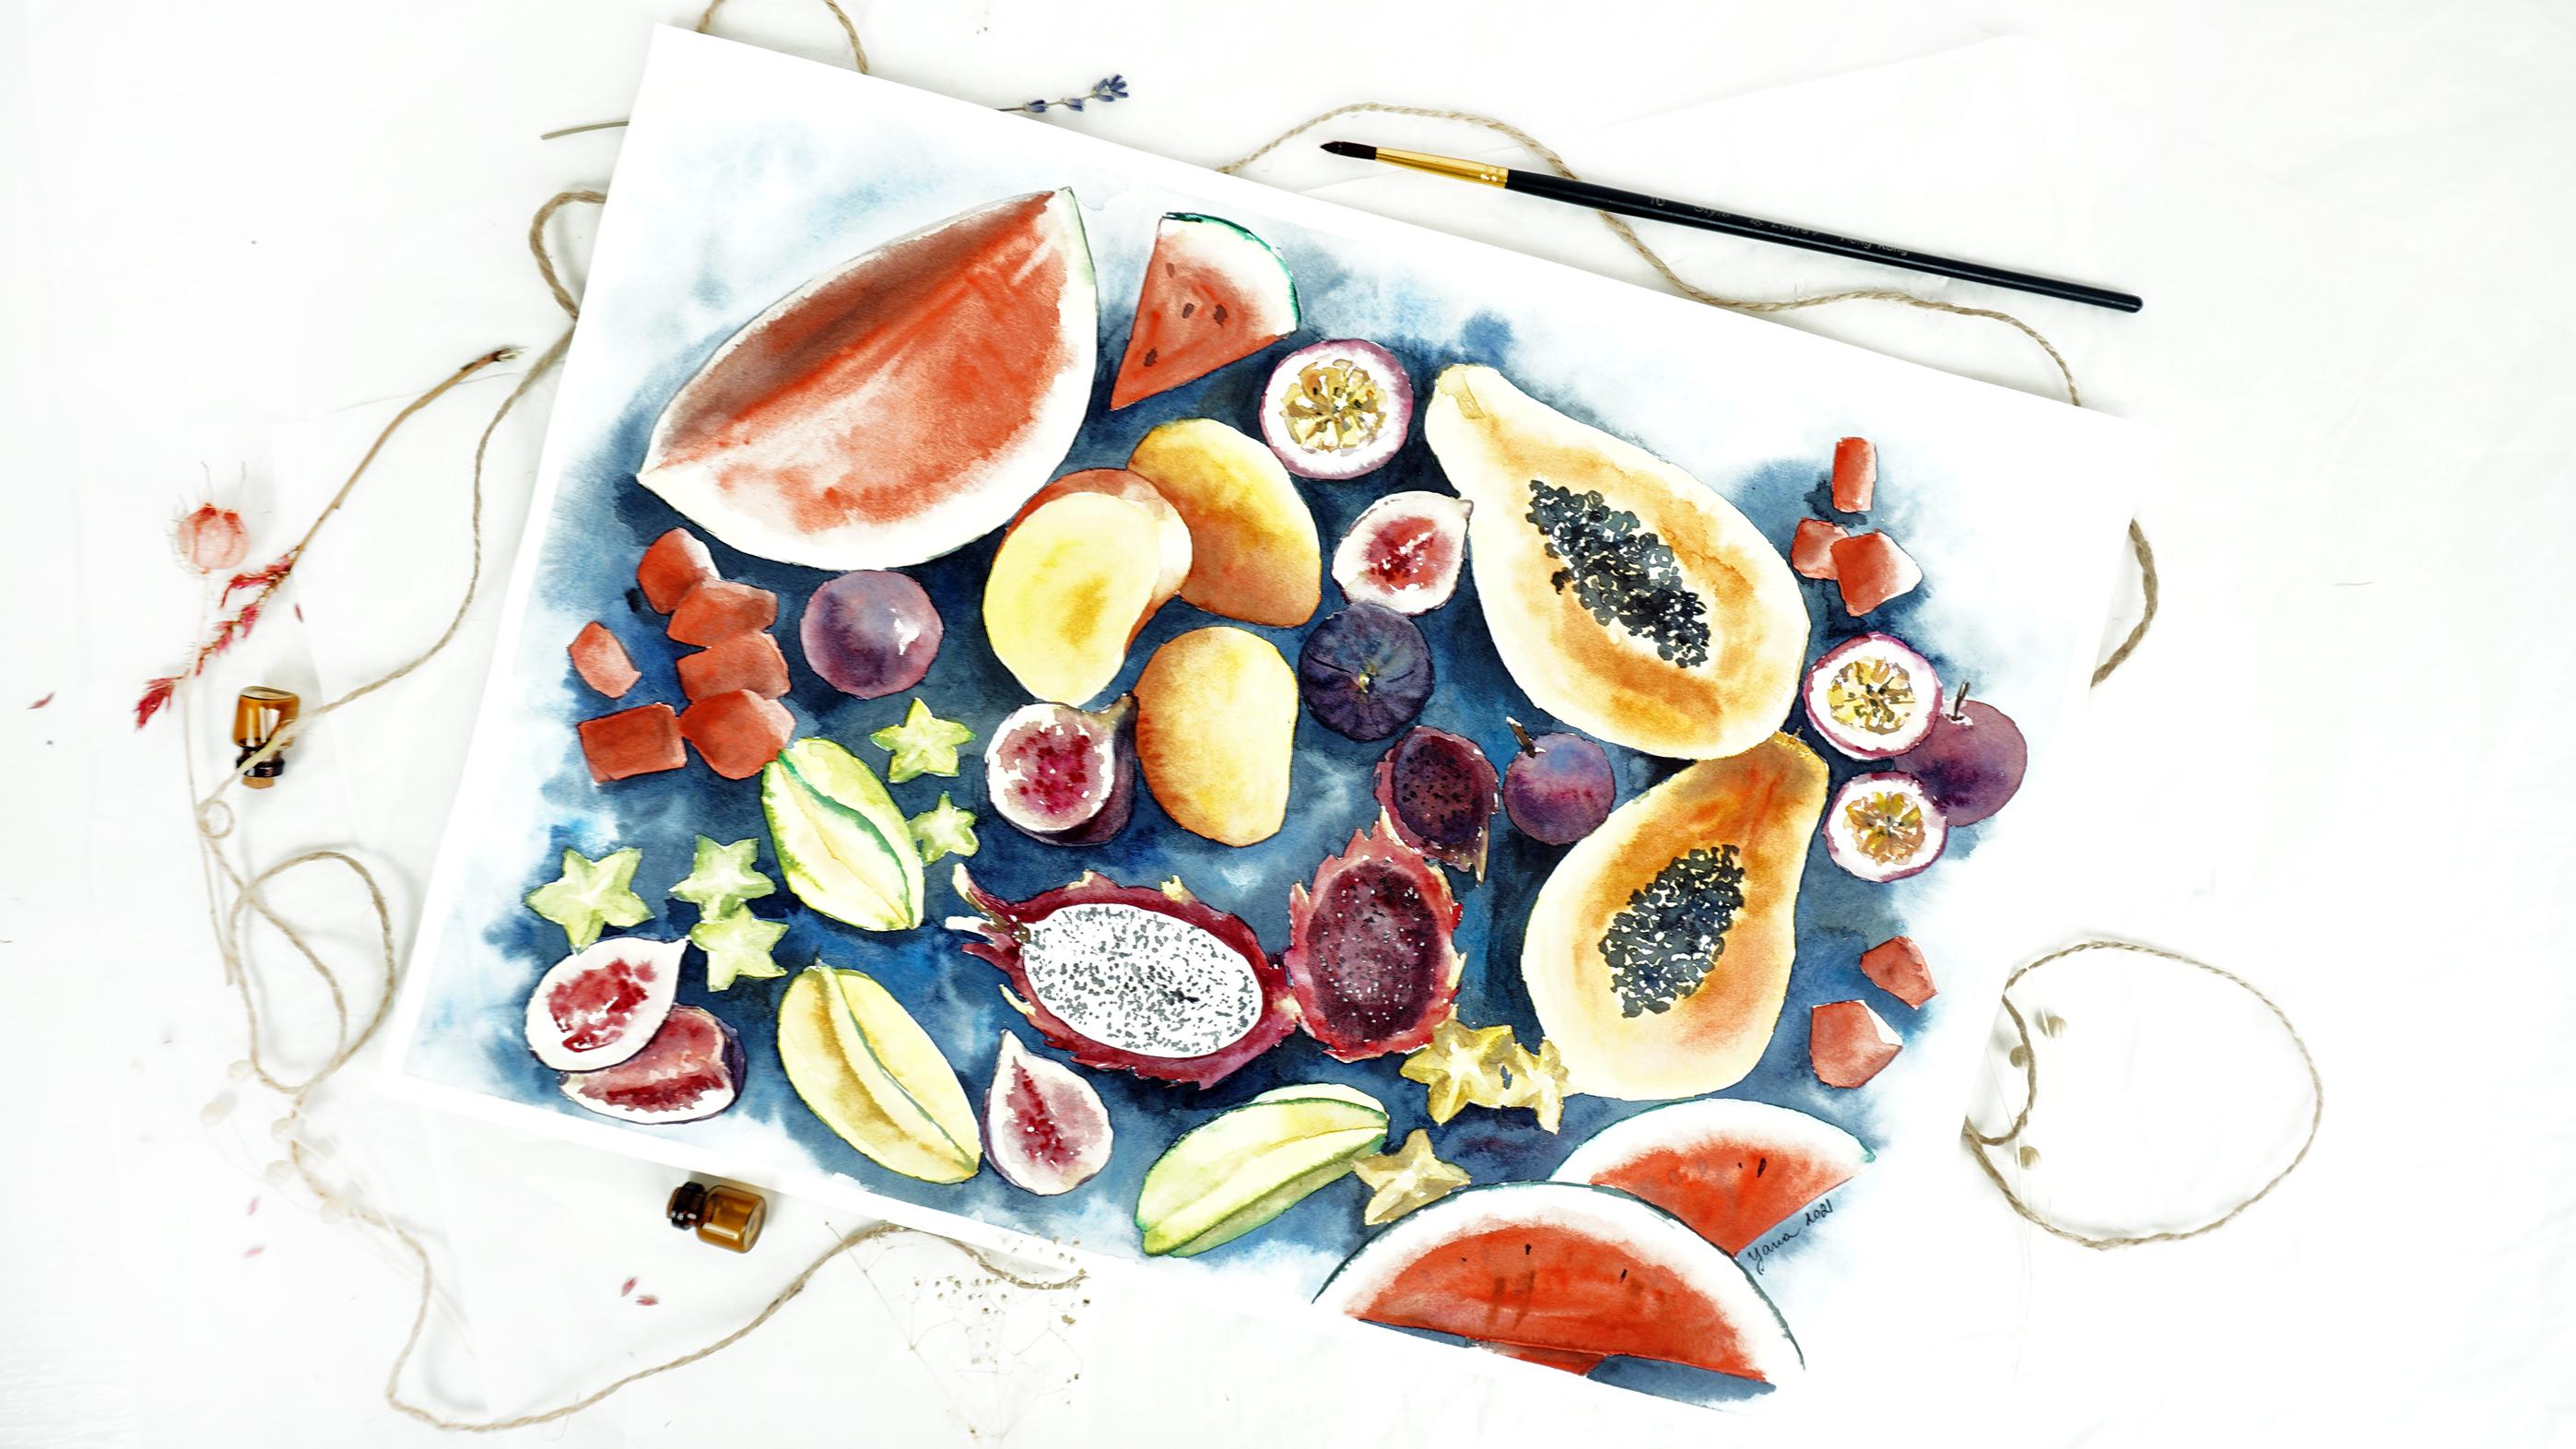
1. Painting a Masterpiece. Part 2: Hello, hello. This is part two
of the masterpiece course, where we will finish working on one large, fruity artwork. If you're just
joining us right now, make sure to start
from the beginning. You can find part one in my course library in tropical
fruits Series section. In this course we will
paint the Romanian fruits, fill out spaces with
slices of fruits and all the necessary details to make them look yummy
and realistic. And we'll create a
nice background to unite all the flows into
one balanced artwork. It is a very big painting, pretty unusual for
Skillshare courses, but I'm sure that
creating it all by herself will bring you a special feeling
of accomplishment. And following the courses of the tropical forest series in
a chronological order will provide you with all
the knowledge you need to paint this
masterpiece with no stress. The beauty of this course
is that you create a unique piece with the
composition of your own choosing, with your own vision and style. Instead of just copying
a photo reference, don't wait any longer. Let's finish this
masterpiece together.
2. 21. Painting a yellow star fruit: So this little guy will
be a little warmer. I'll use cadmium red, cadmium yellow for this one, and start as well
from the left side. Then I'll add a little
bit of lemon yellow here. And the edge. And right away drop
some darker tone. Kind of orange. But I think it's leaning towards brown a bit too
much there than I wanted. So I can compensate
with cadmium yellow. And when it will
get dry eyes still going to be much
lighter than it is now. So I'm not really
worried about it. Then. Same approach. This side on the
right that's further away so the colors don't
bleed into each other. First with cadmium yellow
than with lemon yellow. So the edge of my star
fruit is kinda colder. And the main part is warmer, warm, yellow than some
orangey tone over here. And we should leave it to rest. And meanwhile, I can
paint some of the stores. For example, these guys that are hiding behind this stars, I will be doing with
the warm yellow and with darker tone, orange mixed with blue. I will create the shadows same way as we did
with the other Stars, but the other stars for colder, mainly based on lemon, yellow lenient towards green and here they are
leaning towards kind of brown tone and are
slightly different. Those star that is
kind of under papaya, they have more shadow. So we add a little darker
tone to show this shadow. And you can see that I pay even less attention
into painting the textures and
details of those stars. I'm following the plan
that I did before. But it doesn't mean that I can't move away from it and add some of the pieces and slices that I didn't
draw initially. So if you feel like you want to fill up more space
with the detail, I mean, the smaller pieces. You can don't feel trapped into your own kind of
plan of the fruits. Just listen to yourself. If you feel like there
should be more of, for example, stars, the star
fruit, you can add them. If you feel like everything
is going fine and there's no need for
more. That's fine too. Just remember that whatever
sketch we did before is not a final decision until
you actually painted it. So it's always up for a change, improvement and
well, improvisation. And while we were talking this stuff for
that dry and I can finish up this middle part
here with nice yellow color. Gonna feel like this. Orange got disappeared. Tweet to light
after it dried up. So I add another
layer right away. And also into my
freshly painted yellow, I also added this
kind of orangey slashed brownish
tone right away. And I am taking green, emerald green in my case. And painting the skin, which I totally forgot to do
in my first actually part. So sorry about that. Here we go. Here I
still can add the skin. It's not going to blend
in into the fruit, which is fine and
just have to be that I can add a little
tail here on top. And also, I feel like
some separation between the tones is needed
here in between. So add tiny, tiny stroke of kind of brownish,
orangey tone. Let it blend softly and leave it to dry.
3. 22. The third star fruit: Let's finish up the
third star fruit over here in the bottom. So I apply cold first. Then I add or per,
warmer yellow here. And as we go down, it's leaning even a
bit towards green. So I'll take my oral in green. Here in the top where it
separates one side from another. I'll add a little
bit of orangey tone, just like we did with
the other parts. I take green, added right
away so it blends smoothly. Then I will make it darker, blending it with black. But just a little bit. So there's still more green
than black in my mix. Here we go, the skin is done. Meanwhile, I want to
move towards painting. This side on the far right. So skipping one side
and in the middle. This one is going to have more of a green tone in
it and also kind of grayish and a bit darker. So like the fruit
isn't a shadow. Now we take green paint the
skin right away so it blends. The paint is literally
doing all the job for us. I took a little bit
of brown on my brush, which already has green. So now I have nice dark tone. And I created the shadow because the fruit is located the way that is kind of
lying down on the side. And this side is this one. And it's darker because naturally the other size of the fruit or
custom shadow on it. So we need to make it
a little bit darker. That's precisely
what I did here. We could have started
painting this one away, the one that's kinda behind. But I'm worried that
because we just painted the green line is going to blend into
a yellow line. So I think I might skip it
and wait until it gets dry and clarify some of the textures
of our slices over here. With the orange tone. I'll just point out some of the separations
between those puffs. Oh, I was calling
it the petals in our course devoted
to start fruit. So petal or this star,
subsequent slides. I separate them with
a bit dark orange. Don't. While I was busy with that, this start fruit get
more dry, dryer. And I can add yellow part here above our already painted side. Still very careful to
not touch green line. And I'll really want
it to bleed into my yellow. And here we go. Then I take a tiny bit of
green and add the edge of the skin just to make it logical and connect those two parts. And the final one would
be the one in the middle. I'll take lemon and start from bottom
up, from the bottom. Keep going up. Switching
to warm cadmium yellow. And all the way down here, we'll add already in green. And with the final green touch, I'm adding the edge. I can even separate this central side with a darker green to
make it look like it's really pointing at us. So now we have this
visual effect of this side really looking at us. Okay, So current boys
start fruits are ready. And what we can do
now is to, well, we could have finished
those two tiny halves of dragon fruits over here, and then move on to painting
our biggest watermelon part.
4. 23. Tiny dragon fruit: But already familiar approach. I will paint this
tiny dragon fruit. I'll start with
outlining the skin. Was nice and bright pink color. From switching from
magenta to mother, read back to magenta. Here as well, I can add a
drop of yellow and I know before I was using
another brush, but I feel like this is
such a tiny element, tiny fruit that I'll
spend more time switching brushes. Right now. Just wash my brush and move on. Plus this yellow, I really
only have it on the top. I know since I'm painting
on a very tiny fruit, actually take tiny fruit. I will use the wet on dry technique to
paint the middle part. And it's also a
variety of tones, so I'm adding different
tone as I go from blue to red to pink to
think in a way. Agenda for example. And then some other colors
even maybe read. Why not? When those will get dry, they will give us a nice
interesting sub tones here and they're showing off. And that will look
nice and neutral. So that's why I'm not
worried to use a lot of different tones and colors
in here, including red. And I'll let it dry. Also decided to paint only one tiny half of the
dragon fruit in here. I'll paint fig instead. Because I kinda,
as I was painting, I realized that in my sketch, the fixed turn out
to be way too small. If you look at star fruit, It's not that much
bigger than a thick. So the fig would be
somewhere similar size. I drew them way too small. So now that the painting
comes together in color, I kinda feel that would be
weird to make fixed so tiny. So I will remove my Romanian sketch lines of the fixed and just
paint them bigger. And you shouldn't
be afraid to make adjustments to your
painting. It's fine. Just go with the flow,
trust your heart, and improve your
painting as you do it.
5. 24. The main watermelon: Painting is super big. Watermelon here on the
left will be probably the most interesting challenge
for this masterpiece. And I will take a
bigger brush, this one, and apply clean water on my whole space of
this watermelon. Then with the smaller brush, I'll take very, very
light transparent. I'm lemon, just like we did before
and nothing has changed. Very transparent, very light. Just drop it there, let it sink. And at the same time, I'll take even smaller brush and take a bit of orange and green and drop
it here at the edge. Just let it sink and bleed into this first yellow paint that we already applied
just before. Now. Well, first I'll add some green, actual green here on top. Let it sink. First. I'd like to start from
this side that's darker. So to make dark red, I need to add green to my red. As we already know, it
will achieve darker tone. Very carefully. I am painting this side
that is in shadow. I'm still balanced in between
dark red and pure red. Then we have this
white area that's supposed to be wider because it's inner shadow
is kind of gray. So I painted gray and gray we can achieve by mixing three
primary colors, right? So when I apply this gray, immediately I am lifting pigment with semi wet brush
and even tissue. This way achieving this kind of white skin part
of the watermelon. But it's not shining white, like it's going to be here. And more of gray because
it's in the shadow. Now. Here we are moving towards very nice, bright red color. We have to work on the very
distinctive line in-between. Shadow, read and
highlight it red. So left side of watermelon and right
side of the watermelon. I am trying to make
the edge software, unlike crowd got sharp. Alright, my paper
is getting dry. The bigger brush I can
speed up the process. So remember that
as calls we go to our white part is more careful way I need to be to not cover it accidentally. It's quite difficult
to remove cadmium red sound pretty opaque color. What I'm going to do now, I will play with this edge because I feel like it's too perfectly straight. So I will use a semi wet brush. Dilute the edge. You don't pick up the paint
if needed with the tissue. At the same time intensify
colors in certain areas. Again, trying to
catch my red paint. Moving into white area. And here should be very clear. Separation from, again, very nice bright red
that is in the sun, highlighted in red,
that inner shadow, which will work on in a minute. So remember we mix a darker tone of red by and in green to it. So let's return to this
darker tone and intensified. Now that the paper
is getting dry. The strokes are also a bit
more noticeable and dry. And yet I'm trying to not go into this area
of white dish skin, so I keep it gray as
it is, original gray. And I'm only make
Qin red part darker. My paper is all buckled because it has
a lot of water in it. So on the video it might look like my line
is not straight. Like it goes like this. And hopefully it's not. It's just a visual illusion
because papers, they wavy. So make sure your
line is straight. And also make those lines that connect red to white or gray. In our case, on the left side. Software. Once more, I will try to intensify
read on our Sunnyside. And also an interesting
detail would be to take off flood brush and create this texture just like we
see it on the reference. By lifting some of the pigment, create a nice texture
of the watermelon. Alright, let's let
our watermelon to dry and see if we need
to add. Anything else. After. The only part that I would
actually add right now would be green skin. But you're very
careful and very thin. And also not everywhere, so little bit here. When they're kind of a broken line. But very careful.
6. 25. The watermelon pieces: Since we are in watermelon mood, I would like to continue and
paint a slice over here, and they chopped pieces
of watermelon over here. So here we really work
with very light red, dark red and just concentrated
red. And that's it. We don't use any
other color is just read to play with
all the slices. So I will do
concentrated red color. Then add some darker tone and get very light and
transparent color over here, which is literally just less concentrated
and more watery. Red, which you can lift
with your brush or even tissue. And move on. Painting those little cubes. You can start with a
very transparent layer, then add more
concentrated layer of red and finish up with a shadow. Or you can start with normal concentrated
color and then just left with the tissue, the part that you
want to lighten up. It's really up to you
what type of approach you take to paint in this
******. The song. It's not really a slice more
like squares, rectangles. All those watercolor
tubes are going to bleed into each other because I literally
paint one after another. And I kinda do it on purpose because I don't
really want to spend too much time on waiting
for each bar to get dry and then work on a perfect
line of shadow and light. Here, I'm more relaxed and they just allow
colors to blend it, the one to see
where it leads me. And later on, I can
always come back and add some of the
shadows or textures. I'll first apply clean water than some very transparent
and lemon yellow. Then our orally in green, just let us sink. Not too far though, still want to keep
whiteness. Then. Green skin. And the final batch
will be dark green. Here, maybe here as well. And now we can paint
some of the red. Usual. Drop it in an area
where you had water. It's going to blend
and mix all by itself, creates soft
transitions and edges. At this point, I'll carefully
move the edge over here. Now, let's define the color. Maybe add in some of the
textures when I'm darker tone. Just to show this
interesting texture inside. Well, this one, we
can leave it to dry.
7. 26. The remaining watermelon pieces: I sketch also had
a few slices of watermelon over here,
like cubes, watermelon. So I'm going to paint them. I don't think I will
actually paint all of the cubes that I
planned on the sketch. Want to leave more room for fixed because as we figured out, they should be bigger
than I planned for. So I need to preserve
some space for them. So being just a couple
three cubes of watermelons. Then while those kind of
guys are getting dry, I will return to my
initial cubes over here. Were candles in some shadows. And first, first of all, I would like to intensify
the color because red kind of lost its vibrancy. Just literally use a
layering technique, adding more concentrated
layers of red on our cubes. And work in shadows. We can as well. And something that reminds
us of seeds over here. Let it be and do the
same with our slices. Work all the sizes, our cubes. That already got dry so we
can intensify the color. And what's left to do
here is add darker, seed, a bit more clear.
8. 27. Starting with figs: A bigger part of our
masterpiece artwork is done. And we have painted all the biggest fruits and
even some of the small ones. So now it's time to fill up the remaining space with
the smaller fruits, which are passion fruit and fig. So as I mentioned before, I realized that my sketch
of FIG was too small. So I'm going to improvise and just drop some of the fixed here and they're not the same, not in the same places and sizes as I drew it in the first place. And I encourage you
to not be afraid of changing your
plan on the spot. It's not it's not a big deal. Just go for it if
you think it's going to improve your painting. I think blue mixed
with something. So I get some violet color
and I will paint a nice big, juicy fig over here. The secret to paint in a FIG is to switch between
tones and colors, right in the process. So you start with, let's say blue and then you
add a little bit of pink. And then you switch
to blue again. When the paper will dry. In the end, you will see how old those tones
shine through. And that's really nice
feeling to have to see all those subdomains showing up later when the
paper gets dry. This is also what
makes the skin of the fig look more
natural because it has so many sub-domains in it. Then right in the center, I'll drop a little bit
of cadmium yellow. Just let it be there. Maybe not spread that much, but you've got to
correct it a little. And yes, that's just the
beginning for our fig. And in the center, I'll take coral and
just let it flow. Also add some drops of pink, mother red, pink month
moderate roles. In my case. That is essentially
just pink color. Maybe even some
drops of cadmium. Interesting feel. And I'll just allow the color to blend and move the
way it wants to move. And now also evaluate
how far it goes to eat my white or yellowish skin
that I just painted before. So it took quite a lot. That means that I
will push my skin, the dark violet skin away. And I'll paint this outline slightly away from
the yellow part that I just marked before. And my FIG is kind of
touching the bio here. That's fine. Careful and left
excessive pigment. And yeah, we have our I will have maybe I'll make the
separation a little more. The slide. It's also very close to the bigger piece,
the whole fruit. So I'll take the shadow here just a little bit to
show that it's behind. Make it look a bit more natural. And here we go. They only last thing
I would like to add is a very dark
blue or violet. Maybe with a touch of black
and show texture of the fig. It's a little bit in banded. Each line is little bended. Move in towards the center. The center is the
top of our fruit. And since we look at this figure from 90 degree
right from the top, That's why we see this tip of the fig flat for us visually. Alright, texture of
the thing is done. And I might just add a
slightly darker tone here just to show the texture
of this half. And that's it. I'm not
going to come back to this painting because this
part of the painting, because I think it's
perfectly fine. And we can move on. Painting fixed somewhere
else of this masterpiece.
9. 28. Adding another fig: I can locate another
50k over here. I can choose the one
from the reference that is standard like this. It's leaning against
another fig. And I was thinking
maybe I can put it leaning against the mango. And the trick to be due, this will be to paint this half little bit
and the angle like this. And because the skin of the
is darker than the mango, we can cover the mango
little bit with the skin. And because the color is darker, it will cover mango and
look nice and neutral. So how about we
start the same way from painting the
skin with them. The light part of the
skin with the yellow. It's very smooth, very light. Those lines are almost
invisible, so don't worry, don't try to make them bright and they're not as bright as our current
voice, for example. The tip is leaning
towards green. So I drop a little bit
of oral in green here. Carefully. I'll start
painting the skin. Here. The skin will get
darker so I can cover our Mango a little bit to make it look like
fig is leaning on it. Not a big fan of the colors
leaking into my yellow part. I would prefer to keep it clean. So I remove this part
with the tissue. Even has brownish kind of tip. So I show it here. Now, leave it to dry. And meanwhile, I'll
work on the center using coral mixed
with some think. The edge, I'll make
it smoother with a semi wet brush. Smooth it out. Then I add slightly darker tone. Mark in the center. And the same, I want to remove this edge so with
slightly wet brush, I'm diluting this hard edge. And with more concentrated pink, I add more into the center. Then I can go back to this part, makes sure that mango
is not shining through my dark skin of the feet. Maybe I'll need to correct
the shape a little bit and add some extra pink
tone into the skin. And carefully paint around to
show how far the skin goes. Something like this doesn't
really have a perfect shape of the thing that I
would prefer to have, but that will do as well. Just want to eat densifying
the center over here. To make it more interesting. Some very concentrated spots here and there and
just let them bleed. And we can move on
to the next fruit.
10. 29. Couple of figs in the corner: I think another good spot to
paint figs would be here. And I can paint a
couple of slices, hubs. And I can locate them here in between the
stars of the star fruit. So the same logic first, I create a frame for our
FIG since I'm not painting, not creating a drawing. First, I will paint right
away without sketch. So I need some sort of a frame. And painting this yellow skin serves the purpose
of the frame for me. I need to add purplish
skin as well, but just a tiny
bit to outline it. And meanwhile I can start working on the half
that's nearby. Line on the side. Something like this. And here in the area
where they touch, it's a bit darker. So I planned the shadow right away and add in some pink coral, in my case, tone for the inside. I would like to add a
little bit of cadmium red. Seems like a nice
variation in our painting. Since it's shifted on the side, I'll make the other half darker. And this one here, a little bit dark to n. Now, the best would be to leave
those guys too dry because they start to bleed
into each other. It's not the perfect
outcome for me. I would like to keep the skin the one that
should be white, white, or at least light yellow. So I'm lifting the pigment from this part and leaving it to dry so that later on I can
work on shadow and the skin.
11. 30. Starting passion fruits: Well, the passion fruit,
I'll do the same. I'll first create the
outline like a frame, which is technically
the super light, almost white skin part. It's leaning towards pink. So I use very transparent coral
color to paint this skin. And right away I
take magenta and add the actual skin. Over here. My circle is, you can see
it's not perfectly round. That gives us a better feel
of an actual real fruit. So in this simple maneuver, the skin for our
passion fruit is ready. And now we just need
to paint the inside. And first, I would
like to kind of mark the texture
where the seeds are. But right around it you can
see slightly pinkish tone. And I want to prepare
its first and only then paint the yellow seeds. But also make sure
that the inside is dry and I'll just press the tissue against it to know
that this area is dry. And I can take cadmium and cadmium yellow and paint
some of the seeds. Also, I am painting them but not covering the whole
seat with yellow. I leave some blank spots, whitepaper shining through them. And mixing orange down
right away to get some shadows in-between
those seeds. Again, it's not a painting
devoted to passion fruit, so I'm not going to spend
that much time on defining each seed inside as we did in the course
about passion fruit. I just wanted to
kinda show that, okay, this is the question
through, this is the seed. And people will just
understand it from the shapes and shadows
and highlights. And I can do the same. Somewhere nearby. For example, I can paint a little
passion fruit. Somewhere here. Is going to match nicely with the color of our
dragon fruits around. Just to be careful to
maintain the shape of your fruit next to provide. So we need to adjust now because I can't
really make it look like the question through
this behind the player, that would be weird. I'm going to look neutral. So I need to adjust the shape from the other
side where I still have space. From here. I left this blank spot
here on purpose to make it look like it's
highlighted spot. Because I want to
add little branch later on when it's
gonna get dry and to show the direction
of those fruit. So meanwhile, I can
return to this guy and show the shadows between our seats and actually add some of the black
seeds into yellows. We can see that this yellow seed has
a tiny bubble inside, tiny black seed inside. And with a brown color. In my case, it's burnt sienna. You can use Fantastic. I'm adding shadows. Here we go. We have
our expression for it.
12. 31. Detailing figs in the corner: I have some space here
and actually I sketched out half of the fig here. So I'll just paint it. There's no reason not to. There's enough space. It's going to look realistic compared to
the neighboring fruits. So I start with outlining
the yellowish skin. Then take some forall, drop it in the center, let it mix and flow. And then some concentrated
it's being read. In my case, on both
sides actually, again, intensify, which is also a good opportunity to intensify and workout some
of the elements over here. My texture completely
disappear so I can refresh it. Here we go. Just need to paint
the skin and we're done. Now I need to show the
bottom a little bit. And very carefully with a very thin line,
separate those two. Here we go. The other
two halves are finished.
13. 32. Adding more passion fruits: Evaluating what else
I can add in where I think I should fill
out this space, this space and here. And then we can be done
with this artwork. I think the passion fruits are the ones that
are missing here. So I think we can add more passion fruits,
for example, here. The same approach,
just starting with the outline of the skin. Then paint an actual skin. This point, I don't even
look at the reference. There's nothing to see. We already know the
type of this fruit. Can add one more here. And maybe an actual
passion fruit. Like a fruit, fruit, not cutting to start
to forget words. Right away, I'll probably just paint an actual passion fruit. That's a whole fruit, a sphere. And it's going to be the same approach as I
was explaining before, where we just build
up this fruit. Literally torn by tone. Here I'll keep the
highlighted spot. And that's it. You can drop one here too. When you paint without a sketch, you should always remember
where the highlight is, where the shadow is. And while if it's some
specific shape like a circle, how to fit your subjects into a circle without damaging
the other fruits around you. The highlight will
be on this side. And here's our passion fruit. Now we just need to paint the seeds inside
the yellow ones. And the final part left to
do would be the background and shadows right away. Losing non-time. I actually think that
here is also quite empty. So we can add either
a star, star fruit, or maybe some other
pieces of watermelon. Just to fill out that space. Better to wait for yellow to get dry first and
then drop those seats. Otherwise they're all
going to bleed and melt. I'm just marking
some texture around. And we need to let it dry
before we finish this up.
14. 33. Adding details and slices: So once more we can add a
few cubes of watermelons. Before we round up this
super big masterpiece. The same approach. I take transparent cadmium red to create the first base
for my watermelon cube. And then I'll just intensify
my color by adding more red. At this point, I'm just
fantasizing and not really following any reference here. The darker tone I just
add some texture. Now would be a good
opportunity to look around and decide
whether I need to add any other
colored detail tone before we finish up this
painting with the background. My cadmium always do
color quite a lot. So I am once more
intensifying mind. Watermelons. If you read, is bright enough. You don't need to do it. It's really up to
your critical mind to decide whether you want to
have a brighter color there. What I would like
to add wouldn't be some seeds here
in the dragon fruit. Remember we've finished
working on it. But because it was what, we didn't come back to finish the seeds with the dry brush. Very rapid moves. I'm creating the seeds. Then maybe in watermelon, I'll add some of
the C's over here, maybe here as well. And also with
diluted black color, I'll add some of
the seeds that are kind of not very visible. They're further away and we
don't see them very well, so we need diluted
black to do that. Funny. Now, for the big
piece of watermelon doesn't really have any seed
in it on the reference. If you feel like adding
them, go for it. There's no
restrictions, no rules. Whatever you feel like
will work best for you. While we are in a black paint. I want to add a bit
more of the season, our passion fruit
here and there. Just to play with tones, make some of the tones darker. I would also need to add some of the little branches on
our passion fruits. So take one ****, which is nice, dark brown color. Just add this dry tip over here. And maybe one more here. Maybe separate some of
this is a bit more, so it's more clear. So in some shadows
in-between our seeds, yellow seeds in
the passion fruit. Again, it's all about the
game of light and shadow. Don't need to struggle with trying to separate
every single seed. It's probably impossible anyway, and it's going to look
weird if you will go for the maximum detail here. So just to intensify
shadow a little bit to show that there is a
variety of seeds inside. Just to hint on
the idea of like, there's a lot of stuff in there. But there's no need to actually
paint every single one. This looks like a good
selection of fruits for me. And now we are ready to
do our final, final step, uniting of these fruits, n slices and pieces into one artwork by painting
the background.
15. 34. Start working on the background: So to connect all fruits, we need to create a realistic background
so that they look like all the fruits are just
laying down on some surface. And the surface naturally it
can be brown as for example, woud wooden table, some,
I don't know, deck. Or it can be something
more neutral like bluish, dark blue tone blue
mixed with brown. So it's not very obvious what is the material of this surface, but we understand
that oldest roots align on something and not
just flying in the air. Another important detail here is to acknowledge
that the light, the source of light
is coming from here and from top as well. So it highlights our watermelon
here quite noticeably. It highlights our
Mango over here. Quite noticeably. We have
a little highlight here. So it's clear for us that the light is coming from
somewhere from here. This means that all the
shadows need to be leaning towards left and maybe down. Now the technique we're
going to use to paint the background will be wet. On dry. The brush will
carry lots of water. But we're not going to place water in-between
because we want to have some control over what's
going on and carefully paint around every line
so we don't touch, for example, nice light
skin of the mango or yellow skin of
the papaya and etc. Also is better to use
synthetic brush good because you will have
more control over the liquid in your
brush and how much you release of this water
and stuff like that. So better to have
synthetic for this task. Now, I will use
blue in them turn blue with addition
of burnt sienna. So technically it's
blue plus brown. This will give me nice
dark, almost gray tone. And somewhere I think I'll just drop a bit of pink
to achieve purple. That we will have some
of the variety and stay in the same color palette. Because clearly we have
limited color palette. We have yellow,
orange, red, purple. So they're all in one scheme. There's not too many
different colors, all in the same tone, tonal panels, so to speak. Right? I'm a bit worried. The last touch,
the last moment of truth to finish our masterpiece. So what do we do with the edges? The edges, I would
like them to be soft and rather light
and transparent. So the edges on the
side of our painting, I'll just let them
flow with lots of water and pigment
been very diluted. And as we go inside in
between the fruits, I'll keep the pigment more concentrated and darker here, very careful near our slices so that I don't paint
over them by accident. My blue looks more
like gray because I added brown into it. Now when we work on this edges, I want them to be lighter
and more transparent. So I will add water first, but only when the
work on the sides, so they are less attractive
and less attention. But the water will allow us
to get this soft movement of the pigment much less controlled than if you tried to work on it
with your brush. And try to achieve
soft color transition. But for set with your brush. Here I touch my
mango a little bit. Be careful when you
work around the fruits. Your brush should have a fair amount of
water, not too much, so you still can control
the movement and yet not too little so that your brush
stroke doesn't look dry. Now while this
place is still wet, we can add some of
the shadows in. I'll take tiny drop of
black into my blue. And I will add the shadow
behind our slides, but this slides doesn't
really need much of a shadow. It's flat, so it just lying flat on on the table or
on some surface. There's not much need
to to portray it. On the other hand, the passion fruit slice, it has volume, right? It's rounded like a sphere. Even though it's
cutting to and from top it looks like flat. But that's the whole purpose of painting this background to show that it's not flat and cluster
some shadow on the table. Trying to correct the shape of my mango very carefully
with almost dry brush, I'm removing that tiny stroke
that I got inside of Manga. And here I'll add some
clean water once more. For that you can
use larger brush, for example, this one. I'll get a little bit of
my favorite cerebellum. Just let it move around.
16. 35. Finishing up the masterpiece: And slowly, my car in
a state of meditation. We are moving from
one to another, covering the
background in-between. Choosing some areas to be darker and some
areas to be lighter. Depending on how close our
fruits to each other from, from where the light
is coming from. And just enjoying the process. Here, I dropped this part and left to paint something else
so the edge is really sharp. So it's crucial here to get
nice concentrated dark tone and cover this edge that I dropped so that
you don't see it. I want you to understand.
The background we're working on right now. Doesn't have to be black, doesn't have to be absolutely
dark like a night. It can have lighter
and darker tones can derive from lighter
blue to dark blue. That's going to make the
result more interesting. What I want you to do is
to avoid plain colors. No plain blue, no plain black. Once your colors to be diverse, changing from one to another
so that you can see tones. But at the same time, it should all stay in
the same color scheme. So do not change from blue to green or some other
color that is not presented in the painting and is not a part of our color family. Can't believe we almost
finished this giant artwork. If you're with me, I'm
very proud of you. Indeed, a very long and
challenging piece of work. And you deserve congratulations. It's fair to say that background takes the longest to work on. And yet we didn't finish it. The paper will get dry and the color will get lighter
as you already know it. So don't worry if
in the beginning it feels like way too dark,
it's going to get lighter. And now we are done
with our masterpiece. And I'm very, very proud of you.
17. Class project for Masterpiece. Part 2: If you've come this
far and finish this masterpiece,
you are beta's. This artwork is for sure, requires lots of
time and patients, and I'm very excited
and proud for you to take up this
challenge and finish it. Those of you who are
still in the process, feel free to send me
questions or some of the parts of the painting
that you've already done. If you have questions
or you need help, also please do post
it in discussions. I will be very happy to help you even if you've done just
a couple of fruits. If you done half of it or you have a questionable particular
thing, just publish it. Asked me questions. I'll be there for
you to help out. Submit the stage
you're in right now. I want to see results
of all of you.
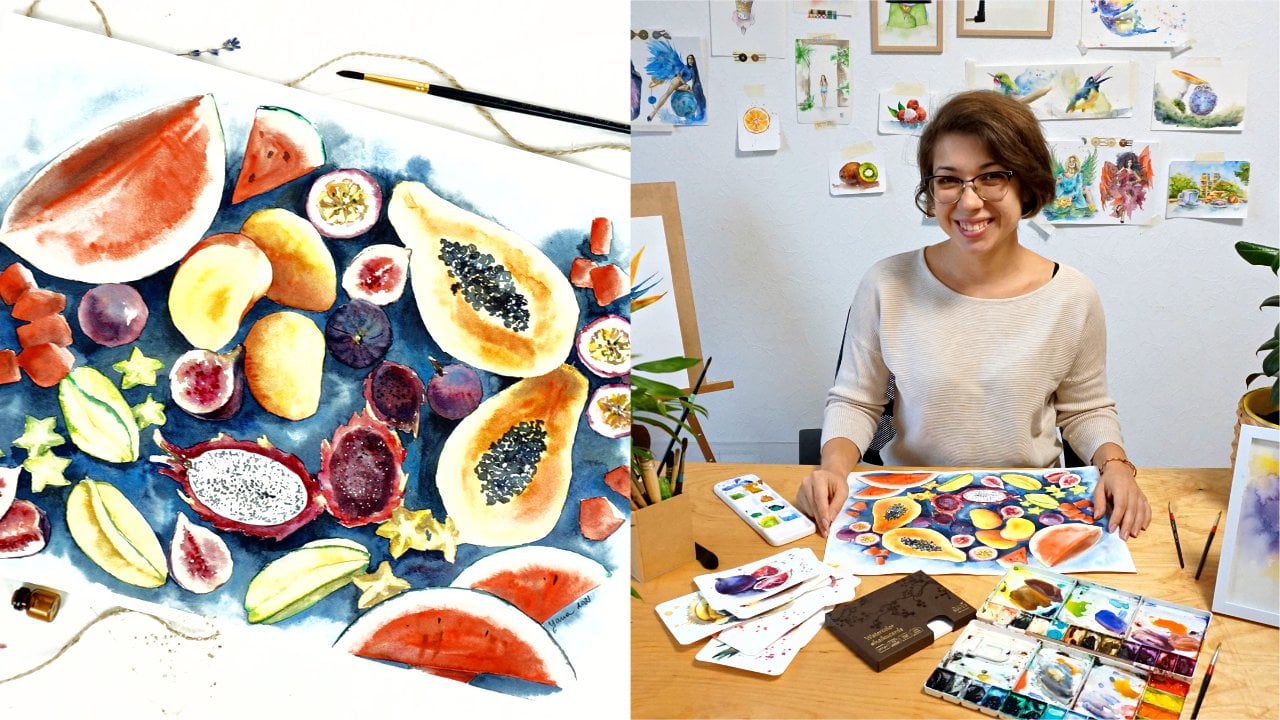
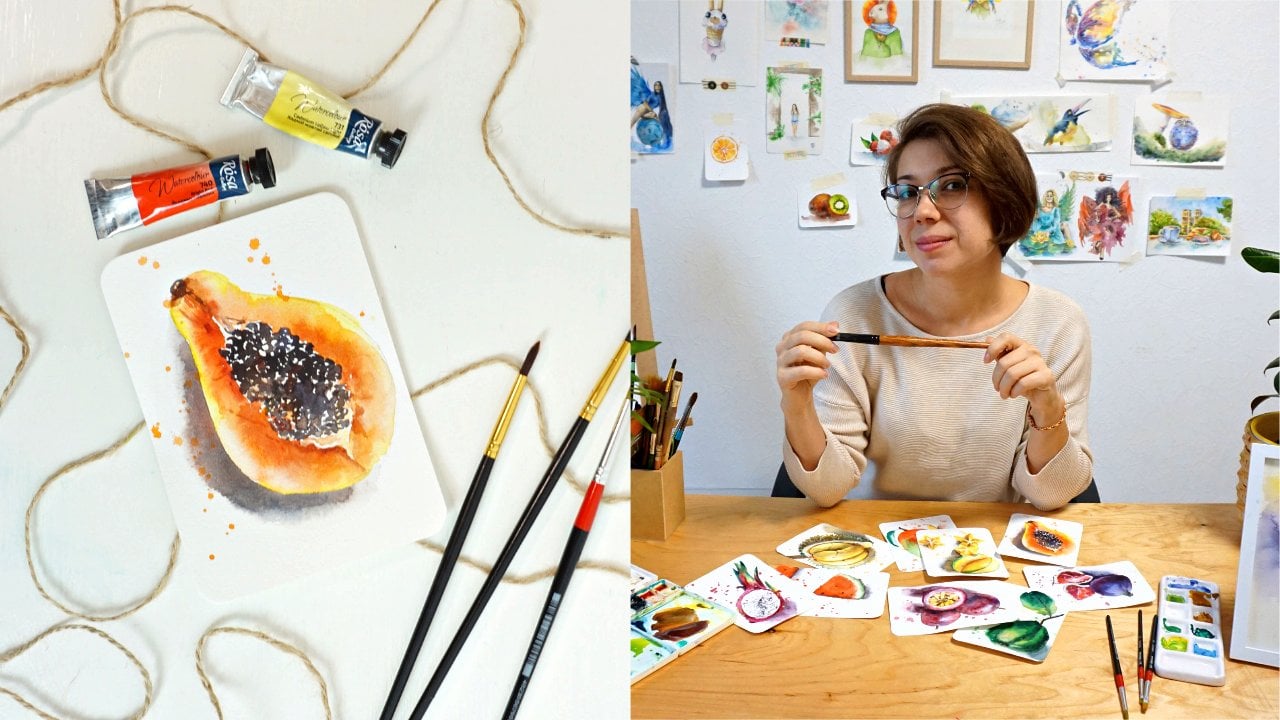
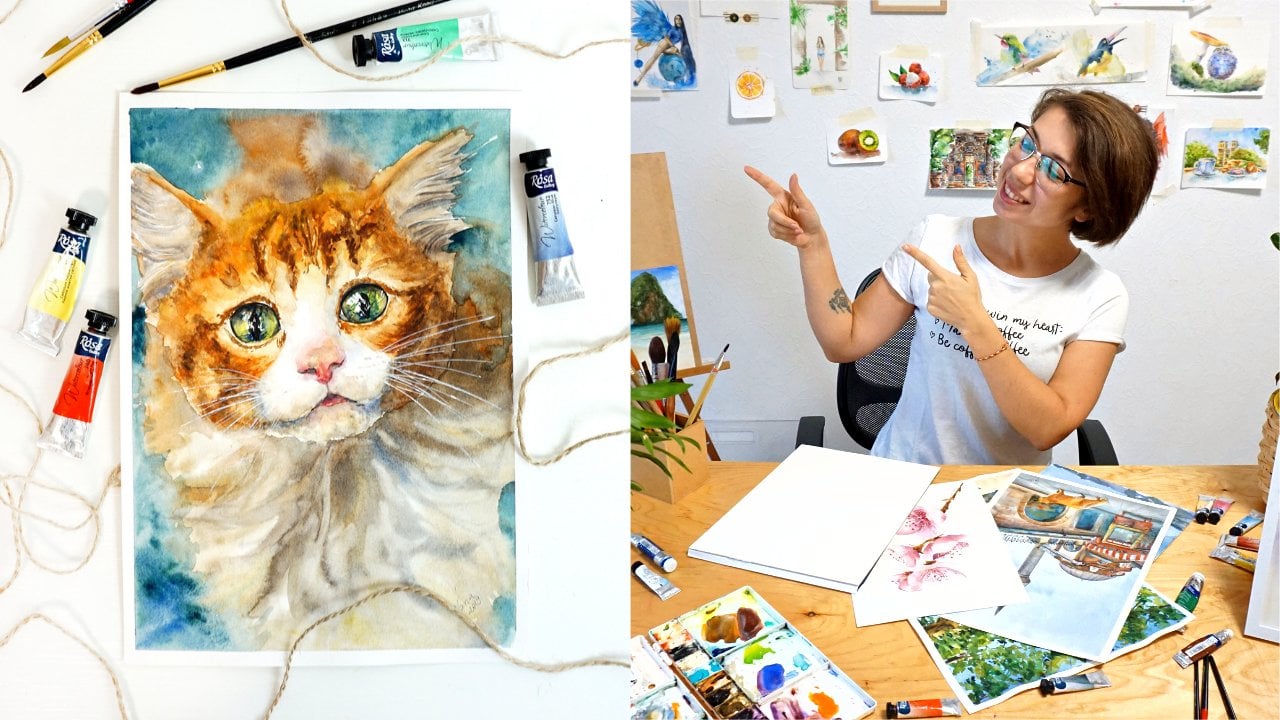
 Yana Shvets, Professional watercolor artist