Transcripts
1. Introduction : My name is Lucy declared, and I am a graphic designer and mixed media
artists from Victoria, British Columbia in Canada. In this class, I'm going
to show you how to prepare your background
for your postcard. So it's ready to paint with
acrylics or acrylic gouache. I'm going to show you how
to add some line work and some simple stamping techniques to create three cheerful
little postcards. So we're going to explore three
different layout options. So a cherry blossom, some foliage, and a
glowing imaginary gardens. And it will leave space
to add some words from my downloadable list of words
in English or in French. You can also personalize it with your own words, quote, or poem. You can also turn them into a little Hank
tag if you want. So go ahead and make one, make to make three or make a big stash of them so you can always have one on
hand to send somebody. I hope to see you in
class. I've yet though.
2. Materials: So for this class, you'll need some cardboard, any kind of cardboard that he can paint and you'll need some sandpaper like 100 Grip is probably good if you don't want to make your own. You can buy the black drawing haiku card by ASEM lt and they're fabulous and they're ready to go and you'll need a hole punch. You can make your own to your own corner to with scissors. Ah, unit ball Stig no broad and white or post a paint pen. You'll also need some black just so. Or you can also use matte black acrylic. You'll need some acrylic wash paint or regular acrylic skewer. You'll need a pencil with an eraser on the back. You'll need a fine black marker and some ah, a glue stick in some contact paper, and also you'll need a phone brush, a ruler and also, um, a hole punch and some ribbons if you want
3. Background: So because we're gonna work on black, you need Teoh. Create your both card, your black background for your postcard first. And, uh so you cannot going to show you how to do that with Jess. Oh, or if you want to buy them, already made, you can get this little stash of black drawing haiku card from S M L T. Art there really wonderful. And they're fabulous, actually. And they're really great to work on. The texture is really smooth, and they'll already have around corners and everything. So if you're going that route, then you're ready to go and you can go to the next video, if not to you gonna use recycle cardboard if you wanna. You know I love recycling stuff, so I obviously always have cardboard around. You can use a cereal box, anything that you have like cookie box eso I do. I cut it to about ah four and 1/4 by six. And, um, I used just so to do Ah, the texture, the background. This one is really great from Daniel Smith, But you can also use regular Matt acrylic if you don't have Jessel and then first what I do is to take off that kind of, um, shiny finish. I use sandpaper. Eso I just I just go roughly on the surface so I can take, you know, at the shiny part. And also, it helps, um, grip the, uh It helps the Jess Oh, dear. To the surface. So to apply to just so I use a foam brush. And, um, first you want to put it on something because you want to protect the back of your postcard . You know, if you don't use anything that it's just going to slide around and the back is going to get a little bit messy. So I use contact paper because I use contact paper and for everything if you've taken my other classes. So I want to keep my my back of that, like the craft color Ah, side. I want to keep it clean. So that's why I use contact paper. So the first coat I'm going to do is I'm gonna go in one direction. So this first coat going to be, um, the long way. So I'm gonna I'm gonna feel I'm gonna make a first thin coat. Um, horizontally, I guess. Or is it Vertical e don't know one direction, So just go in one direction, and when you do the other side, then just make sure you go in the other direction. So when it's dry on, then you can go and put another coat, and it might It might bend a little bit, but that's okay. Don't worry about it is going to flatten out. Um, you know, when it when it dries completely. So now I'm going to go and do my second coat and in the other direction and ah, and then you let it drive, and then you go to the next one because you want to do three of these. Okay, so now this is pretty dry, and I can just remove the back Ah, by, um, contact paper and I can use it again for something else, and you can see that it keeps it pretty clean. It's not perfect, but, you know, it doesn't have to be perfect, but at least it's clean enough that you can write on it if you want. So, um, the next thing you want to do is do some around corners because I think it really adds a lot to it. So if you have around corner punch, then, um, you just punch the corners and that's pretty simple. If you don't have one, what you can do is just do it you know, by hand. Or if you want to just trace your corner with with something round, like this one. Is that the cap of my post ca pink pen? And so it helps you make him all Even so Ik do either way. And there you go. You have your your postcards and you're ready to go to the next step.
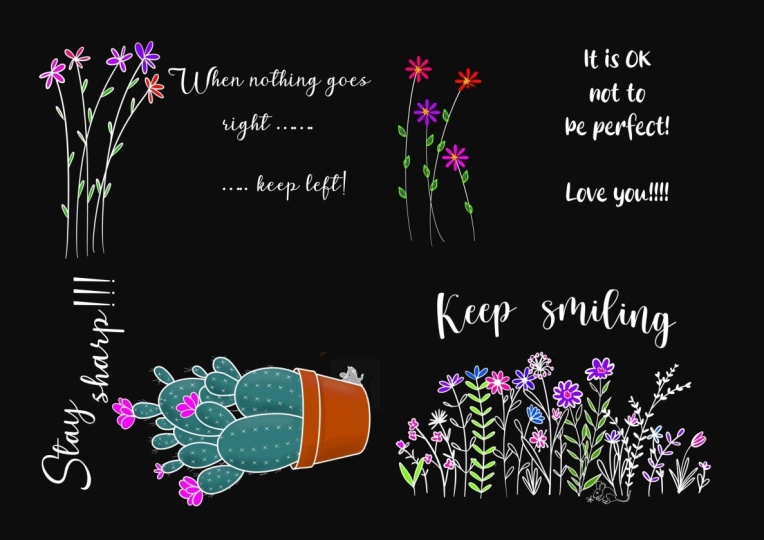
4. Postcards: So for our first postcard, we're going to do
a blossom theme and we only going
to use two colors. And we're going to just do some three little branches
of cherry blossom. So we're going to
use our signal, a uni-ball signal for that. And then to do the branches, then we could use also your postcard paint
marker if you prefer. But I really like this, this particular pen for that because it makes
a really smooth, it really glides
nicely on the paper. So three branches on
the left-hand side. Keep it simple and
leave space on the right-hand side for copy that we're
going to add later. And now we're going
to add some colors. So I wanna do a nice pink color. So I'm using titanium,
white, and scarlet. And I'm also going
to use obscure, and I'm going to use
both sides of it, the flat part and also the pointy part I'm going
to use to paint. So I'm going to put start
with white and just add a tiny bit of the scarlet and start
mixing it. I would say. Just be careful because you
don't need a whole lot. See, I don't put
enough didn't put enough white and I
put too much red. So yeah, you want to just put more weight and add a
tiny little bit of red, so that's pretty good. So 12345, and that's it. There's a flower,
that's your flower. So you keep repeating
that all the way around. Another flower. And if you look at a
branch of cherry blossom, you can see this like
flowers and also the diesel little buds
that are really cute. So I think you want
to add some of those. So you want to kind of
make a mix of little buds and little flowers
for your branches. So next I'm gonna
do the inside of my flowers with white dots. And I just dip my pointy side of my
skewer in white paint. And I like the unevenness of the little dots
when you use paint instead of using your marker or your postcard paint marker. And I add little dots
everywhere here. And a little, a
little shadows are little highlights
on my little buds. And to give it a
little perspective. And my last step is to just add little lines with a pencil. Inside my flowers. I just do three little lines
on each petal and that's it. You have your little branches and you are ready to go
to the next postcard. But first, if you need
to clean up some areas, you can just use
your black marker to fill the little spots. Okay, so postcard number two, we're gonna do some foliage
this time and we're going to leave this side open and
kinda work on the corners. So the upper right corner
and the lower-left corner. And then we're going
to add some leaves and little flowers and stuff, but we're going to do
mostly leaves on this one. We're going to add some foliage on each corner of this postcard. And for this one, we're also going
to add two colors. So we're going to
start with white. And don't worry if there's
holes or don't put too much stuff because
we are going to add some color to it. So this time we're not
going to use a skewer. We're going to use the
eraser of a pencil. And we're just going to use, I'm using green
here, light green. And I'm just using
the pencil eraser on the pencil to just stamp or you can use
anything else you want. But for this one, I'm just stamping
little berries, I guess, imaginary berries. So now I'm just going
to add some line work and with my black marker
inside my berries. And I'm going to add, probably use my skewer to add some white little
details here and there. And I'm also going to go in with my skewer to add some
little dots with the red, with the green, and that'll
be my third postcard. My second postcard, sorry. For our third postcard, we're gonna do an
imaginary gardens. So we're going to work on the bottom part and
we're going to leave the top part of our postcard blank so we can put type there. So if you can put yourself
a little line if you want. And then we're going to stamp
with our pencil eraser. And I'm going to use bright aqua green and vivid lime green. Scarlett. I'm just going
to put some shapes. When I'm done putting
shapes and dots, I'm just going to
draw my lines for my flowers and my stems and
just add some white details and it'll leaves and basically put everything
together that we've been working on before on the other two postcards
and add some, you can bring in your
skewer again to add some little touch of
paint here and there. And it's gonna be a
beautiful imaginary garden, glowing on the dark. Congratulations, I love it.
5. Words: So now you have you three little postcards, and all you need to do is add some words on there. So I have something for you. You can do your own or you can download. Ah, the page that I did for you in French, in English. And you can cut out your little words and decide what you want to put on each postcard. So this one, I think I'm going to do, um, dam in French because I think it would look really pretty. And, um, I have two different typeface for each thing. So one is veteran typewriter and the other one is neutral, I think. But this one is just a regular, um, think it's Neutra regular. So I'm just gonna Yeah, I think I like it just like that. Very simple. And, um, I'm gonna work on my next one and this one. This one I think I'm gonna do, um, thinking of you or you make me happy. Have a bunch of lines at the bottom to that. You can cut and mix and match if you want, but yeah, I like this one. You make me happy, and then I'm gonna work on my 3rd 1 And this one is very festive looking. Some thinking Ah, happy happy birthday would be a very good one for it. So you have you have you three postcards now, And all you need to do is, um, use a glue stick and, um, put him on. So again, you can print your own Siris of words in your own language. Ah, you can, you know, the sky's the limit. Really? You can do whatever you want. And, Harry, have you have you three little postcards? And the other thing you could do is add some details underneath. So, you know, had little dots under your, um, lying or this one. I'm gonna pull heart over the I and, um, for the happy birthday. Maybe help a little festive lines on top. Eso you can add. You can still add little details. And then another thing you could do with your postcard is to turn it into a little Hank tag or just add something to it so people can hang it on the door, are in the window, or you can attach it to present, which would be quite fabulous. Honestly, Eso Ah, here you go. you have your little hang tag or postcard hanging postcard, and here's your other postcard, and voila! Put him in the mail and your friends will love you for it. I guarantee it.
6. Merci!: Thank you so much
for taking my class. I can't wait to see
your little postcard, so please upload them in
the project section below. And if you want to know about
new classes are giveaways, please follow me on Skillshare. And if you're looking for
more inspiration and ideas, you can also follow me on
Instagram at leucine to glow. So I hope to see you
in my next class.
 Lucie Duclos, Design + Mixed Media