Transcripts
1. Introduction: Hello. My name is Lisi Clo
and I'm a graphic designer and mixed do artist from
Victoria British Columbia. I would like to introduce my brand new series of classes that's called
Postcard Studio. The inspiration
behind it is from an Instagram project that
I did during the pandemic. I was posting a
postcard every day for 40 days and I was just using stuff that I was finding
around the house. And then it was so successful
that I ended up teaching some week long workshop
after the pandemic in France and Italy and
in the US and Canada. I thought it would be
really fun to take all that content
and turn it into a series of classes that I could make more accessible for
everybody here on Skillshare. Every class in the
series will focus on a different technique,
mixed media technique, different composition, and
we'll explore collage, stitching, and
stenciling, painting, you name it, we'll explore it. The first one in this
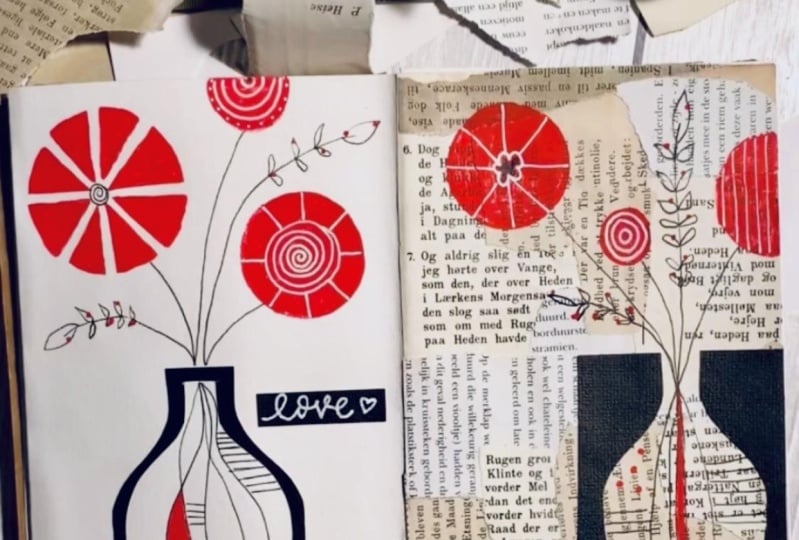
series is all about collage and stenciling and using
a limited color palette. You can always just
decide to do the project and Sketchbook if
you want and for extra credit in my 5-Day Collage Sketchbook
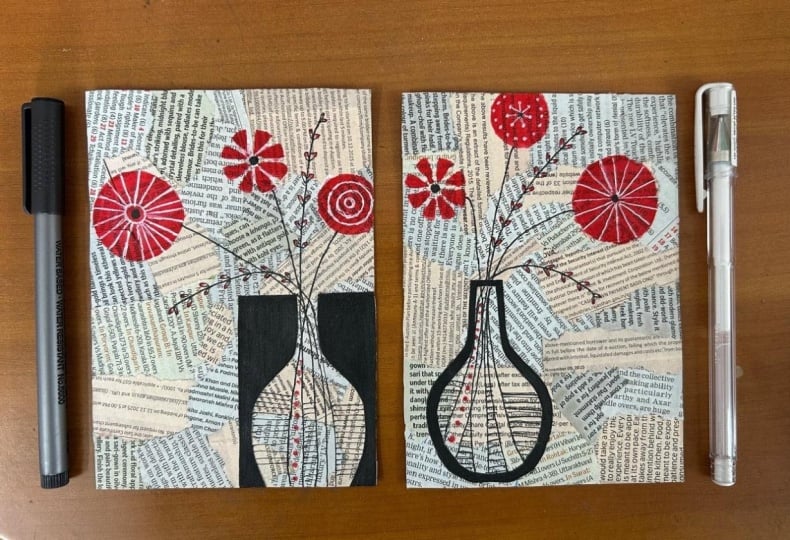
Challenge class. Your class project will be to do one or two postcards
and upload it in the project section below
so I can see what you make. I hope you'll join me and
let's make some postcards.
2. Materials : Let's review the
materials we're going to need for our little
postcards today. I like to keep everything in
a little box because I do a lot of these
postcards and I like to have all my materials
in the same place, and then I could crank out some postcards when
I feel like it. For this particular postcards, we're going to need,
obviously, postcards. I use recycled cardboard. Anything that you
have, honestly, I train my husband
to never throw away any packaging of any kind. I just cut it with
my paper cutter. The size that I like to work with is four and a quarter by 6 " and it's about 11
by 15 centimeters. I just cut a whole bunch
of them some I haven't ready to do some postcards. I like to collect
stamps and you'll see I love to use them
in my artwork. So I usually collect them in
a little box and I keep them around to use as
little mini artwork. You're going to need for
this one the usual stuff. This is paint marker by
ArtistroO you can use Posca pen, you can use a gelpen whichever one you feel
more comfortable with. I use also a fine liner. Any brand will work.
This one is 0.6. I use between 0.3
and 0.6 usually. A skewer, these are
usually pretty long, so I just chop them in half. They're shorter, a
pencil, a glue stick. You're going to use one
color of acrylic paint. I'm using Naphtal red for this, but any red will work. Any color would work, actually. If you want to work
with a different color, I just like the red with the black and white because
it's really cool. And you need a little makeup sponge because
we're going to make some stencils and we're going to apply the
stencil with that. You will need one
piece of black paper. You can also paint it if
you don't have black paper, and then you'll need just
some regular copy paper, recycle paper to make our
stencils, some paper page. So this is what we're going
to build our background with. So try to find an array of different languages and color
like tint for your paper. So this is really
cool. Is Inuk Di tuk. And this is Danish,
French, English. I think I have
Italian in there too. So yeah, just find some interesting book pages so that you can create
a cool background. Then the last thing is, this is from my three
little postcard class and it's really cool. You can use those
on your postcards. You can go ahead and go to
that class and printed. You can make your
own if you want, but these are
actually available in my three little postcard class
on Skillshare. That's it. I keep everything in this box, and then I have it ready to go when I want
to make postcards. Of course, you're going
to need some scissors and an exacto knife and cutting mat would be great
to cut your stencil. Let's get started.
3. Creating your Background: The first thing
I'm going to do is create my background
with my book pages. I'm going to start making
one or two at a time, and then I will just start using all my papers here and it's actually a
very simple process. All you have to do
is put some glue. You can use MT
medium if you want. I usually put it all over first. Like that. Then I
just basically start putting some papers
and I vary the colors, the angle, I will add because I know here
I'm going to overlap here. I'm going to add some
here on the back of my paper like that. I like to let it overhang like this so
I can cut it after. But this can be pretty fast. Um and you can cut straight edges if you want here. I love this paper. I like to vary the
different languages. I have French and
dictionary pages here, different
intensity, typeface. You can use some graphic
stuff if you want. It could be distracting
sometimes, but you could. I'm probably not going
to use it for that. I think I need some Italian
here and I have French. I want to use some
Italian right here. It's also a nice color
that I don't have already. Looks like I have a
little hole here, but I don't know if I'm
gonna do anything about it. Hm. Maybe maybe, maybe, maybe. Maybe I'll use a little piece
of this. Yeah, why not? Okay, this one's done, and I'm going to just use my
scissors and cut the edge. You can do that with an
exact one knife if you want. But it doesn't need
to be perfect. I usually just use my scissors. See, it's that easy. We have one background done, and then I'll do another one so I can work on two
at the same time. Oh
4. Cutting your Vases: So now we're going to
work on our little vase. We're going to start
with that and then we'll do our flowers later. I use a piece black paper
about 2.5 by three. Could be smaller, depending on the size of your vase,
you can make it bigger. But I'm just going to
use this size here. If you want to, you
can draw a shape. You can draw a shape
of a vase first. I usually just kind
of cut right into it. I'm going to do vase and I go all the way
to the top here. Here, what I have is
the negative shape, and I have the positive shape. Now, what I like to do is cut another shape that would be more
like a silhouette. I'm going to go in and just cut another
shape here inside. I will actually give you three different vase that
you can work with. You can decide which
one you like best. You have this one here, and it's nice because it's
a little smaller. You have this one which I love. I'm probably going to
use this one here. Yeah. Then for this one here, usually what I like to do
is I like to make it open. I will cut this piece
here because what I want, what I want is be able to
do whatever I want with it. You see what I mean? Now what I can do is I can make
a really large vase. I can make it really
small and narrow. That gives me a
little more freedom to do other things with it. You can put in the center if
you want, or on the side. I'm going to just glue these
down and keep that for another card and then we'll work on our
flowers afterwards. Okay. All right. So we
have our vase done, and we're ready to start on our flowers in the next video.
5. Making your Stencils : Now we're going to make
some really simple shape. We're going to create some
stencils and very simple, very simple circle shapes. I'm going to use to
make my flowers here, I'm going to use this, you know, you can find something that what size you want
to have your circle, find an object that you can use. Because what I
want is two sizes. I'm going to do one that's
going to be this size and make sure you leave enough room around your piece of paper. This is just copy paper. I'm going to make a smaller one here and I'm going to make
another smaller one here. Because these are
my smiles here, these, I'm just going
to cut the circle. You know, I'm going to do
this because it's easier to do it that way than to do it. Try to poke a hole
with your scissors. But you can if you want. If
you want to just go in like this and cut like
that, you can do that. So there's a couple
ways you can do it. I mean, whichever way is more comfortable
for you, do that. It does need to be
a perfect circle. We like wonky. Wonky can be fun, you know? It's made by a human. Everything that's
made by a human these days is special.
It's not a machine. Okay, so this one here because I because I cut it like that, I'm just going to tape
this for my stencil, you would have enough
of just these two. This would be fine.
But I want to do another one that I
find is really fun. It's create this
little shape here. I am going to use
my exacto knife and I'm going to just do
I'm going to do that. I'm just going to draw
some line like this. And then I'm going to come
in with my exacto knife and just cut shapes underneath. Not underneath, but I'm
going to cut these shapes. Again, wonky. We like wonky. Here, maybe I can get
closer. Is that better? Yeah, let's do that. Yeah. So you don't
have to do that. But if you want to, it's a fun one to do. And you can also make
your own shapes. You can come up with something
cool and just do it. I have my three stencils
that are made, one, two, three, now we're
going to stencil. All right. I'm going
to use my paint now. I'm going to use red, but you
can use a different color. This is NaftalRd you can use
any color that you want. I find that the red is nice
with the black and white. But go ahead and experiment
with other colors. I'm just doing this here and you don't want to
have too much paint. That's the key of doing a clean stencil is to not have too much paint
on your sponge. That's a makeup sponge. Here I'm going to do my
big flour here like that. Then pouncing, up and down. All right. There you
have it just like that. It's already pretty simple. Then I'm going to do
my other two circles. We have those three
really easy stencils. I'm going to put one here. If you don't have this one here, you can just keep making another one here
or just have two. Really, it could be anything. But I'm going to add this
one because I have it. I think it's going
to be very cool. I'm going to put it here. Isn't that cool? It's so simple. I love it. I love
this little thing. I'm easily pleased. Okay, now let's do
the same thing here. But we'll go on the other side, and then you can decide
that you want to bleed this one off
here if you want. The reason why I think it's
better to do something like that than then just stick a piece of collage paper on top. It's because you can see through the beautiful writing,
under the paint. That's why I think it's really a nice touch to do it
this way and it's fun. Then this one, I'm going to
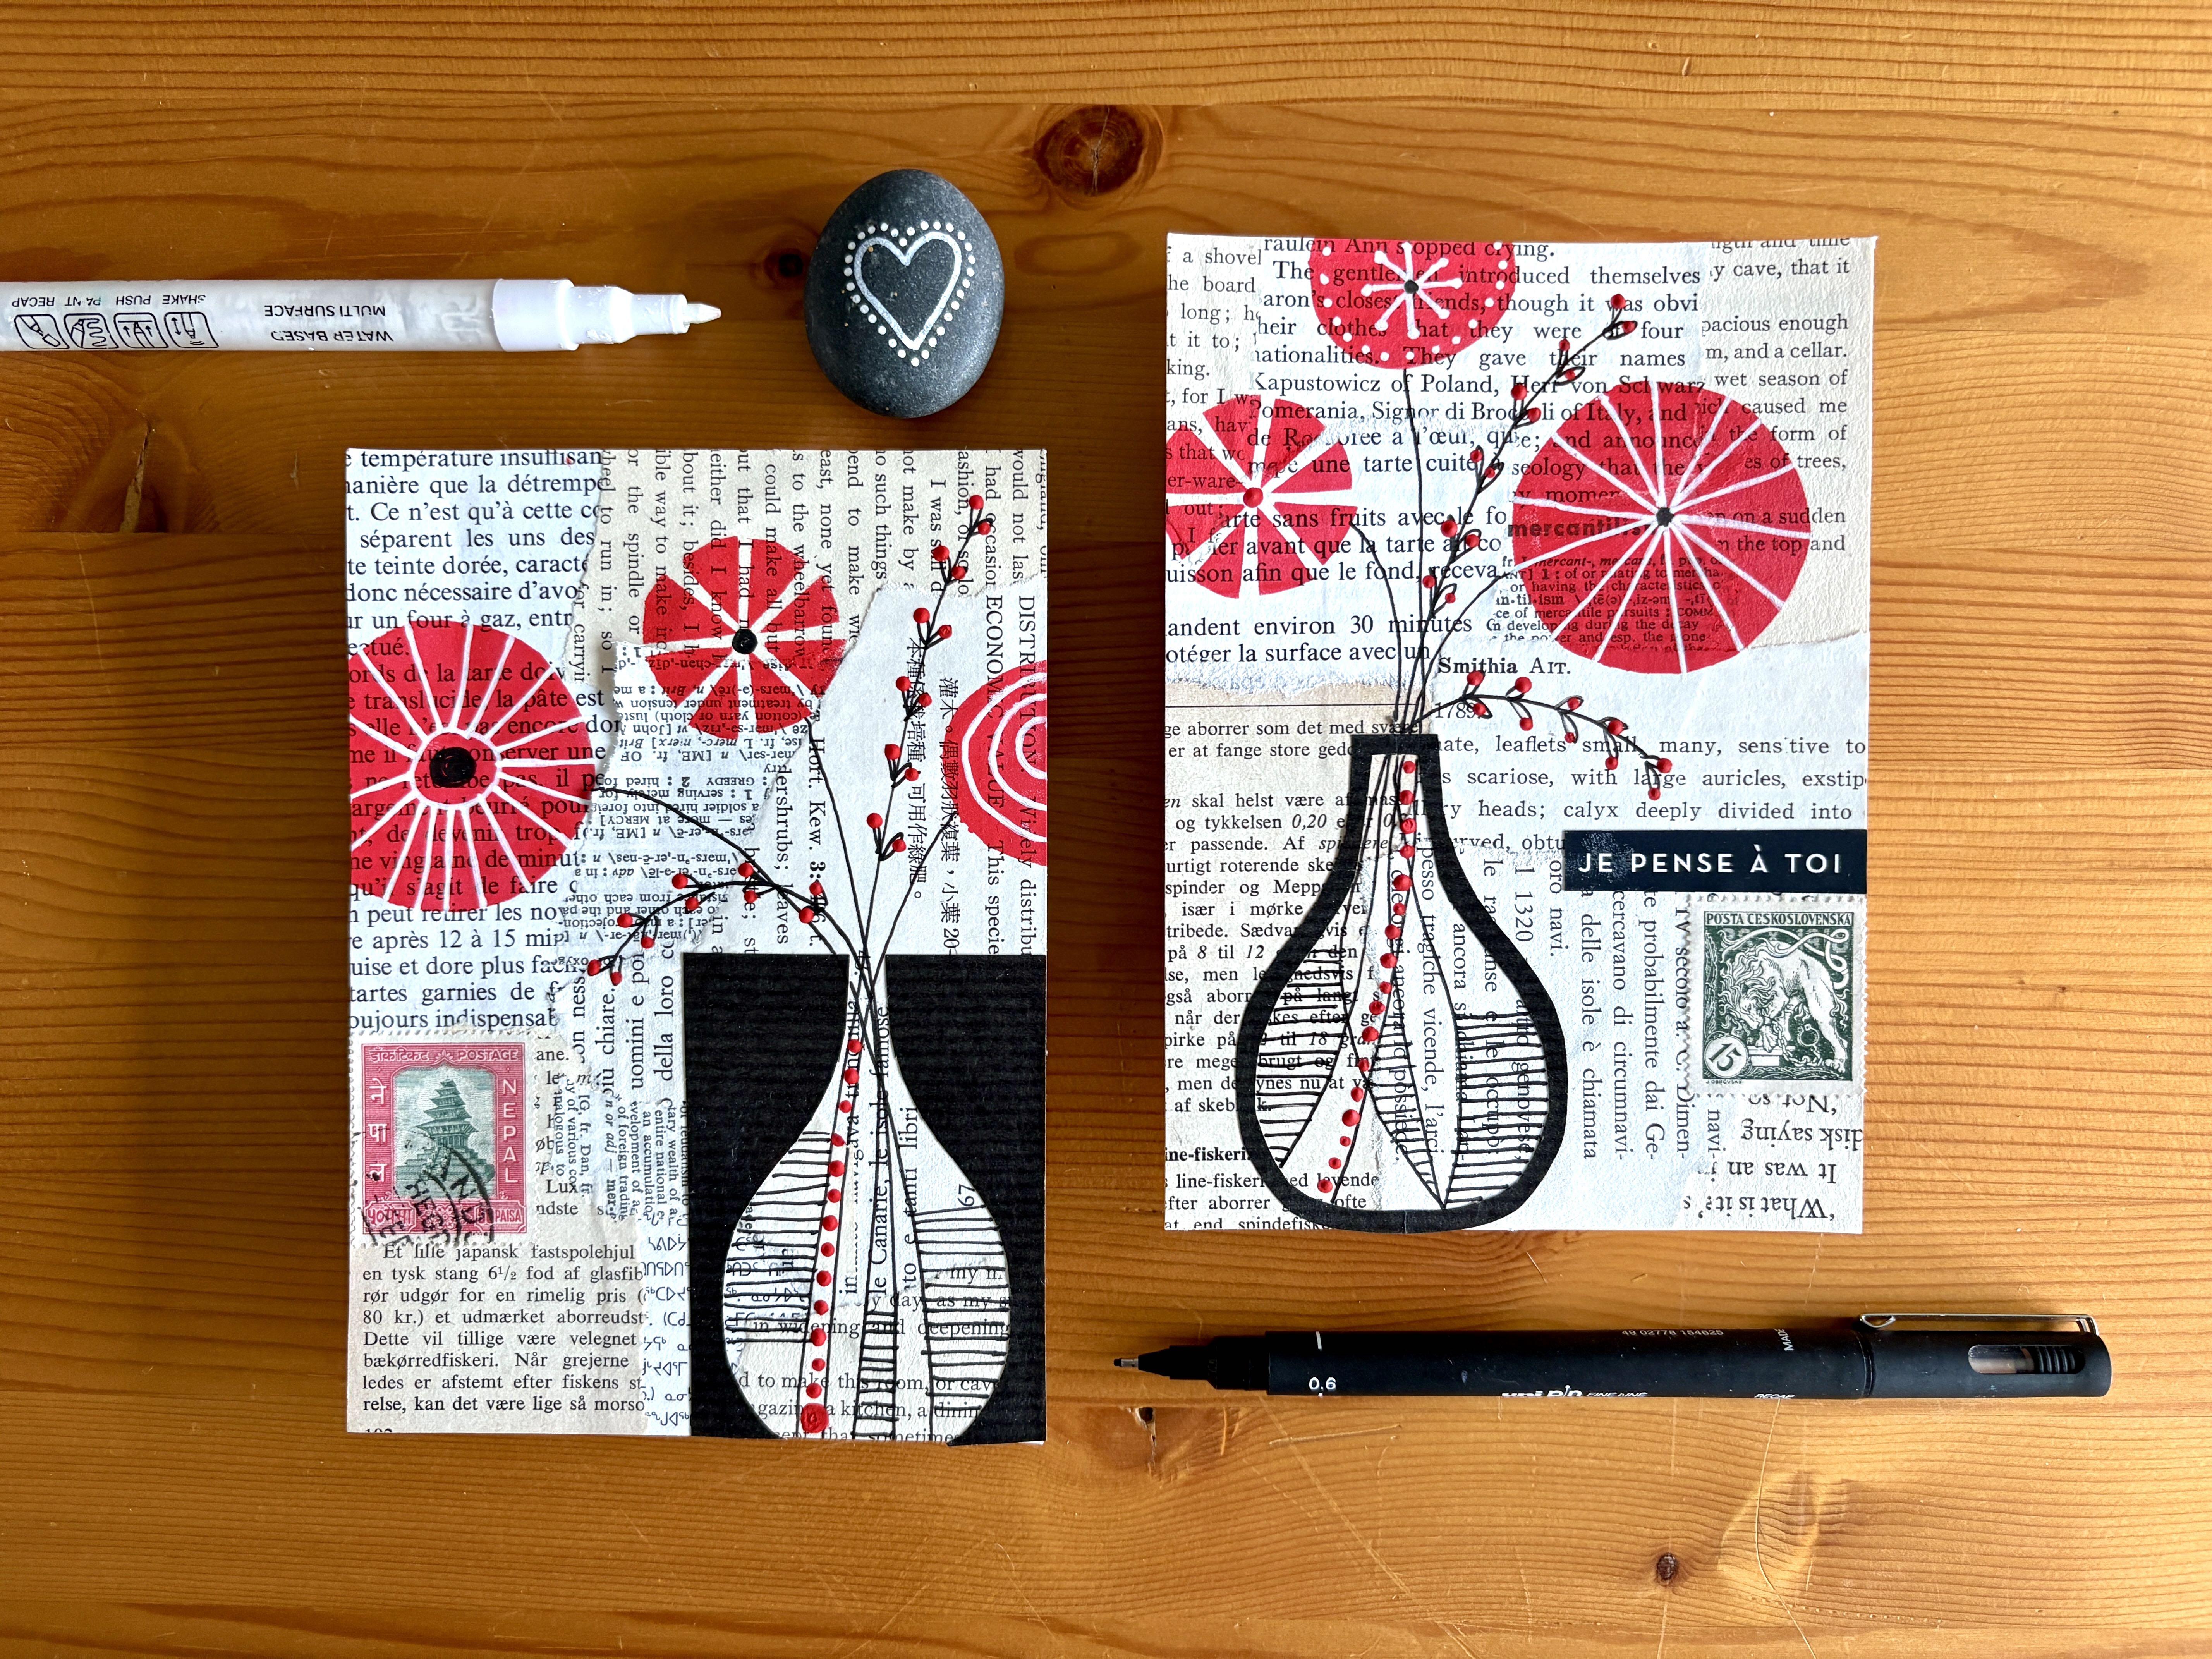
put this one here, I think. All right. Okay. Now we have two postcards that we're ready to add
some line to it.
6. Stems and Flowers: So now I'm going to do my stems. I'm just going to
go in and bring in my stems all the way
down into my vase here. This is why I love having
these open shapes, hoops. Then I love to add a little
flourish, as you know. I love that. I'll add these little little
fage one or two. Maybe I'll add another one here. Okay. All right. And then I'm
going to already like that. It looks good. I'm going to do the
same thing here. Except that now I'm going
to try to go a little more creative with my line
and here in my vase. Kind of more curvy, more fun. You know, you can really
do whatever you want. So you're creating these really interesting shapes
right in there? Okay. And then what I like to do is fill in some of
these shapes here. So now that I've
created all these nice, interesting, new shapes, I kind of want to
fill some of them. Go ahead and use some red paint too to fill
these up if you want. You can use watercolor on top. I mean, there's so many
things you can do. I'm going to do maybe some here. Now it's time to add some
of my white lines in there, some details in my flowers. This is where you
can just kind of improvise and do
whatever you want. I'm just going to do some
really simple lines like this. I'm using my paint pen, where you can use a
gel pen if you want. Okay. And then here I could
use just do some dots. So I tried to keep it simple because there's already
a lot going on on there, so I think I'm going to stop there and then maybe
add a little bit of maybe a little bit of black. Like maybe here. Maybe here. Mm. So we're almost done. The last thing that I
want to do is add a little a little a
few dots of red.
7. Finishing Touches: So the last thing I'm
going to do on this is add a little
touch of red paint. So I'm going to use
my skewer for that. But you can also use
Posca pen if you want. But I like to use skewer
because you can really, um let me get you closer. Like there you go.
Yeah, so you can really get a nice thick um coat. Also, if you want to use exactly the same color that
you have on your flowers, then that's a good way
to do that, right? And then I like to add
some in my vase here. I'm going to call this
done. I go to do this one? Actually, no, I have one more thing that
we're going to do. I'm going to put one here. This is it. Time for
the final touch. You can actually leave it like that. It looks
great like that. But also, if you like me
and you're collecting stamps and people send you all these cool stamps,
you want to use them. I like to bring a little bit of that international flavor into my postcards and I
will I don't know, I will try to find
a color that is not overpowering because you don't want thistmp to take over. But I like these because it
picks up on the red here. And I had this one too, but I thought it was too much because it just
wants to take over. I like these too. Then the
other thing I'm going to add for this one is from my
Tweetle Postcard class. I have a list of
different things that you can add to your card if you
want a little note on there. I'm going to put this one here. Pins atoi means thinking of you and I'm thinking of all of you making
postcards right now. And I'm going to glue this down. And then voilà, you've done two awesome postcards
and ready to send out, ready to show me
when you're ready. I can't wait to see what you do.
8. Working in your Sketchbook : I if you wanted to do the
project in your sketchbook, you can use a sketchbook from my five day collage
sketchbook challenge class. And then you can just use the
same technique, basically. So you'll just need
straight edges. So, you know, you'll need to
put your corners in first, but then after that, it's
pretty much the same thing. Once you've done
your background, you keep going just the way that we do the rest
of the postcards. So extra credit for you
in a sketchbook class.
9. Thank you: I. So thank you so much for doing the class
and making postcards. I can't wait to
see what you make. You can send your postcards
in the mail just like that, or you can also put
them in an envelope. And if you need
some inspiration, you can look at my three little
envelope Skillshare class and you can also use this
technique for other projects. I covered the lam share
all broken inside, so I actually covered it using that same technique
with the book pages. I think I might add
probably some Stencil on it or something. But anyway, get creative
and find some other ways to use this technique
and make sure to upload your postcards in the project section
below and follow me on Skillshare and stay tuned for my next postcard class
in the series. Aviato
 Lucie Duclos, Design + Mixed Media