Transcripts
1. Introduction: Scrunchies are cute
versatile hair accessory that are fun to wear and gifts. If you want to learn how to make five different
kinds of scrunchy, then this is the class for you. In this scrunchy
sewing masterclass, I cover fabric selection, essential sewing tools, how to read the sewing pattern, and even teach you how to make your own jumbo scratchy
sewing pattern. Hi, my name is Julicia James. I'm a designer based
in the United States. I teach beginner sewing at Made Institute of
Fashion Design School based in Philadelphia. I'm also a writer and artist and owner of the business
Julicia Rose. You can visit my website
@juliciarose.com. After taking this class, you will learn how to sew the
classic everyday scratchy. But that's not all. I'll also show you
how to customize this scrunchy in
two different ways. First by making a per-key pop, and then by making a thick glamorous spill with the one you see
in my hair right now. This class is bonus lessons including sessions where I teach you how to make a jumbo scratchy and how to
make a confetti scrunchy. We will sow with both stretchy fabrics and
non-stretchy fabrics. You will need access to a
sewing machine for this class. Follow me here on
Skillshare so you get updated when I post new classes. You can also follow me on
Instagram @juliciarose, where you can see my
latest projects and follow my life as a designer,
writer, and artist. Let's get started with
sewing up these scrunchies. I'll see you in the class.
2. Class Project: For this class, your project can be completed
in three simple steps. Step 1, choose a fabric, and upload a photo of it
to your class project. Let us know if you
chose a woven fabric, or a knit fabric. Woven fabrics are non-stretchy, and knit fabrics are stretchy. I'll go into that more in
the fabric selection module. If it's a woven fabric, let us know how you plan to finish the edges
of your scrunchie. Step 2, sew a classic
or jumbo scrunchie. Step 3, upload a photo of your completed scrunchie
to your class project. As a bonus, you may also wish
to jazz up your scrunchie. Maybe you add a perky bow, or a glamorous ribbon tie
to your classic scrunchie. Or maybe you add confetti on the inside
of your jumbo scrunchie. Have fun with it, and do whatever makes you
happy for this class project. You can download the supply list and the sewing pattern
for this class in the Projects and Resources
tab underneath this video. You can access that tab
when you're on a laptop, or a desktop computer. Let's go into the next lesson.
3. Sewing Tools: Let's talk about the
supplies you'll need. First, you'll need access
to a sewing machine. Next, you'll want scissors
or a rotary cutter. Make sure you buy
fabric scissors. Don't use fabric scissors to cut anything else like paper because that can dull the
blade which will make it harder for you to cut
through your fabric. A rotary cutter will allow
you to cut your fabric a bit quicker than scissors but
you'll need a cutting mat like the one my supplies are on here to use a rotary cutter. A safety pin will
help you to push the elastic through the
body of the scrunchie. Straight pins hold the fabric
in place while you sew. Pattern weights are very
helpful because you can place them on your fabric to hold it in place
while you cut. If you don't have
pattern weights, don't worry about it. You can use something
heavy like a cell phone or a smooth stone that
won't tear your fabric. See you in the next lesson.
4. Anatomy of a Scrunchie: Let's take a close look at
the anatomy of a scrunchie. Have a look at this
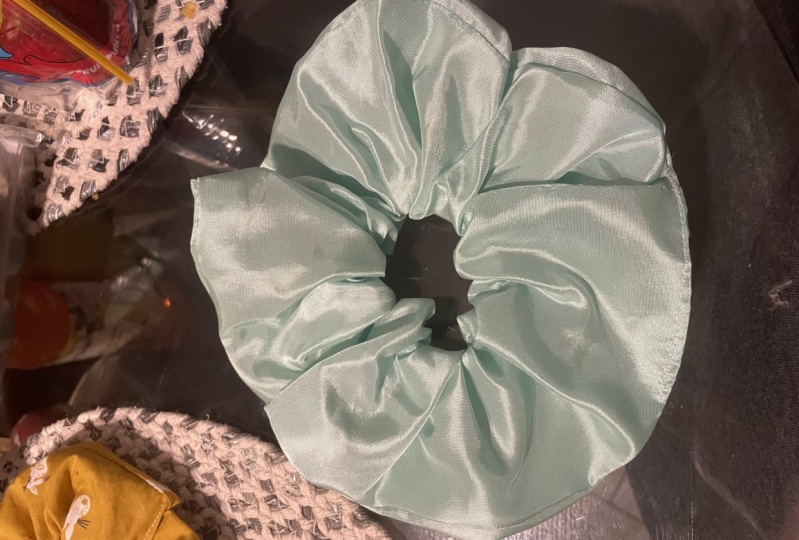
classic scrunchie. It's made up of
just three things. Fabric, thread,
and then elastic. The elastic is on the inside of the scrunchie where
we can't see it. There are quite a
few steps we have to take to create the scrunchie. But at the end of the day, it's just made up of these
three things: Fabric, thread and elastic.
5. Assembling and Cutting the Pattern Pieces: [MUSIC] In this section, we'll learn the right
way to assemble a sewing pattern and how
to read a sewing pattern. First things first, download this scrunchie sewing pattern in the Projects & Resources
tab below this video. The way the Skillshare
platform is set up, I believe you have to be on a desktop to download
the sewing pattern. Now, a sewing pattern is a template that we use
to lay on top of fabric. It's a guide that tells us
how to cut out our fabric. Once we cut out our fabric, we can start to sew it. This pattern piece is
the scrunchie base, which looks like this
after it's assembled. This pattern piece is the
bow of this scrunchie, which looks like this
after it is all sewn up. Before we grab our scissors, let's talk about how
to cut this out. You can see that there's
a solid black line around this rectangle and a solid black line
around this rectangle. Then there's a gray line
within A1 here and here. This is telling us that we need to cut out both rectangles at the black solid line and
tape them together at the A1. Cut along the solid black
line of one rectangle. Leave some paper at the end
of this rectangle here, because that'll help
make it easier to tape the two pieces together. One more thing I want to point
out is this test square. This test square
should be one inch by one inch if you measure
it with a ruler. Sometimes printers can scale down when they print an image. If you measure this test square and it's one inch by one inch, that should ensure
that everything is printed out the
size it should be. After you have both scrunchie
base pieces cut out, tape them together where
the A1 is indicated. Tape the two gray
lines together. I like to tape the
back and the front so that the flap in the back won't get caught on anything. Now, for the bow, there [LAUGHTER] is
no assembly required. All we have to do is cut it
out on the black solid line. We now have the
pattern pieces for our scrunchie base and our bow. Let's talk about the markings on our sewing pattern pieces. First, let's talk
about these arrows. These arrows indicate
where to place the patterns in relation to the salvage edge of the fabric. The salvage edge
of the fabric is the finished edge of the
fabric that runs lengthwise. It prevents the fabric
from fraying when it's on the bulb and may be a different color from
the rest of the fabric. Place your pattern
pieces so that these arrows run parallel
to the salvage edge. I'll show you what
I mean when it's time for us to cut
out our fabric. Another symbol that
you'll notice on your pattern pieces are these red triangles that
are called notches. Notches are where we cut
tiny snips in the fabric. They tell us when to
start and stop sewing. I'll share more about
notches in a future clip. Well done, you've cut
out your sewing pattern. Now it's time for us to
move on to the fabrics. As a reminder, you can download the sewing pattern in the Projects & Resources
tab below the video. See you in the next lesson. [MUSIC]
6. Fabric Selection: [MUSIC] There are a plethora of fabrics that
exist in the world, but most fall into
two main categories, woven fabrics, which are not stretchy and knit fabrics
which are stretchy. Let's have a look at this
golden silk linen blend, this is a woven fabric, it does not stretch
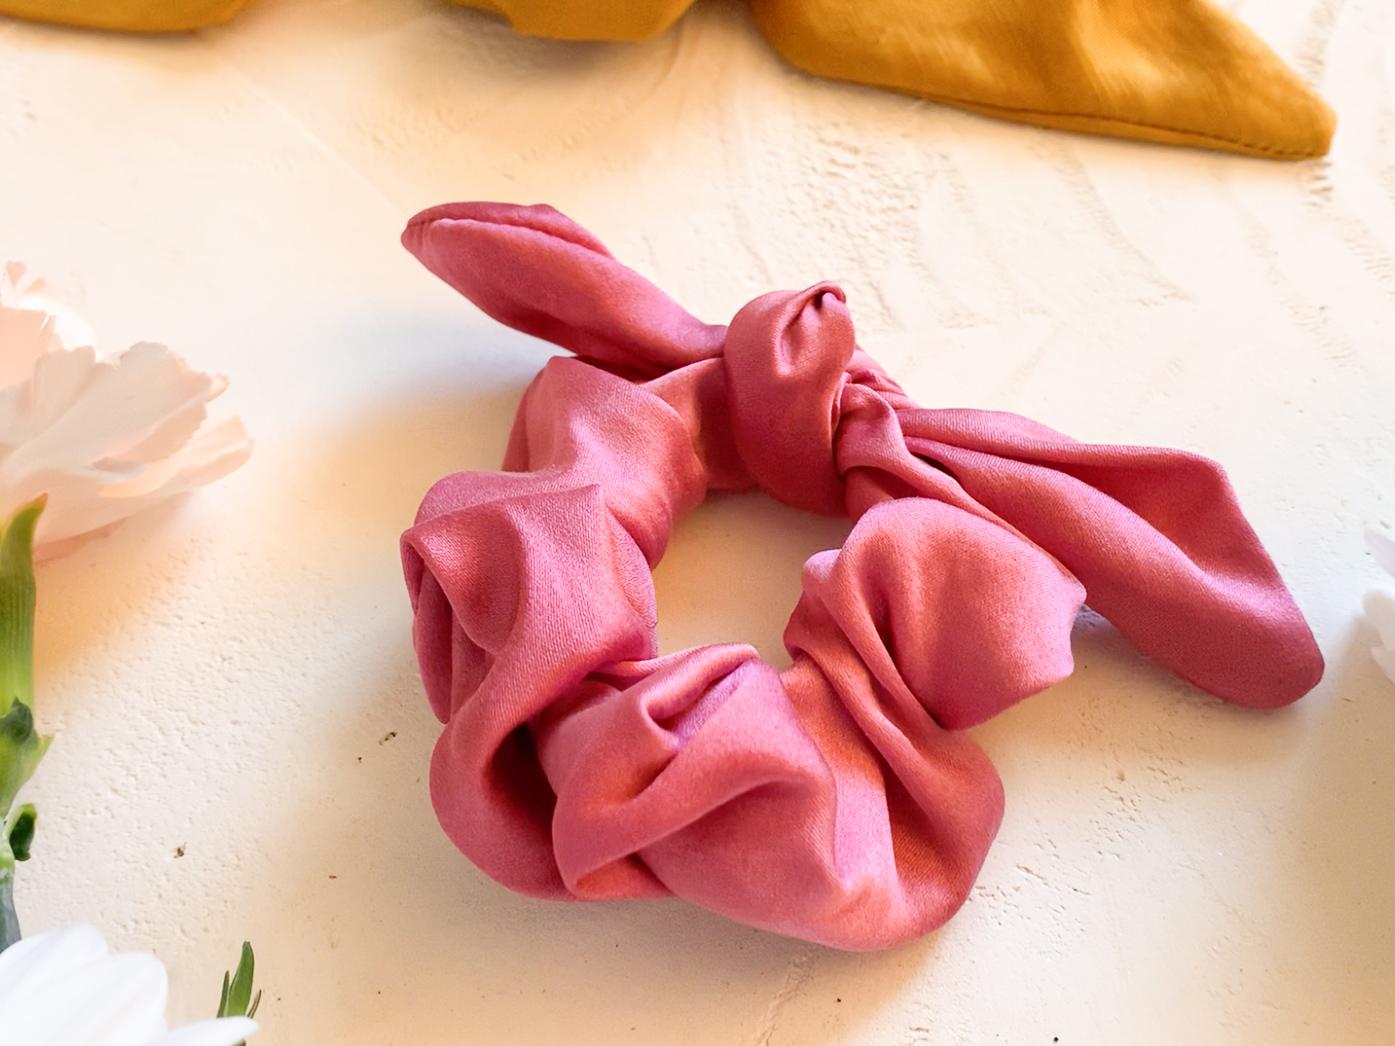
when I pull it, this pink silk charmeuse
fabric is knit, when I pull on it, You can see that it has
some give, it stretches. Why is it important
to know of the fabric you're sewing with is
a knit or a woven. Well, how we finish
the inside seams of Your scrunchie will differ according to the type
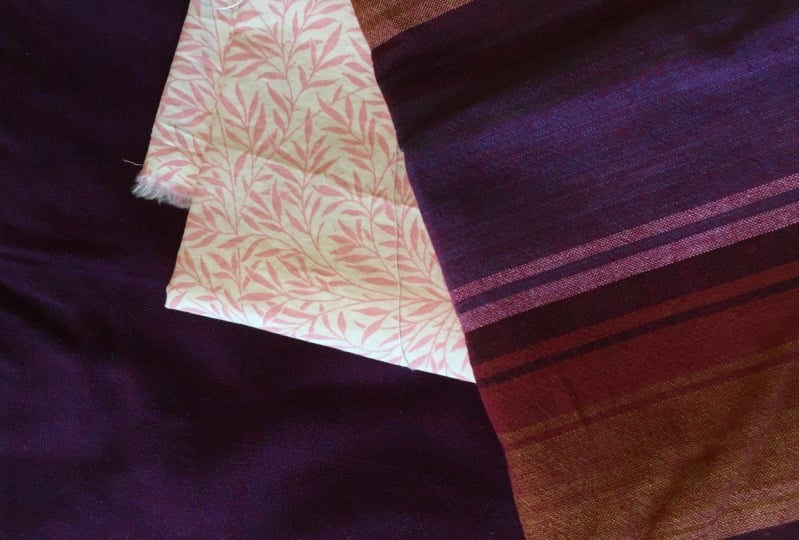
of fabric you're using. Woven fabrics fray at the edges, look at what happens when
I run my fingers along the edges of this
woven golden fabric, the threads immediately
start to pop off, You will have to secure these
edges with a zigzag stitch, a surging stitch or
pinking shears, otherwise, Your scrunchie, will unravel at the edges and could potentially
fall apart over time. Here's another woven fabric, You can see that as I pull
the edges, threads pop off. Let's think about how
we use a scrunchie, when You use a scrunchie, you're constantly pulling at it, put it in Your hair, and take it out Your hair, you're going to want the
inside edges to stay intact. However, when
you're working with a knit fabric like this
sparkly white fabric, there is no need
for You to secure the raw edges with a zigzag
stitch or a surging stitch. As You can see, this fabric is super stretchy, it's even stretchier
than the pink fabric, knit fabrics do not
fray at the edges. Let's look closely
at this pink fabric, there are barely any
threads hanging out. We can see a few tiny threads, but it's not fraying as wildly
as the woven fabrics were. There are absolutely no threads popping out of this
purple jersey fabric. This sparkly white fabric
is uneven at the edges, but when I pull at it, it's not becoming unraveled. You can use both
woven and knit fabric to create Your scrunchie, just remember that
with a woven fabric, you'll have the additional step of securing the raw edges with a zigzag stitch or a surging
stitch or pinking shears. Your scrunchie will
come together a lot more quickly
if You use a knit, that is a stretchy fabric. I will show You how to sew a classic scrunchie
with a knit fabric, and then I'll show
You how to make a jumbo scrunchie
from a woven fabric, this way, You'll know how to use both woven and knit fabrics
to create Your scrunchie. Go to Your local fabric store, ask questions and see
which fabrics You prefer, whether it be knit
fabrics or woven fabrics. See You in the next
lesson [MUSIC].
7. Cutting the Fabric for the Classic Scrunchie: Now that you've got your
sewing pattern ready, it's time to cut the fabric out for your classic scrunchie base. Lay your sowing pattern
on your fabric so that the arrow runs parallel
to the salvage edge. Go back to the video on
assembling your pattern piece if you need a refresher on
what the salvage edge is. Here I'm using a
scrap of fabric, so you can't see where
the salvage edge is. But I know from
memory where it was since I worked with
this fabric before. I prefer to use a rotary
cutter to cut my fabric, but you can use
fabric scissors too. Before you cut the
pattern piece out, you may want to use
pattern weights to keep your sewing pattern
from moving as you cut. You can also use
something heavy, like a cell phone or
a rock if you don't have pattern weights. Now, I'm going to expose the blade of the
rotary cutter and firmly press down on the rotary mat to cut
through the fabric. You'll want to use a sharp
rotary blade for this. If your rotary blade
is dull like mine was, you may have to snip
off a few threads afterwards with a pair of fabric scissors like
you see me doing here.
8. Pinning the Classic Scrunchie: Let's pin our scrunchie base. Ensure that you have all
your notches cut out. There should be four notches. Make sure you have
your pins close by. We're going to fold
this fabric in half with the right
sides together. The right side of the fabric is the side that has
the design on it. If your fabric doesn't
have a design, the right side of the fabric
is the side that perhaps is shinier or looks more
pleasant than the wrong side. The right side of
the fabric will be visible when you finish your scrunchie and are
wearing it in your hair. This is the wrong
side of the fabric which will not be visible after we finish
sowing the scrunchie. Let's fold this
fabric right sides together aligning the notches. Use pins to pin in between the notches from notch to notch. I like to pin the
notches first so I have a guide of where to
start and stop pinning. Once these two
notches are pinned, I add pins in between. Great. O we've pinned
our scrunchie base. Let's move on to sewing on our sewing machine
in the next lesson.
9. Sewing the Classic Scrunchie Base: Let's sew our scrunchie base. Ensure that you have
your scrunchie pinned right sides together
from notch to notch. Use the right stitch
for your fabric. Since I'm using a
stretch fabric, I'm going to use
a zigzag stitch. If you are using a woven fabric, use a straight stitch. We're going to sew with a
quarter inch seam allowance. This means that your
needle should be a quarter-inch from the
raw edge of your fabric. I put my needle down, slide out the first pin, and start to stitch. I remove the pins as I go so the needle doesn't
get caught in them. Remember to
backstitch at the end to lock your stitches in place. Since I used the knit fabric, I can move right on
to the next step. I do not need to
finish the raw edge. However, if you used
the woven fabric, that is a fabric that
is not stretchy, you will need to finish
the raw edge with a zigzag stitch or
an overlap stitch. You can see that for this
golden woven scrunchie fabric, I'm overlocking the edge. Go back to the lesson
on fabric selection for a refresher on why this is
important for woven fabrics. As you can see, I stitched
right up until the notch. My stitching is from
notch to notch. You'll see why this is so
important in the next lesson, when we turn the
scrunchie inside-out.
10. Turning the Scrunchie Inside Out: Now that we've got our
scrunchie base also, now we're going to
turn it inside out. We want the right side of the fabric to be
facing outwards. Now, grab one end of
the fabric and start pushing it upwards with your fingers like you
see me doing here. I'm also pulling the fabric up with the fingers of one hand. This is why we only
sewed in-between the notches to facilitate turning this
scrunchie inside out. You can see I've already
done half of it. This takes a little while so you can play some music or have your favorite YouTube videos or stay calm on,
in the background. This part takes some practice. I'm slowly pulling
the fabric out. Remember to enjoy the process. Our scrunchie is
completely turned inside out with the right side
of the fabric facing out. Next, we want to fold our
scrunchie in half and pin the lower edges together with the right sides of
the fabric together. We're going to sew the
scrunchie base shed. Grab your pins and pin
the lower edges together. It should look like
this when you're done. We will stitch these
edges together with a quarter-inch
seam allowance. When you finish stitching the short edge, it should look like this. Notice I stitched with a
quarter-inch seam allowance. I did not finish the edges
since this is a knit fabric. Pop the short edge
into your scrunchie by gently pulling on either
end of this scrunchie loop. You should now have a loop
that looks like this. This is what we'll
put our elastic into. See you in the next lesson.
11. Cutting the Elastic: Let's cut out our elastic
for our scrunchie. Cut a length of elastic that can comfortably and snugly
fit around your wrists. Remember to account
for seam allowance. If six inches comfortably
fits around your wrists, cut around 6.5 inches. This will account for the
length you will lose when you sew your elastic together
or tied in a knot. I'm cutting around six
inches of elastic. Here, I'm checking to see
whether it's a good fit by putting it around my wrist and just moving my
wrist back and forth. Don't be afraid to
cut another length of elastic if the first length
you cut is too short. See you in the next lesson.
12. Inserting the Elastic into the Classic Scrunchie: [LAUGHTER] We made it to one of the most
exciting parts of your scrunchie
make game journey. You have the base
of your scrunchie and now it's time to
grab your elastic. Get out your elastic and we're going to insert it
into this scrunchie base. You're going to see the magic
of what happens and how it turns into this scrunchie
once we add the elastic. Grab a safety pin, and you're going stick it
into one end of the elastic. Once you've done that, you're going to close the pin, so you've got your safety pin on one end of the elastic and
the other end is free. Now, pick up your
scrunchie base, and you see this part
that we left open, the part that has this
gap here, you see that? We're going to grab the
safety pin end of the elastic and shove it up
[LAUGHTER] that scrunchie. Just put it inside
and you're going to push the pin in
through the fabric. You see what I'm doing here, I am sewing it through
the scrunchie base. As I push the pin up, you see the fabric
is all scratched up, so cute, turning
into this scrunchie. You're just going to pull
the fabric down a little bit and make sure you hold
onto this elastic tail. Another thing I want
to mention is try not to swivel or rotate
the elastic too much. You don't want it to be
too twisted in here. Again, I'm going to push
up the pin in here. The fabric is going to
go and switch it up. Then I'm pulling
down the fabric, making sure my right
hand is holding on to the other elastic end. I'm just going to do that
until I see the pin again. There's the pin [LAUGHTER],
so I'm pulling it through, and there we go. It's already looking
like a little scrunchie, look at that
[LAUGHTER]. So cute. This is like one of the most exciting parts of
making a scrunchie when it actually starts to look like the thing it's supposed to be. Now, that the two
elastic ends are added the scrunchie fabric, I am feeling through the
fabric of the scrunchie, feeling for the elastic to make sure it's not too
twisted in there. So huge deal if
it's super twisted but I just like to doubt
my eyes and cross my Ts. Now, I'm going to
remove this safety pin, being careful that I don't lose the elastic tails
back inside the scrunchie, so I take that safety pin out and we've got our
two elastic tails. What we're going to do next, is sew a secure zigzag
stitch over this. You can honestly just tie
this in a knot and be fine. But I prefer to sew it, not necessarily because
it's more secure just because I feel like it's a clean finish and this is
just what I like to do. I'm going to head to the
sewing machine and I'm going to sew a zigzag
stitch on this. Let's pop over there.
13. Completing the Classic Scrunchie: Let's complete our scrunchie. First, we're going to sew a zigzag stitch
over the elastic. Then we're going to sew
our scrunchie shed. I am sewing the elastic shut
here with a zigzag stitch. Here, I'm pulling
on the elastic to make sure it's secure
and won't pop open. It's pretty secure but I'm
going to sew one more zigzag stitch parallel to my first
stitch for extra security. Remember to back tack. Here it is my completed elastic. Snip any loose
threads that you see. Now, tuck the elastic
loop into the scrunchie. Fold the raw edges of the scrunchie inward like
you see me doing here. Try to make sure that the seams are aligned. It's almost going to look
like a little mouth. Sew your final stitching as close to the edge of
the scrunchie as possible. We're not sewing with
the quarter-inch, seam allowance, we're sewing right on the edge
of this scrunchie. Use a zigzag stitch for knits and a straight stitch
for woven fabric. Hurray, you've now completed
your classic scrunchie. Congratulations. Now, it's time to try it on. Wear it in your hair, wear it as a bracelet,
show it off. But remember, we still
have more to cover. I'm going to teach
you how to add a perky boat to your scrunchie, how to pattern drop
a luxurious ribbon, how to create shear,
jumbo scrunchies, and together, we'll even make a
confetti scrunchie, which is one of my favorites. I can't wait to welcome you into the next lessons. See you there.
14. Anatomy of a Bow: This is a per-key bow which can be knotted around your scrunchie as acute detail. Your bow is made up
of three main things, fabric, thread, and wire, which is
inside the fabric. For your wire, use 20 gauge beading wire found at your local
craft supply store. Let's cut into our fabric
in the next lesson.
15. Cutting the Perky Bow Pattern Piece: [MUSIC] Let's cut the wire
that goes inside of our bow. I'm using 20 gauge
beading wire to give our bow that
nice perky shape. Cut seven-and-a-half inches
of the beading wire. I'm measuring
seven-and-a-half inches on my cutting board. Once you've cut it out, pinch the ends of
your wire back into a small loop with your
thumb and forefinger. This will prevent it from poking through the fabric
of this crunchy. You can cover this loop
with electrical tape for extra security if you'd
like, but that's optional. [MUSIC] Now, let's cut
the fabric for the bow. We can cut it in a
single layer or folded. I'll show you both ways. I'm using a rotary cutter, but not in these
corners of the bow because they can
be tricky to cut. You'll need a pair of scissors, whether they're
large scissors or smaller scissors to cut
into those crevasses. I'm going to start cutting
with my rotary cutter. If the blade of my rotary cutter doesn't quite catch the fabric, I just use these smaller
fabric scissors to cut them. What I'm going to
do next is glide my rotary cutter
around the edges like these twin peaks here and make a rough cut
around this pattern piece. After I'm done with that, I'm going to grab my scissors, and I'm going to snip this little triangle shape
out with my pair of scissors. [MUSIC] [LAUGHTER] Voila. I've just showed you how to cut out your bow as a single layer. Don't forget to snip out your notches because we're going to use those as guides later on. Now, I'm going to show
you how to cut out this pattern piece on
the fold of the fabric. Some of you may find
this method easier. You only need to cut
out your bow once, so just choose the method
that works best for you. First things first, fold your fabric in half if you
want to cut on the fold. I'm using a scrap
of fabric here, but you can see it's
folded in half. Then I fold the pattern
piece in half as well. Place the fold of your pattern piece on
the fold of the fabric. Add your pattern leaps and
once you have those on, you'll just take your
rotary cutter or scissors and cut along the edge. Stop once you get to the fold. Once you've finished
cutting along the edge, take your scissors and
snip the two red notches. Since I've already
cut out my bow, I'm not going to use
this fabric for that. I'm going to save it
for another project. Here, I have my
bow pattern piece, which is all cut out
and here's the wire. Now's a good time to make
sure it fits within the bow. I'm checking the length
and this looks good here. I'm going to set the wire
to the side for now. Fold your fabric in half,
right sides together. Align the notches
like we did for the classic crunchy
piece Grab pins and pin the bot fabric,
right sides together. Now, let's get to
our sewing machine. We're going to start
from this edge to the notch and then from
this edge to the notch. See you in the next lesson. [MUSIC]
16. Sewing the Perky Bow: An alternative to using pins would be these
quilting sewing clips. You can use pins and sewing
clips interchangeably. I'll show you how I remove
these clips as I saw. Start sewing at the
corner of the bow to the notch with a quarter
of an inch seam allowance. I'm sewing down to the notch and removing
clips as they go. Be mindful that clips can
weigh down your fabric, which can result in
cricket stitches. That's why I folded up the bow, so the fabric isn't
weighed down by the clips. I'm being careful not to stitch into this excess fabric
that I folded up. Here's what it'll look like when you saw the first
side of the bow. Let's sew the next
side of the bow. First, I sew one
side of the corner. Then I gently pivot it and remove this clip. I'm just looking at my fabric, making sure everything is laying flat and nothing is twisted. Now I'll continue leaving
a gap in the middle. Here's what your bow
should look like. I did not sew past the notches, so there's an opening for us
to turn the bow inside out.
17. Completing the Perky Bow: There are four steps we need to follow to complete our bow. First, we're going to
turn it inside out. Then we're going to iron it so the fabric lays nice and flat. Next we'll insert the wire inside so it has that
a nice perky shape. Finally, we will sew it shut. Our bow is sewn up apart
from this little gap. Let's turn it inside out, just like we did with
the scrunchies base. First, I turn on one side
of the bow and inside out then I'll turn
the other inside out. When you turn your
bow inside out, it should look like this. We want sharper corners than
this for our perky bow, so grab a point
turner or a pencil. This is a point turner, and here's my pencil. I'll show you how to use both. Take your pencil and gently guide it towards
the tip of the bow. You're not shoving
the pencil in, you're just massaging the fabric over the tip of the pencil. If you shove the pencil in, that could damage your fabric. With the point turner, it's the same concept. Ease a pointer enter into that corner to gently
create a crisper corner. Now, let's press the bow. I press my bow with my iron. Now I'm grabbing my wire. You'll see the two ends of the wire that I've bent earlier. Go back to the cutting the bow pattern piece
module to see that. I'm sliding one end of the
wire into one end of the bow. You may need to bend it like
you see me doing here to fit it into the other end of
the bow. That's all right. We'll straighten
the wire out after it's snugly fit into this bow. Now, I'm straightening
the wire out and making sure there
are no bumps inside. Remember this opening here. Let's sew that shut. As this is a knit fabric, I can use a zigzag stitch or
a triple straight stitch, which is a stretchy stitch. Triple straight stitches
use a lot of thread, so i don't use
this stitch often, but it's a great stretch
for knit fabrics. If you want a straight
stitch that has stretch. For a woven fabric, just use a regular straight
stitch right on the edge. So we're not sewing with a
quarter inch seam allowance, we're sewing on the edge. Go slowly and take your time. Here we go. Stitches
right on the edge. Our bow is complete. We made our perky bow, we completed our
classic scrunchie, and now let's put
the two together. Tie the bow around your
classic scrunchie once, making sure that the wire is
unequal sides of the bow. You see where the stitching
is on your scrunchie, tie the bow around that
stitching to hide it. I can feel that there's
more wire on this side of the bow than this
side, but that's okay. It gives it some character. Now, I'm just going to hide these stitches by folding
it over like that. Voila, there you have it. An adorable little
scrunchie with a perky bow. I love it so much already. In the next lesson, I'll teach you how to
make a jumbo scrunchie. These giant beauties, dwarf of classic scrunchie and they're so much
fun to create. I'll see you in the next lesson.
18. Bonus Lesson: Create a Sewing Pattern for the Jumbo Scrunchie: The anatomy of a
jumbo scrunchie is the same as the anatomy
of a classic scrunchie. The only difference is that a jumbo scrunchie uses a
lot more fabric and thread. Surprisingly, it uses the
same amount of elastic. In this lesson, I'm
going to show you how to create your
own sewing pattern, so you have a template to
make a jumbo scrunchie. Grab some scrap paper. Using a ruler, measure 7 inches by 17 inches. Mark this rectangle
using your ruler. Then, we're going to
cut out this rectangle. After you cut your rectangle, draw an arrow, as
indicated in this diagram. Right cut on fold on one
short end of the rectangle. The total dimensions of your jumbo scrunchie
when you cut it out will be 34 inches by 7
inches before it's sewn out. However, to save on paper, we're going to use this
cut on unfold trick. When you advance to
the next lesson, you'll see what I mean. This is what your pattern
piece should look like so far. Now, your final step is to add notches on each long side of
the sewing pattern piece, about 2-3 inches
from the short edge. This will indicate where we
will start and stop sewing. Awesome. Let's get out
our jumbo scrunchie. See you in the next lesson.
19. Bonus Lesson: Making the Jumbo Scrunchie: There are four steps to
make the jumbo scrunchie. [MUSIC] These are the same steps we followed to create
the classics scrunchie. First, let's cut out the fabric
for our jumbo scrunchie. Here is the jumbo scrunchie
pattern piece that I made. You'll notice that
I forgot to add notches to my pattern piece, but please remember
to add them to yours like I showed you
in the last lesson. Take a look at the fabric. It is folded in
half and I placed my pattern piece right
up against this fold. I'm going to cut it on the
fold using my rotary cutter, but first I'm going to
add two pattern weights. I have these fun
pattern weights that I got from Etsy that
looked like donuts. This fabric is very
slippery and silky, so I need to keep my pink and
purple pattern weights on the edge of the fabric so it doesn't move around
while I'm cutting. Cut your fabric. Because we cut it on the fold, you should now have
a rectangle that's 34 inches long by
seven inches wide. [MUSIC] I'm removing the pattern piece and as you can see our fabric is double the size of
our pattern piece, 34 inches long by
seven inches wide. After you finish cutting
out your fabric, remember to snip your notches as indicated on
your pattern piece, about 2-3 inches
from the short edge. I refolded my pattern piece because [LAUGHTER] I
forgot to snip my notches. I'm going to snip
those notches now. [MUSIC] Next, fold your fabric in half with the long edges together. Pin in between the notches, just like we did for
the classics scrunchie. Stitch in between
the two notches, just as we did for the classic scrunchie with a
quarter inch seam allowance. [MUSIC] Here we have the body of the
jumbo scrunchie sewn up in between the two notches. I also finished the edges
with a zigzag stitch. The raw edges won't fray
since this is a woven fabric. Now, it's time for us to turn our jumbo
scrunchie inside out. Put on your podcasts
while you do this part as it's
going to take awhile. This is a lot of fabric. [MUSIC] Now that it's inside out, I'm pinning the short
edges right sides together in preparation to
stitch them at the machine. Just as we did for the
classic scrunchie. [MUSIC] The short edges of a
jumbo scrunchie are all stitched up with a
quarter inch seam allowance. I also finished the edge
with a zigzag stitch. [MUSIC] If you're
using a woven fabric, remember to also finish these exposed edges of the long side of the
scrunchie separately. It's better to do that before
you stitch the short edge, but if you forget, that's okay. You can always go back
and fix your mistakes. Now, I'm going to push the
short edge inside like that. Now you should have a loop that should look something like this. You can see the gap and
the seam that we sowed, which is right here. [MUSIC] Now take your elastic and cut it the size of your wrists, taking into account a
quarter inch seam allowance. You're going to cut
it just like we did for the classic scrunchie, and you can go back to that
lesson for a refresher. You're going to take this elastic and [LAUGHTER]
put it in this huge tube. I know your elastic looks tiny in comparison to
the jumbo scrunchie, but that is [LAUGHTER] what
makes it a jumbo scrunchie. You have tons of fabric in
relation to your elastic. Trust the process, everything
is going to work out. Pop your pin into the
elastic and insert the elastic pin side in first
into the jumbo scrunchie. Make sure not to lose the
tail of your elastic. You want to keep this and
out of this scrunchie. [MUSIC] While you do this part, you may want to have a
funny YouTube video on or an audio book playing
in the background. Once the elastic is
inside your scrunchie, remove the safety pin and stitch your elastic shut or tie
your elastic an a nod. Now, just as with the
classic scrunchie, the final step is to stitch
your jumbo scrunchie shirt, fold it in by a quarter of
an inch and so it shut. Remember to stitch on the edge just as we did with
the classic scrunchie, as this is a woven fabric I will be using a
straight stitch. All right, my laws, we're done with our
jumbo scrunchie. Aren't you excited? I love this. How does it feel? I'm super stoked with
the way this came out. It's so fluffy [LAUGHTER] and glamorous all at the same time. I use a straight stitch
to close it shut, but you can use a slip
stitch for a cleaner finish. There are tons of
tutorials on YouTube. Teaching how to sew a
slip stitch by hand. [LAUGHTER] The jumbo
scrunchie could eat the classics
grungy for breakfast. It swallows it whole. [MUSIC] Next, I'm going to
show you how to create a ribbon tie for your
classic scrunchie. After that, we're going to
make the confetti scrunchie. I can't wait to share more of my scrunchie secrets
with you guys. See you in the next lesson.
20. Bonus Lesson: Create a Ribbon/Scarf Sewing Pattern: I'm going to show you how to customize your classic scrunchie
with the ribbon. First, we'll need to create a sewing pattern for the ribbon. Which is pretty simple. We're going to use our classic scrunchie base
sewing pattern as a template. We're going to fold the
corners of the pattern down on each short edge. Then you'll have a
new ribbon pattern. This simple alteration will
give us a ribbon shape. Now, I'll use my rotary
cutter to cut out my fabric. You'll want to cut out two pattern pieces
out of your fabric. You can lay two pieces
of fabric on top of each other and cut them
both out in one go. I'm cutting out one layer
of fabric at a time, since I'm using fabric scraps
that are oddly shaped. Here's my first half of
the ribbon all cut out. Now, I'm laying the pattern
piece on another section of this beautiful gold fabric and cutting out a second
pattern piece. Layer pattern pieces together, right sides together
and pin them. I'm going to take this to the sewing machine and
sew all around it, leaving a 2-3 inch
gap on this edge. So we can turn it inside out. Snip two notches where
the gap will go so that you'll remember to
leave a gap while sewing. Here are my two notches. See you in the next lesson.
21. Bonus Lesson: Completing the Ribbon Tie: There are four steps
that we're going to walk through to
complete the ribbon. The first step is to
sew the ribbon leaving a small gap in the middle
where we placed our notches. At the sewing machine, put your ribbon under the
needle right at the notch. I'm carefully stitching with a quarter inch seam allowance. For crisp corners, raise your pressure foot
of your sewing machine, leaving the needle
in the fabric. Pivot the fabric so the pressure foot aligns
with the edge of the fabric. Then sew until you get to
the next corner, repeat. Remember to remove
pins as you go. [MUSIC] As you can see, I've sewn up the ribbon, leaving a gap where
the notches are. [MUSIC] I'm going to clip these corners. Be careful not to snip
into the stitches. When we turn the
ribbon inside out, there will be less bulk in the corners so they
will be nice and crisp. As this fabric is
a woven fabric, I'm going to have to finish the edges so they
don't unravel on me. You can finish your edges with a zigzag stitch or
an overlock stitch. Another way is through
using pinking shears. These are pinking shears. They cut a zigzag into a fabric which makes it
less likely to unravel. Use it like you would any
other pair of scissors. Afterwards, turn the ribbon inside out like we did
with the perky bow. Use a point turner to get crisp edges for your
ribbon tight corners. Now, let's press the
ribbon so it lays flat. You see this gap? Let's stitch that shut right on the edge. We are not using a quarter
inch seam allowance. We're stitching as close
to the edge as possible. We've finished creating
our ribbon tie. Now, let's tie it around
our classics scrunchy base. We're going to tie it around
where the stitching is for our scrunchie to
hide those stitches. Tie it around the
scrunchy base once. We made it. Now we've got four different
scrunchies down pat. A luxurious ribbon
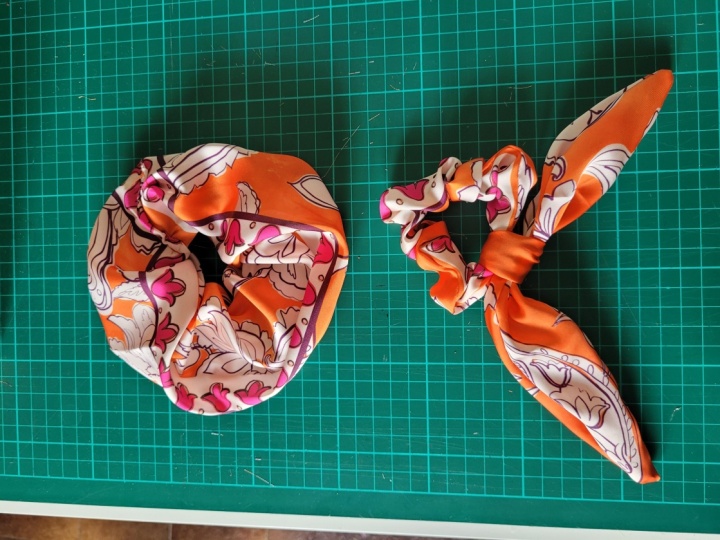
tie scrunchie, a classic scrunchie, a scrunchie with a perky bow, and a jumbo scrunchie. Let's put everything
that we've learned together and adventure
to the final frontier. We're going to make a
confetti scrunchie. See you in the next lesson
22. Bonus Lesson: Let's Make a Confetti Scrunchie: All right, you guys. We've reached the part in our scrunchie-making
journey where we're going to make the
confetti scrunchie. What you're going to need for
this is a jumbo scrunchie. Create the jumbo scrunchie, and you're going to
want to make it in a fabric that is see-through. Get a transparent fabric, it doesn't matter if
it's stretchy or if it's a woven non-stretchy
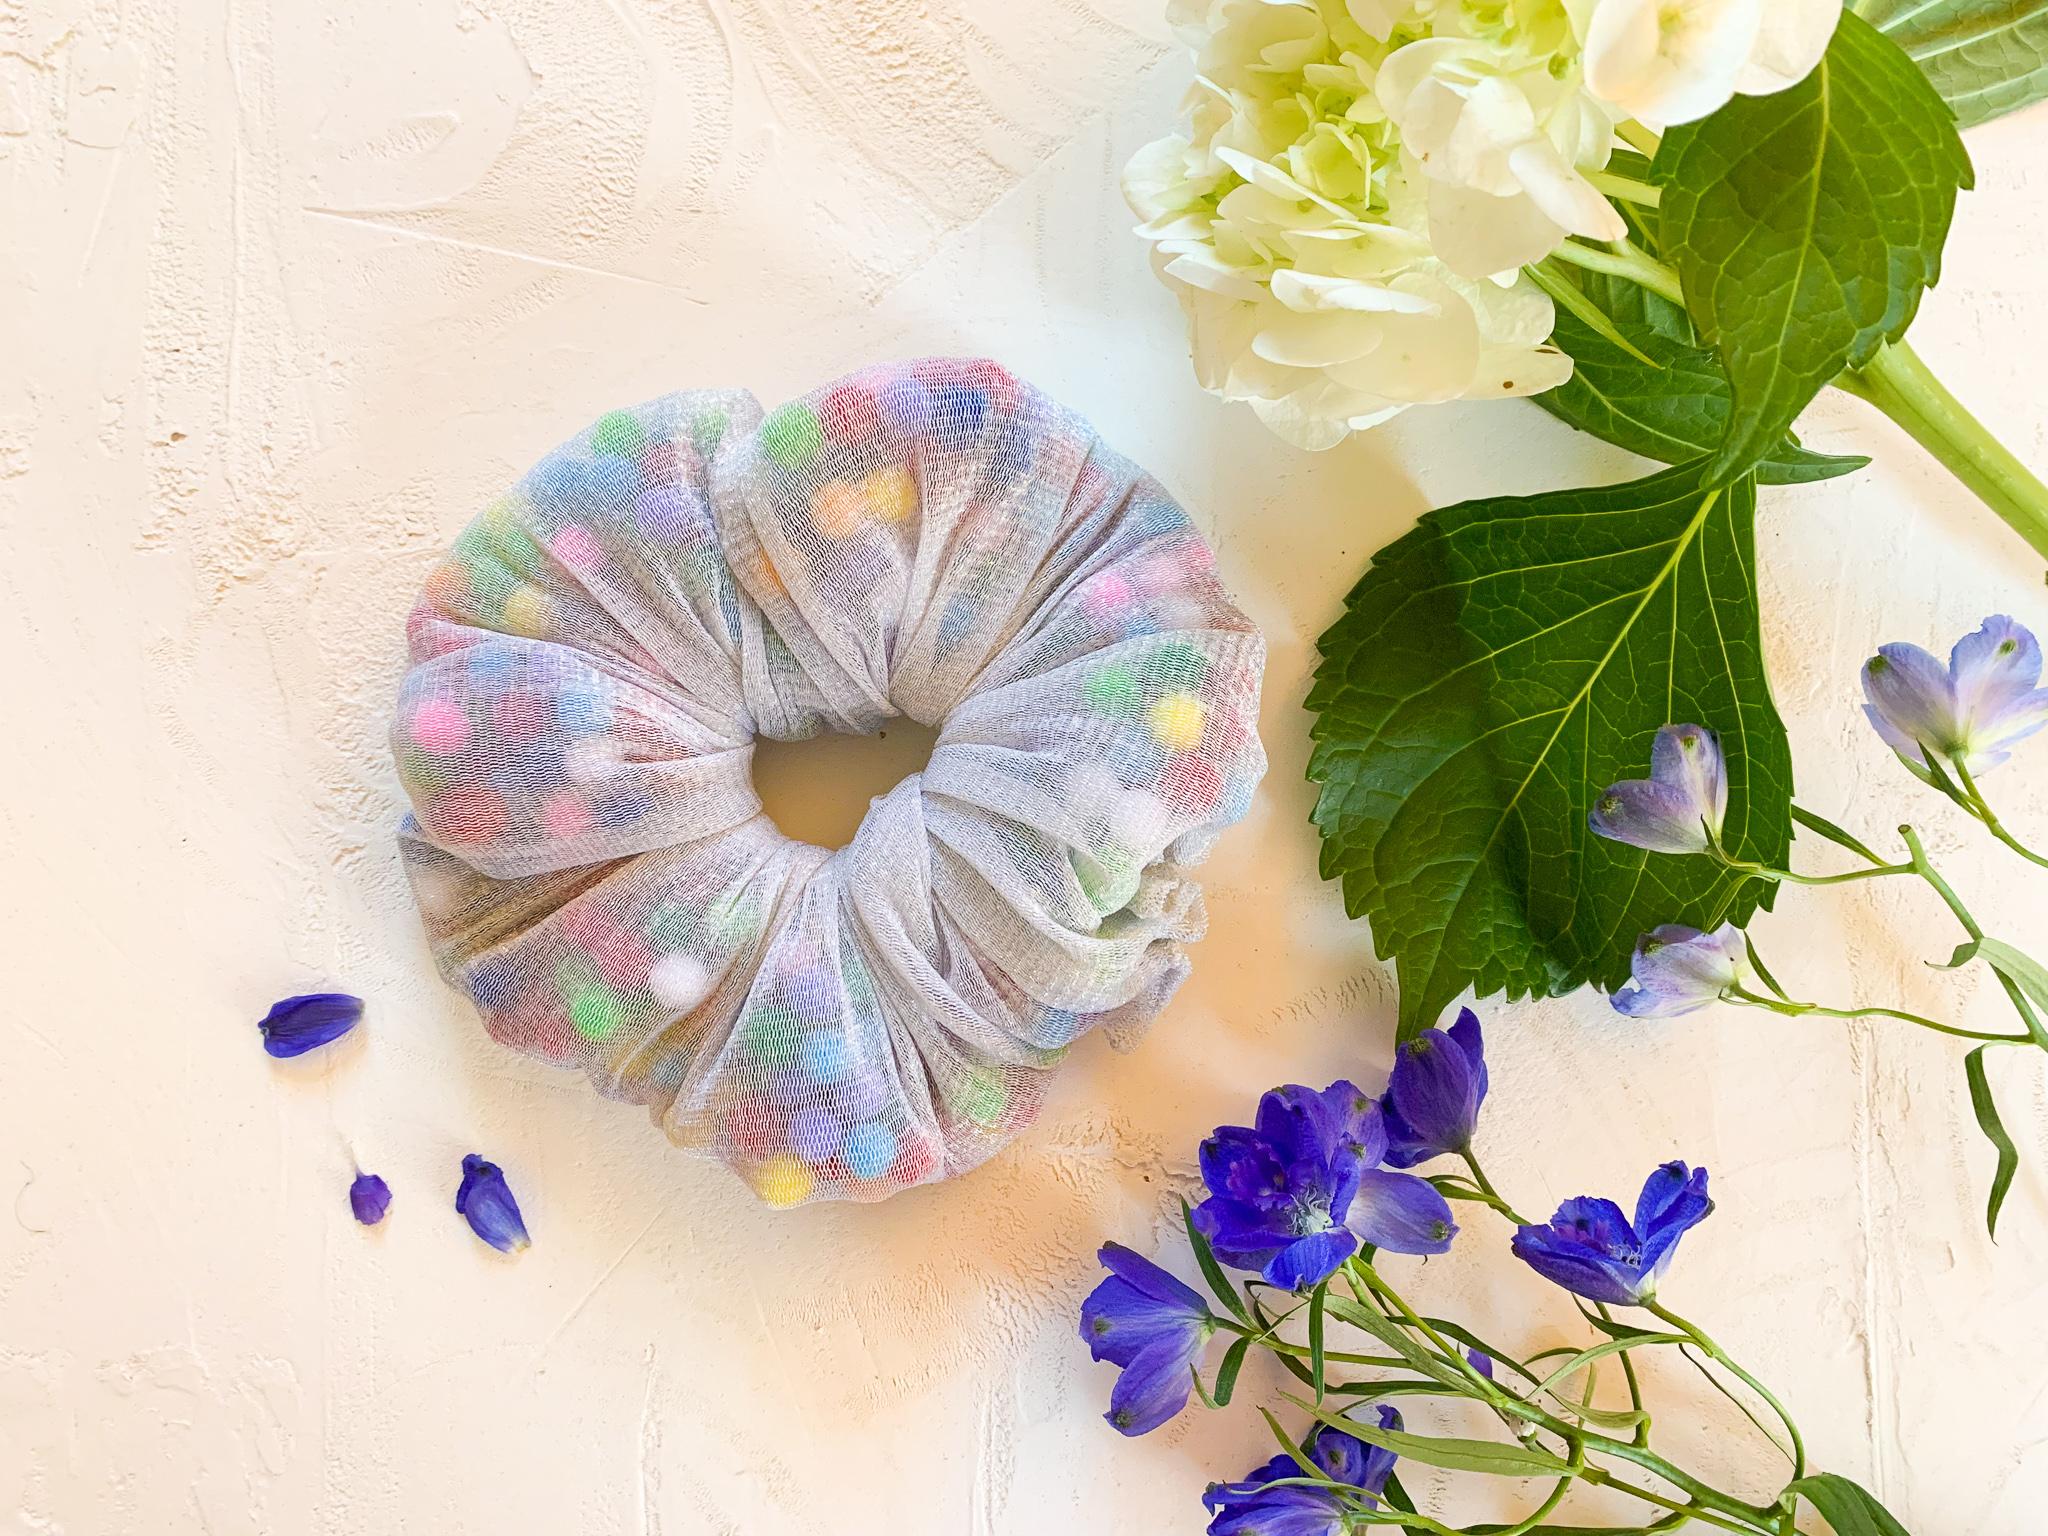
fabric, that's fine. I used a stretchy mesh fabric that is white and has
little sparkles in it. I don't really remember
where I got it from, I've had it for so long. Once you've made your
jumbo scrunchie, make sure you don't close it. You want to get to the part
where you've done everything but stitch the finishing stitch. After you've done that, you're going to want
to put pompoms in it. These are craft pompoms. I got these online, I think I got them on Amazon, but you can get them at your
local craft supplies store. They are fuzzy so they look, I don't want this fall, but they look like this. They're super fuzzy and
you can squeeze them. We're going to pack
your scrunchie with them, your jumbo scrunchie. I think these confetti scrunchies are so fun
because you can really fill it with anything
like I'm filling mine with pompoms
because they're soft, they don't make noise, and I feel like it would be
really cute as a bracelet, but if you are watching
this during Halloween, closer to Halloween in October, you might want to fill it with little spiders or googly
eyes or something like that. I think the confetti scrunchies really fun to
commemorate the season. Or if it's someone's birthday, you could fill it with
actual confetti, I think. Places like Dollar Tree
sometimes sells confetti that says happy
birthday in scripts, and you can put those
in the scrunchie too. Those are just some
fun ideas for you. Let's get into the next video. I'm not going to
show you all the way how to make a jumbo scrunchie because we already covered that, so let's go into the next video.
23. Bonus Lesson: Filling the Confetti Scrunchie: To make your pom-pom scrunchy, you want us up yours scrunchy
until you're at this point. The point where you
sewn up the base, insert the elastic and
sown elastic in a loop or tied it in knot and you
don't want to close it off. You just want to
get it to a point where it's mainly sewn up and you're at what would be the
last step to sew it up. But we're not going to sew it up because now we're going to add [NOISE] pom-poms [LAUGHTER]
I'm just grabbing a handful. You've got a whole bunch
of pom-poms everywhere. We're going to fill this
scrunchy up with these pom-poms. Put them in your jumbo scrunchy. We're going to fill it so
that you can see them. We're going to put a decent
amount in but we're not going to fill it to the
maximum capacity, because if you fill it too much, that it might be hard to actually wear your
scrunchy on your wrist. This so fun you can see inside. You know what this reminds me of when you were a little kid, and you would go to those indoor amusement places like Turkey to use and they would have those,
what do they call it? Ball pits. Yeah. We're
making a ball pit, but [LAUGHTER] in a
scrunchy. Let me see. It looks like we could use
some more pom-poms here. I'm going to push these
down with my finger, and some of them might fall out, like is happening
now, that's okay. We are going to get
those back in there. Right now I'm focusing on
filling this area here. I'm pushing pom-poms
further down, with two fingers of my
right hand and using my left hand to help
facilitate that. [MUSIC] Let's see. We simply fill this
a little bit more, but it is getting better. [LAUGHTER] You are going to
make a mess in this process, but that is okay. [LAUGHTER] [MUSIC] Look at that. I think this is so fun. You might want to do now is instead of directly
sewing it up, you might want to
base it first and see what the scrunchy
looks like with all the pom-poms and if
you want to add more or if you want to take
some out and have less. I'm going to baste this. A baste stitch is a loose
stitch that's temporary, which will take out eventually. I'm going to base this
with a long stitch. On your machine to
do basting stitch, you can use a
straight stitch with a length of four and that's usually long enough so that
you can take it out easily. I'm going to do that and see where we are with this scrunchy
and I'll be right back.
24. Bonus Lesson: Completing the Confetti Scrunchie: Here is our pom pom confetti scrunchie and I think
it's so cute and so fun because it reminds
me of a ball pit and confetti and a
pillow all at once. It's just so fluffy. Remember we're not
finished with this yet we just close it with
a basting stitch. That is a temporary stitch. We use a temporary stitch
because we want to see how does this scrunchie
look on our wrist. Are there too many pom poms? Are they too little? I wouldn't necessarily
put this in my hair because I
feel like there are too many pom poms and
this scrunchie is mainly meant as an accessory for your wrist, like a bracelet. Especially if you fill
it with something hard like plastic spiders, they might be hard to
wear in your hair. Let's see what this
looks like on my wrist. I think this is so fun. [MUSIC] You could even
selectively choose the color pom poms
if you were making this for Valentine's day, you can put pink and red. If you're making
it for Christmas, you can put green and red. If you are making
it for pride month, you would probably put
well all these colors. Yeah, it's just like
so fun, I love this. I think this is just
the right amount of pom poms in here for
this confetti scrunchie. I'm going to carefully take out these basting stitches
with my seam ripper. Then I'm going to sow the scratchy shut with
a permanent stitch. For this knit fabric, I can use either a
zigzag stitch or a triple straight stitch,
which is stretchy. [MUSIC] I'm taking out the
base things stitches here. [MUSIC] Now I'm stitching
the scrunchie shut. I'm being careful to remove
the selling clips as I go. I'll speed this bit up for you. [MUSIC] Here we have our
pom pom confetti scrunchie which looks a
little like a doughnut. Imagine if donuts were translucent and had
sprinkles on the inside. If they were, this is
what it would look like. [LAUGHTER] This is so fun. I'll see you in the next lesson.
25. Final Thoughts: We've made it to the end of
our scrunchie making journey. I hope that you had a lot of fun making all the
different scrunchies. Together we learned how to make five different scrunchies. A classic scrunchie, a scrunchie with a per-key bot, a scrunchie with a ribbon tie, a jumbo scrunchie, and a confetti scrunchie. Scrunchies are so versatile, they make a great project
for a beginner sewers, but they're great
for advanced sewers as well because you can customize this hair
accessory to your liking. I hope you enjoyed taking this class and that you've
learned something new. If so, please remember
to leave me a review and I would love to
see your scrunchies. Please remember
to post photos of the fabric selection that you made and also your
completed scrunchie. Thank you so much for
joining me and for taking the ultimate scrunchie
sewing masterclass. Until next time.
 Julicia James, A creative that sews, writes, and paints