Transcripts
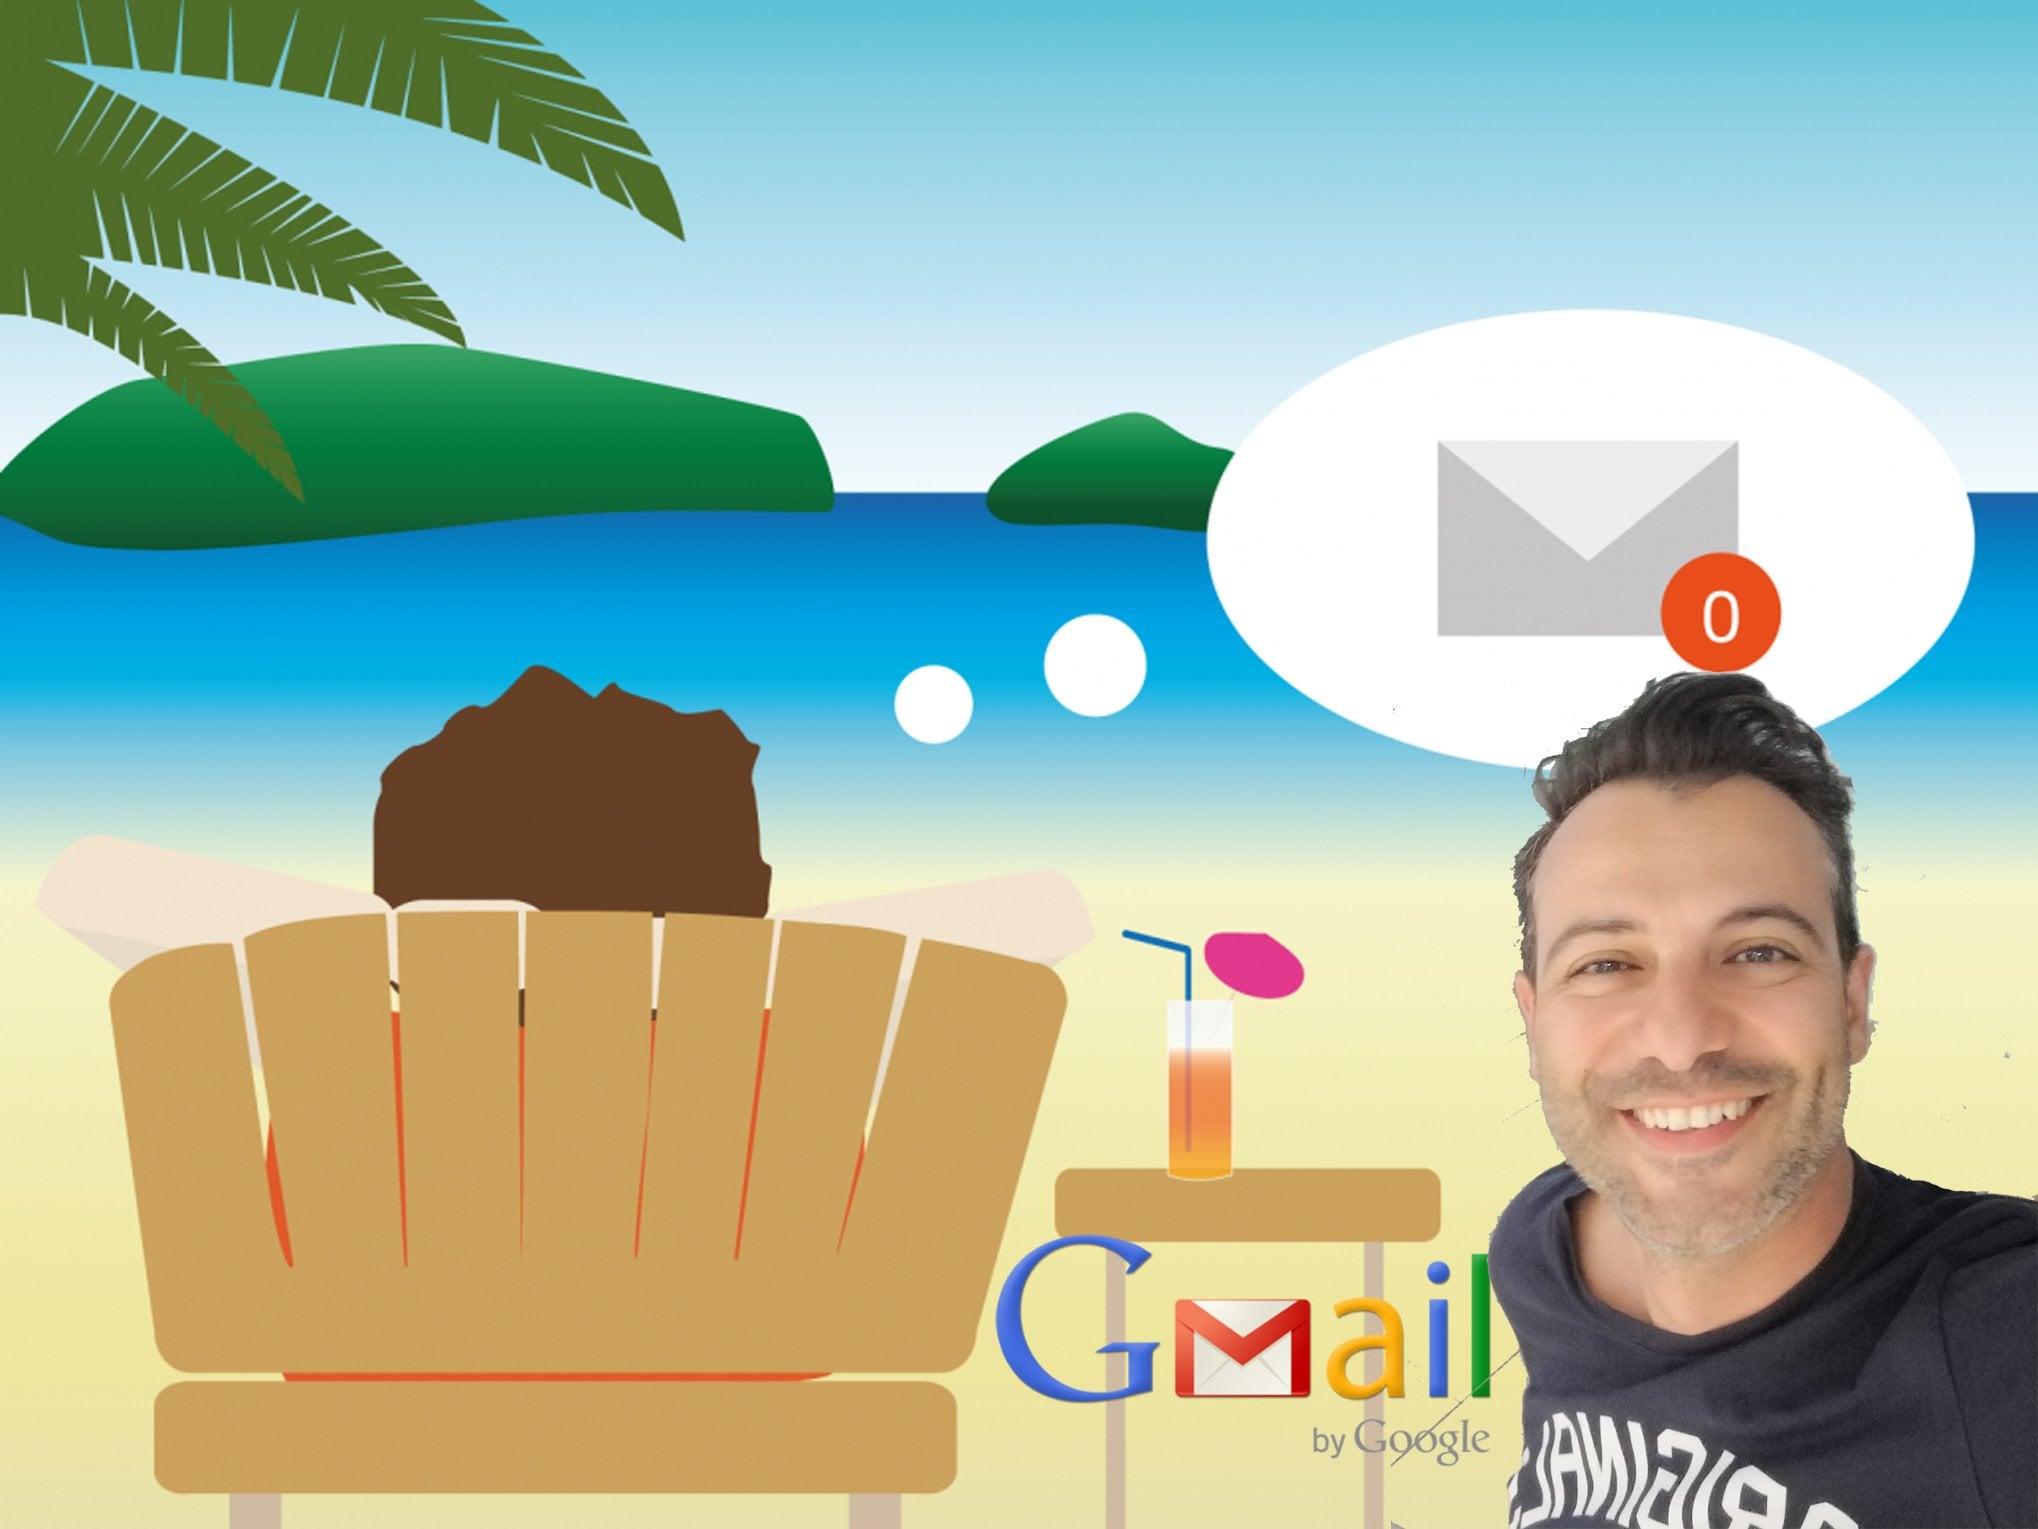
1. Introduction: If you're getting crushed by email, this video series is for you. If you want to become
an email power-user, this is for you. If you want your team to excel, then Stack is for all of you. Let's talk about concentration. Concentration is the
currency of productivity. And nothing kills
productivity in corporate environments
as much as email because it wrecks
or concentration. Now hold that thought
for a moment. So many people and organizations are concerned
about the speed of sharing information because they think that it enhances value but the velocity of
value creation isn't tied to the velocity
of information. The velocity of value creation is based on your
ability to deliver, deliver better, deliver
faster, or deliver innovation and that requires concentration. Email, the way that
most people manage it, severely slows down our
ability to deliver. It fragments our thinking
which fragments or work and fragments our lives. It creates anxiety, eats a valuable work time and
limits our creativity. If you're the average
office worker, you spend 500 hours
a year on email, that's about 30% of your year. That's crazy. If you're running a team
of ten or a 100 or a 1000, you're throwing
out almost a third of your resource
budget on email. And the worst part
is it's negatively impacting the other
70% of what you do. Has anyone taught you how
to use email effectively? If not, you're likely just surviving with your
current email techniques. You can be strategic with email. It's possible. You can use email to excel. Your team or organization
can use email to excel. The Stack Method will turn you, your team and your organization
in the email power users. At its core, it's
a simple set of techniques for managing
your email that'll help you organize and
process your email faster and stay on top
of everything with ease. Doesn't need software
and it works with any email program
that you already use. The Stack Method
is also an approach for managing your time
with respect to email and a philosophy that everyone
can be more productive across all of their work by engaging with email
on their own terms. Mastering email is
worthy of your time. The average person who masters
the Stack Method tells me they get back more
than 250 hours a year and that it's a game changer
for all of their work. In real terms, with just
a few hours of practice, you'll get back a month of your time every single year and everything you need to learn the Stack Method is included
in this video series. So why am I doing this? Because email has a
detrimental effect on individual and
corporate productivity. Because no one else
has caught up with our techniques and it seems selfish to sit on the solution. And most importantly, because it'll make
you more productive. And because I believe that productive people do better
things for themselves, their organizations,
their communities, and the world at large. It's time for you to dive into the series and gain sanity, confidence, creativity and time. My name is Prasanth Nair. I'm the CEO of double Gemini and I'll be there with you
every step of the way. Here we go.
2. The Secret to Email Mastery: It turns out there's a secret
to managing your email. A secret that's simple but profound because it
changes everything. The way you think about, process organize, and the way
you prioritize email. So here's the secret. Most people look at their
inbox and they see messages. They see a list of messages. But when I open my inbox, I see something different. I see a set of actions. Actions that are telling me
to do things like reply, review, do and meet. And that's the secret. Emails aren't messages,
their actions. I know it seems simple, but sometimes it's the most obvious things
that are overlooked. When this concept
of emails being actions rather than
messages first hit me I knew it was important, but I didn't know how important. The more time I spent
playing around with it, the more I realized that
this changed everything. Most importantly, it solved the biggest problems that I've encountered when trying
to master my email. The first major
problem this concept solves is how to
prioritize email. Before I show you
how that works, the first key thing I want you to know if you don't already, is that with most
email software, it isn't easy to prioritize
using the inbox. Most inboxes by default, prioritize by date from
newest to oldest. So if you have a bunch
of priority emails, they'll show up in random
places in your inbox with just a little flag or a color
change if you set them. The problem is that
they're hard to see and not very organized. Your eyes have to jump all over the place just
to figure them out. If you decide to sort your inbox by whatever
priority scheme you use, it creates a whole new problem. When new messages come in, they'll appear below
the priority list, like the messages marked
New on this page. Now this might not
seem like a big deal, but what usually happens
is that people end up with so many priority emails that it's hard to
see new messages. And before long, they end up going back to sorting
emails by date, which again makes the priority
emails hard to see. Inboxes just aren't good
at prioritizing email, which is why we need folders
to prioritize our email. Now in this case, we're
prioritizing using two folders, one called important and the other called
everything else. Now just to be clear,
this isn't our technique. I'm just using this
as an example. In the next chapter, I'll show you how this
works with action folders, which is the technique
I recommend. But first, let's look at some examples of how people
use folders to prioritize. Here are five different ways to
prioritize using folders. The first one is the one that
we use here at Double Gemini, and the remaining four are the
most common ones I've seen people use aside from just leaving everything
in their inbox and prioritizing by date. I'm gonna start with the
common prioritization schemes, beginning with
person and then I'm gonna come back to
how I do things. I see a lot of people
prioritize by person, which means to put emails into folders based on the
people or groups you need to respond to and then
choose which people are the most important to respond to
and work down from there. I've seen people
prioritize by project. So they setup folders for each
of their projects and drop emails into them and answer them based on the priority
of the project. I've also seen people
organize email by urgency. For example, urgent,
high, medium, low. And another technique
I've seen people use is to getting things
done or GTD technique, which is a process
developed by David Allen. And finally, I've taught people to organize
emails by action. Now of course, this is the
prioritization approach that I recommend for
a number of reasons. The first is because
it's easier to prioritize emails by action
than any other method. Let's first look at what most
people do to prioritize. Imagine that you
had a few emails that involve
scheduling meetings. It's easy to say
which meeting should happen first, second and third, based on your calendar
availability, it's a lot harder when you start putting other
actions into the mix. Try prioritizing a meeting against an email
that needs you to do a task against another separate email
that you need to reply to. It's hard because we're no longer comparing
the same things. Emails that contain meetings, emails that contain tasks and emails that you
just need to reply to are not apples to apples. It's like trying to
prioritize between a set of socks and
a set of mugs, I can tell you which socks I like compared to other socks. And pick my favorite between the different mugs I
have in the house. I can even tell you
that I care about socks more than I
care about mugs. But throw them all
in the same pile and ask me to prioritize between
them and I could do it, but it would really
slow me down because my criteria for
why I would choose a particular sock or mug over the other becomes
more complicated. It takes too much brainpower
to figure it out. All of the other approaches
for prioritizing email are painful for
the same reason. Because they view emails as
messages instead of actions. That's what makes
them so tedious. And that's where the
Stack Method comes in. The Stack Method
allows you to make your prioritization
trade-offs at a higher, more rational level, at the level of the
actions themselves. But that's not the only reason why the Stack Method is better. Another big advantage
is that Stack requires less effort than
these other approaches. With the Stack Method, you'll have a finite set of action folders. If you prioritize by
person or project, your list of folders
will be long, continuously growing,
and will require a lot of effort to keep
organized and keep prioritized. The Stack Method takes
less effort than managing by urgency as well. Now I know a lot of people
like to prioritize by urgency, but urgency has a critical flaw, which is that the
level of urgency for an email often
changes daily. Today, a specific email
might be high in priority. For example, imagine that an email is asking you
to create a report. But tomorrow, a new higher
priority request might come in making your previous
email to create a report far less urgent, which means if you
didn't get to it today, you have to shuffle it into
a new folder tomorrow. Now this kind of shuffling takes place on a daily basis when you organize by urgency
because you're urgency changes all of the time. I can tell you from experience that after a few
days of doing this, that it was way too much work. So things just
ended up staying in the first folder I placed
them in until I got to them, which defeated the purpose of organizing by urgency
in the first place. In contrast, if I
organized by action, I've prioritized
my action folders once and I never need to
shuffle an email again. So in this case, I'm using
five action folders. Reply for replies, do for
tasks, meet for meetings, forward for emails I need
to delegate, and review for emails that contain newsletters or other things that
are less important but I should scan. In this case, I've prioritize these in the
order you're seeing. If an email goes into my "Do" folder and I decided not
to act on it today I never have to move
it again. Tomorrow I can just evaluate
if it's more or less important than my other
do's and take it from there. But I don't have to evaluate
it against my replies, which I've already decided
are more important. This saves me
effort, brainpower, time, and eliminates frustration
all at the same time. And GTD isn't as elegant for a number
of different reasons. The two-minute rule
fragmented my time. Some folders like the next action folder
got overloaded with emails and it has the same prioritization
issues as the other folders. Using GTD to manage
my email required way too much effort, gave me anxiety and killed
my productivity. Aside from making it
easier to prioritize and requiring less effort
to manage my email the Stack Method has another huge advantage
over these techniques. It's faster, and not by a little, by a long shot. The first reason
the Stack Method is faster is because you can batch process a set of
similar actions really fast. Let's come back to
socks and mugs, but take it up a level
to laundry and dishes. Picture folding one piece
of clothing then washing one dish and going back and folding another
piece of clothing, washing another dish
and doing this until both your dishes
and your laundry are done, it would take forever. The reason rational people fold clothes and do dishes in
batches is because it's faster. In the same way, it's faster to stick to just your replies, then your meetings, then
your do's and so on. When you're in reply mode, you can blow through
all of your replies. When you're in Schedule
mode for meetings, you check your calendar and get a feeling for your open time, then you can quickly handle all of your schedules at once. With all of the other
techniques, you'd be opening, closing your calendar multiple times just to get them all done. And the same applies to all
of the rest of the folders. The question I get most often
about the Stack Method is, isn't it slower to sort your emails into
action folders first. I thought it was
gonna be slower too when I first started doing this. But it turns out that
I can scan and move an email into a folder
in about three seconds. So I can sort about 20 emails a
minute and essentially clear 100 emails out of my inbox
in about five minutes. And I do this using
shortcut keys, which makes it a lot faster. Now I'm gonna show you
how to set up and use shortcut keys in the how-to video series that supports this. I've even come back from
vacation and cleared about 700 emails in
roughly 30 minutes. So the cool part is that
with the Stack Method, you can even recover
from vacations with extended absences
really quickly, which is a game changer. Yes. It takes a few minutes to sort before you
start responding. But if this was a race, if you sort first, you would not only win, you
would win by a landslide, It's like choosing to
take a few minutes to put on a jetpack before a marathon, you'll be on to
other things while everyone else is
still plotting along. But there's another
more interesting reason for why the Stack is faster. And that's because we can't answer all of our emails
every single day. Now hold onto that thought
because I'm going to explain why this makes
stacking faster. Now this was tricky
to figure out and it's a little tricky to explain. So listen close. Picture this. Every time you open an email, you've got to go
through four steps to understand it and act on it. You have to open it, scan it, decide what to do, and then act on it. If you choose not to act on it or just can't act on
it at that moment, which will be the case for
a large number of emails if not the overwhelming
majority of your emails, then you're back to opening it again to figure out
what to do with it. Now that won't make a
difference if you've just got one or a handful of emails, but if you're
talking about 30 or 50 or 100 emails then it
suddenly becomes a drain. I've seen the same
person open up the same inconsequential
email over 36 times with our mail
tracking software. At a minimum, that's
over half a minute of time they wasted on
just one email. Instead. Imagine, after they
opened it, scanned it, and decided what to do, they put it into an action
folder. At this point they never have to go through the first
three steps again. Anytime they work through
their action folders, they can just jump right
into acting on it. And when you think about this
with the hundreds of emails you get each
week and the thousands, if not tens of thousands
you get each year, it's collectively a
huge time savings. Imagine if you had
to pay taxes every time you open an email and had to figure out
what to do with it. By sorting first, you're
paying the tax once. Why would you want
to pay the same tax two or three or four times? So with the Stack Method, you save time by
batch processing your emails and you save
time by sorting them first. But even better is that you've simplified and sped up
your decision-making. This is mind space
that you can use more effectively to deliver
that next big project. Or used to be more creative for all of the things that
you're working on today. Manage your emails by action in your life will be better. You'll be able to
prioritize easily, work through your
email faster and spend less brainpower doing it. Next, I'll show you Next, I'll show you simple but powerful
rules for creating simple but powerful
rules for creating action folders that'll
keep your email action folders that'll
keep your e-mail organized and be optimized
to work for you. organized and be optimized
to work for you.
3. Customize Your Action Folders: I had this breakthrough which I described in the last video, where I realized that
emails aren't messages, they're actions, actions
like replying, doing, meeting
forwarding and so on. With this realization came the understanding that sorting
and prioritizing my emails into action folders and then acting on them in
batches by folder was faster and required
less effort than dealing with them out of my
inbox and that was great. What ended up being
way harder than I originally anticipated was figuring out the best way to set up these folders to
organize my email. If you've ever gone down
the path of trying to get emails out of your inbox
and organized into folders, you'll know exactly
what I'm talking about. But it turns out
that figuring out a system that worked
for me wasn't enough. I needed a system that
worked for everyone. What I've learned from teaching this class for over ten years is that everyone's
email workflow is just a little different. I'm not going to just show you how I organize these folders, but explain why to do it
so that you can customize your folders to fit the way you work and really the
way that you think. At the base level, I use three types of folders
to organize my email. I call these action, archive
and active folders. In this video, I'm going to
focus on the action folders. In the next video, I'll talk about archive
and active folders. At the base level, I recommend these
five action folders: Reply, Forward, Meet,
Review (CC) and Do. The reply folder is emails I
need to respond to directly. The forward folder is for
actions that I need to delegate to other people or
offload to other systems. For example, if I get
a task via email, but I need someone
else to do it, I would put it into
the forward folder. Or if I get an email and I
want to download and store it, or a pic that I want to store in my photo library
or something that I want to forward on that I would put it into my forward folder. The meet folder is for meetings or events that
I need to schedule, confirm, or accept
on my calendar. And let me be specific here. If you see an email
in this folder, it's either a meeting
invite that you need to check your calendar
on before you accept, or a meeting that
requires you to schedule a meeting
with someone else. If that's the case, then
put it into this folder. I use the review CC
folder in a few ways. I put my newsletters here. I put emails that
I'm cc'd on here, basically anything that I'm
not required to respond to. And this is one of the most
important folders because it keeps the number of emails
in my reply folder specially down to a minimum. Finally, I have the do folder, which is for tasks that
I have to get done. These are just tasks
from other people. Sometimes I even emailed myself a reminder to do a task and
put it into this folder. Now this particular structure
didn't happen by accident. I literally went
through hundreds of iterations to come up
with a set of folders. Even given that, do you think this set of folders
will work for everyone? Definitely not. You'll likely be able to
use this folder set as is. But at some point either
now or in the future, you'll need to change it
or you'll get frustrated. I'm gonna show you what
I learned about creating folders and share a few rules so you can build
and manage a set of folders that's perfect for you. The first key is to only keep the folders that
are relevant to you. For example, if you never end up using the forward folder, then get rid of it and just
use the remaining four. If you move to a different role and end up needing
it in the future, you can always add it back. Of course, add folders as necessary based on
your particular needs. But keep in mind
that you don't want so many folders that it's annoying to click
through all of them. If you have too few folders, you could end up with too many
emails in any one of them, which makes it cumbersome
to get through a folder. In this case, it would take forever to get through
the reply folder, which often causes people to stall out when using
the technique. You want just the right
number of folders to create enough separation
so there aren't too many messages
in any one folder, and so you're not
clicking through too many folders to
get through the stack. And if you're adding or
changing any of these folders, it's important that you
name them correctly. The names should be short
and action-oriented. Here are some examples
of good folder names. Invoice, trade, purchase, file, and scan are all examples
of short action names. They tell you what action is required before you
open the folder. When you open it, you're
immediately ready to get a move on the emails inside. You'll notice that the folders I recommend starting with
already meet this criteria. They're short and
they're action-oriented. I want to hammer
this home a little more because it's important. Imagine for a second that instead of naming
the last folder, DO I named it TO DO? So here they are side-by-side. Notice the difference. The one on the left is cleaner, simpler, and more motivating. Do means get it done. To-do means do it later. You're gonna be looking
at your email inbox thousands of times a year. Why not put yourself in a better head-space
every time you look at your inbox by using an active statement
instead of a passive one. Often I find that just sitting down to do my email is
a psychological battle. That's why all of
the small things in the entire Stack Method, which include things like naming folders are so important. They prime your mind to get over the hump and get
your email done. Of course, the order in which you work through these
folders matters, it sets your priority for how you'll be
handling your email. Here's the order that
works best for me. Here it is sequenced
for clarity. Question for you. Do you think this order
will work for everyone? Definitely not. You'll need to customize it
to fit the way you work. But it's important
to have an order. I'm going to share
the order I use in case you want
to adopt my logic. I put my emails in
order of anxiety. I'm way more nervous
about not replying to something than I am about
not doing something, not meeting someone, not
offloading and not forwarding. I start off with high anxiety. And as soon as I
finish my replies, I feel a lot better. About half of my
anxiety falls into this bucket by the time I'm done with my do
and meet folders, about 90% of my anxiety has gone and about 80% of the
heavy lifting is done. The rest of the folders
are then not only easy, but quick to work through because they're not as
demanding mentally. One last note before I
finish with the order. I literally use these numbers
in the actual folder names. Most email programs sort alpha numerically by using the
numbers in the folder names. It floats them to the top of my folder list and
keeps them in order. When you choose your folders
and pick your sequences, make sure to include the numbers in the name of the folder. When I put it altogether, it's a really simple
set of rules. Only keep the folders you need. Create separation with the
right number of folders, so you don't have too many
emails in one folder. Use short, action-oriented
folder names. They're not just cleaner
but more motivating. Prioritize your folders in the sequence that
works best for you, and use numbers in
the folder names. And that's it for this lesson, I've shown you how to customize, organize, and prioritize
your action folders. In the next video, I'm going to cover the other two folder
types, archive and active.
4. Store with Archive and Active Folders: Archiving is one of the
most popular topics in my live Stack workshop. Question for you. How do you handle
archiving emails? Are you one of those
people that store every email into a
huge set of folders? Or do you just leave
everything in your inbox because you can't
bother or gave up. I used to be one of
those people that archive like a pack rat. I would put everything
into separate folders by client, project
topic, whatever. I had folders within folders. Yes. It was painful to maintain, but it made me feel good knowing
that I was on top of it. Of course. I always thought I just might need that one email one day. You never know right? Wrong. For the most part, archiving every email into separate folders is a
colossal waste of time. If you have to archive
a 100 emails a day, and it takes three seconds per email to drag into
an archive folder. You'll be spending 20 hours
a year just archiving email. That's 2.5 days of your life, you'll never get back. This number doesn't
have a multiplier for the frustration you'll
have along the way. If it did, it would probably
be closer to 40 or 50 hours. In contrast, if you archive everything into a single folder, it might take you
five minutes to find each of the five
emails you need. There were archived over
the course of the year, which comes out to less
than 30 minutes of effort to accomplish
the exact same thing. Now I know that's going to scare some of you, but trust me, you'll find that
email and you'll be glad that you stopped using a complex and extremely
cumbersome method for archiving. In over a decade
since I've been doing this, I've never not been able to find an email in all the
years of teaching this. I've never had a single
person come back to me who put this in
play and regretted it. Don't be afraid
to make the leap. That said, if you absolutely can't live
without archiving, I'm going to show you
another technique that works even better using active folders
and applying something that I
call the wind trick. If you absolutely need
to archive something, put the word "When"
in front of it and label the folder by
completing the phrase. Now obviously the last
example here is a joke. If you can't use the word
"When" for a folder name at the moment you're
deciding to archive an email, then just put it
into your top-level folder and call it a day. You'll probably never need to reference that email ever again. One of the ways I find
"When" folders useful is for things like the fourth folder down "Creating presentations". I used a folder
like this recently. I asked a large project team for what they wanted to include in an executive presentation and stored all the emails they
sent me into this folder. When I was ready to sit down
to do the presentation, it was all conveniently
sitting in one place in this folder
and ready for me to use. This system of filing will save you over two
days every year, won't frustrate you and
will help you pinpoint and find exactly what you
need when you need it. Just to recap. In the Stack Method in total, there are three
overall types of folders. Action folders, which I
covered in the last video. Archive folders which are for long-term storage
and Active folders, which is the broad
category that I use to describe
the "When" folders. They're active because
you're proactively planning on using the
emails in these folders. Stick to these three
types of folders, and it'll be easy for
you to act, organize, store, and find the important
emails you need anytime. Now that you've got
the right approach to organizing and
storing emails, it's time to learn
how to put this altogether and process
your emails smarter. Hope you enjoyed this clip. Check out the next
video. Happy Stacking!
5. The Smart Way to Process Emails: So far in this video series, I've covered the secret
behind mastering email, how to customize and prioritize
your action folders, and how to store with
archive and active folders. In this video, I'm gonna
show you how to put it altogether and process
your emails smarter. I'm gonna start with a
high-level overview of the process then work
through the mechanics in more detail to make
sure that you're a 100% clear on how this works. The process starts with
the inbox and it doesn't matter what Inbox you use Outlook, Gmail, Apple Mail, Lotus, you can use anything. While I'm explaining this, just so I don't confuse you, I'm going to use illustrations
instead of a real inbox. First, I want to give you a high-level view
of the process. I start by opening my inbox
and using Quick Keys, which I'm gonna show
you how to use later, I empty everything into
my action folders. If I have 100 emails, it usually takes me no
more than five minutes. Once my inbox is cleared, I pause for a minute
and breathe in how good it feels to have 0
emails in my inbox. Then I work through my
action folders in sequence. I start by opening
my first folder, which for me is
the reply folder. I then flag the emails I'm
gonna respond to for the day, respond to them and archive
or trash them when I'm done. And then I move on
to the next folder and repeat the process. I flag the emails that
I'm going to respond to, I respond to them, and then I archive or
trash them when I'm done. And then I move on
to the next folder and I continue doing this until I'm done working through all of my
action folders. At this point, I pause because something super
important has happened. I've gotten closure on all the emails that came
in before this morning. I can't emphasize enough how
important this moment is. What this moment
means is that I'm all caught up with my old email. The only email I
have to deal with now are the ones that
are coming in today. Everything in the past is
covered and I can be a 100% certain that I
haven't missed anything. This creates so much
mental relief and pretty much eliminates any stress I
have with respect to email. It's important to
pay attention to how you feel at this moment, because this feeling is one of the key rewards of Stacking. Lock-in on this feeling and you can build the
habit overnight. It should feel like one of
those moments when you're on a plane or a train
or in the shower, when your mind is completely
free to think clearly. From this point forward. I switch things up and work out of my inbox for
the rest of the day. People are often
surprised by this. They're confused that I
don't put everything back into the action folders and
work through them again. Here's why I stay in my inbox
for the rest of the day. The primary reason is because
it's really cumbersome to repeat the entire process again and again
over the same day, especially because active conversations
involve multiple replies. I would just be done moving an email into an action folder only to have the next reply
pop it back into my inbox. So I deal with emails that come in during the day
out of my inbox. If I'm done with an email
I archive or trashing. If I know I'm not going to
deal with an email that day, I just move it into
an action folder and I'll Stack it tomorrow. I continue this until
the end of the day. Anything that's left becomes part of my Stacking
cycle for the next day, which is usually not
a lot of emails. So that's it for the
high-level on the process. It's really simple, right? Now. I'm gonna run through
the process one more time in a little more detail
and point out a few more things to help
make the process stick. So this is a typical inbox. You've got your
folders on your left, your messages at the top and your message
ping below that. Now I know some people's
configurations are different, but this gives you a high-level picture of what's going on. So I start by emptying my inbox. I click on each email to
figure out where it goes. If I don't need it, I
archive or trash it. Otherwise it goes into a
particular action folder. Now when I'm done working
through all of these emails, I go to my reply folder, which is my first folder, the emails I moved from my inbox today or
now in this folder as well as the emails I had leftover from the previous day. You'll find that you often can't reply to everything in
this folder that day. Usually because you're waiting
on information before you can reply or you're
just crunched for time. So I found the best
strategy when I open a folder is to flag the
emails I want to respond to. And I'm already
familiar with all of these emails, so it's fast. Next, I reply, archiver or trash when I'm done. Then I move on to
the next folder and I do the exact same thing. I flag the emails that
I want to respond to, then I respond and archive
or trash them when I'm done. And I rinse and repeat
for each folder. When I flag emails, I'm doing something
really powerful. I'm making a conscious decision on what I'm going to work on. But more importantly, what
I'm not going to work on because I looked at
these emails and decided that they
weren't important, it becomes something that
I can safely ignore, which eliminates any anxiety I have about them slipping
through the cracks. Once I'm done working
through all of my folders, I can be confident
that anything that I didn't deal with that
day was an important. By doing this, I clear out any anxiety of forgetting
to deal with an email. And on the flip side, this frees up a
ton of headspace. That's brain power that
I can apply to my work. If you follow
through this process once and pay attention to how much focus and concentration you have for the
remainder of the day it'll feel, as I
mentioned earlier, just like those moments
when you're on a train or a plane or
you're on vacation, and there's nothing at
that moment that can distract you from
the task at hand. Because of this,
when I want to be my most creative, I Stack first. And I do the same thing
for my meet folder, for my forward folder, and for my review folder. Finally, I get to my
last folder, the when folder. I make sure to do a quick pass just to make sure that
I'm not missing anything. Now I'm done with my Stack, but by this time, I'll likely have more
emails in my inbox. And here's the part that
I explained earlier. From this point forward for
the rest of my workday, I'm gonna process emails
right out of my inbox. Why? Because these emails often
involve active conversations. You'll reply to a few emails, someone else will respond, you'll get new conversations and other emails will come in. If I put them into
folders first, it becomes really inconvenient. It's much easier to deal with active conversations and
activities out of my inbox. S you'll process these
emails by replying, delegating, scheduling,
reviewing, or forwarding. And as you process each, you'll archive or trash it. If there are any
emails that I know I'm not dealing with
until tomorrow, I just dump them into
my action folder so that I'm ready to
Stack the next day. The next day, I'll get in and take any new emails
that I have and empty them from my inbox into my action folders and
then repeat the process. Now that I've gone through this, you should have a clear
understanding of the process. You'll start by
emptying your inbox. Then you'll process the
first folder by opening it, flagging the emails
you're gonna act on, acting on them and then
archiving or trashing them. You'll repeat this for the second folder and do the same for the
remaining folders. Then you'll work out of your inbox for the
rest of the day by taking action and
archiving or trashing emails. The next day, you'll start
the process all over again. When you're doing this. Pay attention to what
it feels like to have an empty inbox and what it feels like to have
closure on your email. It's critical to emotionally
acknowledge these points in time because they have two of the biggest rewards that
come from Stacking. And they're often
under appreciated. Now that you have the basics of how to process your email, check out the next
lesson to learn how to better manage the time
you spend emailing.
6. Own Your Email Time: In the last segment, I showed you the Stack process. In this segment,
I'm gonna show you my email time
management strategy. What I'm going to show you is
simple but crucial because it's gonna give you
what constitutes the base level Stack Method. You need both the process which I showed you
in the last segment, and you need this email
time management strategy to pull off the Stack Method. I'll start with how the process
relates to my calendar. Just to refresh you, the process starts with
you opening your inbox and using Quick Keys to sort emails into
your action folders. Then you open your first folder, flag what you're gonna
deal with that day, and respond then archive
or trash when you're done, then you do the exact same
thing with your next folder. And repeat the process until you're done with
all of your folders. From there, you deal with emails straight
out of your inbox. If I'm done with an email, I archive or trash it. And if I know that I'm not going to deal with
an email that day. I just move it into
an action folder and I'll Stack it tomorrow. And I continue doing this
until the end of the day. Anything that's left, it becomes part of my stacking
cycle for the next day. There are basically
three key steps here. One A and one B, which
we'll do in a set, and then step two, which is done for
the rest of the day. Here's how it looks
on my calendar. And I mean, this
literally. I book time to process my email on my calendar
and it looks like this. One of the calendar entries says Stack: Folders and
the other two say Stack: Inbox 1A and 1B are done together in an hour block at the beginning of the day. Then I have two more
half-hour blocks to work through my email
for the rest of the day. So I come in and empty my inbox and work through my action
folders from 9 to 10. Usually it doesn't
take me the full hour. Then I address any emails that come in during the
rest of the morning from 1 to 1:30 pm and again from 5 to 5:30 PM before I go home. I know some of you are
thinking that there's no way you can just answer
your emails three times a day. Hold that thought.
I'm gonna show you how it's possible in
just a couple of minutes, but I want to finish
this thought first. If you're someone who needs to respond to emails as part
of their job all day long, like if you work in
customer service or you're part of a help desk, then you just use the
whole day for part two. In this case, you would
still block time on your calendar for Stacking your folder in part
one in red here. You just wouldn't block
the time for part two. That would just be
part of your workday. And none of this has to be static. I move my email time day-by-day. And sometimes it even
means doing this out-of-order or
dropping a session. Look at Tuesday and Thursday. I don't have time to Stack on my folders on these
days this week. That's okay. I know
I'll catch up. I've had a week go by
where I can only Stack my folders once it happens. And when this happens to
you, don't freak out. Just focus on your next scheduled stacking session
and get back on track. One more thing, don't feel guilty about doing this
when you're scheduling, especially scheduling
these recurring times on your calendars. Email is work. You need to give your
permission to work on it. If you don't, you won't have a realistic
schedule and you'll be working nights and weekends just to stay on
top of everything. On any given day. I work during work times, an email during
email times without the mental anxiety or panic that most people have with
respect to their email. I own my email time,
I'm in control. I still remember the
first time I put this into play
years ago that week I was literally twice
as productive because I was concentrating so
much better on my work. It's one of the things that
prompted me to put this into a class so that I could
share it with all of you. I've got one more scheduled
related piece to show you before I show you how
to pull this off with ease. So some people like me, like Stacking their
folders in the morning and working out of their inbox
for the rest of the day. But a lot of people find it easier to flip the
schedule on its head. They Stack their folders
at the end of the day, and then the next day, they come in and work out
of their inbox all day. It doesn't matter which
of these patterns you use or if you use another
pattern altogether. It's just important
that you do it. Now that I covered the
foundation of how I schedule, I want to show you exactly how
this works on a given day. The first thing is
that my Stacking time is already booked
on my calendar. I'm proactive about managing this time so that
I'm in charge of my email and my meetings are usually booked a
few days in advance. So I come in and empty my inbox and start working through
my Stack of folders, and usually this takes
me less than an hour. You'll find that if
you Stack daily, that email will take you
less and less time each day, then I work, then
I check an email, then I do a little bit more work then I check my email again. Then I go to lunch. When
I come back from lunch, I'm taking a quick
glance at my email before I head into
my next meeting. Then I come to my Stack time. I Stack my inbox for all those emails that
came in in the morning. Then I do some work, check my email again at 2PM, but I realize that something
urgent has come up. So I take a couple
of extra minutes to respond to that
email at that time. Then I get back to work, check my email right before
my long afternoon meeting, do my meeting, and
then finish out my day by Stacking my inbox. So even though I check my
email throughout the day, only once during the
day at 02:00 PM. Did I let it fragment
my schedule? The rest of the day
I stayed focus. I think you'll find that
with 99% of emails, you can wait an hour or two to respond without
affecting anything. If someone really
needs something urgently, they'll
come and get me. Think about it this way. If someone needs
something urgently, it's their responsibility
to track you down. They can text me,
they can call me, they can even come to my desk. I'm not going to
kill my productivity just to be responsive. The key here is to
be proactive and in control in terms of how you
let email influence your day. Try this even for a
day and you'll find that you can pull it off and that it's a better way to work. The last thing I want to do in this video is show
you a quick formula for estimating how
much time you'll need to work through
your email every day. Start by the number of emails
you get inbound daily. Ok, you've got that
number in your head. I figure that about half
of your emails are junk or emails that you
can trash or don't need to respond to
or take action on. So take the number you just came
up with and multiply it by 50% and you'll get the
number of action emails. This is the number of emails
that you have to act on. If you get 200 emails a day, then you'll have about 100 emails that you need to act on. Now take that number, for example 100, and multiply it by 1.5
minutes and you'll get an approximate for how much time you spend on email daily. Now some emails take
more time and some take less time
depending on your job, these numbers could change, but this will give you
a good estimate to use. Here's a table to help
you figure it out. If you get a 100 emails, you'll need just over an
hour to handle your email. And I would even recommend
rounding up to start. It's better to overestimate
here and then pull back. I know that scheduling
your time to Stack and flowing through the process comes naturally to some people. If you're anything like me, you could be tougher
to pull off. And that has nothing
to do with you. It's because building
new habits is hard. I've got a segment on habit building which you'll
definitely want to watch. But before that, in
the next two videos, I'm going to teach you two of my favorite Stack
Method techniques. Do 5+ and the
Remind technique. You're almost there. Let's get it done.
7. Managing Tasks with the DO Folder: In the last video, I went over my email time
management strategy. This works for the most part, but sometimes there are emails that require an action
that can take up some all or even more time that I've allocated for
Stacking on a given day. I want to show you
how I handle these. Lot of people I've
taught in the class say that this is their
favorite Stack technique. You already know that all
emails aren't created equal just based on the action
required to process them. But there's another dimension
to emails as well, and that's the time it
takes to complete them. I'm gonna show you
how this factors into your email time
management strategy and then how this relates
to your Do folder. Here's my Stacking time. My morning session is to empty my inbox into my action
folders and then work through these folders
and then deal with any actionable emails
that came in in the past. Then my two afternoon
slots are there to deal with the emails that come
into my inbox during the day. Imagine if I got one email
that required an hour to deal with and another that
required 30 minutes to deal with from
the previous day that came in during my
first Stacking session. Then another 30 minute email
came in in the morning and a few 15 minute emails
came in in the afternoon. If I responded to all of these emails in my
block Stacking time, I'd be left with a ton of emails that I didn't
get to that day. What I figured out is that
there are essentially two broad time-based
categories of emails. What I call easy emails and
effort emails. Easy emails just take a few minutes
to respond to and effort emails take a lot
longer to deal with. If you remember from
a previous video, every time I get an email, I've got to go
through four steps. Right? I have to open it. I have to scan it, it or read it if it's long, I've got to decide what to
do with it and act on it. If I dissect the process
of acting on an email, it's clear that it actually has two parts to it,
prepping and responding. I have to figure out
what I'm going to say or actually do something, then I actually have to write
the email and hit Send. Let me break this down
a little bit more so that you're clear on
what I'm talking about. Sometimes prepping is
just a simple thought which only takes a few seconds. And I can craft the message in just a minute and
be done with it. For example, someone asked
me to make a decision, I think about it for a few
seconds, then I respond. These are the easy emails I
was just telling you about. Sometimes I have to do more serious work
before I can respond, like write a report or research something
and it could take me 15 minutes or an hour or even several hours before
I can respond. These are the effort emails
I was telling you about. It's pretty clear here that easy emails need to be worked differently
than effort emails. So I'm going to show
you how I handle it and that's where the do
folder comes into play. When I'm working my email, I pay special attention to the effort emails as I
go through the process. And just to be clear here, an effort email to me is any email that's gonna take
me more than five minutes. What I figured out
is that if I think it's gonna take me more
than five minutes, it's probably going to take me 15 minutes or longer
to respond to. So here's my inbox. And let's assume this is my Stacking session at
the beginning of the day. The first email comes in and I decide that it belongs
in my meet folder. Then I come to the second
one and I realize that it's going to take me more than
five minutes to reply to. That means to me that
it's an effort email and it's gonna take me 15
minutes or more to do. Instead of putting it
into my reply folder, I'm going to place it
into my do folder. And to help me remember, instead of just calling
it the Do folder, I call it the Do (5+) folder. Where the 5+ is
a reminder to me to put emails here that I think will take me longer
than five minutes. And I continue
through this process, placing emails into
the respective folders, unless I come across another email that requires more than five minutes of time. I open my Do (5+)
folder and go through my typical Stacking process
of flagging emails, but this time I do something
slightly different. I open my calendar and create calendar entries
using the subject line of my flagged emails using
the word Do (5+) to indicate this is
my Do folder and the subject line so I
can find the email. And when I do this,
I make sure to allocate the right amount of
time to get the task done. Now instead of archiving or
trashing the original email, I mark it as scheduled by applying a colored
category or label to it. That way I know it's been
scheduled but not completed. And I repeat the same process with my other flagged emails. Now, when that
time slot comes up on my calendar
during my workday, I know that I can easily
find the email in my DO (5+) folder because
it has the word DO (5+) in the
calendar entry name, which tells me that
it's in my do folder, which is quick to find. After I've acted on it, I can archive or trash it. And I do the exact same with the next email when that
time slot comes up. Now in this example, I put the email reminders into my calendar
on the same day, but you can schedule these
for anytime in the future. I often schedule it
for days, weeks, or even months in the future based on what the
action timeline is, I want to make sure
you understand exactly what's happening here. First, you'll identify
the email is taking more than five
minutes and put it into your DO (5+) folder. Next, you're going to
check your calendar for open time and book time for
the email on your calendar. Make sure when you do you change the color of the email to
indicate that it was scheduled. You'll come back
to this folder at the scheduled time
and respond to the email then archive or
trash it and you're done. It's a really simple process, takes almost no time and has the added benefit of helping you better
estimate your workload. The do folder technique
handles one of the biggest edge
cases with email. Emails that have tasks
associated with them. In the next video, I'm going to show you how to handle the other big edge case
that comes up with email, which is how to track requests
with email using email. Here we go.
8. The Easy Way to Follow Up: Question for you. How do you track a request
that you send via email? For example, let's say that you emailed a
coworker asking for a file or emailed a vendor or a client requesting
a task to be done. How would you track
those requests? Do you sticky notes, setup, follow-up reminders, write
it down on a task list, pray that you'll remember. As long as it involves
recording it somewhere, I'm sure that whatever
you use will work. That said, I've developed a little trick for doing this
that I want to show you. Let's say that you're sending an email out that you
need an answer on. Once you draft the
message and hit send, that email goes
to the recipient. And at the same time, a copy is placed into
your Sent folder. There's really two copies, one that they get and one
that you have as a record. Now if you need that email, you'll have to dig
into your sent mail to find it among all of the other
messages that you've sent. It's not that difficult, but
it can be cumbersome, especially when
there's an easier way. So I do this a little differently. Instead of just hitting send
after I've typed the email, I BCC myself, which creates a duplicate copy
that goes into my inbox. I then take this copy and stick it into a folder
that I call Remind. I know I could just grab
the copy from my Sent Mail, but that's too much of a
pain and it's avoidable. If it hits my inbox, there's no way to ignore it, which prompts me to put it
into my Remind folder. Once I move the email
into my Remind folder, it's a lot easier to find
and respond to than it would be if it was embedded with the rest of my sent email. I've just got a
handful of emails in my remind folder to track
down and follow up on. If you take a look at
the reminder folder, which I've added here as a
new folder into my Stack. And for me it's
my fourth folder, you'll see there are a number of advantages to this approach. First, the email I bcc'd myself on is
date and timestamp. When I look at the message list, I can see exactly when my
request was originally made. Second, it's also
really convenient to see all of my outstanding
requests in one place. I can quickly scan
through them and see if I need to follow up on
any particular email. Third, if I need to
follow up on it again, I just end up adding to
the original email message which contains my previous
request or requests. I've had cases where I've
had to follow up with people six or seven
times to get a response. And it becomes very clear to them that they
can't shake me. This is really useful when the situation requires
for you to stay on top of an email thread or send multiple messages
to get a response. The overall process is simple and I'm gonna
show you what I mean. You identify an email for follow-up and this can
be from any folder, you BCC yourself, a copy goes to the inbox, you move it to your
remind folder, and that's where the email sets. If you need to follow up again, you'll email from the Remind
folder and BCC yourself again and repeat the process
until you get your answer. When you break it down, it's really just two steps, which is to BCC yourself on
anything that you want to follow up on and put it in your Remind
folder to track it. Now that you have
the Remind folder, you have the full set
of Stack folders that I use to manage my inbox. The Remind technique that I just shared with
you along with the Do 5(+) technique that
I covered in the last video, make the Stack system complete. They cover the edge cases
so you know that you're completely covered and nothing will slip through the cracks. They'll give you confidence, which is important
because it's one of the key factors required
to make Stacking a habit. And I'll cover all of the
other key factors required to make Stacking
a habit in the last video. And definitely pay close
attention because it'll help you avoid the pitfalls and get into the rhythm of
Stacking much faster. Let's finish this out.
9. A Tale of Two Habits: The last thing I
need to show you is how to make Stacking a habit. So you're thinking,
okay, that's easy, just do, and for you that might be the case. Now, I found that building any new habit can be tricky and building
a new email habit might even be harder
because there's so many pitfalls that can pull you back into your
old way of working. And they're subtle. For a day you're Stacking
and then a week goes by and you realize that
you're not anymore. As a team at Double Gemini, we've learned a lot about building habits
because we have to teach people our
productivity techniques around email management, meeting management, project
management and other things. And we have to do so in
a way that makes them stick at both the
individual and team level. So I'm going to show you what
I know about building a new email habit from working with clients
for the last decade. So you've got your
current email habit. I'm gonna call it your
defacto email habit. It's what you're doing now. I'm not sure about you, but
for most people I've observed There's two big problems with
their defacto email habit. The first is they don't have a well-defined process for
handling their email. The problem with this is that things slip through
the cracks or they have to constantly check to make sure that
nothing was missed. And the result is that email occupies too much mind
space and creates anxiety. The second issue is that they're emailing intermittently
throughout the day. And I'm sure you'll relate to this or know people who do this. It's been
well-documented that it takes 15 minutes to
get into the zone and at least ten minutes of continuous work to produce
meaningful output. You've all probably
experienced that before. What I'm showing you
here is the anatomy of a one-hour task completed
with concentration. Well, what happens when you're interrupted by an email
during the warmup, it resets the clock
and you've got a warm-up again before
you start working. Each interruption means you
go through the cycle again, a longer interruption, and the more time you have
to spend warming up. And suddenly a task that
was supposed to take one hour has extended
to over two hours. Does that sound familiar? The defacto habit is a
terrible way to work. It fragments your attention, which kills productivity, limits your available mind space
and creates anxiety. It's no accident that
the average worker spend six to eight additional hours outside of work just
to get caught up. If you Stack, you don't have to be part of
this statistic. Stacking is better
in so many ways. To start, the process is
complete and efficient. I'm confident that when
I'm done with email on a given day that nothing has
slipped through the cracks. This confidence gives me the ability to email
when it's time to email and work
when it's time for me to do my other
work. With Stack, I'm productive emailing and I'm productive during
my other work. I'm in control and the
difference is liberating. Keep in mind that your defacto email habit
is always gonna be there. That's because you can never really get rid of an old habit. You can only replace
it with a new one. That's what the
research says and that's what I've
experienced as well. To pull off your new habit, it has to be better in every
way and you have to avoid the pitfalls that are
trying to pull you back into your old
way of doing things. I'm gonna show you the
core things you need to pull off to switch to
Stacking as a habit. But keep in mind, there
are a lot of pitfalls. If I showed you all of them, it would be overwhelming. Actually, in the first pass I included all of them
into this video, but it was too much information. If you still struggle, reach out and I'll help
you get over the hump.
(You can go to www.stackmethod.com
to set up a Live Workshop with one of our trainers) Habits are kicked
off by triggers. They're the things that
pull you into the habit, often whether you intend
to do the action or not. The cool thing is that you can bury triggers
to stop you from performing a habit
and put in place new triggers to pull you into the new habit
you're trying to build. What do you think the
biggest trigger is that pulls people into their
de-facto email habit. I'll let you think about
that for a second. Time's up. It's notifications. I'm talking about both desktop
and mobile notifications. You've got to turn them off. It's bold and it might
be scary to some of you, but you have to dictate the terms of how you
engage with your email. You can't let a program
whose alerts are set by default be in
the driver's seat here. Now this might sound dramatic, but every single pop-up
notification that you check is losing a
little bit of yourself. Now, even if you
turn off alerts, you'll still check your email. Just a little less often, which is gonna make
a big difference in your concentration. For the Stack Method, the triggers are in your
calendar and they're set to recur day after day. You might have more or less time that I have segmented here. Or you're Stacking
sessions might be scheduled at different times. That's okay. These calendar entries are there to remind
you that it's more efficient to do your email in
batches than is one-offs. Remember, you might get the occasional
email that you need to drop things to respond to, but that's the
exception, not the rule. 99% of your emails can be handled during
your Stacking time. Even with these triggers, the changes might not happen on the first day or the first
week that you're Stacking. That's okay. Stick with it and your work patterns will change
and you'll be in control. Rewards are the next piece about habit building that I
want to cover. They're the things that
make habit sticky. The drive you to do the habit over and over and over again. So Pepsoden came out with toothpaste in the
early 1900's when not a lot of people
were brushing. Their toothpaste had
a built-in reward. The recipe included
citric acid, mint oil, and other chemicals
that would create a tingling sensation
in your mouth. This reward was so
compelling that within a decade half of the population of the US
was brushing its teeth. Rewards make habits sticky and good habits are
transformational. It turns out there's
already a reward with defacto email habits and
it's a biological one. As humans, we're
literally wired to get a boost of dopamine every
time we get new information. It doesn't matter if
it's useful information, it just matters that it's new. This makes it really compelling
to check your email all the time because
every time you do, you get this little reward. If you use the Stack Method you'll get the
dopamine rush because that's biological and built-in. And you'll get another
reward that's even better. You'll feel a sense of
clarity after you Stack. The kind of clarity
that I find is usually reserved
for vacations or showers or when you're in a car or a train or a plane, when you can think free
and clear of distractions. And you get this because
with the Stack Method, once you've cleared your inbox and worked through
your action folders, you'll get closure on
your past emails. You know, with a 100% confidence that nothing in the
past was dropped, you're on top of it all. The only thing you
have to deal with, which is far more manageable are the emails coming in today. I can tell you from
personal experience that it's liberating. It feels amazing to
be in that state. I actually Stack
before I need to do anything creative or complex. I Stack before every
session of script writing for this video series and it made a huge difference. I could approach the work with more mind space because it, because I felt in total control over all of my other work, especially my email
communications. When you're doing
this on your own, pay really close attention to
how you feel after emptying your inbox and you've finished working through
your action folders. Remember, this is
before you start dealing with emails that come into your inbox for the day. That little moment between the past and the future
is my present to you. There's one more piece I
want to cover with you that'll help you lock in
Stacking as a new habit. And that's the
motivation to do it. For the people I've worked with, the primary motivation
that drives their de-facto email
habit is responsiveness. This can come from
social pressure, the expectations of a manager or customer or co-workers to be responsive on email
and or internal pressure. I've taught a lot
of people who feel that they're not responding fast enough that it'll slow down their coworkers or slow
down their customers. I get it. I've been there too. So I let people know if
something is burning up and they need me right away
to call me or text me. I'm not someone who
checks my email every five minutes
because I'm working. And it also helps remember
that most people shoot off an email to you and then their intention goes elsewhere. They're not sitting
there staring at their computer
waiting for a reply. Chances are that if you were in a meeting or out at the doctors, they could wait a bit for reply and nothing would fall apart. The people who Stack value productivity
over responsiveness, they value getting it done. Once I started Stacking, I found that people valued
me way more because I was able to double my
output on a weekly basis. And that's not an exaggeration. And the ironic part is that
my customers often see me as more responsive than everyone else because with
the Stack Method, nothing slips
through the cracks. If they shoot me an
email, I'm reliable. I'm a 100% reliable
about responding. The secret to locking in, to anchoring this
motivation is to relate Stacking to how
you identify yourself. I have a friend who
works out every day and has worked out every
day for over 30 years, has literally never
missed a day. I asked him how
he pulled it off. His response was that
it's just who he is. He's someone who
works out every day. Is part of your identity
that you're organized? Organized people,
Stack every day. If that's not you, is your identity
that you deliver? People that deliver Stack. Or are you someone
who's reliable? Reliable people
Stack their email. The point here is to make
this part of your identity. Say this with me in your head. I am someone who Stacks daily. I am someone who is in total
control of my email daily. I am someone who was successful, which is why I Stack daily. Make it part of your
identity in it'll be so much easier to stick with, especially in the long run. It's much easier to stick to any habit when you make
it part of who you are. Now you've been through
the entire video series. You've got all of the knowledge required to make this happen. That said there are
some specific details about putting this
all into practice. And those details
are in the how-to videos for emptying
your inbox to 0 to start with, how to set up
and use keyboard shortcuts, how to turn off
notifications and so on. Definitely pay
attention to these, especially the one on
keyboard shortcuts.
10. How to Gmail: Set Up Guide: Hi, Welcome. In the following videos, I will be demonstrating some of our recommended best
practices for using the stack method
effectively and easily. We want to help
alleviate the stress associated with e-mail
and get your inbox to 0. It's important to note that
these are recommendations. They're not hard and fast rules. We want the process to be comfortable and
effortless to maintain. So please feel free to
customize it to fit you. The stack method is designed
to give you back more of your time and is completely
non-destructive. You won't lose any
important emails. We promise. Happy stacking. Okay, so we're gonna
do stack for Gmail. Now the first thing we're
gonna wanna do is change the settings so we're all
set up and ready to go. So we would click
the Settings button, go to C, All Settings. And then I'm just going to
show you a few of them. These are all going to
be personal preference, so however you want to set
those up, that's fine. The thing that I do want
to show you though, is if you scroll down, you'll see Conversation
view and you can see it even tells you it's
sets whether emails of the same topic are
grouped together. So if you have a
bunch of threads, they'll all be selected and
the little group together. And that way, every time
something new comes in, you can see the
entire thread below. So I like to select conversation
view on for that reason. The next thing you can do, and this is really important as desktop notifications and
select male notifications off. Now I know it's a little scary. Some people feel like they're
going to miss something. But I promise you you won't because you're still going
to check your email. But what this enables you
to do is not get distracted every single time you get pinged while you're trying to
focus on something else. So you want to select off. The next thing we're
gonna do, our stars. You can use as many
of these as you like. I think for the purposes of making it simple and effective, one-star is generally the best. You can drag them on or off. I'm gonna do one-star. And you can literally choose whatever color you want and
just drag them on and off. So for the purposes of this, I'm gonna go with a
red star because I prefer that and I'll
put that there. And then the next one is the most important one
you're going to select. And that's the keyboard
shortcuts beyond. You actually won't
be able to do any of the shortcuts I'm going to show you without this selected. And if you get nothing else but the keyboard shortcuts
out of this workshop, you will absolutely save yourself a tremendous
amount of time. So make sure that's selected. When you're done, you're going to come all
the way down to the bottom and
click Save Changes. Mine is grayed out because I've already selected these options. Once you hit Save Changes, you're done and you can
just go back to your inbox. Okay, so we're gonna do the
stack method for Gmail. Now here I am in my inbox. And before we get started, I want to call your attention
on the left-hand taskbar here to these folders, which in Gmail are
called labels. So I'm going to refer
to them as labels. And we have picked short action-oriented
names for all of these. And you'll also
notice that I've put the number of the label
next to the name. And I've done this deliberately because I want to keep this in the priority order in which
I actually like to work. So I'd rather reply to something
before doing something, meeting someone, et cetera. Now, if you recall
from the stack method, when you get an e-mail, you go through four steps. You have to open it,
you have to scan it, you have to decide what to do and then you
have to act on it. The idea of these labels here is that it's going to take
some of the guesswork out. Once you've put these into
the appropriate labels, you'll notice that everything in the reply is something
you have to reply to. Everything in the
do folder or label is something that you need
to schedule for yourself, like a task, etc. So we're gonna go ahead and
work through these right now. I'm gonna go back to my
inbox and I'm going to scan the message and
decide which one of these action labels it's
going to relate to. So I'm gonna say
this one is a du. Now I'm going to use my
keyboard shortcuts rather than dragging it in with the mouse because it's going to
save a lot of time. So I would hit x, so that would actually
select the message. And then I would
hit V as in Victor. And what that lets you do
is move it to a folder. And then all I would need to do is type in the
number of the folder or begin typing in the name of the folder and it
would pull it up. So I've decided this one's ado. I'm going to put
in the number two. There it is. I'm
going to hit Return and let's check to
see if it's there. There it is. So I'm gonna go through my
inbox doing exactly this. I'm gonna say this
one is a do as well. So again, I'm going
to hit X V to return. This one's a meeting
request and I'm going to do this with each of
the ones that I have. Let's make sure that
meeting request is there. There it is. It's in my label. So I'm going to keep going
through all of these and in the same way and I'm
doing it a little more slowly than
I normally would, just so that you're
actually seeing me do this, I'm going to say this
one's probably a reply. So I'm going to do that. So you're seeing
how I'm doing this. So this one's a reply. This one's for review
and I'm going to just work on this in a
sort of a quick, normal fashion that I
would work on it now, this one is probably a
reschedule requests, so I'm going to say
this one might be a meet this one's
probably a reply. This one's a do this one is ado. This one's a newsletter. So I'm gonna say this
one is a review. I'll say this one's a reply, and I'll say that this
one is also a reply. And now I'm going to
take a huge deep breath and sigh of relief
because guess what? My inbox is empty. So now after I've done that, I'm going to come
over to these labels. And I'm going to work
through each of these labels in the order with which
I prioritize them. So first I'll go
over to the replies. And then what I'm
gonna do here is within these labels
that you've created, once you've moved
the emails to them, you'll probably look through and notice that some of
them are going to take a little more time and some of them are
things you can deal with in real-time and
archive or delete. Again, we always recommend
archive so that it's non-destructive so you can still search for it and find it later. So I'm gonna decide
this one is a fast one. And what I'll do is using
the up and down arrow keys. I'm going to store all
of the emails that I feel like I can answer
in real time right now. So this one is one I
can answer right now, so I'm going to store it. And how I did that is I
use the keyboard shortcut, I use the letter S as in Sam. And I'm going to
keep going down. I'm gonna say this one's
going to take time. I can definitely
do this one now. Need to spend some time on that. Yeah, I think those two
are good for right now. Actually, I could probably do
this one as well, this one. So I'm going to say I'm going
to respond to that as well. So then I'm gonna
come back up to the top of the list here. And I'm going to hit R, which is reply
keyboard shortcut. And I'm going to just
reply in real time. And then I'm gonna go
ahead and hit Send. Now I already dealt with this and you'll see that
it also went ahead and labeled it as priority because that's a rule
I've set up that anything from Prashant
comes up that way and we'll talk
about that in a minute. But since I already did it, I don't need it right now. So I'm gonna go ahead and hit Y. Which archives it? And the archive is down here. If you click More, it goes into this
all mail folder, which is the archive. And you can always do
a search in there. I'm gonna do that
for each of these. This one is also
one I'm going to respond to in real time. I'm going to send that one. I already did it, so
I'm gonna go ahead. You can also press this, but I'm going to
hit Y to archive. And then I would do the
last one that I selected. I'm gonna go ahead
and respond to this. Send it. Again, I've done this. Now. I only have two things
left in my reply folder, and they're both some things
that I need to get to later. So that's something
I'm going to come back to and I would do
the same thing. I would go through
schedule things. Am I do same thing I'd star what I needed
to do right now. I've got to do this
and this one I'm going to do later because
it's going to take more time. And I would do
these in real time. And then once they're done,
archive or delete them. So that's how you would
do the stack method. You would go through your inbox, go through all of
your action labels, and then you'd come
back to your inbox, take a deep sigh of relief because you have
nothing in there. And then for the
rest of the day, you would work from your inbox. So anything new that comes in you would deal
with in real time. And then anything that you think might take a little more time, you'd put in one of
these action labels. Okay, so we're gonna
talk about how to create your action folders in
your left task bar. Now as a reminder, in Gmail, these are actually referred
to as labels and not folders. So what we're gonna
do is set those up. You'll see right
now I already have all of the ones that
I normally use setup, so I have one through seven
reply to meet and so on. So what we would do is for
the purposes of this demo, I'm going to delete this one so that I can create a new one. So I'm just gonna go in here. I'm going to remove this label and I'm going to
create a new one. So you see how to do it. So what I would do
is go down to where this arrow is next to the
word More. Click on there. And if you scroll to the bottom, you'll notice that it says create new
label at the bottom. I'm going to click that. And I'm gonna go ahead
and type in three meat. So I had a deleted
that a second ago. So I'm gonna go ahead
and add that back in. Now if I wanted to make it a
sub-level, I could do this. And we're not going
to do this for this particular one because we want this to be a main label. I'm going to hit Create. And then if we scroll up, here it is, It's been created. And you can adjust
the label color. You can hide or show it in label list right here by
clicking these three dots. So you would go ahead
and do this for each of your main folders. And then for seven when
you would create it. And we'll talk about how to
expand that in a second. Now we know that
one through six are going to be actions
that you do regularly. Another way to manage these
is to go into Settings, go into see all settings. And where it says Labels. This enables you to show, hide, and make different choices about preferences if you want
to show a fun read, etc. So this is a way you could
manage it through settings. I really like to just do
it in the left task bar. So let's talk also
about the wind folder. So these are your action
folders as you saw earlier, we're going to move emails into these particular
labels so that we know what to do with them when
we work through our labels. When folder is a
little bit different. So you can see right here that
if I click on this arrow, it uncollapsed as
this and expands it. And you'll see that
you can actually create all of these
folders below it. Now what the wind folder is used for is we use that
for active projects. So let's say you're
working on creating an October presentation
like this first label. Anything that you, that
comes into your inbox, you can create a rule for
it to just go right into this folder so it doesn't
have to clutter your inbox. You can also take any emails that you
get and move it there. Let's say I got this one in my inbox because I haven't
set up the rule yet. And I want that to go
ahead and move that into creating October
presentation. I do it the same way you saw
me move the emails earlier. I would have x, v, I start typing in
the word creating. You can see it pulls it up
right here, hit return. And then let's see, is it There? It is. So that would be a great way for you to save time as well. And again, you
don't want to have too many folders that this is gonna be really overwhelming. But this is for active projects, presentations, things like that that you're
working on right now. And when you're done with it, you can go ahead and
hide the folder. When you're done. If you remove it, it deletes it, so I'd recommend hiding it. And once you hide it, you won't have to see it
actively in the one folder. And again, just like when we
archived our emails earlier, when you go into this all
male area right here, that's where the
folder would appear. So that's what I
would recommend. And you can easily create these. And then you can also rename
them or move them around, or do what you prefer to do. Again, this is the order
I like to work in. This is how I like to name them. You might want to call one
of these trade or invoice, whatever is going to
be your workflow. That's what you want to do. Okay, So one of the
most important things about making stack a habit that you can maintain is booking time
on your calendar. And I'm going to show
you how to create time in your
calendar so that you both work through
the stacking process where you stack
through your inbox, put things in your action
labels and work through those. And also work from your
inbox during the day. So we're going to
think of it as two different things
we're scheduling. So the first thing we're gonna do is we're going to click into a time that we want to
make available for. And I'm gonna make
this be a tasks. So I'm going to click that. So what I'm gonna do is go
into, Let's say nine AM. And I would literally
go into a stack. I'm going to call
this one folders. The reason I'm calling this
one folders is that I want to spend the time going
through my inbox, putting them in
my action folders or labels as they're
called and Gmail. And working through all of
these and I'm gonna give myself an hour of time, which is a good
chunk of time to get all of that done to try
to get my inbox to 0. Now, what I'm gonna do is I'm going to go into more options. And I'm going to do a couple of things I want this
to repeat every day. So I'm going to say that
I actually want this to repeat every
weekday at this time. And I'm going to
mark this as busy. And the reason that I'm
going to do that is I need that time for
myself to make sure that I'm working
through my inbox and then working through
my action labels. Now people often ask
while you're gonna give yourself a whole hour of
working time to do this? Yes. I want you to think about
how much time you're spending going through your
emails on a daily basis, checking them, getting
distracted by them. This will enable you to have a solid chunk of time to
work on your e-mails, get them all squared away, and then you can just
work on whatever comes in your inbox
during the day. So I'm going to click Save. And I'm actually
going to choose this. Red color for this. And you'll notice that it's
been created and it repeats. You can see it
repeats here as well. Then I'm going to create
two smaller times. The first one is going
to be at 01:00 PM. And I'm going to call
this one stack inbox. And this is going to be
exactly what we talked about, how to work through your inbox. So I'll go into more options. I'm only going to make
this one a half-hour, and I'm going to have this
also repeat every weekday. Change the color so it matches. And I'm gonna mark
this one is free. I'm marking this as
free because this is me checking my inbox and things
may come up during the day. I want people to be able to
schedule over it, et cetera. So I'm going to click Save, and you'll see that there it is. I'm gonna do one
more half-hour slot just to deal with my inbox. And I'm gonna do that one at, let's say I'm actually
going to do it at 430. So we'll do this one at 430. And I'm also going to call
this one stack inbox. I'm going to go in here and mark this one is free as well. Also change the color to match
the other stacking times. Hit Save what? That one made it too
long, easy to edit. We can just make
that a half-hour. Hit Save. There we go. Now you'll notice I forgot to do something important here. I didn't make it recurring, so I'm gonna go back in here, make sure every weekday is selected and then hit
Save and there it is. So why the two different ones? Again, we're using
this time that's marked as busy to go through our inbox and then our action folders or labels as
they're called and Gmail. And these are literally to deal with emails that come
in during the day. Now, will you still check
your email at various points? Yes, you will, and that's fine. But this enables you
to really sit down, give yourself 30
minutes to deal with e-mails that you can quickly respond to you during
the course of the day. The nice thing about this
is we can move them around, let's say, you know what, today, I don't really have time
to spend an hour on this and I'm going to have
to catch up tomorrow. I can easily delete this. I can also go ahead
and say I'd like to start with my inbox
first thing in the morning. And I can move that up. And I can move all of
these around as I need to. Something other
people like to do, which is a process that
works well for some people, is to do the stack
folders at the end of the day and then deal with their email first
thing in the inbox, and then again at lunchtime. And so you can do this
however you want to, but you want to make the process something that you're
going to stick to put these slots and a place
that works best for you. We're going to talk about how to schedule work
using the do label. And it's a really helpful tool because this enables
you to put tasks that you've received or tasks that you want to assign yourself
onto your calendar. And that's actually how
it's different than the meat folder because the meat is for calendar invites and
the do folder is for tasks. So what I would do is I'm going to say I've already
worked through my inbox. I've put everything in
the appropriate labels. Here I am in the do
label and I want to schedule this
task for myself. So I'm going to star
it because it's something I'm doing in
real time right now. And then I'm going to come up to these three dots
here at the top. And I'm going to
select Create Event, which pops me into my calendar. I would type in do colon space. So when I look at my calendar, I know that's a task that
I need to accomplish. And then I'm going
to go over here and delete all of the guests. That's really
important because it's picking up the guests
from the e-mail. But you don't want to go ahead and send a
calendar invite for something that
you're scheduling as a task for yourself
on your calendar. So make sure you
delete the guests and you find a time
for the meeting. So I'm gonna say this. I'm going to schedule
time for myself between 1112 on Thursday
to do this task. And then I'm going to hit Save. And you'll see that I've
scheduled this time for myself. It's on my calendar. And the really nice
thing is if I open it, you'll see that the
emails actually attached. And that's great because
when I go to work on that, I have all the
information I need right there in the actual
calendar entry here. And I know exactly what
I need to work on. So that is scheduling
tasks from the do label. So this is called
tracking with remind. Sometimes we send
an email out and we want to have a record of
it that's easily accessible. So you want to follow
up with a client. You want to make
sure that you're reminding yourself of something
important you have to do. Now, you could go into your sent mail and do a search
up here and search mail. But it's pretty cumbersome
and there's an easier way to keep track of the few emails that you really want
to follow up on. That is by using tracking
with their minds. So let me show you
how to do that. So I'm going to compose
a new email and I'm gonna go ahead and let's
say the subject is please. Review file. And then actually I'm going
to do this appropriately. Please review file,
let's say F, G, H. And I'm gonna go ahead and put type something into
the body of the e-mail. I'm just gonna do
a couple of dots. Now what I want to do
before I send this out to make sure that I can keep a record of it and
move it easily into my remind folder is I
want to BCC myself. And that's very easy to do. On a Mac you would do Shift Command B that pops
open your BCC field. And I'm gonna go
ahead and BCC myself, which is this stack
method at gmail.com. And then I'm going to send it. Now you'll see right away
it pops into my inbox. And now I have a copy of this important email
that I sent to a client. So what I'm gonna do is
I'm going to pop that into my remind folder using the
shortcuts I showed you before. So X, V, and I'm going to put
that in my remind folder, hit return. And
then there it is. So instead of having
to search from my Sent Mail and going through
so much stuff to find it. It's right here ready to go. And as I work through
my action labels, I'll get to this
and it will remind me to go ahead and
follow up on it. So let's talk about
archiving and Gmail. Now there's a couple of
things we need to discuss. The first thing is,
is if you go to this more area here with a down arrow on the left
task bar and click on it. You'll notice in the
middle it says All Mail, all bail is the
archive for Gmail. Anything that you've
archived will appear there and if you ever
need to do a search, you can do so up here. The next thing I want
to talk about is you probably saw me do this
in an earlier video. But when you want to
just archive something, you can hit X and
then you can hit the letter Y and
that archives it. Now I'm gonna go to a folder and a shortcut to go to a folder is, let's say I just want to
open the reply folder. I would do g, l one. And that pops that open and
I'm going to hit Return. And now I'm in my reply folder. I think G, L stands
for go label, maybe. Here I am. Now you'll
notice that I can archive when I'm in a label
because it's grayed out. And so using the letter Y enables you to go
ahead and archive. The next thing I want
to talk about is when we start the
stack method process, it's really common for
people to have a thousand, ten thousand, twenty
thousand emails were more in their inbox. And we need to clean those
out and archive anything that's older than three
weeks from today's date. Chances are if it's
three weeks old or more, you're not going to look at it or you've already dealt with it. How we would do that is we
would come up here into the search mail and we would
type in something like this. After colon, we put
the year first, the month and the day, and then before colon, the year, the month and the day. Now, I often do this in
six-month intervals. I've done three here
because we just worked with somebody that had
thousands and thousands. If you do a too big
of a time range, it's not going to
archive everything and it will crash the system. If you're a person
that has ten thousand, twenty thousand
emails in your inbox, do it in three month
to month increments. So I would type this
in and then I would go to this little square
here and click on that, and that will select
every single message in that timeframe. Then I'm gonna go to select all conversations that match
the search and select that. And what that does is it
stops this pagination. See how it says
one to 20 of many. So this way, everything in
that time range is selected. And then I'm going to either
hit Archive or just do Y. And it's going to go ahead. I'm going to confirm
this bulk action. I want to go ahead and
get that into my archive, say Okay, and it's going
to do that in chunks. So that's what will happen. And if I go to my own mail, all of those things
will be there. So a great way to manage your
inbox is to create filters, which in other email apps
are referred to as rules. And in Gmail are called filters. Now I want to call something
to your attention first, and that is if you go
up to the settings tab, you can always manage your filters that you create by going into
C All Settings, then going into filters
and blocked address. And you can see I've already
created these filters, but you can always edit or
delete them as needs be. So if I go back to the inbox, what I'm gonna do is show
you how to create a filter. So let's say that I want
to create a filter where anything that's a newsletter
doesn't go into my inbox, but goes right into a label over here on
the left taskbar. So I'm going to hover over the e-mail that I want
to create a filter for. Then I'm going to
click up here in the Google ribbon and do
filter messages like these. A window will pop
up and you can make this as specific as you want to. Right now I'm going to
say anything that has the word newsletter in it is going to be something
that I want to create this filter for. And you'll notice I put
an asterix after it. And that's there so that anytime the word newsletter appears anywhere in the email,
it will grab it. I'm going to select
Create filter. And then a new window
is going to pop up in this lets me customize it. So I'm going to
decide that I want to create a filter to
skip the inbox. I'm going to have
it mark is red. Then instead of it
going in the inbox, I'm going to have
it apply the label. So it's going to
skip the inbox and go right to my review folder. And now the next thing that's really important
is that I want to apply this filter to one
matching conversation. What that does is anything
that's already in your inbox. It's going to pull into that review folder so that you
can have it there already. And when you get a new email with the word newsletter in it, it'll skip your inbox and
the filters will apply. If there's more
matching conversations that had the word newsletter, this number would be greater. And I'm going to
click Create filter. You can see right here, it's already gone ahead
and highlighted it. If I go into my inbox, It's actually pulled it
right out of the inbox. And if I go into my review
folder, there it is. So this is a cool trick that you can use when you're stacking in your inbox and you
want to open up multiple emails
at the same time. I'm in Gmail right now, and I'm also using
Chrome as my browser. This also works well on Safari. So what I would do is I
would go ahead and I would just highlight the e-mail
I want to start with. And then I would press
the command key. And then at the same time, I would hit click
on my mouse pad. And you'll see that a new
window pops up and its own tab, which is very cool. And I can do as many
of these as will fit. So I'm gonna go ahead and
do the same thing here. And go back and do
the same thing here. And then you'll see I
have several of them open all different emails. Then that way I can go
ahead and knock them out and just respond
to these in real time. And when I'm done, I
can close the tab and then go ahead and do
that with each of these. Let's say I responded to each
of these and they're done. And then I could go ahead
and archive these right out of my inbox and I'm
done with them for the day.
11. How to Outlook Mac: Set Up Guide: Hi, Welcome. In the following videos, I will be demonstrating some of our recommended best
practices for using the stack method
effectively and easily. We want to help
alleviate the stress associated with e-mail
and get your inbox to 0. It's important to note that
these are recommendations. They're not hard and fast rules. We want the process to be comfortable and
effortless to maintain. So please feel free to
customize it to fit you. The stack method is designed
to give you back more of your time and is completely
non-destructive. You won't lose any
important emails we promise happy stacking. Okay, So we're gonna
talk about how to set up your stack method
folders for Outlook Mac. What we're gonna
do is let's review the folders on the left taskbar. How we're going to set
them up is we're going to go and right-click and
inbox and do new folder. Now the reason that I've
actually put them here under the inbox is to keep
it from looking cluttered. And then this allows me to
also collapse and expand them. So that that way if I don't
want to see the folders, I have a tidy left taskbar. If I do want to see the folders, then I can expand them by
clicking the down arrow. Now, this untitled folder, I would want to go
ahead and name. The reason that I've
named these folders this way is because these are action-oriented
words that remind me exactly what I need
to do with each of the emails when I
put them in the folder. So one reply to do
three meat, etc. What this lets me
know is that this is a priority in which I
like to do my workflow. And this might be
different for you, so you may want to
customize it for you. Let's say I didn't have this, I would name this folder
one reply and so on. Putting the number
in the name of the actual folder will float this in the order that
you like to work. Okay, So we're gonna talk about the stack method
for Outlook in Mac. What we're gonna do
is first let me call your attention over here to our action folders
that we created. You'll see that there are
nested under the inbox. And that we've
created them by using short action-oriented words that let us know immediately what we need to do with the e-mail. Do I need to reply to an e-mail? Do I need to schedule
an e-mail, etc. You'll also notice that the
numbers of the priority of how I like to work is in the
actual name of the folder. I like to reply to something, then do something,
then meat, etc. Again, you can customize this for the order that
you like to work in. What we would do is we
would look at our email. And if you remember,
there's four steps to looking at and deciding
what to do with an e-mail. You're gonna open
it. You're going to scan it in a decide what to do, and then you're
going to act on it. Having these action folders ready to go that have the names of the action that
you're going to need to do saves a lot of time. What I'm gonna do is I'm gonna go ahead and go in the e-mail. And I'm going to
make that decision. What kind of an action is it? Now I'm gonna say that this
one is a reply, let's say. And I'm gonna show you
a keyboard shortcut to save you time to move your e-mails from the inbox into the
appropriate folders. You could take your
mouse and drag it in, but that takes a long time compared to doing
Command Shift M, which pops open a box. And then you can literally
type in the number or name of the actual folder that you want to
move the email to. And it happens magically. So I'm gonna say
this one's a reply, and then I'm gonna hit return. And then let's check. And there it is, it
moved it right in there. We're going to do that
for each of them. I'm gonna say this
one is for review. Again, Command Shift M. And this one is going to move
it into the review folder. Let's check. There it is for review. And we're gonna do
this with each of them and I'm gonna
make a decision. So I'll say this one is a do. This one is, I'm going to actually select
this entire thread. This one is a do. This one is, let's say
this one's due as well. Again, Command Shift M, let me pop open the window. I'm gonna say this
one is a newsletter, so we'll say that this one is actually a review, and so on. You'll do this all the way
through all of your emails. And I'm gonna go ahead
and do this quickly now. So then that way
you can see we're working through it very fast. And then I don't have to use my mouse and I'm
saving a lot of time. I'm gonna say this
one's a reply. And again, I can
quickly make a decision as to what kind of
email this really is. I'm gonna say this
one's a reply. This one is going to be
a forward. Let's say. We'll just on, I'm almost
done with my inbox, which is pretty amazing, Let's say the islands or review. This one's a review. This one is a meeting requests. Let's double-check that
that went in there. Here it is. Perfect. And then we're gonna keep going. This one's a do. This one is a do as well. This one's a review. And this one finally is a do. Now I'm going to take a
nice deep breath because my inbox is empty and I'm going
to feel great about that. Then I'm going to work
through my folders. The first priority
folder is reply. What I'm gonna do in here is
I'm going to assess what I can flag and deal with
right now in real-time. Then archive or delete. And then some emails in here
might be something that takes a little more time
and a little more effort. And I'm going to leave
those in here for now. And again, not put them in my inbox there in the
actual reply folder. So I know that even if I can't do it right now in real-time, It's a reply and I
know what I need to do with it when I go
to work on it later. To flag and Outlook for Mac, you need to do control one. And that's the keyboard
shortcut that saves you time. If you want to take it
off, you can right-click, go to follow-up, clear flag,
and that takes it off. If you do it quickly enough, you can do Command Z to
undo, but it depends. So I'm gonna go ahead and flag and then use the
up and down arrow keys. Just going to flag
a few things that I want to deal with right now. And you would go through all
of your replies and do this. For the purposes of the demo, I'm just gonna do a few. And I would literally do this. I would work in
real-time and say, Okay, this is a reply. I'm gonna say, Great. Thanks. I'm going to send it.
And then what I'm gonna do is I'm gonna go
ahead and archive this. Now you can do this
one of two ways. You can archive it with a
button using your mouse. Or let's do another one. Let me flag another
one that's not from me so it doesn't
pop into my inbox. So control one to flag. I'm gonna go ahead and
respond to this one. Command R is a
shortcut to reply. And I'm gonna say, yes, I do. Great, I'm gonna send it. And then I'm gonna go ahead and archive is now another
way to archive other than pressing the
button is to do Control E. And if I go into my
archive, there it is. That's another way you
can do it as well. I'm gonna do this for every
single one of my folders. Let's say I worked
through all of the flagged replies and I
archived or deleted them. I'd move on to the do folder
and do the same thing. The meat folder and
do the same thing. I would do this for each of them until I'd worked
through the folders and the only things that
were left in there were a handful of e-mails that I
can come back to you later. And I'd go back to my inbox and feel relieved because I
have nothing in there. And then for the rest
of the day I would work from my inbox only. So anything that came in, I would try to deal with in
real-time from my inbox. Okay, so a helpful tip is when we talk about
emails with threads, it's making sure that
your conversation view is selected so that you're grouping all similar emails that are
on the same thread together. So if I go to this arrow
right here and I expand it, you'll see that all of
the emails that were related to this e-mail
are now grouped together. So how do we do this? While in the right-hand side of this little bar right here. You'll see this by conversations and there's a down arrow. If I click on that, this is how you
would group them. You'd want to check
off conversations. Click newest on top. So anything that comes in that's the most recent
will be on top. And then you want to
click Show and groups. When you do that,
that enables you to keep all the threads
grouped together. And it just makes it
a lot more handy for keeping track of
the conversations. So keeping the stack
method consistent is key. You want to build a
habit so that you're constantly on top
of your inbox and getting your inbox to
01 of the best ways to do this is by creating
entries on your calendar. That reminds you that you have block time to deal
with your emails. If you look at the calendar
entry I have here, you'll notice that
there's three times I have an hour time at the
beginning of the day at nine AM, nine AM to ten AM. That says stack empty
inbox and process folders. And then I have two
shorter half hour times from 1230 to one. That's his stack work inbox. And another one from
four to 430 that says Stack work inbox. So the first one
I've given myself an hour and I've
marked it as busy. And that enables me to do
the actual stack method, go through the inbox, put things into the
appropriate action folders, work through the action folders. Now a lot of times people ask while you're giving yourself a whole hour of working time
to go ahead and do this? Yes, I'm doing that
because if you think about how much
time you spend on e-mail and how much time that derails your ability to work on your
projects or go to meetings. This is time that
I need to spend every day to clean out my inbox, give myself peace of mind, and be ready for the day. So I've marked this as busy, given myself now are now you
may get to a point where. You're doing this so often and you're so
comfortable with it, it only takes half
an hour and you can customize that
as you need to. The other entries on the calendar here
that are a half hour, the stack work inbox
I've marked as free. If somebody needs to
schedule time over that, or I have something else to do, easy to go ahead
and work past that. Now the most important thing is it has to be
something that you're going to work on and
find easy to maintain. How we've gotten
around that is we've decided that I've arbitrarily
assign these here, but you can put these in a session that's going to
work the best for you. So let's say this. I don't have time to do
this from nine to ten. But today I do have an
opening from two to three. I'm going to empty
my folders then I do I could work on my inbox
for a half hour this morning. So I'm gonna move this around. You know what, today I don't
really have time to do this. I'm gonna go ahead
and delete this and actually let me move
it up so you can see it. Let's say I didn't have
time to do this today. I'm gonna go ahead
and delete it, just this occurrence
and then that way I can not worry about it today, but pick it back up tomorrow. You can move these around, customize them as
you want to etc. Something that some
people like to do is they like to
sometimes start with their inbox very early and
do a lunchtime inbox check. Then at the end of the day, they liked to go ahead and do the inbox and
process the folders. You're gonna customize this for. However it works best for you so that you'll actually
maintain the habit. Okay, so let's talk about using the do folder
and Outlook Mac. Now the do folder is an incredibly helpful tool
because what you can do is schedule tasks for yourself or take tasks that people have sent you and put them
on your calendar. And your calendar will
have the email attached. And you'll also have it
notated in your actual e-mail, so you'll know that
it's been scheduled. So let me go ahead and
show you how to do that. I've gone already into my
do folder and I flagged this email because
this is something that I'm going to
schedule right now. The first thing I'd
want to do with the e-mail selected is go up to categorize and then
click on scheduled, which is a category
that I've created. Now how do you change it? You can literally go
to Edit categories. And you can see they give
you colors and you can add any category you want
and choose a color, etc. So that's how you would do that. So if I've gone
ahead and categorize this and I've picked scheduled. You'll notice that
two things happen. The first thing is I
get a green bar that appears that shows me that
that email has been scheduled. And then in the
actual e-mail itself, there is now something that
says scheduled that screen. Now I want to go ahead and
put this on my calendar. I'm gonna take this email
and literally drag it down to the calendar icon
and put it on there. Then an appointment
window pops up. The first thing I'm gonna
do is go back to this categorize option and I'm
going to select scheduled. And you'll see that that
green scheduled appears. And then the next thing I'm
gonna do, which is important, is typing the word do
with a colon and a space. This lets me know this
is something that I'm going to do that's
been scheduled. Then I'm gonna hit
Save and close. When I do that, if I toggle
back to my calendar, you'll see that it appears
right on my calendar. It's green like in the email
and the word do is there, that appointment is there. If I double-click to open it, you'll see the other nice
thing is that the e-mail that it's referencing
is attached. So that's how you would
go ahead and do that in the do folder and it's
incredibly helpful tool. Let's talk about
tracking with remind. In the course of the
day, we're going to send out tons of emails. Sometimes we need to keep track of a specific
email that we're gonna follow up with
a client or it's something we want to remind
ourselves about later. Could you look forward
in your sent messages? Yes, you've certainly could, but it might take you a really long time to find
it and it might be cumbersome for the handful of e-mails that you
want to keep track of, I'm gonna show you a
shortcut to help you put it in your mind
folder and then it's there so that you can
follow up without having to do a huge search and
you're sent messages. So what we're gonna do is
for the purposes of this, let's create a new email. And then I'm gonna go
ahead and send this out. I'm going to BCC myself. This is my e-mail address here. And I'm gonna go
ahead and BCC myself. So BC seeing myself when
I send the message, allows this to go into my inbox. So the client will
receive their message and then I'll receive
my message as a BCC. Here it is in my inbox, you can see there it is. Then I would just do
my command shift M. Hit F4 and put that right
in my remind folder. And there it is. Here's the email that
I just sent there. And then when I'm working
through my folders, it'll be there as a reminder. You can also do this
as a reply as well. So let's say I'm in inbox
and I want to reply to this, but I want to keep
track of the reply. I'm gonna select this. I'm going to go ahead
and reply to it. And I'm gonna BCC myself, just like I did in the last one. Then I'm gonna send it. And then same thing, this is going to
appear in my inbox. And then as it
appears in my inbox, it will then be something I can move into my
reminder folder. So here it is, IPCC myself. And literally I would do
the exact same thing. I would open it up. I would move it right into
my remind folder. And if I go into my remind
folder, here it is. I that way I can
keep track of it, but I don't need to keep
everything that I'm sending from my cent males
because you probably aren't going to look at all of those things that you send. Just a handful that you want to remind yourself to follow up on. Let's talk about the one folder. The one folder is here, although it is in
sequence with some of the other action
folders we have, the one folder works
a little differently. We're going to use
the one folder for active projects that we're
working on right now, or active folders that
we need to access. What I would use the
one folder for here is, for example, this is something
I'm working on right now. Here's a project I'm
putting together. Then what I would do is
I would set this up. So anytime something came in, I would go ahead and move
it to one of these folders. And that way when
I went to go work on project X, for example, everything I need for project
X is all going to be in the same folder without having to pull it out of other sources. So that's how we would
use the len folder. One of the most important
things we can do is turn off notifications and our email. Now at first that
seems a little scary, but I assure you you
will still check your email a whole
bunch, so very easy. You would go up to where it says outlook, go to Preferences, go to notifications and sounds, and then you would uncheck all of these options
under sounds. So then that way anytime
you get an e-mail, you'll still get it and
you'll still check it, but you won't be bombarded
by notifications. Okay, So this was using
rules on Outlook for Mac, and it's a little bit
different than outlook for PC. But basically I'm gonna go
ahead and hover over a, an email that I want
to create a rule for. I'm going to hover
over this radial team. And then I'm going
to actually go into the rules up here, Create rule. Then you can see the role
name that they automatically applied here is received
from the radial team. I can just call it
the radial team. I don't have to
have received from. If I get rid of this, then I can also change all of the
specifications for this. So I can have a b
from sent to subject. And these plus and minus
signs allow you to add choices onto the rules so you can go ahead and expand
each one of these. And you can have has
attachments state received, and you can type in anything you want so you can customize the rule to be as
specific as you want. Then you have to pick an action. The action I'm going to pick
here is move to folder. I'm going to go ahead
and change this actually two review because that's
gonna be a newsletter. And I'm actually
going to take some of these guys off because
I don't need them. There we go. Then if I want to move
this to a folder, I can decide if I want to apply this to other other rules, to messages that meet
the same conditions. Now, I probably do want to apply these other rules to messages and meet
the same conditions. If it is something
like a newsletter. In this case, I'm gonna
say I don't want to do it. I wanted enabled and I'm
gonna click Okay, by the way, the folder I'm moving
into his review and I can change the folder by
using this menu or clicking on Choose
folder and typing in the number or the name of the folder and then
it will select it. I'm gonna click OK.
And you can see that it saves the
rules to the server. Now if I go to rules that says Move messages from
the radial team. Now if I do that, what it's gonna do
is it's gonna ask me what folder I
want to move it to. I'm going to do six review. I'm gonna hit Enter and it's going to save those
rules and move it. Now if I go to
review, there it is. And anytime the renal team
sends me a new e-mail, it'll go automatically into my review folder and it
won't clutter my inbox. Sometimes you want to
open up a bunch of emails at the same time
while you're stacking in your inbox so that
you can save yourself time as you answer
all of the emails. You're doing it in real
time and then you can close the tab and go ahead
and archive it out of your inbox and you're
done with it for the day. I'm in Outlook for Mac. And it's pretty easy. You would just hit Shift
and select a range of e-mails that you want
to open up in new tabs. And then if you right-click, you'll get open
messages as an option. And if you click that, you want to say yes. And you'll see that
they all open up in separate windows and you can go ahead and reply in real-time, close the window when
you're done with it. Then once you're done
with all of these emails, I did 11 of them. So let's say I replied to all of these in real-time and
dealt with it in real time. Then I could go back in
and just go ahead and modify this entire
selected area. And I'd be done with all of
those e-mails for the day.
12. How to Outlook PC: Set Up Guide: Hi, Welcome. In the following videos, I will be demonstrating some of our recommended best
practices for using the stack method
effectively and easily. We want to help
alleviate the stress associated with e-mail
and get your inbox to 0. It's important to note that
these are recommendations. They're not hard and fast rules. We want the process to be comfortable and
effortless to maintain. So please feel free to
customize it to fit you. The stack method is designed
to give you back more of your time and is completely
non-destructive. You won't lose any
important emails we promise happy stacking. We're in Outlook for PC. We're gonna talk about how to
create your action folders. Now you'll notice here
on the left that I have nested them all under the inbox. The reason that we do that
is so if I collapse it, I don't have to look
at those folders all the time and it creates an incredibly streamlined,
non cluttered appearance. But for now I'm going
to uncollapsed them. You'll notice that we've given them short
action-oriented names, reply, do, meet, remind forward, review and so on. You'll also notice that I put the numbers right next to the
actual name of the folder. The reason that we
do that is so that this is the order
that I would like to prioritize my workflow by putting the number to the
left of the actual name. It keeps it floated in the
order that I like to work. I would rather reply
to somebody before I do something or
schedule meetings. You're going to want to
customize this to suit you best. You may want to
move this around. The best way to create
these folders is to right-click on the inbox, go to New Folder. And then you can go ahead and type in the name of the folder. Again, pick short
action-oriented names. You probably noticed earlier when we were talking
about creating our action folders
that there was also a folder at the
bottom called seven. When you'll see that we did go ahead and continue
the sequence of numbers. But the wind folder does work
a little bit differently. Sometimes you'll need
access to a folder that contains items you're
actively working on. For example, if you're
creating a presentation, we're calling these active
folders and an e-mail. This is where the wind
folder would come in. I would nest all folders
for active projects here. For example, if I
uncollapsed this, you'll see that I've
nested a few folders under here that are things
I'm currently working on. So a good example is working on Project X. I can go ahead and
set that up in my e-mail. So every time I
see an email come in that relates to
working on Project X, it goes right into Project X
folder and we can move it, and I can even move
it that way as well using keyboard shortcuts, which we'll talk
about in a moment. But that way when you go to sit down and work on project X, everything you could
possibly need is all in that folder ready to go
when you're done with it. Say for example, traveling September 2021 already happened. You can go ahead and
archive that folder. Okay, here we go. This is going to be the stacking
process for Outlook PC. The first thing I want to
draw your attention to is this quick steps bar located right in the
middle of the ribbon here. And if I click on this, you'll see that managed
quick steps pulls up. You'll notice that there are
quick steps that match and name these action folders we created in the
left task part. We're gonna come back to
this in a different video. I'll show you how
to set this up. But I did want to call
your attention to it because you're going
to ask why and how I'm moving those e-mails out of the Inbox so quickly
into the action folders. And this is how let me get
out of there and let's talk about exactly how we
are going to stack. If I go into the inbox here, you remember from the
original stack videos that you need to do several things when you
first open up an email, you have to open it. You have to scan it, then decide what to do
and then act on it. So I'm gonna go ahead
and I've already created these action
folders here. And I'm going to
assign an action to each of these emails. That's gonna save
me a lot of time because then I'm going
to know exactly when I'm in my reply folder that everything in there
needs to be replied to. One of them I do folder, I'll know those are things
I need to schedule or their tasks people have sent me that I need to
put on my calendar. So I'm gonna go ahead and
by looking at this quickly, I'm going to decide, all right, This one's a reply. I'm gonna go ahead and move
this into their apply folder. Now if I go into the reply
folder, there it is. It's been moved so quickly. And we're gonna do that
with each of our emails until we have nothing
left in the inbox. So I'm going to decide
that this one is, this one is due. So I'm gonna say
this one's to do. This one is a do this
one's for review. So again, if I go into
my review folder, you'll see this is the
last email I selected. There it is. I'm going to keep moving through
the entire inbox. And I'm gonna use my
up and down arrows. So same thing, just
gonna go ahead. I'm gonna say this one's due. This one's a reply at
some meeting request. This one is a remind ado. Let's say that this
ones or apply. This one's a reply. This one is gonna be, uh, do, definitely a do. I do. That one says please
do so we'll know that is and we'll say
this one's a reply, this one's a reminder, and this one's a reply. If I go into my folders
here, first of all, before I do that, I'm gonna take a huge deep
breath and sigh of relief. Because I have
nothing in my inbox. It's at 0. That's incredible.
And then I'm gonna go into my folders and continue the stacking process
by working through the folders in the order that
I like to do my workflow. So remember I put a
one next to reply because I like to
reply to things first, then I like to do things, etc. So I'm gonna go ahead
and I'm going to flag the e-mails in real-time that I want to go ahead and
respond to right now. Some of them are gonna
take more time and I can leave those in the
reply folder for now. But in most cases
I'll be able to take care of most of
these very quickly. So it'll be pretty easy. I'm going to flag it. So I'll go ahead and flag. I'm gonna use the
up and down arrows. That one's gonna take more time. I'm gonna come back to it. And then I think for
this one maybe I'll also flag this one
at the bottom. So I'm gonna go
ahead and real time, and I'm back here and I'm going to respond to this right now. So I'll go ahead and pop open the reply and I
will reply to it. And then I'm gonna send it. Now I dealt with this now, so I don't need to leave this in the reply folder anymore. I can go ahead and
just archive it. And it's out of my reply
folder and it's done. I would do that as well with the other email that I flagged
and then apply folder, reply to it in real time. Okay. I'll get back to you. Then I'm going to send it. And then I dealt
with this already. So I can go ahead and I can
archive it. And I'm done. I would do this throughout
each of my action folders. So I'm going to decide those ones I'm gonna
come back to later. I'm gonna go to do and I'm gonna go ahead and schedule those. I will do this at a later
video because with the do, the do folder works a
tiny bit differently. Let's go into meat. Same thing. I'd be able to pull this up, put it on my calendar
and be done, and then archive it. Remind, I read this already. I know what I want
to do with this. I'm gonna go ahead and archive this because I did it already. So I'd worked through each of my action folders in that way. And then I'd come
back to my inbox, take a deep sigh of relief again because there's
nothing in here. And then anything else that I got during the course
of the day would be emails that come in
directly into my inbox and I would work
through my inbox for the rest of the day. Let's talk about
archiving and Outlook PC. Now it's important to note that archiving and deleting
are not the same thing. Deleting means you're
really getting rid of it. And you may sometimes be able to delete emails that you
don't need anymore, but usually we recommend
archiving them instead. Archiving is a
nondestructive process that allows you to continue to
search for that actual e-mail, even if it's not
sitting in your inbox, cluttering up your inbox. And it's also, you can do
that with folders too, so they're not cluttering
up your left taskbar. I'm gonna show you a couple
of ways that you can do it. To start out with, you're
going to want to go to this where it says by date and this little down arrow and you're gonna click that and you want to sort with
oldest emails on top. So you're going to
want to click that. Now it's important to note that many people
store ten thousand, twenty thousand,
thirty thousand and more emails just
living in their inbox. You're going to want to do
this in groups of 500 to a 1000 e-mails so that you
don't crash the system. Now, will this take you a little bit of time The
first time you do it? Yes. But then you'll never have
to do it again because you'll be on top of it
with the stocking process. The other important thing
to note is you want to archive back as far as three
weeks ago from today's date. The reason that we say that
is emails that you get between now and three
weeks ago might be active things that
you need to deal with. Generally anything that's
three weeks ago and older. You've either dealt with it. You don't need to look at the email and you're not
going to do anything with it. So again, it's not thrown
out, It's just archived. Once you do this, you're
going to select a group of emails and 500 to 1000 emails, and then you're just
going to archive them. I want to show you if
I go into my archive, there it is there not deleted. They're there. And again, I could always
do a search for them. I'm going to go
back into my inbox. Now you remember this
little quick step bar here. We also went ahead and
created one for archive. And I'm going to show
you how to set that up when we talk about how
to set up quick steps. But just take one email
to give you an example. The way I would do that
is control shift nine. And then if we go
here to archive, you can see that
e-mail is there again, not thrown out, but not
sitting in my inbox. The nice thing is too, that you can do that with
folders that you are done with. If I decide I don't
need traveling September 2021,
that's done already. I can literally select the folder and then
I can do a shortcut. And I'll talk to you
about how to do this. I did Control Shift V. What that lets you do is
it lets you move an item. When you do that, all
I have to do is start typing in the name of the
folder I want to move it to. You can see it's
already selected archive because I
started typing in AR. I'm going to say, Okay, when I do that, it's going to move the folder
into that actual archive. Here. It hasn't going to
select that, say, okay. And then here it is, you can see it's pulled up
right underneath the archive. And then if I decide, Wow, I really need that folder. I'm gonna need it to add some things to it because
something else came up. Can always drag it right
back into the one folder. It's going to ask me, I
say yes and it's back. So that's one way that you can archive folders that
you don't need anymore. Okay, So this is about conversation view or emails
with threads for Alec PC. Now we get a lot of
questions about how to make sure email threads
are staying grouped. So you're not getting a bunch
of e-mails that are loose, that are should be connected because they're part of
the same conversation. This enables you to keep all of your conversation threads
grouped together. So you'd go to this Home
ribbon here and make sure it's expanded so you
can see what's here. Then you would go to View, then see how it says
show as conversations. What you're going to want to do is you're going
to want to make sure show as
conversations is clicked. Then the other thing
you want to do is where it says conversation settings. You want to click, Show messages from
other folders, show centers above the subject. It just makes it easier
for you to see it. And then anytime you get a conversation that comes in and there's a thread
that goes back and forth, you'll see that it will come
up as a grouped thread. And you probably
saw that in some of my emails like this one, you'll get a little arrow. And if I click to expand it, you'll see that these
two e-mails are actually in the thread with
this as the subject. All right, so one of the most important parts of
the stack method process is making sure that you give
yourself set times to stack. By set times. I mean, there's
flexibility with that. While you look at
my calendar here, you can see that I have put
three times on my calendar. I have a time from nine
to ten, so an hour. And this one
actually says stack, empty inbox and process folders. If I click on that, you can see that I've
marked that time as busy. I've given myself an hour to go through the
static method process, which is going
through the inbox, putting the e-mails into the
appropriate action folders, and then working through
the action folders, I find that an hour is completely
enough time to do that, and sometimes I even
need less than that. Can you move this time
around? Absolutely. You don't have
time to do it from nine to ten AM on
Monday and you know, you'll have time to do it at
the end of the day instead, you can move it down here. So it's completely up to you. You have the power to
move these around. Now a question I get a lot is, but how am I going to set aside an hour of the
workday to do this? I want you to think for a
minute how much time you're spending working on your email over the course of the day, and how many times you get distracted by e-mails
that come in. Whereas if you put
aside one hour, you could work through that in a concentrated block
and get it done. You'll notice there's also two other shorter times
I've put on my calendar. This one so stack work inbox and so does this one
at the end of the day, they're both a half-hour. And if we click in there,
you can see that we've actually marked the time
is free for this one. This way, if somebody
needs to schedule a meeting over it, it's fine. You can also move
these around as well. Sometimes I move these down
to the end of the day. The really nice thing is you can also swap this out a lot. Some people like to do there half-hour first
thing in the morning, another one at lunchtime. And then they actually
like to do the process of stacking at the
end of the day to clear everything out before
they leave for the day. However you want to
do this is up to you. Again, you can move them around as needs be with your schedule. But the important part is
that you're literally putting aside time to go through your
inbox processor folders. And then for the shorter
periods of time, you're literally working
from your inbox. Okay, So you've
heard me mentioned quick steps and a lot
of the other videos. And this would be
for Outlook PC. What you would do is
go to your Home ribbon here and you'd see quick
steps right in the middle. Then this bar right
here is gonna be, you press that arrow
and you'll see managed quick steps pops up. Now what we're gonna
do is we're gonna create quick steps that will move emails from your inbox
into the action folders. You saw me moving them so quickly and this is
how you'll do it. Let me show you how
we're gonna do this. In order to make this
an example that sticks, I'm gonna go ahead and delete this first quick steps so that I can show you
how to make it yourself. So I'm gonna delete that. So what you would
do is you would go to new at the bottom here. Then you'd go down to custom. Then you would type in
what you want to call it. So I'm gonna call this one reply because I'm replacing
the one I just deleted. And then I'm gonna
choose an action. The action is going
to be that I'm gonna move it to a folder. And the folder I'm
gonna choose a two in this case is one reply. So that the quick step
is going to match in name to the folder that
I want to move it to. I'm going to add an action here. And for me that's gonna
be to mark it as read, but you may not want to do that and that's
entirely up to you. Now this is the really
crucial part down here. You need to choose
a shortcut key. So it recognizes that anytime you have this quick step and moves it to the folder, the shortcut I'm going to
choose is control shift one. Now could you name it
a different thing? Yes. But I like to make the
number match the priority. So everything is one here
and it's easy to remember. And then you're
gonna say Finish. Then you'll see it's now been
saved and you're gonna say, okay, so now let's do a test. Let's say that I decided
that this one is a reply. I'm gonna go ahead
and select this one. Then I'm gonna do
Control shift one. And let's see if
it went in there. Yes, it did. So we know that that
quick step worked. That's how you would create quick steps and you
would do that for each. So if I go back and expand this, you'll notice we
have one reply to do three meat and so on. So you would do it
exactly the same way. Now for archive, you would do this a little
bit differently. Now Archive is
Control Shift Nine, and I'm gonna show you how to do Control Shift eight
and a different video. It's important to note that the quick steps only go
up to the number nine. So unfortunately, you
can't do 101112, etc. However, you'll find that you have mainly seven main folders. And you're going to have Control Shift eight will
be to pop open a window. And I'll show you how to do that one in a different video. And control shift nine is gonna
be how we do the archive. I'm gonna go ahead and
delete this archive step. Then I'm gonna do it
the same exact way. Go to New Custom. I'm going to call
this one archive. The action I'm going to choose is that I want to move it to the folder and the folder
is going to be archive. I'm not going to add an
action to this one for now. And then the shortcut
I'm going to choose for archiving is control shift nine. Then I'm gonna say finish. And you'll see archive is here. It shows you what
the shortcut key is. And then I'm gonna hit OK. Let's go back into
our inbox and to say, let's just give this a try and say that I want to go ahead
and archive this e-mail. I'm gonna do Control Shift Nine. And let's check our archive. And there it is. That's how you would do quick
steps and you'd want to set that up for all of
your action folders. So when you're in your inbox, you can just do Control Shift plus the number that
matches the number of your action folder and it moves there without you having to
drag it with your mouse. One of the most important things about feeling your anxiety drop away is not having a 1000 folders in
your left taskbar. I'm gonna talk to
you about cleaning up your left taskbar
a little bit. Now we talked about this
a little bit earlier. Want to important tip is to put your action folders in your inbox so that way
you can collapse it. You don't have to see 1000
folders underneath it. This one isn't too bad
because I literally only have folders nested inside the inbox
and folders nested inside when unfortunately
an Outlook, these are native items
that I can't get rid of. I wish I could. But what I wanted to
do is go ahead and create a visual separation. So I didn't have
to have this blend in with my action folders. You might find this amusing, but the easy thing to do here is this is literally a folder that has been named this way to
create the visual Separation. What you're going
to literally do is you're going to
go into new folder. And then you're just
gonna hold shift down and do dotted lines, which creates a solid
line like this. And you're going to say,
okay, When you say okay, that creates the line. And you can put this
anywhere you want to, let's say I wanted to
put it under archive. It would move it there and then that way archive would be over here with my other folders
that I like to look at. This way it creates
visual separation, it looks clean and if you
don't need it anymore, you can just delete it and
go back to how it was. So I like to use that just to separate if I have projects, I'll separate it that way. Let's talk about using
rules for alloc PC. Now rules are gonna be one of the most helpful things
for you to use because it's going to let
you keep everything you don't need to
see in your inbox, out of your inbox. You'll usually want
these emails to either go to the review folder. In the case of things
like newsletters, for example, or the wind folder. If I expand this, for example, I could set this up so that
anything that comes into my inbox goes to the working
on Project X folder, instead of staying in my
inbox and cluttering it up. How we do this as you
go to the Home ribbon, go to Roles, go to Create rule. You're going to click
whatever you want to choose. So you could do from
the renal team, the subject contains,
I'm gonna say anything from the radial team. I want to go into a folder. The way I'm gonna do
that is I'm going to select Move the
item to the folder. This case I've chosen CC review because
it's a newsletter. But if you click Select Folder, you can choose
anything you want. After you do that, you're going to hit Okay? And then you can also add
more rules on by going to Advanced Options
and clicking any of these you can see it's quite an expansive menu that comes up. You can do that. Once you've
selected what you want, you want to click Next. Now I've only chosen one rule, so it's gonna go ahead and have stopped processing
more rules on there. And I'm gonna click Finish. Then it's going to kick me
back to that one window. And you saw at the bottom of the screen it did send, receive. Now, if I go to these rules, I can click always move messages from the radial
team, click that. And it's going to know that
I want to put it in review. And if I go into review, see how it just got pulled out. If I go into review. There it is. Now anytime something sent
to me by that radial team, it's gonna go right
into the review folder. And it's not going
to go into my inbox. Notifications are something that we generally tend
to have turned on. And it's not great to do that because it's pretty
overwhelming when you're trying to focus on
getting a chunk of work done or you're trying to go to a meeting and you keep
getting pinged by emails. We recommend that you turn your notifications
off and Outlook. Now you're still gonna
check your email. It doesn't mean you
won't check it, but what it does mean
is you won't be as distracted while you're actually trying to get some
work accomplished. So pretty easy. This is for Outlook PC. You would go up to
where it says File. Then down here where
it says options, you would select that
pop-up will come up. And when that happens, you're going to
click on mail here. Then you're gonna go to
message arrival here at the bottom and see how I have
some things checked here. You're going to uncheck everything and then you're
going to hit, Okay. Then I won't get
notifications anymore. And I can focus on my work. Again, it doesn't mean you're
not gonna check your email, but you won't be
distracted by it when you really need to focus
on something else. This is gonna be how we
use the do folder to enable us to easily schedule tasks that are linked
to our calendar. What I'm going to do first
is I'm going to create a quick step that's going
to help us in this process. So you remember
the quick step is located right in the
middle of the ribbon. Click on the arrow to expand. Then for the purposes
of this example, I'm just going to delete this
because I'm gonna create a new quick step for you
that you're going to use. We're gonna do this like
we did the other ones. You're gonna go to New,
we're gonna go to Custom. And then we're gonna
call this one schedule. Because that's what
we want to do. We want to schedule
things on our calendar. Then. This is really important to see where it says
choose an action. You want to scroll down
here until you select, create an appointment
with an attachment. That's the one you'd
want to select. Create an appointment
with an attachment. Then I'm going to
select Add action. Then I'm going to
select that I want to categorize the message. The category that I'm going to choose is this
category scheduled. Now you can always create a
new category yourself under categorize and you can make
it whatever color you want. So I'm gonna choose
scheduled in this case. Then I'm going to go ahead
and choose a shortcut for it. The shortcut I'm
going to choose for this is Control Shift eight, because if you recall, we have seven folders. We haven't used Control
Shift eight yet. And Control Shift Nine
is for archiving. So Control Shift, I'm
going to say Finish. Then, here I am. And you can see that now there's a category on here that says schedule and
whatever you've last save as a quick step
is what's on top. And then I'm gonna say, okay, now I'm gonna come
over to calendar view. Then I'm going to click on view up here and
then View settings. This is where we're gonna add
the conditional formatting so that it links to the
calendar and is color-coded. So it's really a helpful tool. While I'm here. I'm going to select
Conditional Formatting. And then I'm going
to select Add. Now in this case, I already selected ad
and I called it do so I'm gonna go ahead and I'm
going to delete this one. Let's say I selected add, I created the name. Do you can call this whatever you want, but
I'm going to select, suggest that we call this do for this particular rule
for your calendar. And you can pick
whatever color you want. I'm going to pick green. Then you can go to where
it says condition. The condition for me that
I've added is to search for the word do and you can do whatever you want
here you can add more. But this is a simple example, so we're going to
search for the word do. I'm going to say OK. Then
I'm going to say okay again. Say OK again. And we're set up. Now if I toggle back to my
inbox and I am going to say I've already gone
through my inbox for the day and I'm
starting to work through my folders and I'm prioritizing
what I want to do. I'm going to do this
one, I'm going to flag, let's say Let's do this one. And I'm going to flag
this one at the bottom. What I would do here is I'm
already hovering over here. I'm gonna do my Control
Shift eight shortcut. I'm going to type the words do or the word do
in front of this. Remember that typing the word do allows a conditional
formatting to happen. Then I can go ahead and change this for
whatever time I want. And I'm going to say, okay, I will save, close. You'll notice something
happened here. I have a green box. The green box tells me that I've scheduled it and you'll see that the green box shows up in the actual e-mail
and says scheduled. Now an even nicer thing is, is if I go to my
actual calendar, you'll see that same due, please prep payroll
shows up on my calendar, scheduled and ready to
go and it's color-coded green because I set up the
conditional formatting. See how there's a
paperclip here. If you double-click on it, the e-mail is actually attached
to the calendar entry. If I needed to reference
it, it would be there. And you can do this with any calendar entries of your choice. Let's talk about tracking
with remind on Outlook PC, sometimes you want to keep a record of an email
that you've sent. And while it does go
into your sent folder, so does everything
else you send. Chances are you
really only want to reference a handful of
e-mails that you send out. So I have a little bit of an easier way to keep track of it. And that's by creating
the e-mail BC, seeing yourself and putting
it in the Remind folder. Let me go ahead and show
you what I would do. Let's say I had this email here. I opened it and I
wanted to reply to it. What I would do is I
would reply to it. Let's say I wanted to save this. So instead of just hitting send, I would go to the BCC
field and BCC myself. Then I would send it. Then once I sent it, I would be able to
have it come into my inbox and now Outlook
takes a second to show up. So we have to be a tiny
bit patient with that. But once it shows
up in my inbox, you'll see that I'm BCC dt. I see it as a new
e-mail and I can just move that specific email
into my remind folder. Here it has now took a minute, but here we go. Here it is. So I'm going to close that
and scroll to the top. Here's my new email on red. So what I'm gonna do is
I'm going to open it up. I BCC myself on it, and then using
Control Shift four, which is our quick step to
put it in the Remind folder. I'm gonna put that in
there, remind folder. And then later on when I'm
working through my folders, I have it there as a reminder, this is great for
emails where you're going to need to follow
up with somebody. You want to remind yourself
to do something, etc. We want an easy way to move our e-mails into
the wind folder. And remember that the folders inside the one
folder reference are active projects
are active folders that we're working
with right now. Rather than dragging
it in with a mouse, there's actually an easier way. What you can do is you
can select an email. You can do Control Shift V, V as in Victor. When you do that, it
opens up this window. And then all I have
to do is start typing in the actual
name of the folder. And if this has collapsed, you may have to just expand it. So let's say I want
this e-mail to go into traveling
September 2021. I just started typing in TR
and it immediately found it. And then I'm gonna hit Enter. And then if we go
into traveling and September, There it is. That's a really
easy way to do it. I'll do it one more time. We literally go in Control Shift V opens up a
box to move it into a folder. I'm going to select, let's say this
time I want to put it on working on Project X. I'm gonna hit return. And then if I go into working
on Project X, there it is. It's very easy to do and it saves you a
tremendous amount of time. Sometimes you want to
open up multiple emails at the same time when you're
stacking in your inbox. This is a really nice way also for you to feel
a real sense of accomplishment because you can close each window
once you're done. An outlook for PC,
it's pretty easy. You would hold down
the Shift key and the down arrow and just
select a range of emails. So I'll do a couple
of them here. Then you would right-click and you can see
where it says open. So you'd press that
and you can see they each open up in
their own window. And I could go ahead
and just hit Reply, deal with it in real time. And then I would do that for each of these windows that are open and I would close
them as I finish them. Then you've got the selected
range and you can archive all of those e-mails because they're out of your
inbox for the day.
13. How to Apple Mail: Set Up Guide: Hi, Welcome. In the following videos, I will be demonstrating some of our recommended best
practices for using the stack method
effectively and easily. We want to help
alleviate the stress associated with e-mail
and get your inbox to 0. It's important to note that
these are recommendations. They're not hard and fast rules. We want the process to be comfortable and
effortless to maintain. So please feel free to
customize it to fit you. The stack method is designed
to give you back more of your time and is completely
non-destructive. You won't lose any
important emails. We promise happy stacking. This is the stock
method for Apple Mail. So what I'm gonna do is walk
you through the process of the stack method and
how you would do it. And then I'm going
to show you where everything is located. So in subsequent videos will
show you a specific setups, but you'll have an awareness
of where they are. So what you would do is you would come in at
the beginning of the day and you would go into your inbox and the goal
would be to open it, look at the email, scan it, and decide what action
is associated with it, and move it into the
corresponding action folder. Now you'll see I've set them
up already here on the left. And again, they have short
action-oriented names. And there's a number to
the left of the name. So I know exactly that this is the order I like to work in. So I would literally
decide, okay, this one is a du and put
it in the do folder. This one is a review and put it in the review folder and so on. Before I show you how to stack, I want to show you something
important in Apple mail. If you go to message
up here at the top, you'll note that if
you click on it, it actually gives you all of the keyboard shortcuts in gray here to the
right of the command. If you can't remember, you can always click on
that and it tells you. The other thing I
want to show you is if you go to move to, you'll notice that here
we've gone ahead and set up keyboard shortcuts
that correspond with the number of
the action folder. Now I'm going to
show you how to do this in a different video, but it's going to save
you a lot of time. So that way you're not
dragging it with a mouse, which takes a couple
of seconds per email. And it also makes it
likely that you might put it in the wrong
folder by accident. So if you're wondering how I'm gonna be doing
this so quickly, that's how I'll show you
how to do that shortly. So what I'm gonna do is
I'm going to go ahead, look at my inbox, start moving this into
my action folders here on the left taskbar. I'm gonna say this one is a do, so I'm gonna put it there. Let's just check to
see that it moved. Yet. There it is. I'm gonna go back into my inbox. This one is a review. This one's a review.
This one's ado. Let's make this one a reply, so I have some stuff to grab. I'll make that one a reply. That's a meat that
one's a do reply. And we'll make these
last ones reveal. Now what I need to do
since my inbox is nice and empty and I can take
a huge sigh of relief. I'm going to start working
through my action folders. So I'm gonna go into
the reply folder first. Then what I'm gonna do is select all of the e-mails
in this folder. And I'm going to
right-click and do Open. Now you'll notice they all
open up in a nice window. So instead of having
a go email by email, I can work on them in
real time right here in this window and then
archive them when done. So I'm gonna go ahead
and use Command R, which is the shortcut for reply. And then I'm just going to say, Hi, how are you? So I'll just do a
little response here. Then I'm going to send it. I already actually sent that. So what I'm gonna do next
is work on the next one. It's the same thing. Do my shortcut for reply, which is Command are great. So I'm going to send this one. And then this is
the last one here. Gonna go ahead and send
this one. These are done. So I can literally just go ahead and archive
these because it's finished. And guess what? I reply folder is empty. And what a great feeling that is because now my inbox is empty, one of my folders is empty. And then I would move on
to the do folder and do the same thing until I had gotten through all
of my folders. So that is the static
method in Apple Mail. Setting up action
folders and Apple Mail. I'm here and I'm in my inbox. And you'll remember
that we set up action folders so that
instead of leaving emails in your inbox and
then having to reopen them and remind yourself what it is you need
to do with it. You literally move each of
the emails into the folders. And that way you'll
know this is a reply. This is something
that I need to do. And so I'm going to
schedule a work, which means I'm going to put
the tasks on my calendar. This is a meeting and so on. So really simple to set it up. What you're going to do is just right-click and your inbox, go to new mailbox
and then go ahead and put the name of
the mailbox in here. Now you'll notice I've put numbers to the left
of the mailbox. And the reason that
I've done that is this is the order that
I like to work in. I wanna do my replies first, then I'm gonna go ahead
and schedule work. Then I'm gonna go through my
meeting requests and so on. The other thing
is when we set up your keyboard shortcuts and a couple of minutes
in a different video. It's going to be
helpful for you to have numbers that correspond
with the shortcuts. So we'll talk about
that in a moment. You'll notice I've
also put them under the inbox and this is really
just to keep it tidy. And that is how you would set up action folders
for Apple Mail. Setting up shortcuts
and Apple Mail. You'll remember
when I showed you the first video on how to do
the stack method process, you saw me moving all
of the e-mails really quickly from my inbox
into my action folders. And I wasn't using the
mouse to drag them there. That takes a couple of seconds. And it also increases
your risk of putting an e-mail in
the wrong folder. So there's a better, easier way and that's by
using keyboard shortcuts. You'll also remember I showed
you that if you go to where it says message on
the top taskbar, there are already some shortcuts that are native to add to male. So you'll see that reply
is command R and so on. But what's not set up are
these keyboard shortcuts to move these emails into
specific action folders. So you only have to set them up one time unless you want to change the name and then
you can modify them. How you're gonna do this
as you're going to go to your Apple icon in the
top left-hand corner. System preferences keyboard. Go to where it says shortcuts. Then you want to
pick up shortcuts. And now to set it up, you need to select
the plus sign. And then right now it
says all applications, but you've got to select male, so it knows where that keyboard shortcut
is going to apply. And then for menu title, you're going to type it in
exactly like this message, dash greater than sign, move space to dash
greater than sign. And now I want to put in the exact name of the
corresponding action folder. I'm gonna do one for
the one reply folder. Now you'll notice
that actually how it appears here is that quick
responses is in parentheses. If I don't name it exactly as it shows up in
the left taskbar, it's not gonna be able to find
the correct action folder. So I'm going to put quick
responses in parentheses, and then I need to give
it a keyboard shortcut. And I'm going to
choose control one. Now I've chosen one to match deliberately with the number
of the action folder. So it's incredibly
easy to remember. And then I'm going to click
Add. And there it is. I also, I'm gonna
go ahead and do another one and just create a folder for a keyboard
shortcut further ado folder. So same thing males
already selected. I'm going to type in message
dash greater than sign. Move space to dash
greater than sign. And this time I'm
going to do to do. And you'll notice this also
has something in parentheses. So again, we want
to make this match. So I'll put schedule,
work and parenthesis. And the keyboard shortcut is
going to be controlled two. So two matches with to do. And then I'm going to click Add. And again there it is. Once you're done, you just
can close out of that window. Now let's test to
make sure it works. So this one says write
on it, It's a meat. So I'm gonna do Control three. Now you'll see that it
was pulled right out of the Inbox and let's check
to make sure it's there. Yes, there it is. Again, now if I go to
message up at the top, I'm in my inbox and I go
to message up at the top. You'll notice that if I scroll
down and I go to move to, you'll see that all of
those keyboard shortcuts show up next to the
appropriate action folders. So let's do a couple together just to make sure this works. Let's just say this as a reply. Let's say this one's a reply, this one's a reply
and this one is ado. Let's check. Are they There? They are. So that's great. And what you can do is just hold the Control sign down and let's do the
appropriate numbers. Super-quick moves
everything into the appropriate action folder. So that's how you would set up keyboard shortcuts
and Apple Mail. Setting up stacking time
on your Apple Calendar. You'll remember when we talked about the stack method process. It is a habit based
method, right? So you need to come in and go ahead and empty your
inbox and work from your action folders
and make it a pattern that you can maintain every day or it's not
going to work for you. An easy, simple Lift way to do that is put the time
in your calendar. And you'll notice by looking
at my calendar right now, I have a couple of
different time slots. I have one that's for
an hour that says stack empty inbox
and stack folders. And I have two
smaller ones that are a half-hour that just
say stack inbox. Now how they're different is that this one at the
start of the day, you can see repeats
every weekday. It's for an hour and I've
marked the time is busy. And what I'm gonna
do in this time is go through the
existing e-mails in my inbox and then put them in the action folders and work
through the action folders. The most important thing
here is I've marked it as busy so that I don't have someone's schedule
a meeting over it. And I take that
time for myself to get through those e-mails
and those folders. So I'm starting with a
clean slate for the day. Pick a time that you
know, you can stick to. If you drive your kids
to school between 89 AM, that's not a good time to pick something that you can
generally stick to. And again, you may not
stick to it every day. And that's simple. Let's say you got through
everything on Monday, but then you come
in on Tuesday and you have a meeting
at nine o'clock, you can move it to another time. No problem. You can also delete it if you can't get to it
that day, that's okay. The goal is to try to get to it daily or as often to
daily as possible. Now you'll notice that
the smaller appointments here for half an hour
just say stack inbox. And if we open those, those are literally a half-hour and you'll notice
they're marked as free. Because these are
just for you to work through your inbox, meaning emails that have come in over the course of that day. Will you still check your email? You sure. Well, but if you see that you have this half-hour
on your calendar, you'll know that you're
able to quickly check, see if anything is
important and you'll have a half hour chunk to work
through all of those e-mails. Instead of doing an email
switching to a task, doing an email
switching to a task. So it's a lot more
effective this way. Some people have to, some people make
this another hour, so do what works for you. And again, this is also set
to reoccur every weekday. So make sure that you
put stacking time on your calendar is one of
the best things you can do to create the habit based approach that will lower your stress on
dealing with email. Using the new folder
and Apple Mail. So the Do folder
is different than the reply folder because
the du folder is for you to take tasks that you either need to schedule
for yourself or tasks that someone
has sent you to do and put that time on your
calendar to do them. What ends up happening often as someone will email
you something that they want you to do
and it'll sit in your inbox and then suddenly
you see it and you realize, I don't have any time
to do that this week. So this is a way that
as you work through your action folders and you start to work through
you do folder. You put all of those tasks into your calendar in real-time. And you can see
what I've done here is I've a split-screen. I have my calendar
open on the right, and I have the folder open on the left. Now what Apple Mail? It's really simple. I can just grab this and I can literally drag it onto the
calendar when I want to do it. Then I can modify it. Let's say I want more
time than an hour. So the first thing I'm gonna do is I'm going to change where it says R E to capital
D, capital O. And then I'm going
to give it a color that stands out
That's a little bit different than the other
tasks I have on my calendar. So I know that these
are things that I need to do and
it's not a meeting, and it's not something else. It's literally tasks that
need to get done by me. And then I can change
the time if I want. Let's say I want this to
be an hour-and-a-half. Great. And then you'll notice it
also pops up, show in male. So what's great
about that is I've gone ahead and put
this on my calendar. And if I open it and
click on showing male, it just pulls up the actual
e-mail associated with it. So when I am working
from my calendar, I don't have to go
back to the inbox to double-check what this
was in relation to. Now, the next thing I
can do is I want to let myself know that I've
gone ahead and schedule this. The last thing that you wanna do is just come back
over to the e-mail, right-click it and
give it a flag that actually matches the color
that you've chosen here. And that way I know that
I've scheduled it on my calendar and I have
it already in there. And when I've
completed the task, I can go ahead and
archive the e-mail. This is tracking with
remind for Apple Mail. So we sent out
tons of emails per day and many of them
are just quick replies. Somebody gets back to
you and that's fine. But there are generally
a handful of emails that were waiting for someone
to respond to or, you know, you're going to
want to follow up on it. And so you want to remind
yourself to do that. What we tend to do
right now is go into our Sent Mail, do a search, but there's so many
emails in there and it's time-consuming to
find what you really need. There's an easier and
more efficient way. And that's by using the BCC field to track and
put it in your mind folder. So if I'm going to
create a new email, what I would do is I
would be CC myself. In this way. I'll get a copy that goes into my inbox and I can
just put that in to remind folder when I'm stacking and it will
remind me to follow up. I'll just create a
quick email here. Now you'll notice
I'm BC seed here, so I'm going to send this out. What's going to happen
is I'm gonna get a copy in my inbox. So then I can go ahead and
use my keyboard shortcut, put it in there, remind folder. And then when I'm stacking, I'll see that it's there. Here it is actually, and it will remind
me to follow up. Now that was a new e-mail
and you can even do that in the reply folder,
any existing email. So let's say I'm in my reply
folder and I realized that I want to follow up on
this delegation request. I can open up the
email and same thing. I can go ahead and hit Reply
and then say type my email. And then I want to
BCC myself here. And then I'm gonna go
ahead and send it. And then you'll notice
that even though this wasn't a reply folder, again, I'm going to get a
copy in my inbox and I can move that
into my remind folder. And here it is. So as I go through
my remind folder at jars my memory to go ahead
and follow up on it. So that's tracking with
remind and Apple Mail. Using the web folder
in Apple Mail. A lot of times we
get asked, well, I have all these
active projects I'm working on and I want to
keep those emails grouped. So if that's the case, that's where the when
folder would come in. Now you'll notice that I have
it here in my left taskbar, and right now it's
currently collapsed. But if I hit the down arrow, you'll see I can expand
it and I have a bunch of active project folders here. These are especially helpful
for something like this one creating October
presentation. And what I could do is I could have all the emails
related to that, the filtered in
such a way by using rules so that they all
go into that folder. I could also drag them
in when I'm stacking. And what that lets you do is, let's say I'm gonna go and
sit down and work on this. I'd have all of the e-mails in one place instead
of sum in my inbox, some in various folders. So it's a really
nice tool to use. And again, you would
create these just like you did with the inbox. You would right-click, go
to noon mailbox and type in the name of the folder that you want to add and then hit, Okay. Another nice thing is when
you're done with this folder, Let's say I'm done with creating the October presentation and
I don't need it anymore. Instead of deleting
the folder because I may need to
reference it later, I can just go ahead and
drag it into the archive. And then what it does
is it creates a way for you to find it easily just in the archive and I can
collapse and expand that. Then if I need it again, Let's say this became active and I needed to create it again. I can just put it back
where it was before. And there it is. It's a really great
way of keeping your left taskbar clean and really only focusing on active projects that
you need to reference. Archiving and Apple Mail. As a general rule of thumb, we want to archive anything
that is older than three weeks ago
from today's date. So if it was three weeks ago and that e-mail is still
sitting in your inbox, chances are you've
dealt with it already. You're not going
to deal with it or it's just something
that you don't need. So that's our general
rule of thumb. Anything older than three
weeks ago from today's date, you probably don't need
sitting in your inbox. Generally speaking,
when you open up your inbox and when we go through this class with
participants in the workshops, they will open it up
and they'll have, let's say, 90 thousand
emails in their inbox. Very quickly. They discover that at
least 88 thousand of them or more are old and they
don't need them anymore. Some of them from years ago. That can really take your
stress down quite a bit. If you drop 80
thousand plus emails in one go just from
archiving them. Again, we're not
throwing them out. You're not deleting them. Archiving is non-destructive. So if I go to my archive here, you can see that there's
still things in the archive, and I haven't deleted them. They're just kind of
stored somewhere else. So I don't have to
see them in my inbox. So coming into my inbox, what I'm gonna do
is I want to sort these from the oldest to newest. So I'm gonna go up to
where it says View. I'm going to go to
sort by and then I'm going to click oldest
message on top. And you can see some of these
are from several years ago, and I definitely don't need
these in my inbox anymore. So I'm going to take the
shift and down arrow key, select a group of emails. And you can do usually about 500 to a thousand
before freaks out, but I would say try to
keep it in that range. And then you can either
right-click and select archive or you can go up to
where it says message. And you'll remember that you can see the shortcuts highlighted. In this case, archiving
shortcut is Control Command a. And if I touch that, actually it's gonna go ahead
and archive the email. So I did that. And they're
not there anymore. And now instead of the 25 emails I had in
there, I'm down to three. So it's a really important step in keeping your sanity is
to archive old emails. Again, if I go into my archive, they're
going to be there. I didn't throw them
away. They're here. This is the one that was on top, but they're not thrown out, but I don't need them right now. So it's a really
important step in keeping your inbox
clean and clear. And again, wall it will seem
daunting the first time. Do it, especially if you're not a person there
regularly archives. Once you do it and
you clear it out and you start being
on top of your inbox, it's gonna be very
easy to manage. So that's archiving
and Apple Mail. Setting up rules and Apple Mail. Over the course of the day,
you get a ton of e-mails and a lot of them tend to be
things like newsletters, not actionable company e-mails, which are emails you
do want to read but don't need to look
at in an urgent way. So rather than leaving
them in your inbox, you can use rules so that they filter to go right
into a folder and don't even hit your
inbox on the way in something that you can
read on your own time. So I'm going to suggest
that anything that's a newsletter or something that's not urgent go into the review folder because
that's really what it's for. How we would do this
as you would hover over an email that you
want to create a rule for. Now you can see I have
a bunch of these, how to geek
newsletters and here, and I don't really need
these in my inbox. So what I can do is go
to male preferences. Then you'll see
rules is already in blue here and I'm
going to add a rule. Now you want to name the
rules something that is pretty close to the same thing that you're trying to filter. So that way you know
exactly what rule that is. And it gives you options. You can select any or all of the following
conditions being met. Again, there's a
big drop-down list here of the conditions. Same thing with this. And you can add or take away conditions by using the
plus and minus sign. And you get the same
drop-down menu. That enables you to make this as complex or simple as you want. Same thing with the actions. There's a bunch of options. So I'm gonna make this
a pretty simple rule. I want anything from
newsletter and how to geek.com to move into a different folder so I don't
want it hitting my inbox. So again, I'm going to
have moved message. And the important
thing is you want to make sure you select the correct folder you
want it to go into. So I'm going to
select the review folder and then
I'm going to say, okay, now see how I didn't
select the mailbox. So it told me I couldn't do it. So now I have to select, Review and then say, Okay, and it's going to ask me, do you want to
apply your rules to messages and selected mailboxes? I do. Because what that's
gonna do is pull out any of the How-To
Geek emails that are already sitting in my inbox and put them in
the review folder. I'm going to say
Apply. You probably saw movement behind
the screen here. And what that did is it pulled
out all the how to geeky males and put them in this review folder.
So there they are. I can read them on my own time. And also anytime a new how
to get email comes in, it's gonna go right
into that review folder instead of sitting in my inbox. So that's a really great
way that you can use rules to help manage your inbox.
14. Happy Stacking!: I build everything you need
to be successful into these additional how-to videos and with the handouts that
are on the Double Gemini site
(www.doublegemini.com), If you need
additional help, we've got the Live Stack
class that we can offer you.
(www.stackmethod.com) And maybe even more importantly, if you want this for your
team or organization, we can come in with our higher end stack email
management office setup and fundamentally change
your organization's culture with respect to email. And remember, the more
productive you are, the better things you
can do for yourself, your organization, your
family and the world at large. My name is Prasanth Nair. I'm the CEO of Double Gemini. I hope you enjoyed these series. Good luck and Happy Stacking!
 Prasanth Nair, CEO | Product Architect