Transcripts
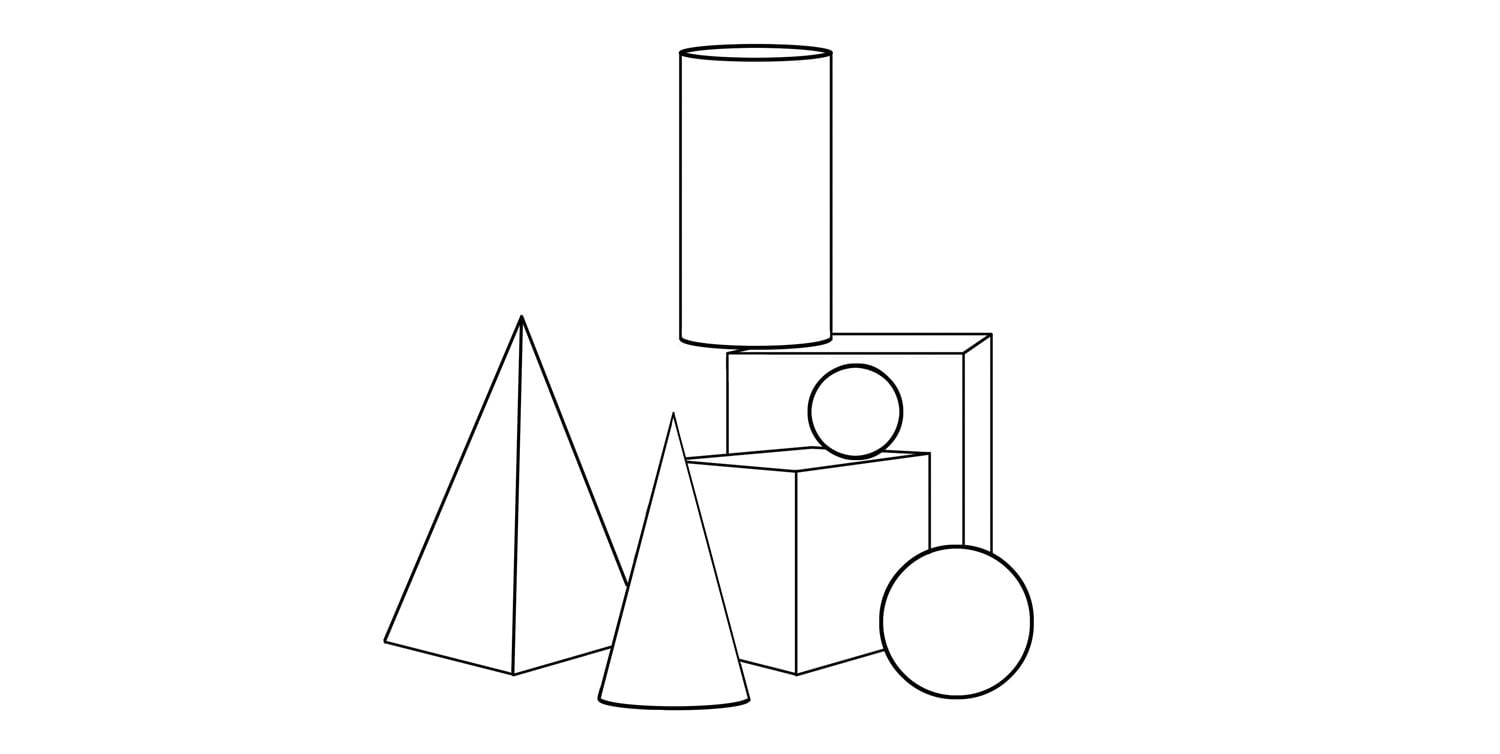
1. Introduction to The Magic of Creating Values: Welcome and thank you for joining me for the class, the magic of values. So in this class we're going to go ahead and explore how to use graphite and graphite pencils and to use values to create objects that feel like they have form and dimension and that illusion of the 3D world in which we live. Let's get started. All right, So through our understanding of the grayscale, through our understanding of creating values, through understanding creating gradations were those values. We're going to go ahead and talk about form shadows. We're excited, discuss what they are. We're going to discuss have a look forum, some little tips and techniques. And once we understand how to do that, we're going to go ahead and we're going to draw the sphere, the cube, the pyramid, that cone the cylinder. These five fundamental shapes that are echoed all throughout nature that will help our drawings immensely. They are so important for us to understand as artists. We're going to explore those and help us to build the ideas of what we should be looking for when we're drawing these three-dimensional solids or three-dimensional shapes.
2. How to Use the Class Drawing Classes: So how are we going to use this class? So the important thing about this class is it's not just about watching the videos. You really need to sit along side the video and try to execute the assignment. That's why the videos are full length. That's why they're not spit up at all. They're real time so that you can sit down and draw with me and pause the video if you need to, even if you're just listening to the video while you're trying to draw your own thing. It really helps to get the thinking process happening and withdrawing, that is 99% of the battles understanding how do we proceed through a drawing? And so go ahead and grab your pencils, get your paper together. And like I said, go ahead and draw with me. With each one of the lessons you will learn to draw, it will be amazing what you'll be able to do. Let's get started.
3. Tips and Techniques For Create Flat Values: So let's go ahead and get started with drawing on the most basic thing. How do we hold these pencils? Where I talk a little bit about hand holds and we're ready to get started on doing some exercises to help us learn to create values. Let's get started. The pencil I've got right now is a for B pencil. And so the reason I've got the four B is it'll show up a little better I could do with any of the pencils that we can with any pencil actually. But this is just so it'll show up better on the camera and you'll be able to see it. I've also got this, this 40 pencils in an extender because if I took the pencil out, it's, it's not even as long as this one. And so you can get these little, these little extenders will, or when your pencil gets short, you put it in here. It's got a little cuff that they crank down. And you can twist it down and now you've got a low more length. So there's really going to be, again, mostly using one of two hand holds in this class, just like with any drawing. Hopefully I've mentioned this before. And it's going to be one of two hand holds now for those are the right-hand. We'll talk about the right hand for you lefties, I'm a lefty, so you'll definitely see that. But we're going to have a tripod grip. And a tripod grip is where we hold it between our thumb and our index finger. Okay. And then, uh, the the pencil sit or rest on our third finger or a middle finger right here. And so these three points make your tripod grip. You also will. There's time to let it come out of the trickier hand. But if you rest it back here in the crook, you have a lot of control. This isn't gonna go anywhere. You don't want it too. Sometimes we needed a little bit looser and we might bring it out of there just a little bit. But that is our tripod handhold. And three we hold it on the three fingers. Don't hold down on your fourth finger. Don't hold it on your pinky. Don't hold it like you're going to stab somebody with it. Try to use that tripod grip. The other type of grip we're going to use is called a baton hand hold. And a baton as it was kinda like they use to conduct music and things like that. And so what you'll do is just as if this was sitting on a table. And I picked that up and I'm going to hold it between my fingers. That's a baton handled now I'd have when I draw the usually my knuckles are up and the pencils down. And there's some times where you might flip it over and reverse it to draw some lines with it. I don't use that a lot, but it's certainly a valid way to hold it. It's still it's this baton handled. You just flip your hand over and now you're, you're drawing this way again. So again, but Bhutan handhold, few lefties, same thing, we're just holding it underneath here where we've gotta between our thumb and our fingers. Now there are certain times I'll loosen up and a whole note between my thumb and two fingers, that just gives you a little bit more movement. If I'm doing some sketching or I want to be loose as people call it. But if I want a lot of control, hold it between all my fingers and my thumb, and that really locks it in. Okay, So we're going to be using those two different hand holds to make value. Now whenever we make value, we only want one range of motion. So we're either going to be using as a risk swing or we're going to be doing an elbow swing or we're going to be using a finger swing. Okay. So we're going to show you these three different types of hand holds for creating value. Now, most of the one I'm using the baton handhold, usually I'm doing what's called a rough and I'm just trying to get some value on the paper. And that I can then come back and manipulate later so we can start putting in some value relationships. What is one value next to another value? And so for the rough and that's when we're, when we're roughing values and putting in those basic values, those basic tones. And tone and value means the same thing. Usually will be using either the risk swing or I'll be using the elbows swing. And so that's what I do first I would do this elbow swing and so I'm not going to move my wrist, I'm not moving my fingers. I'm letting the pencil just rest lightly against the paper and I'm just scooting it back and forward. I'm not trying to lift the paper. I'm not trying to lift the pencil up, nor am I trying to exhort lots of pressure. If I try to exert pressure on the end of that tip, I'm not going to have as much control. So what I'm gonna do is I'm just gonna go ahead. I was doing the risks. We actually need to do an elbow swing. And I'm just going to let the weight of the pencil. So very light pressure to create the value. Now the first time you do an elbow swaying, it's gonna be, it's gonna be really weird, but it helps us cover more area. It also helps if we do a warm up like like I'm hadn't warmed up yet with this. So it's a little bit takes some getting used to some like before you pitch again where you're gonna go and warm your arm up water before you go and do some running. You're going to do some stretching. It just is going to help. Same thing with this. Do a little, some practice runs and you'll have an easier time. But we want to overlap the previous line and move and move. Now moving this way, if I was a right-handed person, I'd probably be doing this and moving this direction, moving towards my dominant side. If I'm a lefty, I'm live moving towards my dominant side. And we're going to try to 0. We're going to overlap those previous lines. And what we're trying to do is make as even as possible. Now this right here, I I left a little space between the line. Go ahead and correct that the moment that happens before you go any further, like there's a little one here that I need to fill that in. A little one just happen there. I need to fill that in. But I can also come back and see if I can overlap the entire area a couple of times. A field as a whole, There's a whole row or, you know, a big space all the way down. And what we're going to want you to do is you're going to want to practice doing this and you want something. So this is about six inches long, maybe almost seven. Again, I can cover more area with this. Let's go ahead and fill that in. We got that little space between that line, get that filled in. I always felt that in first, the reason why is if I don't, if I leave lots of lines and I tried to come back later, it just takes more time. So it's easier and quicker to correct it when it happens. And what I want you to do is I want to practice with, want you to practice with all your pencils so that you can get used to doing this. I recommend the five different pencils. If you've got more pencils, will then try all of them, because they all will be a little different value. They all actually handle a little differently to the H pencils and the B pencils handle quite differently. And again, I'm using a for B for this. So you can see it a little easier. And I want to try and make those lines with one stroke. I was filling that in a minute. But you're going to get a little bit better coverage, little more control. Got some more patchiness I'm trying to deal with if you can do it all with one line. And so we wanna, we wanna do enough of this. So we have, again, this is about six inches wide and it's about an inch long and that's about what we want. And you wanna do, you wanna do that with each and everyone of your pencil so you're used to using it. Okay. So that's an elbow swing. Now again, I'm, I'm drawing flat. We we never draw flower. We want to draw on an angle unless we're doing some things at the end where it's really, really, you know, finite, little tiny details. Here's an old lady bugs sort of stuff. But before, for the most part we're going to be drawing on an, on an angle. So your board would be be drawing with your board on it, on an angle. It's much more, a more natural way to draw. So I'm drawing, I'm, I'm doing this on a flat surface. It's not ideal, but it's the best thing for you guys to understand what it is that I'm doing here. Okay, so the next one we're gonna do is now again, because, because I'm drawing on a flat surface sometimes I'll tuck my hand under my arm to to kind of give it up off the gives me a better angle, a little easier angle to do this with. Unless unless I just do it free hand or I don't have anything underneath it, but that's that's a little harder to do. So let's see, let's try to go ahead and use our, our, uh, risk swing now for the risks thing, swing once again, now I could use, I can use a tripod and user risk swing. So the risk swing with a tripod grip is just going to give me a little bit more control. Okay. So I can do this with a risk swing. And again, it's not it's going to be not near as why does that elbow swing? But still it's going to be much wider than the value I make with my fingers. And again, I'm going to try to overlap and it's a little easier to control than that elbow swing. We want to overlap the previous line. I'm going a little fast. I can slow it down a little bit because it is taking a lot more chances with it not being as as uniform the quicker I go. And I'm trying to move a little more quickly for the demonstration. But just understand that if I took my time little more, I'd have a little more control over this. I'm just trying to even this out right now. If I took a little more time, I'd have a much easier time controlling the value. So again, this is maybe doesn't even require three inches long. Maybe it's 2.522 and three-quarters somewhere in there. Again, I was trying to get that. And I'm trying to do this as uniform as possible. And I'm just trying to push that out, so it's a little more like a rectangle. But I wanna do this light where it's as wide as it is. You know, that this distance and this distance is about the same. So we're going to try and make a square. Okay? So again, we're just using our graphite to make us somewhat, I mean, it's, it's not that we're not all We're almost there. And actually I know I'm doing it. I'm not drawing the value. I'm still doing in a risk swing. I'm just not supporting it any longer, so it's a little looser. So we've got some of these bubbles as wide as it is tall. Now again, if I'm roughing it in, this is the more controlled one because I used I used the tripod grip tripod. I'll have a little more control if I turn it over so my knuckles are up now I've gotten that baton hand hold held between all my fingers. I was doing with that elbow swing. And again now I'm using my wrist. Once again, just a risk swing. Now I've got my my fingers turn just slightly so my nickel knuckles aren't straight up there. Rotate a little bit to the side and then it gives me so my thumb is on top down here. And so it's it's just a little, it just seems like that makes it a little bit easier, a little more natural. But again, we're still using a baton hand hold. It's just I've I've tweaked it a little bit and sometimes I'll do that with a handheld feel like What are you doing? A different handhold them like no, I just I just kinda changed it to make it suit my purposes. It just feels more comfortable. If you have to do some like then if if I had to push it this way because it felt more comfortable, well, then do it. I can't I can't move my wrist as much, but if I do this way, I've got more movement to my wrist. It's just a lot easier to do it like this. And again, I could come over here and i'm, I'm going a little fast once again, but I need to overlap the previous lines. And I want something that again is about as wide as it is tall. And this is even a little bit shorter than the other one. This is maybe, maybe two inches or something. Well, we have this chunk of value That's about as wide as it as it is tall, almost thereabouts. I mean, I could extend it a little bit more if I if I wanted to, there's no big thing. And then you would come back in and fill in any patches. So we have the this is created with the elbow swaying. These are created with just my my wrist swinging back and forth, right? And now we're gonna do a finger swing. Now with a finger swing. We're going to go ahead and we're going to be putting our palm down so the palms going to rest on the paper and I'm going to move just my fingers. Now I'm going to show you a little something on this tripod because when people grip it, though crippled with their thumb out here towards the front. And that's and that's a nice tripod grip, but I can't move my fingers very well. That thumb is blocking them. And so what I'm gonna do is I'm going to move my thumb out of the way now this is still being held between my thumb can see that my thumb and index finger. It's just I've moved my thumb out of the way and back. And my fingers all appoint a little bit, kind of extend them forward and said Bring it back, extend them forward a little bit. And now I can get a nice swing with my fingers and that now my thumbs not blocking it. If I put it back up here, It's kinda blocking it. So I'm going to get this with my thumb out of the way. And we're going to go ahead and do a finger swing. And we're just switching the pencil. Again. We're just scooting it back and forth. I'm not lifting it. I'm not trying to exert lots of pressure on it. If I wanted to go darker, I just stay in the same place and it will start to build on itself and get darker and darker and darker. But what I'm trying to do, and again, this is, I'm actually swing a little bit too far for that. My fingers, they're losing control in the end, so I'm going to bring it down just a little bit. But again, we want to overlap the previous line. We want to make this as, as uniform as possible. And that's what we're trying to do with our fingers swing. Ok. Now whenever we're creating value, you also have to be aware of how much you touch the paper. You don't want to you don't want to touch the paper very often. The reason why is that the, the men go back in and fill in some of these little patchy areas. But the E, the year, your skin of course has oils on your, in your fingers and stuff. And the graphite will stick to the oils of your finger differently than a well, just the normal paper. So if you actually touch this with oily fingers, you won't see it when it's, you know, when the paper is white. But once you start putting graphite on it, you can start to have a fingerprint start to appear in the middle of your drawing. And once that happens, there's no getting that out. You have to start over again. So you just want to make sure always wash your hands, make sure your fingers are good and clean. Some people actually wear a cotton glove with the fingers cut out. So that way the cotton glove doesn't, doesn't allow any of the fingers of your poem or the back of your poem, or whatever the size of your palm, whatever that right there. It makes it so you don't get any oils on at the end. You want to make sure you're not touching your paper too much. So again, I've just started another one here again, this is just the fingers swing, just scooting it back and forth. I'm just overlapping it and I'm just taking my time. And I'm trying to keep it uniform or not doing gradations here, we're just creating value. That's all we're trying to do. And so, and you'll again, you wanna do this. You want to draw with all your pencils and experiment with this because they all act a little differently. You have to control them a little differently. Now again, this is pretty dark because it's a for B pencil. And I say it's pretty dark. I could certainly go darker, but it is dark because i'm, I'm barely putting pressure on this pencil. And so that's a pretty dark mark for something where you're hardly putting any pressure on it. But again, the more I if I wanted to go darker, I just stay in the same area. See how that's going a little darker. Because now this is lighter than this over here and I wanted to more uniform. Well then I'm gonna come back, go over with another layer and second layer will be a darker layer. And that's how we're going to go ahead. And, you know, by going over certain areas and over and over and over again. And as long as I have some control, I will have a very uniform layer of value going across the paper. Okay? Usually people will call this also call this a tome adding a flat value. So if you get, say, a flat value or a tone, they mean the same thing. This again was our elbows swing, our risk swing with a tripod, our risk swing with a baton hand hold. And these are both fingers swings. Alright? So go ahead and grab a piece of paper, get your pencils, and start and fill a sheet of paper with one of your pencils doing an elbow swaying, a risk swing, and a finger swaying and burn through all five of them. If you've got a larger set of pencils, try every pencil, see, and take little notes if you like. The, the, the most important thing when you're learning to draw is being aware of what's going on on the paper. So, you know, some of the best artists will take little notes of what. Especially if they're going to try new medium or try new pencil, they'll, they'll, they'll keep little notes up for themselves and stuff like that. And people that are hyper, you know, like very organized, hyper organized and stuff like that. They, they even will keep on file where they can look up stuff so they can always refer back to it. You don't necessarily have to go to that degree, of course, but I do want you to start taking mental notes as you're drawing. Okay. So yeah, go ahead and again, create a value with the, with the, with the elbows swaying. Create a value where the risk swing, creative value with the fingers twitching. We're going to come back. We're going to talk more about value. We're going to create some value gradations. And we're going to talk some other things about some technique. And stay tuned. All right, We'll be right back. Bye-bye.
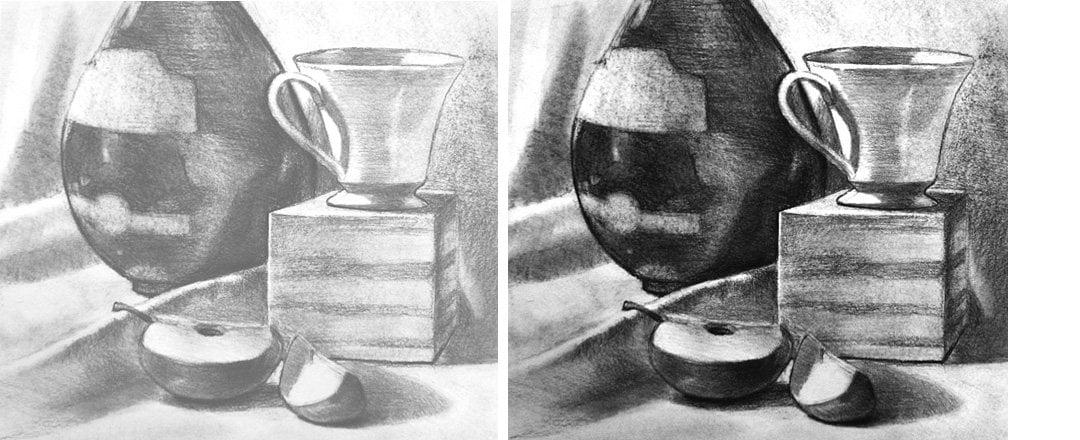
4. Creating the Value Scale Part 1: All right, so one of the most important things and learning to draw is the grayscale. How to create the values from light all the way down to dark. With our pencils, basically we have 10 steps, a value that we're going to be using in this value scale. And it's basically our notes, if you will, for the visual language of drawing. And of course it extends into painting and anything that deals with value, which is anything in the visual arts. But I use fundamental. So let's get started in creating our tensed up value scale. Let's go. All right, So welcome back. So we're going to be talking today about grayscales. And so the fundamental idea of drawing, giving that three-dimensional, that, that form, that we talk about, that volume of stuff. We use values. And there are lots of values in the world around us. But most people can't see beyond 17 to 20 steps of value with the human eye. They can't perceive any more than that. So what we do is we simplify that those values into his tenth step value scale. These are our notes, if you will, as artists for making a drawing. And so right here I've got a little grayscale that I have painted in oil. With a grayscale, we have 10 steps of value. They're supposed to be transitioning from light all the way to the dark is dark. And with a value scale, most commonly with a value scale, we'll start with 10, you know, up here at the top, going down 987654321, being the very darkest on the value scale. Now if you come across an older value scale, those numbers might be switched. When I was trained, they were the opposite and that's because it was based on printmaking. And so one was 10 percent black, 20 percent black all the way down to step 10, which was 100% black, as dark as you could go. But these days, it's been changed. And maybe it has to do with how much light is there. And because of the, you know, a lot of people painting digitally and dealing with pixels and light and things like that. But the most common that you'll find these days is it starting with 10 and going down all the way to one, not 0, but one on the value scale. Now this is almost straight black and the substrate right? White. Technically, some people will say, Well, there's never anything really why there's never anything really truly black and it's somewhere in between the two. But again, this is a simplification of value and this is paint. And so sometimes we have a value scale, you have a medium that can't they can't get the full range like this. Paper is fairly wide, but this is graphite. So the dark historic we're going to build to give us probably somewhere about here. But we're still going to break those down into 10 steps. So sometimes the medium that you're working with will have some limitations and how and how dark they can go. Graphite being one of them. If I was working in charcoal, charcoal can go almost. Because the fact that oil paint has a little bit of sheen to it, this seems deeper than what it is. And so charcoal is Matt. So it seems like the charcoal is, is kind of a peer when anyways, but charcoal will give you a very nice broad range. A value scale more so than graphite. And that's okay. A lot of people that work in graphite, they work in the lighter range. They like that range. That's why they work in graphite. Some people want a full range of expression or they like working in the darks. And if you're, if you're really like working with those rich darks, charcoal is the natural choice for drawing. Now, we're gonna go ahead and create one of these grayscales in graphite. It's very light. And the camera habits, I've got so much light on here. So once you'd be able to see the values really, really well. But I don't know if you can pick this up, but it's been drawn lightly. It's an inch and a half rectangle that's been divided into one inch increments. So it's basically 1.5 inches wide by 10 inches tall. And it has, you know, ten little boxes. Every inch became a box. And so I've got 10 little boxes. I'm going to turn into a grayscale using my pencils. So again, the reason the way we use the grayscale is to evaluate values. And so when people start drawing, I recommend that they either by a value scale or create a value scale or download one or print it off. Sometimes when you print off it could be off the computer can be kind of problematic because if you have a good printer, then you don't get the nice steps of value. Each one of these steps is supposed to be equally distant from the previous step. And that way when you're drawing on an object, you can say, well, let's see, I'm dealing with the lip part of this object and it might be up here and then, but the dark part of that object is down here. And so you get very, you want to be very adept. And so if I called out, hey, that's a number three on the value scale, who will go? I know what that is. I don't know where that is without having to look and that takes time, just like learn to play the piano, you know, you know, people say, well it's, it's a D flat, but if you don't know where d flat is, good luck. And so we want to go ahead and again, have kept the value scale with us for at least six months. I recommend people have the, the, the grayscale with them for at least at the first three years of learning to draw and paint. But it's really great to have, you know, have one of these available so that you can judge your values much more accurately. Okay, we're gonna get rid of that. We're gonna be using pencils now, we're only be using one to five. I could use a full range if I wanted to, if I wanted to get the full pencil kit that starts with a nine H and goes all the way down to AB. You could certainly do that. But we're just going to, we're going to start off again with a simplification. We're going to start off with five of the most common pencils that you're gonna use. And sometimes someone you'll see this. I'm like, I love all those pencils. I give you everything with my number two pencil. And and that may be true. But you're going to have to really kind of push in on the paper. You're gonna have to brutalize the paper, going to be destroying the paper essentially Detroit to make that pencil give you the full range. So again, this is our five pencils that we have. In the, in the drawing class, the H pencils are, are lighter pencils. The B pencils are our darker pencils. And we start off with a 4 H. With the H pencils. The higher the number, the light of the pencil. So our 4 H is the lightest pencil. We have a 28, which is darker than the four age, but lighter than what? We'll talk about this pencil minute, but it's called an HB. So this, we're starting from lightest to darkest. So we have a 28 which is darker than the four age, but lighter than the HB. We have the HB which is like a number two pencil and it's a pretty good workhorse. If, if you don't hear me tell you to use a certain pencil, you're going to be using an HB pencil. That's all there is to it. In terms of RB pencils, we have a to B, which again is darker than our HB pencil. With the B pencils, the higher the number, the darker the pencil. So as these go higher they go, they go lighter. So at 98 would be up here lighter than any of these. And as these numbers go down, they get darker. So they're going to be, and then we have, this is a little for B. And the reason I've gotten this thing is because he's, he's a short pencil. I've been using them. And so what you can do, you can get these little pencil extenders. And now I've, I've lengthened out my pencil. Okay, so for H2, H, H B to B, four B, alright, and these are the pencils we're going to use. And we're going to be layering these pencils back and forth depending on where we are on the value scale. Now I talked about on the value scale that we were going to have. The lightest is going to be a step ten. Going down to 987654321 will be the absolute darkest. We can. We can do. So low I'm gonna do is we're gonna start off here with the with the darkest part or the darkest one, which is going to be number one. And because it's going to be the darkest, I'm going to go ahead and use my four B pencil. Now, I'm only going to be, I'm going to be using a, a probably a risk swing just to save a little bit of time as far as that goes. And so, and we're going to be using a side-to-side motion. And I don't care so much if I if I break out the sides, I want to be very cautious of where they meet. But in terms of breaking outside this rectangle, I'm really not as worried about that. And so I get if I wanted to keep this clean, I could tape it off you to use the tape as a mask or but if I wanted to, you know, if if I try to stay inside that line, I might say, well, that's that's great for those that want to take the extra time. But understand that if I try to stay in the lines, I could do it, but it's gonna take me four times as long. So we're going to try to make this a little quicker the first time around. So again, we're just moving the side to side. I'm using a actually an elbow swaying because I'm so far off the paper. But if I was closer to it, I'd probably be using a risk swing because I don't need I don't really need that much range of motion. It's just that I'm so far away from this. I can't and I don't want to cover the camera that I'm using. Again, my my entire elbow to create this. And again we're just going side to side. Okay, I'm using this for B pencil and I'm just, I'm trying to overlap the previous lines. And I'm using light pressure. That's another important thing we were, we don't want to crank on this. In fact, I'm using about the lightest touch I can. I can. And sometimes I refer to it as is. And whenever butterfly kisses on angel wing soft but you're just trying to use as delicate and a soft of pressure as you can and sometimes feel like, well, how can I how can I get a dark then if I'm not cranking on it? And the thing is, is you're going to have to allow, first off, you're gonna, it's gonna take patients, but whenever you overlap graphite, it builds on itself. It goes darker. And so instead of cracking down on this, which by the way, and makes the graph I go shiny very quickly. It really shoves the graphite into the paper. And once you've done that, you're never gonna get that paper back down to white again. And so if I was doing something very complex, like a face or drawing an eye or something like that. I want to be able to lift stuff out with my erasers. I want to be able to manipulate it. I want to be able to create textures and things of that nature. And if I, if I crank too hard on this, I will destroy my ability to be able to work with the graphite in as an effect of a manner. But because of the fact that I destroyed the paper and I've pushed the graphite into inside the paper itself and there's no getting that out entirely. I mean, you can lighten the surface stuff, but the stuff that's gotten into the fibers of the paper is not coming out unless you go in there with like Abril iPad or something like that. Some of the old electric eraser just to have like a some of these erasers that were very gritty abrasive and they'd get it out. But that you'd actually be taking off layers of paper. Which is also again, not a good thing if you're trying to keep your paper looking like it hasn't been, destroy Haidt or are treated unfair away. So we're going to undo, I'm going over this and over this and allowing the pencil to build this up. Now with graphite, it takes the longest to make the darker passages. Whenever we're working with graphite it we need to have patients. So we've got this here and I'm just going to undo to get rid of this, I should have my brush and nobody saw well that off now usually that's a bad habit to do that. But I don't have my drafting brush. But that's, you know, and I don't want to just do that with my hand because that would smear it. But we're going to layer this because we were like, Well, wait a minute, that's not as dark as that. That's not as dark as that. And I'm like, okay, yeah, you're right. It's not as dark as that. So what we're going to do to make it darker, and again, you really have to use again that light pressure. This is a 4 H pencil, K for h. Now, these pencils that I'm using are Kimberly, but you could use any sort of pay pencil. You could use Prismacolor or what have you. There are lots of good brands of pencils out there. As far as that goes, you could use HDR went or what have you stayed lawyer, some of those other mainstream pencils. But this is a 4 H. And we're going to use layering of pencils to get this darker, but I have to use this, the foreach or harder, they're literally harder pencils. And it's really easy to carve gullies and valleys in the paper with these because they are so hard. Some of the H pencils are so hard that they're sharpened. They will cut your paper like a razor blade. We don't use the nine age because of that fact is it's just if you're not very delicate with that, it's going to destroy the vapor. And this is our 4 H same thing with a very, very, very delicate with this. But This is our lightest pencil. But when I do this, people go whole lot of money you, so that's the lightest pencil. And I say, yep, that is the lightest pencil. And they say, Well, wait a minute, why is that getting darker where you're using that pencil? If that's the lightest pencil, why is it getting darker? I don't understand how that works. And what's happening is that with the softer pencils skip over the texture more. The harder pencils without having to press harder. It's just because of the fact they are harder. They go deeper into the texture. They don't right over the top of the texture the same way. And so what's happening is with this for h, it's getting deeper into the paper and it's turning these white little dots into gray little dots. Because you're lowering those white dots to a light gray, the whole thing is getting darker. So I wanted to just show you this where I've done this half was just the four H pencil. And this half has not been done with a 4 H pencil. Haven't put a layer on top of it. And because I haven't put a layer on top of this half, it's lighter because of all that little, those little dots showing through. So that's what layering the pencils will help us do. It'll help us get a better range of value. You can also get, you know, we can control texture this way. If I'm trying to draw something that's like a, a steel ball bearing or something like that. Steel marble or something of that nature, or even a glass marble or glass or something of that nature. I usually want a surface that doesn't have texture. It's supposed to be slick. Or if I'm drawing Chrome or metal or something like that, Same thing I wanted to be slick. And so by minimizing the texture as well. So look smoother. So I've done a couple of layers with this for h. And after I've done that, I'm gonna go ahead and put that aside. And I'm going to grab myself. A to H pencil. So this two h is softer than the forage, but it's still harder than all the other pencils. So this will go a little, won't go as deep as the 4 H, but it will go deeper than any of my other pencils aside from that 4 H pencil. And so again, this is filling in or darkening some of those little bits of texture again, to make this more uniform, which in turn will make this seem more. We'll make it seem darker. While it won't seem darker, it will be darker because we are making it darker. And so again, I'm gonna go ahead and put now I'm trying to go ahead and least give a nod to the fact that this is where this n. So I don't want to ignore that, but I'm also not again, what I'm really wanting, what I really want to pay attention to is this edge right here. You want that good and clean. Okay? So I'm gonna go ahead and continue to do even the angle of the pencil will also, if I've got to pick a pencil, it's more perpendicular that we'll get deeper into the, the paper, but it will also dig more so you have to be careful. The more I'm more parallel to the paper, the moral while on top. So again, just the angle the pencil will change the look. Or how much to how much of that texture and the paper will express itself. Based on the angle of my pencil. It's pretty, pretty cool stuff. When you get used to when you've been drawing for a bit. And you understand that you can create textures and details really quickly because you understand how to control the pencil in a better way. So I've put a couple layers with that. I'm going to put the two H's side. And I'm going to now grab my HB. Now again, the HB won't go as deep as the two H. And it certainly won't go as deep as the four age. But it will also, it'll, it'll darken some of the, again the outside of those little dots. So part of those dots are going to be darkening a little bit more. There's others that aren't going to be touched because this can't go as deep. But again, just by using this. And again, I could do this over just half of this real quick to to bring this home. If that on the half that I've used this on, it looks darker. And I could do. The more I go over the moral buildup, the darker it will seem. Now there is something we have to be careful with with graphite. This is also while why we are layering. This is also why we are taking our time in darks are the hardest thing with graphite because it takes a while, as you can see, to build up to a nice rich dark, okay, that now I'm using a finger swing when I'm trying to use control. This is where I'll get in here with my fingers swing. Smaller areas, that sort of thing. That's when we would do this. Right. But if you try to go too dark too quickly or press too hard, graphite starts to get shiny, the darker gets. In fact, there's a point at which you have to leave alone because it won't, even if you put more graphite on it, it won't look darker. It will begin to be shiny, are shown here and search a little lighter and lighter so that there's, there's that sheen. And in graphite is some people don't care for that. They liked them more matte appearance and so they'll, that's why they were control circle. And even some artists that are graphite artists, we'll be careful not to go past a certain step of value because after that it's just going to go so shiny that it's hard to look at. It's hard to see the drawing because it becomes so shiny. So because of that, some people have resorted to using combinations of carbon pencils with graphite and stuff like that. And and you can certainly do it, but you do that, but you have to make sure it's well integrated or a won't look right. You'll start to look at what it will look like, patches of different material. And it's hard to describe unless you've actually seen it. But the idea is that if I was working in watercolor, and then also I put some whitewash on there. The white quash stands out because you've gone from transparent layers to suddenly opaque layers of paint and even across the room, which is jobs. So you can tell it that something has really changed. And it's the same thing with, with graphite and carbon pencils. You have to make extra, you have take extra care that they're integrated. And we're not gonna get a ton of that today, but that's so now I've got my two pencils and now we're getting the to-be is the second to the darkest pencil though I think darker than the to-be of my five would be that for B pencil. So I'm gonna put a couple of layers. And this has gone much darker by, by doing all this layering. It allows the pencils to build on themselves easier. It's gotten in there and gotten rid of a lot of that texture. And now again that it started just continues to build. And so I could put a couple of layers of this on here. And by doing that now I can grab my pencil. And we can go over this a couple more times. And now it's actually gotten pretty dark. But if this all, it'll actually go darker now than it would have before. So again, by layering, I actually am going to get a nice deeper, richer darks with my pencil. So we're constantly, unless we all need to, there's going to be some up here. We will hardly layer at all, but because they're so light. But we'll go ahead and again put a couple layers on here. And we're gonna try to get this to go as dark. As we can get it. Now if I really wanted to. Sometimes if we don't have, if we have like lines, we can see what's called the grain. Like if you're not using your pencil and overlapping and you'll start to get little lines. And you'll start to see those lines. If you're not, if you're not careful, they'll just always be there. And so if you want to, you can actually start going different directions. I can go top to bottom, top to bottom, side to side, and then diagonal one way and the diagonal the other way. And by doing that, you can actually start to get rid of any vestiges of grain from your pencils skipping where you didn't overlap of them now, so there's a little bit of a line left between the two that we'll start to leave sort of a grain or a directional line. And the way to get rid of those if you're really having an issue is to go ahead and cross hatch. And that just means take your lines different directions. And that's what I'm doing right now, is just to make sure this is as even and dark as I can possibly get it. I'm using a finger swing now again because I'm I'm in here trying to have more control. So I started out with a, with an elbow swaying and we talk about this in the class. Using the elbows way and using the risks were Swing, using a pencil. And with that pencil using a finger swing. I'm using a finger swing right now. And I'm not doing that. I'm not doing a feathered stroke. Or somebody will, people will call a tapered stroke. We're not, we're not doing that right now. We're just scooting this back and forth. So this is I'm using my fingers but it's not near as it's not the more complicated tapered stroke and or feathered stroke depending on who talk to. So we've got that and that's about as rich, dark as I can, as I could want. Okay, so now what we're gonna do is we're actually going to come up to the step nine because we're going to leave ten as, just as white paper. And so what we would do with this is we're gonna take our weren't, take, take our pencil. And this is a 4 H pencil. And that line is too dark, so you can't have this line the darker than the value you're going to create. And right now, this line here is too dark. So I'm going to line it up first. There is only one that's gonna be a problem because all these other ones are going to be darker. And I grabbed this for H pencil. Now this is the one of the hardest ones because of the fact that the forEach is very unforgiving if you leave spaces between your lines. Okay? So we've got to take our time. So suddenly we were like, Why am I doing grayscales? Well, the greatest skills, because they're like God so boring, I don't wanna do that. But the great thing about grayscales is it really helps you dial in to your technique. So if I'm using, again, my I'm using a risk swing. I'm using a modified tripod grip. In terms of the way I'm holding the pencil with a little bit of spacing now I'm using my, I'm trying to use a little more control. So we've got our fingers swing in here. Okay. And again, the reason that this is such a good exercises because it takes away all the detail. We're not dealing with detail, we're not dealing with complex contours. We're just focusing on value. And not only that, but worth trying to make the value, these chunks of value as uniform as we possibly can. You have to have a whole lot of control to be able to do a successful grayscale. Because if I've got too much texture, if there's too many spaces between my lines. If these values I'm creating are not uniform, the illusion will not be created. And so we want to be at, You want to be able to do practice this enough so that you can actually make a halfway decent grayscale or even successful gray scale. And usually something like this. If you've never done a grayscale to do to do one that's, you know, you take your time, a lot of times when you first sit down to drawing, we're in too much of a hurry. We want too much for too little time for me to tell it to do it. A decent grayscale will take me upwards of 45 minutes. I'll just go ahead and get into your zen state. Put on your favorite music, you know, and, and start, start drawing. Just go ahead and 0s on and get used to getting used to be in there. You're going to probably be there if you're a first-time or you're going to be having a hard time to do a decent one and an hour or two hours. Not uncommon because it's going to be a bit of a struggle. But through the struggle we learn, that's, you're going to, you're going to improve your technique. You're going to start to, because you're constantly and say, oh, let's see, I opened up those lines too quickly. Oh, I need to overlap them a little bit more ON you take my time little bit more all I need to, you know, a, B, C, or D, you know, you're just going to keep keep looking, keep trying your best, and doing what you need to do to get his uniform of value as you possibly can. So now the step 9, the other thing that people will do. And so we're trying to do something similar to this value right here. Many times they'll make it too dark, or they'll make it so light that it doesn't, it's got to be dark enough that we can tell the difference between this to this. It's got to be dark enough. But it can't be too dark. It can't be this one. That would be too dark. And so we want to go ahead and make this again as uniform as we can possibly make it. Okay. We're gonna go ahead and take our time. We're going to look down here, say, Hey, is there any patches that are uneven? Are there any patches where it's a little sketchy? Are there any places that need my attention? And again, sometimes we were like, Well, this is not, this is not super fun. And again, this is like scales doing scales on a piano or chords on no or whatever. But if I add a little stronger music background, probably some a little bit or analogies, but this is, this is like doing wind sprints for basketball and stuff like that. It's a warm up. But the better, the better you can do. The wind sprints vary. You can run, the more power you have, the quicker you are on the basketball court, the better that your advantage against your opponents, the better that you can identify your value is, the better you can recreate them, the better manage you will have with your artwork being more accurate. So again, this is pretty close in terms of those, of those two values. So what we're gonna do now is rushing out. We're going to use what we call a staggered, staggered approach to doing this. And the way we're gonna do this is when it come down here to step five. Okay? And I'm going to use my let me use my HB pencil. My HB pencil is the pencil is right in the middle of all of these other pencils. This step is right in the middle. So guess what? So I'm going to go ahead now, when I do this, I'm going to try to focus on these two values. And I'm going to try to make this right in-between the two. So instead of starting at nine and coming all the way down and hoping I get the right values we're going to use again, this staggered approach to creating this grayscale. So I'm gonna come over here. I've got this HB pencil. Now I also, I'm going to start off a little bit on the lighter side. Because again, this is a B pencil, so I'm gonna have to layer it. If I went too dark to begin with. And I start doing all that layering, which is going to make it darker. And then I could, I could get myself into some real trouble. So I'm going to start off with again, a little lighter. So patchy through there. So I'm going to fill that in. There's like two little circles here I need to fill in over here. There's a little bit of a, sort of a little rectangle right there. So I'm looking for any variation. And if there's variation, I'm going to come over here, I'm going to fill it in. Okay, So now what I'm gonna do is I'm gonna take my My for-each. And again, we're going to get rid of all those little white dots. So I'm going to start with my four h. Now again, I don't care but comes out the side, but I do have to take care of these two lines where it's going to meet the other values. So I'm now actually using, I'm using a little bit of a risk swing, but I saw I just need more control. I might, I might start using a finger swing in some areas because again, that's where you have the most control. I'm using a tripod grip. And again I'm moving just my wrist. Okay. Again, this is really about technique. How am I holding the pencil? What's the angle of the pencil? How light am I using the pencil? How much am I overlapping? Again, this is all technique. This helps you really get down the technique of how to use depends off and how to control it. So if you're drawing something that's more fun, but you don't know how to control the pencil. You're going to have, you're probably not going to end up with something that's going to be as successful. Just like if I was playing the piano and I was like I wanna do some, you know, some fun saw and that's much more advanced than Mary had a little lamb. And so you're trying to do some other song, maybe a variation on a theme by Paganini or something like that. And you're trying to, you know, play them, but you're still fumbling over the keys. And you can't hear the keys very cleanly. And your fingers are going are fumbling over the, you know, the keys and you're in, you don't really have the rhythm and you haven't learned yet how to, to deal with timing and, and all that good stuff. The tempo and everything like that. When you're playing piano, you're not, again, you're not going to have a very successful song because you don't understand really how to play the piano very well. So you're going to be much more successful with that song. If you take the time to practice, you know, if you take your time to practice some, you know, playing some simpler songs, really focusing in on playing your ear, your core words and things like that to get your fingers little more nibbles. Practicing on stretching, being able to open those fingers up and having a better stretch through your different, again your keys and being able to hit that key in a very clean, proper way. Again, if you do that, you're going to start to have much more success. And not only that, but learning how to deal with half notes and whole notes and quarter notes and eighth notes and all that good stuff. Knowing by looking very quickly that, that note, and where does it sit on the treble clef and the bass clef. Knowing that and understanding that and being able to do it on the fly instinctively because you've trained yourself so much. Well now you're talking about you're gonna start having the skills to play some really good songs if you were. You know, trying to push it to, let's say you want to go and play the piano and a professional sort of around while you're gonna be, you're gonna be dealing and practicing your scales and stuff just to warm your hands. And you might be practicing scales warming your hands up, but 30 minutes to 40 minutes long before you even touch a sheet of music. Because you need to get your, your, your, your hands and your fingers nimble and you get them warmed up. You need to be able to hit your keys very cleanly. You need to keep the tempo and the rhythm and all those many things that goes into playing a great piece of music in a professional way. It's the same. So when you're starting out, Of course, you have to develop those skills. You have to learn the bass clef and the treble clef. And you're going to want to learn it so well that you could identify a note in your sleep or being awoken from a deep sleep, you can say, oh yeah, that's, you know, that's D flat and I'll leave me alone or whatever. But, you know, you want to be able to very quickly identify and understand these different concepts. I had an acquaintance. Okay, this is my four h. We're now going to transition to a to H. And I'm going to continue with my, my analogy here, but I had a friend in It's all about mastery is what this boils down to stuff like this is really about mastering the fundamentals. But I had this friend that was a world-class juggler. He was a street performer and overall class juggler. And try to remember, I think he could juggle. I think he's trying to learn to juggle nine. I think you can juggle eight balls, which are essentially juggling four balls in each hand. It's pretty crazy stuff. Or maybe he could do 70 years to work on 80, something like that. But he would talk about how you had to be able to juggle so much of a particular set of number of these different balls or what have you or, you know, he also did the little bottles. They look like bottles. And then I'll call that. But anyway, see in the rings and all this sort of stuff. But no matter what it was, he's like You want, you have to do it well enough that it gets into your subconscious that again, you could wake you up with, someone could wake me up from asleep and he would actually have people do that. Then actually have okay. I want you to come in and we're taking a nap today and I want you to wake me up and I want you to hand me these many things. And he would check himself to see fit if he'd gotten there yet. And I mean, that's that's the kinda stuff that now that might be it BB, be beyond what most people want to do and that's fine. If I click, I'm not trying to, you know, set a world record and I'm not trying to do this for professional, that's fine. And I certainly understand that. And I'm not saying that's the that's the only thing to do what, but what I am saying is that if you want to learn to play the piano, you have to be able to know that though the notes, you have to know what notes you're looking at. You have to know where it is on the keyboard. You have to then played correctly and you have to make it a nice clean hit on that. Tap onto that key and all that good stuff. You have to know what the tempo is. You have to know all this different stuff. And the more you do it, the better you'll be. The more you draw, the better you'll be. I mean, it's, it's really, it's really that simple. It's not any more complicated than, than that. It's a very simple concept. So I've gone over this a couple times with this. With this. Now I have to be careful because again, this value here is again somewhere. It's almost here, it's between those two. So understand that this five won't be the same as this one over here. So I'm trying to look between these two values. And judge, when it's at its halfway point. I think this is at the halfway point there's a better to be lighter because you can always darken. If you have to lighten this with a an eraser, oh my goodness, it's going to be a mess because it's going to be all splotchy your aunt to get in there with your kneaded eraser and do different things and it's just going to be an absolute mess. So Vetter to be a little bit lighter and then you have the ability to go darker than to be too dark because that's where really I'd have to erase it and then it would take me probably an hour to take out the blog genus. While maybe an hour, maybe a bit much, but at least 20 minutes to get that to, you know, to where I can then start to push it down in a uniform way, making it slightly darker or patch it up so that it's uniform and that lighter value, whatever it is I'm doing. It's, it's just gonna be much, much more difficult. So I'm using this to h Now, something about the two Hs and the forage is they're really great for darkening something, you know, because we don't wanna go too. You don't want to go darker. Because again, we just talked about the eraser and having to get in there and it's gonna make it really Blache it. And then you have to fill in all the watches. So doesn't really it has polka dots and you have to fill it in so that it melts in, like it's completely uniform. That's a hard thing to do. So but I'll just sneak up on it. But because of the fact that I've got these H pencils, they don't, they darken it very slowly. And in fact, there's a point at which they want to go darker at all. But I have right now a 28. I'm using this to H to make this more uniform. And it's, it's great because if I went over with one stroke with an HB, it probably it might go too dark. Or is this to make that same darkness of stroke I'd have to go over like 16 times. So it's a little bit easier to fine tune on the, on the lighter side and sometimes even the darker side. With my H pencils, they're really great for fine tuning of value. And I think this is going to be about where we want to, I want to stop here because I think we're ready to go forward. Again. We would go ahead and either go lighter or darker, but we have 3 between year and three between here. So if we skip one, there's the one in between, There's the one in between. We're gonna get used to the staggered approach because now I'm going to try to make a value that's not this line, not this dark was somewhere in between. Now I started this one with an HB. The next one litre is the 20 age Saul's. I want to start this one with a to H. Remember this one had my four h that I started with up there. And so again, I'm going to go ahead and come over here. And I'll start with my 2 H pencil. And again, the ten is left white because that's why that's white paper. I usually withdrawing paper, they're not truly white. So I remember I was saying, well, it's not truly why nothing's really wide and and there's, there's times that's true, but most times on paper if it's not truly white anyway, so we're already at the, the, the paper value itself is a true step 10 where it's not, it's not white at all. It's an off white or a light cream or something that's around. Again, a sort of a step 10. Because it's not truly white. To get true white paper, they had to bleach in and they're usually called bright white. Well, that's a true white. This is not bright white. This is actually somewhere between bright white and ivory. So again, the paper itself is actually a step 10. So I'm using a risk swing. I've got a modified going to modified hand hold, the tripod grip. It's a modified tripod grip. If you don't know that, Go ahead and about the hand holds. Watch the video that talks about the hand holds. If you haven't taken one of my classes before, my very first class I want people to take is the foundation of the line. Or the power of a line is the actual name of it. The power of line, the foundation of all drawing. And it talks about those handhelds. Now I'm also going to have sort of a view, a review of hand holds as well in this class. But there's certain things in that class I am not going to review, I'm just going to assume you know it and go on. And so we learned about things like armature of the rectangle. We learned about things like how to break things down with the armature into halves and quarters and thirds and two-thirds and all that good stuff. We also run about measuring and proportional measuring and how to use it. We use, w
5. Creating a Grayscale Part 2 final: I'm so proud of what you guys are doing. Keep up the good work. Go ahead and you'll keep that energy level high. Keep working the steps, keep drawing. Let's keep it going. All right, welcome back. So we were filling in this step 7 value that was halfway between 5 and 9. And again, I was using a number two pencil. Pardon me Now, number two pencil, I had a 2 H pencil and or for age that I was. Those are our lightest pencils we have. And we're using those to try to keep this. We don't want to go too dark too quickly. So if I was going to go ahead and fill this in, and as far as that goes, I can use the 2 H pencil to help me so that it fills in the values generally, and it doesn't go too dark too quickly. Now the idea is we're supposed to be looking for a value that's halfway between these two. And it's just to help us to get a grant to create a greater range of value. If I just start at the top and went down to the bottom, you, usually you're not going to have full range. So we went with the darkest, lightest, then in-between the lightest to darkest, and now in between the step five and step 9. And this way, we'll be able to target at least be within range of a value step or half a step or something like that. We're still going to have to do some we're still going to have to do a little bit of changing, you know, making things a little darker and sometimes making them lighter. But of the two, as I may have mentioned before, it's easier. It's easier if you're on the light side because then you just have to get out a pencil and dark and down. If you go too dark, well then that's a little harder because you have to get an eraser and you can align them with the eraser, but it's also, you have to be careful not to erase too much and have it become too splotchy and, and, and it's gonna get splotch anyways, but I mean, you're gonna you try to control as much as possible, then you're still going to have to probably fill in lots of little splotches and take maybe as long as 20 minutes to get that all filled back in before you can actually start to modify it anymore. Yeah, you have to make it uniform. Once again because this illusion that we're going to create really depends on these values being as uniform and as just as flat as possible. In other words, we don't want a lot of variations or splotches or look like there's texture. We don't want any. We want as little texture as possible to create this illusion. If we have too much texture, you know, and we don't have a uniform value. It just won't work. And so I think we're about in the ballpark as they say. It's a little lighter towards the middle, a little darker towards it's a little darker down here and a little lighter here and more lighter and lighter in the middle. So I'm going to try to, try to get this to be a little more uniform. So I'm gonna come over here to the middle. We're going to try to spend a little bit time in the middle of this block trying to make the values much more uniform. And we're pretty close. So I mean, we're not way off, but we still need to do a little bit more. But again, that when we're doing, when we're drawing a gray scale, when we're creating these values. The whole point is to not worry about detail. We're trying to just focus in on how light or how dark is it, and how uniform can I make it? That's the only two things that we are worried about now I grabbed a for age. And again, the time, the reason I'll use a for-each, it's the lightest pencil. The 4 H pencil is the lightest pencil. And again, the reason I use it is because I can use it very, I can use it to very slowly make something darker and darker and darker until I have it at exactly the right value. Because the fact it's so light, it takes like four times as long as the two H to get to the same sort of point of darkness. And so because of that, I have a little more control over it. And we want that we want to be able to control the values that we are creating with our pencils. Kay, so now this is almost perhaps a little, a little dark, but we're going to have, we're going to see how that goes. I'm not going to worry about it yet, but luckily this might be a little light. So again, we'll see in just a moment where it come down here to step three and we're given, we're going to try to get a value that's in between those two, between this step and that step. And I'm going to start off with a, with a to B pencil. And the two b is the second of the darkest. So the beast. We think of it as black. The higher the number, the darker the pencil or the black or the pencil. So the B pencils are when we want something a little darker. And, but remember that the v pencils also, because of the fact they are, they are software, that's why they are darker is because the graphite is is a little softer. To harden graphite, they started mixing with clay. The B pencils have less and less clay. They are far soft, softer than the H pencils. And because of that, they ride over the texture of the paper. So that's another thing to keep in mind now in terms of I'm using a risk swing and I'm using a modified baton handhold. So actually, no, actually, I'm partner may not have Bhutan. Bhutan would be like this. Between my fingers like this with the tripod is like this. And so what I'm doing is actually as it's sort of a modified tripod work. I've brought this out of the crook of, I've brought this out of the crook of my hand and hopefully you just hit the end of my fingers. And again, i'm I'm I'm using a risk swing to and I'm just trying to move this back and forth gently and try to be very careful and building this up. Try to be very careful to make it as uniform as I possibly can. I'm also taking my eyes out of focus. Now the first time I do this, I'm not trying to make it as dark as it can go. The first layer that would be unwise. So I'm going to very gently fill this in with value now. It's to live, but I'm going to go over this a couple more times. Remember the more times we go over graphite, the darker that graph I will get. Unless, you know there's a pencil, there's a range that every pencil has. And so sometimes you'll be like, well the pencils not getting any darker wall, then you have to grab a darker pencil. So if I had an HB pencil and I was looking at I'm like, man, it's just not going any darker. We'll then I would grab a to b if the to-be wasn't doing what I needed to make it darker, I would then grab a for b. Alright? And if I had a full range of pencil, you say, well the 4 reason not dark enough, or that I could grab a 6 B now, or an AB. The steps of darkness between a four to six to eight. Our slight. And so like I said, we can use just the five pencils to create values. But, and those five pencils, even most professional artists will use those 50 pencil. Some of them use only those pencils. And then others will use those 598 to 99% of the time. And so all those other pencils that you get in the kit, because there's no 20 pencils or 21 pencil or something like that. If you get all the h's and the HB and the, you know, all the, all the B pencils, you're going to have quite a collection. But because of the fact that most people only use the rest of those pencils. You know, less than a 1% of the time. So people don't, don't, they don't buy all of these like okay, I don't need them. I can make this work. And you can. But also if you just need a pencil that's darker while you get a darker pencil. Same thing about a pencil being needing to be lighter if you're like, man, this is going too dark too quickly. Grab a lighter pencil. So if I had the the to-be pencil with me and I was like, man, this is getting too dark too quickly. Well then I will get the next lighter pencil, an HB. At the HP was working well in gray, but let's say the HP was also going too dark, too quickly. And I'd say, well, okay, I'm gonna go to the next lighter pencil, which will be a to H. And so you want to get used to layering and, and working up and down the value scale. Now, I put about three layers of 2D pencil on hair. And then I grabbed my four H pencil again, a 4 H pencil is to get deeper into the texture of this paper. It's to help us to, again make it look more uniform. And also because of the fact that it darkens this now this is actually a finger swing I'm using now because I'm trying to keep this nice, crisp line. So I wanted to be as clean or razor sharp or I want it to be a nice, good, clean line, both above and below. So again, I'm going to grab my pencil using that finger swing. Now this isn't the tapered stroke or the feathered stroke or anything like this. This is just where I'm moving it back and forth with my fingers. It's the easier type of fingers swing. Remember the tapered strokes a little bit more advanced, but we don't need something super sophisticated for what I'm doing right now. I just need to work the pencil back and forth. And so it's just using a regular finger swing. If you don't understand the difference between just a normal fingers swing and that tapered stroke and or feathered stroke will then go. I would encourage you to go back and watch the video that talks about how they create different values with different hand holds. Is it a risk swaying, is it an elbow swing, his or her fingers swing. And then and with the finger swing, there was either just a regular finger swing or the tapered stroke or feathered stroke are the same thing. They just go by different names. And it's just, it's, it's a lot more sophisticated. There's there's not really, I mean, we could use it at this point. But for right now there's not a big need for it. So I just talked about that tapered stroke and all of a sudden I sort of change gears into doing and doing that tapered stroke a little bit. But unless I ignore what I'm doing, you're not gonna find a big difference. Yeah, you're not gonna, you're not gonna see a huge difference. So I've gone over this a couple times with this for each pencil. Now I've gone back to a non using an elbow swing and I'm just holding onto it with my with my fingers locking my risks, locking my fingers. And I'm just moving my elbow. Okay. So now we've got that where it's fairly uniform. So I'm going to go ahead and grab another pencil. So that was why for h. So we went from a to b up to a 4 H. I'm now going to two H. So the two H's the second lightest pencil. And I'm going to use a couple layers of that to h. And again is going to fill in some of those little. Little light dots that are from the texture of the paper. Because this is a harder pencil and it gets deeper into the texture. And because those little dots become gray dots instead of white dots, it makes the whole thing appear darker, so it's getting dark or not because this pencil is a dark pencil, but because we're getting rid of the, the textures in that paper. And that's a good thing to keep in mind. Now there's times where you'll, you'll use the paper to help you if I'm trying to create like let's say I was I was, you know, again, this is a medium service paper. It's got a nice texture to it. Let's say I was doing it felt hat. And so I want the texture of the felt or something that approximates the texture in that half. Well then I might grab a for B pencil because I wanted to skip over the paper to reveal more of the texture. K. And I could certainly do that. There's, you know, and I can just go ahead and again do that. So that the value I was creating was actually revealing more of the paper texture. Therefore, the surface that I'm describing with feel more rough against smoother areas like this. And so there's times where we will use the pencil differently to reveal texture. There's times we will. If I was working on Chrome or something with very little texture, I want to try to minimize the texture as much as possible when he was a lot of those H pencils to get in there and take out the texture so that it looks more uniform or smooth because I'm minimizing the favor sector at that point. And so we can use again that the texture of the paper and to help us start to help us create the illusion of textures, different types of textures, which is really great when you're trying to draw, create that. So again, this is the two H0 gone over this a couple of times as a couple of layers on there with my 2 H pencil. And then I'm going to grab my pencil again. And we're going to go back and forth and back and forth. And I'm trying to see we're probably almost there. I think I'm probably about a half a step of value away. But now that we've done all that layering, this tubule pencil will look much darker. When I layer it over all those other lighter, lighter pencils that I was using. So I start with my with my Tooby and then I grabbed a 4 H couple layers that I grabbed a 28 percent, a couple layers, and HB put on a couple of layers with that. And then I returned back to my to be at least I think I was supposed to grab the HB. I just realized I don't think I did, but if I had it would just minimum, minimize just a little bit more what was going on with those textures? So I think you can see now that we've done this, we're going to have every other step is going to be. Addressed or fill down so I can start to try to associate the values. My drawing now I'm using a finger swing again because I'm being a little bit more. I want a little bit more control as I put in my, in my values. Again, I'm going to go ahead and, and I should probably say that because all we're gonna do is I'm going to finish this and then I'm gonna go ahead and turn this off. So XML think you need to sit here and you can imagine that, that this is going to be more of the same because I want to fill this all n because that's not the stopping point, That's about the halfway point. So I think it's important to do that. I'm going a little bit some different directions Detroit to get minimize some of that paper that the grain created by if we leave spaces between our lines. So that's important to make sure that we can really help unify, make the value look more uniform. Which is what we want. Again, not, not bad. I think I want to grab the HB pencil. Thanks, I camera, if I use this one, I think I might have actually skipped it, but the reason why is that too busy to go darker and much more quickly. So if I grab a slightly lighter pencil like this, H B, well then I have a little more control, so it's going to be able to darken it in a much, you know, with a lot more care because I have to have what's the term I'm looking for? Basically because of the fact that it takes longer to darken it. I don't have to worry about one little misstep would like to be I could put just one stroke and go all know, too dark, I ruined it. So this one, I'd have to go over three or four or five times to make it too dark. And so again, I'm going to use it to just very gently darken things very softly. And because I'm going to have to work at it a little bit longer. I've got time, no big deal. I'm going to have more control over this. So again, I'm again, I'm going some different directions trying to get rid of the grain. I'm taking my, I had a focus to see if this is what the value is. Because again, So when we first do this, sometimes we get so distracted by the textures that we can't see the value that we've created because we're just so focused on the texture. And so again, I'm going to take my opposite of focus and try to again perceive what this isn't relation to, ship to this and this. Now, for the most part I'm going to write this down. So for this one we used mostly a 4 H. I might have used a little bit of a to H. Maybe I'll actually use a pencil where we can see what I'm writing. So for this one we use the foreach. And then maybe the two H for this one. I could use just the 4 H. Sometimes they'll use a for-each and a to H for the number nine. But again, the two lightest pencils for something like this, it's going to again be the four h. And maybe the two H. That little symbol means. And so that's a to H. For this one. Again, I might use the two H and an HB. I also might use a 4 H If I figure I need to. If there was an area as trying to very gently make darker, I could certainly do that. But I'm saying, say most of it's going to be 2 H pencil with a little bit of HB. This would be the same, this would be a and H b, and then a to H and maybe a 4 H layering. So again, because as that HB is going to start to allow and you're going to see more of that texture showing through. And we use these two H pencils to basically get rid of some of that texture. Again, for this one would be mostly the HB with and HB and then maybe the 4 H and then the two H. With this one. For number 4, we be using the Tooby. And then we would also, we would then jump up to the 4 H, then a to H, then an HB. And then we return to the to be once again, there might be a point where I go, okay, now I need to darken it too or the right darkness. And so I would ditch that, the Tooby and use either an HB or two H to dark and then very slowly get it to where I want. For this one here again, where we would use a to B. And then we jump up to the 4 H and then a to H and then an HB, right? And there might be a point where I might even use a little bit of the for being here just depends on whether it's dark enough. So again, I went to use my eyes on this one again, we'd start off with probably a for B. Then we would jump up to a 4 H. Then we'd put a couple layers of the 28, couple layers of the HB, the Tooby. And then we might return to the four B if it's if it's getting too dark, too quickly, I'd stay with the to-be. Or if I was really needing to sort of push it down just a little bit in terms of its darkness, I'm, I jump up to an HB or even a to H. And then this one again, we start off with a for B. For the number one. Then we jumped up to the 4 H to get rid of that, those little specks. And then we also used a to H together with some of the specs and then an HB and then a to B. And then we return back with a for B to push this down, this as far as we could go in terms of the value. So the number step 9 was for h into h. Step a was four h into h, step 7. Now I could use a 4 H for that, but again, it's gonna, it's gonna probably needs to go a little darker. So I'm going to need a two H and I'll probably be a little bit of an HB. I'd probably start this in with a to H and then maybe throw a goal or with an HB and then return to using it to age. Well, this one I'd probably start again with a to H or the HB depending on the manufacturer, somebody degrees or slightly darker. Some two H's are slightly lighter. But I would start with either the HQ of the two h, put a layer. If I start with the HB, well then I jump up there with a 4 H, get rid of the little specks, then I'd use a to H and i'm I use that tuition to push it down as far as I need to go. So again, this is what we're going to use. So again, I'm going to go ahead and stop the video. I'm just gonna go ahead and fill these in using these ideas. I'm going to come back with this thing filled in and then we're going to actually, that's where the fun begins because we're only, we're not even halfway there yet. We're going to go ahead and fill these in and then we'll be halfway there. And again, I didn't think that you would want to sit here and watch me do this for 30 minutes because it's going to be basically the exact same thing that I was doing with these guys, except this is going to be a step, a value between those two, this will be a step, a value between those two. That's the step value between those though. You see where we go on. So I'm gonna go ahead and fill these in Virginia and I'm going to make sure that when it hits the line, I have to make sure I'm in fact, this one's a little, a little a it's it's not very crisp and clean. So when you come in and clean that up, and I would do whenever I do cleaning up unless it's really dark down here. The ones up here, I'd use two H's and four H's. If they're down here, I'd be using to bees are four b's, maybe an HB, but again, lighter pencil is up here, darker pencils down here. Alright, so I'm gonna go ahead and fill this in and we're gonna come back. And then we're going to finish this up. All right.
6. Creating the Grayscale Part 3: All right, just keep working those steps. Keep drawing, keep it up. You're doing great. Let's go ahead and progress to the last step. All right, so we're back. So I went ahead and I filled in all the different boxes. So now that we have everything filled in. However, like I said, this about the halfway point, because we have some issues here. The value of this box here, the step eight is the same as the step seven, almost for the most part. And 65 are the same. And 43 are pretty close to the same as well. Then I'll exactly but they don't have we need that each step to be kinda the same distance from each other and they're just not. And so what we're gonna do from here is we have to darken seven, or probably better than dark and five. And it's just going to have a cascading effect. So I'm first going to come up here with my, with my four h. And I think this step a can maybe be just a tiny bit deeper in terms of its value. So I've got a 4 H pencil, that's the lightest pencil. And I'm just gonna go over this a couple times. And I just I just want to make sure that we can get a nice step from 79 to step eight. Now I'm not darkening and much because I don't want to go. You know, it's it's not too far off. I don't wanna go too far too quickly. So again, using sort of a Earth's swing at this point. If I had a piece of paper, I cover this area in, place my hand on it and do a much more controlled finger swaying or something. But we're just gonna go ahead and darken this just a little bit more. So again, that this and this is very clear that they are different values. And then it's a definitely a step darker. It's, you know, it's not maybe it's not kinda isn't. It's just good. It's going to be very clear. Step darker. And that's Step 9. And remember this is a simplification of values. So I believe I mentioned that The most people can pick up on about 18 steps of value. Some can't see past 15, but a lot of people can see as many as 18. And then if you have artists that we train our eyes to see much, to see values even better. And so, but most artists can't see beyond 24 steps of value in terms of being able to perceive a difference. Once you hit 30 steps of value. Almost no one that I have that I know of, that I've known personally can perceive that people have to pull out like little light, very light meters to start to try to. Read the differences between the value steps at that point. But again, so this is what I'm going, where I'm going with this is that this is again, as I said, a simplification of how many values there are in the world. If we have 10 steps of value, however, in a drawing or even in our painting, it will look like it has a full range. So if we put ten steps of value in a painting, it will appear that it has a full range of values, which is good news for us. Now sometimes there are things that are quite this slide and not quite this dark. And so there's going to be many times when you're drawing that there'll be half-steps. Okay, and can half-steps would turn this into 20 value steps, right? If we had a half-step between H. So again, sometimes we'll talk about a half-step. Once you get to something like a quarter step or something like that, that is so soft and subtle. Most people are not going to be able to perceive that. So again, this is a simplification of what we can see. And yet, if we can create drawings that have arranged from this light all the way to this dark. And the steps in between. It will feel like it has depth and dimension. And if you know how to do doing really well, then you'll have maybe able to make drawings or paintings. It'll feel like you get someone could step into and walk around. There's that amazing. Okay, So I, that's all I'm gonna do with this one. Now, this one again now I have a 4 H, but I think I'm going to go to a to H because we're down to step 7. And this step 7 is lighter than the step eight. And so I'm going to grab this, step 2 and step two, I'm going to grab this to H. And the reason we're gonna use this is because again, it's going to take much more time to build up the value. Then if I grabbed an HB or something. And plus this will also make it more smooth because there's still a bit of texture in here. That's that's not, it's not what I want. Again, I may have mentioned that all artists are. We like to control our values, we want to control our drawings. We want to be able to. It's all about control, control, control. Yeah, I joke in my class is that ROS are control freaks. And the many ways we are we want to be able to create an illusion that's very sophisticated so that we can create and draw people's eyes and the direction and have the eye move around the image the way we want them to go. There's a, there's a, there's a place to enter paintings. People will say, there's a place to leave a painting. There's a place to sit and sit and say awhile. Before you. Then go on to the next the next painting on the wall to look at that one. But there's definitely things that we want to be able to perceive. And then we want others to perceive. And so we want to be able to control that stuff. And that's a good thing. We want that really. Is it helps our drawing. It's a good thing. So I have a to H that I was using that for. Then I bring my four h back in hair. Again, this will get a little deeper into the texture I'll be able to control this is again, I want this go too dark. I needed to be there not as dark as ABA darker than this. And I may have to go this dark. I don't know if my baby that this will be as dark as this thing is going to have to go. But I won't know that until I have this number 7 at the value that I want. Now there's a particular range for these values. However, depends on what medium we're working in. At the very beginning, I had an oil painted gray scale and the grayscale, it has a much wider range, then even a charcoal gray scale, and that charcoal gray scale has a much, much wider range then a graphite gray scale. But instead of trying to confuse you by saying, well, this actually isn't a step one, it actually step three, and this is all this sort of stuff. We're just gonna go ahead and still make it ten step grayscale. And it's just going to have, it's going to be a little bit instance. I'm going to go near as dark as some of the others. But we can certainly create a nice transition of ten equal steps. And once I've created these, I can then use this with my graphite. Because again, I can say, Hey, these are the limitations. It goes from here and goes that dark. And that's, that's the range period between those, those values. And there's nothing wrong with that. In fact, there's, there's something really good about that because it will help you to understand what your medium can do and what it cannot go to help anchor you and go okay, I can't keep going darker than that, you know? And so grayscales are a good thing in a particular medium you're working in because it gives you, it gives you the range of what can be done in that medium. So again, we're just gonna go ahead and continue to dark. In this case, I'm using this stuff for and it's nice because I can get this to be There's some patchiness, it's a little bit lighter here then some other places. So I can get that to start with dark and slowly, which is again, what I want. I think that this needs to go a little darker still. And so I want to grab a little bit, I'm going to grab an HB pencil. And we're gonna go ahead and using this HB. Now the HB is darker than the two h. It's a pencil that's right in the middle. And again, I can use this to really see how much more quickly it's getting a little darker. And so I can use that as I'm drawing two to darken this a little more quickly now I still want to be, I'm still using a very gentle light touch because I don't want this to go just too dark, too quickly. I don't want to go, you know, kinda get out of my control. So. So again, I want to go ahead and come over here and I'm going to continue to darken this using a to H, because again, I use the HB to darken a little bit. But then now it's kind of close to where I want it. And then I will use this to H to get it exactly where I want it. And it's darker now, but it still has to be darker by about the same amount that this is darker and it's not quite dark enough just yet. So we want equal steps in terms of how you're stepping down to each value. It's kind of like stair-step. She don't want one stair-step that's two inches down, and the next stair step is six inches down, and the next stair step is 4.5. That's just not what you want. That's a terrible type of and so we try it. The other part of this is trying to keep the relationships that changes the steps. This contrast should be the same as that contrast. And again, we're pretty close. We're not exact, just you have a We're really close. We're in the ballpark now. We're we're we're we're within a half a step a value of where I need this to be in order for this to work. Okay? So We're going to continue just to, again, to darken this down just a bit. We're now about the same value as the step six, which isn't entirely surprising because I I felt that was well, I thought, you know, until I started darkening the 7, I didn't know whether it would be happy to darken the 62, but the seven is barely getting to the point where it needs to be in terms of how dark it is. And so that just means we better start at the top because we're going to try to go darker and darker and darker. And again, as long as when we first started, we were we weren't wafer off on this stuff. I mean, this step 7, I'm only dark and by maybe a half a step a value, but maybe three-quarters of a step more than what it was, and that's all it needed. So that's the reason we start off with what we call a staggered approach where you put it in this value and that value than this value. And then you try to put that on there and that one there. And it just helps you keep it within a range. You you're always usually going to be off by a little bit. But the more you do it, the closer you'll be. So you might be like I'm only off by half a step a value. Even if you're off by a full step of value. Again, that's unless it's really, really off in terms of where this starts and without starts at this got too dark and that this was too light and there could be a way where this just would not, you know, you wouldn't be able to pull it off without starting over again. But the whole reason we do what's called a staggered approach, and so you're close enough that you have to modify it like what I'm doing. But you're going to still be pretty close. So I think this step 7 is about where we needed to be. Easy to clean up that edge where. This value meets that value. Like so. It's also a darkening right in this bottom corner of the step number eight. So we're going to take a little bit of that out now I've got some little, little delight dots are I accidentally was pulled too much out. And there's still a mole mark, a little dot and get out. That's a little better. You can come over here to this corner. Here we go. Okay. Okay, So anyways, these really are not bad at all. They're they're they're doing good on this one right here maybe. Again, right in the middle, there's still it's a little bit lighter like right through here. And so I have to I just give it a pencil and spend some time right in that little area where it's just a little bit lives a little bit lighter than it should be. Okay. But this is, so this is going darker and darker. And that's what I want for this, for this grayscale. Now, 65 and all these others are now out of whack. Well, we've got the top part of this is starting to work the way we want it to. And so that's, that's good news. That's what we want it to be able to do is have, is have these, these values very clear. All that's lighter and darker, that's darker still. And the steps are fairly even. I'm I'm up here just trying to get again where it's a little bit lighter through here. Trying to make that more uniform. I think it's, it's doing a much better job. So now for step 6, I'm going to grab the HB to start this off with. Let's go ahead and make sure that my, my edge right through here is what I'll start with is the edge, make the edge dark enough. And then we'll just bring that value down. So that right there is about what I want for that step 6. We'll just bring this value down. Now by doing this step 5 was going to start over. Again. It's going to be too light, so we're going to have to continue doing this with our other values. Here I'm using my fingers pointing at this point, I really need much more control. I mean, I might jump in to do a swing or an elbow swing if I needed to cover an entire area. But usually, at this point we are actually trying to be much more controlled. We're going to be using their fingers swaying because it's got, it has the most control. It's still not a tapered stroke or a feathered stroke. But it is. That's a risk stroke right there. Sometimes I'll do strokes. I want you to think about it. So I'm just going on and you do this and, and so I don't even think about anymore, but I think now I'm doing the figures for you now look, guys that DO NOT. I'm doing a risk swaying. Okay. My my wrist is moving and it's actually rocking a bit, which is usually not a good idea. So I'm putting my hand underneath my risks. So now my risk and can move back and forth and much more with a lot more ease. And so and it's also going to have less stress on my wrist as I do it this way. So that's good news as well. All right. So again, we're gonna go ahead and keep darkening down on this value. For step 6 on the value scale, I'm still using an HB pencil. Now I'm back to the fingers swing. And again, I have a little more control by doing this. And I can go ahead and I can also, again start going different directions diagonally. You know, I was also going from transition from side to side and then going up and down. And then we can go from corner to corner. And this is a diagonal that leans the top, leans to the left. And I could do that and I could do another own work. The top leans to the right. As I'm as I'm doing that. And so I can continue to darken those down and all this and that good stuff. Again, we want to be able to now I think at this point, we're like half a step a value of where I want. And using that a and H b also will start to show more of the texture of the paper. So now kinda push it back down to where I wanted to finally be at. Only use this for age. Because again, the for-each pencil will, well, it's a little easier to control. Very subtle changes the value of this. And so again, it's a really nice pencil when I really want to control very soft transitions, a value. And I don't want big jumps and I actually want to keep it within quarter steps and third steps and, you know, stuff like that. To try to get this to be as uniform as I can give it k. So now that's looking better. It's still a little of a letter in the middle. So I'm gonna go ahead and spend using a risk swing on this. Finally, spend a minute or two. Keeping this or darkening it gently as I work. So again, that's about where I want that. And so see how we really have to, you know, we really have to. It's really changing it up. While all these just these little changes, we now see that this step 5 is actually the same as the step seven. Because of all the changes that have been made. I'm gonna go ahead and this is probably this was a to B. I think I had a I had a four B pencil. That's a bit much. And I thought at the time, but I was like I'm going to save time, I'm gonna do it what I would normally do anyways. And I just put one stroke. I said Nope, too dark. And so I got this to be, I'll be 0, I'll use the Tooby. And the to-be would only do is I'm gonna come over to this step 6. I'm going to darken along the edge with step five until it's the value that I want right through there and such. Okay? And then what we're gonna do is we're gonna go ahead and bring that value down. Now if I wasn't going to actually turn this on the side, so I can really play with that, with that edge. But we're gonna go ahead and again try to fill in the rest of this box that same value. And this is probably going to turn out to be about the same value as the step for you. Just by doing this, I'm almost to the step six. So this is dark and a little, no, not quite actually, it needs to go darker still. So we're gonna go ahead and keep working on this. And I'm darkening this down. Now because of the reflection coming off of this. I can't quite see that edge too well, but I think that that edge is a little rough on there and I really wish that that edge was not quite so rough. And so I'm going to go ahead and try to clean this, this edge up a little bit. I'm going to use a sort of a mask. As far as that goes. I'm going to use this little bit here. And I'm going to go ahead and just blot this a little bit. And so that's taken where it was kind of above their little too dark. And so I went ahead and took that out. And let's see, we're gonna go ahead and again try to get this step 5. Now this is almost going to be the value of a step file with charcoal. So that makes me a little nervous stuff I'm in charcoal mean that's very close to one step. Phi should be with graphite because I don't have as much range to the darks. Will find out. We'll find out if I. If this started out a little bit too dark up there a little too quickly. But we'll find out in just a moment. So we'll keep darkening this step 5. I'm still using the tube events all. Taken my eyes out of focus because you can see value better that way. And this way you can see what's going on with the step five Vs that step six. I think if I use my H pencils, I can get an antique a little bit more of that texture out. I think it'll darken this just a little bit more. Let's try with an HB for just a minute. So let's get this HB pencil now this is harder than a tube. The tube is darker than HB and HB is the next step lighter than a to b. And so I can use this and because it's a slightly harder pencil, it'll get a little bit deeper into that texture. Again, I can't. Sometimes it's the first time when, when we're, when we're, when you're drawing. And I tell my students this all the time, the first three months of drawing is really a chore to be able to see the value, see what values and an understand and identify what values we are looking at, what values we're dealing with. So I tell and I encourage students to either buy or create a gray scale that they can use to start to identify the values that they are looking at when they're drawing objects. No matter what the object is, it's always nice to have a grayscale with you. So you can double-check what the values are. And I do a lot of what's called plenary painting. That means you're painting outdoors. And when you're painting outdoors, you just have to know the values or it's just not going to work. You don't have enough time to play with detail. So artists create great plein air paintings by painting things with very definite the definite value relationships that those are right? You'll have a great painting. And if they're not well then it's much harder to have a great painting because painting Andrew and, or drawing is all about the values. And so, so again, they have all kinds of little contraptions to check value what are called color isolators and value isolators. And it's essentially just a gray card with a hole punch 10. So I know some people that have used like old, you know, credit cards in that they're no longer using or whatever and they'll paint the back with a neutral gray and then they punch a hole on it. Of course, scrape off the numbers and make sure that no one can take this strip off the back. And so that way you don't have in your information getting out there, the gentleman out there. But it's a really great way of having a, a value isolator and or color isolator. Because every color has a value, so you could use one of those. The other thing that nothing you can do is you just take a A, you know, like a card, like a memo card or a flash card or something like that. Whereas white and take and take a hole puncher and punch a hole out of that or cut a hole with an exacto knife, produce something where, but again, that's a really quick makeshift thing that you can use. And then you take the object the, with the, with the holes in it. And you can again start checking values much more easily if you get lost. And in the beginning, in the first, first 3 to six months, and if you haven't done it, you could draw for 10, you know, 10 years and not be well enough aware of the value relationship changes. So it's just, it's a really great way if you train yourself early, you'll have to worry about it. I have people that I know that again, I've painted for a decade or more and they just never have felt the need and the things that they create suffer because of it. So, I mean, there's, there's, there's real importance and value. And it goes beyond style. I mean, Matisse was using value in Matisse of course was not painting realism, but his different shapes. I'm talking about, you know, his later stuff with it became, you know, very two-dimensional, smooth, didn't call it flat. Some people will call it post or space or, or flat space thinking or collage space thinking, that's another way of talking about it. But if you're doing a decent collage, you have to be aware of the values. It's always about values. Whether you're dealing an abstraction, whether you're dealing in representational painting, whether you're dealing and non-objective painting, no matter what the style is, impressionism and post-impressionism or classicism or you know, post-modernism or modernism or Cubism, or no matter what you're working on, It's all about what's the value. So this, this exercise does have value because it is just trying to teach you about how to use and identify the different values that you are looking at in the world around us. So again, this has to go a little darker. Now I'm using a for B because this has just a substantial change that I'm making. I think that's almost dark enough, so I'm going to hold off on using the four b anymore. I'm going to jump up here and use an HB. And that's no lighten though than the four B For B2B and then HB. So this is two steps, lighter. And what this will do is because it's a little lighter, I can use it to as I'm trying to just very gently push this a little darker, a little darker and darker. So it's much easier to control. I have more control with this. Now. I need to even a little more control song we're going to, and I want to get rid of some more of the texture. And so I have a 2 H pencil. Remember the two a2 is the second lightest pencil, the 4 H is the lightest. And this is the, and the reason I'm using this is because this will take out some of the texture. Turn those white little dots in the gray little dots and it will look darker. Then we'll also, it's easier and make it look more uniform. Again, if we have too much texture, we will destroy the illusion. And the illusion is that we're looking for, is that if we do this right, and we, we, we, we set this away from us by about 15 feet. And look at it. It starts to look like a gradation. Even though there is no gradation, there are just flat values. But from a distance, they start to look like there's a gradation. You know, almost like a subtle gradation. Obviously there is a gradation in terms of very definite steps. When, when you look at this from a distance, it melts in and suddenly starts to look like perhaps is just this, this, this, this value radiation or what's something we call shading, going from dark to light as opposed to chunks of value jumping from dark to light. So it's a really, that's the illusion we're after. And if we have too much texture or destroys that if we don't have these edges touching correctly. In other words, if they're not clean, if they're not, Chris was as crisp as we can get them, then then that's gonna be that's gonna be an issue. So so now this I think is where we want it to be. And again, now this is what's going on. What's going on is a little concerning because this is now almost as dark as the step 2, which makes me wonder, am I going to, if I've run out of room, we'll find out in just a minute, but and that just means that it's not a big deal. This happens, can happen to everybody. But we're going to see what we can do with them. So and what I'll do usually for step one is I'll leave it a rule on the lighter side. And wait till I darkened all these down before I start to really push that one. That one can probably go darker by maybe a half a step of value. But before I worry about that too much, we're going to go ahead and try to darken this step right here. And in fact, now this is a for B pencil. I'm going to go ahead and go over both of these at the same time. Now remember, graphite darkens on itself. So this was, this was darker and as I go over the both of them, this will darken and this will darken. And if I if I don't darken this one, these were both still be this will be darker, this will be lighter. So I could certainly do that to see if I've got, you know, how much room do I have the darken this out. All right. Well, we can go darker. So the 3 is now about us because it's Step 4 and I'm using a pencil. Now remember when I'm using the four view pencil and I want to darken it. To get it really dark, I have to layer it. Okay. So. I'm gonna go ahead and do some little more layering. I'm going to take a 4 H pencil. And I'm going to go over this step three with a four h. And I'm going to go over the step 2 with a for age. So I'm trying to make them both get darker. As I go over them. I then we're going to use a to H pencil. And again, I went to go over the step 3, but the 2 H pencil. And then I'm gonna go over the step number two with a to H pencil. Because that way again, I'm trying to keep them both going darker. And I'll go ahead and see if I could do this at an angle. I hope that out. Maybe do a little bit of an angle on this. See if I can push this down. Just a little darker still. K. Once I've done that. Now again, this in this seemed to be the same. I'm going to go ahead and use an HB. On to step three. I'm using a finger sewing. Because I do this. And now go down to step two and use the HB on that as well. And that's because I'm trying to get them to both go darker as I darken this up. Now. And this is starting to get darker than that. It's Tibet. And so now we're going to use the to be. And so I'm gonna use this to B pencil over the step 3. Like so. And again, this is getting darker now again, I can come over here and I can double-check that, that this is again darker along this edge. Now it is K. And now let me go ahead and darken a little bit more. That's step 3, which is I think doing a good job. Okay, that's now darker than the step four. And if I needed to now again, the step 4 has a cold patches. There's a patch here and a patch here that a little bit just a little bit lighter. And I can, I could go in with a 4 H and very softly get those to darken up if the pH is too light where it's not working. I could grab a to H, I could grab an HB, you know, whichever. But anyways, I can get that to even out a little bit. Now for this step. Number 2 to 3 is about close enough. I'm gonna go ahead and try to go darker still. Then this one. And I'm using a for b again to darken this. Alright? Now it started again, it's turned to be darker than the and the three. This number 2, step number 2. So I think I'm barely going to be able to do it. Which is great because again, the, the graphite has a little bit shallower range. But it's still going to look like we've got a nice even step of the different values. Again, this I could go ahead and make sure that this line along there, that border is as clean as I can make it. As far as that goes. Again, make sure that this border is nice and clean. There's a little bit of gray, you know, a little bit of a variation at the top. Now some of those there's an illusion to, so I got to be careful that because here's what happens if you do this just right. There will be a natural illusion that this is darker and this gets lighter. But the thing is that's, it's being pushed a little bit more because there is a slight a slight gradation going on here. But anyways, I'm just saying that that will naturally happen. But some of that is because there is an actual gradation. I'm not going to take the extra I could go over this for an extra hour or where the 4 H pencil and take out all of that. But I'm not going to I'm not going to waste your guys time, but that's how you do it. You just keep on working on it. So at this last part, again, you try and keep a little bit in what's called reserve. So for this last part, with this last value, I'm using just my four B now. And I've got a little room to go just, just a bit darker before it starts to get. Because there's a part where if we're not careful, this will start doing shinier and all look darker. Actually started looking lighter. But there's just a little bit more darkness I can add to this. And that will pretty much round this out to give me a full 10 step value scale. With for this, again, for my value scale that I'm creating here. Alright. Now because of the way I've got the lights again, graphite takes and can be hard to photograph. We can have a sheen to it. And there may not be your xin that I'm looking at, but the camera might be picking it up. So some of this I'm going to have to, when I pull up the video, take a look at that. But the idea and this is already starting to shine a little bit. So I have to be careful because again, if you're at the figure at the right angle, this is going to be lighter. And you have to avoid some of that with, with graphite. You want to avoid some of that with graphite. This is a to B. I'm gonna see if I can maybe knock some machine off by using the pencil a little bit. Still get in there and get some of those those crevices out. Now again, if I know that this is not going to be lightened, I can use a little bit more pressure and darken this down. You don't want to prion, want to crank on it though. Because again, if you do that, then it will go really shiny, really fast. And it just won't look darker. It'll actually look lighter. And it will be really hard to look at it because it'll be just so shiny no matter how you look at it. And so you don't wanna, you don't want that when you're, when you're drawing. So again, you want to take it easy on that. So I'm still I'm not going to try to get any darker than that if I did, it's just gonna be self-defeating. And again, hopefully from the camera angle because I can't tell this until I actually, just because of the way graphite is in terms of how, how much sheen there is to it. But this is, this has turned out really quite well. These are actually pretty close to being even steps now. Not all in all, not all of these are equal. Equal meaning that not all flat, there's some that you can have sort, sorts of little patches. I'd have to get in here with a little eraser like this little dark haired or I'll just tap that little bit, fill this in where it's a little bit lighter. Tap this a little bit, a little bit there. Fill this in words a little bit lighter to make it more uniform, but it would take me about an hour to do that. And I'm not gonna make you sit here and watch me do this for another hour. But that's the idea is that if this was like when I was going to keep and I was really one to make sure it was just as nice as I possibly could get it. Well, then I would go ahead and I take the extra time. And I would go ahead and cross hatch everything. In other words, go diagonal this way, diagonal this way. Go this way. And I go top to bottom, make sure every direction is covered so it's a uniform. Each bit was as uniform in its value as I could possibly stand to make it. That's where the real, you know, that's what, that's the real time burner. When I was in our college, they'd make us do like a 20 step value scale. And not only was it ours, I mean, it would take you days to do it because, you know, there was a cascading effect when you start darkening something over another. And it was almost like a dog chasing its own tail in some ways. And I know they were doing, they just don't really get us disciplined and really help us and, and it was helpful. But it was also it haunted your nightmares. You'd be up all night with bloodshot eyes and all this stuff. I'll try and to get your project done for class. And also you keep your scholarship and all that sort of stuff. But it was, it's really good, it's really good for. So again, everyone should do a grayscale or pretty much finished for this for now again, I could come over here and again, there's parts that are a little bit too light or dark that's too dark. That's strange little darkness there. This is kinda blown out that edge. So again, I could take another hour just cleaning it up and make it really super clean. But since this isn't getting published in a book, I'm not going to care that it's, you know, or it's not my own that I'm going to put on the wall or it's not my own that I'm going to use as a I'm not going to worry that much about it, but I'm just saying these take time. If you've never done a grayscale before, good rate is set, it's set aside at least two hours worth of time. We've been recording this for quite some, for quite a bit. And so, and I've been talking courses I'm working at, which slows me down a little bit. But for me to even do a halfway decent value scale, I guess takes me about an hour and a half, sometimes an hour and 40 minutes to push it to the next level like what I was talking about, can take another two hours to get it to where it's really nice. And again, if I was going to clean these up, I would have normally just take these off so I don't have to worry about it. And then peel it off at the end, you get this beautiful clean edges. But if I was going to do it all by hand, well then again, that could take another hour to two hours just to clean the edges all of the way. One of them too. I was trying to try to create a grayscale. And now again, we've got the grayscale going from 10 all the way down to one, and we've got everything in between. So if I'm drawing something, I can start looking at this and go, where is it on this value scale? And i'm, I go All this one is a step five and this one is the step six. And what is this step 5 or what is it, Step 6. And I need to know that if I'm going to be able to, again, start to play with values. And so that with this class, everything we're going to be doing is with value. So we're going to play the game, and so we need to know it and this will help your drawing more than anything else with value. And I tell my students if you're really serious about learning to draw, if you're really serious while learning to use value, do 10 of these in the next six months. Just value scales. It will level you up no matter where you're at if you because again, you're stripping everything away and all you're dealing with a value and craftsmanship and making sure these values are as you know, as uniform as possible. And the better you can do that, the better you can do the advanced stuff. Or, you know, the better you can do like photo realism or hyperreal ASM or even you if you'd meet night and that can be a nice, beautiful tone and some sort of non-objective drawing. You need to be able to control value. You need to be able to control your, your graphite. And that's what this helps us to do. Okay, so go ahead and give this a shot. We went ahead. We laid this out with a with a ruler. It's 1.5 inches wide, it's 10 inches tall. Each of these is one inch high. You know, go ahead and make your own at home. Again, if you take the time this are really revolutionize your drawing. It'll push it to the next level. You'll have much more control than you thought possible the first time you do this. It can be pretty tough experience because you're, you're dealing with how do I get this smoother and how do not use your finger. Don't be using brushes or something like that. Try to deal with just the pencil. Now if it's really, really rough, you may have to create the new, do what we call the nuclear option. Nuclear. And I could get some tissue or a Q-tip or something. But understand the moment that you do that and you're going to have to first off, you're going to go back into it. So you might have to be really aggressive with it or erase it off, patch it up, and then go back in and meticulously with just the pencil. You can't just smear it and leave it that always looks dirty. Never do that. It's terrible for graphite. If you're working with charcoal, that's no problem. Charcoal doesn't care. You could charcoal with a sander, go over a throw some Jessica want to go over that, throw down some oil paint, go over that. It'll look great because charcoal doesn't care. Charcoal looks great no matter what surface you work on, you can work on brick and charcoal look wonderful. Graphite is not that way. It's the high maintenance medium of the art world. And so you have to make sure your papers all nice, that you have a nice point on your pencil. You know that you're not touching it with oily fingers and all. You just have to make sure that you're really taking care of that drawing surface. But anyways, go ahead and do the grayscale. I've really enjoyed our time together. Go ahead and get out there, get more creative. You guys take care now, bye bye.
7. Techniques For Creating Value Gradations: Right, so we're gonna go ahead and explore the next step, which is learning how to create value gradations or what some people might refer to a shading. So we're going to talk about the tips and techniques for creating value gradations. Let's get started. So we're going to get really in close on this one because we're going to go ahead and do what we call a, a figure swing with what's called either a feathered stroke or a tapered stroke. Gradient stroke. There's different names for different terms for it. Essentially it's where you make a stroke, where you place the pencil and then you bring the pencil off and there's a trailing. If you do a write, there's a trailing when you come in as a trailing when you go out and gets lighter. And the way you want to do this, and this is why we're in so close. So we can see this is that we want to, you're going to do a swing to the pencil. And so I still have this Bhutan, Bhutan hand old. This is, This is the tripod grip. So we have this tripod grip. We're going to be using our fingers into a finger swing. But we're in here close swings to the tip. The tip of the pencil is going to come down and touch the paper, and then it's going to come back off the paper. It's kinda like a little airplane coming down, making contact with the paper and then coming back off, taking off again sort of thing. And whenever we make this stroke, you're only doing it on the downstroke. Upstroke is just to place the pencil to go through the motions again. So I like the first fingers framework is leave the pencil there and we scoot back and forth. With this one. We're going to be lifting the pencil each time. And it takes a little getting used to this as well. I had someone that had told me this after I'd been in the industry for a few years who had commented out on how horrible my technique was and then showed me this and he really helped her abilities are really helps. Your, your drawings go to that next level. And so we really want to learn this. It does take, even when I do this every time we do this to all five minutes, just a warm up and I'm know what it was. Was we doing? So it's not it's the first time we do it. It can be kinda strange. But again, we're looking at, I'll move down here a little further. But we're looking for when we do this to get that tapering. Okay? And by doing that, if we do it right, we'll get a taper on the end, on both ends. This is tapering here, not doing such a good job up here. But again, it's going to, we're going to warm up. So I'm gonna go ahead and again, I'm coming down, placing it, making the stroke and then coming back off the paper. So again, we're trying to make an even tone here. We're not trying to do gradations were just trying to make even steps of value where we get again a little bit of that. And maybe I can, I've got I've got a it's worn a little bit of a tip on this side. So let's see if we can be a little bit clearer about what's happening here. If I, if I push too hard though again, it kind of destroys this this mark. We have to, we have to use a light touch once again to do this tapered stroke. It's a little bit tapering here, a little bit here. And so it's going to take practice. And I can feel when I finally want my hand warms up to it because again, I can see a tapering here and see a tapering there. We've warmed up. And again, this is something that I have to warm up every day when I, when I, when I start do this because it's really, it's really about control. And when we're, when we're using this tapered stroke, it's again where we want more control over our values. We only create this on the down-stroke. I'm bringing the stroke down, touching it, bringing it back off. We instruct down touching it coming off. And that's how we're creating this tapered stroke. And again, only on the downstroke, I only make this on the downstroke. And this is, again, other, other people are teaching this. This isn't something that, you know, I don't claim to be some genius. This is just something that was passed down. Like so many traditions in art. It was passed down. It's not because I have any great, vast knowledge or some super humanly talented kind of thing. It's none of that, It's just being taught by people who know and they show you and you show others. And I, tradition is born sort of thing. So again, we have this, again, we have this tapered stroke that's happening is a little darker here in the middle, a little lighter on the ends. And that's what we're looking for, is just a tapered stroke. We can also do gradations. And with gradations, I could do it with either a risk swing or a elbows swing or what have you. I could do it with a regular fingers wing and I can do with a tapered strains, a tapered stroke or a feathered stroke, or a great aided stroke, whichever one you're using. But to do the, the value gradations, what we're gonna do for this is we're gonna go ahead and we're going to start by leaving our pencil. We're not making it darker. By pressing harder, it's getting darker because I'm going back over the same place over and over again and I'm not using very much pressure. Especially not in the beginning because the more pressure you use, the more you can destroy your paper. And we don't want that. So I'm using very little pressure on this. And this also helps. I've got this tape now you can't see this because the paper goes outside, but this is taped on a board. That harder surface underneath allows the user to get that dark line. So now it's as dark as it can go. It's not getting any darker without me making the pressure harder and I don't want to do that. So what I'm gonna do now is I'm going to come away from that edge. And we're going to bring this out as far as I want. I'm gonna try to bring this out enough and I'm trying to make it as light as I can. This again is a for B pencil. I'm using the four B pencil so you can count it so you can see what's happening. So you actually see the value. Got a little space between the lines right there. Get that corrected. Okay. So I'm just going to come on here trying to make it as light as I can possibly go with this dark console. Okay. So I try I made this dark and I wanted just to kinda of a straight tone. There's a little bit of a kind of a darker line right here that's actually a flaw in the paper. And then if I have some like that, I just get my little eraser with a little, you know, little tip on your race, your kneaded eraser and just pick that up. And it's not a big deal. So we started here, built it up for the week, came out this far. Okay, well, we're going to do next is I'm going to start at the darkest part, which is here again, and we're going to come out half as far halfway. Okay? So I want to start with the darkest part. And I will come out only about halfway. Now when I do this, this is going to look like doesn't really upgradation. Yeah, it almost looks like Neapolitan Ice Cream, three different colors, and I'll chocolate, strawberry vanilla or something. It's not quite upgradation yet. That's fine. We're going to start again, darkest part and I'm going to come in, come out half as far again or in other words, one-quarter of the way thereabouts. This isn't like, you know, where I'm measuring it. It's just guessing. That's about a quarter of the way. No big thing. I'm going to come out a quarter of the ways. Okay? And I can do this with any pencil again, I can do this with any type of swaying, whether it be a finger swing or a risk swing or an elbow swing, any of them. You can create gradations this way. I'm going to go ahead and start again at the darkest part, normally come in just a little bit, or in other words, about an eighth of the way. So when I start the darkest part and I'm going to come out just a little bit. And then what I'm gonna do is I'm gonna take this and I'm going to go over it, over the whole area one last time. Very soft, very, you know, the lightest value I can. And by doing this, I've also got a gradation starting now I do have a word, it's kinda lighter here. Is more of a variation coming up this way, more immigration coming up that way. But that happens, you just come back into this area. This area right here was this little sort of circle. And you're going to go ahead and work that area for just a minute. Okay. You're going to stay there. You're gonna go ahead and come out. You know, about looks like this is about a third of the way started the darkest part come out and again, just about a quarter, sorry, the darkest part come out just about an eighth. And we can go ahead and get these areas. Same thing here. There's an area right there. So when I started overhearing, come out again about how maybe it's closer to a fourth of the way. So at the darkest part, come out just a little bit, come out just a little bit less. And again, now we've got a gradation. And it's again, we've got some some patches here. Again, there's sometimes you'll get this where you've got these opening. It looks like a little circle there or sometimes it's a square or sometimes it's some sort of alpha numeric shape, but letter or a number. And we can just go in there and fill those in so that we can make the gradation look better and better, better. No one says you can't do that. But we haven't altered the way we're doing this. We're just now we're kind of doing almost call this tree arch like the patching someone up and, uh. The first aid station or something. But now we've got a nice gradation. Now sometimes I'll have people that will be like, Well, why can't I just do a gradation where I start and I press hard and then I press a little sit and then I press a little and I press a little less and less and less and less and less and less and less and less and less. Why KID gradations that way? Well, you can degradations that way. However, if you look at this one versus this one, this one looks better. All those layers are going to make the gradation look better. So this will always look better than this. Now I could certainly go over that, you know, several times and get it to look better by layering. I'm I still we go into the whole concept. Halfway quarter of the way a to the way, bring a value over the whole thing to tie it all together. There will still be the same the same process that I went through here. But the reason we don't do this as the second reason we don't do this. This one that will give us a better result. But also I was pushing harder and I was actually carving into the paper. I was pushing too hard. Here at the end. The moment I press too hard there, there's no getting that out. I can't erase that. And whereas this because of the way I did it, because the pressure was very light. I can erase even in the darkest parts all the way back to white paper. If I decided that I didn't need the white paper will then later on you could go ahead and press a little harder and really get some, some Richard arcs out of it. But you still have to be careful because if you, if you start abusing your paper and carving lines, you're able to see those engraved lines and they are not pleasant and they will destroy your drawing, especially if you're trying to do something like realism or photo realism or hyperreal ism, you really have to respect your paper. Now there's another way of doing it with this type of a value gradation. We're starting at a certain place and stopping in a certain place. And again, we started this by the dark line first and then coming out as far as we wanted to go in and stopping. There's another way of doing this where we flip it, we invert it, we do the inverse. And so what we would do is we wanna do it this way and just keep pushing out. And I know I've got all these little bits of value here, so they're kind of in the way, but I could keep pushing this all the way across a piece of paper if I wanted to. And with this, you just start the darkest part. Come out a little ways. Start with the darkest part. This be running to catch on to this real quick, because it's the same thing, it's just the reverse. Come out a little further and start the darkest part. Come out a little further. I got a little bit of a line there. I need to go ahead and fill that in. It happens to everybody. It's just that the professional job no. Fill that in and then they move on. Start the darkest part, come out Livermore, start the darkest part, come out a little further. Started the darkest part come out a little further. Star, the darkest part come out a little further. Are you seeing perhaps a pattern emerging? This is what this looks like. So this was out of my, my drawing pad and it looks like I've got insights to line there. It wasn't super D, but those are really bad because they will. Won't take value unless you actually push value until I'm alright, so I want to start off here and come out again. A little further. Start here again, I'm go out and push it out a little further. So again with this, we can just keep pushing out further and further and further. However, something that happens with this is usually you'll get out to a point where there's very little gradation through here. There's more gradation back here. When that happens, what we're gonna do is we're gonna, we're gonna stick around from here, push out a little bit, a little bit here, a little bit more, a little bit more to they're a little bit more to, you know, I mean, we're going to kind of fill this in with an in-between value step that we're kinda missing. So we've come out a little ways, come out a little ways. And my lowest further. Come out a little ways further. Come out a little ways further. Okay. So this has a gradation, but this back here again doesn't have much of gradations from I start at the darkest part, hands very thin through, down through here. So when I start the darkest part and come out just a little bit started a little darkest part can watch little more. Started the darkest part come out just a little bit more. All right. We're going to come out a little bit, just a little bit again because that area hasn't filled in quite yet. So come out just a little bit, come out just a little bit, come up just a little bit more, commodities, little more. So you're just going to keep doing this until again you get a gradation. Now, I actually, I don't know if you noticed when I went from doing it back and forth and now I'm only doing it on the down-stroke. That means I'm doing a feathered stroke. By stroke is the most control you have when you're making gradations. And what will you be using a feather stroke when we are making or creating value on the sphere. Creating value on the cylinder, doing our best to make something fill 3D. So again, I'd been working in this area and now there's a little bit. This is actually a quicker gradation. This is a slower one minutes. The darks are kind of blending out a little, they're creeping out a little slower. They're not getting as light as quickly. And there's times we want that. And so again now we can come over here and I can keep pushing, keep pushing forward. So now I've hit that other value. Course. I guess I could just, I could seem it in here. And we'd never know that that was its own little thing. But the idea is this again, I'm just going to start the darkest bar, come out further, still start at the darkest part. Come out for their stills to start with the darkest part, come out further still, you know, that's, that's the name of the game. And that's how we go. Once again, we have this area doesn't have much creation to it. So now I'm going to come from here to there and just kinda stick around in this area. Dark and a low, uh, give it a little bit more of a gradation. Make it so it works. I'm also using a tapered stroke. We'll know more control. And I'm layering, I'm layering, I'm layering. There's another little hole in the paper right there. Okay, Now it's gone. Now. And in this particular class, we want to learn how to do most of our values with our pencil. Again, there's a little bit, I want this as all the same. Now I want this to be a little darker so. Come from the darkest part and come halfway through this area. So that's the darkest part. Come out halfway through that area. So again, now we're extending that gradation out. Now again, there's little bit of an art to migration, so it's just naturally some that's happening in the paper. Let's hope it's not a fingerprint. That would not be a good thing. But I'm not too much on this, but if this was a drawing, it would that would not be, you know, I'd have to start from scratch is they'd say with a clean piece of paper. But again, I'm just making this gradation coming out, making this creation coming out. And now I'm starting to stick around a low areas that are a little refer to try to try to blend that are not blend them but well, to fill them in so that they blend in. Now sometimes people will have been who have taken classes where they use lots of stamps with their graphite or our blending tools in the beginning, I don't want you to use any blending tools. As you get more to be a more competent, experienced, beginner, intermediate, and advanced artist. With graphite, we will only introduce induce using brushes. And only at certain times most of the time is going to be done with the actual pencil. And the reason why is that the moment you start smearing this around, it shoves that graphite deep into the paper and it goes flat. It looks like it's looking fillings dirty and smudgy. And and so and that's also why we only use stamps. They give that big, they grind the graphite and once the graphite goes into the paper, it loses its luster, it loses its silvery quality, and it just starts to look like dirt. And so instead we'll try to use the pencil. And even if I blend with a, with a, with a brush or something, I will always go back over it with a pencil because again, we've kinda shoved some of that graphite down into the surface of the paper. So now we have this gradation. We have a gradation in this way, integration this way, this is a quicker gradation going from darker, lighter, much quicker. This is a slower gradation and it's just by getting used to Larry and going over different areas. And that's how we're gonna make our value in this class. And again, I could do this with, again, I was using a finger swing. We could do the same thing over here again using a Eris swing. Just wait till I build that up and then I'm gonna come out a little bit. And I'm going to build that up and that'll come out a little bit further. And I'm going to build that up and then I'm gonna come down a little bit further still. And whoops, I got kind of a line there, but so that's what we were doing just a moment ago. This type of gradation. I'm moving a little fast on this, but I think you get the idea of how we're doing this and that, and you know, it's what we want. It's, it's how, again, I'm used to doing that with a risk swaying. I could deal with a normal finger swaying like I started. I could deal with a tapered stroke. And I could also do it with an elbow swing a much larger area. Again, you would just stay there till you built up. The words. By staying there longer gets darker. And then you're gonna come out a little bit. And then you start over here, works darker. And then you're gonna come out a little bit more. And you start here where it's darker and then you come out a little bit more and you start again where it's darker. And you're gonna come out a little bit further. And now this is again the one we did here where where you're kind of creeping further and further and further out each time. Usually if I'm doing a rough N, If only do a gradation, that's the easier one to control when you're a little looser. If you're more controlled, sometimes I'll pick this one over that one just because, again, if I've got an area where this value has to stop abruptly, I'll do the one where I come all the way out to here and then I'll start over here halfway, quarter of the way, eighth of a way. Whereas this one I get I can just keep pushing it out. So it just depends on what, you know, what I'm actually putting value on. Talk more about that later, but these are value gradations. And so what I want you to do is I want you to try value gradations with. I want you to use your, your fingers swing, your elbow, swing, risk swing. And your, your, your tapered a great aided stroke or feathered stroke, whichever there's, there's different names that you'll hear. Hear people kinda call it. But go ahead and use those and do gradations with each pencil you've got. And again, you'll start because every pencil controls differently. And again, I did, I used a for B, so you could see it much more easily. If I used a for H, it would be so light that the camera wouldn't even hardly pick it up. But this is great for you to, to learn to control. Because the better you can control your values, the better your finished drawings will be. All right. So we're going to come back. We're talking, of course more about value and, but go ahead and practice this. Keep at it, keep it up. The more you do it, the better you'll be. All right, Take care.
8. What Are Form Shadows Anyways?: So the great part about this class is once we've talked about the techniques, once we've talked about the value scale, what those 10 value steps and all that good stuff. We're going to go ahead and explore form shadows. We're going to go over what form shadows are and how to look for them, and what techniques do we use and how that will then be able to help us create drawings that feel once again like they have volume, like they have formed structure and have that three-dimensional quality that we want in our drawings. Let's get started and we are studying about light on basic core shapes are formed shadows as we call them. And so we've got the, we've got here is you've got a pyramid. We've got the cylinder, the sphere, the cube, and we have the cone. And these are the common shapes that are, you know, many things are built from, whether it be a, a pair. And this pair is basically just a spherical shape with a cone that's had the, the end chopped off. Or whether it be something like this, a little bit more fanciful. But again, we still have, this is more of an egg shape, but again it's round. And then we have this turned and twisted, a cylinder on there. And then of course we have the little fins on here that are really like triangles with little bit of dimension on service account like wedges. And of course we've got the warts, but these are still these basic shapes these warts are again, they're a little bit like in some places, other ones are spherical, things like that. If we have, we have cars that are basic, very much conform to the, the box. As cityscapes houses, bicycles, anything that has a definite right side, left side, top and bottom. You're going to develop that from the box. So or a box and, or the, the cube. But of course we take cubes and stack them side-by-side. We've got a box. So if we know how to create form shadows on the simple objects will be more apt to create things with dimension no matter what we're drawing. So if I don't understand form showers and I'm trying to draw a tree. Trees are just trunking cylinder systems. And again, cars are just boxes. And we just talked about the fruit where we have cones and again, cylinders and all kinds of good stuff. I have certain objects like this tequila bottle. And again, this is basically a box that's a rounded box, but it's a box on the less, on top of that box sits a rounded pyramid. And then up here we have a cylinder and a cylinder and a sphere. And again, that little part here is essentially again another cylinder. So if we know how to create the values on area will help us to draw this this glass bottle. Now, with glass, we have other things going on with this stuff. It's opaque, so we only have to deal with the form shadows. With this, we have formed taus plus we have to deal with translucency, plus we have to deal with. Reflectiveness and those three properties make it far more challenging. But it's still the idea that the form shadows are still wrapping that glass. So again, form shadows are very, very important. You got this little chunk out here. Maybe we can turn this a little bit so it doesn't look quite so bad. But so with our, we're gonna talk about these different, again, these different forms and the shadows that are, that are landing on them and so forth and so on. So I've got basically a light. The light's coming in from this direction. As far as that goes, this as my little pointer. But the light's coming in slightly at this direction. And I've got one light source. Now we have what are called direct light. This would be the direct light source and then I also have went light coming through the windows. There might be lights on in the other parts of the room, you know, coming into the shades. And there's light reflecting around the room. There's what's called an indirect light sources. So the direct light source would be something that's shining right on the object. And the indirect light is all the other light in the room. You only want, you only want one light source. If you're, especially if you're a beginning artists, if you have two direct light sources, it's pretty tough to deal with because your object loses form. And then if you have multiple direct light sources, it's going to flatten out like a pancake. So the more that you can have 1 of view or this one light source, the more clear the objects will be. If you muddle it up with a bunch of light sources, again, everything will go flat. So let's go ahead and talk about the form shadows. Now, with, with flat objects like the, like the pyramid or this Q, we have five different types of form shadows and for objects that are round or Vicks. But Let's talk about the form shows. And we're going to have basically light side versus shadow side. We're going to tell you about the sphere first. And for those of you that are in the drawing class will have you draw the sphere and the, and the cube. And I'm going, I'm sending you a picture so that you can try to sit down and draw that as, as well as you possibly can. But we have a base of the light side and dark side and everything here is a light sand dark side lights I Dark Side, light side, dark side. And so everything has a light side or a dark side. After that, we then have formed cells that breakdown to either five or six. Now if it's round, it has six. So this is round, this round, this is around these mounded little folds. So if I have a fold over here, this little fold will have six types of form shadows. If we have this one back here again, there's six different types of form shadows because again it's, it's mounted or in other words, it's rounded than that to be perfectly round, it just has to be round, round alike. So you know, whether it's, you know, like these mountain little folds again, that you'll get here. This would have six warm shadows on this little mound right through there. Anything that's round, it's going to have six warm shadows or round or round like, and then if it's flat planes like the cube, it's only going to have one of five. So again on this, on our little sphere here, we have again where the light is hitting it directly over here. We're going to take, if you take your eyes to look for values, and I should talk about that right now. To look for values, you take your eyes out of focus. It's called squinting. And people always talking about, hey, squint, squint, squint whenever you're in an art class. And so and it's, it's, it's good idea and really helps. So over here is going to be where the light hits this directly and it's going to be the lightest part of our sphere. Now it's actually kind of right about here, because here it starts to get darker as it wraps around the corner. But right around here is the lightest or the direct light that's hitting it. You might say, well that's a little lighter over here. Well, that's something else entirely. And we'll talk about that in a minute. But over here is what we call our light values, okay? Or light tones. And we can actually see this thing wrap around there because it's round, right? And the shadow, we look at that shadow, it's not the same value all the way around because light effects, and that's what form shadows are. It's that light reveals the form of the object. If I turned out the light, everything goes a whole lot more flat. There's still some value on them, but it's much more flat. So we use light to create the illusion of depth. So again, we have our light values is this wraps around and turns away from the light, it goes darker into what are called our middle value. So we have light values here, sometimes called the light tones. And then we have our middle values over here, or sometimes called the mid-tones. Now with the art unfortunate, there's no standard. So you could be in a place where they're using the proper Italian. You can, there's places where they'll break it down, not into six form shadows, but 12 others will break it down into nine. If you get all of the six of these and we'll tell you about though the others will take care of themselves. So we're gonna go over here when Sarah, we have our light values and it comes over here and our middle values, and then we have a darker side of the middle values. Midwives have two sides. They have a light side and a darker side. So we have light values, middle values, we're looking for three. What's the third? By the way, middle values are also sometimes called mid-tones. Middle values are also sometimes referred to as half-tones. Halfway in the middle tone means value. So middle values, mid-tones, halftones, it's all the same place. But this right here where it's even lighter, That's our highlight. Now our highlight is very diffused because this is paper, it's fuzzy. It's made out of little, little fibers. If something is really slick like this porcelain glass, it's going to have really bright, very defined highlights or as something that's not really shiny like the cloth. Now this is probably polyester or something that's plus year some because it has a sheen to it. But so if it was cotton cloth, that would be even flatter. What happens is when it's, when it's fuzzy, the highlight melts into the light values. So this looks like the lightest. So when I'm saying like vise, we might be like, Hey, wait a minute, That right there is lighter, I can say it. Whoops, right about here. That's the highlight and really diffuse and melting into the. The light values and enter the middle values. So we have light values, middle values and highlight those are three. And then once we hit the shadow where the shadow and the lightened shadow meet, this is the darkest place where the shadow is. And it's called a core shadow. It's only on things that around. And so if I look over here, there's like this line going down here on that fold. That's the core shadow. If we look on this right hip is a line that seems to be going down there. That's a core shadow. There's a line that seems to be appearing right there. That's a core shadow. Okay. So and it's very clear in her because I'm bouncing light into it. So we have more reflected light to really indicate that core shadow on that cone. And core shadows and make something feel around. If you don't have a core shadow on around object, it will feel flat. Okay, so we're always look for the core shadow and the core shadow is the darkest part of the form shadow family. So we have the darkest which is the core shadows. As we move away from the core shadows, we get into what are called the dark tones or the dark values. And the dark values are lighter than the core shadow. Okay? Then we have, we're gets lighter still is reflected light. We have little bit of reflected light up here, which is the lightest and the shadows. We have a little bit of reflected light down here. Again, reflected light is the lightest part of the shadows over here we have reflected light on the cone. Again, very, very, it looks very, very light. But always remember that the, that the reflected light as part of the shadow family, they are darker than anything and the lights. So everything the lights are lighter than anything in the shadows. Everything and the shadows are darker than anything and the lights. Now sometimes this reflected light can be very bright and be deceiving. And we'll make it to light. This looks really light, but if I actually pulled this little chunk like in Photoshop over here into the light, it would immediately look like a blemish, like a dark spot. And that's because this looks so light because it's next to the cache shadow. It's next to the core shadow. It's next to the dark tones. It looks lighter than what it actually is. It's an illusion. And we, as artists use illusions all the time. So again, we have light values, we have highlight, we have middle values, light but minimize and darker middle values. We then hit the core shadow, we then have our dark values. Now dark values are important because they are kind of like the middle values of the shadow family. So they have a darker side and a lighter side. These dark values are or darker here, getting lighter as they come over there. So again, look for those nuances. Take your eyes out of focus to look for form shadows. When you take your eyes out of focus, you can see value very, very clearly. If you put your eyes in-focus, you get distracted by details and you see the form shadows less clearly. So that's all six. Now there's one thing I haven't talked about because we're only talking about form shadows. We haven't talked about cache shadow and we're going to, we're still not going to talk about that just yet because we want to talk about flat objects. So flat objects like this, q have only five form shadows. They have a light value is here, the middle value is here, the dark value is here, that's three. Then it gets a little bit lighter. This gets, goes from darker, getting lighter. If you squint, you can see that getting lighter as it moves away from this corner and then it starts to get darker again. That getting lighter is, is the reflected light, so that's four. And then a highlight would be anything along this edge where the light value meets the middle value along this edge, that's where you'd see a highlight. So again, we have light values, highlight middle values, dark values, reflected light. And that's our five form shadows on a flat plane object. Now, this pyramid, we can't see anything but two planes. We'd see a light side, we can see a shadow side. So we're not going to be able to see if we saw three sides. We might be able to sit, you know, we'd see the middle values. But right now all I can see what looks to be the light. Actually this over here is on light, nice, so we can't see the light values, we can see the middle values. But if I align my, I've just right, I could actually see three sides and I could see, all right, yeah, The light value, the middle value, the dark value. But we can't see that from our view. We can only see two sides. So we have the middle value which is still on the lights or stoma light, and then we have our shadow side. So we have middle value, we have dark value, we have reflected light, that's three. And then if we look here, there's going to be again, a little bit of a highlight along this edge before it turns the corner. Middle value highlights dark value reflected light. So again, I still have the light side by, just can't see it. It's over here around the corner. So anything that's there might be there's no never more than five form shadows. So if I doesn't matter if it has six sides like a queue or whether it has five sides. I can't see of course the underside, but this has 54 round here and then it sits on the fifth. Or whether it's a 52 faceted ring where it's got 52 different flat planes. You never have more than five form shadows. Now if you had something that's 52 facets, you might start including, well, we got the light dark values and the darker dark values, and we have the light middle values and the dark middle values. But the idea is, is that we can go ahead and simplify them into one of five. So no matter what fast that you're looking at, it's going to be one of those five. If we wanted to include the light middle values and the, and the dark middle virus and the dark middle, the dark dark values and the light bar guys. Well, you might say seven, but the idea is, again, you can go ahead and simplify it into one of five. And it's really the way those, those 50 planes abut one another, that makes them look lighter or darker. So that's the biggest thing and you'd get technical one technically. Yeah, there's 40 thousand different values out there that we've been able to detect with cameras. But our eyes for the most part can't see more than most people can't see beyond 15 steps of value from light all the way to black. And so we're talking about simplifications. And if you simplify something, it's actually more clear. And so that's why we use the 10 step value scale. But so we again have our light values, middle values, dark values highlight here, reflected light down here. And that's our form shadows. Now we haven't talked about cache shadow. And the reason why is we taught, we talked about cash-out as differently, the form shadows if all things are equal. So if this value here and it's close, It's not the exact same. This box a little darker, but this value and this value of the cube is almost the same. And so if we look at the cache shadow, and then if we look at the core shadow, which is supposed to be the darkest part, will say, Hey, the cache shadows are always darker than form shadows. And it may not pick it up in the camera too well, because again, cameras, they, they will push things darker or lighter. They, they, they tried to equal the values that a little bit. They tried. There's a term for it but escapes me right now. But anyways, and we'll see what happens. This will darken them what it is with your eyes. Your eyes can see more value than the camera. So this looks darker and this looks almost the same value. But looking at this in my, with my eyes here, this is actually lighter and this actually hears darker. So the cool part is when we're looking at stuff, we learned a look to see. And we can actually think it's even, make things even more accurate than a camera. Because cameras are more limited, more limited than our own eyes. But something about cash as the arc darker than form shots. So if we look at the cast shadow right here, you only see a little bit of it right here, but that cache shadow right there is darker than the form shadow over here. If we look at this cast shadow on the, over here on the cylinder again, this cast shadow here is darker than the form shadow over here. And it's a little dark in the form shadow here again in the camera. These are probably the exact same, but they are not. There's a difference between the two. So again, these are formed shadows. We're going to go ahead and look for form shadows. Either light values, middle values highlight core shadow, dark tones, reflected light if it's round. So again, if this was here would be like light tones, middle value, the highlights kind of again dissolving into the light values. And it's, so it's right here as the highlights. So you have light values, highlight middle value, dark middle value, a core shadow, dark tones, lighter dark tones, and then reflected light. And of course, don't forget the cache shadow. So whenever we're looking at an object again, I'm going to take my eyes and a focus and we see light values, highlight light middle values, dark middle values, core shadow, dark, dark, dark tones or the darker dark tones, the lighter dark tones, and then the reflected light right on the edge. You're always trying to identify all the different types of form shadows. One last thing we'll talk about is people will talk about it because it's usually in the cache shadow. And that is what I call occlusion shadows when something touches something else, There's little line here. It's a very dark sort of lining that's basically a shadow where this is touching the wood, touches the cloth. It's called an occlusion shadow. Right here. Again, we're the or it's where the cube touches the cloth that again, that's an occlusion shadow. Occlusion. Shadow. Occlusion, shadow. Occlusion shadow. If you're looking at my fingers and you can see those, you know, the folds or the, you know, the, the little lines, you know, where they touch. Those are occlusion shadows. So that's again which just shows that something is touching. If if I took something off of here and like this has an occlusion shadow right down here. If I took this off, no longer has an occlusion shadow and it seems to float. So if I don't have an occlusion shadow, it won't feel like it's touching something that's free, won't feel like it's, it's anchored or touching the cube. So occlusion shadows look for those as well. They're really, really important. So this has been about form shadows and I appreciate your watching and you guys have a great day in and be more creative. Bye bye. Now.
9. Let's Start With Shading The Sphere: All right, So today we're gonna go ahead and learn about putting value on a sphere. We're going to talk about all the different form shadows. And we're going to create a sphere that has volume and depth. Let's get started. All right, welcome back. So we're going to go ahead and we're gonna deal with form shadows. We're gonna do a little drawing of a sphere using those form shadows. If you, if the word form shadows does not make a lot of sense to you, go ahead and go back, take a look at the video, watch it, try to internalize those concepts, then come on back and we'll work on the drawing in terms of we're going to be using graphite. So like I've talked about in the past, we're going to be using one of five pencils. We have a 4 H pencil, a to H pencil, an HB pencil, a to B pencil, and a for B pencil. And there's nothing special about this pencil. It's just that it's getting a little short. So I've got it in an extender. So I just want to make sure when understands that there's nothing special about that that's extended to make keep the pencil longer. So again, for H2, H, H B to B, for B, that's all the graphite pencils we're gonna be using for this class. And so we're going to be using those five. I'm going to show you how to use them to create form shadows. Again that we've talked about, the form shadows. And we're going to go ahead and put these aside. Now I've also got a kneaded eraser. Again, the kneaded eraser is a great race are and that you can pull apart, put it back together and needed like bread dough. And we can use it to lighten stuff or tap on stuff, pull stuff out. So we're going to have a kneaded eraser within reaching distance. Why we work on this. And what we're going to do is we're going to create a drawing With form shadows. So I wanted to talk about this real quick. This looks a little bit like a beach ball. And I want it to look that way in case he was like, wait a minute. The idea is that when we start our drawing of a sphere, we're going to keep everything separated into their particular families. This almost looks like it could be cut out of paper. These are very fairly sharp edges in most places, not all places, but it's a little softer hair, a little sharper down air. But we should be able to look at this. Amelie go okay, that's light value. This is middle value, both label value and darker middle value. This is highlight. This is core shadow. This is dark tone. This is reflected light. And then this over here again, this is supposed to be the object picking up its own cache shadow. And this is the cash out of this casting on the surface. And again, the cache shadow is not going to have reflected light. It's going to get darker as it gets closer to the object, it gets lighter as it goes away. So sometimes people put cash-out and they just make them nice flat shadows and they're not, they have some They, they have reflected light, they do get lighter, they get darker. There's, there's these variations. Now where this object touches. There is what we call a an occlusion shadow. Occlusion shadow. And again, the occlusion shadows were things touch so and they are dark because they touch. So if you look at these lines, you can see through my fingers or even the wrinkles of the fingers and in my in my skin and you know, these lines in your hand and all that good stuff. Those are those are occlusion shadows. Okay. And so it's where an object touches on other objects. So with this it's a skin is touching the other scan and where it comes together, there's very little light down there. And so that's your occlusion shadow. This touches the table and so we're touches there be an occlusion shadow. So we want these very, very clean, very crisp, very, very clear. And once we get to this point, all we'd have to do is make these into slight gradations. And then it's going to feel like it has form. It's going to have volume, right? It's going to be 3D is somebody would say. Because what creates the illusion of 3D is the shadows. The light values, the middle values the highlight, the core shadow, the dark tones reflected light. And because this is completely round, it picks up its own cache shadow. So we're going to, we're going to create these little wedges of form shadow families. And we're gonna do the same thing on our sphere over here. Now the sphere that we have here is, I've drawn a fairly light. Probably just going to barely be able to see it on the camera. But even still, this can't be darker, the outside contour. Other words, outside line can be any darker than my, my light tones. My light tones are going to probably be this dark. So if this edge is darker than that, it's too dark. Because if you see a dark line and then a value next to it, it looks like a cartoon or it looks like something like a graphic poster look. And we don't want that. So I'm taking my kneaded eraser and I'll go ahead and I'm making it lighter on the edge where it's going to be those, those light tones. And I have this, what we call mapped out. So I've got a little sliver crescent for the light tones. So again, this is mounted on both sides, so a crescent for the middle values. I've got a crest over here for reflected light, across over here for reflected light. Crescent here for where it's picking up its own on core shadow, not core channel apartment, where it's picking up its own cast shadow. And then this right here will be this little ribbon would then be the core shadow. Okay? So we've got this all mapped out. And so what we're gonna do is we're going to want to go ahead and we're gonna come back in just a minute. And we're going to start working on this. And we're going to take this to, you know, as as nice officials we can within a reasonable amount of time, usually on a sphere like this, if you haven't done this before, expect to spend a good 40 minutes to an hour on this thing. That's if you haven't done it. And If I'm gonna do a really nice like this one, even though I haven't got the gradations, it would take me about 30 minutes through the gradations. But this is a really nice, well thought out, very nicely controlled sphere. That's all done by building up the pencil graphite on the paper. It hasn't been smeared around or done anything like that. To complete this sphere out. By the time I completed, I probably have two hours and on that. So it takes time. Sometimes people just want stuff to be really done in a hurry and we don't wanna do that. So we're going to go ahead and zoom in on this and then we're gonna get started. Alright, so the first pencil I'm going to use, I've got my HB pencil. Now, these graphite pencils or Kimberly's, you don't have to use Kimberly, you could use staler. You could use any sort of nice graphite, they're staler, there's Prismacolor, there's, there's HDR went, there's, there's other graphite pencils that you could use. But again, I'm just using an HB pencil. And to start this and we want to go ahead and just like for those who did the exercise with the grayscales, this is really just a grayscale on around surface. So we're going to try to, first off, I'm using a risk swing. And I'm trying to keep this as uniform as I possibly can. Now. When I do this again, I'm trying to make this as uniform, so I'm trying to take time. I'm also very aware of that I'm on the clock. So that's the hard part is not to get too sloppy with this because I want to make it go as fast as I can. For those that have their their grayscales with them, we're going to start off with a value that's about a step eight. On that value scale. If you don't quiet, if you're not quite sure where that is, pull up the value scale video and go to where you can see the step eight. You know, of course it's gonna be towards the end or I finished it. But go ahead and look that up so you understand kind of the value that we want to be shooting for. If you've gone ahead and printed off something from the Internet, that's fine. Use that as a guide to figure, to figure out what the value is. But we wanted to step eight over this entire shadow side. Now this won't be the darkest, this will be our starting point. And now it's still won't be dark enough. So sometimes when we start this, especially if we haven't done a lot of value and we're not familiar with the process. You know, sometimes we might be like, Wow, that looks dark and it doesn't, It's just that everything else is so white. There's an illusion of this looks darker than what it actually is. And when we're working there are, again, our eyes will sometimes play tricks on us. And as long as we know that's what's happening. We we don't get, you know, it's not going to get, we're not gonna get too far astray. It's not going to lead us too far astray from what we're wanting to do on the drawing. If we don't know that that's what's going on, then yeah, we can really it can cause some issues. If we're if we're not aware of what are the tricks that our brains are trying to play on us while we are create, creating this drawing. And part of that is just because we can tell value so well and we can associate it so well that sometimes we have to kind of ignore that a little bit because right now it looks far darker because everything else around it is far lighter. And so what's the context? So I've gone over this a couple times now. We try to get this to about a step eight. Even if it was a step 7, that probably be fine because I'll tell you what the step 8 is actually erring on the light side. Now I went ahead and grab another pencil we're going to layer because I don't want it to be too much texture in here. So I'm grabbing a 4 H pencil. And I'm very lightly, very gently going over the value I just put down with my HB pencil. And I'm going over this again to minimize the texture. And it does that because the 4 H pencil being a harder pencil gets deeper into the creases, deeper into the, the texture of the paper just naturally because it's a harder pencil. And it doesn't ride on top as much as the HB pencil because the HB pencil is softer. And so what we're gonna do is we're gonna, it's gonna get a little bit darker as we go over this, using this for each pencil. Now, before I was using a risk swaying and now I'm using the fingers wing. So I'm just trying to have, you know, usually for a rough N will use a little like a risk swing a little more, or an elbow swing a little bit more. If we want a little more control, we'd use a finger swing. So that's all I'm doing. I'm trying to keep it in the lines. And so what I'm trying to keep it in the lines, especially I'm going to be using that fingers swaying because I'll have a little easier time doing it. So that's it. So fingers pointing, fingers, wing fingers. Whenever I keep doing this, using that finger's going to try to again fill this in, make it look more uniform. Again, if I, if I want to, like if I skip down to step 7 on this again, that's not a big deal. If I'm only a step 9, however, that's a problem. That's too light. Unless, you know, it's just for what we're doing is just too light. Now, what I'm trying to do is I'm trying to represent a circle. There's a light. So what I was, you know, I've done a lot of these over the years. And I have props and I use them in my classes when people are here in studio. And what we use is basically a white clay sphere that I, that I made a long time ago. And that's what we're trying to replicate. So the values are going to be black because I'm not doing a cue. Like an enable or something that would be a if I was drawing an a ball from a pool to pool table set of cue balls, it would be really dark. This is not going to be that dark. It's going to have dark places on a. But for the most part, we want this to be a light to lighter gray sphere. And all that means is that the ICU, all who's a number AQ, all the values would be more in the lower part of the gray scale. And the lights would, wouldn't be lighter than maybe a step 7. Step 8, even the highlight. Whereas this, it's supposed to be lighter. It's going to, it's going to be much lighter overall as far as that goes. So I wanted to go ahead and I'm just trying to get this to be again, that step 8, I'm trying to keep it nice and uniform. I'm using light pressure, I'm getting a buildup gently. Try to be I'm not trying to be too much in a hurry. The more I get into a hurry, the bigger the problem will be. So and again, I'm a I'm a left-handed person. So you're right-handed or folk might, you know, of course we're using a different hand than I am. But again, right now I'm still using a figure swing. We're using a tripod grip for that finger swing, which is mostly what you're going to use if you ever do a finger swaying is going to be a tripod grip. Now actually I'm doing a little bit of a feathered stroke. Remember there's a little difference between the, the, the, just the fingers swing. I'm just going back and forth. This however, I'm placing the pencil down and then I'm lifting it back up and I'm only making the marks on the down-stroke. That's a that's a feathered stroke or a tapered stroke because it's called. And the reason I'm doing that as again, it's just going to help. There's a couple of areas where I wanted to lighter on the outside, darker in the middle and I can I can get that to happen much more easily with that tapered stroke. Because when you make a tapered stroke, it's lighter on the outsides and darker in the middle. That again, I'm still using the finger swing on the tapered stroke. If you don't know what the taper or feathered stroke is as two different names. And there's probably a couple of other names genome. But the one thing about art is that there's no standard of definitions. So there's some things that you'll find out how like half a dozen names at all mean the same thing. This could certainly be one of those. But i'm I'm getting to where This is, you know, about that step 8 on the value scale, which is our starting point. I've kind of lost some of my notation for now, but that's okay. So what I'm going to do next is I'm going to go ahead and I'm going to fill in this cache shadow. And the step 8, maybe somewhere around there as well. Then when I want to start with just the four age. So maybe I'll put it down as like a step nine is gonna go far darker. But for right now, I just want to indicate that it's there. I don't want to forget the the cache shadow, so I'll just go ahead and start putting that in. Now again, the I've I've, I've mentioned that when we when we're drawing, It's gonna take time. So go ahead, put your, put your headphones on, put on your favorite Netflix show and get radio, some serious binge-watching. Don't want to put on some music that you like. And again, you can start, go ahead and start drawing. You're going to, you're going to be tip when some time into it. So get comfortable. What I'm gonna do now is I have this 4 H pencil on my eyes will go to the next part. What I wanna do is I want to go ahead and fill this whole area in as lightly as I possibly can now this should be a step nine for the light tones. So again, I'm gonna go ahead and make this, fill this in is light in value as I possibly can, because even if this is white, now this is not going to be a white ball game. This will be a light gray ball or a grade, a light gray sphere. If we want to use the proper jargon, the proper terms, the proper words. But if this, even if it was a white ball floating in this white piece of paper, I'd have to have some value behind it to show that this was white. Because if something is white, the reason it looks white is because everything around it has a value that's darker, then the lightest light. If I was going to leave this completely white, the paper was going to stay y, well then I have to do something else. I actually have to start to darken the lights just a little bit to show that it's not the same value as the paper. Because if it is, then we lose all the depth. We lose the illusion. It all goes flat. And suddenly it's again, it doesn't have making much sense. So we would call that a, a figure ground, this being the figure on what's around a beam, the ground figure, ground relationship. That figures into some, somewhat of the ideas are just stalled. Visual gestalt theory. And that just alters just the way that we interpret things by the way we see. And that was very big in the 20th century, early 20th century, late, late nineteenth-century. A0 here at near as much these days because of the modern art movement. But it's an important concept because it's about how we process visual stimulus. That's how we process images. It's how we see shapes when we start to, our brand starts to make connections based on our experiences. And so just stalled. That's what the coenzyme a just all this. It was the science or the philosophy of the way the brain sees, translates and, you know, internalizes shapes, how it perceives them, what kind of connections are made. And that's why you see some of these images where you have, well, let's see. It's either the, it's either the young woman or the old woman, you know, and it's the same drawing or if you look at one, it's, it's It's like a vase. But if you look at it again, it starts to look like two people looking at one another. So it's the idea with that, with those people that we're recruiting those illusions, they were very interested in Gestalt. They're very interested in the way the eye translates and C shapes. And they start playing visual, optical games, optical illusions by understanding more and more how the brain perceives shape. And it's necessary if you're going to play those games. Well, I mean, there's, there's some that are really quite incredible what they were able to do. There's one, there's some portrait, a series of portraits that I really liked. And I don't know, I don't know when they were made. So it could be that they predate this, but it's still again, the artist was giving a nod of these ideas because he was creating these portraits. And from a distance you go, wow, don't those, those Greylock and portraits. And then as you get closer you realize, no, it's actually a still life of different types of fruit and different types of vegetables stacked and placed in such a way that they look the shapes line up and look like a portrait. Pretty amazing stuff. And again, I thought that was the whole, that whole dichotomy or the whole idea is it's, it's, it's, it's, it's festivals. Know it's a portrait, know it's vegetables. No, it's the whole idea that it has a duality based on how we look at it and how far away we are from it, and all these different sorts of things. So someone just having fun playing the games with the visual imagery. You know, and it's, it's, it's a very rich game. I mean, it's very wonderful to see and look at those and study them. And, and, you know, we're very aware that the artist is playing a game with us. So to somewhere where it's telling us a story and we're trying to decipher the story or we're just along for the ride because the story looks like a whole lot of fun. Or maybe the story reminds us of a time in our lives or a place that we visited, or an emotional experience that we commonly share with the artist, whatever it is. That's what makes art, you know, interesting and fun. That's what makes art compelling. It's probably a good word for that. So again, I'm using this for H pencil. And now I'm filling in the shape for just the middle values. And I need this middle value shape to be just dark enough so that it's darker than the light values. Again, we're going to have someone's going to begin to look a little bit like a volleyball. Okay? And that's what we want. We want to have to be able to say very quickly, oh, that's light tone. Oh, that's middle tone, all that's highlighted. And we want to be able to distinguish those very, very quickly. The better we can. The more that this will look like a 3D object. There was a, an exercise I would have us do in art school. And they would give us like it was the beginning of design class, I believe when they did this. But they would give you 10 pieces of paper, black, white and everything and eight steps of gray in between. And you were supposed to create a image of the sphere by cutting out the proper values in the proper place. And it was a really fun assignment. And the best part about the assignment was if you did it right from the back of the room, it looked like it had depth that looked like it had transitions that it did not have because it was so if you did it right, had the right shapes of the right value. The gradations took care of themselves. The I would soften and all of a sudden or the blur. And you'd start to have what felt like gradations. And it was just it was it was very tedious. Don't get me wrong, but it was still a fabulous assignment because it really taught you to that it's all about the shapes, It's all about the values. It's not about, you know, how well you're doing your gradations if you get the values right in the shapes, right? Well then that the rest kinda takes care of itself. And so that's what we're going to start to do with this. Now this highlights gotten a little bit obscured. So I'm going to get my kneaded eraser, pinch out a little beak. And we're going to and I'm trying to get out of the waste and kinda see what I'm doing, but I'm lifting up the graphite off of there. To create that highlight. Now again, this is very light, very ghostly. And that's okay. We wanted to we want it to be light. We don't want it to be dark just yet. We're going to sneak up on the values as we do this. But we're going to still have the same relationships. Even when I darken this, this will stay darker, that will stay lighter. So there's a, there's a place. I still think it has a couple of areas where the light values in the middle of eyes don't quite like this. Neither be maybe a little stronger. I know again, this is still kind of light. So when I say stronger, feel like hey Harley thing there. So the aisle, but we still wanted to, again have that difference of value. Now there's a limited value in a dark mode of Iowa, this is closer to the light will be lighter, it gets darker as it goes away. So over here as it gets closer to, there'd be another arc essentially. And I'm just going to darken it just a little bit right through there for dark middle values. Okay? All right, So again, it's still on the light side. But now we're gonna go back to the dark side now before going back into the dark side with a darker pencil. And we take this 4 H pencil. And I'm going to go ahead and put a layer over the entire area to again, just a dork and adjust a little bit. And the reason we want to do that is because if we don't, if this starts to get darker, darker than this, that's wrong because the shadow should always be darker than the light family. Now I'm using, I'm kinda know, I was gonna say side to side, but obviously I've got my hand a little more comfortable angle, so it's kind of a 45. But we are going to want to that's what we wanna do here is we want some of that to happen. Now for this next part, I'm going to, I've got an HB pencil and I'm going to darken for just the just the middle and the middle values and the shadows which we call the dark tones. It's just like the middle value is except in the shadow family that has a light and it has a dark side. So I'm gonna go ahead and leave the reflected light lighter. And I'm going to darken everything else. For those dark tones are rounded. So this starts to look lighter. And the reason it's gonna look gliders because everything around us going darker. Okay. So again, we're trying to I'm still using, I haven't gone to gradations yet. There's gonna be a time where I will, but not yet. Now the reflects a lot I think needs a spread out. I think I chopped into it just a bit. So again, I'm going to take my little eraser, I'm going to tap it along that edge just a bit to make it a little wider as it comes out. And then I'm going to grab that HB. I grabbed the four age, that was not the pencil I wanted. That's all right. I grab the pencil I wanted this is the HB. Again, I'm back to just doing a regular finger swing and now attracts the transitions into doing a feathered stroke. So remember one you're going, you're making marks going both directions, the other, you're making Omar going only one direction. And again, that's what I've sort of transitioned into. As I continue to make the value K. And I think we're going to go in here and we're gonna go ahead and darken this two. We're going to go ahead and grab my HB pencil, which I still have by the way. Now we're just gonna make a soft value going from darker to a little lighter. As it comes out. Little crumble there that almost feels like it's a bit of the eraser, but I can't imagine. Whatever it was. It's gone. That's almost we've got some thunder lightning happening outside. Grabbed the wrong pencil. Well, so you get a little bit a storm movement and sounds like some of the wonderful storms of August. I want to continue to fill in this cache shadow with my HB pencil. Okay. Continue that there. Continue this through here. Go ahead and make a little bit more transition or value. Now. I know I took some time to make this drawing. So I'm going to do some things to help it out. I'm going to put in the occlusion shadow, which again is going to be pretty much the dark as part of this picture, is going to be that occlusion shadow. We also have that cash shadows are darker than the n form shadow. So I'm going to make the cash-out is little bit darker. And relationship to this. For now, because I want to find is I can make this darker, darker, darker. It's no longer going to be dark enough. But for now, again, I'm trying to make just a bit of a transition. And this is going to get letters, it comes out. Alright. Now I'm going to solo this HB pencil. I'm going to go ahead and make the core shadow. The core shadow is the darkest part and I've also changed direction. I think I could wait a little longer to start changing direction. I think right now is fine. I'm going to go ahead and start to follow the contour of this, of this object. It's round so I'm going to try and make little, little strokes. I'm going to merge those strokes. So again, I'm making short little strokes. I'm trying to make them curved and I'm just going ahead and, you know, letting them overlap so I can make it curved by making him, by using, again little. As I swing that pencil is going to have a slight arc to that. And we want those arcs to work with us. As we go ahead and create this, this drawing. It's going to be getting a letter that comes down and we'd darker as it comes up to the top. And this would be the top right, up here, on, on top here. We've got a little ominous thunder back there to give us some background noise, apparently earth-shattering drawing going on here, Bradley. Well, we're just going to keep and now I'm gonna actually start to do a gradation. I want to start to push this out. Using these arc lines are going, I've got an HB pencil. This is not going to be. Remember from the grayscale we talked about how much it takes to dark and dark for graphite. And sometimes there are people that watched like Smith, Smith. And we're not gonna, we're not going to be doing any sort of blending technique. And with graphite, I would encourage you to never, never, never, oh, by the way, never smear using your fingers. You just don't wanna do it. It makes a drawing look very, very choppy. And your oils get everywhere and it just becomes streaky and oily looking and it just does not have a good look. In the beginning, we're going to try to learn how to make gradations using our pencils. And so we're going to be doing the, the harder bit, so to speak. And then we go again, got a little bit more thunder in there. I don't know if you guys can hear that, but it's. Letting us know that a storm was going to cut loose here, produce in most likely. So again, I'm just trying to make a gradation using this HB. I spend more time where I want the strokes to overlap and be darker as I, as I come out, I still am overlap. So overlap in those previous strokes. But I'm using the last pressure. And as I come back, I won't overlap all the way out to the very end. If I fill it with that grid, if I feel that it's already dark enough where I need it to be. If it's like, well, it's dark enough and I don't need to give me the darker. Well, then yeah, I'm not going to I don't want to get darker still. I think this outside is still little way to lie. In fact, not even a little too light, way too light and so on. I'm coming over here and I'm actually going to feel this in a little bit more. Again, we're just barely starting to get the illusion of a 3D quality. It's barely there. It's, it's almost not there because we don't have enough information just yet. And I think this reflected light also needs to get a little darker through here. So we're gonna put a little bit of a gradation on it. Alright. Now, I want to come back in here with my Tooby now I didn't really again, I haven't really gotten there yet. I'm not worried near as much about this one. Is Chris. Keep it as crisp as say that one. But, you know, I could, I could say, all right, well this is going to be my, my core shadow and this is my little ribbon from my core shadow. And, and I can continue to just darken and what's needed for the drawing. And there's nothing wrong with that. But I'm also, I'm also thinking, well, wait a minute, we're going to make this much more. We want to start having gradation. So I'm trying to get at the Australian to push it towards gradations a little bit more. So that we, again, we're going to have just a little bit more of the feeling of the gradation through the wall. I'm drawing this sphere. So I'm gonna go ahead and just continue to some little holes in the values. I'm going to fill those in. And so we would call that tracking. That's where you'll learn all that's that shape is lighter and you just learn to fill it that one shape in until it disappears. There's like a little line here that it's a little lighter, so I just put it in there, told disappears. All right. And again, this is a 2D pencil that I've got here. So it's darker than the HB. I'm still following the form. I'm trying to build up the darkest darks and then start to pull it out and bring it out for the lighter areas. Just like we did for creating gradations. So that's what I'm going to want to do. And again, it's just so with graphite, It's really a lot of the time, it's really been a time. And patients, as I'm building this up, it's getting darker, but it's a slow process. It slowly, slowly, slowly, slowly, slowly getting darker. And that's what we want. But again, you're going to go ahead and turn on your favorite, you know, whatever channel, online channel or your favorite music channel, or pull out some old albums and put them on a listen to own because you're going to be here awhile and that's okay. As long as you understand that it does take time, this art takes time, especially good art. And why wouldn't it, if it didn't take time, if it was just all going to blow this off and whatever alone wouldn't really be worth it. Let's note that people don't go mountain climbing aren't impressed by a little 800 and foot tall hill and ink. And I know you'll be like, oh wow, they're going to be like AG, Let's go find some place to climb. That's just not even the client. Why would I it's it's not a challenge. It's not fun. Why would I, why would I waste my time? And it's the same thing with withdrawing. As we want something that will challenge us. We want something that's going to be difficult. We want something that's going to give us, as the old saying goes or run for our money. So again, i'm, I'm going ahead and i, now, as I'm making these values, I wanna start taking my eyes out of focus as I make these values so I can actually see the value. So I'm not getting distracted by paper texture. Okay? Or that paper texture can be very disconcerting. We don't want to be distracted by that. Okay. All right, so now again, we said up here, there's this, there were the cache shadows picking up its own cash cow. So again, I want to start to put in just an indication of the cache shadow coming around that sphere. Now whenever we're drawing, we want to remember edges. There's always lighter edges against darker edges. That's what creates the idea. So here this suburb of the darker edge, this is the lighter edge. So whenever you have edges where two things meet, one edge is always getting lighter while another edge is getting darker. And it's constantly in flux. So you might have, or this cache shadow comes out here, my beginning, you just a little bit darker. And this has gets lighter. So that's the lighter edges of the darker edge. And then we're, this comes under here. And with this comes, it comes over here. This might be getting slightly lighter as it starts coming in here, this cache shadow. And so again, we just want to be more aware of these edges. Okay? So again, and I'm going to go ahead and I get a TB pencil. And I can almost finish this thing if I just kept using the pencil, I think what we're going to bring the four be in here too, just so it has any means, it has some fun too. It can't be just anybody else em font, all these other, all these other pencils, haven't you? No good to get done. We want that. We wanted to get used as well. So with that, it's also going to enjoy the drawing being used to create the drawing. So I'm going to grab the four B pencil. Now I always start at the darkest part. Whenever we do a gradation chart the darkest part and come out like we were talking about. With this object that's a 3D object is very easy because the darkest part is, at least on this round object, is the CAS department, not the cache shadow, but the core shadow. That's where the lightened dark come together. So with a lightened arc me, this is the darkest part of the form shadows. That's a cash cow. So this would be darker than a form shadow. The form shadows are light tones. Middle value highlight, core shadow, dark tones, reflected light. This is a different type of form, a different type of shadow, and it's a cache shadow. So it, it, it obeys a little different game. Talking about that a little bit, a little bit further in. But we're going to use this for B pencil to again try to get this to create the illusion of depth. What do we want? We want some depth. We want this to have an illusion. We wanted to look 3D and all that good stuff. So again, I want to go, come over here and just continue to create some values over here. And again, I'm say, I'm taking a bit of my time. I don't wanna get too excited with this. I don't want to get my gray hair. I've got some area right there. Seems like I was touching just a little bit too hard with the with the edge and so it creates some lines. And I had to go in there and soften all mob and I'll put it to go on there again, but that's all right. It's just knowing, you know, when that starts to happen, how do I correct that? That's all it is, is how do I make it look better? Okay? So again, this is a for B pencil. I'm continuing to start with the darkest part, come out a little bit. Started the darkest part come out a little bit. So the darkest part come out a little bit. And I just did the same thing over and over and over again. I'm just making a gradation through this for the family. Now, I'm gonna go ahead and grab my HB pencil. Part of this is because some of this is starting to get a lot of texture. And I want to see if I can use the HB pencil. You to fill in some of that texture. I also, there's some areas that are getting darker way to quickly in the HB pencil is quite as two steps lighter than that for B and I can use it. I can still go dark with the the the 285 or apartment not the two h with the HB. I can still go dark if I need to weather. But it's really to try to keep this all nice and uniform, not how to be too splotchy right now we've got some splotch in this happening. So i'm, I'm really concerned to try to get that splotch in US. Rare. Okay. Alright, so I'm starting to get again a nice gradation. Would this with the HB, I'm filling in some areas that are a little too light. I'm trying to also make sure that they're like there's a little light error right about there. Not. And some of this might be so subtle that and again, the eye picks up things better than the camera. And so it may not be too obvious what's happening with this. So again, I went ahead and I'm just continuing to dark and down now we're going to start getting lighter as it goes under here because of reflected light. But I'm really trying to again concentrate to have not just a gradation this way, but a gradation of darker up here. And I probably need to do a little more to establish that a little bit better. But that it's darker in the corner and as it comes down, there's a transition from darker and lighter as it goes from here down through there. And so we're trying to keep our gradations. We're trying to, because the gradients this way, gradients that way. And so we're trying to build that up and I keep in my eyes out of focus so I can look at the value. And now I'm going to actually come in here and try to soften this edge. And the one I soften this edge is I want to start with the ads and bring value N from it so that it becomes a little bit of a transition. And so we're going to kind of bring through here some value. I'm not going to touch it down here whenever we're else will be touch to create again a better value k. So and that's what we want here. We want this, we want this to start to have, again, a feeling or the illusion of 3D. We're going, we're, we're starting to strengthen a little bit more. It's different and it's starting to happen on a little bit. And that's what we want. We want some of that 3D quality, as people might call on my graph, my for-each pencil. Because there's still some areas here after using the HB and the, and the, and the four B, there's some places that just have a little bit of texture, a little bit more texture. This will also darken certain areas. That will really help. I'm going to just come in here with this for h. Again, this for HB pencil will help get rid of some of that texture and also a little dark and asylees. So again, I can use this to very cleanly make this work. Okay? In this a 4 H pencil, I'm using a very lightly. So it's not getting darker because I'm cranking on a Do not do that. That will destroy your drawing. I'll guarantee a. So what we're going to do now is we're going to go ahead and we're going to grab this. This is our AR 2 H pencil. And I'm going to go over here with our 2 H pencil. And again, we're just going to this all fill in some of the areas. I won't go near as deep as the 4 H because it's not as hard, but it will it will go in deeper than an HB or to-be or for B. So again, I can use this W when we call this a polishing method. But we're not really polishing. What we're doing is we're actuall
10. The Sphere Part 2, The Adventure Continues: We're just undoing it on a larger scale. Come out a little bit further. Think you could probably go a little darker overall. So again, I might grab that to be pencil again, I don't think so though. I think we'll just use the HB and we'll just build it up gently. Go ahead and bring a layered over there, layer over there. Over there. Over there. And again, I'm just doing the same thing now. Again, you notice I keep starting back here because it's the darkest part where I've spent the last least amount times out here at the edge. So what's going to happen is you're going to start to get again that gradation happening. So if I stay right in here, there'll be more gradation through here. So there'll be more bleed as people would call it. The part where it's getting a little bit too much texture. So I'm going to grab that to H again. And again, I could come in here, there's rules. It's sort of like a block I need to fill in there and a little this edge seems a little cleaned up and like there's all these little, little bits being munched out of it because of the, the paper texture. So if I wanted to make that edge a little straighter looking, I need to take some of those little those little chunks, those little irregular shapes. They almost look like little puzzle pieces. And it's just the, the, the lighter pencil sliding around over the paper texture creating else. But they are unwanted. Okay? So again, I'm just using this to H. I'm putting a layer over some of these areas. And again, it's gonna get deeper into the texture. Because getting deeper into the texture, it's going to look more, you know, more uniform. The lines are going to look a little cleaner. And just, it's just a really nice pencil to use to clean up these areas, to have a little bit more. It just has a nicer look, more professional, cleaner sort of look to it. And I can control my edges. So again, I'm not trying to put these two crisp, but if I wanted to crisper line, I can come right up to it like this is a little fuzzy. And so that means I need to go out to the edge of that and fill in that lighter little edge. And that's what creates a fuzzy look is there's a gradation is slightly lighter, getting lighter. And I'll just go in and I'll just go ahead and darken it. So that means it's not no longer take degradation out. And now that feels like a cleaner edge. There's times you want to do that like on this guy. I want to. On this guy, I don't. And so I'd be, I'd be on these edges. I'd be still trying to kinda make sure I don't go all the way out to the edge. So I can come out here and then push it out a little bit and get a little bit of feathering are a little bit of a gradation, right? Just a little bit. So at the end, so this feels like a softer edge. Okay? So we've spent a lot of time and the darks and everything like that. So we're actually a come back in here into the middle values. Oh, that's right. We wanna do gradation. So I'm gonna go ahead and start here again, I'm using, I'm going to be using a lot more if either a finger swing or tapered stroke. This right here is a tapered stroke or a feathered stroke again, where I'm only coming making a mark on the downward stroke. I'm trying to make sure that it's coming down, touching then coming off so that again, you get a little more of that tapering. It's a little bit easier to get a nicer, more, just a nicer, a gradation on nicer. Control over the pencil itself. And graphite more than say, other drawing media like charcoal or something like that, really takes time to build this up. There are saving methods to save time. Then we'll get into later, but for now we're gonna go ahead and we're just wrong up our sleeves. And we're doing it the long way. There's no, we're not taking any shortcuts this time. And the reason we want to do this is it will give us better control over our pencils. If we don't do this, then people will usually start going in. I'm going to just start smudging this and I'm going to start doing this and doing techniques that if they don't know how to use them properly and you never smarter the fingers for, for starters, like on us, we all just smudge Oden that look nice. No, actually, it doesn't. Usually looks like someone came along and smudged you're drawing the they got the drawing dirty with dirty fingers. That is not the look that we want. And if you're using graphite, you don't, you're not even going to use stamps or tortilla. Aliens don't use that for graphite. Those are too overbearing. They destroyed the paper as you're rubbing it over the paper. And graphite is the high, I think I call it the high maintenance medium of the art world. And it really is, because if there's anything wrong with that paper, it just won't look right. And it will highlight that surface being a surface change. And a gigantic just won't look right. Now. There's some people I've seen that really go and get into using graphite, whether really rough with it and if you get really roughly that you can pull off as long as it's clear, like I'm going to get Refer this by me. They're getting really rough there. They're building up layers and they're razor bleeding stuff off and they're Brill. They're using a gorilla pad on stuff and and, you know, they'll throw around some just all kinds of like alcohol into the, rubbing alcohol into the graphite and Spring graphite on and erasing it back with very heavy, just really work in the surface. And the thing is you have to really do that. You have to really layer it when you do that. Otherwise, it does not look right. It's still looks like all that looks kind of dirty. Once graphite starts to go into the surface of the paper, it starts to have this unclean dirty look. It just doesn't, it's not as, it's like the difference between a watercolor. For those that know watercolor. If you use watercolor and you, you put it down very, very directly and let it dry. And it has a beautiful luminosity that is destroyed. The moment you start scrubbing it, overworking it, it's lost. It has to sit on top of the paper. The ones that paper is has been that, that texture of the paper has been, you know, played with too much and begins to break down. And if it can happen very quickly, it does not have the same look. And if you really get into, again, I have friends, colleagues and former professors that would do whatever they needed to with watercolor. So there were no rules. They'd be scrubbing on it. They would be, again, scraping into it. They would do all sorts of stuff. But the moment you do that, you lose the luminosity. And that's for some people they don't care. They're like, Look, I'm after, That's sort of a watercolor. And as long as you understand that and know that's the game you're playing, then you're fine. If you don't know what the game even is, then you're in trouble. Because usually that means that you're just gonna, you're gonna end up with the, a painting that doesn't know what the rules are and saw the painting he doesn't say isn't very clear. So if i o, I overwork it here, but I don't overwork it there, but I'll leave it there. But this one is really, really seriously worked and then this one is not and this, this area becomes like a patchwork quilt. Not a good look. However, if he if you treat something where it's all been I worked over in roughed up. Well, then it's fine. If you have everything that's nice and pristine, then it's fine. If you have some that can't make up its mind. What type of painting it is. That looks like, like an artist that couldn't make up its mind. Which usually means that it hasn't, it's going to have an amateurish I don't know what I'm doing. I haven't made a decision. Look. And you don't want that in your drawing? We went wrong. Is it a very clear? We went drawing is say Yes, I can make a decision. You and drawing a say yes, I know what I'm doing and this is what it is. You want. Saint? Same thing when you're painting with watercolors are going to be very clear about what you're doing. You don't want there to be a lot of guessing. And if you want the viewer to look at and go, Okay, I know what they're doing. And if the viewer looks at yours and go E, I don't know what he's doing. All those areas that are undecided, start to look like mistakes. If I start to overwork my drawing, the areas that are overworked are gonna start to look like mistakes. So sometimes in people that have been in classes and drawing classes and watercolor classes, there's like a favorite term, overworked. Oh, that's overworked up people and they just love some people just love that term. I swear they just, they just enjoy that so much. Throwing that out there. And that doesn't mean that it's not a valid point. But sometimes the moment the integrity of the paper was compromise it like overworked, I'll throw it away. Can't do anything about that. But I had another instructor was like, Look, kid that was an HP this a to H. Yeah. The papers when compromise a little bit. Since it's been compromised, you're going to compromise it more. So sometimes when film things people are like, Oh, it's, it's overworked. It's not that it's overworked is that it's under worked. And if you're gonna make it look like it was purposeful will then you're going to, you've got to roll up your sleeves and really get in there and verbalize the paper. So it looks like you're meant to overwork it, not that it was a mistake, that you overworked it. And that's a very important distinguished knowing how to distinguish the difference. Again, I'm using finger swings and tapered strokes. While I'm, while I'm creating this, I'm trying to get my, these are my alignment of values, these are my darker values. So the middle values next to the core shadow are going to be darker. When you're swaying. Tapered stroke. Fingers swing, tapered stroke. So again, I keep switching between the two. That's not a bad thing. It's just an understanding how and what the difference is and what it gives you. A lot of that is just going to come from actually drawing. We go, okay, I need to undo fill this end. Well, I can find you to feel something in, or a term that most artists at sends chills down their spine to say this in an artistic standpoint, but to say color it in. And it still makes me guilty that I'm even going to use this example. But if I need to fill something in or quote unquote color it in, I'm going to be using just a side decide fingers stroke. You know, if I'm going to if I'm trying to go back to where I am, I'm using gradations. I'm going back to a tapered stroke. So that's usually how I, how I'm using it. When I start to all I need to fill this in. Okay. Perimeter finger stroke. Oh, now I'm going back to value. Okay. Tapered stroke. And, and that's how it's normally used to for those those little you know, a little bit. All I need to fill this in, okay. Fill that in now I need to go back to gradations, okay, now I'm gonna, you're gonna keep changing it up. And what does this all here? There's my two h. And again, we want, we want that, we want this to have. Well we can, we, we want to be switching between those that we want to be looking and learning. And so wet while you're drawing, you're constantly asking yourself questions or would it be better if I did this one? It would be better if I did that and experiment. You might go well, normally I'd do a tapered stroke, but let's say they're just a regular finger stroke with how would that change it and don't be don't be so locked in or don't be so. I'm rigid with some of this. I want you to understand that i'm I do a little bit, I'll do this and of course I do get into rots. I've been doing this for awhile. But there is a time where we're like, hey, I need to get out of my rod so there's ties all I'll go. Okay, this is what I normally do, but I'm switching it up. Even though I'm like, I don't know. No, I'm switching it up. I wanna I don't wanna see I wanna see a little bit different than, you know, So it, because I'm just experimenting. I am I've done this for a lot of years with sometimes you're like, oh, you know it well, I thought I should do this, but I I zig when I showed the zag, zig is actually better than my zag and worked better than I thought it would. I know that in the beginning you're just trying to It's all that you can do to even control this ticket, to control your drawing. It's it's very hard to get that. Again, have the control you want. I'm gonna come over here and I'm actually going to go all the way out and try to use a little bit of a gradation from the middle values to the, to the light values. So there's just a little bit, I need a little bit of a gradation. Okay. And so I'll go to h I'm going to grab my foray because I think my two Hs just a little too too dark and so I'm gonna go and grab my for-each and very gently using a tapered stroke. Trying to get just a little bit of a variation through those light values. It's a little bit of a gradation, just a sketch. Okay. Now I got to be careful because if I spend time just right here, I'm going to get a line. Now. If I did a light enough and I'm getting a little bit of a line right now, which is okay, and I'll tell you why. Because I'm actually going to make it darker next to it. That'll be the this upgradation will be lighter because I'm going to darken this through here. So that's why I kept a really like you can always better to go lighter. So you can dark in it, then they go to dark and then have to lighten it. So again, not a big deal when I'm trying to get a little bit, just a little bit of a variation. I get into those light value. So that's the sketch. So that it's not just a line and then an abrupt ending, but there's a little bit, a little bit of that of a gradation. So again, just a little bit of gradation. And again, this is where the illusion is going to happen. And that's why I have to take extra care and caution. I don't destroy it. So again, I've got this four H pencil and I've got a little bit of a gradation happening, and now I'm going to bring this value all the way back. So it's going to darken this. So this will be the lightest. Now I'm not going to work. There's a one place I'm not going to dark in it and that's going to be the highlight. But through here, a lot of this is going to go slightly darker. So this is not a line. So. Hopefully you understand what I did there that I originally left that little lighter, so when I made my gradation and this got darker along that line, then what I'm gonna do now is I'm pulling it out and i'm, I'm darkening this, bringing this down into here, and I'm going to darken this and bring that out. And by the time I do that, this will be the, still be the lightest because of the way I plan that out. Now the words right now, I'm darkening this so it's not lighter than that. Because if it is, then it's wrong. So again, we're gonna go ahead and just keep working on this. When some value down there, coming around that highlight, Come around the highlights. We have to have a little bit of value around the highlight in order for the highlight to stand out. That's another way to ask yourself, is it dark enough? Because if I can't see the highlight, that means what's surrounding because that's just white paper. That means what's surrounding. It is not dark enough. So husband a little bit on the timid side. So now i'm, I'm actually using a little bit of a, of a, of a, of a risk going. Actually it's kind of, you know, the adults and the risks when to fill this in. Because I need this this outer around to be a little darker than what it is. So I'm trying to darken this in a uniform way. And so again, I'll use well, this is almost straight up and down, but it's the same thing like a side to side. I'll use it to go ahead and fill in an entire area very quickly because it just wasn't, you know, it wasn't dark enough now I haven't darkened it a ton, maybe half a step of value. And so we haven't, we haven't, again, we haven't dug into it very much. But just this little bit goes along way. I'm going to go ahead and grab my my kneaded eraser and pull that back out. Now. Now again, at some of it had gotten a little bit of value on it. So now it's shines. Now that highlight really kind of reads. Now we're gonna come back here because again, this is the lightest part this has been filled in. I'm going to use my HB pencil and I'll start to try and make more gradations through the dark middle values because my light middle values have gotten darker. So that means for those to be the correct value, that the the middle values, my darker middle values have to be slightly darker because my lighter middle value is got darkened. So it's a little back and forth and back and forth. But the idea is, is that we wanted to, again, if we, if we take the time and again, I'm using my HB pencil because I had all that. I have all this graphite on here, That's the h's, which is fine, but it wouldn't have dark. And if I tried to get a 4 H and darken this enough, I need a base of at least the HB pencil. I could go back in with a 4 H and fill in little stuff or with a to H and fill in little stuff. But I needed a sort of a global darkening and so I needed a darker pencil. And I'm not using a for B that would be too dark and I'm not using a to B, that would be. Probably a little bit too dark, but the HB seems to be doing exactly what I want. So that's the one I'm using. And that's, again, it's doing what I need for the drawing. Again, I still have my eyes out of focus. This is starting to get darker. That's a little bit lighter. And again, so that's what we want. We have, we have the darker middle values are back now getting lighter as they come across. And again, that's what we're looking for. That's what we want. And again, it can be really, really, really subtle. Sometimes it can be a little mind-bending. When you start to tell ourselves, start to try to get that self-talk. Oh no, it's fine. It's fine. It's fine. Squint your eyes, take her eyes out of focus. If it's not fine, Don't be afraid to say no. Need to do a little bit more. Nope, noodle, do a little bit more. You know, don't be afraid to tell yourself that sometimes we're so what we start to get a little afraid to tell our schools, we put so much time into it. It took longer than what we thought. And we just want to be done with it. But that's the case. Give yourself a break, go somewhere, get up, stretch a little bit, you know, go see your favorite pet or whatever. Or, you know, walk around a little bit, go outside, get a couple of breaths of fresh air, take a 15, 20 minute break, and then come back to it. And a lot of times that's all that's needed. When because we, we, we draw for such a long amounts of time. The breaks are really important to help revitalize, sort of re, you know, to give us that desire to go on a little better as often. But again, we've got this worse just happening. We're starting to get that, that gradation. I'm going to get back in here with my 2 H pencil. And again it's 2 H pencil is not as dark as the HB. So again, I can use this to to fill in some areas and to get just a little bit nicer gradation happening and it will look a little bit smoother. So it's a win-win-win when we use this. And we want to use that. So again, we'd come on over here and okay. And so again, we're starting to get this illusion. Now if I wanted to, I could come over here with my for-each again and check to see if maybe I'm good, just a little bit more gradation through my light tones. And maybe not everywhere where maybe as it starts to bleed into those middle values that we can get just a little bit more on those edges. So now I've got an HB pencil and where the middle values are coming around here. I'm going to darken those just a bit, just to sketch. They're going to be great aid and getting litres. They come out something about like that. And they're going to be getting a little spreading out at the base almost like a curved little triangle going around the edge here. All right, So now I think we were starting to have it doing what we want and the middle values. So and the reason we were actually going to have to come back now and start to look at the the shadow family because the shadow families, everything here and the lights are supposed to be lighter than anything over here in the shadows. And everything in the shadows here supposed to be darker than the thing over here, the lights and this reflected light, it looks like it's darker. Are a part of me that it doesn't think it's darker, looks like it's lighter than the middle values. Now some of that can be an illusion, but I think it's too bright. And the way you can do that, as I've got this little, this is a value isolator. It's very easy to make this as a piece of just a 100 pound paper. I could use card stock, I could use poster board, I could use anything. I could use a little notecards. What have you and I've just punched a hole through them. And what I can do is I can put this right there. And by doing, by isolating this, this is over here, is in the shadows and this over here is in the lights and look there, that's darker than this. That is wrong. So what that means is then my shadows are going to have to go a little darker, but especially the reflected light. So I'm going to come in here into my reflected light. I'm using a to H and now I'm using a risk swing. And I'm just going to darken this down. That's good. I'm using sort of a risk. I'm using a risk swing for this sort of pivot, pivoting my wrist on the edge of the board. Somebody out of the cameras so it's hard to see them, but that's what's happening. Now. This still looks lighter but and it is, okay, cool. But here's what's going to happen. So we want that reflected light. It has to look like it's reflected light as we start to darken this. It won't look like reflected light anymore because it's gone. It seems like we're turning the lights out. But we have to understand what we're gonna do. Because what we're gonna do from here is we're going to then darken everything in the shadow family so that this reflected light looks lighter once again. So I'm gonna go ahead and just try to have an HB pencil. So I was, I was doing some of that with a to H to make it really light, very subtle, very soft. I'm now coming in with an HB. Exciting kidneys, just a little bit more value. And hair. So again, we're just we're continuing to bring this around. Making a gradation out of it. Again, continue to make a gradation out of this. Now that reflect the light hasn't completely disappeared. Which is a good thing. So it's still there, but it's much it's much, it's darker than what it was. But now if we put this on here like so we can see that Let's actually get the, I think we're using different dots. If we use this here, this is now darker than that. Okay. That means that's dark enough. So I'm like, All right. Yeah. Okay. That looks dark enough grade. You're going to go ahead and we're losing the occlusion shadow where this is touching someone. Just make sure that's been re-established. And now we're gonna do is I'm gonna take my HB pencil really quickly. We're almost done with this thing. And we're gonna go ahead and darken the dark tones. So I'm going to use these dark tones. And as I darken the dark tones, interesting thing happens to the reflected light. It's going to start to look lighter once again because reflect the light LEA needs to be there. It needs to look like it's lighter. It's the lightest of the shadow family. But it had gotten too light because we darken everything over here. Now as we darken the shadows, once again, the reflected light will start to look brighter and brighter and brighter. Now we don't want to look to write, but we do, we do need to have it feel like it's coming back a little bit more. It's softened, it just too much. And so I'm gonna come over here to darken some of the core shadow coming here and work in the dark tones. There's also reflected light up here. Hopefully we can start to see that too, that there's a little bit of this reflected light up here. And again, the more we work on these areas with the dark tones darken them slightly, the more the reflected light will be able to be seen it, it will look a little brighter. So this is actually too much of a bar, so we need to bring this out. Should flare out kind of like a little rounded cone or something. Okay. So as this has gotten darker, this down here is looking ladder once again. And I'm going to go into the core shadow just a bit because I think we need to get there some patchiness to it. But again, we're really close. This is a good, good looking sphere. We can see all the different families and the sphere, the light tones, the middle values, the, the, the light tones of it, of I is the highlight, the core shadow, the dark tones reflected light. They're all very clear. When they're very clear like that. That's when we have the illusion that we want. I'm going to go ahead. There's a gradation that needs to happen right Where The core shadow starts to bleed into those darker middle values. And so it's not very far. I'm not going to be working very far into the light, but it's just right where the light and shadow transition there needs to be just a little bit more immigration than what I have. So we're going to go ahead and put just a little bit more of a variation in there. And I'm gonna grab a two because I think some of this again needs to extend into those dark tones just a little bit more, just this. And there's some patchiness here. This is a little bit lighter. This is a little bit lighter through here. This is a little bit lighter through there. Again, I'm taking my eyes out to folks. I'm trying to see really clearly what's what's happening there. That needs a little more transition. So again, so we've got this, we've got this sphere that we've, that we've done. I think we can use just a little bit more of this gradation with this to be right where the core shadow and the light meat. So there's a gradation into the core shadow. And, and that's a really important that we have just enough of a gradation that it turns the corner. If it's too abrupt, it doesn't look quite right. It's called the terminator. So you have them where the light and the light stops and the shadow starts and then the core shadow is actually just a little bit over from there into that, you know, from the, what we call the terminator. So again, we're gonna go ahead and put that in. We get that a little bit more of the gradient happening. And I think we got a little bit of weirdness going on here and little splotchy is all when I say weirdness, that's what I mean. It's the little splotchy through there. That's a little better. We could just very lightly try to see if we get just a little bit more gradation happening in there. Just a tiny bit. I think that's again looking much better. And then again we could say, alright, well, again, if this, if this got a little, if it's getting a little flag because this is almost white paper through here. Again, we can come in here into the so this is the, this is the process you're constantly ask yourself, is it enough, is it enough to I need to go and change a little more? Do I need to change a little bit more? Don't you change a little more? And if the answer is yes, don't be afraid to say, Okay, let's do it. Let's get this to change a little more. Let's get this to change the way it needs to be. I'm I'm I'm kind of you can probably see. I I'm I'm twisting and my chair so I can get because I don't want to move the paper quite so much for you guys, you know, turn it upside down on the side, all that sort of stuff. I would do that if I was working on my own, doesn't matter, but I want you to be able to see this without disturbing the image too much in terms of flipping it around as I'm working on. So I'm really kind of jumping around in this chair I'm sitting at. So you can see, you know, what I'm doing? So again, there's the middle values here going to curve around transition, just a sketch up there. This again is just getting a little bit darker up through here. Just a little bit. This is coming around. It's almost a little too dark. I got too much of a hook there. So I grabbed my little white little kneaded eraser to punch out a little tip. And again, you can go ahead and start taking some of that out a little bit. You know, in case that's just a little too much and sometimes it is and it looked like That's was just a bit much. And so again, we can start to and so it's just little bits like that can start to really give this stricter, really make this feel much better as we are, as we're working on this. And again, this is looking really, really good. This is what we want. This is no doing what we wanted to do. And we can even get to the plumber like, okay, well, what about this cast shadow, this cash-out maybe looks a little bit light through there. So I've got this 2 H pencil. I go in there and just knocking knocking dark and I just slightly you hear me say sits on someone Nonaka down. And that's what I mean. I mean, make it a little darker, make it a little darker, make it a little darker. There's times we need that so that it reads, if this starts to look like it's to lie that this is as light as anything over here. That's, that's too light, it's cache shadow. Can't be as light as anything in the light family. As light as the reflected light, then that's fine. But again, we wanna make sure that this is dark enough that it feels like cache shadow. So again, I've got this, we've got our little, a little a sphere here. And we have light tone, we have light middle value, darker value highlight. We have core shadow, we have dark, the dark dark tones and the light dark tones. And we have reflected light here and we've got reflected light there. And by doing that, we've got something that's really looking nice, is really having a very nice illusion. A nice gradation, all this good stuff. Now if I wanted to take this to the next level, like let's say I really needed this to be clean. More so than one at all. It is already I'd be using my for-each pencil and for the next hour I'll just be going okay, I'm gonna, I need to make this gradation little better. I'm going to stick around here. That's a little patching. I'm gonna come over here. This needs a little bit darkening through there, you know, it just a little bits, little bit, little bit, little bits. And through doing that, it'll just keep, it will get better and better and better and better. And with that for h, we don't want to really change the value. All we're doing with this is we're just trying to make our gradations a little nicer here, trying to fill in a patch. They're trying to make, take out some more of the texture. And it would take me another hour or just going over this over and over and over again. Like I still think it's a little blown out through here. So again, I might go and spend some time on those light values. You don't want to, don't want to disappear. That's, that's, that's the that's the thing we have to watch out for. If we've spent too much time there, it's going to just fade and it won't look like light values anymore. It'll start to look like our middle values. And so it's this, it's this balancing act. As we're working. You know, how much is enough? And this is, you know, if we're working from life, it's a little easier because we can, we can go ahead and look up there and, and reference what we're seeing. Look up there and then looked at the drawing. Look up there. Look now at the drawing. This has just been done from memory because I've done hundreds of these spheres and it's not bad. It's really creating that illusion. It's, it's doing a really good job. And that's what we want when we're, when we're drawing. We want to have something that has very clear, clean. Shadows on it so we can see what it is. We know what, what's happening on it. So, so this again is the sphere using value to put in to create that sphere with a 3D look. Now, this is again would be a light sphere and in fact is a little bit because this paper so light, again, I would almost this line is almost too dark. It looks a little bit like like it's a cartoon. So again, this line, this outside contour line, is darker than the value of the light tones. Well then it's going to, it's going to start to look like, again, a cartoon line. Though sometimes we can get away with this little trick and that is you go to that line and you make a gradation coming this way. So it means the reflected light, the brightest part, will be just in from this a little bit. We can certainly do that. That's again, just a little subtle manipulation that again can really help the illusion. So again, just a little bit of a gradation coming off that edge. Don't, don't take away that original value. It's still there. We're just doing a slight gradation and a couple of places. And again, that can just help just a little bit as I go all k. Alright, so that's turning the corner, just a slight turning a little bit as it's going away from me. And that's something that's really liked. That little slight edge manipulation becomes really, you know, can really make the difference. There is going to be a part where it gets so light that we can't tell where it's going to disappear. As far as that goes. Like so. Wow, I, I kind of have a little one that I missed the edge and it's straightened out. So I'd have to come in there and again, redo that just slightly, That's a to B, that would be a node onto that one. For a lightest pencil we've got. And we go ahead and try to redo that. And I erase it. So sometimes just erasing all of a sudden I will go darker just because you use an eraser a little bit too much. And that's what happened. But again, I have just enough of the edge. And again I've, I'm losing the edge up here. So again, I could just do it just a little bit. That's an HB that's too dark. Use a for-each. And again, try and make this edge a little bit lighter, a little darker here. So it goes from the shadow a little bit lighter as it comes out here. And then it disappears where it gets lighter and lighter and lighter still. So again, just little bits like that really help create that illusion. This edge continuing around and then it disappears. Same thing down here. This little edge down here just picks it up just a little bit, a little bit of a gradation as it goes around and turns underneath, comes out here a little bit and then it begins to disappear. Okay? Little things like that really help if you've done this the first, this is the first time. Don't worry about little stuff like that. Try to get the big stuff, try to get it so you can see very clearly what's a light value, middle value, core, shadow, dark tone, reflected light. And then we have right here now I haven't darkened it. This would be the time to do it though. Is the cache shadow has to be dark in the core shadow. So this cache shadow, There's my four B, this cashflows to start to get darker so we go okay, so that's a cache shadow. It's the cache shadow wrapping up the object. And so it goes a little darker than the, the core shadow. We also have that, again, the occlusion shadows to be very clear. That to make sure that this is again, a little bit of the little crisper edge, perhaps. I'll just right through here, not all the way around, just a little bit right through there, just little nuances. And against now we've got this 3D looking sphere. So go ahead and give that a shot. Using the five pencils. Sit down and make yourself a nice little drawing of a sphere, be more creative. And if you're like worried about drawing the, drawing the sphere, I didn't show that, but I could take, let's say I wanted a template and I could use this for template, just trace around it. Or you could use just some sort of can. And I can put a canned down here. And I can trace the can to give me a nice, a nice, nice circle. And then take that circle and turn into that sphere using all those, all those wonderful form shadows. And the reason I'm telling you traces that takes the, takes the pressure off in terms of doing this nice circle because we're not trying to worry about drawing. At this point. We're only trying to worry about the values, not the drawing part of the circle. So yeah, you'd use a template using old, you know, some, something that's round. You know, you use a can of tuna fish or whatever you like, and go ahead and make a circle and then turn that circle into a sphere. All right, so you guys enjoy this and be more creative. This is Kevin McCain. I've enjoyed our time together with you guys. Have a good one. Bye-bye.
11. Being Square Was Never So Fun! The Cube: All right, Welcome back. So today we're going to go ahead and we're going to learn to put value on the cube. The most important of all our shapes, which we'll learn more and more and more about as you continue through the drawing series. But today let's go ahead and put value on the cube. So we're going to go ahead and we're going to do a little drawing of a cube this time using those form shadows are we've already talked about. We've got the different materials that are going to be using here. I've got all five pencils. I've got my four b bye to be my HB, my two h by four h. So we're gonna be using those and move those over to the side here. I'm also be used I might be using this a little bit. I'm not sure, but I'll put it out here just in case. Again, this is just one of these small white erasers that are kinda like a mechanical pencil sorts get, I don't know if I'll use it, but I'll keep it over here just in case definitely would probably be using this white eraser here as well as my as my kneaded eraser. And we're gonna go ahead and I've got, now it's very lightly drawn. It's probably going to appear there as I, as I start to draw this, we're going to have the light on this. It's going to be coming from. Now sometimes you'll see when people draw, they'll make a little an ellipse. And it looks like a cone. And the reason that they'll do that, they'll make a little cone like this to show the light. And they'll do that instead of just a pointer. And they'll reason why is because the pointer, you can't tell whether this is at this angle, but is it from the back or the front? While the moment I put an ellipse on there, if I can't see like that, this is the elifs behind here. That means that's from the back. If I have an ellipse that's, you know, I can see the front of the ellipse. That means it's around the front. So this is my ellipse right through here with my little my little cone K. So that means that the light is a little bit in the front. This is probably little bit too much. The opening of the ellipse becomes important. Because the more open is, the more it's around the front. I wanted this to be a little more from the side. So I just realized that my ellipse should probably be something about like this truth be told. So again, because I'm seeing less of the ellipse, that means that light is moving further. Now of course, I better be thinking about, which I didn't know any of those who have taken the beginning class go look at that. Well, the alignment of the major axis should be 90 degrees to the to this line, which was not. And so I was trying to say that any of you that have had the other class hopefully would be like, wow man, look at that. He didn't align that major axis to this line here. So as looking like it was kind of at an angle instead of. Being straight to that. And so anyways, but this is my little, this is my little cone, probably seen a little bit less of this. So that means again that the light that you're seeing less of the ellipse, It's going around this way. If I was seeing it straight, you know, without it being in the front or back, it could be straight like that, but that means it's true sidelight. Sidelight where I'm seeing a little bit of the front. So that means that the lights come around the front and it's pointing down. My cones also not symmetrical and should come here and be at a point on that line. But anyway, so that's how that technical jargon, which has very little to do with our shading, but it certainly is important. So now I've got a cone that's a little better. It's not perfect far from it, but it's looking better than what it was before. So anyways, this is going to be my light source. So it's going to be above. In fact, I'm not going to go ahead and redraw and take the time to redraw it the way I did with this one. But I'm probably going to change this to probably something closer to this in terms of that term to that light source. Okay. I just realized that this is going to be hitting this edge. And almost 45 degrees. If I'm eating 45 degrees to this little edge, you can't see because I've got so light, but this top and this side, you won't be able to see it. Well, you'll be able to see it, but there'll be almost the same the same value if I bring the light up or if I brought it down. That means that more light is going to be a one plane than the other. And I made a really short cache shadow. So we're gonna go ahead and bring this up to about like that. So that'll be where the light is and what that means from my. Now again, I'm not drawing this from reference. I'm going to show you some where we are drawing from reference. But the idea is I'm just thinking about the light. If the light is, is up here, this will be my top plane, this would be my median plane and my, my shadow plane. I'm going to go ahead and start putting some value in just so we can see where these are. Because again, it's hard to see at all what we're doing now. I want to start this on the top. But maybe, maybe it will come back over here and start this in the shadow side. So just like we were when we now should actually probably take some time. But I'm wondering. So what we're going to go ahead and start putting in some value, obviously working side to side just like we did on the sphere to begin with. Now I'm doing a rough N, so I'm using a risk swing. I've got a four B pencil. I'm using very light pressure for this risk swing. And I'm just roughing in the shadow shape now the shadow shape on this is just basically, well, there's the cash shadow too. Though I might. Hold off on putting in the cache shadow just yet. Just because if I, if I merge them all, I'm I lose my line and I was I took it I took some time to kind of really clean the lineup, give a nice and nice and clean or straight. And if I lose it through the shadow, it's just going to be more time to try to recreate that. So I don't wanna go along here while I'm thinking about it. Creates some value along that edge. And it creates a value coming out. So and I can go ahead and try to keep the drawing as straight as possible. Usually, you know, all all all I'll just I'll lean the drawing or rotated as I'm working on different places. You've seen me do that on the cone and probably the sphere as well. And that's okay, that's theirs. I kept that in there. It's just so to give you permission that yes, you can certainly do that. But I'm gonna see if I can I can try to keep this as vertical as possible just so it's not as distracting as I'm creating this jump to a finger swaying because again, I'm trying to keep this edge and it's just a back and forth fingers swing. It's not a tapered stroke. It's not that feathered stroke. It's just a regular just, just a regular back and forth stroke that I'm using on this. And now that I've come to find my edges, I was going along the edges a little bit. Again to define them. And now I want to come back. I'm using my thank you. I'm just hovering above the board. You probably can't see it, but I'm using a risk swing with the tripod grip. And again, I'm just going back and forth again. This is a rough and I'm not worried about the fact that I've got some. Now some edge is showing like where this value had stabbed by a. There's a bit of an edge. I'm not worrying about. Again, it's just a rough, rough, rough N. And so I'm not worrying so much about that. I can get rid of that later. And it's and I don't have I'm not going to get rid of it by using my finger. I'm not going to get rid of it by using a cotton swab or brush. I'm going to get rid of it by going over and over and over with value. So again, the whole point of this class is to learn to control your pencils. Once you have control over your pencils, well then you can do whatever you like. But that's to give us a full foundation. Sometimes when people are drawing they'll be like, Oh no, I've got to use a blender. I can't, I can't do it, you know? And so they'll talk themselves into the fact they can't do anything with that, a blending tool. And then lo and behold, they can't do anything without a blending tool. If you just go look, you know, I'm gonna go ahead and learn how to do create values with my pencil is only. Well then the blending tools give you just a, just a lot more freedom and give you a whole new level. But it's not, you're not doing because you're afraid or the pencils were doing it because you're like, Okay, I can do with pencils, I got that. No big deal. Now, let's try some of this blending stump to give me different textures, to give me a little different feel to the edges to do you know it. So it just, it bumps up the earth. How quickly you can do a drawing and how you can play with edges in a much quicker way. Because we don't want to sit here for three hours or something while we're while we're doing this. Or I mean, well, I should say I made for this particular drawing with three hours for any drawing is really not that long at all. Most of your average an average drawing is pretty quick. If I conveying something out in 10 hours or create something or draw somebody in 10 hours. That's, that's pretty quick for drawing. Usually your drawings will start at about ten hours, almost drawings. And then with pencils, especially pencils are much more. Usually there's get there. They're going to just take a little longer. And usually going to be dealing with a little more detail and subtlety and nuance. That's where it really pencils or four, that's, that's their strength. And so why wouldn't you go with their strengths? So again, I'm just doing I'm using a actually using an elbow swing now because I'm using I'm doing I'm drawing through a larger area and I'm trying to keep that edge again, nice and clean. Okay. Okay. And so you might hear me scoot around, are actually skewed in the chair back and forth. Uh, you know, give me a different angle so I can keep this drawing again straighter to the camera so you'll have an easier time seeing what I'm doing. So again, this is, I'm changing to a risk swing. Again, a risk swing is now I am on in drawing flat, which again is not ideal, but for setting up a camera and the camera angles and stuff. It is ideal, but it's not ideal for drawing. So normally I'd be like no anything but I'd really give a pinky finger then after normally draw flat because you're at, you're putting yourself at a, at a disadvantage. Be almost similar to making a baseball player or somebody like that or a tennis players are going to have to wear an iPad or something over a 10 year. You're really hamstringing some of your efforts. In many ways. Alright, so we're going to continue to, we're going to start trying to get this value to be a little more, a little less rough and scribbly. I'm when I'm taking my time, I'm trying to build on the layer and the layer that I had below. And you know, again, when you haven't done flat planes fly planes are a little different than then round planes. Again, I'm using I'm using an elbow swaying with a with a tripod. So again, this will give me a little more control. If I can, the longer I can make a continuous line, The more even that that value will be across that area. So again, I'm using that elbow swing to help me to create better chunk of value. At some point I'm gonna have to come in here where this is sort of darker through there. The lucky thing is this is just so light because this is going to go far darker even though this is supposed to be a lighter cubed. This is the shadow side, so it's going to be going darker still. And I'm going to be talking you just about general value ideas. I'm not doing this from a particular queue I'm visualizing and I'll drawn enough cubes. Well, I can visualize what it would be happening in a convincing way. If you're, you know, in, in the plan to work in Hollywood or something like that, we're going to be doing lots of concept art. Or if you're going to be working in sci-fi fantasy illustration or something, or creating paint paintings in that, in that sort of a subject matter, you're going to need to understand enough about value so you can just create stuff. And a lot of it has to do with understanding the way light works. And with something simple like this, we're going to have a light, a light value, and middle value in a dark value. This is our dark value. In terms of the form shadows we're going to have on here because this is a square and, or a box, anything that's not round, we only have five different form shadows, okay? So the phi form shows that we are going to have here. So these are our five form. And maybe I should put whatever, maybe I'll just go ahead. This is shadows. But we're going to have one, we're going to have light values. I'm just put L t values. We're going to have to kind of highlight. Now this isn't any sort of didn't like the lightest order from light to dark, but I mean a will. But the idea is that highlight and light values can change depending on certain ideas. How dark is the object? How light is the object? So we got light values is what we're going to see highlight on this. For 30, there's going to be middle values. With middle values, those can also be referred to as mid tones. And sometimes they're also called halftones. Those all mean middle values. We will do not have core shadow on flat objects, so no core shadow. We will have dark tones or dark values. Remember tone and value are the same thing. Okay? And then the fifth one we're going to have is reflected light. Now remember the dark values and reflected light. Reflected light. These are part of the shadow family. Kay? Kay, so those will be the form shadows. We're also going to have some, some cache shadow over here. Now. We're just going to, I'm going to act like all this is about the same value. So this is a white Q and a white table with a white, with a white backdrop. Okay. I'm going to grab a 4 H pencil because I have enough of these, of these, the form shadow or the shadow family here to be able to see what the shape is, this parallelogram, if you will. So we're gonna come over here into the lights. I'm going to get a 4 H pencil. My highlight is going to be along along this edge. People will usually put a dark line there, but it's not going to be a dark line. That's our brain translating what is essentially going to be a light line. So we're trying to take that as a rail translated into a line. Understand when we take edges, turn them into lines, we are abstracting something. We are. So it's, it's not going to be dark at all. But we decided, hey, I can see a plane change and we've made it a dark line, but now, and I would if it was a contour drawing, but this is a value drawing. So again, I'm gonna go ahead and put n the middle values. Now the middle values on this is probably going to be somewhere around like a step 7 on the value scale. You know, I guess I said this would be a white cube, so maybe this would be a step 8 on the value scale. So sometimes you'll hear me talk about keying in a drawing. And uncertainty here it's real time about the key of the drawing. What they're talking about is how light or how dark is it. So you have either a high key, in other words, with lighter values or low key with darker values. And for the most part, most paint on most artists will, you know, if you look at remember ADS, definitely loci. Someone who was definitely high key might be like Monet, definitely worked in a higher key or higher register values. The upper end of the value scale, right? So, so like Monet would be high key, remember I would be loci. And so think of that as we're thinking about that, that's, you'll hear someone say King in a drawing. You might say, well, wait a minute, you're just time. I'll highlighted row. We're out of time. I was how light or dark is the overall image? So in a Monet you might have nothing is darker than in step five. And everything else to the 67 and an 89 to ten, much on the lighter end of the value scale. Meanwhile, Rembrandt, the lightest saying, and I remember I might be a step 6. And everything in that Rembrandt is either a five or four, or three or two or one. You know, very, very dark, much darker. And so that's the idea of Heikki versus low key there at a certain, you know, the most of the painting sits in a particular part of the value scale. Well, we can also say King in a drawing, and that just means, hey, what's the lightest light once the darkest dark. And you'd be doing, you'd be king in, in the painting, whether you're doing a high key or low key, it just says, Hey, what's the lightest that will be in my painting and what's the darkest that will be in my painting? Or in this case, what's the lightest in my drawing? What's the darkest and my Drawing Assist you're making the decision. And then you're going to relate everything to that. And it's very similar to music when you say I'm playing in the, in the key of key of G or some like that. I don't know my music enough. I wish, I wish I knew a little better, but in the key of whatever, say the key of G or something like that. And music, a key has a certain collection of notes for that key. And it's the same thing now as using a 4 H before over here, used to for B, over here I'm using a 4 H. And now I'm going to go to a to H for a moment. I'm using a, I'm using a feather stroke. I just, sometimes I'll do this stuff and not even think about it. It's not like I haven't planned out. I think I want it to go a little quicker though, so because of feathered stroke takes much longer. So I'm gonna go ahead. And I'm going to use a side-to-side stroke instead to create this value. And again, we're just trying to, this is gonna be our middle value so we don't want it too dark. I don't want it to light. All that good stuff. All right, on our middle value. Okay. And I should probably be taking a little more time, but again, I'm trying to give this as quick as possible. So that way you can I show I should have I could take my time with this, but again, I'm trying to, I'm trying to keep it as, as create this drawing as fast as possible and still have some control over it. So the size will slow down because they're like, Oh, no, if you're getting too fast. Because again, we do want to take our time, the faster we go, the less control we have. The drawing. Again, I'm trying to control this edge. In other words, I'm trying to make sure I don't go outside the lines. So what have I done? I've Slow down, I'm using a feathered stroke. Remember the feathered stroke is the most control type of stroke we can make. And I'm just going to again continue to fill this in. Now if you remember from the other two drawings that we've done, but remember that the B pencils is a for B and the H pencils, this is a 4 H and a to H. I've got a 28 right now. Are not only lighter, but they also go down smoother. And it's also a little harder to not leave the lines between lines when we're dealing with and I grab my four h Again when we're dealing with the well, when we're using a 4 H pencil or an H pencil, they are smoother but they also are a little less forgiving. It's a little harder to get that nice even tone. We have to slow down more. We have to take our time a little more. We have to layer, go over and over stuff. And because we have to layer, that's why I got the 4 H pencils because I can layer over this and over this and over this and it will, It won't get all that. It won't get much darker very quickly. So I've basically, I've got more room. I've got more control because I have to, you know, I don't have to if I hadn't if I went over one place and was just, you know, I knew was going to go too dark. I have one chance. Well, that would be a very difficult pencil control, but this one, I could go over there half a dozen times and still nobody needed darken that a little bit more. I need to put come over here. You have a little bit, we have more options because again, it's a very light pencil. All right, so We're gonna go ahead and take a little bit of a break. We're going to come back and we're going to continue on drawing this cube. So we're going to continue to just, I've got this four H again. And I'm using again sort of, well, I was, I was using a tapered or feathered stroke or gradient stroke for a minute. And I said, Oh, you know what, That's too slow even though it's nice and control. I think I needed them to make better time, so I decided to go to a risk swing. And so we can just continue to, again make these, these values work. Now, this is not the correct value. Yeah, but I'm gonna come here and put this value on so that this, so I can go ahead and again check my values. As with which we said was called King in your values. And that's means you're checking how light something is again something else. I'm going to leave it light. Along this edge. For the highlight. Now, I could use this eraser and like a shield like this is a triangle or I could take and I could use something like, you know, even a spare piece of paper as a shield. But we have to give a little tiny eraser mark off of there. So I'm going to come on over there with this paper. And the paper just protects. It gives me a nice clean edge again, Bye, bye, bye. I was erasing right against that edge of the paper and it gives me a nice clean edge where I was erasing. And so that will help me down on this end. So now we're gonna go ahead and I'm going to use a, once again, I'm going to use a risk swing. And this will be the lightest value of all. If this is, this is all white and this is white and this is closer. And this is, this is, these are both the same plane. This is horizontal, this is horizontal. But this up here is closer than this would be lighter than the, than the table, which in this case it's supposed to be white as well. So we're just thinking about beams of light get less bright the further they have to travel. And so again, you can use that idea to help yourself create more realistic it looks now I'm going to take out this line. I had sort of a back corner that you probably can't even see it because it's so light. But there was a, you know, a bit of the back line is if this was transparent and I want to take that out so I just erase it off. And I'm using a risk swing. I, I'm using a kind of a tripod, but it's not in the crook of my hand. And I'm kinda using all my fingers kinda together like this. And so having the thumb back. And I was using again a risk swing. Now that right there is something strange in the paper that's starting to reveal itself. That could be a fingerprint. Unfortunately, this No, it looks like it's where the eraser was being used. So so I mean, how if you're not careful, you can rough up the paper and it will never quite be the same again now this isn't too bad. So I think I can deal with it, but that's what happens. So for now, I'm going to lightly now every time we go over it, it's going to go darker. So that's not the last time I'm going to. I got my lower eraser. I pinched out a little tip and I was plotting that little tip as I was trying to lighten that area. Let's see if we can do this again. Now everything was why, but we need to have some value in it. So everyone's minor may or may not. But there's an old joke that, you know, contemporary artist with a white page of paper saying claiming it's a, it's a polar bear and a snowstorm. And whenever you're doing things that are all white, like let's say I was, I was drawing something that's all white and I've got a light source on it. I'm going to have to lower the values of everything in order for it to have some value. Even your digital cameras on the film cameras, you really had to do this now. And you can do this with, with with the digital cameras too, where they'll have you play with the exposure, which that's what you're doing. You're making everything overall lighter or overall darker. Main thing that is affected is the middle values when you do something like that. But yeah, if if I'm if I take a picture of snow, I have to have the correct exposure. And your automatic exposure is not going to help you on your phone or on your digital camera. So you have to play with the exposures. And the exposures make something either darker overall or lighter overall. And if I'm doing this snow well then everything and everything is white and it can get really blown out. Or your camera might try to overexpose. And it might go even darker than what it looks and, and these different things. So the camera doesn't see things the way the AI does. And so we have to kinda play with things to get a decent picture out of scenes that are like, you know, get if it's mostly lights, you react to really work with that. If it was mostly black, same thing, we have to let more light in which is going to lighten everything in general. Otherwise you're gonna have some that's gonna go all black and won't have any of the detail. None of those wonderful form shadow is going from light to dark to middle value. And so it's kind of like working in curves and some Photoshop as sort of program or on your phone when you're correcting for value, you can make things lighter. You may think it's darker. You can make them with higher intensity or saturations, things like that. And you can make those all as, you know, we're doing this the old-fashioned way. What will you do the same thing we're going to look, we're gonna go ahead and make this a little bit darker than it would be in usually the middle values and things like that. And we're going to deepen the shadows just a little bit too. And what will happen is that the object will have more contrast, more pop as people like to say. It will jump out at us and catch our attention. Because the fact that we are increasing the contrast and doing different things. So because otherwise if you're not careful, it'll just, it won't have any depth. It'll feel really flat as a pancake because it's everything so light. The shadows are getting blown out, the middle values are getting blown out. And I just want to have any of that wonderful depth. And again, if anyone's ever thought about or played with her, had a class that talks about your really good digital photography and you step through this and film, do you have to go in and play with the exposures in order for you to get a decent shot out of the very extreme conditions. The extreme condition, everything is white. And because of that, the darkest dark might be a middle gray and the grayscale. But that's, that's what it is. Well then sometimes you're drawing will suffer. It'll be boring, you know, make, it'll, it'll just won't have any of that, that excitement. We want to have any of that punch or POB is somebody will say, which is yes, the contrast, the jump from light to dark. And so I'm putting just enough value around this. Q. I'm not I don't want to do a full or even close to a rendering of the back, the wall, where we're ignoring all detailed this q. This q. Was a. Wood. Q. We'd wait to the very end in order for us, you know, like the last 5% of the drawing started adding the detail. And that's because detail has to conform to the form shadows that this is light, medium and dark. Well then the striations are the wood grain would be light here and a medium here and then darker there. And there's also a different contrast variations and other things. We'd want to make sure we have some of that, otherwise it won't look as good. Now, I've been using this pencil and talking about all kinds of stuff. But I think I need to mention that this right here is an HB pencil. And again, I'm using this HB pencil with a risk swing. Actually right now It's not even a risk swing, it's an elbow Swain. And so I'm really trying to code, I can cover a much larger area by using that. Now sometimes I'm doing, I'm just doing this rather than thinking about this is one of those times where I'm like, It's a wrist. I'm like no, it's not my wrist movement. It's an elbow and it's just again to cover more area. And that's why we use those different swings of the pencil to help us again cover more area than we would if we, if I was using a finger swing. Now again, I want more control. So again now I'm doing a finger swing along there. But as I come off of that, as I can loosen up now because it's not as critical. So I'm gonna go ahead. Good. I'm using an, an elbow swing to fill in some value. K. Again, this is the exciting part. And whenever we started drawing work, we usually will start on what some people will term the haze. And what that means is that you're going to, you're going to use just the basic values and we can always darken them with pencils. Better to have to darken a value than lighten it. Because when we start making it lighter with an eraser, it's going to start to it's going to get patchy and splotchy and it's going to be all you can to take a ton of time to make it no longer splotchy and then continue on. So if you're going to have to be either lighter or darker than the object, be a little below lighter. It'll be better for the. It'll be better for the, for the object. So again, I'm just showing this is the edge of the back wall and it's a vertical surface now it's not in full shadow. This is actually a little darker, the shadow side. But it's a dark middle value. It's supposed to be enlightened, but it's supposed to be sort of a darker middle value. And I'm even thinking of going, well, what if we made it a light gray wall so that it will offset the it will also what's going on with the soil. It'll also what's, what's going on up here? Make it have more contrast. All right, we'll come back in a moment. All right. So I guess I was just I was using an a, so we're going to go ahead and work a little more on this. Obviously, I've got a HB pencil here and I'm going to put little more value in here. And this is, so we have some value around this, around this cube. And it's through are the relationships of the different values that we start to get a relationship. We start to get a feeling of depth. So this is very similar to the grayscale. This is just a more complex grayscale. We needed this to be smooth enough. So we're not distracted by all the various, you know, the lines are some sort of patchy and ask or something like that so that we can actually focus in on the object. And that's what, that's what we want, That's what we need. I of course, could bring this further amplify using an elbow swing now still using a tripod grip. If I could bring this up. And I could bring this all the way up if I wanted to. I don't think it's necessary for this drawing. I just want enough so that we can deal or so we can start to view or start to see a relationship. I've also just picked up. So that was an HB that I had before. And I'm going to pick up at four h. Now with this for h, we can get in here and we can start to fill in some of the little gaps. There's like some I can see some lines that have formed because of, I think it was using a 28 year before, but some sort of a harder pencil has established sort of these little lines. And I'm going to go in there and I'm going to take those out. I'm also going to Layer, layer the 4 H pencil over this background value. The reason we're using the 4 H is because like I have said in other videos, the 4 H pencil is a harder pencil. It gets deeper into the texture. And it will, if I use this wisely, if I'm able to control this and give me an E and even tone, it will bring this together, pull this together, and it will seem. Less splotchy, it'll have a little less texture, it'll be more uniform and all that good stuff. All right, so that's what we're doing. We're trying to kinda pull all this together. We've got something weird coming off this corner. Again, the papers picked up a little bit of value differently. I'm going to take my, my, my kneaded eraser and I'm going to I'm going to blot it just a little bit, pounds or whatever. But we're going to just kinda tap it on their slyly. So I'll just barely makes contact with the paper and just takes off a little bit of that value. And now that's softened a little bit. I might have to do it again because I was like over it, they're starting to appear once more. And that just means that something only have to deal with with this particular piece of paper. And you'll get that and you'll have that happen with other things that will create that. Look. Again with this sort of layering of our, of our graphite, that this will start to appear. And I should probably mentioned that it's really, it can be very hard with a cam quarter or a camera. Have a little bit of parallax. Parallax means that the parallel lines begin to start to converge. So I was looking at this. It looks like, I mean, I was, I've been using a level on this, so it's, it's close, but it's still not perfect. And so this might seem to be coming down a little bit this way or, or, or leaning that way. And that means that you just don't have the lens exactly parallel with the surface, which that's what happens. And it's called parallax for, for lens. And that's why when you're shooting stuff, you try to get it as level as you can. There's a little complicated because the, when the tripod is level, the camera's still out and it's a smaller camera so that I get out a level and I tried to take readings off of it and it's just very hard to get it right on. Doing exactly. Did not have any sort of parallax. That's that's a very hard thing to do. So I'm doing I using a finger swing right now, still using this for H pencil. And you'll see me jump between the fingers swaying to a brisk swing to an elbow swaying. If I need to get into a smaller area, usually all like I was just working on right there. I'll use that finger swaying if I think I need to. You know, like right now I'm using a larger areas I'm actually using and elbows swing. And so I'm just jumping between those, those basic hand holds, those basic ways of creating value that we've already talked about. And again, this four H pencil again really begins to tie this stuff together. It's really nice. And you could, some people say, well, you could also do the same thing with a blending tool. Blending tools, remember, they will push the graphite in and it'll start to look a little dirty. So, and it will also start to obscure all your nice clean lines. Basically just won't look as clean. Then if you've taken the time to do this. You know, with layers. And so that's what we're trying to, we're trying to keep it, you know, using the layers to give us a really nice, these nice edges and all this stuff. And I'm probably taking a little bit too much time with the background because this isn't about, about the background is about the queue, but it has to be, the background has to be nice enough that I can ignore it. And that's very important. It's all about the relationship of the wall to the table, to the queue, and back and forth. And so that relationship can't be just done without a lot of tension told you can't just ignore it. You can't just do it like you're not paying enough attention because I really, this whole illusion is really based on all the surrounding values, including the value of the wall. So again, I have to make sure that I've done, uh, well enough that I can I can ignore it. And that's some, it's always in play, whether you're painting or drawing you. So there's a lot of times you're like, okay, this, this background stuff. And I have to detail out, but there's gotta be enough information that it looks like it belongs. There's gotta be enough information. So I'll look. So I don't, it doesn't become distracting. If it has too much information, it's going to become distracting. And so it's one of these where you're trying to, you know, you're, you're trying to balance how much of how much this value and how dark this value as against this value or how much detail is over here against the detail over there. It's all about trying to find that balance. So it'll work again. I'm using a we'll swing and using a tripod grip. And I've got my little fingernail underneath you probably can't see that, but that's what's giving me some stability as I'm doing this. Is that the finger that's dragging underneath gives me a little bit more control. As far as that goes. Ok. And now I think we're getting there. I think we're getting enough information there where again, we can start to ignore it. This would be again, my my, my middle values. And the middle values are usually going to get, I have my, my for-each pencil. I'm just squeezing this back and forth. So this isn't a tapered stroke. This is just a regular thing, you know, just, just, uh, oh, I'm not even using my fingers. So again, sometimes I do this, I don't even think about what I'm doing and I look, here we go. Oh no, I'm doing something different. So I'm just using a risk swing and a tripod grip. I'm not even moving my fingers. So one range of motion. So again, sometime when when when you've practiced this enough, it just becomes a habit, you know, you'll start to just, you know, change hand holds without even thinking about it. So like I had an acquaintance in college that was a, he was a world-class juggler. And hence he could give a talk about how whenever he was, when he was juggling. So I think you juggle up to 77 balls and I think he was working on juggling eight. And he would actually have people come in when he was. He would like ahead of time, would coordinate with people to see if he had really gotten it. And he'd have someone come in and wake him out of asleep and had him his, you know, his juggling equipment. And I said Look, when I can wake up out of a dead sleep and I can juggle the appropriate amount of balls. I know I have that. I've got that scale, I've got it where it needs to be mastered. It's a memorized. It's him, the gray matter, because you can do it just like it's second nature as some people might say, No, you just do it without even thinking about it. And that's what, that's what's happening here. Well, when you start using these different strokes, and once you get used to them, just start jumping back and forth and you won't even you'll be able to focus more on the drawing and you won't even really notice well when you're using until you start, really you'll go, wow, I thought I was I wasn't even thinking I was kind of just go into the motions, doing what has to be done. And instead of cognitive saying, well, I got to switch to this. Oh, I got to switch to that. Oh, I got to switch this over here. You don't do that. You just you just automatically do what needs to be done because you've been practicing and that's why we practice. So we're going to go ahead and, you know, what I'm gonna do is I'm just going to go ahead and bring this down a little bit. Just a little bit more. Because I think there are videos getting a little long, but I'll just use my four H pencil. We use a couple more layers to fill this in and we'll come back.
12. The Cube Part 2, Returning For Fun!: All right, Once again, let's return to this now. All I did was I used my for-each pencil. I put a layer over this entire area. I put a layer of value over this entire area. And I just went ahead and spent a little bit of time redrawing some of these lines just to clean those up a little bit. So we're starting to see some of them. Some of this q appear. I think it's time I get I've clean these up so I can, I can put it in the cache shadow. And now again, I'm going to, I want to try to go kinda There's a side-to-side, but I'm really actually going a little bit at an angle as opposed to going straight. That's because I'm reaching across here. But for right now what we're going to and I'm using an elbow swaying with the tripod grip. And again, I'm just trying to put a little bit of some people will call this a wash, but I'm always like that's for watercolor. All we're doing is we're putting down a tone which would be the more accurate description. We're not we don't have our brush filled with water. You can actually pull washes n with graphite, with water-soluble graphite or even normal graphite is actually a water-soluble if you have it ground into powder. But I'm not really I'm just kinda putting down a little bit of our because it's a white tablecloth, but it's going to have a little bit of a gradation. There's going to be a little bit of a value, a little bit of a tone to it. And so I'm actually going to bring this value back to the back of the table here. So this is the lightest value. This is not, you know, this is not the cache shadow just yet. This is the, the value of this y table that even though it's wide, it's going to have a little bit of value to it. Good, I'm using a 4 H console, using a elbows swing in which to do this holiness and sort of a modified tripod. I've actually let the pencil come out of the crook of my hand because I wanted a little looser. If you try it again there, if you're running this and you try to control it too hard, you'll make I've got a couple of lines. Again because I was trying to press the pencil a little bit and so just letting it float. Over the surface. And this is so soft, it's probably not. You may not pick up on the camera. Our eyes can see better than any camera. And so, you know, in person you can see a whole lot of subtlety that's just going to be lost. And law detail is going to be lost to the camera. Again, I'm just trying to put a very light tone so there's, there's no place with pure white paper. Right? We're just trying to make sure that there is no place that has pure white paper. And that's so that's on time. I want to somewhat snow. You've got to put some value and snow because otherwise snow is just bright white. Even the shadows will blow out and won't even look like there's anything there. I mean, little things but I mean, you know, but you'll get the shadows get really dark and and then the lights get all blown out. And it really has doesn't have a whole lot of detail, isn't really have a whole lot of the form shadows. And so it looks flat. And so you know what to, what you'll do is you'll play with the exposure and it darkens everything a little bit. And that way you can see detail in the lights and you can see the half-tones and the, or the middle value is half-tones. Middle values are the same. They mean the same thing. So I'm gonna grab my HB pencil. Now we're actually going to start putting in the cache shadow. Again, I'm, I'm using a HB pencil. Now we'll use this just a little very beginning shadows will start to have, as they move out, will start to blur out. And so what I'm doing is I'm starting with a lighter pencil, with a lighter touch. And then I'll bring in a darker pencil. And this little bit that I'm doing right now will be the court as it's transitioning and disappearing. Okay. Alright. So again, now something now I haven't gotten this as dark as it needs to go, so I'm not going to fiddle with or mess with or overwork the cache shadow to match your work too much into the cache shadow just yet. But when we're talking about form shadow should have mentioned that cast shadows which is just blocking the light. So we don't call them form shadows are just the object blocking the light. But that if all things are equal, so this is a white cube, is a white table. Similar or same value in this case, the same. Cache shadows are always darker than form shadows. So as I'm creating these, I'm going to keep them in the back of my mind. And there's going to be a point at which I'm going to darken this darker than this. Then this dark plane on the, on the cube. For right now I just want to address it as we might say, I want to just make sure that I've got. I've got the shape worked out for that cache shadow. Again, it's completely blown out. It's not the right value just yet. But that's not what I'm worried about. So I'm going to go into this, into the shadow side and we put a layer of forage value here, a layer for each value there. We, we kind of cleaned up the edges a little bit. Now we're objects touch. We'll just talk about this real quick because I think we're going to darken this just a tiny bit. Or objects touch. That's the darkest part of your drawing. So when two things come together like your fingers, it will cause a line feed where the little cuticle touches the nail. It's curling down and they're touching together that it causes a line. It's called an occlusion shadow. And it's when two things touch. So if you're drawing a portrait that line between the lips, their mouth is closed as is an occlusion shadow. As we age and we start to get these folds of our skin begin to pucker and then touch, we get lines and wrinkles. So those are occlusion shadows. They're going to be again, some of the darkest. They should be darker than even the cache shadow. So where this white cloth touches that, that cube, there's going to be a line because that's the edge touching the table. On this side, it's going to be even darker because it's in the shadows. And again, it's going to be one of the darkest places and it's called the occlusion shadow. So the occlusion shadow really gives you the feeling that something is touching another surface. If I didn't have this line, this isn't just a line. So if someone's like, well, what's the deal with the line? It's not a line, it's an occlusion shadow. And if I didn't have one, this would feel like this was floating in the air just above the surface of the table. So by putting in the occlusion shadow, it anchors and it says, hey, that's actually on the table, actually touching. Okay? So again, I've talked about how drawing is learning to understand. We see, well occlusion shadows are where objects touch. It's very important. So the next part of this, I'm going to start to incorporate, I'm going to use a shield, a piece of paper to protect parts of the drawing. So I'm going to put this down to like and rest my hand on. And I'm going to come in here and work in the shadow side of this cube. Okay? So again, what happens is it gets darker in this corner. And then as it's going to get lighter and then it'll get darker again. And that's from reflected light. Would light hitting here, reflecting up into there makes it a little bit lighter. So whenever you look at a cube, if you start looking at the corner that is where the, the, the, the first corner that goes into dark, it's going to be the darkest. And in fact, and then as it comes down and it's also darker on the edge. And so you'll see this little sort of this little triangle. And then diagonally, if the light is like this, and usually it's gonna be kinda 90 degrees. So this is how it will darken, but it will be darker in this corner. And then there's going to be a gradation of this getting lighter as it comes out. Now what I'm using is a 2 H pencil. I think this is getting too dark, too quick. So I'm going to grab my four H pencil and use this one instead. And again, by doing this, we're going to start to get a real feeling of depth on our queue because again, we're going to have all those different form shadows. We have light, medium and dark. And then the darks we're going to have reflected light. So I'm using this for each pencil, starting here at the edge where the shadow and the light meat. And then I'm bringing it down a little bit, bring it down a little bit more. We are making gradations. This is actually to the point where we're actually going to start. So before we're really, we're just kinda coloring things in sort of flat. But now we're going to start the darkest part and come out a little bit started the darkest part, come out a little further. Started the darkest part, come out a little further. This shouldn't, this should sound familiar. This is what we're supposed to be doing. Now I made this edge to daughter who can tell you that right now? And if I leave it that way, it's going to look like it's going to look like a, a cartoon. Whenever we have a dark, dark edge or a dark line around everything, it's gonna look, it's just going to have a cartoony sort of look. I think I'll go back to h. I think it needs to be darker. Florida are then the width is four. H is doing so we're going to bring the two h back. And I'm going to start it again trying to make a gradation. And again it's going to haven't. We're doing just a little edges on it to seeing these together at some point. But this is where it gets darker in this corner. External to the corner, come out a little ways. Started the corner. Come out a little ways, started the corner, you know. So again, we're just doing the same thing that we were doing before started our explorer. Come out a little further, still. Start with the darkest color, come out a little still, little further still. And again, we're gonna go ahead and again we're going to bump the contrast. So if I was looking at a cube and it was all white, the dark historic might be a step 5 on the value scale. We're going to, we're going to drop it down probably to the darkest dark might be a step 3, so that we get again a little more contrast. I'm already as an artist thinking, hey, what can I do to make this look better? To give it more drama, to give it more interests, to give it more contrast, are constantly looking and ask yourself, what can I do to make this look better? And remember, always beware because again, we wanted to stay positive. Obviously you want to have and so you want to give yourself positive feedback. All right, welcome back. So we had the Camera kinda turned off in the middle of what I was saying before. So we got that taken care of. And I wanted to kinda pick up where I left off. And that is we're talking about you've gotta be careful when you're about that self-talk. And and what I was trying to say is that it's, you know, you do want to tell yourself, hey, you know, hanging there and keep at it. But what I was trying to say is watch out what? Because we desperately, many times we'll want something to look good because we've worked on, and again, I'm just using a to H pencil. I've got a tripod grip. I'm gonna be using a finger swing. But we wanna, we wanna do, we wanted to look good and, and so the size will again start talking ourselves and all. Yeah, it looks great. Yeah. Oh, yeah, looks great. Yeah, you're doing good. You're doing good. That's and that's good. That the, what you don't want to do is though it starts out if you're not careful, you can start to convince yourself that something you're doing a better job than you, than you may be doing. So don't be afraid to also tell yourself all keep going, keep going on. This is looking good. I'm also going to be heard all this would look better if I did this, or this could look better if I did that. You certainly want to be able to detect what needs to be improved and get it taken care of now. So that's just some we have to be we care with cost as though like again, you certainly want to hang in there and keep it up and do all that good stuff. But at the same time you don't want to be missing stuff because you're trying to you talk yourself into believing something that may or may not be the case. And this is something because we work so much time on stuff. This is something we all have to be kind of careful of. And I've even, you know, I've had this app myself. I've had a project that had to get done. This project decided whether or not I would eat that month or make my renter something important like that. And it would be like 230 or three in the morning and I'd be like, You know, I'm killing it and this is looking so great and this is, this is doing, I'm doing a great job and this is going to be so wonderful. And I would then go and get a little bit of sleep and then come back and then realize that I probably should have gone to bed and, you know, and not stayed out because I wasn't I wasn't working. It wasn't the best thing ever. It was the fact that I was sleep-deprived and I was so desperate I was talking to myself into believing something that actually wasn't the case. And so in times like that, there was a couple of times and I learned this the hard way. There's times you just have to go, nope, I'm gone to bed. And I need to lead a lead to let this lie. I need I need I need a fresh eye. I've been working on for too long. And so that's something that's unique to art as well. We'll work on stuff for so long. And that sometimes again, we lose our ability to really tell whether it's any good or not. And so I'd come back in the morning, go old man. And I'd have to go ahead and take a couple hours to correct the mistakes that I wasn't catching the night before. So that's just, you know, some we want to be careful of as we as we are creating and it's something that happens to everybody. Now, does that mean it has that it has to be some sort of extreme sort of thing where it's like whether you eat or NADH is all dependent on this one little draw your meaning. No, but it's, it's an idea then that it can, that it happens to everybody. Even being a professional and hadn't had been and having been a professional for years, I've been in situations where that's still will happen. I've gotten to the point where I'm smart enough, where I go look. If I'm even a little bit, you know, if I can work on some Toulon, that's other thing. We start going too long again, you start to kinda lose your ability to see it rationally. And it never helps the painting. It just always hurts I or the, or the drawing as the case may be. And always hurt you in the long run. And so you just want to always sort of keep, as, you know, be aware of what needs improving as much as possible. And it's better to take, you know, usually you can't do anything in a drawing and under really two hours. But if you spend something where you're spending like a stretch it like six hours on a drawing and you haven't had like much of a break, do yourself a favor, go take a break for about a half an hour, maybe an hour or do something else and then come back. And that's amazing how differently you'll see something. It's something that's, that's something that's very unique to the drawing experience because the length of time that we got it takes to create something. And again, it's something that's everyone has to watch out for and it's not. And you'll understand what I mean when if you once you start drawing. But sometimes it's not even sometimes in the beginning we just don't want to tell ourselves that we've done something wrong. We all know that's why. Oh no, That's fine. That looks great and all that's fine. It looks great. And there's times it does look right. There's other times it just doesn't. So we have to make sure that we're as as aware as we possibly can be. So I'm using this again, I'm using a And I've, I've, I'm doing a feathered stroke, only making my stroke on the downstroke. And I'm actually trying to now go the direction of the plane so I can start to do gradations. And I'm also trying to fill n and soft. And I think you saw me grab the eraser and I'm gonna do it again. There's this little line through here that's kinda weird, this pattern. And so I'm gonna go ahead and create a little beak on here. And I'm going to get in here and I'm just going to just touch that to the surface to pull up just a little bit of the graphite, not not too wide. I'm just trying to slightly lighten it. And that way I can go ahead and get this too. Be more uniform. Now this is, this is a cube that we've got here is pretty much life size. It's like a 3.5 by 3.5 or almost a four-inch by four-inch. Q. So it's pretty much a life-size. You'll still I sort of a cube that you would, that you might see in a still life or what have you. And again, we're just trying to get some of the some gradations. Now when you're, when you're drawing this, just like when we look for values, when we're creating value, sometimes we'll take our eyes and our focus so we aren't being distracted by all the little nuances stuff. So we can see the patch like patches of stuff like I think my sort of focusing. So there's a patch here and a patch here that's not quite right. A patch up here, a patch here. It's when you soften your eyes, you see more of the basic relationships. When you put your eyes into focus, you actually see more of the general relationships, more of the details. And so again, while we're creating value, and especially in this where we've, we've put down a layer, then we've gone over with other layer, and this is probably a third or fourth time. And then the shadows, you're going to actually go over them, in over them, over them, the shadows more and more than you would in the lights. The other thing that this does remember is this is our H pencils. So this is a tool that I'm using. I'm using a tapered stroke or feathered stroke or gradate and stroke whichever one you want to use. Well, the reason i'm, I'm doing this is I'm trying to get in here. And I'm trying to I'm trying to fill in and we're trying to get better gradations, but we're also trying to fill in some of that texture that the, that the softer pencils leave. Because the softer pencils kind of ride on top of the, of the texture of the paper so they reveal more of the paper texture. And the H pencils, just because they're harder, they get deeper into the paper texture. And so they hide more of that texture that you can make a much more uniform. So that's the great thing about the H pencils is that you can use them to make your to make it more uniform. Okay, so I'm going to now sometimes I've got so many different directions that I've used the pencil in so many different directions. I'm going to try to soften those different grain lines because it's just showing all the different directions of the pencil. And what I'm going to try do and I tried to go up and down, top to bottom and diagonal to diagonal. And by doing that, you can start to, again get some better. You can buy by going all like I'd come again side-to-side, top-to-bottom diagonal this way, diagonal that way. And by going every different direction, you kind of cancel out all the different the different directions of the pencil is being used. And it can also really help the texture too. If you're trying to get something really, really smooth, That's not a bad way to work either. And again, we're doing that. We're hearing this mostly in the shadows so we can build up those shadows. And this is still fairly gentle. This is, these are not dark by any stretch of the imagination. But we're trying to, we're trying to really deal with this pencil is two. To even out all the variations that we've got going on with the shadow side of our drawing. Okay, so what I'm gonna do is I'm gonna go ahead and do that right now. I'm gonna go ahead and go to the right. John, the diagonal going down to the right, the diagonal going down to the right, a diagonal going down to the left. This way. And this way I'm gonna go ahead and do that. I'm going to do this off camera because real time and it's going to take me probably about 20 minutes to fill that in. It's gonna make a substantial difference to the feeling of uniformity on this drawing. And then we'll come back and we'll really just kinda finish this up. So I'm going to mostly use this H pencil for now and do what I said we're gonna do and I'll come back and we'll continue to develop this drawing. We're getting to a place where we start to really see that we have no dark, medium and light. We've got some value here, we've got some value here. But I'm going to work on this then we'll come back. All right, so we're going to continue on. I've put a layer using this. This is 2k. Actually, I put a layer just going this direction and a little bit going this direction. But what's happened is, is by doing that, again, I'm using now I'm using a tripod grip and i'm I'm actually using my my wrist. And the reason we're doing that as again, this just I can move a little quicker. But I've got enough. And again, I did a little bit of dry diagonal this way, a little bit that way, a little bit this way, but mostly it was actually going in this direction. But I did layered a couple of times. But the great thing is once you do that, you actually create a base. So you've got a uniform enough base to then go back in and modify it. So this right here and below, I think I'm, if I haven't mentioned that it bears mentioning now, you're going to spend more time and the shadows than you will in the lie. It's because you have to really build up the shadows. Like there's no place on here that's really except for maybe right there. That's darker then step 5 on the value scale. And again, that's also why you want to value scales. So when I say something like that, you can go okay. Yeah, I've got my value scale. Oh, that's what a five is. Or if you're like, Well, I've, I've gone ahead and I've memorized that value scale. Well then you're good, you know where it is. And so you can kind of get an idea of what I'm talking about. I think there's a little bit of I can try to transition this a little bit by coming up to that edge and coming away from the edge. And I'm kind of starting at the edge and I went out a little ways. I'm starting at the edge. I'm going to go out a little further. I'm starting at the edge, I'm coming out a little further. This is just like what we're doing with those gradations. And I just think there needs to Bill Bill softer gradation from that corner. Now usually this is gonna be the shell side and she also be darker on the wall behind it will pass behind it and be a little lighter. We want that. But it's, it's darkening. It is abruptly getting way too light away too quickly. So I'm trying to bring some of this value over this direction. And it probably be a little bit going this direction. Again, i've I've got the tripod grip. I'm using a risk swing, essentially, made it look like I'm walking my hand back and forth. I'm not doing that. I'm actually swinging the rest like so. I've got a 2 H pencil. And again, we're just a little, just a little bit of work we're starting to get again, I'm a much more subtle transition in that corner, which is what we want k. And so I got that a little darker now of the, this is going to be getting lighter as it comes down here because they're reflected light. But there's still a little bit of patchiness down through here in this area. So let me see if I can just fill that in. Des helping on some of the other drawings of the year. We're going to bring in some of the wordless pencils. Graphite. So they're kinda like the graphite sticks except they're round. And those are sold whether about the length of a wooden fence all except they don't have any wood on. Um, so there's just a solid shaft or graphite and it usually has a plastic coating on it and give it a little bit more strength. So it doesn't just break apart. But those are really, those are really quite nice to again, cover more area much more quickly. Because we want, we want to get to that base layer. Because again, it took me a little bit of time to get here where we're like, okay, this is where we're really going to start to manipulate this. This is where it's got the funds really going to start to happen, so to speak. And it is that is where the fun starts to happen, is once we've got enough of a base that we can then really start to create our gradations. And I think I've got just enough coming down, up here, maybe a little bit more of a gradation through here. Again, risk swaying. Tripod grip. 2 H pencil. I'm trying to get a gradient from dark to medium to lighter here, but it can't be too light right through there. That's the other thing that this has to be dark on this over here, which it's not quiet. So I'm gonna go ahead and put just a layer over the entire middle section of this to drop it down a little bit darker. And I looking at again, maybe just one more layer like that. Okay. Okay. I'm not now I've actually gone, I guess I'll do this without even thinking about like right now, I'm going really fast. And that's because I'm using an elbow swing. And so, you know, I'm I'm jumping through these different types of swinging through the wrist, swinging through the elbow. If I'm doing something really minute, I might be swimming through the fingers. And we're doing this to try to again get this really working. So we all have too much patch as it starts to look a little bit, a uniform starts to look a little bit better. And I think we're getting there. I think we're getting to the point where we can actually quit messing around. Again as equal, we think we've got it. Well, this definitely looks like we've got a shadow side to this. And of course we did before to add some of this is really gonna go just slightly darker so they won't be, it won't be a bad thing to have this shadow side. I'm trying to, I'm already visualizing that, so I'm already changing this slightly to what I believe will be there. Okay. Gone over with you can using that elbow swaying. And again now I think I'll grab an HB pencil as far as that goes. And we're gonna go ahead and use the same pencil. Come in here in this corner, because this should be the darkest part. So I'm gonna come over here trying to really get this cleaned up event, that edge. And maybe dark and just this edge a little bit at the top. And I'm going to use a diagonal now, I'm going to go ahead and we will waste. So you can see what I'm doing a little better. It's my fingers aren't entirely in the y. But I'm going to use the figure swing. Want to come back up into here. I want to try to push out again now. Also have a libel patch or right past the corner. I'm filling that in right now. And again, we're just going to continue to try to get more of a gradation through here. Let's turn to happen. If I thought my my HB pencil wasn't doing enough or darkening things quick enough. I could use that to B pencil. You always go one pencil, either darker or lighter. And if that wasn't working for you, go, go to the next one. That whale, you'll have a little more control. So I think I went a little darker, darks, a little easier, much more quickly without as many swings of the pencil. And so I'm going to use this to be for a moment. See how this looks. Now. I'm using a slight diagonal with diagonal lines going down to the lower left. And keep using this. Who uses again? I'm thinking. See which one this is. Now this is a wordless pencil, okay? And you could use this instead of the wooded pencils. The, usually the wordless are either to be there in the B family, so either CB or for B or six B, sometimes you'll find an AB. But again, what they do have is they have a little more graphite through here. So there are certain times you can use more of the side of the pencil and cover more area. Using an elbow swaying once again. But I can I can use a little more. I can use this to non using a finger swing because that was only just a little loose and looked like I was getting I was going to start to make lines. And instead of a gradation, so again, it's harder to control that elbow swing. That's all right. And again, the reason we do this is we can cover more area much more quickly. So using an almost 20 again, just because I think I need to, this area here thing needs to be this sort of this diagonal gradation going down. And right now it looks like a line. So I'm going to try to cover our, cover this area a little bit and some graphite, see if we can get that to look a little bit more. I think we wanted to be a little bit more control, so I went back to her fingers wing. And in fact now I'm doing a gradient, a stroke or a tapered stroke while I'm making the stroke and the downs and the downs through using that fingers Twain once again, tell you my eyes focus. I'm looking at this, trying to the co-pays that are binding to him with an eraser. Starting to get the basic and general gradations that I'm looking for. And my q I'm sorry to get where it's darker, yellow here. Not quite see. It's close, but we're getting this thing coming here today. I know getting lighter as it comes down. Again, I'm using that gradient and stroke, stroke. All right, so again, we're starting to get some of this gradation happening. Which I like is I come down, I think I'm going to go ahead and go over this area with the highlight just seems still a little too light. So I'm going to soften that just just just, just a little bit. And I think we're just encounter the place where you need to get the eraser out here and just touch up a coma places that I think will really help. Oh, we're trying to do here. I think I need. Now I'm just doing a ruler back and fourth finger swing. Nothing special about this, so I just want to cover more area. All right. I think that's looking pretty good, so I'm going to come in here. We don't want to spend 16 hours on this thing, but I'm going to come in here a little bit and just tap this little area here though, just a little too dark. And it was like a little pattern on it's like a one of the great lakes or some like that in the United States are some that just a little, a little island, if you will. So we would just went ahead and tapped on that, that begins to disappear. So I'm done tapping really gently. Hopefully you can see this, try to angle this out so you can see a little bit better. But yeah, I'm trying to just lighten it just enough. So melts n to the a value around it so it doesn't look like a patchiness. Same thing over here. Tab know, just a little bit, goes a long way. And there's a couple more places or some of this weird stuff is happening. Like there's an edge right through, right through here that's a little strong. So I come in here with now I've got a blade. So instead of a little tip, I've got more of a blade here. And usually you'll use that on like a flatter area. And have kind of taken out the, the words that again a little bit to to flat. Then I actually want a little bit much. I'm going to put just a tiny bit back down in there. Okay. So this little stuff like this, again, there's another little line right through here that I'm going to take out little line through there and we take out and there's a little dark edge right here in that corner That's just a little strong and needs to be darker here, little less dark over there. I'm going to go ahead and take that out. Okay. So come on over into here. All right. So I think the I think the dark side of this is looking pretty good as far as that goes. And so we're gonna come over here into the cache shadow, I think. And I'm going to use this, this H2B wordless pencil. Now, here's what I want to remember about a couple of things I want to remember about shadows. And these are all form shadows. This is a cast shadow. Remember that? I've got, I'm, I'm I've zoomed in here too far button so you can't see it. But remember there's form shadows and cache shadows. Form shows is how the light moves across an object. And how is that light moves across a certain plane, whether it's a flat planar occurred plane, it will get lighter or darker, lighter as it gets, moves closer to the light. Darker as it moves further from the light. So that's a form shadow. A cast shadow is just the object blocking the light. And that's what we've got here. So we've got this cache shadow blocking the light. Now the other thing we want to remember about cash I was as a cache, shadows are darker then form shadows in most cases. So to really make this have a presence, I guess you could say. We come over here against this edge. Because one edge always gets lighter while another edge is getting darker. That's always happening. So I want to see Furman a right now they're just barely darker than that. And I'm going to try. And so I want this cash either be darker than the shadow side of the cube because it's a cache shadow. It's cash-out or darker than form shadows. Now because it reflected light and all the different values at different objects and things like local value. And that's how light or dark the object starts out is. You can start to get things that switch if I've got formed shadows on a dark object and its cache shadow is on a lighter object like a, Let's say we had a black cue ball. And that black cue ball is sitting on a white table cloth. While the cache shadow on a white tablecloth is going to be lighter than a form shadow on an object that is black. So it's this because the fact you have this huge jump, a contrast. Then all of a sudden, what is dark for a light color or a white like that tablecloth is. Barely darker, is barely the value of maybe just below the highlight. Maybe the light values are that same value as the, as the cache shadow on white is the light value on black. And so that's that can be very difficult in the beginning to deal with. And that's why if you've ever, well, the hardest thing that I have you draw in the beginning is like someone has a really bright contrast, like a cow, you know, jurors are they called Jersey? So I don't think their jerseys, the Holsteins, the ones with the black and white patches. So you have those types of cows that are that they use for milk a lot. And I give you these other cash remote tuba, that's, that's a very common one here in the West. Well then it can be very difficult to draw because they have white and black. I mean. And so you have white and shadow and black in light and which is darker and which is lighter. And it can do some funny things to your brain. And, and that's why like beginning drawing supplies all the hassle and say, Hey, draw 0. And the idea is the same. You have the dark stripes against the, the lightest light plus Shia form shadow. So you have this dark and white stripes going in and out of the form shadows. And it's very difficult. It's very difficult to draw in the very beginning because you get all this stuff you have to keep in mind. And if you don't, it won't look right. You'll break the form of the zebra and it will look like this graphic posterize sort of drawing instead of looking like it has and it has some depth or what have you. So again, I'm just bringing this cache shadow n. And I'm trying to, this cache shadow make it darker than my darkest value on my, on the plains of this cube. Because if all things are equal, this is supposed to be a light cue on a light table. Maybe it has very flat light tablecloth, whatever, whatever. But if that's the case, they're both kind of similar values. In this case they're both y. And so let's say that the same wine. But the idea is that an object that has formed shadows out those form shadows are always lighter than the cast shadows. And so we're trying to deal with that. Now, cashflows also have value to them or they have gradations. The cash-out Julian be darker right next to the object. And then as the, as the cache shadow moves away from the object, it gets lighter. It also will be darker in the front, getting lighter towards the Mac because I reflected light. Usually the flood lights are well, it's reflecting off of something. Sometimes it's reflecting off the cube and then back down into the shadow. But we're going to go ahead and just keep putting some value down here. Try and get this cash-out to have a little bit more. Because this doesn't really didn't feel like it was like it was anchored because the cash out of a satellite. Well now we've got some value in this cache shadow, so it feels a little less like it's, it's, it's it's filling one like it's sitting on on a, on a surface now because of what we're doing with a cast shadow. And again, I'm using an edible swing. I'm using tripod grip and I'm using this wordless pencil. So using an elbow swaying, but now I've changed to kinda modified baton hand hold. And I'm using this to trying to fill in some of the patchiness on this. That's really patchy. It's nice and dark, beautifully dark. We got, you know, about the value that I want. But it's a little patchy. So that's okay. That doesn't, that's not the end of the world. Sometimes if people working in certain places, when I say grow up, grab a stop, grab a blending tool. We're going to use a different blending tool. We're going to come in here with this 2 H pencil, which again, really cleanses stuff up and makes it more uniform. I can play with edges like I can leave this edge alone. Let that be soft or come close to this edge. So it's a little bit crisper than this over here. And then as it gets really close eye and come over here and go right up to the edge. It's really crisp that edge off. So it goes from a crisp edge to a semi soft edge to a really soft edge. And by doing that, you're gonna start to make it feel like it's more, it'll feel more like a shadow cast shadow because cash-out was good. And there are edges are sharpest. Well where the light around with that shadow starts off the object. And is that as it comes off the AGA to gets a little lighter and the, the edges get a little softer. So pretty wild stuff. Again, just why? Just by doing this, we have a little bit more depth through here. And it's really starting to happen for us. So I'll get, I'm not going to bring it all the way out the edge here because I don't want to Chris that up too much. See a little further from the edge back here again because I don't want to firm up the edge too much. So I'm trying to keep the edges soft. Fellow right to that edge there. We crisp it on off and crisp it out. And I don't want that right now, right now. I can do that later. So again, I can use finger swaying to get into some of these little areas. Just comes back here and use that H pencil again, I'm using a finger swing. This is actually just a, just a regular finger swimming. It's not a tapered stroke, It's just scooting the pencil back and forth. On the pencils on the paper. Okay, alright, I'm going to put a layer in here with the two Hs to fill in. Some of these little gaps will come back and we'll continue to then come into the light vitamin advise and finish this up. All right, Take care. All right, So welcome back. So we're gonna go ahead and just put a layer of value down here and try to pull this together with the with a to H pencil a little bit. And we're, we're to the point where again we can see we definitely have a light medium and dark have the cache shadow. And again, this is just a generalized, I go to 2 H pencil in my hand. This is just a generalized idea of creating a form shadows with definite plane's lights up here. This would be the lightest. This would be o
13. Drawing the Pyramid, A Nod to the Ancients : Welcome back. So today we're gonna go ahead and learn to put value on the pyramid, tips and techniques for what to look for. Let's get started. We're gonna continue on with this, talking about the magic of values. We're going to be doing some more of our basic shapes are going to be doing a pyramid right now. I'm still going to be using my, my five pencils. I've got my four B My to be my HB, my two h by four h. Remember the four H's the lightest. The two H is a little darker. The HB is darker than one of the H pencils. The to-be is darker than the screen. The four B is the darkest of all. Remember that the B pencils are the dark family. The a stand for black or so the higher the number the black or the pencil, the darker the pencil. The H pencils, the higher the number, the light of the pencil. And the HP is right in the middle. So again, the four H's are lightest and then it gets darker to H, H B2B and forbears the darkest. All right. I also have my, this is a little white eraser. I showed you this earlier on. This has been sharpened with a sanding pad. Sanding pads. Just one of these little things that you can or you can use a sanding pad from Home Depot or sandpaper, anything. If you do that, you want the grid to be somewhere around a 200. 220 would be a more standard 220, 120 somewhere in there. You don't want anything lower if it's 60 grit, that's really rough. The higher the number, the finer the grit. 400 would be fine too. But anyways, I went ahead and send this off. But the historic in a cabinet shop, so with my dad and so I know that this sandpaper here is about 120 grids. We also have my little piece of mu variance. Remember that needed eraser can be pulled apart to clean it. You can all It's also malleable so we can go ahead and sculpt it into whatever size we want. Okay. So I'll put this aside. Now we're going to move aside some are materials. So I've got really lightly drawn in solar physics. You probably can't even see it on this camera. So you have to take my word for it. But I've got this pyramid drawn in. And I wanted to explain what this is. So these little symbols here represent a light. And usually you'll represent them as a cone. If you have them as just like a, like a little pointer, that means it's flat, that means it's a true profile. As it comes around, we start to see it since it's a cone. As we start to come around, we start to see a bit of the cone, a little bit of the cone here, much more of the circle of the cone there. And as this goes behind, again, we see the front side of that ellipse, not the back but the front. So this means this has gone around the back and it's now shining from the backside of this pyramid. So you'll see me draw these symbols sometimes. And not just me, but lots of artists. And that's the notation is to try to note down. We're trying to understand better where is your light source coming from? And, you know, if you're, if you're drawing from life is not that big a deal. But if I'm making something up or I'm creating something that doesn't exist. Like fantasy. Spend fan, fantastical types of artwork, science fiction or illustration or animation or comic book art or something like that. I need to know where the light is. So this is just a notation. Tell me where the light is. Now according to this, I have four different lights. We never have that many lights. But this was just to explain that this right here. Again, this coming around and this is almost pointing straight ahead, not coin is a little bit of an angle, but it's around the front and almost pointing straight out. This is moved around the side a little bit, not the true side like this, but it's still further round. Turn the light is turned like it's going around. This will occur here, rotating around this object in an orbit or something. So this is almost full frontal or straight on, Not quite. This is more like three-quarter lighting. This would be straight profile lighting and this would be backlit coming from the back. And if we kept going around, there would be another cone here. There'll be even more. It will get rounder, which means it would be more towards the back. Well, it's all about that circle. How much of that circle that we see. If we, if we had something like that, again, we could really see just where it's very much that circle. I can that would be almost straight at the back. And so I just wanted to explain what these lights, what this means. This is a notation of where the light is as it goes around the back, we see the curvature of the ellipse because it's a cone. As it gets further, we would see even more of the ellipse as it continues to go around. So again, this would be much more around, so that would be it would be further around the corner. The light would becoming very back-lit. This would be more towards the front. We're not going to. So that's what those mean, that's what those symbols mean. I'm going to actually use this three-quarter lighting. So I'm going to go ahead and well, I guess I've done it too dark to erase it. But I'm going to be using this lighting scenario right here. You always want one light source. If you're doing some sort of advanced drawing, sometimes we'll do a dual light source or maybe even a third light source that's really difficult after that, it just goes flat. And even when you're dealing as an artist, dealing with a dual light source or even a three lights. That's really hard to do because again, it starts to flatten things out. And as an artist, you have to really design it so that it still looks like it has depth. So I'm going to be using this lighting right here for my little pyramid. Now, pyramid depend when, whenever we're looking at, and this is a five-sided pyramid, it's going to have four sides and then the bottom that it sits on. And so it's a fight. It's going to be a five-sided pyramid. With a five-sided pyramid, the base, and it's got this side and there's no side there, another side. So you've got like the front left and the back left and the front right in the back, right. And you've got the base. And the thing with these guys is unless I'm like standing up and looking down at it. Or maybe looking up, but then you'd mostly, as we've seen in the bottom, you can only see two sides of a pyramid. And again, this is really light. But we're going to start this. So what we're going to have is we're going to have a light source, pardon me? Not a light source, but the light side and the shadow side. So remember was something flat and this is going to be a flat object. We only have five types of form shadows, so we can see all the different planes. But because we can only see two planes will basically will have highlight. Maybe I'll make these a little darker. We can have highlight. So I'll be able to see that. We'll be able to see the light tones or the light values. K will be able to see the dark tones or the dark values. There is no core shadow because it's a flat, these are flat planes. And so the fourth thing will be able to see is reflected light. Reflected light. And since it's also going to have a cache shadow of course as well. And the cache shadow, we'll see where it touches for the occlusion shadow. And I can even go in here to kinda just indicate this will help us kind of visualize the base of this, of this pyramid. I've also zoomed on this. So it's, it's really much smaller than the other things that we were drawing. And we're going to try and make this. So this will be a little shorter. Or the other videos were some of the sort of the core shapes. And these are core shapes but they're some of the minor ones. I don't I don't mean to diminish them, but I also, you know, the other one's took almost two hours and we're gonna see if we can really shave this down considerably, something like maybe 30 minutes. So we're going to have the cash out of the cashflows. Who's going to be going off the page here, I can just go again, go ahead and indicate some of that. This cast shadow. Now, I'm using a I was using a risk Swain. I'm I'm not moving my arm very much, but I'm using actually an elbow swing. But I've also got my fingernails. The back of my fingernails are on the paper, so I get a little bit more stability as I'm using this. And the pencil I'm using is a to B, so it's a little bit softer. Normally I'd be a little more cost us with this. What we're going to see if we can, again, this can help us. If we do it this way. You can save us some time. But it can also, because it's such a darker pencil, if it can go and get away from us, the value can really. Good, you get away from us so we can sometimes have much less control. But so whenever we're trying to draw, we're always trying to think of, hey, what's, how much hormones are going to take me? So I can do some short cutting. Vs is a shortcut to is it dangerous to do so? Dangerous is the wrong word, but it's again, what would my drawing suffer? Do I have the control to be able to actually make full use of the tool. Okay, so again, we're going to have this cast shadow casting off here. I'm going to use this Tooby and I'm gonna go ahead and just begin to put in the, the, the, the dark tones. So this is going to be the shadow side. Now remember it is going to be going, this is the edge. You see me getting darker here and getting a lighter as it goes away from that edge. And that's because the reflected light. It's not because it's a core shadow. Sometimes people will misunderstand and think that perhaps it's a core shadow, but it's not, it's because of reflected light. So again, the highest point of contrast is going to be where this edge meets the light edge. That seemed be the highest point of contrast. We're also going to have, it's gonna get lighter as it comes down this way because the reflected light this way. So it's gonna be getting lighter as it comes down this way. It's going to be getting letters, it goes across that way. So and that's the subtlety we want. Now sometimes, sometimes maybe because of the technique or maybe we're doing cross hatching or an ink or something. Maybe we can't get all of those nuances. But since we're using a pencil, all that little subtlety with, with pencil we can, we can, we can try to get some of that subtlety. Now, again, this is, this is a starting class. And I understand that, but I'm just going to say that that's what we're shooting for. And again, we're trying to keep I'm keeping everything really basic. So that way it doesn't become the first time you do this. It's hard enough as it is. We don't need any more pressure, any extra, extra added pressure. And so what we're gonna do it, you know, we're, we're trying to capture all of those different types of form shadows. But we're going to keep it easy and simple. This isn't, you know, I've never been a real believer and show boating unless you're actually, you know, if I'm in a, in a, in a room with professionals and advanced students and we're like, Okay, well let's do a little bit of show boating because they already know the concepts, so I don't need to slow it down and things like that before for those that are just like him. So I'm just trying to get my brain around how this stuff works. I think show boating is can have the opposite effect. People can go, Man, I just I don't know that I can do that. I just don't know if it's if it's something that I want to pursue, if it just looks, you know, just so daunting. And so I don't want that. So we're just doing again and again this we're, we're still trying to get, you know, a gradation going from left to right. We're trying to get a gradation going from top to bottom. And that in itself is going to be hard enough. So again, I'm not trying to diminish what we're after. We're still trying to give a feeling of the third dimension. But you're not, I'm not going to sit here and do a video, like some quick video that I did QuickTime or where it took me for six hours and I compress it down to ten minutes just to show, oh, look how good my drawing can be. An, that's, that's not teaching. This is really about teaching. It's not about, Oh, look you look, you look at what I can do. Now. The cool part is, is that once we learn how to do this, you can actually start to amaze people and your friends and family. And that's where we wanna go. Well, when we were starting out very simple. This is the equivalent of learning the bass clef and the treble clef. And Mary had a little lamb. And, and that's what we're doing when we're using the keys, we are using values. Again, values are our notes. And along with a handful of ideas of drawing, concepts like perspective and other things. If you haven't had the power of line or my first series where we go over site measure methods and construction drawing and all that. You really want to end where we draw cylinders and boxes and, and pyramids and how do we draw them effectively? You really want to take that class because that will really help you with the foundational ideas of contour, in other words, line-drawing and how to deal with complex line drawings. So I'm already starting to get a bit of aggregation over here. And we haven't been going all that long and that's what we're looking for. So again, that Tooby pencil can as long as I can control it. And that's, you know, if you find if I found that it was getting too dark too quickly or, you know, it just seemed like everything was to just getting to black and two uniform. Well, then you ditch the pencil. I have been I've been talking a lot and I guess I haven't been. So I've been using a finger swing for a quick using the after our rough this in to get a basic tone. I've gone to just the fingers swing. This is the one where I'm distributing it back and forth. This is not the tapered stroke or the feathered stroke or the gradient and stroke. This is just simply scooting it back and forth. And I'm spinning wartime up here, so it's darker up here and less time down here. So it's lighter down here. I'm spending more time over here and less time over here. And that's how we're gonna get this, give this some control. And remember that this has to be shadow, so everything has shown us to be darker than anything in the light. I'm going to go ahead and switch now because again, I've got all this texture here because that was a B Pencil. And remember, we can get rid of that texture by using an H pencil. So I wouldn't grabbed my for-each. I'm still going to be using a finger swing. Well, the forest is a couple of things for me. And if I felt that my edge had gotten a little hidden, meandered, like it's crossed into the the realm of this will be the highlight along this edge, also be a highlight at the top. But mostly the highlight we would see on the edge. Of course who was pointed, there'd be no highlighted the top of this. So it just depends on what type of like if it's a nice, really, really hard point, there would be no no highlight at the top of it. So I do have to so I think I'll do that. I'll just go ahead and make this a nice crisp top. So that means the highlight will be all along that edge. Okay. So this is the, this is probably what I'm going to slow down a little bit. And we're going to try to get this a nice clean edges. We say the strays we can. If I if I thought I thought I needed something to help me get straighter, I could come over with a ruler or any sort of stream and a straight piece of paper. I could lay that noun like so. Now, sometimes he would like hiding, that's TV and wow, I think you should do it all by hand and I'll stuff and, and I understand that you shouldn't you shouldn't be using a ruler if you're afraid that you can't do it. But if you're like, look, because I've done tons of straight lines and i've, I've paid the price in art school and spinning 24 hours on shading projects and everything had to be done completely by hand and and, you know, no templates, no rulers know nothing. Yeah, I've done that and so yeah, I could sit there and double my time trying to clean it up. Or this is another one. Let's say I wanted this line here to be nice and clean. I could take a straight edge. Now this is just a straight edge. Again, I could use a piece of paper if you use anything for this really. I could lay it right along there. Let's line it up. And then take my eraser and go right along that edge. And that will clean the edge up. Okay, so that's a real quick way again of cleaning, cleaning up my edges. And now this was sketched by hand. So my lines are our bad. If you've seen my, again, if you've done the first class, you know the power of line. And we were talking about how to draw cubes and how to draw cones, and how draw cylinders and sign measuring methods of construction methods and all this different stuff. You know, we could do a pretty decent line by hand if if you warm up and I can do I can do a decent life. I warm up is a perfect no, not even close, but it's still you're like, Oh, yeah, I'll hand rule. That's for free. Well done. So again, I could I could sit there for like an hour trying to just get everything just so or I can grab a ruler and take about a minute. And again for a lot of time, a lot of times. And again, this is after you've paid your dues and that means done, you're practicing and you've you've done the edges and you spent the time when you took an hour to do that edge. You need to do that. Don't, don't, don't sidestep and thinking that somehow you're winning a game and no one knows that you just sidestep to. Because if you, if you try to get out of doing it at some point, your drawing will never improve. So I'm just saying we're using this to save time. But I don't want you to think that it's not important that pay the price of taking time to maybe do one of these All my hand and make sure that the edges are as clean as you can possibly make them. You want to do a couple of those like that, keep them small. You don't need to do a full page of that. If I do the full page, this thing goes way off the camera. But it's like it's like a 14 by 17 sheet of paper. If I do the Big O 14 by 17 graphite drawing, it would take me all night long to get that thing, to have all the subtlety that I want it. And if I was doing all the edges by hand and everything else, you don't need to do that now that's too. I mean, you you know, if you're like, Well, I want to be a professional. Well, maybe you wanna do, uh, once, but it's not something that you, you know, you only need to pay that price once and then you're like, I got it. I can do it. I understand how to do it. I know that I can do it and now I'm just going to do some things to save myself some time. And so artists have done that throughout the centuries. There was back in the day. These are, these are base after some of the classical methods. And the, the classical artists were really heavily trained. And so like their first couple of years was drawing lines until they could do they could draw a line. It looked almost as if it was hand ruled, not quite, but almost, you know, so much not to go, wow. That was done by hand. That's, that's, that's amazing. And then once they mastered that, they use straight edges to save time. So again, first they built the in the, the ability to do it. And then because these guys were going on to create businesses, the both egg is in Italy, time was money and so they were like, Yeah, okay, Now we're going to say now that you know how to do it. And you can draw really well, we're going to have you say some time, Here's a straight edge. So that's how I went. So and so and we're not going to try and train you like that. I mean, most people just don't have the where with all, you know, the ability to keep their attention span and not get bored to tears, trying to do something like that. And there's a point at which I say look a little bit of that's good too much that I find almost nonsensical. But again, with my classes, if you've done the power of line, we have a little exercise that I expect people to do and I want people to do because it will help their drawing if they do it. Where three times a week they draw straight lines for about ten minutes to 15 minutes, three times a week. And so, you know, after you've done that for a year or two years or five years, you've drawn tens of thousands and hundreds of thousands of lines. You can draw very good line. It's just, it's just like anything. The more you do it, the better it's going to be. And so that's what we're doing here. And again, I'll be using as my for-each. And I've been spending more time up here. I'm coming here and then coming out certainly more time here where it's darker, less time where it gets lighter. All the same stuff we've been doing for all our other all our other drawings. It's the same sort of thing we're doing with this guy. And again, and I'm not going to sit here. So again, we're not going to sit here all day long because again, it's very, very similar. But all I've used so far as the Tooby and the 4 H. And again, this is a light pyramid and all that good stuff. I think I actually needed to get in here and start started working on some other areas, developing some other areas as far as that goes. So what I'm gonna do is I'm going to, I'm going to grab my, oh, I got my 40s pencil. And I'm gonna come over here and we come with, come to the light. Now most of this is going to be light tone. There's still going to be gradation with a light. The light tones a little darker here and there. Lighter down here, but it's going to be so soft that if I was looking at the object, I would hardly be able to see that I've hardly be able to detect it. And so we're going to use this for h because it is the lightest pencil. It's also the smoothness like the tone when you start making value of this. The value just, you can make it so smooth. And again, I'm just using a finger swing. And it's just a regular finger swing. We're not doing anything special. This is not the graded stroke. And if you've forgotten what the gradient of stroke, in other words, also called the tapered stroke, also refer to the feathered stroke. We're not doing that. We're just, this is just, again, we were using a very basic technique here. And by using that technique, now I am trying to keep, I can see I've got some spacing between my lines. So that's some tracking issues. So I do need to pay attention and try to keep my self-aware of the fact that I need to overlap the previous line so that I get a solid tone, a value. And so again, this is going to be, it's going to be a little darker, getting lighter going this way, little dark anyway this way, but just very, very soft, very subtle. If I'm if I'm not, if I'm if I hit it too hard or in other words, if I if if I do that too much, if I make it too dark, it won't look like it's in the light anymore. So I had to be very, very cautious of that. Again, that's why I'm using that for H pencil. The 4 H pencil is the lightest pencil that I have in my drawing repertoire, if you will. And so being the lies pencils, the one I'm going to it's the one I'm going to use. So this doesn't get too dark because if it does, everything goes flat. Now the one thing we won't have here is we won't have middle value. Right now we've got dark tone, reflected light. We've got light tone, that's three. We have highlight, that's four. And that's all we can see. The fifth one for our middle values is actually around and be going or it would be the back, right side, would be the middle value. So anyways, I'm just going to continue using my fingers Swing using that for h k. Now again, that for h, this object has no relationship. There's no, what's called a ground, meaning there's no background, there is no for around. It's just this kinda this floating in this nebula of white paper. And that can be, that will just flatten the stuff out. So what I'm gonna do is we're going to just indicate back here. Like perhaps there's the wall and this wall that I am drawing. And let's try to make it at least almost straight channel. We would have to use our imagination on that one. And because of the fact that I'm drawing flat and this is further away from me. I'm just gonna go ahead and check it. Yeah. So we never draw a flat though. We're doing it for this, for the, for my demo here, because it's easier for you to see the camera. That's the honorees I'm doing doing it like as an otherwise, I would never draw like this. But because I'm drawing and distortion and because I've also got further away from me. So again, I'm kind of reaching out to get, to get to this place. It really distorts the way I see things. And so I got to be really conscious of this. So I've got an HB pencil and again, I'm using the fingers wing now. And this is supposed to be the wall. This is just a flat wall. And I've got this line in here for my parachute of erase that force or putting value on it. Okay. Okay. So HB pencil and the wall, since it's further back of the light is here, the walls for their Mac. Even if they were the same value, this would be darker, but they're probably not. So if this was a white pyramid, then the wall and the wall was an off-white. The wall would be darker, right? And so let's just go ahead and make this back wall. We give it a value. And by having a context that will greatly affect how this pyramid looks. Let's call the activating a space because I'm putting value back there. All of a sudden that value relates to the other values and it has a relationship. Okay? Mike cell. All right, now this is just, I've laid this n We haven't played with as much at all. And we're gonna go ahead and bring this in. Now, I've got this darker area where these two different they're going different directions. So when they cross the yellow darker when you do that. So I want to have to play with that a little bit, but I'm not going to worry about it right now. And this was a table. As, as the light gets an extra table, there's going to be a slight gradation as it's dropping behind the table. Now, the next thing I wanna do is, is this, this table is going to have quite a bit of light on it. And we want to decide, I want to value here on the table as well. And so I'm going to just go ahead and name this is a light blue tablecloth. And if it's a light blue tablecloth, that's going to be live, but it won't be as light as my white pyramid. There's actually going, I'm actually not taking enough time so that you can see sort of what's called the grain. This is going the same direction as that and it's flattening it out for right now. I'm just laying this in and we're not going to leave it like that, but we are going to lay this in like this. So at least for right now. Again, it's going to be a little flatter. And again, we go ahead and bring this out here. And we bring this out here. Alright. So now we've got a little bit of value going on here. What would a relationship? And that was an HB pencil. Towards the end, I think I was using my hand off the paper using a little bit of a as it were using a finger screen with my hand off the paper originally or risk swing. I'm not quite sure which I was doing, but you can do either that one's not better than the other. It's just I'm not I'm not sure which I was doing, but hopefully you're able to go. Yeah. But unless my hands on the camera and you're like, I don't know what he's doing. Well, right now, I've got my hand to the tripod grip. And I'm moving it right to left and I'm using a risk swing. This way I cover more area. So again, the whole idea of the fingers versus the risk versus the elbow is how much area do I want to cover? That's really the only, the only reason we add, of course, a little bit about control and fingers. So you will always have more control than any of the other two. But right now I'm actually good. I'm using the iris way. Moving at the wrist and my fingers are moving with my wrist is moving. So we're gonna make a little bit of a variation where it gets darker as it goes back. And it gets a little lighter as it comes forward. And again, I'm using now I'm actually using an elbow swing contrary to cover more area. Okay. Alright. So again, we've got a little bit of a relationship happening. We can start to see a little bit better. Going on with our pyramid. So that's looking good now of the two I want, I'm gonna go ahead and just darken a little bit this edge for the words. It's supposed to be in shadow, so they'll look nice and dark until I put these other values on there. So now it's too light. It's gonna go a little darker, but I wanna make sure I get an HB pencil. And we use this HB pencil. I'm just going to darken the edge just slightly because I don't wanna I don't want to lose that edge. So MS. Ed should be darker than any one of the Anything else. So we're going to keep that. We're going to make this will make the wall darker than the tablecloth. So maybe this is, this wall is a light gray or something like that. Okay. Now this is a light gray wall in enlight, so it'll be a little darker. But I went, you understand that this show will be darker than that because unless this was a wall that was really dark like leather or something like that, then it's going to be light enough though with the light on it, it's going to make it lighter and it will be lighter than the shadows in my pyramid. So I pyramid is still just barely indicated here. We've still got all kinds of stuff for this pyramid, all kinds of plans. We're going to go back in here and work it. We just need enough value back here. Now we can relate the values together. Which surface is lighter, which surfaces darker. While in general the, the, let's say our pyramid is the lightest, but it also has a shadow side. Whereas the tablecloth and the wall are both in light. Now the wall would be in half tone and the O, in other words, in middle values because it's a vertical plane. Because of this, that there's gonna be more light hitting this, this here and the table because it's down at an angle. And that's gonna be hitting more there than on the, on the wall. And so we want to be aware of that. Now the next thing we're gonna do with this is we're gonna take our 2 H pencil. And with our two h went. So we're going to go back in here. We're trying to fill in like there's a line through here and it looks like perhaps aligned got dug into the paper. That's unfortunate. Certainly don't want that. And so I'm gonna I'm gonna see if I can work with it. Like sometimes you even work with it and take allow that out. There's other types. Now I'm being a little more careful. I'm I'm I'm I'm still using just, I'm not using a feathered stroke yet. Well now I am a little bit. Um, and the reason why is you have much more control with that feathered stroke. So this is the part where we're going to start to everything else out to this point has been a rough N as we call it or a LAN. In other words, we're, we're just getting the basic values for down there. We're not dealing with any of the nuances stuff. The subtlety, as we like to say, that hasn't been addressed yet, but we will start to do that now. So again, I'm using more of sort of the feathered stroke. And I'm only pulling down one direction when I use that feathered stroke to create the back of that wall. Now we're gonna go ahead and come over here to the same thing again, part of this, if I thought I couldn't get rid of some of that texture and it looks like I may not be able to. Well, I can certainly come in here with a brush and brush, brush, brush that a little bit and we haven't done that. So I'm going to come back and we'll grab brush and what will come into here a little bit, see if we can soften that. Alright, so we'll be right back. All right, we're back. So I went ahead and got, this is just a three-quarter, really cheap, a soft watercolor brush. And I'm going to see, so again, sometimes we can use this. So as I refer to this as the nuclear option because I don't want to do this if I don't have to. It first off, it's off with everything blows out all the wonderful soft value. If you've been trying to really keep the value nice and subtle, It's going gonna take all that off and you'll have to go back in and rebuild the value n. But what this is doing is it's softening some of those scratches. It's also because this is getting softer. This looks because the texture, the paper like it has more detail. Even though it doesn't, it has more texture, which the eye reads as all those, then there's a detail, there's texture. And so this actually is going to come forward as this stuff here, it gets a little softer. So there's sometimes we'll use this to to control our our field are feeling a detail or blurring stuff out. You know, almost like we were doing in Photoshop and doing different types of smart Gaussian blurs and different types of blurring sorts of ideas. You can, I can even see if we could soften some of the texture in here really quickly. But again, you gotta be careful because if I do it somewhere, you know, this has got a lot of texture. And again, this can just really blow out the texture. But it also, once I do this, my drawing will never feel the same. And what I mean by that is once I've done this, this will always, always look softened, blurred, smeared. And with graphite it has a tendency to look dirty. Like someone, you know, has been playing in the mud outside. And then commons are just decided to start to smear stuff around on your page. So you're going to be really careful of that. So now some people will like, Oh, I'll just put that aside, I'm done. No, you're not. Because when I when I soften this, I have to then go back in with a tool. A pencil. Sometimes you go back in with the eraser if I was creating texture, but we're not going to rendering rendering for right now. We're just doing River basic stuff. But I will come back in here and put another layer of graphite over the top of it. And what that will happen is it'll bring just a little bit of that luster back, not, not as much as this always will look cleaner. This will always look a little dirty and, you know, and so, but if I go over with my H pencils, especially H visuals have the H pencils have a little more sheen. And so what happens is by going back and redeveloping the area using our H pencils, we can get just a little bit of that less drawbacks. So it doesn't look as much like it just, you know, his dirty like it doesn't look like someone just smeared there. They're dusty handprints over everything. And we don't want that. That's a very, has a terrible luck if you, even, if you will, that do really soft graphite, which is really hard to do graphite, you know, it's, it's easier to do edges in graph I think is to keep it nice and soft. And a lot of people will do a lot of blending, but you have to be so careful and you have to go back into it and you have to go over it and over and over it. So sometimes people think they just always swear and they're done. No Dao the works just beginning, we have to go back in to every area and try to take that pencil into that area and manipulated. So I'm taking out some of those little lines because it was first there was we softened it been ongoing in and very judiciously going into little areas where there's a lighter line there and there's a dark maybe there's another lighter line there and I'm just filling them in 0 so gently. So that again it starts to, it starts to have a nice gradation that doesn't catch the eye because there's some weird texture there that I don't want to be there. What usually you want stuff as we would like to say, do it good enough so that you can ignore it. That's what we're doing for this wall. We want just enough information that we could ignore it. Or I can go, yep, That looks fine. And we literally ignore it and we look at other stuff because this isn't about the wall. And it just, just not as though it's about the pyramid. But in order for the pyramid to look good, we have to have enough of the value doing. And there's a slight gradation on this wall. It's getting a little lighter as it comes this way, get a little darker as it comes down. Also, there's some subtle stuff happening. And we want that and they're just going to be, it's going to look like it's been done well enough that people can then ignore it. Sometimes people get a little weird about that with like I don't want people to ignore it. Well, you do want them, you want them to ignore certain areas and you want them to look at others. That's a good thing. Okay, That's how it's like, you know, direction of the eye. Like for a magician, he wants you to be watching one hand while he's doing something else with another. He, he's trying to distract you. So the magic can happen. That's what we're doing. We're trying to make sure that we've got enough so that this doesn't distract. So instead you're watching your eyes on a pyramid. That's where the magic is happening. And so that's what's really fun about. About drawing is it's really just a visual sleight of hand. That's all it is. And come back down in here and we're going to, and I'm going to try to get this just dark enough that this edge looks lighter. Now this has to be gradation. I was using a little bit of a tapered stroke and that's what I'm doing again. Just on the down-stroke, I'm making a stroke, great and a gradation. And I'm trying to make degredation coming off or you're getting letters a comes over here to the left. Okay. Just a little bit. Not a ton, but just enough. So he was there to go. Look at that. We like gradations in gradations are where it's at. Even if you're, you know, the, the impressionists do this all the time. It doesn't matter what your style is. You can do all kinds of fun things with value, because value begins to direct the eye where to look by making gradations. And I'm trying to make this just soft enough of radiation coming off of this edge. So that light edge looks lighter. But not too much. That may have been just a little too much. I'm going to come in there, fill in some of that texture, every field called out the grain. If you go over just one direction, you'll start to create the grain of your stroke or the direction of your stroke. And usually you want to make it so you don't see that too in so you can do that by going different directions. Hatching. But this isn't hatching to leave the line. This is actually hatching to cancel out lines. So many times with hatching where we're leaving the hatching so it looks really good. And then we have certain sort of indication of the form and the line becomes part of the style. That's not what we're doing here. We're going different directions to cancel out. The fact that we can feel the pencil going in only one direction or the grain or the pattern that you're creating. And so you can go different directions, sort of like an x. And if you do that, you'll start to cancel out that if you go one direction, then go the other direction. They essentially cancel each other out. And that's what we're, that's what we're looking for. So again, where we've got just enough information on the surrounding stuff and that's what we're looking for just enough. You know, that there we go. Okay. Yeah. All right. I'll buy that. That looks fine. That's all we're doing. We're trying to give them just enough. So we were like, Yeah, that looks fine. And that's it. And we
14. Draw The Cone and Then Eat Ice cream!: So today we're going to talk about how to create value on a cone and giving it form and volume. Let's go ahead and get started. So we've got the four pencils or five, I should say. The 4 H, The two h, The h be the to be the four B. Well, we've done before, so we're definitely have those pencils. I'm gonna move these out of the way for a moment. You also might see me pull these out. This is a to H charcoals. Charcoal, pardon me, graphite stick. These are weightless pencils. These will just save me time because I have much more surface area. I can cover more area more quickly. Make this video a little quicker. But this is a to-be would list pencil. So it's just pure solid graphite. This over here is a number for wordless pencil, solid graphite. So you're going to see me probably pull these in here during the drawing, but they're the same thing as the pencils are just solid graphite. There are two h and to be in terms of the things you might see me blending with, I've got you might see me grab a little Q-tip. I've also got some tissue paper that you might see me poll. None. This doesn't mean I'll use it, but you might see me do it. And then I've got my three-quarter inch watercolor brush. You're definitely see me use that before. And again, this is a time-saver. For my erasers. I have my two retractable erasers here. They're like mechanical pencils as far as that goes. And I'm going to be using my kneaded eraser. You might see me use the white eraser. So I've got I keep stuff around and sometimes they use it, sometimes I don't. So that's the idea is that I've got I've got options though. All that stuff on here left a little bit of junk on my kind of dirty it up the paper here a little bit. So I'm going to try to pick up some of this. It's fairly light. You probably can't see in the camera, but you definitely see it if someone's looking at this. I've also got a piece of paper, just printer paper. So I can use this to rest my hand on to protect the drawing. And we've got right here for our drawing, we've got the very lightly drawn in the pyramid. We also have our little r, little cone here that indicates where our light sources coming from. We also have, again, we're going to be drawing with value and we're drawing on a cone which is round. And so we're going to be able to be seeing, or we will see the light values will be able to see. Middle values, will be able to see the highlight, will be able to see the core shadow, the dark values, the reflected light. And then those are the form shadows, the sixth form shadows. Now remember middle bias have a light and dark side. Dark values have a lightened dark side. And then we're also going to have the cache shadow and the occlusion shadow. Remember the occlusion shadow is where this is going to be touching. And when you have something touch, it's the darkest part, it's an a and we call that an occlusion shadow. So if I had my fingers here, those little lines between my fingers are caused by occlusion shadows. The biggest problem we have more drawing when we're struggling is we can't identify what we're looking at the moment. We can identify every one of these different types of shadows that we're seeing and whether they are there or not. Because again, if we're using the queue, we only have five. When we draw the pyramid, we can only see two sides, so we can only see four. So it's important to understand how, what you would be seeing and what you would be perceiving depending on the drawing you're making. So I'm going to go ahead and we're going to start laying in some value now again, this, this right here, maybe we'll just talk about this real quick, is the light source. I can see a little bit of the opening of this of, of, of the ellipse. So I've got an ellipse that looks about like that. Loops. Try that again. I've got an ellipse that looks about like this. That means I can see it's on the front side because I can see the entire ellipse. So I've got a cone here. And because I can see the entire lives, I mean, that's on the front side, but it's not super open. It's not open like this, which would mean that would be more around the front. And it's certainly not, you know, this is almost a true circle that would be further in front if it was on the side. Again, I wish I could put it right here, but I can't if it was on the side that you wouldn't be able to see because of perspective, you wouldn't be able to see the ellipse at all. That would mean it would be true sidelight. Now to start bringing these in and just kinda show that these would be coming around. It's best that this was on an arc, unfortunately, it's not exactly. And then on the backside again, we would see the back of that ellipse starting to manifest itself. The curvature. This we can see the full lips. This we only see the back portion of the list because it kept, because the other part of the ellipse is hidden. We can, unless it was made out of a crystal but or glass or plastic or something. They're plastic, but we're not dealing with that. So again, as it came around the back, we would see more of this rounding because of the ellipse and decanting what, what that code is doing. So again, we've got one that's right here. So what we've what we're looking at is a bit of sidelight that's just a little bit around the front butt right here. So we're going to start putting in some values on this side, we're gonna get started right now. As a matter of fact, remember that the that the back wall is an off-white color. It's also the furthest back, so it's going to be a little darker. It's a flat plane, so it's just going to be value moving slowly across that plane, getting a little bit lighter, going darker as it goes this direction. We've got this light blue cloth, which again is, it's going to be again a light, light, light gray. Lighter, getting darker as light moves across it. And then we have our cone. And so the cone, we're going to have our cone is going to have the brightest highlight area. But in general, these different planes, the backplane will be a little darker, this will be a little lighter and this will be lighter, light and dark, the highest contrast. So let's go ahead and get started with creating value on here, I'm going to grab my, my, my graphite pencils. Like I said, I would like I promised I would. And we're just using a a risk swing. I'm going side to side now. I'm holding this at a slight angle. So the line that I'm creating is at a slight angle and that's fine. Well, we're just going to start laying in some value. All right, and so wrist movement side to side. This is the land, meaning we're starting to rough this in a little bit. This is the certainly is an important part of the drawing. And you know, it's our first value is, but we don't have to have to lose sleep over it. Sometimes we get so timid when we first started drawing, like I'm breaking through a little bit of the line of the tablecloth. I'm not worried about it right now. I'm just I'm not ignoring the edges, but I'm not hyper-focused, are worried about blowing something out. We're just getting started. And that's fine. So again, I'm holding this is in a tripod grip now again, I'm working flat. So I've got my tripod grip. If I was working on an angle, which is what I should be doing, can do it as well because it's harder to get the camera to line up correctly. I would be using that overhand grip or baton handhold. And again, I'd still be using a risk swing. So if you want to work flat, That's fine, but you never do your contour drawing, your drawing of your cone. You don't want to be doing that flat because you're actually drawing it in perspective. Because your eyes are at a different angle to the surface. And unless you're looking right over it, in which case you'd have to kind of lean your back over the table to get your eye to be lined up 90 degrees to your drawing. It's just easier to have the drawing on an angle. It's also more ergonomic for your, for your hand as you're creating the values. It's not just, it's just not a bad idea all around. Now, I can use again, a piece of paper and I can use a piece of paper to your two things. I can use it to either keep my hand. From being drug through the graphite, me being left-handed person. And so used to being, you know, learning to write. Well, as in school from starting on the left, go to the right. The, the old habits die hard and so I'll still do that. So what happens? You're dragging your hand through the, through the value. We don't want to be doing that. And so you can use this to protect your drawing. You can also use this as a shield. So if I want to come down here and make this edge now again, I could do this by hand, but it's going to take me twice to three times as long. Why not just this is not that important now again, I've said it before because sometimes we're like, Oh, that's cheating, that is solely cheating you how to do it all by yourself. And I have went to art school, had projects that they would give us that we're intentionally meant to take us 3468 times as long because they wanted us to build those skills and you certainly can do it, you know, and I would say do it, you know, half a dozen times, dozen times. But after you can do it, what's the point? You're like, yeah, I've been there, done that. I can do that, not a big deal. I can also use this as a shield because I've kinda dirty where my whites are going to be in my pyramid. I can use this as a, what's called an eraser shield. I'm laying this down trying to get my hands out of the way here for you. I'm laying this down so I can erase along that edge. And then when I pull this off, it's going to clean that edge up. And I do the same thing over here, but this my shadows, I'm not well, I'll do it anyways. Let's see. I'm not worried about it too much because it's in the shadow area, but we'll go ahead and do it anyways because I want to get the tip up here. I've got my little, but my smaller racer, my retractable eraser. Same sort of eraser to smaller. You buy these at any any sort of art supply store. That's it's nothing that unique. Also, if I was wanting to like, let's say I wanted to blend this out. And again, I wanted to keep my edge. I could take this right here and protect the edge. Keep it white while I'm out here. Blending with my brush. Okay? So again, I can use this especially, especially in the beginning. So you can do this and it'll just give you a little nicer edge. Now again, if you're like, Look, I wanna do this all by hand. We'll do it. I would certainly I can and I would do that too, except it would turn what this is probably going to be an hour and a half, maybe two. Our video turned into a three hour video. And I don't think I would have your attention that long. I think you would you would go and do other things. And I I'm not sure I could blame you. So and again, I've got sort of an edge that happened there from me putting the shield on. I can go over here with my tissue paper and see if I can lighten that. And I'm also, this is not the final value. I'm going to go into this a couple of times. So again, i'm, I'm not super worried about even if that edge which is still there a little bit stays there, I can get rid of it by layering. So again, we've got our little facts. Maybe, let's see, I'm grabbing a to H pencil. Remember the h is our effect. I think when he, that's too dark and we use a 4 H. And again, remember that we're going to be drawing. And I'm using a finger swaying, I'm not using the gradient stroke, I'm just using a back and forth stroke. Using a finger swaying. Why was I using the finger swing? Well, because the fingers swings a little more. It's great for detail in small areas and I'm trying to get into the smaller without that edge and basically pull some value out, make sort of a gradation so it disappears. And that's what the fingers swing is really great for a smaller areas. If I'm doing like, you know, value on the back of a ladybug or something like that or put an eyelashes on a, on a flea or something. Smaller areas dealing with little skin textures. If you're dealing with hyperreal ism on a face, you know, and you're gonna go put some of the textures of the skin. You're going to be working in smaller areas. You're gonna be using a finger swing. Now usually you this is not the this is still the delay in ER, the rough in. I wouldn't be putting textures on this point. This would be just barely trying to get the value on the cheek around the eye or the basic value on the nose. The crane textures would be far down the line. But the idea is, if I'm going to work in a low area like right now, it's a little darker through here. I wanna do a little bit more of a gradation coming off to make it disappear. The figure swing works really great. If I'm trying to cover a large area, well then I would probably use a risk swaying. If it was a really big area. I'm I use an elbow swing, you know, I just that's all it is. We're going to want to do this enough that we start to do without thinking, oh yeah, bigger area, bigger swaying. Oh, smaller or a smaller swing. Now I'm not really doing a gradation at this point. And so I like it. I'm, so I'm not really doing a great aided stroke. I'm just trying to fill in. I'm doing some tracking and other Philly and there's a little like little lightening strike through here that I'm trying to fill in because it's lighter than the surrounding values. So again, we're just trying to get the values to be correct. And that's all we're doing against still using a finger swing. And you can use the tripod grip if you're working flat, but if you're working on an, on an angle, you will find that that tripod grip, not the tripod grip, excuse me, the baton handhold or the overhand grip. On a surface, on an angle works beautifully and it's a little more ergonomic. Again, it's a little better for yeah, you're not gonna get the strain through the wrist and things like that. And through your fingers. Want to take care of our hands, you know, repetitive motion. We've got to be a little careful here. If you feel your hand cramping up, go ahead and stop, stretch it a little bit, rub it a little bit, take a couple of minutes and then start back into it. You want to take care of. Your hands, you wanna take care and same thing with your eyes. If you feel like you're getting some eye strain from staring too long, you're drawing closure eyes, rub your eyes a little bit, take a break, grab some water. You know. We don't want you we want you to take care of of your equipment and not just your pencils, but of course you know your eyes. It's all about the eyes. Take care of your hands, all that good stuff. Since we're dealing with, you know, these are the essential equipment or it's certainly could equipment that helps. So again, we're getting some, some value around there, which is nice. I'm gonna come over here and bringing some value in here. Now, remember that when we're drawing, we can always not. And I wouldn't do this too much in the beginning, but we can always change the drawing slightly to suit our, our creative needs so we can make the contrast higher. That means, you know, darker, darks, lighter lights. And there's times we might wanna do that for drama. There's other times we might want it to be softer. We want it to be a whisper. We want things to melt in and out of the values and the shadows. And really have something that just, it feels almost like butter in absence of a better term, but just something that melts in and out of our focus. And we could soften edges. We can even soften the contrast and make the lights a little darker, make the darks a little lighter. And all of a sudden becomes, you know, it's like a whisper instead of a really high contrast has a lot more drama. And I hit you with a lot more impact. So I tell my students how back in the day and of course the younger one. For everybody, it's hard to understand, but probably the younger ones even more so about how the visual artists Back in the 1800s before there were motion pictures. They were, they were like the Hollywood moguls of the day and you know, they are there. Certain people would flock to the museums and see the newest painting by these artists. And to see what the stories were and what the allegories or in what they were showing to their audience, what they were telling them, what, what was it saying and the story. And people would get very excited about seeing these paintings in museums were just, they were standing room only for people to come and see the newest artworks by the different and various artists of the day. And so the idea is that we are at the end, we get to create our own world. We get to do things the way we want to. And if we're creating a, a film, first thing that you're going to ask yourself is, what kind of film is it? Isn't an action movie as a drama, is it a romantic comedy? What is it that I'm actually trying to do? Now if we were just trying to deal with basic, basic values at this point, but as you get more experience, as you draw more and more. Then you're going to start dealing with, okay, what am I trying to say? What is the story I'm trying to tell? You're not worrying about struggling with values anymore. Now you're, you're, you're wondering about how you're going to convey your story to your viewer. That's when it's fun. You know, that's where it gets exciting. It's, it's just like playing the piano where once you get through struggling with knowing the bass clef and the treble clef and all these different things. Well then you can settle into playing the music. And once you've got a song where you know it backwards and forwards, sometimes you can tweak it a little bit to bring out certain notes, to bring out certain emotions in the song. And we did the same thing as artists as, as we get used to dealing with. And we've learned all our basic stuff. Well now we can use our basic knowledge to create our own stories, our own allegories, our own messages to our viewers. And that's again where it gets fun and, and, you know, so down the road, the more and more we'll start talking about theme. But even here, we could do it very basically by, do I want a cone that feels moody? Do I want a cone that feels mysterious? I want to call it feels like it's bright and light and fluffy almost. And we can change all that with the value lighter, lighter values. On the light side, like what the impressionists used to use the French impressionist when they painted, gives a feeling of light and sort of a softness and sort of an airy quality. And if you want something that's more sort of mysterious or brooding or something like that, we could go ahead and create the value structure where everything goes a little darker. And the darker tones are gonna, you know, if I make everything starting to feel like sort of this spotlight where the cone dissolves out of the darkness. It's going to feel more moody. Or I could be film more mysterious. Or it could, you know, we can change the feeling of an object just by the values we use and how we changed their relationships. In other words, I'd still have all of the light tones. The light values, the middle value is the highlight, the core shadow, the darker tones reflected light. We'd have all that cache shadow, occlusion shadow. But we would just make them all darker. And as everything goes darker, it's going to have a darker feel. And if I'm doing a painting of what's called a night scape or a night painting. Obviously, we're going to have much darker values. They'll still be the same form shadows. It's just they will be darker. And so there's times you want that, there's times where, you know, it's, it's, it's gonna be a lot more important and there's other times it may not be as important. So I'm covering this again, I kind of there's some some lines in here. I'm using the shield. There's some lines in here that when I skipped around, I didn't pay as much attention to keeping the values fairly close. And I'm kinda paying the price a little bit. But I think we can start to see at least some of our cone. We're now going to think we're gonna come down here and just do a little bit of, because usually as the value travel across a surface, as it gets closer to this table, this table is against the wall. It's going to start to get a little bit darker. So we're going to start to you a little bit of a gradation. I'm covering a larger area. I'm actually using my I'm using again the tripod grip, but I'm using an elbow swing. I would do the smaller area, so I changed to a risk swing right there. Now I'm back to the elbows swing. Now we're just going to try to get a little bit of a gradation happening. As the light comes down. As the wall comes down, it gets closer to the table. And I'm just using this as a shield to keep the edge. Now this edge isn't going to be too sharp. If it was, I would really be doing some stuff to keep that good and clean. But we're going to escape it a little bit soft because we don't want the sharpest edge to be where the table meets the wall. If it is, that's going to take away from our cone. We want the sharpest edges on our cone. That's a 4 H. I think I'm gonna go ahead and grab myself a to H pencil. It's going to be a little darker. Not a ton darker with a little darker. And now I'm going to try to make a gradation down here. Again is the value, is the light gets close to the table on this side, it's going to be getting darker and this side should be darker than that side. So again, we're trying to pay attention a little bit to the relative lightness and darkness of our plane, which is this backplane, which is the wall, which is a flat, a flat vertical plane where the light is just moving across it and it's getting darker as it moves more to the right. It should be getting lighter as it moves more to the left because that's where our light sources. Now I'm using a risk swaying and little dark on this side, little lighter on that side. That's all we're looking for. So now we're gonna go ahead and grab my four h again. So I'm gonna keep this light to begin with. I'm probably going to go ahead and I changed my mind. I'm going to grab an HB here real quick. And I'm going to fill in love with this cast shadow. I'm using a very small fingers swing. Now, I tell my students all the time that bad habits die hard. And they do so when I was first taught to draw, they didn't emphasise technique at all. They didn't tell you how to hold the pencil. I'm going to use my shield here so I don't get my hands on to that value. They didn't show us how to do that. So they're just kinda like do whatever, but make value or do whatever will make a gradation. And because of that, I built some really bad habits. In fact, I didn't even have anyone really talk about it in college either. And so by the time I was in I was working professionally. I had someone who looked at what one of these, these old illustrators came by, the older, you know, the, the master or whatever. And he came over and looked at what I was doing. Like man, you're technique is awful. Technique socks. You need to do some better technique. And so showed me a couple of things very quickly and then moved on. And by doing proper technique, you actually will get better drawings immediately. And so that's why in this class we've tried to start with technique. Because you will immediately have that. You may not know the difference if you haven't drawn before. But I can tell you as one who has gone the longer routes, that proper technique really helps. Why am I saying this? You ask? Well, because just a moment ago, I'll still catch myself going in and going into what I first, how I first learned to draw. In other words, using those bad techniques, I was kinda jiggling my pencil. So swinging with my finger, I'll just kinda rocking my hand back and forth. That's a bad, bad, bad habit. And you will get much clumsier drawing. Then if you use your fingers to use a finger swing. And so that's why I brought that up. Now, I do have certain people that have different issues with their hands and sometimes there are certain motions they can't make for whatever plethora of reasons. And if you have to make a value by kinda rocking your hand, well that's fine. Here's going to have to. And I work with somebody with people like that sometimes I'm like, Look, that's not a problem. It's not ideal but that's all right, it all you'll still be able to do values. We're just going to have to do a, B, and C to overcome the fact that it's going to be a little harder and you're going to have a little rougher time with the values in the beginning, but we can, we can overcome that. But if you, if you have the ability to and you're not working under some sort of mechanical issue with your hands and your fingers. You want to use the best technique you can. And sometimes again, if you're limited, that doesn't mean it has to limit your art, but that just means that there are some things you're going to have to do, some things to kind of compensate. And that's aright. And there's a person here and the area that I know that doesn't have use of their, their arms. And they actually will put a pencil in their mouth and draw with, with it that way. And again, they just, and they do some great stuff because the biggest, the biggest thing to overcome anything is the desire or the will. To do it. And I'll tell you what this person has. Just an awesome Will to create. And they're not going to let anything hold them back. And they do really nice stuff. And when people find out that, that this person can't even use their hands to create the valid value and makes even more extraordinary. Because of how much extra time this person takes to do these drawings. Holding a pencil in their teeth. That's, that's that's a difficult thing to do. I don't have to tell you that, I'm sure. And it's it's pretty amazing. So I was using the shield once again to now. I'm right now I'm using my my tripod grip, but I'm using a risk swing. And we can't really see my hands out of the camera. So because we're so zoomed in on this, we want to want you to be able to watch this as it develops. But I still want you to be aware of what I'm, what I'm doing. I'm still using my four H pencil. Pulling a very lightly using very gentle pressure because I need a bit of value on this tablecloth. And as we create them, a little bit of value on the tablecloth. The outside contour, or otherwise known as the silhouette of our cone, is starting to appear. Because I know I had the drawing really, really light. So now a lot of times people are like, well, how do, how do you normally do you work? Background a foreground or foreground a background. How do you work that? And you can work either way. Normally I will, I'll find myself working from background or foreground. And in most times it makes sense. There's a couple of times a does not make sense. I'll tell you when. And that is, let's say I was drawing. So I was drawing a portrait commission. I'm going to lay the shield along that line just to make it so I have an easier time keeping that nice and clean. Again this way I'm still, you know, I'm using an elbow swaying some covering a little larger area. So we're gonna continue again. I'm using a 4 H pencil. I'm using an elbow swing. Now again, I've got a tripod grip, but if I was on an angle, my board was on an angle like it should be. Again, I'd be using the baton or overhand grip instead. Alright, then try to make a little bit of a variation as that goes back towards the edge of the table with a little bit lighter as it comes forward to just indicate that the light is in the foreground. So let's return to my I was saying, hey, when would it not be the case that I would start foreground and background? Well, if I was doing a portrait commission, I would start with the face. Because here's the deal. If the face doesn't work, if it doesn't have a likeness, no one's going to care about how great my values are everywhere else. It has to look like that person. It has to look like a head. It's got it's got to be there. And if it's not, nothing else, we'll save that drawing. It's the same thing is if I'm doing, when I'm doing wildlife art, if I'm doing a drawing of a bear or something like that, I start with the animal because if the animal doesn't work, it doesn't matter what happens around it. And so there's times where I've been like, oh, that didn't work. And I started to start again. But all I'm out is my time that I spent on the main subject. And then you go on and do it again and it works and that's fine. But if I had gone and done everything else and then started that subject and realized that it wasn't working. Now I'm out a whole lot more time. So there are certain certain times when I would I would start with one area and work out. Now I wouldn't recommend that for beginners. You know, I just, I wouldn't recommend it because you want to get the experience of working in entire drawing. And you're not worrying about having to sell it. And you're not worrying about having to pay or red based on whether or not somebody likes it. So get in the habit because like I said, what we normally will do is we will work background to foreground. That's how we normally will work. And the reason why is because I want to rather have this edge overlap then start the foreground and get this thing drawn and then be so afraid to touch against it that I get this white line all the way around it. That is not, that looks very, that's very amateur, very amateurish as people would say. It doesn't look right. And so you want to get into the habit of being able to overlap your edges. Don't be afraid of overlapping edges and there's times you want to overlap edges. Otherwise again, you get these white lines around everything. And that's not helping. That's not, that's not going to as not a good idea. That's not going to help the drawing. It's not going to help you. It's not something you want to get. I'm going to try to spend more time back here and we keep this lighter. And as I'm working back, keep this little darker because again, this light, this was me traveling across the surface. And as it travels across the surface, it's going to get darker as it moves away from the light. So again, we're just gonna go ahead and give a little nod to that by bringing this over. Like so. And then we also want this to be a little darker at the back. So we're gonna go ahead and bring this. And make it a little darker as it goes back towards that table. There's like some little checks are still there that when I didn't have. So I'm gonna do this. I'm going to use my shield. Protect the edge, come over here and take those and all these little marks coming off of there. They're breaking through because I didn't I didn't protect the edge enough. Actually, I went, I would do it by hand. And so if I, if I wasn't using this, if I wasn't using this to protect it, I'd have to clean it up or raise a clean it up or race it. Really go back in and reestablish the edge. Now I'm going to actually go back because I think that edge is a little too firm. And I'll make a little bit of a gradation right along the edge and soften it. But the whole reason I did that was just so that I have a little bit of a cleaner edge where the table plane, which is a horizontal plane, like a table. If your table is not horizontal, it's gonna be really hard to eat off of where this horizontal plane meets this vertical plane, a plane standing straight up. Okay? So again, I'm working on this. I got my four h Using our risk swing now. And I'm just, I'm just spending more time here again, where I spend the most time can be darker. I want this darker than that, that darker than this, this darker than that. I'm trying to make this look like there's light moving across the surface. Now again, I'm getting some again, sometimes this is the paper. I'm getting this paper is a little rough. Probably got kicked around the studio. This is not a new pad. It's at least a couple of years old. And so if things are kind of stuff gets put on stuff and the papers scrape against one another, it starts to rough up the surface. And so all I'm doing is trying to soften the words, catching and weaving these little checks, little, little spots as a graph I words, it's the texture is was pulling the graphite, leaving it there. And I don't want that. So I'm gonna go ahead on this thing and I'm going to come into the cache shadows a little bit. Now I'm not here to worry a ton about the cache shadow, but at the same time I'm not going to ignore it. So I'm gonna go ahead. And you can bring the cache shadow over here. Okay? And now we can see the silhouette of our, our pyramid. And so what we're going to do now is we're going to start by shading our pyramid. And I'm going to grab my, probably my 28. By 28, I think I'll use my HB, maybe. We'll use a 2s1, maybe I'll use this to H. We'll see if now I don't like that idea. Let's go ahead and grab my HB pencil. And again, I'll just go ahead and use this to protect my, my edge work over here. And I'm going to use a risk swing. And I do have this, this time. I actually like to change the way I use this, but I've got this in a baton hand hold a little bit. I don't know why I picked up that line. I don't know if I will just heavy-handed Earth, That's a line that was there before and got arrays, sometimes that'll happen, the eraser and sometimes these has a little bit of it leaves a residue behind that will pick up the mark a little darker. I'm not worried as much about it now because that's just going to go much darker. But I am going to note that I got to be aware of it because that cannot stay. It's gotta go. Gotta go, gotta go, gotta go. It is not welcome. None this drawing. So again, I'm just using this risk swing. I'm using an HB pencil. I'm actually transitioned into a finger swing. Now. The bigger the bigger, longer lines was with that risk swing. Now I'm trying to be little more careful as I get closer to the edges. And I've tried, I've changed to a finger swing. So again, there's there's there's many times because I'm I've done this for so long. I'll switch, I won't even be aware of it and then I'll I'll catch it. Oh yeah, I switched because I'm just so used to 0. We have the smaller area. We're going to use a smaller swaying. Okay? If I'm using two biggest swing into smaller than area, that's going to be an issue. It's going to be like a bowl and a, and a China shop as they used to say, gotta make a mess. And so now again, still a finger Swing using very delicate, very small, small little strokes to create our values. Okay. Now again, we're really zoomed in here. And so with the camera, because this little cone I've got is maybe three inches tall, maybe 3.5. Now I guess it's for but it's not very big. Very big at all. We could take this and say, Hey, how big is it? It is, this is just three and a quarter or something like that. So it's not very big. So the camera is really zoomed in here so you can see what we're doing. And because of that, the texture is probably going to be even more pronounced. Because you're really close to it as it would be almost as if you had your nose against the paper looking at this thing. And so there's quite a bit of texture here. Now I could do one of two things. I could, I guess throw stuff around. I can go ahead and grab my my little brush, which works just fine. I'm going to use both. I'll just say I and I can grab a 4 H and I will grab a 4 H. But first, if you've got something that has lots of texture, called the nuclear option. Probably need a better term, but it's, it's, it's like your last ditch effort. That's another way of putting it that the brush. Now it's going to lighten everything too. So it's blown out some of my values. But what it also has done is it's softened some of the texture. And now I can use, I've grabbed a to H, see if I can get some of this texture to going to use, use my little tissue paper here. And I'm going to roll it. I've got a little, a little tip on it. And I'm going to try to see if I can keep out of the way the camera so you can see what I'm doing here. Well, I'm trying to do it just along. There's a y, the line along the edge, I'm just just right. We're along the bottom of this right along there though I was trying to it's still going to white line which has got to go away at some point. But I was trying to soften those again, some marks and had way too much texture right along that edge, just trying to get rid of. Now I've picked up my two h again. And now what we can do with this is we can try to remember that the H pencils will go deeper into texture. The softer pencils will not. So what we're going to continue to build this up, we're going to continue to try to, again get the, get the texture to disappear. We don't want it. It's not welcome. See there's something going on here every time I go over that, it picks up the the graphite a little darker. That's not us. Again, I can feel it It's refer the paper is has been roughed up. You can actually fill when you go over with a pencil, it has a very definite different feel to it. It feels like you're on sandpaper all of a sudden. And that means that the paper got roughed up a little bit. It doesn't mean we can't use it. Just means we have to be aware of it. Okay. So again, I'm gonna come in here. There's some little cuts in here too. I can see. I don't know what happened there. But there's little lines and those lines are a little cuts. And this is probably out of a sketchpad that might be where it's transferred from the page below. Enter that I can work with. It's still, it's not ideal. But remember that our, our cache, or pardon me, our shadow side has to be darker than anything in light. And so that back wall is should be lighter than my shadow side on my on my cone. And so we're gonna go ahead and fill this in a little darker. And I needed to go darker still. So I'm going to grab an HB pencil. And I should probably you would grab a tube. Truth be told, I think I will. I think I'll just go ahead and jump that to be the two of the B is kinda rubbed off low bed, so I had to double-check, wait a minute, what pencil do I have? This is my 2D pencil. And we're just gonna go ahead and fill in. Now remember whenever you blend it only but you always go back into it. And I don't know that I've mentioned that once again. So if I come in here with this with my brush like so, I then need to go back in and make sure that I've gone back in and I have put graphite over the top of it. Or it will always look like it's been smeared and smudged and always look like it's just a little dirty and that's not what we want. So again, I'm gonna go ahead and keep dragging this down. But now this is darker than the background, which is what we need. Because this is shadow and this is enlight. Now this was fairly uniform,
15. The Cone Part 2, More Ice Cream Please!!: So we need to have that identified. I'm also going to go ahead and there's going to be this, we'll get a little, let me go ahead and define this outside edge of the cone. Just right through here. Or maybe picking up a little bit, but it's all of its own cache shadow. Okay, So gotten the occlusion shadow. Now we're going to start to now remember when we're dealing with the wall, with anything in drawing with graphite, then we're going to spend the most time in the shadow area. So I've come into this with my, I've got a to B. I think I might use worse my where's my four B? I'm, I grabbed my four B pencil. And we're gonna start to create the core shadow. Now because this is a cone, we're going to get sort of, these are going to be triangles. These little families of value should be triangles. They should not be just straight lines, but they're going to start to echo the cone. And what is the colon? It's a rounded triangle. So we're going to be thinking about that as we're creating this. So we need these triangular shapes who are different families of value on our in our drawing. So let me go ahead and darken this. And this core shadow is going to flare out and give us a little bit of a very thin triangular sliver. We're going to continue drawing this. We're going to, you know, I'm taking my eyes a focus, which is a good idea to do to have your eyes out-of-focus or soft focus while we're doing this so we can see the value. We can see what it is. We're, we're, we're doing over here, and that's what we want. We want that it's a good thing, it's not a bad thing. We're going to have a little bit of reflected light down here, where it's going to continue on. I'm going to grab my Tooby that for me for whatever reason. I'm not liking that as much as I was like in my Tooby. So we're going to grab that. We're going to come up here to the tip and go ahead and try to clarify the edge a little bit. All right. We're gonna go ahead and begin to try to create a gradation into the dark values. So I'm using, again, I'm just using a regular finger swing. I'm not using a tapered stroke. Nope, I actually I'm wrong. I actually I'm using a tapered stroke. So you can sunspot is yeah, this is so second nature that I'm not even thinking about it. Could I have been using a regular back and forth? Yes, I could. That would be what that looks like. But if you see me where it's like, oh, he's only making a mark on the downstroke and it sounds like this. Let's do that difference versus this. You see how it's a different sound. And not only that, but with the tapered stroke, you only make the stroke on the downstroke. So again, it makes a different sound. Listen. Okay, so I was using a tapered stroke, didn't even know it. Again, it's just all out of habit. Now, again, I'm getting some weird stuff on the paper. I'm going to use this. Little didn't necessarily plan to do this because I don't I don't use these as much. In fact, everybody when you're using years. And I think in the class so that I may not be using these or whatever, but I've used a more in this class and I probably have in the last 20 years of art school and all that sort of stuff, which is kinda funny. But they certainly have, usually I'd use a small brush and canceling or what would you do know? Otherwise, I'll use a small brush. I would have around like a number five or number 10 round watercolor brush and I'd use that instead. All right, I think it has some of the values in there. I'm gonna come back in with my for-each, see if I can deal with some of the textures a little bit. Around the edge, we're going to have reflected light. All right? So we've got a reflected light there. And then we're going to come up here. And as this comes up, it's going to have less reflected light as it comes up. The cone is, the cone moves away from the surface of the table. The table is what's reflecting the light. And so I'll put, as it moves away from the source that's reflecting the light, it's going to get darker. Just as if I was moving away from the actual light source. Something gets darker as I move away from this, it's bouncing light back, it's going to get, it's gonna get slightly darker. It's little nuances like this that really start to create that illusion we're looking for. So important. And if we ever have something that doesn't look like it has volume that doesn't look like it's three-dimensional. Doesn't know. There's a problem somewhere in these, these little ate. The sixth form shadows and the cash down the occlusion shadow. There's the answer is in here. The answer is that we've done something that breaks or violates the rules of the way that form and form shadows act. And so that's. That's good to know because that's what we're looking for. Like what happened? Well, that's where we started looking at. What is it that we did that was different. Where is it that it doesn't conform? And now we have a game plan to figure out what the issue is so we can correct the issue. And I can't tell you how many times, you know, and sometimes it's hard to see. So we need a fresh eye. If that's the case. We're like, look, I don't even know anymore. I've been looking at this thing too long. Go and do something else. And come back to the drawing the next day when your eye is fresh and you'll see it much differently. As a professional you are to catch things, but even professional artist had this problem. And so there's different tricks and stuff like that. But even with the tricks to kind of trick your eye and get it as fresh as you possibly can. You still, there's times we need to actually come back the next day. There's times where you actually need another voice should get another artist in here and go, okay, this is, this is driving me nuts. What is wrong with this? Because their eye is going to be much fresher. Certain artists would turn paintings to the wall for six months and then turn around so they had a fresh eye. It's amazing what all of us seem like very easily go, Oh wow, what's the, what's the what's that? Because you're no longer you're staring at it all day long and you're not as, you know, you're not invested in it. You get invested in something the more you work on it. And because of that, sometimes it's harder to be able to see what the issue is to make it better. The other thing that I encourage people to deal with, so many people are doing online learning these days. And I know a lot of people when they're doing online learning. So there's a lot of, especially there's, there can be frustration and they don't feel like they're getting any better. Now I usually tell students that the biggest strides, the biggest improvement you're gonna make your drawing is the first six months. And even the first month. Second month again, can be just huge if you've got really good instruction. If you're someone that's been drawing for 10 years. The increments are very slow and the way to track that is to keep a sketchbook where you're doing your sketches and your drawings, and then thumb back through them over a six month period. And what wasn't apparent over the days and weeks and hours becomes very apparent as you look back over your sketchbook over a certain amount of time. That can really help you to keep your, your energy up that, Oh yes, I am learning, I am improving. It's slow, but it's there. It's just like when somebody May lose five or ten pounds or 15 pounds. We don't necessarily notice that because we're looking at ourselves everyday. We don't, we don't notice that but someone else. It's like, wow, hey, look of you and you're like, oh, wow. Okay. I guess that happened. So back to what I was saying. Some case you're wondering, well, where's the theme we started off with? So many people are online learning. And then he's talking about this other stuff. So what I'm going for is that my wife is an author and so something that authors have done for years and years and years that artists don't normally do. And I don't know why that is. They do it in academic settings. They do it in school settings because it's required we understand that you have to do that to learn. People don't necessarily do it on their own. So what you need, what you'd want to do is either a setup. Now there are mentorships and critique services. I offer critiques services and things like that. You can certainly hire somebody to do a critique service. But if you're like, Look, I don't know that I'm at that point for a critique service, but I do want to know, you know, I want to be pointing the right direction and you can put together a critique group. Try to reach online and through social media, find other people that either have a crit NIH where you can take your work in and just get a free critique. Or, and this is what my, my, my writer friend, my y's would write her friends will do is they will create their own group. They'll find some people that are writers. And they'll come together and they'll read each other's stuff and they'll give them selves critiques. Because it's understood that you need outside feedback and it's just the same with the arts case. I was using the 4 h. I'm going to grab the my 20 H and it continue on with my story. So if you put together a critique group, here's the hard part because people are like, well, this person is a beginner and I'm a beginner. How are we going to, how are we going to know? Because people were, there's time. So especially when we're beginning where like, I know somebody who looks weird but I have no idea how to fix it. And that's not going to help. So what you do is you put together a critique group, but you always want somebody that's got a little more experienced, someone in the group that's got a little more experienced that can help the other people along. So someone's been drawing for a year. And you know, they can go ahead and help try to understand what people really want or pardon me, understand what people want. That's not my point, is they can see what the person is doing wrong and give them feedback. I'm starting to, I'm going to start to put in the values on the light side. Okay. And I'm just using a finger swinging. This is just an I guess I am using a tapered stroke. I just noticed that my son, like what am I doing? I'm gonna do it. Just worry their fingers though I'm not doing around their fingers wing and with a tapered stroke, the reason I'm doing that is because the light side is more finicky. I don't, I don't layer it as much. And so that means that my values had to be much more accurate the first time. And the tapered stroke is a stroke that we have the most control over. We get the most, the most control of their values. So that's why I'm using that tapered stroke to begin to create the values for my drawing. Now I also have to remind myself about the triangle thing. Because what I was getting was a bar. A straight bar does not work. It's not, it's a cone. So that means again, everything's going to be sort of a, a slice of a rounded cone or in other words, I guess around a little triangle. So that's what I'm doing right now. And this will be my middle value. I'm then going to go ahead and the highlight would be right about here because this is around the corners a little bit. And that means that as it comes around over here, that this is a 28, I need a 4 H, too dark. It's going to be getting, these are gonna be the light tones. This would, this little triangle that I'm working on right now is going to be the light tones for my comb. Light tones. So I'm gonna go ahead and I'm using a tapered stroke. And I'm trying my best to overlap the previous line. Got to be careful because I use quite a bit of light on here when I create my drawings. And a bounces off the paper and into my eyes and I get snow blind, you know, for those that ski. Because again, there's so much light being pounded into my eyes. And so sometimes it makes a hard right now. I'm having a bit of an issue with that. But we're gonna go ahead and keep working on this. We're going to keep developing the light values. We're going to continue to develop this, to go ahead and finish off my thought. And that critique group again, get somebody that's got a little more experience and more. It's even better have two or three people to have a little more experience. And then when you have the critique group tell them what you want. Because sometimes people get off on tangents is that you don't care about. Introduce your work, say, Hey, this is what's going on. This is my problem. This is what I want feedback on. And I'm not really worried about some other stuff. You know, if they're trying to talk to you about what the thing feels like and you're like, Look, I don't really care what it feels like right now. I'm just trying to get down value and try to put those together again. It's you, you have to really get to a place where you're not worried about someone saying something negative about your painting or your drawing. You can't be worried about what are they going to say because you have to hear what's wrong in order for you to correct it. That's what is critique is it's where you're taking and looking at some say, okay, this is done well, this is not done so well. Go ahead and correct this. Keep doing this that you're doing well. And that's how you improve. And so the first time, the first few times with critiquing would be very, very hard to listen to the criticism. And the hardest part is an odd get. Your half-brothers all ruffled, and then start an argument about why you think that it's okay when in fact, you know, it's not okay, but it's more about being, you know, getting an injured ego or something. Try not to do that. And just listen to what people had to say. That's the best thing you can do. If you, if you get injured and then start arguing your drawing, you're not gonna get any better and you're not getting anything out of it. And that's going to be a self-defeating process. And so you have to learn to start to take what we call critiques. Now, give critiques or constructive, they're there to identify, here's what works and what doesn't work. Keep doing this the works and keep improving that. And then improve this. That's not working. And why wouldn't you want to do that? Why wouldn't you want to get that feedback? If you were playing piano when you're not playing the notes, right? Someone's doing you a disservice if they're if they patch on the head and say at all it's all grayed now you need to correct the notes that you're, you're not, you're making the error is on so that the song sounds better. Same thing with drawing. You need to correct the issue so that drawing is better. Now, I would encourage you that if you go that route, the best way, the best thing is people will tell finding mentors and that's always a good thing. Again, take advantage of critique services, take advantage of mentorships if you can. So even if you're in a critique group, Sometimes people, The dawn, the downside of critique groups is sometimes people don't give you a good enough critique or they don't have enough experience themselves. If you've got a beginning intermediate artists, they might be telling you what they can proceed, but they may or may not be perceiving the most important thing. And so it's still good to always have someone who's a very advanced and better yet a professional. Evaluate your work and lets you know what you're doing, let you know what you're doing, right? And then tell you what you need to do to improve. That's the best of both worlds. And again, the critique services are great. And again, if you, if you get a really good, if you put together, together a really good critique group, again, that's worth its weight in gold. And if they're all kind of doing the mentoring and the critiques surfaces and you're doing the personal critique service. Your own critiques get better that the group gets better as a group and that's the best type of group to be involved in. Those aren't always because circumstance or other things aren't the easiest to do. But they will give you the best. You know, the, the the combination of those two things will work the best for you. I'm I'm using this blender because again, it was just a little bit of roughness and it's right in this area. And I'm trying to get rid of that, but I can't just do one or and leave it because that will stand out. And so I'm trying to sort of blend the whole area and then come back into it. All right. So we're gonna go ahead and we're going to take a break now we're going to come back and we're going to finish out our cone. We already have this thing starting to develop. It's getting that exciting part where it's really fun. But we'll come back and we'll finish this thing out. Alright? Alright, let's go ahead and continue. We're going to work here in the lights were going to be dealing mostly with the middle values. And we need those dark middle values and then lighter middle values. We're just going to continue. Do even do when I've got a 2 H pencil. I'm using a finger swimming. I just hit a little mark where it was light on one on both sides. Because again, there's a score, there's a score on the paper, meaning there's a little line that's been dug there and it was soft but it's still there and yet learned to work with that. Again, there's another little line right there, a little white line from some of the Strange things that ever been happening with this texture. And again, there's always going on. So, you know, no matter how well your professional papers have a lot less of the US, but on, on these types of, this is right out of a drawing pad. You just have more of this that you have to work with. And and that's fine. You just wanted to work with it. I'm using the tip of the pencil more because it'll get a little deeper into the paper. If I move my hand over, that means I'm using more of the side of the pencil. So there's different things you can do to have the, the, the pencil go deeper into the paper just by the angle that we use. That's an important concept and we're really haven't do that a lot on this, on this drawing because of some of the characteristics that are manifesting themselves. These little scores and these different things. And the paper had gotten a little raft and stuff like that. And my getting in there and again, using a little different angle of the pencil gets a little deeper into the paper. And I'm still trying to keep my hand. I'd actually be even more like this, but I don't want to get to where you can't see it. So on I'm trying to stay as far away as I dare and still try to get the the angle so that I will get in there and get a little deeper into the paper texture. So we've talked about the harder pencils get deeper into the paper texture. Well, as you get more into drawing, even the angle that you use can be a game changer. And that's what I'm doing right now. I'm using the angle of the pencil so that I can get a little deeper into some of these areas. That if I use the edge of it, it'll show those little lines and the scores and things like that. But if I use the point, I have to use a very delicate touch. But if I use the point, it'll get a little deeper in there. And do that. And the paper texture. Again, I'm using a to H, I'm using the tapered stroke. I'm having a baby said there's a whole lot more than I have almost any of the other drawings we've done. We've had some of this happened with almost every drawing and saw. You've just learned to work with it. But this is, this has been a little especially it just a little bit more than that. We have, uh, some of the other drawings. So like right now I'm trying to like there's this jagged edge. It's kinda weird because of the way that the paper's been taking some of the values. So I'm going in there and working with the tracking. And again, tracking is where we can fill in little areas that are lighter. So in this case I'm Chris being an edge, making it straighter by filling in any little bumps. Then make it look like it's not straight. So that's just part of the that's part of draftsmanship. It's the patient's part of this. It's where the rubber really begins to meet the road. And if we're going to be, if you're one of these people that really wants to deal with realism and hyper realism. This is where you're going to live. Meaning this is where you'll spend most of your time, is, is making sure that the textures and everything are doing just what you want them to and not what you don't want them to. And so you get a, you want to get very adept at dealing and filling in and tracking so that your, your drawings always look like they are very uniform. To give that feeling of realism of the values just kind of crawling around the form. And that's how you deal, deal with that. We're not dealing with photo realism or hyper realism, either one. We're just dealing with a certain amount of realism as far as that goes. And that's because we're not going to know. Yeah, you gotta walk before you can run you, things like that. You've got a dog battle before you can swim. You got to learn how to do this before you can deal with hyper realism. Because really good hyperreal as I'm as someone who knows how to do the basics. And they keep pushing it further and further to a higher, higher and higher level. If you can't do the basics, you're not going to be able to get to that higher level. And so that's, that's all this, That's all this is. And it's all about draftsmanship. And there's a lot of really good people out there. Some of the best though. You'll, you'll see that they, It's, it's layering and layering and layering and brushing and layering and smoothing and layering and smoothing and layering and blending and layering. And that's that's just part of the process, that's the patient's part. And if you're going to deal in graphite, because graphite takes longer, if you're dealing with charcoal, still going to take a long time, but it takes about half as much time with charcoal if you know what you're doing than it does with graphite. Graphite, you have to really take your time. It's almost as an exercise and patient says it is and anything else. But this is getting to the point where we can start to have that illusion. We can see core shadow, dark tones, reflected light. One where we really have a really say I was doing it, it too much of an angle on it, started to pick up these little little checks again. And they are still there. I'm gonna see if I can. Soften a couple of them by getting a piece of tissue paper twisting out just a little tip. I want to be very, very soft with it. But it's just got these little dark little specks of, of graphite that it's holding on this little like a little mountain top or whatever on the surface of the paper. And I'll try and do is not as soften it up. So it doesn't look like black spec and it can melt into the value. So now we're gonna go ahead and go in here. And the gradations in the lights are much softer than they are in the shadows. So this is where we're going to, again, the patients is going to come into play. I get this to H. I think I probably did transition into a 4 H I will in just a moment because it's a little dark for some of the areas I'm working in. And we're actually going to make a gradation through here. And that's a definitely gonna need that for h, that lighter pencil. So that it does what I want. Let's go ahead and grab that right now. See, grab that for H console. Here we go. Let's get on back in here. Again, this texture, I can feel it. It's like i'm, I'm making value on really light sandpaper. Now part of this might be I just realized I'm using an older board. And there's more I think as you can see some water standing on. I got a little wet. And this isn't the old mason. I people will refer to this as my snide. It's not. This is, this is MDF, meaning medium density fiber board. And it doesn't have as much glues. And all that means is that when it gets wet, it will raise the grain. Some of this might actually be because the fact it's transferring some of the race grain as I go over it. And so there might be something like that going on. I just realized that because if you're if you're on the surface that's got texture underneath and you've got a paper on top. What's it going to do? Well, it's gonna start to transfer the texture. Texture will start to appear on the surface of your paper. And that might be what's going on here. It may not be, but that's something to keep in mind. That's why usually I'll use the white. The other side of this board is white and fairly smooth. But the only downside is, is that the lights reflect off that white and really kind of wreak havoc with the camera. A little bit. So that probably means I'm gonna have to get one of the true Mason I boards. They're just darker, they're deeper and they're darker when they get wet. They don't raise the grain at all because they've got so much glue and resin that they've used to glue the Sadat's together, that it doesn't do anything, doesn't do much. And that's what the old Mason I was, you know, was used in instances where he didn't want water damage or something like that. For, well, for what we're doing. Then it makes great, really great drawing boards, but you can hardly find the stuff anymore. Apparently, I don't think I've seen probably Mason ID and a decade, but I haven't you might have to special order, but I just don't know how available does these days. But there was a time where you couldn't get what I mean, it was everywhere. Couldn't really get almost couldn't get away from the stuff that we're. So there's two was so common. And these days you see the MDF which is not the same, it's not as good enough for what we're doing. So we're just going to come back over here into the dark side. If this is my middle value, my light values, my darker mobilize need a little bit more. Hassle degradation right now it looks like it's just uniform. And so we're going to spend a little more time right next to this core shadow. Building it out, building it up, building it up. So we can get more of a gradation. So we're just continuing on here. Given the value down using that table and stroke he using our patients. Because I'm sure you're like, wow, this is akin awhile and I have all my goodness. So I also have to kind of be mindful of the clock. You guys are, you know, we are drawing in real time, but I understand that if we get too long on this is just going to seem like it just never ends and we don't want that. I'm using my four H and a little bit of a tapered stroke. And I'm just coming in here and doing some of that tracking where I'm filling in some little areas that just seemed to be lighter than other areas and they become like a splotch and we don't want those. So getting some of that taken out. All right, go ahead and grab my HB pencil. Come back into the shadows of this core shadow. Just a couple of places, Wow, that really went dark and then right next to it, It's light. That's where that paper is picking up in certain areas and not another is the same way. And that's all right. I'm aware of it. That was a good example where we're like Holy smokes. And I'm just going to darken a little bit of this core shadow. I'm gonna go ahead and grab a to B pencil. Again, just like we did on the grayscale. We're going to build this up. So I start with a 4 H. I skip the two H and jump to an HB. We'll see if it's, if it's still going to work. But the reason we do this is once we build it up with all those different pencils and then come back to a for B. It'll go darker than what it did, what the pencil did before. So I'm gonna grab my four B now. And I want to come on over here. My shadows are just about to the point where I'm just going to leave them alone. He's just getting darker right along here because I've used those other pencils to layer. So that for v is given even I'm getting, I'm just trying to go to the darkest part of the core shadow, which is right in the middle. I don't want to make it a line. So I wouldn't come over here where the light and shadow meet and make a really dark line there because I'm not trying to do that. What I'm doing right now is I'm trying to make this more of a gradation feather out a little bit. With this for B. And a couple of places. Get that triangle back that we want. And again, we can start to see core shadow and reflected light. That's what we want. Now when we come back into the lights, the lights need the most work. We're gonna come over here little bit. We're gonna go ahead and use our 4 H pencil. We're using a tapered stroke with 4 H pencil. We're going to build this up gently, lightly, all that good stuff. Take our time, hold our breath. But on some music in all this good stuff. And and keep, keep working on it. Does that patient's part. This is the part that's the fun part. This is where the magic happens or what have you. And I'm trying to get a little bit of a gradation along this edge. Now it's starting to happen for us. This is what we want now. I also uses piece of paper, use it as a shield. I'm going to see we can. What we're trying to do is we're trying to make sure that the edge of the wall is darker. The edge of our column. If it's not, that's going to be an issue. And I think I have a 4 H, I'm going to use a 20 H. It's going to be a little softer. So I'm gonna grab this over here. 2 H pencil, tapered stroke. All right, let's go ahead and trying to make sure we have more of a gradation starting force. This is what we want. Again, it's looking good. Hoop. This is what we want happening on our drawing. So the, as the edge, one edge always goes lighter, one edge goes darker. As the wall edge and goes darker, the edge of the pyramid comes forward. So again, the Salon, we'll use this as a shield one more time has only come up here. And I'm going to have to erase some of the value I have there because I needed to erase and get myself a clean edge. And then I'm going to come back and put some value on it. But that edge along there was a little little soft. I couldn't tell what it was. It almost like it was supposed to be part of the wall and that's not what we needed. We use this to. There's a little eraser Chrome there that I tried to get off of. There. There we go. My 2 H pencil, feathered stroke are great. David stroke. We're going to come in here. I'm going to start making again a little bit of value right there. Okay? We're going to work down here. Now again, usually with the highlight is going to be lighter at the top and a little duller as it comes down through here. So we're going to work over here and try to get, keep this live, but we're going to try to get just a little bit of a variation. Right through there. This has gone a bit flat, so we're gonna come over here again. I've got a 2 H pencil. So what am I need a lighter pencil. So I'm going to grab my four H pencil. And again, we're going to work with that for H pencil. It's the lightest pencil we've got. Now if you've got a full so you have a pencil kit and you've got a pencil kit where you've got a nine B pencil all the way up to a nine h. Well, you could also go, Well, you know, I'll grab a five-page instead or even a six H, but and I didn't I didn't require you guys to do that for this class. And so we can keep the cost a little bit to a minimum. But as we go into some of them more. Intermediate classes, we're going to expand our range of pencils a little bit and a little bit of our range of materials. So that we have a little bit more we have more options. I was using and I'm still using a tapered stroke, but I've moved further back. I was choked too far up on the pencil. And I just needed a little bit more. Remember you have more control from the back of the pencil and you do from the front of the pencil. And so that's what I was dealing with. I wanted, I'm going to go ahead and cover this edge once again, try to make sure trying to get this nice and flat. Maybe I'll even make this a little stronger. I'm going to fold this in half. Make that edge a little stronger, a little thicker. No cards are nice because they're a little thicker. They'll give you a little more protection. And we're gonna go ahead and just again along this edge, really make sure that we've got as clean as crisp an edge. Because we can get off of that. See, I've got, let's see, it's broken through there a couple of places. So we're gonna come over here with our kneaded eraser and sort of make, put a beak out there and we're do a little bit of touching along this edge, which will lighten it along that edge and see if that cleans it off the bed that helps. It's a little splotchy now. So I'm gonna have to go back in and fill that in. But it was not bad because I've got what I needed was I knew this edge to be clear. Now it's more clear, but now it's a little swatch it well, we can take care of splotchy. Just go on there and very lightly and very gently fill that in. And that will take care of all those swatches. Now we're, this comes through here and there's a plane or power. We have the comb where it's now on a lighter as there's always edges that go that will switch. And that happens all the time as we draw. And the more aware of it we are, the better our drawing will be. So for right now this is the lighter edge as it comes down here, then it switches to the darker edge. This is the lighter edge. So there is always this transition in play. And as artists we have to be aware of it. There's always again, one edge that's going lighter, while another edges going darker. And they will switch depending on the relationship. Of the edges. I know I've said that. And you might say, well, yeah, you're repeating yourself. And the reason I'm repeating myself is if you understand it, you might be like, yeah, I get it. I get into my brain. I get it. This is to get it in the drawing. Because again, until we can get it in the drawing, we don't have it. Until we can show it in our drawing. We don't understand it. Someone again could say, yeah, I understand how to play the song on that, on that piano. But if they can't play the song, they don't understand how to play the song. Didn't matter what we understand intellectually. For drawing, it matters what we can do with drawing. Same thing. It doesn't matter if you get to intellectually understand something on the piano. It matters when you put your hands on those keys and start playing the song. That's where, as they say, the rubber meets the road, that's where you show that you understand. And so sometimes students are like, I get it, I get it, I get it and I look at their drawing and I go, nope, you don't because you're not showing any new drawing. So that's why we keep reminding you. Repetition is the key. Repetition is how you learn. Repetition is how we improve. And so that's, that's whenever you're drawing, there's a, there is a burden placed upon you, the learner, individual and all of us that are returning equipped pencil to paper, that there is a certain sort of humility that we have to bring to it. There's a certain sort of understanding that we have to ring to it that we are going to always be learning. And that, and that that's just always in play that we should look for and be aware of that these relationships are always there and if we can ignore them. But then we were gonna get, it's going to affect our drawing. And it's not going to affect our drawing in a positive way. It's not going to effective in affected in a way that is going to be good for us. It's going to affect it in a way that is bad for us in the drawing. All these mental well-being. If you're constantly having Chrome's withdrawing because of the fact that we are not being aware of the fact that we have to practice and it's, it's not going to happen the first time. It's not going to happen the second time. I tell people that really want to learn to draw and draw these. The cone, the, the sphere, the cube, the pyramid, the, all these shapes draw them at least 10 more times, each one of them. Over the next six months to a year. Sit down and you don't have to do it every day obviously. But between now and the next year of drawing fit in. Ten more of each one of these shapes. Keep the drawing small so they can be small studies. It doesn't have to be the bane of your existence. It doesn't have to haunt your nightmares. It's just something that you're going to want to do if you take the time and if you do it, you will level up as they say, you're drawing much more quickly and to a much better level than if you ignore it. You could draw for five or six years and ignore doing this and you will not improve as quickly. That's because of the fact that the more we understand the basic shapes, the better off we are with our intermediate and advanced drawings. So it's that important. It's like understanding, you know, your scales on the firm musical instrument and understanding how to move your fingers with the next enough dexterity that you can create the note that you want to in a very, very clean and hit that node or without any issues or problems, you're going to be much better off as a musician trying to play your songs. If that's the case. If not, it doesn't matter if you're playing the most sophisticated song in the world. And you're stumbling over basic things like, you know, how to be able to hit the note. Same thing with drawing many times, you know. We understand this with music intuitively. If someone sat down and said, Hey, I want to play some, some Beethoven, but they don't understand where middle C is and they don't understand, you know, anything about meter and they don't understand anything about the keys and the notes and what type of nodes and all these things. Or if they have an understanding, but it's just a basic understanding. They're not going to do too well with trying to play an advanced song. There's going to be, they're going to be stumbling over so many of the basics that it's not going to be very enjoyable. And some would say, well, they could keep playing it, yeah, they can keep practicing it for 234 years. One song to try to bringing up their basic skills to the point where they can almost play that song in a much better way. But I would argue that if they'd taken the time to learn the basics, that they couldn't burn through a whole lot more songs and have a lot more enjoyable experience. And more, most likely they wouldn't get frustrate because most people would get frustrated after the first three or four months of practicing the same song over and over. And they would just give up. We don't wanna do that. We want you to continue on and continue to draw and continue to improve and the way you improve as Bye, knowing your basics, the way you improve the fastest. As by knowing your basics, the way that you learn. Because by knowing your basics, I've done tons of these shapes over the years. I can't even, I can't even tell you how many spheres I've done. Well over 1000 to be sure. And that's why I can do it in my sleep. I could I could draw a sphere in my sleep. Any angle, any light source, you name it, I can draw. And so it may or may not be perfect, but you do a pretty good job because I'm very familiar with it. I've done it. And I can, I've done lots of flat values I've done and grayscales, I've done all these different things to, so that I can create these nice even tones and these nice flat values and we can create the illusion is all because of the fact that I've practiced, I've put in the time I've made the sacrifices. That's how you learn. There is no shortcut to learning. Everyone once or to be a shortcut. Their own wants to listen to the person that says, hey, I got the secret that and you don't have to practice and you're going to get super g
16. Last But Not Least Drawing the Cylinder!: Welcome back. So today we're going to learn how to put value on a cylinder to make it fill 3D and volumetric or in other words, to have formed feel like it's again a three-dimensional object. So let's get started putting value on the cylinder. We're going to go ahead and finish out with drawing the basic values on a cylinder. In terms of the tools I'm using. Again, I've got my kneaded eraser here in a couple of different pieces. And again, we can use this. We can make it more malleable, use that to pull out different values on the drawing. So we're gonna be using that. I'm going to be using this three-quarter inch. This is really a cheapy. It's like it was like $2.50. So I mean, we're really a cheap brush, but it works great from overusing, affords a soft brush. It's a three-quarter inch watercolor. Again, it's, it's a, it's a synthetic brush. Very inexpensive but nice enough to use for our drawing, so it doesn't have to, you know, I wouldn't watercolor with this, but it's great for our drawing. We've also got this. This is just a white eraser that comes in this little extender. It's kind of like a mechanical pencil and it's just really nice to have. So we're going to be using that. You'll be using this as well. We're going to take it, put it aside. We've, we've got all the difference pencils. We've got the four B, which is the darkest. Pardon me, these are the H pencils. So we've got basically are five pencils. We've got our 4 H, R2A, R2B, and R for B. Remember that the age family, those pencils are the light pencils. The 4 H is the lightest, the higher the number on the pencil, the light of the pencil. So on nine h would be the lightest of all. We have the B pencils again, that the darker pencils, the higher the number, the darker the pencil. So I've got a to B and a for B, if I have an a B, that would be the darkest pencil I can have. So from lightest to darkest we have the 4 H is the lightest. And then we're going to go darker from there, the dark, the next step, darker as a to H. Well, for the five pencils that we have, they make a three H, But we were gonna get the three h by layering between the 4 H and the two h. So you have a 4 H, the two Hs a little darker. The HB is darker than any of those. The B pencils are darker than the h be. The next step down would be a E pencil and the forbears, the darkest of all. So we could reverse that and say, all right, the darkness is the four b. And then it gets lighter to be HB two h for h is the lightest. So again, we've got these pencils, nothing new, we've had them before. When those out of the way. We've got this we've got this little indicator here of the direction, the light. So this, we can see the opening of the ellipse. And what that means is that means that the light is around the front side just a little bit. It's not if it was straight a profile shot, it would be a flat triangle. Because if we view a cone and a certain, in a certain light, in a true profile, we have no arc, so becomes if flattens out. But as it goes around the corner, you start to see the backside of that ellipse open up. So I can't I can't see the list because it's behind here. All I can see is the top edge. But as it comes around the front, we can start to see the lips open up and it gets more and more open like we talked about with the pyramid. So this means that this is really sort of a light kinda at this angle. So it's around the front, It's a little bit above it and the light striking it. And it's probably striking in somewhere about there is about where the direct light is striking this right about there. Now if you take that out because I don't want that to pamper my drawing. I went ahead and drew this really lights. You probably can't really see much of it at the moment. But we've got a, I've got a cylinder. I've got the cylinder that's going to be sitting on a table. Again, the back of this wall is going to be a light gray as far as that goes. So it's going to be a light gray. There's GR AY probably can't read my writing because I have very bad writing. So the good news is all of you out there with bad penmanship doesn't mean you can't draw. We've got a table over here that's going to be a baby blue or light baby blue color. Okay? And then our code over here is going to be white. Okay. So the lights on our, I think I said Cohen, I meant to say cylinder. We have a white cylinder, so the lights on our cylinder going to be lighter than any other area in our drawing. We're going to be able to see all six form shadows. Now this right here is going to be a flat plane. So this is a cylinder, meaning it's flat across the top. And of course, so it can sit down on a table, it's flat on the bottom, but it's round around the belly. We could think of this as a as a, we could put a belt on this thing because it's around it's around this direction going around the belly, if you will. And we're going to be able to see on here all six form shadows now not appear. That's gonna be a flat plane. It's just going to be going from darker to lighter. Because the, the light is above this right here is going to be my light values. And it's going to be the lightest of the light values. So I've got L t values are going to be right here. On the top of this, this ellipse, which is the top of my cylinder. We're also going to be able to see is all six form shadow. So remember we have the form shadows. And those form shadows are as follows. We're going to have our light values. So we're gonna put LT values. We're going to have our middle values. Middle values are also referred to as mid-tones. Tone and value mean the exact same thing. And sometimes you'll hear them called halftones. Halfway in the middle. Tone means value, middle value, mid-tones, half-tones. They're all talking about the same place. And we look for these first. We're also, you'd probably be able to see a highlight on here, at least a soft highlight. Okay. We're also that's for all the families of value in the light side. Then we're going to have a core shadow only on the round part. So we're going to have our core shadow. I guess I shouldn't write this so you can actually read it. So we're going to just put essays for shadow, core, shadow. Oh, I've put a T in the highlight. That's not right. We're just going to scratch that out and we're going to ignore it. So all of those English teachers out there don't say, Hey, wait a minute. Where did you learn how to spell? So we got, we're going to have our core shadow. We're also going to see our dark values or dark tones. And remember the dark tones are lighter than the core shadow. This is not the darkest, this is the darkest of the form shadows. So remember these are formed shadows. Those are the values that create the illusion of depth. And they tell you whether the surface is round or flat or bumpy or undulating or whatever. So we're gonna put form essays for form shadows. We're also going to be able to see reflected light. So we've got reflected light over here in our list. Right? So we've got form shadows and then we're also going to be able to see a cast shadow, at least an indication. Remember the cash cows are just an object blocking the light. And then where something actually meets the table or something touches, like if I put my two fingers together, that dark line that's created, that's an occlusion shadow, that means two things are touching. So what we'll just put 0, That's what's to be an L. Look at that horrible writing. Occ ALU, clue Zhang, I think it's s I hope there's one at me is there are two Ss. Yeah. Okay. I think there's one S. Okay. So occlusion if it's not, I apologize for all you folks that know how to spell out there. But an occlusion shadow. And that means something's touching other surface. So we're going to see all of these. We're going to have a light value here. We're also going to have a light value on the vertical on this cylinder. But they won't be the same value because this is a plane that is on top and the light's hitting it more. And this is a plane on the side where the light will be hitting it less. So the light tones on the side and the light tones of the top. Are not necessarily going to be the same value. This is going to make more sense once we actually start putting some values down. So again, because this is so light, but we'll go over this in just a moment. I'm gonna go ahead and start using my 2D pencil tool, the pencil. And I'm going to use this to be pencil. And I probably shouldn't go too quickly. They don't want to make a mess. Like I've already started to kinda make a mess. And that's all right. I just want you to go okay. And sometimes to get more control, we go, We kind of grid our teeth and we use more pressure. We actually want to go the opposite direction. We want to use less pressure and we'll have more control. So we need to do a little bit if you need to do some deep breathing and get into your zen state or what have you really need to relax if you're too uptight or tight or a really worrying yourself about. We don't have to worry about anything. This is just a drawing. You know, we got time. So just, you know, relax, get into it. It's you were going to be on this. We're going to be doing this for awhile, so you're fine. Don't don't feel like don't feel like you have to stress anything. So unlike we're doing taxes, this is just, you know, we're just trying to relax and do a little drawing. So forgive me for any accounts out there that don't find that funny. But anyways, I know I give them my my blood pressure goes up when I do taxes, maybe maybe not everybody out there, but just because it just seemed a little stress or we don't want that here. Yes. We're trying to do something. Yes, we're trying to keep certain things in the back of our mind to help us with creating value and shading and all that good stuff. And we do want to be mindful over the same time. You can't, you don't want to worry about it either. You want to put on your favorite songs, binge-watch some of your favorite Netflix episodes, do whatever it is that you can do to get yourself to relax. The more relaxed you are, why you're doing this, the better your drawing will be. So and I really mean that that's, that's, that's what this is supposed to be, supposed to be relaxing forest ANOVA chew. My life is stressful enough. I don't need more things to stress me out. I probably need more things to love me, release some stress. And that's what drawing is supposed to be. At least if you know, if you're doing it as a hobby now for all you are professors, professionals out there like, well, I don't know about relaxing. Because you want if you're doing something that's going to decide whether you eat that monster. Now, there's a different dynamic to it. Doesn't mean you don't enjoy it. It just means there's a different energy, there's a different dynamic, a different expectation. But still, it's much more relaxing even under those conditions than anything I've ever done. So again, I spent 20 years in the industry, you know, grinding out images and things like that. And even on the most stressful day, it was a far better day then. Then pulling down a job, but it's some big superstore or something like that or working in some corporate office where you have to be a yes man to some terrible boss resolving something nice about being your own boss. You know, sometimes it gives me the day off, you know, things like that. If I have to go somewhere for a family emergency, he'll he'll give me the time off. I'm my own boss. There's a downside that she also going to be your own motivator, but that's a whole different conversation. But anyways, that's, that's a whole different conversation. What we're starting to get some, some value here and the value is going to start to describe our cylinder. Now remember we're dealing, we're trying to make this look naturalistic. We're not trying to stylize this. We're trying to make this as natural looking as possible. As if we just set this up and put a light on it on a real table somewhere and took a photograph or whatever. We're trying to recreate that sort of an idea. And so we want to be as accurate as we possibly can. And I was going somewhere with that. The idea is, is that in reality there are no edges. So that's why my aligns or so light because the moment you start putting down thick lines and you can't get rid of them. You've ruined the idea of edges. And there are no lines in nature. You'll hear that said a lot. There are no lines in nature, there are no lines in nature. And what there are, there are sometimes long shapes that look like we would call them a line. There certainly are those, but they are not lines. And a line is much crisper, is much different. And many times, and I love the saying and it's true. Sometimes people kinda like, you know, only one, that lines are an abstraction. They are, lines are an abstraction of re-interpreting and edge into a line. Because there are certain edges that we might make a dark line, but it's actually not dark at all, like the ridge of my cylinder here. A lot of that average is going to have a highlight running along it and, and not a dark line at all. So that's the whole idea that that's a way to demonstrate or illustrate the idea that there are no lines in nature. So I tried to go just one direction when I was first doing this, I didn't have to go and shop over here. But this I was kinda above using, I'm using sort of a uses a combination. I started out using a a risk swing and an elbow swing to kinda to to lay that in. Now I'm using a finger swing because I want a little more control. Because yes, you can see over here, but it just begs for a little more control. I'm using my Tooby pencil and I think I'm gonna go ahead and switch to my HB. The eight squeeze a little lighter. And that's why I'm going to switch to it because I think it's getting a little too dark too quickly and I don't want it, you know, I don't want that. So what do I do? I shift to a pencil that's going to be a little lighter. And if the HB seems to be getting too dark and in my areas I'll switch to a to H. So, you know, don't be afraid. That's why we have the different pencils is to give us a little bit more control over things like value and how light or how dark is it going, and also how, how uniform is the texture and different things like that. We want to be able to control that. And we can use the we can use the fact that we have these different pencils to give us more control. Because again, if I'm using a light pencil, I'd have to go over it twice or three times or four times depending on which principle is as many times you get the same sort of darkness or might even have to go over ten times. You know, there's, so because of the effect we can, It's going to build up more slowly. We are going to have much more control over. That's what we're doing with graphite. We're building up our darks. We're making the darks darker by spending more time. They are not by, remember I'm using a light pressure. We're not trying to crank on this stuff. We're trying to use as lighter pressures we can get away with as we're creating this. Now. I've got this, this is kind of broken through the lines. I want to clear up some of the lines here for the top of my cylinder. And I have written now the white eraser again is as much softer on the paper. It's it's not as aggressive as my kneaded eraser. The kneaded eraser, I use it for shapes and you pounds that are pushing into stuff to pull up the graphite off. But I'll just show you this too. This is just a little makeup brush. As far as that goes. And my my my wife is gonna get rid of it. And I grabbed that these are really nice. This was a nicer one. But she upgraded or what have you do you have to use this? No, but it's really kind of I don't have a drafting brush with me in a moment. And a brat drafting brush just takes away your eraser stuff and doesn't disturb too much of the graphite. You can do the same thing with this. So I just, yeah, I've got this on hand and I was just brushing off my drawing a little bit, cleaning it up, so to speak. So where you go ahead and clean this up a little bit more, you know, we're always get this little makeup brush. And We're gonna go ahead and clean up this line here, this edge and I keep saying line and that's not right because it's not aligned. We don't want it to be aligned. We want the, the, the, what looks to be a line or what is actually an edge is created by this darker value against the lighter value. And it creates what we would term and edge, not online. And usually there's also in the drawing process, you're going to usually be a cleaning up in racing and stuff to clean, clean up some edges, sometimes fairly read it regularly. It's not it's not a big thing. Not, you know, it's it's something that you do a lot in the process. So I've got this thing, I'm going to switch again to a, maybe a to H scores that goes here, this. So I'm using a finger swing and I'm actually using the tapered or gradient or feathered stroke, whichever one you want to call it, they all mean the same thing as basically where we're making this just on the down-stroke. I'm also using this two-way, so I'm going to have more control because it's lighter pencil. We'll fill in some of this splotch in us. Very, very softly, very subtly. And by taking a little bit of patients and going in here with this, I'm going to be able to get a much nicer result. Who doesn't want a nice result, right? I mean, everyone wants a nicer result. So good. I'm gonna come over here using my, my pencils. And I'm going to go ahead and create this value. And again, we're trying to make it more and more and more uniform. And I'm using again the finger swing now. I've actually got my hand off the paper. So I don't touch the drawing. But you can't see. But I've actually i'm I'm resting my arm further back, so so it's not as so I have a little more control. But if I was smart, you know, if I would, if I was a little smarter, I could take, I could take like a piece of paper like printer paper E sort of paper and put it down as to protect my drawings. I'm just trying to keep my hand from dragging through here because I'm a lefty. And usually because I was of course trained in schools. Just like right-handed people. People's, you know, if you start, you start on the right. As a writer, writing and come across, you're not going to drag your hand through and stuff. But as a left do you do so lefties that are smart. And again, I really have to, again, I would do our programming and I don't do this enough, should actually start from the left and come to the right. But, you know, and I guess I did do that a little bit, but now I still have to go back into the drawing. In which case again, you're going to have areas that are going to be worked on. So grab the piece of paper, put it down and you'll be back. You'll have less issues. That's what we want. Less issues. I just wish I had less issues. Probably my life, which is I had less issues but whatever. So we're gonna go ahead and we're going to keep now we're going to keep keep on, keeping on as they say, We're going to keep working on this. I'm going to go ahead and bring your gradation up. Getting. So I'm just trying to again define this edge that's going to be defined by the value. Okay? And we're gonna go ahead and I'm going to put a value also down on the table. I think I'll use an HB pencil. So there we go. And I'm going to be using a my elbow swing. This is actually a little lighter across that edge, just in one place. And so I went back in there to darken that just a little bit to create that again, that edge, this idea that one edges lighter in the other edges darker. Again, I needed, if I hadn't, I find you to dark at all entire area very quickly. Again, now I've got a now I'm working on a flat surface, so I'm holiness in a basically a modified tripod OGM. I'll go to the tripod, but I've got the pencil all the way out here. And I'm kind of tweaking why, you know, pulling my hair, my wrist up a little bit. Because I'm working flat. You don't normally work flat. But this is basically to help. It. It's films much easier when things are flat. One of these is out to get a little nicer setup where it can be a drafting table or something. So I have a little bit of an angle because you change your hand holds normally I'd have no baton or overhand grip and I'd be using I'd be using that and it's a little quicker too. So that's so I'm trying, I'm actually using a tripod, but I'm kinda modifying it to make it feel a little bit more. I've got my thumb pointing up this like this, and I've got this atom the crook of my hand. And it's just so I can, I can move my my hand a little better. And that's because I know I never draw off. You don't want to draw a flat. That's not a good idea. Whenever you're drawing, you should be drawing on an angle. That way you don't get carpal tunnel and all, all kinda weird stuff because there's certain handhold that are more ergonomic. They're better for your, your, your hand. If you use them. I'm gonna go ahead and continue to lay in some value. Again this table. Now, this table cloth is again baby blue. And maybe blue is darker than white. But baby blue is also still further like color. And I don't want this to be a lighter somewhere by the step 8 on the value scale, somewhere about there. So it's going to be fairly light. And most likely my my light gray wall isn't going to be any darker than a misstep aid on the value scale either. If you don't know the numbers on the value scale, go re-watch the values kill video because you want to be really you want to know those numbers. So when I call them out, you kinda like, Yeah, I know what you're talking about. I'm there with you. And again, remember with the value scale that ten is white and the one on one is black. Now sometimes you'll see a value scale that reverses that relationship. Like when I was trained, it was black was 10 and white was one. But the one we're using this a little more common these days than the one I was trained in is usually the white is 101 is black and it refers to light, a 100 percent light on a white surface is white. And 10 percent, 90, 90% less light is going to be a really, really, really dark when you started the lights on Once the leg goes out, everything goes black. But that's the idea is it's as it refers to light, a 100 percent light, we're going to have that white is going to be brilliance. And then as you dropped down, 10 percent is going to get darker. As you drop down the light even more, it's going to get darker and darker, and darker and darker. And that's what the, the value scale is referring to is that relationship. So I've got a little bit of this, of the top of this table. With at least a bit of a value. I can go ahead and try to perhaps make a little bit of a gradation. So work a little more at the back or start at the back and come out towards the front so that my lightest lights on the table or towards the front of the table and not the back of the table. I can certainly do that. And again, by doing this, where are our little cylinder are starting to emerge? Now I'm going to grab my pencil again. Once more. I'm going to using this to be, I'm going to start to indicate some of the cache shadow. So again, we're just going to start to put in some of the darker value for that cash. And the cash cow is going to get a little bit darker as we work on it. And this drawing is not about the cash. No, we just need enough of the cache shadow for RID go okay, cache shadow. I'll buy that. Again, there's so much the drawing we've said to be close enough that someone says, Yeah, that looks fine. And then they can ignore it. Like again, this drawing should not be. The people are staring at my cache shadow. I've done something wrong. If however, the cache shadow is good and other people are ignoring it. And looking at the comb, or pardon me, not the comb, but in this case the cylinder. That's where I wanted it to be looking. So there can't be anything funky happening with the cache shadow, but can be somewhere texture thing that I, I did or I got too much of the line showing through white lines because I didn't uniformally try to, try to keep my value a little more uniform as I was making it. You know, anything like those are gonna start to distract the eye. And the eye is going to become aware of the fact there's something weird going on. There's something different. When I say we're choosing me, there's something different going on. That's not going on elsewhere in the drawing. And you don't want that, you want just enough for people to ignore it. So they don't think anything is wrong. And it's kind of like sleight of hand with a magician, with a magician, you know, with one hand they're trying to distract you. So the other, the other hand can, so they can perform the trick. That site a hand-drawn look at this hand like my other hand. And we're doing the same. It's a visual sleight of hand that we're trying to create where we want it to look so good enough or correct enough that people don't focus on it. That doesn't mean that the other areas are going to be funky or what have you just means that we have to do everything or most things within a good enough degree that they can be ignored. And that's a good thing for us. Okay. So I was using a lot of an elbow swing a little bit through this. I was also using a regular finger swing. Now I'm using that gradient stroke or a feathered stroke again, so we will call a tapered stroke. And these have more control. Okay? And again, you'll start to, the more you draw, the more you'll start to switch back and forth and you won't even think about it. Many times when I'm doing these videos, I have to kind of look at, look at my arm will go, Oh yeah, I'm doing this and I'll look, I'm like, Wait, am I really doing that? And sometimes I'm like, No, I'm not, I'm actually doing something else because I'm just I'm just not thinking about it and that happens quicker than what you think. Yes, I've been drawing for a long time, a couple decades and all that good stuff. But, you know, when I was first starting this draw, drawing from my first year, within just a month, you're actually kinda that point where you're like not thinking quite so much about what you were doing with which particular swing. And so it happens quicker than some might think. Now, i'm, I'm gonna go ahead and we're going to use a little more of the brush on this drawing. And when you use a brush, you use it to do one of two things. It's either going to, you can lighten area because when you brush it, it's going to get a little lighter. You can also brush something because you wanted to have less texture. K. So or you can soften an edge, it'll soften that edge will soften a value, then it also soften texture. So again, I could come in here and soften the texture of my drawing. And I could use this guy or I could even use this guy if I wanted to. Again, this brush. But again, this is just going to soften it. It's going to take out some of that. And this will save me a little time to what I could have. Brush this whole thing with the with my one-inch brush. It's just this one is bigger so it covers more area. Okay. So now we've softened everything up just a bit. Okay. Now again, you're never done when you do that. You never just leave and go. Okay. Well, I know I did I did the brushing now I'm done. No, you're gonna have to It's still a little splotchy. It still got some. Stuff going on whenever you brush something or smearing or blended, it starts to look dirty a little bit so we don't want it to look dirty. So we can go in here and start to create gradations because migrations go got blown out when I did that. So that's something else I don't want. I could come over here with my kneaded eraser, rounded off on the bottom and pounds, pounds with it to lighten up certain areas. So you can do that. Now with this, with this kneaded eraser, It's hard not to create a texture of some sort. And so I might have to try them and then coherency if I could, you know, Russia back a little bit, soften that texture. I can take and use this very, very gently and very, very lightly to again, a race, you know, away some of that graphite, just whoops, and that's starting to be a line. That's all right, we can take out that line. Right now. I'm trying to get more sort of a gradation using my eraser. This is dirty now so I have to molded back into the back like like that, flatten this out a little bit. Okay. So I'm just flagging, finding this out just a bit so that it's not that way. It'll be a little softer and overlapping these little pounds Marks. I can start to get again a gradation. And I can now if I was trying to do textures, I could lose some of that texture there. If I wasn't trying to texture, I could come in here with a to H. I could fill in this lighter line that happened because of my eraser where it may too much contact me that until light line and I can just fill that line in until it disappears. So again, I can use this to H get a little bit of splotch in us all over the place. Can I use that eraser? Now? That doesn't mean it's a bad thing. It just means that I'm going to have to go in here and fill that stuff in. And I can. It's really not a big deal at all. Okay. And this is where graphite sometimes feel like, wow, why does it take so long to do a drawing and we don't, you just do it and leave it. Well, if you're, if you're doing a lot of this, you know, textures and every time you blend something, you have to go back and reestablish the values. You have to go back over it with a layer of value. And so you're constantly going back into this stuff to get the drawing to do what you want. Now, I'll go ahead and to H there. I think I need to be a little lighter for some of these, a little bit little areas. And for that, I could go on with my four age. And I can still see some of the little pounds Marks. What if I come in here and I start to fill those in and they will disappear. Again. That's part of really learning how to deal with. I mean, you can do the same thing as your papers. Like there's some weird parts on this because it was like the paper got a little beat up. And what I mean by that is probably was between some sheets of paper like a pet habits from a drawing pad. And if those papers rub against one another, it starts to raise the fibers and graphite doesn't like that, so it'll start to make some weird splotchy start to happen in your drawing. And that's kind of always the case unless you're using nicer paper that it's, you know, there's less of that. So if I was using illustration board that I went and paid four or $5 for, for 30 by 40 sheath and cut them down into 11 by 14 or something. That's going to be less likely to have those imperfections. And adults, they can take a little more abuse, as some people would call it. Because it's a nicer paper, it's made a little better. And so even sometimes even just change the paper. And here's fuel talk about leveling up and how to get better and all this sort of stuff. And sometimes there's little things that you can do that puts you in a better, you'll get a better drawing even without changing anything. If you change one thing, you can get a better drawing. There are certain, there are certain pencils that are a little clumsier to use another's. Certain brands because they're, they're really not a professional pencil. So the material, so I have a little time. My painting class people will come in and, and try to use this really bad student grade paint. And I'm like, you don't want to use that and they're like, well, why? What's the difference? Well, the difference is huge. And as, as an artist, it's mostly the pigment. There's higher pigment in and the better paint, that's why it's more expensive. And if you're, if you're with pain, it's all about how good your pain is. Where the oil pain or acrylic paint what your pigment load is, people would say, I'm using just a very controlled tripod grip and things like that to put in the occlusion shadow. But but the materials themselves, sometimes. That's a good case of it when you go from saying using student grade paint to a professional grade paint or even a high-end student grade or low-grade professional. Those are just in a whole different ballgame than the students stuff students that was terrible, don't use it. Better to limit your colors and get professional paint into the USA. Two dozen colors it with that are actually student grade. So we're continuing on with this occlusion shadow. Like so. And we're just going to go ahead and you'll keep and we're going to come in and start with the cylinder. Again. It got a lot going on with the, we've got the background that we softened. Again, the background, these are the baby blue and the light gray are probably about the same value. But there are two different, this is a horizontal plane, so the light hitting this more directly and a vertical plane, the light is not hitting it as directly. And so two values will be two different, will be two different values. If there are two different angles to the light, the one that's more direct will be liner. The one that's less direct will be darker. And that's what's happening on this wall. This wall, because it's a vertical plane with a light source, It's at an angle. The light is going to be hitting the table much more so than the wall. So That's why I'm trying to come in here and darken the wall because right now it's almost the same value. Here's here we'll, that's not what should be happening. Same thing over here. We've got this not this wall here and the, and the table top and the table tops to be lighter than the wall. And so I'd come over here and sort of trying to get gradation on this wall. So we would just continue making, making this wall. We're gonna do some more of that. But we've also, we're to the point where you've got enough value. We can see hopefully our cylinder, you know, very well. And usually I'll do this. I'll, I'll, I'll draw my background and my my areas around the cylinder or the object is going to be one main, the main event. And then that way we can relate the values one to another. Okay? So again, we're going to, we're just going to keep working on this and moving through this to to continue our continued this drawing and get our drawing finished off. All right, so we're gonna go ahead and we're going to come back and we're going to work some more on this. Take care. All right, welcome back. So we're gonna go ahead and get back into this. Before we left, we just softened a little bit with the brush. And again, I use this just to save some time, but I could have used, just as easily used my, my one-inch brush to have done my my blending and stuff. What I do now those aren't whenever we want a crisp up an edge. A 4 H or two h is a really great way to crisper line. So I've got my for-each pencil here and I'm going to just very quickly tried to crisp up. The line, making it a little darker next that edge. So this is live, this is the time a darker that makes the edge look sharper. So whenever we have, again, we have, whenever we have two edges come together, one goes darker and one goes lighter. And the higher the contrast the the more that's going to really show up. That edge is going to pop as they say, that's going to have a lot of contrast, going to catch the eye, jump out at you at all, mean the same thing. It's going to, it's going to be really eye-catching. So again, I'm using a finger swing. I am using the gradient stroke or tapered stroke. And I'm using a foreach console. And I'm just trying to crisp up some of the edges a little bit. And do the same thing over here just a little bit. Using this for each console. Okay? Now again, when we soften these edges again, it kind of blended them down a little bit. And if we wanted to, we could bring a little more contrast. I can grab my HB pencil. And I'll come in here with this HB pencil and come against this edge and make a gradation. Like if this was a table and this is the wall is the wall comes down into the light, it gets lighter, but then as it starts to tuck behind the table, it'll start to get a little darker. And it's a quick, It's a quick radiation, but we gotta be careful that it's not. If it's too much, it'll look like this right here that looks kind of like a, like a bar of a darker value and we need to make that have a gradation. The Push it out so we're starting the darkest part, come out a little further, starts in August part come out a little further. Right now I'm just using a regular finger swing, but actually I'm not even using a finger swing. My fingers are moving, it's my wrist. So I'm doing I'm using a risk swing. And I can cover more area that way and I can work faster. And again, by this layering, we do lots of layering and graphite. That's how we get the subtlety, that's how, how we add things to really the magic to start to happen is some people might say, is all from that layering that we do. And the really nice part about this is as one edge goes darker, the other edge looks lighter. So again, it's all, it's all about the relationship between these values. And we're going to see this happen more and more and more as we get more and more of our value relationships where we want them to be or just barely starting to get them, kind of where we'd like them to be right now. This is still a little bit too much of a bar or a band or, you know, it just looks like a rectangle. So I'd have to come up here and what I have oh, I have an HB. I'm like, why is it getting so dark so quickly? So now I can get, I'm making that gradation and that's happening a whole lot easier. I had a for-each before and it wasn't doing much. Now I've got my HB and it's going darker more quickly, which I'm having an easier time making my gradation. So again, sometimes you might be like, Well again, this pencil's not doing much. It's too light. Go to the next darker pencil. Now this is still in the light side, so I don't wanna go too dark with that over here on the shaft. And because the light will move across the surface, lighter to darker. So there's, this should be darker here than it is over there. So it's not right now. In fact, it's almost the opposite, darker here than it is over here. So I'm gonna come over here and I've got the four B pencil. And again, this will all go darker much more quickly. And I need to, I need to make it darker. In order for this to look correct. Thinking I'll start at that edge, come out a little bit, start with that edge, come out a little more stars at the edge. You know the process, this is just, we're going to keep doing that until we start to get a gradation. Now that looks like a band. Now what that means we want to push now further and further and further. And so again, we start to get a nice gradation happening. Value. And that's, this is where again, you put on your, your favorite music. You can put on your favorite Netflix channel or whatever, or whatever it is you watch. Maybe it's the, you know, Amazon Prime or just whatever your favorite channel is, put and put on your favorite show and,
17. Drawing The Cylinder Part 2, The Finale!: Practices how you learn. And my grandfather would always say, hey, you know, nothing worthwhile is free and that's what he meant. You got to put your time and if you really want to, do you want to do some you love? You better be willing to put the time in because no one can do it for you. One can learn something for a, you have to be the one who learns it yourself. And that's the fun part for me and all those, yeah, you know, I like to draw so and and I think some of the best artists and the ones that I've met than that I admire. They're constantly learning, they're constantly trying to improve, that are constantly challenging themselves. And I know some other people that work in the arts that haven't challenged themselves and they're kinda, they've been dialing it in for the last 15 years. And they, you know, they they they live very comfortably and they may think that's all they need to do and that's fine. But the ones than the people that I enjoy them also the ones that are constantly changing, they're better now than they were three years ago there. They're going to be better three years from now they're good because they just are always challenging themselves, are always trying to get to that next level. They're always trying to say something where their work that touches the viewer to let them understand how it is that they felt in the moment. What was their impression of a landscape? Well, was the character Someone's phase, what was the the scene that they were trying to create, you know, everyone's got something they're trying to do. And the more effectively you do it, the better you're going to be. And so there's, again, there's certainly will paint the same paintings over and over and over again. And that's because they know they'll sell and that may be fine for, for them. But again, the artists that I really admire, that I admire the most are constantly pushing themselves, experimenting and trying to get better every day. And, and that's a process and that's what having a life's time of work is about for an artist is trying to say something new with themes that have been around for many, many, many years. And so how do you do that? And that's, that's the challenge. And yet there are themes that we all share. And so usually you're communicating in a way we can communicate the most with familiar themes. We all experience happiness, we all experienced sadness, we all experience hunger and the need to, to sustain ourselves through a food and drink and that sort of thing. And of course we have family and there's the life cycle and all these different things that. Fire commonalities among, among all of the people in the arts, in our family and the human family. And you could even extend it out, of course, to the, you know, the mammal kingdom and stuff. But for what we're actually trying it usually we're doing our artwork not for, you know, other species, but for our own sort of thing. But anyways, so keep yeah, I keep it. Keep keep on, keeping on I guess, keep practicing, keep trying to work on this cylinder with me. You know, practice and draw outside of the class. These are just basic concepts where there are important concepts, but they are very, very basic. And and so we're going to, and so what I'm looking for, we want to learn them so that we can apply them in. They apply to everything we do. No matter how how simple or how intermediate or advanced. Form shadows are always something that are in play. If we're dealing with representational ism realism. Where we're trying to give a nod to the physics of the way light is affected as it travels across the surface. That's what realists have been doing for hundreds of years. And then of course, you know, allegories and stories that are of the, the people in the light. You know, the things that are in the light. What are they experiencing? We turn the lights out. We don't know because we can't see anything but, you know, we're always using the idea of light traveling across the surface. And even people that are using the abstraction and things like that or even non objective people, we'll talk about what's called a collage space. And then what that means is that instead of dealing with a much deeper three-dimensional space, are you using a much more shallow space, but you're still dealing with light medium and darks. And light medium darks and dark medium darks and no definite darks and blacks and values that are up towards the lighter end of the scale and values that are up towards the deeper into the scale. And so, no matter what you're doing, whether you're dealing with representational ism, surrealism, neoclassicism, neoclassicism or, you know, Neil modern or something like that. A lot of artists work with value. They may not know if I look at a Jackson Pollock, he's not necessarily trying to emulate the subtlety of light traveling across the, the rim of a, of a tea cup or a glass. But he is using dark medium and light and everything in between, all kinds of values to create patterns with those spatters that he makes. And to create certain patterns. That in some cases they are patterns of classical works of art. And other ones they are patterns that emulate, you know, the, the, the constellations of the sky and things like that. So there's or the patterns of a rusty, rusty old truck. If you've ever seen even a realist painter, rusty old truck. There's an abstract quality to it, to be sure. So no matter what we're doing, these concepts are always applying. Now while I've been chatting away at, yeah, I've, I've been using this for B pencil. I'm using a very lightly because again, it gets really dark very quickly. And I've been using a I went from using sort of a little bit of a of an elbow swing, but then I didn't I didn't have enough control. So then I went to a finger swing, a regular back and fourth fingers swing. And then as I'm getting more control now I'm actually trying to get where I'm using just on the downstroke. So we're using that feathered are tapered stroke. And what I'm trying to do is I'm putting the value of the entire shadow family. And I'm going to change my pencil now that I've been working with that I'm going to go to an HB. But the reflected light, which is the lightest and the shadows, is still a shadow value. And my shadows are supposed to be darker than anything in the light. Especially these light values. Light gray, baby blue. So this is supposed to be darker than this. This is supposed to be darker than that. Now that's cash 0, so that's what we darker than this. So I'm trying to get the relationship. Or the key is some people will say, you'll hear people tell a keying in every once and awhile. King in a drawing or keying in a painting. And all that means is that they're relating the values one to the other. What's your lightest light? What your darkest dark? This will be my darkest dark. Somewhere on here will be my lightest light, and everything else will fall in between. And so that's my key. And so as we're, as you're creating a drawing, try to think about more and more. When you boil it down, it's really just what are the relationships? What kind of relationships are we talking about? How dark or those relationships. So, good example of this would be Rembrandt who painted very, very dark paintings. They looked like, if you can think of a stage and someone shining a spotlight into the darkness. So very, very, very dark except towards falling on the person's face. And that spotlight. I've got an HB pencil. I'm using this as I'm chatting you up. I'm using the gradient stroke. And I'm just trying to fill in some of this some of these these patchy areas because that for me is a little harder to control than an HB. And so I'm going to layer on layering this to get more uniformity. And again, what I'm trying to create or establish is the lightest value in the shadows. So this will be the lightest and those shadows, and so it's got to be dark enough for it to read like it's still a shadow. So where this hits This wall. Well, where it you know, where this comes together against the wall. This is the darker edge. I say whenever you have a well, we normally would think of as a line that's two edges coming together. So one edge goes to her, which is this one, another, and it goes lighter, which is that one. So that's what we're doing right now. We're creating these, these wonderful edges for our drawing. Okay? So we're gonna keep going to keep doing that. We're going to keep working on this area. And I'm still using my fingers swing. I'm using this HB pencil. As I'm dealing with this HB pencil, I'm going to start to see if I can just very gently. It'll go to slightly darker against this edge and on top it'll be lighter. And that'll create that the edge that we want. So I'll just trying to, at some point I had to clean this up with an eraser up here. I don't think I'll do that just yet. But now I'm actually going to start to create gradation, getting darker here, going lighter as it goes down. Because this reflected light is not only the lightest on the edge, but it should be lighter here than it is up here, and this should be the middle value. And so I'm just spinning a little more time to the top. And then I'm coming down and the middle area. And then i'm I'm I'm trying to spend very little time down here so that it will start to look like I need to go down here right now because again, a little splotchy. But by doing this, I can start to get a gradation from here to here. Now that was the B pencil. I think I'm going to grab a to H because I've got all these little, these little stars or what have you, the texture. That's why I'm calling the little stars, these little, these little specs, these little light specks of a value. And remember this is a lighter pencil, but it's going, it's making that value darker. And I have to use this very, very lightly because I will use too much pressure. With these hard pencils. The softer pencils won't stick to the value, so I have to use them very, very lightly. You might ask, well, why would that be? Well, all the pencils have a slightly different configuration, how they make it. Basically, there's more and more clay that is added to the graphite. And so that makes the H pencils harder. Well, that's same clay. If you press down really hard, fills up all the All the little, the little texture on the paper will fill up with this graphite. And graphite is also a, it's an industrial. It's not a fluid, obviously it's dry, but it's an industrial lubricant. It makes things slicker. And so anyone who's ever maybe raised a pine wood derby cars or something knows you put it on the little tire axis of the tire and the tires will go quicker because of the fact that graphite has that unique quality that it's a, that it gets, it's very slick so it helps things move over at the slicks. It's slick surface. Well, we don't want that. We need to be able to, to, uh, build on, on our graphite. And so what we'll do is we just cuz this very lightly. And as long as we use it lightly, we could use this all day long. And my other pencils will stick to it if I, if I press too hard, they want. And so I'm using very little pressure. Like if I if I usually I'll, I'll, I'll touch people on their hand. And my class just to kinda give them an idea of the pressure. And it's just, it's just a little bit firmer than the lightest a very light touch on somebody's hand. So it's advisable. I'm like it's just barely more noticeable than a than a lady bug crawl on your mean. And we want that we want that kind of light pressure. The moment you start cranking on stuff is you're going to kill your drawing. So I'm getting a little bit of a gradation. That's why I want it. I'm going to ditch the two h now and come back to the four B, because now we're gonna deal with a core shadow. So this is all the shadow family. And along this area we're going to have our core shadow. And now I've got my four B pencil. And actually I'm using moderate pressure now. I could also build this up by staying here a little longer, which I will do some of that. But I'm just using a little bit heavier pressure that I was just a moment ago. But I gotta be careful. I'm not cranking on this. Again. If you start cranking on this game over, it'll, it'll fill in, the whole paper will fill in. I'll start getting really shiny. It'll be hard to see the darks, darker, looking lighter because of the fact that they're getting all shiny. Henry has tried to start building up our gradation from here, going over to there. And this should be darker here than it is down here. So we're going to use these gradations, but they're going to be a little different. There will be a little lighter down here going across that surface. Where we come over here, it should be a little darker. So until August board I'm coming out, I'm using a finger swing. I'm using a for B pencil. Um, so again, i'm, I'm working on this area with a pencil. I'm starting at the darkest part, coming out a little ways, starting with the dark as word, coming out a little ways, starting with the darkest part, coming out a little ways. And again, we're just barely starting to get a gradation over here. And that's what we're looking for. Looking for this. Again, I'm going to come here to the middle. You know, I don't want to work out here. I want to work here towards the highest the highest density, if you will, so that I already have a gradation, they're happening and I don't want to ruin that if I came right to this edge and start darkening that out and make it into a line. We want this to be a soft, what looks to be a core shadow wrapping around this object. And again, it's the darkest is the core shadow. And then from the core shadow we have a gradation into the middle values. And then it gets lighter on the edge into the reflected light. And right now I can't see that just yet. That's the reflected light is not lighter yet, so I'm going to have to continue to build this up until we do have a little bit of reflected light there on the end. It's getting there, but it's not quite there yet. So again, we're going to, we're going to keep working on this to get this illusion. Now if I, if I felt like there's some serious texture going on here in this paper. This paper seems like a good head a little. It's from a pad. And if pads are left, you know, Arthur moved around a lot. The paper kinda, you know, crimes against itself like that and it's not good for the paper and saw. I think that's what's happened here because it's just we got all this sort of, there's a little bit of annoying differences with the, with the, with the texture of the paper. Like maybe it's just been a little roughed up a little bit. And that's not good for, for making values. Again, I'm just going to continue to start the darkest part, come out a little bit. Started the darkest part commendable for other star, the darkest part. Come a little further. I get I'm using a downstroke, I'm using the tapered stroke. Known all that good stuff we've talked about. And again, remember that the darkest, the darkest parts are the ones that are going to take us the longest. So I've been using this for real pencil. Now what I'll do is I'm going to jump up to a 4 H, just we're gonna do the same thing we did with our grayscale. We're going to need to build this up. So I'm starting with my four H pencil and I'm putting a layer over this entire area. And then I'm gonna go ahead and just start making my gradation using this Fourier transform. Again, it will start to get a little darker again because it's filling in those little spots. It's filling in those little label was little stars sometimes I'll call them. And that's the texture of the paper. Sometimes people are like, well, if it's so much to fill that in, why aren't we using like smooth paper? That way we wouldn't have to fill in any texture. Well, that's true, but graphite bit needs to build on itself to get darker. There has to be texture for the graphite to actually get dark. So if I actually use smooth paper and I use all the same pencils and try to do everything the same and it went through the same process. By drawing would be 80 percent lighter. Now partly not 80 percent, 20 percent lighter. So it would it would be a noticeable difference. My darks wouldn't be as dark. And that's because we need the texture to build up our values. So we're going to continue on here starting at the darkest part coming out. So as long as we're coming out, started the darkest part coming out, you know, and again, I'm using this, this four H pencil. And again, we're starting to get a little bit of this. What we need happening here. We are now going to grab a to H pencil. And we do the same thing that I did with the foray. So I'm going to try to cover most all of the area where there's 2 H pencil. I'm using a very lightly because again, if I use this one too heavy, I pencils won't stick to the other. Softer pencils won't stick to the graphite. So very softly, very gently. Again, I'm going to go ahead and make some gradations. And so I'm trying to cover most all this area. And take out that little lighter line very carefully with my two H there, it's gone. So again, we're just gonna go ahead and again put, we're layering this. We're layering all our different pencils. And by doing this, we actually get more depth. So now I'm going to put down my 2 H pencil. I'm going to grab my HB. There we go. Same old, same old. We're gonna go over the whole area thereabouts using my pencil. And you seal this is, as this has gone darker, this starts to look a lighter. Again, these relationships are really are important. I'm not making this up. Now. It's the fun part of drawing. It's the amazing part to me. You know, that this is where the magic starts to happen as people like to say, where through all this layering and through all this planning and the other thing I tell people is work your plan. In the beginning, we can really, self-doubt can be very destructive to what we're trying to do. And too much self-doubt will make you quit trying to draw what we don't want that so many times the drawing goes through phases. And my old, pardon me, my old professors to talk about this, he would say, Look, you're either. Bringing a drawing to life or you're killing it. And that when you're making a drawing, it'll always go through that lifecycle. Sometimes it's coming alive and sometimes it's not. And you want to stop when you're bringing it back to life. The point where because again, it's going to be times where you're killing it and sometimes you're bringing it back to life. So I've used my HB, we're going to graph our Tooby and do the same thing. But sometimes I like the analogy so people can relate when you like when you're cleaning, if you're going to clean your garage or you're going to clean your room, are going to clean your workshop or whatever the area is in your house where you're like Man, that that they need some needs some attention. But usually, you know, going in, it's going to give, it's going to have to get uglier before it gets better. You know, you got to pull stuff out to them, begin to organize it. It's gonna get uglier before it gets better. And the drawing with your drawing is going to go through that phase 2 where to get it to look nice. It's going to have to go through an ugly phase. Right now. I'm kinda, I'm kinda of an ugly phase and that's okay. Because I want to continue to work my plan, I'm going to darken this. This will stay latter, darken this, continue to work your plan. I tell people Look, usually the people. And some are classes. They always loved to use the word yeah, you overworking, you're overworking it and you're working at most times. People aren't overworking it. They're just not working it enough. They haven't got to the point where it makes sense. Where all the different form shadows are reading and all of a sudden the lights come on. So I did that everywhere with a to b. Now coming back to them, I for B. And this is the fun part, is once I've layered all those pencils, even by using the same pressure, the four B is all of a sudden making darker marks. It's by getting used to this layering method. All of a sudden you're going to start how you're going to have these. You're going to get just Richard arcs. You're going to have a much better range of gradations. And it's going to really help the drawing we want that. That's going to be really great for us to. That's not a bad thing, believe me. It's going to really be advantageous to your drawing. So so that's what we're doing. We're just gonna, we're gonna go ahead and continue to build up certain areas on this drawing. Now I'm almost done with the shadows. The shadows takes the most time because we have to go over it, over it and over it and over it so many times to get this to work. And so again, we've got this where this is looking like a core shadow, dark tone, reflected light, light or dark medium and light. That's what we want. That's what we need. In order for this to look right. Case. I'm just gonna go ahead and little bit more through here. Okay, now we're gonna work on the lights. And we're going to start with my HB. Even my to be a little bit. So I'm going to work on the, on the dark middle value is now right about here. I'm going to have my light tones k. So that means this is going to be dark middle value and alignment of value k. So I'm already trying to kind of map out in my brain what I'm going to need to be doing now. See if I can know. Don enough control. Let's see if I can do it with my K yeah, risks way. So I needed I needed a little wider arctan, then a finger swing. And so I've got a risk swing the the elbows whom were just too loose, not too loose with this wasn't going to work too well. That's what that's what I mean by that. I've got this weird thing happening with the paper right through there. That's actually a manufacturing defect. But that's all right, I can work with it. So you, you learn to deal with that. The more you draw it like this is some funky little texture here is different than everywhere else. Like you can see where the screen they make paper on screens were. The screen had a little funky funkiness going on with it. But that's okay. A lot of times you can work with that, fill it in. No one's the wiser, no one would know. It's going to look fine. And so, you know, have patients. That's just part of the process. And again, that's why Why do the one where you have to go out? Well, you know, oh, I've got something I don't like what's happening. Well, it's all that it says left this little splotch there. I need to somehow deal with. And so you go and you deal with it. And it doesn't have to be anymore. You know, it doesn't have to be any harder than that. Now, I have my Tooby pencil. I used my my wrist swing and then for that I came in with a finger swing and I was I was just trying to re-establish some areas where there's a variation in the texture or there was a line. There's a line here that needs to be filled in as little space right there that needs to be filled in little sort of line anything right there needs to be filled in. There's a little bit of a line right here then these are fill in. So that's what I was doing. I was getting in here with my pencil to fill those in. As I continue with my drawing. I think I'm going to go ahead with my HB. Yeah, that's my HB. And we're gonna go ahead and continue putting a value on. So I think I need some dark middle values need to kinda transition a little bit more across the and the, the light family maybe just a bit. If we're not careful, this will start to look like a dark line. And someone's drawn in with a sharpie marker or something. And that is not the look we're going for. So start at the darkest part with my fingers when come out a little ways. So are the darkest part come ILO ways, sort of the core shadow come out a little ways. Start with the darkest word, the core shadow come out a little ways. You know, it's, it's that same sort of thing. And what are we gonna do? We're gonna repeat it, repeat it, repeat it. I do and dishes rinse, repeat, rinse, repeat, rinse, repeat, hurry, hurry, hurry, hurry, hurry. And that's, you know, whatever. It's less than you went as someone on your shoulder going hurry weather doesn't really like her do the dishes or whatever. But so I don't want it to see if my kids, someone, you know, bark at orders over your shoulder, but that's just all we're doing. We're just doing the same thing over and over and over again. Switching out the pencils, hanging out, watching our Netflix, drinking our favorite whatever beverage, whatever that may be, and just smile in and love and life. And that's what we wanna do. That's what is required when you draw annulus is you're just you're missing out. That's the part of this. This is really meant to be enjoyed and don't be afraid to give me all this technical stuff and all that kind of thing. But, you know, at the very end, at the end of the day we want to be yeah, loving this stuff and join this stuff. Having fun and being creative is supposed to be fun that least that's what it said in the literature I read. Sometimes I think I may have gotten the wrong pamphlet, but overall, I agree that that's the statement. So I'm gonna go ahead and I'm going to begin to make the value in my medulla my lighter middle values. So remember we have dark middle values and we have lighter middle values. So what I'm doing right now as I'm coming over here into my lighter middle values, I've got a 2 H pencil. I'm using that tapered stroke. And we're going to continue on making these down, coming all the way down to kind of it's like I'm coming down like a scanner and then I'm coming back up and then I'm coming down. And that'll help me keep it more linear. And it's hard if you do it all the way to there and then another stripe here. And if you do it like that, you're gonna have these like these rings and I don't want that. So that's why I'm kind of going down like this little scanner coming down to the here and now I'm going to come back up following that straight line. And then when I come to here and I want to start to go down, okay? Least in the very beginning, that's how we're gonna do this. Okay? And again, this is starting to have a look of a gradation of value, gradation of tone. It's looking like, Well, we want it started to look like a cylinder. And so this is that whole thing of working your plan like maybe 20 minutes ago, it didn't look like a cylinder so much. Buh-bye, bye. Work in my plan. This needs to go middle value and it seems to be lighter than this, this, or this, but it's gotta be darker than that are, you know, that's that's what we're looking for. So again, okay, so now I've got this getting a little lighter, but I want more immigration. So what I'm gonna do is I'm going to still kinda work up and down and up and down and up and down. Wherever I need to to give myself a little better gradation. There's also a little bit of a line here. We need to make this sort of semi, we'll call a bleed. And that just means you need a better little bit more of a, of a gradation. So we're going to work right on this edge. Lightened shadow meat and I'm going to try to see if I can get just a little bit more of a creation right, where the light and shadow come together. If we're not careful again, they'll start to look like a line. And, and so we need to, we need to get out to really be a gradation. So it doesn't look like a line. That's not what we're looking for, that's not what we want. That's not going to be helpful. But again, we can't really tell this is our core shadow, which is what we want. We've got a core shell and then we have our dark middle values. Like so. So we have our dark middle values. And again, this is starting, this. There's a gradation on a, happens on a cylinder. And again, we're just doing this. This is just the idea of a cylinder. But instead of putting a photograph up there, but it will photographs a cylinder. Because our eyes actually see more than a photograph, well, can see more than a camera can see. Yet to ever really expertly done photograph in order to catch what I'm going to be talking about. And that is as it goes, don't we have a gradient because the reflected light, it gets lighter, going darker up here, and there's a little bit of dark and starts to crawl. And so there's sort of like this sort of triangle as this, this right along the edge where it gets just a tiny bit darker and then it quickly create aids out. There's a gradation very quickly. And so that's what we're trying to play with right now. And I need a more of a radiation coming down and, and I'm going to play with that too. So but that's what we're working for, that's what we're striving towards. And we're actually, we're getting really, really close. This is going to leave the hardest parts are done. The ones that take the longest is the dark values and the shadow family in the light. So it takes a lot less time because we don't want to go as dark with graphite are really takes time for that graphite to be built up and have a nice dark, rich darks as we like to say, they're nice and rich. I think we can make this just a little bit more of a gradation. I think we're getting there. I think it's starting to look really, really nice. I think we need more immigration on this site too. So I'm going to work on this edge a little bit. Again, if you're wondering what pencil I've got, I'm using a 2 H pencil right now. Okay. This is actually just a site, just a side to side stroke. So this is just a regular finger swing. I know I'm working whether fast, but I'm just going to run their fingers when I'm just trying to dark, make it a little bit darker. And right along this edge to that edge, it's just slightly, there's, there's too much of an edge. We need to darken it so it has becomes more of a gradation. I think again, it started, it started to do it. We're getting to the point where it's really starting to happen. This is the exciting part. We're like, yeah, all our decisions are now coming together, their culminating. And it started to create the illusion of depth. And I know I've said this before and I'll probably set it on all of these videos. But it is, it's a fleeting illusion. And it can be just a couple minutes between. I don't know that this looks right to holy smokes. Wow, that looks yeah. That's starting to look right. And again, it's just it can be so quick going from nope, that doesn't look right to oh, yeah. Yeah, that's what I want right there. That's looking great. And that's the, that's the wild about is that it's just how quickly that can develop. And it's all about having all those warm shadows that we wanted in here. And so we have core shadow, dark tone, reflected light, middle value, light tones. As this comes over here, the visibly some light middle values is this is going to start to try to, well, it's going to darken as it goes around the corner. So this is going to be getting slightly darker and then there's going to be upgradation getting lighter. So the edge is going to go slightly darker and then there's going to be a gradation getting lighter as it comes in. Do I have a 2 H pencil here? He, I've got 2 H pencil. Going to be really careful with this because again, it sounds forgiven. It sounds forgiving if I have those spaces between the lines. So I've got to really make sure I'm overlapping like previous line. Whoops, there's a big space there. All right, I filled it in. So now we want to we want to be really careful with that because we need, we needed a gradation and we need this to look right? But if we're not careful, we'll start to create all kinds of really rough textures because we're leaving spaces between the lines. So don't work any faster than you have to if it takes you 2.5 hours to do this little sphere, not sphere part, make a cylinder. That's fine. And by the way, drawing takes a lot of time like I can't do a halfway decent sphere and cylinder and a cone, you name it any one of these little shapes. I can't really do a decent one and under an hour and a half. It takes at least an hour and a half to create the illusion. With graphite. There's some techniques we could use to try to. And we have been using the brushing a little bit to help us get to it a little more quickly. And so that has helped shape some of the time off. But there are some other techniques we can use as well that can help us to get and build a values much more quickly. And will certainly show those to you. And I do a lot of that with the pair as well. Because otherwise it would just take it again three times as long. And they can, graphite does have a subtlety. We can't get any other way. But it's the length of time it does take. It takes I think I've told you the street three or four times as long as to do with charcoal drawing. In the beginning, most of my, almost all my students, Hey, charcoal because they're not familiar with it. I mean, they low that because it's just so it seems so difficult in the beginning. And then once they learn how to do it, all of a sudden it becomes their favorite medium. It's so funny. I don't know anyone that hasn't reversed their decision on that. But almost everyone universally when they first started like, Oh, this is terrible. I can't stand this. This is the worst medium ever. And then they get, you know, because there's so much more used to a pencil. We know many times, you know, maybe this is going to be changing here is the, is with a younger and younger generation, but still there's many people that are in their twenties were, you know, that they were in school and they got a pencil and that was their first thing was learning how to use that pencil. And so we have we have a lot of comfort with a pencil. Using that pencil because we've we've used it and so, you know, in school and stuff. Okay, So this is getting darker, this is getting lighter again. We're really starting to create that illusion of being round. And again, what we're wanting is that illusion of being round. And it's really starting to happen. And again, this is so exciting because this is, this is, this is where the illusion really starts to come together. And that's what I want. So again, I've got this creation here coming in. That's, it has a little bit of value. Darker up here, getting lighter as it comes down. Because of reflected light. And almost obliterated that. So that means my middle values and not have to be a little darker up here. So this looks lighter. So again, it's all about the relationships. So this is really starting to have, again, that nice feel. This looks like shadow, this looks like lights. This is the exciting part because again, it's starting to really come together like we'd hoped. Cross my fingers, say a little prayer. All that good stuff. All right, Now, so this is really starting to work. Another thing I might do a little bit right now as I might, I could come into here. And again, I'll make this this is supposed to be darker. The cash house was to be darker than the, than the core shadows of this has to be darker here, then that's lighter there. This thing comes down. This has to be a gradation because that looks like a line. So that means I'm going to make this value come out and be the same value as that little looks like a line, but it was just a chunk of value. And so if I if I do that, if I make it darker, That's all dark wood starts to bleed. We're starts to make a gradation that looks like okay, yeah, this is the cache shadow. So again, I'm using just a to b and 0 for B pencil. And I'm using finger swings. We're really here. We're, we're, we want to be using a little more actually, I'm using a little bit of a risk swing right there. To cover more area much more quickly. We can come over here and we've got our occlusion shadow. Or this touches. And our occlusion shadow should be. But something down so I can put my hand on and protect my drawing. So I got my hand on this pencil. But the occlusion shadow should be dark enough. Like she's, you'd be able to see it even a little bit into the cat and the cache shadow. Because the occlusion shadow is darker than even the cache shadow. So that's, that's sort of an important thing. Yeah, we're getting there. So on this top, because of the way the light rays will hit, a lot of times this will have a slight gradation from a little darker on this edge, which pushes that, makes this edge look a little lighter. Gotta be careful what am I using? I'm using a for B, that's way too dark. Then I grabbed my two h. And again, we have to be very careful with this. We don't want to go too dark, but it's just a slight gradation going around here. And by this, and there's, there's a little bit again have a gradation right along this edge that pops the edge it makes shows the highlight because the highlight is being, is right next to this little bit of value. And then there's a little bit of value where it goes a little bit, gets a little bit darker at the back. And that's so again that the bank does is try to start to pop forward. If it's lighter back here, then it is up here again, it can start to lift up, do some crazy stuff. And then as this goes across, it gets, there's a gradation where it gets lighter. As it comes across here. We use a 4 H because again, it's it's hits some some some rough area. I don't know what again, that's probably because I love my my drawing pads kind of be kicked around the studio little too much. And so in ROS at the paper. I don't I don't take I'm not near as gentle with them as I probably should be. When I'm actually doing drawings, I'll actually grab the little nicer paper. But in the beginning it, this is nice enough. This is again that Strathmore 300 series. And again for beginning artists that that's perfect, that's fine. It's a good enough favorite are really sink your teeth into and get a decent drawing. And you can do some really great stuff with it. But if you're like, I don't want to enter a show or I wanna do a drawing for for grandma or whatever the case, maybe a friend of mine. And you want it to last a while. Well, you're going to want something besides. This paper. Okay, so again, now we're going to do the highlight. Now we've already got where the highlight starting to show itself. When we brush this airbrushed value over the whole the whole drawing. And so what I can do is I can take my eraser and pull out some highlight along that edge. Okay, I'm going to grab my other one that I've, I've put I've sanded a tip onto it. And again, we'll see if we can just pulls a little bit, little bit more. So I think it's a little bit too uniform to light everywhere. But here's how I do. I'm going to do, and we use this for h. And I'm going to very softly, there's also like a little dark right there that's just a little too dark. I want to take that out with my kneaded eraser. But I'm gonna, I'm gonna sort of reform these when I need to. And I'm gonna make some a little darker and some, you know, some will fade a little bit. Then I'm going to do this subtlety with my, with my four H pencil. All right, so here's what we're gonna do next. I w
18. Tips on Creating A Line Drawing of A Pear: All right, So welcome back. So we're gonna get started on drawing the pair. But before we draw the pair, we need to talk probably a little bit about drawing this wonderful object. And so we're gonna do a very quick overview of what we learned in the first class so that we can then draw the contours. In other words, the line drawing that represents our wonderful pair here. So I'm going to put him aside for a moment. And in the first class. And that is the power of line, which is our basic drawing class where we learn about Measuring and creating these different shapes like rectangles and triangles and circles and all that good stuff. And we'll learn about citing and measuring. And so with measuring, we're able to measure the width to height. And if I took my little pair here and I measured the width and took it into the height. I'm going to find out that this pair is about my unit being my width. It's going to be 1 third units tall by one unit wide. So you take the widest part, pardon me? You take the shortest party divide into the longest. So it'd be the width into the height. And the width is our one increment. And that this is one and the third times as tall as it is wide. And so by doing that, we get a width line and a height line that we can then turn into a rectangle. And this rectangle is 1 third times as tall as it is wide. The basic proportions for our pair, it's height to width ratio. We then talked about finding a center line using x marks the spot. And we could use a center line. Now because this is a piece of fruit and this doesn't stand straight up, it leans. So I found the central line first and then I ran the axis line. The axis line is showing the Lean of this object and this right here showing my axis line. So we get our rectangle, which is the height, the width relationships in that rectangle. We would then X marks the spot put in our center line. Then we draw our axis line. And the reason when you use the rectangle is you can start looking for alignments. The part where it actually touched the ground is over here to this side of my center line. And then it leans and it hit the rectangle I was using measuring to figure out that this this axis line hit the rectangle about at the quarter point, just, just before the quarter point. And it was almost two-thirds of the way over the bottom, almost a quarter and at the top, and that's my axis line. So you to draw this thing and we're, we're doing, we're not doing just a caricature of this pair. We're actually doing what's called a rendering or portrait. We're trying to really make it look like the pair were working with. And so that's why we're gonna go through these very formalized sorts of ideas so that we can know how to do it. Now when you get really good at this, you can start hopping through these different, I'll get a basic idea of the height, the width start to and then jump right on him thinking of the rectangle, but drawing the object, you can shortcut it. But in the beginning, you want to very formally do this because it helps your brain start to focus on these very subtle relationships. Then once we had our axis line and our central line, we then went to the next part shown here, where we went to construction drawing. Okay? Now, when we did the first-class, we did a whole selection of objects. And for the most part we're just trying to make them look pretty much like what they were were trying to ratchet it up now are trying to make it look even better. And we're doing again a portrait which is really dealing with just the pair. And so we're going to hyperfocus on it. And so what we would do is with this construction, I was thinking of the circle. Now this actually, the construction of this thing is actually closer to and lips or even in an oval if depending on how you look at it. But what I was doing is I was scoring and completing the circle because it's sometimes it's easier to modify the circle when you're doing a portrait like this, okay, We can use construction one of two ways. This is one way to do it. So with this, I again, I look to where the, the circle actually breaks outside the bottom of my rectangle because the bottom of this is cut off, is shorn off a bit. And so anyways we try to look for the circle and then we're, we're basically in a carbon from the circle. We also have the cone or what we've simplified into kind of a polygon, but it's essentially a triangle with the top cutoff for the top up here. Now we can still see our central line. We can still see our axis line, which gives us the lien for our pair. And this is our basic construction. Now the basic construction with construction drawing is again just a, it's a simplified idea of the pair. It's basically a circle with or if we wanted to, we say a sphere with a comb. But since we flagged it out, now a circle and basically a modified triangle kind of cut the tip off and then we kind of put an angle there right there when we go to the next part and this is the part we didn't cover. So we're going to get here to this next part. And with this next part, which we're gonna do here and going forward, that we didn't do so much in the other class is that we're going to look at this object. And I'm going to try to see if I can turn this to about where it was when I was looking at it. It's about here. Ish it's a little turn a little differently, but it's close enough. Last part a little better. But instead of just drawing the curves, we could just draw curves over the top of it. But it's usually, we're going to be off a little bit. So what we do instead, and then again, this is if we're doing a portrait now if I'm doing just a basic pear and a little pair among dozen objects, I'm not going to worry about it being a portrait of the pair. I just need to look pair like enough that I can get away with it with this. We're trying to get a little zone, zoom in on this thing, on hyperfocus on it. So we really get something that's closer to the real feeling of this pair. And so what we do is with straight lines, artists will always take straight lines and curves and we try to break them into straight passages. Okay, and then you can draw the curve over the top of those stray passages. So the reason we do that is when you start breaking curves into straight sections. Now we can measure that section. We can compare that section to another section and look for angles. We can check if this isn't the right place based on where this angle breaks or that angle breaks. This is up a little higher on this side. It's higher on this side. It comes off the cone lower on that side. And we can start to start to look for where it touches the cone when it swells out where it touches the rectangle. This, uh, touches way down here. On this pair. This one touches a little bit more towards the loops, towards the center of the bulb right about here. So by using these straight passages and I got these big garish dots on here. But then in some of them are not exactly straight. I didn't, I didn't do this with a real rise to these by hand. But the idea is that we start with the straight lengths first. And again, we would do this in the beginning, you know, so that we can start focusing on breaking down curves. If I can take this and break this into straight lines, it's going to be much easier to replicate that curve looking for the main points of where it straightens there and then there. And these how this has quite a few little dots. I could have simplified it. This would have become a straight line. This would become a straight line. But to really kinda do the drawing where I want sort of more than nuance, you would start to expand those straight lines out to get more little lengths like this right here starting to already give us the, the silhouette, if you will, of that pair. And so that's what we're doing. We're trying to take curves and then go ahead and turn them into straight lines, like what we've done right here. Okay? And if we look at this, now, this green outline is this original construction. So I have this green line here. And hopefully you can see very clearly how much of this basic construction has been trimmed and cut into to make this pair. And again, this was also like I noticed, oh well the circle needed to lift and different things like that. So this was just a basic approximation and this is where we're honing in on it. We're getting even closer. So again, we use the straight passages to, you know, create the straight lines for our silhouette of our drawing. And then from here, you can come over this. You could then curve these lines out into the, the, the curves that you need for that drawing. But again, so again, you would draw over, over these points that didn't make your finished drawing. Obviously, this would not be this dark. This would be light, light lines. Same thing with my construction. This would be light, light lines along with my center line, along with my axis line, whose it'd be very light. So I could then draw over the top of it. And then no one would be the wiser as to how it was created. Now, with this one, like I was talking about, we're doing a portrait. And so I actually broke the circle out. Because again, what that circle represents is I was just continue I was looking for where the circle started and then seeing as a circle came around around around this the outside of this foot, I probably can't see the tip. So there we go. The circle comes out and around and then comes back around. I was trying to find that. So this one we carved into that circle, we carved carved away, just like it was clay. We started building out areas and we start pulling areas away. This is one way of doing it. Normally unless I'm doing a portrait and I'm doing one rendering of one object. I would do this if I was doing a rendering of one object or one object only, if I had a collection of things would do it a little more like this. With this, I've, I've kinda shrunk in, so I'm looking for the inner inside here. I'm kinda trim off the outside and look for that inner circle. Inner circle that's inside the pair. And then I build out. So if I was doing a still life with a lot of different objects, I would kinda shrink it down and make it smaller than then what that circle is. And then I'd go to my straight lines and the straight lines are building out. This is kind of like our skeleton. And this would kind of be like the muscle and the fat and the skin on top of the bones. So with this one you're expanding out. And what we did this the most where this cut in was mostly on the circle. But you can do either way. You can either cut in or you can build out and sometimes you'll do both. You'll actually be cutting in in some areas and building out on others because you're changing stuff. But this is what I would normally do on what I have like a collection of objects. I'll look at it, kinda look for little, look on the slimmer side. Kinda cut into it a little bit when I when I'm making my little armature. And then I would build outward. And you're gonna come with this. And this again has a fairly good drawing, are fairly good approximation of our silhouette. I shouldn't say silhouette, I should say contour because we're not just doing the outs. Well, this is the silhouette, but we're actually going to do a full line drawing, which means we're going to, we're going to work inside, not just the outside, but this is pretty much the silhouette of that pair again, that are straight. Again, we would come in here and we would take this, these straits and they would start to round out and round off. And that would become our more finished drawing. And so we're actually gonna do this. We're actually going to, so whether you build outward or cut in, you're going to be very, very light. So what I've got here is I've prepped a really, really, really like drawing. Probably barely see it on there. Or I did the, I've done the construction and all this good stuff. And now on top of this construction, I'm going to go ahead and I'm going to draw my pair. So we've got, and again, I've got a, a to B pencil. So hopefully you can really see this. But I'm going to come in here. And using some sort of calligraphy is some people would call it. I'm gonna go ahead and And I'm making this again much darker normally found going to shade this. I don't want the lines to dark because again, this would look like a cartoon. So understand that I'm making this a lot darker. So you guys can see it. Right? So that's the stem. And then from the stem we're going to come out here. And we're gonna come over here. Like so. Now on this the theirs a slight overlap because the cone begins to come in a little bit. And because it's no longer And this is kind of an interior line, I'm going to have to lighten it. Then interior line. And I go ahead and maybe lighten this just a little bit more. There's a kneaded eraser and just tap on that a little bit. Alright. Buddy this to come in because what's going to happen behind it is this is my overlap. This is the bulb of the pair coming around here. Like so. Again, I'm making this a little bolder so we can see it. I'm also going to try to make some, this is an interior line, this is an overlap again, because we have a section. This and I'll have a picture of the pair side over here so you can kinda see it. So what we're going to do is again, this is, there's a section that overlaps and comes into here and kind of meets up with this. We're going to keep that a light line because it's an interior line. It's not as important as the exterior. Call it a hierarchy. Certain lines are more important than other lines, and so that's certainly would fall into that category. And we're going to then going to come down into here for the foot. Okay. Now if this was a contour drawing, in other words, if I wasn't gonna do value over the top of this, I'd really start to start playing with a line, thick to thin. It's like, just like calligraphy. And if it's going into shadow is going to get thicker and it's going to get darker. And if it comes out a shadow, it gets thinner and lighter. And it just has a nicer, what we call line quality. This foot tucks behind a third little second foot. I said third, but I meant to say second. So this goes behind this. So this is going to be an overlap. And remember when we overlap something, we push it back whether it's another object or in this case, just another line, k. So this isn't shadow here. So it's going to be darker and a little thicker. Now I'm rounding this out a little bit. This is actually a little bit too. Like this is all like this should flatten out just a little bit through here, just a tiny bit. But again, I'm not going to worry a ton about that. This should fly in a little here. This should fly and just a little bit there. If it gets too, too flowy. If not, that's an that's always a bad thing. But if we're doing something where we have like this pairs a little, it has some places that are very round, but then it has some other places that go slightly flatter. But if we make everything curves, curves, curves and curves, it starts to feel a little whimsical. It starts to feel more like a cartoon drawing. So you've got to be careful of that now. Some of you who have used that for stylization, and that's perfectly fine. And so there's been some very famous artists that, that like that's sort of a look. And that's what they're going for. And so that's perfectly fine as far as that goes. But we're not necessarily looking for that. Okay. I'm going to come around here. This again, this kind of a flirt the back. And it comes over here, over and comes down into the bulb. Now again, there's a part where this part of the cone is going to come in front of the bulb that's going behind. This is kind of like your shoulder. This is the neck and that's the shoulder. The shoulder comes behind the neck. And you can see the the muscle wrap the trapezius muscle wrap behind and around the neck depending on your point of view, of course. But it's the same sort of thing that you have natural overlaps if you're drawing people and faces because of musculature and different bits of of fat and skin folds and muscle attachments and different things like that. You're going to have areas that are going to have natural overlapping. And it's actually going to be for anything you're going to be drawing, including our pair. So this again comes up and comes out. Like so now this so far mostly except for where we broken with the stem, is mostly the silhouette. And again, we want the outside of this darker than the inside start to get a little lighter. Because again, that's what's called a hierarchy. A hierarchy means certain lines are more important than others. And so the outside line should be more important, the inside. Now again, we're going to be doing a value drawing, so we're not going to be working so much with the contours and the hierarchies, but we don't want to ignore them either. And so what we're going to go ahead and do is. We're going to do, we're gonna, we're gonna deal with some of the interior stuff happening on my, on my pair. Alright, so let's go ahead and on this pair we have where this comes in. This comes in a little bit. And it picks up into a little section where it It's sort of dish and then a bolt out. There's like a second, this goes a little flatter and that goes around the corner. So this is causing. And so I want these lines to be a little bit lighter, but we're going to start to deal with some of the typography because we're, we want to think form. And even when we're dealing, dealing with just a, a, what we call a contour drawing. We're going to try to incorporate some of the things that are happening on our pair. Like there's a section here where this little bit of the cone comes around and then it hits into this other ridge line that's overlapping. As overlap starts to come up here and then it spreads out and starts to come a little bit around the cone. That's very, very soft. This gets a little bit more of the edge. I would get a little bit darker, not as dark as the outside person to get a little bit darker. And again, this is just for my understanding. This is understanding. Deal with a contour. And this comes down. And this is why there's a bump here and a bump here because this is a section that is coming down and around and then comes out through there. Now, the I might have a slight exam drawing from the pair. The photograph I have might not be exactly It might be turned a little bit more than what I'm looking at right now. So there might be some variation, but I just wanted to, I want to have the photograph there just so you can start to see and start to look at some of the different things that are happening on, on the pair. Again, there's sort of a, there's sort of this starts to come down. And there's a section that kicks out and it makes like this modified diamond shape. Okay, so again, this is just giving a nod to what is happening on this pair. This comes around, this little, this swell. It comes across there. It comes around there and then back into the cone as we have, you know, again, this, this section. Anyways, we could get more into this where this is the top ridge. Now again, these, these lines are very, very light. And for the most part, I wouldn't, I wouldn't worry a ton about these. Except what we are doing is that these places, these little different, like this shelf, if we're dealing with value, this is going to be lighter, this would be darker. So we do want to be thinking of why we're doing it. We do want to be thinking about what information it gives us. There's the same thing up here. There's a part where this this stem kind of hits the side of the ridge or this pair. This ridge is rounded. Again, we would show this with. With value. But if I was doing a contour, you might even look to where the there's what's called a shoulder. And you could look to where the shoulder kinda dives in, comes up over and dives into the parallel that because it starts to show a little bit that this is the front side of the pair and this is the back, and this is a little too dark. You'd have that that looks like a stripe, right? But it's just an indication of the form line that's a little better. So we gotta be careful that we don't get this doesn't get too dark. Because if it does, it's going to start to look like it's very soft nuances. And if it's too dark, It's going to look like it's a major swell or some like that. And it's not this over here where the stem kinda slams into where this turns around. Well, we could thicken that because that is a pretty important junction. Kinda got that little too thick and a little less Mark was not what I wanted. And then we can even have the fact. So this comes around this ridge. This starts to follow a little bit in a couple of places. They'll start to pick up the ridge line on some of these divisions coming around here. And again, that means this is the top. So this is the flatter part where the stems going to be growing from, right? Or it has a dives in a little bit. It's kinda like, you know, for those that have drawn an apple. And we will certainly draw an apple, not in this class, but other classes. You have again, the shoulder and it goes down to the little funnel wall. This has a funnel but it's very shallow. The funnel is, is, is not very deep. It's very, very flat in comparison to an apple. But if this is not flat across, this has a little bump, the bumps here and comes down and then bumps over here. So again, fairly, fairly soft, but it's still that's happening. This little thing right here is what we call This is thinking of form like here's a little ant walking across here with little bits of ink on its feet. And it just helps you to try to understand what's going on with the contour line. Now we're not gonna get any more into contour than that. But this right here, this actually needs probably be kind of stylized because this divs in here, this comes over here, this breaks here. It's a little, it's a little clunkier than the smooth flowing line I put there. And again, you gotta be careful because we have all these different planes in a smooth flow line makes it seem like it's all curvy. And sometimes it's not curvy, sometimes it's a rounded edge. And we'll get those on this prayer where there's times where it's a rounded edge. There's other times it's just kinda flow a and round. But this right here is the basic contour of our pair. And so I wanted to get us to the point where we can kind of see what we're using. Again to create this pair of first started with a light sketch like this. I then did my little straight edges that was super soft so you couldn't see it. But I wanted to show you just how light it was. You know, I can still see it, but it was just dark enough so you can still see it's like a good Then come over the top of it and put it in the finished edge, the finished edge work. And that's what we've got here. We've got the finished edge work on this, on this drawing right here. I've got my little eraser here that looks like a pencil, but it's an eraser. It's just a really thin. And if I had to, I kick over and clean this up. And again, normally, if I was gonna do a drawing, a value drawing this. Now this looks lighter in the camera, probably by about 25 percent lighter than what it actually hasn't my page. Part of that graphite because it picks up and kicks off the glare. And so it looks lighter than what it actually is. But in other words, that's a little that happens. Oh no, I dropped something on it. Well, I'd just get out my little white eraser. And I take that out. Or at least light in as much as I could. But again, this right here would be much darker. And then what I would actually use to draw the pair with. On the pair drawing video, you'll see a light little drawing like, I like this over here for the outside lines as well because I don't want big, dark rich because it looked like a cartoon. But we do want to be able to draw the contour of this pair. So again, we started with you start with the square, find the center line, find the axis line, then do the basic construction, and then do the straits for all the different curves, and then do our curved line again. We do that to help us start to see better what we are observing. Or if you're a more advanced AR or an intermediate drawing my goal Kalanick jump right on in with my axis line, do my quick instruction, which is what I do with this. And then I just went over with my final line. It doesn't have to take long. Like usually if I would draw this before I start drawing a drawing like five minutes, maybe eight minutes tops. So once you get used to using the method, it becomes very, very, very easy. So I want you to guys to go ahead and take the reference that I've included for the pair that we're going to be drawing and go ahead and using that photograph and draw your contour line of the pair. If, if that's still seems a little daunting, I prefer to draw this by hand. But if you need to try to do some sort of a you could do a tracing if you wanted to, or you could credit if you wanted to. I prefer you guys tried to start learning to use the construction because that will take you to, you'll have better conference withdrawing much more quickly. And gridding only works for copying. We are kind of copying stuff in the beginning, but for imaginative drawing, cartooning, illustration, fine art, these other things a lot times where you're making your modifying stuff and sometimes you're making stuff up from what you know. And a good artist can, can do an entire painting that looks really realistic, all from memory. And it starts out with basically learning how to draw. This is using contour lines, using lines, using constructions, using axis lines and center lines. That's where we start, that's how we that's how we began. So go ahead and do that. And we're going to go ahead and on the next part we're going to talk a little bit more about the shading part of our, of our little pair. Alright, thanks for joining me. Go ahead and get started on the drawing, the contour, and then tune in for talking about planes and values. Are you guys Have a good one? Gets started drawing. Bye-bye.
19. Let's Learn about Planes And Values: All right, So welcome back. So we're going to talk a little bit about planes and value. So this right here, whenever we're drawing, we want to start thinking of planes. Flat plane. So this right here shows is an apple that we've got here. And this Apple has been broken down into 12. What do we got here? 5, 10, 15, 20, 25 planes, and then another three back there. So quite a few different planes. And at the very least, people always say, Well you want, when you have something, it always has a definite, even if it's round and it had definitely has a right side, it definitely has a left side. It has a top, it has a bottom. You know, you need that to read. It needs to look like that is the case. If it's not. We got some issues going on. And the last thing we want in our drawing is more issues because we're probably going to have enough of them as it is. But with these 28 or so planes on my little, my little app or where I took a round apple and I cut these into little planes or facets as if this was, you know, a little crystal apple, if you will. And this crystal Apple was then cut into all these different planes. And so we've got our little apple here. And the idea is that we can start to still see the different families as they move across this apple. So we have our light values right there, right? We have our highlight, we have our live middle values, we have darker middle values, right? We have light values across here. We've got again, we have our dark middle values there. The top of the apple is lighter. For the most part. Globally, it is here on the side. The side of the apple is lighter in the light than it is in the shadow. So we have that the right side over here is darker than the left side over here, the top ridge is lighter than this side down here. That with the shadow side is darker there then the side and light, the underside. Now we have some of the underside has reflected light, but the underside, and this should probably be a little bit darker through here, not an under there, but the underside and in the places where it's not catching reflected light is going to, which should be darker than, than, than this place here. So these are actually probably a little bit, little bit too light. I use my imagination on this and I'm looking at this and go, yeah, this is, this reads this side here is as lighter overall, then this here which is not good, That's wrong. But that's at least what we're trying to do is that every time you have a change in plane, you have a change in value. So values are constantly moving, they're constantly changing. And even if we cut this into 2008 planes, each one of these plates is going to be slightly different than the value next to it. Which is interesting because if we actually just take her eyes and squint our eyes and sort of marking these down on our value scale. We're going to find that there's basically six or seven values in here. So it's not 28 different values, it's really only six different values or so. And if we start as adding cache shadow. So this is the idea that we're start working with, is looking for planes. And so this is again, it's just an apple. But we're going to do the same thing with our pair. So right here, we've got our pair and this is a pair right here is just round. So this would be like our cone slapped into a sphere. And this is what we get and this has nice smooth value. We have our core shadow, dark tone, reflected light, dark middle values, live middle values. Light value is highlight, highlight, light middle values, alignment of value. This top here is lighter than the side. This top ridge line right through here is lighter than the side. This side where the light is lighter over here, then this side over there. So we have the basic idea where it feels like it has a top, a bottom, and a right side, and a left side. And it has all six form shadows, including this right here is our cache shadow. And I don't know if it reads, but it should. This cash-out was suddenly darker than our core shadow because cashflows are the darkest of all. This. I just put enough for it to look like there's a shadow down here. This is not, you know, I blew it out. But on the, on the on the object it had everything is correct the way it should be. Now I can do, I can blow out shadows for if you want for feeling emotion style, things like that. But I still wanted enough to indicate, yes, this does have a cache shadow. Yes, there's a light source, but this is an object is completely smooth. It has no bumps. It has no, nothing going down and something coming up. It's just smooth all the way around as if as if this was made mechanically with limited literally completely round ball slap on top of a cone. This right here next to it is a simplification of the left side, right side, front side. So it's got, you know, again, it's got the right side. It's got a left side, it's got a front side. It's got a top ridge here. It's got a top ridge there. It's got an underside down here. And they should be slightly different values together. They should be slightly different values. Again, I think this is now this is a little bit darker, but I don't know if it's reading in the camera, so I could have pushed this down maybe a little bit more. There are some reflected light that hits this underside plane, but I can still push the whole thing a little darker to make it read. Like it's that underside. The underside should in general be darker than up here, except where you've got the reflective light gets a little lighter. But again, with this, it looks like we have a definite right side, a definite left side, indifferent front side, a top, a top and we can't see the bottom it's sitting on. But when infers that it's sitting on something flat, and that must be the bottom of the pair. So we want to be thinking of these basic planes. But again, this pair here only has, is very smooth. It only has, if we look up here we can see 1, 2, 3, 4, 5, 6. It's hexagonal or like a hexagon. It had it would have three sides on the back and 37 and we have the three sides on the front. The pair is much more complex than that. So what we're gonna wanna do, and it's even more complex than then. The next drawing. This next drawing here has what do we got? 1, 2, 3, 4, 5, 20, 12345, about 25 different planes. If there's not 25 there, That's fine. Forget and forgive me if I mess that up and with my math. But I didn't count beforehand, so I'm guessing that's a good estimation. But we can see very clearly hopefully that these all have a little different planes. And again, hopefully it can read on the camera because you're, if you're looking at this and we can tell very clearly that this is darker and this is slightly lighter, not by a ton, but it is. This is darker, this is lighter. This is darker than this. This is darker than that. And yet this whole slice represents the middle values. This whole slice over here represents the light values. This slice here represents where the highlight would be running down. This stripe over here, this is the core shadow. This stripe over here is the reflected light. But if we, if we can, This again shows us that there's going to be all these different variations of plane changes in our pair. Now again, this is again very symmetrical. Pairs are much more irregular than this. But we want to be thinking of those planes. Okay, this right here. What we've got next to us shows again where we've taken something that's round and we've split it into flat planes. This is a plane coming down. It then has a little flat area. So it comes down here like so. Write this then has, it has a cash cow because the lights over here, and this is flipped up so it casts a shadow down onto this that's actually truly horizontal. This little plane right down here that this rests on. That's a horizontal plane. Then it kicks up. And again the lights kinda over to the side enough over the side that is catching a casting that shut off that lip down onto here. So this is going to be the lightest plane because it's going to be the one that's most, the most parallel to the direct rays of the light source. This goes up, this thing goes over like so. This goes over like so. Definite value changes, definite plane changes. We're thinking about the plane. Now. Obviously the pair is not going to be this flat. It's not going to be this rigid. This right here though, is this shown as a continuous rounded surface. So it has all these different planes, but now we have gradations. And so this is the cast shadow. As this comes down here, it gets darker like it does there. As it comes up, it starts to face the light so it gets lighter. We have our highlight right along here. It then has goes to our middle value. So that's our medulla is on top. And then as it curves around, there's a core shadow, there's dark tone and is reflected light. So this gives us the plane that starts to feel like it's doing this. Okay? So by understanding the different families and the form shadows, we can create something that has a feeling of this thing coming down like a ribbon mounding up and then coming back down. Okay. So this right here, again, it's the same thing as this right here, except this has all been rounded out. You're going to have things like this happening on these bulges in the skin. We will have certain planes that are not facing the light going in that are darker. And other planes that are rising up that are getting lighter because they're catching light. Okay? And that's what we truly trying to illustrate here is just for this one, we broke it into planes. But it's so that we can understand the values. And then we can take that and imagine it on something that's more round, like a piece of tape or a ribbon. Now this is the very similar sort of a thing. With this we've got, again, let's say this is the skin of our, of our pair. We have little planes that are darker because this shows a plane that's going away from the light. So it must be going down and N, because this is an uninterrupted value, that means that a value we'll just get as it travels across a surface, it's just going to vary. It's not going to vary that much. Even on around surfaces of small section, there might be a little more variation but not much. So the biggest variations is where the little plane, this is like a dimple or something or this has been pushed in. So this plane goes down away from the light. And then this plane pushes up and that's lighter, That's towards the light. This is bigger and it's doing the same thing. This is going down, like this is a plane going down an n, down an end of that pair. And then the other side is this plane coming back up. Okay? And because of that, this right here is getting darker as this is coming down. And then this is getting lighter as this is coming back up. And then this is the surface that's going to be that steady value going across there. This will start to feel like they're little divots in the skin, a little, little, little undulations and things like that that'll happen on this pair. This is like, this is this over here is like a mound. So if we had something that was mounted or rounded like this, and I kind of made it a flat this way. We could have curved this a little bit by doing this, making it so that the line was not so flat going across it that would help. So this shows that this is not only round this way because this is showing that it's rounded this way because it has a light side. Light values highlight environmental values, dark middle values, core shadow. You can say these are light values, then lay middle values then dark middle value is core shadow, dark tones, reflected light. This is showing that this is round. Okay? Now originally I had this straight up and down, which means it's around this way, but straight that way, that rarely would happen. So what I want I would do with this shadow would start to cut it. And then it would sort of say, well, not only that, but it's around this way too. That's a little more common. Now that the other one can't happen. Well, we can make this film were like, you know, again a little MT, but that would mean that the light's coming from this direction. Right? This is the reverse of what's happening here. This is coming up towards the light, this plane is going up, this plane is going down, this plane is going up, that plane is going down. Light's coming from this direction. This is the light side. This going down that direction is the dark side. And again, we come over here. This is now the dark side that's going down in and this other one is coming up towards the light and catching the light. All right, so we're going to look for these when we're drawing the pair is by understanding the plains and being able to look for something. We're drawing a pair that has a definite left side. And pardon me, a definite left side of definite right side, a definite front side. Now the top side I had this binning like he can't see the top would be on the other side. And then a bottom, it's sitting on the bottom. And then we start adding the fact that it's going to be round around, ask for the details. We do this, but obviously hopefully we can think of the fact that if we took this and added this, it would, it would definitely feel like it has volume. Planes can be waived by thinking of planes, it helps us to check the volume of an object. But then once we've got a, you know, where the planes and then some of the errors are going to be rounded once we've got against some of the rounded areas, once we've got some of the plane areas put together, we're then going to, if you wanted to, you can start to put in some of the details. Now this is not little blemishes or freckles or anything like that. This is surface detail. These are planes, little tiny planes like on this, like right here we can have, okay, there's on this, There's, there's a part where the plane changes. There's a plane that goes down and then there's a plane that comes up. Okay, So we can go ahead and we can say, all right, well this goes down. And if that's going away from the light, that would be darker. Right? If I took more time, this will look more sophisticated, but hopefully you get the idea. This is the plane that's coming up. So this plane goes lighter. And now I've got a different, you know, I've got a little what you might call detail, but we're not talking about freckles. We're not going to be dealing with subtle changes in the pigmentation of our pair. This is all about planes. Again, if we did some of these small ones over here, we can start to have again, again more information, more detail of what's happening on the surface of this pair. Right? When I have to give them, they're a little bit with a more sophisticated tool. Again, we're going to start to put, you can start to put little debits in here. I can also again, if we could then also again start to turn this right now it's a plane. But if I came over here, and depending on how much I feather that plane, it's going to start to turn from a sharp edge into a rounded edge. Most of the plane changes on this pair and none of them are going to be super sharp. But there are going to be some that are gonna kinda be rounded like this, where you will have sort of this rounded edge happening because of what's going on with the pair. So again, by to do that, we just now I wouldn't necessarily start with a pair of this Angular, but understand that even if I did, I could come in here and start to vary the values and vary the tones. And very quickly start to get something that's going to look like that pair is going to start to emerge. Because all I'm gonna do is I'm going to start to blend out by bringing value off that edge. And that edge begins to turn, begins to become a semi hard edge. That if I keep bringing it out, it's going to become a semi soft edge. And if I cake bring it out, it can become so soft that it looks just like form shadow. So I could very quickly and if I wanted to, I could because this is so harsh. Again, I if I if it was if I had an edge there, I need to really get rid of I couldn't me, I'll take my little blending tool. And I can go ahead and really start to. Now because I've blended it got darker so that it looks like there's a there's a there's sort of a bump there something. But like I like that look at that. I made an irregular sort of detail on there. I could roll out my little by little kneaded eraser and kind of just roll it along here to lightness a little bit. If I needed to, you know, again, I can come back in here if I needed to with a little tissue. Soften that edge. Again. Now it's starting to fill more like It's no longer this horse edge. And again, I can start to get rid of all these planes or some people would call them tessellations. This is how 3D programs work. They're made up of tiny little rectangles and triangles. And the more trials you have and rectangles and smaller and smaller and smaller they get, which looks like a net. If you've ever seen the the h1 rendered 3D drawings, It's a net or a grid. And again, the more triangles and the smaller triangles, smaller they get, the finer the grid looks like until they look like they're round. Well, what we're doing is we're, we're not, we're not making it a nip from triangles where we're taking these edges and adding some value to them. And by bringing them out more and more and more, all of a sudden they start to feel no longer like they start to soften. And the more we bring them out, the more they soften. And we can continue to soften these things until they start to look like. They are just, you know, value wrapping around a smooth, semi smooth surface. Obviously, this prayer, like we said, has some bumps. It has some undulations. Again, this is a little crisp so we could come along that edge and just put a little value on it to make it less crisp. That's how we can vary the, the different edges and things on this. So again, I can come over here and we could start to that's like a 20 h and I'm going to do it. But I could come over here with this eight, this to be. And again, I could start to bring value off of this, start to round off those little tessellations. And again, you give me an hour on this thing. And I can take this thing that looks like it's been carved up with a knife or something. And I could turn this all into these nice rounded forms that are going to start to look like this, this nice little pair that didn't start off. Kind of. It, it almost looks like this thing embrace its inner, its inner geometry or something. Or, you know, it's, it's, it's cuboid sort of Genesis, whatever. But we could go ahead and round this all off and make it like it make it look like It wasn't, you know, start to round off the contours. These right now are straight edges. We start to round this off and again, it's going to look more. The term is organic is people would say, and that just means that it's going to look more lifelike. Because most parents don't look like they've been made with a whole bunch of little flat planes. There are planes on a pair, but some of them, most of them are going to, almost all of them. In fact, I would say all of them are going to be at least semi, somewhat rounded. You're never going to have something sharpen nature that would just look weird. But you are going to have a little mound, you're going to have a little divots. And again, this David is too sharp. So again, we come around here and we put just a little bit of value around the outside, start to soften the edge. That's how you soften edges. Just bring some value out from it. And now this looks less and less and less sharp. It looks softer. And so we're going to use this technique, this idea of thinking about planes along with our values. So we're trying to think of like this. We're also trying to think like this. And we're going to combine them. And you know, along with planes, these little divots and things, thinking of how the, sometimes you'll have none, none on the pear, but sometimes you'll have something where it comes out so far that the little rounding edge casts a shadow. We don't, we're not doing anything that complicated right now, but we will do a class on intermediate objects. We're, we're gonna start to do warty gourds. It started with fins and different things on them that really start to push the bounds of our creativity. But we're not going to start off with that. So again, I could take this very quickly and again, just apply some magic to it. And within minutes we can start to make this turtle look. Again. There's, it's so close to being parallel like it wouldn't take too much to get this disturbance mood being and looking exactly like the pair because they're just there, there are enough. There are enough planes. Again, some of these planes, we have to get inherent, soften them out and really get aggressive with this, while aggressive as you can but tissue to erase some of those. And then we'd just again, we come in here. And maybe that got a little too dark because I like that. So we could pull some of that off and push some of it down. And, you know, and again we could, we could start to make this look more and more and more pair like. We don't have our dark middle value is really to give us a gradation just yet, but we could, we could put those on fairly quickly. And again, by doing this, That's how we're going to start to get this to start to look like it has it's round or like it has volume. Right? So again, I can take this, soften it up a little bit. And you just have to work this obviously because I kind of ground this in these planes. I'd have to really work at it, but it wouldn't take much. We're we're getting pretty close on this side. It would just take another 10, 15 minutes to often make this look like, Hey, that looks kinda like a pair of good luck. It's got some straighter edges, It's got some rounder edges, so forth and so on. This is a straight line. Again, remember this would come out a little bit because it bumps up and then it comes back. Again. We just need to put some of that randomness in nature. And that's what that would really help this to. This comes in, in front. We can start looking for overlaps, but just doing little stuff like this, all of a sudden this just a little bit there and this little bit here, a little here, and then this round a little bit and this comes under a little bit. Still see the little tile there. So we would take and make that a gradation. Now the tile disappears. Make this into a gradation to the tile until that tile disappears. And again, that's how we would make this pair start to feel. And there are some people that work this way, especially in painting where they'll start with these almost like it's made from flat planes. And then by doing some very quick brush manipulations, all of a sudden it looks round, it has form and volume. So we're less so in drawing, but it's still the concept of the same. You're thinking of planes. That's how this works. So I want you to think of this as you're watching the video on drawing. Think about the plane. Is the plane going away from easy going down away from the light, or is it coming up towards the light? And how does that, how does that affect the value of the different planes? All right, so you go ahead and again, keep this in mind. This, if you practice this and you can get your brain wrapped around it. And I understand there's when I say get your brain wrapped around it, I don't mean understand it mentally. Analytically, yes. So there's things that I understand analytically that I've been trying to get an incorporated into my painting for 20 years and my drawings and things as a professional. And I'm still trying to having gotten quite to the point where they're where I want it to be. So, you know a thing when you can draw the thing, just intellectually understanding it doesn't mean anything I can intellectually understand. Playing the piano was touching the keys in the right order and playing the right notes in the right time in the right place. But it's much harder job to do that. And that's the same thing with drawing. I can intellectually understand. Yeah. Okay. I got to go what's going on. But you have to show it in the drawing that tells somebody that you understand. That's what tells somebody, yes, I know what I'm doing and it just comes with practice. And the first part is knowing what you're looking for. That's what this class is for. What am I looking for? I'm looking at what's the plain doing. So when we start doing things like because we're not going to be doing just cylinders which are completely flat and uniform, or spheres completely flat and uniform, or cones completely flat and uniform. These actually have variations and that's what this stuff is about. The variations, That's what the planes are about kinda. I'm trying to get into your head how things are changing. And in fact, this was, this was actually very, very uniform. If it was an actual pair, we might have a plane that, that comes out here and another plane that pushes over there and little frontier. But we do want to start looking for planes as we draw objects. Give it a shot. If you do it all, really affect your drawing in a very positive way. Alright, so go ahead and stay with me. We're talking about mapping our shadow shapes. And until then you guys have yourselves a great day. Bye bye. Now.
20. Identifying the Shadow Shapes: All right, welcome back. So in talking about now is we're talking about mapping the shadows. So this right here, I have the contour drawn of my pair, and this'll, this pair I'm going to show you the parent is drawing from, since we're dealing with the shadow shapes. But I've got my contour drawing to the stem. The contour drawing comes around here. There's an overlap. This here. I didn't deal with that overlap as much I showed up, but that's our eye. We're, we're, we're looking at something very different. So it doesn't matter that it's not quite there, but this is where this comes into the bulb. This is a definite plane change because this is a ridge. And so this overlaps and this which comes here as far as that goes and this comes down under the foot, comes down there's a there's the foot tucks here. It has a foot that's in front and another foot that's behind, three little feet and forth, if you could actually see through it there because there's another one like this on the other side that's kinda go around the flower. That was once the flower of the pair, this comes up. Okay, this does show the overlap. This was a much bigger overlap than this. So I included that and this comes up. Now remember this is the most important, one of the more important parts that sometimes we get it wrong. Remember that there is a slight ridge, that this stem is down inside that ridge. And so because we have the light from if you look at the at the photograph, we have the light is not quite side lit. So we'd see a little bit of the ellipse, meaning it's not. It was completely silent. Remember it be just a flat pointer will be at the ellipse, at flatten out. That means that it's truly what we'd call profile light, side lit. So this right here is our light K. So it's a little bit on the front, but mostly on the side. That's why our ellipses. So, you know, it's it's a title ellipse here, though we've got and what this is supposed to be like a little doll or a little stick that into a, that's an a cone. And the cone shows the direction of the light. Okay? So it's coming over here because of that. We have two colors here. I should probably talk about that too. I have the dark blue is the shadow. Everything that's truly in shadow. Now this is reflected light, but this is also an almost looks like it's this blue, but it's not, It's actually this blue here. So maybe I should just go ahead and change its color a little bit by doing this. So that's not confused to be in this family over here. But this is supposed to, this is everything over here is in shadow. This is where it gets complicated because this comes over and this starts to go into light. That's what these two little lighter areas are. And this is the shadow. Now this is the entire shadow family. It's just that there's a very distinct reflected light. So I showed that. But this whole thing, including this, all this is the shadow shape. And then all of this lighter green, It's kind of a teal green. Not quite a turquoise, but, but anyways, it's a blue-green. This is the light. So we have the dark blue and then we have the light. Now we're going to talk about the shadow shapes. The reason this is so important is because this is the front side that is lit. This is the backside that's in shadow. Then as it comes around, this right here is the cast shadow of the stem. It merges the shadow shape over into this little dish. This over here is enlight that overhears on light. Now they would be middle values, but they're still in the light. Remember the minimizer and the light. So even this down here on the, on the stem shows the shadow coming under the stem. And then down here, like so. This is the lit side, this is the shadow side. And we want to start mapping that now for the shadows because they can sometimes be pretty complex. But if we break them down into simple shapes, it's much easier to look at it now if I strained to the South, this has sort of a triangular shape appear on the cone, and then it has basically sort of a modified crest in here. But that's super simple. It's much more complex than that. But be aware of its basic shape, it has to, if I, if I strain know this out, There's my rectangle. If I straighten all this out, There's my crescent. All right. But we've got, so we have to have that, that's going to have the basic, This has got to become that shade, those basic shapes. But from there, what we look for is basic alpha numeric or geometric shapes. So we're looking for a circle, or a square or a triangle, or we're looking for a number, or we're looking for a letter. Okay, we're pretty, pretty much aware of alphanumeric shapes, meaning numbers and letters because we do so much of that and with my writing and everything else. And so as I was, I was looking at the shadow. And if I simplify this show, this became a C curve. Right there. Okay? It's a reverse C curve but it's a C curve. This was then a straight or you'd say it's the number one or letter. I know number one gives you I think that it has a little whatever. But this is just really straight, like a like a letter I or something or a straight line. If we want to go that route, that's fine. Then what we've got here is we've got this open U-shape that's on its side. And then we have again this little tail. And then what do we have here? Another U-shape or reverse C curve, whichever it doesn't matter. And then there was a little tail and there was also a little straight and then it came down and then it came out. Now I didn't have to wear a business basically use of bom, bom, bom, right? And an almost, if I attach it to here, starts to look like a very soft number three. But I just went ahead and said, you know, there's sort of a, a times c curve there, C curve, C curve, C curve. When we start thinking of those types of things, it becomes much easier. C curve, C curve, C curve, C curve, C curve, C curve, C curve, C curve, straight, straight. Okay, so very, very simple. These puzzle pieces are going to help me and I wanted to do what's called mapping. This is called mapping. We're going to map the basic shadow shapes you needed as to give you as much information, but also be as simple as possible if you start putting there because there's all kinds of stuff going on here, I left out. If you start putting these little map puzzle pieces everywhere, you're gonna get lost. Because it's so complex. So there's, you want to keep it simple to a point. Again, there was little tai chi little bits that came off of here that I ignored. I cut off. You're basically going to take her eyes at a focus and draw what you see out of focus. Ignoring the little stuff of wool will disappear. And you'll see just the big stuff. This over here again. This is just a very soft curve. There's a little, a little v right there. There was a soft c curve there and another soft c curve there, came over, there was another, there was a U-shape. There was a U-shape, a straight, a V straight, straight, C curve, straight over. The basic shape though was basically, if we straighten this out, you know, this looks like just sort of an irregular polygon. It comes up, it comes down, it comes down, it comes over. That's our basic shape of this thing. Now, obviously, it's more complex than that, but we have to have that shape in there. If this right here is not the basic shape of all the little, all those little undulations that it's not right. I have to think about that basic. What is the basic shape now it's round. This is rounding over around area. So that's why this is not a straight line. This is rounding across another, There's a rounding error here that kinda does this. Sort of like this right there. And again, that's why this is coming down. It's rounding around that area and then this is rounding around the bottom side. So you're going to look for the best you can for the shapes that you see. Now you can take a look at mine and after you've drawn yours and see if it's right, or if you're seeing the same thing, sometimes you'll see things slightly different, that's fine. Usually by the time you shade, a lot of times, you'll kinda get to the same place. Most artists, sometimes artists will map. Because what I'm doing is I'm really taking these are middle values, enlightenment values, dark, minimize alignment of eyes that have all put into the same family. But if I start fracturing these, oh, this is the dark middle value and these little like all of a sudden I start to get too many pieces and I get lost. I can much more easily divide these when I'm shading them. But I know where I met these anchor me to where I'm at. So this is the middle value, middle value, middle value. These are light values and light middle values. Because again, I've merged some of those, these ones right here, these little tiny things where people will call these islands. Some people like to give nice little names of this semi, we'll call this constant continents. The bigger landmasses and islands. And you want mostly continents, less islands. But all that, I mean, all of these are, these are highlights. There's a highlight. There is much softer obviously, but I have to make a definite decision. What's that shape? What's this DEWATS a definite decision that what's that shape? This actually kinda comes out a little bit more so it actually modify that. But I do that when I'm drawing. It's not a big deal. This is just so I can get started. This is just so I kinda know what's going on. Again, this would be very light, so it'd be very malleable. I could easily shift this line over, pull it back. Because again, this would be very, very lighted be drawn. This is a different object. This is a cone. Be drawn very lightly like that. Pardon me, maybe a little darker, but again, very, very light. So I could just go ahead and I can get started on that. So again, you're gonna want to map this out again. This is dark values and dark tones. Pardon me? I just said darker eyes in our town, so there's the same thing. These are the core shadow and the dark tones together. This is even cast shadow. So I've merged three families under this one shape. This reflected light is very important. So I, I, I went ahead and I singled out, normally if I was painting, this would all be one shape. I wouldn't single that out. I would do that with a brush stroke. But we're drawing, we're not painting, so we have to be a little bit more aware. These right here again are our middle values, layman of eyes and dark values pushed together. And the reason this is dark is because this is a plane that's going away for me like this down in a way. And this plane here is coming up and towards the light. That's why this is going to be darker. This will be lighter. So I am doing this to understand better what's happening on the pair. This it'll highlight is on the rich, the rich, the paradigm is the top ridge of this period is this. It's a little more round, that's a more irregular, but it's because there is a definite shelf and that's where this highlight is hitting is off that shelf. Okay? And so there's obviously going to be, this would be lighter value, this would be probably a little, you know, little light middle value there. This would be light value up here, this would be highlight. So that's what these little ones are. This as a highlight up here, that soft, there's even tiny little highlight along here. Now you gotta be careful appear because it gets darker because of pigmentation. Alright, we're going to try to ignore the pigmentation and all the little details, and instead, look for what the object is as if it was painted with white paint. We wouldn't see any dots. You wouldn't see any freckles. We wouldn't see anything like that. We would just see the basic topography that, you know, does he get lighter as it goes up and then over the terms from the light, that's what we're trying to do with this. We're trying to map this as close as possible. So and then this is just our cast shadow. Very, very, very simply just kinda thrown in there. This is what we have to do. We have to map our shadows with, with drawing the sphere, it was easy because all we have is a circle. So as long as we could draw the circle, then all we had to worry about once we have the circle drawn is a crescent of some sorts. Simple. This is much more complex. So again, we're going to look at the thing with our eyes out of focus. We're going to start again. When I would start this, I'd actually start with just the basic shape of this. So if I had my, my pair, Let's say this was, let's say this was going to make this in my pair. Let's say this was the original little drawing of my pair over here. I'm just going to really quickly, this is going to be a caricature of this. But let's say I drew my little pair like so. Well then what I would do is I would I would go ahead and and when I was starting this, As I would start again with just the basic shapes. So this comes here, rounds over, comes up, rounds over. This then comes down. I'll do this very lightly. Just comes down here. And this comes down here. And that goes there. Okay, That's the basic shape. And then I would come in here and go, okay, and this comes here and this comes out there and this can then comes here, you know, start with your basic shape and then cut into it. This actually is 24 over this way this actually needs to come over here. See, this is why should, this is what you do in the, keep it simple. It's much harder to do this if you've gone and painstakingly taking 20 minutes to map all this out, this needed to move. So if I look at this and I'm comparing this to this, this is also really the wrong way. This is leaning this way, that's living that way, but we're going to ignore that. But we first need to have the idea of is that basic shape of the shadow. The shape I need that I can then modify and come in, they're going out, gets into that. It's going to be, this is going to come in here, it's gonna come out. They're going to undulate as it comes over here. It's then going to go over there. And I think I got this a little bit off because this should tuck under there and that should tuck under there, and then this should tuck around there, whatever. So again, start with very simple shapes. Same thing with this. If I, if I did this, I would like look this the simplest way the shape is. There's something about like that simple shape here. It's a shape. Again, basically like that. There's another very thin shape here that kinda it gets a little darker along the edge, just along this whole area and then it gets lighter. I'll just go right there. And then I would modify these. Okay. Because they're a little more, again, they're a little more irregular, right? And then we'd go kid as a highlight here. There's a highlight, there was a highlight here. There's a highlight there. He had started off very lightly with that and then again modified as needed. This actually stretches, this is smaller, this has a little bit, you know, it's a little bump, your little frumpy or, you know, we can right now it's just a little I would start with that again, very lightly. So I get rid of it because obviously they're not, they're not that square-like. What these are. These are placeholders is a place holder so I can go back in there later and modify that to look even better. That's this going around the ridge. This then has, again where we see this come over here. There's another little bit back here that we see. And this is all in shadow. Okay? So this is how we'd start this. And again, if I clarify this because I think there's a little bit because I'd suddenly lines in there. This is my basic shadow side. Now remember I didn't know this, I didn't pull out that reflected light. But if I was gonna do that right now, we'd say okay, because of the way that this is formed, reflected light is wrapping around this far. There's a little plane back here. This lifts up and down. And then it really makes that reflected light much brighter because of the way typography, the plane changed, which would be the, the better way to say it, the plane change of that pair. So this is, you can give me the shadow shape. There's the reflected light, not the highlight reflected light. This will then come out here. This is then going to come over here. This is then going to come over there. This would be our middle value. This would be our middle value here. There'll be some middle value there. And again, this would be light tones are reflected light. So go ahead and try to map out your pair as best as you can. And have, of course, the, the photograph here that I mapped from or pretty close, It's going to be may not be the exact same, but it's pretty close to the reference I was using. Because I was actually using the pair instead of the reference. But, but this will be very close. You'll be able to see this hopefully, but try to map out your shadows. And then we're going to, then we would start putting in the values. And when we, how would we start the values where we start with two values, right? We start with shadow side and light side. So this right here, and then we just keep developing. And the shadow side, there'll be core shadow there be dark tones, reflected light and all that good stuff. And the lights, there's middle values, lights and highlights. And the middle bodies have two sides. Light side and dark side and the dark vice have two sides, light side and dark side. And then there's a core shadow where the light and light and shadow come together. There's the core shadow and we start to put that on there. And then you'd have the dark tones and reflect the light and all that good stuff. And we can start to turn this into a drawing based on, on these different ideas. So go ahead and map out your shadows after you've done your contour drawing. Then put a map of your shadows down, keep it light, and then turn on the video of shading the pair because we start off with me already having my contour done MI mapping done. And then we jump into the drawing. So go ahead and get this stage. And then you'll be ready to turn on the video and follow along with me as we turn this pair into something with volume by putting on all those wonderful form shadows. All right, so that's what we're gonna do. Go ahead and give this a shot. I look forward to having you guys follow along with me and drawing the pair. Thank you so much for tuning in. Bye, bye. Now.
21. Shading the Pear: All right, welcome back. So we've gone ahead and we've learned basic shading techniques. We've learned how to put value on the 3D forms, the cylinder, the sphere, the cube, all that good stuff. We're now going to tackle the pair. And even though it may look fairly simple as we get into this, well, you will find that it has all kinds of wonderful complexity. So let's go ahead and make a wonderful drawing of the pair. We're going to be drawing a pair in graphite. For those that may have seen the apple drawing video that I did, we worked in charcoal on, but this time we're going to do graphite. Now I've got a few more materials here that I normally talk about in class. They're just extras in case I need it because I didn't Whoa. It. You always always want a backup plan. Are you always want to make sure. So I've got and it's also I went, I don't want to, because graphite with these small pencils, it's gonna take a long time to cover this whole area. So we brought in some, some tools that, you know, that have a lot more graphite to them, you know, Islam or graphite on this surface then this, which is mostly wood. So mostly what was just a little bit of graphite at the, at the, at the end there. So again, i'll, I'll I'll tell you about what these are, but they're there. May not even use them. But again, these are just, these are graphite as well. These are just graphite sticks. These are graphite six, and then these are wordless graphite pencils. These right here and there. They'd been used a lot, so there's not much left of them. They don't have to be short like that. They, they, they start out like early pencil. So this is just, this is a for B. Wordless pencil stuff for B. This is also a four. B would list pencil. And this is this byte Darwin's. They're the only ones I know that make these. And it's kind of a strange sort of graphite. It's, well suppose be hard and it's kinda like a to H. But it's really crumbly. It leaves a lot of graphite on the, on the surface. And so I get, I don't know if I'm going to use this. We'll see if, if I, if I do, it can be a great tool. So again, it's just called a hard, but it's about like a to H. This is against a bigger graphite stick. This is by what is it? Art graph. And again, just a bigger chunk of graphite. And it just says soft, sudden these larger ones, it won't have the alphanumeric system. It'll just have hardening or soft. And it says it's soft. Someone's some are stamped and they'll actually have, this is a to B or for B or six B. This is a kneaded eraser. We've got here a vinyl eraser or a plastic eraser. These are plastic erasers to they're just little smaller. So this is a account like a mechanical pencil except it's got, it's got that eraser in it, you know enough, I'll use it. But again, these can be kind of fun. This is again, same thing except this again is just a smaller eraser. Again, I don't know if I'll use these, but I just pulled them out. This is a this is an electric eraser. Spins can take some. Take out little highlights and stuff again, it's made with just a plastic eraser. The plastic races are really good for erasing in graphite. With your graphite, you don't want anything to mess up. The paper. Got some crumbles here, those left behind. You don't want anything messing up the papers. So you're going to use the plastic erasers because they don't they don't they don't mess up the surface of the paper. The paper I'm using is a 470 Strathmore 80 pounds, medium surface or medium texture paper. And it's just right out of a drawing pad, you fight it anywhere. If you find that 300 series, That's fine as well. Again, I think that's 70 pound paper medium texture as the biggest thing. Graphite builds on itself. So you want some texture. If it's smooth, the graph I won't build on itself and will, and won't build up, build up those different layers. And if it doesn't build up the layers that the graphite can go as dark. So on smooth paper you're drawing would be lighter. These are the big things we want to have. Again, these are the pencils, the five pencils we use in class all the time. This is a 4 H. Put that to the side. This is a to H graphite pencil. This is an HB. The four H's are dark, permanent darkest, the 4 H is the lightest. And then your two H is a little darker, your HB that I just had, That's our workhorse. So we do most of our sketching with then we have a to b and we got a. We want to for B. Now I can find my four B. And this guy was around, so I grabbed them. He's, he's actually an API which is a little much, but there you go. Not a whole lot difference between a for B and, and an API. But like I said, I couldn't find that for me. This is a for b, so I'll definitely have this guy is 2. So let's get started on this thing. So I've got, I've got my I've got my little little pair sketched out here. I'm going to start. Now I've done some mapping. That means I'm looking at some of the different, some of the different shapes. So we've got here and I'm going to go ahead and put some value in those shapes to create this into a drawing. And and so let's go ahead and get started with us. And again, we're going to, we always start simpler and go more complex whenever we draw. I'm starting out with again with a for age, we're going to start putting in just the lightest values to start with. Again, with, with, with graphite pencil, you're, if you are starting with the lightest wise and you build up to your dark. So right now we're putting in some of the lighter values for the for the pair. I think. Yeah, So sometimes all I'll start at different points. But there's so many subtle plane changes on this guy that I wanted to go ahead and make sure that I had my I want to start out with a light because again, there's so much going on with these, these light, I'm half-tones, these light. And you can call them half-tones. You can also call the middle values. But you've got to really be, you want to be aware of what's happening with those, with those middle values. Are there Really, really important to the drawing. So yeah, we want to go ahead and start to make sure that we were addressing all of these different values as far as that goes. And you go ahead and put this in here. Now, I should be trying to do this. I'm kind of Whenever he had started this, I haven't kinda gotten into my group, so I started out a little. This is a little too random. I should actually be trying to do this. Not random, but there's three space between my lines I should be trying to put in is uniform value as I possibly can stand to do and just not knowing it. So I want to want to improve that because that's the, you want to, you know, even though I'm going to go over, over this and over this and over this with these four H's. And I'm also using very little pressure. These four H pencils, if you're not careful, they will score your paper. And once your paper is scored, game over, you're never going to have your the same surface again. Now, I think I'm actually going to come in here and begin to put in some of the the values surrounding the pair. Now we're also gonna do a little bit more of a finished drawing and graphite because of the, of how we use a lot of these very sharp pencils and things. It takes a lot longer to put down value than say the the charcoal pencils that we were using yesterday? Because we were when I was doing the apple or whenever you use charcoal, you're usually you're going to blend some stuff. Now, not always, but a lot of times you're blending stuff. And so when you're blending stuff, it's going to put down very quickly some different tones. And with gratify, we're not gonna do a whole lot of blending. I might do some, but I wanted to try to, to do this without blending. It's just how long is it going to take it because graphite drawings usually take anywhere to twice as long to three times, as much as four times as long as that charcoal drawing. Just because again, it how small the the the tips are and that we're not doing a lot of blending. Sometimes I'll have people ask me, Well, why, why, why we're gonna do a smearing or anything like that. And the reason is I first want people to learn how to do stuff without relying on quote-unquote smearing stuff around. And if you do that to graphite, it really starts to look dirty very quickly. And the last thing and the last thing you wanted, you're drawing it look like it's got dirt all over it and it will really start to look like that if you're not careful. Even when you blend, you have to use very specific tools. And I know people will, pardon me. They'll say, Hey, well, I I've done drawing that I've done with my finger in it. And it looks just fine. And the truth is, it doesn't looks terrible. Oh. And the other thing is, is that it also messes up your drawing when you're using your finger. The reason you don't want to do it with your finger, especially, I mean, do it with a different tool. Never use your finger. Because what happens is that graphite loves, loves, loves, loves, loves the oils your skin. And it will attach itself to any oils that it finds on the paper. So if I haven't washed my hands really good and i'm, I'm doing a drawing. And I touched that drawing with oily fingers. And I start to specially if you start to blend, a fingerprint will appear right in the middle you're drawing and there's no way of getting that out once that's there. Gameover, you got to start the drawing all over again because there's no getting that out. So when you start using your finger to smart stuff around, you start leaving oil everywhere. It's really hard to get a really good looking surface once you've done that. It's not impossible. But the work that it would take to get it, there's probably more than you're going to want to spend because you're gonna take five to six times as much time to take that area and try to get it to to overcome that the fingerprints. So we're going to try to touch are we're going to try to touch as little as possible. The paper. You can't probably tell that my my wrist isn't even touching the paper. And in fact, I just put my arm under my wrist so I can bump it up a little bit. Again, keep it off the surface. I'm going just a side to side. Now again, I'm not It's kind of a slight angle because this is just comfortable. It's a very comfortable angle. So I'm doing my pencil is going side to side it to like a 30 degree angle or something like that. And, and that's our eye doesn't have to be a true verticals. Not enough for when I'm doing he doesn't, not for this particular area and there might be a time you need that, but this is not it. Not to mention a fuzzy and do that. I've turned my board 30 degrees, but so anyways, we're gonna go ahead and we're just trying to get some value down here. Now. This is as much as, so I'm going to show you this now. I'll just tell you whenever you blend. We've talked a little bit about blending. Do use of finger. I can use a paper towel or paper towel that's too harsh. Part me but clean x there we go. Something soft. So people will use Q tips on those or you have to use them gently. Because graphite is really likes a pristine surface. It's kinda like, well, it's not count like it really wants to surface to be nice and smooth. And if you start. Roughing it up. You'll never get to like the same. So this is just a brush. This is actually a makeup brush. I want my wife was gonna throw it away and I'd like, what do you do it? That's a nice brush. It's like yeah, I got a better one. I like give me that. Usually I'll use a goat hair brush. Goat hairs are just soft. They're very soft. You'll see when art stores white bristles. And again, they're very, very soft. They're also very inexpensive. You can get like a two or four edge brush for under five bucks or something like that. So they're very, very, very inexpensive. So again, I'm just, I'm just brushing this a little bit. And the reason I'm actually doing this in case you're like, Hey, wait a minute. I thought you said, well, we're just trying to soften a little bit of this texture. Now again, I can also use this as a very soft cloth. It's almost the softest sat and it's a very, very thin, thin, a codon. I can go ahead and do that. But here's the thing, and you price it a little bit in the camera, but it's even worse than rural life. Once you do that looks terrible. And it does right now it looks awful. So whenever you blend, you don't just leave it. You have to then go back in with another. Oops, that's not what I wanted. You have to go in with another tool. So see, maybe I'll use my 20 h. So I've got my two H pencil. I originally was going to grab my four age hungry, am I to H I think. And I'll go and come back over this area. They got softened because if I don't do this, this inner is going to look terrible. It's going to look absolutely awful. I was using my four B before I believe, but I was using it just gently, very, very soft. I can you can lay your pencils and this is a harder pencil and it's a 20 age. And I'm layering over four B now it as long as you do this really smooth, you can layer your pencils and not only that, but layering your pencils, We'll give your drawing more depth. Now, now that I'm starting to put some graphite over the and again, this is really subtle there. So there's some things that are so soft the camera does, doesn't pick it up. But if we see it in real life, we pick it up. It's, it's, you know, we're like, hey, there it is and it's as bright as day. And so, so what I'm doing is by putting more value down, again, I just don't, I don't brush and leave it because again, it's gonna look like someone came over and smeared this drawing. So I'm going to come back in with, with my, with my pencils. I'll put some more value down. And this graphite has a smoother. See there's some right there. Sometimes that'll happen. I don't know what that is. That could have an oil. It could have been a sometimes the, the, these erasers, these erasers have a mineral oil and, um, so you gotta be good. You got to really take care of your, of your surfaces and see if I can get it out with just a little bit. Alright, well that's not going to happen. So what I'm going to have to do is I tried to light it with my eraser and then come back around very gently. With this light pencil. It's softened, it. But I'm going to have to make sure that I'm I remember that area. And you're going to have this happen. A lot of drawings That's a good example of, you know, if it's not a perfect surface, the graph I was like, nope, nope, nope. And it makes it look really rough. And again, if I'm trying to do texture, that's fine. But as of right now, I'm not trying to do texture in this drawing. And I'm just trying to get enough value back here so that we can see the payer, because this drawing is about the pair. It's not about, about the law. This is what, this is a long behind it. And that's not what this drawing is about. It's really about the pair. Another thing about graphite is it takes a lot of patients. Again, I know some people that, you know a little bit like, why do you have all those pencils? I can do a drawing within just one pencil, and I certainly can't do. But here's the deal. If I've only got a number two pencil, you're going to have to pretty much destroy the texture that paper to get the full range that I can get with the five, the four age, the two H, H B to B and for B. Whereas if I use those five pencils, I can preserve the paper. And It's just going to have to go back and erase stuff. I need to get rid of stuff. If I just, I've got so many more options by doing that. And so it's, it's yes, so you could absolutely do it with just 11 pencil and if that's all you got, that's what you got. But the, you know, the five give you a lot better range. And you have, you don't have to sacrifice the pavers much either. So again, we're going to try and take care of the surface of this papers as much as possible. Now again, I'm holding my pencil and what's called a tripod grip. So sorry. No, I was holding a tripod which is holding between the two fingers and laying down your third finger. This is on top of your third finger for you right-handed folks. It looks like this. So it's between this finger and that finger and it's laying down on my third. That's right. There is a tripod grip and there's basically just two handles. The tripod grip or where I'm holding it between my two fingers like so. That's a baton handhold. Got extend the pinky, right? I'm just kidding. But I hold it mostly between the two fingers and the thumb. So now I'm holding this in a tripod bone convoluting the pencil fall forward because I'm drawing flat and it's a little weird. So it's kinda change my my hand hold. The whole the whole point of this thing is what I want you to do is not just watch this again. Sometimes we think that I'll learn more by watching and watching does help you to a certain point. It helps you to intellectualize what's going on. But I mean, it's, it's pretty, it's free. It's kinda like going along. If I, if I wanna learn piano, I'll just watch my. My teacher, because I learned more. I mean, what it's going to boil down to is the Watching is going to tell you, well, it's basically playing the right notes at the right time and using the right finger halt, well, alright. And then you gotta get down there and you gotta, you gotta, you gotta do it. You know, it's, it's, it's, it's where the rubber meets the road is. So it's the same thing with painting. There's things that you can understand intellectually. But to then be able to create them by hand is going to take quite a bit of time. Now, I've got, I gave it a little bit of wall code. Now this tablecloth is black and again, there'll be there'll be a photograph and there'll be a photograph within the frame again, you can see what I'm what I'm drawing and stuff like that so you get a feel for it. But I'm going to also upload upload a photograph of this so you can work from it. But, and that's where I want you to do. I would like you to watch the video. And then I want you to try to get your pencils together. Can afford H a two H and H B, a to B and a forbidden didn't matter what company uses a lot of good ones out there. And so just, just a good company. Steelers won and you've got Kimberly and you've got PRISMA color and you've got underwent. And these all are fine companies that make really good graphite pencils. And so you can't, you can't go wrong. You don't want to mix and match though because the companies, there's no standard. I mean, there's a general HB is kind of in this range, but the HB in one, in one manufacturers arsenal is going to be a different value than the than the pencils and others. And so for the most part, especially as beginning are. So really, if you are beginner, go ahead and keep your pencils. A relatively, not relatively, but in the same manufacturer, you'll just have a lot easier time with it. Because I have a PRISMA color and I know if I've got Prismacolor as well, then my my two h is as dark as an HB, a full step and there's some that are almost two steps different. So if I had no only pencils, I would, it'd be like I had two of the same. But prismacolor that's a to H and I had a Kimberly that's an HB. Those who handles are about the same range. And so it's just going to throw your whole system off. So again, keep your pencils and then by the same manufacturer, it'll just be much better for you and you'll have a much more enjoyable experience. Now, there's a point here where we need to deal with the outside contour of this drawing. So I'm going to start to put, I'm going to start to try to deal with the value touching the edge or this pair. And I'm just gonna go ahead and do this. Flips, move that a little bit there. And then we'll continue on because again, we don't want to get too far into this. We didn't come here to draw the wall. It's taken me almost 20 minutes just just to put in a wall value. And again, we didn't come here for that, so we're going to move on to the pair itself. But if I didn't finish the thought before again, you're going to have photograph, grab your pencils, grab your erasers, watch the video, and then try to execute one of your own using the photograph and then see how successful you are. And that's what we want you to do it. I want you to use these two, not just watch for your inner, just to watch them, but I want you to actually grab the photograph and set out some paper and get your pencils and try to do, try to do a drawing. Try to mimic what's been done and see how successful you are. Alright, so again, we're gonna get started on the, on the pair. All right, so we're going to get, get onto that. Now the first thing I'm gonna do is I'm going to come on over in here. We use a piece of paper to protect my drawing again, I don't want my oils of my skin getting in there. And we're going to come on over here and we're going to start to put in the the values of the shadows. So I'm going to go along here. And we're going to fill in the shadows from my pair. And I've got an HB pencil that I'm using. Hb pencil again is like a number two pencil that all the yellow ones, yellow, orange ones that you see around everywhere and take to school and all that good stuff. So again, it's a nice workhorse pencil. It's a middle value range. It's halfway between the 4 H in the HB. But what's great as it can create some, some dark values. And and so that's why we're going to be using it. So let me go ahead. I want to try to fill this and again, I'm using a side to side. Now. I just changed direction. They're a little bit and I was just more because of what I was doing there then because of a change directions. I'm going to go ahead and pull some of this. And then I'll get a little bit, a little bit too much. But we're going to be exile day yet. We're going to go ahead and. And again, start to put in these song going right. So the core shadow, this is where the dark and the lights meat on this. So that's what this, this edge, this looks kind of like a lion almost, but that's what this is. This is the, again, the core shadow on this on this object. And the core shadow again is, is something that you need to round surfaces. And it can really give something that feeling of having volume. In other words, being round around, ask this parish religious to cylinder. It's a modified cylinder. There's all kinds of subtlety going on here on this thing, but it is a cone nonetheless. Again, this is part of the core shadow down here. As it begins to turn away from the light and drop into shadow. Alright, now I'm going to take a 2 H pencil. And that's just so I can make it a little bit lighter, a little bit easier. There's just makes a little easier. I'm gonna go ahead and I'm willing to fill in when I actually take back the HV. Alright? So I'm trying to keep these. I'm not doing gradation jazz. Sometimes we only wait. What do you wait? What do you know and where do the more of those gradations? And we're not doing gradations yet. We're just trying to put in a flat values of all the different form shadows. And there are six of them. There's light values, middle values highlight, and that's in the light family. So there's light values, middle value or highlight. And then in the shadow family there's a core shadows which are right here. There's reflected light, which is the lightest. And then your dark tones are essentially your middle values and your, and your shadows. So overrides, whoops. Move that a little bit at night. So again, I want to continue on putting in these thing, in this value. And again, it takes, it takes time with graphite. And I'm thinking I'm going to grab one of these other pencils that are a little bit darker and that have the Woodlands pencils that have more area. See if I like using that for this k. So let's see worse. There's a four B would list graphite pencil. This is basically a baton handhold, but again, I'm holding it. This because it's at the end of the tips of my fingers and might look a little bit like a tripod grip doing a risk swing. So I'm moving my wrist back and forth. All right. So again, we're just sneaking up on this thing constantly looking at what I'm drawing. That's another key thing is keep looking at what you're actually drawing. That's going to really help usher putting in all these little values and subtleties. So again, we're just putting in some more value here. I'm looking up there. I'm taking my eyes out of focus or what's called squinting. All these things are going to help us as we're, as we're drawing and painting as well. You're always squinting, you're always looking for. And what is it? I'm really saying double-checking what you're saying. It really helps to to clarify your drawing. Big breaths in through the nose, out through the mouth. Sometimes they'll are a lot of times why, you know, when I'm drawing all usually means hey, I'm, I'm double-checking my my observations. But other times it's just, you know, this is you're getting into that zen state and you kinda start to do some nice deep breathing, which is really a good place to me. That means your focus is, it is on the object you're drawing. And that's always a good thing to be focused on what it is you're trying to do on this. I was trying to clear off the board a little bit. We had some little crumbles on there. So I'm just barely starting to get into to get this this, these shadows and start to have some form and some substance. We turn and stare up there. Now sometimes your eyes are not just sometimes your eyes actually will open up when you're looking into the shadows. The shadows that again can seems so dark, suddenly look much lighter. And that's something to always be on the lookout for because suddenly we're not, we're not drawing the relationships like they were just moments ago. Our eye is now seeing something else because it's, you know, it started, it's trying to get more detail in the shadows and that's that's some you have to look out for because if you're, your eyes will start to, you'll start to believe anything because your eyes keep changing and you're like, well, okay, I guess. And then you look at the lights and the lights, your eye closes down because there's so much light there so your eyes close, your eye closes down to see more. And all of a sudden it looks. You know, so much darker and so your, your, your lights are getting darker, darks are getting lighter. And then you're drawing goes flat. And that's, you know, so you want to be, you want to be careful that you want to be aware of that happening. So it doesn't become something that is taking you away from where you're missing with the drawings actually doing or what the object or what the light on the object, That's what I'm trying to say, is actually doing it. So whenever you do that, you'll just rapidly bringing blink your eyes, take her eyes out of focus and then don't focus on any one part of your object. And all of a sudden, you'll see the values again. And then as you start to stare into the shadows, it'll start to your IOS, start opening it up and the same thing starts to happen all over again. So right now I'm trying to darken for my dark tones. And the dark tones are your middle values in my, in my shadows. So I've gotten, it started, starting to get a little bit more value in hair, which is what we want. And there's this new look for shapes because there's so much going on here. Just take her out when you're taking out, is that a focus? Look for shapes like this, looks like a V, a little V wrapping up and around. And there's v comes around and then it gets a little bit lighter as this comes down to the foot and the foot gets a little darker. But it's not all the same value either. The foot kinda bows out and so there's a, then it gets darker and then a little bit lighter and then it starts to go darker again. And just little subtleties like that or No, I said, Well, we're going to keep this flat to begin with, but and I'm still not doing gradations yet, but I am trying to do some what we call smaller planes. These, they're still fairly flat, but we are starting to think of this plane is darker than this plane and this plane is lighter than this plane up here. And we want that because it will, it will start to give us some of these, this subtlety or someone would say detail, but it's not really detail. It's the C subtle plane changes every, every time something changes planes, it changes value. And so again, I want to make sure that I'm being very consistent and being very aware of what these values are doing as they're changing and shifting and doing all, all manner of things. Alright, so again, this is I'm going to take my HB and I think my HB only come in here. I'm going to look up here again. And I want to, now I'm going to kind of follow the form and I'm going to try to kind of lost some of that core shadow, how dark it is. And so we're going to come along here and just darken that core shadow and some key places. As I'm, as I'm dealing with my, with my pair. And again, it's doing some of the same thing down here. We're going to again follow the curvature of the pair. As I'm creating that core shadow, as it goes around my pair. Like so. Now here you do some of this up here too. It seems like it's they could use it. So I'm going to make my strokes follow the form. This is rounded this way. And so I'm going to use these strokes that are rounder. So this is what we're looking like so far on this pair. Continuing to squint, continuing to try to see what's happening here. And again, I'm, I'm looking up there. I'm looking down at my pair. I'm looking up there. I'm looking down at my pair. Alright? So I'm going to use my, my 2 H pencil. And it's again a lighter pencil. And because it's lighter, takes longer to build up and it helps me with subtlety like what's going on here in this and the shadows. So I want to darken some of these things ever so gently. And if I look at I cross I with like a for b or two, b is going to go too dark and even the two age was going a little too dark, too quickly for my taste. And so that's the time you get one. And then so you said RIO the HBS to too much. And so I went ahead and grabbed the two h It's the next one. And this one was going too dark, too quickly. Well, they don't grab the 4 H. Now again, this is an HB pencil. I want to use the side of the pencil. I'm using very little pressure because if you don't, you're gonna get, you're gonna dig into your, into your, into your paper. And again, you're going to destroy your drawing. We don't want that, that's no good. So again, I'm going to go ahead and very, very gently use my and so here. Now I want to grab my HP again. This is the outside contour of that pair. Now the prayer does have some really interesting stuff going on. There's a, some reflected light. Reflected light is, as can be. Seem very, very bright at times. And, and so we've got some reflected light on this on this pair. And and I'm trying to make it, I'm trying to gauge it against what's going on here in the background in terms of how light that is. And so I'm making it a little darker as that goes darker, if that's that dark, I'm getting my TV now because he now the other values need to be darker. If that's the, this is the lightest, well then everything else has to go darker than that. So again, this is all about the subtle relationships that are so important. They're gonna give this a look of reality. And that's what we want. We want this to have filling of reality. Now again, I'm, I haven't done a lot of gradations, but still we're starting to get things that start to look like like, like I have because we have these three families. Core shadow, dark tones, reflected light. And then we have all these planes. Certain plans are a little lighter, certain glands are a little darker. And because of that, it's starting to look like it has a lot of depth even though I really haven't jumped into doing gradation jet. And so this is an, but it is so important because again, this is already starting to feel like it has some depth. So I'm, I'm looking here and I'm like, Well, I'm going a little too quick, leaving a little bit too many spaces in between my lines. And so that's bad draftsmanship. I'm chiding myself and I don't do that. Don't be that guy. So that's what that was. I was, uh, come on. You know what you're supposed to be done. So again, I'm gonna go ahead and start to It's hard to reassess some different areas here that I think that like this arrow goes darker as this was darker, this will look lighter. So I've lost some guide through. They're excited, dark ins in relationship to that. But this has to be darker than that. So it's all these, these subtle relationships, it's all about what is the value next to another value that gives it its feeling of roundness or flatness. Or, you know, it's, it's really just, it's almost like a dance. It's a no or better yet for those are magic lovers, sleight of hand, where we are making people believe a certain sort of reality that actually doesn't exist. This is a flat piece of paper. After all, this is not anything that's even remotely three-dimensional. And yet if we do our job right, you can have people thinking, wow, that thing really looks like it's got a three-dimensional quality to it. And that's when you've really done. A lot of reflected light here. But that was probably a big mistake. So I'm gonna take that probably back out because I was just a little too strong. So again, yeah, we're we're constantly looking to make. Again, our, this is our illusion. There were, we are magicians on a stage. And this stage is this two-dimensional piece of paper that is flat as a pancake. And we're making people think that in fact it's not, it's an illusion, it's a, it's a mystery. You know, you're, you're fully in people's eyes. Which is nice because what we're creating, because that's what we're doing where we're showman, we are, we are performers. When a visual sense, we are creating a perceived reality. And that perceived reality can be whatever we make it. That's part of the, that's part of the job of the artist is to create in the viewer a feeling of an author of some sort of reality that actually may or may not exist. And yet if you do it correctly, view it can feel very true to life. And that's how some of these artists like Andrew Wyeth and Norman Rockwell and others who are able to inspire just entire generations because of their ability to show on the stage that was their canvas or a piece of paper. A certain slice of Americana, certain, certain idea, a certain know, treasured memory or place or event. And nowadays with photography and cinematography and all these things and their own with smart phones. And sometimes people make the mistake that maybe it's not as powerful as it once was. But I would say that it's even more powerful now because if you know what you're doing, you're drawing or painting your artwork will stand out from something that was just shot by somebody down the street or next to you or what have you. Because it takes an artist's now people can sometimes stumble onto a good picture and that happens too. But they certainly, they rarely stumble more than a couple of times where someone that knows what they're doing and they can reproduce that. Over and over and over again and create quite a, quite an impact on the viewer. And that's important to understand that you know that it's at the very best, the people that can do it consistently is because they've been trained there. They are artists and they are inspiring people. And so many different ways. And that's what I love about art. That's what I love about creating art as how that we can, again inspire people that we are just, we are visual, visual magicians. And that's what makes it fun, is having that ability to, to convince people of things that may or may not be or are the way we wish it to be as opposed to the way they are. Or, you know, sometimes you are trying to show not just a, something that eludes to reality, but reality of it itself. And that can certainly be powerful as well. This is a for B pencil that I'm using. I'm going to just try to bring this edge, give it a little more firmness. This was a little bit too bright down here. I don't want to get rid of it entirely, but there's just a little below on the right side. And then this down here was even darker than this up here. So and part of that is because this tablecloth is black, tablecloth is actually reflecting back up into the, to this pair. And so there's this edge along here. It looks very, very, very dark because it's the tablecloth reflecting back into the pair itself and as the Pentateuch sander, so it's, this plane is going down, sorry, It's going down this direction. And it's catching the reflection of that black tablecloth. Now, sometimes people will say, well, it's a good one, draw what you see. Some people will also, artists have their, their philosophies and depending on who the train them. And one of the philosophies is, no, don't, don't draw what you see. Because sometimes your eyes can deceive you, but draw instead what you know. And if you draw what you know, then you're going to be in a better place and if you draw what you see. And so that's another sort of philosophy for, for those that, you know, that are, that are in the art world and I've always been to the Milo has been in the mindset to temper what you see with what you know. So we're going to get on into here. So we've put in some of the values of the darks core shadow, where the dark tones that are a little lighter than the core shadow and the reflected light. That's even lighter still. Now this is reflected light too, and it's a little brighter than this. Now sometimes we're going to make a decision, an artistic decision. And I just, I just don't know that this is reading very well. And I just don't know that it's that I'm not sure that it's that important. So I'm thinking of get it and I'm just softening it just a bit. Also thinking of softening this down on the head. Because this is not as light as this is. And that's working a little better now far as that goes. And again, we could play with this all day long. I think we'll we'll leave that this still seems a little bright for what it is. But again, I think I'll leave it. I'm gonna go ahead and bring a little more value down into here like that. All right, I think we're done. So at least for the shadows over here. So we're going to come on in here with, I believe, a HB pencil. And I'm going to start putting in some of the some of these middle values using this HB pencil. And again, first I'm just gonna go ahead and put it in fairly flat. We're not even going to worry. Now again, this is plains almost like the facets of a rain. So again, if we get the fleet, these planes, what would the right value t
22. Ending Farewell Magic of Drawing: Congratulations, you've made it through the beginning drawing class for values, the magic of values, where we've learned about that three-dimensional quality that we need our drawings for those who want to continue the journey with me. Join me for our intermediate drawing class where we're going to be drawing things that are more difficult. Like perhaps seashells and other things. Maybe leaves, stuff like that where we have to bring together what we've learned and then using those values, create much more sophisticated drawings. All right, I look forward to having you in future classes of AI now.
 Kevin McCain, Anyone Can Learn to Draw