Transcripts
1. Skillshare Introduction: H Hi, and welcome to my course on the fundamentals of
landscape planting design. Now, plants are an element
within our gardens, and their selection and
placement is just as important as any kind of paving materials
that you pick out, any kind of structures, arbors that you may
design into the garden. So whatever you're designing, the plants should reinforce
what the solution, what your intent is. Do you have a
walkway going along? Maybe you want hedges along
to reinforce that movement. So that's what we're going to be talking about
within this course. And we're going to be
starting with looking at the conceptual
planting plan because a conceptual plan is a starting point where you
can go to your client, you can say, Here's
the ideas that I want. I want shade trees here. I want hedging over here. I want perennials in
this area without being specific to the
actual plant species. But in the conceptual
phase, the plants are, especially the trees
drawn to scale to represent what their mature
size is going to be. Now, when we go to develop
our working drawing, our actual planting plan, we have already decided the
scope and size and purpose of the plants that we are
looking to install and have installed
into our gardens. And we'll carry this on into
a full working drawing, how to label your plan properly for
installation purposes, and then how to
actually bid this out for budgeting
purposes and bidding. So that's where we're
going to take all of this. You will have an assignment later in the course
where you'll do your own planting design that
you can send over to me, and I can critique and offer suggestions
if you want me to. So that said, let's go
ahead and jump into this, and let's get started with fundamentals of landscape
planting design.
2. Class Project: Hi, and welcome to this lesson. And this one, I'm
just going to just talk briefly about the
project for the course. And of course, this is a course on landscape
planting design. So your project is to do a
landscape planting design. And I have provided
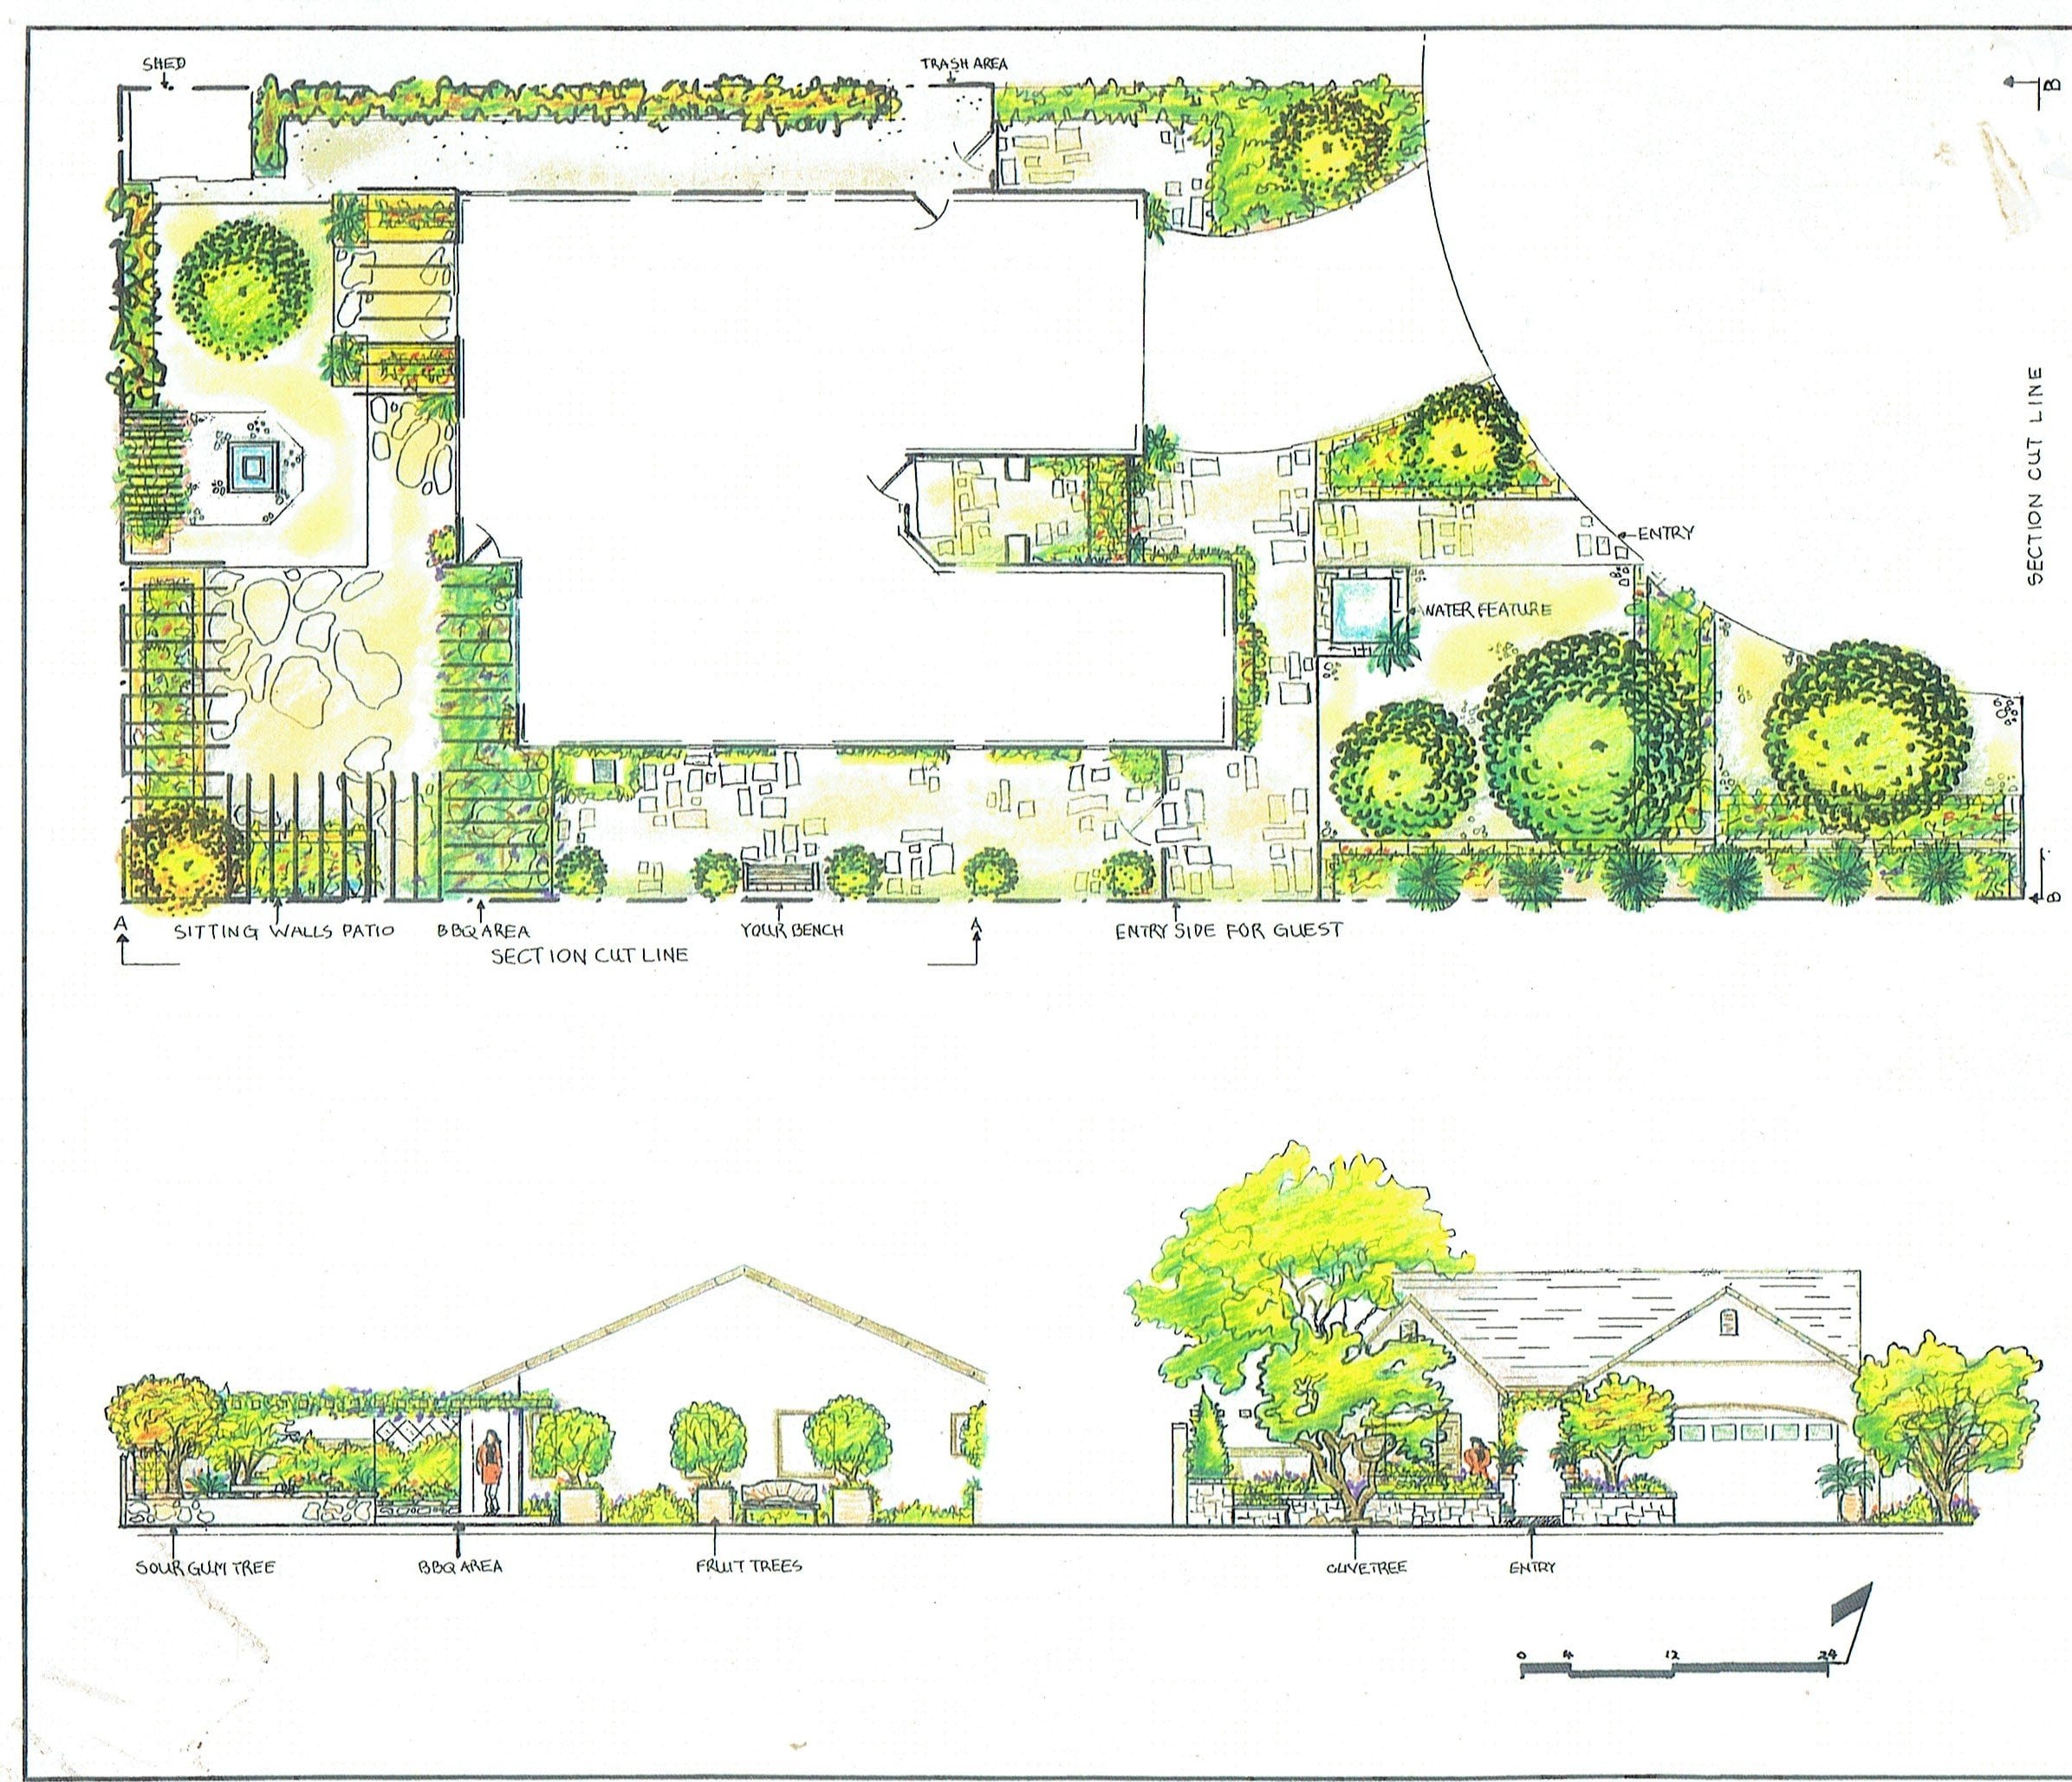
examples for you. I've given you an example of
a conceptual garden plan. I've given you an example of
an actual working drawing, a planting plan that I did that shows all of the
labeling of the plants, their locations
within the landscape, their quantity, container size, botanical and common names. All of this is information
that if you're doing a planting plan for
yourself, for a client, you're going to
need to have all of this information not
only for clarity's sake, but also for bidding purposes. So the project is to
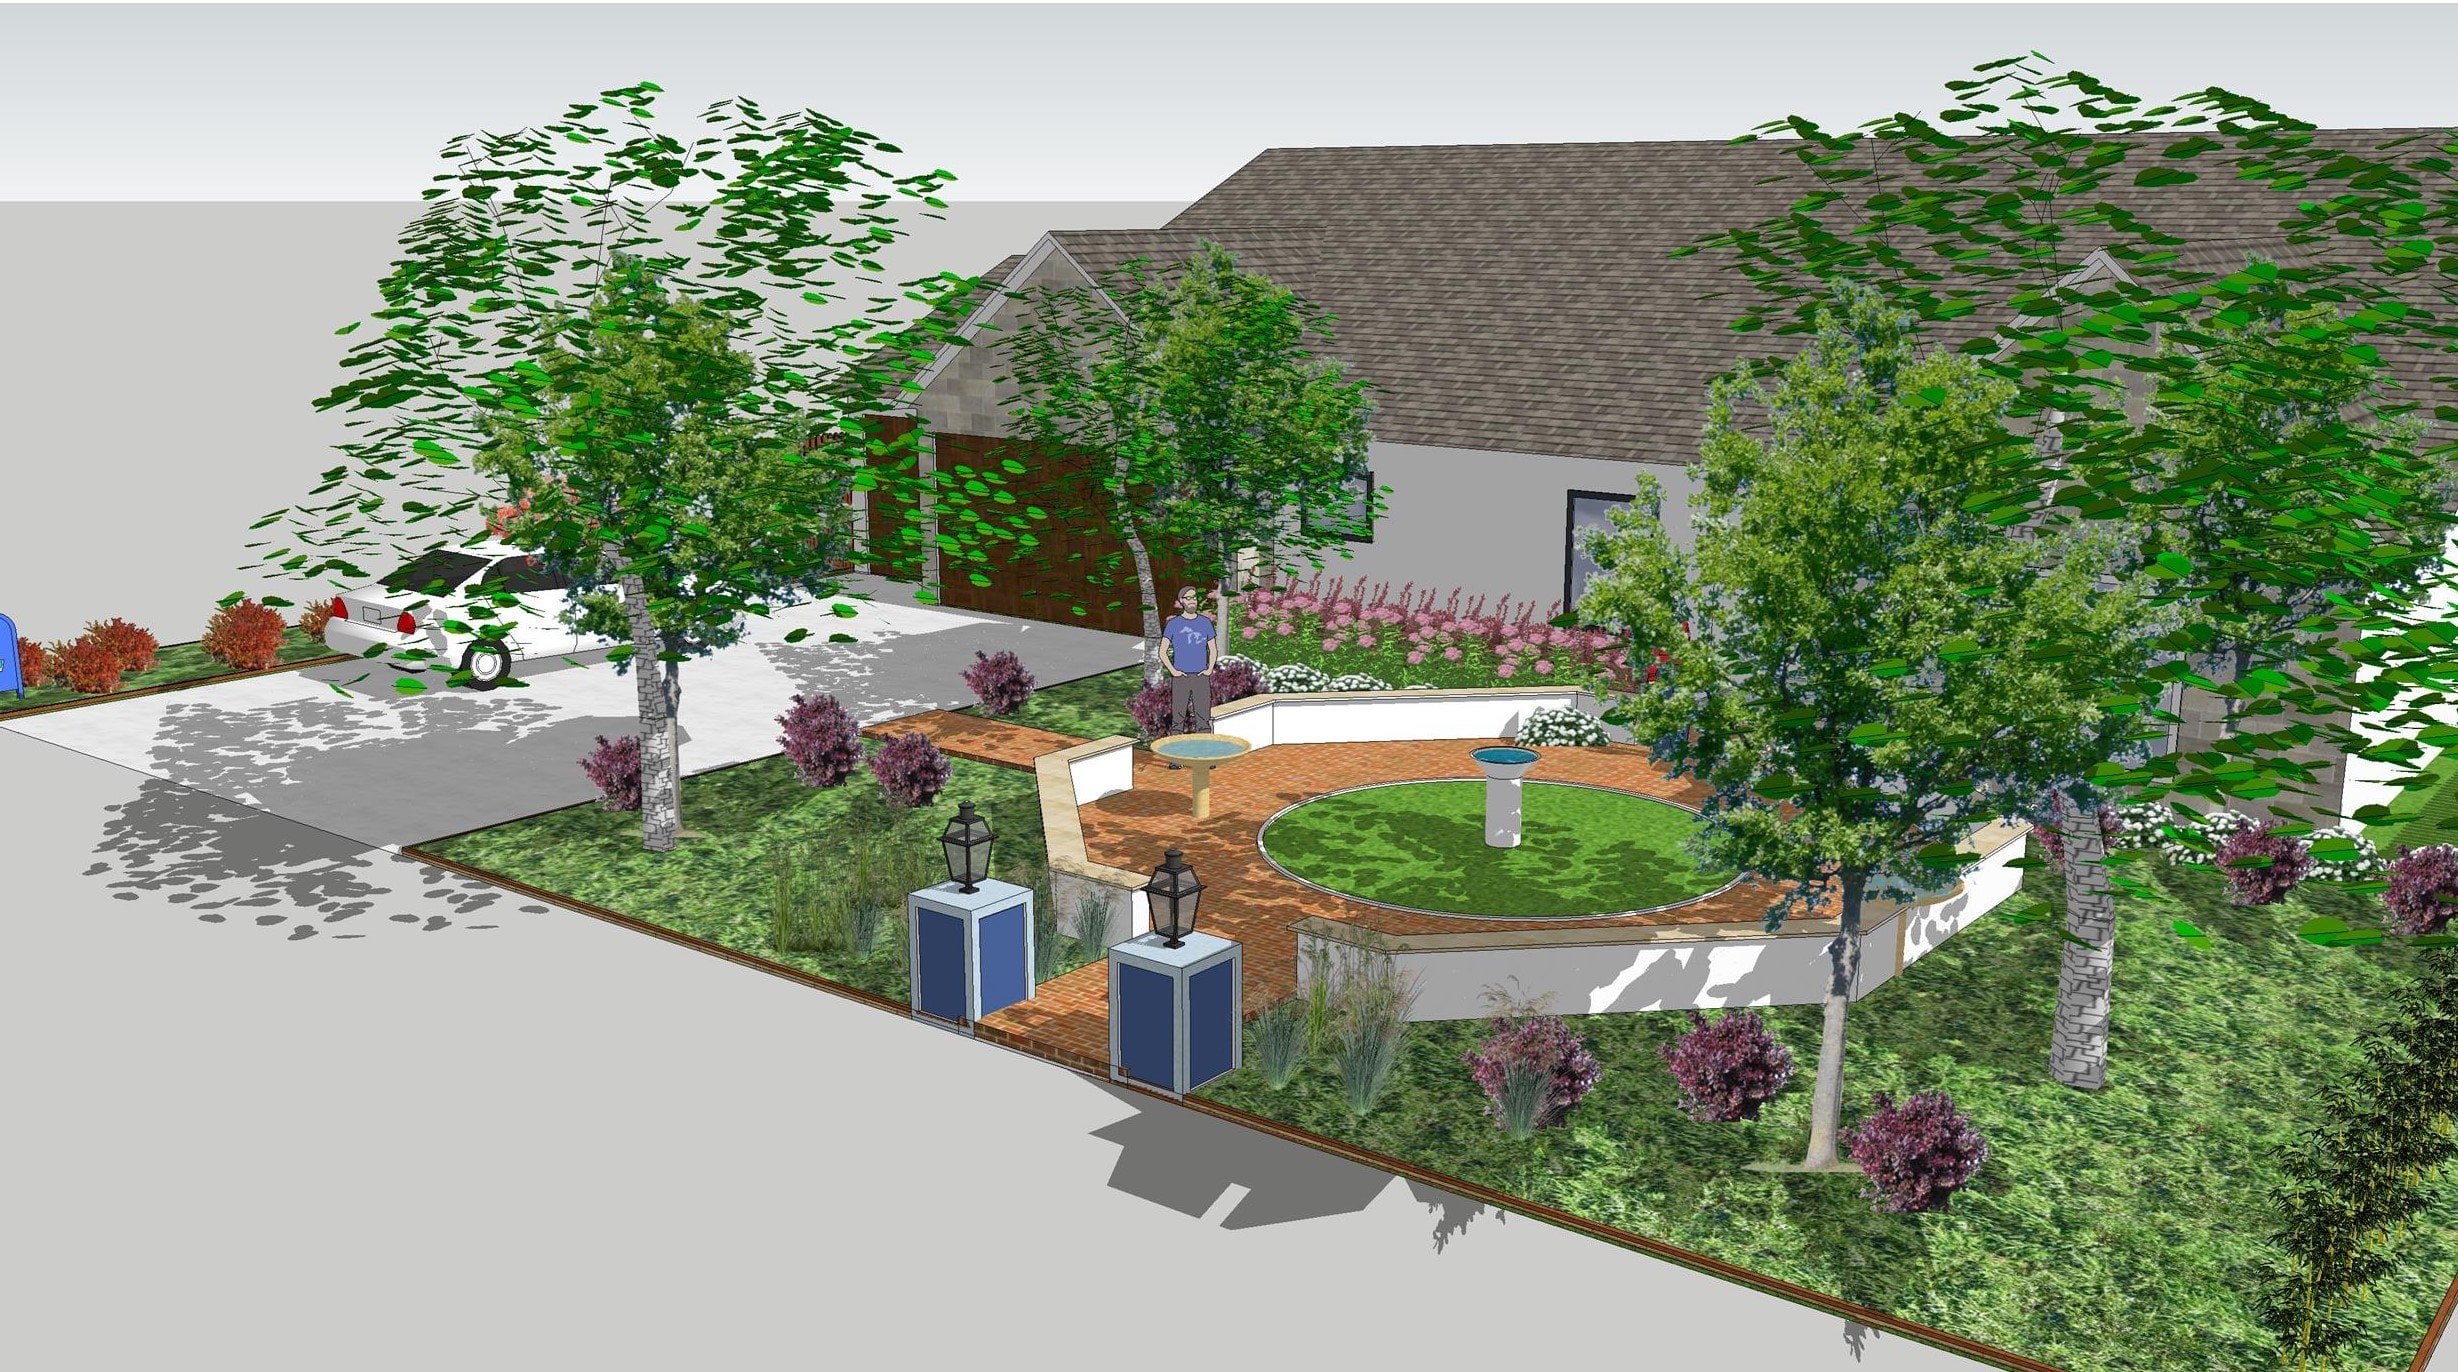
develop a concept plan, a concept planting plan, and you can use the blanks
that I have provided to you. I've provided you a couple of different site plans that show the footprint of the house, the property lines,
and I've provided this for you in both
imperial measurements, feet and inches and in metric. So it should work wherever
you are living and working. Again, I've also got the concept plan example just for your reference
and then a planting plan. So develop concept plan and a planting plan to be able to be uploaded to the
project gallery. I've also got examples in the course of what a
mood board would be, and a mood board is
just something to focus your attention and more graphically depict
your design intent. So you can go to a
client this and say, This is what I've got, but it's a flat piece of
paper. It's colored. That's true. But it doesn't
really get the idea across as effectively as if you had a mood
board along with you, which simply is another way of taking photographs of
your design ideas, furniture, plantings,
water features. And you'll see that within the course because
we're going to cover the whole thing within this course and how you
develop this stuff. So anyway, take a look at
that and I look forward to seeing what you come up with and some projects showing
up in the gallery. And if you have any
questions along the way, then feel free to be in touch, and I will be available
to help move you along. Okay, that's our project, so let's go on into the
meat of the course, and I'll see you in
the next lesson.
3. Plants are Living Things: Hi, and welcome to this lecture. And in this one, I
just want to talk about plants as living things. And they are going to have
environmental requirements, needs to survive and thrive. And we need to be aware
of what those are. Ideally, what we want to
do is use plants that are adapted to where
we live and work. Now, again, I'm in
northern California. I'm on the Inland Valley. We have temperatures that
range from the upper 20 degree Fahrenheit range
in the winter to 100 hundred and ten
degrees in the summer. So we have a wide range. The upper temperatures aren't necessarily as critical as
our minimum temperatures. So wherever you live, you
want to be aware of what the minimum temperature is that you're going to
be working within. Now, again, I'm in a
Mediterranean climate. I have minimum temperatures of about 25 28 degrees in the
winter on a cold winter. Now in the United States, we have 13 different
hardiness zones that the Department of
Agriculture has designated. Zone one would be up in the interior of Alaska
where temperatures easily drop below 50 degrees
Fahrenheit and -50 degrees Fahrenheit
to Puerto Rico zone 13, where the minimum
temperatures are going to be seldom
below 60 degrees. So the plants in Puerto Rico certainly won't
survive in Alaska. The plants in Alaska, many of them will not
survive in the hot, humid climate of Puerto Rico. So we want to be aware of what these temperature ranges are.
But it's more than that. It's what kind of aspect or where do the plants
naturally grow to where they're going
to be able to survive and thrive within the landscapes
that we're designing. So for example, I may say, Hey, I've got the north
side of the house. I could put azaleas, hydrangas north facing,
you know, cool, loving plants in that area feeling that they're not
going to get the hard, hot summer afternoon sun. But if I'm not careful, that sun can swing pretty far north in g summer
here in my area. And even on the north
side of the house, I can have hot
afternoon sun coming in that would burn the plants that I thought were going to be safe. So when you're doing
a planting design, part of your job is to
do a site analysis. Go out and see what the sun and shade patterns
are throughout the day, so you have a better idea
of how hot it's going to be or how shady it's going to be in this
particular area. Another tip is that
you want to be able to group plants together based on their exposure and
their water needs. Now, here in California, we have something called the
water use classification of landscape species, which just basically says, Is this a low, medium or
high water use plant? And we can use this
information in grouping plants together so that when we're irrigating them, we can do it very efficiently. Now, depending on
where you live, you may or may not
have access to this type of
information directly, but your local garden center or Department of Agriculture, Agricultural
Extension office can give you information
on this as well. So when you're designing, we want to make sure
that we're working with plants that are going to
be adapted to the region. Again, I'm in a
Mediterranean climate. I have a lot of native plants
here in California that I can work with in my
central Valley region. But because we are a
Mediterranean climate, I can use plants from
Southern Europe. I can use plants from Australia. I can use plants
from South Africa. So I can use plants that are
adapted to these conditions. But I'm not going
to use plants that are necessarily adapted
to other kind of climactic conditions that I know are not going to survive in the extremes of temperature or the soils that we have
here in my region. So again, I'll be working with plants within this course and throughout this course that are adapted to where
I live and work, but I'm picking them based
on their function and then selecting them and
placing them appropriately. Wherever you live, you
need to do the same thing. Go to your local garden centers, get to know the plants where
you live and then use them in replacement of
what I may be using because what I'm using
you may not have access to or they may
not be applicable. But the overall direction, the overall process is the same. And that's where we're going
to go in the next lecture is start looking at the
process of developing a planting plan to where
we can actually take a conceptual plan
such as this right here and turn this into an actual working drawing that you could hand
over to your gardener, landscape contractor,
whoever, and they can take it and install it for you or you can go to your
local nursery and say, these are the plants I want, and you're confident that they are a working drawing
that is going to work well and survive in
your particular garden. So let's take a look at that whole process
and get it started, and then we're going
to work our way on into actually developing
our planting plan. Okay, thanks for watching and
I will see you in a bit. So
4. Planting Design Objectives: Okay, let's talk about some
objectives in this lesson. And in this one, I want to talk about planting
design objectives. So your client may or
may not have an idea of what kind of plants or the style of the garden that they
would like to see. But you as the
designer should have objectives and have
an overall direction that you would
like to garden in. So if your gardens
out in the country, if you're working in a rather rural area or at
least some ground around you, maybe a cottage
style garden would fit the architecture of
the home and the site. Well, what is a
cottage garden style? And to me, cottage gardens
would be perennials, ornamental grasses, plants
that would tumble over pathways and blur those lines of the path and give a little
extra visual movement. Also be, you know, picking the proper paving
material for your pathways. So for a cottage style, I would probably want to have
something fairly informal. So it could be native stone, native flagstone,
could be used brick, something along those
lines that I feel would be historically accurate
to that kind of a garden. And I would do some
research on this, if necessary, to find out, you know, what kind
of plants were used. What kind of, I don't know, hybrid perpetual roses
might have been used or shrub roses that might cascade
and be inform looking. Plants that would have evoke that fragrance that you would imagine in a
perennial garden. You know, what kind of
trees might have been used, and knowing that you're going
to be working with plants that are going to
have to stay within the confines of the area
where they're planted. So we're minimizing
the amount of maintenance that
might be necessary, other than if you
have perennials, yes, you're going to have
wintertime pruning down, cutting back of
flowers and such. But overall, you want to keep
this to a minimum to keep the garden going and looking good but not become a burden. So on another hand, your client may have sculpture that they want to show off some kind of artwork. Well, this may lead to a more
structured style of garden, and that could mean
clipped boxwood hedges. Uh Tea roses, standard
tea roses standing in a line like sentinels along the backside of
the boxwood hedge, a more formal pathway or
pattern, rather than flagstone, it might be cut blue stone or something along
those lines that lead and lend to that formality
of your design solution. Again, whatever
you're designing, you want these
plants to reinforce your ultimate design
solution within the garden. Another part of this is what
is the site itself like? So, here in northern California, we have a lot of native oaks. And while oaks are not
necessarily drought tolerant, per se, our oaks do need
their winter rains, but they have evolved
and adapted to our long, dry, hot California summer, especially up here
in the foothills. We're not in a fog belt. So if I design a garden and
I'm putting in plants that require a fair amount or even an average amount
of summer irrigation, this can lead to
root problems and disease for the oaks
that are on the site. So if I'm going to be
designing under or near oaks, I need to start thinking about
what kind of objectives? What are the plant
selections that I'm going to have to
work with so that I'm not compromising
these trees and potentially losing them on the site because I
made a bad decision. So I may be looking at natives or adaptable plants
that I would put in in the fall and minimal
summer irrigation and keeping it targeted to
that plant for the first, you know, couple of seasons
until it is adapted, and it can take care of itself, and we can pull irrigation away from those trees so we
don't compromise them. And it's going to be this
type of overall thought and precision that
we need to put into our planting designs
even at the conceptual stage. At that conceptual stage, we're still looking at, Oh, I want to bring people
out into the garden. I've laid out the
form that I want. How am I going to
reinforce this? Do I want to have
a seating area? And if I do, do I want to do arbors and put vines over
it to provide shade? Do I want to just use trees
that are going to have a canopy broad enough to
provide shade in the summer, but perhaps sun in the
winter or early spring. So these are all considerations, and at conceptual stage, I'm going to be laying
out my plant selections, even though I don't know
what they are at this stage, not necessarily what they are. I'm still going to be looking at the function that I want them to be performing at and I don't want them
to be too large. I don't want trees
that are going to be too large for the site. I want to have trees
that are going to be proportional to the
house and the property, the project area that
we're working with. And in the next lesson,
we're going to revisit a conceptual plan and
conceptual planting plan, and we'll take a
look and see how this planting plan reinforces the overall structure
of the garden and then how we can
use these ideas, these conceptual
planting plans to make ultimate species selection when we do our actual
working drawing. So there we want to be aware of what are the
objectives of the client? What are the demands of the site that we
are working with? What is the design solution
that we are coming up with? And how can we use plants to reinforce that design solution
to make all of this come together and be the garden that we want our clients
to enjoy and that they're going to be happy to show off and that we're going to be very happy and pleased
to say, I designed this. This was what we did, and it's going to be a feather
in your cap, as well. Okay, let's take a look at the conceptual plan and just
see how this is going to aid us on down the line when we actually get into making
our plant selections. Okay. I'll see you in a bit.
5. The Conceptual Plan A Review: Okay, let's talk about the conceptual plan and
what its purpose is. When you're starting to design for someone, you've
gone in and met them. You've either done
your own site survey, they've provided you with a
site plan of the property. You want to come up with
your design solutions. But the purpose of
the conceptual plan is it's acting as a
discussion document. You're coming up with
initial ideas that you can then take to them and say, Here's what
I'd like to do. I want to take a
path down this way. I'm going to set an arbor and
a seating area over here. I'm going to use a water
feature here as a focal point, and I'm going to
have some plants and trees that are going
to reinforce this. It's going to give shade
along the pathway. The hedging or plants along the path are going to
reinforce that movement. Um, you're going to have
fragrance along the path. You're going to have
maybe something special at the end of the view that becomes kind of a focal point and
draws them down to it. You might do some kind of arbor and trellising that
actually frames the view and encroaches in on the path a little to where it opens up again on
the other side. These are all conceptual
ideas that you can take to your client and then say, Here's
what I want to do. Here's where we're
going to go with this. And they say, I like a plan. I think it's great. What
are these plants over here? What are these trees over there? And at that stage, it's perfectly fine for you
to say, I don't know. Now, if you have an
idea, fine, spit it out. But if you don't know,
it's okay to say so because what you're
doing is getting the ideas across
and making sure the client's happy with
what your solution is. And it doesn't have to
be a paying client. It could be friends or family
or even just yourselves, but you want to have
something that you can analyze and think about
and sleep on, so to speak. So part of the reason is, if I did a plan similar to this guy right here
with all the layout, all the pathways, water
features, patio setup. And I went to all the trouble of selecting all of the
plants early on. And then I bring this plan to whoever I'm presenting it to, and I say, Here it is. And they say, you know, no, this isn't what we were looking for. Let's start over. Well, that could throw a
whole slew of your plants out the window
because they're not going to work within
the new context. It could throw a lot of the
different elements that you've been thinking about out the window if you've
been too specific. So by being a little
more general, it gives you that
wiggle room to make adaptations and changes
to the plan early on, and especially in
the plant material. Now, the client says,
Gosh, I love it. I love everything about it. Let's go ahead and
carry on with it. Now, this plant material, you've already thought about
what the function of it is. And now you can start
looking and saying, now I know what the function is. This is what I'd like it to be. And in the back of your mind, you've also been
thinking about species, even if it's not conscious, and you can go ahead
and start selecting the actual plants that are going to be installed
on down the line. So let's look at this same conceptual plan
and just see how the plants help to reinforce the overall movement
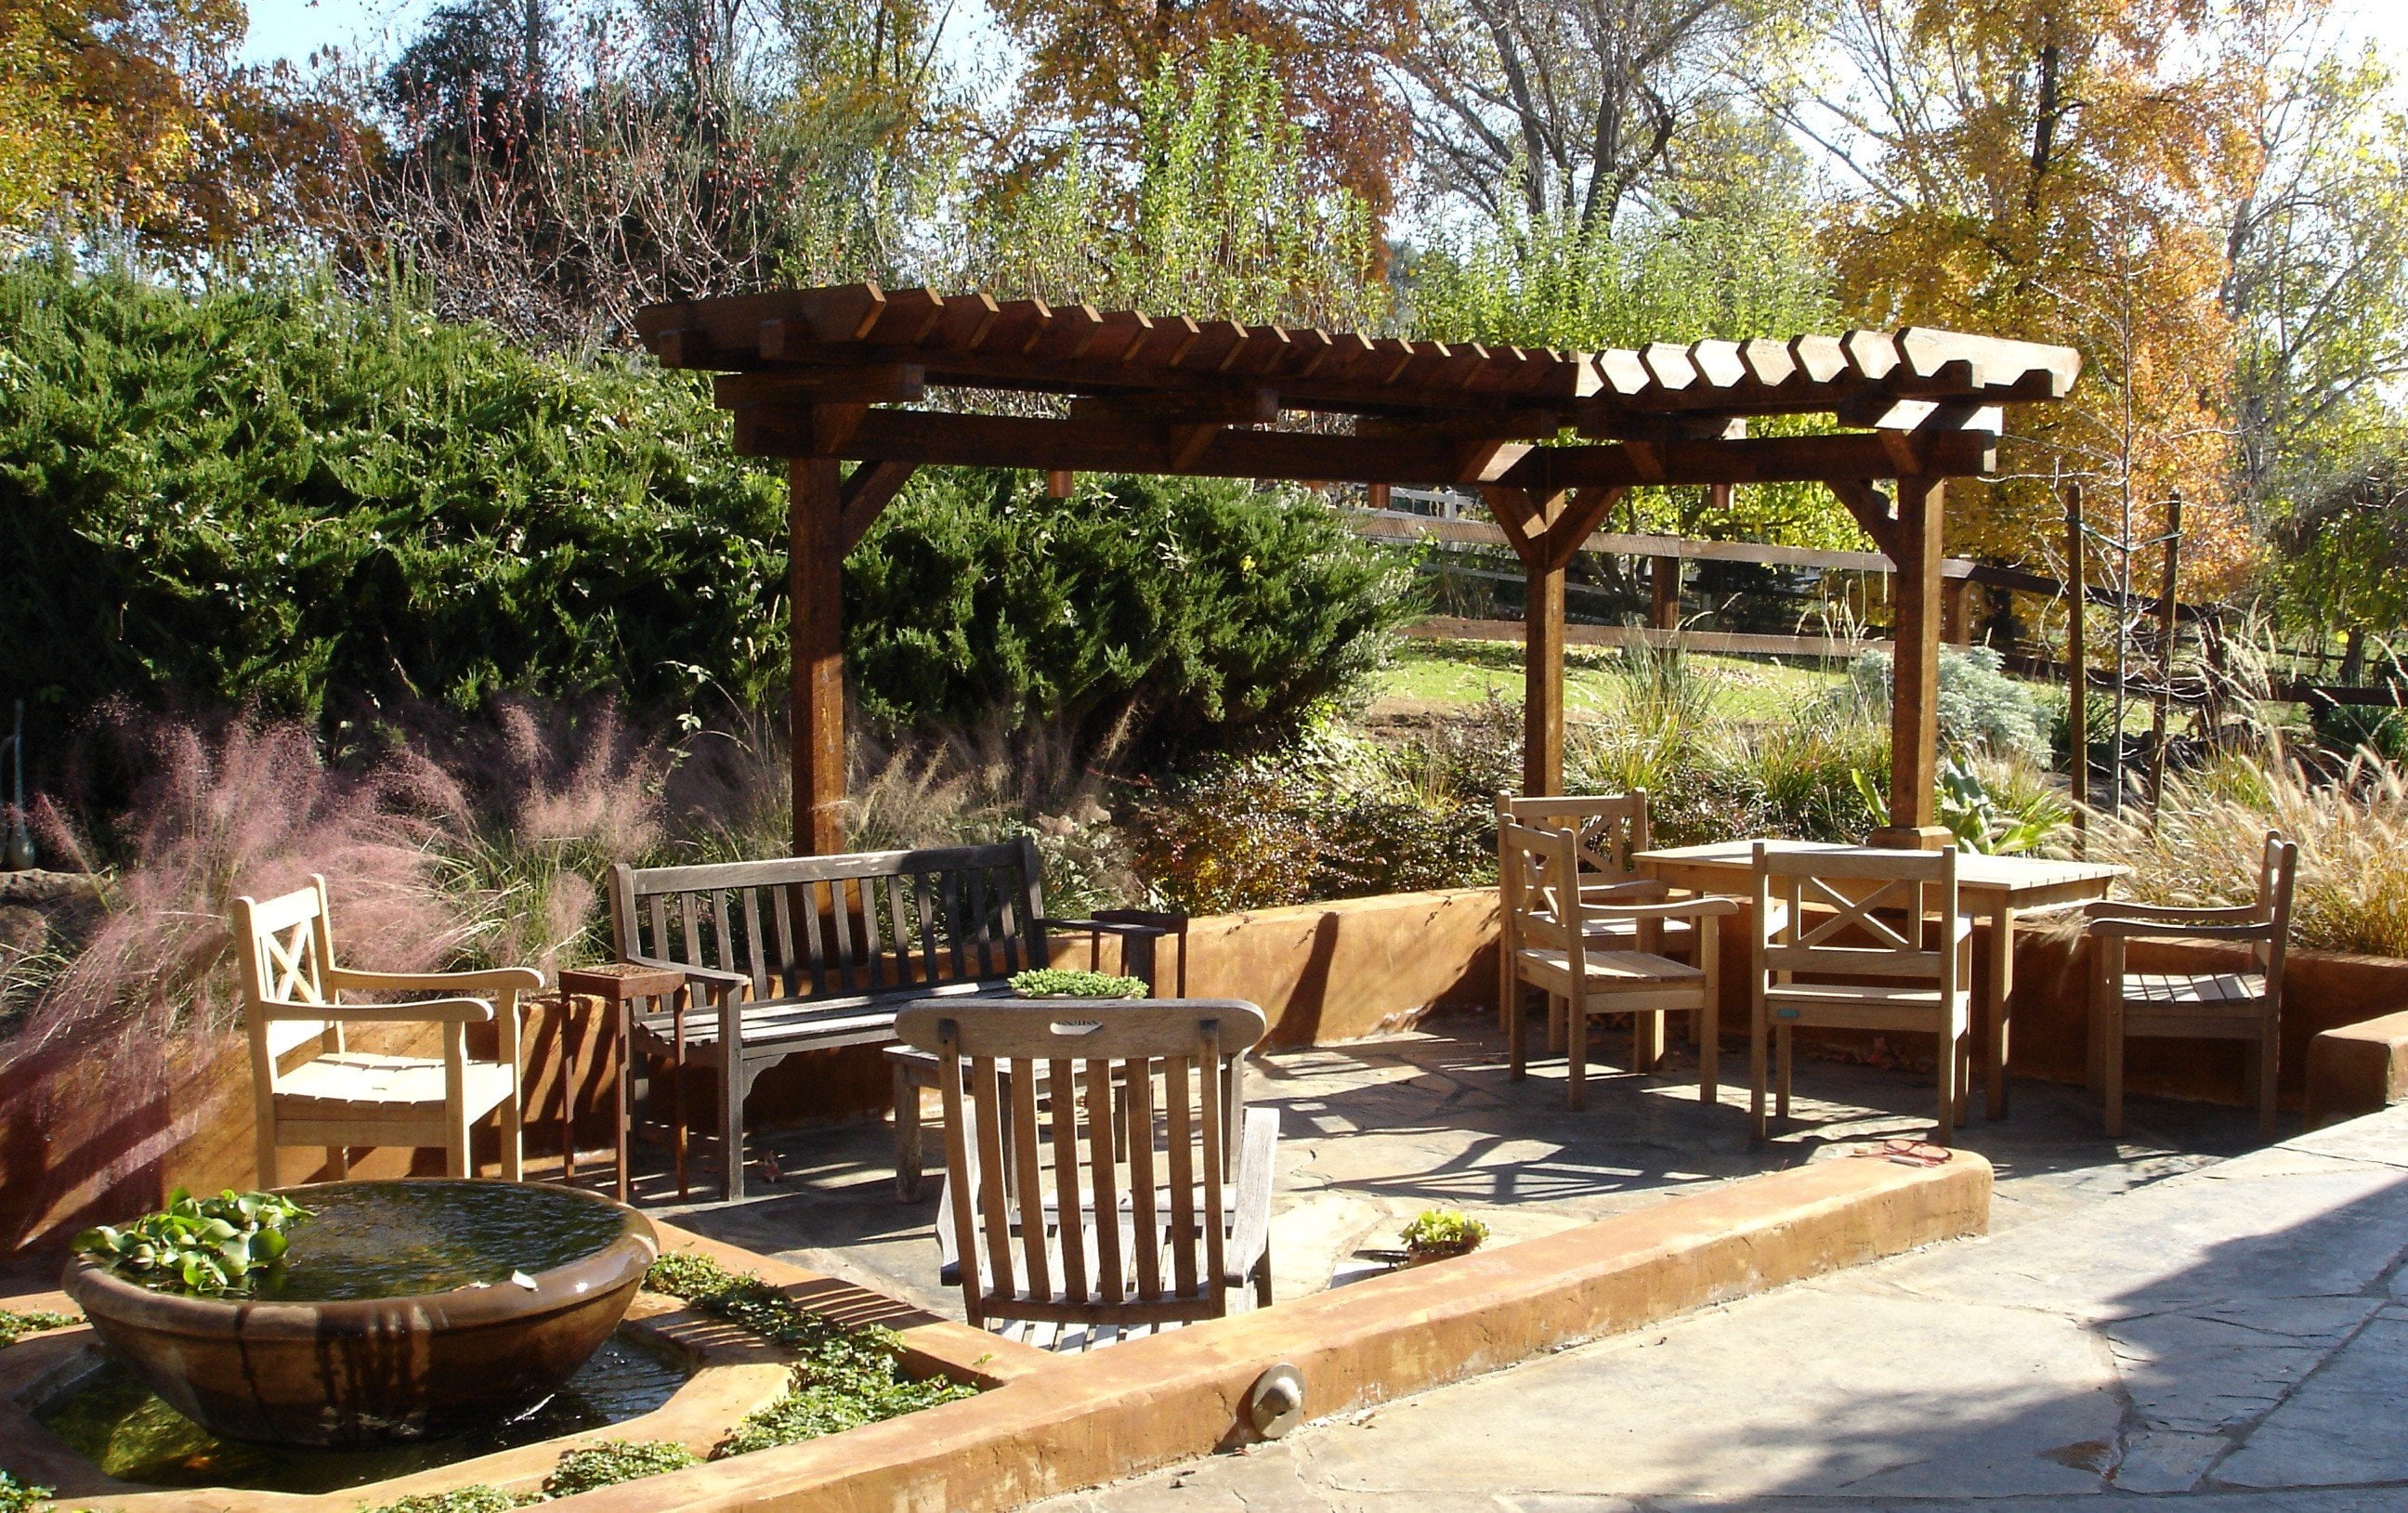
and design solution that Scott produced. Okay, here's this
conceptual plan, and we've got our cul
de sac right over here. We've got a driveway coming in. Well, most people are parking
out here in the cul de sac, especially if there's more
than one or two people. So rather than them coming in on the driveway where
their first view is that of a garage door, Scott developed an entry
walk right over here. Now you can come
in at the entry. A water feature at this point, acts as a focal
point or a draw so it detracts you from this area. You also have some taller
shrubs and a small tree, which helps to screen the driveway area from
the entry walk coming in. You can still come in off the driveway if you've
parked out here. But now your focus is coming right into the
entry of the home. Now, as you come in, you can turn and come
in this direction, plantings are screening
the facade of the home, giving up more of a garden feel. Native trees that
have been drawn to scale with the diameters of the trees depicted with very little or no planting
underneath them so that, again, they're not
compromised by over irrigation in
the summertime. But then a little
bit of a backdrop of some kind of a taller tree, and it's got kind of
a spiky look to it. So it just kind of says, Well, maybe I could put in
some dwarf juniper or something along those lines
that would be applicable, but provide a little
bit of screening and visual separation
from the neighbors over on this side of the fence. The pathway comes down, and this is really just
a utilitarian path to come around the side of the house to get to
the back garden. So the same small
tree or tea roses, something along here, again, we don't know what it is.
We don't have to know. But the fact that there's five of them and they're
all the same. Kind of reinforces movement
coming down along this path. But then we've got an
overhead arbor that was designed in with
vines growing on it, which kind of gives
this look of, gosh, I'm transitioning from just
a utilitarian walking area into the back garden. As you come in, the arbor
continues along the backside, some kind of ornamental, small ornamental tree
right in this area. Again, all of these
would be drawn to scale to the diameter that you ultimately
want them to see. By drawing them to
this diameters, particularly the trees, now when it comes time to
select a plant, you can say, I want a tree that's going
to be ten foot in diameter, 15 foot in diameter, whatever. You've drawn it to scale. You know how it's going to proportionally fit within
your garden scheme. Knowing the diameter and roughly diameter and
height can be equal, and then you can start looking at trees that are
going to fit that function. And it kicks a whole
bunch of trees out of the way that if you hadn't put this kind of
thought into it early on, you would still be potentially considering to put into the
garden without realizing, Oh, gosh, these are going
to get to be too big. I've got to back this off. So now you've already
got this size, this function nailed down. Now you can go to the
different websites, different nursery websites, whatever your knowledge
base is and say, This is the size tree I want. This is the color bark I want. This is, you know, anything that I've already
taken into consideration at this stage and select that
plant on down the line. This is another reason
for this conceptual plan. So you come into
the back garden, again, the stone has
changed slightly. This was more of a
flagstone paver cut stone. By the time you come through and transition into the back garden, the graphics are depicting a more free form flagstone
or some other kind of stone. So it changes the feel of your entry into the back
garden right there. You have an entry into
the house at this point, but you also have a
private entry off of the back bedroom at this location here to
come out into the garden. Decompose granite or gravel as a ground cover paving
material in this area, another water feature,
another small arbor and some taller shrubs back here to give privacy from the
neighbors on this backside. So all of these plants
are reinforcing what this movement is and how the species are
actually selected. Will now ultimately become a lot easier when you go to your catalogs or your
own knowledge base, visit the nursery and say, This is what I want to use. This is the exposure
that I'm working with with sun and shade, what plants are
going to work best. And now you can plug those plants into
your working drawing, and from there, we
can come up with an actual costing and then final installation
of your design. So that's really the purpose of the conceptual plan and the conceptual planting
plan is to think through these different
elements early on so that when you get to the point of doing
your working drawing, a lot of the questions
that you may have that you hadn't answered if you
went straight to a design, then it's been taken care of, and you've got your
client on board with you. So that's the conceptual plan. Let's wrap up this section, and in the next section, we're going to start looking at the actual working drawing and how to put that together, label it properly, and so
we can do some costing. Okay, thanks for watching.
I will see you in a bit.
6. Section One Wrap Up: Okay, let's wrap up Section one. And in this section, we've covered a fair
amount of ground. It's only been a few lectures, but we've talked about
plants as living beings, and we need to understand
what their needs are, what the conditions
are that they're going to thrive in and understand these aspects
of our plantings, so we're going to give them the best chance of survival as we possibly can and
not just survival, but to thrive and do
what we want them to do. We've talked about some
design objectives, planting design objectives, knowing what our clients
specifically want, or at least what
they are hinting at. If they don't really know, but they're kind of
talking in circles, you need to be able to interpret what they're saying
and pull those ideas out and then coalesce it into a conceptual plan that answers the questions that they may
not even know that they had. So the design objectives
of the client, the planting design
objectives of the site, what is going to be appropriate for where you are
actually designing. What are your objectives as the designer to put your stamp of creativity and plant
knowledge into your design, and the plants are going
to be there to reinforce your design solution and make it work properly all
the way down the line. There's still plenty of room for adjustment and modification, but you're coalescing
all of these ideas down, and it's going to be much more efficient by doing it this way. So that was Section one. Section two, we're
going to get more into the meat of planting design and actually selecting plants
that are going to be appropriate for the purpose
that you were looking at. Again, I'm in
northern California. I'm going to be
working with plants that are familiar to
me and that I use, and I'm going to
explain how they work within my design solution. Wherever you are,
you're going to have to take this concept, these ideas and adapt them to your climate and the plant palette that
you have to work with. But the overall
functionality and the overall direction is
going to be pretty universal. So it's just going to be educating yourself about
what you have available. Enough of that for now, I will see you in
the next section, and thanks for watching. And let's move on.
7. From Concept to Working Plan An Introduction: Okay, welcome to Section two. And in this section, we're going to move ahead from the conceptual plan and jump into actually developing
a working drawing, a landscape plan that someone could take
out into the field, and they're going to know
what species is going to go. Where? Where does this tree
go? Where does this shrub go? What size plant is going to be, what size container that you're going to be
putting in the ground? So we're going to
start talking about the actual working drawings
of a planting plan. And the planting plan does
become the catalyst for all of the subsequent plans that may be required for a
landscape installation. Once we know what
the plants are, then we're going to know
what is going to be the best application
of irrigation. We're going to know
how we want to lay out low voltage lighting if we choose to do something
along those lines. We're going to know
about arbors and how their construction
may be fitted into this. But the planting plan becomes this base catalyst to help launch us into all
of these other modes. So this course is
about planting design, and we're going to talk about going from the conceptual
plan to the working drawing. I'm going to talk about the
actual labeling process, what I feel is the best way to label the plants on the
plan for clarity's sake, and then using this information to create a plant
list or plant legend. And finally, using that to
be able to get a cost on the materials on
the plant material from our plant broker, local garden center or nursery. So that's where we're
going in this one. So let's go ahead
and get started, and we'll take a
look at going from a conceptual to an actual planting plan
in the next lecture. Okay, I will see you in a bit.
8. The Functional Diagram: Hi, and welcome to this lesson. And in this one, we're
going to start looking at how to develop
a conceptual plan. And when you're going with that, we're going to start with
a functional diagram or bubble diagram,
some people call it. And because I want my plants to be not just attractive
on the property, but I want them to
fulfill a purpose. I need screening over here. I need screening over there. I need low mounting shrubs here to create some separation
between one space and another. I want low ground cover
to give an open feeling. I want trees for
shade, you know, whatever it might
be accent plants to pull you both visually and
physically through the garden. So that's how I'm
going to start, and you do this by doing a bubble diagram,
functional diagram, and then you can take that
information and turn it eventually into an
actual conceptual plan that you would show
to your client. Now the conceptual plan in turn, becomes the springboard
for creating the actual working drawing where you're selecting
the species, the numbers, the container
size, and so on. So let's start with our
functional diagram. And to do that, we're going
to turn to the board and look at the site plan
and how I get started. So here's our site plan, and all of this open space
our planting areas in here, the walkways in off of the
road have been defined. Water feature this coming around is defined this is a walkway
into the back patio. And then a service walkway on this side of the
house, as well. So to create a
functional diagram, I'm going to first off
I'm going to lay a piece of trace paper over the top of this because I don't want to
mess up my original drawing. Now, this is an 8.5 by 11. If this was an 11 by 17 or 24 by 36, I would
do the same thing. So I'm just going to take this and lay this thin trace
paper over the top of it. And what's nice is I
can see through it. I can see all my structure, but, you know, I'm not messing
up my original drawing. So knowing the property, knowing what functions I
need my plants to fulfill, I can just start
putting bubbles down. And by that, I mean, I'm going to just come and
put a drawing right here, and I'm going to call that tall. I call it tall screening. At this point, I can come
in and say I want to have some low ground cover. I'm going to put in some
accent plants here. I'm going to put in some medium and then some more
accent plants here. I'm going to have this be medium to give some visual
blockage from the driveway. And then because this is
the entry off of the road, then I'm going to
go ahead and have a small tree on each
side of the walk. Now I'm coming in. I'm going to go ahead and
because there's neighbors, I'm going to just throw a
bubble over here and call this medium to tall screen. And because this
is the driveway, I'm going to keep that
as a low ground cover. So if somebody opens a car door, that's not going to be an issue. Now they have access into
the garden this way. They have access to
the garden this way, but they also have access
to the backyard right here. Well, I'm going to add
an arbor with vine, and I'm gonna go ahead. I'm going to put some hedging on each side to help redefine or help move people
along this pathway. I'm going to do accent here with low ground cover here, same ground cover
probably on each side. Here I'm going to
do tall screening, and I'm going to come over here and I'm going
to carry that in, and then I'm going to
just have a little bit of low ground cover there because
this is a patio area here. It's in full sun. I've got a graveled patio
area over in here, which can double as
a planting area. But I'm going to go ahead and I'd like to have
a little separation, I'm just going to put
another arbor in here. I'm going to put some low to medium shrubs
on each side, just to kind of
give some privacy and define the
walkway coming out. Even though it
wasn't designed in, I'll throw in some
stepping stones. I'm going to bring a
low ground cover here. I'm going to put a water feature back there as a
focal and a sound. Now I can go ahead and
have some accent on each side and put in a couple of chairs or some kind of
resting point at that point. So there is a bubble diagram, and it literally can
go that quickly. Once you know the
property and you understand what you're trying
to accomplish, screening, shade, sound of water, ground cover accent plants, you can literally lay
it out this quickly. Now, when it comes to creating
the actual concept plan, I have a better idea of
where I'm going to go with that and then from there, I can create the
actual working drawing and select my plant species. But for right now, we've done a functional diagram,
a bubble diagram, and I can move on to
create the conceptual, which has been done,
and at this point, we can jump into in
the next lesson, actually defining
the plant species. That's the process and it
really is about that simple. Let's go ahead and wrap this
one up and I'll see you in the next lecture. H.
9. The Final Planting plan: Hi, and welcome to this lesson. And in this one, we're
going to pick up where we left off in the
previous lesson, where we did our functional
or bubble diagram showing the basic use or functions of the plants that we want
to put into a project. Now, there's a couple of
ways you can work with this. You can take a
functional diagram and take that information and use it to create a
conceptual plan for your client, such as this one right here, showing the overall
properties and function of the plants
that you'd like to include in the design. And depending on your
relationship with the client and the progress with
this individual project, you can go from a functional diagram
directly to a planting plan. And I have done that
in the past, again, depending on the individual
project and client. I know I'm just basically doing
a planting plan for them, so I'm going to go ahead and get a little
more specific and start naming out what it is that I want to
put into the project, and then I can walk them
through it that way. So let's go ahead
and take a look at the board and
see where we're at, and we'll have a quick review of the last lesson and then, you know, coming into it with the plant graphics to create
an actual planting plan. So here's where we left off
with our functional diagram. I needed some tall
screening right in here. I wanted some accent plantings. I wanted some low ground
cover, some trees, screening back in the back here, screening in this area. So all of this is
going to start to drive the plant selections that I'm going to be looking at. And what I've done is, again, I kept this sheet clean while I was working up these functional diagram ideas. So now, I started creating
an actual planting plan. And at this point, what I'm looking at is trying
to come up with plants that are going to physically
fill the space properly. So I've got screening back here, and to denote what
this screening is, I'm going to come in
and rather than saying it's T one or T two
or S one or S two, I'm actually going to use the first three letters
of the genus and the species to identify what these seven trees screening trees are
right along here. And based on the amount of
room that I have to work with, I have selected I
wanted an evergreen. I wanted something that
would be low maintenance. So Juni Paris chinensis. The first three
letters of the genus, the first three letters
of the species. And in this instance, I am going to be
looking at using a variety called Spartan
because a spartan will get to be about 15 feet tall and three to
five feet wide. That's a perfect size
for this location. I need something that'll get a little bit
of height to it. I'll close in on itself, and it won't get overly wide. It won't become massive. So the maintenance
is going to be fairly easy to maintain
and take care of. So what I've done is I have given these junipers a distinctive
graphic to themselves. Now, I needed accent plants. So I've got accent plants
down here on the flat. This is a little bit raised up. And they also have their own
distinctive graphic to them. I've got five of them here, but I also have three
more right over here. So visually, I can
see that these are the same plant
within this design. And I went ahead and because I wanted
kind of an accent plant, something that would
throw some color, I chose just common garden
hydrang hydrangia macrophyla and I say that there's
eight of them. Well, I can see three right here where I'm denoting the plant. So if I'm looking at it from a contractor's or
installers viewpoint, say, Well, there's
eight. I only see three. Oh, here's the other five. Now it's very easy to come in and do the layout of the plant. I wanted some medium
plants in here. So in that instance, I would come in, and again, I'm going to just throw a line, and then I will take
my line up to that. And I'm going to call
T Berberusthumbrgii. So Japanese barberry kind of
a nice purple leaf to it. I'll have some nice contrast. And I've got six of them, one, two, three,
four, five, six. So now I can just parentheses, put six underneath that. And my installer
is going to know, great, I've got six
BberousTmbrgii. And that is them right there. And again, the graphic is quite distinct to define
what this plant is. And it makes it so
much easier than going back and forth with S one. What's S one or S three,
whatever this may be. Because I'm not going
to remember S three is Berberus and S one
is what was that again? I've got to go look
at the legend. But when I see the
genus and the species, then I can put that together
very, very quickly. So that's how you can start putting a planting
plan together. And I'm just coming
in and picking plants and using my circle
template to pick diameters that are going to fit the area most efficiently to
help keep maintenance down. I knew I wanted to have some
rough hedging over here, so I'm just going to come
in and show some masses. But then I can denote how many of these
are going to be in here. And in this instance, I didn't want anything
terribly tall, but I wanted
something that would have some interest to it. So a plant that we
call Berkeley sedge, which is a carax
is a nice plant. It gets to be about 12, maybe 14 " tall, mounding. So it gives some definition, but it's a soft
feel to it that I think would work really
well next to flagstone. So that would be the plant
that I would choose for this. And I can just note
this on my plant. So I come back in I put in
carats and the species to it, and I've got seven of them. I'm going to just denote
that in that fashion. Now I've got a nice soft
grassy plant here and now I can bring underneath my arbor, I can bring a ground cover in, and I'm using Asarum out here, and I think Asarum would be a really nice plant
to have back here. So AsarumKdatum, or
wild ginger, ASA, CAU, and at that point, I can fine how many are going to be here,
so one, two, three, four, five, seven of them, knowing that they spread, nice evergreen broad leaf, deep green ground cover mounds
up to about eight to 12 ", so it's not going to be in
competition with the carats, but the two textures are going
to complement each other. So that's how I start developing an actual planting plan based on the functional diagrams that I developed based on my site
analysis of the property. Okay, that's where we're at. So let's go ahead
with the next lesson, and I'll see you in a bit.
10. Labeling the Planting Plan: Hi, welcome to this lesson
where we're going to talk about how to label
your planting plans. And remember, the planting
plan is a working drawing. It's something that
someone's going to take this sheet of paper
out into the field, and they're going
to have to be able to identify what the plants are, place them per plan into the
landscape to where the crew, whoever's going to
actually dig the holes and install them, can do this. And you want it to be
able to be done as cleanly and efficiently
as possible, especially if you're
paying somebody. So the clarity of the plan
becomes really important. So there's a couple of
different methods that people use for labeling their plans, and we're going to take
a look at both of them. I think the easiest way to do it is to just jump onto the board and see what it has to say and kind of look at the pluses
and minuses of both. I do have my preferred method, and I will make that clear once we see what
we're looking at. So let's turn to
the board and take a quick look at
how to label plans and make it as clear and
intelligible as we possibly can. Okay, let's look at the table. Okay, so I have a
planting plan here, and we're just looking
at a portion of it. I'll get the concept across, but I want it to be kind
of a close up so that we can see what I'm
trying to explain. So in this planting plan, the whole
identification process, the entire
identification process has been through just
the same circle. It may vary in size based on the ultimate
diameter of the plant. But the only way you're
going to know one circle from another is the fact
that on the interior, this says S 16. This says S ten. So that's not a quantity. That's just the numerical
number of the plant. So this is shrub number
16, shrub number ten. Over here, we have shrub
number eight and so on. Same thing with the trees. We have tree number one, T one, T four down
here, another T four. Well, the more I look
at this and realizing that I've got 20
different shrubs in this property
and this landscape. Well, I'm not going to
be able to remember what T one is from T ten to T 15. I'm constantly going to have to look at the plan, say, Okay, I've got X number of T tens
or S tens in this area. What is S ten? Well, I go back up
to my plant list, my plant legend and it says, Oh, S ten is whatever. So I'm going back and
forth in that style. The beauty of this, I guess, is that if you take this to a client or your nursery,
and they say, Oh, we don't have this or we don't like this particular plant, which should have been sorted before the final
planting plan, anyway. But on the plan, S 16 is always S 16. In the legend, you just change the name to whatever
the new plant might be. I particularly do not care for this method of labeling
a planting plan. I find it confusing. I find that as a landscape when I was doing
landscape construction, and I had plans of this
nature come through, I would have to look
at it, look up. What is it? Okay, let's get these plants and
place them over here. To me, it was confusing. So let's look at what my preferred method is and
how I think it works out. So let's take another
look at the board. So one last look at this plant, you can see here's the front
yard symbol botanical name. Well, the symbol is T one, T two, T three for
the trees, and so on. And then S one through S
14 for the front yard. The backyard is also labeled, but goes up to S 20. And then they just have the botanical name the
common name for it. So Olea Europa would
be dwarf olive, two of them, five gallon, a water use calculation, and then a height and a width, which is nice to have on there because it does show you what the ultimate size of the plant
on average is going to be. This, on the other hand,
is another method. And I'm just going to
zoom in a little bit. And in this method,
what I'm doing is I'm actually using the botanical
names of the plants. So in this instance,
I've got let's see. Let's pick this one up here. So I've got Aster, AST, species. I also have lavender, LAV. So the first three
letters of the genus, which would be avendula. And the variety that
I'm choosing is Grosso. You can see I've got lavender, Grosso, and then in
parentheses eight, this line This line brings me down to where
these plants are located. Here's my eight lavenders.
They're joined together. And you'll see also on
this plan that I drew, all of my symbols are
slightly different. Here, I've got them
joined together. I've got a little circle to show the stem of the plant,
where you would plant it. Here, I've got some aslepis
tuperosa butterfly weed. And I've got this, and the symbol is a
little bit different. I'm showing the circles
interconnected, and instead of a circle, I've got a little slash
and the same down here, a slightly different symbol and a different diameter because
it's a smaller plant. And even these symbols right here are different
from the others. So I can easily look at the plan and say,
Okay, what is this? And I can come up,
follow this over. It says it's Calamagross,
Carl Forrester. I've got four of them. And if I look back down, I see one, two. Here's a third one, and then I've got a fourth
one over in here. So the symbols are all
giving me information. Then I can go to
my plant legend. And here's calamgrosis
Caro fororster. I've got four of them. They're five gallon size because I'm saying
the container size. And then calumgrots
coforsterFeather reed grass. As the installer, once I see what the name
is in the plant list, and I identify that
with the genus and species or genus and variety
on the plant itself, it becomes very
easy for me to tell my crew or if I'm picking up plants and
placing them myself. I know exactly what
they are very easily, and I'm not going
back and forth with the S 16 or S ten up to the
legend coming back out. All of the plants would
have been delivered by the nursery or I would have
hauled them in myself. I've got them laid out on
the driveway in blocks. So all of the coral, you know, calamgross
are over here. All of the lavenders are
in a block over here. I can very easily have my crew or myself or
the homeowners go, pick up what I need,
bring it over, and we can place it in the plan in the landscape very easily. So those are the two
different ways of labeling, and I've got a
couple of examples of my preferred method and
the resources for you. But that's how I prefer to do my labeling when I'm
doing a planting plan. It's clean, it's professional, and it's easy to
understand once you have a little bit of the botanical
knowledge under your belt. So that's where
we are with that. And so let's go ahead and
move on to the next lecture, and we'll keep moving ahead. Okay, thanks for watching
and I will see you in a bit. But
11. Creating the Plant List: Hi, and welcome to this lesson. And in this one,
we're going to talk about generating
the plant list or plant legend that goes onto your design,
onto the plan paper. And we're also going
to take a look at how you use this to get the costs of the plants from your local nursery
or wholesale nursery, whoever it is that
you're working with. So a couple of different ways to generate your plant list. And one is, as you're
designing your plan, then I would suggest that, especially if you're
drawing by hand, that you go ahead and keep
a tab of paper next to you. And as you put a plant on
the paper on your design, go ahead and jot that down
on your separate tablet. And the reason for this
is it just makes it a lot cleaner than
doing a whole design and then having to go back through the design
and locate all of the plants and make
sure you've got everything and the quantities
and the whole ball of wax. So if you just have a
tablet of paper there, I've written down on the plan, I want this plant, Cosa urnata. So I'm going to use
the first three letters of the genus and species to as my
identification on the plan. So I'm going to write that
down on my tab of paper. I'm going to write down once I've determined the quantity, then I'll write down the
quantity of the plants. And then I can decide at that point on the
container size. And I'll talk about
that in a moment. So that way, I can come back in, and if I'm drawing by hand, then I'm going to go
ahead and take all of these plants that I have
included in my design, and I'm going to plug them
into a spreadsheet like Excel. And now I can plug
all of this in. I can set up my columns. I can have whatever I'm using to denote which
species is which. And then I can do a sort, and I can alphabetize it. And having it alphabetized
is a big plus. It's a good just professional
way of doing it. But your plant broker or nursery are going to
appreciate that because they can just go down the list and go through their
plant catalog, and it just rolls really smooth instead of
jumping back and forth botanically from one name to another because they're
not in alphabetical order. So let's look at the
table real quick. And get an idea of
what a couple of these different ways of doing your plant list or
plant legend would look like. So here is a plant legend
that has been generated. This was done on the computer. So I created this plant
list on the computer. And what's nice is now they
have their own setup within the program on what we're
going to be working with. But it gives me my annuals
and perennials up here. It gives me the grasses, the ornamental grasses
I'm going to be using ground covers because I can sort all of this in the
program itself, shrubs over four feet, shrubs under four
feet, and then trees. Well, here's my quantity, but this also shows the actual graphic
symbol of the plant. So someone can look at this and jump directly over
to the plan itself, and each of these different
graphics are going to be represented up here
in the legend. So we've got that.
Then we've got our botanical and common name and then an abbreviation if
you choose to put that in. And then, importantly, the container size because
that's going to have, of course, a huge factor on the overall cost
of your project. So from a computer
generated planting plan, this is what a legend plant
legend would look like. On the other hand, here's one that I did where
I just used Excel, used it as a spreadsheet. I created this plan. We looked at this earlier. So I've got all these
different plants. So as I'm writing this out, I'm putting it onto
a separate tablet of paper because you can see this is a fairly
complicated plan, and having to go back into it
and make sure I have gotten every plant that I've
specified can take extra time. I don't want to spend
that extra time. I'd rather just write it down as I go, put the quantities. I can determine the container
size right then and there, or I can do that a
little bit later. But then I can take this
sheet of paper and again, just type it all up
just the way I've labeled it on the tablet
and then do a sort, and I can alphabetize this and make it
work nice and clean. Then to get a costing
on all of this, I can just take this
Excel or I can take this plant legend that's
been computer generated, and I can email this
list to my plant broker, to my wholesale nursery. I can physically walk it into the local garden
center and say, can you give me a
cost on these plants? And as a contractor or landscape
architect or designer, you'll probably get a
certain discount off of the plants if you're
purchasing them yourself. So that's how you
can generate one, your plant list, which needs
to be on all of your plans. It has to be clear and
identifiable so that whoever's installing the plan they know
what plant is going where, what the symbol is, what the abbreviation is to where
they can get it out there. And I know a lot of this
seems pretty self evident, but at the same time, just getting it down and organized is a critical
function in all of this. So that's pretty much it for generating
the plant list and then taking that list to your nursery and have
them price it out. Don't you go online and
try to find the prices, say, on a wholesale
plant nursery, because not only
are they going to give you the best prices, they're also going to tell you the availability of that plant. So again, back to container
size just real quick. Plants like ornamental grasses, I'm going to specify at a one gallon size
because in one season, they're going to grow up
pretty strong and ful fill in the planting area that I propose them
to be filling in. Shrubs more than likely, like the Cross or azaleas or
something along those lines, I'm going to go ahead
and speck in probably a five gallon because
I want to have that bulk and size
to it early on. And then for trees, I'm going to jump up to a 15 gallon container size
or maybe even a 24 inch box container size depending on
the application and the size that I would like to see in the landscape right
from the beginning. And now the nursery is going
to be able to tell you, is a 15 gallon corns
Florida available? Is a five gallon
barbers available? And how well rooted are they? So it gives you an opportunity to make some
adjustments if necessary. Now, for myself, I will take on the responsibility
of locating the plants, making any adjustments or
substitutions as necessary with my client's approval to bring
the plants to a job site. Then I will be on site, and I will take possession of those plants from the
nursery as they're delivered to make sure they are of the quality that
I would like to see. And if they're not, I have the opportunity
and the discretion to send these plants back. If I don't like
the way they look, if they just look, you know, just not a good specimen, I don't have to accept it, and we can wait and get
those plants in later. So how do I charge for this? Personally, I'm going
to charge for my time. I'm going to charge for my time within getting the plant quotes. I'm going to charge for
my time going out to the site and taking them off
the truck, approving them. And if I'm going to lay them out for the contractor
or the homeowner, I'm going to charge for my time doing that aspect of the work. If I have that part of the
contract under my belt, then I'm going to
pass the cost of the plants to the
client at my cost. I'm not going to do
any markups on this. And I know other people will
put a ten or 20% markup. That's fine. I don't do that. That's just me personally, but I don't do the installation. I'm not going to dig holes, and I'm not going to put
the plant in the ground. I'm not going to run drip
lines or irrigation to them. But I will place them and make
sure I'm happy with that. And then I give them
a bill for my time, and they get a discount on the plants because they're getting them at full
wholesale cost. So however you structure your business and however
you structure how you give your clients a full value added
feature for doing this, that's your decision,
but that's how I work. So anyway, that's just kind of plant list and costing
them out in a nutshell. And so, with that, let's go ahead and shut
this lecture down, this lesson down, and I'll
see you in the next one, and we'll keep moving on. Okay, thanks for watching
and I'll see you in a bit.
12. Photographic Examples: Hi. And in this lesson, I just want to kind of take
us on a photographic journey. And I want to show how plants have been used in
different landscapes, different gardens that I
have visited over time, and how they fulfill
their function for whatever that
particular designer or architect was envisioning. You can have your plantings fulfill the function
that you need them to and still have the overall structure of your garden, your
design approach, your form composition, all
tied together to give you that cohesive garden that you are envisioning
as the designer. So anyway, let's take
a look at some of these different gardens that
I have visited over time. Some are large, some are small. Some are very formal,
some are very casual. But it's really just to give you kind of a
nickel dime tour of how plants can be used in the landscape to
fulfill their functions. Okay. Let's just take a look
at some of these photos. So this is a very formal garden. This is Valandr a chateau in the Lois Valley in
Southern France. And this is what a formal
garden actually looks like. You're going to have
clients that say, I do not want to
have a straight line because a straight line
is too formal for me. Straight line does not
make a formal garden. A formal garden is what you see here where you have very
manipulated plantings. The boxwood are very strictly
and closely clipped. There's going to be topiary. There's going to be a lot
of different elements in this very geometrical in shape. And this is just the
vegetable garden. They grow up to 40
different vegetables in this vegetable garden here. But this is a garden
in New Orleans. And again, it's a straight line, but the azaleas
that tumbling over the edges of this brick walkway
help to blur that edge. Now, it still has a certain
amount of formality due to the brick and the material and the way the bricks
been patterned. But as the azaleas
recede away from us, you can see that they're kind of cascading over that
path a little bit more. That's causing some
visual tension, and the whole layout is actually dynamic and it helps to move
you down along this path. Again, a straight path does not necessarily mean
a formal garden. Here's two more examples. This one on the left is a
natural garden in Scotland, and again, much less
formal because of the gravel pathway,
the material. And as you move down
the path, again, you've got the plants kind
of closing in a little bit. You're getting some shadowing. It's causing some
visual attention. But it also is like, Oh, I want to go down and see
what's around that bend. The yellow rhododendron with the complimentary colors of the purple plum on
the right hand side, become a focal point to
help grab your attention. All of the plantings
are soft and rounded with the exception of the conifer on the
left hand side, which helps to
punctuate the scene. On the right hand side,
we have a garden I designed a few years back
and flagstone paving. And if the bronze sedges
hadn't been cut back, they would be tumbling
over that pathway and softening all of these edges
out really, really nicely. So we also have a very casual and very classic English garden
in Southern England, classic herbaceous border,
the different perennials. Now, if you look at this, you're going to see
a lot of the plants are repeated
throughout the garden, and the colors are
repeated as well. It's a very soft, natural feel to it
with the curves. The yellows of the yarrow in the foreground here on
the right hand side are repeated by yellow day lilies behind the red chairs
in the background. Red chairs are a
complimentary color to all of the greens
within this composition. And then, again, the
different colors, the pinks and such are
repeated throughout. So there's always going
to be some unity and repetition which leads
continuity within the garden. And that's something
we want to strive for. We can also take advantage
of borrowed views. Now, another very casual garden. We've got just a gravel pathway. Path varies in size and width, so that gives it a nice, you know, casual feel to it. But the actual boundaries of this garden end right
there at the fence line. But you can look at these
plantings, look at the colors, and you could imagine that
this is just a fence on the property and the property continues on out into
that landscape beyond, whereas that is just
a borrowed landscape at a pass through out
into the open fields. The heavy conifer on
the left hand side, kind of leaning over the gate gives depth and
perspective to the view. And then all of the plantings, you can imagine them
just cascading on out into that nice grassy
meadow beyond. So everything plays together. Everything reinforces
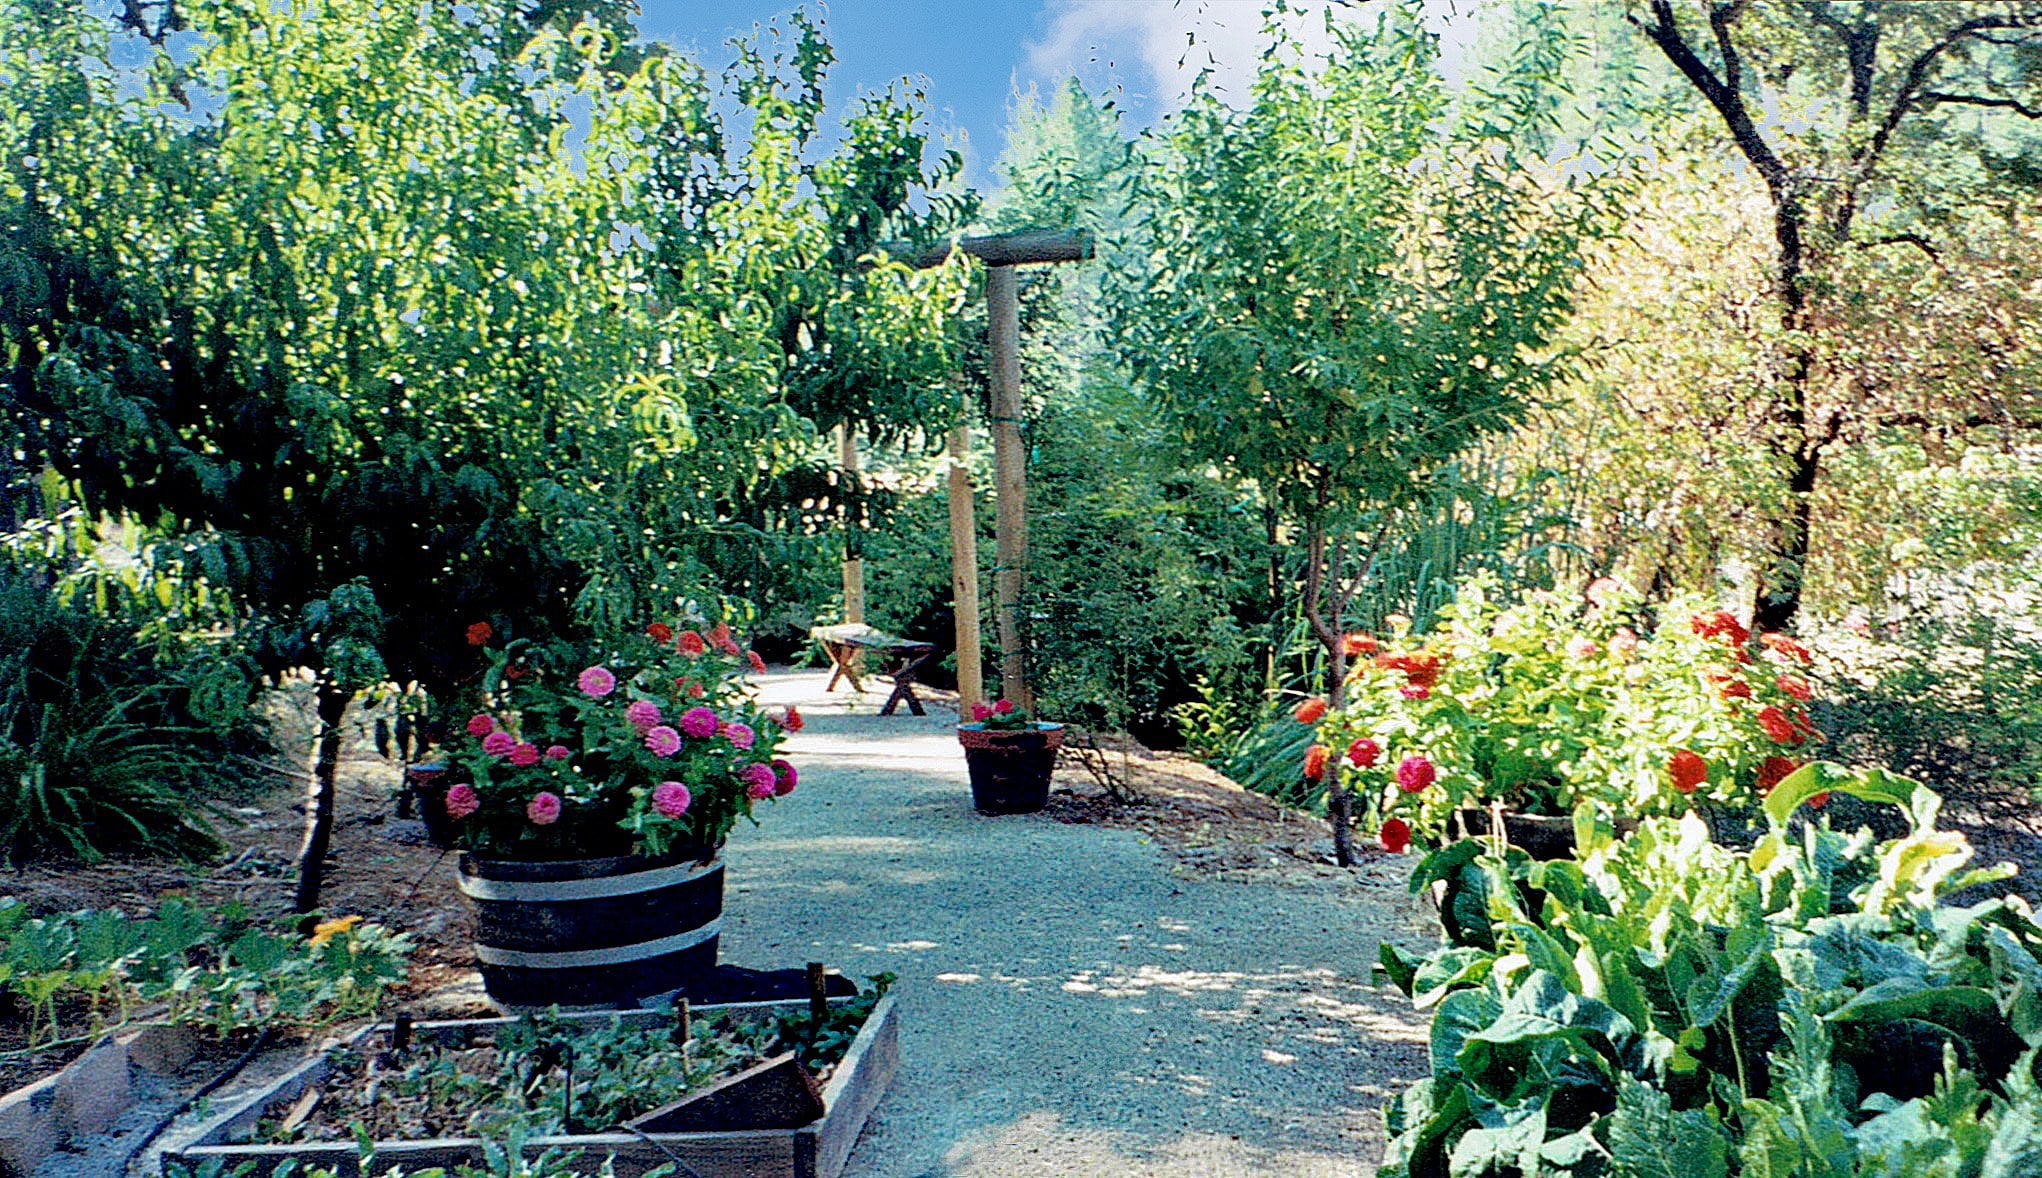
the movement of this type of a garden design. We can take inspiration
from natural landscapes. So this is a small waterfall in the American River
Canyon near where I live, and you can see that the
plantings are really simple. It's just boulders, moss, and some young ferns that are just sprouting
out in the spring. But it lends itself
to the ideas of how can I do a natural
waterfall for my own garden? And even if it's
on a larger scale, this garden is in the Sacramento Valley
and it's quite large, but it's evoking a
mountain landscape with very large boulders, Japanese maples
cascading down to reinforce the cascading
of the water. A little bit of conifer is visible in the upper
left hand corner. So that is, again, reinforcing the
mountain landscape, and even the cherry blossoms hanging down in
the foreground on the right help to reinforce the whole feel of
an oriental garden. Okay, so we've had an
opportunity to look at some photographs of
different gardens I've visited. And the whole gist of this is the plants need to reinforce your overall design solution. So the waterfall, the
Japanese oriental garden, the Japanese maples are cascading
down over the boulders. It's a mountain landscape, even though it's in the
valley, the Sacramento Valley. But they've created a
mountain landscape, the Japanese maples
cascading down, reinforce the waterfall,
cascading down. The little bit of conifer on
the left hand side that we see in the photograph
reinforces that mountain feel. So you've got ideas of
putting designs together. The repetition of
plant material, the repetition of colors, the repetition of shape
all help to create unity and continuity and interconnection
within your garden. But what if you've got
this great design. But this is all you've got
is a flat piece of paper. It's been rendered,
it's colored in. That's great. Is
there something else you can do to help
convey your ideas to your client and help to focus the design for
yourself as well? There is, and it's
called a moodboard. Here's a couple of
mood boards now. We'll take a look
at both of these. But it's just a way that you can start doing some
research you have an idea of what you'd
like the plant material to be or at least what it
would like to portray. You might have ideas
for water features, you might have
ideas for furniture or different kinds of
sculpture or furnishings. You can find these photographs. You can go to a site like
Pixabay, pixabay.com, and you can get free downloadable
professional quality images that you can digitally put together and have them printed. You can have it put on a piece of foam board to where you've got something now that's a
good solid presentation. And you can come into your
clients and you can say, Here's the ideas that I've got. And it just gives you one
more arrow in your quiver, so to speak, on selling your ideas to whoever you're
presenting this garden to. Oh, that's our photographic
journey in this lesson. So I hope this was useful, and I look forward to seeing you in the next
lesson down the line. Okay, thanks for watching.
13. Course Wrap Up: Okay, well, that brings
us to the end of this course on the fundamentals of landscape planting design. And I guess my final thoughts are plants are more than just, I'll say, the icing on
the cake, so to speak. They're more than just looking
pretty in our landscapes. Just like any other feature that we design into the garden, the plants have a role to play. They have a function,
and we want to have that function fulfilled. So whether it be a nice flowering shrub or an ornamental tree with
brilliant red bark to it, why you have it at the
location that you have it? Do you have it out there
to be a focal point to help pull people
down along a pathway? Hedges, whether they're
formally clipped hedges or they're
very loose and kind of just casual help to reinforce movement
down the same pathway, a water feature,
again, a reward, a visual to get us out to
another part of the garden. Do we need screening
on one side? And if we do, what
heights, what density, what width so that we can achieve the function of
that screening to hide perhaps an objectionable view to another property or another
part of the same property. And we want to pick plants that are going to be low in
maintenance, if ideally. So we're not generating
a lot of green waste and having to constantly trim
and prune these things back. But at the same time, they're
achieving their goal. That brings us back to that
conceptual garden design. At that point, we've
gone through the idea, I need screening over here. I want a focal point out here. I want something to
reinforce movement here. I want ornamental grasses or sedges that might help to
reinforce a water feature, whether that feature
be formal or informal, but it helps to reinforce
the whole mood and the feel of the sound and visuals of water
within the garden. Where do I need shade? How can I use shade and sunlight and shadow to help move
people through the garden? And there comes in the trees, the canopy of the tree. And at that conceptual stage, we're still looking at the
ultimate size of the plant, so that once we come into selecting our final
planting species and genus, we already know we want
something that's going to be 20 feet in diameter,
20 feet tall, something along those lines, that kicks out a whole world of plants that wouldn't
be appropriate. So it helps to
streamline our process. That was what I was
hoping to get across. I hope you found this
course valuable and I look forward to seeing you in another one on down the line. So anyway, if you have any
questions, then as always, feel free to be in touch, and I look forward to seeing
you again in another course.
14. The Graphic Scale: Hi. In this short lesson, I just want to go over
the graphic scale and the advantages
of always having a graphic scale on
any of your plans, planting plan, irrigation plan, site plan, doesn't matter. Include a graphic scale. Typically, our plans
will be two scale, 1 " equals ten feet, 1 " equals eight feet, whatever it might be, one to 50, one to 100 if you're in metric. But if you take a
plan such as this, and I was to blow it up to
an 11 by 17 or an 18 by 24, 24 by 36, that numerical scale value is no
longer going to be valid. And the same holds
if I have a 24 by 36 and I reduce it
down to an 8.5 by 11, again, that numerical scale
value is not going to hold because now the plan has either been
reduced or expanded. Now, a graphic scale,
on the other hand, is just a bar graph that you
put on your plan directly. So let's look at a graphic scale on a full
sized sheet of paper, a full sized plan, and
the advantages of that. Okay, so here is
a graphic scale. I've got the numerical
scale right here. 1 " equals ten feet. I've got my North arrow, but now I've got a
graphic scale down here. If 1 " equals ten feet, I can take my scale rule and I can take my
engineer's scale because one to ten is engineer, and if I place this on, indeed, 1 " is ten feet. If I reduce this down in size, and for example, I'm going
to bring this guy in. Now, this is 1 "
equals eight feet. But if I take my scale rule
and I lay this on there, 1 " is actually way over here. This plan has been
reduced in size, but during that reduction, the graphic scale reduces down at the same proportion
as the rest of the drawing. Conversely, it will expand to the same proportion if I was
to take this and blow it up. So all I have to do to be able to get a feel
for what the scale is is take my scale rule or some kind of
measuring device, and I can say, Oh, eight feet on my graphic
scale is right here. There's 02, four, six, eight feet right here. Now I can take something
that I can measure with. And in this instance, I
just go ahead and use the 16 scale on this rule, and I can lay that on here, and I can see that rather
than 1 " equals eight feet, it's a lot closer to half
an inch equals eight feet. Well, this is a 16 scale, so that means that
eight 16th equals eight feet or one
16th equals a foot. Now I can come on and I can measure different
elements within the plan, knowing that each of these
16th inch increments is going to equal a foot, and I can get a fairly
accurate assessment of the space that
I'm working with. So that's the beauty
of always putting a graphic scale to
size on your plan, no matter what happens
with that plan, if it's reduced and
put in a set of, you know, folders for storage, whatever it might be,
that graphic scale will still give you an accurate way of measuring elements
within the plan. So that's what you might
be working with when you download some of
these site plans that I've provided for you. Don't just look at
the numerical scale and take that for granted. Check it and then use
the graphic scale as necessary to get any actual dimensions
that you're looking for. Okay, that's it. That's
the graphic scale, and I will see you
in the next lesson.
 Robert Littlepage, Landscape Architect - Teacher, Author