Transcripts
1. Introduction: Good morning, and welcome
to my beginners Gardening course on growing your
vegetables and herbs from seed. I'm Rob Little page. I'm a landscape architect and the author of the
fundamentals of garden Design and a field guide to the conifers and shrubs of Placer County here in
Northern California. And I'm a lifetime gardener. I've been gardening for
almost 50 years now. Over the years, I've grown
vegetables, herbs, flowers, and native plants that I use in restoration projects and for sales with our
local garden club. And what I like about growing my vegetables and
herbs from seed is I have a greater selection of the varieties of plants
I want to access, whether it be at the
local garden center or through seed catalogs. I'm also saving money. I'm getting more plants than I can possibly grow for myself. I don't grow commercially, but I can get them
for a fraction of the cost of buying plants
that have already started. And there's something
about growing your own plants up from seed, seeing the seed germinate, bringing them out into the
garden and hardening them off, and then actually picking
fresh vine ripened tomatoes, digging your own potatoes, all of this fresh vegetables
that you can't compare with picking them up
at the grocery store or even sometimes at
the farmers market. So this course is a
compilation of what I have learned over pushing
50 years of gardening. None of what I'm going to
discuss are hard fast rules. These are guidelines. Each situation is
going to be different. Each garden is going
to be different. But I've learned a
lot over the years, and I'm looking forward to sharing this with
you in this course. So I look forward to seeing
you and thanks for watching.
2. Course Overview and Project: Okay, let's have
a quick overview of what this course
is going to cover. And our first lesson
really is going to be, if you're going to set up a
seed starting area station, what are you going to need in the way of trays or lights or other components to have a successful start
with all of this? So we're going to
cover all of that. We're going to talk
about two different ways to actually germinate
your seeds. One of them, I call
it the baggy method, but we're creating environment inside of just a
simple sandwich bag, plastic sandwich bag where we can germinate our seeds
and get them going. It also is a great way to
test the viability of seed. If you want to just test seed maybe that you've
saved over time, how viable is it still, even if it's too early
to plant it out, find out if it's even worth
working with that seed, and you can do that using this method and getting
an idea of germination. The second propagation
or germination method is we're going to just use some six pack planting
trays and we're going to plant directly into them
using a seed starting mix. And we'll talk about
that and the pluses and minuses of both of these as
we go through the course. Then we're going
to take a look at once you've got
seeds germinated, you want to keep them
irrigated properly. So we're going to talk
about a self watering tray that I have here on
the table behind me, where you're watering
your seedlings from the bottom up rather
than the top down. This keeps the soil surface of your seedling trays
a little bit drier. And consequently, the
chance of fungal disease, damping off disease is going
to be greatly reduced. And we'll do that in
conjunction with having a small fan to help keep
movement across these seedlings. Once we have our slings up big enough and they're well
rooted in their trays, and you can tell
it's time to get these guys ready to go
out into the garden. Everything's starting to
turn in that direction, then we need to
harden these off, and we're going to harden
them off and we'll go through the process of that so that they can be acclmated to being out in the actual
garden environment. If you take them out
just straight from this protected environment
into the garden, they're probably going to burn, something's going to go wrong
because they're not used to being out in an
uncontrolled situation. So we're going to
acclimate them, and that's called hardening off. Once they're hardened off, then we can go ahead and
finish our whole process by transplanting them
into our garden beds that are prepared and
ready to accept them. And that's where we're
going to finish the course. That's how we're going
to be tackling this. So your class project, I'd like to see you set up your own seed starting station. Now, I use this in a
corner of my office. You may have a garage or another situation
where you can have a much larger seed starting
situation and be innovative. Gardening is not a straitjacket, and everything that
I'm going to be talking about
throughout this course, are items or procedures that
have worked well for me. And I'm using these as
a guidelines to share this knowledge with you and help you get off on a
good solid start. If you have other information, share it with all of
us because, again, gardening is an ongoing
learning experience, and you'll have the course
to give you some guidelines, and I look forward to seeing
you in the next lesson. Okay, thanks for watching.
3. Getting Started - The Materials You Need: Okay, if you are new to
doing seed starting, growing your own vegetables
and herbs from seed, you're gonna need to have
a few supplies on hand. And while this is an
initial investment, it's not that much money, and it's a one time
investment depending on how big of an operation you're going
to be working with. So you're going to need to
have a seed starting tray. And that's similar to this. We'll take a closer
look at this. But a seed starting
tray is really nice because you have the humidity
dome that comes with it. So this keeps that
humidity and warmth inside the tray while these
seeds are germinating, or if you've done
pre germination, then you can have
them planted in here. And you're going to be
able to keep your medium, your soil starter mix at the right temperature for the seeds to germinate
effectively. And how are we going
to keep them that warm is by using a heat mat. I can just plug this in, and I'll plug this
into a thermostat, which will help to regulate
the heat that's coming on. Certain vegetables like to have their germination temperatures
higher than others. Cool season crops like
broccoli or lettuce can be down in the 60,
65 degree range, whereas tomatoes, they
like to have a temperature of around 75 degrees,
anywhere 75-85 degrees. Well, the thermostat is going
to monitor that for you so that you are able to keep
that seed starting mix. Like this right
here, a soil mix at the temperatures that it needs
to be for the germination. So let's just take a
little bit closer look at what I have
here on the table. I've got my humidity dome. It's got vents in the top, and then they will come
with a 72 pocket tray. And you can use these, especially for leafy vegetables, like spinach and such
like that, lettuce. Then you can fill these with your seed starter mix
and then put your seeds, whether you put them directly
in or pre germinate them. I'm also going to have a
very fine vermiculite, very fine horticultural
grade vermiculite. And the purpose of this is it will hold moisture
for your seeds, but it's very light weight, and the seed can emerge up
through this very effectively. So this tray right here
with the heat map, which I sit underneath it, and the humidity dome, this is a two inch
humidity dome. You can also get them in 7.5
inch, so they're taller. But this here cost me about $35 at the local
nursery at our garden center. And that comes with the
heat matt included. Horticultural grade
formiculite is kind of all over the map. I got this package, which was, I think, 26 ounces, and this is very light weight. So 26 ounces goes a long ways. And it cost me, I believe
it was about $18 delivered. Another thing you're going
to want is a small fan. So a fan is really useful. Once you have ceilings
that have emerged, then having a fan, this is a variable speed fan, and it also has the
option of oscillating, although I don't really
use that very often. The beauty of this is
that it's going to one, keep the surface area
of your soil mix dry. You want the moisture
down there for roots, but you want the
surface dry to help ward off any fungal
infestations. And it also acts as I'll say exercise for your seedlings as
they're coming up, it's going to get
them to start moving. And when they start moving,
that's like us moving. They're getting their exercise, and it helps build a stronger
stem, a stronger vegetable. You're also going to want
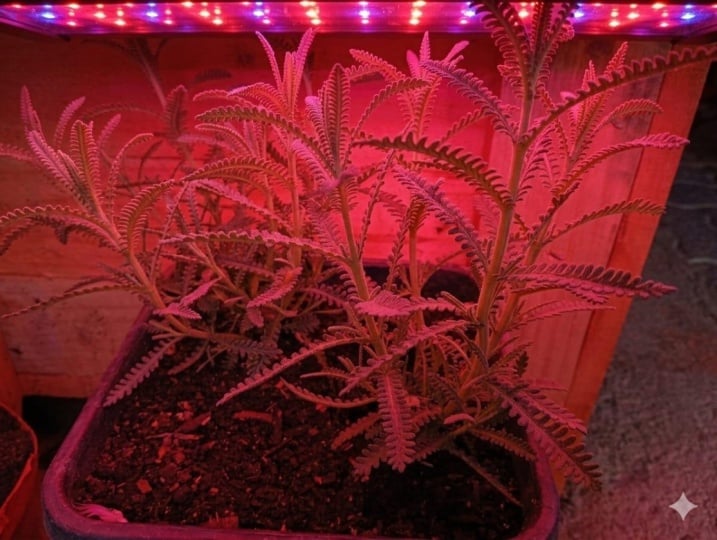
to have grow lights. Now, what you're seeing now are the grow lights
that I have currently. These give enough light for the seedlings to have the
energy that they need to grow. So really, that's just about everything that
you have to have. I also have labels. So I just get my plant labels. So I can keep track of what I've planted and the dates
that I've planted them. So I just grow for ourselves, so I don't use the 72
cell tray that often. I usually use a six pack, and that works fine
for what I do. So this is a one
time investment. We're just doing seed starting. We're not using
the lights to grow these plants up to
flower or to fruit. We are just using them to get a four to six week head
start on our garden, so we can get these out in the yard when spring and
weather allows us to, and the soils have warmed up. A bright white shop light with fluorescent or LED lights is going to be sufficient
for getting your plants, going, giving them the
light that they need, and getting them up to being
strong enough to where once the weather has changed and is warm
enough out of doors, we can start moving them out, hardening them off, and then transplanting them
into the garden. So about the only thing
you're going to be replacing over time is your soil mix, and at some point, probably getting another bag of your horticultural
vermiculite. So that's really all
you got to have. You need your seed tray, you need a humidity dome. You need a heat mat. I strongly recommend getting a
thermostat to go with it. I also have a timer so I can have my lights
come on and off. And then the lights the
PVC pipe or you can make it out of metal or whatever
you want to work out of, you can hang it from the
ceiling depending on where or what you're doing with
your seen starting setup. And it's pretty simple and
it works very, very well. So, okay, so that said, let's go ahead and
jump into this, and we'll go into doing
some pre germination so we can test the viability of our seeds in the next lesson. Okay, thanks for watching.
I'll see you in a bit.
4. Germination Method #1: Okay, in this lesson, we're going to take
a look at actually getting our seeds germinated. And I had mentioned
there was a couple of different ways that
I will do this. One, I will do what I
call the baggie method, just using a little
sandwich bag, plastic sandwich bag,
and the other is using sois mix and planting
directly into that. So in this one in this lesson, we're going to take a look at germinating our seeds
in the baggie and why I think there's
a lot of advantages to doing this when
you're getting started. So let's move over to the table, and we'll take a look at
how this is going to work. Alright. So to get started with getting
your seeds germinated and an excellent way to test
the viability of your seeds. You know which seed
is still good, which seed isn't
going to do as well. So that's why I use what
I call the baggy method, and it's really simple. You just have a plastic sandwich
bag like this one here, and this is what we'll be
putting the seeds into to hold the humidity and keep them warm while
they germinate. And then I use a coffee filter
rather than paper towels. I like the coffee filter. I absorbs the water easily, and the roots will not
penetrate the fibers of the coffee filter as readily as they might
with paper towel. So that's what I prefer
to work with here. And then, of course, you
need to have some seed. And in this instance, I'm going to be potting up
some Italian butternut. This is a gosa which is a
nice, large butternut squash. So I'm going to be putting this one in to get
these seeds germinated. So let's just kind of
go through the process. It's pretty simple, and we'll just walk our
way through it. I'll take my seed. And they're fairly
large seed butternut, so I'm just going to
kind of scatter them on. So I'm going to just lay those. Then I'm going to fold
this over fold this over. Now, when seeds initially
go to germinate, you want to have enough moisture in there to where it can help to expand that seed itself, the husk, and absorb
that water so that it can then start to germinate. And since I start a lot
of different seeds, I'm going to make sure I
remember which one this is, and I know Rigosa
is a butternut. And what I'm using is
I'm using a paint pin. So this is just a
black paint pin, and it's nice because
it's waterproof, so I can take this and
put it right inside. I could write on
the baggie itself, but if I put this in there, I know it's the gosa and then I can reuse the bag for
other seed on down the line. Then all I need to do is come in and pop some water in making sure I get
this pretty damp. Now, initially, I'll put a little extra water in more than what I really
need for the seed to continue to germinate because I want that extra moisture to help that seed husk to be
able to absorb the water, expand, and then get the
germination process going. In about 24 hours, I'll come back with a piece of paper towel and I'll
check, see how it looks. If it looks like there's just a little too much water in there, then I'll open the baggy and I'll mop some
of that water out. I don't want to be too much water to where
the seed is going to take a chance on rotting or getting some kind
of fungal infection. But initially having
this little extra water helps to get that
germination process going. Then I will take it
and put it in my seed starting tray where I've got
a heat mat underneath it, and that heat mat is set
to about 60 degrees. And then with the
lights overhead, it warms it up to
around 63 to 65, which is an ideal temperature. It helps to get these going. I started some other
goss about 72 hours ago. So let's take a look
at what they're looking like after
only three days. So this is going to be an
opportunity to see what kind of germination I've had
with these there we go. Get that to open, get this to open. And I can see I've got
really good germination. Nine of these seeds
have germinated. They're just coming
out. Some are a little bit further
than others. So I've got 90%
germination out of this batch of gossa
butternut squash seeds. Now I can pot these up in
my soil as potting mix and put them back in the tray and wait for the plant
to actually emerge. And that's what we're going
to be looking at next when we go ahead and
pot up some butternut. Okay, to pot up my sprouted
seeds, my germinated seeds, I am going to use
a soilless mix, and I tend to put my
mix into a bucket, add a little bit of water, and just pre moisten it. And I've got a little
planting tray. I can just fill that. Okay, so there's
my seed starting. Now I can pull my
germinated seed over, and I'm just making a little
divot with my finger. Very carefully set that in. Then I'm going to
take my spray bottle, and I'm just gonna put a
little bit of moisture, and then I'm going to label it. I've already written
this label up. I'm just going to
stick that down in. Now I know what I've got, and now it goes over to
our seed starting tray, and we'll put the humidity dome, and we're going to just watch these now for the next few days. Okay, we're over here at
the seed starting tray, and at this point, I'm just going to
simply take and put my butternut squash that
I just potted up in. I do have this on a heat mat, and the heat mat is
connected with a thermostat. I've got my probe on the inside which
monitors my temperature. I have my lights overhead. I don't know when these seeds are actually
going to emerge above ground. So I'm going to have my lights on so that as soon
as these emerge, they are going to get
the full spectrum of light that they need
to grow and be healthy. Once they've emerged,
the humidity dome will come off because I don't want to keep that humidity inside, and I'm going to have
plants ready to go in the ground when
the time is right. So I'm getting a head start
on my planting season, and I'm testing the viability
of my seed as I go. If I just planted
these directly into the soil without doing a
seed germination test, the bagging method, then some of these seeds
have sprouted, some of them haven't I don't know how viable
this is going to be. So this is why I like
this method best, even for small seed because
I can use tweezers to move them into the planting
bed, into my pots. So that's a good way to
get going with this, and I think it
works really well. But nevertheless,
we'll go ahead and by starting up with using our
soil as mixed directly, then that is still
a good way to go, and I would just put them into the humidity dome directly. But we'll just go through that process in our next lesson. Okay, thanks for watching. I'll see you in a bit. Oh
5. Germination Method #2: Okay, welcome back.
And in this lesson, we're just going
to take a look at a different way to
pot up our seeds. In this instance, I'm going to go a slightly
different route, and I'm going to be potting
up some tomato seeds, and tomato seeds
being quite small, rather than pre
germinating them, I'm going to go ahead because they're so small and just pot them directly into my six
pack and work at it that way. So let's walk our way
through the process here. So I've got my six
pack ready to go. And once again, I have pre
moistened my seed starter mix. Again, I'm doing an
Italian variety. This is costiltoFdirntino. So again, it says, plant them about a quarter
of an inch deep, because I haven't done a
pre germination with these, I'm going to put two or three
seeds in each depression, and they are very tiny. Two rather than just
pushing the soil back over, I'm going to use a
very fine vermiculite. And that is what I have here. This is a very fine
horticultural gray vermiculite. My soil's been pre moistened. Now I'm just going
to put this over. The vermiculite will hold the moisture, but
it's very light, so it's very easy for the seed to push up and through when it
sprouts and emerges. I just And there's roughly a quarter of an inch. The vermiculite also helps to discourage any kind of
pests or such like that. Now that I have
it in and give it a very fine spray to moisten
that vermiculite down, I like using just a
pump spray because I can control the volume
or the pressure, so I'm not blasting
the vermiculite out of the way and washing the seed. I just want this to be damp enough to where it's
going to hold my moisture, and I'm almost done. Now, I'm going to be planting more tomato seeds, so
different varieties. So I like to get this back. Go ahead and make
sure I label this. And I'm just going to call I'm going to go the abbreviations
the word is too long. And I'm going to put the date, which today is February 19, and that gives me an idea of how long it might take
for these to germinate. Now I can go ahead
and just put this in and really, that's
all there is to it. And you can do that
with squash seeds, any kind of seeds you
want to work with. But you can get
them started early. And I start these early so I can get a head start on
the growing season, and these plants are ready to go when it's time to do that. How do I know when to get
these out into the ground? I've got a garden planter, and we can look at it here. It tells me this is for spring. The other side is if I want
to do a fall planting. My last frost date
is usually right around or average
last frost date is right around
the end of April, indicated by this
bright red line, so I can set this to
the end of April. Here's tomatoes. I can start my seed indoors anywhere along through here, and
I'm going to start them. I'm starting them a little bit earlier because I
want them to have some good size by
the time I can put them out in late April, early May, depending on what the actual temperatures
are doing. So depending on what
your last frost date, average last frost
date is in the spring, you can adjust this to that. So that's how I use my planner to help
guide what I'm going to do as far as
putting my seeds in and getting them germinated
and getting them ready to go. So now it's just a
matter of putting them in the tray, setting
the thermostat, putting the humidity dome over, and sit back and see what
happens in the next week or so. Okay, that's pretty
much it for getting our seeds started and
getting going with this. So I will see you in the next lesson.
Thanks for watching.
6. The Self Watering Tray: Okay, we are about a week
into our seed starting. I've done germination with the coffee filters
and got my seeds germinated and planted
them up that way. I've also directly
seeded them into my soilless mix
and then put that horticultural grade
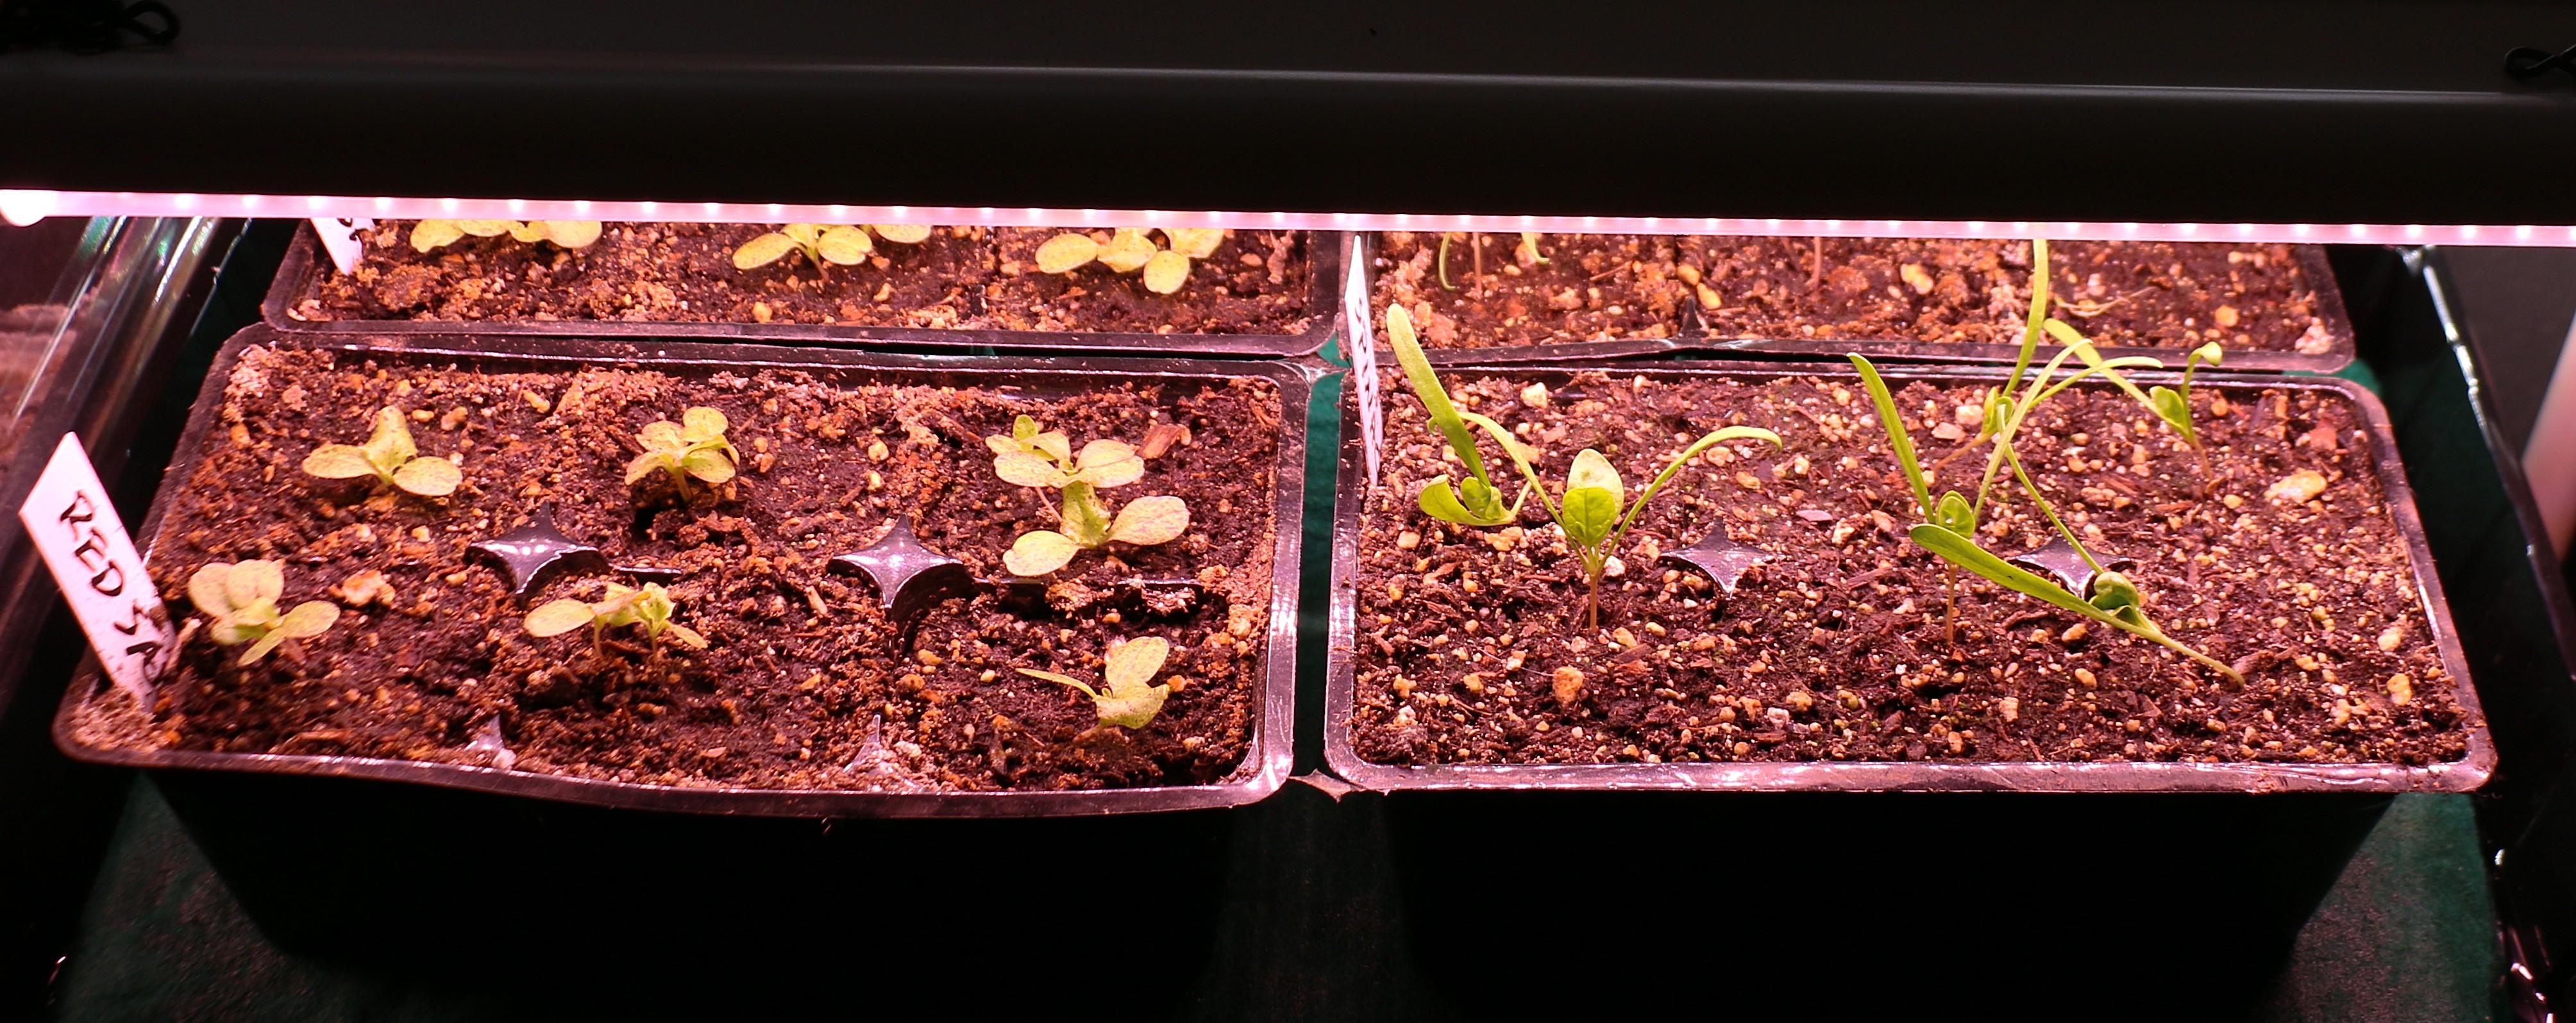
vermiculite over the top. So the ceilings are
starting to emerge, and I want to pull
that dome off. Warmth, humidity and moisture are all going to lead to
potential fungal problems. And that's what I want to
avoid with my seedlings. I don't want to have damping off or any kind of fungus problems, so I need to get that
humidity dome out of the way. I'm also going to want
to have my lights going to where they are
going to get the amount of daylight or light they need to grow into good
strong seedlings. Another part of this is I want to water from
the bottom up, not from the top down. By water from the top down, I'm keeping moisture there at that surface level,
and I don't want that. Again, it can lead to damping
off and fungal problems. But if I water from
the bottom up, now that water is going to come in through
capillary action, and it's going to reach what we call holding or field capacity, but it's going to give the
plants what they need, and I'm going to keep
the surface dry. I'm also going to bring
in my little fan, and I'm going to
have that going. The fan is also going to
help to keep the surface, the soil is mixed dry, but it's also going to start buffeting those
ceilings just slightly, and it's kind of
like them getting exercise that's going to help them to develop stronger stems
and be a stronger plant, just as if they
were out in nature and they were getting caught
by winds in the morning. So how do I get them to be
watered from the bottom up? I use what I call a
self watering tray, and to put that together, we're going to be looking at a few different
little components. I use the seed starting tray that I have been
growing them in. I take the dome off, and then I use that waterproof
tray that I can fill up. And then I use just
a plastic mesh. This is called egg
crate light panels, and you can two foot by four
foot at a hardware store, local hardware stores, and
they cost about $25 for that. But I can get six
or eight panels out of that when I snip it
with my electrical clips. Is going to be
sitting in the tray, and it's going to
be sitting on top of a piece of three
quarter inch PVC pipe. So now I have it in
this configuration. I'm going to take a piece
of felt and lay it on top. I don't want the water coming right up to
the surface on this. I don't want it
saturated in that sense, or sitting in water. I'm going to let
the filt wick water up from the reservoir below, and it's going to be traveling across through
capillary action. What happens is I have my
plants in my six pots. So I've got them in my pots, and the bottom of the pots, yes, they have drainage holes, but these drainage
holes also allow water to wick up inside, again, through capillary action,
bringing that water up to where the roots of the plants are going to be able to
take advantage of them. So what we're going to do
is I'm going to get to the table here and
show you how I set this whole thing up and then you'll have a
better idea of what to do for creating your own self watering
tray when it comes time. Okay, let's take a
look at the table. Okay, so here is
my humidity dome over the ceilings that
have just emerged. So I'm going to set that aside. And you can see, I've
got seedlings coming up. I've got lettuce in this. I've got spinach in this. And now I want to keep
this going and happy. So what I'm going to be doing is using those components
that I was just showing you, and I'm just going to set these out of the
way for a moment. And now I'm going to just simply lay my PVC pipe on the interior, and then I'm going
to pour this in. I'm going to take
it up to probably about halfway up the sides of this PVC pipe because I
want to make sure that that grating is not
being submerged. I don't want this
to be saturated. I just want it to
be able to water. Now I can just lay
my grate on top. And now I can lay this down. I've got the ends in the water. So it's going to start wicking this water up onto this tray. Now I can bring my
spinach plants back over. So now I've got this setup. Water will wick up
onto the fabric, and it capillary
action will bring it in through the bottom
of these planting trays. And then I'm going
to set my fan, and I'm going to just have it positioned to where it
can blow a gentle breeze, and you might be
able to see this taller spinach is moving. My lights are set about nine or 12 " above my
plants to give them that. And I'm going to Run my lighting for about
16 hours a day. I don't want to run these
LED lights 24 hours a day. Plants, just like us,
need to have a break. They need to have
some dark time. So I'm going to run
these for 16 hours a day to give them the
light that they need. But then they're going to have
an eight hour rest period and just get that recuperative
period that they need. So you don't want to run
your lights 24 hours. Run them 12 hours
or 16 hours a day. Again, my lights are
suspended about 9 " above. So at 9 " above I'm going to
run it for 16 hours a day. If I dropped these
lights down to where I was about 3 " above
my seedlings, then I could lower that
duration and run them for, say, about what, 12 hours a day. It's going to give them the
amount of light that they need to be able to grow
and not get legging, not be reaching for the
light to where they get all thin and spindly
and want to fall over. So that's my process. There's our self watering tray. Now I'm going to
go ahead and grow these plants up when they
get to where they're starting to outgrow
their six pack, then I will lift them. They'll be well
rooted by that time. I can lift them at that point and put them
into four inch pots, or maybe at that point, the weather will have changed, and I'll be able to
take and put them out into the garden directly. So I can play that by ear, depending on what my
actual field conditions weathering situation is
as we roll into spring. Okay, that's pretty much it on putting your self
watering tray together and getting that humidity
dome off and helping these plants to
grow into the healthy, strong seedlings and
young plants you're gonna want when you go to transplant
them out into the garden. And we're gonna be
talking about that in the next lecture
when we're going to talk about hardening
these plants off. You don't want to take them from a controlled environment like what they're in now and take them and put them
directly out into the garden without giving them a chance to acclimate
or harden them off. What the actual
weather conditions, field conditions are for where you're going
to be growing them. Okay, thanks for watching. I'll see you in the next lesson.
7. Hardening Off Your Seedlings: Okay, we're out in the garden, and this is where I am
going to be planting out my squash and lettuce and such
as the season progresses. But I want to have
quick noise disclosure. Here, I am out of doors. We've got a road not far away, so there's possibly going
to be some vehicle noise. I'll try to mitigate that as much as I can or edit it out, but just it might slip in on us or a train or
a plane going by. So anyway, this is
where my garden is, and it's barren right now. But the seeds, we've
got them germinated. I've got them under lights, and I've potted up the
squash plants into larger containers
into four inch pots from those six packs that
I was starting them in. And now I'm going to want to
start hardening them off. I don't want to take them from
a controlled environment. Under lights where
the temperatures are fairly mild and regular out into the actual environment where
it's going to be much more subject to variations of temperatures and
wind and sunshine. Sunshine is much
brighter than the lights that I'm growing these
seedlings under right now. So I'm going to want to do
what's called hardening them off or get them acclimated to being out here in the garden. Now, I can bring them out. I don't have that many plants, so I can move them
back and forth easily. I have a greenhouse over here to the side that I can put
them in in the evening. So they'll start moving from the office where
I've got my seed starting out here into the real world. Now
I can put them out. And the first day, especially if I want to
put them in full sun, then I'm only going to
give them about, oh, 30 minutes or so of
sunlight that first day. I want them to kind of
get used to this slowly, and then I'm going
to move them into my greenhouse where they'll
have diffused light. I can put them in
the shade house side of the greenhouse to where
they'll have air movement, but they won't have
that bright sunshine. Then the next day, I can give them 60 minutes
instead of 30. I'm going to increase
that 30 minutes. And I'm going to do that
each day until I've got them up to about 8 hours
of sunshine in a day. At that point,
they're ready to go. They can be planted
out into the garden. Now, I'm still going
to watch my weather. If I have some freak, late spring snowstorm
or frosty conditions, then I'm gonna hold them back. I'd rather hold them
back and keep them in, let them get a
little bit larger, maybe a little bit more
root bound rather than take a chance on putting
them out into the garden and losing
them that way. Now, an option if you
are growing a lot of vegetables and moving them back and forth every few hours, then what you might
do is look for a way to rig up some shade
cloth over your beds, you know, 70, 80% shade cloth. And if you put that together, then you can put them out they'll be protected
from that hot, glaring sun, but you won't have to move
them back and forth. Or if you have shade trees where you can put them
where they're going to get dappled sun and shade and
still get some air movement, keep them watered, keep
them irrigated properly. Now you can leave them out. As long as it doesn't freeze, you could leave them out 247 and let them acclimate that way. But the whole key is
you don't want to just bring them out from a controlled,
protected environment, into the garden and then assume that they're
going to survive and do great planted directly
into the ground that first day because chances are they're
going to get sunburned, and if they do, that could kill them right off or certainly
stunt their growth. So once we've hardened them off, then the next step is going to be doing
some transplanting, and we'll just have a quick little
demonstration on doing some transplanting here
in the next lesson. But that's basics
of getting them hardened off and
ready to go out into the garden so you
don't lose all of the effort and work you've put into in germinating these
seeds to begin with. Okay, thanks for watching. I'll see you in the next lesson. Okay, so one more thought about hardening
off your seedlings. And that is you've got them under lights,
you're growing them up. But when do you actually
take them out of doors? How large should
these seedlings be? And a good rule of thumb
is you want to have at least two sets of true
leaves on your seedlings. Now, these spinach and lettuce plants that
I have behind me, they are just coming on. They're just starting to
get their true leaves. They've sprouted out about
ten days or eight days ago. So they're still too young to
really take out and move to the greenhouse and start moving into the outside environment. Now, again, these are
guidelines overall. My butternut squash,
I moved them out of those six packs into four inch containers because
they were very well rooted. I didn't want them
to get root bound. And so I went ahead and transplanted them
and put them up. Now, I am slowly
hardening them off, even though they don't
have their true leaves, all of their true leaves yet. But they're a good,
strong, hardy plant. So I'm going to go
ahead, move them out, have them in the garden for
a little while each day, move them back into
the shade house, and then I put them
in the greenhouse overnight where it stays warmer. But they're getting a chance to acclimate to the actual
outside temperatures. So just like everything
else in gardening, I wouldn't say that there's any real strong hard fast rules. Everything's just
some guidelines and play it by ear and
use your intuition. But for delicate plants like
spinach, lettuce, tomatoes, you want to have those
true leaves going to where you know you've
got a good strong plant, and by that time, it's going
to be getting pretty well rooted and you're going to be able to start the
hardening off process. Okay, I just wanted
to throw that in. Thanks. I'll see you
in the next lesson.
8. Transplanting Your Seedlings: Okay, we're out in the garden, and I've already put my
lettuce in the ground, and I still have a six pack of spinach that I've grown up. It has all been gone through the hardening off process that we talked about
in the last lesson. And these beds are six
foot by three foot wide. And so I've kind of scratched out roughly a square foot
for each of these plants. So now I've got my lett us
in and to transplant these, like I said, I've waited
until they're well rooted, and at that point, I can just come in and lift these and might be
able to see the roots, how well rooted these are. So I'm just going
to go ahead and I'm going to leave a little
bit of space in between. And I always use a
starter fertilizer, just a little bit to help kick start them in when I
put them in the ground. And I just sprinkle
a little bit, and then I'll dig this in. Then not everybody will use a starter fertilizer,
and that's fine. This works for me. So when you're
gardening, each of these is going to be an
experiment while you learn what works best for
you in your situation. So everything that I've
been talking about in this course is not a straight
jacket. It's guidelines. It's just some basic
guidelines on being able to get your
plants going from seed all the way up to hardening off and then getting them
out here into the ground. Number five, all of these really well rooted and ready
to go number six. Just pop him over here,
and there we have it. We've got our spinach
in the ground. We've got some of our
lettuce in the ground. I still have more spinach
and lettuce that's still under the lights that
I've been bringing up. So that's going to give me a little bit of
a delayed harvest. So I'll use one of
the other beds. And now, as I work these, I'll have a later harvest up until the summer gets too hot. This is coming into early March. The weather's mild. We have had chances of snow in the past. But if it looks like
it's going to turn really frosty, with
the raised bed, it's very easy for me to cover
this with a frost cover, and I can protect these plants from really
cold weather if necessary. But by this time, in our area, we should be in good shape. So all I have to do now is just give these a quick
watering and we're done. So there we are.
That's a the secret of putting something in the
ground with transplanting. It's really easy. Just make
sure you've got them grown up and they're healthy
and they're well rooted to where when
you do put them in, they're not gonna just fall
apart or it's gonna be a lot easier for them to
acclimate, you know, and they have had that
hardening off period, so they're well accustomed to what the weather
is right now. That pretty we is gonna
wrap up this course. Thanks for watching, and I'll
see you in our last lesson. Okay, thanks for watching.
I'll see you in a bit.
9. Thank You: I Okay, so that pretty well wraps up my beginner's
gardening course on starting your vegetables
and herbs from seed. And really, you can use
this technique for anything that you want to start from
seed, flowers, whatever. And so there's going to be a lot of more
information out there. You're going to be listening
to other gardeners. What I'm offering you in this course are
guidelines that have worked for me to get my garden up and running
and being successful. And so I'm passing this
information on to you, hoping that this will
be the same value to you that it has been
to me over the years. So I encourage you
to leave a review. And I look forward
to seeing you in the next class where I'm going to be having a beginner's
gardening course. Now that I've got
everything in the ground, I want to get it on irrigation, and that's where we're going
to go in the next beginners gardening course is setting
up our drip irrigation for our vegetable
garden and how we can schedule it and make it
all flow nice and easy. Okay, thanks for watching and I'll see you
on down the line.
 Robert Littlepage, Landscape Architect - Teacher, Author