Transcripts
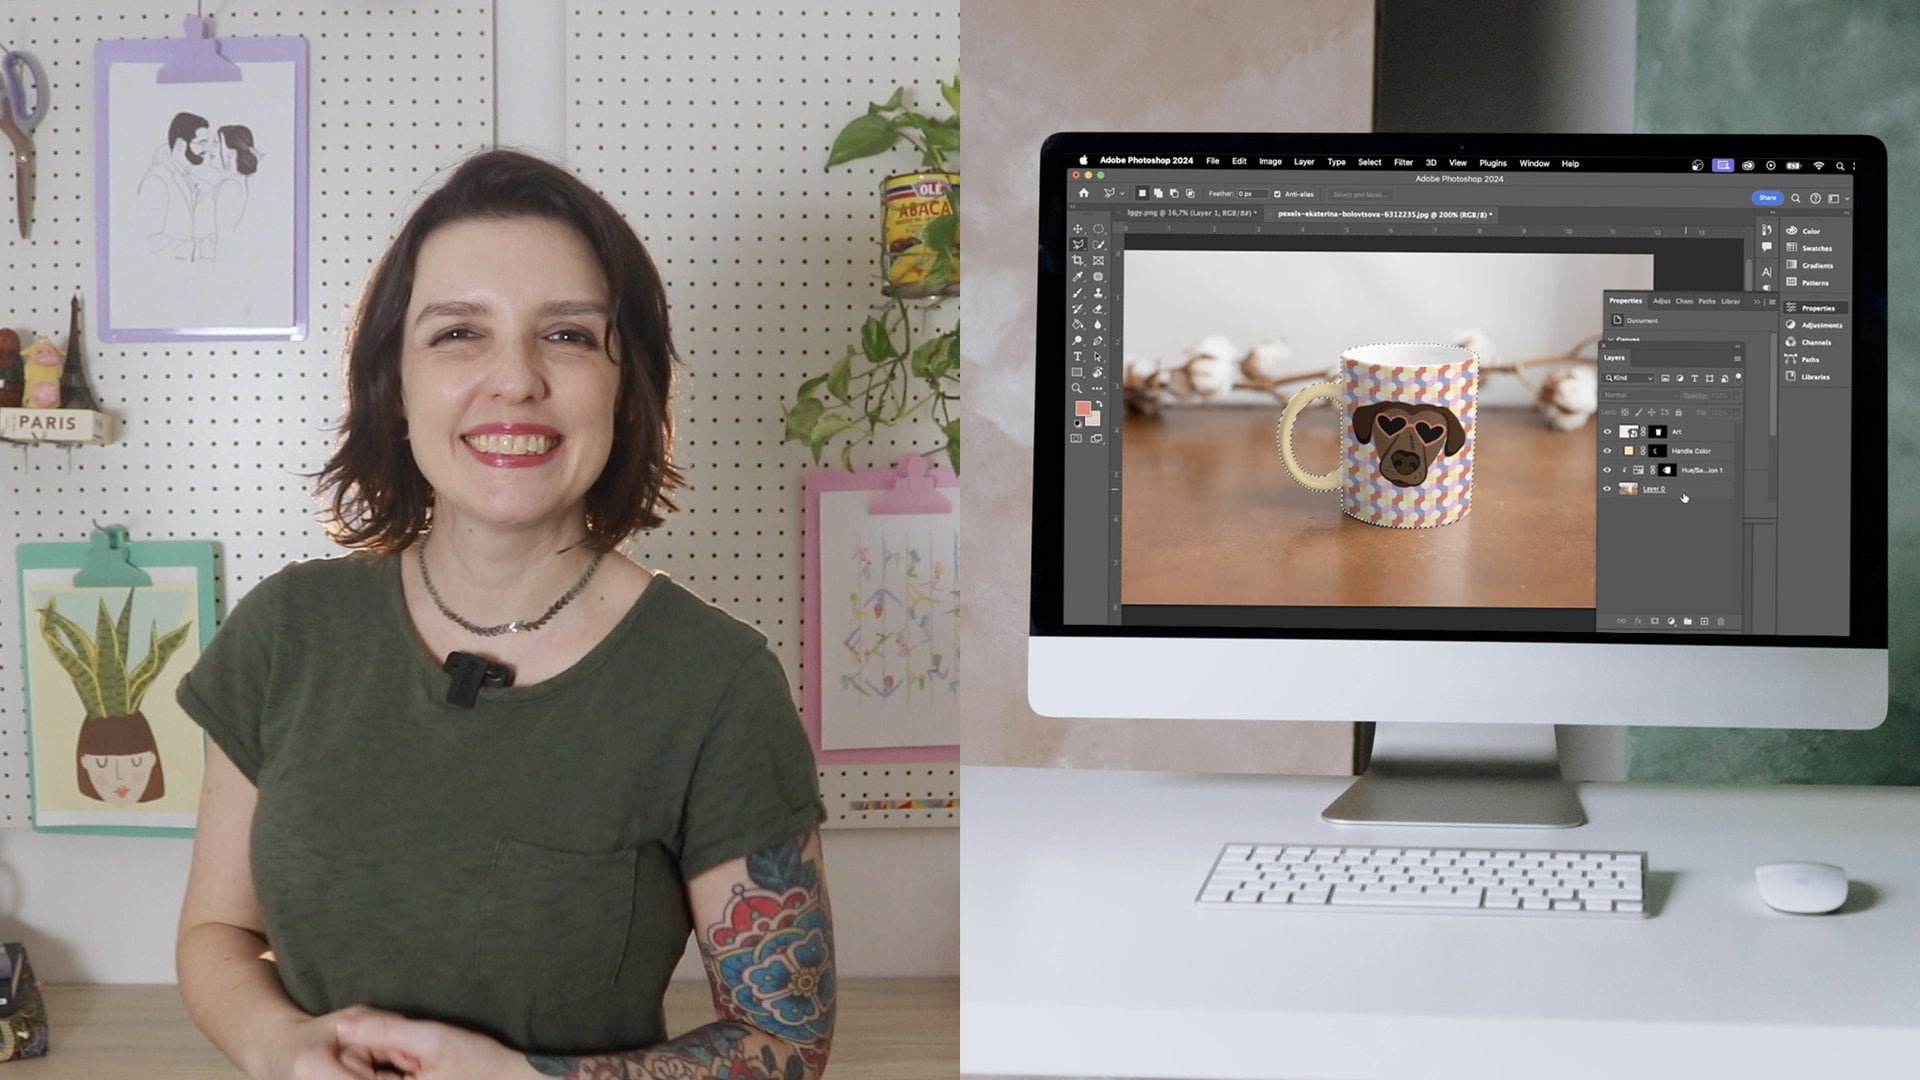
1. Introduction: Welcome to the digital room makeover Photoshop
for Interior Design. My name is Amy Everard, and I've been
transforming spaces for the past 17 amazing years
as an interior designer. Whether it's a cozy home or a chic office, I've done it all. And when I'm not crafting dream
interiors for my clients, I'm inspiring the
next generation of designers as a professor. I also have a podcast
called Soft Landing that's packed with insider tips
and design secrets. If you're passionate
about interiors and you want to dive deeper, you definitely need
to check it out. Let's jump into an exciting
preview of our course. In this class, I'm going to take you through how
to give any space a digital makeover
using Adobe Photoshop. This class is great
for beginners because we will learn everything
from start to finish. No previous photoshop
experience required. But if you have used
photoshop before, stick around because
you'll learn a specific style to
quickly and easily transform any
interior photograph to represent your
creative vision. We'll start with how to get the best picture of a room
to use as a base layer. Then we'll jump right
into photoshop, where we'll talk about all
the different tools you can use to create a visual
for your new space, including how to
select an element, using the layers menu
to stay organized, how to create special effects
through the layers menu, modifying and changing the color and size of different elements, the art of finding the right
images to add to your room, how to bring everything together through different
collaging styles, and how to share your
final vision with friends, family, contractors,
and even clients. We'll look at techniques
to modify images using both empty rooms and lived in spaces with existing
furniture and belongings. To get started,
if you don't have a license for adobe
photo shop yet, which is critical to
use the software, you can go to adobe.com
and download a free trial. From there, you can choose to continue the software
paying either a month to month fee or an annual fee depending
upon your needs.
2. Module 1: Adobe Photoshop Overview: Photoshop is a really wonderful, versatile and in depth tool. It can be used by all
kinds of creators from photographers to graphic
designers to illustrators. For this course, we're going to put our blinders on and focus on just the tools and
workflows that will help us create our
three D makeover. I like to think of photoshop as a tool that lets us
paint with pixels. We can change the individual
squares that make up a digital image
by color and size. Many of the creative techniques that you could do by hand like collaging and painting can
also be done in photoshop, but it's much more easy
to manipulate and save different variations when
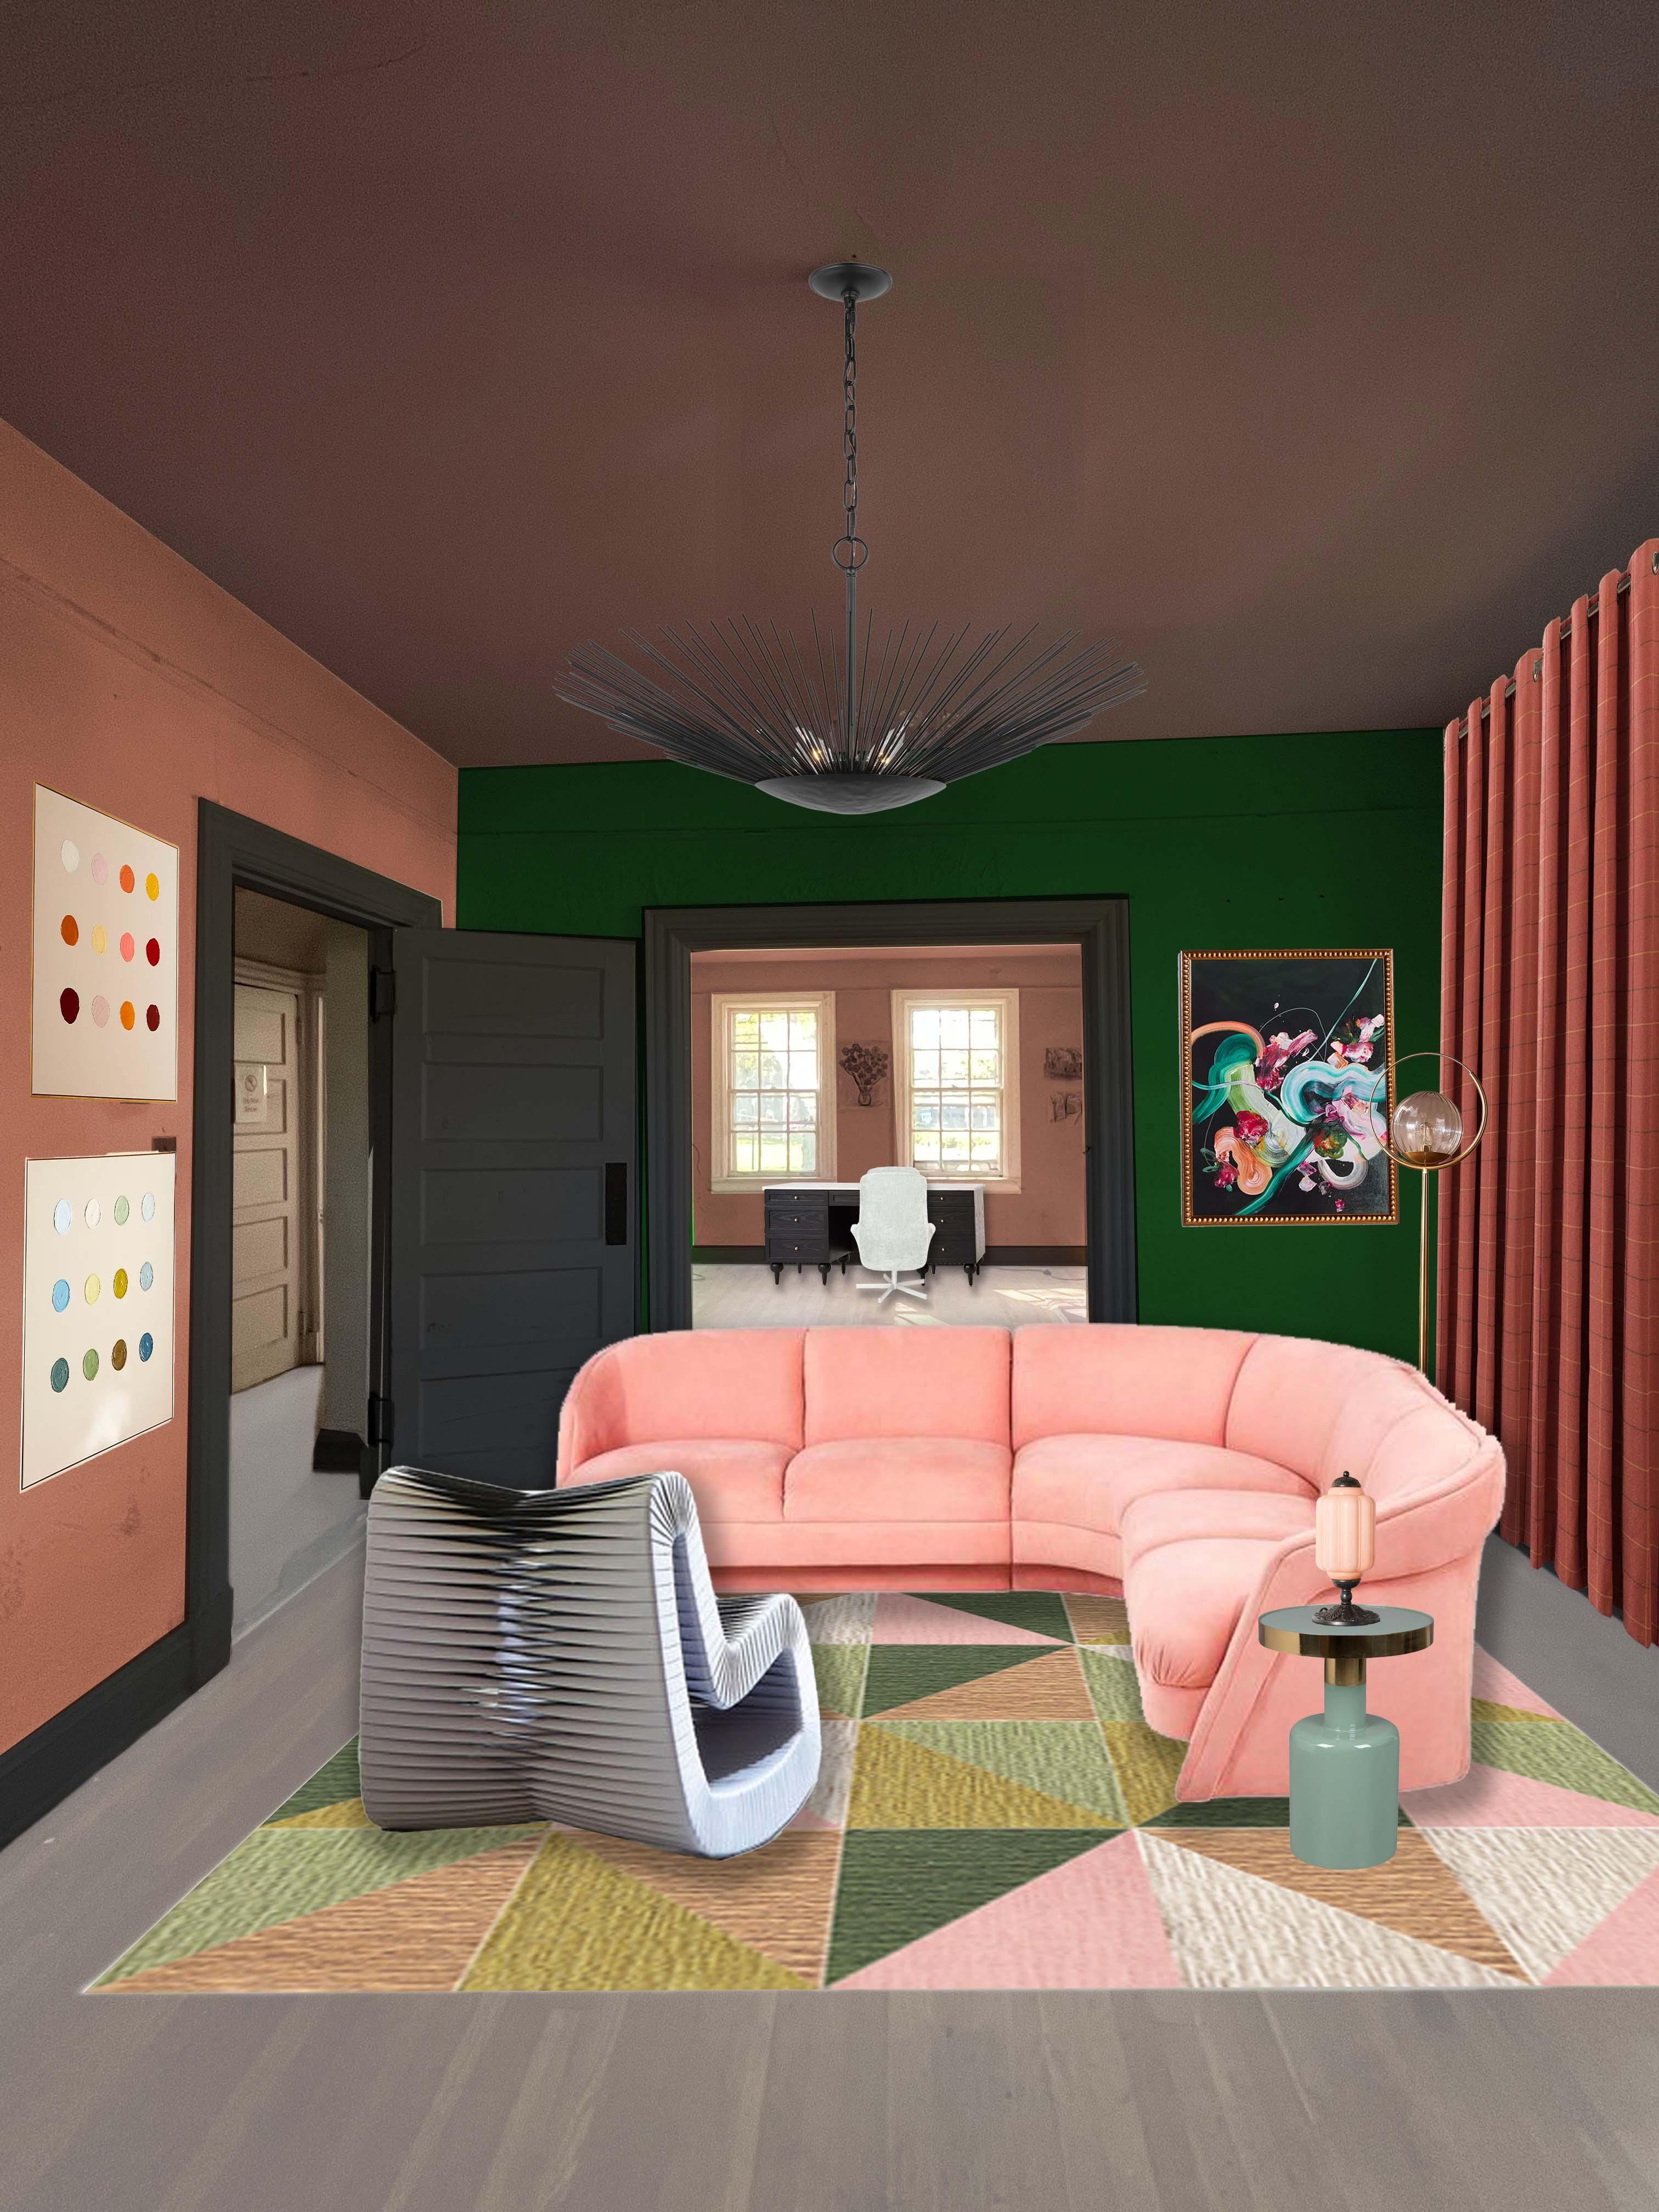
working in a digital medium. In this course, we're
going to create immersive three
dimensional pictures that make the viewer, whether that's you or a client, feel like they are in the space when they look at the picture. This is a little bit different
than what you might see on pinterest or other
interior design focused, social media where you might see a moodboard or a flat lay. Even though these are fun and do help tell the story of what
the space could look like, they're mostly two dimensional, and they don't always
take into consideration potential elements
in the space that are existing that
are going to remain, for instance, wood flooring. There are many file types
that can be opened in photoshop and many
file types that can be exported from photoshop, including JPEGs, HEIC files, gifts, tiffs, PNGs, and PDFs. We will be saving our files
with the dot PSD extension, which stands for
Photoshop document. This is a file that is
unique to photoshop, can really only be
opened in photoshop. And it will save all of our
detailed information so that our image is easy to go back and edit if we want to make
updates or changes. But towards the end,
we'll talk about exporting and how to save as a file type that is universally easy to
open and easy to share. One of the most
important and best tips I give my students when they're learning photoshop for the
first time is to save often. So you can go up to the top of the screen and select File Save, or you can use the
keyboard shortcut, which is command S
if you're on a MAC, and Control S if you're
on a Windows machine. And this is because it's not
unusual for life to happen, whether the power goes out, you accidentally close your window and you
don't remember. Once in a while, photoshop will crash when you get into
really heavy files, although nothing
we're doing should be quite that substantial. But it is very easy to lose work when you're not
regularly saving, and it's very easy to get
in flow with photoshop. You can really get
into what you're doing and easily forget to save. So if you have to put a little reminder on
your computer to save, save, save, I would save
every 15 minutes or more, just so you don't have
to lose work because sometimes you create
a little magic and sure you can always redo it, but it's never
quite exactly what it was when you lose it. So get in the habit of saving, it will save you
a lot of trouble. For all of the different
tools that we're going to learn in this course and
the keyboard shortcuts, you can refer to the
course download. You'll see where everything is. You'll be able to check
in on where to click and what keys to type to get
to tools much faster.
3. Module 2: Photography: Every digital room makeover starts with a before
or a base layer, and that comes from a picture
of your existing space. So let's talk about how to
get the best image to use as our base layer for our
photoshop, digital makeover. The goal with our base
photo is to see as much as possible of the
room in a single shot. So you definitely
want to be able to see a good portion
of the floor, but you want to be able to
see the ceiling as well. From there, I like to try and capture two to three
walls of the room. Three can be a little tricky. To is usually pretty manageable. But the goal for this is
so that we can see all of the different components
of the room in one image, so we can understand how the finished product
will actually feel. There are a few methods
to achieve this. One is to go ahead and use images directly from a
real estate website. If you have just moved into a
new space or you still have the original real estate photos of the space you're
now saved somewhere, those can be absolutely
wonderful images to work with because they are usually fairly empty they're not cluttered with
personal belongings, and they tend to be taken with a wide angle lens and a good, clear, crisp, bright lighting. But you can also take
the picture yourself. This can be very helpful
if you have elements in the room that you want to reuse
in your digital makeover, like pieces of furniture, maybe even existing
wallpaper or light fixtures that may have not shown up
in a real estate listing. In order to do this, you'll want to keep
in mind two things, the vantage point
and the lighting. You can use the camera on your phone to take
these pictures, and you'll want to
be very careful about how you position
yourself to take the image. In order to get a
great vantage point, you want to think about
being a little bit further out of the room than you might think
you need to be. So if it's a fully enclosed room like a bedroom or a bathroom
or an enclosed kitchen, stand in one corner
of the space, and if you're able to get a wide angle or zoom
out on your phone, that can be very helpful to get the most information in
one picture as possible. If you use an image that is too close up to the
detail of a room, it's generally referred
to as a vignette. And these are detail shots that can add a lot of atmosphere
and vibe to a space, but it doesn't
necessarily help us understand what the entire
room is going to feel like. So I encourage you to take a
step back when you're taking your pictures quite
literally and get as much of the
room as possible. If it's an open space that has an adjoining room to the
side, like, for instance, a open living room
and dining room or a kitchen with an
Eden dining room, try to stand in the other space to take the
picture so that you can see the full entirety of the space that you're
looking to transform. Lighting is key with
interior photography, and every space is different
in terms of how it is lit and how much
natural daylight it gets. You want to be able to see all the elements in
the room clearly. I would recommend trying to take a picture at a few
different times of day. So one in the morning, one in the afternoon, and you can even try taking a picture at night
with the lights on. Although Usually,
you're going to want an image that has lots
of daylight coming in. I will often turn all of the electric lighting
in the space off and let the daylight come into the space to illuminate
it in a little bit more of a soft and
natural looking way. But some spaces, some spaces may not even
have any windows with natural light if
you're working in a basement or New York
City apartment bathroom. You'll have to test it
out a little bit and see which image looks
the clerest to you. I would also recommend holding your phone both
horizontally and vertically to see which one will give you the best composition and the most information
in your picture.
4. Module 3: Selecting: So here we are in Photoshop. I've launched Photoshop 2024, which at the time of this recording is the
most current version. And what we're
going to look at in this section is
selecting things. And with photoshop and collaging and creating
three D images, selecting is really
the bulk of the work. And there are multiple
different tools that you can use
to select an item. Some of them you may develop
a personal preference for, but all of them have
their uses depending on how you're going to work
with your selection. So I'm going to start by
opening up my base image, and you can do this by
going to file and then open and navigating to wherever you have
saved your images. So make sure if you've
taken your pictures on your phone that
you have somehow shared them onto the computer or machine that you're going to be working on Photoshop with. I have mine in my recently
opened files here, which Photoshop has
for your convenience. I'm just going to go
ahead and click on that. So here is my base photo. And there are a lot of things that I want to change
and add to this. But I can't start changing
and adding things until I'm able to select the
individual items that I want to change. So on the left, you'll see your tool bar. And these are all of the various tools that
Photoshop has to offer. This is kind of a
home base for you, and you can click and
drag and move it around, but it will definitely be
on the left side typically. And all of our selection
and move tools are here. Many of our modification tools, coloring tools are here. If you ever don't
see this window, if you close it by accident, there is a little x in the
upper left hand corner, and you close it
and you say, Oh, no, where's my tool bar? You can go up to the top
where it says Window. You have lots of drop down
menus up at this top bar, and this is true
whether you're using a windows machine or
a mac. I'm on a MAC. So if you're using windows, you might see slightly
different menus. Some of this might
look different. You're certainly not going
to have the Apple logo, but you should have the
window pull down menu, which is almost all
the way over to the right of the top menus. And from there, these are all of the different windows
that you can have open in your photoshop session. And down almost at the very
bottom is the tools window. And you can see that
anything that has a check to the left of
it is an open menu. Anything that isn't checked
is not open right now. So since I closed my tool
bar, it doesn't have a check. But to bring it
back, I just click right on it. And there she is. She's back in action, ready to help us do everything
that we want to do today. On the right side, you will see lots
of different menus, and there's a lot of great information that
you can find here. We're going to come back to
this in the layers module. But for now, you can
just leave them open. You don't have to do
anything with them just yet. If I want to zoom
in on my image, I can hold down control
on my keyboard, if I'm on a windows machine
and command, if I'm on a MC, and then do either
the plus sign to zoom in or the minus
sign to zoom out. If I want to see my whole
image fit in my window, I can do controller
command zero. So that's really great if you
zoomed in a little bit too far and you want to jump
back to the full image, command orchitrol zeros,
one of my favorites. And then as you zoom in, you can use the pan
tool to move around. And that is the little
hand shaped icon here, the hand tool. And its shortcut
is the letter H, so you can activate it by
either clicking on the button or just tapping the letter
H on your keyboard, and you can click and drag with your mouse to move around. And see different elements
of your image close up. Over here on the toolbar, you will see there are
a few different icons. If you hover over these icons, it'll tell you exactly
what the tool is. It'll even give you
a little animation sometimes of how
to use the tool. So at the very top, you have the Move tool, which is how you grab and
move something around. Right below that is referred
to as the Marquee tool, and you can either
right click or Control click on it to see
that there are different Marquee tool shapes. We're going to start with the
rectangular Marquee tool, and that will be the one that you use most often,
I would imagine, This is a fairly
simple way to select. And when you have the
Marquee tool selected, you can also activate the
Marquee tool by typing, just hitting the letter
M on your keyboard. There is some information
up at the top that helps us calibrate and
fine tune this tool. We'll talk about that
in just a second. But for now, what you can do and you can pause the video
to practice this. Is click and drag. I'm holding down my
mouse this whole time, and I can move my mouse up and down and select any
area that I want, and then when I let go, I will
have that rectangle there, and that is now a selected item. You will see these
little wiggly lines around the area
that is selected. And that's photoshops way of communicating that there
is a selection happening. If you'd like to make
a new selection, you can do control D or
command D if you're on a MC, and that will deselect
what you've just done. And you can make
a new selection. Now, let's look at these
settings at the top. So the default setting
is a new selection. Every time I click and drag, I will deselect automatically the selection that I had before, and it will select a new square. If I decide to choose
additive selection, which is this little icon
of two overlapping squares, that will allow me to select
multiple things at once. So if I click that little icon, Now I've got one
little rectangle here. When I go to make
a new rectangle, it will just keep
adding to my selection, which is very helpful
because in photoshop, it can be hard to select everything all at once
that you want to get to. The additive selection
tool is very helpful. If I went a little bit too far, the icon right next to additive
is subtractive selection, and that's the square that is an outline on top of the filled
in square. I click that. And now I can actually remove
parts of my selection. So if I need to fine
tune and scrape a little bit off of what I have
selected, I can do that. Again, if I want to start over, I've selected something
I don't want to do, I can always do control D or command D to deselect
the whole thing. And we do have our
rectangle tool. There's the elliptical Mark que. If you right click or Control
click, if you're on a Mac, on the Elliptical Marquee tool, you can get a circular
shape, which is really fun. It's not super useful, but it is available to us. And one other thing I
didn't tell you, guys, is that if you want to get a perfect square
or perfect circle while you're using
the Marquee tool, you can hold down shift the whole time that you're
clicking and dragging. Here I'm clicking and dragging and getting a perfect circle. If I let go of shift, it'll hop into an
ellipse and really respond to exactly
how I'm moving my mouse in both the
height and width format. But if I hold down shift, it'll stay a perfect circle. The same is true for the
rectangular Marquee tool. If I click and drag
and hold down shift, I will have a perfect square. That's a fun little
thing to help us. Now, the Marquee
tool is very easy to use because it's really just
a click and drag format. However, it's not very precise. But if we want a more
precise way of selecting, there are a few other
tools that we can use. Right below the Marquee
tool is the Lasso tool, and you can shortcut to activate this tool by
just punching the L on your keyboard once that will quickly
activate this tool, or you can click
directly on the button. There are a few
different types of Lasso tools nested
within this button. If you right click or Control
click, if you're on a Mac, you can see that
there is the Lasso, the polygon lasso, and
the magnetic Lasso. Let's start with the Lasso. So here, we can
click and drag and draw really any free
form shape that we want. This can be really cool if you're drawing or
you're an illustrator. It can be a little bit too dependent on the strength
of your hand for my use. So I tend to not use
this one as much. If you have a stylus
or a whacka tablet, this can be really, really
great and really fun. And again, we can use our additive and subtractive
selection buttons. Those are still up
at the top here. So the first one is
just new selection. The second one is
add to selection. So here I can create
a little squiggle. And then maybe I want to start
selecting this chandelier. So I could draw Right around it and keep adding. I could keep outlining
different shapes in this image. But again, it's very dependent on my hand not being shaky, which is great, but I prefer. I'm going to do control
or command D to D select. I like the polygonal lasso, and this works a little
bit differently. I'm going to go
ahead and zoom in on the chandelier a little
bit more closely. Use the hand tool to get it centered on my screen so
I can see the whole thing, and I'm going to practice using the polygonal Lasso tool to try and select
this whole thing. So I've got my polygonal
lasso tool selected. And it's different from the regular Lasso tool because this is going to
be a series of clicks. I've clicked once, and I'm not
holding down my mouse now. I can continue to click
and make a series of short lines around the object that I'm
trying to select. I prefer this selection tool because it allows
me to be precise. And I don't have to
worry about if my hand shakes a little bit or
if I'm not 100% perfect. It just gives me a
little bit more control over how I select,
when I select. I can always let go and take a break if my hand
gets tired with, you know, more elaborate
objects like this. It can take a
little bit of time. I really love to
put on a podcast or some nice light music when
I'm doing this kind of work because it requires
a pretty high level of concentration and patience. I think that my students tend to get the
most frustrated at this step because you are going through and selecting
something quite meticulously. Now, I think that the folks over at Adobe
realize that this is definitely one of the major
complaints about photoshop is the tediousness that's required
to select an actual item, and they have been working
on creating AI tools, artificial intelligence
tools that will help you select things faster. And although they are
not completely bug free, they can be quite helpful. So we're going to
look at those next. We're going to do
this the hard way first and then look
at the AI option. Um, I will say that it's important to know
how to do this by hand because there
are going to be many instances where the
AI tools may not work. They are still very dependent on a high level of
contrast in the image. And what I mean by that is that if you are trying
to select an object and the background is similar
in color to the object. For instance, this picture here where I'm working with
a glass chandelier. The actual color of
the chandelier and the ceiling beyond it are
very similar in color. They don't have a
lot of contrast. The AI tools will
struggle to select it. They're not quite as sharp
as the human eye just yet. You're still going
to need to be able to know how to go in and select something in
this more manual flow. Okay, so I have the main
perimeter of the selected. And what I'll need
to do next is select the subtractive option and go in and take out
some of these voids, so I can go in and remove
that the ceiling is. So that'll take a bit of time. Not bad. I could keep going
and maybe take out some of the selection here in
between this cording. But what I'm going
to do right now is because I'm veryly happy
with what I have selected, I'm going to save this selection because
there's nothing quite like the disappointment of doing
all the selecting and then accidentally going
Command D select. Oh, no, where did it go? And you can always just do do which is up at the top here, you can do undo D select,
which, of course, the shortcut for that is
either Control Z or command Z, and it'll bring back the
action that you just did. So I'm going to go to
our pull down tab here, the select pull
down tab, and about All the way down, not quite all the way down, but
almost all the way down. There's an option here
that says Save Selection. I click on that, and I will basically create
a selection menu. I can name each
selection that I have, and then I can
easily bring it back up whenever I need to use it. This one, I will
name C chandelier. Click Okay. Then if
I do deselect this, I can go back up
to the select pull down menu and choose
Load selection. And I can choose whichever
ones I have right now, I only have one and say, Okay, and it'll come back to me. There is a third type of Lasso. If you right click or
Control click on the Lasso, you will find the bottom option is called the Magnetic Lasso. And this is a tool that's been with Photoshop
for a long time. But it reminds me of photoshops first attempt to have
like smart or AI tools. The magnetizing that
happens with this type of lasso tool is it will try
to snap to an object. So I can click once. I don't even have to
hold down my mouse. As long as I move nice and slow, the magnetic lasso will attempt to follow the shape
of the object. And it's fairly sensitive
The slower you go, usually, the easier it is,
and you can click to help it along if it's not
grabbing these points. You'll see that it is creating little points as we go that are noted with
these tiny squares. I find that I have
to go sometimes even slower with the
magnetic lasso tool than I do with the
polygonal Lasso tool. So I don't use this a ton, but I definitely have
friends, artists, designer friends
who swear by this, and it can be in a
fun tool to use, but I'm a polygonal
lasso person myself. Our final set of tools
that we're going to cover in this module are
the Wand tools, and you can select the wand tool by tapping the letter
W on your keyboard, or you can head on
over to your toolbar, and the wand is right
below the Lasso tool. If you don't see the little
wand shaped icon right away, you may need to right click or Control click if you're on
a Mac directly on the icon. There are a few other wand
tools nested within this. You may have the object
selection tool or the quick selection
tool already selected, but we're going to look at the basic magic wand
tool right now. So in order to understand exactly how the Wand tool works, we have to have a little
bit of a better idea of how photoshop sees images. Photoshop is a raster program, which means that it
sees every image as a constellation of
tiny squares or pixels. And what I mean by that is, if you zoom in on your
picture as far as you can go, you will eventually start to
see a grid of tiny squares. Each one of these tiny squares is a single individual color. Anytime you see
something with lots of shade and shadow
and definition, it's made up of many
single colored pixels. The way the Wanda tool
works is it will select pixels in the area that you click that are of
a similar color. So if I select a flower, it will kind of guess
and estimate all of these little pixels that
are about the same color. And it's not a perfect
process, right? Because that's not the
exact shape of the flower. But it's really following the color that it
sees in the image. If I click on a larger surface
like this window pane, It will select the
whole thing because the window panes are
basically all white, and it will see and sense where the color changes and
not select that area. Now, this is very handy for
images that might be like a piece of furniture that's on a solid white background or
a solid black background, where it's all one color. Where the Wan tool
has its limitations is for photo realistic
images like this one, where everything is made up of 1 million different colors and all of these
different pixels. So clicking on any one
individual area might not give us the selection we want because photoshop
is guessing. Well, these pixels look like they're the same colors
where you clicked, so I'm going to include them. And they all have to
be touching, too. That's the other caveat. It's not like it's
going to pick up all the colors in the picture. So, good for white backgrounds, good for black backgrounds, other things, not so much. But we love the Wan tool, and we use it a ton. Now. Here's where things
start to get really exciting because a lot of what
we were doing with the Lasso tool was
time intensive. Recently, Photoshop
has developed a tool that is meant to
incorporate some sense of AI or a smart tool that will help us with
our selection process. That is nested here
in the Wand tool. We have the object
selection tool. The shortcut is also W for that. If you want to specify between the Wand tool and the
object selection tool, you do have to go
into the menu right click or Control click and
select the one you want. So the object selection tool
will pick up, look at that. It gives you a
little pink preview. It picks up objects
within an image, and it's a lot more
advanced and smart than just the Wand tool or even
the magnetic Lasso tool. You get a little
preview in the pink, and then if you click, it will go ahead and select the object that it
thinks you want. For the most part, this
tool is very helpful. It doesn't always
do a perfect job. So we can't rely on it 100%. However, If we look at it here, now, this is a really
tough object to select, I have to say, because it's a glass and silver
chandelier that is above a cream
colored ceiling. Everything is very
similar in color. The fact that the object
selection tool was able to even differentiate between
these glass lanterns and the ceiling is amazing. Did it do a perfect job? No, because if you
look at the area here, we're going to have to
go back in and add this preferably for me with
an additive Lasso tool. Now, that's not really
that bad compared to how long it took us to select this by hand with the Lasso tool. Go in and touching
up a little bit. The object selection tool
saves us a ton of time. But it's important to
know how to select things by hand because the
object selection tool still has its limitations. There are some objects in different pictures that
it just won't recognize. And there are some
pictures where you might want to
select something that isn't necessarily an object, which you'll actually see me
do in the collaging module, where it really doesn't
want to pick up a countertop and I have to
go in and select it by hand. But when the object
selection tool works, it saves us a ton of time, and it's really, really great. High contrast is key. Here I am hovering
over the floor, and you can see that because the floor is so much darker
than the rest of the room, the object selection tool
has no issue picking it out. There it is. Now, I probably need to touch
it up a little bit. There are some highlights here that I can just add
in with my Marquee tool, and I'd probably want to go
in and do a little perimeter, clean up and probably
add this saddle as well. But for the most part, it
saved us a ton of time, which is really fantastic. But between the Marquee tool, the Lasso tool, the wand, and the object selection, you should be able to select
any object in any image, and then we can start to
modify it in the next process.
5. Module 4: Layers: L ayers in photoshop will
help us stay organized and help us manipulate
objects in a specific way. So we're going to take a look at the layers menu and how
to use it and how it can be a really helpful tool when we're creating
our digital makeover. So I mentioned that
there were some menu over on the right hand
side of the screen, and one of those is
the Layers menu. Mine is showing
up automatically. If for any reason, you
don't see your layers menu. You can always go down to
the window pull down tab and find it right about in the
middle of the selections. And you can just go
ahead and hit that and have it either
disappear or appear. If it's checked, you
should be able to see it. I'm going to go ahead and
pull my layers menu into the center of my screen so
we can look at it together. Every object can be put
on an individual layer, and objects that are on separate layers will not
interact with each other. We can also apply different
effects to layers as a whole, which will help us create more photo realistic images
for our digital makeover. Right now, because I
have a flat image open, I opened a JPEG file, which is what came
out of my camera. I only have one true layer, and right now, that is the background layer,
which is locked, and I can tell that it's
locked because there is a little padlock icon all the way over to
the right in the menu. If I want to manipulate
this in any way, I will need to change it from being a background
to an actual layer. In order to do
that, I can simply double click with my mouse right where it says background. And this window will pop
up that says new layer. Now, this is not creating
a new layer, really. We're just converting our background image
to its own layer. So here, it's going to
automatically name it layer zero. And if you want to
keep that the name, you totally can, I like
to rename my layers, things that make sense
to me so that when I'm moving things around
later on in my project, I'll remember what they are
because it's easy to forget. So I'm going to go ahead and
name this original photo. And then I'm just
going to click Okay, and now I've got my
original photo layer. With all layers, I'm able to toggle them on and off
in terms of visibility. If I want to hide a layer
at any point in my process, all I have to do is
click on the icon that's shaped like
an eyeball right to the left of the layer, and that layer will disappear. Now, what we're seeing here on the screen in place
of that layer is the iconic gray and white
photoshop checkerboard. Anytime you see
this in photoshop, it's just indicating a
sense of nothingness. Basically, if I printed
this out right now, it would be a completely
blank white page. If I saved it as a
different file type, it would be a white square. If you ever see this, just
know that that means there is nothing there as opposed to
an actual color or a pixel. So I'm going to go ahead
and turn it back on. And so now I can add
additional layers to my image to start building
up my digital makeover, and we'll look at how to
do that and how to add some really cool
features to our layers. So the first thing I'm
going to do is open up a couple new images to
bring into my file. So I have a sofa that I and a light fixture
that I e earlier. And we're going
to look at a more detailed process
of how to choose the right photos for your
collage later on in the course. I'm going to start by using
our handy dandy Wand tool. I'm going to click
the W on my keyboard. If I zoom in here on this image, I can see that the background for this image is mostly white. I want to isolate just
the light fixture itself. I don't want to bring in
the white background. The easiest thing for me to do is to click this
white background. And you can see
that with the wand, it's selected most of the
right half of the background, but it needs a little help. I'm going to make sure that
I have add to selection, clicked here up at the
upper left hand corner, and I'm going to
continue to click around this white of the lamp. So I've got most of the
outside of the lamp selected. I'm going to click in some
of these little void areas, because I don't want to
bring that white over. Then it looks like
we've overstepped the bounds a little bit
here on the left side, I'm going to go ahead
and take the Lasso tool, the polygonal lasso tool, and put it in subtraction mode, and just go through and trace away some of these areas that
I don't want to delete out. This will take just a minute. Okay. So now that I'm
happy with my selection, I'm going to go ahead
and in this image, this has a background
type layer, so I'm going to double
click on that and just say, Okay, I don't need
to really name this. I'm not going to be continuing
to work in this file. It can be layer zero,
I'm going to say. And now I'll be able to actually delete
out the background. So I'm going to t the delete or backspace button on my keyboard. And that white goes away
and is replaced with the photoshop checkerboard that we were learning about earlier. Now I'm going to
deselect everything by hitting either Control
D or command D, if I'm on a Mac, which I am. And now I'm going to
select the move tool, which is right up at
the top of our toolbar. And I'm going to click and
drag this image into my house, into my little picture here. Now, I can see that we've
brought this in and obviously, there's no white
background around it, so it looks like it's
floating in our image. It has its own layer and I can now toggle
my light on and off. I'm going to double
click on where it said Layer one and just rename it to new Light. I can move this around by
clicking and dragging on it. And I can turn it on and off, which is really cool. Let's do that again. I also have a sofa
image here that I like, and I'm going to use the Wand
tool again. And just click. That did a pretty good
job because there was a nice high contrast between the sofa and the
white background. The wand tool is great for
selecting when there's a good contrast between an
object and the background. You really don't have to
do a lot of extra work. Then I'm going to double
click on my layer, where it says
background, say, Okay, it's just going to convert it to a regular layer
and it unlocks it. Delete that background, and now I see my photoshop
checkerboard again, so I know there's
nothing behind it. I'm going to click and drag
it into my new picture. So now I have, I can see I've got my new light, I've got my original photo, and I've got this sofa that has been auto
named Layer one. I am going to double
click on the Layer one. And name it Pink sofa. And as I start to layer up new
images onto my base image, it may start to matter where in the layer
menu these items are. So the order that
a layer is listed is how it will be
visible in the image. So it's very important that my original photo is at
the bottom of the list. I can reorder things in layer menu by clicking
and dragging. See, I'm just clicking
and dragging. If I click and drag and put
the original photo on top, I won't be able to see any
of the new objects I brought in because the original
photo is on top of them all. So I'm going to go
ahead and click and drag and bring it down again. And I can turn any of these
layers on and off any time. Right now, the light fixture and the sofa aren't really
interacting that much, but if I were to move my new lights down
for whatever reason. It is below my pink
sofa in the layer menu. And so it's always going to
be behind the pink sofa. If I have them
interact in any way. And if that's the way
I want it, great. But if I want my light to
be in front of the sofa, then I will need to drag it up above it in the layer menu. And now my light will
always be in front of it. And as you move things around, you may notice that photoshop
is usually set to default to auto select the layer
that you click on. So I don't need to
necessarily click on the layer of an object in
the menu before I move it, I can simply just click and
drag to move it around. If you have a layer that's
a little bit pesky and in the way as you're trying
to move things around, for instance, the
original photo, if I keep accidentally clicking and dragging
on the original photo, it's going to slide
around in place, when really, all I want to do is Move my light fixture around. I can either turn my layer
off or I can go back and either right
click or Control click and say lock layers, and I can just click all at the bottom
here and say, Okay, I can always unlock that just by clicking on the lock icon there. So you're able to do that. You can turn it on
and off quite easily, and that will stop things
from moving around. Now that I have my
objects in place here, I can start to add different effects to the objects based on the layer
that they're on. The first thing I'm going
to do is for my sofa, It very much looks like
it's floating in place. And it doesn't look like it has a visual presence on the floor. You can still see
that the light from the window is shining
through past the sofa, which it wouldn't be
doing in real life. So I'm going to add a drop
shadow to this layer. If I add any other
objects to this layer, they will also have
the same drop shadow. So here at the bottom
of the layer menu is the FX menu, which is FX. And if I drop this down, just clicking on it, there are a lot of different
things to choose from. We are going to
go all the way to the bottom and
choose drop shadow. And from here, there's a menu with a lot of bells and
whistles and levers to pull. What I recommend doing is always uncheck,
use global light. And then the main
three levers that will help you define your
shadow is the distance, spread and size dials. So I can pull these out. They're usually all the
way over to the left. The further to the right
that you move them, the more dramatic they become. If you watch my
self as I do this, you can see that there becomes a very dramatic
shadow that's coming out all sides of the sofa. And I can play with this
really to my heart's content. This is very much an
artist's choice in terms of how dramatic you
like your drop shadow to be. One thing that can be
really helpful is also to click on the wheel above those levers,
which is the angle. And wherever you just
click and drag on this little one handed clock and wherever the dial ends up is where the light source
or sun would be from. If I want my shadow to be on
the lower right hand side, I would move the lever to
the upper left hand side. As I move that around, I can see my shadow move around
in place a little bit. I don't want too much
on the top there, just a little bit at the bottom. And once I'm satisfied
with how that looks, I will say, I can see in my layer menu that
I've applied this effect. If I have been
working on a file, maybe I put it away for a couple of weeks,
a couple of days, when I come back to the file, it will always be there,
and I'll remember, right, I put a drop shadow
on that layer, speaking of which I
am going to save. I mentioned this before, but saving in photoshop is a great thing to do
as much as possible. And I can still move
my sofa around, and the drop shadow
will go with it. Alternatively, I can
make something glow. So if I want my
chandelier to glow, I can select that layer, go back to the effect
tab in the layer menu. Pull that down, and
just above drop shadow, I can choose outer glow. And this works very much
like a drop shadow, but instead of
projecting darkness, we would be
projecting lightness. So there are two
little levers here, size and spread, and I can move these out as much as I want. Spread will make things
a little bit sharper. Size will be how
far it goes out, and you can make it as dramatic
or as subtle as you like. I'm going to say,
Okay. And now I can see the effects
that are on that layer. If for any reason
as I'm working, I bring an element in, and it's not to my liking. I don't want to see it anymore. I can always turn it off
and I won't have to see it. But if I'm really deciding
I'm done with that layer, I can go ahead and delete it by selecting it and then clicking the little garbage can icon at the bottom of the layer menu. It will ask you if you're sure, and you can say yes,
if you're sure. Then that light will be gone. If I wanted to bring it
back, I would need to drag it back in from
the original image. But that can be very nice when you start to build
up a lot of layers, your layer menu can get
a much to sort through. So having a limited
amount of layers can actually help you
work a little bit faster. Now, this is all very
helpful for images that we might find that are on a white or solid
black background, but not all of the
images that we want to use are going
to be that simple. So I'm going to open
another image that has a little bit more of
a complicated background. This is a chair that I
want to show in my design. So I'm going to go ahead and
bring the whole image into my new photo just by dragging
and dropping and here, I might want to use that
blue chair later on, so I don't necessarily
want to delete it out. What I am going to
go ahead and do is select the white chair that I definitely
know I want to use. Then we're going to use something in the
Layer menu called a clipping mask to hide the rest of the
image but not delete it. So I'm going to
click on Layer one. Let's just rename this armchair. And I'm going to use my object selection to
select that white chair. Let's zoom in a little bit and see how good
of a job it did. All right, not too bad. I'm going to cut out a little bit on the
bottom here just so it's a little bit cleaner.
Okay, pretty good. Now, with the armchair
layer selected, I'm going to go ahead
and hit the button that's actually right
next to our F X menu. It's a little rectangle
with a circle in it, and it's called the
layer mask button. When I tap this, what
it's going to do is hide everything
in that image, except for what was selected. Now I can move this around
like any other layer. I have this in front of my sofa, so that is going to be
the most visible thing. But if for whatever reason, I wanted to get the rest
of that image back, I could just say either disable
or delete the layer mask, and the image would
come right back. If there's an image with multiple things that
you might want to use, you can use a layer mask
to hide certain elements, which can be very, very helpful. It's also very helpful if
you're combining two images. For instance, if you have
multiple existing photos that you want to combine
certain parts of, layer masks are
very, very helpful. It's like a very elaborate
way to crop an image. Now, I want to add a
drop shadow to my chair, and I could go through and add it manually the same way
I did for the pink sofa, but I would like it to be
the exact same drop shadow. I don't want to have to
eyeball it again and have one be slightly
different than the other. So I can actually use
the layer menu to copy and paste the
exact same drop shadow from one layer to another. So in my layer menu, I'm going to select
the pink sofa layer that already has the
drop shadow applied. And I'm going to either right
click or Control click, if I'm on a Mac, directly
on the name of the layer. And all the way almost down at the bottom is the option
that says Copy layer style. So I can click on that. Then I can click on my
armchair layer, and again, right click or Control click, and I'll get that
same menu up again. Here down at the bottom
is paste layer style. When I click on that, the
exact same drop shadow shows up on my chair. I can toggle this drop
shadow on and off by clicking the little
eyeball right next to it. But it's the exact
same drop shadow, and that saves me time
because going in and manually adjusting the exact
drop shadow takes a second. And I like to save
time where I can. So we love the copy
and paste feature. Being able to copy and paste the layer style from one layer to another will save
us a lot of time, especially as we start to
add more and more objects to our makeover and get
going with our dream space. Another thing you
might want to do. This is actually a very
popular client request is to change the
color of a wall, a ceiling, a door, some
element in your photo. And we can do this
in our layers menu. So what I'm going to do
is select something. Let's change the
color of our floor. So I'm going to use the
object selection tool. I'm going to hover
over my floor. Make sure I'm on my
original photo layer. Select my floor.
I'm going to use my additive marquee
to make sure a couple of those sunspots are still added and then go
in with the Lasso. Make sure that's an
additive mode as well. Just add a couple little
detailed elements that got left out with
the object selection. Then of course, there is, let's pan over with
the hand tool. Going to add the saddle. No. Now I have my
floor selected, and I'm going to adjust
the color of my floor. Next to our layer mask option. There is a little circle that's half filled in, half open. I always call it the
black and white cookie. If I click on this, I have the option to make adjustments, add colors, and this is a
really helpful tool for us. I want to make this
wood floor lighter. So I'm going to go
to Hue saturation. And now my hue
saturation sliders have popped up in my properties
window over on the right here. And I'm going to slide
my lightness up, and I'm also going to desaturate
a little bit because I like that sun faded look that
we see on wood sometimes. Okay, cool. I can turn on
and off this hue saturation. It's not permanently
affecting my original photo. If I decide to change it, I can always just select the layer and move
these dials around. I could also click the
colorized button here. Now, just to go over the basics. Lightness, that's
pretty straightforward. You move the slider
towards the white, it gets lighter, towards
the black, it gets darker. But saturation is referring to the intensity of the color. The further I push
it towards the red, the more intense
that color will be, and the further I push
it towards the gray, the more black and
white it will be. If you want something to feel a little bit more sepia toned or just a little
bit more subdued, you can pull it
lower in saturation. The hue, of course, will change the actual objects color based on how you
move that around. Ast but not least, I want to change the
color of one of my walls. I love a good accent wall. I'm going to go ahead and select the back wall with my
polyono lasso tool. I want to see the whole wall, so I'm going to turn
this furniture off. Now that I have my
whole wall selected, I'm going to click the
layer adjustment button down at the bottom
of the layer menu, and I'm going to choose
Hue saturation again. This time, I am going
to click Colorize, and oh, pretty pink. Let's turn on these
other layers, so I see what I'm working with. Let's do a nice
dark forest green. I'm going to move the hue
slider to the green range. I'm going to kick the
saturation up a little bit, but I'm going to pull
the lightness down so that we get a really
nice, deep rich color. I can change the
name of this layer. It says Hue saturation to, but I can also just name
it green accent wall. So that I remember
exactly what it is. And now my digital makeover is really starting to have
a little bit of umph. I can start to visualize
what this will look like just through
using our layers menu.
6. Module 5: Transforming: Transforming in photoshop is an amazing effect that allows
us to change the size, the rotation, even the
perspective of an object, and that helps them look like
they belong in our collage. It's actually pretty
easy once you know how. So let's get into it. The first thing we want to
do is select our object. If that object is
on its own layer, you can go ahead and click right on the layer
in the layers menu. You can also use the move tool to select the object
in the image. Either way works, it's
really personal preference. But either way, once
you have it selected, you should see that there is a thin blue frame that
surrounds the object. If we zoom in a little bit here. We will see that that frame
has eight white nodes. There's one in each corner, and then one in the center
between the corners. These nodes are for our use. If you hover over
them with your mouse, you'll see that your cursor
changes shape a little bit. It might change into a
diagonal arrow if you hover over the corner or
an up and down arrow, if you're on the top or a left to right arrow, if
you're on the side, and we can click and drag on any of these nodes to
resize our object. Which is really fun.
If for any reason, you don't see this frame with the white nodes around
it automatically, you may need to activate the transform mode by
clicking Control T, if you're on a windows
machine or command T, if you're on a
MAC, and this will automatically bring up
the transform mode. You'll need to do
this when we get into further more advanced
transforming techniques, which will come in a minute. Control T or command T. I can also hover over the corner
of one of these nodes, and I can look for my arrow to change into a little curve
with an arrow on each end, and I can then rotate my image. I can also adjust the
perspective of an image. And this can come in very handy for things like area rugs. So I'm going to place an area rug in this
space and show you exactly how to adjust the perspective to
match your image. When I'm teaching
graduate students how to sketch in
three dimensions, we have a whole lesson
on perspective, whether it's one
point perspective or two point perspective, and I'll try and give you a very easy summary of that here. Every image has a
vanishing point. That is to say, if you were
to trace all of the lines in your image and add a line
that extends out past that. If I do that even just with the lines that
make up our walls, I can follow the bottom, extend that out,
and even over here, I can see that all
of my lines come together in one little point, and that is referred to
as the vanishing point. Right there. Some images have two vanishing points and they're
often over to the sides. This is a very
straight on photo, and it's referred to as a
single point perspective. This is all to say that you want the images you bring into your photo collage to align with the perspective
as much as possible. We're not going to be
super technical about it, but understanding this idea
that visually all the lines connect together at
some point can be very helpful as you make
these transformations. So I'm going to open an image of an area rug that I found that
I want to use in my space. And I am going to do the same process we were
doing with our other images. I'm going to double click
on the background layer, change it to a regular layer, and I'm going to select the white around the area
rug and delete it out. D select by doing Control D, and then using my move tool and dragging and dropping
it into my image. And here, I can see that the way the layer has placed
itself automatically, it's above my sofa, but behind my chair. I want it to be behind
the sofa as well, so I'm going to rename
my layer area rug, and then I'm going to drag
it below my sofa layer. Now, I can automatically resize it just by having it
selected, which is great. But if I want to do a more
complex transformation, what I'll do is either right click or Control click
if I'm on a MAC, and you will see that there
are some options that come up for different types
of transformation. What I'm going to choose
is the distort option. What distorting allows
me to do is to grab the corners of any image and
move them independently. As we've been resizing the sofa, it stays proportional
to its original size. But distort is going
to allow us to drag the corners and echo the one point perspective
I drew earlier. I'm just going to drag
these corners down. Oftentimes, I will eyeball and look at an adjacent wall and try to get the angle to match up and follow along with
that adjacent wall. You can move the corners in
the back down a little bit. And then move the corners in
the front out a little bit. And it's okay if it goes off the screen because
that's what it would be doing in real life. And then when I'm
done, I can just press enter or return
on my keyboard. And now I have a area rug that fits the perspective of my image, which
is really fun, and it's a great way to really
start to understand how a particular piece
of furniture would look on top of an area rug. An important thing to keep in
mind when transforming and distorting images to fit within our collage is to not overdo it. We can skew and adjust things a little bit within the
two dimensional realm, but it's important to
remember that we're still creating a flat
two dimensional collage, so we can't rotate a view
of an existing image. So it's important to find images of the pieces
that we want to use that are somewhat at a similar
angle of our base photo, and that is what the next
module is all about.
7. Module 6: Collaging: The right images will help
your digital makeover come to life and finding
them is a labor of love? There is no shortage of furniture companies
with robust catalogs, all of which are
available online. Use this as a resource library. Most furniture
manufacturers have multiple pictures of
every piece they sell, all at different angles. Look for images that match the angle of your
base photograph. That's the most important thing. Would you see more of the top of the piece or maybe
just one side? If you're not sure, you can
save all the views and try placing them in your collage
to see which one looks best. Stay organized by saving all of your images in one
folder on your computer. I even like to rename
the files that I save with the manufacturer
and model name. This will make the process go faster once we start opening each image in photoshop and adding it to
our main collage. Now that we have a
basic understanding of all the tools that
we're going to use, we can begin the
art of the collage. I'm going to go
ahead and open up all the images that I
saved for this project, and that includes lighting, curtains, furniture,
all the fun stuff. And I've chosen a couple of options for different
things, as well, especially artwork,
or I'm not 100% sure exactly what I want to use. That's actually the
beauty of photoshop. We can look at different pieces in our space and decide
which one is right. For each of these pieces, I'm going to use the
same method that I have been using for the pieces
I brought in earlier. I'll double click on the layer, convert it to Layer zero. Use my wand tool to select
The white background, tapped delete on my keyboard, Control D to D select. Use my move tool to drag that
image into my composition. And I can resize it by
clicking and dragging on one of the little squares
around the image. And I'll close each
file as I enter it into my collage so that I don't have 1 million
files open at once. Here's a great example of an image that might not
be as easy to select. It is not on a white background, but this was the best image that I could find
of this product. So I'm going to try the object selection tool and
see if it helps out at all. We'll try our luck It's
certainly selecting something, but I'm going to have
to go back in and de select a lot to get a
clean version of this. I'll use the Lasso with the
subtractive feature selected, and I'm going to zoom in really close and take out
what I don't want. As you're doing this
kind of detailed work, make sure to take your time and zoom in and out
as much as you need. Now that I have what
I want selected, I'm going to double click on the layer to convert
the background to a regular layer and click and drag with my move tool and look a cuts it right
out like a stamp. I want this floor lamp
to go behind my sofa. I'm going to approximate
its height and name the layer floor lamp and drag it behind the
sofa in my layer menu. As you continue to add pieces of furniture and accessories
to your collage, you'll need to resize them so that they're proportional
to one another. I'm doing this here by eye because I've had many years
of practice doing this, but you can do this by looking at the actual
furniture dimensions, either on the product
website or by measuring the actual piece
in person if it's available to you and
then sizing accordingly. If my sofa is 36 " high and
my side table is 18 " high, then I want my side table to
be half the size of my sofa. Here the angle of my desk
is just a little bit off from the angle
of the back wall. I'm going to do control T
to enter transform mode, right click on the desk
and choose Distort. From there, I'm just going
to adjust the angle ever so slightly to better
match my photograph. I also think that right now the side is visible
for this piece. Based on the angle
I'm standing at, I think that we would actually be able to
see the right side. What I am going to do
is right click right on my desk and choose flip horizontally all the way
at the bottom there. That will mirror the object, and that makes it fit the
perspective even better. As you can see with this view, I have two rooms
that are visible, one that's closer to the view of the camera and one
that's further away. I'm using the basic
principles of perspective to help things
look more realistic. The further away something is, the smaller it is, and the closer it is, the larger it is. The desk that I've
placed closer to the front windows in this house
is smaller than the sofa, which is closer to us. Now I'm going to copy my
layer style and paste it onto my desk and desk chair so that they each have a
little bit of a shadow. I'm actually going to go in because we were just
talking about perspective, that shadow might be a
little bit too heavy handed for something that's
that far away. I'm going to double click on my drop shadow and adjust its
spread size and distance. It's a little bit more compact. Much better. And now I can copy that and paste that one
onto the desk chair. Keeping in mind
the principles of perspective will
help your collage to look more realistic. And the main thing to
remember is that the further away an item is from where
the picture was taken, the smaller it is, and the closer it is, the larger it is. You can see I'm resizing here to help maintain that principle. I want to use a new light
fixture in this space, but I can tell by looking
at the image that this light fixture
is not going to completely cover
the existing one. So what I'll do is I'll
take the original photo. And use the Marquee
tool and select an area directly adjacent
to the chandelier. I'm going to make sure to unlock my layer so that I
can work with it, and I'm going to
hit Control C and Control V. Now I have
an additional piece of ceiling that's going to
help cover up some of the extra bits and
pieces of my chandelier. I can do that on the
other side as well. I can also take the erase tool, reduce the opacity up
at the top to around 50 adjust the brush size
to be a little bit larger, and I can gently erase the edges so that the image looks a little bit more blended
in with its surroundings. I'm not going to
worry too much about the center line there because that's where my new
light fixture is going. I can consolidate
these two layers into one by holding down shift, selecting both of
them, and hitting control E to merge the layers. I'll just name that
layer ceiling patch. Now let's bring in
the new chandelier. I'm going to try using the
object selection tool first. That doesn't really seem to
be giving me what I want. Oh, look at that.
It's not terrible. Let's try up here. I'm always open to being surprised by
the object selection tool. That is for sure. Let's zoom in and
use the Lasso tool to take out a few things that it may have
grabbed by accident. Intricate items like
this lamp can be very challenging and time consuming to remove
the white background. Here you can see I've
missed a few pieces, so I can only really see that once I've brought that
into my main collage, and I can keep editing it. And then from there, I'm doing the exact
same thing I did to the accent wall
where I'm changing the surface color
of the baseboards, the trim, the doors, and all of the walls. And then I'm bringing
in some art pieces. And I've chosen more
than one piece of art, and I can look at each one
in the space to use this as a helpful tool to make
decisions. Okay, Wow. We got all the way through with the digital makeover
is complete, and we changed almost
every surface in the room, and I'm really happy with
the way it turned out. I hope you're happy with the way yours turned out as well. Now, we started with an empty
room for this photograph. And that is in many cases the easiest way to work because you don't
have to cover anything up. But that's not always realistic
for everyone's situation. You might be living in
your home that you're thinking about giving some kind of a renovation or makeover to. So the picture you have is
just going to have your stuff, your furniture, your
belongings in it. And so we're going to look at an example of an
image like that and how to make it a little bit more of a blank canvas
for us to work with. Here is an image of a real
working livable kitchen with some pieces of furniture that we probably don't want
to keep for our makeover. There are many different ways actually in photoshop to
remove unwanted items. We're going to look at a few of them just so you
have a choice in which type of tool you
want to use because different tools work better
in different situations. Half of the work in patching something in photoshop
is being able to visualize what will be there when we're finished as opposed to what is there now. The technique we're going to
do first is very similar to what we were doing
with the chandelier in our first image, where we're using a piece of the photograph to cover up another piece
of the photograph. So I'm going to start with
the floor for this table because the majority of it is happening on
the floor here. There is a decent portion that is along the wall and the
window and the cabinets, but the majority of
it is on the floor. So if we start there, we're going to get a good portion of the
table covered up. Using the polygonal lasso tool, I'm going to select as much
open flooring as I can. Flooring that doesn't have
furniture on it, ideally, flooring that doesn't have
a strong reflection on it, although that's a little bit hard to avoid with this picture. But this is going
to be my source for new flooring
underneath my table. So now that I have
that all selected, I'm going to hit Control
or command C to copy this. Then I'm going to hit Control or Command
D to deselect it. So I've got it copied
to my clipboard, and now I'm going to select
where I want to place it. So same process with
the polygonlaso tool, I'm going to select the
floor area around the table. And I'm going to include
the floor beyond the table as well just so
it looks a little bit even and consistent. And then I'm, of course, also going to include
the shadow and reflection from the table because if the
table is not there, it can't cast a shadow, right? So I've got this
whole area selected, and now I'm going to go up
to the edit pull down menu. And I'm going to
choose paste special. And paste special is
a really cool menu. It allows you to do a lot of different kind of custom
effects and tricks, but we're going to use
the paste into selection. And what that's
going to do is it's going to take what we have
copied on our clipboard, which is our wood
flooring and paste it into the frame
of our selection. So you'll see once we do this, we'll actually be able to
move the image around, and it won't show up outside of the area
that we've selected. In photoshop, we
call this a mask, and you'll see this reflected in our layers as well.
So here we go. Paste into, and now I'm going to use my move tool
and move this guy around. You can see that as I get to the edge of where
I had selected, the wood stops being visible. In my layer menu, I can see that there's a little black and
white thumbnail that shows the boundaries
of my selection. So this is actually a pretty advanced
photoshop technique, but it is so helpful. As I move my wood floor around, I can try to match up
the graining if I want, although that can
be a little tough. And I'm going to do this in
multiple sections as well. So another great way to copy an item in photoshop is
actually to hold down option if you're on a
Mac or Ault if you're on a Windows machine and click
and drag with your Move tool. And this will create
a copy for you. And when you're holding
down Alt or Option, you should be able to see
that your cursor does a little mirror image letting you know that
it's ready to copy. So now I can move
this copy around. And adjust exactly where the
wood graining is showing up. If I want to adjust the
angle of the wood graining, I can go ahead and do control T, hover over the
corner of my image, and just rotate it
slightly so that the graining doesn't
look too skewed. Not bad. Okay. Then
this new section of wood automatically
became the top layer. I want to pull it down under the first section of wood
just so that the line is a little less obvious between the two sections of wood.
I'm going to do that again. I'm going to hold down
option on my mac. You can do alt if you're
on a windows machine, and I'm going to bring in my
next piece of wood flooring. I can adjust the rotation
just a little bit, and I'm going to pull this
down below my other layers. I'm actually going
to put it below the first piece of wood
but above the second one. We've got almost all of
the table covered up, so I'm just going to
do one more section to cover up that
last little piece, rotate it just a little bit. The grains all going
in the same angle. And then drag this to the bottom of all
the sections of wood. Okay. So we've got a floor covering that
looks fairly decent. It's not perfect, right? And I could go through and
blur these lines out with the erase tool the same way
I did with the chandelier. And depending on how
much patience I have, I may want to take the time to really make it look
super realistic, but I will eventually be
putting furniture on top of it. So how picky I want to be
with that is up to me. Now, that is one way to cover
things up in photoshop. Obviously, I would need
to go in and do that for the back wall and the window
and the cabinet as well, so we don't see these
chairs in the tabletop. But because what's
behind the chairs in the tabletop is so much more elaborate than
what's on the floor, it can be a little bit
tricky and time consuming. So I'm going to show
you another way to do this that is actually
quite amazing. So recently, Photoshop has
created these AI tools, these AI generative tools, and they are actually
quite great. They're not perfect yet, but they can help us out so
much in situations like this. What we need to do as
photoshop users is be careful with selection and with how we prompt these
AI generators. So I'm going to show you some things to keep in
mind when doing this. I'm going to use my
polygono lasso tool to select not just my table, but the area around
the table as well. And I'm giving a good, I don't know, half inch border. And this is so that when the
AI goes to delete the table, it'll have some elements to work with and cover up
the table with. So I've just selected the table, and all the area around it, the shadow, the
whole thing, right? Nothing too fussy, nothing
too time consuming. And now I'm going
to go up to edit, and a little bit less
than halfway down our edit menu is the fill menu. I'm going to choose
generative pill. And I'm going to
type my prompt here. So you can be very
simple in your language. You don't need to speak
in full sentences. You really just want to be direct about what you want done. So I'm going to say
remove table and chairs. It helps when you
spell it right, too. And then I'm going
to click Generate. Wow. Isn't that amazing? And not only does it
look pretty good. It gives us three different
variations to choose from. So depending on some
of the details, that one's a little weird
with the dishwasher. I can choose which one
I think looks best. For me, I think it's between Oh, yeah, definitely the middle one. Middle ones better.
I remember when I was a student studying, design, I would spend hours using
different patching tools to copy little sections of an image to cover
up areas like this. So as a long time
photoshop user, I am in a lot of awe
with this new feature. As skeptical as I
was at first about how well it could actually work. It's quite wonderful. So now, We have this
whole patch on a layer, and it's named the layer
based on my prompt. The layers remove
table and chairs, and I can toggle
it on and off and you can see the
extents of the layer. It's really quite impressive. Let's do this again with the light fixture
above the table. So I'm just going to use
the rectangular marquee in this instance and select the whole area around
the light fixture. Go to my edit, pull down menu, and choose generative fill, and I'm going to say,
remove pendant light. I want to be as descriptive as possible without
being too wordy. But if I just wrote
Remove light, the A, I could think I mean the light coming
in from the window. So I want to make
sure it understands I mean the actual light fixture. So I wrote pendant light, and I'm going to click Generate. Wow. The great options, again, and I can click through them and see the wallpapers a little
different in each one. I think for me, the first
one is the best option. Is there anything else
that's changing? Yeah. Number one. So now I
have that as a layer. M I can go through and do
this as much as I want to. Let's do it again with
the other pendent light. One thing is I want to
make sure that I'm always on my base layer when I do this so that it has that
information to pull from rather than one of the
additional layers that I added. Edit, generative fill, remove. Let's try light fixture this
time and see how that goes. Gone. Like magic, it's amazing. Here are other two options. That one left something behind. This one, this one
versus this one. That one's cleaner. Okay.
Done. And I could keep going. There are some other elements
that I do want to get rid of that I think will
cover up quite easily, like the border wall paper
that I can cover up when I apply a new material
over top of it. But this is a great way to go through and edit
elements out and get the blank slate that you need to create your
digital makeover. So from here, I'm going to
start adding pieces in. Ironically, the first
thing I want to do with this kitchen is
change the flooring. For me, I've never been a big fan of wood
flooring in kitchens. It's totally
personal preference, but I want to change
this floor to stone. And a lot of the makeover choices we're going
to be making for this kitchen are more
architectural finishes rather than furniture. We'll add a little bit
of furniture at the end, but we're going to
change the flooring. We're going to change
the countertops, the tile, and all of
the paint colors. And that's a slightly
different process in terms of collaging. So let's get started. The first thing I'm
going to do is open up the image of the flooring
that do want to use. And I would recommend finding
an image, if possible, that's completely flat, rather than something that is a picture that's in perspective, a picture that someone took of an installation in the room. You want to get a totally
flat two D image. Now, this is not totally perfect because there are some
legs on this image. So I'm going to choose, I only need a small section of this tile because I'm going
to make it a pattern. But I want to make sure
that the edges match up. So I'm going to have half of a white diamond on each
side of the left and right, and then half of a pink
diamond on the top and bottom. And then from there, I'm
going to go up to the top, pull down the image
menu and choose crop. And now I'm only going to see what I wanted
to see of my image. From there, k, another
advanced photoshop technique, but you're ready for it. We're going to go to edit, and we're going to go
to define pattern, which is a little bit
more than halfway down. And here we can just
name our pattern. So I'm going to name this
Marvel checkerboard. Say, Okay. Now, I'm going to
go back to my kitchen image. I'm going to select my floor. I'm going to start with
my object selection tool on my base layer, none of the new layers
that we've created. And that we'll select
most of the floor. Of course, the table and chairs are technically
still there, so it's selecting around them. I'm just going to
grab my lasso tool, make sure the
additive property is checked and add that area in. It looks like I also have some little sections
to delete out as well. I'm going to do that. Okay, I'm satisfied with
my floor selection. Now I'm going to
add my new floor. At this point, I have
the full floor selected, and I'm going to save
this selection the same way we did in the
selection module. I'm going to go up to the
select pull down menu. I'm going to selection almost all the way
down at the bottom. And name my selection floor. We will need this later, but we have to do a
couple other steps first. I'm going to hit Command D
or Control D to D select. Now I'm going to create a new layer by tapping the
plus sign on the layer menu. From there, I'm going to
hit the layer fill button, the little black
and white cookie. I'm going to choose pattern, which is the third from the top. Now, this is Photoshops
pattern library, and there are some
predetermined ones. You can see that
photoshop defaults to this nice leaf green pattern. But since we saved our pink
and white checkerboard, it is also in our library. You can see there's a nice
thumbnail of it right there, so I'm going to go ahead
and select my thumbnail. And I'm going to increase my scale a
little bit because I know I want a big chunky
checkerboard for my flooring, and I'm going to say, Okay. Then I'm seeing some of the nice generative fill
layers that I created earlier, so I'm going to
go ahead and drag my checkerboard above
those in my layer menu. Now, right now, this is a mask and in order to manipulate
it with the transform tool, I need to convert it. I'm going to right click on my layer where it says
the name of my layer. I'm going to choose
Convert to Smart object. A smart object will allow us to manipulate the image in
a semi permanent way. Now you can see we have our eight white dots
at each corner, and I'm going to go
ahead and tap Control or command T to activate
transform Right click, and I'm going to choose Distort. Let's get my layer
menu out of the way. Now I'm going to pull my top
two corners down and in. I want to try my best to have the checkerboard
cover all of the floor area and follow the perspective that's
established in the image already. I might need to zoom
out to really see that. But the main idea is that
the two top corners will be in and down and the two outer corners will probably just come
out a little bit. If you have a
perfectly square room, you can just match the corners of the corners in your room. But because I have this bay
window and some cabetry, I have to kind of imagine what this room would look
like as a perfect square. I'm going to hit, return or enter to complete
my transformation. F here, I can bring back
my floor selection. If I go to the select pull down menu and choose load selection. Under the channel
pull down menu, I choose floor, the one that
I saved, and I click Okay. And then making sure I have my marble floor layer selected, I'm going to create a
layer clipping mask simply by clicking on this
nice little button that says layer masks. It's a rectangle with
a little circle in it, and it's going to crop
everything that's not selected. And there I have my floor. Now I have a great base to put some additional
furniture on. This is very exciting. I want to do some more
surface modification before I bring my
furniture in though. I want to change the
countertop and the tile. We're basically going to do the same process with
each of those surfaces. Let's start with the countertop. I'm going to open a really great marble image that I found. I'm going to crop out any texts
that I don't want to see. And then I'm going to
say edit define pattern. This is blue marble. I'm going to zoom in on my
countertop a little bit and see how well I can get the object selection
tool to recognize it. I'm not getting much from
the object selection tool, so I am going to use the
polyonso tool to go ahead and trace this whole thing on the island and on
the main counter. Okay. I'm not including the backsplash
because I'm actually going to change that
to be full tile. So I'm just going to do
the blue marble here. And I'm going to
save this selection. Create a new layer, it Control D to D select. Add a layer pattern to it. I can see my floor is above it. I'm going to drag this above
all of my other patterns. I'll right click on it and say, convert to smart object. And then I'll hit Control T
or command T. Right click, choose Distort and start
bringing this in a little bit. Now, I don't have to go as far with this as I
did with my flooring. I don't have to pull it
off the edge of the image. I just have to make
sure it's covering all of that nice counter area. That looks pretty good. I'm going to hit. Then
I'm going to go to select load selection
in the channel Man, I'm going to choose
counter, say. Then I'm going to create
my layer mask here with the layer mask button at the
bottom of the layer menu. I want to add tile to a few places where it
does not exist right now. I want to bring this out
onto this wing wall and really carry it out throughout the whole kitchen
because I love tile. I am going to need to
select this all by hand because it isn't one specific
object that I'm selecting. I am covering overtop
multiple objects. I'm even going to cover
up this microwave here because I don't really
like the way it looks. So I'm just going to
keep adding and slowly clicking going around objects
that I still want to see. I know I'm going to
add a new facet later, so I'm going to go ahead and just cover up the existing one. Let's save this
selection as tile, create a new layer, Control D to D select. I'm going to open the tile image that I want
to use to make it a pattern. I'm going to crop out just the top and left edge because I can
see a little white there and I do feel
like it will show up when we tile when
we tile the tile. It, define pattern. Now I'm going to
add a pattern to this new layer and I can go ahead and shrink this a little
bit because I don't think it'll be very large
just a little. Okay. Now I'm going to right click and say convert
to smart object, it Control T. Right click or Control
click, choose Distort. Now I'm going to need to do
this a few times because I have multiple surfaces
that the tile will go on. I'm going to match this
wall with the tile. Then I'm going to use my
copy trick by holding down option and
creating another layer, it Control T, right click for distort and cover
the other wall. I'm covering more than
I need just so that I'm able to easily match
the perspective points. I like to line up my edges of my image with
where the wall is. It's just a little
easier to do visually. Okay. Now I can combine these two layers by shift clicking,
selecting both of them, and doing either
Control E or command E. And I can bring up my
selection of my tile wall, say, hit my mask
button, and bam. Our tile is in place. Let's save the sky while
we've got a minute. So I've done my floor, my tile wall, and my countertop. And from here, I'm going
to make adjustments to paint color on the
walls and the cabinets. And this is the exact
same process we did in the previous photo where
I'll be selecting the wall. Adding a mask to
change the hue and saturation of each object and
seeing what colors I like. Collaging allows us
to experiment with different ideas and visually understand the relationship
of elements in a room. Interior design hinges
on coordination. Make sure to look at
the sum of all parts, not just the individual items. Photoshop is a tool for you
to use your creativity, and once you get a
feel for using it, you can spend hours
testing different schemes. So settle in, get comfortable, take breaks, and have fun. I've added a solid color layer fill to my ceiling
and the bay window, but I don't want to cover
these up completely. So here I can change
the blending mode of the layer to let some of the
photo behind show through. This can be really helpful when you're just
trying to change the color of a multi
surfaced object. There are a lot of
different blending styles that respond to
different amounts of light in different ways. I would suggest going through and seeing which one looks best. I would suggest using multiply
in a lot of instances, it often looks the best. But if you're not
satisfied with that, you can try some of
the others as well. Hue saturation and color
are often good options. I think for mine, I am
going to choose color. So I've changed all of
the surfaces in my room, and now it's time to start
bringing in appliances, plumbing fixtures
and furniture in the exact same way that we
did in the first image.
8. Module 7: Saving: Congratulations. You've
gone through all of the different tools
that you need to create your very own
digital makeover. And now the last step
is being able to share this amazing image
with whoever you want. Right now, we have our file
saved as a dot PSD document, and you can see the extension
up at the top here. That, of course, stands
for photoshop document. This is a file type that can really only be
open in photoshop. Not everyone has photoshops, so we want to be
able to save this as a file that anyone can open, like a PDF or a JPEG, TIFF, PNG, et cetera. We also want to
preserve this file because we have all of
our amazing layers here, and all of our selection saved all of these
different things, and if we ever want to come
back and make adjustments, we need these things to remain. Oftentimes, when you are saving
as a different file type, the layers will get compressed and that information
will go away. Typically, you're going to have at least two variations
of your file, one with all the layers, and one that is a little
bit more compressed, that's easy to share. Let's look at the first option. We'll go up to file and save as. If you've worked in other
types of software before, using File and Save As
is fairly familiar. But there are some
different processes here in photoshop
to keep in mind. If you're on a PC or
a Windows machine, your save as window might look a little bit different from
mine because I'm on a mac, but the fundamentals
are the same. You can name your file up at the top and you can navigate to where
you want to save it. Down at the bottom
is where you're able to choose the file type. Under the Save as option, there are a limited amount of
file types to choose from. We of course, have our
photoshop document, which is the default selection. Then there is the Photoshop PDF. I am a fan of this because this will save our layer information. And it's the type of file that you could potentially
send to someone else. We might not always
want to do that, and we'll look at
that in a minute, but it allows the flexibility
of still being able to edit the file and send it out in all one
file, which is great. So I'm going to
save this as a PDF. And what will happen is
the file that I have opened in Photoshop now is going to change to the file
that I save it as. Right now, it's
kitchen one dot PSD. I'm going to save it as
kitchen one dot PDF. I'm just going to click save it. Then here we have some
options to choose from. I can change the quality
of my PDF here if I want. If I'm trying to compress
it and make it very small, if I want to send
it in an e mail and there's some a file
size limitation, I could choose
smallest file size. However, I want to preserve the quality
and beauty of my photo. I'm going to keep it
at high quality print. Click Save PDF in the lower
right hand corner. Click ys. Now, My file name is
kitchen one dot PDF. Kitchen one dot PSD still
exists where I had it saved. I just don't have it open
in photoshop right now, and any changes that
I make from here on out would be made to
kitchen one dot PDF, and kitchen one dot PSD is preserved from this point in
time backward, basically. This is a good
option. We can see that we still have
all of our layers. However, the file size of a PDF and the file size
of a dot PSD file, is quite large, typically, especially when we
have a lot of layers. All of that information is
stored as memory in the file and makes the file be hundreds
of megabytes sometimes. So if we want to e
mail something and not jam up our friends and
families in boxes, we can export this image as a different file type that will compress all of
the layer information, and you'll really just see the image with no
editing capabilities. So to do that, we'll go to
file and we'll choose export. The second option is export as, and that will open up
a menu here for us. So the first option that
we have is our file type. We can choose PNG,
JPEG, or Jiff. All three of these work
well for e mailing or even sending
through text message. You're welcome to experiment with all three and see
which one you like better, but they do all work
for these purposes. And if I want to adjust the quality for
whatever reason, I can. I can keep it high, high quality, will
create a crisper image. Low quality will create
a smaller file size, and you can have the slider anywhere in between for
a little bit of both. From there, I'm
going to hit export, and it will ask me
where to save my file, and I'm going to save
it in my folder. Now, one thing you'll notice
is here at the file name, it has stayed Kitchen one PDF. The JPEG has been saved to the
location that I specified, and my PDF is still open. That's the difference
with export. It's not changing the
file we're working with. It's making basically
a copy of it somewhere else for me
to open another time. Now, why would you want
a PDF versus a JPEG? Here in my file folder, I have a few options saved. I have kitchen one dot jpeg
and kitchen one dot PDF. Remember, kitchen one dot PDF has all of my layer information. If I open kitchen one
dot jpeg in photoshop, My layer menu is blank. It's all just background. So all of that information
has been compressed, and if I want to edit
anything further, I can't. That's really important to know. However, when I look at my file size for
kitchen one dot jpeg, it is 5.7 megs. Kitchen one dot
PDF is 152.5 megs. So if I'm trying to e mail that or even send that
via text message, I might have issues. I might have my e mail
returned to me rejected, depending on how
much room someone has in their inbox or
how big a server is. So typically with e mailing, you want to keep it smaller. But for our own records, we want to keep
the larger file so we can always go
back and edit it. So as long as you have two
versions of your file, you'll be able to both
edit it and share it. And if you make a change in your main file
with your layers, you can always re export the image with any new
changes and updates.
9. Thank you!!: I hope you enjoyed this
class and leave with an amazing image of
your dream space. Thank you so much
for letting me be your guide through
this photoshop lesson, and be sure to post
your class project. I love seeing your work. I'd love to stay in touch. You can follow me
on Instagram at Soft Landing Studio and be sure to check out my
podcast soft Landing, wherever podcasts are available.
 Amy Everard, Your Space Deserves to Shine!