Transcripts
1. Limits are liberating!: When we're making art,
the possibilities are endless, which IS wonderful! But sometimes, having so many choices can
feel overwhelming. And when we're overwhelmed, we can get ourselves into a
bit of an artistic pickle. Name is Gemma, and I'm
an artist maker who has been in many a
creative quandary before. The way I often move forward through them is by pulling back. And it's this paradoxical
thought that I'd like to explore with you today
and in the next few days. In this class, I'm
inviting you to join me for seven days of
creative limitations. It's a challenge class, but
a cozy one that you can explore all in one week or spread over as many
days as you need. Creative limitations in the
context of this class are simply boundaries that we are going to make for ourselves. On each day of the challenge, I'm going to be sharing a
suggestion that you can box in your focus and this may sound like the opposite
of what you want to do. But it is amazing
how many ideas can spark when you're given
rules to work within. We'll be exploring
limitations of color, size, time, space, tools,
marks, and senses. And I'm hoping that
when you try them, you'll discover how easily you can access your creativity, even when you're feeling a
little less than inspired. Whether you're an arty beginner who's looking for
encouragement and ideas or a longtime artist looking for a creative refresh, these limitations are fun to try and are so useful to keep
in your back pocket. The ideas they spark can
expand in so many ways, and I'm looking forward to
seeing where they lead you. So take my hand, my
creative friend. Let's enjoy spending
this time together. I'll meet you in
the next lesson, where we'll have a quick chat about projects and resources. I'll see you soon.
2. Our Project: Our class project is very simple and you can complete
it however you like. As you make your way
through the challenge days, give each limiting idea a try. You'll likely find that you vibe with some more than others, and that is absolutely okay. Some you might spend
30 minutes on, others you might move
on from after five. The goal is simply to explore how each limitation changes
the way that you create. And hopefully, you'll experience some surprises along the way. If you create anything
that you'd like to share, take a photo of your page and upload it to the
project gallery, popping a note alongside to say which creative limitation
it was sparked from. If you try out more
than one, brilliant. Upload however
many as you fancy. You can also feel
free to hop around order-wise. If you want to complete day four
before day one, well, who am I to burst
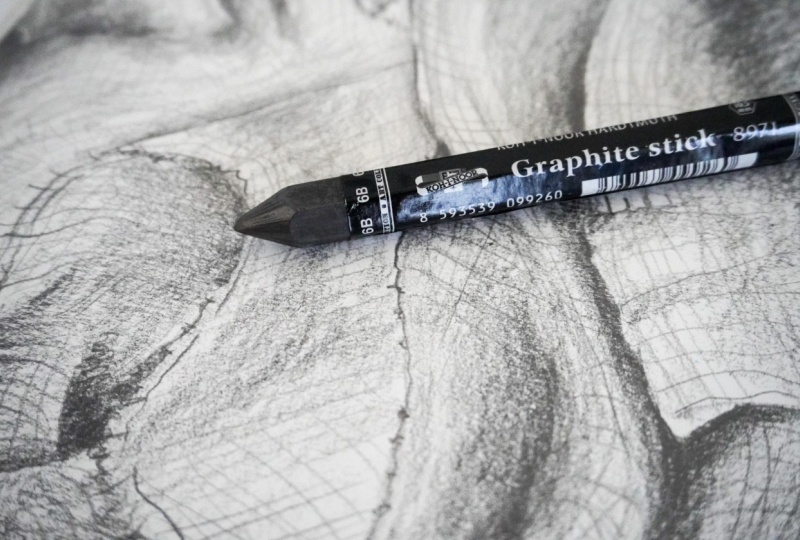
your art bubbles? Now, listen up. You can use any materials that
you like - pencils, paints, pastels,
collage, digital tools, whatever feels fun
and accessible. If you only have
a pen and paper, that is perfect, too. And there are some
handy resources, just chillin' in the projects and
resources section. Go grab the Drop and Draw sheet for quick
prompty goodness. Seek out the Challenge
Cheat sheet. for example ideas if you need a bit more inspiration,
or download the Twisty Prompt Cards to take the limitations in a few
more diverse directions. Don't worry about perfection. Just notice how each limitation shifts how you think and create. I so love seeing everyone's creations in the
project gallery. It's a wonderful
space for sharing and supporting each other's
creative meanderings. And remember, it's
your own journal space to log whatever you like. Pieces don't have
to be finished, ideas don't have to
be fully formed. I'll be adding in
all the art that I'm making for the
challenge into a project, too, so do come join me. The next lesson is day one. Where is this first creative
limitation going to lead us? Let's go find out together.
3. Day One - COLOUR: It's day one, and we're starting with a really fun limitation. Color. Color is one of the first things we reach for when we make art. So what happens when we
take a chunk of it away? Removing the full
rainbow of choices helps us to focus more
on other aspects, things like tone,
texture, and contrast. It also naturally
gives our artwork a really strong sense of
cohesion and direction. So for this challenge day, I want you to pick
just one color. You can choose to use
any hue that you lack. Maybe you'll choose a color
that matches your mood today or one that you
wouldn't normally lean into. Whichever color you land on, I want you to
create an art piece using just that
one color family. And just because we are creating
inside this limitation, it doesn't mean that there
are less decisions to make. More focused ones. Here are some questions to consider
before you start today. Will you use just one
type of material? Let's imagine you are going
to use coloring pencils. You could, for example, pull out all of the red
pencils that you have and use them with
varying pressures to achieve different
tones of red on the page. Will you mix up your materials? Maybe you'll rummage through your art supplies and find
that you have a red pencil, a red acrylic paint, a red marker pen, and a red pastel stick. You could use all of
them in one artwork. Will you explore solid
color or gradients? Your material might
affect this choice, feel free to let
it lead the way. For example, if you are using just the one red paint marker, you might want to create in
solid blocks of flat color, whereas if you are using
one red watercolor, you may want to water it down
to create lighter variants. These are all just jumping off points to get you thinking, do what feels right for you. So pick your limited adventure
and let's get creating. Now, this limitation can
work in different ways. So let's first consider
how color feels. One color family can give a strong emotional
pull to an artwork. For example, blues
like I'm using here, can create a calm
or cooler feeling. Does Bess, the orang u tang, feel more pensive just
because she's drawn in blue? What would she have felt like
had I used yellow or green? Whichever color you're
choosing today take a moment to think about why it's
calling to you right now. What emotion might it
be adding to your art? Okay, so we are all up in
our feelings right now, but let's sidestep into
the joys of cohesion. With only one color, we don't have to
worry about whether what's on our palette
will work together. Our artwork will become
cohesive automatically, which means a niggling
pressure can be released. While we create, we
can focus on how it feels to make rather than trying to picture
the end result. Very relaxing. Did you know that you are a creative
problem solver? Oh, me, you are. When we can't rely
on color variety, our creative problem
solving superpowers kick in to figure out how else we can
add interest to an artwork. Maybe you'll try to draw
different textures, varying the pressures
that you use. Perhaps you'll insert a pattern, or maybe you'll
layer your drawings. Hello. Let's geek out together
over tones, values, and contrast because
sticking to one color means light and shadow
can make a big impact, helping to create more
three D seeming forms. If you are using a material that can be muted or saturated, such as wood coolor
or coloring pencils, explore the contrasts
in your artwork by creating different
tones of the one color. Where are the deepest
and darkest areas, and where are the brightest? Think about how you can travel
between them on the page. Can explore flat
solid color too, if you are using a
material that is harder to modify into different
tonal values, such as a paint marker. You still have plenty
of options to try. With everything on the
page a solid color, your personal style
might start peeping out. To create more
interest on the page, you are forced to consider
composition more. How will you balance the
page or do you even want to fewer choices means less
overthinking and more flow. So don't hold back. Art
doesn't need you to feel completely sure
about where you're going. I just needs you to show
up on the page somehow. Start with whatever
springs to mind. A simple doodle can break up a blank page and give you
the spark to keep exploring. So what will you draw today? Feel free to use prompts from the drop and
draw sheet if it helps or follow whatever whim that wanders into your mind. It's done, take a moment
to look at your piece. What surprises did
your one color reveal? Don't forget to take a photo of it to share in the
project gallery. I'd love to see your
one color wonders. Tomorrow, we're going to turn
our focus to our art tools. What happens when we limit them? Let's find out
together in day two.
4. Day Two - TOOLS: Hello to you, 'cause
it's day two. We're going to leave
our expectations at the door and embrace an itty bit of chaos because today
we are limiting our tools. Tools in this context is meaning anything that you can
use to make art with, such as brushes, palette knives, clay smoothers, sponges
Your fingers! And it could also include
any singular art materials, such as a pencil or
a ballpoint pen. For this challenge day, I
want you to pick one tool. So you can keep it super simple and just grab the
nearest pencil and use only that to
create an artwork with or for extra
experimental vibes, pick something that is not
even a standard art tool, such as a stick, a sponge, the edge of a bit of cardboard, even the wrong end
of a paint brush. Anything that isn't your
go-to comfort tool. Then use that one tool
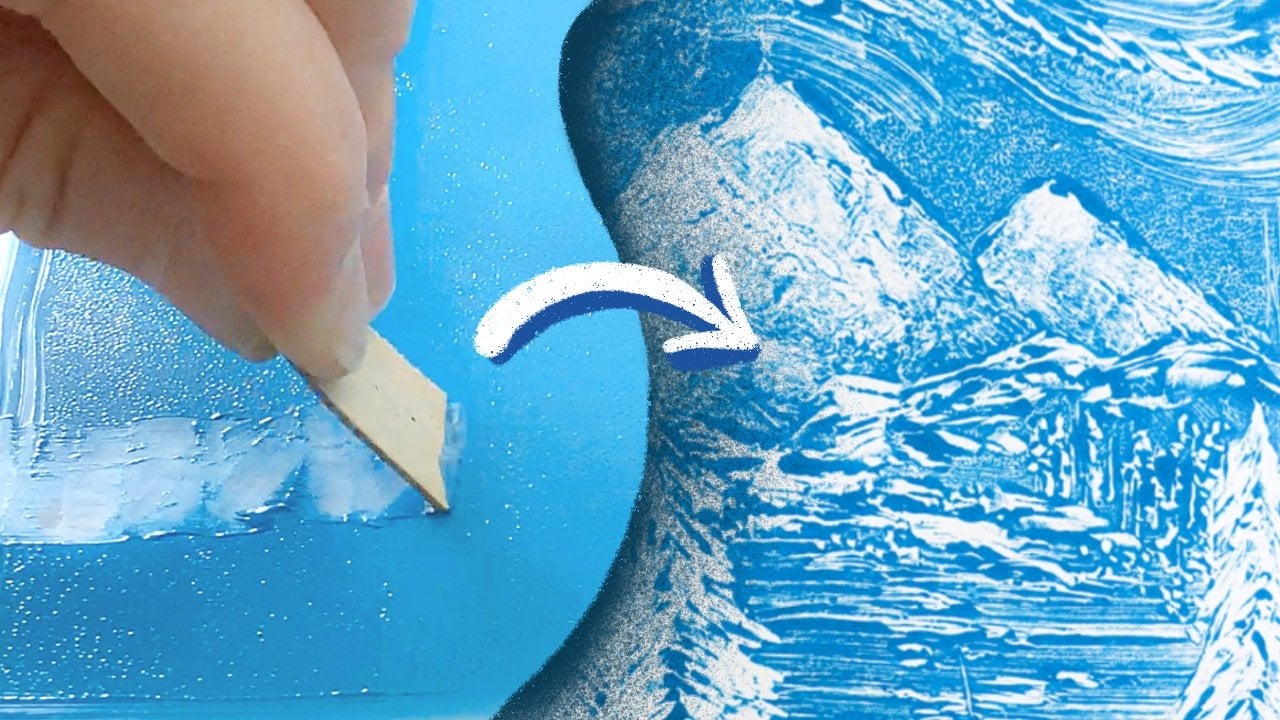
to draw or paint with. For my experiment today, I'm using a wooden
skewer and some paint. Nothing fancy, just a pointy
stick that will not quit. The purpose of this limitation is to gently nudge us out of habit mode and into a little
bit of cozy discomfort. When we can't use
our usual brushes or pens, something
interesting happens. We stop aiming for perfect lines and start noticing what
the tool wants to do. They can be surprisingly
demanding and bossy. Choosing an unfamiliar
tool encourages creative problem solving
in the best possible way. You discover textures and gestures that you
wouldn't usually reach for because the tool has its
own odd little personality. For example, with the skewer, I can blob the paint into dots, though it is harder than I expected because the
tip is so small. As I go along, I find
out that it creates dots easier when I have a bigger blob of
paint on the tip. I can also drag the paint
across the page into thin, dusty and spindlely lines or turn the skewer
more horizontally for thick streaky marks. One of the quiet superpowers of limiting tools is that it breaks those invisible
habits that we don't even realize that we have - the same brushstrokes
that we always fall into or the same tidy lines that our hands
automatically reach for. When we take those options away, something loosens and
we let ourselves play. For my Day Two adventure, I started in quite a
restrained and delicate way. I was subconsciously trying
to control the skewer's marks, hoping to get it to draw neatly, thinking it would
simply do what I told it. But painting
in this way was not as enjoyable as simply dragging the paint around
on the page in clumps, smearing it into swirls
and scratchy stars. Which is why by the end, the page turned into a muddly
mark making playground. So try letting your tool dictate the direction
that you take. Tilt it, twist it, drag it sideways, see
what feels most fun. You might find your
marks look messy or unexpected and I hope that you allow them to be
just as they are. Your job is not to
control this outcome. Your job is simply to
find out what it is. Limiting our tools is one of the fastest ways to shake
off creative stiffness. Let your tool surprise you
today and see what textures, shapes, and gestures it
can lead you towards. Don't forget to share
your one tool creations in the project gallery. I would love to see
how they turn out. Tomorrow, in Day
three, we're going to be shinking things down. We're going to go
small and see how that changes how we
create. I will see you there.
5. Day Three - SIZE: Welcome to Day three,
and today it's all about finding our focus
in a smaller space. Our limitation
this time is size. Tiny canvases take less time
to complete and, therefore, can feel a lot less pressured. But they can still push us to make plenty of creative choices. So, for today, I want you to choose a small way of creating. It could be by drawing
on a sticky note or a postcard or perhaps by
restricting parts of your page. You just need to put
down some edges and then simply start creating
within those boundaries. Working small is strategic. It helps us to focus on
essentials like composition and encourages us to make intentional decisions
without overthinking. For my day three exploration, I'm drawing a few tiny
cassette themed studies. To start, I have three small
boxes drawn on my page, and as I fill them, here are a few thoughts that you might consider for this limitation. Firstly, what can you
fit in this small space? And what are you taking
fit to mean here? Do you want your
drawing to be fully enclosed in the walls
of your canvas or will you let it be bigger
inside the space and therefore lose parts of
itself beyond the boundaries? When the space is this small, you may not be able to
include everything, and this forces you to simplify and focus on the parts that
you are truly interested in. Secondly, think about
the different ways your drawing might
live within the space. A subject can be expressed
in so many various ways, and the small space
limitation gives you a chance to explore
multiple ideas quickly. For example, in my first box, I doodled multiple tiny casettes scattered through the
space like a pattern. In the second box, I zoomed in on a corner of the
spool of the cassette. Can you tell it's
a cassette when you can only see a
tiny part of it? Does it matter if you can't? In my third box, I doodled
a full cassette tape, and as I did so, it
looked to me like a face. I added in a neck and a body
and it looks pretty odd, but it was fun to draw. When you are drawing small, you start to notice how every line might
take up space and so it pushes you to think about which ones are truly necessary. It's a lovely exercise in
editing as you go. You can ask yourself,
"how simple can I make this while still
capturing the idea?" As smaller experiments
can be speedier ones, I also sketched on a
couple of sticky notes. On the pink one, I challenged
myself to be detailed, so I did a partial zoom in to the cassette and positioned it at an angle coming
off the corner. In the yellow sticky note, I only drew one element
of the cassette, the circle of the
spool and used it as a secondary frame inside the space with a view
of a tree inside. Drawings are wonderfully
approachable. You can finish them
in minutes and finishing something,
even something small, and build creative momentum in a way that sometimes
larger projects can't. Over time, these
little moments add up and train your creativity
to show up more easily, more flexibly, and
with more joy. So pick your tiny surface today and see what wants
to live inside it. You can borrow my cassette idea if it sparks something for you or choose a new random subject using the drop and draw sheet. Tomorrow, Day four takes
us into sensory limits. Oh, what does that even mean? I will explain everything in the next lesson. I
will see you there.
6. Day Four - SENSES: It's Day four, which means we are halfway through
our creative week. And it feels like a good
time to take a gentle leap. We rely on our senses to tell
us what we are creating, but if we switch up
how we use them, we can discover some fun things. So today's limitation is all about drawing with
reduced senses. It may feel strange, but
it's a good strange. This limitation helps us strengthen our
observational skills, loosen control, and open up expressive lines that we didn't
even know we could make. So, find a simple object
that you would like to draw. This works best if
you find something that's familiar and
not too complex. I'm using a jumbly
pile of cutlery. Then give these ideas a try. Draw without looking
at the page, place your object a little
way away from your page. You want it far enough away that when you
are looking at it, you can't see your sketching
page at the same time. Now, position your hand
holding your drawing material, ready to draw on the paper. Look at your object and
keep your gaze fixed on it. As you let your eyes
travel over each detail, let your hand start to move. Try to draw the object, but don't look at your
paper as you do so. See if you can let a little
instinct take the lead. You'll find your lines become a little wandering map of
how your eyes are traveling. It's an odd feeling of
disconnect at first, especially once you finish and look back at your paper
to see the results. You'll likely find
lines which end too soon or curves which
wander too far. No matter what ends
up on the page, it's the release of
control which counts. Drawing from memory. Next, try memory drawing. Study your object
for a full minute. It will feel like a long time. But this is your chance to imprint your object
on your mind. Once the minute is over, you can turn to
look at your page and start to draw your object. But don't look back at it again! Draw from just the
memory you have, and see how much that you will subconsciously
creatively adapt it. Memory drawings reveal what
your brain prioritizes. The proportions might wobble, the details may shift, but it helps you to
notice what feels essential to you
about a subject. Drawing from touch. Pick up your object
or if it's too large, go over to it for a moment. Hold it in your hands
and close your eyes. Let your fingers move around it, noticing textures, edges,
temperature, and form. Don't rush it. This is a little moment of
calm observation. Once you feel ready,
open your eyes, put your object down, and
return to your paper. Try drawing your object
from the memory of the tactile feelings that
you just experienced. Maybe the drawing
will come out with more exaggerated curves because
they felt deeper somehow. Maybe you'll add in
marks to convey texture because you felt its presence a lot more through touching it. This experiment is
a reminder that observation isn't purely visual, it's part of a wider
sensory experience. Lastly, try gazing
at your object and drawing it using a
continuous line. Your eyes can flick between the object and the pages you go, but your pen cannot lose
contact with the paper. This experiment keeps
you present and committing to each
mark as it comes. No erasing, no hopping around, just one slow, curious
journey across the form. Continuous line drawing
encourages creative problem solving because you have to figure out pathways
between details, how to get from A to B without everything
feeling muddled. I decided to overlap all of
my experiments on one page, but you can draw them
separately, if you like. Now, these drawings may not
look polished, but instead, they fizz with instinct, wobbly expression,
and curiosity. I would love to see your
wonderfully wonky creations and let me know how you
felt when you created them. Tomorrow, in day five, it's time to start
limiting our marks, which is a great way to
explore our creative rhythm. [Makes awkward beats] I'm looking forward to it. I hope you are, too.
7. Day Five - MARKS: Now, how often do you consider what marks you are
making as you create? We often take for granted
how many decisions we make without noticing just because they simply feel natural to us. On this, day five
of our challenge, we're going to be limiting the types of marks that we make. So firstly, what is a mark? Well, it's a building block of your creativity on the page. It's any trace left by your tools or materials
on your surface. Think lines, dots, dashes,
curves, shapes, textures, patterns, all of which combine via how you arrange them
to become your artwork. When you restrict the types
of marks that you make, your whole drawing
language shifts. So today, I want you to choose
one type of mark to use. Here are some you
might consider. Try drawing a subject just
using straight lines, bendy lines, dots, squares, or perhaps heart shapes. As you choose, notice
what your expectation might be for how those
marks might serve you, and then try and
pick a subject that goes against the natural
rhythms of them. For example, in this experiment, the drop and draw
sheet told me to draw cogs and who am I to tell
a piece of bossy paper no? So seeing as cogs are
full of circles and arcs, I chose straight lines as the only marks that
I could use here. As I figure this conundrum out, and as you start
drawing on your page, here are a few things
worth noticing. One type of mark, such as a straight line can
still be varied. While they are all going to
be straight, their length, thickness, direction, and how close together they are
can all be different. This can alter how your
art piece looks and feels. The repetition of
using just one type of mark might feel frustrating
or it might feel calming. Drawing in this way, can feel
very rhythmic and cohesive, and you might discover a flow that you've not
experienced before. As you draw, you'll
be problem solving, which is not always
straightforward. Luckily, mistakes
don't exist here. Give yourself space to
make mess or muddle. If you have time to try another mark limitation
after your first, it is worth doing, as you really start to notice how
different marks feel. Remember you can draw something figurative or entirely abstract. Perhaps you'll fill a page with looping lines and play with
the colors that overlap. Maybe your page will explore
texture or you could use something like a letter stamp to build up a quirky
shape on the page. Mark making is one of the purest forms of
visual expression, and today's challenge will help you to tune into that directly. Tomorrow, it's day six, and we will be limiting time, which is only a
little bit stressful, but also energizing and fun, I swear. I'll see you soon.
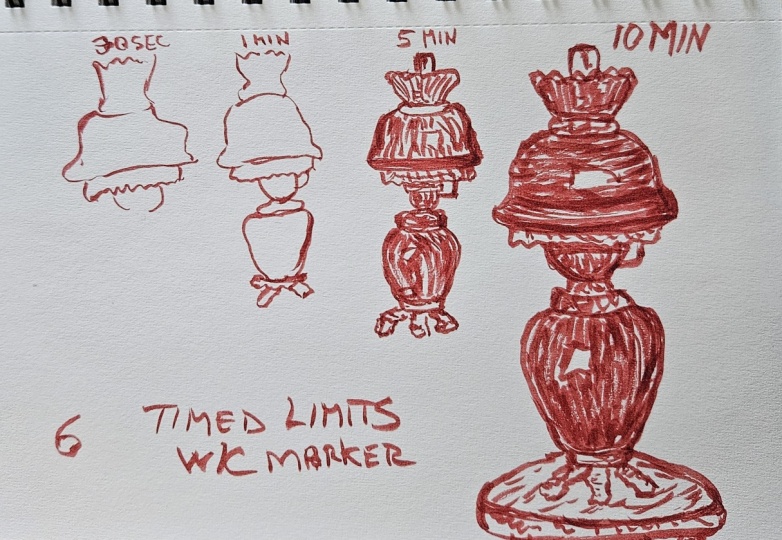
8. Day Six - TIME: This week is flying by, I hope you're enjoying
our time together. And speaking of
time... for day six, we are stepping into one of the liveliest limitations
in the whole lineup. We are limiting time. For this challenge,
you will need a timer and a speedier type of
art tool or material, such as a pen, a pencil, an art marker, or some paint. Also, choose an easy object to draw and place it somewhere
you can see it clearly. Popping a timer on
as you draw changes everything because
priorities really do shift. Here are some timings to try and some points to notice as you do. Set your first timer up
for 30 seconds and try not to freak out about how that doesn't feel like
any time at all. Yes, it is going to fly by, but don't go into it with an intention of
finishing your drawing. This sketch is going to be
a moment, and that is all. In this pocket of limited time, put your focus on sketching
the most essential shapes. React to what you see by finding the basic outlines of your object and don't
second guess your choices. Whatever you put on the page, go with it because you will
not have time to go back. When the timer beeps, you may look at your
drawing and think "huh". It may look messy
or half made, but isn't it interesting
to see what you are still able to convey
in so short a time? So let's sketch for a
little longer this time. Set your timer to 1 minute. In this pocket of limited time, put your focus on
refining the shape. You spotted the basic outline
in your first sketch, so in this second one, realize that despite this
being a short window, you don't need to rush
as much as you think. Maybe this time you can complete or connect lines
more intentionally. When the timer beeps, take a look at both of your
sketches together. How has the second one
moved on from the first? Did it feel easier
or harder to create? Okay, we deserve a breather. So next, let's set our
timers to 5 minutes. This is still not
really that long, but after the first
brief experiments, it's going to feel like you have much more space and calm. In this pocket of limited time, put your focus on
light and shadow. Start observing the edges of your object and how
they sit in the light. You have time to look at
your object more now, but still not so much
that you can spiral into indecision when the timer
beeps. Notice how you feel. Did that experiment seem calmer
or more focused somehow? Lastly, set your time
up to 10 minutes. This will feel like a decadent
amount of time by now. As you settle in to sketch, put your focus on observing and making intentional
decisions. For this experiment,
you can slow down and properly
look at your object. What details might you
not have seen before? In your previous sketches,
you've built a momentum and already practiced
the shapes and shadows, you already have
that ready to go. Now you can add in nuances and instead of
drawing reactively, draw with a direction in mind. Whilst it might seem
like time is expanding, 10 minutes is still
not really that long, so it is wonderful to
take notice of how such a small pocket of time can hold so much creative
action inside it. When the timer beeps, look at all of your
drawings together. Can you see how each one
has progressed or changed? Which ones do you like the most? It may not be the
one that you spent the longest time on. My favorite turned out to be my
five minute drawing, which felt far more accurate in the end than my
ten minute one. So, time is a gentle
but powerful editor. Being aware of it can push us forwards, encourage
spontaneity, and inspire a little bit of creative panic but
in a good way. Let me know how you get on with this one. Can
you believe it? Tomorrow is our final day, and in it, we're going
to be limiting space. It's going to be a fun end to the week, so I
will see you there.
9. Day Seven - SPACE: It's day seven.
Yes, I said seven, which means we have made it to the final day of this creative
limitations challenge. I am sad that this is
our final day together, but I do still have excitement
bubbling up underneath. Because today's challenge
is about limiting space. And it's a fun one. Space in this context is all about the page in
front of you and the decisions that you
make about how you want to fill it and what
you want to leave blank. It's often a natural impulse to want to try and
cover a page fully. But sometimes blank space can add to the story that
you're trying to tell. So on this our final day, I want you to look at
your page and make a decision before
any marks are made. What space on it are
you going to use today? Because you cannot use it all. The limitation monitor says so. Maybe you'll decide to draw only in one corner of the page, or perhaps you'll stay
right in the very center. Think about how you will keep from expanding into
the blank space. Will you draw an actual boundary line that
you cannot cross? And if so, how does
that feel to do? Or will you cut actual space
into your paper somehow? Remember, in art, blank
space is rarely empty. It is full of
questions and answers. It is part of the composition, and you get to choose
what it means. For example, in my
day seven adventure, I painted quirky
owl like creatures. Don't ask me why,
it just happened! The first one is limited
to the corner of the page and I made it
peep out over the edge. The rest of the space remaining blank forces our focus
to the owl creature, giving it more importance because we can't see the
body of the creature, it feels like it is
popping into frames spontaneously rather than
sitting for a while. This creature seems
to live in a world beyond the page rather
than inside it. But once you've made a decision, don't feel like it's rigid. Once my first creature was happily taking up corner space, I cut a hole in the
blank space above it. Then I painted another
creature on the page behind. The hole becomes another
version of blank space and it creates its own set of boundaries for what it allows
to be seen through it. It limits what we can see of the creature on the other page, which makes the creature seem more secretive
or contained. What might the
conversation be between these two creatures who don't interact directly as the
space separates them, but who do inhabit the
same page indirectly. Use of space raises
interesting questions, and it can hopefully bark a few fun ideas for you to try on this last
creative challenge day. When you're finished, take
a moment to notice how the untouched areas of your artwork shape the piece just as much
as the filled ones. Thank you for joining me across this week of creative
limitations. Thank you for embracing them and being open to where
they might take you. I hope you've discovered
new possibilities, new marks to make, new
quirks in your own style, and a realization
pulling back can be just as helpful a creative
tool as pushing forwards. The last lesson
is the wrap party, where I'll be sharing
some final thoughts, offering some inspiration
for what to try next, and giving you some
well deserved cheers. Can I get a "Yay!"? Bring your
own nibbles because mine just will not
squish through the screen, and I
will see you there.
10. The End? Or the beginning?: Oh, hey, you made it. I'm so happy that
we get to debrief and celebrate spending
this week together. It has honestly been
such a pleasure. I really hope that
you've enjoyed it, too. Over this week, we
have limited color, tools, size, senses, marks, time, and space, each one providing a different
doorway into creativity. I hope that they've been
fun to try and that they've given you some sparks
for future ideas. When you're having a
moment of creative stuckness in the future, remember that fewer choices
can sharpen your focus. Instead of trying to
think of everything, think of just one thing and then take a step
forward with that. Follow your curiosity and
problem solve as you go. Of course, this challenge
does not need to end here. You can keep
these limitations in your creative toolbox
and revisit them anytime that you feel a bit stuck or need to shake your habits loose. Take them a few steps further, you could try combining them. A one colour drawing
in 30 seconds. A tiny sketch. Using
an unusual tool. A composition in
one corner using only curved marks. Or start inventing your
own limitations. Ask yourself questions like, what if I only draw
circular things today? What if I create only
with found objects? What if I draw the same object in
ten different ways? The more you play with limits, the more possibilities open up. Also, don't forget to make
use of the resources, the drop and draw sheet for
quick prompt inspiration, the challenge cheat
sheet for example ideas, and the twisty prompt cards to spiral off in new directions. If you have any questions, let them loose in the discussion. We can find the
answers together. If you enjoyed this class and you'd like to see more from me, then do give me a
follow on Skillshare, and then you'll be first to hear when any new classes come out. I'd also love it if you
could leave a review. They really do help me
out, but they also give other potential
students an insight into whether or not they
would enjoy the class. It would be so helpful
to hear your thoughts. If you'd like to hang out
more, I would love that. Find me beyond Skillshare on my website, gemmathepen.com, where you can find helpful art and craft blogs; on YouTube, where my creative goofiness is let loose just for
your entertainment; And in my newsletter,
the Pen Diaries, where I share my coziest updates and behind the scenes peaks. And do come say hi
on Instagram, too. I'd love to stay connected, and I'd love to see
what you continue creating after this.
Don't forget to upload any of your
challenge day creations into the project gallery
if you're happy to share. It would be so
great to see them. Thank you for spending this time with me and for showing up for your creativity in such a
thoughtful, playful way. Your art practice does not need grand plans or
perfect conditions. It just needs you, a
spark of curiosity, and sometimes a
little limitation to start something wonderful. Until we meet again,
stay curious. Keep making happy, and I
will see you next time.
 Gemma the Pen, Making to Make Happy!