Transcripts
1. That’s the Creative Juice - Intro: Some believe creativity
is a pot of gold that only a few can find
after a long journey. The truth is that creativity
runs within us all. It's just a matter of getting
the juices into flow. Hi, I'm Mike, an
artist from Germany. Creativity has been my
profession for over 20 years. I started as a copywriter for big brands like Burger King, became an author, and then switched careers to
digital illustration. And I'm still
learning how to swim. As a top teacher
here on Skillshare, this class is my invitation to you to explore the
different stages of creativity with only one
single but very juicy object. First, we'll get the hang of it. Five simple drawing exercises
will get you sketching. This prepares us for
the most exciting part of the class when we dive into six juicy prompts to explore our creative potential
with pen and paper. Two dies, and even AI. I've prepared the
creative Jews magazine to guide you through class. Grab your copy in the resources
section on Skill Share. It contains worksheets for all the exercises
we do in class. Other than that, no
special tools are needed. You can follow
with pen and paper digitally or with any
tool you can sketch with. Whether you consider
yourself a seasoned creative or someone who doesn't think they're
creative at all, which trust me can't be true. Join me to explore new creative perspectives
and unlock your creativity. Are you ready to get your
creative choices flowing? I can't wait to
see you in class.
2. Your Tools and Your Project: Hi. It's so nice to
have you in class. Let's first grab the
creative Jews magazine. I've created specifically
for you to get started. Go to Skillshare under Project and resources and
download the PDF. This is suitable for
all PDF readers, and it's best to use one that allows you
to draw and edit. You can also open
it in procreate or just watch the video and
follow with pen and paper. Our first and important
page is T one. Here, write your name because the golden rule of the creative
Jews is that it's yours. There's no right or wrong, and there are no judgments. You are the Jews boss. So first mission accomplished. Turn to the next page for a great overview of all the
steps we take in this class. Step one is our
preparation time. Five easy to do and fun
drawing exercises will train your observation
skills and get you into the
practice of sketching. We keep it simple and focus
on one single object, orange. Step two, incubation. Once you have climbed
the hill of preparation, I will send you on a pause. This allows all the
great information and drawing experience from your
preparation to sink in. Let's do something
really boring. So to get ready for step number three, the
creative exploration. This is the most exciting
part of the class. Join me for six creative prompts and let your creative
juices flow. Get ready to flip
your perspective, zoom in and out, explore
the magic of analogies, and even learn to let draw, then we learn how to write creative prompts for
AI image generators. Finally, we'll
celebrate our results and see which ones have
the potential for more. I will also show you how
to keep the juices alive. Your project is straightforward. Every time you complete
one of the creative tasks, take a screenshot or a photo. Share this image with us
in the project gallery. You can update your project
anytime as we progress. I'm happy to give
you feedback or to brainstorm some ideas
if you get stuck. Don't forget to follow
me so you don't miss any new classes or updates. There are new exciting
prompts coming soon. Okay. Last tip, have a close look at this
page before we start. It contains all sorts of fun and interesting
facts about oranges. This page can help you when you sketch or look
for ideas later. Are you ready to
get the hang of it? So join me for level one of our creative journey.
See you there.
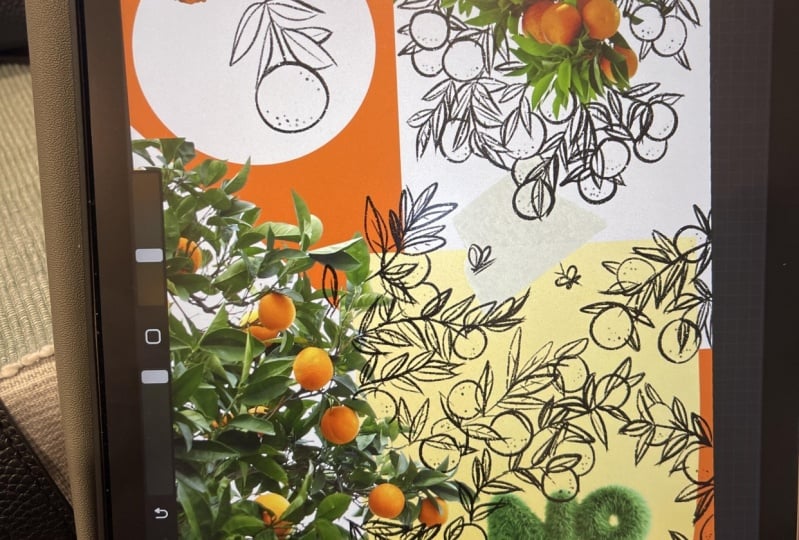
3. Preparation 1: Sketch Oranges and Branches: Hi there. Welcome to Level one. On this page, we have
our first set of oranges and your first task is just
to get into the orange flow. First off, we'll simply draw oranges on branches
with lots of leaves. There's no need for
you to work hard. Just stick to the references. Draw what you see
and take it easy. Look, I'm working here
with very simple lines, simple shapes, and
only a few details. Maybe a bit more here, but that's already it. Let's move on to the next group. This beautiful branch is
full of juicy fruits. Start adding more leaves
and oranges to the green. Sketch some branches,
that's stick out a little. Also, sketch a
couple of fruits and maybe a few more
leaves on top of them. You can add freely. Have a look at the reference
photo and see how the leaves are arranged on the orange tree and how the fruit
might be hanging. We are now in orange
training camp, so to speak, and everything we
practice now will help us later in
the creative tasks. Your powers of observation
will be one of them. Now don't be afraid
of the drawing paper. Draw branches that
reach far and wide. If you like, let your hand
slide across the page, creating a branch that boldly cuts through the
center of the page. In this step, we want to
fill the page as much as possible with oranges,
leaves and branches. The composition doesn't matter. This is your juicy
joker for creativity. See how I draw these
uncomplicated lines. Now, feel free to be
much braver than me. Go ahead and draw
these leaves on a larger scale and play around with sizes
and proportions. This step is our preparation to tap into the orange
side of our minds. So, the more oranges
and leaves we bring to life on our
page, the merrier. Try to make it really
your page and don't be afraid to fill it with your abundance of beautiful
leaves and oranges. Give yourself some
artistic freedom. Go ahead and draw at your own pace and sketch
in your own style. You can of course, make some
corrections with the eraser. An artist friend once told me that real artists
do not erase. But today, we are not
those restrictive artists. Today, we are the creators
of the creative Jews. If you want to erase, erase. I'm just going to draw a
couple of bees up here, and they are happy that they've produced such a
beautiful orange. Or that's nice. I think this is a happy orange ending to the first exercise. Well done. I think it's juicy. I can't wait to see your sketch pop up in a
project gallery. A screenshot of the page or a
photograph is totally fine. Now, congratulations. You have filled
your first basket with oranges for
the creative juice. See you in the next
level to earn more. See you in level two.
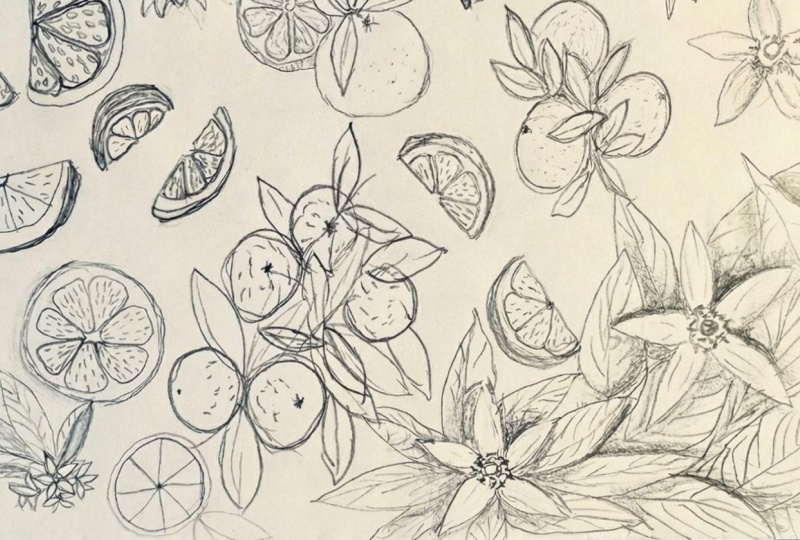
4. Preparation 2: Sketch the Better Half: Welcome to the better
half of our orange. In the second exercise, we focus on the inner
world of our fruit, and you will find that
no two are alike. As we get into the
heart of the orange, we'll start to notice all the tiny little things
that make it unique. But here's an advice. Begin with the basic forms. You can just stick to simple shapes and sketch
the details only slightly. These tiny little lines here are perfect to portray the
pulp of the orange. I also indicate the orange peel simply with a double line or a line that is drawn a bit stronger and runs a bit
wider at the top end. Try it out for yourself and use a thicker line to create
a little depth like here. Okay, let's move to number two. Take a look at how great
this orange looks. It's almost a shame that we are only sketching
in black and white. But one thing at a time. First, I draw a basic
shape very simply. And something went
wrong with the era. But let's take that
as a happy accident. That might lead us to a new shape or a
different perspective. Anything is possible
in this class. The more we repeat, the more you will get an
idea of variations. At first, I drew the pulp
with simple strokes, and now I'm just making
small oval figures. This way, each of your sketch will have a
slightly different flavor. Of course, you don't have to draw perfectly aligned ovals, but you can, if you want to. I fill in the space
with a few hatches. This almost adds a bit
of color to the sketch, but don't take it too seriously. Sometimes we have episodes where we draw very boring things. But that's just to strengthen our orange synopsis so that the creative juice
flows faster later on. So let's embrace the boring. What progress have you made? Remember, you can do this
exercise at your own pace. Okay, nearly done. That's good. Let's move to the third better half and take a closer look
at the orange peel. The orange peel is famous for not being completely smooth. So let's just draw a wavy line. And let's see how can we
vary the line inside. Under the orange peel, there are a little pores in which
the orange oil is hidden, and these pores are circular. So a wavy line will work
brilliantly. All right. Hm. You will see sometimes it takes a few tries to get the line to look right. But believe me, the more you practice, the easier it will be. If you're working in a
drawing app like Procreate, you can easily rotate
your canvas to draw in a way that's most
comfortable for you. If you're using pen and paper, just keep rotating
your paper to find the most natural way
to draw. All right. Let's see how we can also make this light inside
a bit more interesting. Maybe by making these ends at. Now it looks a bit more
graphic. What do you think? Yes, we do all of them. Now, the next option is to draw the little paws of the orange
directly into our sketch. The sketch isn't so much
about drawing in detail. It's more about drawing
in a way that creates a mental image in
your orange brain. Almost like a sticky
note that says, remember, they are paws
underneath the orange. You can draw them
this way or that way, and they might look cool
when you draw y later. Okay. How far have you gotten? In this class, we will draw
together in real time, so we can get the
hang of it together. I'm almost done. Just a
few more little oil beads, and I will call it complete. Feel free to take your time
and try out more variations, such as thicker strokes, and don't think
too much about it. Just give it a try. Yeah, it has become quite interesting. And again, I'm using
my simple lines, perhaps a little stronger this
time to suggest the pulp. Well, have your synapsis
turned a little orange yet? Now, let's move on to this one. You will find it at the bottom
right of the worksheet. The perspective is
quite interesting. If I draw the center of the
orange in a star shape, it leads directly to the outline of the fruit
pieces or the segments. Do you see what I mean? I
noticed this relatively late. Okay, and now it's time
to add some drama. Let's add a bold filling. I draw the flesh of the
fruit with dark black lines. It might even look
like a blood orange. Okay? Yeah, it looks
quite interesting. We have one more reference to draw from at the very top right. The nice thing about this
one is that we can see a bit more of the orange
peel in a new proportion, so we can try a new perspective. Instead of drawing a
simple semicircle here, I'm going to sketch a bit
more of the irregular shapes. Yes, of course, erasing is allowed, correcting is allowed. You are the boss of
your magazine page. Because you are an
orange artist, right? Okay. For the texture of the peel, I will just use simple hatching. That's it. Start slightly and then add it with a
little bit more pressure. When you're done,
take a screenshot or photo for the
project gallery. If you like, choose the
better half you are drawn to. Maybe a or just say, Oh, Dad's Now, congratulations. You have earned
the second basket in our preparation stage. At the next level, it's
time to smile a little. Emotions are a great
feel for creativity.
5. Preparation Smile: Sketch Emojis : Now it's time for some
truly happy things. Let's turn these orange slices into a few smiles or emojis. You don't have to
make them all smile, but it's a great start. A simple line becomes a smiling mouth to dots
transform into eyes. W, our first emoji is born. Now, number two. Number two
opens its mouth quite wide. I almost think it wants to
yawn or does it want to sing? Maybe not. Let's try
the e yes differently. Okay, like this.
Yeah. All right. Our first singer is ready. Here's a great way to observe different expressions.
Take a mirror. Now you open your mouth
wide trying to sing, and maybe even pull a
silly face. Don't be shy. You can support each emoji
with a few extra icons. You can add some musical notes and a trouble clove to
complete the scene. And here's a second tip. When you draw an emotion, try to express it in
your face as you draw. For example, imagine that you're making a sour
face like this. As you mirror those feelings
in your expressions, they'll naturally find their
way into your drawings. What you can also do is not to draw all of them
in front of view, but also some in a side profile. When you start doing that, you'll notice that you want the oranges to
interact a bit more. So this little friend offers
a tulip to the other. And the second one, of course, is touched and blushes a little. Now, not all of them have to be perfectly nice
and well behaved. Sometimes sticking out your
tongue is perfect, too. Let's give it some rebellious
against the grain energy. Yeah. Your creative Jews
magazine is your playground. You got to set the flow. Let's see. Who are you? Well, it looks like someone has fallen over
heels in love again. And the adored orange slice. Well, it's getting heart shaped eyes and is just
as much in love. I also know exactly what makes the other
side so attractive. It's the hair style or the
hair without any style. With juicy extras, you can truly make those orange mos your own. Like with those funny curls. And sometimes a few
lines are just great. And now, ladies first. Let's start with a proud pout and a pair of deep orange eyes. Right on the top, the
crown for my orange queen. Of course, she has
a sepa with her. And instead of an apple, it has an orange on top
decorated with an orange leaf. So here's one more. Oh, but don't call
the orthodontist. This orange is proud
of its overbite. But it's word is just getting a bit. That's just
the way it is. This page of the magazine is your personal emoj
brainstorming page. Everything is allowed and
you can draw anything. But I admit it's a bit
challenging in places. What can I draw next? What else is going to change? Crossing these barriers is crucial to get your
creative juices flowing. We keep going. It doesn't
have to be beautiful. The main thing is
to keep drawing. One thing I haven't included yet is an orange
slice making like. Squinting eyes and the wavy line for the mouth are a
pretty good symbol for this. Oh, sorry. It turned out quite crumpy. Of course, he can't stand the two singers
trilling downstairs. He's a real music fan. I. Do we have an animal orange
yet or an orange animal? No. Then it's about time. This could almost
be a little lion. What else comes to mind? Mm. I think I'd like
someone with glasses. I'm super curious to see how your orange
mg will turn out. And don't forget
once you're done, take a screenshot of the page and upload it to the
project gallery. I'm so excited to see your work. And now our last slice. The finale of this juicy
session brings us, I think, an English lord. This is his mouth,
of course, the eyes. Like a real smiley. Of course, he wears a bow tie around his neck and a small
bowler hat on top of his hat. In Germany, we call
those hats melons. If your creative juices
are already flowing, feel free to draw
a melon as a hat. To round things off. Let's add a few extra touches
to the orange smiles. Our sour one, what
does he get? Hmm. I think he gets a moustache, a very nice moustache, and very thick eyebrows. What looks like a second row of eyebrows is actually
the hair line. Well, we're in sketching
stage. Just have a little fun. When you're done,
snap a screenshot or a photo for the project gallery. Please share your creative work. Now I can say, congratulations. You've earned your
third basket of orange fruit for your
creative juices. Ready for more then have a little break and then I'll
see you at level four soon.
6. Preparation 4: Sketch Arrangement & Perspektive : All right. Let's stretch
a little. Are you ready? Okay. Our fourth level is all about arrangements
and perspectives, our challenge, getting the hang of that orange in
various settings. Of course, we're starting
with the toughest one. This masterpiece
of an orange peel. Honestly, peeling it so
beautifully is already difficult. But drawing is even
more challenging. A little trick is to start
with slightly invisible lines to get a bit of an idea of how these parts of an
orange peel overlap. Once you've cracked
such complex shapes, you will have less
fear of unusual forms. From now on an orange
peel can also be a fun curl or garlands at
the bananas birthday party. Now that I've found
the basic shape, the second step is to
take a closer look. Where are the parts of the peel that are visible
from the outside? And where is the
inside of the peel? Are there any shadows? I hint at this with
very loose hatches. Now, this observation also
feeds our creative brains. We are building up
even more information that we will be able to easily call up from our
subconscious mind later on and combine
it in new ways. Are you making progress? Great. Let's put that
orange in a box. Or let's put it this way. The aim here is to have
several oranges in one place and to draw them
in a compressed environment. First of all, I'm going
to sketch the box. But already in a perspective
given in the picture, make your life easy and
stick to the reference. That's okay. Let's start with the oranges. I use simple circles to represent the fruits. Okay. Let's see one more here. And depending on where I draw the point of
the tip of the stem, the perspective of how the orange sits in
the box changes. Again, we can add
shade or darken the empty spaces a little and make some corrections
as we go along. But what would a
proper orange box be without a fancy label? Just write oranges in
bold in your handwriting. Well done. And now we have our creative
orange juice in a glass. This is all about
the proportions of the glass and the orange. So we might be able to
combine it differently later. For example, an oversized slice of orange to a tiny glass. Ah, then the orange must have a lot more creative juice
than our class can hold. Hm. Good point.
We'll remember that. And I, of course, hope that our creativity is a lot bigger than what
our paper can hold. Okay, now, drawing these
oranges should be easy. We have been practicing so well how we can capture this
with simple lines, right? Okay. And the fruit, the full fruit and a few
more small touch ups. Okay. And yes, we
need one more leaf. You can also add some shadows. One more thing. Of course, a little piece of
cake must not be missing. We'll start with a first
basic geometric shape, which is the triangle, and then we'll simply connect the lines to form
the overall shape. That creates the base
for our slice of cake. On top, I can already
begin drawing the orange slice with
both thick lines. Okay, I'm not so sure why there is a spring of
parsley on my lemon slice. But I suppose that's
a matter of taste a little cream on top and
maybe some orange mousse, or maybe it's more bit
like orange jelly, right? Okay, let's see. Now that we have this delicious
layer of cake outlined, I can arrange the individual
layers of butter cream. If you're a chef, it would be
great if you could tell us your orange cake
recipe and maybe even make a quick sketch
of it, no pressure. Okay. Now, let's add a few bubbles
to our sketch to give it some texture and to get a better idea of how
it might look like. Yummy. Oh, dear. Several oranges in one scene
from different perspectives. Half oranges, a whole orange. That's a challenge, but
please don't worry too much. And just begin with the halfs. I start working on them
with simple shapes. Super easy. Then I combine it with the
orange body, so to speak, to make it a full
half of an orange, and that's enough for now. Of course, if the slice
is sketched like this, you could draw a
completely different body, maybe a boat or a nutshell, but that's something for later. Now, let's draw the whole
orange fruit on the plate. It's overlapping a bit now, but I can use the eraser
to remove the overlap, so I already have an idea of how my objects are positioned
in the sketch. Super easy. That's okay. In procreate, I
can easily circle around my object and
adjust it on the canvas. Now, let's add the details. To make this combination look a bit different
from the others, I'm going to make a thick
and bold outline around it. Almost like a sticker. For that, I'll add some
pressure to the apple pen. But if you're working
with pen and paper, you could also use
a thick marker, something that contrasts
with your pencil. This isn't going to be
perfect, but it's okay. And sometimes you
just need to let go. Last round, free
drawing from memory. I will quickly sketch
a basic outline of half an orange and
draw the inner lines. I'll also add our graphic connecting
lines for the segments, you know, and somehow I can't forget this sketch we drew in level two with all
the little pause. So let's do it again. But in a much
simplified version. I'm drawing this purely for
memory, so don't judge. This is an important step
in breaking away from all our references and starting to interpret
things creatively. When you're ready,
take a screenshot or a photo of the page and post
it in the project gallery. Excellent. And we have
kept it to 10 minutes. Congratulations. You earned your fourth basket
for the creative juices. See you in level five, where it is all
about speed drawing.
7. Preparation 5: Sketching Speed: Finally, our last step is to simply sketch a part of the
orange with different speeds. First, we draw calmly and
pay attention to details, and with each new step, we draw a little faster. Our challenge in the
first circle is to capture the many details
without being overwhelmed. Imagine you're
standing in front of this orange blossom
studying it carefully. Instead of trying to
copy every detail, focus on the essential elements
and their overall shape. The pedals, for example, can be sketched with
simple graceful lines. Like this. That's
absolutely fine. To enhance the contrast
add a boat outer contour. And inside the blossom, we'll refine the stem a bit and a bit more,
something like that. All right. In the next one, let's sketch a bit faster. I start with the petals and then I draw the
center of the blossom. I sketch the small pistols with the main pistol
in the center. As you can see, I'm a
bit more confident now. The lines themselves
are much stronger. So I don't need an outline. Third step, draw a bit faster. I start from the
center like this, and it almost looks like an eye with a few
circles around it. Now, add the padles around
it, and we're done. Very good. And now
at full speed. All right. Oh, boy. It's so loose and messy. I almost resembles a starfish. Can you see that? Remember,
with speed drawing, it doesn't have to be beautiful. It's all about quickly sketching this blossom
without any reference. Now, let's move on to the tree. Of course, this involves many, many details, and
in the first step, we can get involved
with all of them. The trunk and the
main branches first. Then we can focus on the tree top with its
many graceful curves. Of course, there are also some oranges loosely scattered around as I can see
in the picture. Instead of drawing each
leaf individually, I'd suggest the tips of
the leaves like this. If you have a lot of time, you can draw each
leaf individually and adjust it to the flow with
the branches of the tree. Few more details here. Okay. Let's move to step number two a bit
faster this time. Sketch the top of the tree
in a more relaxed way. By the way, an orange tree can grow to a height of
up to 10 meters. Look at our fact sheet
at the beginning of the magazine for all
this juicy information. Now, instead of meticulously
drawing individual leaves, I symbolize them with these
wild waves or things. I don't know. So feel free to explore your own
shading technique. And what is definitely needs
are some small oranges. I will add them now with
bold black circles. Great. Yes, now with more
speed and less detail. Instead of drawing a lot
of waves in this tree top, I'm going to work with three or four simple graphic shapes. Okay. Let's take a moment
and erase the overlap. Good. At this point, it's enough to outline
the oranges with circles. At this step, I'll
skip the leaves. And here, in our last circle, everything is once again
brought up to full speed. A simple grown for the tree. A few oranges. And in a really simple symbolic
shape, the leaves. Yes. And we're done. Now let's add some parts to the sketches
that we like best. Okay, how is your orange
side of the brain doing? Are you already well filled? Great. Because now we move
on to the third object, and it's probably super
easy for you, right? Simply draw the orange with
a few leaves attached. We've practiced
this quite a bit. So this exercise might also remind you a little of our
very first practice sheet. Now, for the initial step, take some time to outline
the leaves properly so that you can better see where
the fruit is underneath. Let's proceed to the next
circle a bit faster now. Perhaps I won't add quite
as many leaves this time. Instead, let's revisit
the first circle and add some more details. Yes, now with more
speed and less detail. Can you see how quickly my leaves are flowing
onto the worksheet here? Now I already know the position of the orange underneath
and I practice. Circle number four, now we
are going to very quickly, and sometimes going too fast can lead to a
lot of mistakes. Yes, sometimes time pressure
isn't the best advisor. Let me erase this part. Okay. But somehow, it's
got a funny shape. Not so bad after all.
You, it's all right. And finally, the leave. In the first circle, let's take our time
and look closely. What's the in structure like on this leaf and what's
the overall style? We're going to study
the shape carefully, and if you feel like it, you could even sketch the morning dew on
the orange grove. Okay. Now, a bold outline makes
this sketch just perfect. This creates a beautiful
contrast between small lines of the veins
and the large outlines. Let's move on to
the second circle. We'll draw a bit
faster this time. You can see that the
overall shape is becoming familiar and I'm getting
better at capturing the veins. That means in circle three
I can draw even faster. Yeah, something like this. Final step, speech drawing
in our very last circle. Quick, yes, quick, outline, the outer line, the outer shape. Okay, it's enough to suggest the form and the
rains like this. Maybe not perfect,
but it's done. Once you're ready,
share your sketches in the project section. Well done. Congratulations. We've
completed this page and the last stage
of the preparation. I'm going to give some hearts to the sketches I like the most. And to be honest, I think
they are quite amusing. Congratulations. Here's your fifth
and final basket of oranges to fuel
your creative juices. You have earned it after
all your hard work. To let all the great information
and training think in. It's time for our
well deserved break. So let's embrace the boring. Okay.
8. Mandatory Break - Incubation: Yes, it's time for
a refreshing break. Now, breaks are not
a sign of laziness. They are an integral part
of the creative process. Treat it like a professional and call it your incubation stage. This is where all the
orange information like everything we've
just sketched settles in. As we step back and give our consciousness
time to wonder, our subconscious is now
running at high speed, working with all the
things we've fed it. To allow the magic to happen. Take an extended break. Do something that doesn't involve technology.
Go unplugged. Even if ideas are already coming up and want to be seen, sleep. Sleep is always a good idea. Count something, your
socks, the grass, the dust, or brush your
teeth very slowly. Of course, walking is
also an excellent option. Once you're well rested, I will see you for our
first creative exploration, turning our orange world and
perspective upside down.
9. Prompt 1 - Upside Down: Welcome to our very
first creative prompt. We're going to experiment with turning the world of
oranges upside down. But what happens when
you flip an orange? Well, it still looks like
an orange, doesn't it? But let's see what
happens when we challenge ourselves and
draw an orange growth. But with our non dominant hand, if you normally draw
with your left hand, switch to your right
hand and vice versa. Let's dive in. We start with some orange trees. Keep it simple, draw them in basic shapes and
with basic lines. Keep in mind that
imperfection is okay. We're breaking out of
our usual tidy lines. A shaky circle for the tree with a messy
trunk is just fine. Using the untrained
hand opens you to experimentation and
letting go of expectation. How are your orange
trees coming along. Lovely. Now, let's add
another row. But watch out. In this orange grove, the trees are planted
neatly side by side. So this prompt challenges
us even further to first use our less practice hand and to embrace the imperfection. And now the task is to
draw and create order. So your orange loving
neurons are probably firing. As you can see, I've arranged everything in a somewhat
geometric pattern. And now the third row. Watch the magic of your untrained hand creating
something aesthetic? Or at so fun. All right. Let's add the last tree trunk. Perfect. Now, let's
make our scene a little bit more complex
and add some shadows. Imagine that your
orange is the sun, and the sun rays come from the top right and fall
diagonally to the bottom left. Drawing these shadows is
quite a challenge for me. My brain knows
exactly the shape, but translating it into an
actual oval is so tricky. Don't let this inner
dilemma overwhelm you. Just keep adding shadows under the orange trees bit by bit. Okay. Two more to go. Are you done. Excellent. Now, let's see what
happens when we truly turn this orange
growth upside down. Rotate your paper or
your iPad, 180 degrees. Yes, so what does
your creative C? I can clearly see nine oranges
each with a little leaf. I think that's so juicy. Of course, you can add a few more details to
suggest the orange peel. And when we turn it over again, these will be the
oranges on our tree. Fantastic. So let's
label each side. I write orange beneath here. And when we turn the
paper over again, I write trees underneath here. Fantastic. When you're ready, share your sketch in
the project section. Turning your world upside down
is a great daily exercise. When you see
something interesting or have drawn something, turn it over and
explore new shapes. Even everyday objects like a
toothbrush can inspire you. Have fun discover. See you for another
creative perspective in prompt number two.
10. Prompt 2 - Zoom In: Welcome to our next Juice
change of perspective. Now, let's zoom in
on that orange. Imagine your professor with the finest microscope
in the whole world researching the fantastic
inner secrets of the orange and making all
sorts of discoveries. It's these explorations
that you'll capture on this worksheet
in the magazine. Choose any part of the orange
you want to zoom in on. I take a quarter of a slice. Please stick to sketching
for this prompt. It's all about developing
ideas in this class. Depending on which part
of the orange you choose, a few outer or inner lines will be enough to
define its shape. Now, let's take a
closer look and allow your creativity
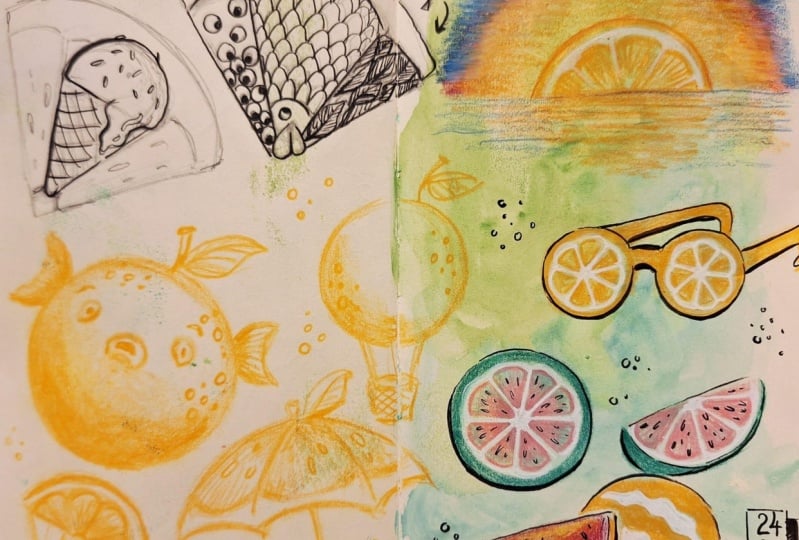
to work its magic. If I rotate my
quarter of an orange, it looks like an ice cream cone. Mmm. So let's give it a try. The orange ice cream is
inside the orange and the honey waffle comes
along with it. All right. Hm. Of course, it is a
hot day in orange land, and the ice cream is
melting down the cone. Now, let's add some
texture because maybe it's an orange
not ice cream. Let's refine the drawing a bit more and erase the
unnecessary parts. But as delicious as
the idea sounds, it's not quite juicy
enough for me. Mm. Maybe not. Let's try something different. If you're also unsure and
have an orange at hand, take another look to see if there's any hidden
inspiration inside. For me, the juice sags within the orange
segments have won. The parts where the delicious
orange juice lives. So why not add another flavor. How about a carrot? It has a very similar shape, plus orange carrot juice is
super tasty and healthy. With the oval shapes
of the fruit sacks occasionally interrupted by
the shape of the carrot, this could be a great
visual surprise. To emphasize the contrast, let's keep the top
leaves of the carrots. You're free to choose how you explore and what you
discover in the orange. Maybe you'd like to draw
with me at the same time, if so, I suggest you very
decise of the carrots. Also to avoid a rigid pattern, spread them around
the juice sacks in a somewhat random way. Everything should look
nice and organic. To maintain the overall
of the orange slice, I use the outer edge of each segment as my reference
and stay within these lines. This means that no curt leaf
should extend beyond it. Yes, it can be a
bit time consuming, but use these
simple drawings and even seemingly trivial
sketches to let your subconscious mind come up with new and amusing shapes. Don't be afraid to get bored. You know what? Why we are making a super
delicious mixed drink hidden inside our orange. Why not add another flavor? What do you think of banana
orange carrot juice? So let's explore that. This time, I'm going to
do things a differently. I'm going to draw the bananas. Again, I'll try to keep the
sketch as loose as possible. In the next step, I'll work on the little oval shapes for the juice sacks
around my bananas. The professor in
me wants to take another look at the true
heart of the orange. Okay. You can always take
a step back and examine the details of the
orange inner world again. Remember, the basic
rule of brainstorming, anything goes, there
are no restrictions. Sometimes it helps to zoom in and out of my sketch
in procreate. But you can also just
put the pan down and walk around the table to get some distance
from your drawing. Now, let's briefly capture the recipe of our
super orange mix. In the first orange segment, we have the banana. And from a scientific
perspective, there's a clear resemblance
between the two. Well done. Now, the second segment. Our orange carrot has also proven to be a
suitable combination. Bravo. And now my inner chef is contemplating the
best third option. I think I'll stick with a
classic choice for staying fit. We need our daily greens. So superfood kale
will provide us with our essential nutrients,
vitamins, minerals, fiber. Mmm, you guess what, and all these anti oxidants. They are also found
in dark chocolate. Maybe we should add that too. Okay, this would be a
true brainstorming moment when one idea leads to another. But today, let's stay within
our ten minute time frame. So we will go with Kale and sketch the juicy
ovals around it. If you add some additional
veins to the leaves, they will send out even more
from the complex pattern. Okay. Our sketch already has a certain resemblance to
stained glass. Don't you think. But to achieve this effect, we would make some
of the outlines of each segment thicker and make
the transition smoother. Fantastic. It looks great
and very important. Don't forget to label your idea. Now we have a smooth orange or smoothy orange instead of
a simple orange juice. Super. I think that's
absolutely juicy. Here's another little idea
for the overall contour. Do you remember that
underneath the peel are pores that contain
the oil of the orange? In my sketch, these are turning into little berries,
maybe blueberries. Mm, what a yummy
smoothie we will get. Now, again, that's a
task for the patient, but it will be worth
it in the end. Quick tip. It's not necessary to have a
perfectly polished sketch. The important thing is to
communicate your idea. Always sketch your
idea so that it can be understood
even if someone else doesn't share your
creative potential or if you come back to your
sketch a few days later. Okay. I'm really curious to see how your so in came out. It doesn't have to be
a smoothie you drew. It could be any discovery you made as a
creative professor. Fantastic. It's time
to take a screenshot or photo and upload it
to the project gallery. You can apply this kind of creative thinking to any
other object or situation. So the next time
you face a problem, have a look at all the tiny
details. Congratulations. You've gotten your creative
juices flowing once again. See you for the third prompt.
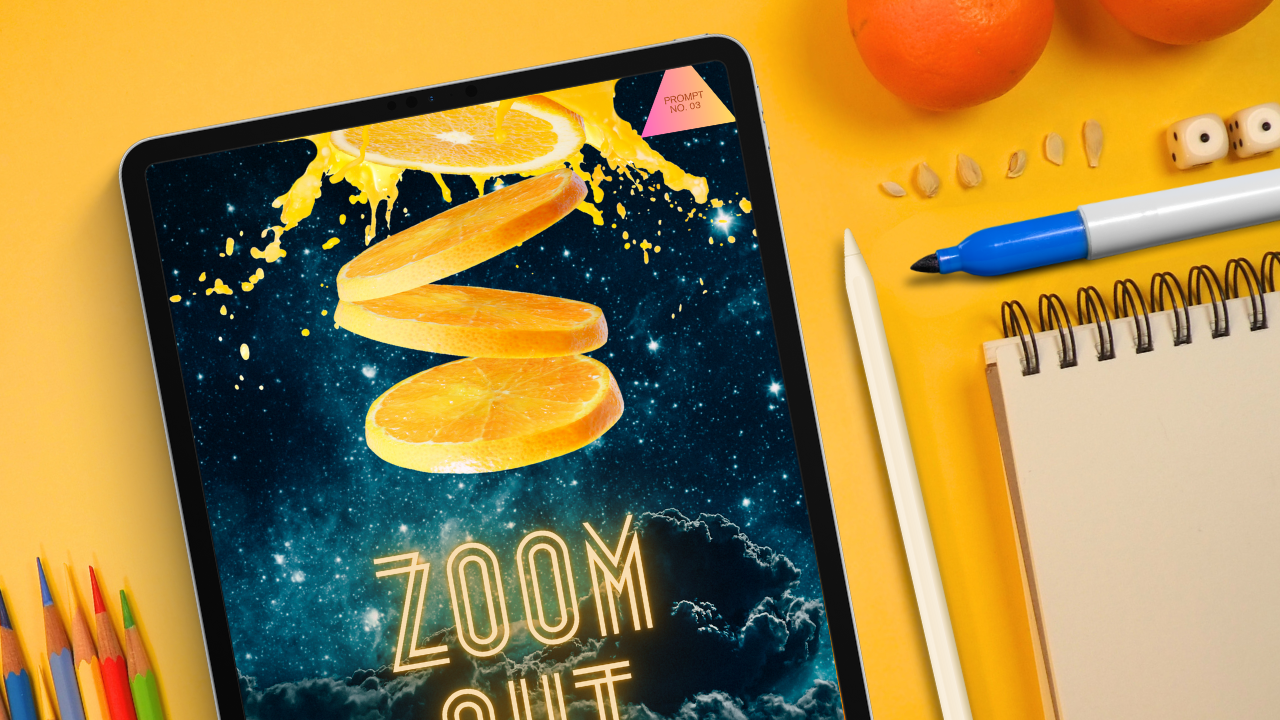
11. Prompt 3 - Zoom Out: From the cozy inner
world of our orange, we now venture far
beyond its peel. Our next prompt is to zoom out. Imagine your bird or a satellite
looking down from above. Now, I see a small patch
of land with a few trees. To emphasize the perspective, I'll sketch a small house. Now, let's turn the orange into something extraordinary
like the moon. So in my creative scene, our half sliced orange
becomes a crescent moon, casting its orange glow
over the landscape. You may have a different version to find your inspiration. You may need to close
your eyes and meditate. So out again and again until
you find an angle you like. So here's what my
inspiration produced. But maybe I zoomed out wrong. There's just nothing
juicy in this set. Let's start again. Let's
make it more dramatic. Instead of looking at the world, let's look at the cosmos. Out here, I imagine
a planet called Ogia 500 billion
miles of Jews away. Of course, Ogia is completely
orange, like really orange. And it also has an orange leave as a
signature symbol, like this. Of course, it has its own
planetary juicy rings. Yes, like this. Yeah, now
it's a really juicy planet. But wait, an unexpected sight. A, an unidentified
flying orange. Of course, our half orange slice is a spaceship jetting
through the cosmos. That's great. And of course. Yeah, what else do we need? We need some stars. And some of them with tiny orange leaves. Rumor has it that there was an orange mission to planet Oga. Perhaps some courageous humans visited orange planet and left
behind a remarkable flag. Well done humans. Remember the orange details we practiced in get
the hang of it. Now, combine them
in unusual ways. Let's add some orange seeds. Let's see how they
fit into the scene. Oh, they might look
like mini rockets. Well, that's a great idea. And the last one. Okay. Oh, yes. And a fiery tale. Like this. Yeah, that's perfect. But just be careful. It should not look like
multiple orange rockets attacking this peaceful planet. They're probably just visiting
with cake and cheese. So what's your expedition like? Feel free to have a break and
take some time to incubate. Take a walk or close your eyes to let your
creativity flow. Also, spend some time
to add a few details. It's another excellent way to come up with more
ideas for your sketch. When you're done,
grab your phone and take a picture or take a screenshot if you
draw digitally. Now, whether you landed
in outer space or zoomed out of your orange
in some other way. It's a great creative
exercise to look at the subject from as
far away as possible. In our next prompt,
we will gamble. So bring two dies to the table.
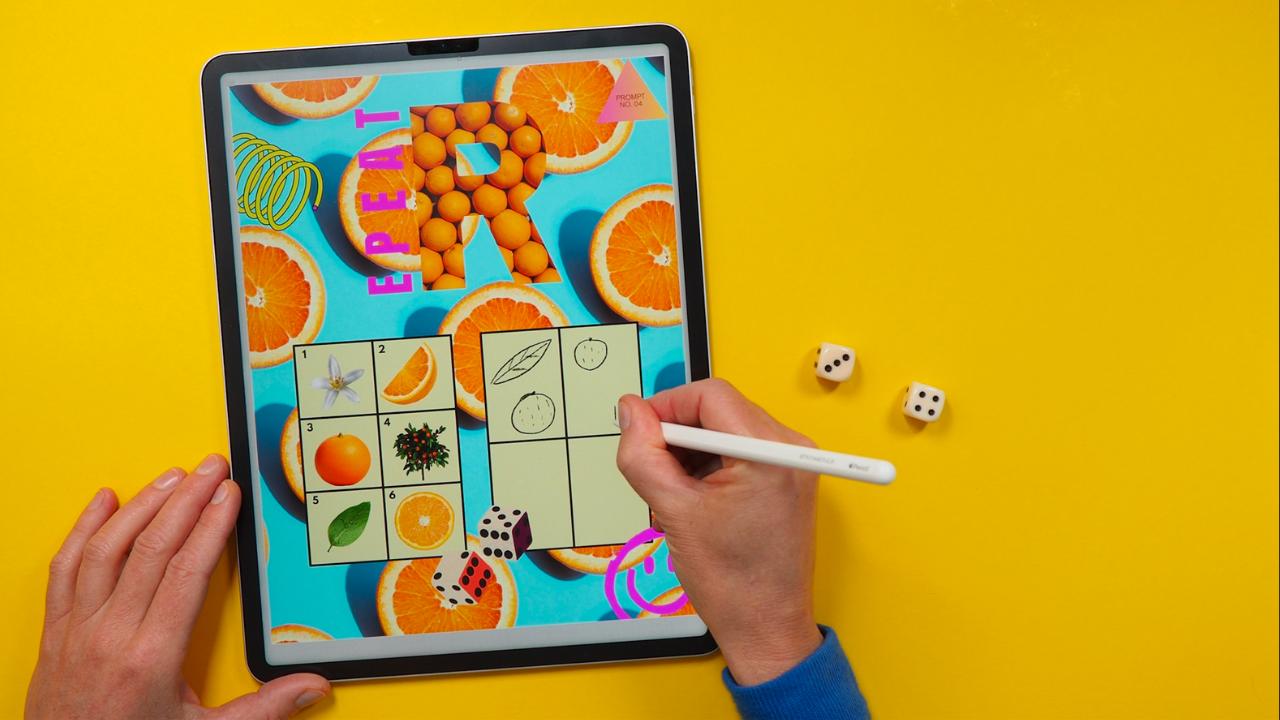
12. Prompt 4 - Repeat: In this prompt, we get playful
in our creative process. We need these six elements
of our orange theme, and you need two dies. Pause the video and go and
get them now. Are you ready? Then let's roll the die
for the first time. Ah, a five and a three. Let's see what we get.
The five represents the orange leaf and the three
represents an orange fruit. Your task is now to
sketch your result, which may be different from
mine in the first box of the empty table. Great. Next round, roll the die again. A three and a four. So it's a orange and
an orange tree again. I keep it simple and
just sketch it out. You can also go and sketch your result in the
second column. And a few more oranges
here, and that's it. Let's do one last
round together, okay? Roll the dies. And it's
a double. Fantastic. And it's such a nice one. So I'm so happy. So now I have a pair of blossoms in the third
field of my gameboard. So beautiful. Go ahead and
sketch your results too. To have our results
ready for the next step, you can either take a screenshot
or just write them down. Say hello to your next
creative playground. First, I need the
results of my roles. If you're using procreate, go under action and turn on reference and import the
screenshot of your die result. Now it is visible on
the page all the time. You could also just write
it down on a piece of paper and have them next to
you. Are you ready? Okay. Our creative
task now is to fill each of these mock ups with
one of the dice results. So you are in the role
of a surface designer. Congratulations. Now,
choose an object you're especially interested in. So I want to start with the. And for that, I'll
use let's say, the second dice result, the orange and the orange tree.
Yours might be different. So go ah with your very
special combination. Are you ready?
Let's get started. Remember, you have completely
created freedom here. Go ahead and express yourself. You're the chief designer
of this mark after all. I'm going to start with
the most prominent part I want to draw on the
mark the orange tree. So in different
positions like this, and of, there should be some oranges hanging
on the tree too. Now, I begin to fill the
space with my second element, the little orange fruits, so that they will somehow
fit together funnily? Yes, and don't
forget the handle. If you paint the handle, too, it immediately gets
a very cool look as if the mug has
already been designed. This is so much fun. So cool. And to be honest, I really
enjoyed this prompt. What about you? Are you
up for a happy dance. Okay, let's make another object. I really like this cushion, and I think it's really
great that I roll a pair. So let's make the
cushion together, and I'll draw the
result of the pair. Have you also rolled
something special. I can't wait to
see your results. So don't forget to share those little highlights as a note in the
project gallery too. First, I draw the
most prominent flower right in the middle with
its petals fully open. An orange blossom is so
pretty and smells amazing. Mm. Beautiful. Now I'm going to draw my element in each corner
around the hero blossom. I'm not going to draw
it all the way through. Instead, I will draw it so
that it looks as if the print is continued on the other side of the cushion. So like this. And you can see
that our hard work in the beginning has
really paid off. Now, all these shapes from the preparation stage just flow to us and we
can try them out. We no longer have to search on pinterest or take
pictures ourselves. Instead, we have
stored a bunch of mental references in the
orange side of our brain, from which we can
now draw our ideas. Now, all I need is a couple of little fillers that I can arrange nicely
across the cushion. Oh, that's so pretty. It has been a great exercise, and I look forward to
seeing the screenshot of your final designs in
the project gallery. Now, the third object
is still to be done, and you can get creative on your own now and take as
much time as you like. To keep it, try different
designs with the same elements. And now, congratulations. You've completed the fourth
prompt of the creative Juice. See you in the next lesson
where we will make the orange.
13. Prompt 5 - Make It Sing: Say hello to our fifth
creative prompt. We are creating analogies. Our task is to find similarities between things that might
not seem related at first. Have a look at the
range and the record. What they have mainly in
common is their shape. But a record would
realistically not grow on trees and an
orange would not play. But with a imagination? So let's put the orange
slice on the record player. I first drew the basic
shape of the record player. Depending on the perspective from which I draw the turntable, the orange will need a little
bit of adjustment too. You can also keep it simple and draw a top down perspective. Next, let's add some details. For example, we are going to add the tone arm of
our record player. It will rest directly
on the orange slice so that it can play the juicy
tunes from the orange. You can find other
music analogies. For example, with a gramophone. Here, the horn, the cylinder from which the music comes out, could have the shape of an
orange blossom or its leaves. My suggestion is that you use your creative freedom now
and draw whatever you like. I'll add a few more details, but let's not dwell
on that for too long because we want to
try out more things. Maybe even an instrument. How far are you? Are you ready? All right. So let's
try an instrument. On our worksheet in a magazine, you'll see a banjo
and an orange slice. Now draw the guitar strings in the middle and try to
get some perspective. It's that easy to make our
orange thing by analogies. And remember, it doesn't have
to be a musical instrument. Our starting phrase
is Make it C. This is your creative springboard from which many possibilities
can emerge. Analogies and metaphors are a great way to start
thinking creatively. They are also often
used in advertising. Imagine you're making a
commercial for an orange juice, and the slogan is
sip the sunshine or squeeze the sun
into your glass. I think you quickly get images of how to get that
message across. But let's go back to our
last make it thing exercise. We still have the
saxophone down here. So let's draw together. Can you see the shape yet? It can be made out
of half an orange, which represents the lower
part of the saxophone. Yes, also a couple of keys. Bit more here, and we're ready. I've also prepared the idea
for the musical notes, so why not use the
small segments of the orange to make
cheerful notes, perhaps with an
orange leaf on top. Once you're ready, take a
screenshot of the sketch or photo and upload it to
your project on ski share. Keep it juicy and try more analogies between an orange and the things around you. Use a phrase like
Make it sing as a springboard for
your creative ideas. I see you in the final prompt, where we'll explore creative
drawing with the help of AI.
14. Prompt 6 - Say Hi AI: All right, let AI
do the work for us, but it still needs
our creative input. So, hello to our very
last creative prompt. Your task is to write
three creative prompts for an AI image generator
featuring an orange. There are five key areas to consider when creatively writing your prompt. Are you ready? Here are the five aspects
your prompt should include. First, the visual medium
or in short imagery. You don't have to say a
picture of something. Just be specific. Is it a three D rendering, a photograph or
perhaps pixel art? Second, focus on a specific
idea and keep it simple. Name the object and describe
the setting briefly, like an orange in a basket. You can even move away from realistic images and let
your creativity flow. Number three, make it special. Add some details like the size, a special color or mood. Consider using adjectives
to convey emotions. The more facts you describe, the more detailed
your result will be. Number four, choose a style. Use keywords to determine
whether it is realistic, abstract, or maybe whimsical. You can even imagine
the orange as a piece of art made
by Salvador Dali. Finally, mention composition
and perspective, like different
viewpoints, for example, bird's eye view or wide angle. For those specific terms, you can get the help
of prompt generators like Daily List or
any image database. Now we are well prepared
for our last creative task. Your task is to write
three creative prompts for an AI image generator that include all five aspects
you just learned. Use your worksheet
in the magazine. If you need help, remembering what each key element means, feel free to watch
the video again. Press pause and take
your time as you write. We'll meet again soon, and I'll show you
the three prompts I've written and the
images AI created. Yes, we are back, and
this is my first prompt, photograph of a blue
orange dressed as a pirate in the crow's
nest of an old ship, realistically captured
from a frog eye view. I use Microsoft Designer
as my image AI. I enter my prompt at the top
and then click on Create. Designer is part of
Microsoft's copilot, which you can easily access
using the Bing search engine. There's no account required. It currently generates
the images with D three. These are our first
pictures, kind of funny. Let's see which one I like best. I think I take this one. Okay, the frogs perspective
isn't quite right, but I like the way the nose
of the orange turned out. If you found a picture you like, download it, to use it
in the project gallery. But how would GPT
approve this prompt? Something like this
with many more details. For example, a detailed
description of what the iPadch should look
like. This is the result. You see, experimenting with
prompts is just as important. Notice how from the
frogs point of view, the orange suddenly
has frog feet. Let's move on to
prompt number two. Illustration of a small orange celebrating its birthday with fruity friends in the style of Alice I Wonderland,
using vibrant colors. And here are my results. They're quite nice and cute
but somehow not outstanding. I immediately wrote
a second prompt incorporating many more details. In this one, I also focused
on adding emotions. For example, everyone's
having a great time. Take a look at the results. A few days later, I entered the same prompt again and
received these results. You can see that AI is
learning and evolving. All right. And my
last prompt is this, a three D rendering of an orange slice wearing
an astronaut costume, floating in space in the
style of Di with splashes of orange juice added to the futuristic scene in a
wide angle perspective. And these are my results. It's so exciting to see how the nature of the
medium, in this case, a three D rendering determines how my story
is told in the image. I hope your prompts
have been a success, and I can't wait to
see your results. Don't forget to share them
in the project gallery. Now, keep it Juicy. Practice creative
prompt writing. Have fun describing an
image in many ways. Experiment with different styles in which your image
should be created. Congratulations. You have also completed the last
creative task. I see you in our final lesson
where we will celebrate our results and see which ones have the
potential for more. I will also show you how to keep the Jews alive. So there.
15. Your Potential and Commitment: Okay. Let's celebrate our results. On this page, you can upload all your sketches or
images to the prompts. This is your time to
reflect on each idea. Think of them as
seedlings that need your attention, but be gentle. Not all of them may
grow into big flowers. See which idea speaks to you and can't wait to
come into the world. Your job is to
decide which one has the potential for more and
let that idea take the lead. The next page will help you
keep the juices flowing. Creativity needs commitment. Write down how many days you want to repeat the exercises to see how your magazine changes and which ideas
eventually blossom. I drew for 33 days to
prepare for the class, sitting down for 10
minutes every morning. I started with Inc and filled many pages
of my sketchbook, and only a few of them
became a digital drawing. Down here in these three nodes, there is room for some
motivation. Write it out. One. You are the boss. There's no restriction,
no judgment. You are in charge of
your creative juices. Be open to change. Don't get stuck on one idea. B open to new directions. Finally, take breaks. Creativity happens
while you're doing while you're resting
while you're reflecting. Do not forget to rest. You can also share this page
in the project section. Sharing it with your classmates gives it a little
more commitment. I look forward to that, too. When sharing your creative
adventures on social media, use the hashtag
SK creative Jews. Tag me on Instagram at Text and Tulip so I don't miss
out on any of it. To round things off, we'll have a little wrap up
to show you how to submit your project and summarize what you've learned
in class. See you there.
16. Wrap up and Submit Your Project: A big round of happy faces. You have completed the class. Here is what you've learned. Step one, preparation. You have completed five
drawing exercises, and you have trained
your observation skills and got into the
practice of sketching. Step two, incubation. Hopefully, you have
had a boring time. This break was
necessary to allow all the great
information and drawing experience from your
preparation to sink in. Step three, the
creative exploration. There were six
creative prompts to get your creative
juices flowing. I hope you enjoyed these. To round things off, you have
had a bit of a one on one with your ideas to see which ones have the
potential for more. And you have committed to a routine to keep
the juices alive. If you have any questions, the discussion is always
the place to ask. I'm happy to help. If
you enjoyed the class, I would be super happy
to receive your review. Your feedback is one of the most important keys to helping new students
discover this class, and it's really easy to do here. If you haven't started
your project yet, let me quickly show
you how to do it. We are now on the Skillshare
Project and Resources page. Tap on Submit Project
on the right. First, upload your cover image. It will appear as a thumbnail
in the project gallery. Like this. Also, give
your project a title. Your cover image will also be the first image on
your project page. So there's no need
to edit again. This is where you can share the magazine pages you created. There's also plenty of space to share any ideas you
have had along the way. Feel free to come back later and share more of
your creative juices. I will be notified and can help you along the
way if you get stuck. Add some text to make the class even easier
to find on scale share. When you're ready, scroll
back up and hit publish. Congratulations. You have earned your official Skillshare certificate
for the class. It will show your name, the class, and the
teacher you learn from. I hope to see you in one of my other classes I teach
here on skill share. Get ready because there
are more prompts coming. Don't forget to follow so
you don't miss any of them. Thank you so much for
joining me today. I can't wait to see you
again for the next u time. Choose
 Ulrike Text&Tulip, Digital Art in Procreate