Transcripts
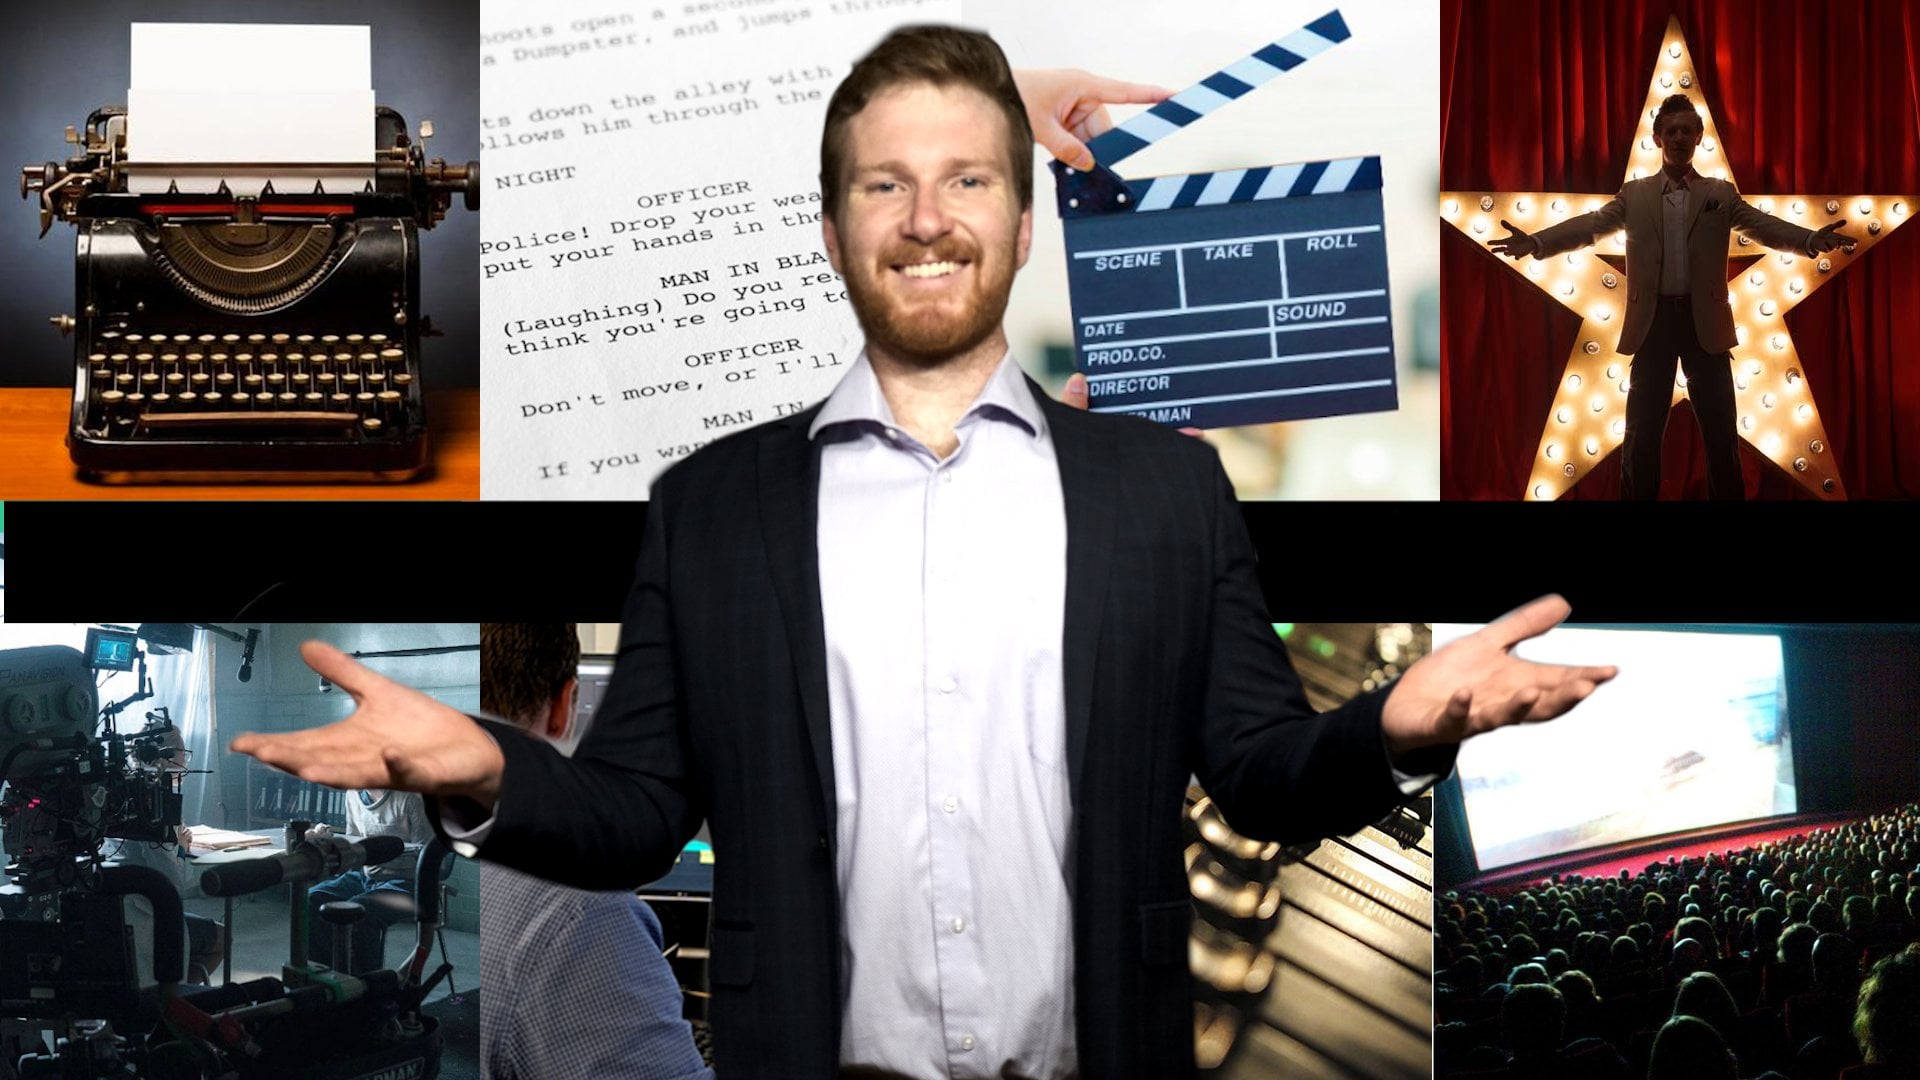
1. Introduction: In the heart of every
mesmerizing film lies the unsung hero,
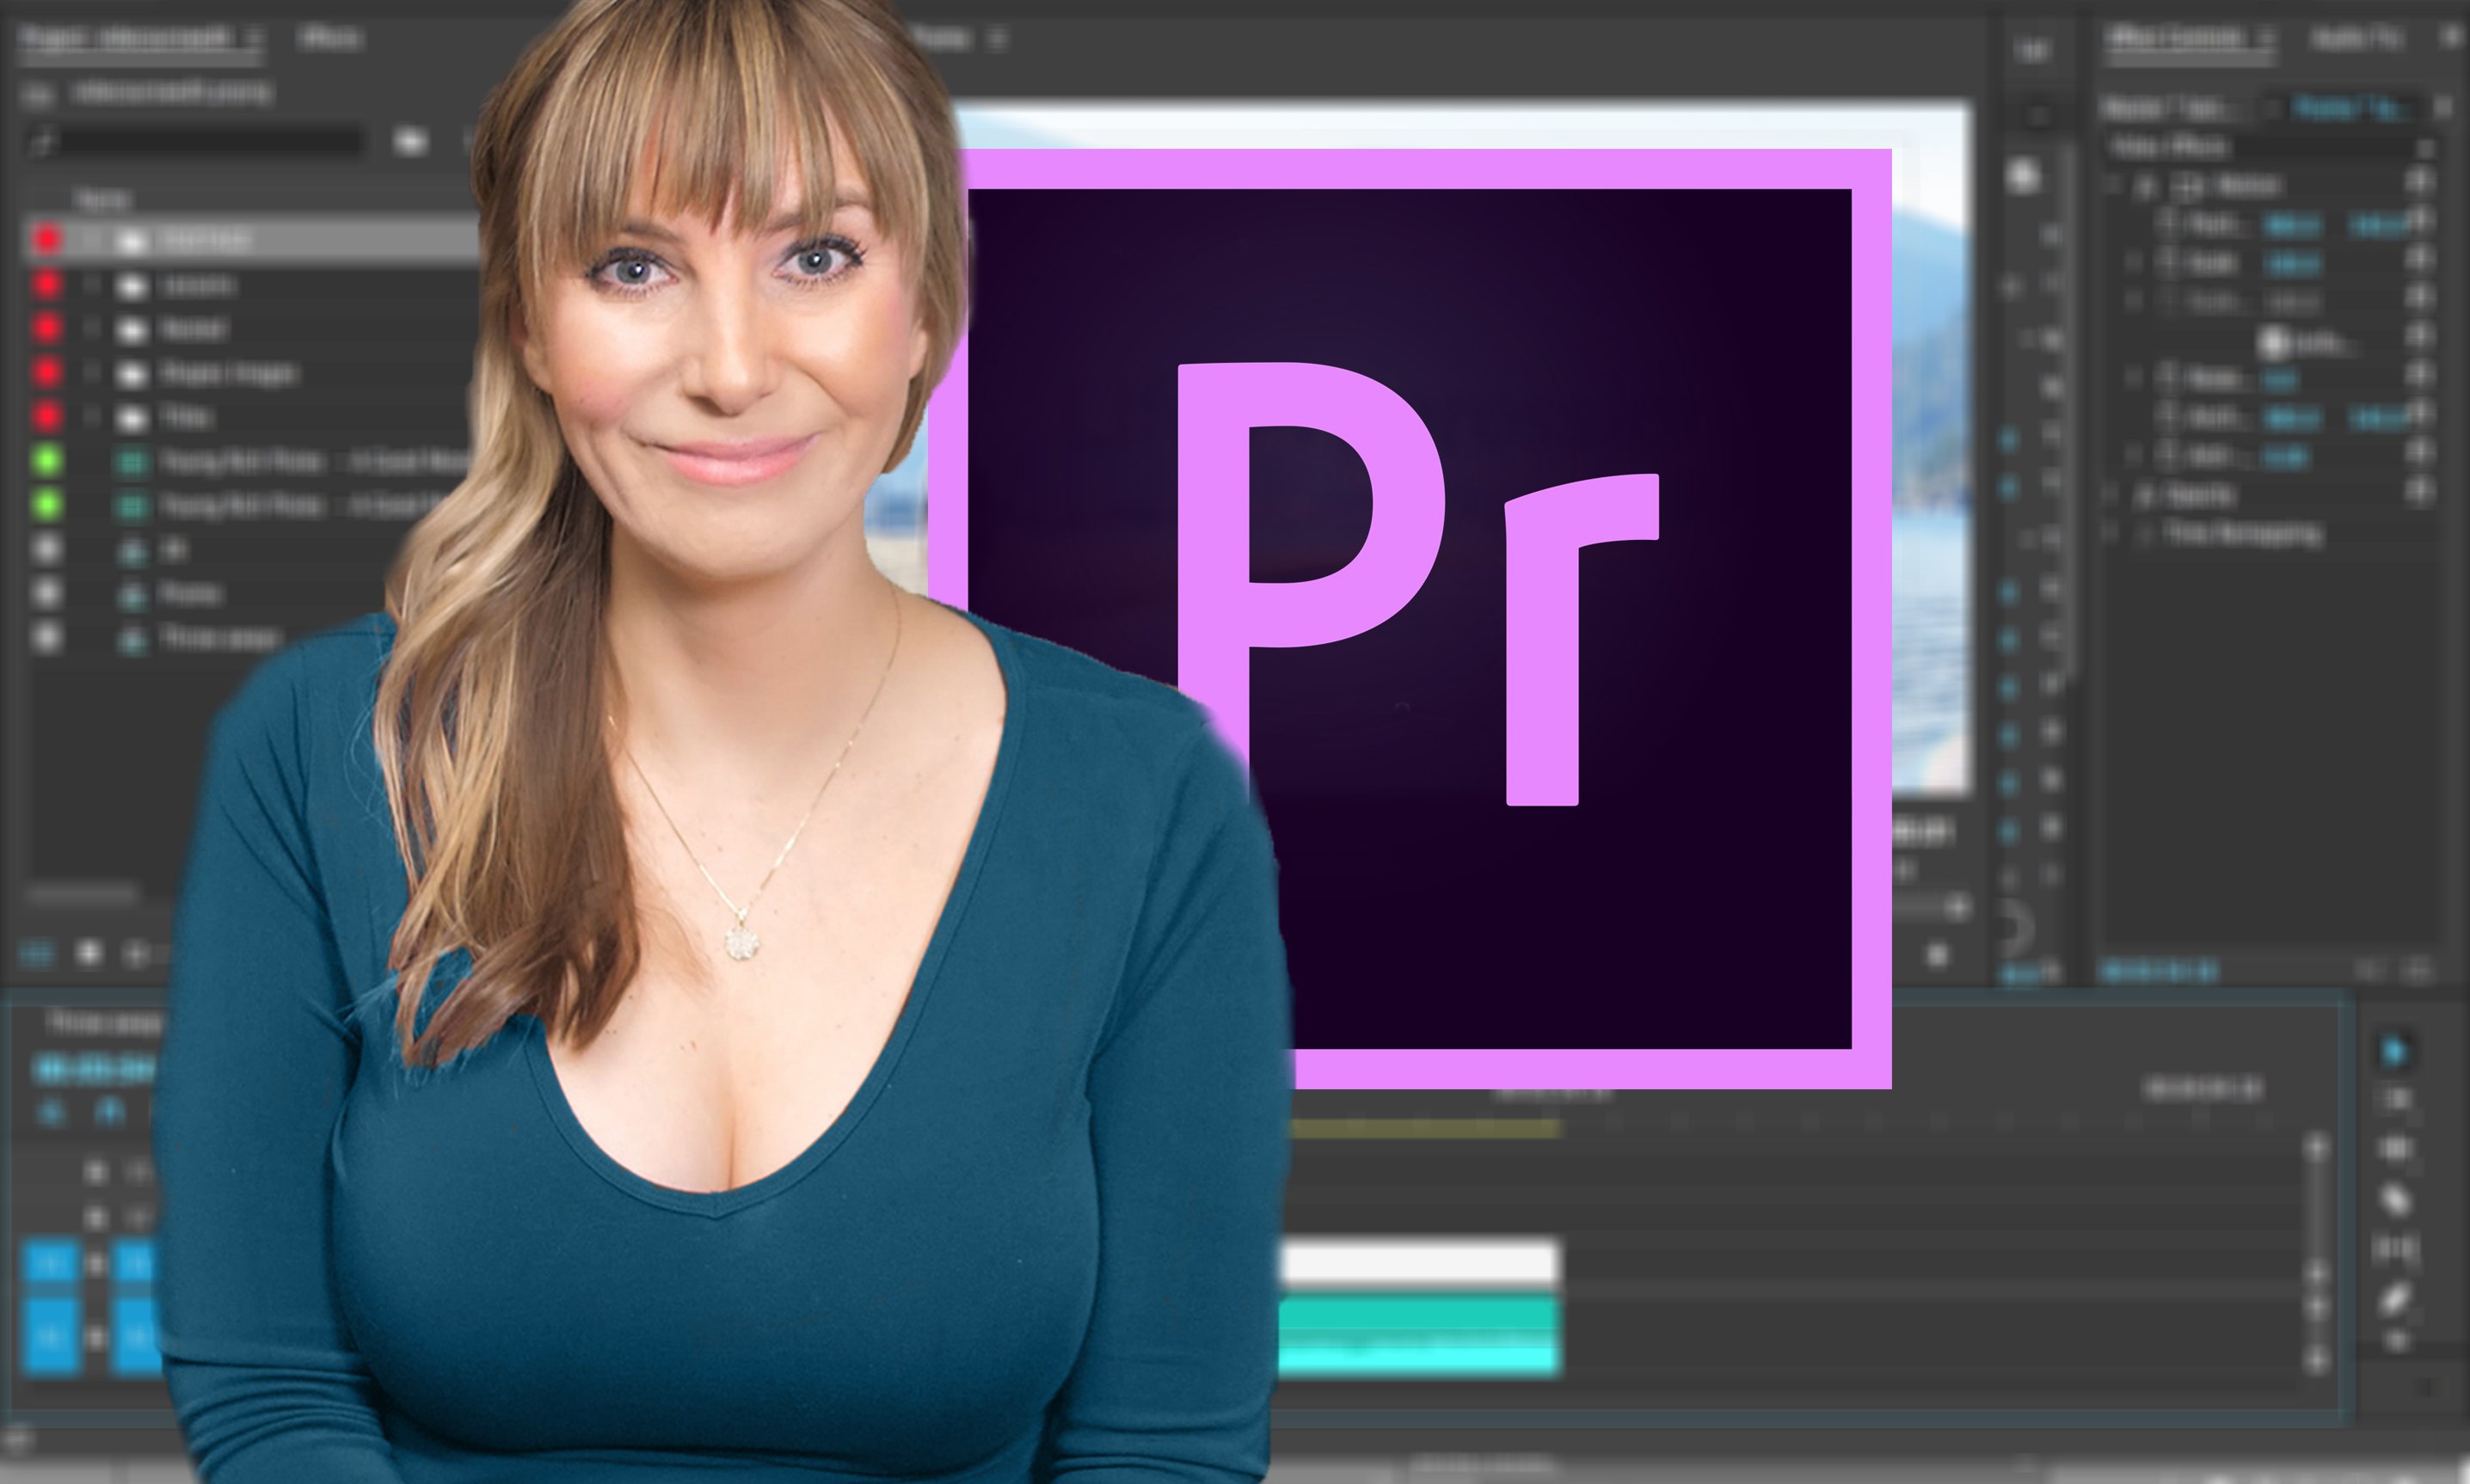
the video editor. Hi there, I'm Avena Cross, a video editor based in Sydney, Australia With over 80
years of experience. I've been lucky
enough to work with a diverse range of professions
to create amazing promos, visuals for big events and
conferences, typography, animations, and captivating
content for social media. I even had a couple
of my short films nominated at an
international film festival, which was really cool. Today I'm excited to share the insights I got from my adventures in
the film industry. Inviting you to an
incredible journey where you discovered the
yard of video editing. First, let me tell you a story. Once upon a time, a young and ambitious
filmmaker believed that the master never told in his editing software would
make him a great editor. Over time, he discovered that the two essence of video editing went far beyond the tools. It was about creating
emotional connections and memorable stories. Editing is not just about technical skills but
also the principles of story telling that can invoke several different
emotions in your viewers. And that's precisely what
this class is all about. Whether you want to become a
professional video editor, enhance of social media
or simply have fun. This class will guide you through the entire
editing process, just so you have a
very strong foundation in the out of storytelling. We'll begin by exploring
the ideation phase and the importance of
a creative brief to set a clear vision
for your project. Next we'll dive into video editing techniques
that shape the style, pace, and rhythm of our story. Following that, we've introduced the W Premiere pro interface and cover the foundations
of video editing. I'll share with you my personal workflow demonstrating
step by step how to work the timeline and learn all the tools you need to
manipulate your footage. We'll also get
into understanding the concept of key
frames and blend boats, Purposeful use of transitions
and video effects, and the fundamentals
of essential graphics, color grading, and
audio editing. For your class projects, You have the
opportunity to practice all these skills by creating
your own short video. Feel free to use your
own footage Source three videos online. I'll
show how to do that. Do or use the asset
that provided in products and resources tab
and to make things easier. You will also receive a
comprehensive guide book filled with variable content, some pat activities, and tips, allowing you to really focus on the creative aspect
of video editing. This class is perfect
for beginners or more season editors looking to develop a deeper
understanding of how to convey meaning
in their edits. By the end of this class,
you have a solid grasp of the editing fundamentals in the mindset of
professional editor. Plus you have an ark flow that it can use over
and over again for future projects in sharing consistent and
impactful storytelling. Are you ready to impact
in this exciting journey? So come with me and
let's get edited.
2. Class Project & Set Up: Thank you so so much
for deciding to take discourse with me
throughout the course. You have the
opportunity to create a 1 minute short video
for your class projects. Here's an example
that I created. The creative process is painful. This is what happens to my mind every time I try to
come up with an idea. Thoughts, emotions, feelings,
and places all come at the same in abstract fragments
that simply make no sense. It's like being in the
chaos of a hurricane, in the middle of a thunderstorm tossed in the waves
of a raging sea. I crawl, I fight, I run. The more I try, the more
I seem to get stuck. This is because the secret
is not about trying. It's about letting go. When I stop chasing, when my mind fights peace, I realize it's not
about catching an idea, but I didn't catch. That's it. Well, that lasts until I start
the next project, where I have to come to the same realization all over again. I made this video specifically
for this course and the best part of this project is that it's very open
for our creative. Exploration means
that you can either use the footage
provided and follow along with me or you can go nuts and create your own
version of the project. Maybe you have already got like some idea or some story in mind. If you're feeling
very adventurous, you can use techniques that
you're going to learn in this course to create
something completely new. Maybe a chavel video
showing your last trip. Or maybe some visuals
for your favorite song. And don't worry if you
don't have footage to work with As I'll be
teaching you how to source free stock footage and create your own
narrative or story. The most important
thing is that you have fun and enjoy your process
while learning something new. Chapel guide you
throughout the course. I have created an
exclusive guide book with a lot of
complimentary information, some tips, and some
activities that can help you to get the most out of
your learning experience. So pay attention,
especially if you cities, I can hear the course because it means there is
a hidden gem ATA, extra content waiting for you. In your guide book, you'll be doing a creative
brief for yourself, which is very similar to the one that I use with my clients. This will prepare
you for the industry and provide a
sytematic approach to creative video
making that you can use over and over again
for your future projects. To complete this
course, you need a computer and a
premier install. And there is also step by
step on how to do that. In your guidebooks, in
projects and Resources, you can find all the files and fringe that you
need for this course. I recommend you to try to
do everything from scratch, but you can open my
premier file at any time to see the examples that I
created for smoke activities. The coolest thing
about video adding is that there are so many
ways to tell a story. Come wait to see what your
creative mind comes up with. So make sure you post
your final video and activities in project
gallery of this class. And let me know if you
want some feedback. And don't worry if it
doesn't look like perfect or if it doesn't turn out
the way that you intended. We are not looking
for perfection here, but we are looking for ways to take your skills
to the next level. The more activities
that you post, the more questions that you ask, and the more feedback
that you receive, the more you learn and grow. I'm so excited to be back
in this journey with you. So make sure you
download everything, the guidebook and
the assets from the project and
resources section and I'll see you in
the first lesson.
3. Storytelling: Your Message & Goals: Are you excited
to start creating with premiere? Of
course you are. However, before
diving into editing, it's crucial to establish some clear guidelines for
telling your story effectively. So that's why it is lesson we're going to explore
the diation phase, which is basically which
consolidate your ideas, messaging and goes into a
document called Creative Brief. Okay, imagine that
the manager of a pub hires you to create a highlight video to promote the place. He gives you all the footage
from the last parties and he says that he wants something
dynamic and engaging, but he doesn't provide
you the creative brief. Excited to get started, you dive right into editing and create a fast
paced video featuring some crazy shots of young people dancing and use some
electronic music. After some days of work, you probably show the final
video to your client. And to your surprise, the client says that they had
a different idea in mind. They were targeting a
more mature audience. Seeking a place to
hang out or to have some drinks and to have
some conversations. But you, without
a creative brief, totally misunderstood
the project's goals and now we have to do the
edit all over again. So the creative brief is like a map that
guides you throughout the editing process
and sort of locks in all the main ideas
regarding the project, preventing even like some last minute changes from the clients. And I know, I know it seems like some extra work, but trust me, it can actually save
you time, effort, and even money at
the end of the day whether or not the client
provides the creative brief. It's up to you as an editor to create one for yourself
so you can define clear guidelines
for your project and also make the
whole editing process. Mother, download now the
creative brief document from Projects and Resources tab, and let's do this together. This one I created based
on other examples, but it's very similar to the one that I use
professionally. Our creative brief
has eight sections and we are starting
with the overview. It's where you write
like a big picture of your project
briefly talking about electoral ideas and also what inspired you to
create the video. Okay, next it's video category or the genre of your video. And when it comes to your video, it's important that you
know that there are a lot of different
categories to choose from. I don't know, from
creating a travel video, using clips from your last trip, or a motivational video with you based on a spoken
word that you like. It doesn't really matter
what you want to choose, as long as you have an idea of what you're going to create. And in this course, I'll be
creating a visual narrative, which is basically a short film containing a story
with no dialogue now, Okay, hold on a second,
hold on a second. Feeling extra creative and you want to make a video
from scratch, maybe. But you don't want to
spend so much time writing all the script. Why don't you try to
work with a theme, or feeling or emotion? Maybe this is
something really fun. This is a fun way to practice
everything that you are going to be learning
here in this class. As you can really get creative, using like heaps of abstract shots just
represent your idea. For instance, say that your
theme is like peacefulness. You can get a calm
song and use like different videos
represent the words such as, I don't know, a calming ocean or leaves moving or a gentle
wind or breeze, Birds, fine, so forth, whatever. Remember that. Be like your very own interpretation
of the theme. If you feel peaceful
by looking at a bonfire or someone walking by the beach,
just go for it. Don't be afraid to
express yourself and let your uniqueness flow through your work. Next
we have audience. And here you can include
all the information that you know about
your tight audience, such as gender or age, race, income level,
and so forth. Whatever's necessary
for your project. It's important to understand your audience because it
helps you to determine the best editing style
for your film and for the message that you're
trying to communicate. In my case, I have aga dows and now they are somehow
involved with creative work such as visual artists or filmmakers
scrypturiters, et cetera. All right, next platform, format and length and how that you know the audience
and your goal. It's good to determine the editing style are
going to use for this video platform they're going to create the video for. Is that a Youtube or Instagram
or Tik Talk, whatever. Really just keep in
mind your audience and where they normally
watch video from. Then we have message and goes. Message is basically the
purpose of your video. Maybe you just want
to sell a product, or maybe you want to provoke
a thought or emotion. Or even like, I don't know, create like some excitement, a feeling, whatever you want,
really just write it down. Finally, we have your tone. Your tone should always be
aligned with your message, your creative brief, and also
with the client's branding. Here's a good way to look at it. Message, which is your
words, your script, or your voice over plus
your tone equals emotion. And you might ask me, okay, what does that even mean? Your message and the
words that you're using or the voice
over you're using. They're just information
by themselves. In order to, if create like a link in a connection,
you need to use a tone. Tone is this link
that is going to tie it all up together to create like emotional
connection with your audience and also to create like a purpose
for your video. So you should always
ask yourself, how do I want my
audience to feel? And I want my audience to
feel confident and somehow inspired to keep creating
regardless of the struggles. Because we all know,
like, sometimes there are some creative blockages
that comes on the way. And I want them to feel that. And I want them to feel
a little bit tense at the beginning when we go
into the character's mind. And then I want to at
the end a bit of humor, but I'd say this is
more secondary tone. Then have a story,
which is basically a chronological order about what's happening
in your story. And it could be simply like a guy is sitting in a
chair with the head down and cameras them in and show images of things
inside his mind. Cameras the mouth and show the same guy sitting at the desk, and
that's basically it. And finally, we have the
visuals or the moodboard, which is basically where
you put all your images together or video references. And that's useful for you to guide you throughout
the process later on. But also for your client
to visualize your ideas. You can use the document here
or you can use interest. And just in the
link to everyone, it's involving the project,
that's basically it. Creative briefs are a
great way to narrow down your possibilities when
you start a new projects. And it can help you
to be more assertive with your creative decisions as well while you are editing. This document is highly used by almost every creative
industry around the globe. However, it's
important to remember that they don't always
need to look the same. Because different
companies work with different types of
creative briefs based on their own needs. So now go ahead and make
your own creative brief. Feel free to use the
example that I gave you, but also feel free to change
whatever you think is necessary to fit your
reality projects or client. Make sure you check
your guidebook while making your own creative
brief as it has a lot of complementary
information that can be helpful for you to throw with your imagination and take your learning experience
above and beyond. Do that now, and I'll see
you in the next lesson.
4. Rhythm & Pacing: Viadvkin As Soviet film
director once said, editing is not
merely a method of junction of separate
scenes or pieces, but it is a method that controls the psychological guidance
of the expectator. In other words, editing
isn't just about like putting together different
shots, different scenes. It's also about like
influencing the viewers. When someone is
watching your video, something needs to happen, like in their emotions
and their thoughts. And one of the most
common ways to that is manipulating the rhythm
and pace of your film. And that's why we're
exploring this lesson. So what is rhythm and pace? Rhythm and pace and film
editing are kind of related, but it still have
some differences. Rhythm is all about this structure and the
timing of the cuts. It basically consists on
how you arrange the shots, your cuts, your music, and sound effects
in just one scene. Now, pace is a little different. B is more about
the overall speed of the film or the scene. So when you have a fast pace, it might get you really excited or on the
edge of your seat, maybe, while a slow
pace can build the tension or give you
some time to think. In a nutshell, both
rhythm and pace play a role in the flow
and feel of a film. Rhythm focuses on the
arrangement of elements, shots, and their timing. While pace is all about how fast the whole story moves along
or how the story unfolds, The opening sequence of
the Great Guts features fast paced editing
with quick cuts on. The rapid fire rhythm of the editing creates a sense
of energy and excitement. On the other hand, the pacing of the film overall is slower
and more deliberate with a measured tempo
that allows for decactive development and also
the thematic exploration. For example, check or guide
book if you want to see more differences between like rhythm and pace in other movies. As editors, we have the power to control the
rhythm of your edit, which directly affects the
overall pace of your video. One of the most
common ways to do that is by changing the
duration of a shot. Okay, but before we get ahead of ourselves, let's
clarify one thing. If you're not familiar
with the term shot. Shot in film, editing
basically means the continuous footage
between two edits or cuts. Each segment between
cuts is called shot and their length or
their duration conj actually affects the
audience reaction. We need to remember that
some emotions take time. Sometimes holding a
shot for longer helps the audience to connect
with what's going on. Connecting with the characters. A short film that I did
when I was at college, the very fit shot
is really long and my idea there was to make the audience uncomfortable and really intrigued
about Joy's feelings. Joy, this girl here
there, you can see it. Now I want the duties to
be like very intrigued. Because the Dr. is telling
her like some bad news. And I wanted the
ties to get dragged, you know, into this feeling. What is she feeling
at this moment? So that's why like
this long shot really helped to get the
audience to emerged. In treatment that would
be recommended is experimentalist, no
guarantee shows. The tree of life Long takes
are used to create like a sense of beauty, wonder,
and introspection. In one scene, Mrs. O'brien
walks through a field while a voiceover of her
thoughts and memories reflects on the mysteries
of the existence. The long take, combined
with a voiceover, creates a powerful sense of introspection
and contemplation. Inviting, really
inviting the viewer to reflect on their own
place in the world. Sentence in his film, 1917, took this to a
whole other level, attempt to create like a movie
with one just long shot. It was pretty cool, obviously. This is extremely
hard to achieve, so there was actually a few hidden cuts
throughout the movie, but they are so well done
that we can barely see. And it doesn't defeat the
purpose behind the whole idea, which is to be very
mersive and make you feel like you are in those
changes with the young men. Check your guide book
if you want to see more movies than just one shot. Now if your movie is
filled with action scenes, eptcutting might be the goal
for movies like Mad Max, John Wick, and most of the fighting movies really
are full of fat shots. Gives the audience
the feeling of adrenaline and get them right
on the edge of their seat. The Born Identity is a
good example of a film known for its quick cuts and
fast paced action scenes. The short shots create a sense
of urgency and excitement, making the viewer really feel
like part of the action. And I can't forget
to mention cycle. This classic thriller
uses quick cuts to create like a sense
of shock and surprise. The famous shower scene, a great scene by the way, features over 50 cuts
in just 45 seconds. This creates like a very
frenzied and chaotic feeling that mirrors the
characters panic and tear. So when you're creating
your class project, whether it's a
promotional video, music video, or a narrative, it's very important to always keep your creative brief in mind as you guide you towards the best rhythm and
pace for your view. The Chamber was the first
short film I ever made. After finishing the draft, I noticed that the
first shot was way too quick and it wasn't giving me enough time to wonder, or you're getting Eks about what was happening
with the character. And that was the opposite of what I had in
my creative brief. So I went back and
I changed it just by simply making the first
shot like a little bit longer. That gave like time for me in
the audience to really get immersed in the character and to really wonder about
what was going on. And that was like way better
at the end of the day. Now thinking about it,
I noticed that I did a lot of long shots
when I first started. Maybe that was my
thing back then. Anyway, in this lesson,
we learned how to manipulate the rhythm of your edit by simply changing
the length of a shot. However, there are
several different video editing techniques that can be used to affect the rhythm and create
different meanings. And that's what we're going
to learn in the next lesson.
5. Editing Techniques: Cut on Action & Jump Cuts: I remember when I first started my video editing journey that I'd have like this awesome idea, but I couldn't figure out how to bring that idea
to life through my head. Well, that's exactly why this
lesson will come in handy. We are going to explore the most used video editing
techniques in Hollywood. And those techniques can
really help you to create like impactful and meaningful
videos, ready to dive in. So let's start with
this type of cut, cut on action or continuity
in video editing, maintaining continuity is
essential for storytelling. This is basically when you make a cut during a character's
movement or action, which helps to create a seamless transition
between shots. Let's take a look
at this example here on this other one, the cut is right at the moment that the
character is going to put the foot in the
microwave, wed it all. That actually happens in
most action packed films or fighting scenes where the editor cuts between shots
as characters fight, making the transition smooth and maintaining the
fast paced energy. Remember, cutting on action is a great way to create
a flow in your edits, so that's a good thing
to keep in mind, be aware of if you
don't want to have like weird cuts in your videos and if you want to keep
the continuity next up we have jump cuts. They are cuts that create a
sudden jump in time or space. Which can be sharing for viewers if you use
intentionally. However, when used creatively, jump cuts can be a powerful
storytelling tool. This technique is
used in many ways. One of them to show
you time passing by, as you can see in this scene, trying to catch time, that's what you call to expect. Or in this old movie called
Little Shop of Horse, it can also be used
to show a sense of urgency or to amplify tension
in this German thrill. Jump cuts are used throughout
the movie as a protagonist, Lola races against time
to save her boyfriend. Action thriller features
a chase scene in which the protagonist Jason Bourne
is pursued by a murder. The uses jump cuts to increase
the sense of urgency, creating a frantic and intense atmosphere
during the chase. Lastly, this technique
can simply be used as a style or effect as you
can see in these scenes. And I can't forget
to mention that this technique got
really popular on Tito as I trick to make
things appear and disappear. Cuts are the number
one thing that affects the continuity of the story you're trying to tell. The next lesson will cover
some more adding techniques to help you enhance your
narrative. I'll see there.
6. Editing Techniques: Other Types of Cuts: Let's keep talking about
some editing techniques as we explore some
other types of cuts. The next one I want
to talk about is called cross cutting
or parallel editing. This technique is
really cool and probably one of my
favorites as it involves a cutting back and forth
between two or more actions happening at the same time. It can simply be used for phone or video conversations
where two characters are talking to each other or in a more ecative way to
play with time and space. As you can see in
the move section, especially the scene regard, these beautiful
slow motion shots intercut with them
fighting in the dream. This is one of my favorite
movies by the way. It can also be used to build
attention as you can see in the quiet place to instead of showing one scene at a time, the director decides to
use cross cutting to show two main events
happening at the same time. S I'm not going to lie, I was on the edge of my seat
when I watched this movie. If you haven't seen
this movie yet, I highly recommend to do so. Our fourth editing technique
is called cutaway. This method involves
cutting away from the main action or the main
scene to a different subject, to a different location or detail before returning
to the original scene. Editors can use technique
for basically any purpose. A great use of
cutaways is to provide insight into the characters
thoughts or emotions. By cutting away from
the main scene to a visual representation
of what's going on inside the caters mind, You can create a
deeper connection with the audience and add
complexity to the narrative. Yes, Hello, Robert
Elizabeth in Minder Two. It's used to portray
Lloyd's daydream in the sci fi thriller push. Cutaway shots are used to exploit the
protagonist memories. And in this intense scene
from the movie seven, the cutaway shot shows Ml's dead wife just before
he shoots the killer. This allows us to
experience his anger and panic in his thoughts during
this stressful moment. Another cool use of
the cutaways is to transport the view to a
different place and time. As you can see in
the Tree of Life, or Harry Porter in
the Deadly House on the Nine V Tricks hollow to kill Harry Lily Potter carts herself. Between them, the
curse rebounded. Lastly, a cut away can simply be a cut to what the
cart is looking at, creating a connection
between the shots and adding some context
or meaning to the scene. Sometimes people call
this a cutting as well. Technique number five
is called match cut. This is basically
when a transition between two similar shots. A famous example of a match cut is found in the movie
as Space Potty. I cannot forget to mention everything everywhere
all at once. This movie is a little bit
weird, I'm not going to lie, but I simply love
the way they use match cuts throughout
the whole movie. They definitely contribute to the unique style of the film, helping to emphasize connections
between the multiverse. Look at this one, for example. Every possibility, at
the same exact time, commanding the infinite levels of power in my own
class projects, I use a lively long
shot at the beginning. Just so the audience
have time to understand what the
video is all about. After that, I throw
heaps of cutaways to show what's happening
inside the character's mind. Emphasize discomfort
and confusion. Maybe your audience
is going to feel different way when they
watch your creations. And that's Stally, fine. The most important
thing is that you have purpose while you are doing
your editing choices. The chances to hit
your audience and to be more assertive
is like way bigger. While there's so much
more to talk about writing techniques at
the end of the day, it's crucial to remember that editing is in many ways in nar, form driven by feeling. Walter Murch, the famous
editor of Godfather and so many other big movies said that editing
is like dancing. He put it this way, you can explain the
rudments of dance, but to truly learn how to
dance, you have to dance. In other words, the
more impacts editing, the better you get at it. And as you do so, you develop your own creative approach and a better understanding how to connect with your audience
in a deeper level. Hey, a great way to sharpen your skills by really paying attention to the
movies that you watch. One thing that I
love doing is re watch my favorite
movies a few times. Really to really think about
what they make me feel, how they make me feel, and why they make
me feel that way. Next time you watch a movie, try to think about how they use these techniques to evoke
emotion or enhance the story. Over all, ask
yourself questions. Is this too fast?
Is this too slow? How does it make me feel? This is a super
helpful exercise to grow you as an editor
and a story teller. Get that into practice and I'll see you in
the next lesson.
7. Video Curation & The Role of Music: The right footage. And music
enhance your narrative, set the mood, and keep your
audience hooks from start. To finish this lesson, you're learning how
to source music and footage for
your video and also understanding about some
legal consideration during this stage
of the process. Let's start with video creation. As you know, the class
project is about creating a little narrative through
the use of videos. And you can either
use your own footage or maybe stock footage or
the combination of both. But if you decide to
use stock footage, make sure you comply with all
the licensing agreements. Because some videos might
require attribution or have specific restrictions
on the way you can use them. And you may ask Abner,
I'm a young creator, I can't pay for the footage right now. That's totally fine. Because I have
good news for you. There are a lot of websites
with free stock footage and they're coming in very handy when you want to avoid
some complications. One of them is pexels, which you'll be using
for this lesson. But feel free to
check your guide book to check other options as well. But okay, with
your idea in mind, find some relevant footage that relates with the projects
you are creating. Simply go to peels, use keywords and
filters on peels, and download the desires clips, and here's a little tip for you. Always keep an eye on the altar of the videos that you like. You might notice that sometimes you have
like similar videos, the ones that
you're looking for. And if you download them or download videos
part of collection, maybe you can
actually create like a better harmony during the editing process because
they're going to look alike. Okay, now let's talk a little bit about
the role of music. Music as you probably know, plays a very crucial role for video editing as it can help you to evoke emotions and
enhance your storytelling. However, it's very
important to consider copyright when using
music for your video. Just so you know, copyright is actually a pretty cool thing. It's there to protect
the expression of ideas by giving exclusive
rights to the creators. So it basically
encourages people to create known money
from their creations. Using copyrighted music
without permission can result in copyright claims, strikes, or account amination. On platforms like
Youtube, for example, I highly recommend you to use royalty free music libraries or Creative Commons
licensed music. So you know differences. Creative Commons licenses
come with certain conditions. While royalty free
libraries offer licensed music without
additional fees or royalties, you can simply purchase a license or subscribe
to a service. Websites like Art List, Music Bed or Youtube audio library are good sources
of royalty free music. You can use the filters to find like the best
genera and mood and feel and then
download the tracks in MP three or wave format. And some websites even
offered the option of having the watermarked versions of
the music so you can test in your projects before
purchasing a license. Sum it up when sourcing music and footage
for your videos, explore royalty free platforms. Keep an organized file system and be aware of copyright laws. By doing so, you create
videos that are not just visually and audibly cool, but also legally compliant. Explore some of the
websites in your guidebook looking for footage and music for the video you're created. Once you have all that you need, it's time to organize and prepare them for the
editing process. Ensure they are properly labeled and in the
right folders. This way you can be ready
for the next lesson. We'll be talking about the fundamentals of a
premiere. I'll see you then.
8. Adobe Premiere Workspace: This lesson, we are
getting familiar with the premier interface and how to personalize
a workspace to fit your needs.
Let's jump right in. Okay, First, make sure you have a premier open and ready to go. Once it's open, you can
see the home screen. And to create a new project,
just click on New projects. Name your project. I'll choose a location that you are
going to save your project. It's very important
to choose a location that can easily find there on. Let's leave everything this
way as it is. And click okay. It's your first time
using a premier. Don't get intimidated
with all these screens As we go through the course, we're going to get more
familiar with each one of them. Like most of the apps, premier is panel based, which means everything
is organized in different panels based
on their functionality. And here's some panels that
you can get familiar with, starting from this
project panel here. This is where you put
your music videos and organize them into folders. Then you have Program panel, here's where you have a
live view of your work. Then you have source panel, and it basically shows
the peer view of your individual videos
or elements of music. And you can also use this
panel here to select in and out points and direct
to your sequence later on. But then you have like timeline. Timeline is where you manipulate your footage and you can
do like cut supplies, rearrange videos, and work
with the audio as well. In other words, basically here is where the magic
of editing happens. Yeah, we'll get
familiar with that. And some tools here
in tools panel. And you're going to
talk about some of them as we go with the course. Right. It's good to
know that you can move the panels around to change
their placement, their size. Or simply if you don't
want to see any panel, you can just click on
the little menu here, three lines, and you can
just get rid of them. If you got something by
accident, it's so good. You can just reopen
it by going to window menu and just selecting the panel that
you want to make visible. Again, check mark that
you can see here next to the panels just shows the
one you have currently open. Now the arrangement of all these panels is
called workspace, which are essentially
layouts for premiere. There are some layouts
that's already set up, and each one of them is better used for a specific purpose. Sometimes I use the
assembly workspace when I'm selecting my clips, I can just get like the
relevant panels open. This is like the vertical
panel, really for Instagram, Tiktok, or any vertical video that you might create
for the scores. We'll be using
Editing Workspace, which displays every
relevant panel for editing. But I'm going to change just a few things here because there are some extra
panels that I don't need. So I'm going to close
them this way I can keep my workspace
nice and tight. Good. All right, once
I'm done with tweaking, I can save my customized
layout as my own workspace, give it a name, and that's it. By doing this, you
don't have to arrange all the panels again later
on, you know, right? Customizing workspace
in the premier can offer you, like,
several benefits. And it can increase
your productivity, it can decrease distractions. And now it's time for
you to create like some workspace with
your own preferences, something similar to the
one that I created maybe. Or you can create something from scratch or whatever
you want to do. Just make sure it
suits your needs, which is very important. Remember, visual
organization makes it easier for you to
locate and access. To overall optimizing
your workspace, optimizes workflow and empowers
you as a video editor. Do it now, and I'll see
you in the next lesson.
9. Importing & Organising Your Footage: In this lesson, we'll
be covering how to import and organize
your footage. You can either
download the footage that I provided in projects and the resources step
or you can use the videos that you selected
in the previous less. This way you might
start gathering some ideas for your class
projects along the way. Alright, let's jump right in. Once you have your
project created, it's time to import
your footage. So you can just do
that by clicking on File Import or simply drag it up in your files
here in your project. It's important for you
to know the premier accepts a lot of different
files like photos, videos, even like
some other Adobe apps as well like Illustrator
or After Effects. So you can just import
the individual clip, individual clip, I'm sorry, Or can port the entire folders. And it's very essential to
keep your footage organized. So now it's looking
sort of nice, but trust me, it can get very messy once you have a lot of
files in the same projects. However, I'm going
to share with you a folder structure that really helped me
throughout my career to keep all my
projects consistent and keep my workflow like
the same over and over. And if you adopted this
industry standard approach, you are really setting you
up for professional success. Professional, you're
going to set you up for professional success
derived from start. So let's get started and
create some folders here. So here I'm going to go 00 and this bin is going to
be all your sequence files. Then have media. I go like numbers because it has an alphabetical order
later on and it's nice to see everything in order
since I have media and we can put all your
important videos here, then have two audio. I'm going to create some
bins here because there are some different types of audios that are normally used. Have one for music,
one for sound effects, and one for voiceover. Then I have a third folder
here called graphics. We can create folders like sub
folders as well for images or branding photos or lower thirds or
whatever you prefer. Lastly, I have these
four nested sequences. Once you have your
footage structure done, you can just drag and
import all your footage in the bins or you can actually use this import
tab here if you prefer. Here we have some view options, you can change the view to
you on going to change this, that's how it looks
like or keeps a list. Or you can change you free form, which is a pretty cool way
to organize your videos. Because you can freely
arrange your videos based on categories or if they look
similar, whatever reading. Then this information
here is called meta data. It's basically all
the information available about
your digital file. If you double click
here on the video, you'll see the video in the
source panel right here. And here you can visualize
your video just as scrap through using
this Do playhead here. You can also set the in and out points to choose
the best part of your videos and can jack that later on
into your sequence. But as you can see, we don't have a sequence yet, so we can't do any editing. And that's why in
the next lesson, we're learning how
to create a sequence and how to start
having fun editing. Remember, the key to a successful binging structure
is to keep organized, consistent, and really tailored to whatever it's useful
for your workflow. So create some beings now
for different types of media like videos,
audio, sound effects. Maybe your favorite
gifts of cats, maybe. I don't know,
that's a weird. Anyway, just create
a photo structure and I show you your future self. And anyone that might
really need to work in your project in the future will thank you so much
there right now. And I'll see you in
the next lesson.
10. Setting up a Sequence: All right, setting
up a sequence. Although this is quite
simple and straightforward, there are a few things
that we need to pay attention when
creating a sequence. In this lesson, we're
learning how to properly set up a new sequence
in your video project. If you're not familiar
with the term, a sequence in a
premiere is basically a container that
holds all your video, audio or any other elements
that you might have there. It's where you do
all your editing, from trimming your clips to adding effects and transitions. In other words, it's
where the magic happens. Okay, I'll show here
two popular methods. You create a sequence premier, and you can choose the
ones with you best. The first method
is just clicking on file New in sequence, or you can just use
this little icon here. You see the premier comes with a lot of
different presets, and we have the
option to choose one of them or manually
create a sequence. Okay. Just so you know, the
best preset often depends on the footage that you are using or the output that
you are creating. But there is a very
popular preset option here called digital SLR. This one here,
especially this one, SLR 108 P 25. It basically creates
a sequence of 1920 by 1080 pixels
of resolution. And 25 frames per second
for the frame range. If you don't know what
frames per second mean, it's basically the
amount of photos, or steals, or frames
as the name says, that you're going to have
to create 1 second of view. In this case. Here we
have like 25 photos, 25 steals in order to create
like this second of video. If you zoom in your timeline,
that's what you see. Then we have 25 frames here, each one represented
by this line. And the 25 frames creates
like a second video. You're keeping 25 because nobody 25 or 30 frames per second are a good standard to create like a natural
look in your video. You're a beginner,
I always recommend you to start with the preset, but it can also set
up your sequence. If you just click
here on Settings, just so you know, this
can get very technical. In this lesson, I'll be covering just the main settings as we normally just keep all the
other ones always the same. But if you are very curious
about it in your guide book, you can check, you know, more information
about this topic. In my example here, I'm going to be creating like a
horizontal video. I'm going to change
this time base to 25 frames per second, just so you know the standard
for which the video is, as I said before, 1920 by 1080. That gives you like a
ratio of 16 by nine, which is the rectangular shape of the videos that you
normally see everywhere. You're creating a vertical
video, I don't know, for Tiktok reels or
whatever really, you can just invert this values. Here. Go 1080 by 1920, and this will get you this
nine by 16 resolution, which is the opposite
of the previous one. Make sure you have the
right frame size set up. You can just copy all my
other settings here as they don't normally change
in your guide book. You can also find the
most common settings and resolutions
for social media. Check it out if you want.
Once you're done here, just name your sequence and hit. Okay. And here's your sequence. Here we go. Now there is one more method that
I was talking about. There are two methods.
You created a sequence. The second method is, instead of doing all
the settings manually, you can simply right
click on your footage. Go here in new sequence
from clip vol. I. This is definitely the quickest way to
create a sequence, but you need to be very cautious when you decide to
use this method. Because this method is
going to create a sequence based on the attributes of
the clip that you selected, need to ensure that
the clip settings really aligned to the outcome
that you want to achieve. For example, say that I have a horizontal
landscape clip here. I use it to create like
a new sequence later. If I want to drag like a vertical video here
into the sequence, you may notice that it doesn't really fill the entire screen because the sequence was
designed for landscape clips. If you want to avoid this issue, always check the clip you're using to create
your new sequence. And make sure it matches the outcome that you
want to achieve. And you can simply
do that by right click on your clip
and go properties. And you're going to see
here all the information about the clip. Here you go. Your sequence appears here in the project panel and you can just double click on it to open. And yeah, if you want to
ever change the settings, you can simply right
click here and go to sequence settings and you can change any
information that you want. The next lesson we're
learning how to clip Sto sequence and other tips on how to manipulate
your footage. So see you then.
11. Manipulating Your Footage: This lesson we'll be learning how to manipulate your foot. We'll talk about how to work
at tracks and layers and get familiar with some editing tools and features. Let's get started. Okay, now it's time to decide what videos that you want
to drag into your sequence. And you start playing with that. You can either drag and drop
the whole video like this, or you can double click
on your video and use the color brackets here to
mark your in and out points. Another way to do that is
using your short cuts and for endpoints and all for
points on your keyboard. If you do this, you can
select just the pad that you want and drag
that into your sequence. By doing so, while it's essential to know where everything is
premier is located, I highly recommend you to start
memorizing the shortcuts. Because shortcuts speed up your process and make
your workflow way faster. I highly recommend
you to do that, and I'll start mentioning
some shortcuts as we go about our lessons. Okay, back to importing
footage into your sequence here you notice
that every time you drag an item into your sequence, you see like these boxes here. The item is represented by
these boxes and they have different sizes based
on their length or duration. Every
clip has that. By the way, when it
comes to videos, you notice that the box have
like under box together, which means that
this is the audio. If you don't need the
audio for any reason, you can simply unlink
the audio by using command L or control L or
just right click and link. And it's allow you to move
the video in the audio independently and even delete
the audio if you want. If you drag your footage and the order is not
coming for any reason, please just check
your time line and make sure both tracks
are selected here. Because sometimes if just
one of them is selected, you're going to have just
that track important. Okay, Once you
have your sequence created and some clips in it, you'll notice that the
program panel becomes active and you can
preview your video here. But just remember that
the program panel preview is for everything that's
in your timeline. And the source panel preview is for the video to
select right here. Anyway, in the program panel, you can zoom in using this
option here any time. Or dragging this bar, sorry, this bear Anyway,
don't drag the bear. Or can either use like plus and minus on their keyboard,
which is really helpful. And you can use that
in your timeline as well as you can see here. And if your computer
is struggling to play the video in real time, you can just change the
playback resolution right here. And this is just a preview. Doesn't affect your
final resolution when you export your video. One really cool thing
about premiere and B actually in general, is that they have the
concept of layers. In premiere, they are
called video order tracks and they work in a very
similar way to the S as well. Basically, whatever
you have on top of your layer stack in order is what do you see
in your preview? If the top video layer
here is like too big, we'll notice that's going to cover up everything below it. And if you want to
make it visible again, it can just
adjust the size. And I'll show you how to
do that layer on as well. You can also use this on here, this little eye to show or hide your layers visibility
for other tracks, you notice that they have two
buttons here is for muting the selected track is for
slowing the track that you want to slow and muting all the other
tracks in this sequence. Okay, now let's talk
about the to bar. I'll show you the
most useful tools for editing my opinion. The first one is selection two, which is the one they're going to be used the most because it allows you to move clips around, change the order, and
adjust the length of your clips by clicking on
the edge and dragging. Sometimes you can see
the To triangle here. It basically means that's at the beginning of
the end of your clip, You can't extend
beyond that point. Then we have track
forward and backward. It basically allows you
to select everything from this point on wards or select everything from
this point backwards. Pretty handy as well if you want to create a gap
in the middle of your videos and you don't actually want to move
them one by one. Then we have razor two which is basically a tool
for cutting clips. Simple like that. And then you can move them around
using selection two. Then you have type two, which can create like
a text to your video. Text appears as a
separate video here and you can adjust its
duration using selection two. And as you do with
any other elements, if you want to edit the text, you can just above click on it and then you can
edit the text here. I'll talk more about this later on and another lesson as well. Lastly, we have rolling,
added two before keep going. If you can't see any
tools for any reason, just click and hold
on your tool here. And you can see
some other options here. This one is right. This, this too is very
useful because let's see. Adjust the added points
between two clips. Change the position
of the added points without affecting the overall
duration of your sequence. As you can see here,
I can drag this around and it doesn't
change the duration of the sequence at all. You can totally do
this manually as well, just dragging each clip, but it's way quicker if
you use this two here, or even quicker if you just hold command and you're
going to see that it's going to change your mouse
temporarily to this one here. You can use the rolling
added tool and then you can release command and then
back to the selection tool. Pretty quick and easy to use. Another cool thing
that you can do in premiere is adding markers. Markers can be very useful for showing important
points in your timeline. And you can simply
add a markup by hit M. Just move your
playhead whatever you want. Hit M and that's it. You can also add, like in this markup here
that you just added, you can just double click on it and change the description name. Change the duration
if you want and the color if you want as well. That's very helpful because
sometimes I use this market special transitional
effects that I want to create and also to pinpoint
some motor issues. And I can remember later on if I have to correct
and fix something, great if you want to use these to collaborate
with other people. Because then I can just come
here, give some feedback. When the person like
opens your project, they're going to
see exactly what you want them to do or change. You can also go nuts if
you want to add a marker for every bit of a song,
you can just do this. Play your song and
start adding markers is helpful because they can
just come back here and then place your footage
right on the market and is going to be in
the right bit of a song. Now one thing to
be cautious about is when you're adding a
marker here in Premier, just make sure you don't
have any clip selected. Otherwise, Premier is going
to add a marker in your clip. You can do it as well. This
is useful when you want to add a marker inside
of a specific clip. You can drag the clip around later on in the
maker, stay in it. The last thing that I want
to show in this lesson is a quick way to change
the speed of your clip. This is very useful
when you want to create a time lapse or is a
motion super simple. You can just write, click on your clip, select
Speed Duration. And here you can change
the speed of a clip. If you want to double speed,
you can just go like to 100% if you want half speed, you can just go 50% if you
want to reverse your clip. You have this option here
and it's simple like that. Here's not the protein for you. Always pay attention to the
frame rate of the clip. You are trying to slow down. If the frame rate of the
original footage is too low, slowing it down can make it
look like choppy or started. This is because there
isn't enough information in the frames to support
the lower motion. It's always best to use a
video with higher frame rate, such as 60 frames
per second or more. If you plan to use
a slow mo effect, well, now's a good time to
play with your footage. Go through your video,
selecting in our points and drag everything
that you think is relevant into your secret. You might want to add some markers if you think
it's useful just to indicate some specific
things that you want to come back
later on and add. Maybe a transition,
I don't know, maybe a specific effects
that you want to add. I don't know
anything you have in mind on how you're
starting to look like. This is a good time to
do a bit of planning. So go ahead and I'll
see in the next lesson.
12. Effect Controls: Blend Modes & Key framing: One of the most useful ways
to manipulate your footage, not to be premier, is through
the effect controlpanel. It's like the heart of premier, where pretty much all the
effects and settings happen. In this lesson, we're
exploring how to use the tech controls to change
different attributes, land modes, and to
create animation through the use of key frames.
Let's get started. Okay, back to premier.
Here you'll notice that every per have your timeline has its own set of attributes. And you can simply
change them by clicking on a clip and going
to effect Controlpanel. Here you can find
like a bunch of settings that you can
play around with, like position, scale,
rotation, and opacity. Here can also modify
attributes of any other effects that
you have in your clip. If you add it like
a brightness and contrast effect for example. You can also use
effect control spanel to change the
settings, everything. Basically you can
change in here. In effect controls,
that's how you fix that problem that you
talks in the previous lessons. If you want to add a vertical video in a
horizontal sequence, you can simply increase
the size here, the scale, and the position. If you want, you can fix the
video in the entire screen. But remember not to
scale up too much, because you might
lose some quality. Just be aware of this, this other attribute here as you change the
opacity of the video. But there is a very
special feature here that I want to talk about. It's called blending
modes or blend modes. Blend modes are basically a way to make your video or footage or images to look different by blending them together
in different ways. Although itself would know
what each blend mode does, You don't really need to
memorize all of them. Instead, focus on just
understanding these form and groups and test out different options based on
what you want to achieve. First one is darken, which makes the white piece of your clip
transparency, then lighten, which makes the black pixels of your clip transparence
then contrast to basically increase
the contrast of your footage or
image and inversion, which invokes the color
of your top layer before blending it with the bottom
one to see that in action. Here got two images
on the top layer, and one of them like with the white text with
black background. Another one with, I don't
know, this abstract liquid. I have a video here
on the bottom layer. Let's try to apply
a blend mode from each category and see what happens, starting
with the first one. When I choose the dark mode, just notice that it gets
rid of the white pixels and keeps the darken
errors of your image. It's pretty good when
you want to remove a white background from
a video, for example. Now moving on, watch what happens when I choose
the light in mode. It does exactly the
opposite of darken mode, making the black pixels disappear while it
keeps the white ones. This can be useful to add some overlay elements
in your video, such as co film scratches
as the one that I did on my inch or light leak which is pretty cool
because you can easily find some
free stuff online. Just download and
make a video look. The next group is
especially good if you want to
enhance the color of your image or even add some texture to your
footage like so. Finally, the last section works by inverting the
colors of your layer. As you can see here when
it choose difference mode, it's a very nice way to salllyze your footage or even to
create some glitch effect. And I'll show you how to do that later in the
course as well. Now, another way to
make your edit more dynamic is to the
use of keyframes. Key frames are a way to
animate the attributes of a clip or the attributes
of an effect over time. You can use keyframes to animate almost any attribute found
in the effect control panel. Try key framing. Premier
is pretty simple. Just select clip or element here and go effect
control panel. Most properties, you notice, they have the stopwatch
icon next to them, which means that they can
actually be animated. You can click on stopwatch icon here to activate animation, and premier will create the
first keyframe for you. Now we can move the
playhead a different point in time and change
the attribute value. Premier will
automatically create a new keyframe at
that point in time, and you can adjust the value of each key frame
whenever you want, but always make sure
that the playhead is exactly on the keyframe
that you want to adjust. Otherwise, Premiere
is going to create a cane key frame just
next to the previous one. Instead, you can avoid
this problem by using your plus and minus
keys on your keyboard, zooming out this
little time line here. Or you can simply use these arrows here to jump
between the key frames. And you know that
you got it right when the keyframe becomes blue. All right, here have some
photos that I want to animate. And I got them from a
website called Splash, which has like heaps of images
that you can use for free. Highly recommend you to
use the website, right. Let's start creating like a zoom effect for
these photos here. First electric
photo, Go to effect controls here on scale
to activate animation. And that creates the
first keyframe for you, as you can see in this
little time line here. This little time line
basically represents the length of your clipper photo that you're working
on at the moment. Just so you know
now the value of this keyframe here is
100% Let's hear what happens if I move
forward and create another key frame here
by clicking on this icon and change the value to 130% If I go back here
now and play it, I can see that the scale change, creating this zoom effect. Now, do the same thing with
this other photo here. This is a photo of me, we Paris, by the way. Beautiful place. I recommend you to go there, but we haven't been anyway. I like sometimes you just create keyframes
in the middle of this timeline and
drag them around. Drag them like to
the beginning and the end just like.
So I don't know. Sometimes it seems easier when I really know
what I'm doing. Cool. Lastly, it's important to know that there are
two types of keyframes. There are the linear key
frames in the Bezier. Basically linear key frames, which are the default
for a premier. They create like
a constant change between two key frames. And they have like
this shape here. While Bazar key frames
can the create like a more smooth transition and gradual change
between the key frames. The ones that like
use the most are the easy in and easy
out key frames. These key frames are star or
ends with a slow speed and gradually accelerates
or accelerates when they approach
the next key frame. This creates a more
natural motion. This is what happens if I use easy in my some effects here. Can see the acceleration
coming and decelerating here, or if I use easy out, can see the difference
between them. These are a nice way to
create a more natural motion. And you don't need
to be limited to use just one attribute at time. Sometimes you might
want to change the position as
well as the scale. Just make sure your subject is right at the
center of your frame. In my class project,
for example, I use several K frames all around and I use like
one here to create like a fake camera zoom effect on
this shot, on this one here. And that helps to keep the high energy that I wanted to have in
this part of the video. Learning how to use
keyframes is super important as you can do that in so
many different situations. Here's an activity for
you to pat lesson. Import five or more photos
or images in premiere. In traction, make them
using key frames. You can experiment to play with different types of
keyframes or blend modes. Whatever you want to create like a more dynamic
patch, be creative. Have fun exploring
possibilities. And don't forget to share
your creations right here. I'll see you the next lesson.
13. Seamlessness: Transitions & Speed Ramping: Transitions are an essential
part of any video project. While the king cuts, just like the most base way to switch
from one clip to another, Lou Premier has some cool
features that can help you to smooth out some cuts
and create some effect. To this lesson, we're
learning how to use some of these tools and techniques
to enhance your video. Let's get started. All right, let's start with transitions. A premier has a lot of transition
options to choose from. The most common of them you
should know is the cross, which is basically a fade in
and fade out for your clip. And this is the default
transition in a premier. You can quickly apply by right clicking on the beginning
or the end of your clip, or between two clips as well. And to apply default transition, or can also use the shortcut
command D or control D. If you want to check the other
transitions are available, you can just go to effects
panel and video transitions. Here you can find
some wipe transitions and some zoom transitions, deep to y, deep to
black and so forth. They're quite simple and ugly in my opinion, to
be honest, but anyway. But there is one of them
that you seem to be using quite often
in my projects. And this transition is
called V gradient wipe. This effect creates a
very smooth transition based on the luminance of the brighter areas
of your video. When you force applied
transition to a video, you'll get this weird but interesting effect
and it's cool. But you can make it cool if you choose a reference layer to
create the transition from, instead of having the two clips next to each, you're done. I prefer to put them
in different layers, like in a Pi, transition to the top one and change the degradient
layer to my video one. Use the brighter areas of
my clip one as a reference. As I said, you can always
invert degrading here. Going to get a different result. Just so you know, VR stands
for Virtual Reality, which means that all the effects they have in their names, they are designed to work
well with V R footage. But I always find like creative ways to do that in
my normal footage as well. Just go for it, try it out,
and see what you think. Transitions like this are very
cool to use as an effect. But sometimes all you
want is just like a nice and smooth transitions that doesn't steal all the show. There's a video technique in Premier that's perfect for that. It's called speed
ramping and it basically allows you to change the
speed of a clip over time. Speed ramping is especially
used when you want to emphasize or create a high light on specific moments
of your clip. Or if you want to create
like smooth transitions. And that's what we're going
to be doing right here. By gradually changing the
speed of a clip over time, you can make the
transition between the two clips Less jarring. In this vid while ago I used
speed ramping stranger still look, to be honest with
you, I could have used a clip speed as I told
you before just like. So watch this. But the final effect
is not quite the same. Let's do spe ramping
together here in this clip. First needs to enable the time remapping
option in your clip. Just right click here
and select Timepa Speed. Then move your
playhead to the point where you want to
start the speed ramp. Then hold command or control. And click on this line to add a key frame at
the current speed. Move the play head
to the point that you want the speed
ramp to finish. To end hold command again and click on the line to
add another key frame. For now we've got this which is prettymaatere the other method with a sudden change of speed. But to make this ramp smooth, you can just click on the
key frame here and drag it. This will create these ramps. Hence the name is going to make this gradual
acceleration on your clip. To make it even more subtle, you can just drag
those handles here. You can create this nice curve
and this the end result. You can preview and do some
adjustments here if you want. This is a little tape for you. If you want to
make this effect a little bit more interesting,
you can add some blur. Maybe because I don't want to actually mess
around with my clip. I can actually create an adjustment layer here,
but you do just like. So this is basically a transparent layer where
you can apply effects on it. I'll go to my effects panel now, then effect blur and sharpen and drag the directional blur
onto my adjustment layer. Here you can change
the blur length and the direction of my blur, but I don't want it to be
applied to my whole video. Just for a transition part, I can roughly align my playhead with the
start of my speed ramping and create a key frame with a value zero
for the blur length. Then I can move ahead a little bit to the center of
the speed ramping effect and add another key frame with a value, I don't know, 50. And move to the end of
my speed ramping effect. And add another key frame
with the value of zero. The blur effect increases
and it goes back to zero, creating this effect right here. Now to use technique
for a transition, you can simply
create a speed ramp at the end of your clip, at the beginning
of the next one. And because we spell
out both of them, it makes the transition
is smooth and nicer. You can repeat the effects like as much as you
want, just like so, and just really play around now in order to create a
transition between two shots, always try to observe these three key things
first, color and brightness. Always pay attention
to the color and brightness of your
shots are similar. Because if one of them is too dark and the other
one is too bright, the transition might
get a little bit weird. Second, observe the
movement within each shot. If you combine shots that have
the same camera movement, that'll give you
a better result. And lastly is composition. If you try to put two shots with similar elements together
like a did here, you might get a
better outcome to speed ramping takes
practice your master. But the more you try, the more you're going
to get used to it and the more you're
going to create like more engaging videos. I encourage you to go right
now through your footage. Try to find places
where you can actually apply some seamless
transitions using speed ramps. And feel free to share
your outcomes here. I'd love to see what
you come up with. Do this now and I'll
see the next place.
14. Order of Shots: Kuleshov Effect: In this lesson,
I'm going to talk about a powerful video
adding technique. They can also help you to take your video to the next level. The name is Kulshov
effect Kloshov Effects named after Lev KulshovIm. Hope I'm saying his name way. He was like a Soviet
filmmaker from early '90s. In one of his experiments, he shows that the meaning of the shots isn't always
like in the shot itself, but in the interaction
between the shots. Essentially, the crucial
effect involves ranging, cutting together different shots to create new meaning
and emotions. Here's a short film, just demonstrate this
principle in action. First we see a close up of a man's face with
neutral expression. Then intercuts the face
with different other shots. First, play with soup, implied that the man
might be hungry. Secondly, a dead girl in a coffin implied that
the man might be said. Thirdly, a woman laying down implied the men might be
lustly looking at her. All the three
examples, the shot of the man is exactly the same, but our brain always tries to establish a connection
between them, and that's where the
meaning is created. We see the same principle being used all the time for
Hollywood movies. This is one more thing
that you might want to be aware of next
time you watch a movie. Understanding cltial
effects can help you convey a lot of emotions
and ideas to your audience. For your lesson activity, try to apply clot effects using the footage that you have
filmed or have sourced, or even like source more
footage just for activity. It's very important to
understand this concept. Once you have your footage, you can simply import
them in premiere. Play around with short
duration and the order of shots just to try to create different
meanings and effects. Here's an example that I created because I'm sourcing footage
from different creators. The shots might look a
little bit different, so I added some black and
white effects on top of it, just so they look
like more similar. Also, we're learning more how to export your video
in the last lesson. But just so you know, and I can see what
you're bring up to, I want to show you a quick way to export your videos here too. You can select in and out
point in your timeline. Same way that you do when
you're dragging your video into a timeline for point
and no out point. Then you can go to
export, give you a video, a name, select a location
where you're going to save it. Then you can choose
match source for preset and H 64 for codec. They'll create like
an MP file for you, which is one of the most
popular formats for a video. It's basically accepted
in all platforms online. After this, you can
just hit Export. If you want to share your
video, just go to Youtube, click Upload, then select your video and wait
for it to be uploaded. Once your video is done,
just make sure you select this option here
showing that this video is not made for kids. And also change the visibility here to public or unlisted. Public is for is for Youtube to post on your feed so
everyone can see. Unlisted is if you
want the video to be seen just by the people
you share the link with. This way the video is not
posted on your Youtube channel. Now just go ahead and
experiment with this technique. And remember to post your
results here so we can also enjoy your work I'll
see in the next lesson.
15. Conveying Meaning with Effects: This premier has a lot of
effects that you can use to enhance your footage
and tell your story. This lesson we are going to
see some creative ways to use these defects and
other techniques to convey feelings and emotions. All right guys, Convey
meanings with effects. The first one that
I want to show you guys how to create like this dream illusion or memory through the use of
effects in your footage. The first one that I
have here for this one, I would want to
change the color. Sometimes if you change
the color in your footage, make it more saturated
or less saturated, that can differentiate with
your original footage. Therefore, showing your audience that this is like part
of something else, another reality
maybe, or a dream. For this one I'm going to
just use limetry color. Maybe the saturate a bit, change the contrast to
make it less sharp. Also here, like change
the blacks here, have a little different
footage already, but you can also add
some effect here. You can also add
some blur effect. I'm going to just
type blur here, Go to gush blur. Dragon jop here can change
the level of your blurriness. As you can see, it creates like this illusion effects already. However, you might want to
see what's going on inside. There's nothing new
for you guys here, which is the use of masks. You can hit this circle here and it creates a mask
for you with this shape, you can just change
the shape like, so make it more like wider. There you have it. However,
I want to invert the shape, I want to actually have
the blur on this side. You can just click right here. You have the blur on this side. Now however, it's very sharp. The transition here
is very sharp. You can use the mask feather
to make it more soft here. This dreamy effect,
if you emphasize that just use like maybe
different live leaks or overlays here
have one to use. Can drag this one on top of do my footage here can
create like this effect. Maybe this one is too
much with the colors, so I can use black and
white effect, drag drop. It creates like this illusion,
dreamy effect, right? So many ways to do
that, obviously this is just one of them. Now I want to also
talk about chaos, how to create chaos
or confusion. You can simply do that by
adding a lot of fast cuts, just like go crazy
with your cuts. Maybe sometimes you might even
want to flip your footage. If you go here on
effect flip vertical, that will give you some
actually confusion into the fast cuts as well. It's pretty weird
but in my work. But I also want to show
you how to create be effect to make your footage like maybe some
creepy sometimes. Maybe to emphasize
something is happening. For that can simply
use the razor just in here and create like a cut in
every single frame like. So. Then you just, I'm going to do a few more
here then you can come back with your selection to
delete some of the frames. Just leave one each frame. That's the effect,
have a strobe effect. Pretty simple and needed to do. And also create like some
meaning or something you want to say in your
video, in your story. However, you can emphasize this using like blending modes. Here I have this overly footage which is just like
some effects here, maybe just like
some texture only. However, if I go here
and use difference mode, I have like this for now, but I also want to invert
the color of this texture. I'm going to go here, go to invert and create like this negative effect
which is pretty cool. Now if I do the same
thing here with my razor cutting,
like every frame, same as I did like previously, can leave like a bigger one here even can go back
deleting a few of them. At the end, you're going to
have something like this, which is really cool
depending on what you want to do or if you want to add like
some chaos or confusion. So that's another way
to do that as well. Now, next one we have
the vintage or retro. Here I have my footage.
Again, you can simply use like some
vintage phones. Very basic, but that works, just final lines on
vintage phones and that will add to the
vintage look of your film. But also you can play
again with lumetry. Let's go to the creative tab. I'm going to change the tint to something
like more reddish, so maybe a bit of
red here as well. Very subtle difference. And
then I can just like make the film more faded like
this. Maybe this is true red. Now, I'm going to go back on this one just by
changing the colors. You can also have
something cool, but then if you
combine that with some film scratches
or dust or whatever, really the old films
are used to have, they can emphasize the effect. Here I have the dust and
scratches and as you know, blend modes simply go
to blend modes here. Just change to lighting
and they'll have it also has a lot of texture
to your film already. Emphasize the effects you want to create
this vintage look. If you want to go
one step further, just one step further, actually you can add
some grainy maybe. So here I have this
grainy effect. You can just find
this like online. Super simple. You'll
find this online. If you change the blank mode
again, maybe to overlay, you have like this nice
texture which really looks like a node in
the retro film footage. I really like this
effect, actually. Anyway, moving to the next one, we have chromatic aberrations. And this is basically
the RGB separation of colors that you can
have in your footage. And you see that all the time in some glitch effects or some footage that
people want to show, like maybe some
technology thing. So this could be very nice
because it's super easy to do. You just go to go to
chromatic aberrations. It's a VR effect as well. Dragon drop, and
there you have it. So here you can have
like an effect controls, maybe just change whatever you want to change to
emphasize the effect. And you can even use key
frames if you want to change the point of interest here and create like a nice
animation like. So that's pretty cool, but you want to add
some futuristic look in your footage or for
any purpose really. I use that all the
time. I really find these effects very cool. In the last one
that I want to talk about is the warp stabilizer. And that's useful
when you have like some shaky footage and you
want to correct that here. Have like a footage
where I was filming and it was a bit shaky because
it was cold, sorry. But then later on, I don't want this to affect the
meaning of my video. I want this to be like very soft and very eye
steady as well. So you can just go here
on effects as well. Go to Warp Stabilizer,
Dragon drop. It's going to
analyze your footage and after a little
while you have your footage here
ready and look at the difference Is pretty
good job actually. Very stable, very nice in comparison
with the one underneath. Look at that shaky. I was just like shivering. But then after they wipe, stabilizer very nice and steady. And that actually does not
affect my video overall. If the meaning of
it is just to keep something like calm,
ful, and peaceful, it doesn't work all the time, but just give it a go
in your footage when you need it and see if
that works for you. All right. These are
some creative ways to create meaning through
the use of effects, but there's so much more and
I highly recommend you to, just like you have a spare time, start going through
every single effect in premiere and start
testing them out, because that's the only
way that you can know, like everything that
premier is capable of. And when you have
like something to create that might comes
back to your mind, and you're going to be
able to really emphasize your story using different
effects in a creative way. So do that whenever you
have some spare time, and I'll see you the next list.
16. Essential Graphics: Essential graphics. This is the panel in
premiere that allows you to create text elements and
other motion graphics. In this lesson, we're getting
familiar with this panel, essential graphics and learning
how to create titles and some graphical elements as well that you can use in your
own video projects. In to access the panel,
you can simply change the workspace to caption
and graphics right here. Or you can activate the panel in the window and
essential graphics. And here you can find
some motion graphic templates that
come with Premier. But you can also download
new ones if you want. As you can see here, I
have a lot of options. Anyway, let's start
adding a text here. For that, I can just click
and Design Tool bar. And click on any part of your
screen to be able to type. That creates a text element that comes up as another
item in your sequence. You can freely move
that around. Rap it. Same way to do with any other
element in your sequence. I'm going to go here and
write something, Inception, which is my favorite movie by
the way, to customize that, you can either go to Effect Controls and click
on this little arrow here. Or you can just
use the essential graphics panel and go at it just to have access
to some extra features. You can change the
phone type size, text alignments, and so forth. You can also change the
principle texts such as column and some strokes or
shadows, few wants. But notice that
every text element comes with their own
transmision controls. What's the difference
between text transformation controls and the clip
transformation controls? You may ask, that's
a great question. The transom controls
under video here applies changes to the
entire video frame. As you can see in this box, this shows like that's
affecting this whole frame. For example, if I want to
change the rotation here, it applies to the entire frame. On the other hand,
the transformation controls under text or the essential graphics here applies specifically to the
element that you select. If I do the same thing here
and applies some rotation, it affects just your text. Now if you're experiencing some issues with the text being cut off or not showing fully, you can make sure just to check the transmission
controls here, because sometimes the text is beyond the boundaries
of the video layer, causing it to be
partially hidden. I can simply adjust the position to make this visible again, just like so. And that's it. If you come to this icon here, you can create a new element. Let's create a rectangle. Then you can change
size here, the color. Right now we can see your text. Just because the
order of our layers, you know the lesson, right? We can just move this layer here to the top. And that's it. We can see that again later
in your effect controls. You can even be a
little bit bold. And you can find your
elements here or text and create animation,
maybe, I don't know. You can just like do
some key frames here, change the position,
whatever you come up with. Lastly here, having an
called safe margins. This basically shows where
it's safe to put your text in order to be visible
in any type of screens. Sometimes some TV's
crop the images. If your texts show
close to the edge, that might get cops as well. Well, these are some cool
features in essential graphics. Add some title in your video and do some captions
even if you want. Let's keep exploring per in the next lesson.
I'll see you then.
17. Basic Audio & Music Editing: This last I'm going to
be teaching you about the basics of audio editing
in the Premier Audio Editing, as you probably know, it's a critical part of
any video production. With Premier useful tools, you can easily clean
up and enhance your audio to create
professional creative videos. Get ready to dive
in. First step is importing your audio
into your timeline. And it's a simple as
importing anything else. When I'm working with audio, I normally expand the layer
by clicking on it twice. Sometimes I do that
with video as well, so I can see the
time nails and it's way better to understand
and see all the details. Also have a look at
your music first and see what the wave
form tells you about it. Sometimes you'll notice like there is a drop in your music. Sometimes a build up. And you can use
that creatively to emphasize some
moments of your edit. And can you view some markers as I told you in the
lessons before. Now, to adjust the
levels of your audio, you can simply just change levels on your effect controls. Or you can do demonstrat
from your time line by simply adjusting this
line up or down. If you have more than
one audio track, such as, I don't know,
Music, dialogue, sound effects, you'll most
likely be adjusting all of them to balancing them out
and making them sound nice. And just make sure this audio
meteor here doesn't reach the edge because when that happens you start getting
very weird distortions. And you can also hold
command or control and click on your line here
to create key frames. And that allows
you to manipulate the levels in specific
parts of the audio. Very useful when you have like voice over and you
have some parts of the music that's way too loud and it makes hard to
understand the voice over. You can just simply
adjust here by using key frames and your audio is going to be more
well balanced. Same as video elements. You can also add some
transitions in your audio. Can simply right
click here and select Apply default transitions
or you can in cuts, Command shift D for audio transitions and command D. If you remember it's
for video transitions. The default video transitions to cause is off for
audio is going to add like a face at the
beginning of your song or at the end of it or
between two songs. If you have like a transition
between two songs, you always move the transitions
of the audio levels. You can change the
duration of the transition by
simply dragging it. If you want to be very accurate, you can click on the
transition and type right here the exact amount of the frames that you want
the transition to be. Same as any other elements
in your time line. You can use the reserve tool
to cut or trim your audio, and select and hit Delete on your keyboard to get rid of
the pass that you don't want. One more important thing to
mention is that Premier has a bunch of effects to
improve your audio quality. Same as any other effects. You can find them right
here in effect panel, and you can simply drag and drop an effect onto your audio track. However, dealing
with intrixies of audio can be very
tricky sometimes. And that's why Premier has a panel called Essential Sound, and that really
helps to simplify the process of audio editing. With essential Sound, you
can choose your audio type here and perform some tasks
such as adjusting levels, applying noise reduction,
adding reverb or compression, and much more with
just a few clicks. It has a lot of things
that you can play with if you really
want to get into that. But there is a very
special feature here that I want to talk about. It's the possibility
of extending your song automatically. What? Yes, I know. It's
cool. It's very cool. If you choose music
as your audio type, you can see the duration
of your music here. And you can easily hit this check box Tick
remix and simply give your audio a new duration
su, super useful tool. And I find this
really helpful for me also to create a very nice and must transition between two songs,
two different songs. Try to find songs
with the same key. Maybe you need to
know a little bit about music theory for that. Or maybe just know what
a key in the song is. Because there is a very cool
tool online that I use, it helps me identify
the key of a song, which is really life changing. So you should check
your guide book if you're interested in
learning how to do that. When it comes to audio editing, there's a lot that
you can do and really a lot to learn if you
want to become an expert. And a cloud has even like
an audio software called a Audition which is fully
dedicated to audio editing. But because here in
this course we are more focusing on
the editing side, we're not getting into the nitty video of audio editing as the features premiere. More than capable to do
a very good job for us. Play around with it. Play around with your music and audio. And I'll see you in
the next lesson.
18. Final Touches: Color Grading: Oh my gosh. We have
come so far already. And at this point, you probably already know of how every single element
in the editing process plays a very important role in creating a
meaningful message. And a nice narrative
in story as well. But there is one more aspect of video production to talk about, which is called color grading. Color grading is essentially
the process of adjusting the colors and
tones in your video to create a specific
looker mood. In this lesson, we are going
to talk about the basics of color grading and how to make your video stand out by adding
the professional touch. But why is color
grading important? May ask well, essentially
helps you to set the mood of your video and you
can use to create like some emotions as
well in your audience. A well done color grading can make your video look
more cinematic, more polished, any
hence or video of all. On the other hand, a poorly
done color grade can make your video look amateurish
and unappealing. There are several movies known for their remarkable
color grading. Some of them have a
very natural look, whereas some of them might be
a little bit more creative. The Grand Budapest
Hotel, for instance, features a distinctive
pastel color palette that gives you like whimsical
and nostalgic feel. Revenant, on the other hand, features a more natural
color palette that captures the harsh beauty of the film's wilderness setting. Color grading normally comes at the end of the
editing process, but sometimes I do like to test out some ideas
with a small clip, just at the beginning when
I start just to explore some possibilities to
the color grading. In premiere, you'll need to add the lumetry color
effect on air footage. It's going to come up as an
effect, in effect controls. But unlike other effects, lumetry has its own panel. You can easily access the panel by switching o space to color or enabling the lumetry color
tab right here, right? But before getting into
color grading itself, let's start with some
basic color correction. Depending on the camera
you're shooting with, because of your footage
might change or they might lack some contrast here, can adjust the exposure contrast and saturation to get a good starting point
for color grading. And also to match your footage, your videos, so they
all look the same. You can also adjust the
white balance here so the whites in your image look
like they were supposed to. Or if you prefer, you
can use this eye drop here just to pick the
white point of your image. If you're really
shared, this is like pure white and they'll give
you another white balance. But it's not very accurate.
So normally I just by changing the tines here and try to get the
white balance white. Now let's move to
the creative Am, and this is where
the fun begins. Because here you
can experiment with different color grading presets and see how they
affect your video. And there are many different
styles to choose from, ranging from cold to warm tones, high contrast, and
even advantage looks. And they are called lets. By the way, premiere
comes with some options, but you can also find some
extra lets online if you want. Some of them can even copy the color style of movie that you like,
which is pretty cool. They work like filters
on your footage. But the technical side
of its way deep up, there's a section on the
top in your guide book just in case you want to learn
how to use them properly. But for now we are doing
some basic color grading. I'll be focusing on some
specific features of lumetry that really find
interesting and very useful. One of them is the color wheels, where you can
adjust the shadows, tones, and highlights
of your video. This helps you to balance
the colors to achieve a natural look or
a stylistic look. However, you can also
use the curve step to adjust the color
channels individually. Just so you know,
all the colors in the computer screen
are made up by combining the light of
three different colors, Red, blue, and green. Rgb, the combination of
the mode together here can control these three
colors individually or use the De to control all
of them at the same time. Just so you understand
this graph very well, this part of the
curve represents the shadows of your footage. This the m tones and
this is the highlights. But notice that if I move
the curve like this, it affects the whole image. If I want to change
the highlights, for example, I need to isolate these sections
by creating these dots. When I move, this part I
know will be affecting now just the
highlights very trip. If I move this pi, I'll be
affecting the mid tones. And if I move this
pi, I'll be affecting the shadows only which are mostly the trees
in this video. But sometimes the curves
don't do a good job as letting the right colors
that you want to change. When that happens, you can
use the other cool tool here to select just the colors
that you want to adjust. You can use this eye
drop to help you out. You can click on a
color that you want. Choose your hue in your video, and adjust up and down this line here to adjust the saturation. That's why it's hue
versus saturation here. And then we have hue versus hue, which means you can
choose your color here, change to another
color, another hue. This is hue versus luminous. And you can choose your hue in your video and change the
luminus of that column. Anyway, this is
one of my favorite parts of lumitry column because it really gives you a lot of control
over your grading. I'd encourage you to play
around and have fun. In the video that I'm creating
for my class project, I decided to make the
colors darker and slightly blue just to give a sense of
mystery or thriller vibe. Now, some color mistakes
while urging color grading, not paying attention
to the skin tones. Skin tones are a crucial
element of video editing. And incorrect color grading can make this skin look
a bit unnatural. Pay attention to the
skin tones and use tools like the hue saturation
in curves to adjust them. If needed, you don't
want to go too far and maybe create some
malians like this one here. Other one. Ignoring
a white balance. Proper white balance
is essential for accurating natural
looking colors. Make sure to set
the white balance correctly before you
start the color grading. And use tools like the
white balance elect if you are not very
sure about it. Once you're satisfied
with the color grading, just go back to the
adding workspace by clicking on the added tab. These are some cool features
in lometry color and they'll help you to get up
to speed with color grading. It takes practice though, and experimentation to develop
your own grading style. So don't be afraid to try out different things and just see what works best
for your video. Every single video is
a different thing. Every single video is
a different, like, color scheme that
you might use to enhance your story
and narrative. Just do a few experimentations and I'll see you in
the next lesson.
19. Project Breakdown: Hey everyone. If
you made this far. Well done. Well, salute. We are just so close
to end our course. In the previous
lessons as you know, I showed you a little
bit of how I was implementing some ideas and some techniques in my
own class projects. But obviously, I couldn't
mention everything that I did. So here's a breakdown with
some extra useful tips and some things that I've
done in my video just so we can really
get the most out of it. All right, so let's get started. I'm very excited
about this class. It's very useful. So we can see everything
that I've done. This is my timeline, by the way. He is my timeline.
A little bit crazy. I know quite
overwhelming as well. Sometimes I like to be
extra if I need to, just when it comes to effects,
because they love effects. But anyway, don't
get like shocked by this because
this is basically, this is my music, this
layer is my voice over. And this is just like a
bunch of sound effects. So nothing really
new for you here. I'm going to use just the
video here. The video here. So I'm going to this part starting with this first
shot that I have here, as you can see, have
like zoom effect here. And you know what you created zoom effects already, right? However, in this situation I use like a
different technique. Instead of using this
normal scale here, I actually use the transform. Which you can see here already. Because I was typing
this before transform, I can drag drop onto
my footage here. It's basically the
same information, same attributes that you
can find here under motion. However, the difference
here is that you can add some motion blur as well
depending on your animation. Here we have shut angle. If I have this to zero, you can see here
that goes back to normal, normal zoom effect. Nothing really cool about it. But then if I have 2360, it really ads like
this motion blur. That's the only reason I use this transformer effect
here in this moment. It gets like a more
nice zoom effect in transition into my
other footage, right? Just weird abstract thing. However, if you just double click on here, little
circuits for you. This is actually just
footage of a camera lens, you look at that. I just found this
online and I was like, wow, I might just use
this for something. So I did, I went here
this like as part of my transition and I went
right into his mind, you the coctor's mind in
this situation here in this case where we start like having a lot
of other footage. Just simple things
that you can do. Now here I have like
an overlay text, so can you see this?
It's a bit dark. Yeah, This overlay texture here over all my
footage basically. Can you see like a
bit of this here? This is simply by changing
the blind mode to lighten because the original one is like this black background, this little texture here. I just changed to lighten and have this nice
effects throughout basically all my videos except for this moment here where I have the same overlay footage. However, I wanted to
create some modifieds. I actually just drag and drop some brightness
and contrast. You can find it here.
Brightness and contrast, drag and drop over your footage. In this case, my texture. And I changed to
lighten mode and I just changed the brightness and contrast right
here, can you see? And it creates like
this, nice effects. Just like a nice
way to play with effects in order to
create something like, I don't know, maybe
you represented the file is corrupted
or I don't know. Here, I added some effects called black and white as well. Because otherwise I
would have had like these colors are all around
and don't want that right. Next part of my video that I want to emphasize
and really show you, it's like that you can really go nuts with the amount of
overlays that you use. For this part of my video, I used like one overlay here, which is the Japanese text. To go to effect controls, I really just change to
lighten mode in black and white because I didn't want
to see these colors here. Then I have another
overlay with this noise. Same thing, blend modes again, another one and another one, which is the TV static here. All of them together,
you have like this nice cool effect. So can go nights and just
do whatever you want. Really, one more here. This lighting mode, again the original footage
is like this. Then again, lighting mode
three strong Levi is 100% Just jump to the passage
to 30% and black and white. So I don't see the
colors. Right. As you can see. Again, things that you have already learned. Nothing new for you. It's just a matter
of playing with the tools creatively
and creative effects. One more thing that you
have already learned, which is the speed ramp. I use this to create
like transition right here, which
is pretty cool. Right here I have my
footage of this wave, then I create like a speed ramp to accelerate the
footage at the end. Combine this footage with these leaves that I
filmed from outside my window in my apartment and
combining with the lights. Look how cool. It
looks really seamless. And I love this
just so you know, this is just click
on this pot just so you can see what
this is all about. It's just me like idiot, filming a light for more than five or I
don't know, 10 minutes. Even look at that.
Just filming a live. Because I was like, I want
to get some effect to use later on and that's
what I made out of it. This transition, again, using the same things creatively
to create different effects. Right. One more thing that
I want to show you is that, can you see that
there's a footage here and you can't really see that this is because
I disabled this footage. Sometimes if you're
unsure if you want to use this footage for your project or not, you can just disable. Just right click
this button here, enable, so you can see this one. Now I ended up not using it, I just left it out. Click enable again
to disable it. And I'm going to enable
the other one here. Again, that's the
way that I ended up deciding to use this effect here to have like in this
part of my video here, right, Moving forward here
have like as you know, heaps of shots to make my
transition into this moment where the characters
finally finds piece several things,
different shots here. Then I go to this moment and
here as you already again graded to create like this nice transition
based on the luminus. But as you can see, the
transition happens. And you can still see
through my footage here, the footage and the videos
underneath this is because I use different effects here that you haven't
heard yet about. Which is called Luma Key, right? As you can see, if I
use Luma Key here, you can actually
decide what parts of your image based
on the luminus. Again, to cut off here
there's a threshold, so you can just change
the percentage here. I left like around 10% so I can really see
through my footage, the silhouette, see my
character here in this moment. Because we talk about how he's getting like into
this peaceful moment. Calm thoughts, I don't know. Then I want to see
him silhouette, but I also want to
see what's going on in his mind which is
their representation. The jellyfish and everything that I use here to
represent that. That's why I use
this effect here which is pretty nice effect. I love this effect
especially for this footage here
because it worked so well in my opinion. All right, here at the
end, as you already know, the butterfly coming,
which represents the idea, by the way, the
idea touching you. When you have like
this peaceful mind, the character wakes up of this day dream or whatever he was feeling at the moment. Then he realizes again that this process is
going to, it's a cycle. Every time this is
my life, actually. Every time again, I
start a new project, I always go like fully into it. And I was like, this
is so complicated. And then after a while I'm
just like, oh, I got this. Then I start new project
again and everything happens the same, all over again. Anyway, have this and I dip and I cut you
black at the end. I have right here, some text. One more time to
finish that off. It's just a matter of
playing with effects, user creativity, and the
things that you've learned. To create different things and create meaning
to your story. Now here's a fun facts
about my class projects. This is actually the
second draft of my video, and it was the first
one if you want, in projects and resources step. But I just want to
tell you something. Although this is the
second version of it, I wouldn't say I'm 100%
satisfied, happy with that. Yet there are further
things that I would change video
to make it better. But I left this way on purpose. Just so I can do an
activity with you. I want you to give me
your creative feedback about my video based on the things that
we've done so far. This is an awesome exercise. You train our rain,
how to criticize, and how to give feedback
to someone's work. And also that actually is
very helpful to you to make you more self aware of your own editing
choices right here. What do you think
about my video and the things that you would
have done differently? Be nice, but not
too nice because honest feedback is one of the greatest ways to
improve our skills. Just go ahead and I'll see.
20. Exporting & Sharing: We have finally got
to our final lesson. This is about exploring
your footage. Some important
information that you need to know. Let's jump right in. Right? Basically, I
showed you how to do this on collectional
effects lesson, but there are a few other things that I briefly want
to talk about. Let's exploit this video here. Set the nine and our
points in your time line. Your short cuts are and no on
your keyboard, you forgot. Then you can go to Export
Tab and already shows you that you can choose like your
name here, location preset, and now here on format said the most popular codec is 8264 because it gives
you an MP four file, which is basically
accepted by any platform. However, if you're looking
for a very high resolution, you should go for quick time, which gives you an MOV file. When you choose Quick
Time, you'll notice that the format changes
here to Apple prores, fortune two, which is just
the name of the codec. And essentially the difference
between them is that the 8264 compresses
more of your file, so it gives you a
reasonable resolution and it is Miller file size, and the Pros Fortune two does less compression
to your files, so it gives you a
better video quality, more colors, more details. However, the final output is
going to be a lot larger, and I call applaud this file everywhere or
every platform online. So this is normally used
when the client needs the best quality video ever
for a specific reason. So maybe he's showing the
video in a conference, or maybe he's just sending the video to someone else
to do the color grading. So it's always good to know that there is this option available. Okay. So now if you want to change specific things
about your videos, we can do it here, but it's
normally automatically set up based on the settings or the preset that you're using. And we don't normally
need to worry too much about this or the audio
settings and so forth. However, there is just one more thing
that I want to talk about. Last time I told you to hit Export when
you're ready, right? But this is going to lock
premier and it doesn't let you do any editing while
your file is being exported. So there's another way
to export your videos, which is this button here
sent to media encoder. They'll take you
to another B made specifically to
manage video exports and also video conversions. That's pretty cool
because it lets you change your settings even further to some different
presets if you want. And you can still go
back to Premier and keep your editing going while
your file is being exported. This is basically
all they need to know about exporting
your videos. Right now, I highly
encourage you apply your creations and post
the links right here. I'd love to see what
you come up with in your activities and especially
in your cost projects. So just go ahead, do that now and I'll see.
21. Conclusion: As we finish this
editing course, it's time to reflect on the incredible journey we've
been through together. From a simple story
to a short film. You've been introduced to
a lot of editing tools and techniques to help you create emotional connections
and memorable stories. We talked about the
importance to do a creative brief before
creating a video, to have a clear picture
of your projects and to save a lot of time
in the editing process. Then we saw how to manipulate the rhythm and pace of your
video by just changing the show duration
and use editing techniques to create ani
and enhance your story. We dive into premiere, exploring the most useful
tools to manipulate footage, change the bend modes, and to create an innovation
using frames. We talked about how
every single aspect of video editing plays
an important role to create a meaningful message. Similes, transitions,
text, color, grading, music and so forth. As you move forward, I
hope you remember that the art of video editing is not just about the
technical aspects, but also about the
principles of storytelling that invoke a wide range
of emotions in your views. Also, keep in mind the workflow and photo
structure we have created together as you can help you in the future projects. And if you forget anything, you can always come back to your classes or your guidebook. I highly encourage you to leave a review
about this course. Let me know what you think about it if you have any questions. If you want to hear more about
a specific topic, maybe. And do not forget to post
your final project here in the gallery so I can
give you feedback and I can also watch everything
that you've been creating. Thank you so so much for
embarking this journey with me. Hear future, follow me to be notified about future
classes if you want. And I hope, I really, really hope that as you keep exploring the out of storytelling
through video editing, your passion and creativity, take you to new highs. I'll see you next time. Bye.
 Abner Cross, Filmmaker, Editor & Storyteller