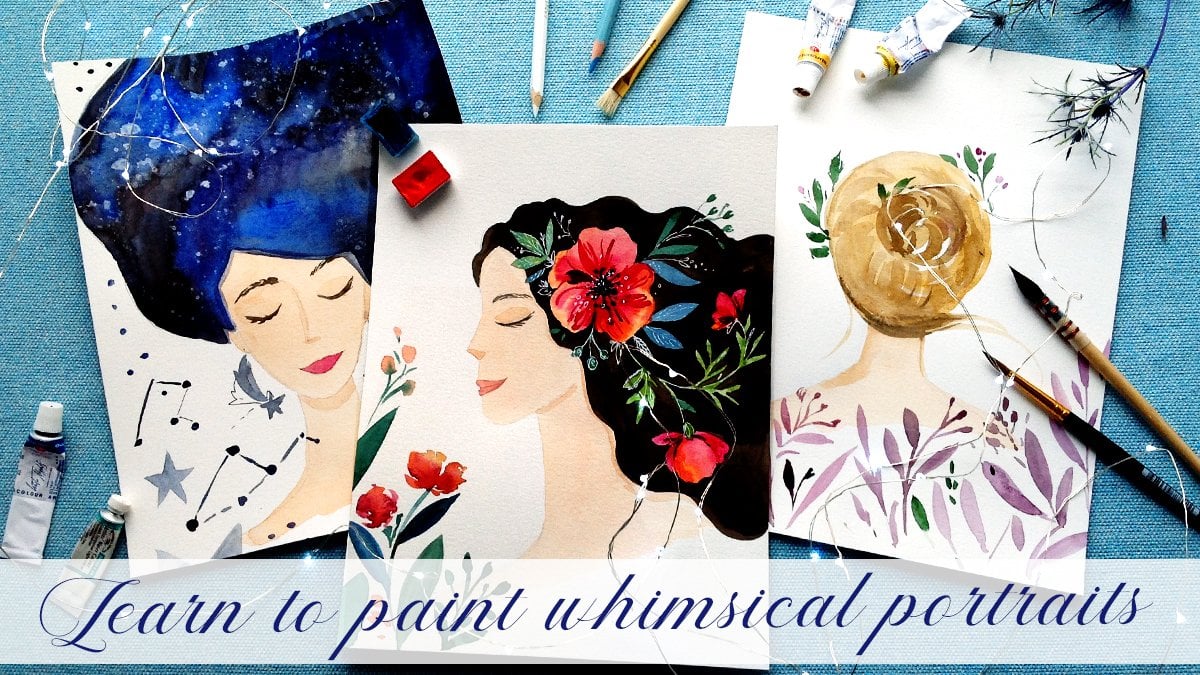
Transcripts
1. introduction: Hi, Skillshare.
Nice to meet you. My name is Al Laura. You might know me from a project that I have online where
watercolor comics, and I use this little squishy,
little animal characters. With this class, I'm hoping to offer you tools
and techniques to make drawing feel easier
and more accessible and a lot of fun because
art is such a gift to have. But I'm going to break this
lesson down into three parts. The first part, I'm going
to show you exactly step by step how I draw my little cute characters,
and they're really fun. You can, gift them
to your friends and family or you can just
give them to yourself. So that would be great. I'll hold no secrets back. And then, secondly, I'm going to give you a
watercolor tutorial, something like quick and easy. I use watercolor primarily
because I was a control freak, and watercolor kind of
forces you to relax. A lot of people are
intimidated by watercolor, and I understand
and then thirdly, I'm going to show
you some exercises that generate inspiration. These are a couple of tools and techniques I use to kind of pull ideas out of the air and bring them down to the page. So they're tried and true. I use them every day, and
they're really fun. So I'm very excited. Thank you for
clicking on my video. Thank you for taking
a chance on me. So without further ado, let's get started into rest
2. materials and mindset: Hi. Hi again. I have a new off and on. We're gonna start. Make sure
your workspace is clean. I personally get in a creative
head space way easier. You just need a pencil, any kind of pencil and a pen. I like to use microns. This is a Micron 02, but any pen will work, I use microns because I don't think they
bleed with watercolor. So if you want to use these
drawings for your watercolor, I recommend a Micron
and watercolor. Any kind of watercolor
will work from the cheapest palette
you can find to the nicest palette
you can find. Personally, I use these
keratake watercolors. I like the creaminess of them, and I like that
they're not in it tube because they can just
play and they're fun. The blank page can be
really intimidating. So what I like to do
before I start drawing is something that I'm
borrowing from Mr. Rogers, where you just take
a moment to think of someone who immediately makes you happy and fills
you with love. We're just going to
take a brief moment to send them some love. Nice. Nice. If you feel compelled, I would love to see
your art if you put them in the project gallery
that would make me so happy. Don't feel like you
have to. I just really, really want to see them. But again, no pressure. No pressure. Alright, let's
get into the first lesson.
3. how to cute: Alright, so let's start
with, like, general shapes. So the heads, like
all heads tend to be, are round. Like so. And instead of a perfect
circle, they're kind of lumpy. I like to have a lot
of fat in the cheeks, so it's almost like a deflated
ball towards the bottom. Yeah. So you can draw a circle
and then think of, like, fat around the cheeks, and it'll take some
getting used to, almost like a pear shape. I'm sure you've seen these Ts that show where to put
eyes in the mouth. So with my characters, I like to put the eyeline
a little bit lower. So not quite dead in the
center, but a little bit lower. 'cause it kind of
emulates an infant. And infants have
really huge foreheads, and all of their features are really smooshed down towards the bottom of their
face. Like so. So you'd put the eyes on
this eyeline. Like so. At the tips here and here, this is where ears typically go, and you can do a wide array. For the bodies, they're
kind of like jelly beans. I like to kind of stick the booty out a little
bit. I think it's cute. And then the legs instead
of straight legs, which also work and are
wonderful, I again, like to make them baby like and have a little bit of a bend. Everything is very
squishy with these guys. And the arms start wide and end a bit narrower,
if that makes sense. Then you kind of have
any kind of tail. Awesome. Yeah. Just
kind of like that. Let's do something even easier. Facing the front, we
have our T shape. And then it's a bit
of a pair tear drop. So have a really big neck, kind of an
indistinguishable neck, and then I put the arms
directly below it. Again, even facing the front,
little bend in the knee, have a slight dent
for the ankle, like so, and boom. For the face, this
is the fun part. Oh, my God. So you have
your basic sketch, and you would do
this with a pencil. This is the pencil layer. Make that a little
like it's a pencil. Then you come in with your pen, and I like to space the
eyes out just so like that. This is my ideal ratio. You're equidistant from
the middle pretty far. And the spacing of the eyes will really change the character. Same with the
spacing of the nose. Let me show you an example. See how differently all
these characters seem. Does that make
sense? Even the size of the nose will really
change the character. It's pretty pretty fun. Alright. That was a cute nose. The mouth is by far,
my favorite part. I want you to get
really loose with it. I think if you're
working traditionally, which I always do,
just have so much fun. Relax with it, the
tiniest little curves, and gestures will really
change the expression. Oh, my gosh. It's so fun. The tiniest gestures will
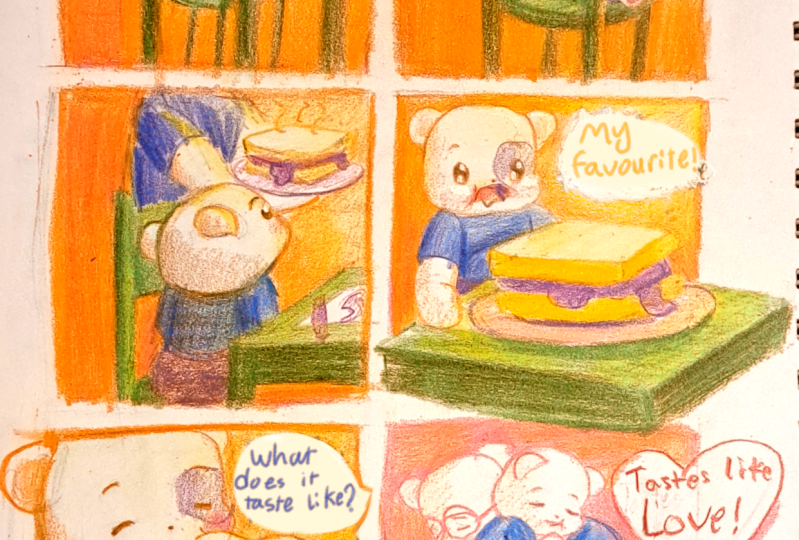
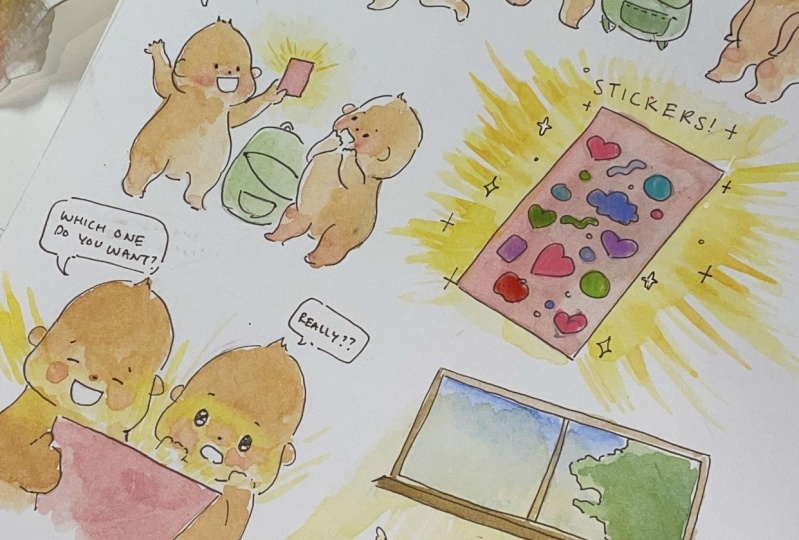
change the character. Oh. So fun. Awesome. I like to make my characters as cute as possible because there's something so disarming
about a cute thing. Like, they're just universally
charming, and right away, it just kind of lowers
your guard a little bit, and they're just
instantly likable. So it's a very powerful tool, especially if you
want to talk about more difficult topics. What I also like about them is that they're very universal. They have no age,
no gender, no race. They're just as close as you can get to the
shape of a soul or, like, the spirit
of a little baby, the characters can take on any vessel and any relationship, depending on the context. It's a versatile
tool. I like it. Cuteness is a way to soften
your work. It's very playful. It's very light. And if you're working on
something heavy, lightness helps get
it off the ground. You're bringing your
character to life, it's really important to think about the form all
the way through. You're an artist, but
you're also sculptor. You're trying to
have the illusion of a three D effect with just lines and shapes.
It's a little tricky. Easier said than done. So think about how the
weight is being distributed. Think about the movement
of baby animals. For example, they're
a little clumsy. They tend to tilt. Think about maybe like a sack full of flour, the way it can, flop around. Visualize it in your head, visualize how it would
walk across the room, and then do your best to kind of emulate that
in atatic drawing. The way your character's
pose will also be very indicative
of its personality. Is it playful? Is it shy? Is it silly? Is it more serious? Take your time with
it and have fun. You don't need crazy
costume designs to have a really
fleshed out character. You can show a lot in a
face and in a gesture. There's no right or wrong here. Just do what's fun
and feels good.
4. dipping into watercolor: The next lesson we're
gonna do is watercolor, which is my personal favorite. I started using
watercolor because I was really obsessed with
control when I was drawing. I focused on really
tight intricate inkwork and I was predominantly
black and white. And watercolor really forces
you to relinquish control. You're not just painting alone. Water is a living thing, and it has massive amounts
of creative intelligence. And if you allow it to
kind of work with you, it will inform your artwork, and you, too, are
like dance partners. A lot of people are really
intimidated by watercolor. In the same way, I think people are intimidated to ride a horse. It's a little unpredictable, and it's a living thing
that you need to work with. But once you get over that
initial hurdle of fear, it will exponentially
improve your work. You don't have to control it. You just have to kind
of guide it along. Keep working with it, and it will reward your
patience, always. Just like everything in life. Okay. So there are three
classic techniques. What I'm going to do
first is wet on wet. So you start by
wetting the paper with clean water, and
then you add pain. So the colors are really
going to blend and flow and create this soft look
and a lot of gradients. This is great for cloud,
skies, background, anything that you want to
have a subtle flowing effect. So you load up the paint
and you dip it in, and don't be worried
if it starts to bleed and spread around. That just means it's working. Just be ready that
this is one of the most unpredictable
elements of watercolor and just
anticipate that. Don't worry too much
if it takes time to, like, learn exactly how
much water it takes. That's a learning curve.
With this technique, the colors also blend
beautifully together. If you want something to have a seamless blend
from green to blue, for example, this is
the way to do it. Next, I'm going to
show you dry on wet. With this technique, a dry brush is loaded with paint and
applied to a wet surface. So this results in slightly more defined lines
and edges than wet on wet. But you'll still
get some of that really nice soft bleeding. It's Oh, that sounds
creepy, sorry. This is ideal for adding details
to backgrounds that need a softer look,
reflections, so on. Here I am adding some
cinnamon to this toast. The next one is dry on dry. So this is mainly
just a dry brush. You take a little bit of paint
and apply it to dry paper. It's perfect for
fine details like tree bark for creating
textured surfaces. When you get a hang of
these three techniques, you can mix them together to create some really
beautiful effects. It's amazing what can be
done with these tools. I'm still learning
new things every day. Now we're going to give
them space to live inside.
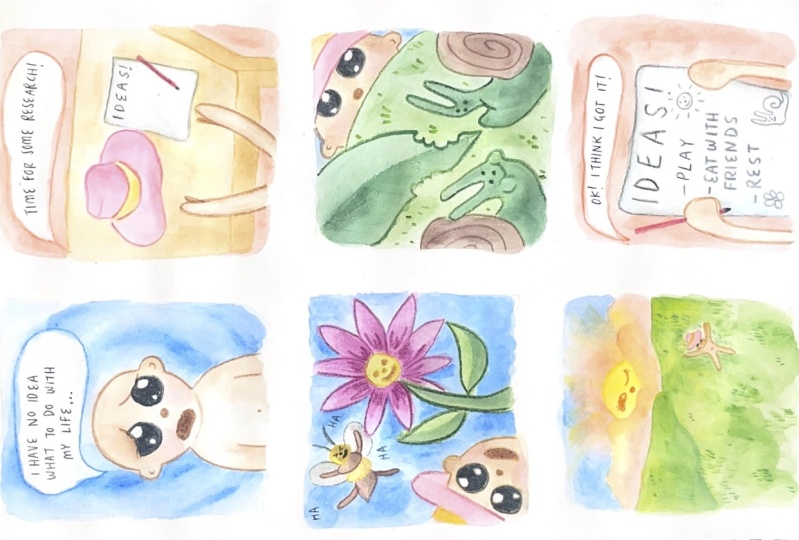
5. inspiration exercise: We're going to take
a memory, a feeling, maybe something you want
to happen in the future, and we're going to
meditate hard on it and then put it into a comic. So I want you to think about something very
specific for just your. Take something that really
sparks your excitement and get as specific as
possible with the details. What does the room smell like? What does the carpet feel like? What do you see? What do you hear around you? Really, really think on it. Use all five senses and senses beyond those.
Put yourself there. L. Get as precise with
those details as you can. And then we're going to
try to bring it forward. So here's my example. What I was thinking
was a really crisp, beautiful autumn day where
you smell on the breeze, this sensation of fall
break in first grade. You just have this,
like, scholastic books fair smell in the air. I don't know
how to explain it. And you're walking
around the woods and the leaves are
crunching under your feet, and it's starting to finally get cool so you can let go of the summer sadness and really just embrace the quiet
restfulness of autumn. So for this, I wanted to make it really
bright and vibrant and beautiful and have
all the colors really exploding outwards because it's
this feeling of just, like, joy to be in the space. And I remember seeing
these birch trees, and it really caught my
eye because they looked so thin and papery and
just really stunning. And yeah, that's my memory, and it made me feel like
I have come home again, and cold weather will do that. Another example that's
really specific. When I was little, I would
lay on the carpet in my mom's bedroom and I would watch the dust in the sunbeams. And I always used to think they looked kind of
like little fairies. And I just remember spending
so long doing that. And I know that's a
really specific memory, and I'm wondering if any of
you did something similar. The more specific you get, the more universal it becomes. I remember this day, and
it's nice to draw it again. Another example is going to the public pool with my
sisters in the summer. That was a highlight
of my childhood. Everyone's lives are full of these strange magic experiences, and it's really a
gift if you come forth and share them
with other people. I remember these mushrooms in the public pool and the water
would be down on your head, and it felt really mystical, almost spiritual,
and I loved it. There were other examples like the grocery store had rainforest sounds when the sprinklers went off
on the produce, that was magical and
just any car wash. And it sparks other people to
look at things differently. When you're trying to figure
out mood, color is crucial. It is so evocative of
emotions right away, and it's even
evocative of memory. I like to use a color palette reminiscent children's
books I think there's something very powerful about that nostalgic quality. And I found that it softens
people's resolve around any ideas that I'm
trying to share because they're going to think it's something familiar to them.
6. closing thoughts: You feel compelled
to make art at all, that means that you
need to make art. The same way that when you're hungry, you need to eat food. Your soul knows what's
going to nourish you. If you feel like you have
nothing interesting to say, I promise that is a delusion and a lie
that was fed to us by this really weird system that we've set up for
ourselves. Society. Don't worry so much
about how it looks. That's not as important
as how it feels. The mark of really good
art, in my opinion, is how sincere you're
being while you're making it you can really feel when someone cares about
what they're doing. A I hope you got anything out of this video is that art is actually really easy
and accessible, and you should just
come towards it like it's a meditation,
like it's a journal. Like it's taking a walk
through the woods. There's no end objective. The actual act of
doing it is the craft. So I'm really proud of you for taking the time
to do this today. It's rare that we, like, treat ourselves to
something so nice. Please keep making art. It will give you a richer,
fuller, brighter life, and you can use your
art pieces as like, souvenirs for your timeline. There are zero
negative side effects. Once again, I would love
to see anything dev. Please drop in the
project gallery that will make me so happy. I will print it out
and put it on my wall. Creating art, it builds a bridge between you and
the rest of the world. The only part of
the bridge you can build is from your side. So don't ever feel depression like you need to save the world, or you need to make something radical that will save people. Just focus on saving yourself. Better you get at
comforting yourself, reminding yourself
you're worthy of love, reminding yourself how special
and wonderful you are, the easier it will be for other people to
recognize the same. The stronger and steady
your foundation, stronger steady bridge will be. It will be much easier for the
world to meet you halfway. Thank you to Skillshare
for giving me the time and space to talk about my
favorite thing to do. And thank you again for
taking the time to be here. I'm so, so grateful. Until next time, remember, you are the creator of your
own world. Happy painting. I love you.
 Anna-Laura Sullivan, Watercolor cartoonist of sweet things