Transcripts
1. Introduction: Hi, I'm Hongshu, and I'm a motion designer in Canada. I have been animating for six years now, working in advertising agencies for clients like Adidas, PayPal, Walmart, and many more. Today, I'm going to teach you how to animate anything with the Graph Editor in After Effects. If you want to be a professional animator, this is a number one thing, the most important thing you need to know, the most important skill that separates amateurs and professionals, something you will need to practice more than anything else in animation. In this class, I'll first explain the concepts of timing and spacing, the most important animation principle there is and will completely change how you animate every single thing the rest of your life. From there, I'll introduce you to the value graph, how to work with the value graph, and what the different types of animation we can achieve through using a value graph. Then I'll go ahead to work on two different projects to show you how to animate with the value graph to bring the animation to life. After that, I'll introduce you to the other type of graph, which is a speed graph. I'll show you how to animate real projects with the speed graph to give character to your animation. At the end of the lesson of each graph, I have a fun project setup for you to work on. You will be able to apply the techniques learned in this class to new projects or something that's your own. Don't forget to upload your assignment on the project page to share with me and get some feedbacks. The techniques we talked in this course can be applied to all kinds of animation. Once you understand how to animate with the value graph and the speed graph, you will have infinite options to your animation and explore more possibilities on your own. Without further ado, let's jump right in.
2. Timing & Spacing: Hello, everyone, and welcome to the first class. In this class, we're going to talk about timing and spacing. The reason I made this a first-class is because timing and spacing is the single-most important principle in animation. Yet, no one really talks about it. At least not enough people are talking about it. It is a secret to a great, good-looking, awesome animation that people don't teach you that I'm about to unveil. Without further ado, let's jump right in. First, let's talk about what is animation. But simply, we have a stake here. People may say, from A position to B position when it animates, that's animation. However, this is not really an animation. This is only a movement or a position change. What is animation? In my understanding, animation is everything that happened between A and B. Everything that happened between A position and B position. This entire thing in the center is animation. We'll elaborate more on that later on. In this lesson, we'll talk about the single-most important thing in animation, the single-most important principle, the overarching principle that will change how you animate every single thing for the rest of your life, the thing that your practice the most more than anything else if you want to be a professional animator. What is it then? The thing that differentiate an immature animator and a professional animator is the understanding of timing and spacing. If you understand timing and spacing as an animator, you will already be better than 50 percent of the animator out there if he finished his scores and do all the projects, and understand essential skills that we taught in here, I can guarantee that you will be better than 80 percent of the animator out there because most of the animators don't know about these essential concepts and what makes up a great and professional animation. Next, let me explain to you what is timing and spacing in animation. This demo here is made available to download so that you can play with it, and it is beneficial to be able to understand how the object moves based on how you change your keyframes. Like here, we have a stake and two positions. Let me just hide this and turn on this animation here. As you can see on the screen, first, let's talk about timing. Timing is pretty simple. At zero second here, I have a keyframe on this stick. At 30 frame, I have another keyframe here on the position property so that the stick change from one position to the next. Now, if I play it, this is the animation that we get. What is timing then? As we all know, this animation right now, it takes 30 frames to complete. The 30 frames is a timing for this animation. That's the duration of the animation and also, how long it takes for the animation to happen. That's timing. Easy to understand. However, not a lot of people know what is spacing and what a spacing means. Now, let's say I want to make this animation faster, make the stick to move faster. How do I want to do that? Some people may say, well, you can make the two keyframes closer so that we can modify the timing and then now, it moves faster. Instead of taking 30 frames, it can take maybe 23 frames to complete the animation, so that is faster. Another way might be just go back to right-click keyframe assistant, Easy Ease it so that the animation is easing in and easing out. It appears so the animation is faster. After these two ways, this is where most of the animators stop. However, there's much more to it. Some people ask, why is my animation so plain or boring? It doesn't look so smooth, it doesn't have the energy that I wanted. Here's the ultimate answer to all your questions. It is not the only two frames, A and B, these two frames that you're concerned with. As a professional animator, you are responsible for every single frame in your animation. What do I mean by every single frame? Let me turn on the interpolation. Every single frames. From A to B, these are all the frames that the stick move in order to get from A to B. As a professional animator, you are responsible for every single frame in this animation. Even though you can't see them, if I don't turn on the interpolation, most of the times, the only two frames that you see is beginning and end. But think about it for a second. Most of the time when we set up keyframe, we are only seeing the two keyframe that we set up, A and B, and ignoring everything else in between. All of these. If you're only concerned with these two keyframes, A and B, and all you do is simply just ease the two keyframes, you're missing out on infinite option that you could have on your animation by changing the spacing. That's why your animation looks so plain and amateur. The only way to become a professional animator is to take the responsibility of all of your in-between frames and manipulate them with a purpose. The way to do that is by using timing and spacing. Now, you probably understand what is spacing. All these in-between frames, one between another, these are called spacing. Remember, the timing that we have is a duration of the animation. Now, you're only concerned with A and B, two positions, and the duration of the animation. When we talk about spacing, that's when we talk about all the frames in between A and B and how we manipulate all the frames in between to create the animation that we want. The next question is, how do we change spacing? Timing, as we all know, we can change the keyframe on the timeline here. Let's say F2 key I can easily drag the keyframes to change the timing. That's very simple. But now, how do we change the spacing? In After Effects, spacing is actually controlled by a graph editor which is hidden. That's probably why most people are missing out on it. It is this very little button here. Looks so simple and unimportant. However, this is probably one of the top three most important buttons in After Effects. In After Effects, you got all these buttons and you got hundreds of effects, presets, and so many other tools in After Effects. But this button here is what you use 80 percent of the time for your professional work. I mean, 80 percent of the time for your professional work. If you're missing out on this, this button right here, you're missing out on 80 percent of the possibilities of your animation. That's why your work doesn't look so professional. But don't worry. Since you're here, we are teaching you how to become a professional animator. After this course, you will be better than 80 percent of the animators out there. Now let's come to a different composition on the left here, Easing Keyframes Demo, to play with some of the spacing so that we can get different kinds of animation. You can see here, let's set the keyframes here to linear. Just hold down Command and then left-click. Set the keyframe to linear. Now, if we preview this, you can see this is the linear animation that we get. However, if we select both keyframes and come to this graph editor to manipulate some of the spacing, right now, By the way, for the graph editor, there are two different types of graphs. One is value graph, and then the other one is speed graph. These two graphs work differently. We're going to talk about both in detail in the upcoming lesson. But for now, just bear with me. I'm going to show you some of the possibilities we have. First, let's come to the speed graph. We can right-click Keyframe Assistant, Easy Ease. Once we make a default easing, you can see the spacing of the frames changed. Now we have more of the stick in the beginning and the ending on the animation, meaning they're moving slowly at the beginning and then moving slowly at the end. Now, let's drag this curve here, make it more dramatic. Let's see what we have, what the animation looks like. Without changing the timing, it's still 30 frames, you can feel that the animation actually looks faster. If I make it even more dramatic, just drag this all the way, like this, let's see what the animation we have. I can click on this "Hide all" button. I can hide all of these interpolations, just seeing the two frames at the beginning and the end. Without seeing any of the in-between frames, this is what the animation looks like. You can see it's got much more energy and then it's got character to it. It doesn't look so boring anymore. This is a curve that we get here. If I change the curve like this, make it faster at the beginning, then slowly coming to the end. Let's preview this. You can see now, the stick moves fast at the beginning and then slowly comes to a stop. Another thing is right now, you can see at one second zero frames, I have this curve all the way at the bottom here. This is the speed graph, meaning at zero second, the speed of this object is zero. However, if I drag this up here, that means the object already has a speed coming into the frame so that it's not starting from zero. Let's preview this. That's how it looks now. If we have a curve like this, the stick is going to move slowly at the beginning and then very fast at the end. Let's preview this, stop very abruptly. You can see with the changing in spacing, we can get so many different options to our animation. This is what the in-between frames look like with our curve looking like this. If we show the comparison here, on top, we have the linear keyframes, and then at the bottom, we have the easing keyframes. However, at the bottom, we can modify the spacing of the frames however we want and achieve so many different possibilities to our animation. That's what I wanted to show you. I wanted to show you how many options you have with manipulating the spacing of the animation and what we can achieve. We'll spend most of our time in this course in graph editor. I'll teach you how to animate in here and to visualize animation based on the different graphs that we have. It will take some practice, but I can assure you that you'll get there by the end of this course. Once you are familiar with the graph editor and be able to adjust it with purpose, you will have full control of your timing and spacing and be able to take responsibility for every single frame of your animation. Thus, animate anything precisely to do whatever you like. Not only that, you will have the confidence of knowing you can do anything you want and not limited to the two keyframes and the system default, Easy Ease, or use plug-ins to get the desired look. You won't be able to achieve everything and anything manually with graph editor, I'll also attach a PDF reference sheet with different types of graphs that are most commonly used by professional animators so that you can take this project file and play with it to get the different type of animation in the document.
3. Value Graph Explained: So here, we're back in this After Effects demo file. Then right now, I'm under Easing Keyframes demo. Here, I'm going to demonstrate to you how to change the value graph in order to change the spacing of the animation. We can see over here, right now, I got two keyframes added on this layer, the stick here, from one position to the next, and it takes about 30 frames, and 30 frames is our timing. Keep in mind, we're not going to change the timing of the animation. All we're doing is just to use the value graph to change the spacing. Right now you can see the steak is only moving on the horizontal position is not moving up and down. So that's why I need to go to the position property, and then right-click Separate Dimensions. Now you can see the x position and y position are separated, and now we can delete the y position because we don't need it anymore. We just need to use the x position. This chart here, this demo with all the in-between frames, this is to show you how the spacing is going to change by modifying or changing the value graph. Yeah, this is a very good way to visualize. Because most of the times when you are doing animation, all you need to do is to set two keyframes at the beginning and the ends. If I don't have this, all the frames in between, you wouldn't be able to realize what's happening to the animation itself, and if you're only concerned with the two keyframes. Remember, as I said in the first lesson, it is not only the two keyframes that you're concerned with is all of the frames in between that you need to take responsibility for if you want to become a professional animator. Now, let's go to the Graph Editor. This little button here. Just click on it. I want to use this button here, fit the graph to view. It's going to fit to my view here. I want to make it bigger, and now, before I do anything, I want to check which graph am I in. You can click on this button here, it shows you the type of graph that you're in. Right now, I'm in the speed graph. But in this lesson I want to talk about the value graph, we're going to talk about the speed graph later on. Let's just switch to value graph, and this is a graph that you get. What it means right now is from left to right, it's actually increasing in time from left to right, just like your timeline is increasing in time. Then from bottom to top is increasing in value, whatever value it is right now the value is exposition. If you modify the size of the object, is going to be increasing in size. In this case, we're increasing in exposition values. This graph, you can see there are two key points at the beginning and the ends, and these two points correspond to our keyframes. If I click on the two, hold on shift, click on the two points here, select the two points on the value graph. If I go back to the timeline, you can see the keyframes are selected. Modifying or changing the points in the graph, it's actually changing the keyframe. Say if I want to change the timing of the animation, I can just grab this point and then move it to maybe 25 frames, and if we go back to the timeline, you can see our keyframe is changed to 25 frames. Since we don't want to change the timing, we only want to play with the spacing, so I can change it back to 30 frames. Now first let's do a default, easy ease. Let's hold on shift and click on both keyframes and then hit F9 to easy ease the keyframe. Now you can see this is a system default, easy ease, and you can see over here the spacing of the sticks are changing. It's closer together at the beginning and closer together at the end. What it means is that it's slowly picking up speed, and then going faster in the middle, and then going slower at the end. If I play the animation, you can see is slower at the beginning, picking up speed and then in the middle is faster and then slowing at the end. The way to visualize the graph is at first, because right now the thing that I want to teach you is to just by looking at the value graph, you will be able to tell what the animation is going to be based on the different type of graph you're getting in the Graph Editor. For the value graph, what you need to remember is, here at the zero second mark, you can see there's the Bezier handle, the tangent of the curve, and right now the basic handle is flat. So flat means speed is zero. At the beginning of the animation, the object speed is actually zero, and then as it goes, to the middle, right now you can see this points here. If I add a tangent, I can just click on command and then hold on command, mouse left-click. I can see there is a tangent that I added in the center. This Bezier handle is actually steeper, is not flat anymore. It has a angle that going diagonally. The steeper this tangent is, the Bezier handle is, the faster the speed is. Based on this graph, we can tell the animation at the beginning, since the Bezier handle is flat, is from zero, going faster, and then slowing down at the end. That's also what this chart's tell you. The closer the spacing are, the slower the animation is, and then the further apart the sticks are, the faster the animation. Let me just delete this points in the middle here. Go back, and then let's go to the end of the animation. Right now if I just slightly changing the flatness of this Bezier handle, and you can see it's not flat anymore. It's probably got a like of 10 or 15 degree angle. That means the animation doesn't stop at the end. The speed of the object is not zero at the end because zero is flat and now it's never becoming zero. If I have more keyframes, go past this or animation go past this the stick is just going to keep moving, it's not going to stop at zero because the handle is not flat anymore. Now, let's say if I move this all the way down, you can see the tangent, the Bezier handle is much steeper. It's so steep that you can see this chart here, the stick are further apart, which means the speed is faster. Based on this type of value graph, we can tell that the animation, the object goes from zero speed, slowly picking up speed and then going faster, faster, faster, and then boom at the end. The end never stops, so it happens very abruptly. It's very fast at the end. If I play the animation, you can see what it looks like. That's what it looks like. This type of curve, you can see it's slow at the beginning and then fast at the end. Now, if I show you another type of curve, this is just for you to play around with. I'm going to have this file available to download. You don't have to remember everything I teach you. We're going to practice everything the same that I teach you here and then you're going to be able to just look at the value graph and know what type of animation is going to happen to your object. Well, the ultimate goal of knowing the value graph is to just look at the type of value graph you have and knowing what kind of animation is applied on your object. We're going to get there with practice with more lessons to come, but I guarantee you, in the end, you can be so precise with your animation, you can just mimic whatever animation that you see in other people's work and then make your animation so smooth and so precise and deliberate to do whatever you want with your animation. Now, so as we said here, if I just grab this handle, pull it over, and then graph the first handle, pull it all the way, you can see, our chart here, it's so close together at the beginning and then further apart in the middle. Let me make it so extreme. You can see what it means is at right now. The object is moving so slow at the beginning, it's easing, easing, and then all of a sudden, it picks up speed so fast and then it slows down again. Let's see what it looks like with this type of value graph. You can see without changing any of the timing, only changing the spacing of the animation, this animation feels much faster than our linear animation. It's got so much energy to it. Another thing I can do is even, I can just pull this thing back a little bit and then pull this forward so that you can see the Bezier handle is steep at the beginning, which means the object comes in with a speed before our object at zero second is with zero speed. Now, since it's got a curve at the start, which means the object already has a speed coming into this frame and then it's fast at the beginning, and then slowly, slowly, stop at the end. Let's see what it looks like with this type of animation curve. Speed up at the beginning and then slow down in the end, and you can also see the first two stick, they're so further apart, which means fast at the beginning and slow at the end. Then there are some other ways that I can modify the graph. Let's say if I want to change it this way. Now, just remember steepness equals speed, flatness equals slow and you can see from the second, the graph is steeper. Just look at the Bezier handle. If the Bezier handle is now flat, it's got speed. The steeper the Bezier handle is, or even the tangent of the graph is, the faster the movements are. As fast as the beginning and then around 15 frames, it's slowing down. It's almost flat, but it never stop at the center here, it never comes to a stop, and then goes faster again. Let's see this animation, so fast, slow, fast. Look at that. That's interesting. If you don't know how to modify the spacing, how can you achieve that? There's no way that you can achieve it. You can probably achieve it, but then it's not going to be so smooth. By just changing the spacing of this animation, we get this smooth transition, you can see the object slowing down the center there. Then if I want to add another keyframe here, let's say if I want to add another keyframe, just hold down "Command" on the keyboard and then left-click, add a keyframe. This is how you add a keyframe. If you go back to the timeline, you can see I also added a keyframe in the timeline. But once you know how to animate graphs, you don't even need to go back to the timeline, you just do everything, you just add keyframes, do your animation within this view here. You don't even need to go back to the timeline view. This thing is so flexible. You can do so many things to it, you can do so much stuff. Right now, you can see the tangent is not flat. What if I made it flat? It's flat here, which means the object stops at the middle. The speed actually becomes zero for a moment, and then pick a speed again. If I preview this animation, you can see the object stops in the center. Now what I want you to do is just to take this project file, come to this easing keyframe demo, and then just play around in the value graph. Just make sure you change it to a value graph instead of a speed graph and then see what spacing you have over here and what animation you will have with different types of graphs. Next, I'm going to show you how to use value graphs to animate some of the icons and how to apply the things that I showed you here to actual projects, actual animation.
4. Value Graph Demo 1.1: Now that you know what value graph is, in this video, I'm going to show you how to animate with value graph. Now, here we have a file with three type of icons. We're going to animate the three icons with value graph, something that I showed you before. But before we do that, I want to show you the bad example and what most people do. Here, we have a animated version, here's what I have. This type of animation, I only applied the default easing to all the keyframes. If I hit "U" here, you can see I put two keyframes and then I easy ease them with a system default easy ease, that's the animation that I have. A lot of animator, they just stopped there. This is considered a bad example, is what most animators do. They just put two keyframes and they use a default easing. Nothing else to it. But there's a lot you can do with value graph to just manipulating the spacing of the keyframes to get a different type of animation. I'm here today to show you how to do that. This is not what we want. Let's start with a brand new composition. This one I haven't animated yet, but we're going to call it good example. Now, let me just show you what I have here. Basically the first three layers, if I toggle between the eye icon here, you can see this is a clock I have. First, this one is the clock body and then I have a clock handle and then the check mark. This one, the green layer. We have this arrow here, down arrow and then this globe here. Now the third one, I have a pen here and then all of those content on the board, and then this notebook here. Last there I have is a background. That's all we have. First, let's put the green layer, this globe to the first layer so that we can animate the globe first. Let's zoom in, hit on "Z" and then drag with your mouse. First of all, let's identify this layer. Then I have the Anchor Point right in the center. By the way, if you are not seeing the same panel as my after effects, you can go to Windows Workspace and then just choose "Standard" work layouts. If you are still not seeing it, just Reset "Standard" layout to Saved Layout. This way, you're going to get a default standard layout and now we should be seeing the same thing. Let's go to the scale. Just hit "S" on keyboard and then let's put in a keyframe. I want to drag this timeline, make it bigger. I want this icon to stop maybe after 15 frames. Command shift right arrow, go forward 10 frames. Then command right arrow, one, two, three, four, five. You can see right now, we're at 15 frames. Hit the stopwatch here, add a keyframe and then go back, change the scale to zero. Now, we have a movement here for the globe. What I want to do is go to the curve's editor, fit the graph to view. Let's select keyframes and then hit "F9 easy ease." Now, what I want to do is I want this to pop in. I want the globe to start from zero, but then pick up speed and then slowly just stop at 100 percent. I want the speed to be faster around this front portion of the animation and then slowly easing into position. Let's see what I got here. Let's click off the layer. It's still too slow. What I want to do is just drag this handle all the way. Give it more energy, something like this. Let's preview. Yeah, that looks cool. That's pretty good. Then, go back to the timeline. Make the timeline is smaller. We can just copy this already animated keyframes onto this arrow here. "Command V" We should have the same animation for the two elements. However, since it's a down arrow, it should have a coming down, like a momentum somehow. I also want to change the position property, hit "P", and then at this point here, I want the arrow to stop moving and then around zero second, I want the arrow to come down from the top and there's one thing I want to point out. Going forward, every time you animate the position property, I want you to right click "Separate Dimensions", this is so important. If you're working with value graph, you have to separate dimensions for the x and "Y Position" and animate those separately. Otherwise, you wouldn't be able to. Think about it, value graph, it's time versus value. But then if you have position, its x and y value, is two different values. If you want to animate with value graph, you have to separate the dimension of x and y so that you can just control one of the value. It's so important. It's key here is to just right click the position property and then "Separate Dimensions". Now, I can check off this "X Position" because we are only concerned with ""Y Position"". Then I just want to drag this "Y Position" up. Let's preview this. The arrow just comes down, but it's got no energy because we didn't modify the graph yet. Just go to the value graph, hit on this "Fit to View" and then select the two keyframes, "F9, easy ease" Then I want a similar curve here for the arrow so that the animation is consistent. Now, let's go back and preview. Something like that. It's got more energy to it, definitely. Looks nice. Now, let's do the same thing for the second icon. This first layer is a clock. I want the clock to animate in the same as a globe. I just want to copy this scale properly, put it on the clock here, go to zero second. Also, you need to make sure the Anchor Points. The point where the animation is based off, need to stay in the center. If you go top here, this "Pan Behind Tool" can allow you to move around the Anchor Points. Let's say, if I have the Anchor Point on the top here, if I go to rotation, hit on "R" and I rotate, I'm going to rotate based off that Anchor Point position. That's not what I want. I just want to go back. I want the clock to come in from the center. Another thing that we need to pay attention to, is that the hand of the clock needs to come in with the clock. What I need to do here is just to select the layer of this hand, and then use this "Pick Whip" icon to just drag and then parent it to the clock so that when the clock moves, the hand moves with it. Let's just change back to their original position. Now what I want to do is right click "Position" property, "Separate Dimensions". Maybe around 15th second, I want the clock to settle in position. Then go back, I want the clock to move up, so that I can change make the ""Y Position"" just drag it to the right so that it moves down from zero seconds so it comes up like that. That's the animation. Something like that. Then, now I want to modify the graph editor. Just go to the value graph and then remember how we select the two keyframes. Another way you can select two keyframes is that just double click on the "Y Position". Now, if I click one time, you can see the keyframes are not selected. If I double click, these two keyframes are selected and then I can hit on "F9 Easy Ease". But this time, I want this clock to ease in position. I want the clock to shoot up fast and then easing into position. Something like that. Let's go back to the timeline here. Let's see what we have. It's still a little abrupt. Another thing I want to do is, for the clock, I don't want the clock to show at the beginning. I only want the clock to show one it's moving. What I need to do is just click on this layer and put the mouse at the beginning of the layer. Just drag it back a few frames so that the clock doesn't show up at the beginning. Now you can only see a hand, but then I need to drag the hand as well. Now, let's preview this. You see that? It's subtle, but nice. You can see this clock is not showing in the beginning. But when it appears on the screen, although it's sudden, but it's got very subtle movement easing into the position. I want the clock to come in maybe a little earlier, so backtrack the two layers. Something like that. See that? It looks good. Now it comes to the clock hand. This one, I just don't want it to move. Just hit "R", I don't just want the hand to just rotate constantly. Because this is going to be an icon animation, which it's going to be static at the end. I just want this hand to rotate, stop there. But then when it comes in, I want it to just maybe rotate from negative 200 something degree. Something like that, let's hit "F9 Easy Ease". Go to the value graph, add a bit more easing to it. Just use this S curve. Give it more energy, let's see what it looks like. Another thing is, I don't want it to stop at the beginning. I want to start moving already when it comes in. What I need to do is, I'm thinking, just change it to this type of curve so that the hand is already moving. It's already got a speed at zero seconds when it comes into the frame, so that it's not just starting to move when it comes in. I want the hand to start moving already when it comes in and then easing into position. Something like that, let's see. Or maybe the motion is too much. Maybe I can change it back to negative 150 instead of negative 230. Something like that. It works. Now it's our check mark. The clock comes in. Then for the check mark, it's easy. Let's just copy the globe here and then go to zero second. Put the cursor, timeline indicator at zero second. Select this check mark, "Command V", paste it in place. Let's preview this. Something like that looks pretty nice. Let's save the project.
5. Value Graph Demo 1.2: Now, finally, it's our notepad. For the notepad, I wanted to come in from the top, move down. Same with the notepad, I got this line elements and then this notepad, but then the line needs to come with notepad. I need to parent the line to this layer here so that it moves with it. Then the pen that's fine. Hit P on the keyboard, and then right-click Separate Dimensions. Now we've got y position. So I want the notepad to stop around here, 15 frame, hit stopwatch here, and then go to the start. I want it to start from the top, maybe somewhere around there, and let's click on the both keyframes. Hit F9. Easy, go to the Graph Editor. Make sure you're in the value graph. Just click on this y position. If you have both x and y position selected, is going to show you this pink line of x position, but this is not what you want because you won't be able to zoom in on the y. Just click Off and then click on this y position again. It's only showing you the y position. Now, same thing. I want the notepad to come in with a speed and then easing into position. Go back to the timeline here, and then I want to do the same trick as the clock. I don't want to see the notepad at the beginning. I'm going to drag these two layers to the content aligns and the notepad to the right, a few frames so that it's not showing. You see the layer is not showing at the first second, at the first frame zero frame, and then two frames without anything and then pop into the scene, slowly easing into position. Let's see. Something like that. Since my notepad is coming from top to bottom, I want my pen to come in from bottom to top, right-click Separate Dimensions. Put a keyframe here and then drag it down. Go to the graph editor. Just F9, easy for the graph to view, then just drag this curve. Make a curve like this. That is easing into position, something like that. Then just drag it back a little bit. Just make sure you're not lucky if your mouse is like this, you're dragging the whole layer, including the keyframes. This is not what you want to do. What you want to do is just when your mouse becomes a two-headed arrow, you can just drag this layer to modify where the layer is going to show up on the timeline without changing the keyframes. You see the keyframe there. It's static, it's not moving with the layer. This is what you want to do. If your mouse is just one mouse cursor, you're going to drag the whole layer with the keyframes. This is not what you want to do. Let's preview. Something like that. It looks nice. If we want to even go further, I can also animate the lines here. I already have a pre-comp here, but we can just go inside this pre-comp, double-click. Zoom in. This is what we have. We have the lines and the dots. You know what we can do, we can just do one line and then copy and paste. Let's see, where is the first line? This is the first line. I want to put it on top. Then just go to scale. Make sure to put the anchor point. Just go to the pen behind tool. Drag the anchor point to the far left of the line. Now the line is going to animate based off that anchor point. Go back to the Selection tool. Now you can see when I click on this line, it's got an anchor point on the left. Just check off this link button here so that I can animate the scale property. Hit a keyframe, go forward 10 frames, and then put a keyframe there. Only modify the x value, change it to zero so that the line can just grow up horizontally. Sum like that. See that? Now we can just easy ease go to Graph Editor, Value Graph. Click on the scale property and then drag this handle to this S curve shape, something like that. Now I can just duplicate this line animation to the three lines over there. Delete this one, delete this one, delete this one, and then I can just Command D, command D, command D. That's for D for duplicate. Then I can move these animated lines down to replace the ones that are already deleted. Now I've got four lines that's animated. But then another thing is I want them to be staggered. I don't want them to come in at the same time. I want to stagger them by two frames, something like that. Then one the first, since it's too small, so I don't want to animate this circle anymore. All I want to do I just when the line animates in. I want the circle to pop onto the screen. Just change them at the starting point of the layer to the same starting point as the line. So they just come in like that. Drag everything back one frame. I feel like the circle is coming too fast, maybe move it back one frame further. Something like that. You see. Now we can go back to the good example. Let's see the final animation for the notepad. You see. Now what I want to do is just to stagger the three icon animation. After this globe settles in position, I want to start the clock, and then once the clocks settles in position, I want to start the notepad. Three seconds of animation. There you go. That's how we animate using value graph. Now let's compare the good example and bad example. See what's the difference between using Value Graph and not using it. This is a good example. It's got more energy. It looks very smooth, and it's got a purpose. It's very deliberate. However, let's see the bad example here. Looks very flat. The whole animation it doesn't have any life to it. Just no energy at all. Very systematic looks very default. Well, there you go. That's your first lesson on how to animate with value graph. I'll see you in the next video.
6. Value Graph Demo 2: In this video, I'm going to show you another example of how to animate with value graph to control the speed of your animation. Now, I've already got this file setup. You can take my file. I'm going to put it available to download so that you can use this file to practice. Here in the file you can see I have this graphic here, made of just one line, and I have one layer at the bottom, just as a hint of the logo, what it looks like, and I can just lock it. On top I have another layer that's in color. What I want to do is go to this down arrow and then come to this button here, add a trim paths effect. If I change the ending value of the trim paths, you can see the lines actually animating as if it's drawing onto the screen. Now I want to put this percentage at three percent to only show a portion of the line, and then if I animate the offset value, if I change the offset value, you can see the lines are actually moving along the path. So this is how we want to animate this logo here. It's very simple. All I want to do is to put a keyframe here as your second when the value is zero, and then go to the fifth second and put one full rotation per one here in the front. If I preview the animation, this is what I get. The line is just traveling along the path. I can cut the preview here, hit on "N", and that's how it's going to loop. However, right now is so boring. We didn't add any easing to it. We didn't change any of the value graph. It's just one simple animation with two default keyframe. Here I want to show you how to use value graph to animate this. I want this thing to resemble as if there's gravity taking place so that when the line moves up to the top, it's slowing down because it's going up. It's slowing down to the top, and then once it goes over the hump, it moves faster until this point here. When the line need to go up again, it slows down, and then go faster again when it enter a slope, and then it goes slow, quick, and then slow fast, and then slowing and then go very fast. Basically, I want to have this line to animate as if there's gravity taking place. Gravity in effect. How do we do that? First, we need to put a keyframe whenever there's B change. Let's say on the zero second, we have to have a keyframe at zero second, and then if I toggle the timeline over here, so before the line comes to the top, it's just slow down and then after it goes over the hump, it should go faster. This is where the speed change. We need to add a keyframe. Now go forward. Over here, this is where the line needs to slow down. I need to add a keyframe, and then on the top, it needs to go faster add a keyframe, and then over here, same thing should slow down starting from there. Then this point here should go faster starting from there, and then this point speed change, this point speed change, and this point speed change, and then this point speed change. Those are all the points where the lines need to change in speed. Select all of them, right-click "Keyframe Assistant", Easy Ease. This is going to be a default easing. If we preview this, that doesn't look right. It's not very smooth, and then it just doesn't make sense. Now what we're going to do, select all of them, go to the Graph Editor. You can see this is what it looks like. I just want to select this Offset Value. Go to this button Fit to View. First, we need to think about it. At this top point here, going into this point, the line should be slowing down because it's going up. Which means the line should already have a speed at the beginning, and then I don't want it to slow down all the way to zero because right now, if I just zoom in on this, hit "Zed" on the keyboard and then zoom in, you can see this Bezier handle is totally flat. I don't want it to be flat because it means the speed is zero. I just want it to slightly tote a bit so that it's not flat. But when I drag the handle, you can see those two handles are broken. That's not what we want because we want the speed going in here, and then going out to be the same. So what I need to do is just select this point here and then go to the Convert, select a keyframe to auto-Bezier, which means the two handles are going to be locked together. Now you can see when I adjust one handle, the other one changes too. At this point, I just lightly want to adjust this handle with an angle so that it never stop. However, at the beginning, the line should go faster because otherwise there's not enough velocity for it to go over the hump at the top. Basically at zero second, I want this to already have a speed. Remember flatness equals zero, steepness equals speed. So I want this graph here to have a steeper slope here to have a bigger angle. It goes faster and then slowing down. Over here, at this point, it should go faster. Which means at this point, the Bezier handle, Z is broken again, I just need to lock them together. The Bezier handle need to be on the angle, something like that, so that it has speed. Then from this point going out, it's already got a steeper angle. It means from this point going up, it's fast first, with a momentum from the last part of the animation from this coming down. It's still got the momentum, and then all of a sudden when it reached the top it slows down again. But right now, this curve here you can see it's flat, let me lock it first, which means it's zero. However, I don't want the speed to be zero, so I want it to slightly adjust this curve here. Something like that. Then go to this frame. It's essentially the same thing. First, let's lock this, and then same thing, put a steeper graph to it. Something like this. Go faster. Then over here at the top, lock this. Over here, it's slowing down. But I don't want it to be flat. Otherwise it's going to mean zero. I don't want it to stop there, so it goes all the way over here. It should start picking up speed, lock the handle, change it to something like this, and then over here, same thing, lock the handle. Give it a very gentle curve, and then keep going over here. Lock the handle. This part it just start speeding up. It goes to the top. From here is going to slow down. We can first make it flat and give it a slight angle. Then at the end is going to be moving faster again. Something like that. If I see the whole graph, you can see this is what it looks like. It's very smooth. Now let's preview the animation. You can see now is very smooth. There is speed change. When it goes up, it slows down, and then when it comes down it moves faster as if there's gravity taking place. With this example, I just want to show you how to by just manipulating the spacing of the animation. Then using the value graph, you can actually achieve something that you are not able to achieve if you are not using the value graph. Then this animation is going to be super smooth, and you can do so much to it. Now if I want to do a logo reveal, I can maybe just duplicate this layer, Command D, and then put it behind that. Maybe I can move this back one frame or two frames so that it starts two frames slower, maybe just one frame, and then I can change the full color of this to maybe a blue color. It sound like that. Maybe I can duplicate another one, put it behind it and then offset one frame, change this color to a bright yellow, something like that. Then if I preview, you can see there's two lines with two different color that's trailing behind. But this time the animation is much more complicated. It looks complicated, but it's very simple to do. Now what I want to do is maybe just, I lock this one. I don't have a trim path to it yet, so I can just add a trim path effect, and then maybe set the final end value at 100 percent at the fifth second mark, and then go back to zero second, set the value to zero. Then I want to change the opacity back to 100. Now, let's preview the animation. It's almost like a draw-on effect. This is how we animate this logo reveal.
7. Assignment: Value Graph: Congrats on finishing this first section. So far we covered two important topics. One is timing and spacing, the concept of timing and spacing. Two is value graph. What is value graph, and how to animate with value graph. With that said, here comes our first assignment on value graph, and let's take a look see what it is. Here is the file that I already set up for you. I got three logos here, and I want you to use the same way that I teach you in the previous two classes and animate this logo. You can choose any one of them or if you want to do more, you can animate all three. But I want you to animate those logos with value graph, something that I showed you in the previous classes, and it's very simple. You can just animate all these elements in each logo, and you can go into each composition to animate those, and then if you want to do all three, you just go into each composition. Animate all these elements. Maybe it's either scale, position change, rotation, whatever you want to do, just don't forget to use the value graph to animate all of them. Once you're done with this animation, you can share it with me so that I can provide some feedback to help you with learning. That's it for the class projects. I can't wait to see what you come up with. Good luck.
8. Become Motion Insiders: Before we continue, I want to share with you an exciting news. Motion design courses just became more affordable
at motion circles. With our motion
insider membership for as low as $7 a month, you will get unlimited access to our top tier motion
design courses, trusted by over 50,000
students worldwide. Time to elevate your
motion design skills to become the best
animators you can be. As an insider, you
will also receive complimentary project
files from all of our Motion Circles
YouTube tutorials. And enjoy an exclusive
25% discount on all the other incredible
animation projects from other artists in
our project file shop. Don't miss out on this
opportunity to level up your animation skills while becoming part of our
vibrant community. Join us today at motion circles.com and unleash
your creative potential.
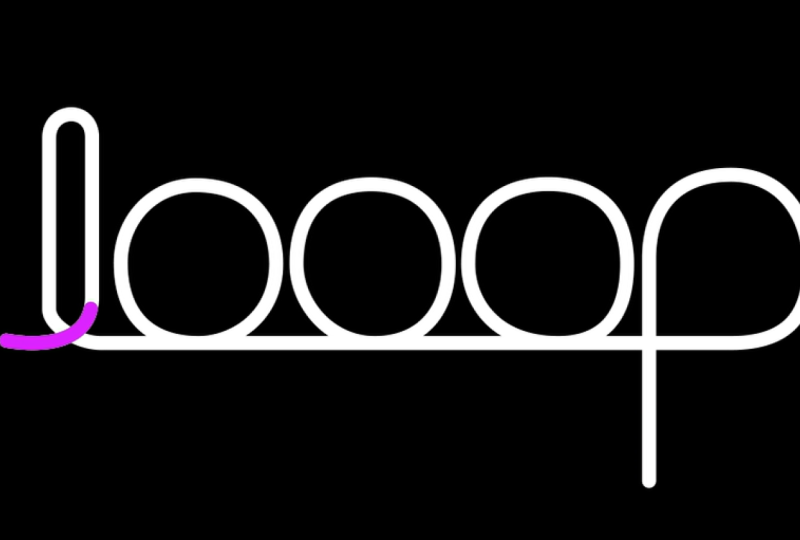
9. Speed Graph Explained: Welcome back. Did you have a hard time with value graph in the previous lessons? Don't worry, you're going to get comfortable with it once you practice it a lot and then start using it in your projects. Today, fun time again, I want to show you another type of graph in the Graph Editor, which you know is going to be the speed graph. If you have problem learning value graph or had a lot of pain learning it, don't worry. I can assure you this speed graph is going to be 10 times more painful than the value graph and to be honest, speed graph is easier to get lost and it's just not as intuitive as the value graph. However, sometimes in certain situations, a speed graph is the only thing that you can use to animate. The speed graph is as important as value graph. However, if you like value graph more you can in the future animate more with value graph, I also know some animators they only animate with the speed graph. So it depends on what you like you can choose whatever ones you like to animate with. However, there's certain situations that you have to animate with speed graph, something that you cannot do with value graph. Remember this project I showed you before, this loop animation, and today in this lesson I want to show you how to achieve this loop animation with a speed graph instead of the value graph. Now let's go into the keyframes. Remember how we animated this line animation? We just put in a keyframe whenever their speed change and then we modify in the value graph based on our understanding of steepness equals speed and then flatness equals 0. So whenever there's speed change when the line goes faster, like this part here, the line goes faster we want a steeper graph here, and then when it slows down, we want a smaller angle like a more gentle curve here. A steeper curve means faster animation and then gentle curve means slowing down. In the end, this is the type of graph that we get with this animation. This is the value graph. It's very smooth. Now let's see what it looks like in the speed graph. Click on this icon, go to Edit Speed Graph, wow, wow, wow. What is that? Look at that. With the same animation, this is a speed graph that we get. In the speed graph, let me make it bigger. In the speed graph, you can see the x-axis is going to be increasing in time, and then the y-axis going up, it's going to be increasing in speed. Which means, remember, when we animate this line, we add a keyframe whenever there's speed change. In the front, we want the speed to be high, and then going up all the way to the top, we want the speed to slow down. That's why you can see it's almost close to zero and then when the line comes down again, it should speed up and that's why you can see over here, the speed goes up again. The graph can tell. The graph can show you that right now it's almost like 400 pixels per second. The speed goes up and then slows down again, goes up, slows down, goes up, slows down. So that's how we get the same animation with a speed graph. However, I don't want to just show you the end product, I want to show you how to do it if we don't have this in position. Now let's just go back to the timeline and then hold down Command, Left-click, so we can change all the keyframe to a linear keyframe and there's no speed change any more. Select all of them, go to the Graph Editor. Now make sure you're in the speed graph and this is the speed graph feel with linear keyframes, everything is flat, there's no speed change. However, the speed is not zero right now it says it's 70 pixels per second, and you can see the zero lines over here. Now what we're going to do is just to adjust the speed at each point of the animation to whatever speed that we want. Remember in the beginning, and we want the speed to be faster. So we can drag this up and then at this point here we want it to slow down because however when I drag it, you can see the two handle, it just broke. The same thing with the value graph. What we need to do is to lock the two handles. Select this one and then go to set to auto base A just to lock. I want to do all of them so that I don't have to worry about it later on. Just select the two keyframes there and then lock the handles. Lock them, lock them, lock them. Now when I drag one of them, two is going to come together, go hand in hand and that's how we want the speed to go down. At this point, it should start to speed up again. Just put it way up and you may ask me like, how fast would do we want it to be like right now it says 100. Like how fast do we want it to be? To be honest, it just comes with practice and experience first, you never know how fast you want it to be. But it really depends on the timing between the two keyframes and then the rule of thumb is to just make the curve as smooth as possible without any spikes so that it should look pretty smooth. Now we can just do the first round and if it's not fast or slow enough, we can adjust later on. I just want to put it something like that. At this point slows down and then this points faster, this point slow. You see this thing here that looks weird. I don't know why. Maybe it's because it's not fast enough. I don't know why. Then at this point, faster, this point's slowing down and this point faster slowing down. Let me just adjust the handle here to make sure something like this is not smooth at all. Just adjust this one here and sometimes when you're adjusting the speed graph, it doesn't work like the value graph. When you adjust one of the handle, nothing else changes except for that handle that you're adjusting. But then for the speed graph, like whenever you change something, there's always something else that's changing with it. So you just have to deal with the uncertainty within the speed graph as long as you have something smooth or it looks smooth, your animation should be good. Another way, right now, I have this speed graph adjusted. I can go to this icon here and then show reference graph and that case is going to show me the value graph underneath. So that this case, I can just tell with the speed graph I have right now, it almost similar to the value graph that we get a little previously. I can tell the animation is probably going to be something similar to what we had before. Let's just preview this and see what happens. It slows down, it goes faster, it slows down, it goes faster, it slows down. Yeah. You know what? It actually looks pretty good. It feels very natural except for the first loop, I feel like the first loop is on the top there is not slow enough. It's too fast, so I just want to adjust and maybe one more thing here. However, I don't want it to slow all the way to zero. Maybe I can drag the handle so that given more time to easing in and out of the frame so that there is a slight ease to it. There's the moment that says hanging there, something like that and then let's preview it again. Yeah, it looks better. It looks much better, so pay attention to the first loop, yeah. It ends there at the top and then goes down again. This is how you do a similar animation with speed graph and then next video, I'm going to show you one more example of how to use speed graph to animate.
10. Speed Graph Demo: In this lesson, I want to show you another example of how to animate with speed graph just to help you with learning how the speed graph works. I have this composition set up, I have a rocket, and then I have a background, which is a space. All I want to do is to let this rocket just move around the string within this space here. I want this to move along a path, which the path is going to be having all of these ups and downs, and then I want the rocket when it goes up, it slows down as a previous video and then when it moves down the slope or down the curve, it's speeding up. To demonstrate, say if I have a curve like this, your rocket would just slow down at this point here, and then it goes faster around here, and then take the momentum with it, goes up, slows down, something like that. First, let's just draw a random motion path. I want to go top here to this Pen tool and then I want to maybe draw a smooth motion path, maybe with a curve like this. I don't know. Something like that. If that looks good, something like that. That's the motion path of my rockets. There's a few points I need to pay attention to this curve here. There's a few point that the rock is going to change the speed around here, it's going to go fast here and then this point here is going to have a speed change is going to go from fast to slow, and then this top here is going to be the slowest. It's going to hand there a bit. Then moves faster coming down and then slows down again at the top of there, and then goes faster, and then slows down a bit, and then exit the frame. That's what we're going to have for our rocket. However, if I just use this line that I drew here, all these points are going to become the keyframes on this motion path. However, these points are not the points with the speed change on the rocket. I wouldn't be able to work with this motion path. What I need to do is to redraw this motion path with this point, specifically, positions at the point where the rocket is going to change the speed. To demonstrate that, I want to lock this motion path. I want to redraw this motion path here, maybe one key over here, and then this is a point where the rocket is going to change speed. So I want to put a keyframe there, and then on the top, this is where it's going to change speed again, I'm going to put a keyframe over there. It doesn't have to be exact. Then this is a down point where the rocket is changing speed, put a keyframe there. Then this is another high point with speed changes. I can adjust this handle here. Then over here, this is where it's going to adjust the speed. Then this is a high point with speed changes. Then from there, it's going to exit the frame. Now, let me just modify the curve a little bit so that it resembles what we have before, something like that. Now I can delete the previous one we drew. Make sure you like the curve that you have because you won't be able to adjust it later on once you apply a motion passed to the rocket. This is the curve that I like. It's very simple to let the rocket travel along this path. First, we need to go to this down arrow, Content, and then Shape, go to the Path, and then add a keyframe on the path, Property, and then copy this, Command C, copy this keyframe. Then go to the Rockets, hit P on the keyboard, turn on the position property, make sure you copy the path keyframe into the rocket position property, Command V. Now, if I hide this original line and I can just preview here, you can see the rocket is traveling along the path. Right now, it's taking two seconds. I can drag this one, maybe take three seconds. Let it take longer time. Yes, something like that. The first problem we have is the rocket is not facing the right direction, so I can go to rotation and then just change the rotation rockets like this so that it's facing the right direction. Another thing is we need to turn on the Auto Orient because right now, the rocket if I only adjust the rotation, it's just going to face one direction all the time. But then when it turns like here, it doesn't make sense anymore so what we want to do is just turn on auto orients. It's under layer transform and then Auto Orient, turn on this orient along path. Now, let me just change the rotation value again. It's facing to the right direction, and then let's preview. Now, It looks fine now. It's always facing the right direction to the path. Hit U on the keyboard, show all the keyframes. Another thing, before we go to the Speed Graph, we need to turn these keyframes into a regular linear keyframe. The way to do that is right-click. First, we need to turn off this rove across time and then select all of them again, hold Command on the keyboard and then left-click. Now you can see these keyframes are just regular linear keyframes. Let's go to the Graph Editor. Make sure you're in the Speed Graph. Let's click on the position, and now you can see all these points here. The speed is constant. We can start animating with the Speed Graph to adjust the speed of this rocket. First, at this top point here, from this point, let me think about it. At the second point here, this should be the place where the rockets is fastest because it's coming down from a slope. That's why this point should be the highest, which means the first point should be lower than the second point. Let's just drag this down a little bit, something like that. This is the fastest point, and then when it goes up over here at this point, this point should be pretty slow. You see there's that broken tangent again, I need to just make sure these keyframes are all locked together. They're all locked together. When I move one of them, both is going to move at the same time. At this point, I want it to slow down because this is top point, it should lose some energy when it climbs up. At this point here, it should be fast, which means right now it should look good. I'm trying to make this point slow without letting this graph go over this max value because otherwise the highest point is going to be here. What I need to do, maybe I'm thinking I need to drag this point higher so that at this point it still have the highest speed. Let's try to drag these two points so that this point at the bottom of the slope here, this point is the fastest speed and then it goes slow and then faster again. At this point is fastest speed, and then it starts to climb up, which comes to this point here at the top. That means the rocket is going to lose a lot of the energy climbing up and then that's why it slows down again. The speed is very low and then at this point, after a very big slope, this point should be the fastest, maybe over here. Then it slows down again, something like that, and then it exit the frame. Let's preview and see if my graph makes sense. Right now it doesn't make so much sense because the speed is barely changing. I feel like the changes are not extreme enough so that I don't feel like there's any hanging in the air at the top there, which means I need to keep adjusting it. I think at the top there, it's still too fast. I need to pull it all the way down, make sure it's hanging there. Another thing is, right now, I need to pull these handles so that there's a hang. As I was pulling the handles, you can see those two curves are adjusting with the handle being pulled, which means the highest point is not going to be this keyframe point anymore, it's becoming this point over here. In that case, I not only need to drag this point all the way up because one thing I need to pay attention to is these key point here, keyframes always need to be the point with the fastest speed. I cannot let the other points go over that keyframe point. Otherwise, it won't be realistic. It won't be right. In this case, I want this to hang in the air. However, I want this point to still be the fastest highest point, so I need to keep dragging this up, and now that's good. Then I need to drag this handle here, this too, make a hang in the air a bit, and then drag this, pull this up, try to smooth out the curve over here. Right now the lowest feeding point is this section over here, which is not right. I need to pull this down and then just try to smooth out the curve. Now, you can see this part is not right. I need to pull this point all the way up, give it more speed. This part here, I want it to hang a little bit, drag the handle and pull this up. Pull this point up, and then try to adjust this handle here. I think that's more extreme, but the curve is still pretty smooth. It doesn't have weird spikes or whatever. Let's see what it looks like now. That works for me. Look at that. There's a lot of hang time at the top there. There is a lot of speed changes. Another thing is, I feel like the whole animation is too fast. It's probably too fast. What I want to do is select all the keyframe and then hold down Option on the Mac, Alt on a PC, drag the last keyframe out all the way to the four second mark. Let's see if that changes anything. It just give more time to the animation. This way right now, what I did is just adjust the timing of the animation, give it one more second so that the animation is ticking one more second. That's it with this lesson. Now you should know how to animate with Speed Graph, and next is our Speed Graph project.
11. Assignment: Speed Graph: Here, I've set up the project for you. I just want you to do the same thing as my previous lesson. We have a astronaut here. You can just animate either this or astronaut or these rockets using the same way that I animated the rocket in the previous lesson. Just draw a motion path first and then apply the motion path to one of the element here or two of them and then let them just flow in the space. Don't forget to adjust the speed graph to make the animation smooth and realistic and nice. Good luck with this project. I can't wait to see what you come up with.
12. Congrats!: Congrats on finishing this course. Now you should know how to animate with the graphs and how to bring energy and life to your animation. Don't forget to work on the assignment and upload it to the project page. The more you practice, the better you will become. You can also check out some of my other classes on animation. Thank you so much for taking this class. I'll see you in the next one.
 Hongshu Guo, Motion Designer