Transcripts
1. Intro: Hi, this is home Sho from Motion Circles.com In this course I'll teach you how
to make trendy type animation that
you see online. I have been teaching motion
design for four years now and have taught
over 40 K students. I'm truly honored to be able to share what
I've learned in the past ten years
with the community and help the students in their
motion design journey. This class is inspired
by the work that Matt, Boys and Pitrit
have been putting out for years on their
Instagram channel. They have put out hundreds
of ways to animate typography and the work they're doing are truly inspirational. If you want to get inspired
on how to animate typography, make sure to check out
their Instagram page in the class description below. In this course, I'll be showing you how to animate
typography the way they do and make your type fun and
visually appealing. This class is beginner friendly. However, I'm not going into
too much details on how after effects works if you're interested in learning
the software. This other class is called the complete beginners
course on after effects will help you and get you started right away
with the software. In this course, even if you are a beginner with zero
experience in after effects, you will still be able to follow along step by step with
the things we teach. I try to make this course
as simple as possible for beginners to
understand the process and logic behind the animation. Once you understand the ways we animate these typographies, you will be fully
equipped to animate your own typography animation
in the style you like. And start explore all kinds
of possibilities on your own. The techniques and
process we teach in this course is applicable to any other motion
design project. And you can apply
the things we teach in here to other
projects right away. For the class project, I'm
going to take you through how to animate different
styles of typography. Step by step, you can download the project
files to follow along. You can also choose
your own word and design to test out the
techniques we teach. The goal is simple to make it fun through these
different projects. In the class, you
will be learning all essential aspects of after effects with
real world practices. We'll be covering,
how to prepare your design file
and illustrator. How to customize your
own design storyboard. How to leverage free plug ins to work more effectively
and save time. How to take full control
of your animation by using speed graphs and bring life to your movement
like a professional. How to apply special effects to your type animation
and make it stylized. How to animate
realistic bounces. How to apply some simple animation principles
to your project. And how to use
simple keyframes and graph editors to achieve
complex animation. Tons of keyboard shortcuts, workflow tips, and trick that you can start using right away. At the end of the
course, you will have a complete understanding
of how to make these trendy
typography animation and be able to
explore on your own. Once you're done
with this course, you can check out
my other classes and start diving deep into motion graphics and after effects animation
on various topics. If you have any question
going through the class, don't hesitate to reach out
and I'll be here to help you. So are you excited
to get started with some awesome looking trendy typography animation
to share online? I can't wait to
see you in class.
2. Find Inspiration: Welcome to the class.
Before we begin to dive deep into after
effects and animation, I want to talk
about where to get inspiration and color
palettes For me, I like to get inspiration
on Pinterest and Heads. The content are curated and
you will be able to find awesome design and animation
on Pinterest or heads. Just type in anything
you're looking for. Let me show you how it's done. Now we are inside
pinches and I've put in the keyword
kinetic typography. This is what it shows me. Basically for pinches,
the result is based on your previous
search history. The more you look at those
awesome looking design and the better design
will show you. Basically you can see these are all the different types of kinetic type that you can
reference or get inspired from. Something like this. One
is looking pretty cool. And once I click one of them, if you scroll down, you can also see some of the related
design and animations. And this is a good way to explore different styles
of animation or designs. You can also see there's different color
palette that you can even reference from
these inspirations. I'm pretty sure if this is the first time you're
using Pinterest. It doesn't show you this
many good looking designs. But be patient because once
you use it for a while, it's going to show
all the different designs based on the ones that you clicked on through time. Your boards is going to
look better and better. And these are all
great ideas you can use to animate your
own typography. Some of them are static,
some of them are animated, and they can all be
good references. That's it with Pinterest. If you go to hands, we can search
kinetic typography. You can even use a
different keyword, maybe like type animation. It's just going to
show you a bunch of different ideas where
you can animate type. And this particular
one is from Matt, as we mentioned in
the previous intro. And he's done a lot of
great typography animation. You can reference his
style or his animation. There's a ton of different
options and there's also other amazing designers who
are working in typography. And they will have those beautiful kinetic
typography animation like this one is looking
pretty cool as well. I like the texture and
the animation is fun, playful, that looks pretty good. I personally don't
use hands a lot, that's why you can see the
boards over here on hands, it is not as good looking
as the boards in pinchest. Once you use like one of the program or the
software for a while, it's going to take on the
kind of style you like. And then through
their algorithm, it's going to recommend
you more and more the ones that you liked
or you clicked before. So that's why you see
this colorful palette or like a array of different animation that's on my board. And through time, if you click on those beautiful looking ones, it's just going to populate
more and more better designs for you to match up
with your taste. So that's a good way to get
reference or get inspired by the amazing designs and
animation we already have that's on the Internet In
terms of color palette, this is the website
that I'd like to use. It's called Cooler Stassio. If you go to tools and then you can go to explore palettes, there are a ton of color palette that's popular right
now that you can use. You can just take a
screen grab or you can even generate your own palettes. If we go to the
palette generator and if we hit on the space bar, it's going to populate
all these colors. If you like one of the
color, you can lock it. Let's say if I, let's
populate like this one. If I like these two color,
I can lock them here. And then keep populating
other colors. I like this yellow here. And then let's keep populating
the two on the left. I'm just hating space bar to
keep switching the colors over here on the left and
think until I find a good one, I think this is pretty good. So I'm going to save this
palette for my project. That's how we get inspiration
from the Internet, and also how to get a
good color palette. In this course, I'll
be using a lot of keyboard shortcuts and it'll
be reflected on my screen. Keyboard shortcuts
are great ways to improve your
efficiency and workflow. It separates the amateur
animator from the professionals. If you want to do it
the professional way, make sure you use the keyboard
shortcuts the way I do. And with practice
they will become natural and intuitive
to you. That's it. With this lesson, I'll
introduce you with some plug ins that
we'll be using throughout the course
in the next lesson.
3. Free Plugins: In this lesson,
let's take a look at some plugging
that we can use to speed up our workflow and
help us animate typography. Let's go to Scripts.com This first one I want to talk
about is called as Copy. And this one is name
your own price. You can put zero if you're a beginner and you
want to test it out. And if you want to
put whatever number, you can put it here
and add it to cards. Basically, this one
is going to copy your eases without
overriding your values. What it means is that
once we use this one, we can apply the same
easing animation to different things by just copying the easing without changing
the value of the property. So we're going to
demonstrate how to do that in the actual license, but this is a very good one. That's going to save us a lot of time and speed up our workflow. This is the first
one, each copy, and then if we go
to another one, this is called Decomposed text. It's also name your own price. So what this plugging
does is it can separate each letter
from one textbox onto its own layer so that
we have each letter separated and can be
animated individually. And that's very
important when we do the animation for typography. This is also a name,
your own price, and you can put zero if you're a beginner just to test it out. Another plug in I
want to talk about is called Motion Tools Pro
from Motion Design School. This one is also free and it's got a lot of
different features. I'm pretty new to this and
I want to test it out, so I kind of play around with it while we are
animating typography, I'm going to show a couple
ways to use this plug in. There's a lot of potential
to this plug in, but we only explore very
little from our lesson Still, if you want to use
it and try it out, you can download it and
test them out yourself. There's also tutorials
online where you can find people how to use this plug in to speed up their workflow. And this is a very
good one for me, personally, I haven't
been using it too much. And the last one
is the overload. This is a paid plug in, it's not free, it's
from Battle X. Basically, it's
going to help you transfer your
Illustrator file or Illustrator layers
to after effects seamlessly so that
you don't have to do anything just with
one click a button, you can transfer all these
shapes information from Illustrator to after effects
if you're a beginner. We also showed you how to
do it without the plug in, but this plug in overall is going to save
you a ton of time. And that's for the four
plug in that we have. The first one is as copy
and then decomposed Text Motion Tools Pro
and then overload. If I open my after effects, I already have those
downloaded and installed. If we go to Windows, we
can go to extension, and there is the
motion tool panel one. I can turn this one on
and then I can drop this panel maybe just right above my effect
control over here. So that I have this
motion pro panel open. I want to drop this effects
control panel underneath. So we have two panels separated. And then I'm still seeing
like this motion tools pro, that's how I arrange the panels. And then if I go to Windows, I can also access my decomposed text
underneath over here. This is one we actually need it, we can open a window to
access that plug in. And this is the copy. If I want to do this one, I'll just make it smaller. Maybe put it on top over
here just to dock this copy. And then I have my East copy and my Motion tool over here. I can switch between the two by clicking on the tab over here. We're going to use the
As copy a lot and then we're going to use a little bit of motion tools In the lesson, you can explore this
plugging on your own. There's a ton of
potential, like I said. The last one is the overload. However, the overload is mostly when we're using
it in Illustrator, we transfer Illustrator
files to after effects. In this case, since it's
inside after effects, you can also transfer
backward means, like you can transfer layers from after effects
to Illustrator. It works both ways, and I'll show you that in
the lessons coming up. That's it with the plugging that we're going to use
in the lesson. Let's go to the next video.
4. Design + Prepare Artwork: All right, let's get started
with this first lesson. In this lesson, we're going
to animate the word share. Share stands for
share your work. As a creative person,
you got to keep, practice your craft and
share it with the world. Sharing is a contribution. The more you share, the
more you inspire others. So as you can see here
in our illustrator file, we already have the word share designed with a
beautiful color palette. However, I want to show you
the full process of how to animate any word that
you like in this style. So in order to do that, let's start from the ground up. Let's use the right panel
here to design this word. And then after the design, we're going to import
this artwork inside, After effects To animate, we'll quickly design this word. The font that we're using
is called drug boats. We just need to
type in the word. Now, I also did some
stretching of the heights. Right now it is 171% of the original heights because we want to fill up the space. A lot of the times
we're animating the path property
of these words. In order to do that, we
need to outline the fonts after the outline just hit on command shift
O for the outline. After we outline the word, we're not able to change the word that we
selected anymore. So make sure you
choose the right word that you want to animate
before you outline it. And after you outline it, you won't be able
to change anything. Now we just need to
duplicate this word. Hold on, option and
then drag it up. Now we have another word here. Let's change the color to green. Let's move it over here to have an offset
with the second layer, so that we almost have a three D shadow behind
the word that we have. However, we also need
to tweak the path of these back layers so that all these corners are
connected as you can see here. The way we want to do
that is we can zoom in, Go to select the second layer
which is a black layer. And then let's go
A on the keyboard, select all these anchor points. I'm going to drag this
anchor point here to connect these corners here. And then I'm going to drag
these two anchor points, move it up that it is
connected at the top. And then over here I need
to connect this corner. Just drag this anchor point,
connect the corner there. And then I can drag this anchor
point to move it over to the left so that the shadow is coming over to
the curve nicely. Now we have a three D S here. We're going to do the
same thing for the H. We'll modify the
black layer at the back. Right now we have this direct
selection tool selected. So we can click on these anchor points and
then just drag them. You can see over here we're
missing one anchor point. What I'll do is I'll hit P on the keyboard with my Pin tool. I'm going to add an anchor
point on this path. Hit on this path, and now I
have an extra anchor point. Hit A on the keyboard to go back to the direct
selection tool. And then I'm going to drag this anchor point all the way to the edge corner here to
connect these two corners. And then I'll add
another anchor point in here, P on the keyboard, Add anchor point, hit
A on the keyboard, Go back to the direct
selection tool, do that. And then over here, I'll
drag it here so that we have the H all connected.
That's good. We'll do the same thing
for the other letters. Now I think everything
is looking great. I've got my three D letter. Next thing we just need to
change the color of the H and R. I just realized we're
missing an exclamation mark, which is fine because we can use this batch after I
have this designed. Now I just commence shift G
to ungroup all the letters. Now I can select the H
and R to pick this color. Now we have Share ready to use. That's how I designed
this letter here. After we have the
letter designed, we just need to import these letters into after
effects and start animating. Let's go to After Effects. Let's create a composition. Click on New Composition, Name this one main Com, and then make it
1080 by 1080 pixels. Frame rate, 30
frames per second. Change the duration
to 10 seconds. Click on okay, now we have this work area that we can use. That's good. Let's go
back to Illustrator. Now, the industry standard
to import Illustrator files into after effects is by using
a plug in called overload. It's under window
extension overload. However, it's a paid plug in, it's not a free one. We're going to show you
how to use the overload to quickly transfer files between Illustrator
and afterfacts. It's going to save a
ton of time if you are working between Illustrator
and after eats. It's just going to be
a huge time saver. I'll also demonstrate
how to import the files without overload
the plug in at the end, But for now we're going to save some time and use overload. Once we have these
letters ready, I'll just select each
one of them and then use overload to transfer the
files inside after Efax. Let's select this and the
black layer at the back. Now we have this whole
S letter selected. Let's push this button here. Transfer our letter
to after effects. And then I'll select
the pink one transfer. And then select the
A again transfer. You can see how fast it is to transfer all these
shape information, path informations from
Illustrator to after effects. Now I can push this background as well in terms of the shadow. We can create it later once
we have the animation. So we don't need to
worry about the shadow. And we can worry
about, or maybe I can push one star and then
just rename this one to Star. For now, I'll just
hide it because we don't need to use
the star for now. Now I have all my
elements inside. After effects, we can go start animating within after effects. First of all, I need to
group these letters. First two layers is
going to be my letter S. Men shift C to make
a new composition. Name this one chair. Okay, and then the command C, H. I'm grouping these letters now I have all my letters and
my star, and my background.
5. AI to AE Without Overlord: All right, in this video I want to talk about how we transfer Illustrator file into after effects without the
plug in overload. Although overload will help
you to save a lot of time, it's a paid plug in, so if you don't have
it, there's also a simple way to transfer file from Illustrator
to after effects. Here we have this
Illustrator file set up. And in terms of text animation, the first thing we need to do is we need to outline those text. Let's say if we have our
text design in Illustrator, the first thing we need to do is to outline it so we can use a shortcut command shift to
make sure it's outlined. That's how you outlined
the text in Illustrator? I can delete this one since our design is already outlined. I just want to show
you how we can outline it before we
import our files. The reason we need to
outline it is because the way we animate
in after effects a lot of the time we
need to manipulate the path property
of these shapes. We need to have these
shapes in an outline in order to animate
in after effects. After we have the
topography outlined, we need to go to a layer panel. And then let's click on
this drop down menu here. Let's select this Release
to Layer sequence. So right now you can
see we only have one layer inside
this layer panel. Which means if we import this
file into after effects, we are only getting
this one layer with everything baked
in on this one layer. So that we cannot manipulate each letter or
element separately. So in order to animate
these letters separately, we need to go to this dropdown. Click on Release
to Layer Sequence. Now you can see everything under this layer is separated
on its own layer. And now we just need to select everything that's underneath this layer one and then drop
them outside of layer one. That layer one becomes
empty. Now I can delete it. In this case, you can see each element is separated
on its own layer. If I toggle these
visibility icons, you can see this is my
color palette over here. And then I got layer
seven, which is a star. Here, I got a bunch of layer
that represents stars. And then over here, I got
each letter on its own layer. That's the way we
want to separate our layers inside Illustrator. Let's save this
Illustrator file. That's all we need to do inside Illustrator before
we import this file, let's save this one command S. Let's go to After Effects. I already have my
composition set up. All I need to do is
go to Project Panel, Double click over here. Let's navigate to my
storyboard, which is Share. And then on the Import as we need to change it to
composition, retain layer sizes. This way we can keep the layer size that we
have in Illustrator, which is 1080 by 1080 without changing the
original file size. Then make sure we don't select this Illustrator or
Photoshop sequence, because if we select this one, it's going to cause a
problem with our timeline. Make sure this is unchecked. Click on open. Now
you can see we got a folder called Shared Layers, which contains all the layers that we have inside Illustrator. And then we have a
composition imported. A double click inside
this composition. Right now you can see
under this composition, we have all these layers. That's similar to what we had inside this layer
panel in Illustrator. That's how we import all these individual layers inside after effects
in order to animate. Now what I need to do
is select everything, copy them, and then paste it
onto my main composition, which is my working area. That looks pretty good. The next thing we
need to do is to organize the timeline
a little bit. I already know that
the first couple of layers until layer six to six, these are my color palettes. So I can delete it for now. I don't need my color palette. And all the star layers, I can group them inside
one composition. So select all the star layers. Command shift C, name this
new composition star. Now we have the star
layer saved inside my project panel here so that I don't need to have
it inside my timeline. I can delete it in my timeline, but it's going to remain inside my project
panel over here. Let's see what we
have underneath. This is my exclamation mark. With my exclamation mark, I also want to find the shadow that's in the black behind
my exclamation mark. I want to find that shadow. This layer 27 is a shadow. So these two layers should
go together as one letter. Right? To group those,
I'll precompose it, command C, Just name this one exclamation
mark as my letter. And then I'll find
the next two letter. This is a E. I want to find the shadow of the E
because these two made up my three D letter E.
We'll group these together. Call it like this.
Now you get the idea. I just need to find each
letter with the shadow behind it and group those two layers together
to represent each letter. That's how we transport our illustrator file
inside after effects. The issue with this shared
letter animation that we have, we're going to animate
in the next video. However, just a preview, we're not going to change the shape information or the path information
of these letters. In that case, I don't
need to change any of the illustrator layers
into a shape layer. However, there are some
cases that we need to change them into
a shape layer. So to do that,
let's for example, if we want to change this
R into a shape layer, all I need to do is re
click go to Create, Create Shapes from vector layer. And now you can see
it's going to create an outline layer,
layer 18 Outline. And turn off my original
Illustrator layer. Now if I go to this
dropdown menu, go to Group, go to Path. You can see if I
click on this path, I got all these anchor points that I'm able to
manipulate to drag and morph these shapes into a different letter
for animation purposes. So these are the two things I want to show you in this lesson. First is to prepare the Illustrator file
inside Illustrator. Make sure in the layers panel, we're separating each layer on its own individual layer with the release to layer
sequence command. And after we have all these
elements on its own layer, we can import them
inside after effects. And then we can use the composition to group
them together. If we don't need to
animate the past property. If we do need to animate
the past property, we can just go re click
and then go to Create, Create Shapes from
vector layers. And that's how we
create these shapes, where we can animate
the past property over here to morph between
different path. If you don't have the
overload plug in, this is going to be
your go to video. If you've forgot how to import files from Illustrator
to after effects, you can always refer
back to this video. And with practice, this process is going to come natural to you. That's it with this
video. Let's go to the next one to animate
this Shear text.
6. Share: Now let's get started
with the animation. First, I need to P
on the keyboard to pull up the position property, and now we can re click
separate dimensions. Since we're only
animating the Y position, we don't want any X
position changes. Let's say the key frame
on the Y position. First of all, I want us
to move up and down. What I want to do
is I'll animate one letter and then apply the same animation
on all the letters. And then offset the
animation keyframes so that they all have the same
animation staggered, so that all the letters are
animating one after another. Let's try this animation first, go forward. Five frames. Command right arrow,
12345 And then let's do a anticipation because my S is
going to move down. Before it moves down, I'll
have it move up first. Most like gaining energy
in the opposite direction. It's an animation principle
that we used before. I move, you always go to the other direction
to gain energy. And then let's go
forward ten frames. Command shift, right
arrow for ten frames. We'll move this letter
down, maybe around here. That looks good. And then go
forward ten frames again. Command shift right arrow. It's going to go back to the overshoot
position, command C, copy this key frame over here, and then go for
five frames again, 12345 copy the first keyframe. It's going to go back to the
original position command V. Now this is one loop of my animation for the S.
If I preview this one, it's going to go up
and then go down and then comes back an overshoot. It's going over a little bit, It's almost like going over too much and then recoil
back into position. This is my general
animation for the S. Now I just need to
select all the keyframe, reclick, keyframe
assistant, go to ***. And then let's click on
this graph editor to modify the graphs in order to get
some energy of our animation. Now we just need to drag these handles a little bit
so that we get some energy. Maybe 75% of influence, or let's try 70% of influence. You can see there's
a influence number when I'm dragging this handle. Let's try to give 70%
of influence over here. It doesn't have to be exact for the anticipation overshoot. Maybe give it a
55% of influence. I don't want it to be too much. Now, let's see what
it looks like. Yeah, you can see. Now we have
some energy to our letter. It's got some character.
I like this motion here. Now we just need to duplicate
this animation again. Let's make sure it, once it goes back to the
original position, it's going to stay
there for five frames. So let's move
forward five frames, 12345, and now we can
copy the key frame. All the key frame
command C, command V, and then go to the end again, 12345, hold it for five
frames. And then copy again. And then let's copy one more
round, 12345, Copy again. So now we have four
loops of our animation. Let's play this S
animation here. Yeah, I like that. Now we have the animation ready. We can just copy all
these keyframes to the other layers
so that they will have the same kind of animation. But before we do
that, we need to select all the layers
P on the keyboard, make sure we re click on the position property,
separate dimensions. Now we have the white position. Let's copy all the
keyframe in it position. And then select all these position property
for the letters. Make sure our timeline
indicator is at zero. Second command V to
paste in the key frame. Now everything has
the same keyframe. They'll move the same. Now, all the letters are
moving at the same time. However, this is not
what I want to do. It, I want each letter
to move one at a time. So in order to offset it, let's go select the letters
from the second letter, the key frame from
the second letter. Select all these, make
sure you don't select the first batch
because we need those for the easing influence. And now let's go to this
motion tools plug in. I already showed you how
to install this plug in in the previous video
and how to put it in here in your after
effects panels. We need to change the amount
over here to two frames. And then let's hit
this button here. It's going to offset our
keyframes by two frames. However, once I click on that, if I go to my graph editor, you can see it's deleting all
of my easing information. So what I want to do is select the first batch because we
didn't touch the first batch, which is the animation on the S. We need to select
the animation on the S and then make sure we do a copy on the
easing information. And then we can select each
letter, all these keyframes. Make sure we paste in the
easing information again. So that we still
have that animation that we have at first. And now I need to offset the first two layer by
two frames as well. If I select all the key frame
and go to the graph editor, now you can see all these curves are beautifully offset.
And that's what we want. Let's play the animation
that's looking pretty good. Now we can just quickly
animate the stars. Let's say we have the star
here attached to the S. Let's hit R and shift on the keyboard to pull up
the scale and rotation. Let's hit the keyframe on the scale and rotation
property scale, 420 frames, comment shift. Hit the key frame again
for the rotation, I just wanted to maybe turn
one round in 2 seconds. Then for the size, I'll have it maybe around 50%
at the beginning. And then go all the way to 100% And then hold
there for five frames. 12345, hold there as
100% for five frames. And then go back to this again. I'll move these
two in the center. Now we're going to re
click Keyframe Assistant, Easy Ease, and then go
to the graph editor. Let's try to manipulate the handles to give
it some influence. Give it maybe like 65% or 70% of influence to have a curve similar to this one
in terms of rotation. This is my rotation curve. I'll pull these
handles together. And then in terms of the scale, this is my scale curve
that looks pretty cool. I feel like it's not
moving fast enough. Let's pull these together, make sure it's
rotating fast enough. I'm selecting all
the key frames. And then holding
down option to move the last keyframe to adjust the time to make it
go faster and slower. Now I can duplicate
these keyframes. Command go forward five frames, command V. Now I'll change
this rotation to two rounds. This is going to be the second loop That
looks pretty good. Now I can duplicate the star
command D for duplication. I'll move the star to be around here at the
corner of the itch. And then the third one, I'll move it to be around here. The fourth one, I'll
move it around here. Fifth one, I'll move
it around here. And that's all the star we need. And then I'll parent the
star to each letter. So the first star
is parent to the. So that it's moving with the. I want to make sure it's
moving with the letter so that it's not rotating randomly. The last one is going with
the exclamation mark. Now I just need to offset
the key frame a little bit. Maybe by two frames. 12345, maybe by five frames. And then 12345 go
45 frames offset. This one go 45 frames. 12345 offset. 12345 offset. That
looks pretty good. Now let's make a shadow
layer for our text. Let's select all the layers above the background and set C. Let's change this one to
Share Animation. That's good. And then duplicate this
layer command D. Let's go to the effects and
Precess Panel sender, Windows effects and precess. Search for effect
fill, Go add a fill. Then let's move this one down
to the right a little bit. And then let's select
this one to be a lighter version of this background color or a darker version of
this background color. Just slightly darkened,
almost a hint. I think that looks pretty
cool. Let's play this one. Now we have a shadow going on underneath our text animation. Now the last thing
we want to make is a swipe sheen effect going over from the left to the
right going over the text. To do that let's go
to layer new solid. Let's create almost
like a white color. Let's try a white color. Now I just need to
go to the Pintole. Draw a shape that
looks pretty good. Now I'll just move this one over to cover
this letter here. I'll move it all the
way to the right. Let's make sure the anchor
point in the center, Hold down command
triple click on this pen behind tool to move the anchor
point to the center. And then let's hit
P on the keyboard. Let's add a key frame and then
go forward 123440 frames. Move this one all the
way to the right. Select both key frames. Right click keyframe
assistant, easy ease. Go to the graph editor. Make sure we're all
adjusting the speed graph. It's been the speed
graph that we are adjusting since the beginning. That's something that I
forgot to mention before. Make sure to click on
this button here to go to the speed graph that we're adjusting to manipulate
the animation. Give it a graph like
this. Just want to make sure it's covering
all the letters one is sweeping across.
That should be fine. And then next thing
we need to do, we need to make this
share animation to be the alpha mat of
my white solar layer. Let's go to click on
the white solar layer. And then we need to turn on the track Matt
option over here. If you don't have it, make sure you click on the second button here in the corner to
turn on the track mat. And then go to select
the layer number two, share animation to be the track. Now my share animation has disappeared because the
icon is turned off. But we need to turn it back on. And now if I toggle over, you can see the chin
effect is covering, overlaying on top
of my animation. I feel like the
transparency is too much. So hit on the keyboard. Let's change this one to
85% tone it down a bit, and now let's see what
our animation looks like. That looks pretty good. All right, that's it with
our first animation. Don't forget to try it and
share it with the world. I'll see you in the next lesson.
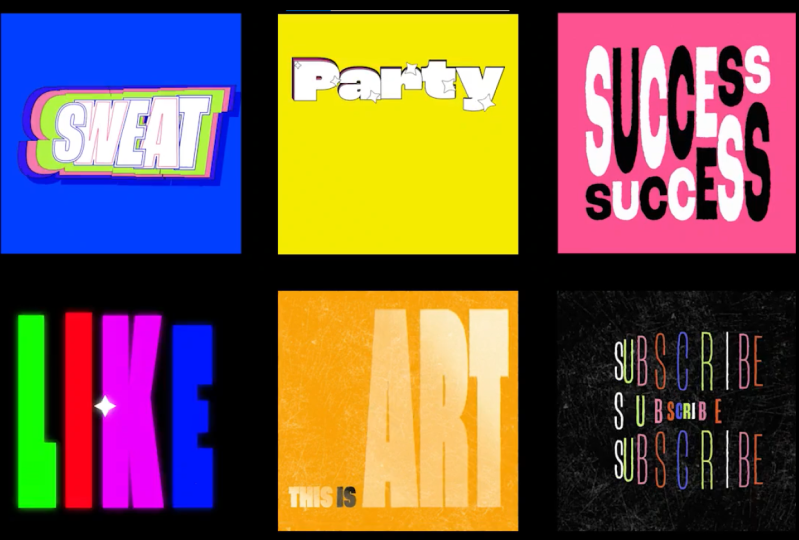
7. Success: Welcome back. In this lesson, we're going to animate
the word success. Action is the foundational
key to success. Pablo Picasso ideas won't lead you to success,
actions will. So today we're going to put in some practice to animate
this word, success. As you can see here,
we have our success designed in our board
with an illustrator. I already showed you how to use the plugging
overload to transfer file from Illustrator
to after effects, and I also showed you how to do it without the
plugging overload. In this lesson, I'm going
to teach you another way, which is to build this
design inside after effects so that we don't
need to transfer any files. Now let's go inside
After effects now. First let's create
a new composition. Let's name this one main Com. Let's change the dimension
to 13, 50 to 1080. And then frame right to
30 frames per second. Duration to ten
second. Click on. Okay, now we have a composition
and the project set up. First of all, I want to grab this pink color that
I have in my R board. I just want to grab the code and then go
to after effects. Let's create a background. Go to Layer New, Sell it. Click on the Color
Paste in the code. Click on, okay, now we
have a pink background. We can lock this layer for now. Now we just need to
create our own text. Since we're not using any of the text within this
Illustrator file, we can build everything
inside after effects, and we can animate right
inside after effects. Let's type in the word success, then let's go to navigate
to character panel. If you don't have it, it's
under Windows character. The font that we're
using is called Rock Grotesque condensed bode. I just want to make the font
bigger to fill up the space. I also want to
stretch the height, vertical scale of the
font to make it higher. Somewhere around, maybe
here, that's tall enough. Next I want to
drag two rulers to mark the top and bottom margin. Command R for the ruler. I will just drag two ruler to make sure I got
a similar margin. So that the font that we have does not go
over the margin, getting too close to the edge. Now I can move this word
up, that looks good. And let me duplicate
this layer command. Drag it down for this text. Let's go to character. Let's change the fonts
into a different width. Let's choose the
bold one for now. And then I can shrink the size. I don't want this
vertical scale anymore. Change it to 100% and now we have this shorter
version of the success, and then we have a taller
version of the success. Zooming in terms of the
spacing in between, I want to maybe get these
two closer to each other. So that in this case, I might
need to change the scale. Might need to change
the vertical scale of this top layer even bigger. Now we have a
pretty good spacing between these two
different layers. I think that works for now. The way I want to
animate these is that I want to use
the path property of these two different
version of one same letter. To morph between being tall and thick and then
being short thick. It's basically a morphing
between this over here, this path property information, and then this small path
property information. To do that, we need to
convert everything into a shape layer with
path property Re, click Create, Create
Shapes from text. And then go to the first layer, Create, Create Shape from text. And now we have
the two text layer outlined that has
path information. We can hide these two
original layer now just uses Shy button and then click on the Shy here
to hide the two layers. If I toggle the drop down
menu under the content, I have all these different
layers within this one layer. And then I have all these other letters within
the second layer, which is the bottom text. That looks good. And first, I just want to animate
the top one first. The way we're going
to do this is that we need to
select two layers. Let me select both layers. And then in the search bar, let's search for our path. Now it's going to turn on all the path property
that we have. Under each letter, we need to add a keyframe on
the path property, all the letters that looks good. Next, let's say we're going to animate the letter S first. To animate the morphing between the shorter version of the S and the taller
version of the S, all we need to do is to copy the key frame under
the path property. Let's copy this key frame, and then let's go to the path
property of the taller S. And then let's go
forward 25 frames. Command shift, right arrow, 12, that's for 20 frames, and then 12345 for 25 frames. And then we can select
the path property. Hit command V to paste in my smaller version
of the S. However, it's moved to the bottom. I need to have a
stay on the top. And once I do that,
if I preview this, you can see the S is stretching. That's the kind of
animation that we need. It's pretty straightforward. And then let's say we go
forward another 25 frames. Then we can copy the
previous key frame which is the original state man
C and then command B. Now if I solo this S layer and the background and then if
I just play this animation, it's going to have this
S layer coming up and down morphing between the tall version and
the shorter version. So that's how we animate a morphing between different
thickness of the font. A special note here is that in order to animate the
morphing smoothly, it's better to have the two
thickness within one family. Because for most of the
font that's well designed, the anchor point, the number of anchor points are always the
same within the same family. You can see this longer version, the taller version
of the S it has, it has this many anchor points. And then if we toggle
to the shorter version, it's having the same
amount of anchor point. And those anchor point carries the position
information and the path information that's morphing between
these two thickness, let's say if we change it to a different font family and then if you want to morph between two different fonts, and then the two different
font family is going to have different number
of anchor points. That's going to cause a problem. So make sure you always
animate the morphing between characters or between letters within the same family. And then some of the font
works better than the others. For example, this
rock grotesque, it's having a ton of different thickness from extra
wide to like normal width. And then condensed, compressed. They have so many
different thicknesses that you can use to animate. And there's also other fund that we're going to use
throughout the course. But that's a special note, is that we need to always
animate within the same family. Now you can see that basically
how we animate one letter, since we already have this S, we can unsolo this letter
and the background. Now we'll just do the same thing for the rest of the letter. Let's see if we want
to animate the U. Let's copy the shorter
key frame over here. And then let's go
down to the U here. Make sure we align the
key frames together, V. Then we just need to direct the U all the way up
to align with our margin. Now we can copy this
first key frame. Now we have the S and U
animating. That looks good. Let's do the C. We've
got the C here. Go to this one and then align
the key frame together. Then we just need to move
the C all the way up. Then go to the second C, because the same letter, we just need to copy it. And then we just need to move
the C over here as well. That's good. And
then we have the E. Let's copy the
key frame on the E. Then let's go to the
path property of the E. Make sure you select the path property before
you paste in the key frame, otherwise it doesn't
know where to go. That looks good. And
then we have the, let's go to the key
frame of the S, and then let's go to
the taller version. Make sure we paste it
in, move it to the top. The last one, we
can do the same, but just move it all
the way to the back. This is going to
be our animation. And then if we go forward
25 frames, again, we're going to copy
the original states of each letter so
that it's a loop. Now you can see if I play it, we got all these letters animating that
looks pretty good. Next thing we're going to
do is we're going to do the same thing for
this bottom layer. Now we just need to copy the information from
the taller version. Let's go to the S, which is the first key frame. Then we're going to paste
in this first keyframe to this shorter path
property command V. That looks pretty good, it's already coming
up from the bottom. That's what we like,
then let's copy the U. Paste it in. That
looks pretty good, so that we don't need to
adjust the position anymore. It's having the exact
position that we want. Now we copy the C. The second
C here, that looks good. And then we copy
the E, that's good. And then we'll copy the S. Then the last S,
which is this one. Make sure you select
the past property. Now I just need to make
sure it's going back to the shorter version after 25
frames to make up a loop. Now if I play this animation, this is what it looks like. It looks pretty cool.
However, we need to adjust the easing setting so that it's got more energy. Let's select all the key frames, then we re click Keyframe
Assistant. Easy ease. Let's go to the graph editor. We need to change these handles. Make sure we're inside
the speed graph. Click on the second
button. Edit Speed Graph. Now we just need to
dig some influence. Maybe change the
influence to 70% Let's try to change the influence
to 70% on both handles. It's going to give us
a nice animation with some energy that
looks pretty good. Let's go back to the timeline
and see the animation. I feel like I want more energy. I want to make it even more. Maybe instead of 70, let's try a 80% of influence to have more easing
and more speed variation. Let's try 80% of influence. That looks pretty good. Yeah, I think I like that if I drag
this timeline even taller. Now what we want to do is I just want to duplicate
these keyframes. First of all, select all
these keyframes, command C, and then we can duplicate these
keyframes two more times. Command V duplicate. And then over here,
command V duplicate. And maybe one more time, command V duplicate,
playing four times. Same with this batch
of key frames. Copy. Then command V pasted
in command V past it in. Command V pasted it
in so that I know my animation is
playing four times. Now that's good. And the next thing
I want to do is to stagger these keyframes. Or offset these keyframes
so that each letter is animating one after another instead of all at the same time. To do that, I basically
want this S to go first. And maybe after two frames
right arrow two frames, I want this to go. And then I want each letter
to be delayed by two frames. Let's see what that looks like. If I delay the animation
for two frames. For each letter, that's good. And then we're going to do the
same thing from the start. We're going to have two frames. It's going to be my
second letter here. And then go for two frames. Now we have everything
delayed by two frames. Now that's pretty
smooth. I like how it looks. That's beautiful. If I close the drop down menu, all I have is two layers within one composition
with a background, but the animation
is already inside. I like how that looks. Let me try to change
a couple of letters into a dark color instead
of the white one. I want to change and the
C and E and into black. To do that, let's go
inside this first layer, and then let's select
the go to the fill. And then change this
color to black. And then next one, we're
going to select the first go into the fill,
change it to black. Then we're going to change
the E. That looks good. Then we're going to change
the, this one. Run one. Need to change the last to
plaque. That looks good. And then for the second layer, it's going to be
the bigger U here. This one. Then the C here. This one, the second one, and then the S here. Okay, that looks pretty good. If I select all and
then close all. Well, that's my animation.
That looks pretty good. I feel like it's not
right in the center. I just want to move it maybe
in the center a little bit. Let's see our animation. Now let's adding some turbulence on top of this animation. Let's go to the layer new and then select adjustment layer. Now we're going to
add in an effect called turbulent displays. Select the turbulent displays, you can see it's
already distorted. I want to change the amounts
to make it less, maybe 20. And then let's
change the size to a smaller size, maybe to ten. You can see my edges of
the letter is already roughened in terms
of complexity. I can tone it up to maybe five, and you can see the edges are
more pixelated, even more. Now we can animate
the evolution. Let's go to the
beginning from zero. I want to see where my end is. If I have my end over here, I'll change the evolution
to maybe five times. Now my turbulence
should be moving and I should be having a turbulence
that's constantly moving. I feel like the
complexity too much. Maybe I tone it back
down to three and then the size to seven, just on a very gentle movement. The next thing I want to
add is a noise effect. I can do a noise
effect over here. Add it on top of my layer, put the noise effect
in the front. Let's change the amount
to 10% It's going to have slight noise
going over my animation. I think that looks pretty good. And the last thing I want
to add is those arrows. You can draw the arrows
in after effects. To save some time,
let's just use the overloaded plug in to
push it into after effects. I got two layers here, which is my arrow. I'll drop it down,
put it underneath the noise adjustment layer. And then I'll just
quickly animate these two with a trim path. Let's go to the trim path
and then let's to zero. Make sure the start is all zero and then go forward
maybe 20 frames, change everything to 100% then relic go to
keyframe velocity. If I change the
influence to maybe 66, the same thing as this one. Go to keyframe
velocity change to 66. Then I need to move
the two key frames in the end forward so that they are not
starting at the same time. Let me copy these four
key frames and put it under layer one. That should be our
animation for the Eros. If I select the two layers, MechifC name this one arrows. Now we have one arrow over here, and then I can duplicate it. Hit R on the keyboard, rotate it to 180
degrees, it's over here. And then duplicate it again. Maybe put it around the C here. Now I just duplicate the
arrow a couple times. I spread them out, place them to different positions
according to my animation. Well, that's it with the
animation of the success hope. Enjoy it. And I'll see
you in the next video.
8. Looping Animation: All right, in this video I'm
going to show you how we can make a seamless loop
with our animation. Let's use this project
as an example. In order to make
a seamless loop, all we need to do is to find a starting point that's
the same as the end point, and that's how we
create a seamless loop. Let's toggle the timeline
and see our animation first. If we go to the keyframes
of our success, animation you on the keyboard, you can see this
beginning frame. We don't have
anything that's the same as these beginning frames. So I need to pull it all the way until my last pass key frame
is starting to animate. So at this point, I think this could be the
starting point, because this is a point when everything has already
started animating. I need to make sure I drag a ruler to find a
reference point. I can use this S as
a reference point. Let's say I just want to
mark this position of my first S ear and make sure I know where this is located. And then I also want to use a different word as a reference, like the smaller S here. I'll drag a ruler down here. If you don't have
the ruler, just hit command R. To pull up the ruler, all we need to do is find
two reference points. The first here and then
the dark smaller S here. This is my position for
the S. And then I be on the keyboard to cut the preview range to
start my animation. From this point
on, the next thing I need to do is to find a end point where this is at the exact
position as my ruler. If we go forward, this
is our animation. This animating. That's
good. That's good. If we want to find something, we can go from the ending here. If we drag the
timeline indicator from the back to the front, you see around this point on this is the exact
point where my two S's are in the exact location
with my s from the start. That way I know this frame is exactly the same
as the first frame. If I cut it here, it's going
to create a seamless loop. Let's hit in on the keyboard to cut the preview
range to here. And this is the preview
range where we're going to have a stimulus
loop animation. Let's hit space bar
for the preview. Yeah, you can see
that's a seamless loop. Since we also have some
secondary animation. We have all these arrows
that's coming in and out. We also want to make
sure all these arrows are starting and ending
inside my preview range. If my arrows are going outside, starting from here, it's going
to mess up with my loop. If we have a secondary
animation similar to this one, I need to drag all
my layers inside my preview range in order
to create a seamless loop. Also, you can see if I
hit you on the keyboard, there's not only one
point where we have these two Ss are the exact
position as the first frame. If I go backward again, there should be another
point over here. This is another point where it's going to loop seamlessly. If I cut it from
here, I can just hit in on the keyboard to
cut it here as well. Basically, we have
a couple loops inside my layers as animation. And I can cut it
wherever I want, as long as the first and last
frame are exactly the same, I just want to see in
between these positions, I don't have anything else. Maybe this frame here,
even if I cut it here, this is the exact same position with my two s. If I cut it here, it could, it could still be a good spot with a
looping animation. The only issue would be, I think these S are good. The only issue would be there might not be
enough time for my arrows to complete its animation within this
short period of time. So I want to include maybe two loops with my
looping animation around here N. I can allow my arrows to animate
within these two loops, and then I still have a complete themeless
looping animation. I hope that makes sense. I can show you another example. Let's see another example here. Here is another example. This is the animation that we're going to work on
in the next video. However, we can use this as a example for our
looping animation. First we need to pull up the ruler command R
to show the rulers. And then I need to find
my starting position. I just want to make
sure I find a place where all my letters are
starting to animate on. Let's see if this is a good
place around eight frames. I just drag a ruler to see
where my first letter P is. And then I need to
drag a ruler to make sure we mark down the
position for the Y. That's good. And
then we can be on the keyboard to set the
preview range here. Let's go forward, make sure we can maybe allow
it to play for two loops. And then we'll find a
place where we have the at the exact
position around here. This is the exact position of
my first letter and the y. Let's hit in on the keyboard. Let's see if I play over here. If it's going to be
a seamless loop. Yeah, I think that makes
sense. I think that works. Now at the first frame
we have the P and the Y, and then the last frame we have the P and the Y in the
exact same position. That's how we create
a seamless loop. I also need to make sure
all my stars are animating within this preview
range at the start. Although in my timeline you can see the layer extending out, but nothing is animated on yet. So I don't have to worry
about it that much. If I toggle the keyframe, this is a starting point where the first star is animating on. It's already within
my preview range. That works. And then I need
to make sure the last star is not going outside of
my ending point here. I think that works as well. That can please
our similar loop. If I play it, this is
what it looks like. It's just going to keep
looping continuously. All right, that's
it with this video, hope you get an idea
of how to create a similar loop with our
typography animation. Let's go start animating this party text in
the next video.
9. Party: Welcome back. In this lesson, we're going to animate
this word, party. Work hard. Play hard when life is hard. Don't
forget to party. As you can see, we already have this design laid
out in Illustrator. We can take a screenshot of
the color palette for now, and then we're going to build the text inside After effects. Now let's go back
to After effects. Let's create a new composition, name this one main comp, and then change the dimension to 1080 by 108030
frames per second. And then duration
will be ten second. Click on okay. Now we have
our after effects file. Now let's go to type tool, Typing our word Party
That Looks good. And then in this lesson, we're going to use the
font rock grotesque. Let's change it to
a heavy weight. Make sure the vertical scale is at 100% Everything
is back to default. We only need this one
layer of font for now. In this lesson, remember
we talked about some of the style when we animate, we have to change the
editible text into a pass so that we can manipulate the past
to do the morphing. In this lesson, we
don't have to make an outline of our text so that after we
animated everything, we can still change the text into whatever copy that
we want to say here. So that's one advantage that we have if we don't
outline our text. Now we have our party word here. We're just going to drop
it down. Let me zoom out. We're going to go to my Align tab and then
center Align It. I also want to zoom in again to make sure my anchor
point is all the way down. Let's click on this pen behind
to drag my anchor points. Make sure it's aligning
to the center of my text. And then drop it
all the way down, just over to the edge over here. In terms of the animation, I only want to deal with one
property in this lesson, which is a scale property. Once we drop the
anchor point down, let's turn on the
scale property. As on the keyboard, if I
make the scale larger, it's going to enlarge
our copy, right? So this is going
to be essentially the animation that we want, making this party line
bigger and smaller. Let's put it back to
100% I just want to see if I change this
text all the way up. Is this big enough to
occupy the whole space? I feel like I want this text to be right around here
when it goes bigger. In that case, I might
need to drop this anchor point even further down. Maybe over here, let's say I have 270% around
this here and then change it back to
100% or even smaller. We can make it even smaller, maybe like 50% so that the
party line is way down there. I think that works from 50% to 300% Yeah, that
works. Essentially. That's our animation.
First of all, what I want to do is I
want to go to import my color palette that I
already took a screenshot of. Make sure I have my
color palette here and then go to layer new solid. Let's sample this
yellow color as a background for the text. I want to go to character, make sure we have
a white fill and a black outline that
looks pretty good. We can hide the color
palette for now. Now we can animate the
party line at 0 seconds. Let me pull it down, zoom
it up at zero second. I want the scale to
be maybe 60% Yeah, that looks pretty cool. With my anchor point down there, I can set a key frame
on the scale property. Go forward 25 frames,
click 121-23-4525 frames. Now I can zoom it all the
way up to 250 or may be 300. Yeah, I think I like how it is right now. That
looks pretty good. And then let's go to move
forward another 25 frames. And then copy the
first scale keyframe to make a loop so that this is our animation, go up and down. Let's duplicate the three layers again to make it two loops. Go up and down and up and down. Now that looks pretty good. I like that animation. That's basically the
keyframe that we need. And then now we
need to manipulate the easing to give
it more energy. In terms of the animation. Select all keyframes, right? Click keyframe
assistant, easy ease. Go to the graph editor. The way we want to
edit the graph. First of all, we need to make sure click on the second button. Edit Speed Graph. We're
inside the speed graph. Let's say this button
fit graph to view. To make it bigger, we want to
have a bouncing animation. Which means in
terms of a bounce, whenever a bounce happened. Or a ball bounce all
the way up to the air, whenever it reaches the
tallest or highest point, it's going to be where
the speed is the lowest for a bounce over here. At this point, the graph
should be almost flat, as flat as it can be, so that we can achieve
a bounce curve. And at this point, it's
losing all the speed. At the beginning, I wanted to
hit the ground with energy, so I need to pull this handle
all the way back in to have a curve where we have
some speed at the beginning. And then slowly, this
energy is going to go away. As the curve is flattened, we have the energy going away. And then when it drops, it's
going to slowly speeding up. Again, this is the curve that we need in terms of a
bouncing animation. We just drag this handle here. These two loop, the curve
is going to be identical. So we're going to pull this
one all the way up and then drag this curve back a bit. We have some speed
at the beginning, slowly dissipate towards
the highest point. The speed is going
to become zero. And then when it drops, it's going to slowly
speeding up again. And then when it
hits the ground, it's going to get
some energy back. This is the graph that we need. We also want to make sure
these tallest points are around the same height so
that we get the same energy. Let's see, the animation
when we adjusted the graph. Yeah, we already have
some bounce to it. I think that looks pretty nice. I just need to duplicate this keyframe one more time
so that we have four bounces. Let's command C and then make sure the timeline
indicator is over here. Command V, Now we have
four bounces, 1234 it. Now we have our animation ready. We just need to
do one more thing before we duplicate it
to a different color. I want to select the text and then go
to character setting. I want to reduce the
tracking a bit more. Maybe change it to negative 50. I can also adjust individual
ones, maybe these two. I'll just use my keyboard
shortcut option, left arrow to move these closer. Then move this one
out a little bit. Move this one closer just
to adjust the tracking. Now we have a party tech
that's close to each other. With tight tracking
now we just need to separate each letter on its own layer so that we
can offset the animation. Let's go to pull up my plug
in in window decomposed text. And then with the party layer selected, we can decompose it. So that after we click
on the decomposed text, we're going to have each
letter on its own layer. And this party layer is
turned off its visibility. We can shy this one
with our shy layer. If you get a arrow in
the decomposed text, it's because if I click
on this text tool, and then if I drag a
bounding box and type in the word party. After I have this
party layer selected, I can click on the
decomposed text. However, it's not going to work, it's going to give
me an error set. Paragraph text is not supported. What is a paragraph text? A paragraph text is
when you click on the type tool and then you drag a bounding box first
and then type in the text layer after
that's a paragraph text. However, in order for the
decomposed text to work, you need to click on
this type tool and then click on the
screen one time. And you see there's
an empty text layer. Now if you type in
the word party, don't drag out any
of the bounding box, just click on the screen here. Type in the word party.
Now if you click on decomposed text,
it's going to work. So if it's giving you an arrow, it's because you drag out a bounding box when
you type in the text, which is going to give you an error message in
the decomposed text. Back to our lesson. Now
we have the party ready. I just need to hit
you on the keyboard. Show all the key frames I need
to offset each key frame. Let's say the P is going to be the first letter
that comes up. I was offset by one frame. Go for one frame,
and then we can drag all these key
frames forward by one frame that our letters
are go up one at a time. Let's see what it looks like. Yeah, that looks pretty good. That's all I need. Let's
select all the letters command shift C. Let's call this
one party animation. Now we have one batch of party animation command D. Let's first duplicate
it one time. We just need to turn on our color palette and
move it to the side. Now for the second, I'll go to my
effects and precess, search for fill color. Then for the second color, I'll change it to
this pink color. I also need an outline. So I'll achieve the outline
through the layer style. Right click, Go to layer
style at a stroke. Let's go inside the stroke. Let's change the stroke
to maybe one and then change the color
to a black color. It's going to be a black stroke. And then put this
purple one back. Now let's duplicate
this pink layer again. And put it underneath, change this color
to this red color. And then duplicate it again. Put it underneath,
change it to the purple. And then duplicate again, put it underneath, change
it to the dark purple. Now we have all these colors
behind my white color. Now I just need to
offset the layers. Let's turn off the
color palette. Go forward one frame, offset the layers, hate the life square bracket
to offset the layers. And go forward one frame
again, offset this layer. And go one frame, offset this layer and then go one frame again,
offset this layer. Now we have all these
layers offset by one frame. Let's take a look
at the animation. Now we just need to
complete this piece with some secondary animation,
maybe some starts. Let's add in the
stars animation. I have it under the
star animation folder. I'm using the star animation two with a bunch of duplication. Now this is a full animation. All right, that's it with
the party animation. I'll see you in the next video.
10. Like: Welcome back. In this class we're going to
animate this word. Like we already talked
about three different ways to animate text in
the previous lessons. If you like the class so far, don't forget to leave a
review under the class. It will help this class
to reach more students who like to learn this
kind of animation. And it'll be really appreciated. Now let's get into this lesson. We have this type laid
out in Illustrator. The font we're using is
called rock grotesque. And this bold one is
a condensed black, and the thin one is just
a thin, tight fasis. The reason we're
using rock rotesque that it's a really big family. It's got all these
different thicknesses, different weights so that we can manipulate and morph
between each one. You can also choose the
different type pass, but I recommend something
that has a lot of different variations
so that you can transform or morph
between those variations. We also talked about how to
use the plugging overload, as well as how to transfer file from Illustrator
to after effects. In this lesson, in order
to save some time, I'll just use the
plugging overload to push this letter
to after effects. Let's go inside After Effects, create a new composition, name this one main
comp and change the dimension to 1080 by
108030 frames per second. Duration is going to
be ten second click. Okay, we have our composition. Let's go back to Illustrator. We can also type in the text in after effects, but
to save some time, let's go push this one skew
at one letter by one letter. Now we have one.
And then go back, push the K, push the
E, that looks good. And then let's ungroup it. And then I'll push one by one. I'll push the L first, and then the I, and then
the K and then the. That looks good. Now we have the path information
of all these letters. Let me create a background
layer, new solid. We just need a pure black
background that should work. Drop it all the
way to the bottom. Now we just need to animate the path property to morph between the different
thicknesses for each letter. If we're not using
the plug in overload, I'll just quickly show it. Let's hide everything here. Let's say if we have our own letter typed
in in after effects, let's change it to
condense black. Make it super big like this. If we're not using the
plugging overload, what we can do is we can and then go to Create
shapes from text. Now we would have the shape
information for each letter, there are four letters inside. Let me delete this text layer. Now let's go inside
and look at here, under the content, there
are four letters and all we need to do is duplicate
it three times. In the first layer,
we can delete the three letters and leave
only one letter inside. And then in the second layer, just delete the
other three letters. In the third layer,
let's delete the L, I, and E. And then
in the last layer, let's delete the
first three letters. Now we would have four
different letters on its own individual layer and each one is contained
with path information. So that's how we do the path information without
the plug in Overload, it's the same as using
the overload plug in. But overload just makes
it easier to transfer all these path information from Illustrator
to after effects. Now let's turn our
layers back on. We already have these
path information. It's the same thing as what
I demonstrated before. If you do it manually, now we just need to animate the morphing between
the thicknesses. Let's select all the layer. Go to search for
the path property. Make sure the timeline
indicator is at zero second. Let's hit a stopwatch for
all the path property. Now we have a keyframe
for all the path. Now we just need to grab the first path information
from the very L, which is layer five over here. Let's copy this path
information command C, and then let's paste it
inside the first letter, which is this big L here. Let's go forward 25 frames. Command shift right
arrow, 1212345. Now we're at 25 frames. Select the path property
command V. Paste it in. If I toggle the timeline, you can see this path is
transforming from this very long one to the short
one. That looks good. And now let's select the I, or you can do the E, since
we have it selected, let's copy the key frame
under the path command C. And then let's go search for the bigger E here,
which is this one. And then click on
the path property. Make sure you click on this
property before you past the keyframe command V.
Let's do the K here, command C to copy. Let's find the K, this one. And then command V. Then
the last one would be the I, this one. Let's go copy the
key frame and then go to the letter, this one. Click on the path V. Now we can just turn off these
four letters, which is the original one that doesn't have any animation. Let's turn off the visibility. And then we can click
on the Shy button and click on all the layers. Now if I play this animation,
this is what I get. I get a morphing between the two different thickness
of the four letters. Essentially, that's
the animation. That's very basic animation
for this movements. And then let's hit
you on the keyboard. We're just going to go forward another 25 frames, 1212345. Now copy the first keyframe
so that we complete one loop. Everything is going back
to the original states, and we have this one loop here. Now we just duplicate
the key frame again to make sure
we got two loops. Now if I play the animation, this is the movement we
get before we continue. I also want to start
the animation with the thin type faces first
instead of from the thick one. All I want to do is I
want to cut these layers, select everything option
left square brackets. And then we can move
everything to zero second all the layers so that it's starting
with the thin fonts. And now we're missing one
key frame at the very end. So we're going to go
forward 25 frames again, and then copy the
first ever key frame onto each layer so that
we can plead two loops. And it's coming back
to the thin type faces now that I have all the key frames,
select everything. Red click, Keyframe
assistant, easy ease. And then let's go to
the graph editor. Let's hit this thick
graph to view. And also click on this button to make sure we're in
the speed graph. In terms of the animation, what I want to do is
a bouncing animation. Bouncing curve that we talked about in the previous license. Remember when we have
the party animation, we did a bounce at
the highest point, which is this point
here in the timeline. I want this animation to hang
there so that I can drag these curves just to make sure I'm dragging this
curve all the way out. And then the speed is going
to become zero almost. The curve is going
to be as flat as possible for the first curve, I'm just going to
drag the handle back. In terms of influence, I want to change this influence to maybe 90% of influence. You see that influence number? When I drag the
handle over here, I'll give it 90%
of influence and then drag the first handle
all the way to the left. Let's do another 90% of influence over here so
that it's balanced over here. I need to marquee, select this because there's four different layers with four different letters and there are some key frames over here. So I need to marque, pull this handle back, maybe two, 15% and then marquee, select again, do the same thing, move this handle all
the way back and then change the
influence over here to around 90% This one
could be 90% as well. And then the last one is
going to be the same, around 15% of influence
since it's to loop. So these curves
should be identical. And this is a type of
bouncing curve that we need. Let's see what the animation looks like with
this type of curve. That's pretty nice. It's almost like a
bounce, You see that? I feel like the
animation is a bit slow. Let me try to move
these keyframes closer, select everything It
option and the keyboard. And then just drag
the last keyframe so that we can manipulate the spacing between
all these keyframes to make it go slower or faster. In this case, I want
it to be faster, so just move everything
inside to be closer. I think it looks pretty good. Now, I can just maybe copy
these key frame one more time to give them four
loops instead of two loops. Now it's going to do four loops. Now that's good, and the next thing I
want to do is to add some opacity change to make
the letter flicker a bit. Let's go to the first letter. Hit shift on the keyboard
to pull up the opacity. And then let's go from 100% maybe go forward
five frames, 12345, change to 85% and then go forward five
frames again 12345, change it back to 100% 12345, and then let's change it to 85% We have almost
like a flicker to it. And then we can
add an expression to loop out this animation. Let's hold option
on the keyboard. Hit the stopwatch, adding an
expression called loop out. Then the brackets hit return. Now after we add in the
loopout expression, this is what we get. We get this constant
flicker for this letter. I think that works. Next, I just want to copy the keyframes and do the same thing for the
other three letters. Select all three, go
to zero second with the timeline
indicator command V. Hit you on the keyboard
to show the keyframe. And then I just need to copy this expression command
C and then go to add it onto these three letters. Hold down option. And then click on
the stopwatch to open the expression field and then paste in
the expression. Now we have all of these
three letters flickering. I think that looks good. And next thing I
just want to offset the key frames maybe
by two frames. Go to zero. Second command, click for 2 seconds and then I'm going to offset
these keyframes, go forward two second again, offset the keyframes go forward two second again,
offset the keyframes. Now I just realized the problem. Remember when we copy the first two set of key
frames into four sets? I remember we didn't modify the curve for the last keyframe. If I go inside these keyframes, if I go take a look at the graph editor
within the keyframe, and remember this is the end, this is the last
keyframe where we had in the first animation and we just basically did a copy
to get another two sets. However, the influence in here is not correct and
it's not consistent. So I need to adjust
the influence over here as well
to make this part around 15% And now we should have a consistent curve
throughout the entire animation. Let's copy these influences. Select everything,
go to easy copy. Copy, and then paste the Easing onto this
set of key frame. Click on this As,
then go to this one, click on the S. Now
I'm just copying everything to these
three different letters. Now let's take a look and see if the animation
is consistent. Yeah, now it's much more consistent when the
second loop ends, coming into the third loop,
that looks pretty good. Now the next thing
you want to add is to add some
secondary animation, maybe some stars like
the previous lessons. I already have my stars
inside the project panel. It's star animation number one. And once I add it in, it's just going to randomly
appear in some kind of stars. I think that looks pretty cool. And now let's add in a
glow effect as well. Go to layer adjustment layer. Let's change the name to glow. And let's go inside the effects and process
and select the plug in. Deep glow, Deep glow
is not free as well, but I just want to demonstrate
what it looks like. You don't have to use it
if you don't have it. But once I drop it in, you can see it looks really premium. And it gives this nice
glow, maybe too much. Let's change it 2.5
and then tone down the radius, Maybe 400. Let's just give it a very subtle and nice glow
effect over here. Let's change the
input threshold. Maybe no, Yeah, and this is what it looks like with the
deep globe plug in. Other than the deep glow,
I also want to change the color on these letters. Let's go to add another effect, hue and saturation onto
this adjustment layer. I just want to, from the start, hit the channel range, hit you on the keyboard, and then maybe go to
around 4 seconds. Let's change the channel to
make it go, maybe one round. Now we have a color
information changes throughout the whole animation. Let's see what it looks like
with the color changes. That looks pretty cool. I like how it looks, but I think the animation is
lacking a bit of energy. I still maybe want to try to
make these keyframes closer, only the path properties. To make these keyframes closer, I have to select
everything hold down option and then select
the last keyframe. Just strike everything
inside like this. Yeah, that's much better if we want to find a
place where it can loop. Maybe starting from
this frame here on the keyboard, this
is the end place. May be hit in and we
need to make sure the channel range keyframe is
within this looping period. Let's see what it looks
like with the loop. Yeah, that's going to
be a perfect loop. That looks pretty
nice. Let's say with this lesson,
hope you like it. And I'll see you
in the next video.
11. Thanks: Welcome back. In this lesson we're going to
animate this word. Thanks. We all have many people
to thank to in our lives. For me, I'd like
to thank you for taking this class and choosing
me to be your instructor. I really appreciate
your time to be here with me learning these
animation techniques. So I want to say thanks
in an animated way, just like this animation here. First of all, let's go
back to illustrator. This is our storyboard. The type face I'm using
is rock grotesque. Again, I like to use
this family because it's got a huge
variation, right? Right now I'm using
this black fonts and in this animation we want
to do something more like a fake three D. It's got some width to each letter and
it's very simple to set up. We just make a copy
of this one and then let's outline it. Chmift, we can outline
this one again. And then let's just change
the color of each letter. Ungroup it, Chmiift to
ungroup the letters. Now I can just
sample these colors. You can choose
whatever color you like to make your own
animation on a unique word. I'm just showing you
how we can do this. Thanks. Now I can
just put this one underneath the
letter and just move everything to the right so that we can see a thickness
behind each letter. Now I can group each letter
and the shadow together. Maybe drop this key on top
and then move them closer, and then drop this
a back like this. Just staggering these letters. So that we can create
a depth like this. If you want to
arrange it this way, it can be something similar
to my left, this board here. And that's how we set up the Illustrator file
for this animation. Since we already know
how to use overload, I want to review in
this lesson how we can transfer the file from Illustrator to after
effects without a plug in. Let's review that again. We can use this
one as an example. I don't need the shadow anymore because I can create the
shadow later in after effects. Right now, I'm just
going to select all the shadows and
delete the shadow. I'll drop this one over here so that it's
not within my R board. And let me delete this R board so that I only have one
R Board to work with. Listing here is just for
demonstration purposes, but in order to transfer
file from Illustrator to after effects without the
plug in, this is what we do. Let's go to the Layer panel and then go to this
drop down menu. Click on Release
to Layer Sequence. Now it's going to expand everything that's
underneath layer one. We just need to select everything
that's underneath layer one and then drop them
outside of layer one, so that each one is
having its own layer. And then we can delete
layer one since it's empty. Now this is all the layer
that we have that's separated from our command
here, release two layers. Now we have everything
separated when we import this illustrator
file into after effects, everything will be on
its separate layer. Let's save this Illustrator
file command S, and then let's open
after effects, create a new composition. Call this one main comp. Then we can do 1080 by
108030 frames per second. Duration can be 10 seconds. Click on, okay,
just go to Project. Now we can import the
Illustrator file. Double click on
the Project panel, and then navigate to the
storyboard over here. Make sure we select composition
retained layer sizes. And make sure we don't select
the Illustrator sequence. It's going to cause a problem. If you check this mark here, make sure it's unchecked
and click on open. Now if I go inside the
thanks composition, we got all these layers.
Let's copy everything. Move to my main composition. Next thing we just need
to group these together. For each letter is having a letter in the front and then there's a shadow
or the thickness. We need to group them together. Command shift C to
group this here. And then these two
are the group it. Then then the N, then the K. And then the, the last
one is the background. Now we have all these letters imported into after effects. Now we can start
animating these now. First of all, I
want to align them. Let's hit command
R for the ruler. And then let's drop a
guideline over here. That looks good. I just
want to align everything. Drop the down, and then drop the Ok. And then the S. We can move
everything up a little bit. Now first of all, what I
want to do is I need to move the anchor point to each letter on the base line of
each letter for the, the anchor point in
the center of the key. Let's hit the pen behind to drop this anchor point
at the bottom of the T. And then for the H, do the
same thing for the same thing, drop the anchor point to the
baseline of each letter. Now that works. And then let's select everything
P on the keyboard. Now we can add a key frame. What we want to do
is we want to do a bounce animation, right? Go forward. Maybe 20
frames can shift, right arrow, 20 frames. And now we want
everything to drop down. Maybe around here,
the highest point. I want them to jump
all the way to here. And then this is
the lowest point. Let's go forward
20 frames again. And then we can copy
the initial key frame to go back to the
initial position. Now I'm thinking about
it. I should start with the letters on the ground. Let me delete the
first key frame, and then let me move
everything to zero. Second, I'm starting with
the letters on the ground. So that they can jump up
and then go 420 frames. Now I can paste in the
initial key frame. Again they just
land on the ground. After I have all
these keyframes, click Keyframe
assistant, Easy East. Go to the graph editor, hit the thick graph to view, and then make sure we're
inside the speed graph with the second button
here. That's good. Maybe pull it here. When it's jumping up and down, I want to make sure one is at the tallest point,
the highest point. This is where the speed
is going to die down. We're going to have
a flatter curve around this area here. Then for the initial
touching the ground, the curve is going to be
more steep, like this. So I'm going to drag all the handles of the two
side all the way back. And then the middle handle, it's going to all the
way extend it outside. It's flatter curve
at the highest point and then a steep
curve on both sides. Let's see the animation. I don't have another
set of keyframe yet, so I need to duplicate V three key frame again
to make another set. So that we can have a bounce. Let me just come duplicate it, that's going to be one bounce. There's still some
issue with the curve. Let's select everything. Go to the graph editor. I can see over here,
it's not symmetrical. There's some issue
with the curve. I need to pull this handle
all the way back to make sure it's gaining
the same amount of speed at the
bounce over here, so that it's perfectly
symmetrical. And we get a bounce curve.
Let's see the animation. Yeah, I like how it looks. Now maybe what I can do
is select everything. Hit option on the keyboard. Move them inside a
bit more so that it's got more energy
On the bounce. Yeah, I like that. Now I just need to duplicate
the keyframe. Let's duplicate that to
add two more bounds, 123. Now we have three bounces, 123. I feel like the place where we copy the key frame is
having issue again. Let's select
everything, go inside. You see this curve over here? This point, it's got a weird curve on the left hand side
that's not symmetrical. What we need to do
is we need to make select anchor point
and then we need to drag this curve all the
way back like this. That is symmetrical. Again, everything is consistent, the speed is consistent. Let's take a look. Yeah, I think that works. And then the next thing
we're going to do is we just need to offset the key frame so that each letter is coming
down at a different time. Let's have the come down first, and then we're going to
have come down second. Go forward one frames,
or maybe two frames. Let's try two frames offsets. And then we're going
to have the H12 1212. Then want to, let's see if that works. That might be too much. I think I would maybe prefer
one frame of offsets. Let's do one frame instead. I just need to move everything back so that there are
one frame offset apart. Go for one frame.
Yeah, I like that. That looks pretty good. Now
the last thing you want to do is to do a color variation
on top of everything. So let's go to a layer new and then create
adjustment layer. Let's go to effects and presets, search for hue saturation. Then we're going to do the
same thing as we did before. Hit a keyframe on
the channel range, Hit you on the keyboard, go to seconds, or we can
find a place where it loops. Let's say this part here, Make sure my first keyframe is aligned with the
looping first frame. And then we're going to find another point where
loops maybe here hit and then I'm going to change the channel range to one round so that it's changing color. Let's see, the
loop that we have. Yeah, I think it works.
Let's zoom in, take a look. Now, the last thing
we want to do is to add a bit more character
to our letters. What we can do is we can
squash and stretches. When it hits the ground, it can squash a little bit. And then it's going to add
some character to our letters. Let's everything as
on the keyboard. Hit Shift. Let me show
all the key frames. Let's animate the first, which is our first letter. I just want to manipulate
the y, y position scale. Let's unlock this property here. And then at the beginning,
when it's on the ground, I want to change the scale to maybe 75% That might be too
much, but we can try it. And then maybe after
three frames, 123, it's going to go back to 100% Then when it hits
the ground again, before it hits, right when
it hits it's going to be 75. But before it hits three
frames earlier, 123, it should be at 100% Then
go for three frames again, 123, and then it goes
back to 100 again. It's going to be something
like this one hit 75, and then after three
frames becomes 100 again. Let's go to Keyframe Assistant. We can also easily add some velocity from this keyframe
velocity tab over here. Let me just change it to
66 as a standard easing, let me copy these three key
frames. Paste it in here. Move the impact, the middle frame to
align with my impact. And then over here, move
the middle frame here. Let's see what it looks like. Now it's adding some
squashes to my letter. Now I can just duplicate
all these keyframes, Come and see, and then
go to the next letter. Make sure we unlock the scaling, and then let me find the position of the
impact over here. And then make sure we align them with the middle key frame. Go to the next one. Align the middle key frame
over here like this. Then unlock the scale. Align in here. And then the last one here, a line in here. Let's
see what it looks like. If it makes a difference, Yeah, you can tell it's got some squash and stretches when it goes down,
hitting the ground. I think that's good enough. If we slow down the animation, it's going to look more obvious, but I don't want to slow
down the animation for now. Now the last thing we
want to do is to add some shadows underneath
this text gear. Let's select everything,
group them together. Let's call this one
things animation. Then let's duplicate it. Go to Effects and precess, search for a process
called fill. Then let's change it
to this blue color. And then we can make it a little bit different
from this blue here. Move it down, and then we can offset the
position property. It's not that visible.
Let's make it darker. That looks pretty good. Let's see what it
looks like now. Yeah, I think that works. There you go. This is our final
animation for the. Thanks. That's it with this video. I'll see you in the next one.
12. Become Motion Insiders: Before we continue, I want to share with you an exciting news. Motion design courses just became more affordable
at motion circles. With our motion
insider membership for as low as $7 a month, you will get unlimited access to our top tier motion
design courses, trusted by over 50,000
students worldwide. Time to elevate your
motion design skills to become the best
animators you can be. As an insider, you
will also receive complimentary project
files from all of our Motion Circles
YouTube tutorials. And enjoy an exclusive
25% discount on all the other incredible
animation projects from other artists in
our project file shop. Don't miss out on this
opportunity to level up your animation skills while becoming part of our
vibrant community. Join us today at motion circles.com and unleash
your creative potential.
13. Follow: Welcome back to this lesson. In this lesson, I'm going
to animate the word follow. If you don't already
know, we also have a Youtube channel that
shares everything animation. From there, you will learn
all kinds of tips and tricks and techniques about
after effects animation. So make sure to follow us at
motion circles on Youtube. Here is our storyboard
for this lesson. We got the word follow. This is a typha that I
found from Phon.com This is a free resource that you
can use for all kinds of typhaces and there's
different categories. This is the phone that I found
here that's called Andres, and this is the one
that we're going to use to animate in this lesson. For the color palette, let me just take a screenshot
of my color palette. And let's go to after effects, Create a new composition. Name this one main comp, 1080 by 108030 frames
per second, 10 seconds. Now let's import our color
palate here, make it smaller. Let me go to new solids. Create a background, same as a pink color, drop it locket. Now we can go to the type tool. Let's type in the word follow. Then let's go to character. Change the typhase
to make it smaller. We can make everything
capitalized so that they have a similar height
for each word. I also want to increase
the letting a little bit. That's the word that we have
here, looks pretty good. I just want to make sure
this percentage here is back to 100% Because I'm going to animate the path
property of this letter. I might need to make it bigger. I feel like this word
is not big enough. This is how big I want to make this work to be around here. Let me hide the color palettes
in terms of the animation. We want to separate each
letter into its own layer. To do that, we can use a
plug in that we had before, go to Windows and then
go to decompose text. Hit this, decompose, if you're getting
an error message for the decomposed text, go back to the
lesson where we talk about how to animate party. In that video, I talked
about how to solve the arrow message on this plug in If you're getting it when you
hit the button. Just make sure to go back
and watch that again. If you're getting
error messages now we have these letters separated. I can delete this
follow line here. What we need to do is we need
to convert each letter into path relic create shapes from text. That's
what we want to do. We want to create
shapes for each letter. Now we can select all the letter and then
hit the Shy button. Hit the Shy button over
here to hide them. Now we have everything
that's outlined. However, if I toggle
inside each letter, the outline, you can see all
these letters still exist. It's because of the decomposed
text plug in that we used. It's still saving all
these other information. All we need to do is to delete all the other
letters that's inside the contents of my layer so that I don't get confused of which
letter we're animating. I'm just going through
this one by one. Go to content and then
save the old here. The last one would be, delete everything that is above
the W. That's good. Okay, that's good.
And then next, we need to animate the path
property of these letters. Select everything,
search for path, and then hit the stopwatch to add a keyframe
on all the letters. That's good, This is
my original position. Let's go for 20 frames. Command shift, red arrow. Let's make sure we draw a ruler so that we know
where we want to stop. At the highest point of the
letter. Maybe around here. If I animate, go, select the path
property of this W and I'll drag the path
all the way up. I'm going to do the same
thing for all these letters. To drag these path all the way up to align
with my guideline. This. Then I'm going to shoot this one up and
then drag this one down, maybe around here that works. Let's see the animation, That's our animation, that
looks pretty good. Let's go for 20
frames, again, 12. And then we can copy the original key frame that it goes back to
the original position. And we can complete one
loop of the animation here. Now there's one loop. Go up and down, go up and down. And we still need to copy
these three key frames. And duplicate one more time. Come in duplicate. After this duplicate, we're going to animate the
easing for the keyframes. Select everything, Re, click, go to keyframe assistant
at the end, easy ease. Go to the graph editor. I want to do this
bounce curve again, make sure we're inside
the speed graph. Drag this slider
to make it bigger. I want to a bouncing ease like the previous
animation where we have everything just flats. One is at the top and then goes down with some speed and
force so that we can have a bouncing animation,
a curve like this. Everything when it goes
up is going to slow down. And then when it drops,
it's going to speed up. Let's see what it
looks like. Yeah, I think that might work. I just feel like this part, when it bounces, it's at
the end of the bounce. When it hits, it might
be too aggressive. I want to give this easing over here a
little bit of wiggle room, select everything,
drag this curve out a little bit and then drag
this curve out a little bit. It's not that aggressive. Let's try if that works. Yeah, I think that works better. Let's strike this curve to
form a shape like this. Over here, you can see
the influence number is around 15% This part, I'm going to give
it 15% as well. In terms of this one, I'm going to give it
a 95% of influence. And this one I'm going
to drag it back to 95% I also need to make sure, because I'm
manipulating the curve on all these different layers, I need to make sure
I'm marquee selecting the handle because each handle
consists multiple layers. If I only click on this one, I might only click on one layer which is going
to mess up my curves. Yeah, I think that works. I just need to duplicate all
these key frames again at the end to give it a
couple more loops. Every time I
duplicate, I need to fix a curve where my
timeline right now is just go inside. Let's see the curve over here. I need to drag it back
maybe 15% of influence. That's the animation I want. In this case, you see one, it, it at the end, it's not that aggressive. Another thing I can try
is I might be able to, let's say from the start. What if I pushed it
down even further? Let's drag a line over here. And then at the beginning, I can drag everything
even like this. Move the path so that
everything down like this. And that's our
starting position. If I do the same thing for this frame here like this, I think I like this better. Now, I can just copy this
keyframe and then add it whenever it hits the
bottom over here. I'm just copying
these two keyframes. And then replace where the letter comes down so that we have the new set of positions
for the past property. Like this, that
looks pretty good. All right, that's our animation. It looks pretty smooth. I
like how it looks good. Now what we need to do is I need to offset the keyframe.
Hit you on the keyboard. Make sure it's offset by maybe one frame or two
frames. Let's try two frames. We're going to offset these
keyframes by two frames. Let's see, the animation. Yeah, that looks pretty good. That's all we need in terms of the basic animation set up. Now we can combine these layers. Call this one follow animation. Now we can duplicate it and add some colors based on
our color palettes. For the first duplicate
added to this color, the next one would
be this pink color, and then the next one would
be this darker purple. Then the last one would
be this color here. Other than the color, we also
need to add some stroke. Go to the second duplicate. Let's go to Layer Styles and add a stroke in terms of the stroke. I'm going to change it to a black stroke,
give three pixels. Let's see if three pixels work. And then after we have
this layer style, we can copy this one command C and paste it onto
the other layers. Now each layer is going to have a layer style with strokes. I'm going to move the white
one all the way to the top. And then it's just going to
change the order of these. Now let's hide this one. We can see all these
colors, one behind another. That's good. We can
delete the color palette. Now, next thing, we just need to offset the position
for each one. Let's go to the second one
and offset it to the right, maybe 123455 pixels. And then this one will be 10 123-451-2345
I'll be ten pixels. And then 123-451-2345 This
one will be 15 pixels, and then this will be 20 pixels. Now we have these offsets. The next thing I also want
to do offset on the timing, Not only in the position
but also the timing. Let's try a one frame offset. Left square brackets
offset one frame. There's one offset, one frame. Each layer is offset
by one frame. Let's see, the
animation. I think the animation
itself works just I feel like all these letters
are so crammed together. So what I want to do is I want to spread them
out a little bit. Let's go inside. And then maybe
let's give it some space. Let's change this
one to the left. I'm just going to space out these letters a
little bit so that they're not feeling too crowded outside from the outside
composition, right? I'm just going to
space these out. I think that works. Let's go back and see what it looks like. The stroke might be too thick. I'm going to change it
back to one pixels. Then I'm going to change all the stroke to just one
pixels instead of three. Now I think it
looks much better. It's not that heavy anymore. It looks a lot lighter. I think I like how it looks now. Now I've created a loop over
here with my preview range. That's it with this animation
for the word follow. I'll see you in the next video.
14. Relax: Welcome back to this lesson. In this lesson, we're going
to animate the word, relax. Sometimes the most
productive thing you can do is relax in this lesson. Just relax and watch me
work on this animation. And need to manipulate the shape of this text with
an illustrator. And then transfer the shape to after effects and work
on the animation. First what we want to do
is we're going to save this copy and then duplicate
another one on the side. Let me just create a big
block here as a background. And then I'm going to
duplicate it three times. We have three different
shapes for the same word. And then for the first one, I want to go to Effects. And let's go to Warp. And then we can go
to the Arc property. In this Warp option, if you
click on this drop down menu, we have all these different
shapes that we can distort. Our type two, we can do the Arc, and then we can also change
the setting in order to manipulate the shape even more and distort
it the way we want it. In this case, let's try to
make this one into a squeeze. For the first one, I
like the squeeze better, so I'm going to go distort
the band even more, maybe 53% And then I can even change the horizontal
vertical distortion as well. But for now, I think it's good to have it symmetrical like this to be squeezed in
the center over there. I like how this one looks. I'm going to click on okay,
and save it as this for now. And then for the second one, let's go to Effects
and warp it again. For the second one,
I might want to use this arc option here. And then I can probably create something if I put everything into neutral
position the band, maybe let's change it to 16. And then let's do a
horizontal all the way to 80% It's going to make our type into this
shape like this. Then if I want to
do the vertical, I think it might be too much
to change the vertical, so let's keep it 80% And then vertical will be zero and then the band will be
something like this. I think that works for me. That's my second shape. And then the last one,
let's go to warp it again. We can also explore all
these different options. This is a bulge option that's almost the
opposite to this squeeze. Everything is
rounded on the side. Then we also have these ones, the shell lower and
the shell upper. You can also do a flag. There's also a wave. I think I like the wave. Maybe I can try the wave
and this is a fish shape. The fish doesn't look so
well, it's hard to read. And then we have this rise
and then the fish eye. You can explore these
different options yourself. But I think what I'm going to use is I'm going to
use this flag and then I'm going tone down
the distortion a bit. But I think what I'm going
to use is I will use a wave option and then I'm going to try to do it
on the other side. Just the opposite as this
previous one that we did. And then we can try to
do something like this. I think that works for me. Let's click on, okay, now we have all these
four options as my final distorted shape of
this relaxed type faces. Then for now, I think I will just put this one
here. Put this one here. In terms of the animation, we're going to animate
this one first, and then this 1 second,
third, and fourth. Now that I have all
these shapes distorted, I'm going to just put them onto my board. Delete this one. I also want to put these
three color onto my R board. Remember how we
talked about how to prepare the Illustrator
file before animation? And we're going to do
that now in this project, let's go to Layers. And then click on
this drop down menu. Click on Release
to Layer sequence. We need to select
everything and then drop everything outside of layer
one. Delete layer one. And now that we have
all these shapes separated in Illustrator, let's click on Save Command. Now let's create a
project in after effects. Click on New Composition
Name this one main comp, change the dimension to 1080
by 108030 frames per second. Duration is going
to be ten second. Click on Okay. We can import
our Illustrator file. Go to Relax. Make sure the import as is
set to composition, retain layer sizes and uncheck
this illustrator sequence. Leave it unchecked,
and click open. Now let's go inside this
relaxed composition. Let's copy all the layers and then paste it into
the main composition. The first three layers
are the color palette. I can turn it off for now. Other than the color palette, we have these four
layers that represent four different shape of our text that we imported
from Illustrator. Now we can animate
the first one. First, let's sit on the keyboard to pull
up the scale property. Now in terms of the animation, I want to animate this text. 0-100% and maybe with
a slight overshoot. So let's do that. Let's hit the stopwatch, and then add a keyframe. Change the scale to 0%
Let's go forward 15 frames. Then let's change the scale to 110% And then let's go
forward ten frames again, change the scale back to 100. And then let's go for
ten frames again, change the scale back to zero. This is going to
be our animation, 0-110% It's going to
hover around 100% and then stay there for
ten frames before it shrinks down to zero
again and disappear. Now let's select
all the keyframes. Go to Rec click
Keyframe Assistant, easy as the graph editor. Make sure we're inside
the speed graph. We're just going to
change the influence of this curve maybe to 90% over
here on the right hand side. And then change this one to say we can do a 25% over here. Let's just drag both
sides towards the middle. Then this part,
we're going to do 25% and a 90% of influence, almost symmetrical to what
we had in the beginning. This is the curve that we
get. Let's see the animation. That's the animation we
want for this one text. Now what we can
do is we can copy the key frame command C and then duplicate it onto all
the other three layers, command V. We can turn them on. Let's hit you on the keyboard
to show all the key frames. We don't want them to come
out at the same time. So we can cut all
these four layers. And then right click,
Go to layer style, Go to keyframe assistance, Sequence layers. Click Okay. Now we're going to
have all these layers in the sequence,
one after another. However, I might also
want to adjust the order. I don't want this one
to be the second layer, I want this layer
to be the second. I still need to manually
change the layer order. Although I already did
the sequencing layers, I'm going to use
number six here, then this is the last one. I also want to tie these
layers closer together. Let me go to click on this button and show
the title Action Safe, so that I know
where my center is. I just want to move my layer and my text
right into the center. That's good. This is
right in the center. And then when it disappears, I want this one to come in
so that they're tied closer. This one, I'll move it here because the anchor point is
not right in the center. I might want to change anchor
point to the center here. When they disappear,
I'll move this one here. This is the anchor
point, looks good. Let's see the animation now. Yeah, I like how it looks. The next thing we want
to do is we want to duplicate the layer two times and then add
another two layers of details to each animation. To do that, let's go
to the first layer command D two times and then let's set
you on the keyboard. In terms of the animation, I think what I want to do is I want to move the first
key frames forward. A couple frames for
the second layer. And then for the title player, I move the key frame forward
so that it's offset. Then what I want to do is to
unlink the scale property. I want to change the X scale
on the first keyframe to be 100% Same thing
with this one to be 100% If I change the color, you will see what happens
after my changes. Let me fill this one
with a different color. We're going to
fill this one with the green and then we're going to fill the
top one with the purple. All right, let's see our
animation for the first layer. Essentially what we did is
that for the second layer, which is this green layer, we want this layer to
come in at 100% X scale. So that we have this
swipe animation, almost like a swipe from the center going
towards both sides. This animation that we achieved
from this keyframe here, that's the animation
we want and we want to create the same animation
for all the other layers. All right, that's how we
want to achieve that. And then let's do the same
thing for these other layers. Command D, duplicate and then
hit you on the keyboard. Let's move it forward,
maybe a couple of frames. And then let's go select
both of these layers. Unlink the x and Y
position in scale. And then let's change this one
to 100% change this one to 100% Now we just need to
change the color for this one. I don't want the
color to be exactly same for all these
different shapes. I want to alternate the colors since the first
one has the blue, green and purple in this order. For this one, I'm going to
change a different order. Probably purple, green to blue. I'm going to do purple
as a bottom layer here. Let's copy this fill color then. The green could be
in the second layer. Then blue could be the last layer which
is already in blue. Let's see the animation now that we have some
layer animating and then we also have the
color changes as well. That's good. And
then we're going to do the third layer over here. Duplicate it. Hit
you on the keyboard. Show the keyframes, Move this
one forward a little bit. Do an offset, and then
unlink the scale property. Go to the first key frame. Change this one to
100% scale in X scale, and then this one to
100% in X as well. For this one, I want the top
layer to be in green copy, and then I want the middle
one to be in purple, the last one to be in blue. This is what we get. Yeah,
I think that works for now. And then the last
one we need to do, hit you on the keyboard,
offset the key frame. The first key frame,
I link the property, change the X scale to 100% then change the X
scale to 100% Again, for the last one, I want the last layer to be
in the green color. The middle one
would be in purple, and then the last layer
would be in green, and the top one
would be in blue. That's all my animation. Let's take a look. Yeah, I think that looks pretty
cool with that animation, let's select all the layers except for the
background command, shift C. Call this
one relax animation. We can delete the
color pallet now, and then we can
duplicate this layer, go to Effects and find
this fine edges effect. And then let's invert
the fine edges effect. We can make this
fine edges effect, maybe keep it the same size. And then we can drop
the original layer on top of the fine edges effect. Make this layer
smaller like this. Then if I play the animation, now we have one extra layer of the edges with this neon color. If I go to add a glow effect, go to layer new
adjustment layer. And then let's find deep glow put onto the adjustment layer. Tone it down to 250
and then 0.5 exposure. Let's see what it
looks like now. Yeah, that looks
pretty cool with the globe setting for that neon outline and the
animation that we have. This is beautiful. There you go. That's how we animate the relaxed animation
in this lesson. I'll see you in the next video.
15. Subscribe: Welcome back to this lesson. In this lesson, we're going to animate the word subscribe. I hope you are
having a lot of fun learning these
typography animations. Don't forget to subscribe to our Youtube channel
to keep on top of industry trends and also
learn different tips and tricks and techniques to
improve your animation skills. I already have my subscriber
designed in Illustrator. This is going to be serving as a guideline for our design. And we're going to go
back to after effects to start creating this design
Inside after effects, let's create a composition. Name this one to main comp. Change the dimension to 13, 50 by 1080. Frame rate. 30 frames per second
duration. Ten second click. Okay, let me import
our Illustrator file. Double click, Import
Illustrator file, and then import as. Make sure here the
setting is set to composition,
retain layer sizes. And make sure to uncheck
this illustrator sequence. Click on Open, Go inside. These are my three layers. We have smaller text and then this bigger one
and then the background. Let's select this
both small text here. Click Create Shapes
from Vector Layer. And now we've created the
outline for these letters. And then we're going
to create shapes from vector layer with this
larger text as well. Now we have two outlines, we can hide these original ones. We have two layers of outlines
for these two word here. If I click the drop down menu, you can see each
letter is broken down into its own group. Next thing, I just want to
center these two groups here. Let's go to a line and
then click on the center. Next, we can start animating the path property
for these layers. Let's select both, and then
search for the path property. Let's hit the stopwatch
to add a keyframe on all the path properties
under these two layers. That's all the key frames we need for all the
path properties. We need to figure out
which letter is which. For group one is
starting from the back, group one is the letter
E. Then the last group, group nine, is going
to be the letter. Essentially what we need
is to copy the key frame. Let's say the, let's copy the key frame under the path
property of the bigger. Copy this one here, command
C. And then let's go search for the smaller here. It could be the group nine. Yeah, it is a group nine. And then we need to
paste it on here. But we need to move
forward 20 frames. Command shift right aro, let's paste in the key frame. And then make sure
we move this S to align with this
position that we want. Now if I play the animation, you can see my S
is animating from this original position of
this bold and small version, all the way to this
bigger and thin version. And that's how we
do the animation between these two
typefaces, two thicknesses. And we're going to do the
same thing for each letter. Let me just find the second path property
keyframe for the U, which is going to be
the group eight here, this is the bigger U. And this is a key frame, we need command C and then paste it onto the path property under
group eight, command B. Make sure to move this to align with the position
that we need it. Next, let me find group seven. For group seven, we've
got three key frames. We need to copy all three. Commancn. Let's go find group seven here. Make sure you click on the
path property before you paste in the key frame commenV, then move it over
here, number six here. Paste it in here, Move it here. Then we're going to have number
five key frame command C go in here. Move it over here. Then for the B is going
to be group four, command C, paste it
in under group four, Move it over here, that's good. Group three here,
command C, paste it in. Paste it in, move it here. Then the last two groups, which is group two, you've got three key
frames on group two. Move it over here. Then
the last group will be this keyframe for
the past it in here. Now we can hide
this layer because we got the animation
on the other layer. Hit the Shy button. Let's
see the animation for now. That's our morphing between the two states. I
think that looks fine. And now we just need to copy
the original key frame, all these first
keyframe command, and then go for 20 frames. Paste it in so that we
have one loop here. It's going big and
small and small. Let's go inside
the graph editor. Select everything, right. Click. Go to Keyframe
assistant, easy ease. Go to the graph editor. We need to manipulate the
graph like what we did before. Just drag the
influence over here to maybe 95% Let's do 95%
influence in the center. And then on the two sides, let's do 15% influence here. Let's change to 15% Let's
play the animation. Yeah, in order to
see the effect, we still need to duplicate these layers a
couple more times. Command C and then
duplicate. Duplicate again. So we have this bounces. Yeah, I think I
like the animation. Let me duplicate again
to have four loops here. In terms of animation,
I like the energy. I like what it looks like. It should be fine. I just want to see what if
I duplicate this layer. I'm going to maybe do
something fancy here. Let me duplicate two times. Then you on the keyboard, we can start from the
second key frame. We can cut the layer from here. Select the two duplicated
keyframe option, left square bracket
to cut it here. Then we're going to move
the starting position of the two new layers over here. And then move this one down. Move this one up, so we have a layout like this. And then let's play the animation and see
what it looks like. Okay, essentially
what I want to do is I don't want the overlap
that makes me a little dizzy. If this is the
style you're going for, I think you're good to go. But for me, I think
I can manipulate the curve even more to
have a similar animation. I think what I need to do, hit you on the keyboard. Let me make the timeline bigger. Let me only adjust the first
three set of keyframe. The first three keyframes on all these path properties
go to the curve editor. Let me delete the rest of the keyframe so that
it's not distracting. Let me delete this layer so that I only have one
top layer to work with. Let me get all these key frames and then let me set it back
to the original key frame, the linear key frame. And then re click
keyframe assistant. Easy as Let's go adjust the
curve like we did before. Try a 95% of influence here in the center on both
sides, 95% of influence. Then we're going to do a 15% of influence at
the beginning and the end that the animation actually matches
with my first set of key frame or the first layer. Now they should have
the same bounces. However, when they changes, it's just going to be
one big and one small. Let me duplicate these
layers four times, or three times 123, so that they match
up with each other. And then now I can
duplicate this first layer. Move it down so that it's
occupying the whole space. Let me drag these layers down. Let's see the
animation. Now, now we don't have the
overlap anymore, so this is the animation we got. I think I like this better without the overlap and all the motions are
similar, right? So another thing we can add is, what if we do some offset
between these letters? Let's hit you on the keyboard. Let me see if I
can do an offset. Let me try one frame offset. So let's go forward one frame, and then we're going
to move this here. And then one frame
for the letter B. We need to copy the
three path properties in order to change one
letter in this case. So I'm going to move
these three sets here. And then go forward for S is
one set and then go forward. For the C is going to be one
set and go forward again. For the R, it's going
to be two sets. And then for the I,
let's go forward one. And then let's do the
B. It's going to be the three sets here that's
account for one letter. And then go for one frame. Move these ones over
here so that we have one frame offset
to all these letters. I think that looks pretty good. Now we just need to
do an outset for the top layer over here,
you on the keyboard. Let's do the same offsets. Go start with the
first letter S here, and then go forward one frame. Move these keyframes further. Now let's see what
it looks like. It's going to look like
almost a wave effect. Now, we can just delete this one and duplicate
this one again. Put it down here so that we don't have to adjust
it one more time, because these two layers, top and bottom, are having
the exact same animation. Let's see what it looks
like after the offset. Yeah, I think I like it better. It just feels very smooth
and there's a rhythm to it. I think I like how it looks. So let's do that and
then save the project. Let's combine the three
layers into one composition. Men of C, name this one,
Subscribe Animation. Now before we finish, we have a couple more
styles that we can add. Let's duplicate this
layer one time. And then on the second layer, let's go to find hue saturation
effects for this one. If we offset it by one frame, just move this ring
one frame forward, we can change the
master hue and get it a different color that's going
behind our original layer. Let's change the master hue. I like this blue color
behind the orange, I think I'm going to
go with this one. And then we can also tone
down the master saturation. And tone down the lightness, maybe to negative 15 on both. So that we have almost like a scribble layer underneath
it to give it an echo effect. That's what it looks
like. Then after that, what we can do is we can
add in a noise effect. Let's go layer new
adjustment layer and then let's go
adding a noise effect, change the noise to 10% Another thing I want to add
is turbulence displace. Now we can see
everything is distorted. However, we want to change
the amount to maybe 20, then we can change the
size down to five. If I zoom in, you
can see there's some roughen edges
that goes around each letter to make this hosting look like
a scribble effect. In terms of animation,
let's go to at a key frame on the
evolution and then we can go five second and then change the evolution
amount to five round. Let's see how fast
the animation is. You can see there's
slight animation. If I go this to full resolution, you can see the
effects that I get. Now I think the second
layer might be too much. It's making me a little dizzy. Maybe I should change
the opacity down to 35% or 20% Let's try that. Well, it's an option for you, you don't have to turn it on. I think it might be too much. If you don't like it, we
can just hide this layer. Now, this is the
animation after we add it in the animated
turbulence display. I think I like how it looks like now we just need to add in a animated texture to
complete this animation. Now I just dropped in
my texture from online. Let's put the texture in, let's make this texture bigger
to cover the whole thing. Then first of all, it's in white color, so we
need to invert the color. Let's search for inverts that it's becoming
a black color. Now let's animate the
rotation property of this texture are
on the keyboard. We're going to do one
key frame at the start, and then go forward
five frames, 12345. We can animate this
rotation here, make sure it's big enough
to cover the whole canvas. Then we're going to
do another rotation, just make it as
random as possible. For every five frames we're
going to have one round. Then after we have
these keyframes, right click, turn it
into hold keyframe, and then we can do a expression option and then click on the
Stopwatch over here. Just type in loop outs. Now we should have a texture
that's looking all the time. This texture right
now is too dark. Let's go to tone
the opacity down. Maybe to 65% or even
30% more like 25. Let's change it to 25% Tony down and let's see the
animation for now. Now, there you go. That's our full animation
for the subscriber. Hope you like this lesson. I'll see you in the next video.
16. Sweat: All right, in this lesson we're going to animate
the word sweats. If you ever want to be good at something, practice is key. We are already putting our blood and sweat
into these animations. Trust the process,
and keep practicing. You will become a great animator before you even realize it, let's take a look at our
storyboard for the sweats. This is my word here and let me put a
background behind it. Just a demo of how
we set this up. Here we have this rock
test condensed bold. First let's go to
this transform tool. Click on it, and
then we can skew this bottom on the left
a little bit, slant it. Now we have this text here. The next thing we
want to do is to add a white color and change the outline to
this purple. That's good. The next thing we
need to outline this one comment to
outline this word. And we can go to object
path and then offset path. Once we do the offset, we can do either 20
pixels or ten pixels. I think 15 pixels
might be good enough. We can click on, okay, now we have these strokes. That's within the letter itself. We can ungroup these letters. Command shift G to ungroup it. For the outline, I
can change the color, let me copy this color hex code. And then we can change the outline into
the purple outline. Now we have this text set up, and then all we need to do
is to move them closer. That's how we set
up this text here. Now I can just delete
this one and then make sure in the layers
panel is all separated. We can save this
Illustrator file. Let's go to After Effects. Click on this one, create
a new composition. Call this one main comp. Let's do 13. 50 by 108030
frames per second. Click Okay, let's drop in
our illustrator file Sweat. Make sure it's set to
retain layer sizes. Uncheck this
illustrator sequence and then we can go
inside these ones, copy all the layer, paste
it into main composition. That's good for now. And
then for the background, I just need to make it bigger
to fit the entire space here, lock the background. Let's move everything to the
center of the composition. We can also hold down command and triple click
the pen behind tool. In terms of each letter, we've got two layers
for each letter, we can group them together. Let's group this S first men, name this one S. Then for this one will be
these two will be. Then these two will be A. These two. These
two will be the. I don't know why we have
three layers that's not containing anything.
We can delete those. Now we have the word here
that looks pretty good. First, I think in this case, I just need to animate the scale property
for these layers. Let's hit S on the keyboard
at a keyframe at zero second. Go forward ten frames. I want to see where
the anchor point is. What if I move this one bigger? If I change this one
to 150% of scale? This is what I get
at the beginning. I think what I want
is I want to change the scale to make it even
smaller. Maybe like this. Let's do 35% something like that. And then go for 20 frames. Again, copy the first
keyframe to complete a loop. Let me select everything. Re click, go to Keyframe
Assistant, Easy ease. Go to the graph editor, make sure we're inside
the speed graph. I just wanted to hang over
here with 95% of influence. Drag it until we see 95
doesn't have to be exact. And then over here we change
it to 15% That looks good. Let's see the animation. Yeah, I think that works. And then I just
need to duplicate this one a couple times. Let's try four loops. And then this one, again, 12, just duplicating
these key frames. That's good. And then we can offset the
key frames for each letter. Let's offset it by two frames. Go forward, two frames. See what it looks like
with two frames of offset. All right, that's our
animation for the sweat. Now we just need to
select all these layers. Ken, name this one. Sweats animation. Let's duplicate this
layer a couple of times. Now we can copy
this color palette. Let's dropping our
color palate here. This is going to be
the first layer. For the second layer,
I'm going to use a effects called Phil. Let's change the
color to green color. Then for the third layer, we can change it to
this pink color. Then the last layer
we can change it to the dark blue color. Let's have one frame of
offset for these layers. I just want to see
what it looks like. Now, maybe one frame
offset is not enough. Let's do two frames of offsets,
see what it looks like. I also want to add a layer style stroke
around these new layers. Let's go into stroke. Let's change it to
make it two points, or 1.1 point should be enough. Let's copy this layer style and then paste it onto
these two layers. Now we have a stroke
that goes around. Right now, I feel like it's
hard to see the second layer. Let me change the size of it. Let's change it to maybe 110%
to make it a bit larger. And this one, let's
change it to 115%. Then the last one,
let's change it to one 20% let's see
what it looks like. Yeah, I think it
looks better now. It's much easier to see. After we have these animations, I want to duplicate the
last layer one more time and then use
this one as a shadow. Let's go to adjust the assemble this
background color and make this background
color darker. I need to move the
position property and make sure this one
doesn't have a stroke. I just want to move it out
to serve as a drop shadow. And then we can delete
the layer style. This one should be
like drop shadow here. I can move even down like that. Now this last layer is
serving as a drop shadow. I think that looks pretty good. And the last thing
we want to do is I want to add some outline that goes out as well for the
first sweat animation. Let's go click Review the
Layer Sourcing Project. Let me duplicate this layer
in the project panel. Then this one is going to
be called Sweat Outline. And then let's drop the Sweat
outline onto my timeline. Let's go inside this
outline layer inside here. I just need to get
this one layer, copy this outline layer, and then paste it inside
this sweat outline. We can go into each
layer and copy the outline illustrator file
into my sweat outline layer. Now I can hide all
these composition just to have my outline. Now I can hide
these compositions. These are my outline layer. What I want to do
is go rec click, Create Shapes from
vector layers. And then under this
content group, we can turn off the fill
to only show the outline. We're going to do the
same thing for this one. Let me create the outline
for these layers. And then we can also hide all
these Illustrator layers. Click on the shy button. Now we just need to go
inside of each content. And then turn off the fill color so that we only have
one outline left. Turn it off, turn it off. That looks pretty good. In terms of the animation, what we can do is
on the keyboard, go for 20 frames. I just wanted to out like this. Let's try everything out S E, A and then it might be too big, shrinking down a little bit. Move this one here, let's overlap them a little bit so that each
one can be seen. I just want them to zoom up. I also want them to
zoom up in the center. So I need to manipulate
the anchor point. Set the timeline
indicator at the end. This is the position
that we want at the end. Then at this point, I
want to go to the pen behind to move the anchor
point to the center for each letter that we're going to zoom in from the
center for each letter. So this is what it
looks at the beginning. We can even do it much smaller and this is going
to be our animation. Select all the key frame,
Relic keyframe assistant, easy ease easing like this. Let's see if it works. Let's change this one all the
way, give it more energy. Then for the transparency, let's hit key on the keyboard. I just wanted to disappear
when it zoops up. Almost like this, so it's disappearing when
it's zooming out. And also for now, I want to offset it by two
key frames for each letter. This is going to be
the animation we have. Let's see outside what it
looks like with our animation. Now this is what the
outline looks like. I'm just positioning it behind the animation that
we already have. And you can see the
outline comes out first. Before all these animation, I just want to see
what it looks like if I turn the outline color into this green color instead of the dark blue because I
feel like it's hard to see. Let me just sample
this screen color here and copy the hex code. I'm changing all the blue
outline into the green. I think the green
is easier to see. Yeah, I think it looks
better with the green color. Now, can duplicate this outline. Put it here again. Now here's our final animation. That's it with the
sweat animation. I'll see you in the next video.
17. This Is Art: Welcome back. In this lesson we're going to
animate this phrase. This is art. I just love
this phrase so much. It reminds me that what
we're working on is art. And we're using our art to
contribute to the culture. Culture is shaped by art, so let's use our
creativity to create more amazing arts to
shape our culture. Here we have our text
inside Illustrator file. We'll import this file
inside After Effects. Let's go to After Effects, create a new composition. Name this one to main com 13 50 by 108030
frames per second. For ten second, click on. Okay. Let's import our
Illustrator file. And make sure to
change this one to Composition Retain Layer Sizes. And check this
illustrator sequence. Click on Open. Let's go inside. Now we've got four layers. First, I just want to
animate the first word. Let's name my layer. This is, that Looks good. First of all, before
we do the animation, we need to establish
a couple guidelines. So let's go hit command
R. To open our ruler, I need to pull a ruler to attach it to
the baseline of my word. And then I need to pull
a ruler to attach it to the top so that I know
my original position, the height of my original text. And another thing is when
we animate the bigger word, we need to establish a point where how tall this word
is going to be, right? So I think around, I think the tallest
I'm going to make, each word is going to
be around this tall. I'm just going to snap
my guide over here. This is my position
for the bigger text. Then we also need a position
for a smaller text. In terms of the smaller one, I'm just going to roughly
drag a guide here. And this is going to
be my smaller text, maybe around half of the
height of my original text. So these are all the
guidelines we have. Let's go animate my first word. Hit on the keyboard to pull
up the scale property. Hit the stopwatch
to add a keyframe. We're going to add an
anticipation to this animation. Meaning if this word
is becoming bigger, we need to shrink it
first before it goes big. Go forward, five frames,
everything we're going to animate in a increment
of five frames. The anticipation and overshoot is going to be
five frames apart. And then the actual animation
is going to be 15 frames. Just remember that. Go
forward five frames. 12345, Let's shrink
it down to 115. There's a couple number
that we need to remember. First, this is the
anticipation number 115. Let's go forward
15 frames, 12345. That's 15 frames. We're going to make this all the way big. However, the height
is not tall enough, so I need to unlink
the property here, make this Y scale
bigger like that, and link it back on. This is going to be
our final position. However, I need to
do a overshoot. Let's scope 45 frames again. 12345. This is going to copy
this last keyframe we had, V. This is going to
be my final position. However, for the overshoot, I'm just going to make it
slightly bigger so that it's overshooting before
it settles in position. That's my first
animation. Small, big. And then come back down the
click keyframe assistant. Easy. Go to the graph editor
in terms of the influence, let's try 75% of influence on the anticipation and
overshoot and then we're going to do 90% of influence on the
actual animation. So this bigger graph here
is the actual animation. Also make sure you're editing the speed graph so that's
90 and then we're going to do 75 over here and
then 75 over here. Let's review the animation. Yeah, I like that energy
here. That looks good. Now, since the first word is too big is covering my
other two words, I need to shrink down
the other two words. Let's go add null object, make sure it's at the
bottom right corner of my text and then
it's on the baseline. Go select the last key word,
parent it to the null. Hit on the keyboard for the scale property. I
want to do the same thing. Do an anticipation,
in this case, it's going to
become bigger here, then I'm going to
do an overshoot, become too small, then the final position
would be around here. I need to adjust my
smaller text guideline to make sure it matches
with my final small word. That's going to be
my smaller word. If I go select the
four key frame. Let's go to my easy copy. Plug in, hit the copy and then
paste the easing on here. Let's see the animation. Yeah, that looks pretty
organic, pretty fluid. I like it now. We just need to hold this
scene for five frames, 12345, Add a keyframe on the
scale of the null and the keyframe for the
scale of the first word. That's good, We're
going to hold here. Next thing we're
going to do is we're going to make the
second word bigger. We're going to shrink
this first word back down into its
original position. The way to do that
is we can copy the first four key frames
and then paste down here M V and then click go to the last option
keyframe assistant, and then select time reverse key frame, which
is the last one, I'm not sure if you
can see but it's the last command time
reverse keyframes, we're going to have the
exact same animation. However, it's reversing
the animation we had. The first word is going back
to its original position. Let's do the same thing for the null object
command C and then command V and then go
to red click keyframe, assistant time
reverse keyframes. Basically it's reversing
our key frames. And then, let's
see, the animation. The only problem is
on the second run, I need to have this, my
second word becoming bigger. Let's add a key frame on the scale property
of my second word. Let's do a small, very slight anticipation to one, 15% then we're just going to make it all
the way big, like this. Let's property link here, strike the wide position
scale like this, and then we're going
to link it back on. Let's go backward, make sure it's
overshooting a little bit. And those are the key
frame for my second word. We're going to copy the easing. Copy and then paste
the easing on here. Let's see the animation. Yeah, I think it works. Although I also need to make
these two words smaller. Because now since the
middle word is too big, it's covering the
side word right over here in the final position. I'm just going to make this
one smaller, like this. The issue is we cannot
adjust analogy. Because if we adjust
log over here, it's going to drag my
second word together. In order to do that, we can only animate the
scale property of this third word here from
this original position. Let's also try to give it a
anticipation, maybe to 115, then over here, just
going to shrink it back down to a similar
size to my first word here. And then copy this key frame. Give it a overshoot,
something like that. And then let me copy
the easing again, put it onto this here,
let's see the animation. Yeah, I think that that works. That's good. And then let's go forward five frames
to hold it here. Hold everything for five frames. That's good. The next thing we're going to animate
the third word. Arts, make it bigger. Let's go forward
five frames again. 12345. Just going to
do a anticipation. 15 frames, go all the way big, maybe like this big. And then unlink the property. Change the heights,
link it back on. Go for five frames, copy this last key frame, this is the final state. And then the second, last one, we can do a little
bit of overshoots. Make it bigger, that's good. Now our is too big, so we need to shrink
it back down. In order to shrink
is, first of all, I need to make it smaller, almost the same size
as my first word. In that case, we're going to do a anticipation and then shrink
it back down like this. However, if I do it this way, we're going to have a big gap. If I turn off the art, we're going to have a big
gap between these two words. That's not what I want. The
issue is my anchor point. However, I cannot change my anchor point because
if I change it, the first batch of keyframe is not going
to be working anymore. In this case, what we need
to do is to split the layer. Where I need it over here. I need to split this
layer command shift and then to save all my keyframe that I had in the
previous portion. And then going forward
from this point, I'm going to use a
new layer to control this letter or this word with a new position
of my anchor point. Now I've already split my layer. I can delete these two keyframes because it's on the
original layer, it's not working anymore. Let's go as on the keyboard, let's change the anchor point to the bottom left corner,
may be around here. And then let's do a
overshot. That looks good. And then if I shrink the
size of my second word, you can see now if
I turn off my art, it's actually going
closer to my first word. I don't know what happened
with my baseline. It's not aligning.
Yeah, that should work. The thing is I just
need to make sure that my anchor point is right on top of my baseline so that I
can align the letter better. I need to go to pen pine to make sure it's on
the baseline here. When I'm shrinking
the size down, this do a overshoot. That's good. That's
the animation for the second word coming down. I might need to make this
anchor point to the right a bit more so that there's more space between
the first two words. Yeah, just put it right on the edge of my letter.
That should work. Yeah, that works for me. Let me turn the art back on. However you see the
art is too big. I still need another
null object. Let's go to find a
new null object. Make sure it's starting
from here at this point. And then we are going to move this null
object all the way to the bottom left corner and we're going to
parent the and this to this null object on the
keyboard for the null object. That's animate the
scale property. Let's do a overshoot
of 110. That's good. And then when it
comes back down, I need to drag it all the way, like this, smaller over here. Maybe this. I'm using this new
null object to control both the first word
and the second word. And I'm using the second
word with a new layer, a split layer to
control itself to have itself to be the same
size as my first word. And then the null object is controlling the two words
together to shrink the size. Let me copy my influence. Let's go to the original
layer on the keyboard. Just want to copy the influence. Copy here. And then put
it on this null object. I also want to put it over here. Let's see the animation for now. Let's put it here as well. Let's see the animation.
That's our animation for now. Now we're going to
continue animating, make everything back to
its original states. For the arts was my arts. I just want to hold it
here for five frames. 12345 for everything. Let's hit the key frame. That's good. Then we have
these keyframes here. Don't need this one. Now we can animate everything back
to its normal position. Go forward five frames again. 12345, let's go a
slight overshoot, and then we're going to do
an overshoot for the art. Then 15 frames, 112345, the art is going to
go back a overshoots, then this is going to
be the overshoot, then. This is going to be
the original position. However, I need this to
become one oh nine as well. And then the last one
would become 125. 125. That's the original size
of my arts. That's good. And then this one is going
to be scaling up like this. That's my final position. I'm just going to do an overshoot over
here. Slightly bigger. That's good. Then same thing, we need to copy the influence. Always go back to the original four key frames to
copy the influence. Just copying these, easing
onto these new key frames. I think that works.
And then we can it into set the preview range. Let's see the animation overall. I just need to make sure, this proportionate
scale to put it back. If it's 72, I need to put
it back to 72.6 over here. Change the scale back to 72.6
so that it's proportionate. There you go. That's our
animation for. This is art.
18. Texture & Noise: Next thing we can just add some animated texture
and finish it off. Now I have my texture
layer over here. Let me track my texture down. First I want to apply
it to my first word, go rotate this texture
R on the keyboard, and then rotate it,
maybe put it over here. Let's change the blending
mode to a soft lights. I just wanted to cover
my text layer over here. I will use this text layer
as alpha mat for my texture. Let's go to Track select
layer number seven. Also, I need to
turn this layer on. This is what it looks
like after the texture. And then this is
without the texture. I think it looks
pretty cool with the texture here,
looks fine to me. And then I'm going to
duplicate this texture and put it on top of my art. Then let's go to track Matt. Make sure it's set to this
fourth layer called Arts. Now we have this texture
layer on top of my art text. I can make this texture
smaller, even smaller. Maybe rotate it a bit more. Just give it a good position. Make sure you also turn
this art layer on, otherwise it's hard to see. Let me make it smaller.
Put it over here. Just want to rotate it to a direction,
something like that. And then make it a bit bigger. I can also unlink the scale
property to maybe change, make the texture
longer like this, that the pattern is
more obvious inside. I think I like that one better. Then I'm just going to make it a little bit wider to
cover my whole text here. And then rotate it like this. Maybe change it to eight,
I think that works. Yeah, I like how that looks. Next thing, we also
need to parent this. I'm going to parent the
texture with my art layer. And then the first
texture will be parent to this layer that is moving
with the texture, right. And then I'm going to
duplicate the texture again. D, put it on top of
the, the second word. I'm going to put it on
top of the second word. Make sure the track mat is set to layer eight for this one, and then this one
is set to layer six because we have
two different layers. For the second word, we also need to turn on the
second word for this one, let's change the blending mode to a different blending mode. We can try maybe a hard light, let me try a hard
light over here. Now we can see this becomes a black color instead of
a beige color before. And what if I go to the
opacity and tone it down? Then we can also make
this layer smaller, move it here, change the scale. Just manipulate the texture
so that it looks good. I think this texture
looks pretty good. I like how it looks now. I just want to
make sure this one is parented to layer eight here. And then I'm going
to delete this, duplicate this one, make sure this one is parented
to layer six. Now this is the animation
after we added the texture. I think I like these
textures overall. And then now I just
want to finish up by doing a
couple more things. Adjustment layer as
to a noise effect, let's put it to 10% Now we just need to add
a turbulence display. Change it to 20 the
size, maybe to five. Then let's do a animation
on the evolution. Hit the key frame over here. Hit you on the keyboard. Let's do six round. The last thing we will
do is we're going to drop in another
texture that we had. Let's put it in here
and make it bigger. Let's do some
rotation changes to my texture that some
rotation changes. Select everything, right
click, whole key frame, and then add in an
expression called loopout. Now we're going to
have this texture animated throughout
the entire time. We need to invert this texture. We already talked
about how to animate texture in one of the
other lesson, right? I'm just going to
do it quickly here. We're inverting the color now. And then we're going to
hit on the keyboard, change the opacity down. Now let's change the blending
mode to screen Now this is the final animation with some textures and some
turbulent displace effects. It just makes our
animation overall really stylized
and really grungy. There you go. That's how
we make this animation. Hope you like it. I'll see
you in the next video.
19. Export Gifs: All right, in this video I'm
going to show you how we can export our
animation into a gift. And we can share it online. First, when we talk about gift, most of the gifts are looping, so we need to make
sure our animation is a seamless loop
before we export. I already talked about how to do that in the previous lesson. You can refer back
to that lesson where we talked about how we can make a seamless loop
out of our animation. And the main thing is
that we need to set the preview points with the shortcut on the
keyboard, which is B. And if I want to export this video from
zero second to 1 second, I can just set it 0-1 When my timeline
indicator is at zero. I'll be on the keyboard
as you can see here. And then I'll go to 1 second. Hit N on the keyboard, and this is my preview range. This is going to
be the range that my video is going to
be exported from. We just need to make sure within this range our
animation is looping. In terms of this animation, if I play it, I
think it's looping, although the texture
might not loop. But I don't think
that's a problem. Because the texture is
always changing randomly. It doesn't affect our animation in terms of the point
where it loops, when everything settles down. If I hit in on the keyboard, this is the ending point
where I can make it loop. If I play it, I think that played out just fine with my ending
position around here. So this is going to be the
area where I will export a gift based on your
animation and your video. Just to make sure it doesn't have to start
from zero second, like we talked about in the
looping animation lesson. You can start it in the middle around maybe like 15
frames or even 1 second. As long as you have an area
that's a looping animation, we can start to
export as a gift. With this preview range
set in my timeline, I'll go to composition. Let's go add to Adobe
Media Encoder Q. This is another software
that's from Adobe, and it's mainly for
helping you to export. Now we have the Adobe
Media encoder opened. Let's go select
this dropdown menu. You can see over here,
it's animated gift format. You can also export
it into a H 264, which is a normal video format. Or you can export it as a gift. There's a bunch of
different formats, but in this case, I'm going
to go for animated gift. And there's also a
preset over here. Normally we don't change any of the setting
in the preset. And there's also a
output location. Let's go select
this one over here. I'll just do a Output folder, and then I'll call this one. This is Arts. Let's go click on Safe. Now it's ready to be exploited. I'll just click on
this Play button here. It's rendering our file
into a animated gift. After it says done, let's
go to my folder here, let's go to the output folder. And here we go.
This is our gift. If I make it smaller, you can see it's
looking pretty good. That's how we export
a gift format video. Let's see how big
it is right now. Sometimes when you export it straight out of the
Adobe Media encoder, the gift is going
to be super big. Right now, 100 megabytes,
which is too big. And if that's not the kind
of gift that you want, let's go to Photo. We can open Photoshop and drop
this one inside Photoshop. Let's go to File for Web. I just want to see if we can make this file size
smaller because 100 megabyte is too big
for a gift over here, it's going to turn
on the set for web window and then make
sure it's set to give. We have these
settings that we can control if the size is too big. One thing we can do is we can shrink down the overall
size of our animation. It doesn't have to be this big. If we go for 50% it's going
to render at 675 bit, 540 and it's going to significantly shrink down
the size of our gift. You can see over
here, my Photoshop is calculating now with
50% of original size, the weight of the file has
come down to 16.51 megabytes. I think this is a good size now. However, if you want to
make it even smaller, you can actually change
all these other settings in terms of the color. If you don't have a
lot of color inside your animation, you can try, maybe change the 64
color range into a 32 and see if that
changes anything. Sometimes you have
to balance out the quality of the gift and
the weight of the gift. In this case, once we change the color setting to
32, nothing changes. Everything still looks the same. However, the weight of
the file has decreased. Again, that's a win for me. I can also change over here
all these different settings. You can try each one and see if we can still maintain the same quality while making
the file size smaller. But I think I'm happy with
what I have right now. I can just go click
on Safe and then go export it to
this output folder. Let's call this one. Number two. Let's go to our folder here. This is our new gift, which is 12 megabytes. That's a good size. And then
the size is much smaller. It's half the size
of my original gift. That's a native way of how we can export as a gift format. There's also other plugins like Gift Gone and other
ones that you can download and install
in after effects to save you some time when
you're exporting the gifts. Most of the times I find myself using Photoshop to
optimize it instead of using the plugins
and going back to when we had the export
with Adobe Media encoder. You can also go click
on this ad to render que instead of the
Adobe Media encoder. This way it's going to render everything inside after effects. It's not going to open
another software. The problem with this is if
you're rendering over here, if the render time
is taking too long, you wouldn't be able to work out anything within after effects. There's always trade off if we click on this
high quality here, we don't really have a gift
option within this render. However, most of
the time you can do a H 264 video and then
go click on okay. Let's render this video
into my output folder. Just call this one, This is art P four and click on Render. Now we will get
this MP four video. We can open this video inside Photoshop and then use the
same way that we did just now, go to save for Web. Then we can optimize our gift
within this window again. All right, those are
the two ways where we can export and
optimize our gift. These two ways is going to
give you some degree of control over your quality
and also the file weights. You can test them out and see which way works
better for you. That's it with this lesson. I'll see you in the next video.
20. Congrats!: Grass on finishing this course. Hope you had as
much fun animating these typography as I do. There are so many possibilities
to these animations. You can customize the typefaces to get a complete,
different look and feel. You can even add in
some textures and maybe some grading
colors and some gloves. Just be creative and see
what kind of style you can come up with by combining
some of these techniques. From here, I hope you
can finish a couple of your type animation
projects and upload them to the project section
of this course to share it with your fellow
students and get some feedback. My goal for this
course is to show you the different
techniques that we can use to animate these typography and the possibilities by
switching things up. If you like this course, don't forget to leave me a review. I like to hear your feedback and how this course
has helped you. If you have never used
after effects before. I hope this class is a
game changer and let you see that sulphur itself
is not so hard to learn, and animation is
easily achievable. I hope this class
will inspire you to learn more motion
design in general. We also have a Youtube
channel that we share animation tips and
tricks and techniques. Every week you can follow us at motion circles on
Youtube and Instagram. If you have any question
going through the course, don't hesitate to ask me. I'm here to answer
all your questions and give you guidance
along the way. Thank you so much for
taking the course. I'll see you in the next one.
 Hongshu Guo, Motion Designer