Transcripts
1. Intro - The Amigurumi Masterclass: Have you ever seen these beautiful
crocheted creatures passing on your feed? This three dimensional fiber art comes
from the Japanese term amigurumi, which literally means knitted or
crocheted plush toy, and no one can resist such a cute creation. What if I told you it's
easier to learn than it looks? Would you like to try? Hi, I'm Emilie Bolduc, the French Canadian
who's behind Crochetmilie's brand. Perhaps you met me through my popular
online crochet course for beginners. I had the privilege to share my passion
for crochet to thousands of people. Women, kids, and even some men. And they all discovered
a satisfying hobby. I couldn't wait to put together
a course for you to master the specialty of amigurumi. I've worked hard to think about
all the concepts you will need so that this technique no longer
holds any secrets for you. I have prepared several lessons
that integrates practical projects so that you can effectively learn
to crochet all kinds of amigurumis, whether you're right or left handed. I start by showing you the basics. By the way, if you haven't taken my
beginner's course, you will still be able to follow the instructions. As there will be a dedicated lesson
for those who have never crocheted. I will then explain to you
the particularities when crocheting amigurumis. And we will quickly start practicing
with a project for beginners, the little lion, which will make a pretty keychain. Then you'll be comfortable continuing
with an intermediate project, the flamingo, where you will learn how
to sew different parts together. With the third project, my favorite, you
will learn to personalize your amigurumi, make it into a little character. And the final project, the giraffe,
will make you an expert in the no sew technique, where all the parts
integrate as you crochet it, which allows you to avoid the often unloved
step of sewing the parts together. With each project, you will learn
new techniques in order to make your amigurumi as aesthetic as possible. Plus, I'll show you how to read any
amigurumi designer pattern so you can feel comfortable taking on any project. Are you excited to get started? Join me right away in my amigurumi class!
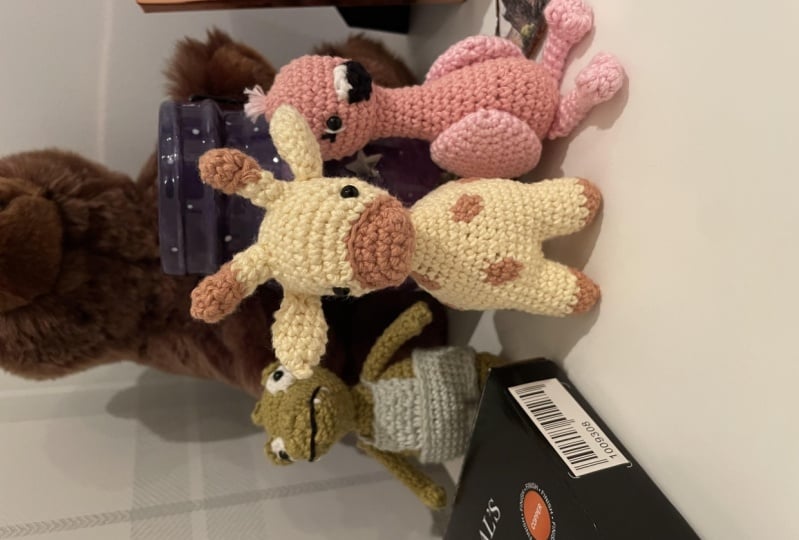
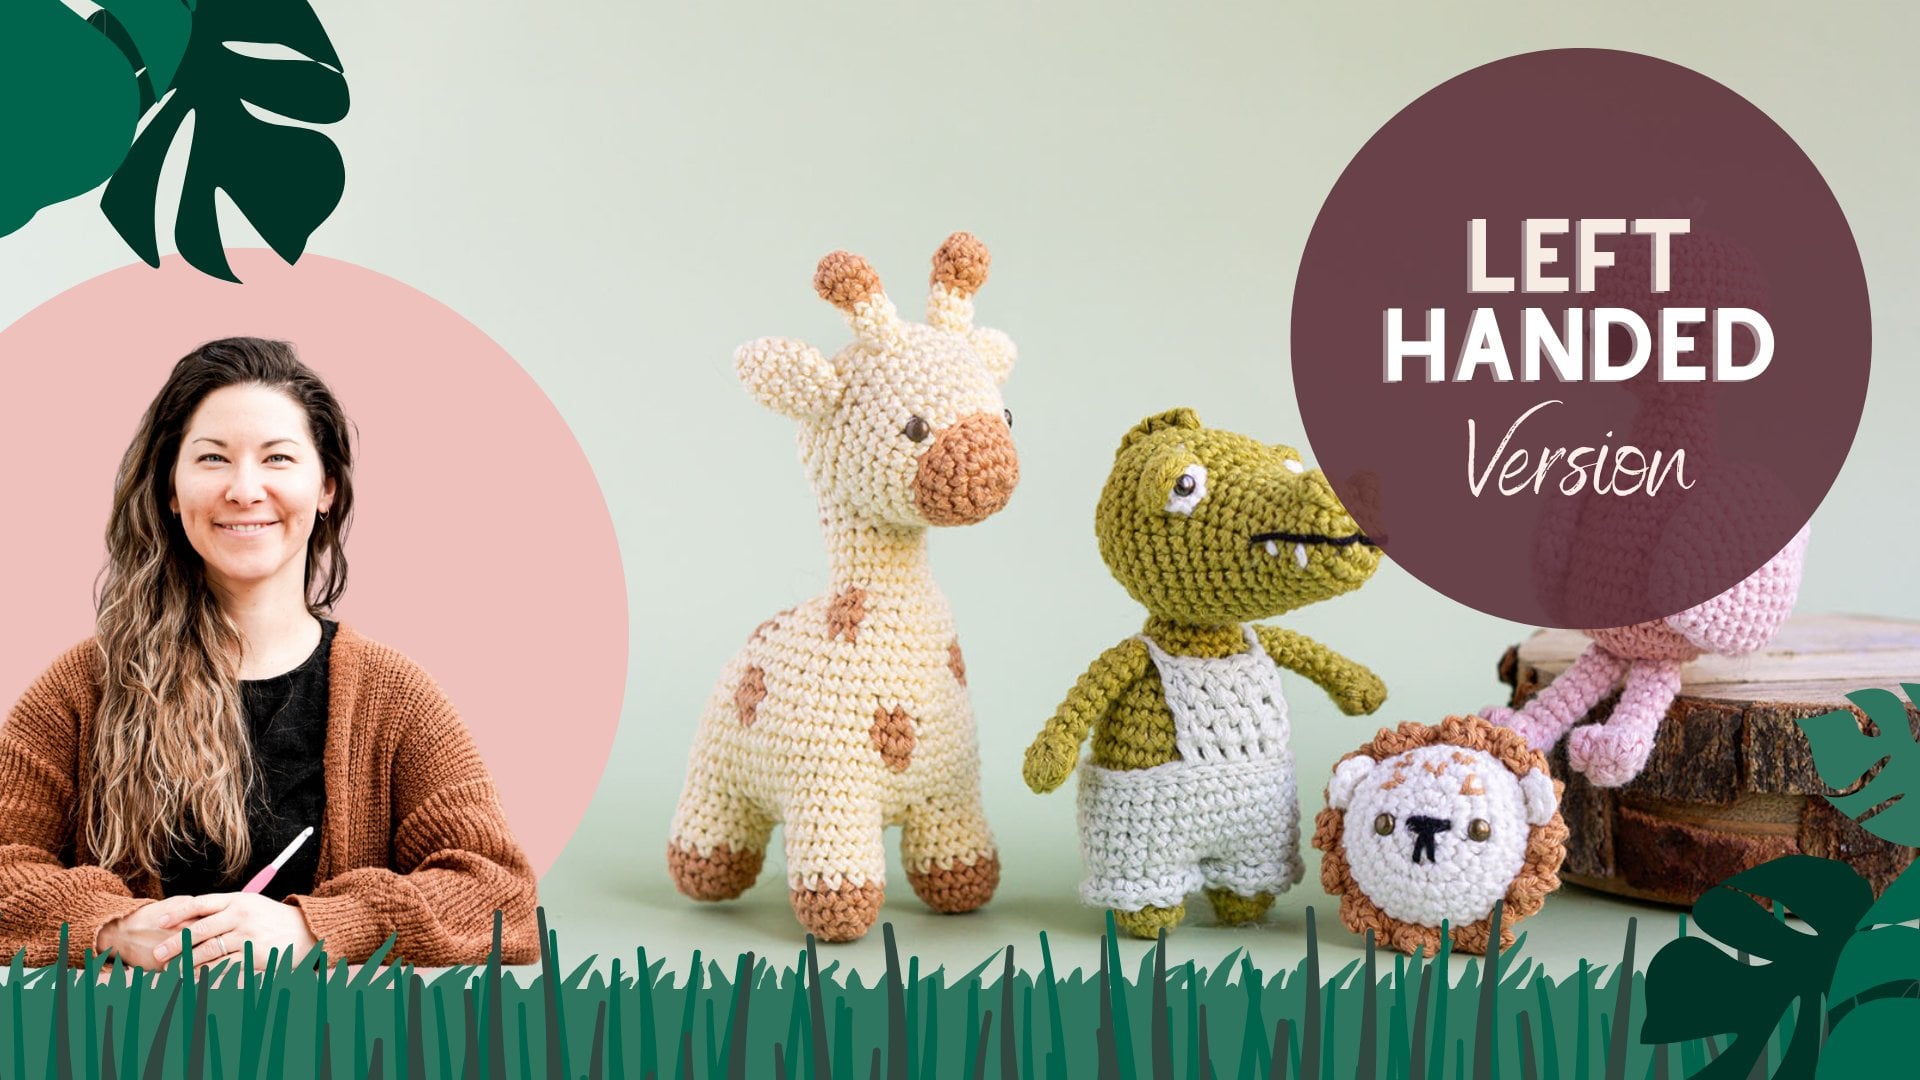
2. Projects Intro: In this masterclass, you'll be able to make
all these four projects. The most beginner
one, the little lion, will give you all the basics
to crochet amigurumis. The Flamingo will add a touch
of more complex techniques. You'll learn how to make a little character with
the shy crocodile. The final project will
show you how to crochet a complete amigurumi in one
piece without sewing anything. You'll be an expert after
these four projects. I can't wait to see
your amigurumis done. Don't forget to share the pictures with
me in the project gallery below. We'll now take a look into the
materials you will need.
3. Materials & Techniques: Let's start with the materials you
will need to crochet amigurumis. First, the types of yarns used
frequently are often sport, dk or worsted weight cotton yarn. The numbers behind the label
corresponding to 3 or 4. You can also work with real wool. The most common yarn, the acrylic one
which is found everywhere and often with a thickness of worsted weight. Finally, the super bulky one called
the chenille yarn, very popular right now for creating soft amigurumis. But I don't recommend this type of yarn
if you're really a beginner because the stitches are a little harder to see. But for those who already
crochet, It's very pleasant to work with this kind of yarn. Here's what each kind
of yarn gives as result. So, on the left, you have
the lion made of cotton. You see that the finish is matte. The stitches are tight, very defined. It really gives a nice texture. We also have wool if you want
a more fibrous, softer texture. About the acrylic one, it's a
little thicker and the texture will depend of the type of yarn you use. And finally, the chenille yarn
makes the same pattern a lot bigger and incredibly soft. Remember that there is no rule. You take the yarn you want which
will make your amigurumi unique. And remember to choose a hook
suitable for the type of yarn you will use to make amigurumis. It is suggested to take a hook a little
bit smaller than normal to avoid holes that are formed between the stitches. So the work must be as tight as possible. For this, I recommend you, with the
sport weight yarn, to use a hook 2.25 to 2.75mm, with worsted weight yarn 2.75 to 3.5, and with super bulky yarn 4.5 to 5.5 mm. I will explain to you in a few
minutes what I will use in my course to create amigurumis. Polyester fill is essential
to be able to give a shape. My favorite brand is Polyfill, which
can be found in all good craft stores. You will also need a yarn needle
for sewing parts together, to weave in ends, and there are two kinds
that exist, one with a straight tip and one with a curved tip. Both do the same job, but it seems that
the one who's curved makes sewing of the different parts of the amigurumis easier. You will obviously need
a pair of scissors. A stitch marker will also be very
useful to know where each round begins. But if you don't have one, you can
always use a thread or hairpin. And some like use pins to secure the parts
of the amigurumis before sewing them. Personally, I have never used
this technique and I'll show you my tips to avoid using them too. The cutest part about
amigurumis is the eyes. There are different ways to do them. You can simply crochet them. You can also use thread to embroider them. And this option is the most
safe for young children. And you can create all kinds
of facial expressions by embroidering with black thread. Personally, I like to use metal studs. They are very small pieces with four
pins that close around the stitch, which makes it almost impossible to tear off. There are also safety eyes,
which we see very often. It gives such a cute result, but
unfortunately, even if the term safe is in its name, they are really not
recommended in creations made for babies or children under 3 years old due to
risk of suffocation if they come out. Another aspect of safety eyes is
that you have to put them on before finishing your project because you
have to absolutely secure it inside. So you have to be sure of their
positioning before completing the project. Personally, it creates for
me a bit of stress, so I like much better the other options. One last way to personalize
the character's face is to use felt and hot glue. You cut any shape in the color
of your choice and you just glue them onto your amigurumi. It could be the eyes, the
mouth, or certain decorations. After having spoken to you about
all the kinds of materials you need to make amigurumis, here is now the
materials I will use for my class. To complete the four projects of
the course, you will need a 2.75 mm crochet hook. I use the Clover Amour brand
that you can get in my store. I will also use cotton thread from
Ricorumi brand in these colors. White, light pink, dark pink, yellow. Caramel, green, and mint. The exact name of the colors
of the RicoRumi brand will be indicated in my pattern available
to download in the course documents. You will also need black cotton yarn
or embroidery thread, a stitch marker, a yarn needle, polyester stuffing, 8
metal studs of 5 mm diameter in copper and black metal colors, And they are
totally optional if you want to use safety eyes or simply embroider the eyes. And finally, if you want to
transform the first project into keychain, you will need one. If you are interested in an all inclusive
option, I offer this box, which contains everything you will need to accomplish
the four projects of my Amigurumi course. The link to get it is in the
description below this video. And here's the material if you
decide to go with the chenille yarn. The major difference is that it
will be a 5mm hook instead of the 2.75. You will not need metal studs,
you will simply embroider the eyes with the black thread. All details regarding the brand and colors
of this yarn is written in the pattern. And that will give you four
beautiful and soft amigurumis. Now let's see the specific
techniques of amigurumis. For those who have never crocheted,
you can move on to the next lesson, where I will show you the basics
to be able to crochet in the round, to be able to start a project. You can come back here afterwards. For others, you know that the
basis of amigurumis is to do single crochet stitches in the round to
make a three dimensional shape. You could see in my Crochet Course for
Beginners that we need mathematics, The goal is to proportionally
increase using math tables that we learned in primary school. As a general rule, amigurumis often
start with 6 single crochet in the circle that we multiply at each next round. So I put the table here for
you, you can refer to it later. I gave you an example when we
start with 6 single crochet in the round and when we start with 5. The formula is the same. It is to increase by the same
number of stitches in each round. So, round 2, we would increase by 6
stitches, which will give you 12 in total. We would make an increase, meaning
2 single crochet in same stitch, in each of the previous round 1 stitches. At round 3, we would
increase every other time. The pattern would read as follows. So, two single crochet in the next
stitch, an increase, followed by a single crochet in the next stitch. And we would repeat this formula
six times for a total of 18 single crochet in round three. In the next round, there will be two
single crochet between the increases. So you would make an increase, followed
by two single crochet stitches. And you will repeat this pattern all
around so that it gives you a total of 24 single crochet in round 4. And we will continue this way
until the desired diameter. And then we will continue with
simple rounds to stop the increasing. The first project will show you
how to form a beautiful sphere by crocheting a cute little lion. A little point that I want to share
with you is that in some patterns, The increase will not be written at the
start of the round, but at the end. Note that this is totally the same,
it's only a question of preference. If you make a large size amigurumi, when
we always increase at the same place It will tend to create a geometric shape,
in hexagon or pentagon, depending of the number of stitches in round one. So, I discovered this tip a few years
ago, that by moving increases on even rounds, we really get a perfect round
shape, and I wanted to share it with you. This is completely optional because
it needs a little more concentration, but since I wanted my course as
complete as possible, I hope that you will appreciate to know this formula. It will generally not be
written in the patterns. It's up to you to see if
you want to apply it or not. It will only make your amigurumi
a little more aesthetic. I will review the
formula with you quickly. Basically, when there is an even number
between two increases, for example in round 4, there are two single
crochets between the two increases. You calculate 2 divided by 2 equals 1. So you will start by making one single
crochet followed by the general rule. So, one increase, two single crochet,
one increase, two single crochet. And at the end, after your last increase,
you will do the missing single crochet. The increases will have
been shifted by one stitch. The round after, the fifth one, you
do as usual, an increase followed by three single crochet all around. Round six, you will have four
stitches between each increase. So, four divided by two equals two. You would start by making two single
crochet, followed by the increase. Four single crochet, increase, four single
crochet, and after the last increase, you will have two single crochet to do. So once again, it will be shifted,
which will make the perfect circle. I hope your brain is not going to explode. I'm going to put all these tables in
the documents to download, in order to come back to it when you need it. Have you noticed that the shape of
the single crochet in amigurumi is a little different from the normal
single crochet that you learned? There is a way to take the yarn
which makes the stitch tighter and gives the effect of a square pixel. So instead to appear in the shape of a V,
the single crochet will appear in X shape. You will learn this technique
in the first project. But know that the choice between the two
techniques won't make a big difference in the general appearance of your amigurumi. A thing also to watch out for is to
be careful not to crochet backwards. Remember that you must always crochet
from the outside to the inside. So I'll give you a little
point of reference. I gave you the picture here. That's the back side, the
wrong side of the project. You see horizontal strands
as well as inverted Vs. You're not supposed to see
that on the right side. Your project should rather look like this. You are now ready to begin the
project that I have prepared for you. You will learn to change colors in a
more subtle way, how to make invisible decreases, how to close the end more
aesthetically, and many other things. In addition, I made sure that in
each project, the pattern is written differently so that you can be
comfortable understanding all the patterns you will find in books or in
the internet of any crochet designer. And for crocheters who are left
handed, watch for this rounded spot that will be at the top right
of each video to have access to this version I made just for you. Are you ready? Now let's start with the little lion!
4. The Basics - How To Crochet In The Round: This video is specially made for
those who have never crocheted before, so you will learn the basics. How to hold the yarn, the hook, how to
make the basic stitch, and how to crochet in the round with the yarn and hook you
have chosen thanks to the previous video. You will start with a slip knot. I'll show you how to do it. It's like a normal knot,
except you don't finish it. So, you pass the thread through
the loop, but you hold both strands together to form the slipknot. I'm going to start again. You make a loop, you pass the thread
inside, but you don't take it out of the loop, and you pull on the
two threads to form the slipknot. You can insert the hook into the
loop and tighten the knot around the hook, not too much, so that
the hook can slide inside the loop. Your other hand will hold the yarn
to help you maintain good tension. I'll show you how to place it. Pass the yarn around your little finger,
up to your index, and with your middle finger and your thumb, you will come
and pinch or hold the knot that you have done, which will become your project. And your index finger stays in the
air to keep tension in the thread. I'll show you again, so you turn around
your little finger to your index and your middle finger, your thumb, hold
the knot, the project you are going to do, and your index finger is in the air. There are two ways to hold the hook,
there is the pencil way or the knife way. It's up to you to decide which one is
the most comfortable for crocheting. We will now form the starting
chain made up of chain stitch. I'm showing you now how
to make your first chain. The hook facing you, you'll go
under the yarn and do a yarn over. You roll up the thread around
the hook by twisting your hook downwards so that it can pass into
the loop that is on your hook. And coming out of the loop, return your
hook upwards to not lose your thread. Let's make another chain, so the
hook facing you, yarn over, twist your hook down, pass it through
the loop that is on your hook, this way, and twist the hook upwards. So you have two chains done. Don't forget the positioning of each
finger, the index remains in the air, thumb and middle finger hold your project. That is so far the starting chain. You will now learn how
to make a single crochet. It's the basic stitch of all amigurumis. The index finger of your dominant hand
holding the loop that is on your hook, you will enter in the second chain
from your hook, the first one you made. So you enter the hook
right here, in this loop. Use your thumb and your middle finger
to help you insert the hook into it. And you're going to yarn over by
taking the thread from behind, like this, and you're going to pull this
thread through the chain, like this. Flip the hook up with your index
finger of your dominant hand, hold the two loops created. Replace your fingers to have good
tension and make another yarn over that you will through the
two loops that are on your hook. You have formed a single
crochet, the basic stitch. To make a circle, we will insert
six single crochet into the same space, in the same chain where
we made our first single crochet. So you see the little hole here? You are going to insert your hook inside. You are going to do a yarn over, pull
it through the chain, We are done. Make another yarn over and pass it
through both loops that are on your hook. Your second single crochet is done. You see that it forms little braids. Now let's do our third single crochet. You enter the hook in the
same space, in the same chain. Yarn over, go through the chain. Yarn over. Pull through both loops on the hook. And we continue with the fourth one. Always in the same space. You see that it gets a little
bigger, a little bit easier to see. You make your single crochet. You notice that my index of the
opposite hand is always outstretched to maintain good tension and my thumb
and middle finger guide me through the project by holding it tight. So here is the sixth single crochet. We will count them together right after. So you see all the small braids formed. Each of them are single crochet. So this one is the one we just did. The fifth, fourth, third, second. And our first is right here. You can pull the beginning
thread to tighten the circle. We're going to count them again together. So that makes us one, two. 1, 2, 3, 4, 5, and 6. This one being our first single crochet. You will insert the hook in the two
loops formed by this single crochet, the small braid that it forms. And it's normal to have a little
difficulty getting into the stitch because we are at the beginning. Gradually, as the project progresses,
it's going to get really easier. You're going to have more space. So you do a yarn over, as usual. You pull through the stitch. You hold both loops on your hook. You replace your fingers and you
do another yarn over that you pull through two loops on your hook. You have just made the first
single crochet of round two. In this round, we're going to
start expanding our circle. So to do this, you will make
two single crochet in each stitch of the previous round. So in the same stitch where you
made your first single crochet, You are going to make a second one. So, two single crochet in one
stitch will give you an increase. So, you enter in the same stitch,
yarn over, pull through the stitch. Yarn over, pull through
two loops on your hook. Don't worry if you're not able to see
that you made two stitches in one. It will come with practice. So far, good reference points are
the braids formed by each stitch. Now go get your stitch marker. It will be very useful to
know where each round begins. Place it in the first single
crochet of round 2, so it is not the one which is right next to the
hook, but the other immediately after, since that we made 2 so far. Hang it there. And we will continue our round 2. So in the next stitch, in the next little
braid you see, you enter into both loops, yarn over, Pull it through the stitch, yarn over, pull it through
two loops on your hook. Your single crochet is done. And you will enter in the same
stitch to make a second one. And you will repeat this
pattern all around until you arrive at your stitch marker. So if we do a little calculation, you
make two single crochet in each stitch. You had six at round one. Six times two equals twelve. You should therefore have
twelve stitches in round two. Twelve little braids. We have now reached the last stitch
of round one, where we will make two single crochet and increase. So you have made six increases in
round two, and we will count the twelve single crochet together. This is one, two, three,
4, 5, 6, 7, 8, 9, 10, 11, and 12 where is your stitch marker. We will now continue with round 3 where
we will increase every other time. Start by making 2 single crochet
in the next stitch, which is the first from round 2. You can make another one in the same,
so, You just did an increase. You will replace your stitch marker on
the first that you made, right here. And in the next stitch, you will
make only one single crochet. In next one, you can do an increase,
so two single crochet in this stitch. Only one single crochet in next one. And you continue this pattern all around. 2 single crochet, 1 single crochet. You will just need a
little more concentration. So we proceed this way. It's progressive and proportional
increases all around to create a beautiful sphere. At this moment, we add
6 stitches in round 3. And if you do calculations,
12 plus 6 Equal 18. So you will have 18
single crochet in round 3. And I'm convinced that you
already find it easier. You have more space to
make your single crochet. And your round 3 is finished. You should count 18
single crochet in total. And what you see, this is
the right side of your work. Here is the back side. You must always work in a manner to see
the right side, to always crochet from outside towards the inside of the project. Now that you know the basics to crochet
in the round, you can go back to previous video for more explanations
at 6 minutes 40 seconds of that video.
5. The Lion - Materials & Techniques: Welcome to the first
project of the course. This little lion that looks all simple
will show you a full of specific tips and techniques for amigurumis and its
small size will make an ideal keychain. You will put into practice
the perfect circle method. You will also learn the technique
for making single crochet stitches in the shape of an X. I'll show you how to make
decreases that are invisible. How to change color a more subtle way. How to sew an embroider additions. How to add a row on the main
part that will form the mane. How to close the end
the most aesthetic way. And you will learn how to hang a keychain. You will need a 2. 75 mm crochet hook if
you use DK cotton yarn. Otherwise, if you use a thicker yarn, the
chenille one, you can take a 5mm hook. Next, you're going to need
caramel and white cotton yarn, also black yarn for embroidery. You will need a yarn needle, a
stitch marker, polyester stuffing, two 5mm metal studs that you can
replace with safety eyes, or simply the black yarn for embroidery. And finally, if you want to transform
it as a keychain, you will need one. If you chose to crochet with chenille
yarn, know that I made a complete tutorial which is in the bonus video section. Instructions remain the same. Only you will be able to see
how to work with this yarn. And why not crochet both? Which will make a
beautiful father son duo. Let's get to work right away and
start crocheting the little lion!
6. The Lion - Rnd 1 to 5: We will start with the white yarn. Maybe you learned how to start
with a slip knot followed by two chains for crocheting a circle. This technique is excellent if you
want to use it, but I'll show you another way, a little more ideal. The magic ring, or magic circle,
that you maybe have learned in my crochet course for beginners. So I'll show you how to do it here. You're going to roll the
yarn twice around your hook. You hold the loops well with your
index, your other hand holding the yarn as usual to have good tension,
and come and pinch the circle it gives. And with your hook, you pull the thread
through the circle, and you make a chain. So we're going to crochet
Rnd 1 in this circle. I'm going to start again. Two turns around your hook. You hold the two loops, you place
the yarn on your other hand, you pinch the two loops formed,
and with your hook, yarn over or under, and pull through the circle. And you make a chain to
secure everything well. So we're going to do our
single crochet in this ring. You see, there is much more space. It's easier to work inside. So let's start with the first single
crochet and I will show you the technique to make a single crochet with an X shape. So usually, you yarn over. You take the yarn from behind. But to make the shape of an X, you will
have to yarn under the hook, this way. So it's a small additional movement,
but it gives a more defined result. The second yarn over. You can do it the usual way. It won't matter. It's really the first one
that makes the difference. Let's go with the second one. So instead of doing a yarn over
from the back, you go over so that the yarn ends up under the hook. You bring the yarn through the ring. Your second yarn over will
be made the usual way. And you pull it through the two loops. You can now place your stitch marker
on the first single crochet you made. If you like better doing single
crochet in the usual way, which is V shaped, go ahead, the result
will be essentially the same. But since it's a course specially
designed for amigurumis, I'm going to work with single crochet with the X shape. Yarn under, instead of yarn over the hook. So continue making single crochet
in the magic ring to have a total of 6 single crochet in round 1. If you loose your thread like me,
you can just pull the loop or pull the thread to start again. At the end, you can count if
you have 6 single crochet done. You can pull on the beginning
thread to tighten your magic ring. And we will continue with round 2. Remove your stitch marker and
you will enter in the first single crochet made in round 1. This one. Enter in both loops, like that,
in the little braid, and you can make a single crochet. And do not forget, if you chose to do
the single crochet with the X shape, stay with it all through the project. And if you chose the
traditional way, do the same. Replace your stitch marker on the
single crochet that you just made, and you are going to make another
single crochet in the same stitch, which will give you an increase. And continue by making 2 single
crochet in each of next stitches. You will have a total of 12
single crochet in round 2. The last stitch will be the one
just before the stitch marker. You make 2 single crochet inside
that stitch and count carefully if you have 12 single crochet. We will now continue with round 3. In this round, we will
increase every other time. So, you are going to make 2
single crochet in the next stitch. Place your stitch marker on the first
one and continue by doing just 1 single crochet in the next stitch. And you continue this pattern all around. 2 single crochet in next stitch,
followed by 1 single crochet in next one. 6 times in total, for a result
of 18 stitches in round 3. At the top of the screen, I
wrote you the pattern, the instructions to follow for round 3. You should end up with 1 single crochet
in the last stitch of the round. You can now count if you
have 18 single crochet made. In round four, we will still do
proportional increases, but this time, given that we are in a class
where I want to show you as many things as possible, we'll try
together the perfect circle technique. So we will shift our increases so that
they will not be always at the same place. It's not a variation that I'm going to
write in my patterns, we're just going to do it together here in this tutorial. Instead of starting with an
increase, we will start with one single crochet in next stitch. Place your stitch marker on that one. We will then proceed to our increase. Two single crochet in next stitch. So, you see that we have shifted
our increase of one stitch. You will then continue as
indicated in the pattern. You will make a single
crochet in next 2 stitches. What we did was to took these 2 single
crochet between the increases, we divided in 2, and we put 1 at the
beginning and 1 at the end of round 4. Each increase will still be separated
by 2 single crochet stitches. So keep it up, 2 single crochet
in next stitch, 1 single crochet in the next 2 stitches. All around, and after the last
increase, you will only have one single crochet to make in the last stitch. After you have done your last
single crochet, count if you have 24 single crochet made in round 4. Round 5 will be the last round
where we are going to increase. And given that the number of single
crochet between each increase is odd, we will follow the pattern as indicated. We will start by making 2 single
crochet in the next stitch, an increase. Place your stitch marker on
the first single crochet made. And you will make a single
crochet in the next 3 stitches. And you repeat this pattern all around. 2 single crochet in next, 1
single crochet in next 3 stitches. An increase, followed
by 3 single crochet. You will have a total of 30
single crochet in round 5. The project should look like this and
we will count the rounds together. So you have your little circle here. That's round 1. Then you have round 2, round
3, round 4, and round 5. And to know where each round
begins, it makes a sort of spiral you have round 1, round 2 which
starts here, round 3, round 4 and round 5. So if you don't have a stitch marker,
you can always refer to this little tutorial to know where each round begins. We will now continue with
round 6 in the next video.
7. The Lion - Rnd 6 to 14: Round 6 and 7 will be single rounds
so you will make a single crochet in each of the next stitches for a total
of 30 single crochet in each round. At the end of round 7 we will
change color so just stop before making the last single crochet. At the end of round 6, you will see that
the project tends to go on the wrong side, so just unroll it to always crochet
from the outside, which is the right side, towards the inside of your project. Now continue with round 7. You make 30 single crochet and
get back just before making the last single crochet of this round. At the last single crochet of round 7,
get the caramel colored yarn close to you. Start your single crochet as
usual and during the second yarn over, join the caramel yarn
and pull it through both loops. Your color change is already done. We will now continue with round 8. In this round, We are going to work in
the back loop only of each next stitch. So this little loop here. And something I like to do for a more
subtle color change is to replace the first single crochet with a slip stitch. It's very simple. You yarn over, you pull it
through the stitch and through the loop that is on your hook. And you continue by making
single crochet as usual in the back loop of each next stitch. And the last stitch will be
made in this back loop, here. We will now continue with round 9 and 10. Before continuing with round 9,
you can cut the white yarn and secure the two strands at the color
junction by making a double knot. For the next two rounds, you will
make simple rounds, so a single crochet in each of next 30 stitches. Once round 10 is completed, your little
lion should look like this right now. We will count together
the number of rounds. 1, 2, 3, 4, 5, 6, 7, 8, 9 and 10. For those who chose to put safety eyes,
now is the time to put them between round 3 and 4 on each side of the face. For the others, we will
add the eyes at the end. Round 11 we will start to close our
project to make the circle smaller. For this you have to make decreases and
I'll show you how to do them invisibly. You will enter into the front loop
of the next two stitches, like this. You're going to yarn under, as
usual, you pull through the two front loops, yarn over, pull
through the two loops on your hook. So you see that we have
transformed two stitches into one. You can place your stitch marker
on it and continue making a single crochet in the next three stitches. In the pattern, the decrease
will be writted like this. SC2TOG, which means
single crochet two together. But I will use another way to write
the decrease in the next pattern. We'll do now our second decrease. You will enter into front
loop of next two stitches, followed by a single crochet
in the next three stitches. So you repeat this pattern all around. A decrease, 3 single crochet. 6 times in total. And you should have 24
single crochet in round 11. We will continue to make decreases and
I'll continue to work with the perfect circle method to show you this technique. So we're going to shift them
so that they will not be at the same place as the previous round. But you can follow the pattern
shown at the top of the screen if you want to do the usual method. You will start by making a single
crochet in the next stitch. Place your stitch marker back on this one. And you're going to go with your first
decrease, always taking the front loop of the next 2 stitches You will then make a single
crochet in the next two stitches. And repeat all around. A decrease followed by two single crochet. And if, like me, you follow the
perfect circle method, after your last decrease, you will only
have one single crochet to do. And you'll have a total of 18
single crochet in round 12. Round 13, you will
decrease every other time. So you can start with 1, followed by a single
crochet in the next stitch. Repeat all around a decrease,
a single crochet, for a total of 12 stitches in this round. You are now in the last round. It's going to be very simple. You will make a single crochet
in each of the next 12 stitches. In my beginner crochet class, you learned
to do the last round with only decreases. So here I show you another method
and you can choose which one of the two you like the most. At the end, you will pull on
the thread and remove your hook. You can cut the thread leaving
a good length and pull it into the loop to secure it. We will now stuff the interior. And a little tip for help you stuff
it well is that you can separate the stuffing so that it helps bring it inside. Also, you can use the end of your
hook to really go into every corner. It's important not to stuff
too much so that it doesn't make holes between stitches. Go gradually, little piece by
little piece, until you have a beautiful formed sphere. It is convenient to finish the
last round with 12 single crochet. This way, we have all the space
necessary to stuff it well. In the end, it should look like this. You see the sphere has a good round shape. There is not too much
or not enough stuffing. You will now grab your yarn needle
and insert the ending thread inside. We will now close the end. You will enter into the first stitch, next
to the knot from the outside like this, and you'll come out through the next stitch
and you continue like that all around from outside to inside and inside to outside. You can also go this way by passing
your needle between the two stitches. You can start pulling to close the circle
and finish entering into the last stitch. Pull the thread well and tuck
in your needle in the middle of the round to close it securely. This is what it should look like. So you have finished the
main part of the little lion. In the following video, we will continue
with the mane, the ears and the finish.
8. The Lion - Finishing: We're now going to crochet The mane of the lion. Do you remember we left the loop available
when we have crocheted the round eight. It's right here. So you enter your hook in one of the loop. You can take the one from first
stitch, but it doesn't matter which thread you start on, it'll
give exactly the same result. But your hook must point
to the color section. Take your caramel yarn and join it in one
of the loop like this and make a chain. In the same loop, you are going to make
a single crochet in the usual way, with the yarn over, followed by two chains. And another single
crochet in the same loop. Let's move on to the next loop. You repeat the same thing. One single crochet, chain two, and
a single crochet in the same loop. And you repeat that all around. That will form the mane. In the pattern, you see in
parenthesis all the stitches that must be made in the same loop. If you are too used to make your
single crochet with the X shape, it really doesn't matter if you do them
at this level, but it's really easier with the usual method because it's
more natural to yarn over the hook. Keep it going all around. See you at the end. After working in the last loop,
you're going to slip stitch in the first starting loop. Go into it, yarn over, pull through
the stitch and the loop on your hook. So, that's it for the mane. You can pull the thread, remove the
hook, cut leaving a good length, and pass the ending thread
into the loop to secure it. We will now embroider the face. Cut a black strand of
about 50 cm in length. Enter it into your yarn needle and we
will start by embroidering the muzzle. You will pass through round 1 and
turn around 3 times like this. In the third round, bring out
your needle between round 2 and 3 and a little diagonally. You enter in the middle of round one,
and you come out right next to it to create a small mouth pointing downwards. If you would like to embroider the
eyes, I show you now how to do it. So you bring out the strand between
round three and four, and you create a little line like that
on each side to form the eyes. For those who are going to put the metal
studs or have put their safety eyes, you can join the two black strands together
to be able to secure and hide them. I'll show you how to do it. You will make a double knot with these. You will then enter them into your
yarn needle and pass inside the lion. Cut off the excess threads. And that's all. I show you now how to install the
studs, which will serve as eyes. You see, there are four
spikes, four points. You will encompass a stitch of the
round three on each side of the muzzle. With the other end of your
needle, you will come and fold these points around the stitch. So it takes a little bit of dexterity, but
I'm sure that you're going to get there. And at the end, you check it
out that the stud is very solid. We will now place the second one. With the colored threads which are
hanging around, you will be able to use one to embroider the little
V's on the top of the lion's head. There will be two rows. In the bottom row, in round
four, there will be three V's. And in round five, two. You can follow on the screen
to know where to place them. And there you have it, we've
almost finished the little lion. We are now going to make the ears. With white color, you will start
with a magic ring, or chain 2, according to your choice. After making the magic ring, chain 1. And you're going to do 4 single crochet
in the round, followed by a slip stitch. And the last stitch will be a slip stitch. You can tighten the circle, remove your
hook, cut the thread, and secure it, and I'll show you a different way of doing it. You can only pull the thread
from the end to finish your knot. You can repeat the same
thing to make the second ear. Then we'll sew them to the little lion. We are going to sew the ears so
that the right side is facing. So here is the right side. You can see the little braid clearly. But frankly, even if you have the wrong
side facing you, it won't appear at all. So enter the beginning thread in
your yarn needle, the thread that is located in the middle of the ear. We are going to insert
our needle about here. In the round just before the
mane, at about 2 o'clock, if our lion would be a clock. So, enter the thread, and
do it come out anywhere. You will then sew the ear with
the ending thread, that you can enter into your needle. And you will start sewing
in the stitch right next to where you entered, like that. Come out in the stitch where you have
put your beginning thread, pass it in the middle of the ear, any strand. That's what I love about crochet. Doesn't need to be exactly perfect
work, as long as it is very solid. Go back into the same place in the
lion's head and pass through the stitch, which is right next to it. You can go in a stitch from
the end of the ear and enter it into the little lion to go out. Go look for the other end
of the ear in a stitch. And finish by joining
your thread to the other. We will be able to secure and
hide them in the little lion. You now know how to sew a
part between two rounds. To secure and hide the threads,
you can make double knots. And you're going to bring them
in with your yarn needle inside the head and cut off the excess. That's all. You can now sew the second ear. And there you have
finished your little lion. You can either secure and
hide every other thread The way I showed you, but if you want
to add a keychain, keep one available. I'll now show you how
to attach a keychain. So, with one of the caramel colored
thread available, you will pass it into your needle, bring it out above the
head, between the junction of colors, and you'll be able to pass the thread
through a small chain of the keychain. If your needle can't pass
inside, try with your fingers. Otherwise, if you have a pass
wire, that might work too. So you can put your needle in
the same place as the thread and pass a second time in the ring. I will show you that it works to pass the
thread with the fingers into the ring. So put the thread back in your
needle and you can once again insert it through the lion's head. The important thing is
that it is very solid. And given that you still have
only a thread, you can't tie double knots and tuck them in. Personally, I like to
go around two stitches. I go back and forth like that and
you enter in the middle of these two stitches to secure the thread. And you can cut off the excess. And there you have it, you
have finished your little lion. Well done! You are now ready to move on to the
next project, the little flamingo, where you'll learn new techniques.
9. The Flamingo - Materials & Techniques: You have now discovered
the basis of an amigurumi. Let's explore a little more with
the second project, the flamingo. By the way, even if the following projects
are not classified in the beginner checkbox, it is only because they ask a
little more dexterity and concentration. But in the end, it always
comes back to the same thing, a series of single crochet. So even if you are completely beginner,
it is certain that you will be able to succeed all upcoming projects. So we will now learn how
to crochet in oval. Sew parts together in
three different ways. We will learn to make stitch and relief
that I call the bobble stitch, which will form the fins of the flamingo. We will also learn to crochet
in round with a small number of stitches, which will form a tube. We will know how to simulate hair
or feathers on the top of the head. And finally, you will learn how to
embroider eyes so they look super cute. You will need a 2.75 millimeter hook. If you use the DK or Sport cotton
yarn, otherwise 5mm for chenille yarn. You will need dark pink color, light
pink, a little bit of white and black, a yarn needle, scissors, a
stitch marker, polyester stuffing, and two metal studs of 5mm diameter, as
you can replace with safety eyes or black thread to embroider the eyes. Let's now start the little flamingo!
10. The Flamingo - The Body (1): With dark pink color, let's start right
away with the body of the little flamingo. So you will start by making a
magic ring, followed by a chain. And you'll make 6 single
crochet in this circle. And as for the first tutorial, you
can choose to make your yarn over your hook or under it, as I'm doing now,
which will give you either a single crochet with a V shape or an X shape. You can pull the thread to
tighten the circle and count if you have 6 single crochet done. You can count on starting from the last,
which is more easy to find the first one. So, 1, 2, 3, 4, 5, 6. The first is this one. You'll make a single crochet inside. And another one because
we're going to increase. You can place your stitch marker on
the first single crochet you made. And we continue the round 2. You will make increases in each
of next round 1's single crochet. So, 2 single crochet in each, which will
give you a total of 12 single crochet. You will notice that I write at the top
left the round in a very simplified way. You will often see this
writing in amigurumi patterns. This way, you will be comfortable
undertaking any pattern. But in mine, I use a more detailed
description for avoiding any ambiguity. At the end, you can count if you
have 12 single crochet in round 2. Now let's move on to round 3. Now we will only increase
every other time. You will make 2 single crochet,
1 increase, in the next stitch. Place your stitch marker
on the first one you made. And you will make a single
crochet in the next stitch. And you repeat this pattern all around. So, 1 increase, 1 single crochet,
2 single crochet in next stitch, 1 single crochet in the next one. So, in the end, count carefully if you
have 18 single crochet made in round 3. For the next increase in round 4,
you remember I told you about the perfect circle with shifted
increases from one round to another. So, instead of always increasing
in the first stitch, we will make a single crochet before, and then
we're going to do the increase. But in the patterns, it won't be
indicated to make this shift there. So it's according to your
taste to do it or not. So two single crochet in the next
stitch and you'll make one single crochet in the next two stitches. An increase in the next stitch followed by
a single crochet in the next two stitches. Continue all around and at the end
you will only have one single crochet to do after the last increase. So here is the last increase
and we finish it with a single crochet in the last stitch. You should have 24 single
crochet in total in round four. Round five, this is our
last round with increases. So you're going to make two
single crochet in the next stitch. You can replace your stitch
marker on the first one. And you will do a single
crochet in the next 3 stitches. And you repeat all around,
increase, 3 single crochet, 1 increase, 3 single crochet, for a
total of 30 stitches in the round. At the end, you will see that the
project tends to roll on the wrong side. So just unroll it, so you crochet
from the outside to the inside. For round 6, you are going to do 1
single crochet in each next stitches. And you will repeat this
round 5 times, up to round 10. I'll see you in the next
video, where I will show you how to count well each round.
11. The Flamingo - The Body (2): You have now completed your 10 rounds. We will count them together. You have the first one here. Where is the small circle The second, the third, four, five,
six, seven, eight, nine, and ten. We will now continue with round 11
where we are going to start decreasing. We are going to make a
first invisible decrease. by entering into the front loop
only of the next two stitches. Yarn under, pass through both loops. Yarn over, pass through
two loops on the hook. Place your stitch marker on this
stitch and you will make one single crochet in the next three stitches. An invisible decrease in next
two front loops and one single crochet in next three stitches. Continue this pattern all around
for a total of 24 single crochet. For round 12, we will make a simple round,
so you will make a single crochet in each of next stitches, for a total of 24. Round 13, we will decrease again, but we
will shift it so that the decrease isn't at the same place as the previous one. So you're going to make a single
crochet in the next stitch. Put your stitch marker and
you're going to make a decrease. Followed by a single crochet
in the next two stitches. And you're going to continue all
around, decrease, two single crochet. And don't forget that after
the last decrease there will be only one single crochet to make. So after the last decrease,
you will make a single crochet in the last stitch, just here. And you will have a total of 18
single crochet in this round. Round 14, you are going to do a
simple round, so 18 single crochet. For round 15, we will do a
decrease every other time. So you make an invisible decrease,
followed by a single crochet. For a total of 12 single
crochet in round 15. Round 16 to 20 will be all simple rounds. So you are going to make 12
single crochet, 5 rounds in a row. At the end of this round, you
will be able to start filling the little body with polyester. After putting the stuffing in,
you can continue round 17 to 20. A single crochet in each
of the next 12 stitches. See you later! Once you completed round 20, instead
of doing a single crochet in the last stitch, you can replace it by
a slip stitch for a nice finish. Cut the ending thread, leaving a
good length, and pull the thread through the loop to secure your work. And we're done for the body. We will calculate together the rounds. So round 1, 2, 3, 4, 5, 6, 7, 8, 9,
10, 11, where we see the decrease, 12, 13, 14, 15, 16, 17, 18, 19, and 20. You can add stuffing to
fill the neck as well. You can use the tip of your
hook to help, or if you have little fingers, it will work. And there we go, now we
will crochet the head.
12. The Flamingo - The Head: With the same pink color, the
dark one, we will start as with the body by a magic ring. And you will make 6
single crochet inside it. At the end of the last single crochet,
you can pull on the beginning thread to tighten the round. And we will continue with round 2. You are going to make 2 single crochet in
the first single crochet made on round 1. Place your stitch marker on the first one. And continue increasing all around,
making 2 single crochet in each of next stitches, for a total
of 12 single crochet in round 2. For round 3, we will do an
increase every other time. So, in the first single crochet, you
are going to make 2 single crochet. Place your stitch marker on the first one. Make 1 single crochet in the next stitch. And repeat all around an increase,
a single crochet in the next one. For a total of 18 single
crochet in round 3. Round 4, an even round, we are
going to make shifted increases. So you will make a single
crochet in the first stitch. Replace your stitch marker on it. And let's make an
increase in the next one. And you'll make a single
crochet in the next 2 stitches. So you repeat all around,
increase, 2 single crochet. And at the end, you will
only have 1 single crochet to do after the last increase. And you'll have a total of
24 single crochet in round 4. For round 5, you will do an
increase followed by a single crochet in next 3 stitches. all around for a total
of 30 single crochet. At the end of round 5 you can roll
your work on the right side to always crochet from the outside to the inside. Round 6 to 10 you are going to
do simple rounds, so 30 single crochet on each one for 5 rounds. We will now count the rounds together. You have 1, 2, 3, 4, 5, 6, 7, 8, 9 and 10. We will continue with round 11. We are going to start the decreases. So, you are going to do 1 in the front
loop of the next 2 stitches, followed by a single crochet in the next 3 stitches. And do this all the way around. 1 decrease, followed by 3 single crochets. For a total of 24. Don't forget, like me, to put your
stitch marker on your first decrease. For round 12, we will
make a shifted decrease. So you're going to start with a
single crochet in the first stitch. Replace your stitch marker. And you're going to make a decrease
in the next two front loops. Followed by a single crochet
in the next 2 stitches. And repeat all around. A decrease, 2 single crochet. And you will have, once again, just
1 single crochet to do after the last decrease, for a total of 18. At the end of the round, you
will be able to start filling the head with the polyester stuffing. And if you had planned to put on safety
eyes, this will be the time to do it. They will be located between
round 8 and 9, 6 stitches apart. For the other method, we will
add the eyes only at the end. Round 13, you are going to make
a decrease every other time. And a little thing, because the
stuffing is a little bit in the way, with your middle finger you
can keep it away from your work. It will help you crochet. So a decrease, a single crochet,
a decrease, a single crochet, all around for a total of 12. At the end, cut the thread leaving
a good length and pass it through the loop to secure your project. You can also add a little
stuffing so that it's very round. And put the head aside,
we'll use it later.
13. The Flamingo - The Wings: With light pink color, we are going
to start the wing like the other parts of the flamingo, with a magic
ring and 6 single crochet in it, Count if you have 6 single
crochet done. Pull the beginning thread and
we'll continue round 2 on the first single crochet of round 1. So we'll make an increase, 2
single crochet in the same stitch. You can place your stitch
marker on the first one. And continue by doing 2 single
crochet in each next stitches. For a total of 12. For round 3, you're going to make a single
crochet in each of the following stitches. So 12 single crochet in total. Before starting round 4, make sure to
roll the project on the right side. To always crochet from
outside towards the inside. And this time we will
increase every other time. So you make 2 single
crochet in the first stitch. You can replace the stitch
marker on the first one. And you will make a single
crochet in the next stitch. And continue all around. Increase 1 single crochet. For a total of 18 single
crochet on round 4. Round 5 you will make a single crochet
in each of the following stitches. For a total of 18 single crochet round six, we'll increase. We'll start by making two single
crochet in the first stitch. Place your marker on the first one,
and you'll make a single crochet in the next two stitches and increase
in the next, followed by a single crochet in the next two stitches. And you repeat that all around for a
total of 24 single crochet in round 6. You notice that I did not use the perfect
circle technique with shifted increases because the shape will be more oval and it
will be stick on the body of the flamingo. So we go with normal increases. For round 7 to 11, you are going to
repeat the same thing, a single round. One single crochet in each
next stitches for a total of 24 single crochet for 5 rounds. At the end of round 11,
we can count together. That's round 1, 2, 3, 4,
5, 6, 7, 8, 9, 10 and 11. Round 12 will start to decrease. So you are going to make a decrease in
the front loop of the next 2 stitches. You can place your stitch marker. And you will make a single
crochet in the next 2 stitches. And you repeat it all around. A decrease, a single crochet
in the next 2 stitches. You will have a total of 18
single crochet in round 12. For round 13, you will do a single
round, one single crochet in each of the next stitches, for a total of 18. Round 14, we will decrease every other
time, so make a decrease in the front loop of the next 2 stitches, followed
by a single crochet in the next stitch. And you will repeat all around
for a total of 12 single crochets. Round 15, you will do a single
crochet in each of the following stitches for a total of 12. The last round, round 16,
we will decrease all around. You can hide the beginning thread inside
and start your invisible decreases. So you make 6 invisible
decreases in total. The last decrease, you can make
a slip stitch, so you just pass the thread through the two loops
and the loop that is on your hook. Remove your hook, cut the
thread, leaving a good length, and pass it through the loop. We are now going to close
the tip of the wing. With your yarn needle, you go
through the front loops of each stitch of the last round, like this. In the end, you pull and you
go in the middle to bring the thread out of the wing. You just made your first wing. You can make another
one and set them aside.
14. The Flamingo - The Paws: I just want to warn you, the
paws will seem to you a little more difficult since it's thin. It's a small tube that we
crochet, so it's optional. The flamingo is very beautiful
without paws, but you can practice, because often in amigurumi, there
are little pieces like that. So you can give it a try, but if that's
causing you too much frustration, feel free to skip this part and
you can come back to it later. We will start again with the magic ring,
and you will do 6 single crochet inside. Pull the beginning thread to close
the round, and you will make 2 single crochet in the first stitch of round 1. Place your stitch marker on the
first one and you will make a single crochet in the next 2 stitches. An increase in the next stitch, followed by a single crochet
in the next 2 stitches. This will give you a total of
8 single crochet for round 2. You can remove the stitch marker and turn
the small paw on the good side once again to crochet from the outside to the inside. You will make a single
crochet in the next stitch. You can put back your stitch marker. And now we're going to do a
special stitch, the bobble stitch. That I will explain to you. You will yarn over before
entering into the stitch. Yarn over or under, it doesn't matter. I'm going to do a yarn
over, like the usual way. You go through the stitch, yarn over,
pull it through two loops on your hook. Then you yarn over and you pull through
one loop only, that is on your hook. You will yarn over before
entering into the same stitch. Yarn over, pull through the stitch. Yarn over, pull through
two loops on your hook. And finally, yarn over,
pull through one loop only. And we're gonna do this one more time. You yarn over, go into the same stitch. Yarn over, pull through the stitch. Yarn over, pull through two loops. And finally, yarn over, pull through
all loops that are on your hook. So that's the bobble stitch. It adds a small relief
on the flamingo's paw. And then you're going to make a
single crochet into the next stitch. The way you used to do it. And make sure that the bobble
stitch comes out like that. And we continue. We're going to do another bobble stitch. So... Yarn over, enter into the next stitch. Yarn over, pull through the stitch. Yarn over, pull through two loops. Yarn over, pull through one loop. And we start again. Yarn over, go into the same stitch. Yarn over, pull through the stitch. Yarn over, two loops. Yarn over, one loop. Another time, yarn over, go into the
same stitch, yarn over, pull through the stitch, yarn over, two loops, and finally,
yarn over, pull through all loops. And you make a single
crochet in the next stitch. Make it tight to be able to
bring out the bobble stitch. We will now continue with single
crochet until the end of the round. And for your information, the
bobble stitch is actually made up of three double crochet put together. So the term double crochet is a basic
crochet stitch, which you may have learned from my Crochet Course for Beginners. For round four, we will
do two decreases in total. We will start with a decrease. by taking the front loop
of next two stitches. The bobble loop is really behind it. Here. You can place your marker on that stitch. And then you are going to make a single
crochet into the next two stitches. This is where your dexterity and
patience is tested, because it's very small and there's the beginning thread
in your fingers, but I reassure you, this part doesn't take long to do. You make the second decrease here, followed by two single crochets. The next rounds will all be the same. You will make a single
crochet in each stitch. 6 single crochet in each
of the next 6 rounds. Just a small thing, if you don't
want to put your stitch marker to have less obstacles in your
fingers, you can count to 36. Because 6 single crochet on 6
rounds, 6 times 6 equals 36. So if you think you're enough
concentrated to count 36, go for it. And don't forget the last stitch
of round 10 will be a slip stitch for a more beautiful finish. Cut the thread leaving a good
length and pass it through the loop to secure the work. I hope you didn't find it too difficult
because you have a second one to make.
15. The Flamingo - The Beak: With the black yarn, you start again
with the magic ring and you will do 6 single crochet in the ring. Pull the beginning thread to close the
circle and you will start making a single crochet into the first stitch of round 1. But we're going to change
color just before finishing it. So yarn under, you go through
the stitch, hold your work tight. You go get your white yarn now. And you will pull the thread to
finish your single crochet, like this. Then you will do two single
crochet with the white color. And you'll end up with a slip stitch. And that's it for the beak
of the little flamingo. You can cut the white and black
thread, leaving a good length. Secure the work and set it aside. We are now ready for assembly.
16. The Flamingo - Assembly (1): We're now going to sew
the head on the body. You can enter the ending thread
of the head in your yarn needle and start sewing it in each stitch
of the last round of the body. So you always take both loops of each
stitch to sew them together, this way. And at the end you will be able to enter
the thread inside, anywhere in the body. And bring the one from the end of the
body, join it to the other one, here. They must be in the same place. You can admire your beautiful sewing. And with the two threads, you
will be able to tie a double knot. And with your yarn needle,
enter them into the body to hide them and cut off the excess. This is how we secure and hide
the threads that come out. We will now make the little feathers
at the top of the head of the flamingo. So, you can cut two strands of
light pink, about 30 cm each. Put them in your needle, and go into the body, anywhere,
because the wings will hide what we are going to do. You're going to bring in your needle,
go around a stitch, just to secure the little strands, then leave approximately
the same length on each side. And you will bring your needle to
the top of the head, like that. You can now go look for the
remaining thread and bring it also at the top of the head. The fact that we wound the strands
around a stitch will make sure that it's impossible that the little feathers
come out of the top of the head. Then you will cut to approximately
a centimeter from the head. And with your yarn needle, you
will separate the little strands of all threads, which will have
the effect of a little feather. This section is only for those
who crochet with the super bulky yarn, the chenille yarn. I'll show you how to do the small
feathers on the top of the head, since this thread does not separate. So you can just copy what I'm doing. You go to the top of the
head, you make three loops. You just turn around to
secure them properly. And that's it. You can do a double knot with both
strands and hide them in the head. The wings will be placed on each
side of the flamingo's body. Approximately at this place. You will flatten and sew
them from the inside. Therefore, there is no exact science. That's what I love about crochet. As long as it is very solid. The bottom of the wing is going to be
approximately at the 5th round level. Some people like to put pins to hold
the pieces in their right place. I personally find that holding it with the
opposite hand makes a good job for sewing. You can leave a little border so we don't
see it even if the wing is upturned. Always make sure during the
sewing if your piece is still in the right place to continue. You can leave the back part not sewn. I hope, unlike me, that you had a
longer strand for make sewing easier. You can also bring back the
thread anywhere you want. We will now sew the second wing. You can place it from the
other side to the same height. If your strand is not long enough,
you can always cut a strand of the same color and sew with it. So you do the same as with the other wing. You sew inside, this one leaving a
border, so that the seam is subtle. And don't worry, you can't make a mistake. Just go in any stitch as long
as the wing is securely sewn onto the body of the flamingo. At the end, join the strands up to the other,
and you will be able to tie a double knot. Tuck the strands into
the body to hide them. and cut off the excess. We will now focus on the face. See you in the next video to continue.
17. The Flamingo - Assembly (2): We're going to sew the beak
on the head of the flamingo. So you can take the black thread that
is in the middle, the beginning one, with the white beginning thread. And we'll enter them in between
the round 1, 2, 3, 4, 5, 6, 7, 8, 9, between round 9 and 10. In the middle of the head, between
the front of the two wings. You can place it so that
the white part is upwards. And you take the white thread and we'll
begin to sew it between round 8 and 9, from here. And always take the two strands of the
beak's stitches for sewing on the head. And you can stop sew the white
part by entering the thread between the next stitch of the head. And you will take the black thread
and start sewing in the same place. So the lowest part of the beak
will be between round 10 and 11. And finally, you will join the
black thread to the white one. Check if everything is fine, if
the beak is well centered before securing and hiding the threads. We are now going to
put on the little eyes. So if you have the metal studs,
you can place them in round 9 and with your yarn needle, you will be
able to bend the 4 points so that it is solid around the stitch. You see that there are approximately
a stitch between the beak and the eye. If you don't have these metal studs,
you can still embroider with black thread, as we did with the lion. Or if you chose safety eyes,
they should already be there. You can place the other eye on the
other side and fold the small points. Always check if they are solid,
so that they cannot come loose. Cut a strand of black
thread about 30 centimeters. Enter your yarn needle through the head,
up to the stitch which the eye is located. And do as I made, to
embroider small eyelashes. And at the end, bring the thread
back to the one from the beginning, to be able to make a double
knot, and hide them in the head. Now cut a strand of white
color, about 30 cm too. And you go embroider a little
white reflection around the eye, as I'm doing at the moment. And join the thread to the one from
the beginning to be able to hide them. Pull tightly on the white strand so
that it fits tightly around the eyes. And there you have it, you have
just learned how to add personality in the eyes of amigurumis. You can now hide the strands inside. We will now sew the paws, but as you
can see, it is pretty even without them. If you like better to embroider eyes
either with black thread or chenille yarn, here is the procedure to follow. With your black thread, you will
pass 5 times around a stitch of round 9, where is the eye supposed to be. You're going to go out to the side to
make the little eyelashes this way. Then with the white thread, you
come and embroider between the eyelashes and the eye, like this. And you can come and add a reflection
in the eye, turning around a black strand to look like the picture. We will now learn another method
of sewing one part on another. Instead of sewing it in the round as we
did with the beak, we will flatten the paw and sew it taking both sides together. You will see, you can enter between
round one and two, approximately in the middle of the lower body,
and make sure toes point forward. Then you will enter your needle from edge
to edge, taking the four loops of the two stitches, so that they are well flattened. Pass again through the
loops of two stitches. So we see that we sewed the paw between
round one and two inclusively of the body. You can always come back so
that the paw is very solid. You can really sew the way you
want, as long as the paw is flattened, perpendicular to the
body, everything will be beautiful. As you see here, as long as there
is no hole to see inside the paw. We will now sew the second one. The same principle. Make sure one more time the toes
point forward, on this side. You can start sewing
between round 3 and 4. And that's all! Join the two strands together
to be able to hide them. Well done! Your little flamingo is now complete! You are now ready to move to level 3,
the personalization of an amigurumi.
18. The Croco - Materials & Techniques: Welcome to the third project of
the course, my favorite, where you will learn how to make an
amigurumi a little more personalized. You are going to crochet this cute
shy crocodile where you will learn to make paws without sewing, to crochet a
garment, in this case the overalls, where you will learn how to mix stitches. You will also learn to crochet
on the surface to make the bumps on the crocodile's head. And finally, you will see
that we can really give a personality to the character,
integrating details into the face. To make the crocodile, you will need a 2.75mm hook, or 5mm if you
use super bulky yarn. You will need lime green colored yarn,
mint green, a little bit of white and black yarn, a yarn needle, scissors,
a stitch marker, polyester filling, and two 5mm diameter metal studs. Which you can also replace
with safety eyes or black thread to embroider the eyes. Now let's crochet the crocodile
starting with the legs.
19. The Croco - Paws: We're going to start the
little crocodile with the paws. So you can take the green yarn
and start with a magic ring. Chain one and make six single
crochet inside the ring. At the end pull the beginning
thread to tighten the ring. Count if you have six single crochet
made and continue with round two. You're going to make two single crochet in
the first single crochet from round one. Therefore, an increase. You can place your stitch
marker on the first. And continue by making a single
crochet in the next two stitches. An increase in the next. So two single crochet in it. With a single crochet
in next two stitches. For a total of 8 single
crochet in round 2. Round 3, you will make 2 single crochet
in the next stitch, an increase, followed by a single crochet
in the next 3 stitches. An increase in the next
stitch, followed by a single crochet in the next 3 stitches. You will have a total of 10
single crochet in round 3. And often, at the end of this round,
it's a good time to roll the project on the right side to forever work
from the outside to the inside. Round 4 and 5, very simple, you
will make a single crochet in each of the following stitches. Therefore, 10 single
crochet in each round. The last stitch of round 5
you can make a slip stitch to finish the first little leg. And cut the thread, pass it
through the loop to secure it. Put it aside and start round 1
to 5 again for the second part. Only, we will not cut
the thread at the end. We will continue by adding
the first leg on round 6. See you later! Round 6 you will continue by making a
single crochet in the next 10 stitches. Place your stitch marker, it
will be very useful this time. Arriving at the 10th single crochet,
we are going to make 2 chains. Like this, 1 and 2. And you'll come and get your first
part that you have made, the first leg. And we will continue
to crochet on this one. So, you can start anywhere. I like to start just beside of
the last stitch where is the knot. So, you go in the stitch. Both legs will be hooked together. So, you continue, you make 9 additional
single crochet around the first leg. When you arrive where
is the knot, skip it. Do not add a stitch. Go really just where the slip
stitch has been made, like that. So this is where it gets
a little more complicated. You see the two chains that we did? There is a lot of strands here. But when you look at it like that,
you see well the little braid. So you go and make a single
crochet in this loop here, the one that is facing you. So, when you put your project from
this side, you can see that it is in this loop that we must go. Don't take both together, because
we're going to crochet in the loop of the opposite side in the next round. So, one single crochet on
each of these loops, here. And that's it for round 6. For round 7, you see that your
stitch marker is very useful. Because we could think that this
stitch is the first, but no. It's really where is your stitch marker. So, you're going to make a single crochet. Replace your marker. And we will continue making 9 single
crochet since we've already done 1. So when you have made your single
crochet, you see that we arrive at where the two chains have been made. Now it's a little easier to see. You see the loops of
opposite side of these two? You are going to make a single
crochet in each of them. And we will continue to do our
single crochet on the second part. You continue on this one here, which
is in the junction with the two chains. And you continue like this until
you reach your stitch marker. You can count at the end if you have
24 single crochet made in this round. It should look like this. So from now on, this will be very easy to
continue the body of the little crocodile.
20. The Croco - Body: We will now continue to crochet
the body of the little crocodile. So for round 8, we will start by
making an increase in the next stitch. Place your stitch marker
on the first one you did. And we will continue by making a
single crochet in the next 3 stitches. And continue all around. 2 single crochet in next
stitch, followed by a single crochet in the next 3 stitches. It should look like this. Round 9 to 14, you are
going to do the same thing. A single crochet in each next stitches. 30 single crochet per round for 6 rounds. See you at the end of round 14. We are going to count the rounds together. Here we have the first, second, three,
four, five, six, seven, eight, nine, ten, eleven, twelve, thirteen and fourteen. We are going to move to round 15. We're going to make a decrease in the
front loop of the next 2 stitches, followed by a single crochet
in the next 3 stitches. You do this all around 6 times, for a
total of 24 single crochet in round 15. For round 16, you will make 1 single
crochet in each of the following stitches, for a total of 24. Round 17, we will start by making a
single crochet in the next stitch. Since I make you practice the
shifted decreases, which will not be indicated in the pattern. So you make your decrease in the front
loop of the next 2 stitches, like this. Followed by a single crochet
in the next 2 stitches. And you continue all around,
decrease, 2 single crochet. And after the last decrease, you will only
do 1 single crochet to finish the round. And here is the last single crochet
immediately after the last decrease. We now move on to the next round. Round 18, a simple round again. You will make a single crochet in
each of the following stitches. 18 single crochet in total. At the end of round 18, you can start
to put the polyester stuffing and feel free to use your hook to carry
the stuffing in the little paws. We are going to decrease every other time. So you make a decrease
followed by a single crochet. And you repeat all around. Decrease, 1 single crochet. For a total of 12. The last round, very simple. 1 single crochet in each of next stitches. 12 single crochet in
total for the last round. And don't forget that the last single
crochet will be replaced by a slip stitch. For a better finish. And the slip stitch. Finally, you can cut the thread,
leaving a good length, because we will sew the head with it. And pass the thread through
the loop to secure it. And you can add a little bit of stuffing. We will now continue with the head.
21. The Croco - Head (1): You will now learn a new technique
to start crocheting in rounds, that will form a kind of oval. You will see. You can make a slip knot. It's like making a regular knot without
taking out one of the strands, like that. I will do it again in
case you don't remember. You can enter the hook in the loop
and pull the thread to tighten it around the hook, but not too much. We are going to make a starting chain. You're going to make 5 chains, so hold
your hook horizontally and facing you, yarn over and you go through the loop. You make 5 like that. And the fifth one. Now you're going to put the starting
chain horizontally and you will make a single crochet in this
one, the second chain from hook. So you still do your
first yarn under the hook. As we always do with amigurumis. And you will continue in the next chain. Another single crochet. You do the same thing, one
single crochet in the next chain. And in the last one, you are going
to make three single crochet. Then we are going to work on the
opposite side of the starting chain. In the loops which are free. So start a single crochet here. In the next one, another single
crochet, by taking just the little strand of the chain, the little loop. And in the last one, you are going
to make three single crochet. So the first round is finished. You see here, this is our
first single crochet we made. You can count, you should have eleven. And the little strand that you see here,
this is just the turning chain, the one we jumped to make the first single crochet. So this is where we're going
to continue with round 2. You can make a single crochet. And another one, so it's an increase. You can put your stitch
marker on the first one. And continue by making a single
crochet in the next 2 stitches. Followed by an increase in the next one, one single crochet in the next, an increase in the next one, a single crochet in the
next three stitches, an increase, and we finish with a single
crochet in the last stitch. So you see this form an oval. Which will be the mouth
of the little crocodile. And you should have 15
single crochet in round 2. Round 3, we are going to do
the small nostrils of the crocodile with bobble stitches. The same stitch that we made
for the flamingo's toes. So, we start with a single crochet
in the first, we put the marker back. You're going to make a single
crochet in the next stitch. Then we will make the bobble stitch. I remind you, it is made of
3 double crochets together. So, you yarn over, you enter into the
next stitch, yarn over, pull through the stitch, yarn over, pull through 2 loops,
yarn over, pull through 1 loop only. And you start again, yarn over, you
enter into the same stitch, yarn over, pull through the stitch, yarn
over, 2 loops, yarn over, 1 loop. And for the last time, yarn over, go
into the same stitch, yarn over, pull through the stitch, yarn over, two
loops, yarn over, all loops on your hook. And then you make a single
crochet in the next stitch. And make sure that the
bobble stitch pops outwards. You will make another single crochet. Followed by a second bobble stitch. Yarn over, go into next stitch. Yarn over, pull through the stitch. Yarn over, two loops. Yarn over, one loop. And you repeat another time. And the last yarn over, you will pull
through all the loops on your hook. And you will make a single
crochet in the next stitch. Make it tight to pop the bobble stitch out. And you can continue by making single
crochet until the end of the round. And that's it for round 3. Round 4 to 7, you are going
to make simple rounds. So, one single crochet in each
of the following stitches. It's a little hard to see where to go
when it comes to the bobble stitch, but it's here, the little braid just behind. So continue like this, making single
crochet in every next stitches. 15 single crochet per round for 4 rounds. See you at the end of the 7th round. We will count the number
of rounds together. So here we have the first one that
makes a circle, the second, the third, where is the bobble stitch Four, five, six, and seven. See you in the next video to continue!
22. The Croco - Head (2): We will continue with round 8. You are going to make an
increase in the next stitch. Put back your stitch marker on the first. And you'll continue making a single
crochet in the next 2 stitches. And you repeat all around. An increase followed by 2 single crochet. For a total of 20 single
crochet in round 8. The next 2 rounds, you will make a single
crochet in each of the following stitches. 20 single crochet in
each round for 2 rounds. For round 11, we will start by making a
single crochet in the next 3 stitches. And you are going to make 10
increases, so 2 single crochet in each of the next 10 stitches. It will look like this and you will
continue by making a single crochet in the next 7 stitches until the end of the
round for a total of 30 single crochet. Round 12 to 16, single rounds, so 1
single crochet in each next stitches for 5 rounds, 30 single crochet in each one. See you at the end of round 16
to count all our rounds together. So after finishing the round
16, it should looks like this. So you can see the round
where we did 10 increases. We can count from there to see if
we did 5 additional single rounds. We will now start doing the decreases. So make 1 in the next 2 front loops. Followed by a single crochet
in the next 3 stitches. 6 times. Do this all around for a total
of 24 single crochet in round 17. Round 18, we continue our decreases. So, given that we are going to practice
shifted decreases again, you will make a single crochet in the next
stitch, replace your marker, and you are going to make a decrease in
the front loops of next 2 stitches. Followed by a single crochet
in the next two stitches. And you continue all around. Decrease, two single crochet. And at the end, you will
only have a single crochet to do after the last decrease. But it's really up to you. If you like better to follow the
instructions at the top of the screen, it will give the same thing. After finishing your round 18, you
will now be able to fill with polyester stuffing the little head of the crocodile. Round 19, we will
decrease every other time. So, a decrease, a single crochet. One decrease, one single crochet. All around for a total of 12. And to prevent taking the stuffing
with your hook, place your middle finger between the stuffing
and the work to keep it away. For the last round, you will do a
single crochet in each next stitches. 12 single crochet. Frequently, in the patterns, they
will tell you to decrease 6 times. So you have the choice. It's just the little finishing touch
in the end which will be different. But in this case, I will do 12 single
crochet for a more beautiful finish. Don't forget that the last
stitch will be a slip stitch. You can now cut the thread
and pass it through the loop to secure the little head. You can also add a little more stuffing. And there you have it. There is nothing left than
to close the tip of the head. You will be able to enter the thread
into your yarn needle and to close the end by entering it through a
stitch and taking it out through the other, as I do on the screen. In the end you pull the thread and
you return your needle in the center. We are now going to do the arms.
23. The Croco - Arms: To start the arms, again with the same
green color, you will start with a magic ring and 6 single crochet inside. Count if you have made 6 correctly. Then pull the beginning thread to close
the circle and you continue on the first single crochet by making one inside. Place your stitch marker on
it and you will make a single crochet in the next 5 stitches. So it's a simple round. It's going to be very small. I warn you, if it ever annoys you too
much to make a small part like this, I have an option at the end of the
video to make the arm a little wider. Round three, we're going to add a little
thumb on the end of the crocodile. So you will start with a single
crochet in the next two stitches. You can also roll the small circle
so that it is on the right side. So this is your first single crochet. Place your marker on it. Make a single crochet in the next stitch. And we will do the bobble
stitch in the next one. It's always three double crochets in one. So, yarn over, go into the next stitch. Yarn over, pull through the stitch. Yarn over, pull through two loops. Yarn over, pull through one loop. And you repeat, yarn over, go into
the same stitch, yarn over, pull through the stitch, yarn over,
two loops, yarn over, one loop. And again, yarn over, go into the
same stitch, yarn over, pull through the stitch, yarn over, two loops,
yarn over, all loops on your hook. And you will make a single
crochet in the next stitch. And don't forget to make
the bobble stitch pop out. It's starting to get very tight so
don't hesitate to check at the end the alternative so that the arm is a
little less difficult to work with. Continue making single crochet
until the end of the round. Round 4 to 10 will all be the same. You will make a single
crochet in each next stitch. 6 single crochet per round for 7 rounds. You see the loops which are
behind the bobble stitch? You enter these two
loops and you continue. A little trick is to always pinch
the arm in the right place to guide your hook to enter the stitches. Since it's very small, very narrow. See you after round 10! The way of crocheting round
10 should look like this. Pinch the little arm to
see each stitch clearly. And don't forget that the last
one is going to be a slip stitch. So we're going to count
together the number of rounds. We can start to the third given
that's where the little thumb is. So 3, 4, 5, 6, 7, 8, 9 and 10. You can cut the thread and
secure it, leaving a good length, so you can sew it later. Since the arm is quite long, you
can cut the beginning thread which exceeds because it is a little
too difficult to put it inside. And that's it. I have a good or a bad news for you. You have another one to do. I will show you right now the alternative
to make the arm a little bigger. You will start the same way. 6 single crochet in the magic ring. Here I show you round 2. Basically, you are going to make an
increase in the first stitch, followed by a single crochet in the next two stitches. You repeat this twice,
for a total of eight. So, you will work with eight single
crochet through, instead of six. Which will give you a little
more space to crochet. For round three, where the
little thumb will be, you will start with three single crochet. Then, the bobble stitch,
followed by 4 single crochet. You do round 4 to 10 in the same way,
a single crochet in each next stitch. Only, you will have 8 single
crochet in each round instead of 6, which will give you more space. The arm will look like this. You can see that this makes not a big
difference on the little crocodile. If it makes you feel more zen,
go ahead with this alternative. We now move on to the next body part.
24. The Croco - Tail: With the same color, you
will start with a magic ring. And this time you are going to
do three single crochet inside. Pull the beginning thread to close the
round, and continue by making a single crochet on the first stitch of round one. Since there is only three stitches in
round one, it's a little more difficult to continue on the first stitch. So help yourself with the other hand to
properly guide the hook through this one. You can do another stitch
in the same, an increase. Place your stitch marker on the first. And you're going to do 2
more increases, so 2 single crochet in the next 2 stitches. You will have a total of 6
single crochet made in round 2. Round 3, you will start by making
an increase in the next stitch. Followed by a single crochet
in the next 2 stitches. Repeat and increase 2 single
crochet once more for a total of 8. You can take the opportunity to roll the
project on the right side and continue. Round 4 this time you will make
an increase followed by a single crochet in the next 3 stitches. You repeat another time for a total of 10. Round 5 and 6 you will make a single
crochet in each of next stitches. 10 single crochet for 2 rounds. And don't forget the last
stitch will be a slip stitch. And that's it! You can cut the thread by leaving
a good length and secure it. And leave this little piece aside. We will now crochet the eyes.
25. The Croco - Eyes: We'll start with the eyelid. So with the green color, you
are going to make three single crochet in the magic ring. Pull the beginning thread to close
the circle, and you will make a chain. The special thing is that you will
turn the work on the other side, and you will make two single crochet in
the last stitch that you just made. In a pattern, we're going
to call it the same stitch. So a single crochet and a
second one in the same place. And you will do the same thing, 2
single crochet in the next stitch. And into the next one, you're going to
make a single crochet and a slip stitch. And that's all! You can cut the thread leaving
a good length and secure it. You can now make a second one. You'll notice that in the
pattern, I write the Chain one at the beginning of second
round and not at the end of the first. It's common to write the turning
chains at the start of each round. So you can do what you want to
either turn, make a chain or do it at the end of the previous round. Chain one and turn. This is just to make writing easier. It does exactly the same thing. We will now do the
little white of the eyes. So make 6 single crochet
in the magic ring. With the white color, obviously. At the end, you pull on the beginning thread
to close the circle and you will join with a slip stitch in the first single crochet. And that's it, you can cut
that thread and secure it. Let's make a second one. For those who would like to put
safety eyes, it's time to put them. Insert them in the middle of each
eye white and choose a small size, approximately 5 millimeters in diameter. For other methods, we'll wait later. Now let's move on, on the overalls.
26. The Croco - Overalls (1): You will now work with the mint color. And we will start with a starting
chain, so you make a slip knot, you insert the hook into the
loop, and you will do 31 chains. We will now start the round 1. You are going to make a
single crochet in each chain. You can start in the second
chain, from the hook right here. And continue to make a single crochet
in each of the following chains. We'll meet up at the end. So your last single crochet will be here. And count carefully to see if you
have 30 single crochet in total. Counting each small braid. For round 2, you will turn the work
and you will start on the first single crochet made at round 1. So it will form a ring. It's going to be in this one. You see that's the turning chain. This is our first single crochet. You take both loops and you
make a single crochet as usual. And make sure that the ring formed
by the round is not twisted. And you can put the stitch marker on
this first single crochet of round 2. And continue making single crochet
in each of the following stitches. And the last single crochet will be here. So, that's it for round 2. Round 3, you simply make a single
crochet in each of the next stitches, for a total of 30. Round 4, you will have a
little feature at the end. So, you will start with a single
crochet in the next 28 stitches. If it's easier than counting,
you can simply stop your single crochet two stitches before the end. So here, there are two stitches
left before our stitch marker. You are going to make five chains. You will skip the next two stitches,
so these, and you will skip all three first of the next round to
make one single crochet in the next. This will create a little space to
be able to put the crocodile's tail. We start round 5. You can continue with single crochet
on each of the following stitches until you arrive at the chain 5. We are now at the chain 5 section, so
we will make a single crochet in each of them, entering into the top loop. If we follow our stitch marker, we
will now start the round 6 given that we made our chains between 2 rounds. So that's why I write it here to make
a single crochet in the next 3 chains. So you can put the marker back on the
single crochet that you just made. And we continue with the round 6 making a
single crochet in all subsequent stitches. Round 7 we are going to
make slip stitch all around. So it's simply entering into
the stitch, yarn over, and pull it through the two loops. Whether you do a yarn over
or under, it doesn't matter. It won't appear. At the end, you can cut
that thread and secure it. We are now going to sew
the crotch of the overalls. With the beginning thread, you will
insert it into your yarn needle. And you're going to sew
the round 1 in the middle. To do this, you can count
14 stitches from each side. So you should enter the next stitch and
sew on 2 stitches as I do on the screen. We therefore include the first
and the last single crochet from round 1 to sew them on 2 strands
from the middle of the round. I hope everything is clear, as
long as the two leg openings are pretty equal, like that. You can now enter the needle inward
and turn the overalls over so you can secure the strands inside. So you can zigzag in strands that you see. There is no exact science as
long as you feel some tension when you get into the strands. It's only to be sure that
the threads won't unstitch. And that's all! You can cut the thread. We'll now continue to do the
front of the little overalls.
27. The Croco - Overalls (2): We will now start the
front of the overalls. So where you finished the
last slip stitch, you will count 14 stitches to the left and you will join your yarn in the
loop of round 6, therefore the round just before the slip stitch one. You can use your needle to know where
to start or put your stitch marker. Join the yarn in this
stitch and make two chains. We will use a different technique
to add texture to the overalls. You are going to make a single crochet in
the same stitch where you joined the yarn. And you can yarn over the hook
from now on instead of under. So chain one and you will make a
single crochet in the next stitch. Always take the loops of round
six and not the one of round seven, the slip stitch one. You will chain one, single
crochet into the next stitch, and repeat three more times. Chain one, single crochet in next stitch. So that's it for round eight. You will now make two
chains, and turn the project. We will continue on this
side for round nine. We're going to make our single crochet
in the spaces created by the chain one. So you're going to do your first single
crochet in this space, in the first one. Here you do a chain one, and
you jump to the next space. Make a single crochet, chain one. In the next space, single
crochet, chain one. One last time, like this. Here you will skip the next space and
you're going to do your single crochet into the space made by the chain 2. That's right here. It's just to make the front
of the overall straight. Chain 2 and turn the project. We will continue round 10. Round 10 to 12 will all be the
same so you're going to make a single crochet in the first space. Chain 1, a single crochet into
the next space, and continue like this until the end. Your last single crochet will
be in space made by the chain 2. You may recognize this stitch which I
used from project number 9, the washcloth, from my Crochet Class for Beginners,
a very pleasant stitch to crochet. So for round 11, chain 2, you
turn and you do the same thing. Single crochet in each
space, followed by a chain 1. At the end of round 12, do not turn. You will chain 10. We are going to make the little straps. You can cut the thread and secure it. We will now do the second strap. You can attach the yarn here at the
other end and do it again chain 10. We will now attach them to
the back of the overalls. So you can attach the first
and the last stitch of round 6. And take the opportunity
to weave in the thread. So just go zigzag and
strands to secure it well. And the second strap, you go
place it in the fifth stitch to the left of the last stitch. Five stitches to the left of the knot. And secure the thread. And there you have it. You can weave in all
the remaining threads. We will now add a small
border at leg level. You will join the yarn on a
strand of one of the two legs. You are going to make chain 1, and in the
same strand, you will make a little shell. So you will do a single crochet,
chain 1, and a single crochet in the same strand, in the same loop. Once again, you can do
yarn over instead of under. And we continue. We are going to skip the
next strand, the next loop. And in the next one, you
do the same thing again. One single crochet, chain one, one
single crochet in the same strand. We skip one, and into the next, single
crochet, chain one, single crochet. You do this all around. At the end, maybe it will miss or have
one more strand, but as long as you have eight little shells around on
each leg, everything will be beautiful. So here is the last shell. In the end, you will just have
to join with slip stitch in the beginning junction right here. You can cut the yarn, secure it,
and we will make the second leg. Join your yarn on one strand. It is always good to start in
the middle of the overalls. And once again, you make a chain
1, and in the same strand, you are going to make a little shell. A single crochet, chain 1, You skip a strand, and you do
the same thing in the next one. All around for a total of 8 shells. The last shell will be
right in the middle here. Like I told you sooner, sometimes
it seems like one strand is missing, but it won't appear at all, as long
as you have 8 shells on each side. You can now weave in the strands. Given that they are by two, you
can enter both at the same time. It will go a little faster. And don't forget to weave them in
on the back side of the overalls. And that's it for the overalls. We will now move on to the
assembly of the crocodile. And then, we will be
able to put it on him.
28. The Croco - Assembly (1): We will start by sewing
the head on the body. So if you would like to use pins
to secure the head, go for it. But I will show you my
method without any help. So we will start by counting the number
of rounds because we are going to sew the body between round 15 and 17 of the head. The nostril is in the third round, so 4,
5, 6, 7, 8, 9, 10, 11, 12, 13, 14, and 15. You can place a stitch marker
just for reference, to know where is the round, where to sew. So place another one 3 rounds further. You see that we're going to sew between
round 15, 16, and 17 inclusively. And once again, don't worry if you are one
round before or after, it doesn't matter. So we will start. Place your head straight,
nostrils upwards. You will enter the needle in
the back of the head, like this. And you pass it through each of
the strands of the body, passing between two stitches of the head. You can check several times,
especially at the beginning, if the head is always straight. So you follow the line between
the round 17 and 18, and you can progress in the round. With the head well placed
on the body like that. I hope that it is clear enough for you. Otherwise, you can just follow
my movement on the screen. So you guess that at the front of the
body, you will sew at the place of your first marker, between round 14 and 15. And there you go. So make sure the seam ends where it began. Check that everything is fine,
that the head is well placed. And you can tuck the thread
inside to join the head one. Tie a double knot and hide it inside. We will now sew the arms between
round 18 and 19 of the body. So instead of counting starting
with the feet, we know that the body contains 20 rounds, so you can only
count 2 rounds below the last one. It will be right here. And we're going to flatten the arm. So, you're going to get through
two stitches, like this, and you sew arms on each side of the body. As long as they are
solid and well flattened. We will now sew the second arm. Once again, you will begin
two rounds down from the last. And sew in these three spaces. And that's it for the arms. You can once again tie a double knot
with the two strands and hide them. We will now sew the tail on
the back of the crocodile. It will also be flattened. So you always take two stitches
at a time passing from edge to edge between round 10 and 11. So we count together. Here is it. One, two, three, four, five,
six, seven, eight, nine, ten. So the line between round 10 and 11, place
the marker or a needle as a landmark. And sew the tail between these two rounds. And there we go. Now let's do the face. Eyes will be sewn into the round
12 and 13 of the head inclusively. So 1, 2, 3, 4, 5, 6, 7, 8, 9, 10, 11, 12. So between round 12 and 13. Here you can put a little
marker just as a guide, and with the thread from the beginning
of the white eye, you can enter between the round 12 and 13, approximately at
this level, on each side of the head. And with the ending thread,
you can start to sew the eye. And this time, don't go around
stitches, but enter the stitch and exit through the next one. After having sewn around, you
can join the two strands together and check if everything is fine. Now let's move on to the second eye. Try entering the beginning thread
by counting 9 stitches apart. And check if it makes sense that
the eyes are not too crooked. And start sewing the eye into
the round 12 and 13 inclusively. We will now sew the eyelids. The right side will be outside. You can insert the beginning strand
in the middle behind white eye. And start sewing like this. So you just have to put it down
over the eye and sew all around. Et voila! Now move on to the second one. And that's all! You can hide all the strands. We will now put the pupils. If you use the small metal studs, you
can place them in the center and fold the spikes with your yarn needle. Always check if they are very solid. Repeat on the other side. And that's it for the
little crocodile's eyes. I now show you the version if you would
like better embroider with black thread. So with the black color, you can
just pass in the middle of the eye. And go for a few laps
backwards, like this. It's that simple. We are now going to do the small
bumps on the crocodile's back.
29. The Croco - Assembly (2): You will learn a new technique,
which is to crochet on the surface. So we will start by joining the green
yarn between round 14 and 15, who happen to be a round higher than the eyelids. You are going to enter your
hook perpendicularly of the head by taking round 15. You will join the yarn, make a chain,
and a single crochet in the same space. So by taking the round,
you will then chain 2, And in the next space, always
try going in a straight line. You will take round 16. You will make a single crochet. Followed by 2 chains. Then you take round 17, always
in a straight line, like that. You make 1 single crochet. Chain 2. And you continue like that, lowering
the head up to round 12 of the body. You can make a slip stitch at the
end, instead of a single crochet. Cut the strand and secure it. You can join both strands
together to be able to make a double knot and hide them inside. That's all for the little
bumps of the crocodile. We will now move on to its teeth. With the black thread, you go
into the middle of round 1 and exit between round 2 and 3. You insert your needle into round 1
again and you're going to bring it out between round 8 and 9 on the face side. Return between round 2
and 3 to form the mouth. And come out on the opposite
side of the round 2 and 3. And make the same thing on this side. Enter the beginning thread
to join the other one. And the mouth is finished. We are now going to
embroider the little teeth. So with your white thread, you will
enter around before the end of the mouth, from the corner of its mouth. And you go pass around a stitch twice. Come out three rounds further
to make the second tooth. And it's the same principle, you
turn twice around the stitch. And you will bring out the thread
on the other side, pass twice around the stitch, and this time,
you let two rounds of distance and you embroider the last little tooth. Join every thread to be able to hide them. Here, it's optional, but we will make a
little belly button for the crocodile. So you can embroider a little X right in
the middle of its belly, around round 12. And hide the threads. And here is the pretty crocodile. Now, it's time to dress him. This is how we put the overalls on him. Well done! You have now completed the level
3 customization of an Amigurumi. He's so cute! Let's attack now the last level, the
Giraffe, which will be completely no sew.
30. The Giraffe - Materials & Techniques: Welcome to the last project of the
amigurumi course, the one that will make you an expert with the no sew method. You will learn to integrate
different parts while crocheting, so no assembly will be needed. I also included color changes that just
required a little more concentration. But if you think your brain will overheat
with all this, I have prepared for you an alternative to small spots of color. But, which will require
some sewing at the end. So, if you really want the complete
experience of the level 4, follow my instructions and leave your
hands crocheting the little giraffe. Here is the materials you will need. The 2.75 mm hook, if you are working
with a thin yarn, the cotton one. Otherwise, if you work with chenille
yarn, the super bulky one, a 5 mm hook. You will need yellow color, caramel color. A yarn needle, scissors, stitch marker,
polyester stuffing, and two 5 mm diameter metal studs to make the eyes. As usual, you can choose to
take safety eyes or simply embroider with black thread. I hope you're ready! We're now going to crochet the little
giraffe, starting with the paws.
31. The Giraffe - Paws: We're going to start the
giraffe by crocheting the paws. First, you take the caramel color,
and you start with a magic ring, and 6 single crochet inside. Make a single crochet in the
first single crochet of round 1. Place your stitch marker. You're going to make another
single crochet in the same stitch, there for an increase. And you continue to do increases in each
of the next stitches, for a total of 12. You'll notice that I changed a
little bit how to write the pattern, because sometimes you will see
a small star in place of the X. But that means multiplication,
so 6 increases makes 12. Round 3 and 4 will be single
rounds, made with the same color. Therefore, a single crochet in
each of the following stitches, for a total of 12 in each round. The last single crochet of
round 4, don't finish it. Instead of the last yarn over,
you will join the yellow color. And we are now ready to
continue with round 5. We will once again use the technique that
I showed you regarding the color change. In the next stitch,
you make a slip stitch. so that the demarcation is more subtle. Pull the yellow yarn to tighten a
little bit the stitch and continue to make single crochet all around. No need to put your stitch marker this
time given that it's obvious that the round starts with the yellow color. The round will start on the
slip stitch and you see that the demarcation is more subtle than
if we had made a single crochet. And from this round, you can
use your stitch marker to know where the round begins. You will therefore make 3 more
simple rounds to go up to round 8. We'll meet up at the end. Don't forget that the last stitch
is going to be a slip stitch. You can cut the thread and secure it. It is also a good idea to
tie a double knot with the threads of the color junction. Take the opportunity to put a little
bit of stuffing in each of the paws without filling them too much. And that's all. You can do three more. In this pattern, I will tell you
the right yarn to work with by writing with the corresponding color. If you are colorblind,
I thought about you. In the written pattern, I will
indicate clearly which color to choose depending of the round or the stitches.
32. The Giraffe - Muzzle: We'll start the muzzle
with the caramel color. You will do a starting chain, so you start
with a slip knot, and you make 5 chains. Next, you will make a single crochet
in the second chain from your hook, and you are going to make a single
crochet in the next 2 chains, 3 single crochet in the last, and we'll continue working
on the opposite side of the starting chain, beginning here. The loop right here. You will make a single crochet. Another one in the next loop. And two single crochet in the next one. And that's it for round one. You should have ten single crochet made. Continue with round two by making an
increase on the first stitch of round one. So you skip the turning chain and
you go in the first single crochet. For your second single crochet made in
the same stitch, you can put your stitch marker on the first one
and continue by making a single crochet in the next 2 stitches. You will then do 3 increases in a row, so
2 single crochet in the next 3 stitches. Continue by making a single
crochet in the next 2 stitches and make an increase
in the next 2 stitches. You should have a total of
16 single crochet in round 2. Round 3 and 4 will be single rounds. You are going to make a single
crochet in each of next stitches. 16 single crochet per round for 2 rounds. Don't forget at the end of the round
to roll over the muzzle to always work from the outside to the inside. And at the end of the round, you will
join the yellow color just before finishing your last single crochet. Once again, for a subtle color change,
we are going to do a slip stitch first. This time in the back loop. Everything in this round will
be made in the back loop. Just pull the yellow strand a little bit. And you will do a single crochet in the
same loop, which will give an increase. You will see that the single crochet is a
little more difficult to pass through the loops because of the previous slip stitch. So if you are not able to do
it, forget the slip stitch. Make a single crochet
instead for the first stitch. It will be all good. Now continue increases as you
see at the top of the screen, there are 8 total increases. So we just made 2, you can make 6 more. Always in the back loop. After the 8 increases, you
will make single crochet in each of the next 8 stitches. You will have a total of 24
single crochet in round 5. You will now make a single
crochet in each of the following stitches for a total of 24. Round 7, you will start by making a
single crochet in the next 7 stitches. You are going to make an
increase in the next one. Followed by a single crochet in the next,
and another increase, and you end up with a single crochet in the next 14 stitches. For a total of 26 single
crochet in round 7. The last round, round 8, you
will make a single crochet in each of the following stitches. Finishing with a slip stitch. You can cut the thread and secure it. If you intended to put safety eyes, it's
time to put them between round 6 and 7, approximately here, on each side. For others, we will add
the eyes at the end.
33. The Giraffe - Ears: Now we're going to make the ears. You're going to start
again with a magic circle. You will do 3 single crochet inside. Tighten the circle and we will continue
with round 2, making 2 single crochet on each of the next 3 single crochet. So, 3 increases for a total of
6 single crochet in the round. This round is a little more difficult
to crochet since it's very small. So, take your time. Put your stitch marker on the first
single crochet of round 2 and we continue. Round 3, we will increase
every other time. So, you will start with an increase on
the first single crochet of round 2. Followed by a single
crochet in the next stitch. And you repeat this pattern all around. An increase and a single
crochet in the next. At the end, roll the project
so that's on the good side. Round 4 to 6, you are going to make a
single crochet in each of next stitches. So 9 single crochet
per round for 3 rounds. And the very last round, you
are going to do a decrease followed by a single crochet. 3 times. 6 single crochet in total. And your last stitch
will be a slip stitch. You can now cut and secure the
thread and make a second one. Once both ears completed, we
will move on to the horns.
34. The Giraffe - Horns: We will start the little
horn with the caramel color. You will make 6 single
crochet in the magic ring. Then, you will make an increase in
the first single crochet of round 1, followed by a single
crochet in the next stitch. And you repeat. An increase, 1 single crochet,
2 more times, for a total of 9 single crochet in this round. You will now make a decrease. So it will create a small
bubble above the horn. So a decrease in the front
loop of next 2 stitches. Followed by a single
crochet in the next stitch. And you repeat 2 more times. Decrease 1 single crochet. For a total of 6 single
crochet in round 3. At the end of your last single
crochet, you will join the yellow color and we will continue with round 4. Now you will work in the back
loop only of the next stitches. So we will start with a slip
stitch in the next loop. Just to make a subtle color change. And then you are going to make a single
crochet in each of the next 5 back loops. For a total of 6. Always use your opposite hand to
properly guide the crochet in the round, given that it's a very small piece. The next two rounds, you will make
a single crochet in each of the next stitch, by taking both loops. And do not forget, the last single
crochet will be a slip stitch. You can cut the thread and
secure it, and make a second one. And there you go. Now let's get to the interesting
part, where we will start to form our little giraffe.
35. The Giraffe - Body (1): We're going to start the body
of the giraffe by making a slip knot and you will do four chains. Make a single crochet into the
second chain from your hook, a single crochet in the next chain, and three single crochet in the last one. You will now crochet on the
opposite side of the starting chain. You will make a single crochet in the next
chain and two single crochet in this one. The last one. That's it for round 1,
we will start round 2. Here you see the first
single crochet you made. You will make an increase in this one. So, 2 single crochet. Place your stitch marker on the
first, and we will continue by doing a single crochet in the next
stitch, followed by 3 increases. So, two single crochet in each
of the next three stitches. A single crochet in the next stitch. And two increases. You will have a total of fourteen
single crochet made in round two. Round three, we will start
with a single crochet. Then, you can put your marker and
make an increase in the next stitch. One single crochet in the next. An increase followed by a
single crochet three times. The first time is done, you do the second. Therefore, an increase, a single crochet. And the last one, increase
followed by a single crochet. You will then make a single crochet. And you will make an increase. An increase followed by
a single crochet, twice. It will give you a total of
20 single crochet in round 3. That's all for round 3. We will now get down to the
fun part, where you are really going to learn something new. We will now attach the paws
while crocheting round 4. So, I'm showing you this right now. You are going to take a paw. And you're going to align it with the
body so that we can crochet both together. So you're going to crochet inside the paw. You place it this way. No need to be specific about the location
of the paw but personally I like that the ending knot is stuck on the body. So that it is less apparent. So you're going to enter from the
inside of the paw in a stitch. and into the next stitch of the body. So it's like you take two stitches
together and you do your single crochet. You can now place your
marker on this stitch. We will continue. You enter inside the paw,
in the next stitch, and in the next stitch of the body. And you make your single crochet. You do it one last time, like that. So you attach the leg
while crocheting round 4. So we're finished for this leg, we
will continue working on the body. So be careful here, the next
stitch will be this one. So you're going to make a single
crochet in the next three stitches. We will now attach the second
paw, so it's the same principle. You align the paw with the body and
you crochet from the inside of it. I'm going to start right next
to the last stitch, right here. So we enter in the stitch of the
paw and in the stitch of the body. We make our single crochet
and we repeat two more times. We enter in the stitch of the paw
and in the next stitch of the body. We make a single crochet
and repeat one last time. In the following stitches of the
leg and the body at the same time. So the second leg is well placed. Now you will do a single crochet in
the next stitch, which is right here, and we will place the third leg and you
will crochet it on both parts together. In the next three stitches, we'll continue on the body, one single
crochet in the next three stitches, and we will fix the fourth paw. By crocheting again in both
parts, in the next 3 stitches. And we're going to finish round 4 with
a single crochet in the last stitch. Your stitch marker will help you to see
if you have crocheted the stitches well. If you haven't doubled or missed one. And that's it for the paws. I hope it didn't cause
you too many problems. We will now move on to round 5. To start round 5, we won't start on the
stitch where was your marker, because we will not crochet on the stitches
that we put together with the paws. They will be hidden inside. We will start immediately to
crochet on the outline of the paws. So, you go take the first stitch
available on the first paw. You can replace your stitch marker,
and we will continue to make a single crochet over the next stitches. You should do 9 per paw, given
that, if you remember, each one has 12 single crochet in total. We used 3 to hang on the body,
so you have 9 left to crochet. When you arrive at the junction
between one paw and the body, be careful to not add an extra stitch
in the strand that you see here. It's really in the next stitch, where you
really see the 2 loops, which are free. So you're going to make a single
crochet in that one, and a single crochet in the next two stitches. Then we continue on the second paw. You enter in the next stitch. In this case, it's the stitch
where was the slip stitch done. Always easier to do inside this
stitch, where the slip stitch is made. So you continue by making single
crochet all around the paw. 9 single crochet on this paw. Once again, arrive at the
junction, do not crochet in the strand that connects both parts. But really in the single crochet which
is between the second and the third paw. This one here. So it's easy to see. It's the only one that's
right in the middle. And you continue. On the third paw. In my case here, once again, the next
stitch is where the slip stitch is. And we continue. We make nine single
crochet on the third paw. Once again, stop just before the junction. And you see the three single crochet
that separate the third and fourth paws. You will crochet in this
one, that start here. And we continue on the last paw. Nine single crochet. You can see the way that I
wrote the pattern at the top. I wrote what to do on each
paw and between each of them. And we repeat what there is
between the brackets twice. And you will finish the last
single crochet, which will be in this stitch, between the two paws. And that's all. You can now count if you have 44
single crochet done in round 5. See you in the next video to continue.
36. The Giraffe - Body (2): Finally, a not too complicated round. We will start with an increase in the next
stitch, followed by 10 single crochet. And we'll repeat that 4 times, for a
total of 48 single crochet in the round. Between the paws, you can help
yourself with the opposite hand to guide well your hook on each stitch. Round 7 and 8 will be simple rounds,
so you make 1 single crochet in each following stitches, for a total
of 48 single crochet for 2 rounds. Before starting round 9, you can tuck
in the threads inside if any comes out. You can also close any little
holes you see between the paws using your yarn needle. You can add stuffing inside the 4 paws. In round 9, we will start
inserting the small color spots. You will now take the caramel yarn and
you will cut 10 strands of approximately 12 inches long and set them aside. If you would like to do the alternative
version of the giraffe without the color changes, but by sewing small circles
onto it, you can skip this step and follow the pattern with only one color. This alternative will be indicated at
the top of the screen and in the pattern. We will now start round 9. Make a single crochet in the next
stitch and place your marker on it. Make a single crochet in the next stitch,
but we are going to join a caramel strand just before finishing it like this. And you are going to make 2
single crochet with caramel color. Before finishing the second one,
take your yellow thread again and pull it through both loops. We will continue with the yellow color. You are going to make 17 single crochet. And you'll notice that I have changed
a little the way of writing the pattern at the top, given that we
all know that we make single crochet. I put the first letter of each color
next to each number to know how many single crochet to make of each color. At the seventeenth single crochet,
you will attach another strand of caramel color, and you are
going to make two single crochet. And just before finishing the second one,
take the yellow thread again and you will make 13 single crochet with the yellow. At the end of the 13, take a new
strand of caramel color and you will make 2 single crochet with it. Once again, before to finish the
second, you take back your yellow thread left behind and you go make
10 single crochet with the yellow thread to the end of the round. Round 10, we will continue
the same principle. You will start with 2
yellow single crochet. And don't forget to replace
the stitch marker on the first. At the end of the second one, you take
the first caramel strand that you used, and we will continue the little spot. You are going to make 3 single
crochet with this color. And at the end of the third, as
usual, you join the yellow yarn. And you are going to
make 7 single crochet. At the end of the 7th, you join
a new strand of caramel yarn. And you will do 2 single crochet with it. Join the yellow color and
make 7 single crochet. After the 7th, join caramel
color and make 3 single crochet. Join the yellow color and
make 12 single crochet. Taking the available strand, finish
your last single crochet and make 3 single crochet with caramel color. Join the yellow color to
the end and finish with 9 single crochet of this color. Ok, round 11 looks super complicated
but it's just that we're going to start making decreases. 6 proportional decreases. It's just that sometimes
they fall between 2 colors. So the pattern is a little complex,
but just follow the sound of my voice and it's going to be fine. And for the people who decided
not to work with two colors, just follow the instructions in
black at the end of the line. We will start by making a decrease,
followed by a single crochet, which will be in the caramel colored stitch here. And join this color precisely in the end. Make 2 single crochet. Join the yellow color and you
will make 3 yellow single crochet. Make a decrease. 2 single crochet. Join the caramel color and make
3 single crochet with this one. Join the yellow color and
make a single crochet. A decrease. 4 single crochet. Join the caramel color
and make 2 single crochet. Join yellow color and make a decrease. Followed by 3 single crochet. At the end of the third,
join a new caramel thread. And make 2 single crochet. Join yellow color and make a single
crochet, followed by a decrease. 3 single crochet. Join the caramel yarn and
make 2 single crochet. A yellow single crochet, followed by a decrease and 6 single
crochet until the end of the round. If, like me, you forgot to put your
stitch marker, stop 2 stitches before the start of the first caramel spot. And you can secure the caramel threads
of the spots that are finished, knowing that a spot is done in 3 rounds. You can make double knots with threads. And that's all for round 11. We will move on to round
12 in the next video.
37. The Giraffe - Body (3): Round 12 is going to be a simple
round so you will start by making 11 single crochet in yellow. Join the caramel color at the
end of the 11th and make 2 single crochet with this color. You will then make 12 single
crochet with yellow color. Join the caramel color
and make 3 single crochet. Then 10 single crochet with yellow color. Attach a new caramel strand, and you're going to make
two single crochet, and you end up with two yellow single crochet. You can, once again, take advantage
of securing the strands of the spots that we finished here by doing
a double knot with the threads. We will continue with round 13. In this round, we will
continue to make decreases. Six in total. We will have a little break of
color changes, so you're going to make a decrease, followed by
five single crochet in yellow, and you will repeat three times. At the end of the decrease sequence, you
will do another decrease, followed by three yellow single crochet. Join the caramel color, and you
will make two single crochet. Then, after changing to the yellow
color, you will make a decrease. Followed by 5 single crochet. Make a decrease. Followed by a single crochet. Change to caramel color
and make 3 single crochet. And finish with a single
crochet in yellow. At the end of the round, you can secure
the small spot that was completed. Round 14 will also have 6 decreases,
but will not be proportionally equal. So those who follow the pattern without
the color change still follow the instructions to know when to do them. So we're going to start by making
12 single crochet with yellow color. Join a new caramel strand and make a
decrease followed by a single crochet. And change color at the
end of the single crochet. Make a single crochet followed
by 3 decreases in a row. You will then make a single crochet
followed by decreasing twice. So a single crochet and a decrease. Then you will do 5 single crochet. Join the caramel color at the
end of your 5th single crochet. And make 2 single crochet. And join the yellow color and
finish with a single crochet. Secure the little spot we have just
finished and we move on to round 15. Round 15 you will love it, just 3 steps. You will start by doing
12 yellow single crochet. After the 12, join the caramel color. And make 3 single crochet. And end up with 15 yellow single crochet. Round 16 we're only going to do 1
decrease towards the rear of the giraffe. We'll start with 5 yellow single crochet. At the end of the 5 single crochet,
add a new strand of caramel color and make 2 single crochet. Followed by 5 single
crochet in yellow color. 3 single crochet of caramel color, a yellow single crochet,
followed by the decrease. And you finish with 12 single crochet
in yellow until the end of the round. And you can secure the little
completed spot right here. In the next video, we will start
forming the neck of the giraffe.
38. The Giraffe - Neck: Let's continue with round 17. You will make 5 yellow single crochet, 3 single crochet of caramel color, 3 yellow single crochet, 5 yellow decreases, and 8 single crochet of the same color. You should have a total of 24
single crochet in round 17. Round 18 has scattered decreases. So either you press pause and you
follow the pattern up here or let yourself be guided by my voice. So we're going to start with a single
crochet in yellow, followed by a decrease. Two single crochet. You join the caramel yarn. And you are going to make a decrease, followed by a single
crochet with this color. Join the yellow color and you
will make a single crochet, a decrease, 2 single crochet, and
repeat that 2 more times. A decrease, 2 single crochet. And you will end up with a decrease
followed by 1 single crochet. You will have a total of 18
single crochet in the round. You can secure the small spot
that we have just finished. And take the opportunity
to fill with the stuffing. We will continue with round 19. Now you will make 8 single crochet, 3 decreases in a row, a single crochet, and you join
a new strand of caramel color. You make 2 single crochet, And you end up with a yellow single crochet. You should have 15 single
crochet in round 19. Round 20, very simple, 12 single
crochet in yellow, followed by 3 caramel single crochet. And the last 3 stitches
of caramel color here. And join the yellow yarn
at the end of the third. Another simple round, you will
make 13 single crochet in yellow, followed by 2 caramel single crochet. At the end of the 13 yellow single
crochet, you join your caramel strand to make the last 2 single crochet. And join the yellow yarn at the
end of the last single crochet. Secure the threads of the
last spot we finished. You are going to make a single crochet
in each next stitches, in yellow. 15 single crochet in total. At the end, add a little bit of stuffing. We will now attach the muzzle
to the neck to form the head.
39. The Giraffe - Head (1): For round 23, start with one
single crochet in the next stitch. Place your stitch marker. It's going to be very
important for this round. Bring the muzzle part closer. We will now hang it around the neck. It's the same principle as with the paws. We're going to start crocheting
from inside the muzzle. Start by positioning it like this, the
knot that is stuck on the neck, like that. And you will start crocheting in
the penultimate stitch of the last round, which is located just to the
left of the knot, of the slip stitch. You enter into this stitch, and
into the next stitch of the neck, and you make your single crochet. You will continue, you enter in
the next stitch of the muzzle, as well as in the next stitch of the
neck, And you make a single crochet. And you repeat two more times. You enter the next
muzzle and next stitches. And you make one single crochet. And one last time. So the muzzle is now attached. We're going to continue crocheting. You will continue on this stitch. You are going to make
three single crochets. I would suggest you to add a stitch
marker on the single crochet who is immediately after attaching the muzzle. This will help you for the next round. So there we had one single
crochet left to do, in yellow. And I'm sorry, I inserted
one last little spot. So you will get a caramel strand. You will join it at the end
of the third stitch and make two single crochet with it. Join the yellow yarn to the
end of the second and continue until the end of the round. You should do 5 yellow single crochet. We now move on to the next round. We are now going to crochet around
the muzzle and neck to form the head. You are going to make a single
crochet in the next stitch. Place your stitch marker back and
you will continue on the muzzle. It's going to happen to be where
is the last slip stitch, just here. And you continue with 24 more single
crochet before the color change. At the junction between the muzzle and
the neck, your stitch marker will be very useful because it can be confusing. But this here is not a
stitch to crochet inside. It's really going to be there,
where is your stitch marker. So you continue in single crochet. You should do 3 more before color change. You take the caramel strand. You are going to make 3 single
crochet with this color. Join the yellow color and
make 4 single crochet. You should have a total of 33
single crochet in round 24. Round 25 you will start with 27
single crochet of yellow color. Then you will do 2 caramel single crochet. And you will end up with
4 yellow single crochet. And secure the last spot. Round 26, we're going to start
to attach the little horns. So you will start by
making 9 single crochet. After the 9, you will approach a
horn, and you will once again, like the other parts, crochet inside it. So you will take a stitch. I like to start with the
one next to the slip stitch. So you enter into this stitch
and the next stitch of the head. You do a single crochet and you go into
the next stitch of the horn and the head. Make a single crochet. And that's it for the horn. You will continue on the head by making a
single crochet in the next three stitches. We're going to hang now the second horn. Once again, you will go from the inside. You take a stitch, you can
take any one, it won't matter. And you also enter in the next
stitch of the head, twice. The same thing that the other side. And you continue on the head
until the end of the round. You will do 17 single crochet. It should look like this. Before you start, make sure
the thread from the beginning of each ear is tucked inside. You can cut a little bit of it,
then tuck it in using your hook. In round 27, we're going to attach
the ears, and you will learn a new way of integrating them. So you will start with 5 single crochet. Go get the first ear, and this time, by
flattening it, this is a term which means that you are going to enter 2 stitches
apart at once, as if to close the opening. So you enter your hook from edge to
edge through two stitches, like this. And you enter in the
next stitch of the head. And you make a single
crochet across all that. And you do the same thing again. You enter from edge to edge into
the next two stitches from the ear and in the next stitch of the head. And you make your single crochet. So you will see the ear is
closed and attached to the head. Make a single crochet in the
next 2 stitches of the head. Then, on the little horns, being given
that there were 6 single crochet in total, you should be left 4 stitches available. What we are going to do is to make
invisible decreases on the horn. You will enter into the front loop
of the next horn's 2 stitches. You make your single crochet. And you are going to do
the same thing again. You enter into the next two front loops
of the horn and you make a single crochet. So the horn is well closed while keeping
the same number of stitches in the round. You will make a single crochet in
the next three stitches of the head and we're going to do it again. Same thing with the second horn. You get into both next front
loops for an invisible decrease. Make your single crochet and you start
again taking the two front loops. You make a single crochet. And we continue on the head. It's not easy to know where to
continue but it's in the stitch where you see well the little V here. This is the next stitch. So you're going to do two single crochet. And then we will place the second ear. So we flatten the ear and enter
from edge to edge in two stitches. And in the next stitch of the head. You make your single crochet and
we start again a second time. You enter two stitches through the ear
and into the next stitch of the head. Continue on the head in
this stitch, the next one. And you continue to make single
crochet until the end of the round. You can now relax. The rest of the pattern is very simple.
40. The Giraffe - Head (2): Before starting round 28, those of
you who have chose to put safety eyes, it's time to place them. You can refer to this picture. It's on each side of the muzzle,
two rounds above the color change. For the others, we will
place eyes at the end. We're going to start the
round 28 with a decrease. Followed by nine single crochet. And you repeat that three times. You should have a total of
30 single crochet at the end. At the end of the round, you can tuck in
all the strands of the horns and ears. And if ever there are small spaces
which were created at the ends, you can tighten them with the same
thread, like I do on the screen. You can also secure the strands that
you tucked in by making double knots. Round 29, you will start with a decrease,
followed by 3 single crochet, and you repeat that all around, 6 times. You're going to have a total of
24 single crochet in round 29. Round 30, you will make a decrease
followed by 2 single crochet, and you repeat all around for
a total of 18 single crochet. At the end, you can fill with stuffing. And also take the opportunity to tuck
in the thread from the end of the muzzle and use it to hide any small holes
that could have been formed at the junction of the muzzle and the neck. We will now move into round 31. You are going to make a decrease
every other time, therefore a decrease, one single crochet. 6 times, for a total of 12
single crochet in the round. For the last round, you will do 1
single crochet in each of next stitches. But you have the choice to
make 6 decreases instead. But the first option gives
a more beautiful finish. At the end, cut and secure the thread. You can also add a little bit of stuffing. And we will close the end
of the head with our needle. Bring in the needle from the
outside to the inside in the next stitch or simply go between the
stitches like this, all around. And insert the needle in the middle
of the hole and pull very hard. Now enter the thread to
across the neck and body. We're going to come and
use it to make the tail. Bring out the strand between round
12 and 13, right in the middle of the little glutes of the giraffe. Cut another yellow thread and
pass it on each side of the thread that is coming out. And you're going to make
a little braid out of it. When the braid reaches a length of
about 2 inches, you can tie a knot at the end and cut off the excess. And that's it! We will now put the eyes, holding
the giraffe in front of you. You will put them in round 7 of
the muzzle on each side, right here. And you use your yarn needle to fold the
small points, so that they are very solid. Look at the other side
and do the same thing. If you would like to embroider eyes with
the black thread, you can refer to the Lion project to know how to make them. Check if they are properly hooked. And there you are! You've done your little giraffe. Well done! You have completed a
project completely seamless. You are now an amigurumi expert! For those who didn't crochet the
little spots with me, you can make 10 little rounded spots made of
6 single crochets in a magic ring that you will sew on the giraffe.
41. How To Read A Pattern: Here you are at the last lesson where you
will learn to read any amigurumi pattern. I will use the one of the
projects you'd have just done. You can download the PDF
file below this video. It's on the first page of the pattern
that you will find the materials you will need, the abbreviations that will
be used, as well as the rules that will be used throughout the pattern. You will have the approximate
size of the project once finished. As you see in this case, depending
of the yarn chosen, the size will be different, but I give you the measurements
that it gives with the cotton thread. As for the material, the
hook size will be specified. I wrote you here that I used a 2. 75 mm hook for sports DK yarn or 5 mm for
super bulky yarn like the chenille one. But as it is written, you can use
different hooks for different dimensions. This is why you will find
rarely a sample to make. You will also find the weight or
length of yarn required for making the projects as well as the colors. I wrote down the specific
brands I used if you want your amigurumis to be identical to mine. Now let's move on to abbreviations. Just a quick note here, I specified
that I use US crochet terms, because in UK they are different. The single crochet is
called the double crochet. So if you find a UK pattern of an
amigurumi that every stitches are double crochet, you'll know that means that you
will make the single crochet you know. You must recognize now all the
abbreviations I wrote here, thanks to the course projects. But I will review them with you here. The goal is always to simplify
the writing of the pattern. Therefore, the chains will be
written CH, single crochet SC. SC two together is one
way to write a decrease. It is to make two single crochet together. You will therefore see one or
the other abbreviations written and know that they are identical. You can also see the abbreviation of
word increase, which means to make two single crochet in the same stitch. I also explained the special
stitch used in the pattern, in this case the bobble stitch. It's important to know that my
bobble stitch might not be the same for another crochet designer. This is why the instructions will
always be indicated to be sure of the way to do the stitch in the pattern. Then, you have the slip stitch and all
other abbreviations used in the pattern. And I write down my general rule
that all the stitches will be crocheted in both loops together,
unless contrary indications. So if we crochet in the front loop
or back loop, it will be indicated. Otherwise you consider that
you enter in both loops. The next page in the pattern, I made
you a small resume of general rules which are applied for amigurumis. Which I explained during my course. So this is a little cheat sheet,
which could be very useful. Now let's start with the pattern of
the first project, the little lion. You have the hook size and
the color to start with. And with which technique
will you start with In this case, I suggested either
making two chains or the magic ring. You have the choice
between the two methods. Then you have the first round. I tell you that you have to do 6 single
crochet in the second chain from the hook if you started with chain 2. Otherwise, it will be 6 single
crochet in the magic ring. And I will write you in parenthesis
at the end of each round the total number of stitches in this round. Then, the second round, I wrote
you to make 2 single crochet in the first single crochet of round 1. Just so you understand that we must
close the circle and continue on the first single crochet made in round 1. And then make 2 single crochet
in the next 5 stitches. So you will make increases in
each stitch of the round 1. Which will give a total of
12 single crochet in round 2. Round 3, it says to make 2 single
crochet in the next stitch an increase. Followed by a single
crochet in the next one. In parenthesis, that means that
everything in these parenthesis are going to be repeated 6 times. And that will give you a total
of 18 single crochet in round 3. And just a little note, when you
don't see a number in front of the single crochet like here, it just
means that we have to do just one. Then, after the 7th round, I
write to join the caramel color. That means that at the last single crochet
of round 7, you will join the new color. And the letters that are in red
correspond to a picture, which can help you understand better. Then, in round 8, it is specified
to crochet in the back loop only. Then, throughout this round,
you will only crochet in one strand, one loop, the back one. But the following rounds will follow the
general rule of crocheting in both loops. Round 11, this is where
we start making decreases. I will write down the abbreviation SC2TOG
but you know very well what it means to make an invisible decrease,
since we are making an amigurumi. And it's the same principle
then with increases. Everything in the parenthesis,
you will repeat 6 times. So 1 decrease followed by a single
crochet in the next 3 stitches, 6 times. will give you 24 single
crochet in round 11. The little box here, it's only if you
have decided to put on safety eyes. You really need to place them
before closing your circle. Don't forget that you have to
start stuffing before that we no longer have room to do it. In the last round, I
wrote you two options. Either you make a single crochet
in the next 12 stitches, or that you make 6 decreases. The result is almost the same. It's really a personal choice, but it's
easier to add a little bit of stuffing when we make a round of single crochet. And at the end, I write you the
instructions to finalize your project. When it is written FASTEN OFF That
means cutting the thread and passing through the loop to secure it. As a French person, I always saw
this instruction in the patterns without knowing what it meant,
because it's not really translatable, but you know now what it means, and
it's shorter to write it like this. Also, I wrote to add some
stuffing and close the end. I have pictures to help you know how
to do it correctly on the next page. When it's time to do the mane, I wrote to
join the colored yarn to one of the front loops which were available from round 7
and then you will make one round only. You will start with a chain 1 to
give you a little bit of height and then everything in parenthesis. Single crochet, chain 2, single crochet. You do all that in the same loop
and in each of the next loops. And I tell you to make a slip stitch in
the starting point, the first loop you joined the yarn, just to finish the round. Instructions for making the ear,
you will do whatever is in the parenthesis, in the magic ring, or
in the second chain from your hook. And all the following instructions are
the steps to finalize your little lion. Now let's move on to the flamingo,
where I wrote the pattern a bit differently, more simplified. Instead of writing to you to do 2
single crochet in the next stitch, I put you the abbreviation for an increase. It's much more concise. The text is lighter too. You see that the parentheses have
disappeared, but I put little stars. We often see this type of
characters in the patterns, but it's totally the same thing. You have to repeat 6 times what
is between the little stars. Then you will sometimes see in brackets
or parentheses the number of rounds to do. For example, round 6 to 10, instead of
counting on your fingers that it is 5 rounds, we will write it for you how
many rounds to do the same instructions. Then I used the abbreviation
DEC for decrease instead of single crochet 2 together. Round 12, you see there is only a
number of single crochet to make. It is simply to do a single crochet
in each of the next 24 stitches. In the next page, you have the
instructions to make the wings and paws, and I write you in
parenthesis how much to do. In the instructions for the paws,
you notice in round 3 the term bobble, which means that you will
make the bobble stitch, which is explained in the first page. When you will make the beak,
you are going to join a color right in the middle of a round. So I write it like this. You do a single crochet with the black
color, you join white color in just before finishing this single crochet,
and then you will make a single crochet in the next two stitches, followed by
one slip stitch into the next stitch. In the assembly page, you will see
where to sew the parts and I always write between which round to sew them. Now let's move on to
the crocodile pattern. This time, I put the instructions
to repeat between brackets. Again, it's the same thing
as parentheses or stars. Do you remember? We made the paws separately
and then we tied them together. So the way to write it is that round
1 to 5, you made it, you put it aside, and then I asked you to repeat
them, but to continue with round 6. Round 6 will therefore
only be on the second paw. But I ask you, right in the middle,
to continue working on the first one. So you integrate the first
paw that you made in round 6. And you will continue to crochet
around both paws in the next rounds. You also notice the 3 little dots
here, it's simply to tell you that the instructions continue on the right page. Then, with the head of the crocodile,
we didn't start with a magic ring. I wrote you to do chain 5. And instructions from round 1, you
see that we're going to crochet on the two sides of the starting chain. Here in round 11, I wrote 10 increases. That means you will make an
increase in the next 10 stitches. For arm instructions, I wrote to
you in a small box the alternative to having one arm a little
plumper, but easier to crochet. To make the eyelid, we're not
going to close the circle, so I have written in row 1 to turn. You make your 3 single
crochet in the magic ring. You turn your project to be
able to work on these 3 single crochet there on the wrong side. And you start the second row by doing
2 single crochet in the same stitch. This stitch will be the last
single crochet made from row 1. And all this will come to form a semi
circle, which will make our eyelid. Take note that when we're not closing a
round, we're not crocheting in rounds. It becomes a row. The overall instructions look very
complicated, but you have to just take the time to read and you can
always compare with the video tutorial to see if you understand correctly. For assembling the crocodile,
when I note that it is between the round 15 to 17 inclusively, is
that must be sewn and include the round 15, 16 and 17 in your sewing. Also, when I write that you have to
flatten and sew, As I showed in the video, it's really flatten the part and
sew by entering through both stitches to be able to sew on the same line. I then gave you the instructions
to crochet on the surface. So it is not really a row, but I wrote
you in bold letters what to do in each stitch for creating the small bumps. Now let's move on to the giraffe pattern. I made another little one
modification in writing. We can see in the pattern that
instead of times or an X, it's a star. So the star in this case, if not used as
a parenthesis, will mean a multiplication. So you will make 6 increases in round 2. In the interesting part of the
pattern, I tried to explain the inclusion of the paws clearly. I hope it worked. But I wanted to show you another
feature that you can see in the patterns when it is written repeat
with a star inside brackets. That means to repeat everything what's
between the brackets another time. So that indicates that you will
do twice what is in the brackets. And a new rule appeared. I'm writing to you that from
now on, I will stop to use the single crochet abbreviation. Because we all know that
it's the basic stitch. But I will replace with letter
of the corresponding color. So it will look like this. The number of single crochet
to be done with the same color. That's it for reading a pattern. I hope you learned everything that
you will need to be capable of creating the amigurumis you want. See you in the next video
for the final words.
42. FINAL WORDS: Do you now feel your superpower to be
able to crochet everything around you? I hope, at least, to have given
you all the confidence you need to start any Amigurumi project. It always makes me happy to see
what you created from my course. You can share it with me
on any social networks. You can find me on Instagram or
Facebook under the name of Crochetmilie. I was very happy to have been part of
your crochet journey in this course. I'm already looking forward to
create a new course for you. Don't hesitate to shoot me your
suggestions and subscribe to my newsletter to not miss anything. See you soon and I wish you to
crochet as often as possible. Have a good day!
43. BONUS - 4 Ways To Change Color: As you noticed, the usual way to
change color makes a really big demarcation when crocheting in round. So I'm going to show you four more
subtle ways to make color changes, which will make it more aesthetic. I'm going to start with the
simplest to the most complicated. It's up to you to choose
which method you prefer. The simplest method, in
my opinion, is this one. The one I prefer is after have change
color, you replace the next single crochet with one slip stitch, like this. And you continue with single crochet. And at the end, you see that it
makes not a too big difference. You continue as usual your
rounds on the slip stitch made. And you see, the junction of
color is much more subtle. If your project requires a
color change between each round, you can decide to join rounds. So, after joining the new color,
you can make a slip stitch into the next stitch, chain 1, a single
crochet in the same stitch, and you continue in single crochet all around. And at the end, at your last single
crochet, you join the color again. You make a slip stitch in
the first single crochet. So you skip the chain, you make a
slip stitch in the single crochet. You make another chain and a
single crochet in the same stitch. And you continue. So it will give you a seam. Except that the color change
will be much more subtle. Without breaking your head too much. This method is really if you
invent your own amigurumi. And that you want a nice straight
line between the color change. So, the round preceding the color change,
you will join the new color at the end, at the last single crochet, as usual,
and you will work with both yarns. Basically, you are going to come and
join the new color with each single crochet that you are going to do. The first yarn over or under, you will
take the original color, and the second yarn over, you come and get the new color. It's a little bit complex and you
must be careful not to tighten the single crochet too much. Your tension should be quite light. You see? This will create a small color line above
and that will ensure that in the next round, the demarcation between the two
colors will give a nice straight line. So the next round you pay attention
to enter only in the new color loop. When you finish the last single crochet
of the round, you can cut the thread, pull on your hook to close the stitch, then you will enter the hook
from the inside towards the outside, not in the next stitch,
but the one immediately after. So you skip a stitch, you enter the one
after, you come and take your thread and pull it towards inside, like this. And you go enter your hook into the
back loop of your last single crochet, and you will come and get your thread. This will create a fake stitch. If you're afraid of losing sight of
it, you can add your stitch marker, just to know that it's going to
be in this one, that we will begin to crochet with the other color. So make a slip knot, put your
hook in, Inside, and we will come and join this color on our
fake stitch, which is right here. We can recognize it because
there is like a little horizontal strand which passes through. Right here, you come in and you make
your single crochet with the new color. You can pull the threads
behind to tighten well. And you continue to do
your single crochet. We meet at the end of the round. After have made your last single
crochet, it will look like this. So you will come and continue on
the first single crochet you made. We are going to do another round
and I'm going to show you one more time this color change. So, at the last single crochet
of the round, you cut the thread. You bring it out by pulling on your hook,
and you are not going to enter in the next stitch, but the one right after, this one. After you enter the hook from
the inside, you come to pull the thread to bring it inside. You place your hook in the back
loop of your last single crochet. You come in, you go get the strand
to bring it back inside, what will create your fake stitch. And you will continue by joining
the new color on this one. And at the end, you continue with a
single crochet on the first one you made. And tighten all the strands tightly back. You can tie double knots. Still pull really hard to
hide the junction of colors. So it's a method which requires much
more time, but if your project contains lots of color changes and you want a nice
line of junction, this method is for you.
44. BONUS - Invisible Increase: You have learned how to make invisible
decreases, but did you know that there was also a way to make invisible increases? The first single crochet of the increase
will be made in the back loop only of the next stitch, and you will do your
second single crochet taking both loops. So you enter in the front loop
and in the back loop like this. And your invisible increase is done. It's like your first single crochet
was hidden behind your second one. I'm going to do another one here. The first single crochet will be
in the back loop only, and the second in both loops, like this. This technique will be practical if
you make a big amigurumi or a project that requires a large diameter.
45. BONUS - Change The Appearance: Now, let's take our amigurumi
into plastic surgery. First, I'll show you how to
add blush on your amigurumi. You have two ways. Either you take some pink thread
and you embroider a small line below each eye, like this. Or you can simply use a real
eyeshadow or blush that you will apply using a brush on your amigurumi. This method is, however, definitive. Don't be mistaken. A technique you can use to shape
the face is to take a strand and enter it between two places. In the example here, I would
like the muzzle more pronounced. So I'm going to come and bring
in the thread each side of the muzzle between the stitches. And I'm going to come and pull my two
threads so that the eyes sink a little more to make the muzzle stand out. This technique is often used to
bring the eyes of the amigurumis a little more towards the inside. And you can secure your plastic
surgery by making a double knot with the strands that you will tuck inside. I will now teach you how to add hair. You can cut several strands
of the color of your choice. You enter your hook at where you want
them to be, grab your thread in the middle, get it out by the stitch and
come and get the remaining two strands to take them out through the loop. This will secure the threads
and make little hair. When you are finished, you
can make a small haircut. And that's it! And if you want that hair to be
curly, you can separate each strand of the thread with your needle. I don't know if Our Little Lion
was more beautiful before all these modifications, but at least you will
have learned three new techniques for modifying your amigurumis.
46. BONUS - Lion With Chenille Yarn: This tutorial was designed for those
who chose to work with the chenille yarn type, a super bulky yarn. So you will need a 5mm hook to work with. And given that you need to know
how to crochet to be able to be comfortable with this type of yarn,
I won't give as many details as the little lion project in the course. But you will at least have a good idea
of how to work with chenille yarn. You will start by doing 6
single crochet in a magic ring. You will notice that I do yarn under
the hook instead of over, so that my single crochet are X shaped. Even if it doesn't appear so much,
it will make the project tighter. And another thing to watch out for is
that with this type of yarn, you have to be very delicate, because if you pull too
hard to close the round one, It might breaks, so try to pull a little bit as
you go, and as you make your 6 single crochet, as I show you on the screen. Once your 6 single crochet are done,
you can continue with round 2, making 2 single crochet in each of the 6
next stitches, for a total of 12. For round 3, you are going to
make 2 single crochet in the next stitch, followed by a
single crochet in the next one. So, an increase every other time, all
around, and it will give you a total of 18 single crochets in round 3. Round 4, I will apply, in this
case, the perfect circle rule. So you're going to start with a single
crochet in the next stitch, and you are going to make your increase. Two single crochets in the next
stitch, followed by a single crochet in the next two stitches. You repeat all around, and after
the last increase, you will have to make one single crochet. You can choose to follow the
pattern that is shown on the screen instead, it will make no difference. It's just that, given that we
are in a specialized course for amigurumis, I wanted to make you
practice this perfect circle method. You should have a total of
24 single crochet in round 4. Round 5, you will make an increase, 2
single crochet in next stitch, followed by a single crochet in the next 3 stitches. You repeat 6 times, and you will have a
total of 30 single crochet in this round. Round 6 and 7, you are going to make
a single crochet in each of next stitches, for 2 rounds. We will meet up at the end of round 7. At the last single crochet of round 7,
you will come and join the thread of caramel color, just before finishing
this single crochet, like this. And we will be able to
continue with round 8. Round 8 will be crocheted in the back
loops only of round 7, like this. And you will continue to make single
crochet in each of the next back loops. The next two rounds, you make a single
crochet in each of the following stitches. We meet at the end of round 10. Round 11, we're going to
start making decreases. So you're going to go into the front
loop of the next two stitches, this way, and you do your single crochet as usual. That's an invisible decrease. You can replace your marker on the stitch. And you can make a single
crochet in the next 3 stitches. And you repeat all around. A decrease, 3 single crochet. This will give you a
total of 24 in round 11. Round 12, you will make a single
crochet in the next stitch, since I make you practice shifted decreases
with the perfect circle technique. So after your decrease, you make a
single crochet in the next 2 stitches. All around, and after the last decrease,
you make only one single crochet. You will have a total of 18
single crochet in round 12. And again, if you prefer to follow
the pattern on the screen, go ahead. It won't make any difference. At the end of the round, take
advantage to add stuffing. Round 13, we are going to do
a decrease every other time. Single crochet 2 together. A decrease, followed by a single
crochet, 6 times, and you will have 12 single crochet in this round. Use the middle finger of your opposite
hand to keep stuffing out from your work. The last round, round 14, you
will make a single crochet in each of the following 12 stitches. At the end, replace the last
single crochet with a slip stitch, for a more beautiful finish. You can now cut the thread by
leaving a good length and secure it by passing it through the loop. Add some polyester stuffing and
we will come and close the end with the yarn needle this way. Once you've done the sewing with
your needle, pull the thread and tuck in the middle of the hole. We will now crochet the mane. We're going to go crochet on the
loops who were left free from round 7. So, you will come and
join the caramel thread. You are going to make a
chain, a single crochet. Make the normal single crochet
with V shape by doing yarn over instead of yarn under. Chain 2 and 1 single crochet,
always in the same loop. This is what will form the main. So, in the next loop, 1 single
crochet, chain 2, 1 single crochet. So you repeat this pattern
all around, within 30 loops. We meet at the end. At the end, you can make a
slip stitch in the first loop. Finally, cut the thread and secure
it passing it through the loop and bring in this thread and the
beginning one in the same place. We will now secure them
and hide them inside. To do this, you make a double
knot and you tuck them inside. We will now embroider the face. Cut a strand of black thread about 1. 5 feet, and we will start by
embroidering the muzzle and the eyes. You can follow on screen
to know how to do it. With one of the white thread, you can
embroider little reflections in the eyes. I warn you, it's not easy. You have to go around a strand of black. It's quite moldable, so with your
needle, make sure you make it show up. You can now do it on the other eye. When you secure the white threads,
be careful not to pull too hard to not hide the white reflections. If you have a bit of caramel yarn left
that sticks out, use it to embroider the little V's on the lion's forehead. Otherwise, you can take a new strand. So, you do the following. There will be 3 in the
round 4 and 2 in round 5. I hope that, unlike me, you
had a slightly longer strand. We will now crochet the ears. For the ear, you will do 4
single crochet followed by 1 slip stitch into the magic ring. That's all! So you make 2 like that. We will now sew them on each
side of the lion's face. Enter the beginning thread so that
it fits well in the center and you can sew with the ending thread. You can secure and hide the strands
inside and you can sew the second ear. If you chose to transform your lion into
a keychain, it's now the time to do it. So you can just enter a thread,
if you don't have one you can put another one and make two turns in
the small ring of the keychain. to secure it. And you will hide this thread. I'll show you how to do it right now. You're just spinning around two
stitches back and forth like this and you cut off the excess. Bravo! You have finished your
So Soft Little Lion. You can now follow the same
instructions with the rest of the projects with your chenille yarn.
 Emilie Bolduc, Crochetmilie - Modern Crochet