Transcripts
1. Introduction: Welcome to this course on generative AI in
Adobe Photoshop. My name is max and I'm a photographer and
content creator. Before we're five years of
experience in the industry. In this course, we'll be
exploring the use cases of generative AI in
Photoshop and how you can use it to create
stunning at unique results. We will start by diving
into Adobe Firefly, the Generative AI engine in Photoshop and explore its
various features and tools. Later, we will work on real-world examples like
removing objects from a photo, adding new elements and
expanding pictures. Or if the power
of generative AI, whether you're an
experienced Photoshop user or just starting out, you can get access to the
Generative AI features of Photoshop by downloading
the newest Photoshop Beta. And if you don't have a
subscription, don't worry. You can make use of a seven-day free trial and follow along
with dead version. You can even try generative fill on the
Firefly website for free. So let's get started and take your Photoshop
Skills to the next level with Generative AI
2. Firefly: Hey, there. In this video, we'll be
talking about Adobe Firefly, the Generative AI engine behind the new
Photoshop features. We will talk about what it is, how to use it, and
what to use it for. What is Firefly? Firefly is a suite of AI models
that can generate texts, images, and other media in
response to prompt the user. Initially, it is focused on
image and text generation, but later it will expand
to video creation, 3D workflows and much more. The image creation engine is comparable to Dolly mid
journey as stable effusion. You can access Firefly by going to firefly does adobe.com, and selecting the
text to image mode. There, you can look at some examples created
by the AI model. And when you hover
over the image, you can see the
prompt that was used. This is perfect for
getting an idea of what kind of prompts
cost the desired results. When it comes to text, to image prompt, there are some general
guidelines to follow. Text prompt should
be at least three to seven words long,
detailed and concrete. They should include a
subject, a location, descriptors, aesthetic
and style keywords can add the finishing
touches to the image. So in conclusion,
the structure for the prompt should be subject, location, descriptors,
and style. This structure doesn't
matter for the result, but I find it quite useful for remembering what I should
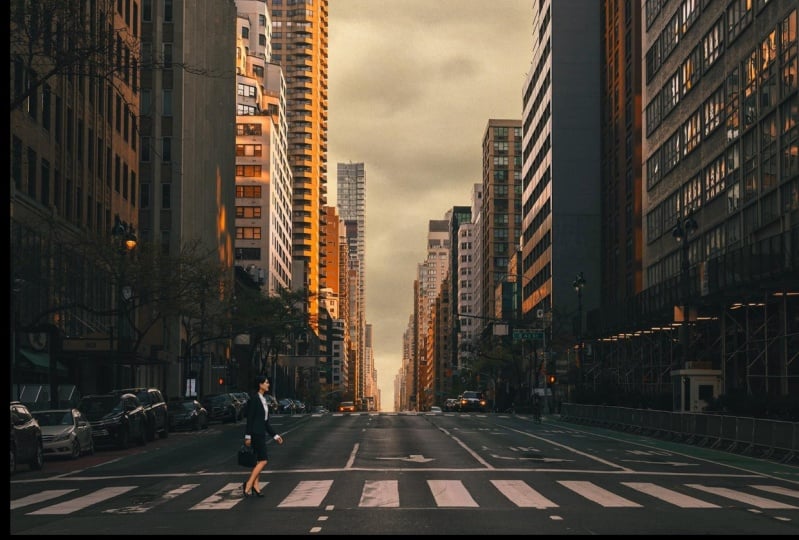
include in a prompt. So as an example, let us try to recreate this
picture as close as possible. At first, we will use a general
prompt and Z the results. So let's start by entering woman sitting on a beach
into the text field. Then we click Generate. As we can see, we're getting some pictures of a woman
sitting on a beach, but they're not replicating our picture at the results
are not consistent. So let's try a more
detailed description following our guidelines
and structure, let's enter side view of a
wide young woman sitting on a TVA on a sandy beach against blue sky with a
lake in the background. Woman wears white clothes, has brown hair. Looks relaxed. Photo 50 mm. They can add in our
and there you go. The results are much better
and much more consistent. With some jobs in
Photoshop and Lightroom. We could get this picture very close to our initial photo. At the right side
of the window is an interface that you can
use to refine the results. You can change the aspect ratio, pre-select the style, and select colors, lighting,
and composition. There are some limitations to
the image creation engine. It is difficult to get realistic
looking hands and feet. The results are not
photo-realistic. It looks rendered more
like a concept Art. So keep those limitations in mind when creating in Photoshop. Now, let's talk about some
use cases for firefly. It can be used as a text to image engine for
brainstorming looks, ideas, pictures, to apply styles
or textures to text, to recall a vector
artwork, and much more. Furthermore, it is natively integrated into Adobe Photoshop, but that we will explore
in the next few videos. Thanks for watching. See you in the next one.
3. Removing objects: Hey there, welcome to
this video on using generative field
to remove objects from an image in
Adobe Photoshop. In this video, we'll be exploring how to
use Generate, fill. The difference between
generative and content aware fill real-world use
cases and examples. Firstly, using generative field to remove objects
is fairly simple. Just select the area
you want to remove with the Lasso tool or any selection tool
you're comfortable with. Then on the new hot
bar, click Generate, Fill or go to Edit,
generative fill. Leave the prompt blank
and just click Generate. And there you have it. They objects should be removed. Now, let's talk
about the difference between generative field
and content aware fill. Let us try to remove a subject from an image
using both methods. This image, we would like
to remove this player. So let us click Select Subject. Then we will, by
holding the Option key, will remove this player
from our selection. And under this menu, we can expand the
selection by ten pixels. So the AI has something
to work with. Then we will go to Edit
Content-Aware Fill. And there you have it. We will output it to
a new, a new layer. And this the result of
the Content Aware Fill. So now let us try
the same method. But with Generative, we will select this
object. Once again. Remove the player with the ball, expand the selection,
and click Generate, Fill, generate.
There you have it. This is the generative
fill layer. And this is Content-Aware Fill. Under the Generative layer, we can also select
some variations to see if another variation
suits this use case better. But with the variation, they invents some kind
of poll back there. And that is not what we want. So this is the final result. Overall, we can say generate
the fill is perfect for recreating natural patterns
and complicated backgrounds. While Content-Aware Fill is
better for smaller objects, we have an even background. Generative AI tends to invent stuff just
like with this poll. So often it is faster to
use Content-Aware Fill. So now let's look
at a few examples. So you get the idea
on this first image. I would like to remove this
flower from the image. So let's go ahead
and select it with the Lasso tool kits like so,
generative, fill, generate. Let's look what kind of results. But again, just like that, we have a perfect
re-creation of this cake. Now let's look up
some variations. Here. Here he is trying
another kind of cake. Maybe that's better. And here another, there's a
difference in the background. So let's look at
the background and the variations that think. The second one, I like most. There you have it perfectly
recreates the cake. And with the background
it has some problems, but pretty much it is flawless. Let's look at another
example here. I would like to
remove this subject and the reflections
in the water. So let's see what AI does. I'm selecting subjects, giving it a little bit of
room to work with. And then we will add
the same selection, we will add the shed. So okay, let us try
generative fill, generate. Now I'm really curious if it is able to recreate this
shadow when the water. But let us see. And there you have it. She's gone perfectly. Let us look at some variations. Find the second one
the most realistic. Let us turn this layer off and on so we can
see what the AI does. Pretty impressive. In this example, I would like to remove people
from this chart. So let us go ahead and
select this object. Expand the selection
by 20 pixels. Okay, generative feel. Let's go. Okay. What is AI trying to do? See this happens
sometimes where I select this object and
click Generate, Fill. And on some subject it
completely removes them. And on other subject it
does something weird. So let us try entering a prompt and write remove the subject. Let's try again. Okay? No, it doesn't want
to remove those subjects. So I think that would be a
case for content aware fill. So as our last example, we're trying to remove
those knives from an image. This time we're going to use the polygon lasso tool to
get some straight lines. Drawing a rough shape around the divs that generate the fill degenerate. Okay. We can see that
it doesn't understand, but we'd like to do it, puts some other knives
there and not removes it. So let us try entering
a prompt and writing, remove the null. Generate. Okay, there you have it. Removes the knives and replaces
it with a little leaf. Just awesome. Here's the before. Here is the after. In conclusion. The
new generative field is a powerful tool
that enables edits. Take a lot of time
and knowledge. In seconds. It will only get better
with time because right now the results are a
bit and consistent. On one picture, it works great. And on another one, it completely screws up. So that is all on generative
field for removing subjects. In the next video, we will explore how
to expand a photo. Thanks for watching, and I'll
see you in the next one.
4. Expanding images: Hey there and welcome to this
video on using Generative fill to expand the
aspect ratio of images. In Adobe Photoshop, we'll
be exploring how to use it, some real-world examples and discover the limitations
of this powerful tool. So how do we use
generative field to expand pictures?
It's fairly easy. First, use the Crop
tool and select the desired aspect ratio while holding down
the Option key. Drag out a frame and
confirm the cropping. Then with the rectangular tool, select the image, the selection, and choose generated
film from the hot bar. Or I go into Edit
generated feel, relieved the prompt blank
and click Generate. Just like that. Picture is expanding. So let's take a look
at some examples. So in our first example, let us try expanding. So first we select
the Crop tool and our aspect ratio and
go for 16 by nine. And try holding down
the Option key. Let's expand. Okay, Let's go little
bit wider so we can place the phase of
the woman On a thirt. Confirm the cropping. Select this object. Inverted generative fill,
generate. There you go. That picture is X band. And it does a really good job. Firstly, it expands those hills in the background
and those trees. But also look at this
toggle right here. It expands it perfectly
and also an expense, the shadow of the woman. So pretty much this
is a perfect result. Let's look at some variations. Okay, they're pretty minor. I would say the first
is the best one. Now on our second image, Let's try to expand this one. And this is a classic example
where this photo was taken for social media in a
vertical aspect ratio. And if we would like to use
this image on, for example, a website or for printing, we would have to shoot
it horizontally. And after fact, we could
do nothing to recreate it. Now if there's
generative fill tool, Let's try expanding this
picture to a 16 by nine. First, we unlock the layer, just like we've said, select 16 by nine. And on this we'll
go really wide. Just like that. Selecting image, Burnet,
generate a fill. Let's go. There you go. The picture is expanded. It does a really good job. Here's the before,
here's the after. And it recreates the city perfectly and expands
the mountain. Nobody could tell
the difference. In our last example. Let us take a look at
this food picture. And I would guess that AI has a hard time recreating cake, the chicken, the whole table. So let us try expanding
it with the crop tool. This one, we go pretty
wide so we can free, can see if the eye
is able to do that. Okay, now I'm impressed. Look at this picture. It perfect, perfectly recreates the chicken, the cake, knives. And it even creates a kitchen or some kind of living
room in the background. Let's look at some variations. It's also pretty
good this morning. But I like the
first one the most. If you look closely, we can see some kind of glitches
right here in this area, but we could fix
that pretty easily. But overall, I would say, here's the before,
here's the after. It is pretty flawless. In conclusion, we can say that it is a
really powerful tool. Out of all the use cases, I find this the
most reliable one. The results were astounding
and pretty flawless. Sometimes there
are some glitches, but they are pretty minor and easily fixed
with some touch-up. So that is all on
expanding photos. In the next video, we will explore how to
add elements to a photo. Thanks for watching, and I'll
see you in the next one.
5. Adding elements: Hello and welcome to
this video on how to use Generative fill to
add elements to a photo. We will discuss how to use it, discovered and limitations and find some real-world use cases. Alright, How does it work? First, you need to select the area per you want
to place the subject. Keep that I mentioned of the elements you want
to place in mind. After you have made
your selection. Choose their generate
the fill option, enter a concrete and
detailed prompt. And to remember the
general guidelines for prompts that we've discussed
earlier in this course. Click Generate. You can choose from three
different variations. Feel free to click Generate
again for different results. You can also change prompt under Properties and click Generate again to refine your results. So let us look at some
examples together. So in this first example, I would like to place a
boat in the foreground. So let's start by selecting
an area within Lasso Tool. Click Generate the fill, and then we will
describe fishing boat. Okay, let's look at
some variations. The first one looks
pretty solid. But if we zoom in, we can see that it has a hard time recreating
the people and faces. And overall doesn't
look really real, but the composite
is really soft. So in this picture, I would place a rusty old
car in the background. So let's set it back. Area. Describe what we want. Old, Rough the yellow car. What could we use to
describe it in more? Let's say, placed sideways
with some leaves on it. Generate. Let's go. Okay, There we go. Let's look at some variations. What, this looks pretty awesome. Look at it. Okay, if we zoom in, there's this kind of on
realism that we already found on with the Firefly
texts to image engine. But from a far away, it looks pretty awesome. So let's do one more. And let us try
something difficult. Let's try placing some
humans right there. We're selecting that area. Then we say young woman hiking close and
a yellow jacket. Back to the camera. And I have purposely entered
this prompt with her bag. Turn to the camera because I know already that it
would screw up the face. It's completely. So this is a little
trick that you can use to create some kind
of decent results. And let's expand the
selection a bit more. So the I has something
to work with. Let's click Generate and
let's see what it does. Okay? Does what
we've told it to do, but it doesn't do. This one looks really good. Let's zoom in. There. You have the problem. The phases are
completely distorted, but from a far, it
looks pretty solid. Let's try to create a face
that is more realistic. Selecting it once
again and describe A face. But I don't think that AI is able
to do that. We're phases. It has a pretty rough time. They have it. It is able to do it. The variations are
more unrealistic. So I think with humans, it has a pretty hard time. Let us try something else. I would like to play. Beer in the back. So let's just enter. Okay. That is somewhat decent. The first one looks pretty good. Resume in, yeah, it doesn't understand that shallow depth
of field of this image, but the places it
in a bit of fog. So it looks good. But same thing with animals. The photo realism. Isn't that good? So now let's try
something different. I would like to replace
this top with a dress. So let's select loafing and
be careful with the hands. We have removed them from the selection because
just like we've said, it has a hard time
recreating them. I will click generated fill. Let's describe it. A white dress for a degenerate. Okay, There we go. The clothing looks
pretty flawless. And just like I've
already mentioned, it has a hard time
recreating those hates. Let's look at some variations. Just looks awesome, Pretty good. In this picture of the hands
are screwed up even more. Variation tree. It does also were
pretty good job. But I think he has the
Nicolette is connected to anything and it has some
weird glitches right here. And there's always, the
hands are pretty distorted. Now let's try something else and change the
hairstyle and column. Send back. Now we'll
extend it to right here. So DI has something to work with because we're going to
replace it with log here. So let's describe it along. Lone pair, generate. And there you have it. She's blonde. Look at some variations. Second one looks pretty solid. Let's domain. Yeah, it does a pretty good job. Even creates new ears, which are a little
bit distorted. Overall, this is a
really powerful tool. However, there are
some limitations. Just like with the
text to image engine. Generative field has problems
with photo realism and has a hard time creating
feet, hands, and faces. It also sometimes places background elements
that aren't correct. Composites are good, but nearly all of them
need a touch-up. Lastly, it can be difficult
to get consistent results. And often it does not
pick up on prompts. Use Generative effectively. There are some general
guidelines to follow. You should experiment with
different kinds of synonyms. For prompts. Some work better than others. Your prompt should be as
detailed as possible. Alter your selection and it makes often a huge difference. Plays hair always as
the last element. Be careful with big
changes and stay away from faces and hands.
With dead set. You can use it for background
elements such as birds, boats for animals, and
people in the distance. Sometimes it can also
be useful to change the clothing of your subject and altering the
hairstyle in color. That is all on adding elements. I hope you enjoyed it and I
will see you in the next one.
6. Possibilities, limitations, policy: Welcome to this video where
I would like to summarize my experience if the
Generative AI in Photoshop, Let's start with
the possibilities. All in all, it is
a truly powerful to with a lot of possibilities
for brainstorming, concept Art and
real-world use cases. They expand feature is truly impressive and trivia
tool that I will use a lot. Also, the feature for removing objects looks very promising. But adding objects at
the moment is a bit inconsistent and may not be
suitable for frequent use. However, keep in mind, it is only a Beta and
Adobe is working on it. So we can expect it to
get better with time. Despite its strength, there are some limitations that
we need to consider. As we've already
mentioned, humans, animals, and major changes to the image are difficult
to accomplish. Also, the tools behave and
consistently at times, which is currently
its biggest problem. But we can hope that
in future versions, we can tweak the results with more parameters and get
even better results. Now, let's talk about the
policy of this feature. With other texts
to image models. There are concerns about
the dataset that is used, and there is a lot of discussion about
copyright infringement. However, Adobe uses photos from Adobe Stock and openly licensed content to
train their AI models. They are also planning on
paying contributors of Adobe Stock for their
contribution to the AI model. As of June 2023, generated field is in beta, so commercial use is
not possible yet. But as soon as generative
fill leaves the beta phase, it will be available
for commercial use. All in all, Adobe Photoshop
generate the Fill feature is a promising tool for creating
stunning images with ease. Despite its limitations,
it has the potential to be a game-changer in the
world of image editing. I hope you enjoyed this video and I'll see you
in the next one.
7. Conclusion: Hello and welcome to the
last video of this course. It's been a pleasure
to have you. Throughout the course, we've
covered a wide range of topics related to the Generative AI features
in Photoshop. I hope you've enjoyed it and learned a lot from the videos. And I hope this has
opened your eyes to what modern technology
is capable of achieving. If you want to dive deeper
into the topics we've covered, I highly recommend reading
the blog posts from Adobe. They are a great
resource to learn more about the latest
versions and features. Finally, I would like to thank you for
watching this course. I hope it has been a
valuable experience for you. If you have any
feedback or questions, please don't hesitate
to share it. We always appreciate
hearing from our viewers. We hope to see you in future
courses where we will continue to explore the latest trends in
modern technology. Thanks again for watching
and have a great day.
 Max Schweitzer, The future belongs to the curious.