Transcripts
1. Class Introduction: This class is all about the new symmetry tool in Adobe Fresco. I have been waiting
for this tool to be added, and
now that it's here, I am really excited to
teach you all about the features and give you
some ideas on how to use it. If we haven't met yet, I'm Amy, a surface pattern
designer and illustrator, plus Skillshare Top teacher. I have taught several
classes on Adobe Fresco, and I wanted to create this
short and simple class that gets straight to the point on the new symmetry tools
in Adobe Fresco. No F, nom. If you have never
used Adobe Fresco before, I recommend watching
my introductory class on Adobe Fresco first. You're welcome to
watch this class now, but I'll be jumping straight to the symmetry tool features and showing you
tips on how to use it to create a
floral illustration. You may find it easier
to follow along if you already have knowledge of
the basics in Adobe Fresco. If this sounds like fun, then join me in the first lesson.
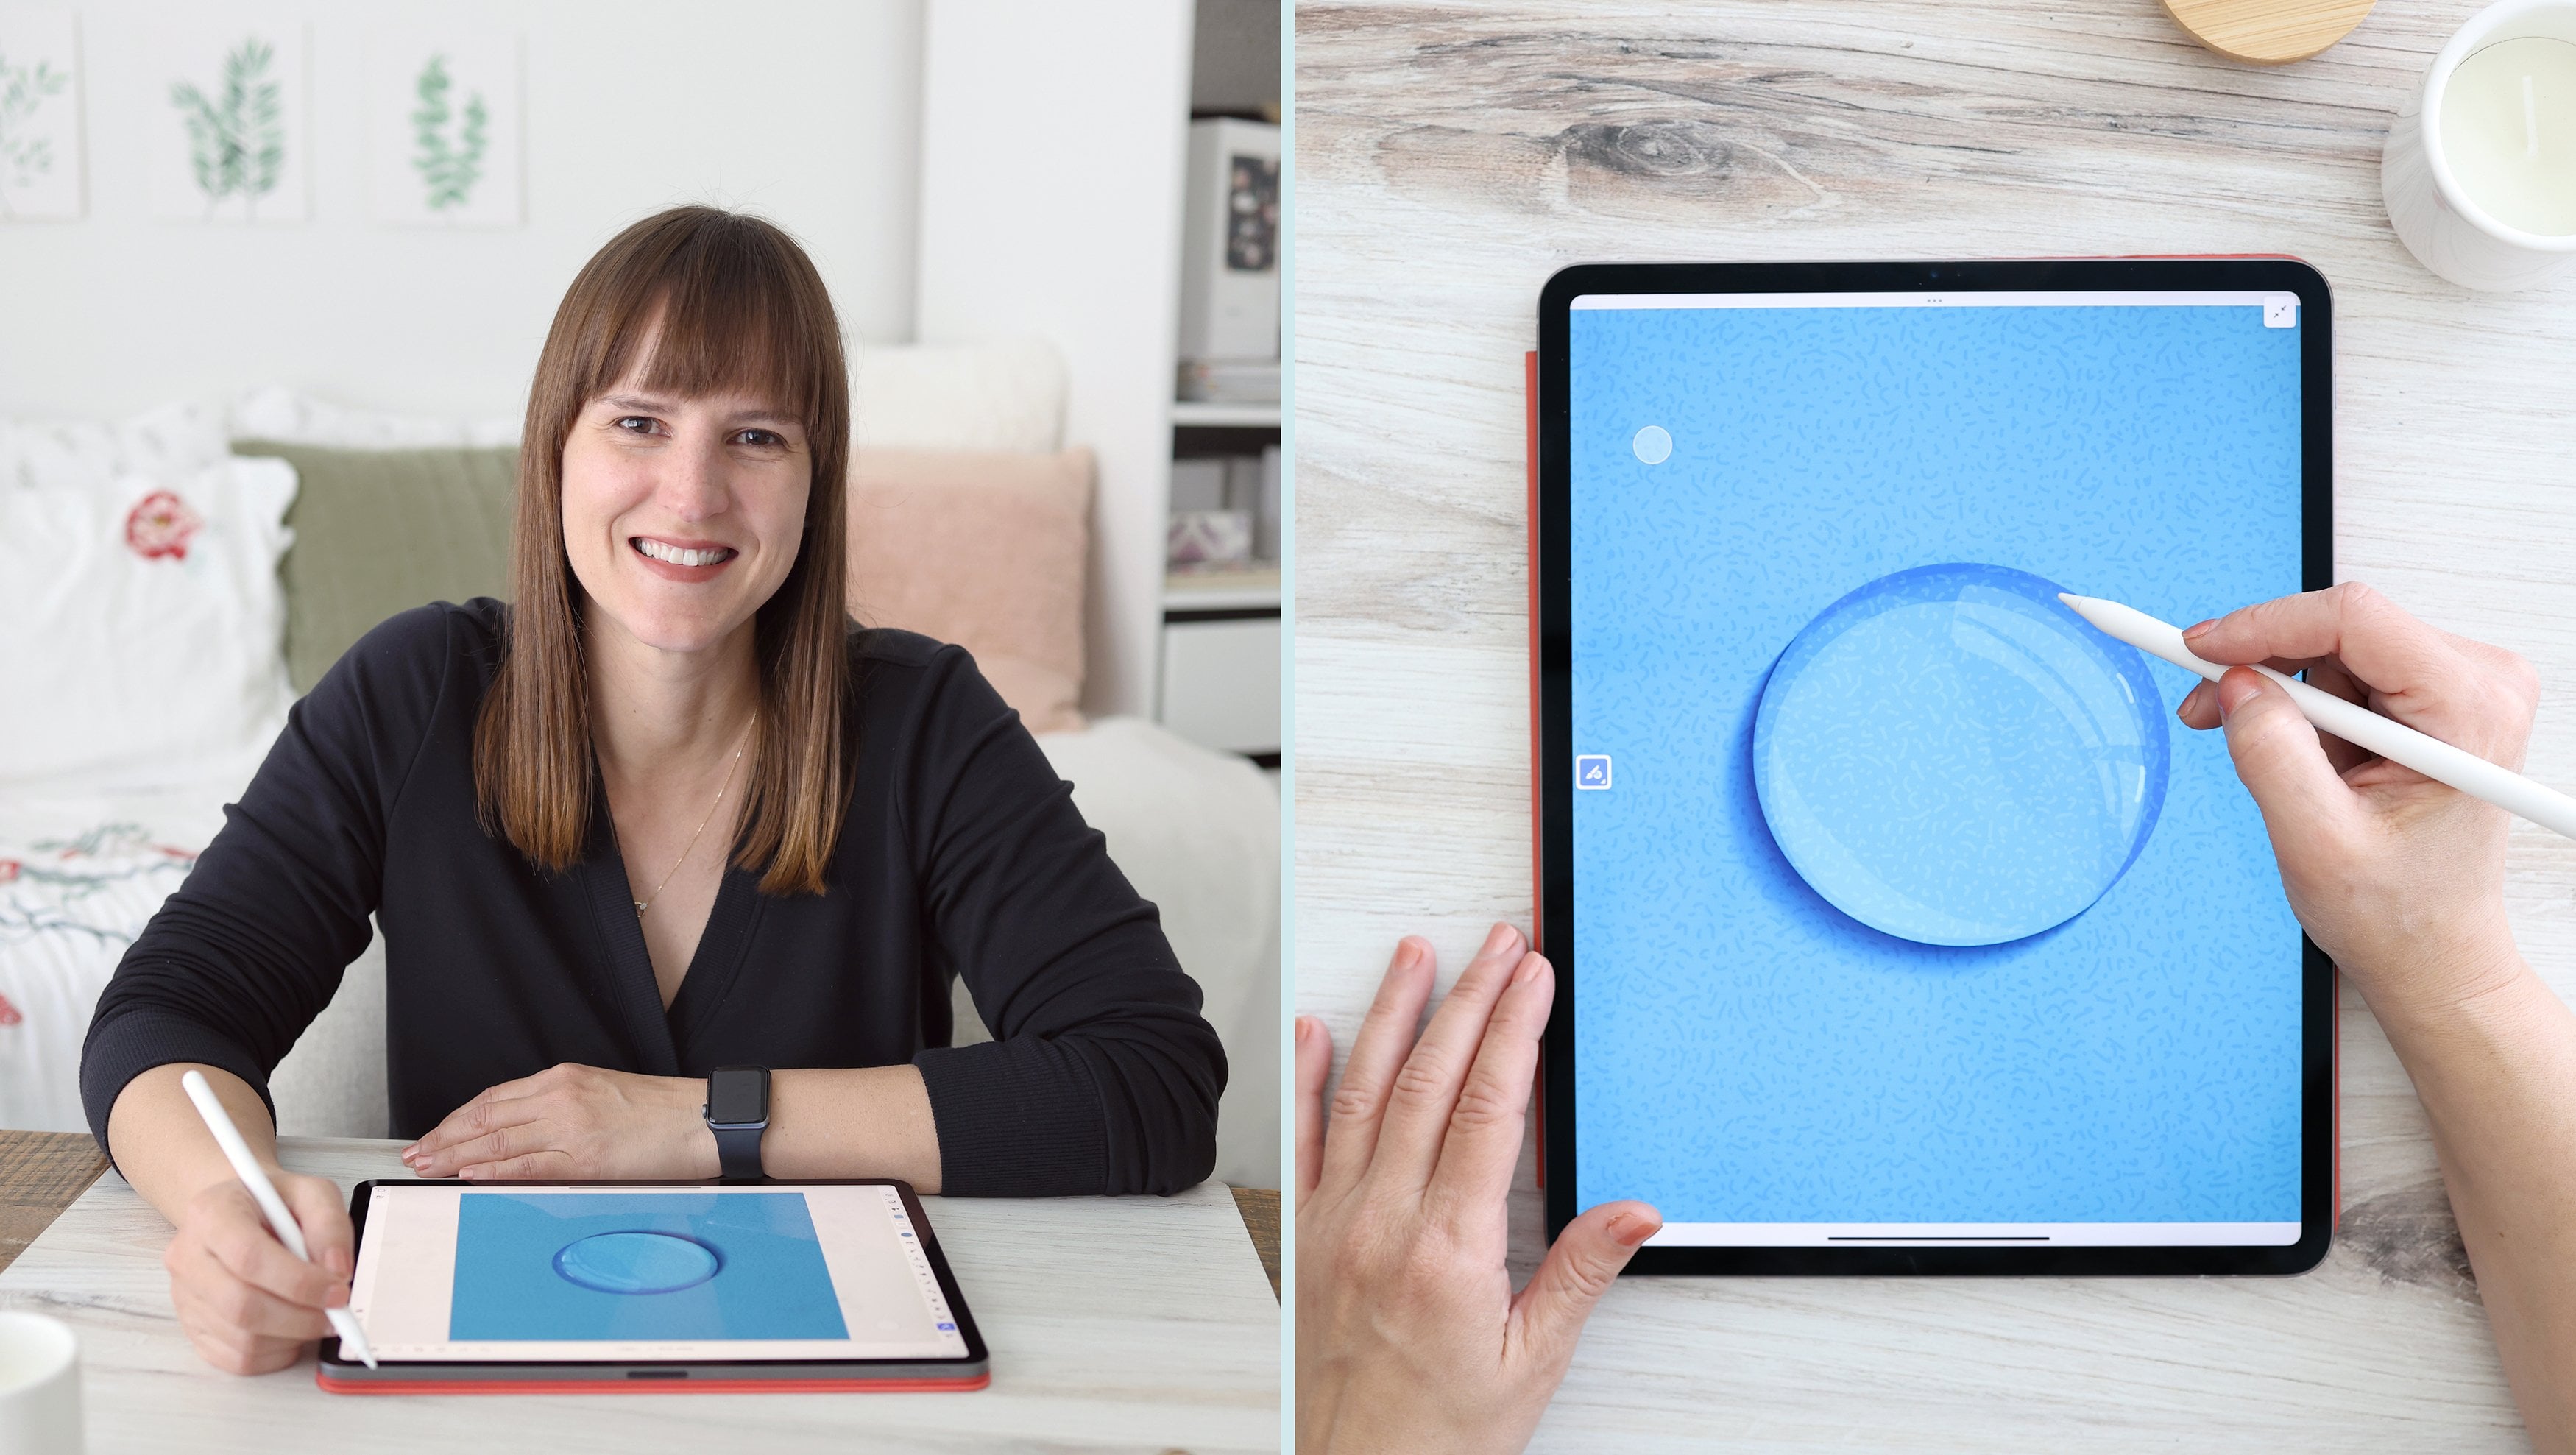
2. Symmetry Tool Basics: I have set up a new Canvas. And if you'd like to
use the same settings, I have created a
2,400 by 3,000 pixel canvas with a
resolution of 300 PPI. You are welcome to use the same canvas size or create your own. You'll find the
symmetry tools on the right side under
the precision panel, tap to turn them on, and you'll see the first set is
reflective options, and the second set is
rotational options. You can also tap to
turn on move guides, and you can move your
guides around the Canvas, and then you can tap to reset
your guide back to center. I recommend turning move guides off once you're
ready to draw again. The symmetry guides
can work with any of the pixel live or
vector brushes, as well as the eraser
and the smudge brushes. It's important to know
that if you draw, it will mirror your drawing. It will also mirror if
you use the eraser. You can use the
smudge brush as well, which is compatible with
the pixel and live brushes. It will work with most of your selection tools
like the Lasso tool. Or the ellipse tool. You can see that it also
selects the mirrored side. The exception is the magic one which selects continuous colors, so it won't mirror
your selection unless areas of the same
color are touching. So I'll just clear that layer. Also, if you draw with a vector brush and you
overlap your line, and then you try to use
the vector trimming tool, it will actually trim
your entire shape. The vector trimming
tool only works on two or more separate
lines and it sees the mirrored line as
one continuous shape. You can use the vector
trimming with separate lines. Just draw your shape first, and then you can
add contour lines, and then when you turn on
the vector trimming tool, you can trim out the excess. Notice that it doesn't mirror the vector trimming
on the other side, so you will have to trim each individual line if
you use that feature. The same goes for
using the fill bucket. If I fill in this shape, it won't mirror that
fill on the other side. It only mirrors
drawing and racing, smudging, and most
selection tools. This is just something
to keep in mind when you're using
these symmetry guides. Now, if you turn move guides on, you'll notice that there is a small white circle
at the very center. You can also see there is a dark field circle which you
can use to rotate your line and it will snap to
different angles as long as you have your
snapping feature turned on. I can move this horizontal
guide anywhere on my canvas and I can
rotate it to any angle. I'll just turn off the
move guide so I can draw. If I draw here, oops, that's the fill bucket. Let's reselect my brush. As I draw, you'll notice that the mirrored line is
outside of my canvas. It's just important to keep the center of the
guide in mind as you move and adjust your guides and start drawing your shape. I'm just going to reset my guide and I'll
clear that layer. Let's quickly scroll
through the guides. The first one is vertical, and it's going to
mirror right to left, and you also have
a horizontal guide that's going to
mirror top to bottom. Than the quadrant, which will reflect the same shape
in each quadrant. You also have different
radial options that just have increasing
numbers of guides. If you draw across a guide, it's going to create a
very symmetrical shape. If you draw in
between the guides, you get a more
asymmetrical shape. So I'll just clear that layer. And next up, we have
our rotational guides. They have some of
the same guides like the vertical
and the horizontal, except they're going to rotate your drawing instead of
reflecting it across the guide. You also have this three
sided radial option, and you can see you have many of the same options as above, but the outcome is going
to look a little different using rotational versus
reflective guides. In the next lesson, I'm
going to show you how to use these symmetry guides to draw different types of symmetrical
flowers found in nature. We're going to go over
which guides to use for each flower as we gear up
for our class project.
3. Symmetrical Flower Examples: For your project today, you
can use the symmetry tools to create imaginative and
playful versions of flowers, or you can draw from nature. I've actually created a Pintres board with
a collection of flowers that have
natural symmetry for reference and inspiration. And in this lesson, I'm
going to go over how to create some of these flowers
using the different tools. Today, I'm going to show you
how to draw seven flowers. A dogwood, a bell flower, a blue columbine, a daisy, a plumeria, a
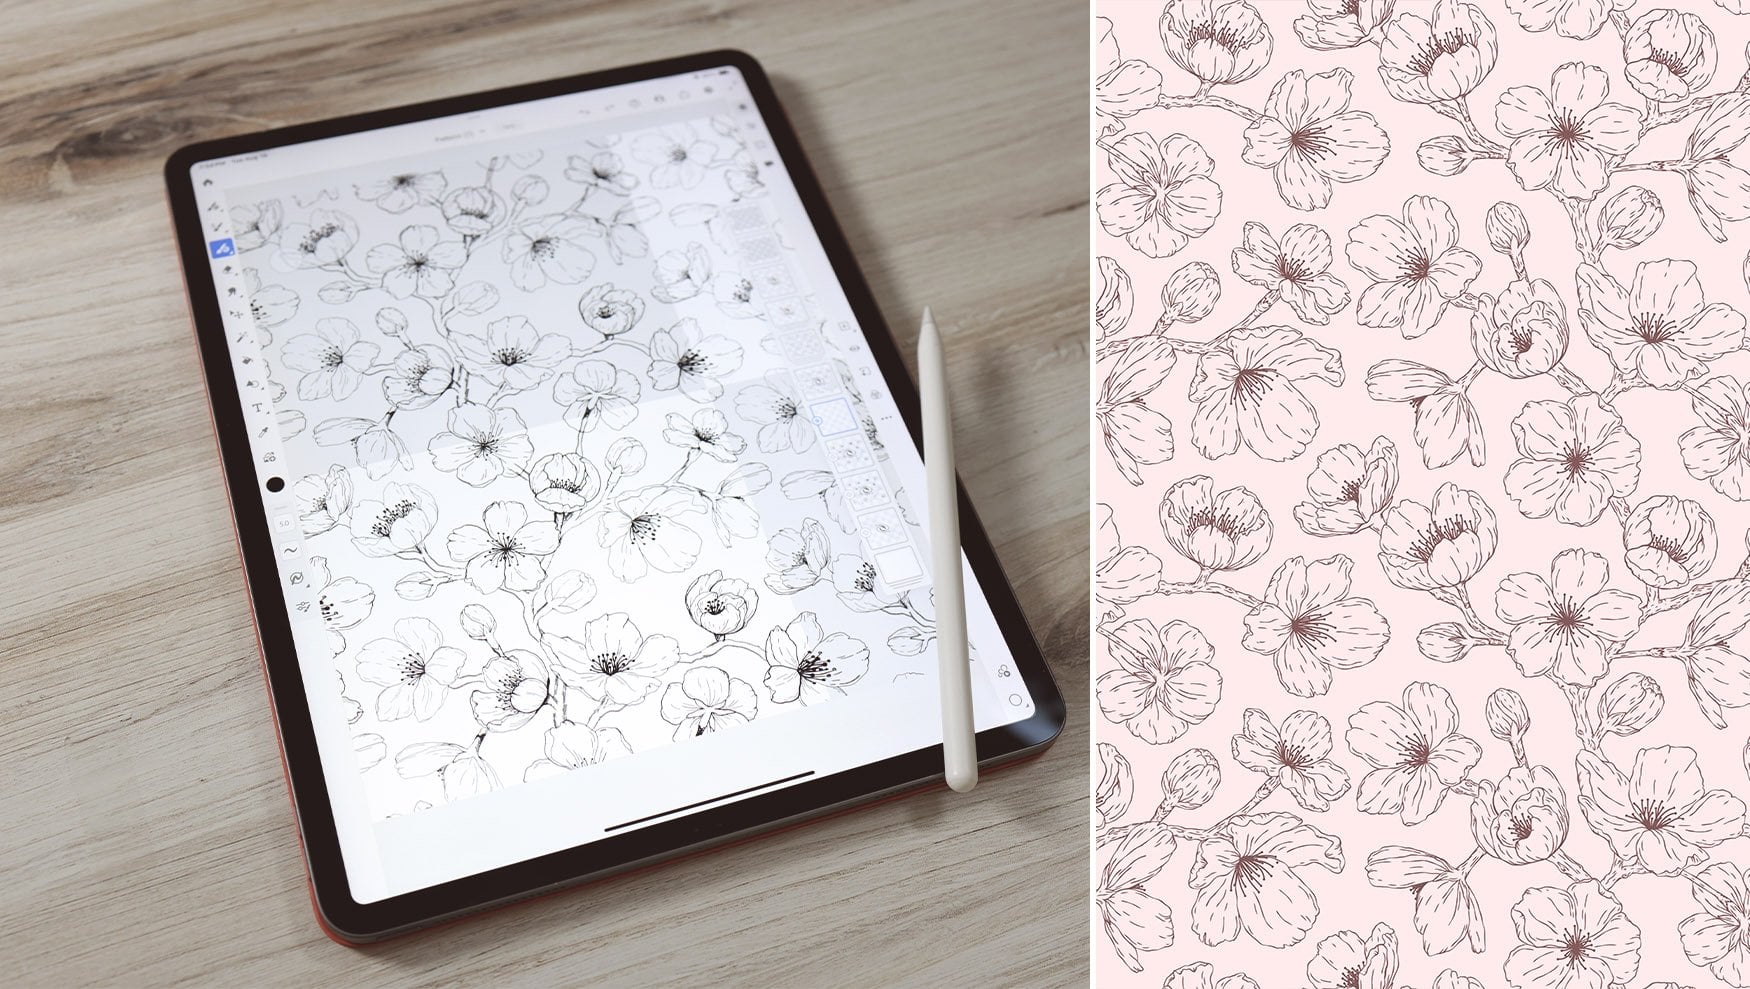
marigold, and a mum. First up, let's draw
a dogwood flower. Now, I'm going to go over
to the symmetry panel and select the quadrant option
under the reflective options. Because the dogwood flower
has four symmetrical petals. I'll start from the
center and create a nice rounded petal
shape. Do that. It snapped because
I held it too long. Next, I'll create a second set of petals on the
horizontal axis. Then I just want to create a notch at the top of my petals. Let me do that.
I'll zoom in so I can see this a little
bit easier as I draw it. And I'll draw the same little
notch on my other petals. I'll turn on the secondary touch shortcut to use the
vector trimming tool. I'm going to be working
in vectors today, but feel free to work with
your favorite brushes. If you want to use
a pixel brush, you can also just
erase these lines. I'm just going to get rid
of these in the middle. So you have two petals
overlapping a second set. I want to draw the center, so I'll increase my
brush size to make it easier just to fill in
the center quickly. And I'll take my brush size back down to create some details. You can keep your flowers simple or add as much
detail as you like. Here we have the basic
shape of a dogwood flower. Next up, let's draw
a bell flower. For this one, I'll select the second to last
reflective option. I'll start at the
center and draw a wide petal that comes
to a point at the top. Now, I'm going to
use the fill bucket to fill in each petal, and this will create
one large shape. Then I'll select a new
color and I'll draw a small center with skinny rounded sections
like a little star. I'm actually going
to make these a little rounder at the top. Then I'll use the fill
bucket to fill them in. Next, I want to add little veins to the petals
for some added dimension. Once again, you can add as much or as little detail
to these basic shape, but this is the basic
shape of a bell flower. With the same symmetry tool, we can create a blue columbine. Now, this is an example of a flower with two
different petal shapes. I'll start with the first
petals in the back. I'll use the diagonal lines and draw a long petal that
comes to a point, and I'll turn on
the primary touch shortcut so I can erase
the overlapping areas. If I tried to use the
vector trimming tool, it would just erase
everything since it was drawn from one line. Next, I want to create some
veins in these petals. Then I'll add a new layer to draw the second
set of petals. In the real flowers, this part in the
center is white, but I think I'll use
a light blue so you can see it a little
easier in the demo. Now, I want to start
from the center and draw a shorter rounded petal. And I'll fill in the petals
so you can see them, including these little areas. Now, the blue columbine has these long pointed petals underneath these
short round petals. And the smaller petals
also have two colors. I'm going to create
an irregular, that's my fill bucket.
Let's undo that. I'm going to create
this irregular shape coming out of the center, which represents
that second color, and then I'm just
going to fill it in. You have another color
in the center that represents the little bitty bud in the center of the flower. I'm just going to
create another color. This is an interesting
flower because it has so many different layers
with different shapes, but you can use that five
petal shape for everything. We'll finish out the reflective symergy tools with a daisy. Now I'm going to go back
to the panel and choose the last reflective option which we can use
to create a daisy. I'll choose a light color
for my first set of petals. I'll start by drawing
some nice long loops in between the lines to
create the background petals. I'm going to fill them in
so you can see them better. Then I'm going to create a
new layer and I'll choose a new color that's slightly lighter for the
next layer of petals. I'll draw another set of
long petals that cross the lines and go between
the first set of petals. Then again on the next axis. Once again, I will fill
all the petals and there's a lot of
little gaps to fill in because I overlap my line, so you can make this
a little cleaner. But these days you have
these long skinny petals that overlap one another. I do need to create a
center to the flower, but I find it easier to increase my brush size so I can fill
in the center quickly. I can also just create little dots to make
it an irregular edge, and that's the basic daisy. Let's draw a plomeria with
rotational symmetry tools. I'm going to select
the five sided option under the rotational tools. The Plumeria flower is perfect
for using this option. I'll just decrease the size
of my brush first and then I'll also select a
light cream color. The plomeria has a
rounded oval shaped petal and there's a little
irregularity to the edge, so it doesn't need
to be perfect. The petals also have an
edge that's rolled up, I need to select a new color to differentiate that
area from the rest. This edge needs to be
curled into itself. To create that illusion,
I'll just draw a line inside the
edge that tapers off. I'll turn on my secondary
touch shortcut to use the vector trimming and
clean up these lines. Now I can fill in each
of these sections. Then I'll go back
to my first color and I'll fill in the
rest of the petal. That's how you create the
basic petals of the plumeria. Next, I'll create a center, and it's usually a darker color and the center and it doesn't
have to be too perfect. I'll fill it in and then
we've got our center. The petals also
have a color that fades outward from the center. I'll draw a loose wavy line like this, and then once again, I'll turn on my secondary touch shortcut to trim the excess lines with
vector trimming tool. Then I'm just going to fill
in each of these shapes, and that's the
basic luma flower. Next, we'll move on
to the marigold. I'll select the last option
under rotational symmetry. I'll just zoom in a
little to the center. I'll start with a nice little rounded shape at the center. Then I'll work my way outward
with small squiggly lines. They don't need to
touch, but you want to keep it loose and irregular. There's lots of petal layers and they have very curly edges. You want to draw
some longer lines and also some shorter ones. Now, if I want to
fill in my flower, I'm going to create a new
layer and add a new color, something a little lighter. I'm going to increase my
brush size a little to make this go a bit
faster as I draw. I'm going to draw a
line along the edge, making sure I close any gaps, and I can fill that in
with the fill bucket. And you could create more layers if you want a larger flower, but I think this
mimics the layers of curly petals in a marigold. The last flower we're
going to draw is a mum. I'm going to start from the center just
like the marigold, but I want to create
a pointier petal. I'm going to draw
these fast and not trim all my overlapping
lines for the sake of time, but you can definitely be
more precise than mine. Like the marigold, you want some irregularity in the layers to make it feel a
bit more organic. You can keep adding layers to make yours as
big as you like, but this is the basic mum shape. Now you have several examples of flowers that you can draw with the different reflective and rotational symmetry options. There are lots more
varieties of flowers, some of which have very
similar petal shapes to the flowers we went
over in this lesson. Feel free to practice these and add your own embellishments, and you can work a
little slower and with more precision when
creating your versions. You can also find
your own flowers and see how you could create
them with these tools. In the next lesson, we're going to discuss the class project.
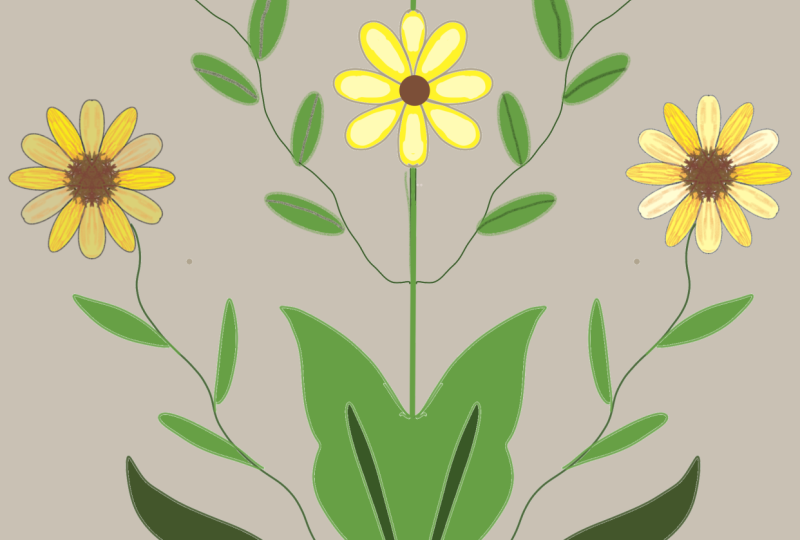
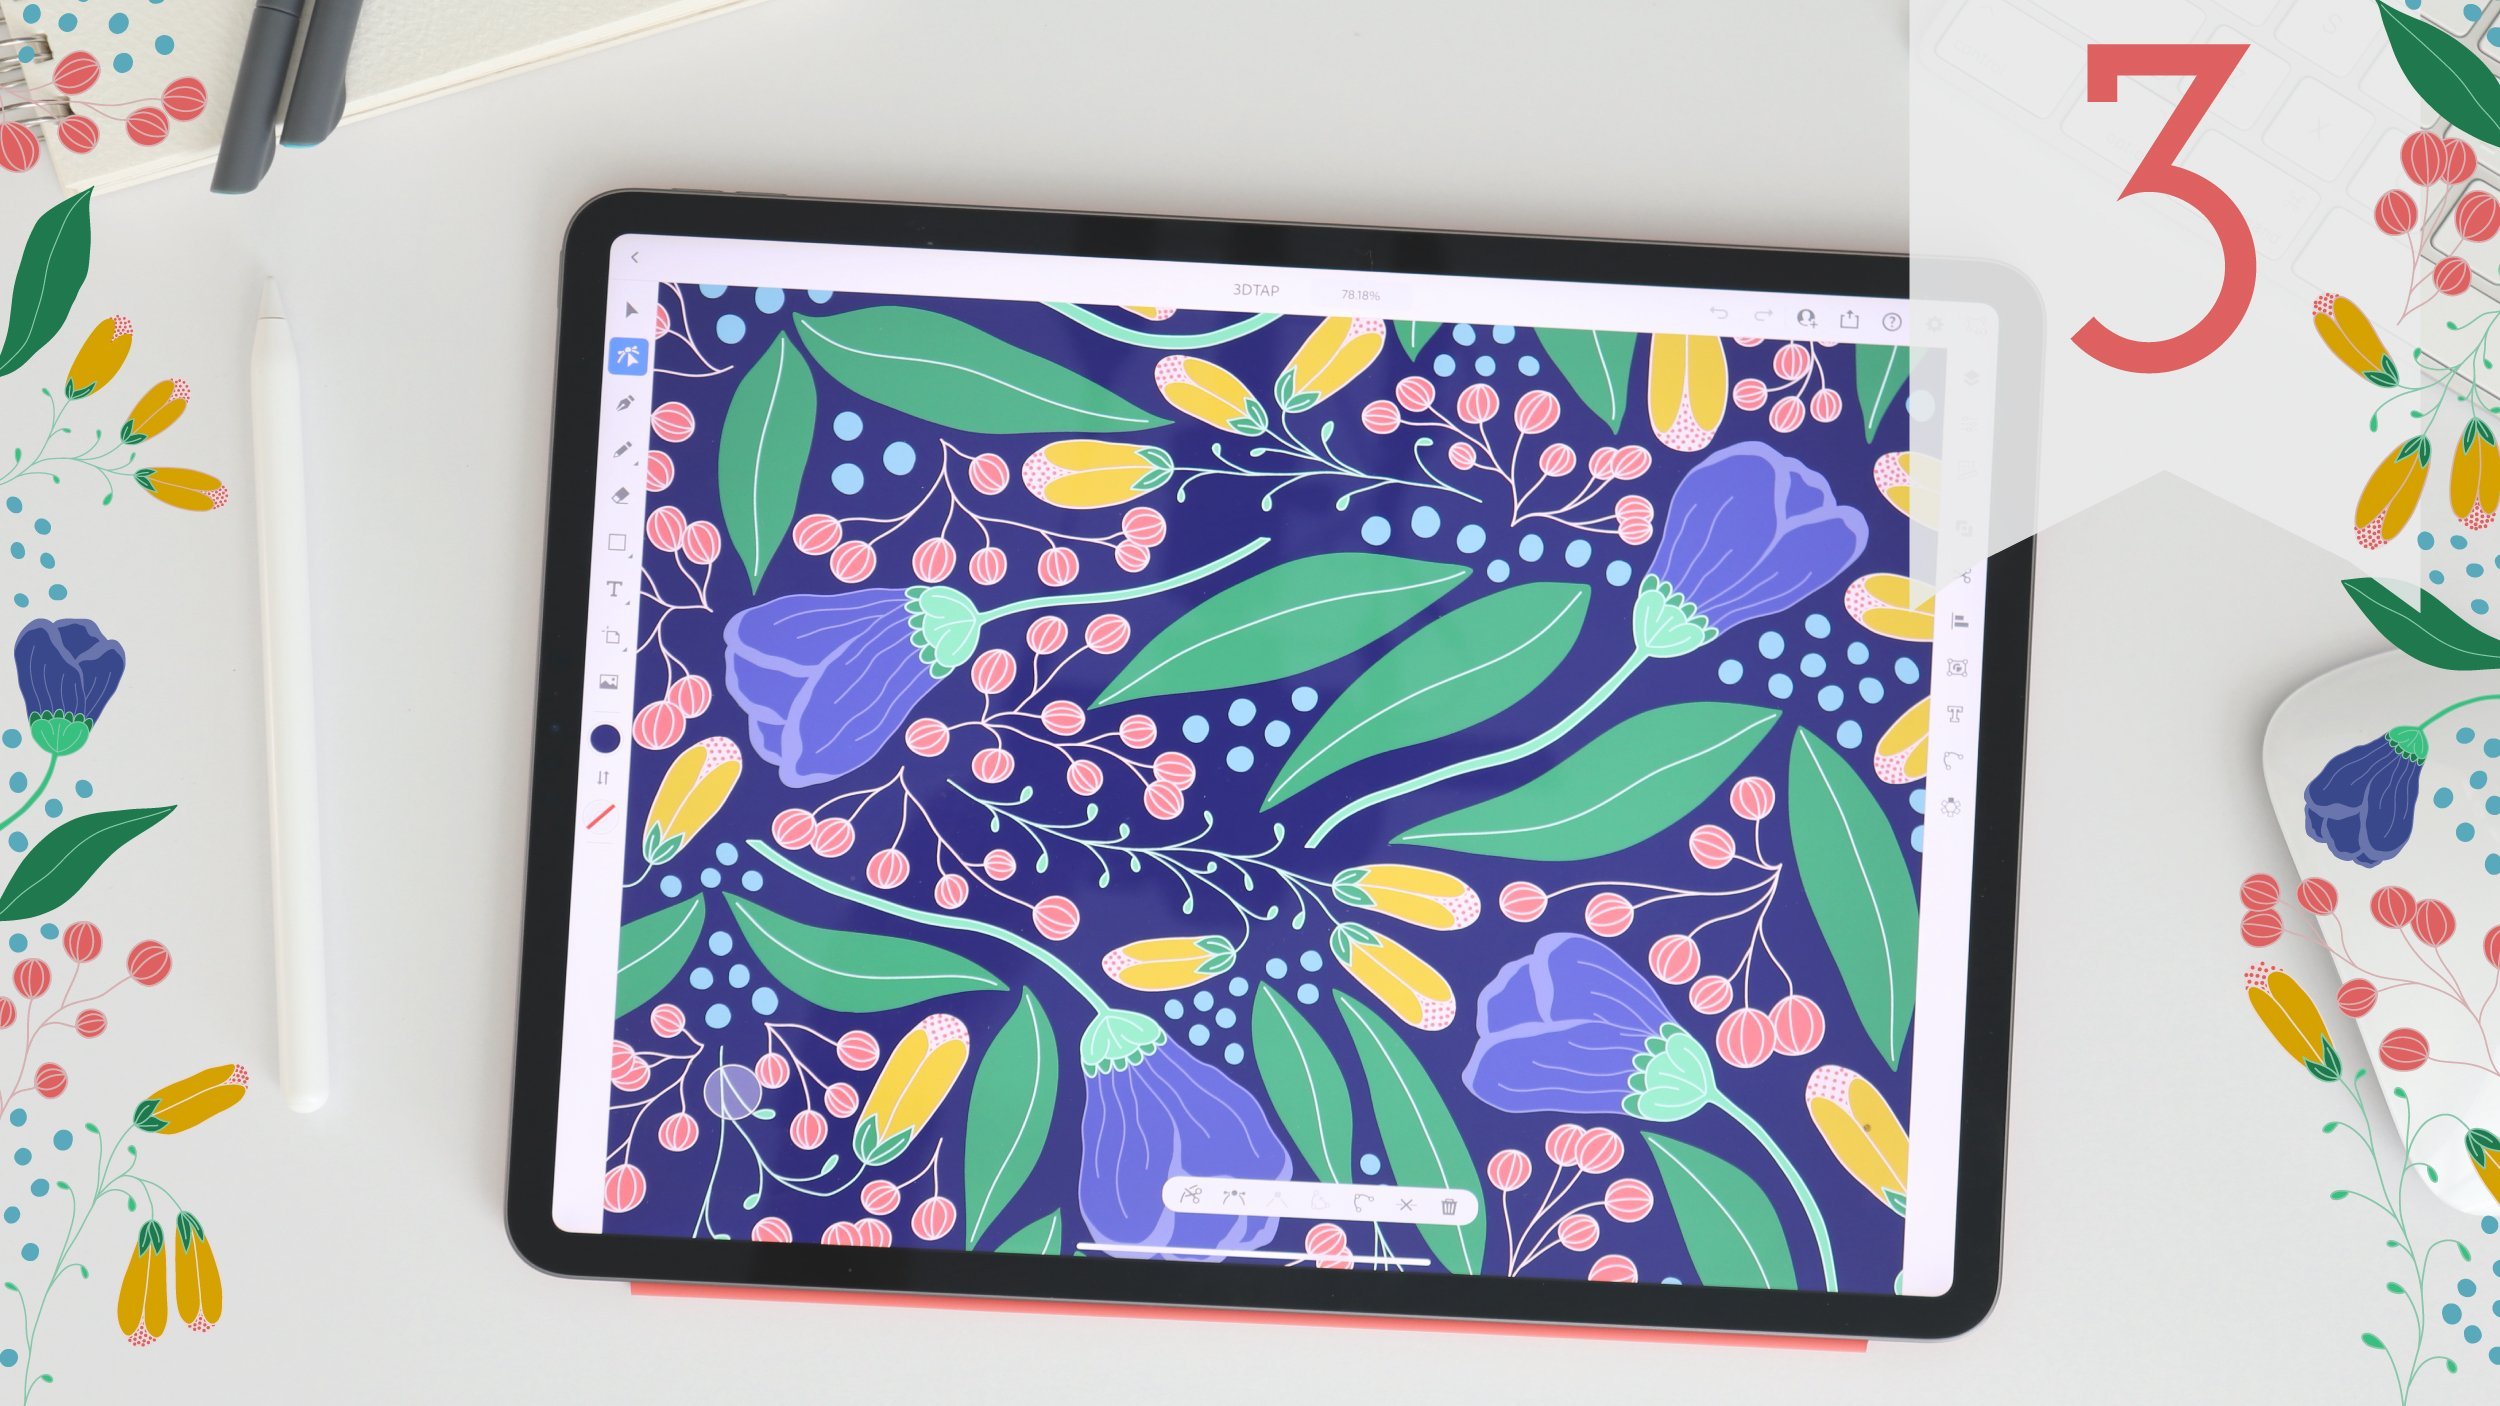
4. Class Project: For the class project, we're going to be creating a symmetrical floral
illustration. You can use any of the symmetry tools for your illustration, and you can stick to one guide
or mix and matter guides. In this example, I decided to use the vertical
reflective symmetry tool. I kept it at the default
position at the center of the Canvas and then just drew some vines and
a mix of flowers. The main stems and the
flowers at the center of my canvas have a
vertical symmetry as they cross the
vertical guide. But each of the leaves
and flowers I drew, and the rest of my image have a more organic asymmetrical
hand drawn look. So there is symmetry in
the overall composition, but not in most of the
individual motifs. So the overall look has less precision and just has
a bit more of a loose style. I also drew more from imagination and created
my interpretation of the flowers rather than
trying to be realistic and representative of any
particular flower as I demonstrated in
the previous lesson. So, this style is
just one example of a symmetrical
floral illustration that you can create
for your project. So you can stick to one
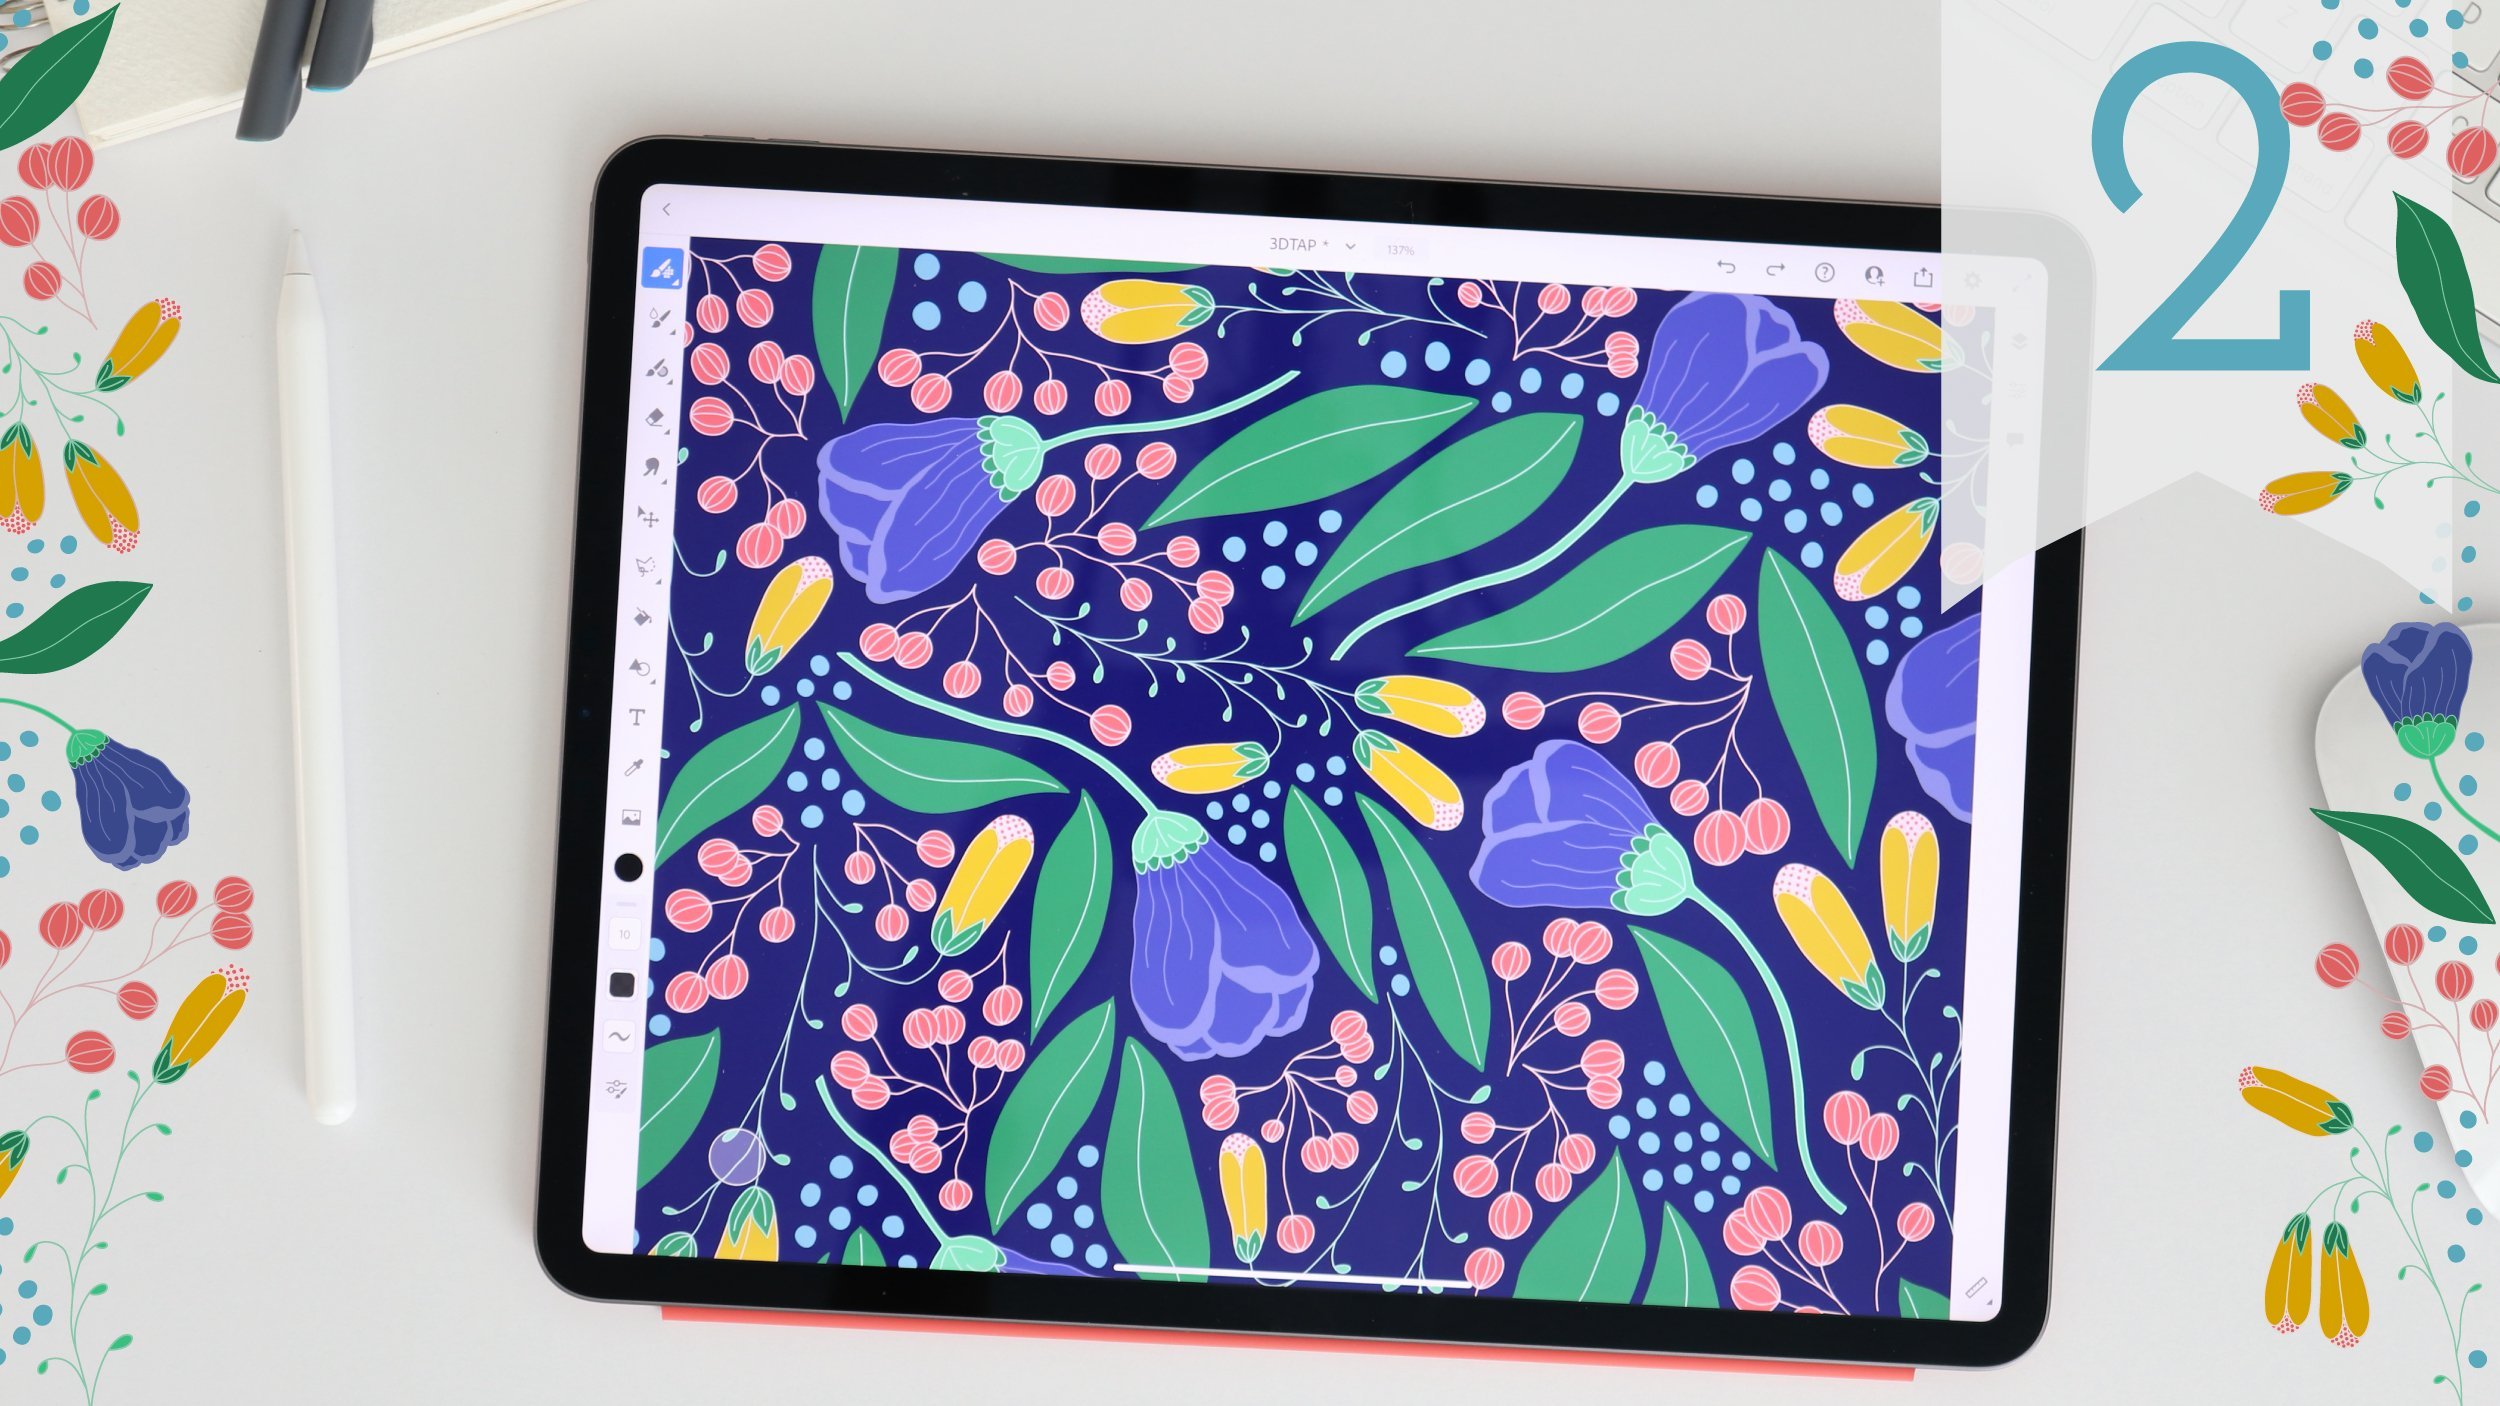
guide or as I mentioned, mix and matric guides, as I'm going to show you
in the later examples. For my second example, I started with the same vertical reflective symmetry
tool for my stems. I laid out the composition
of the stems first and then I chose a radial
symmetry to draw my flowers, starting with a daisy
at the very center. So just as I demonstrated
in the last lesson, I first drew a set of petals, and then I added
the embellishments. And with the ability to
move the guides around, I'm able to mix and match different symmetry tools
throughout my illustration. So not only will
there be symmetry in the overall composition, but there's going
to be symmetry in the design of the
flowers themselves. And for fun, I'm mixing daisies and marigolds
in this illustration. Now that I have
drawn one marigold, I want to make sure that it's mirrored on the opposite side. To make sure it lines up with the stem on the opposite side, I will create a new layer and
fill it with a fill color. Now this is going to act as a guide for the full
size of my Canvas. Next, I duplicate
my marigold layer and open up the transform tools. If I turn on the
primary touch shortcut, I can select the
duplicated marigold layer and my white
background fill layer with the multi
selection feature. I can flip them vertically and align the marigold in the
same position to the right. Without this filled
background layer, I wouldn't be able to
match up the marigold to the exact same position
on the opposite side. I can also use multi select to move and adjust the
flowers as needed. I can now switch back to my
original vertical guide to draw the rest of the stems and continue adding elements
to my composition. Since I've added a new
section of my stem, I need to add a new flower. I created another daisy
using the radial symmetry. Like the marigold,
I will need to reflect a copy of it
on the left hand side. So I'll duplicate that layer
and open the transform menu. And then once again, I
need to flip it vertically because my vines were drawn with the vertical reflective
symmetry tool. So it can be fun to mix and match the different guides
in one illustration. Drawing all of
your elements with symmetry guides will add more precision to your
overall illustration. For this last example, I've chosen the horizontal
rotational guide for my main composition. Like my previous illustration, I drew my vines first with the
rotational symmetry guide. Once I had finished adding
all of my embellishments, I moved on to my flowers. Like last time, I chose to use a separate radial guide
to draw my flowers, so there would be symmetry
in both my main composition, but also in my
individual flowers. This illustration, I chose to draw three plumeria flowers. And each time I repositioned my guide to draw a new flower. Even though I didn't change up my variety or type of flower, each flower had its own
unique hand drawn quality. Once I had drawn all
three of my flowers, I grouped them together
and duplicated the group. Once again, I added a layer
and filled it with a color, so I'd have a layer that was
the full size of my canvas. I opened up the transform menu, and I selected both my
filled background layer and my duplicated flower group. Because this composition
uses rotational symmetry, I had to rotate my layers
instead of reflecting them. I have snapping turned
on so it snapped in perfect alignment
at 180 degrees. Now that I see my
full composition, I can make adjustments
as needed. If I move a flower around, I will need to repeat the transform process to rotate a copy on
the opposite side. This will keep my
composition symmetrical. I can do this as much as I need to until my illustration
is complete. For your project, you can
stick to one guide like my first example or mix and match guides like
my second two examples. Just remember that if you choose a reflective symmetry tool, you will need to flip
any duplicated elements. But if you choose a
rotational symmetry tool, you will need to rotate duplicated elements
in your composition. Have fun and experiment with different
composition styles. I'd really love to
see what you created. So please upload your project
at a class gallery page. You can upload any part of the process, including
your sketches. And you can always go back and update your project at any time. To upload a project, go to the Project and
Resources section of the Class page and
tap Submit Project. When the page opens, you can upload a cover image and add a project title
and description. The cover image will
automatically be cropped so you can always share
additional images and then click Publish.
5. Final Thoughts: I really hope you've enjoyed this short and simple class on the new Symagy tools
in Adobe Fresco. Please upload your project to the class gallery page because I really want to see
what you've created. You can always ask questions or share your thoughts in the discussion section of the class. And I'd love for you
to leave a review so other students can discover the class and decide if
it's right for them. If you enjoy this class and
want to learn more from me, you can check out my other
classes here on Skillshare. Click the follow button
if you want to stay up to date and be the first to know
what I'm working on next. As always, it's been
an honor to teach you, and I hope I'll see you
in my next class. Oh.
 Amy Bradley, Surface Pattern Designer & Artist