Transcripts
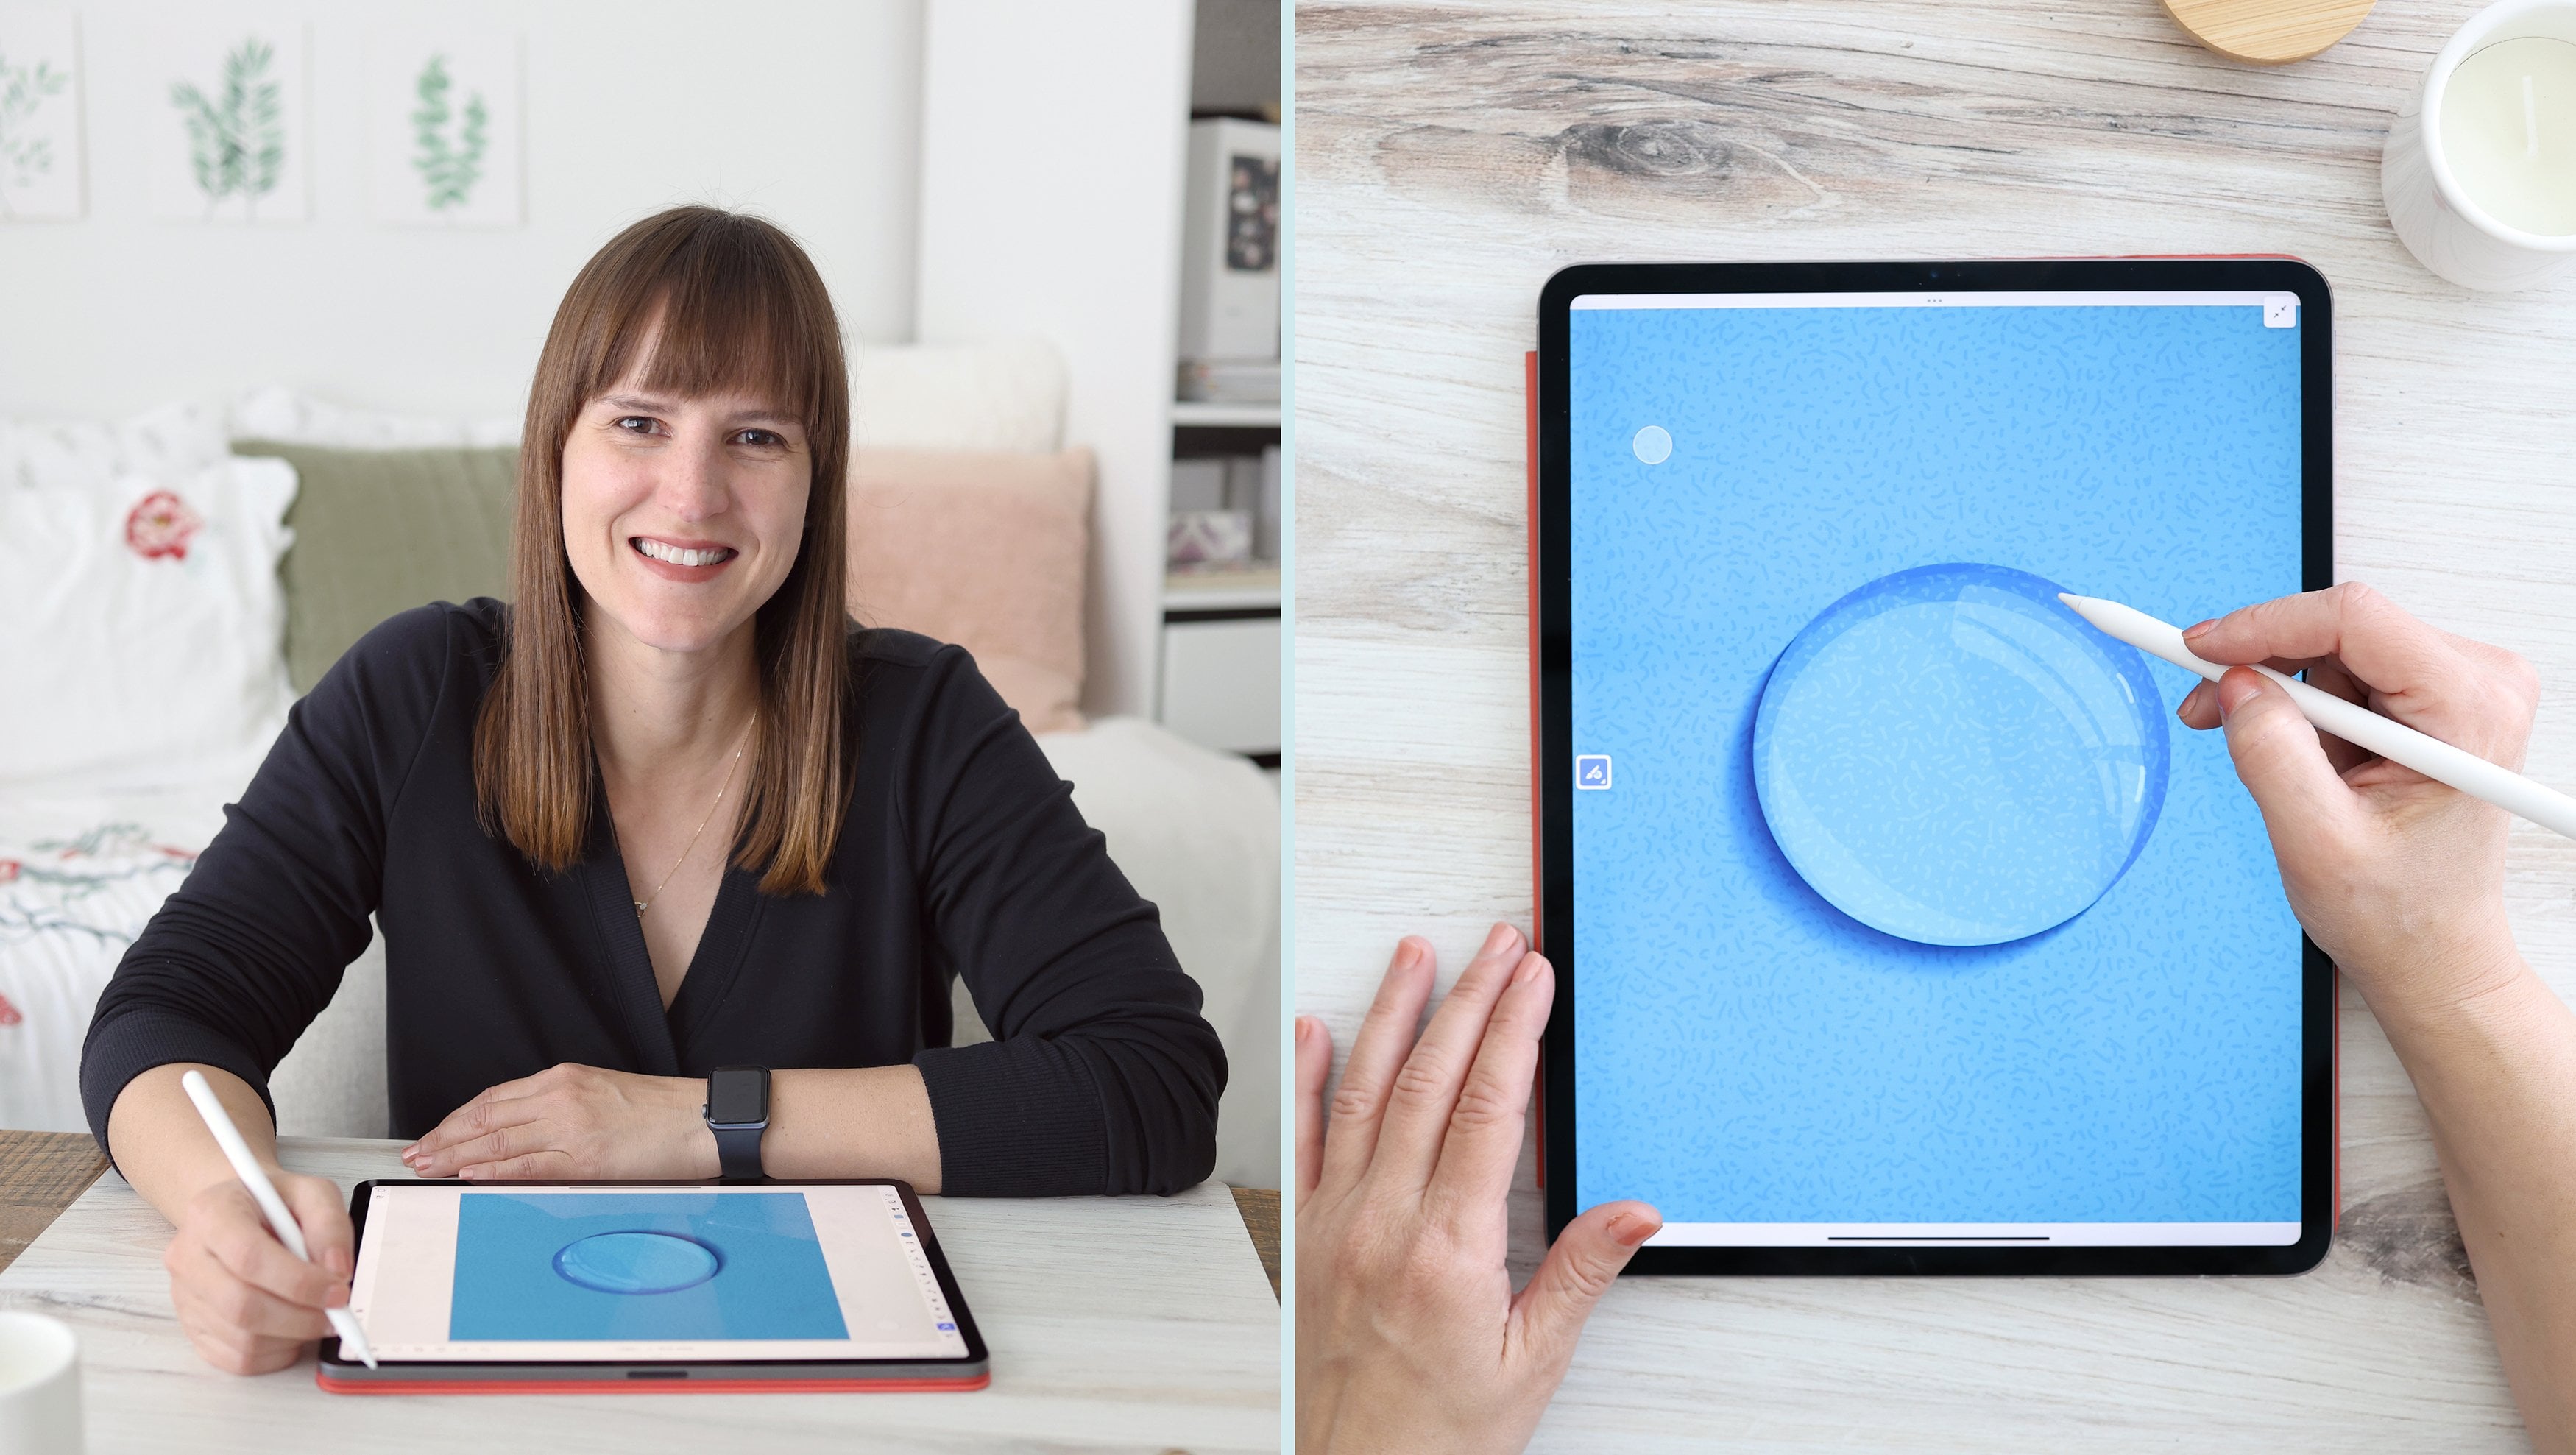
1. Class Introduction: Welcome to my class on planning a floral pattern
in Adobe Fresco. I'm Amy, a Surface
pattern designer, Illustrator, and
Skillshare top teacher. When I started out on my
Surface pattern design journey, planning a pattern meant
brainstorming a theme or idea. I would take the idea,
illustrate the subject matter, and then build the
pattern layout by fitting my
illustrations together. I spent a lot of time
illustrating the subject, and then a lot of time making the illustration fit
in a balanced repeat. While this method may be
effective for some patterns, more complex patterns
need better planning. You may already know how to plan a pattern using
paper and pencil. I've taken this
traditional paper method and digitized it for
maximum flexibility. All I need is my
iPad, Apple Pencil, and Adobe Fresco, and I have ultimate freedom
of location and time. I can go from sketch to finish illustration
all in the same app. This class focuses on planning
a pattern, but at the end, I'll show you how I take my final vector illustration from Adobe Fresco into
Adobe Illustrator and create a pattern swatch
using the Pattern Tool. This is an intermediate
level class. So it will be helpful to have some pattern design
experience and to know the basics of Adobe Fresco
before you get started. If you're new to Adobe Fresco, I recommend watching
my Skillshare class, intro to iPad art Part
two, Adobe Fresco. I teach you the foundational
skills for creating patterns in my class
geometric patterns, simple to sophisticated
repeats in Adobe Illustrator. And this class is a
great way to build on the skills learned in
service pattern workflow, Adobe Fresco to
Adobe Illustrator, where I teach you how to create patterns with the repeat tool. If you want to stay up to date
on new classes I publish, follow me here on Skillshare, or you can find me on Instagram or Pintres at Amy EB Designs. Join me in the next
lesson to get started.
2. Class Project: For the class
project, we will plan a floral repeating
pattern in Adobe Fresco. We will start by discussing
the tools needed to create a pattern tile and how to use our canvas to plan a
continuous floral repeat. We will spend a lot of
time in the planning phase by building up our sketches
and testing the layout. We'll also take a look
at drawing flowers in perspective and at
different stages of growth. Then we will isolate
the repeating element for our final illustration. At the end of the class, we will draw a final vector
illustration that can be sent to Adobe Illustrator to create a pattern swatch
using the Pattern Tool. It is important to choose your subject before moving
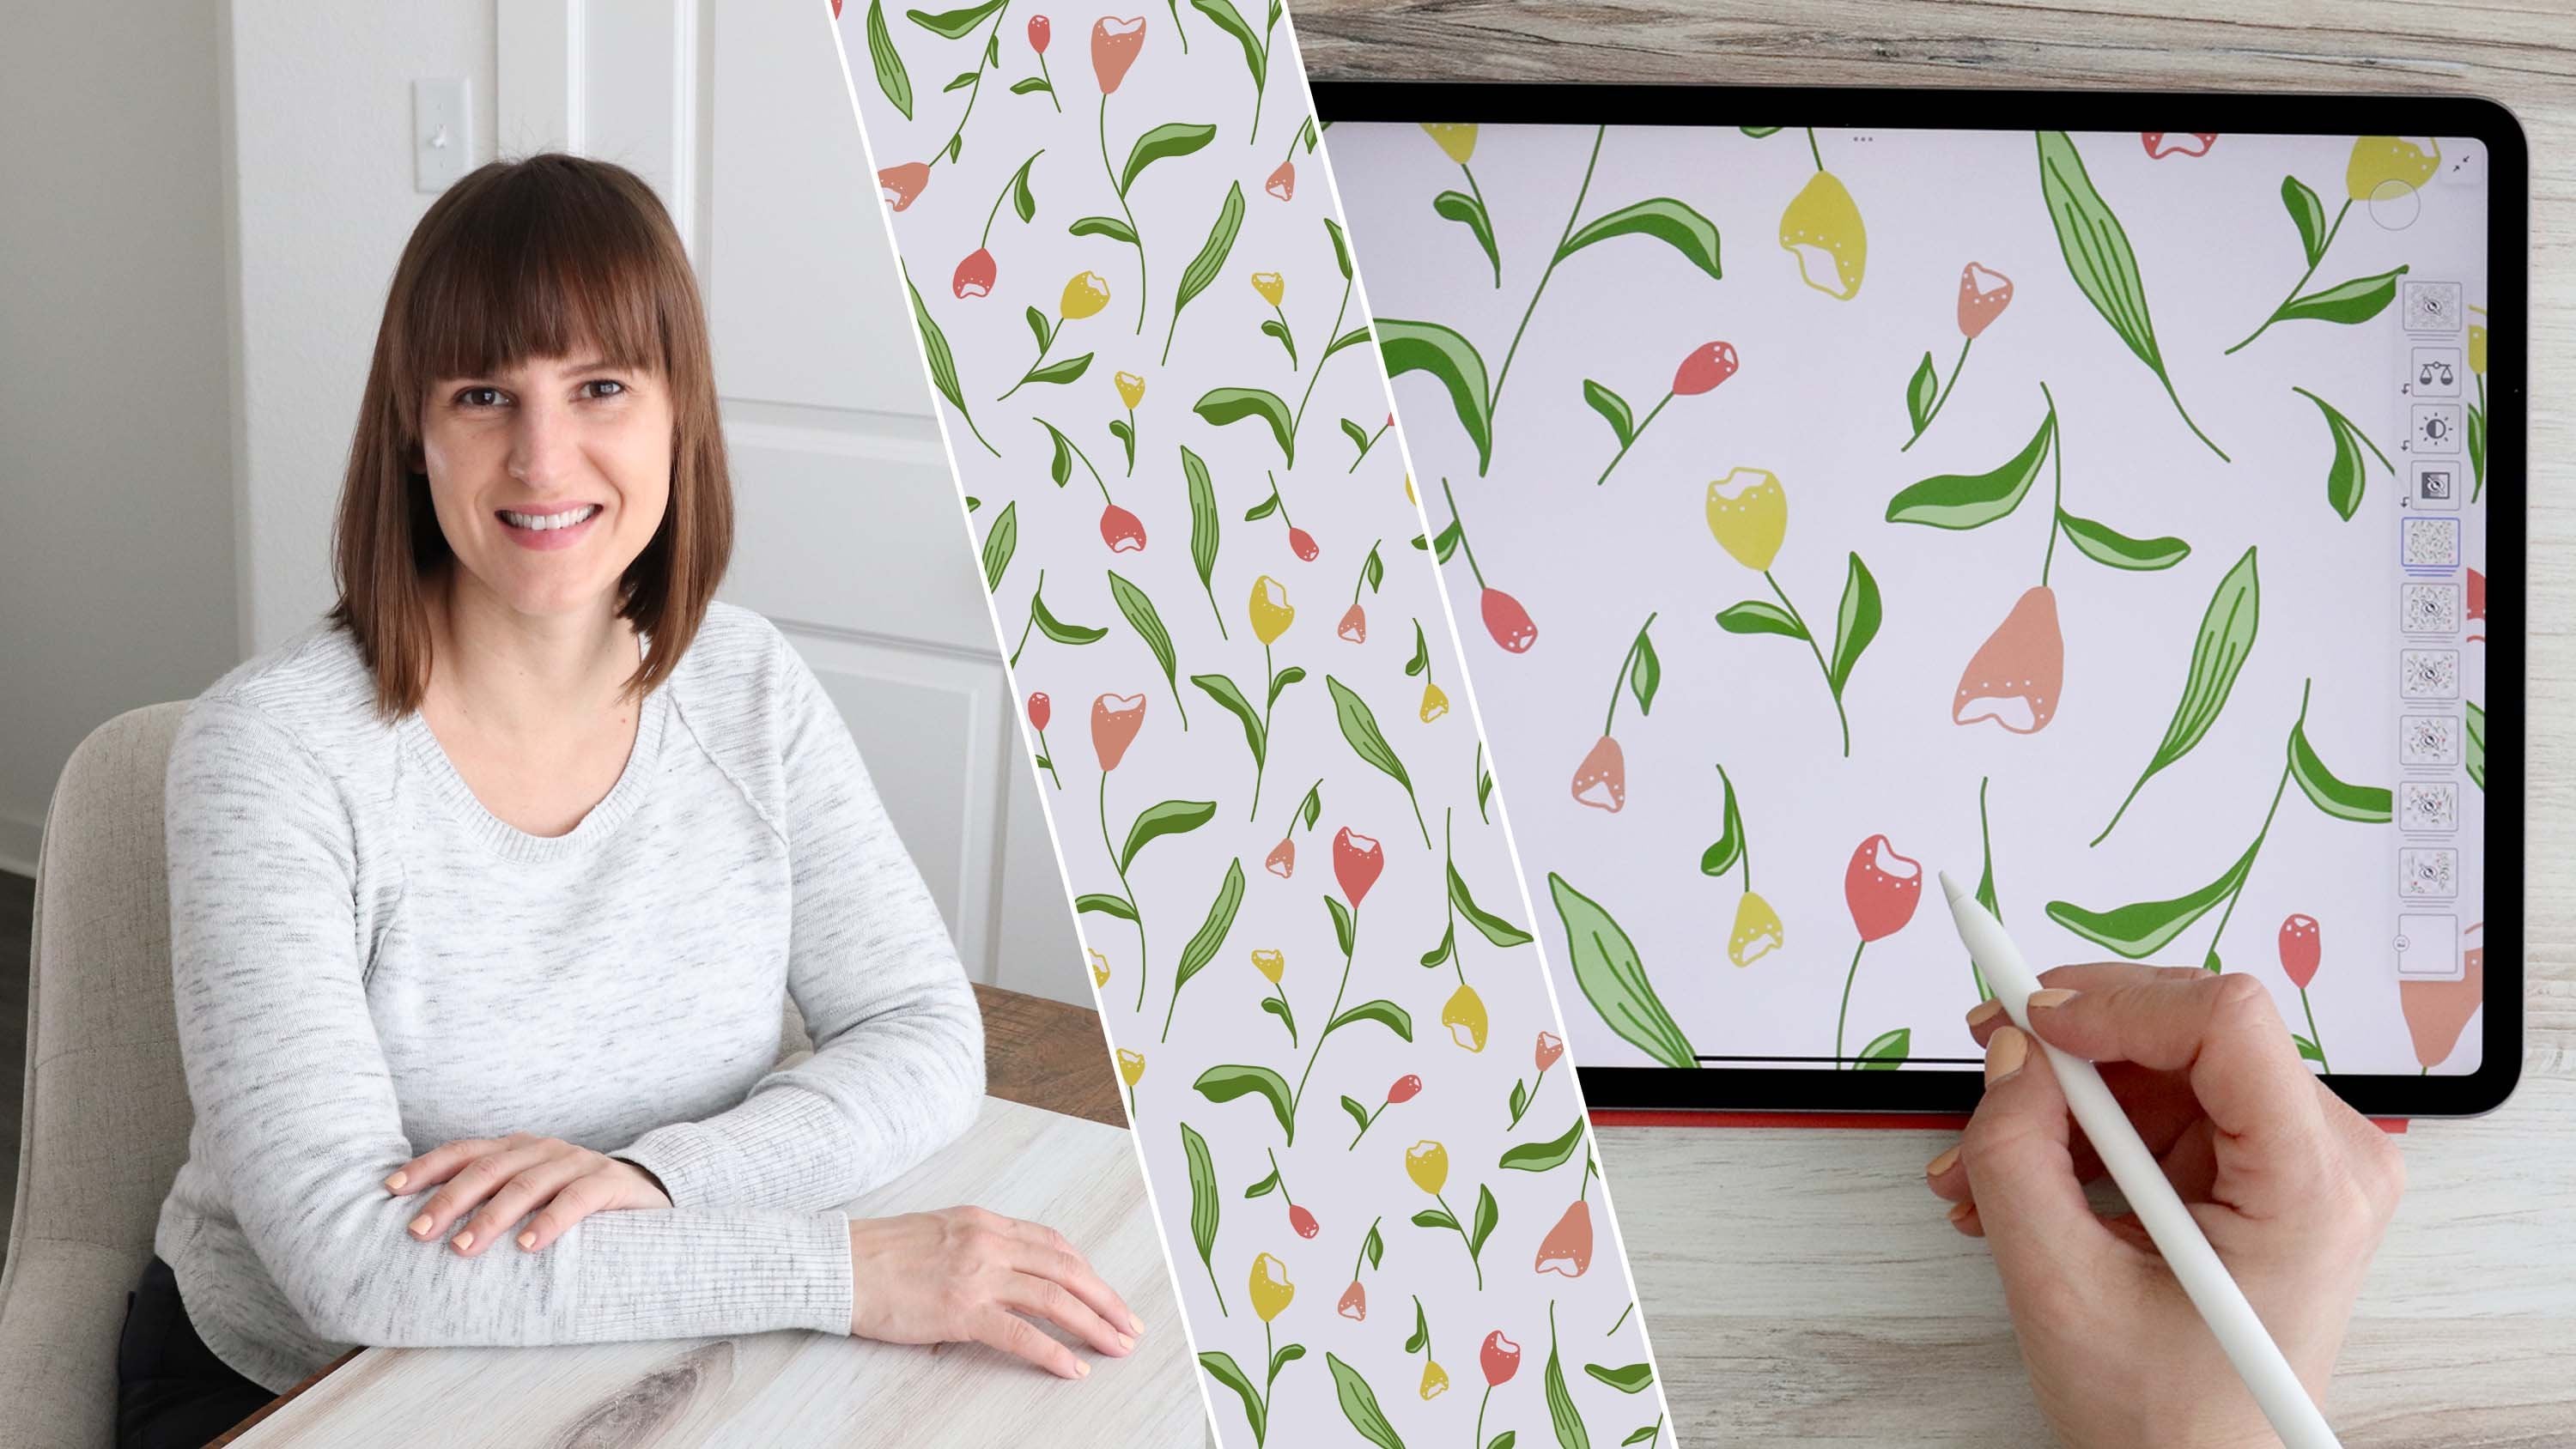
on to the first lesson. Now, you can follow
along with me as I create a cherry
blossom pattern, or you can choose your
own subject matter. In the Project and
resources tab, you'll find a link
to a Pintrasbard I created with a variety
of floral branches and vines that can be used as inspiration and reference
material for your pattern. I've also included a list
of keyboard shortcuts in Adobe Illustrator and common pattern layouts
for reference. You can download these and
save them to your files. When you're ready, please upload your project to
the class Gallery page. You can upload any
part of your process, even if you don't
finish the final pattern in Adobe Illustrator. I'd really love to
see what you create. To upload a project, just go to the project and
resources section of the class page and
tap Submit Project. When the page opens,
you can upload a cover image and add a
project title and description. The cover image will be
automatically cropped, so you can also share
additional images and then click Publish. In the next lesson, we'll
set up our Canvas and create a grid for our pattern
tiles and Adobe Fresco.
3. Setting up Your Pattern Tiles: The first thing that I want
to do is create a canvas. I'm going to go up
to custom size, and I'm going to
keep this at pixels. I'll change the
width to 3,600 and the height to 3,000 pixels, and I'll tap the lock so the aspect ratio
will remain intact. I'll go down to the section on print size and change
it to 300 PPI, so it will be high resolution. And you can see that
at this resolution, it's the equivalent
of 12 by 10 ". Lastly, I'm just going
to rename the project, and I'll call it pattern. I'll tap Okay and
then create document. You can create a
square or rectangle whichever suits you and works best for
creating your pattern. These techniques work regardless of the shape of
your pattern tile. The first thing that
I need to do is make sure my alignment
guides are turned on. So I'll go over to
the precision panel and find them in snapping. If this section is closed, you can tap the
arrow to open it up and make sure that the
alignment guides are turned on. So this is off and this is on. And this is going to be
really important as we build our pattern to make sure that everything is
aligned perfectly. You'll see why this is
important as we move forward. But for now, just make sure
the guides are turned on. Next, I'll go over
to the fill bucket, and I'm just going to
fill this blank layer, and I'll choose pixel. And I'm going to select the
transform tool and then resize this so that it's reduced to half the width
and half the height. So you'll see this
thin blue line here and then this
thin blue line here. And when I'm not
aligned, they disappear. So these are the center guides, and I know that this is exactly
one quarter of my canvas. I'll tap done, and then
I'll duplicate this layer, go back over to my
transform menu, and I'm going to drag it
down to the other corner. You can see that it
just snaps into place. Again, you can see
these blue lines that pop up to let me know
I'm perfectly aligned. So I'm going to tap
done, and then I'm going to merge this
down to create a little grid that's going to set up the boundaries
of my pattern tile. I'm also going to go back up to my layers properties panel and turn down the opacity
because I just want this to be a faint
guide in the background. The tiles are not
too distracting, but this is going to represent the boundaries of
my pattern tiles. One tile is going to
be the full pattern, and then I'm going to be able
to repeat it below and over to see how the repeat is lining up as I cross over the
edges of my boundary. Now, if I go over to
my selection tools and I tap and then select
the magic wand, I can select one of
these quadrants. And you'll see the
marching ant lines, and they show the area that's
outside of the selection. So the only area that's
selected is right here, and I can deselect it and
then select a different one. So as we go through the process, you're going to see how this
layer is going to help us with each step as we build
and test our pattern. And this is an essential layer. So make sure you create this
before you move forward. In the next lesson,
we're going to start laying down the foundations
of our pattern.
4. Laying the Foundation: We are going to start by
laying out some branches, and I'm going to work inside of this top area as
my pattern tile. I'll zoom in just a little bit. And I'll create a new layer and go over to my pixel brushes. I'll use the basic pencil
under sketching brushes, and I'm just going to start laying out the foundation
of my branches. So I'll start with
something like this and then maybe
another one here. And just keep in mind that these will eventually
sink up top to bottom. So you can think about
these transitions as you sketch this out. And as you lay out
your branches, you're just going to create
some small offshoots. You don't want to
have everything going in the same direction. You want this to feel
organic and natural, and everything you're doing right now is going
to be refined. So this class is all about
planning out a pattern, so it can be as seamless and
well balanced as possible. You don't need to get too
into your head at this point. Alright, so let's
just say that this is the basic layout of
my branches to start. And this is super loose, and I can adjust anything. The next thing that
I want to do is to duplicate this and see how
everything is lining up. So I'm going to go
over to my tile layer. Well, actually, I need to first duplicate my sketch layer, and then I'm going to
go to my tile layer, and I'm going to
select the magic wand, and I'll just tap
inside this top tile. So this is selecting the full
size of that pattern tile. Now I can select my
duplicate sketch layer, and I'll tap Transform, and now I can move
it directly down until it snaps into
place, just like that. See, those blue lines. So it's snapping right to the
center, and I can let go. Let me show you what
would happen if you don't use the tile layer.
Let's turn that one off. And I'll duplicate
that sketch again. And let's just say I go
straight to the transform tool. Now, you'll see that
the edges of this don't quite meet up all the way. So it's really not selecting
the full size of that tile. And if I were to
now move this down, oops. There we go. So if I move this
down, and let's just say I'm moving it into place
and it snaps to the center, now let's turn on the
other layer I moved, and you can see that these
don't line up properly. And if I use this
one in my pattern, everything is going
to be off a little. So let's just delete
that bad one. And just make sure you're
using the tile layer each time you move your pattern
to ensure it's in alignment. Let's finish the other column. I'm going to duplicate
this bottom layer. And because I duplicate
the bottom layer, I'm going to use the magic wand to select the bottom tile. I'll go back up to my duplicated sketch and tap transform. And the other thing
you can do is turn on the primary touch shortcut
with a double tap. And as you move this section, that will constrain the
movement horizontally. And if you need that
extra guidance, as you move it over,
you can use that tool. You still want to make
sure it's snapping to those blue lines so it's
perfectly in place. And we need to repeat
those steps once more, so I'll duplicate the sketch. I need to go to my tile layer, and then I want to use my magic
wand to select this area, go to my duplicate sketch
and then transform once again and just move it up until it snaps
right into the center, and I see those blue lines. So I'll deselect, and you can see that I have this
basic grid repeat. And we can take a look at how
the branches are lining up. So these two kind of look like they're
almost meeting together, and that could look
a little awkward if this side branch is
flowing over to the other. So I may just want to have this one go up a little bit more or maybe even adjust
this one to go down. And these two look like
they're just going to pass right over each
other so that could work. You've also got these
transitions where this vertical branch
needs to continue, and I'm probably going
to either create the branch transition
or I'll just put a flower to hide
that transition. And as we move
forward, I'm going to show you how to draw
elements that cross the edge of each tile so that you hide the transitions
between the tiles. We'll talk more about
the transitions and upcoming lessons as we
build out the pattern. In the next lesson, I'm going
to show you how to plan a half drop repeat instead
of this basic grid repeat. There are a few
additional considerations when planning a
half drop layout, but the results are
always more dynamic. So let's go over that
in the next lesson.
5. Half Drop Repeat: Now that we've learned how
to plan a basic grid repeat, in this lesson, we're
going to review the steps to creating
a half drop repeat. I love half drop repeats because they have
an elevated look. They add a little variety and complexity to the layout
because they're offset. So the way a half drop works is every other column is
offset by half vertically. So the process starts
exactly the same way by moving the sketch layer down. I'm just going to
delete these two layers so that all I have left is the bottom tile because this column repeats
straight down like before, so it's fine to leave as is. Now, though, we need to
create the offset column. So we need to duplicate
the sketch again. We need to go to the tile layer and select it with
the magic wand, then go back to the duplicate
sketch layer and transform. But instead of moving
it straight over, we want to move it over
and up to the middle. So you'll see here that you're still centered on the guides, but instead of
lining up the edge, you line up the middle of the
tile to the center guide. And you can use these circles
to show the halfway point. So these guides will
snap to the edges of the tile or to the
center of the tile. And you just want to make
sure that everything is lined up exactly halfway and tap done. Now the second column
is offset by half. Now, if you want to
create a brick repeat, you would do something similar except with every other row. So you would duplicate this
top one straight across, and then duplicate again and go halfway between
the vertical center, so every other row
is offset by half. You can choose your layout. You can go grid,
half drop, or brick. I'm going to be creating a
half drop in this class, so I'm going to move
forward with this layout. The important thing
is that you make your decision now
because the lines of your branches will line up
differently in each layout. So in the basic grid layout, this branch lined
up with this one, but not in this half drop. So as I sketch out my pattern, I need to know which
repeat layout I'm going to use because that will
determine how I make my edits. So let's finish off
this right side column for the half drop repeat by
adding the top and bottom. We need to go back
to our tile layer. We're not going to duplicate
the sketch layer just yet. With the tile layer selected, we're going to use the magic
wand to select the top tile. So imagine the pattern shifts
up to finish the repeat. The bottom half would be up here and the top half
would go down there. So with this top tile selected, I'm going to tap
the sketch layer, and that's a layer that
hasn't been duplicated, and I'm going to tap
transform so I can move everything in the
top half straight down. Make sure that it snaps. And then hit Done.
And now I have a new tile piece where the
top and bottom are flipped. Notice the difference between this column and the new tile. I now have an offset version
that I can duplicate. So I'll go back
to my tile layer, select the bottom tile. Go to my duplicated sketch and use the transform to
move it to the top. I'll hit Done and
let's deselect. And now you can see
that this column repeats straight down, and this column is
offset by half. And you can pick out two points in the first column and find that same element in
the second column and it'll create a
little triangle. So here's another
set. And that's how you know you
have this correct. So I'm going to be working in a half drop repeat
for this class. You are welcome to
follow along with me, but I'm going to show you how
to play a half drop because it requires a few extra steps
that I want you to learn. You're always going to
have to think about how things line up in
the offset column. And if you can learn
the half drop, then a basic grid
will be even easier. I also think the half drop
works really nicely with a continuous floral pattern like the one that I'll
be making in this class. So join me in the
next lesson where we will lay out the floral
elements of our sketches.
6. Filling in the Flowers: Okay. Now that we've
decided on a layout, we are ready to fill in the
flowers on our branches. I'm going to draw
cherry blossoms, and you are welcome to follow along or pick your
own subject matter. We're also going to
adjust the branches to fit the half drop repeat. So the first thing I want to do is go over and group
these three layers. They're my duplicates. I'm
also going to turn down the opacity on these layers because I want my main
layer to stand out, and these duplicates
are just there as reference for
the transitions. I'm going to tap
my original layer, and you could draw
your flowers on a new layer or just
use the same layer. I'm going to use the same
one because we're still just sketching very
basic shapes here. And I'm just going to zoom
in here a little bit. Anything I draw on the top and the left side
will get cut off, so I'm going to work
along this bottom and this right side and move the overhanging pieces into
the main tile when I'm done. I want to overlap the edges so I don't create a line where
the tiles transition. So I'm going to lay
down basic circles that represent where I want
some floral blooms to go, and I'm going to start
in the borders of the pattern tile where there's a transition from
one to the next. So I'll start right
here. Oops, Deselect, and I still have the
magic wand selected, so I need to select my pencil. And I'll put a big
flower here maybe. And then a couple of
smaller flowers here. And I'll just keep working
to fill this bottom border. So I'm going to just
speed this up a bit. Since this is a half
drop, these flowers are going to end up over
here in this area. So I'm going to take my eraser and just pull this
back a little bit, which allows room for these flowers to fall over the edge. I may even take this branch
in a different direction, maybe up here a little
bit and add a few buds. And now I just need to
keep maybe extending this branch and have these flowers overhang a
little bit more of the edge. And I also need to make sure that this area
here is filled. So I'll add a little branch
and a couple of flowers. And I don't want
to add too much, but maybe I'll add a little bud here and another one here. And I'll just speed
this up again. Actually, undo that last one. I realize I already
have something here, so I'm going to stop before
I work the top edge, and I'll just add a couple
more here and here. Now, before I add too much
to this side and top, I need to move everything
overhanging the other borders. So I'm going to go back
and select my tile layer. I'll use my magic wand. And I'm going to be
adjusting the sketch layer, so I'm going to select
the top right tile. I'll go back to
that sketch layer, and I haven't duplicated it, but I'm going to move
everything inside this tile, and I need to move it over. Now, if this was a
straight repeat, I would just move
it straight over, but I need to move
it over and halfway down because it's a half drop, and I want to line it up
properly, just like that. Tap done. And now I need to take everything from the bottom and I need to move it up. So I'm going to select the tile layer, go
to my sketch layer. I'm going to move it up right
until it snaps into place. There we go. Tap done. And one thing that I can already see is this is starting to
get a little clustered here, so I need to make an adjustment. I want to erase these here and just bring them
back a little bit so it's not so
crowded in this area. There we go. And I don't have
anything here in this area, so I could add
some flowers here. And I just keep checking
for all the other areas that I need a flower or
two, like this one here. And I'll keep going until I feel pretty good
about the layout. Now, when I get to a
point that I like, I need to see how the
pattern is flowing. So I'll go through this
quickly because we just learned the steps
in the previous lessons, but I'll duplicate
the sketch layer, go to my tile layer
and use my magic wand, take it and move it down. Then I can duplicate my layer, go to my tile layer, tap
the tile, transform. And I'm going to move this
to the middle because it's a half drop. Deselect. And I'm going to turn
off these branch layers so you can see how
this is flowing. Lastly, I need to
move the top half down so we can finish
the half drop column. So transform and move the top half down
to the bottom tile. Done. Deselect, duplicate layer, go to my tile layer, transform. Oops. Actually transform the
tile layer. Let's undo that. Here we go. Now we go
to our sketch layer, and now we can move that
layer up to the top, snap in place, and done. And now we can start to see how our pattern is
flowing together, and we can continue to make
more and more adjustments. For instance, I see a hole here that we'll probably
want to adjust, maybe move this flower
over into this space here. So in the next lesson, I'm going to show you how
to test the pattern on a larger scale to check for issues with the
repeating elements.
7. Testing Your Pattern: One thing we can do
at different stages is test the pattern repeat
at a different scale. If we can see more
pattern tiles, certain things
will pop out to us that are hard to see
at this current scale. So to do this, I'm going to group all of these
sketch layers together, and I'm going to duplicate
them because I don't want to destroy this
original set of layers. And I'll turn that
original layer off. And I'm going to merge this
duplicated layer group. Next, I'll select
the transform tool, and I'm going to resize this down to one quarter of the size, and I'll duplicate that layer, tap transform, and I'm going to slide this over
until it snaps. And I'll merge that down, and now this is one layer, and I'll duplicate the new layer and I'm going to slide it down. There we go, right until
it snaps into place. And this just lets us see our
pattern on a smaller scale. So let me turn off
this tile layer, and you'll be able to see
it a little bit better. And I think I'll also
merge that layer down, and then I'll duplicate it, and I'll make it a
little bit darker. So from here, you can see the repeating
elements more clearly. There's this strong linear part here that I may want to
break up a little bit. And anytime you have too many branches going
in one direction, it'll create a strong visual
line that draws the eye. So you want to be mindful of these areas because
they might stick out. If you have too many large gaps, the negative spaces can
also be distracting. In a pattern like this, we don't want the repeat to
be too obvious. So we want to fix these areas before we go too far
along in our sketching. At this point,
we've just laid out the basic shapes to get
an idea of spacing, and we aren't tied to anything. Maybe something needs to
be a little bit larger. Maybe there's too dense of a cluster somewhere that's
really calling our attention. If you do something
a little harder, that's going to
stand out naturally, and it wouldn't be
too worried about that because in the end,
you'll balance it out. But is there any area
of your pattern that you're seeing major
flaws or gaps or holes? Are some areas too dense
while others are sparse? This is the time we want
to fix these things. It's very simple to change
anything at this point. We haven't invested too much
time in this pattern yet. If we could correct things now, it'll just make for
a better pattern and save us a lot of
time and energy later. So I would do this
testing method at different stages as I
build out my sketches. It's really easy to just quickly check the
pattern this way. So you go back to this step throughout your pattern
making process. If I turn these layers off, I can go back to my
original sketches. I'll ungroup these layers, and I can continue sketching. So I'll turn back
on my tile layer. And I'm going to start moving things if I see
they are a problem. So I'll tap on that
original sketch layer, and I notice, for instance, this area of the pattern
is too close together, and that matches up to this
area of my original tile. So I'll take my eraser
and just remove these so they just aren't
as close. Here we go. And I'll add something
back up there. I also need to be mindful of the duplicates of
areas I've edited. So I'm going to
group these layers, and then I will turn down the opacity just a little bit so I know what
is the duplicate. And I don't want to confuse
what's been changed already. So let's go to another section. I see a gap here, and I want to add something
to fill it out. I'll start extending
one line or the other. The other thing I could
do is extend this across. So where this is meeting
up and I want to go here, I could build a cluster
that goes across the edge. Then I need to move the overhang section to the original tile. So I'll use my magic
wand, select the sketch, transform it, and I move it over and down halfway.
Just like that. And now I can see where
this is going to line up in the repeat and I can
extend the illustration. So all of these steps that have shown you up to this point will be repeated as you add
more detail to your sketches. In the next lesson, we'll take a look at how to
draw your flowers at different angles because
that will help us as we add more detailed
flowers to our sketches.
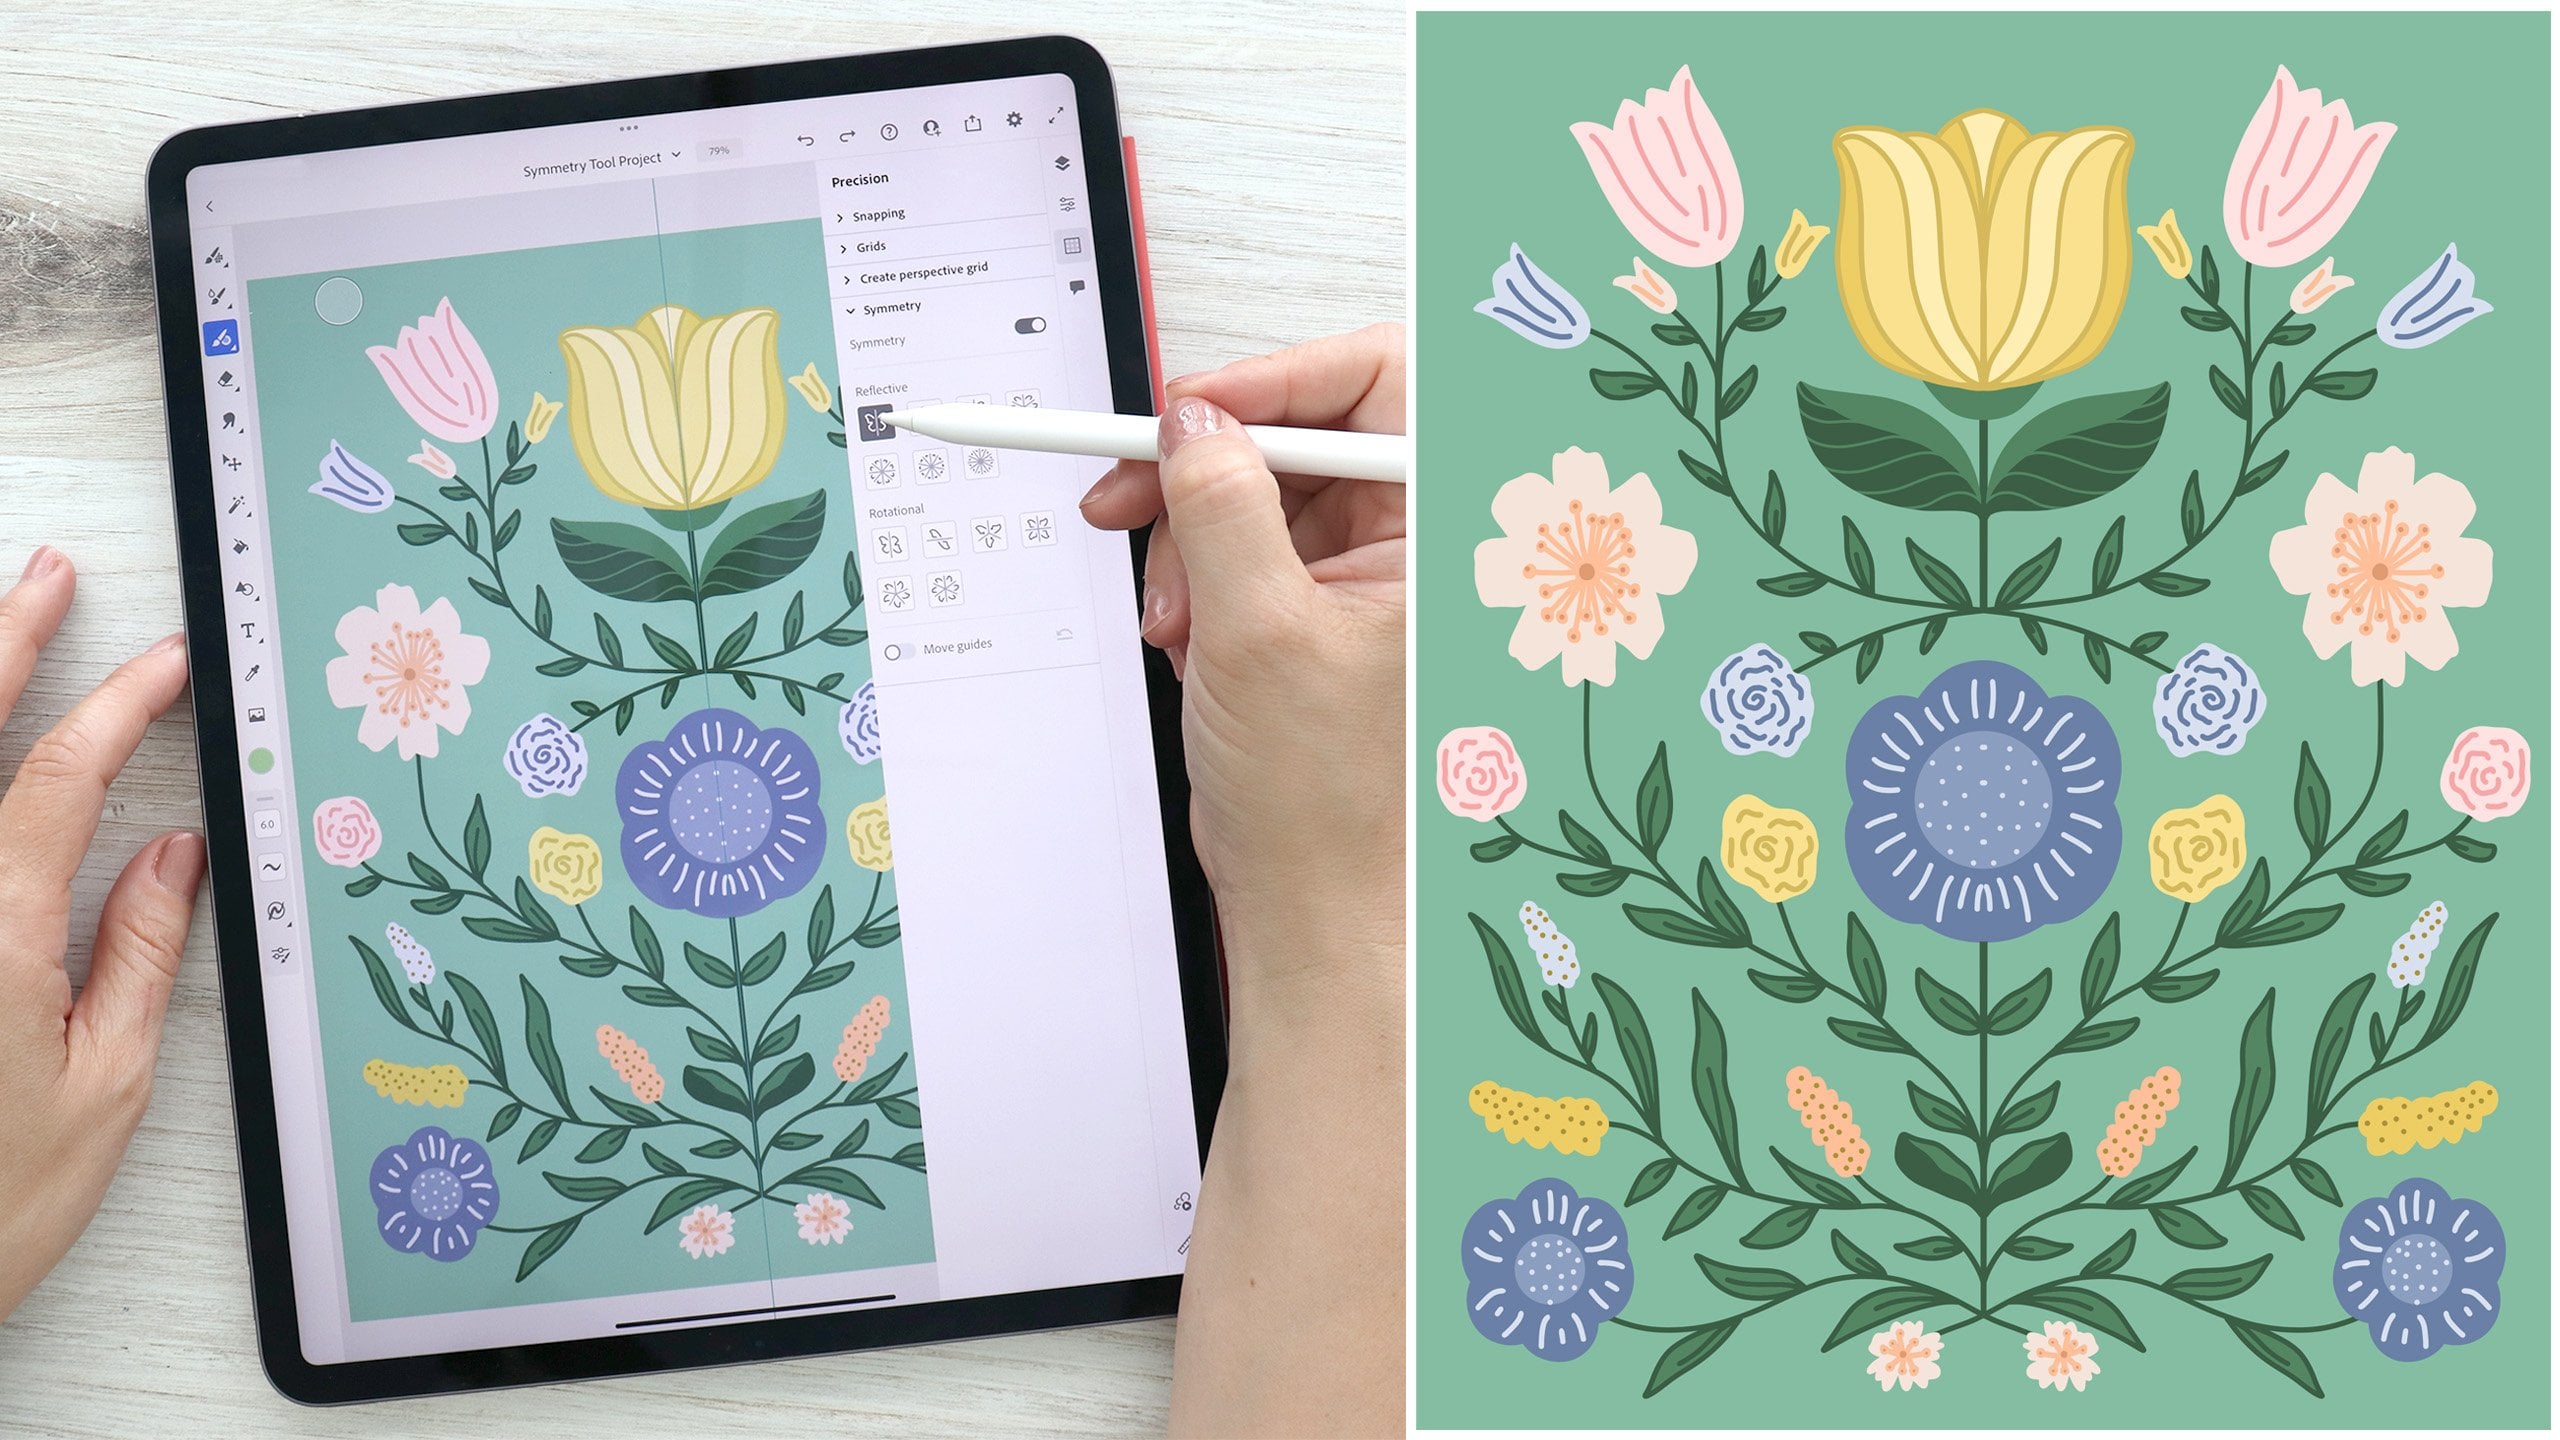
8. Flowers in Perspective: So far, we've laid out
some very basic shapes that represent flowers in
branches in our pattern. And before we move to the next
stage and add more detail, I want to discuss
drawing flowers from different perspectives and at
different stages of bloom. I'm going to go
through my process and you can follow along. So I'll open up my layers panel. And the first thing
I do when I'm drawing anything with
a complex form is break it into its
very basic shape because everything complex
starts with a simple shape. For the most part,
flowers are essentially circles or ovals at
different angles. So to start, I laid out different sized
circles and ovals. I use the drawing aids, which
can be found down here. You can just press to
select the circle, and you can draw
these by hand or use the drawing aid to make
it easier on yourself. And you can see that I created circles to represent
different sizes. So this down here is
the smallest bud, and then I created a row to draw different versions
of the budding stage, and the top row will be
flowers in full bloom. And then the middle row
is going to be flowers at different angles because
when you look at a branch, the flowers are not always going to be facing straight on. After I create the guides
for different stages, I need to create
a reference point for the center of my flower. It's helpful to have a guide
for the shape of the flower, but also for the orientation
of the center of the flower. This first flower is going to be fully open and
facing straight on. The rest of the flowers face
slightly different angles, and this will help me as I start drawing the
basic outlines. Next, I would start to draw very rough sketches
of the petals, the center, and even
the stem if visible. So this one here is
open and facing me. This one is also open, but
it's facing away from me. The two in the center are open but angled slightly
away from me. Notice the center point is
offset inside the main guide. And then the other
thing to think about is foreshortening
of the petals, so the ones in front are a bit flat as they are coming
towards you while the petals in the
back are curling up a bit and have
more circular shape. In the next row, I've drawn
flowers at sharper angles. So the petals are a little
flatter and more ovular. This one has not fully bloomed, so the petals are curled
up and it's facing away. This one faces
further away from us, so we see some of the stem in the back and we don't see
as much of the center. Here you see a bit of the stem and less of the center as well. The bottom row has
the bud stage, so everything from a
tight bud to seeing it as it opens up and the petals
start to spread out. These are rough sketches at the different angles
that I want to draw. From here, I would take down the opacity on
this sketch layer, so it can be a guide for the next layer of sketches
as I add more detail. On a new layer, I
sketched my flowers with a bit more detail because I had an underlying
shape to guide me. You can see that I started to add in some irregularities
in my line. So if you look at
a flower petal, the edges aren't perfect, so this adds a level of
realism to my sketch. I'm keeping it loose, but the
flower has more definition. The great thing about the sketching process
is with each layer, you can refine your drawing
by keeping what works and discarding what doesn't there's less pressure and
more room to play. Everything can be changed. Now, don't get too granular with your details too quickly
or rush this process. I typically have at least
a few sketch layers, but sometimes I have
more depending on the level of complexity
in my subject. From here, I'll turn off the first sketch layer and I'll reduce the opacity on
this new sketch layer, and I'll turn on the
next sketch layer, and you can see I've
added even more detail. I'm going to turn off the
sketch layer below this, and I'm also going to turn off the original guides so
you can see this better. At this level, I've added more detail to the
contours of my petal, along with some cross
contour lines to show form. I've also added places
where the petal curls up at the ends and refined the
center of my flower. For this class, I'm
drawing cherry blossoms, but if you've chosen a different subject for your pattern, I recommend looking
at reference photos so you can study the
shape of your flower, the number of petals, and so on. I created a Pintrsbard with reference images of
the cherry blossom and a few other options. You can study the images to see what these flowers look
like at different angles. It's helpful to break down the
flowers into basic shapes, but it's also helpful to
reference photographs if you can't find examples in
real life to reference. I do think this is a helpful
process to go through, but don't feel like you have to go to this level of detail. And keep in mind, these
are still my sketches, not the final illustration. So I can continue to refine them to fit what I need
for my pattern. These flowers are fairly
representational and realistic, but you may choose to draw
more stylized versions. Draw what suits your style. But even if you create simpler,
more stylized versions, I think it's helpful to think about the different
stages of blooms. If your flowers
are more abstract, having everything
from a small bud to a fully blossomed flower and then viewing it at
different angles will create some visual
interest in your pattern. I can also use the
different angles and the underlying sketches to draw variations of each flower. Having multiple versions of each stage of bloom will
create a sense of repetition, but also allow some variety
within your drawings. I can use the
underlying rough sketch as a reference to
redraw the same flower. For instance, I
have these flowers, but I drew a second version
of this first flower, and it's the same angle, and I use the same
underlying guides, but I changed up the
petals so that I have two different flowers
facing straight on. Here's the first flower and then this second version
from this angle. So you don't have to start from scratch every time because you can take the underlying sketches and create additional flowers. In the next lesson, I'm going
to show you how you can use these flowers in the next stage of laying out your pattern. Don't skip this step
because we're going to use these sketches again as we
add details to our pattern.
9. Adding Your Flowers: Now that we've practiced drawing our flowers at
different perspectives, let's see how we can
refine our layout. I went through different
versions of my layout, making edits like I demonstrated
in the previous lesson. And I started with this, but eventually landed on a
layout at a larger scale. I decided to go with larger
flowers and denser spacing. Now, one option I
have is to take this rough layout and slowly
build up my sketches, adding in more
detail every time. It would be similar
to what I did with the individual flowers, but I would build out
everything together. The second option is to use the flowers that I've already
drawn to create the layout. I'm going to turn
down the opacity on this layer group, so
they're there as a guide, and I'll turn on my
flower layer group, and you can see I created alternate versions of
some of the perspectives. This one, for instance,
is the one that I took the basic underlying sketch and redrew an entirely new
version of the flower, where the petals are different. I did this with a
few other flowers so it'd have some variety. You can create alternates
of all of them, but I think this is enough
to fill my pattern. Next, I would duplicate the layer and turn off
the original group. I would then use
the transform tool to resize the flowers. Now, when you resize pixel
layers, they degrade a bit, but these are basic sketches, not my final work, so it's okay. I've also saved my original set. I also have all of my flowers on their own layer to make
them easy to move. Next, I would organize
my flowers to the side because I want to
focus on this tile, and I need them to
be out of the way. Now, I can start
building my layout. So I will select a flower
and go to my Transform tool. And actually, let me just
move that out of the way. I can move this over
to my pattern tile. I want to start along
this bottom border and along this right border, and I'm going to fill those
out first and then move duplicates to the opposite edges before filling in the center. As I place my flowers, I can rotate or resize
them as I need to. I would continue placing
my flowers around the edge until I find something
that works with my layout. And as I place the flowers, I want to group the ones
that I've already used, and this way, I can easily
tell what has been placed. I'll go back to
the transform menu and move this flower next. I'll rotate it and
place it about here. I'm leaving room at the top because this flower
overhangs the edge, and I'll leave this side
open because I'll place flowers on the right side that fall over the
edge, as well. I have to exit the
transform menu each time I want to add
the layer to the group, but it's good to stay organized. So let's do a couple
more and speed this up. Now that the borders are filled, I need to duplicate
this group because I want to keep the original
flowers I've laid out, and I'll merge the duplicate
layer group to flatten them, and then I'll drag it
out of the layer group, and I can use my tile
layer for the next steps. I'm going to turn off
this group for now, and the next steps are familiar, so go to the tile and use the magic wand to
select the top tile. Now, I go to the flattened layer with the flowers and move
this over to the left side. Keep in mind that if you have anything that
overhangs that corner, you're going to have
to move it as well. Next, I select the
bottom and move it up and it'll lock into place. Now I can see where everything
falls over the edges, so I can continue
filling in the center. I can go back into
the layer group with my flowers. Let me
turn them back on. And I can use the
flowers that I haven't placed yet to fill the
interior of my tile. So let's take this flower
and place it up here. And I'll reduce the size and
then let's see, rotate it. Something like this. Yeah, I think there we go. Just like that. And I would
continue to fill the space. I also need to consider where
my branches are growing. So once I have some
flowers placed, I would create a new layer and I would start sketching out some branches so that they fit with where I've
placed my flowers. I need to think about how these flowers are
connected to one another, and I can use my
underlying sketch as a guide or reference. As I add branches, I may find the orientation
of a flower, doesn't make sense with
the angle of that branch, so I can adjust the flower. I also see there's a gap here, and if I add a flower
that crosses the border, I do need to go back
to the step where I duplicate it and move it
to the opposite edge. So let's go back into the layer group and
find a new flower. And if it fits inside my tile, I can add it to the group of placed flowers and move
on to the next one. I only have to duplicate
it to the other edge if it crosses the border
of my pattern tile. So let's imagine that we
filled out the entire tile. I'm going to turn
off this background and my branch layer. And in here, I
have an example of a finished layout where all of my flowers and branches
are filled in. Let's go into this layer group, and I have a layer of branches. I have my flattened
layer of border flowers, and I have my group with all the flowers I've
placed on separate layers. So at this point, you should
have something similar. Take some time to
create your own layout. In the next lesson, we'll
assess our pattern, and we'll go through the steps
to test the pattern to see what is working and what
needs to be adjusted.
10. Fine Tune Your Layout: Now that we have finished
adding our flowers, we need to test the
pattern to see if it works and then fine tune our
layout based on that. So I have the layer group
containing my flowers. My branches are on
a separate layer, and I also have the
flattened layer with the copies of my border flowers. I'm going to turn that one off, and I'm going to duplicate
my layer group of flowers, and then I'll merge the
layers on that duplicate. I'll also duplicate my
branch layer and drag it to the duplicated flower
layer and then merge them. I can't use the magic
wand on a layer group, so I need everything to
be on a single layer, and I'll drag this out
of the layer group. I'm going to turn off
that group of originals, and I'll select my tile layer and then go to my magic wand. And I want to once again, create a single tile
where everything sits inside the tile borders
so I can test the repeat. So I'll move this. I'll just slide it up into
place until it snaps. And you can see here
I actually have a little piece that fell into this corner that I need to move. Oops. Let's tap the tile layer. I'll select the lower tile and go back to the flower layer, and anything in this
column needs to be centered when I move it over because it's in my half drop. That will complete the
petal of this flower. I now have my entire pattern
fitting inside this tile, and I can finish the repeat. So I'll duplicate it,
go to my tile layer. Oops. I forgot to select that. I'll go to my duplicate
and I'll move it down. And then I'm just
going to repeat the steps to go through the process
and build the pattern. So move this over
and to the center. I'll select the bottom
half and go to that layer, and I'll just shift
this up to create a new pattern tile and select duplicate p. There we go. Select that one
and move it down. Now that I see the full repeat, I can assess it and make
note of any issues. For instance, I
see too much space here that isn't balanced with the spacing
of other elements, and I see other areas where
it's a little overcrowded. From here, I would group these layers that
are my test pattern, and there'll be a reference
point as I make adjustments. I need to go back to
my original group with the individual flowers so I can tweak the ones that
aren't working for me. I need to find the right
layer for this flower here, which I think is this one. Yes. I think I want to switch
these two flowers around, so I'll move this over
and rotate it to fit. And now I need to find
the other flower, and I think it's
actually up at the top. There we go. So I can move
it over, oops. Over here. And I would just
adjust my pattern until I feel it's laid out well. Each time I make an adjustment, I would repeat the steps to move everything to the
same tile and then duplicate it until I have the complete pattern
so I can reassess. I want to show you some examples of the variations I created. I'm going to turn this off, and I'm going to
turn this one on. And so this is the original
pattern that I created. Let's take a look in this group, and to make the
changes easier to see, I've created an extra layer and filled it with a color that I've clipped to the group
so when I turn this on, you'll see the
original in green, and then I'll turn
the next version, you can see the second
iteration of the pattern. Everything in green is
in that first version and everything in black
is the second version. So let me zoom in here, and here's that original
flower that I moved over. I then switched
out these two buds and moved this one over
to this spot and so on. In some cases, I just
barely moved the position, and in other cases, I shifted it completely
to a new spot. Let's turn this green one off and you can see this new
version a little better. I can still see some gaps
that need to be filled in, so let's go to the next version. I'll make this one red, and let's see this third iteration. You can see I'm focused
on this central area, and I made small adjustments to the flour by nudging
it over a little bit. And this was nudged down. I rotated this one over, and each time I made
some adjustments, I tested the pattern again. So I'll turn this layer off and let's take a
look at my last version. So it's getting closer
to being finished, but I still see issues
that I want to fix. You can see I made
a pretty big switch here with these two flowers. I decided that the two original
flowers were too similar, and they kind of, you know, mirrored each other. So I found that to
be distracting, and it was catching my focus. I made some other
small adjustments, tweaking flowers here and there, and I also adjusted
this branch because I noticed it was creating a strong visual line
that stuck out. You can see this took
several iterations, but it was fairly simple
to adjust each time. I eventually ended up with
this version of the pattern, and I'm much happier
with the balance here. When you're working out
the flow of your pattern, you want the spacing
to be balanced, even if yours isn't this dense, and you don't want two things
that are too similar to be touching each other because they're going to
catch your focus, and you want your eye to
move around the pattern. So just keep making adjustments until
you're happy with it. Once the layout is good, you could take your sketch one step further with
the final details. I would turn down the opacity
and then add a new layer. And refine my sketch even more. And every time I add a new
sketch layer and I refine it, the cleaner my sketch will be and the cleaner my vector
illustrations will be. My final pattern is going to be drawn with vector brushes in Adobe Fresco and exported
to Adobe Illustrator. And the cleaner
my illustrations, the less time I have to
clean up in Illustrator. This sketching and planning
helps me work out the kinks, so don't rush this process. It's easier to adjust
things now rather than after you've spent tons of time on your final
illustrations. In the next lesson, we'll talk about drawing your
final illustration.
11. Final Illustration: At this point, we have
the final version of our repeat sketched out. The next thing we
need to do is take this sketch and draw
the final illustration. Now, you're welcome
to use any brushes or techniques you typically
use to finish your motif. But first, we need to isolate the elements that need
to be illustrated. I'm going to come
into this group and turn on the
group of flowers, and I'll turn off
the full pattern. This is essentially
the only thing that we need to illustrate in
our final drawing. You could turn down
the opacity on this sketch and use it to
draw your final illustration. But one thing I want to do is connect this flower over here. And if I try to use the
background pattern, the flowers cut off at
the edge of my canvas. The same goes for other areas. There is one flower
that is cut off. So I want a version where
this flower is connected, and my motif can be
drawn as one piece. And I'll show you my process in case you're in the same boat. First, I need to
create a new layer and I'll move it to the top, and then I'll fill it with
a color with a fill bucket, and I'm going to clip it so that my original motif stand out
against the background. Next, I want to exit this layer group and
duplicate the layer group. Then I'll flatten it
into a single layer. I'll turn off the
original group, and I want to resize my canvas
to double the current size so that I can expand
the visible area of my pattern and see
more of the repeat. I need to go up to my settings, and I'll tap change, and I need to make sure I lock the aspect ratio so it
stays in proportion. I'll double my
height, and it will automatically double
my width. Tap ok. And now I do not want
to resize this piece. I want to keep it
the exact same size. So I'm just going to hit done. Depending on how many layers you have and the
size of your file, this could take a few seconds. When it's done, it's centered
in the middle of my canvas, and I want to move
it up to the corner because it's exactly
half the height and half the width of
this new canvas size. It shifted right
up in the corner. The next part is going
to look very familiar. I'm going to
duplicate this layer. I'll go to the
Transform menu. Oops. See if I can get that.
And I'll slide this across and just
make sure that it snaps to those guides
because that's important. I'll merge this down, and then I'll duplicate
it one more time, and I'll slide it
down into place, making sure that it snaps. And now if I merge this down, I can find a full version
of my motif to illustrate. I think this one here
works perfectly. So I don't need this flower because I can see that it is
fully visible on this side. And what I want to do is take my eraser and erase
the parts that I don't need so that I can easily see the area that
I do need to draw. I don't need to erase the entire illustration just enough to make this stand out. Having my illustration in red makes it really easy to see. Actually, here I do want
to make sure that I leave a slight edge of
this bottom flower just so I know where
that branch ends. It's going to be up here
at the top, as well. And so I'm just going to leave
some reference points for the outlines of the edge
where that branch finishes. And I do have the branch up here and below, so I
can pick which one. I don't need both of them.
I just need one of them. So I just have a bit more
to erase and I can actually get rid of this red flower because I have it over
on the other side. Oops. I raased a tiny bit of my flower there, so I
don't want to do that. Let me just finish up here. Almost done, and I've
isolated my illustration. Alright, so now I have a fully connected motif
that's all one piece. And I need to bring my canvas
back to the original size. So this has to be recentered. And I'll go back
to my fill bucket, and I'm going to
create a new layer, and I'm going to fill
it with a pixel layer. I'm just going to resize
this down to the lower tile, and I need to find my
guides, snap to it. And this represents my original
canvas size and tap done. And I'll just turn
down the opacity so we can see everything better. And I want to center my motif
in the middle of this tile. I can take my magic wand
and tap that filled layer, and I can select
everything outside of it and go to the sketch
layer and erase the rest. So all I have left
is my final motif. The last step is to group
those layers and move this to the center because I'm going to resize my canvas back down
to the original size, and I need it to be centered
so nothing gets cut off. Now, I go back to my settings, lock the aspect
ratio one more time, and then change this
back down to 3,000, tap ok. And now the canvas is back down
to the original size. Give this a second. And let me ungroup these layers
and turn this one off. And if I open up my
original layer group here and turn the
background off, I can zoom in and move that original set over so you
can see how these line up. There we go. So that's my original motif where the flour is hanging
out on its own. And if I turn it off,
you can see I now have the full motif with the
floer connected to it. So now I have one piece
and everything is the exact same size
it was originally. And I can use this layer as
the base for my illustration. I would turn down the
opacity on this layer. Add a new layer, select a vector brush and then start drawing my
final illustration. And at this point,
you can create your final illustration in
whatever method you prefer. I'll be using vectors, and you can illustrate
this as one piece or by drawing each individual
flower on its own layer. I'm not going to go
into detail about drawing with vector brushes
because I cover that in my class surface pattern workflow Adobe Fresco
to Adobe Illustrator. If you want my drawing tips, check out lessons three
through five of that class. In the next lesson, we're going
to send our illustrations to Adobe Illustrator so we
can create our final pattern.
12. Send to Illustrator: At this point, you should have your final illustration drawn. I drew mine with vector brushes, and I created one large
connected illustration. I wanted to go for a tone on tone line drawing
for my pattern. And you could have gone in a totally different direction,
and that's great, too. This class is about
planning a pattern, but you are free to finish it in the style of your choice. If you chose something more complex with a larger
color palette, I do have some
tips for exporting the cleanest vectors into
Adobe Illustrator in my class, surface pattern workflow, Adobe Fresco, to Adobe Illustrator. Lessons three through five
cover all you need to know. One of the reasons we spent so much time on the
sketching phase of this process was that we should have refined our
sketch along the way. And by the time we drew
this illustration, we should have a nice,
clean drawing to export. So let's talk about
what we need to do before sending
this to Illustrator. I want to make sure that any
sketch layers are turned off because hidden layers
won't be exported. I also created a duplicate
of this project and deleted all my extra layers because sometimes when you send it to
Illustrator via Quicklink, it can be very slow if
your file is too large. So I went back to
the home screen and duplicated the project, and now I have my original
and this simplified one. The last thing that I need
to create before I send this to Illustrator
is a pattern tile in vector that I'll use
as a reference for the correct size of my pattern when I'm creating
it with the pattern tool. So I have my fill
bucket selected, and I'll create a new layer and then tap to fill
and choose vector. I'll use the transform tool to resize it to that
top left corner, making sure it snaps
to the guides, and I can turn down the opacity, but it doesn't really matter. This is just a reference layer. So next, I'll center
this around the motif. It doesn't need to be
perfectly centered. Now I have a reference
for the total size of my pattern tile when I
bring it into Illustrator. So these two layers
are turned on, and that's all I need
to send to Illustrator. Now, the fastest
way to send this to Illustrator is to go up
to the share menu and tap open a copy and then
tap Illustrator desktop. Depending on your WiFi
connection and your file size, this could take a few minutes. Just tap Illustrator
on the desktop, and it will indicate
that it's processing. You'll also need to
be sure both Fresco and Illustrator are up to
date for this to work. When you see the document
sent notification, it should be done,
but it could take a few more minutes to
open on the desktop. If for some reason this
is not working for you, you can also go to the
Share Menu and tap Publish and Export
and then Export As. And I would choose Export as a PDF because that will
keep all of your layers. Just save it to Dropbox or Files and then open the
file in Illustrator. So if the Cinda desktop feature isn't working, that's
another option. The third option would
be to go back up to the Share Menu and select
Illustrator on the iPad. Sometimes if I'm having trouble, I'll send it to the iPad
version and it's faster. And because the
files on the iPad automatically sync
to the desktop, the file shows up on my desktop. So that might be a helpful
backup plan if you can't get the Senda desktop
feature to work for you. Hopefully, the first
option works for you. So let's take a look at what happens when you send to
Illustrator on the desktop. Assuming Cinda desktop worked, you should see this
dialog box open up, and you should see the
first option checked because we want to convert
layers to objects. Make sure the second
two remain unchecked. We don't want to flatten
layers to an image or import those hidden layers
that we turned off. So this looks good,
and I can click Okay. And here's our illustration. In the next lesson, we'll go over cleaning up our
layers and using the Pattern Tool to quickly turn this into a final
pattern swatch.
13. Create a Pattern Swatch: Now that I've imported my
artwork from Adobe Fresco, I can create my pattern
swatch in Illustrator. First, let's take a look at
how this came in from Fresco. If I go over to my layers panel, you'll see that I
have a few layers. I do have that background
layer that came standard with my
Adobe Fresco canvas, and I'm going to delete that
because I don't need it. And I also have the tile layer and I have my artwork layer. My tile layer still has the opacity lowered
as it was in Fresco, and I'm going to
create a new layer and drag the shape to the new layer. Now the opacity effect is
removed, so it's not permanent. I'm also going to switch it up and change it from a
fill to an outline. I'll turn that
layer off for now, and I'm also going to delete this vector layer
now that it's empty. If I open my vector layer, you'll see that I have
all these separate paths that make up my artwork. I'm going to press Z on my keyboard so I
can zoom in here. And you'll see that each
of the strokes that I made to draw this are
separate little paths. This can be a little
cumbersome to clean up depending on how you
organized your layers. But for me, I drew this
to be one solid piece, so I kept it on one layer. I'll go over to my
Pathfinder menu, and if you don't see this over here on the right side bar, you can go up to Window and
select Pathfinder here. I'm going to merge all
of the paths together. Now, you can see that this
has become a compound path. All of my unconnected
cross contours are still individual paths, but the main artwork is
a single compound path. I'll go back to my layers
and open this group. I'll press V on my
keyboard to get back to the selection tool and then Shift Command G
to ungroup everything. Now I can select the main outline which shows up in green. I'll press Shift Command
right bracket to bring that layer to the front and to the top of the layer. I can toggle it on and off
and isolate it as needed. I can also go down
to the bottom, which is where the transparent
fill layers will show up. So these paths are created
from all the compound paths. I could fill these with a color
if I wanted to keep them. I'll just command Z
to undo that fill. Actually don't want these.
So with this one selected, I'll go up to select SAM, fill and stroke, which selects everything that matches
the no fill and no stroke. I'll press Command G to group it and toggle the
visibility on and off. So you can see
they're unnecessary, and with it selected,
I'll just click Delete. If you think you
might want to fill your piece in later,
you can keep them. But I know I'm using outlines
only, so I don't need them. I could go through
and continue to clean up some little tiny stray marks, but this is pretty usable as is. I'll unlock the compound
path and select this layer, and then go over to
the Swatches panel and choose a color for the fill. Then tap the stroke
to change it. Press Okay to exit that, and I'll select transparency because I don't want
to stroke color. Now, I have one piece that
I can recolor as needed. I'm going to press
Option Command zero to fit this to the screen. So I have my artwork cleaned up, and the last thing I'll do
is select everything on this layer and press
Command G to group it all, and then I'll create a new layer and drag the group to it. I just like to remove those
original vector layers that are imported from Fresco. And now that my
artwork is cleaned up, I can create my pattern. There are three ways to create patterns in Adobe Illustrator, using the Pattern Tool, using the Repeat Tool
or the Move tool. If you're already familiar with creating patterns in
Adobe Illustrator, you likely know the original way to create a pattern
using the Move tool. Before the introduction of
the Pattern and repeat tools, this is how you made
a pattern swatch. If you're not familiar
with this method, I do think it's a
great skill to know, and I teach it in detail in
my class geometric patterns, simple to sophisticated
repeats in Adobe Illustrator. If you want to know how
to use the Repeat Tool, I teach everything
you need to know in my class surface
pattern workflow, Adobe Fresco to
Adobe Illustrator. The Repeat Tool is
the only one that's available on both the
desktop and the iPad, so I mainly use it if I'm on the go and only have
my iPad with me. I also have a lot
of tips on bringing Adobe Fresco Illustrations
into Illustrator. In this class, I'll be
using the Pattern Tool. Since I've already
planned this pattern out, I think it's the quickest
and simplest way to create my pattern swatch. I'm not going to go over the
other options in this class, but you can check out
the other classes if you'd like to learn
about those methods. Now, before I start
on my pattern, I'll need to know the
pattern tile size. If I turn this layer
back on and I select it, I can see the tile size. You may be thinking that you can use the
artwork for reference, but that's not going to work
because it needs to overlap. My artwork is seven
by roughly 6 ", but it overlaps
inside these gaps. So the size of my artwork is larger than the boundaries
of my pattern tile. You may recall that I originally
created my project to be 3,600 by 3,000 pixels, and I set the
resolution at 300 PPI, which meant it would
print to 12 by 10 ". My pattern tile is half the
width and half the height, which makes it six by 5 ". If you forgot to bring in your tile layer and you chose a different size project for me, you should be able to just use half the width and height
of your original project. Your document setup is in
pixels instead of inches, it will convert to 72 PPI. So it will show up as a different pixel
size in Illustrator. And this can be confusing. So importing the tile
as a reference point can be helpful if you
like working in pixels, so just keep that in mind. For now, I'm going to
turn the tile layer off, and now I have this piece
of artwork that I can move around with all my
paths grouped together, and with it selected, I'll go
up to object pattern make. The first thing that you'll see is this dialogue
box that opens up, and once you've read it, you
can choose Don't show again. It's just letting you know that a new pattern swatch has been added to the Swatches panel, and you can see the
new swatch over here. When you are in the
pattern editing mode, the changes you make will
apply when you exit this mode. I'm going to click
Okay, and you can see that it creates a
standard grid repeat. You'll also find this dialog box where we can adjust the pattern. So let's go over these options. I'm not going to use all
these features because I planned everything out
for this pattern already, and I know exactly what I need. But you may want to use this
tool for other patterns, so let's review the features. The first thing I
can do is name it, so I'll call this
Cherry Blossom pattern. Under tile type, you can click to see the options in
the drop down menu. And the default is
the grid repeat, but you also have a brick by
row and a brick by column. Brick by row is often simply
called a brick repeat, and it'll be offset
by every other row. Brick by column is the same
thing as a half drop repeat, and that's what I'll be
using for this pattern. You also have hex by
column and Hex by Row, but you'll most likely
use one of these three. If you follow along with me, you'll choose brick by column, and you'll see that it shifts the columns over
and down by half. The next option when you select a brick repeat is
the brick offset. If you are using this tool to build a pattern from scratch, you actually have
options for how much the columns or rows are offset. The default is half, and that is the measurement we
used in Adobe Fresco. But you can choose
other options if you're using this tool
to plan out a pattern. The next section is where our pattern tile size is
going to come in. You'll notice that
the default setting is the size of my artwork, but I want to change
it to six by five. Now it fits perfectly
to the size of the pattern tile I
planted in Fresco. So you can see
where the edges of this branch line up perfectly, and everything tucks right in to match the pattern
I created in Fresco. You can choose to size
your tile to the art. And obviously, that was
what the default showed. And let's just turn off that
option for this pattern. If you move your artwork around, you can choose to have the
tile move with the art. If you make any adjustments
and move your artwork around, all the copies will
adjust accordingly. Again, this isn't
necessary for my pattern, but if you're using
this tool to play around with a layout, you
may need that option. I'm going to go back and
reset this to six by five. Another setting that you
can adjust is the overlap. So you can adjust if they
overlap on the left or right, or the top or the bottom. Now, this artwork does
not overlap because I created it to line up as a
continuous branch vertically, and they tuck into each
other on the sides. But let's say I did
have these overlapping, I would choose whether
this flower overlap, that one or vice versa. And you may need that option. Last setting is how many copies you're going to see
in this editing mode. And you can see there
are these copies that show me how my
pattern is flowing. And this is set to
three by three, there are three columns
and three rows. But you can use the
drop down to select more copies and you can
see all the options here. You can also choose
to dim the copies. If I turn this off,
you can see that they are the same
color as my artwork. It makes it easier to
see the full pattern. But if I dim the copies, it's easier to distinguish my original artwork
and make adjustments. Now, you can also choose
to show the tile edge, and this is our six
by five pattern tile, or you can show
the swatch bounds, which show where
the actual swatch ends and begins. I'm
happy with this. So since I've already
preplanned this, there's not a lot
to adjust here. To exit out of this editing
mode, I want to click Done. If I click cancel, it'll
delete this pattern swatch and not save any of my edits, so I want
to click Done. And when I do that, you can see the swatch change and I have
this cherry blossom pattern. If I want to go back and
make any adjustments, I can just double click
on the pattern swatch. It'll bring me right back
into the editing mode, and I can make any
adjustments as needed. So let's just say
that I wanted to see what this looked like
as a quarter offset. If I click Done, it'll update this swatch and if I
click Save a copy, it will create a second swatch
with those adjustments. You can just test
out some edits and create multiple versions
of your swatch. Let me click Cancel
because I don't want to save any of those
changes to my swatch. At this point, we have
a pattern swatch, but there's no background color. I'm going to go
to my toolbar and I'll zoom out so you can see
this a little bit better. I'll press M on my
keyboard to bring up the rectangle tool and you can
also find that right here. I'll draw out a
rectangle and make sure my fill is selected, and I'll go over
and click my swatch to fill it with my pattern. You can see my pattern fill
has a transparent background. Pattern Tool doesn't let
you create a pattern with a background color,
and I'll show you why. I'll press V on my keyboard so I can move this shape around. When I drag it
over the artboard, you can see that there's
a transparent background. Let me show you what
would happen if you included a background
color in your layout. Let's go to the layers and
turn on that tile layer. I'll select it and then switch it so that there's a
fill but no stroke. And I'll go over to
my swatches panel and add a lighter
background color. I need it to be in the back, so in the layers panel, I'll drag this layer
to the bottom. This time, I'll select my artwork and my
background color, and then I'll click
Object pattern make. And it brings my background
color in as another object, and two of the edges
are going to overlap. So if I move the artwork
into that same size, it cuts off a section
of my pattern. So no matter how I
have this overlap, something is going to be hidden. So you can't bring in a background color with
the pattern tool. No, I'll just press
Cancel on that. I do have a solution for this. Let me first just
delete the shape, and I can drag my swatch
out of my swatches panel, and then you can see the elements that
make up the pattern. I can go to the layers panel
and then select the group. And I'm actually going to create a new layer and drag the group to it so it
doesn't get confusing. If I open the group,
you can see all of the copies of my illustration
that make up my pattern. I also have the background
shape that creates the swatch. So because I created
a half drop, there are three columns to
create the full repeat. So with this noFill noStroke bounding box that creates
my pattern swatch, I'll press Command C
on my keyboard to copy it and Command F to paste a
copy directly in front of it. So they sit right on
top of one another. I'm going to select
that top copy and go to my swatches panel and
give it a fill color. Now I can select everything. And you'll see here
in my Layers panel, I have selected all
of the artwork, the noFil no strike
bounding box, and the filled shape. I just have to drag it over to add a new swatch to my panel. I'm going to delete this now, and I'll press Mame
keyboard to bring up the rectangle tool
and draw a rectangle. When I fill this
with the new swatch, you can see it has
a background color. So I can still have the
one with no background, but a second one
with a background. So if you want a background
color in your pattern, you'll have to add it in after you've finished using
the pattern tool. It's that simple to turn your artwork into
a pattern swatch. In the next lesson,
we'll go over how to export our work and
wrap up the class.
14. Export Your Work: Now that we've
finished our pattern, let's review different options
for exporting our work. First thing you can
do is go over to your Swatches panel and click on the little menu here and use Save Swatch Library as AI. You can give your swatch a name. I'll call mine cherry blossom. And then it'll be saved to
the swatch files folder, and I'll click Save,
and then I can find it down in the swatch Library's
menu under user defined. So with this saved
as a swatch library, I can open my swatches up in another file as needed.
So that's one option. Another option is to save
it to my Adobe libraries. So if I go up to Window
and open libraries, it'll bring up my
library's menu. I'll click Create New Library, and then I'll name
it Cherry blossoms. And click Create. And now I can simply drag and drop my
elements into the library. So I could take my illustration, for instance, and
just drag it in. And then I can also drag
and drop the shape that's filled with my pattern
and drag that in there. And I can add any elements
I need to this library. With it saved to my libraries, it's accessible on
other devices where I'm signed in to my
Creative Cloud account. If I want to use
this in a new file, I'd simply drag anything from my library onto the
workspace to use it again. So you can collect all
the assets related to your pattern in one place and have it accessible
to use again later. You can also export your
file in different formats. If you want to share your
project for the class, you can export it as a JPG and upload it to
the project page. We also need to
save it as a PDF or other format for
printing or sharing. To export it in any
of those formats, you will need to
create an artboard in the size you need to export. So far, I've been
working in inches, but if you've been working in pixels and need to change to inches or just need to export it in a different
unit of measurement, you can do that in the
document setup menu. Either go up to file
documents setup, or you can choose documents
setup right here. You can also press
Option Command P to bring up the
document setup menu. I can use this drop down menu to change the
unit of measurement. I currently have mine in inches. But if you need to
change your format, just select it and
then click Okay. Next, I'll go to
the Artboard tool, which is over here
on the toolbar, or I can press Shift O and
then draw out my artboard. And I can go up to the top here and reset
to the size I need. So maybe I want it
to be ten by 12 ". I'll press V on my keyboard to go back to the
selection tool, and I'll drag my pattern
over to cover the artboard. I'll just use the hand tool to move my workspace over a bit. And I can position it
to capture the part of the pattern that
I want to reveal. I can resize the shape
to fit my artboard, and I can also right
click Transform Scale, and I can choose to
scale it up or down. I want to be sure
that I turn off transform objects because I only want to transform the scale
of the pattern inside. And when I have what I
want, I'll click Okay. Once I have it positioned and scaled on my artboard,
I can export it. I'll go up to File export as, and I can give it a new name. I can select the file location, and then I can select a
format to save it as. For the class, I'll choose JPEG, and I want to make
sure I use artboards. I can select all artboards
or specify a range. Right now I have two artboards, and I just need to
export Artboard two, which is the one I
set up my pattern on, and I'll click Export. In the JPEG options, I'll select a color model. If I'm exporting this for
screens like social media, I'll select RGB, and if I want to select
this for printing, I'd want to select CMYK. Next, I can select
the resolution. If I'm exporting this for use
on social media or the web, I may want to select 72 PPI, but if I do want to print this, I may want to choose 300 PPI. I want to make sure that
art Optimize is selected, as well, and I'll click Okay. To export it as a PDF, I can go back up to
File Export Export As, and choose Adobe PDF. I have the same options
as I did before, and when I've saved what I
need to, I can click Export, and I have several options to choose from in the settings, but it's important to
note that you have the option to preserve
Illustrator editing capabilities. If I were to check this box, then my PDF could be opened
in Illustrator with all of the layers rather than as
a flattened image in a PDF. So just keep this in
mind when choosing this option and whether
or not you want someone to have access
to all of the layers and pattern elements in your file. So when I'm ready, I
can click Export PDF. You have different export
options for different uses. But for this class, all
you need is a JPEG to upload to the project and
resources section of the class. I'd really love to see the
pattern that you've created, so please share it. You can also just share
the final piece of artwork that you created,
your illustration. If you didn't take
this all the way into Illustrator to build
the pattern swatch, you can also export
your sketches or the pattern you
created in Adobe Fresco. Feel free to share whatever part of the process that you'd like. In the next lesson, I'll wrap up the class with some
final thoughts.
15. Final Thoughts: Hope you had fun
taking this class and are happy with
your final pattern. You can take what you've
learned and apply it to any type of pattern
you want to plan. I'd love to see what you create, so please upload your project
to the class Gallery page. You can share your
thoughts and ask questions in the discussion
section of the class. I'd also love for you
to leave a review. Reviews help other students
discover the class, so I appreciate you taking
the time to leave a review. If you enjoyed this class and you want to
learn more from me, you can check out my other
classes here on Skillshare. Click the follow button
if you want to stay up to date and be the first to know
what I'm working on next. As always, it's been
an honor to teach you and I hope to see
you in my next class.