Transcripts
1. Class Introduction: Do you like me
laugh painting and drawing and would like to use your art to create
digital artwork. Well, discuss is for you. Here we are going to learn
the most important tools to leverage your art as much
as you want using escape. I'm feeling some anatomy
designer, educator from Italy. I work as a freelance designer, selling my illustration and patterns on Creative
Market as Spoonflower, I discovered surface
pattern design in 2017. I remember working in my
university campus when I saw a poster advertising a curse about surface
pattern design, I didn't know what it was, so I asked my classmate
what it was about. There he expanded what
surface pattern design is. Since then, I've tried different techniques,
approaches, methods, and accreted many illustrations at buttons for my portfolio, but also for clients. If you're curious to
see more of my work, you can come meet on
my Instagram profile. Here in summary design. In this class we're
going to cover how to vectorize your painting, create a repeating pattern and a color palette using escape. Escape is a graphic
software that you can download for free and
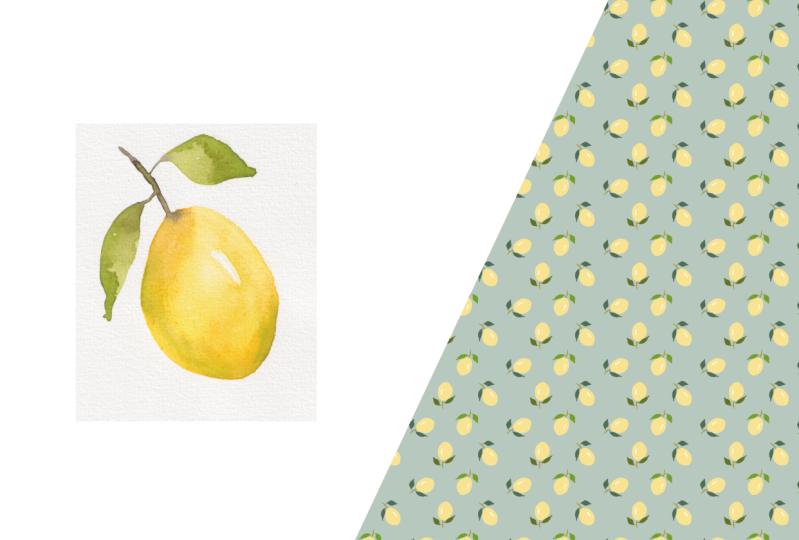
install on your computer. The materials you're going
to need for this class. Or a picture or a scan of your painting and a photograph that you like because
of its colors. If you want, you can also use the same picture and paintings I'm going
to use in this class. You will find them in the
project and resources section. To take this class. No
previous knowledge of escape or surface pattern
design if needed. You don't even need to be an experienced designer
painter because we can create beautiful
******** setting from simple marks on paper. If you're interested to
learn my method to create repeating pattern on
escape using my artwork. Well, this class is pretty flat.
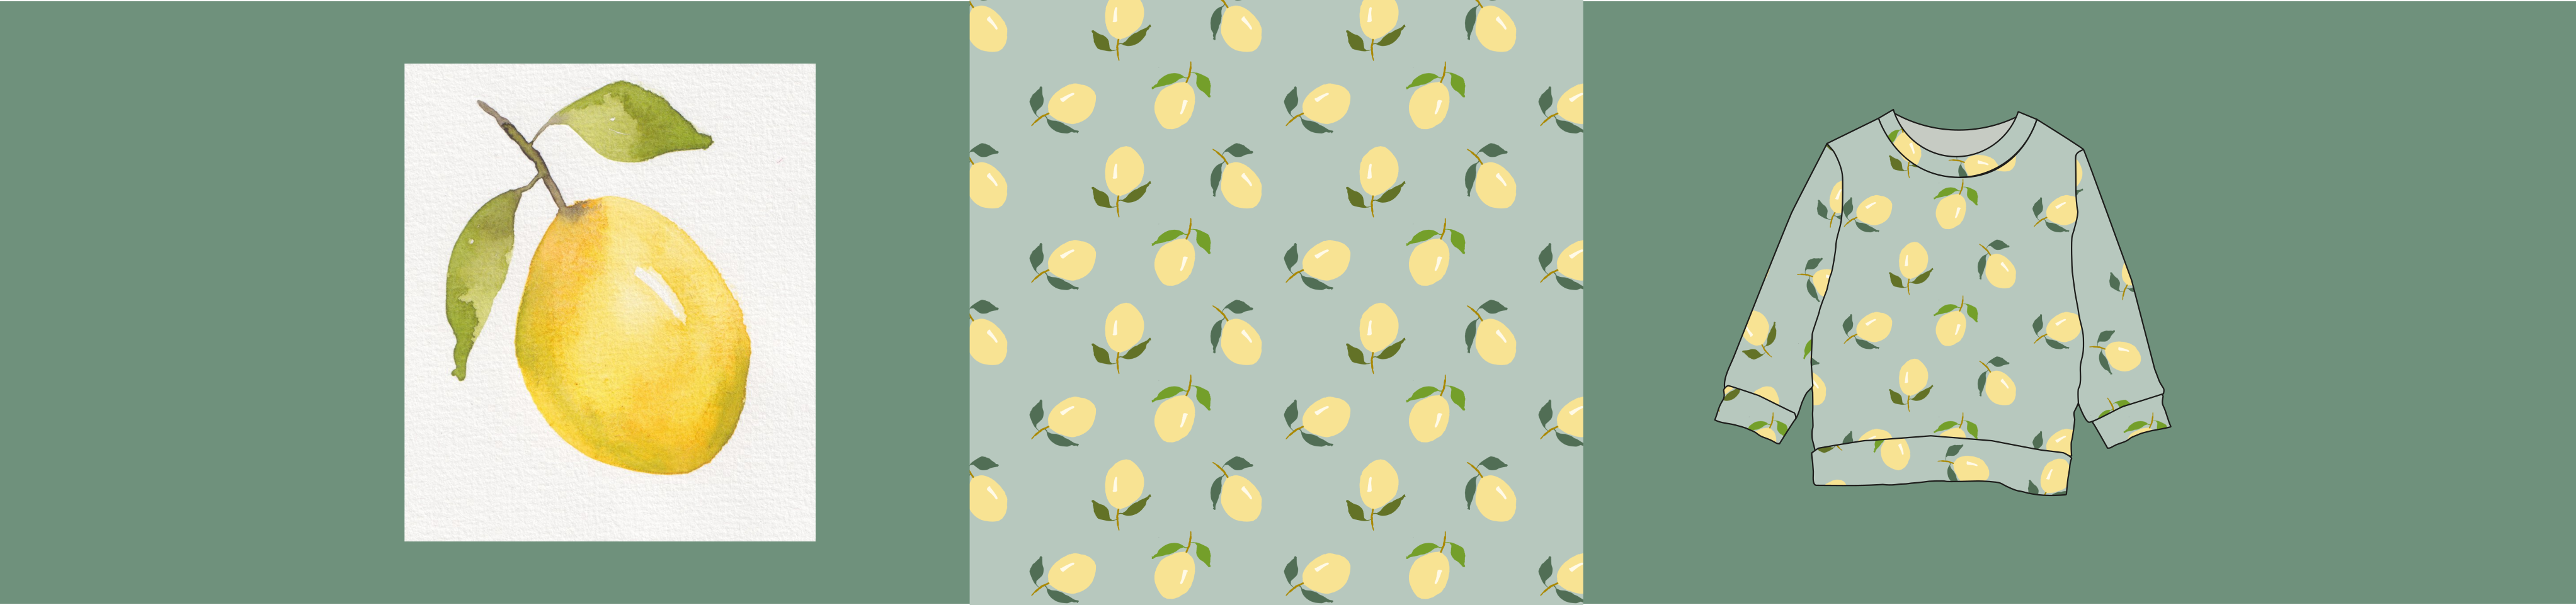
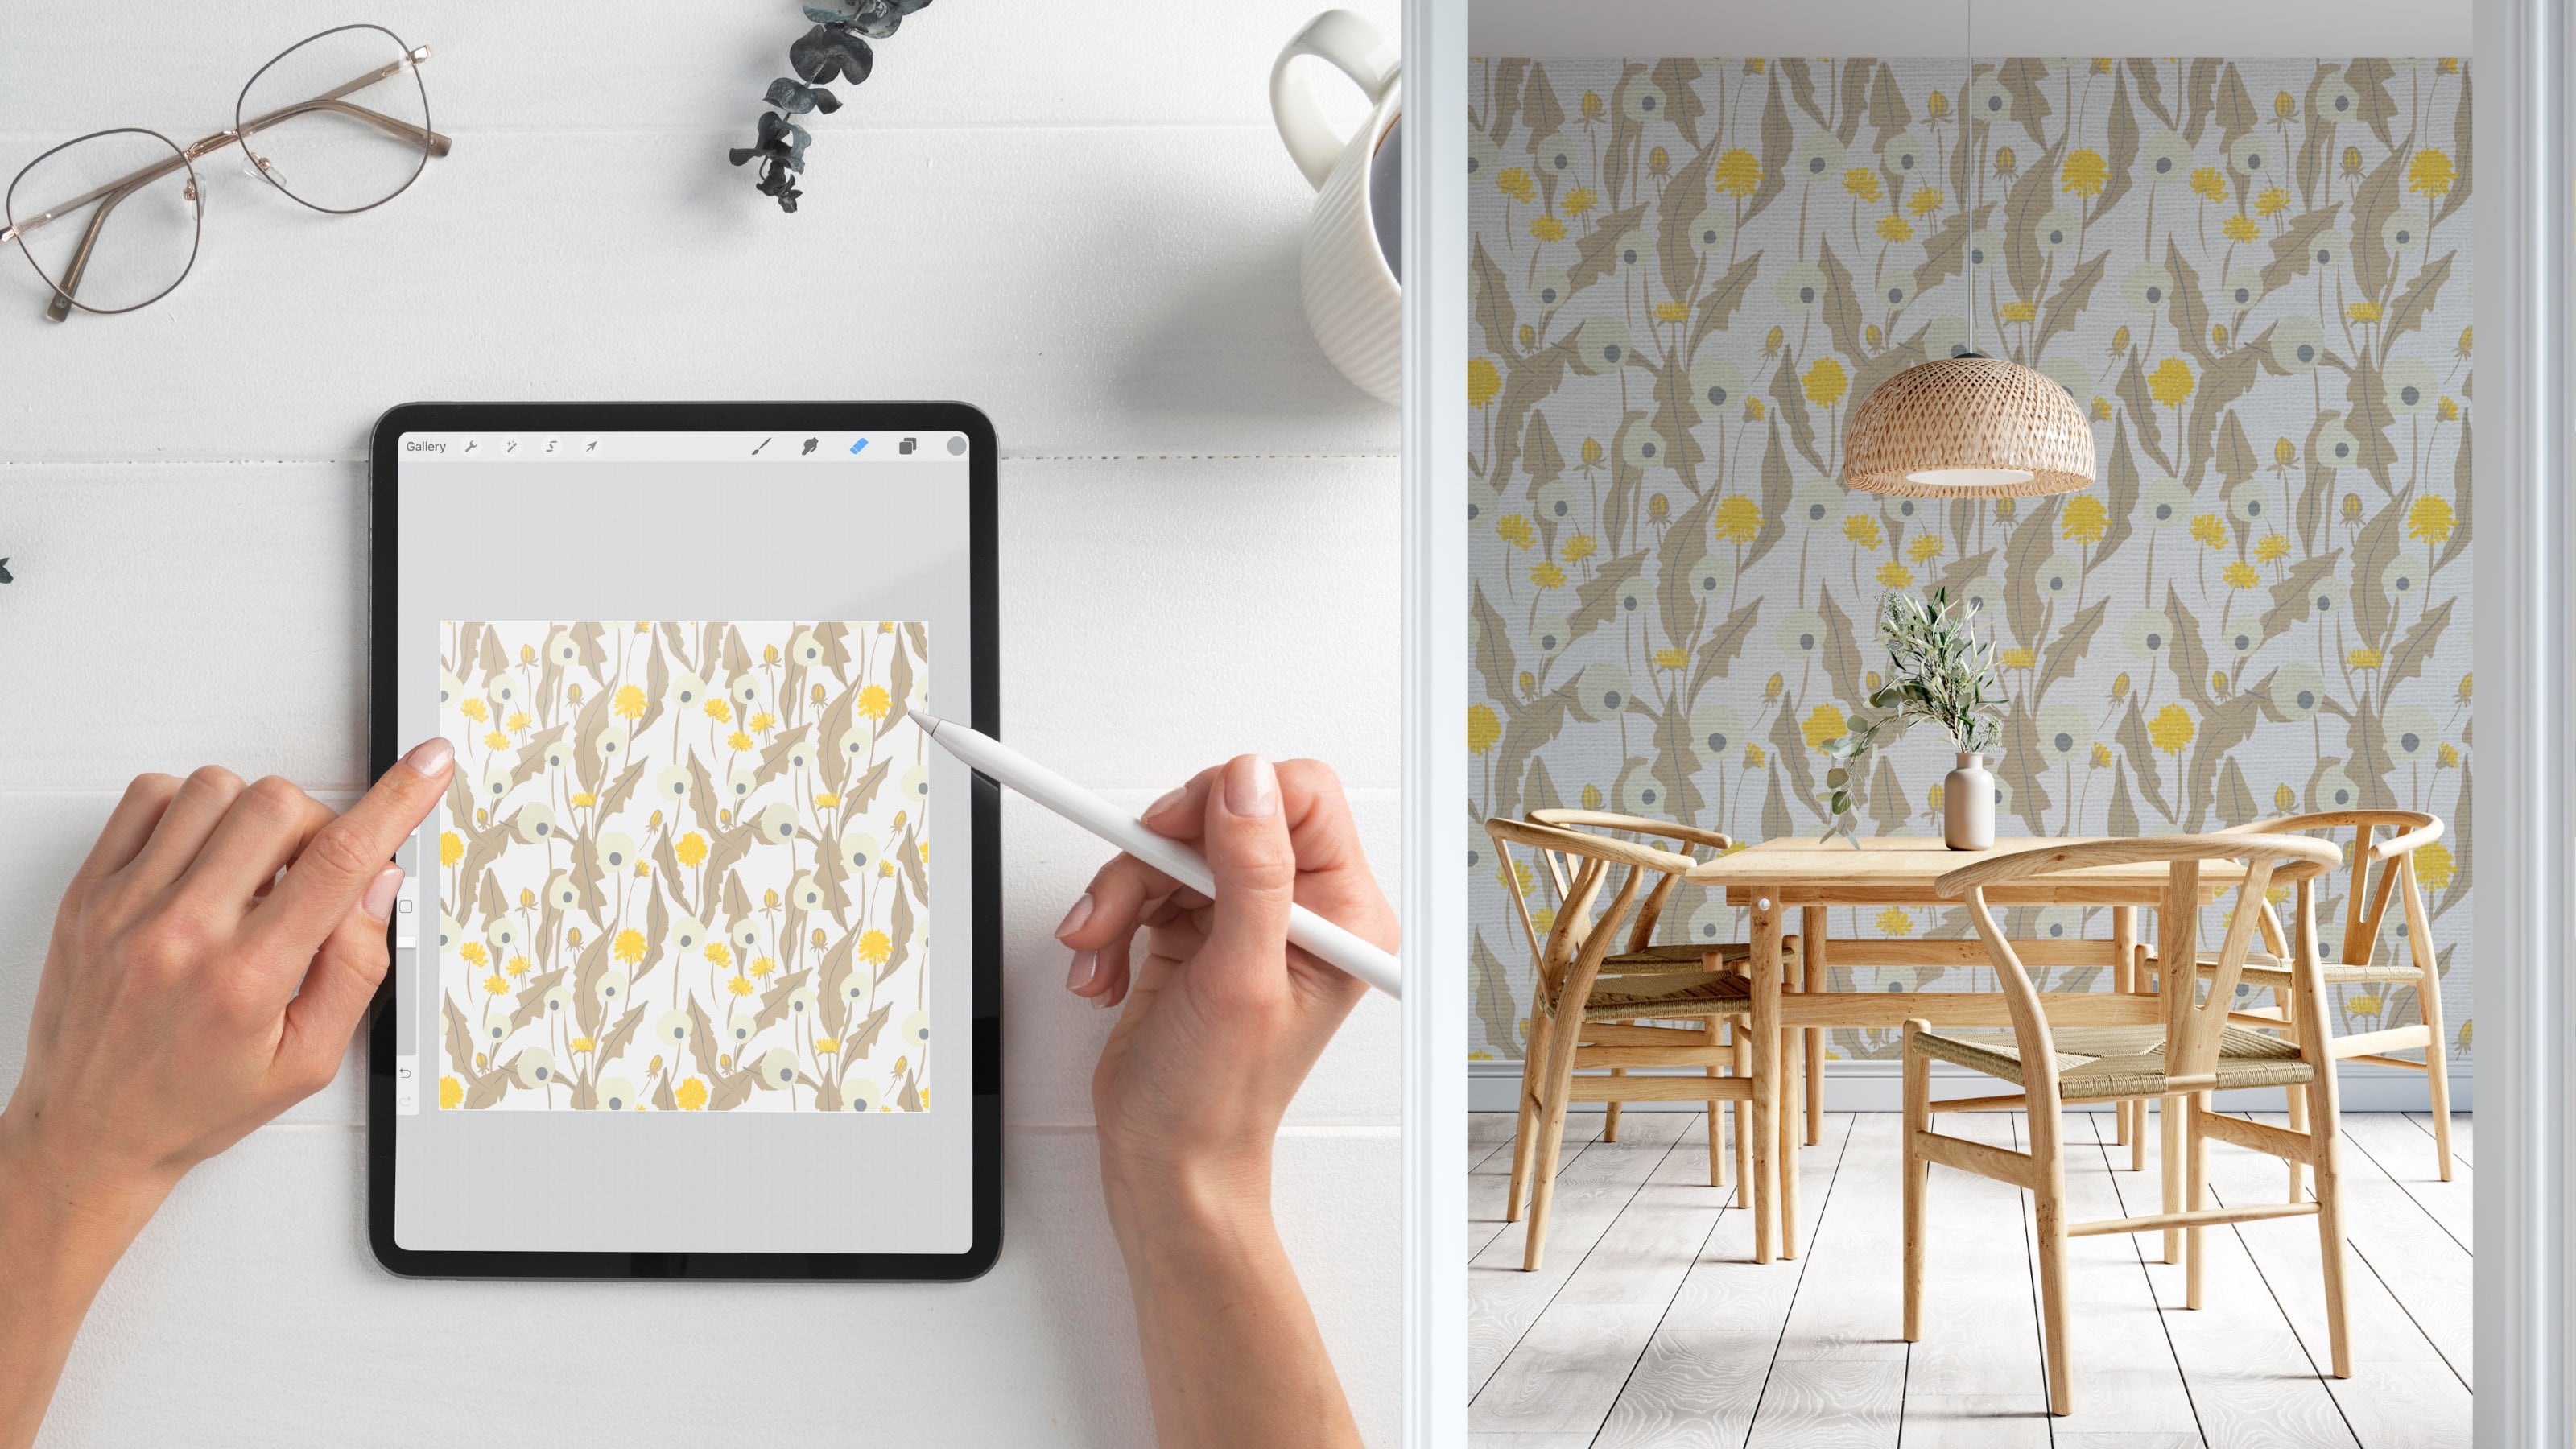
2. Class Project & Class Resources: Your project for today's class is to create a
repeating pattern, do a product mockup, and fill it with
your pattern using the tools and methods
I will teach you. You can choose to
share your project, showing your pattern
and your mockup, or showing the
pattern you created an escape and original
artwork that you vectorized. Know that you can either use your own artwork or
my lemon paintings. You can download them from the resource section down below. I chose this project because every time I finish
a new design, I find it satisfying to see my pattern
on product mockups. This is also a good exercise to show yourself that this case, you will learn while vectorizing your artwork and building a repeating pattern can be
used in many other ways. Sometimes I use these
kind of mockup, also my Instagram and
Facebook profile lawyers to show the way my patterns, we'll look on finished products to set yourself up for
a successful project. I suggest you watch
this class twice. Wants to have an idea
of what we're going to do and familiarize yourself with the structure of
Enscape itself a second time to implement each
passage following my steps. But of course, feel free
to do as you prefer. I also suggest that the pattern you create
is a simple pattern with one or two elements maximum and apply it to a simple product
mockup like this one. It is the time and
place for you to experiment and have fun. I repeat each passage as
many times as you need. Before diving into
the main class, I suggest creating a folder on your computer where to collect the pictures and scans
of your paintings. I picture you like because of its colors and where you will
save it in Enscape fight, we're going to create
together as a first step, open Escape on your computer. Great. Now we're ready to start
seeing the next lesson.
3. Introduction to Inkscape: In this class we are going to
learn how to open Enscape, create a file, import the picture of our painting
and save the file. I start opening escape. I click on the Enscape icon
and it will open a file. This is my artwork, and it's now it's on
the shape of an A4. To check that you can go to File Document Properties and
this window will appear. You can see that now the
page size a4 is selected. Here is where you can change
the size of your art board. But I like to work with an A4, so I will leave it like this. To zoom-in. I press Plus on my keyboard. To move around. I hold the space part with
a left-click on my mouse. I choose. What I want to see. This is the escape working area. Usually we have you will have some tools on your left bar and some windows open
on the right bar. But don't worry, because every time we need to
open a new window, I will show you how to do it. And while we work on escape, the windows will start saving. Here on the right side
of the working area. The first thing I want
to do now is to import a picture of my
scanned document. We'd go on File Import. And here I go in the folder
where I've saved my picture, you selected and
then click Open. These are the
settings you should use when importing a picture. I usually choose these
and then I click, Okay. Now, you can select the
picture by clicking once on it and then you
can move it around. It's very big, so I
want to reduce it. I click on it until I
have this kind of arrows. Then I drag one arrow to the opposite corner
to reduce the size. And I hold the Control key
to keep the proportions. Otherwise, they will
change like this. But if I hold Control, D proportion will
be kept the same. Here I'm part to the,
my first picture. If I want to rotate the image, I click on it until I get these
different kinds of errors are used to rotate
the picture while these kind of errors are
used to change the size. Okay? To save this file, we can go to File. Save. You choose the folder
where to save it. You give it a name. I will call it less than one. And then click Save. We just created our
first escape file. We imported an image
and we save the file. Now we are ready to continue and learn how to vectorize
our painting. See you in the next class.
4. Vectorize Your Art: Method 1: Welcome to lesson two. In this class, we will learn
how to vectorize our height, how to collaborate, and have your elements ready to
create a repeating pattern. We start from where we left
from the previous class. We learned how to open
a file in escaped, and we learn also how to import the picture
of our painting. We can start from here. The first method is
called Trace Bitmap. So with the selection tool, you click and select the image. You go on the top bar menu, you select Trace Bitmap, and this window will appear. If he doesn't appear, it might be that it's
already somewhere in your working area and you
just have to look for these name in your
previously opened windows. There are many settings
and you can play with them and experiment the different
results you can get. I usually play with brightness
cutoff and see which one, which value gives me
the result there. Like for example, now, we threshold value 0.850. It gives me this result. But for example,
let's try with 650. I click Update to see how these settings will
vectorize my illustration. And this is too bright for me. I want to more colored area. So I go back to 850 because
I know I like that. As I told you, try different
settings and options. Once you've found
the result you like the most, you click, Okay? And then you can close the
window or reduce it any. In my case, it's here. So when I needed, it
will always be there. It created a vector. They're shown of my
previous illustration. So I can select the vector
illustration, move it aside. Now I want to show you
the difference from a vector element and
image made of pixels. If I zoom in, for example, I started seeing
all the pixels that create my my picture. While instead, if we
take the Nodes tool, I select my vector shape
is going to show me all these nodes and lines to
create my vector element. This is the main difference
with this Node Tool. I can select each
single node that makes, that creates the shape and
modified movies and edit. If I want to go back
to the previous shape, I can go I can press
Control Z on my keyboard. Yes. So this is what
the Nodes tool is useful for you because if you don't like something
of your shape, you can take this tool here or pressing N
on your keyboard and go there and move
each single node. As you see, there are
many nodes in this shape. And usually the more nodes there are these lower
in Skype will work. So what I suggest you is to
reduce the number of nodes. To do that. You select your
image like It's now. And then you go in
the top bar menu, select the path and simplify. And it will reduce the number of nodes and simplify this shape. You see, I can do it again. Contra-asset. I go to the previous step. This is how it was before and then I select Path, Simplify. Any simplify this shape
actually like it. I don't mind it. It's more smooth and simple. That's good. I always save now and then to be sure that I
save the work I've done. Okay, so now I have
my vectorized shape. I zoom in, I see that there are little pieces that I don't
want I want to delete them. They were traced in
the trace process. To eliminate them. I can choose the eraser tool and go to each one and
erase them like this. Here, you can choose the
width of your eraser, that is the size. Now using a 36, but I show you what it would
look like if it was 100, it will be these big. You can also choose the mass. Now, I set the setting
for what if it was one? You will be like this. I go back to 5856. That's okay. And I delayed the extra
bits that I don't want. And I'm careful not to
delete the main shape. But if it happens, you can always press
Control Z and go back. I would like to
smooth this part so I will try to do it with my
eraser. It was too big. So we will reduce the
size of my razors to 40 is okay for these action, I'm using the mouse, but I find it a bit difficult. So to make it easier, we use my drawing tablet. I like it more like this. This is better. The next
step is to color my shape, but I would like to have
a color, the lemon, a different color
for the leaves, and a different
color for the stem. What I have to do them now
is to separate each part. To do that, I zoom
in very close. Okay. Then I took the
eraser tool again. It's quite big for me now. I want smaller, so
let's see, I choose 15. Let's see how it is. Now, I want it even smaller. Let's do three. That's great. Okay, so with the
selection tool, I select my, I'm
on the main shape. I take my eraser tool
and I separate them. They're super dilemma
from the stem here. And then the other leaf
from the stem here. Okay? I zoom out by pressing minus on my keyboard with
the selection tool. I select the lemon, and it's still one only piece, but I want to
separate the leaves from this term from the lemon. What I can do now is to
go to Path break apart. But it will consider
also the small beads. You remember here there was the white area of the highlight. I wish we again contrast. That is still one only element. I have this white
area here and here. Now they are empty spaces. In fact, if I create a shape
and I bring it behind, to bring it behind,
I select object and lower to bottom
and I put it behind. You can see that those
parts are empty. Select the object and press
Delete on my keyboard. But I want to separate the
parts that create the shape. So I select the lemon, choose path break apart. He will take those empty
areas and make them as shape. But I will show you I can
change the color of my shape. For example, if I go
here on the bottom, I choose, I can choose
one of these color. For example, you choose
this bright green. If I move this shape, you will see that
behind the there is no more the empty space. So what I want to
do is to take away this shape from the main
shape of the land mode. And I will show you
how to do that. Let's start from the lemon. I drag selection shape
all already lemon. And then be sure to include all those little
parts made like that. And I go on path and
exclusion escape. What he did is that it took away the shapes from the main
shape of the lemon. Again, I will create
R-squared and I will move it behind object
lower to bottom. And now you see again that
those are empty spaces. But my shape with
Dilemma is separated. I wouldn't do the
same with the leaves. So select the leaf and
all the little pieces. And then I go to Path exclusion. And I have again my empty areas. I do the same with
the other leaves. And if it doesn't, select also your leaf to
select more than one item, you hold Shift on your
keyboard and then select the second item, pass exclusion. So basically now we have
separated elements.
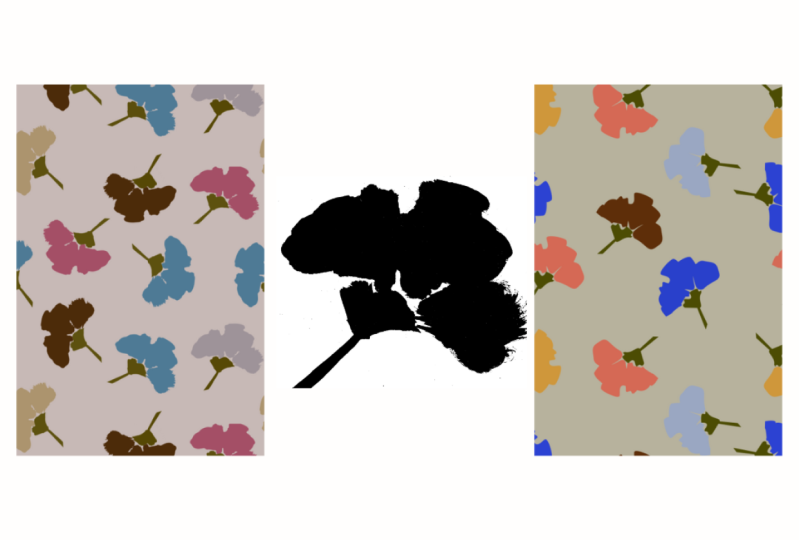
5. Vectorize Your Art: Colour Your Art: The next step is to give
color to each part. To do that, we're going to
create our color palette. We will import a picture that we like because
of its color. To do so we go to file like
we did before, File Import. We go finding the
picture in our folder. I will use this picture
that I took last summer. I was selected and press Open and leave these settings like we did in the first class. Alright, zoom out. I want to turn it vertical so
we'll select, click again. Once on the image, I hold Control on
my keyboard to turn it vertical, perfectly vertical. I click again on my picture
once and reduce the size and hold the Control key on my keyboard to
keep the proportions. I'll reduce it a
little bit more. Alright, then I zoom in
pressing Plus on my keyboard. So you can do the same
with your picture. What we're going to do now, we create the circular
shapes next to our picture. So you drag it and you hold Control to make a
perfect circle. Now, it gave us a green
fill and a black stroke. I don't want a stroke
for this purpose. So what you can do is to go
to object, Fill and Stroke. And you will see
this window here. You can choose what do you
want as a fee and as a stroke. We want it, we want a flat
color. What about this trope? We don't want the stroke, so we select no paint
and he goes away. Did you see you can choose
a flat color or an opaque? We did feel I want to use are
more neutral color for now. So what about these light gray? I take the selection tool and I want to duplicate this
circle many times. To do that, I right-click
on the shape and select, duplicate it, duplicate it a shape perfectly
on top on the first one. In fact, if you drag it, you will see that now
you have two circles. If you want to drag it perfectly
under the first shape, you can hold Control
in this way. You will stay perfectly
in line with it. Another way to duplicate a
shape is to select a shape. Start dragging it and press once the spacebar on
your keyboard like this. Every time you press
the space bar, it will create a copy like that. But we don't need so many
circles was just to show you. So contra-asset, I will
eliminate the one I don't need. So again, I select my shape. I start dragging it and
press the space bar once. And then again. Then again. Third color can be
enough for now. So I can delete
that extra shape. To delete it. You
can select it and press Delete on your
keyboard or right-click. Delete. Okay, but now they're not anymore in line and
equally distributed. To do that, you
select all of them. You go to Object,
Align and Distribute. And you will see now the window
for Align and Distribute. And this tool will help you to align them perfectly
as you want. You want these to be
elected to selection area. First, you want them
to be vertically centered and then
equally distributed. So you will select these distribute centers
equidistantly vertically. Alright, I'm happy with them. Now I can start
giving them color and picking the color
from a picture. But since I will be
working with a lemon, I will pick colors from my own painting
because I liked it. So I can move away the pictures of my
roses and bring my lemon. First. I will duplicate and
move the new copy here. I will enlarge it a bit, holding control to keep
the proportion right. Now, I select the first circle. I take them color picker tool, and I go to take a look, then Selection Tool,
color picker tool, and I choose a darker color. As for the Selection Tool, color picker tool, and I
take a brown, light brown? Yes. As for the Selection Tool, color picker tool, and I
like S for selection tool. Color picker tool and
I take dark green, maybe darker like this, like this minus to zoom out. Okay, I always save now and then to have
a good color palette, I suggested you have always
enough contrast between your colors and you have
both light and dark hues. For example, I'm not
satisfied with this brown. I think it's to pay. I will add a color more
saturated and maybe more dark. To do that, I can select it and choose one of the
colors down here. For example, that one. He's otherwise another way
to change the color of the field of your shape is to go to the Fill
and Stroke window. If you don't have it anymore, you can always go back to
object, Fill and Stroke. And you will find your window. You select field,
because we want to change the color of
the field and you can move these around
until you find your color. But I went to Brown,
darker brown. This is nice. I like it
maybe a bit more dark. Yeah, this is better
for me, for example. And if you feel like
you need more color, you can always add a circle. For example here I want to
add a lighter yellow color. So I come here. Maybe choose this light beige. Yes. I'm out here, I have my colors now. I select them and bring them
near my vectorized shape. I can move these outside my working area or my art board because I
don't need it for now. And I move. Now I'm going to give a color to each separate part
of this picture. S for the selection tool and
deselect the first leaf. I go to take the
color picker and I select this group
and move up again. Actually, I will take them and move them up here so
we can see better. I do the same for
the second leaf. I select the leaf color picker
tool and I select degree. Yeah, I think I
will keep this one. Selection tool. I select the lemon
color picker tool, and I select the yellow
selection tool as I take the stem color picker
and I go to take my brown, I'm quite okay with it, but I would like the color
of my leaves to be darker, so I select 1 first leaf. I hold Shift on my keyboard
and select the second leaf. And I come here to darken the color like
that. I like that. Okay. So now I have my lemon
and it's colored. But do you remember
that before we deleted some little parts or the
shape to separate them. Now I want to go and
fix those parts. I zoom in. I start with this
lemon and this term. I can take the
lemon and drag it. And actually I like it. It's now, it's on the top. And if I want it on the bottom, I can come here to object lower to the bottom
and it will go underneath. But I like it like this. Maybe I find that this term
is a bit too sharp there. To modify the shape. I take them Nodes
tool. I select. I go to select each
nodes and move them. But do you remember
the lemon is on top? So what I can do is take
the selection tool, select the select my stem and
bring it on the top. Yes. ****, again, the node tool
and modified until I'm happy. I'm going to do the same
for my leaves as zoom out. And now I have my lemon. But the parts are
still separated. What I like to do to make the work flow easier is to group all the elements to them when I
have to move them, I don't have always to select
all of them and move them, but I can just grab
it from any part. To do that, you select
all the elements. You go to Object, Group. And now they are all one piece. So it's easier to move around. If you want to go back to the separated elements you selected and you go to
Object and Ungroup. You will have all the separate
parts, parts like before. But I like it grouped, so you select it all. And then you do object group. You can also do
Control G, right? And this was the first way
you can vectorize a painting. It's called Trace Bitmap. The advantage is that
you can scale these as much as you want and you
will not lose quality. Instead, you cannot do with that pixel image is
you cannot scale it too much because then it will start losing
quality and resolution.
6. Vectorize Your Art: Method 2: We just learned one method
to vectorize our painting. I'm going to show you another
method for practicality. We can make a copy of our original painting and we'll make it a bit
bigger, holding control. Okay, what we're
going to do is to draw on top of our picture, what I suggest you to do
is to reduce the opacity. To do it, you select the image, you choose object,
Fill and Stroke, feel, and hear you
reduce the opacity. I think this is okay. Now we want to lock it so we
don't move it accidentally. So we go to Object, Object properties, log and set, and now we cannot
move it anymore. If we want to unlock
it, go to Object. Unlock called. Now
I want to lock it. So again, lock set. Alright, so to draw, there are many different tools. There is this pencil, the Bezier curve pen, and they calligraphic
pen or brush. I will show you quickly what you can do with the different tools. We, this freehand pen, you can draw a shape, so we'll draw it without
lifting my mouse shape. Then I close the shape. Okay? I do again the same for the
other leaves. Like these. I do the same for this leaf. And then I close the shape. If something happened and
you do not close the shape, we denote tool, you select
the last two nodes. I can zoom in to show you. I select the last two nodes. To close this shape, I will choose joint selected
m nodes with a new segment. And it will create a new
segment to connect them. And now it's a closed shape. I draw the two leaves. And as you can see, it created a shape and the
color is only for the stroke. If I want to change it. And I wanted to give
a color to the field, I come to this window field. I choose color. Then I go to stroke paint, and I choose no color. So it's only a feel. And actually like these colors, so I will leave it like that. I do the same for the
other shape. I selected. Fill, color, stroke, no color. And I leave it like that. This was the first tool. I will delete this picture
just for practicality. This was the first to
the free hand drawing. And for every tool, you will see that here there are different settings
you can use to customize the tool
for what you need. Yeah, They're tool
is the Bezier tool. It draws shapes, building
them with notes and line. So I click, then I click
again, I click again, I click again, I click again, and basically I create a shape. If I click and then click, and then if I click and hold, I will create curves. Click and hold curves. These handles are the handles I can use to edit the shape. Click, click, click,
click and hold. You see a Create Shapes. And then if you want
to close this shape, I go back to the first node. I can use these tools to create this shape
of the element. So I will take the
tool and come here. And three, this shape
dilemma as I want to lie D and then I want
to close the shape. So I click again
on the first node. Also here, it created a shape only with a
color for the stroke, but I want to recolor
only for the fear. So I come to the window, stroke and fill and I
choose now color for the stroke and for the
field, I choose color. If I want to change the color, I can also select my object. I choose the color picker tool
and I click on the color. I want to give it like this. Maybe want to smooth in
a bit the shape there. So I take the node tool, I choose one of the nodes. And then move it to edit
the shape as I prefer. Like these. You can see, you can
do a lot with these. It's really customizable. Alright, I like, like this. And I save. The other tool is called
calligraphic brush stroke. It gives you the possibility to use different variation of it. What I suggest you to do is
just to try all of them and have fun and find the one
that works better for you. I like working with the
market, for example. I like Keats like this. But for us, for example, I think I can go with, with, with a bigger, with, for example, that this about the
color I want Brown. Alright, so I can come here. This thickness is good. Then for the little branches, I choose something smaller, maybe a 55, It's good. Like this and like this. Now they are all
separate things. I select all of them. I choose Opacity 100, and then I want them
all to be together. So we group them
with object group. Another thing you could do
is to select all of them. Go to Path Union and he will put them all
together like one unit. So now to see if you
like the result, you can select all your pieces, move them aside so
you have your lemon. You can always take the node tool and go
back to edit shapes. For example, this one
has many, many nodes. I think there are too many. I can reduce them going to Path Simplify and
I'm happy with it. I can go here. Node, thicket and
edit as I want. And I can bring the yellow part with
the lemon on the top. So go to object and rested up. Yes, this is better. I can do the same with
these leaves object. Restaurateur. And now I want them to be, I wanted to group them,
so select all of them. And then I press Control
G on my keyboard and they're all one
element together. Contrasts save
these second-class. It's completed. We learn how
to vectorize our painting, and we learn two
different methods. In the first method, we use the Trace Bitmap tool. For the second methods, instead we use the drawing tools to draw the shapes
of our painting. We also learned how to create a color palette and how to
give colors to our elements. So see you in the next
class where we will create together our
first repeating pattern.
7. Pattern Design Basics: Hello and welcome
to lesson three. In the lesson, we are going
to learn how to create a repeating pattern using
our vectorized elements. In the previous class,
we learned two methods to vectorize our paintings. One was the Trace bitmap method. In the second one, we
use the drawing tools from Escape to draw our shapes. At this point, you can choose which vector version
you prefer to use. For example, I think I like this version because it brings
more hand-drawn feeling. To start. I will eliminate the
elements from my, our bird that I don't mean. For example, I select this and
hit Delete on my keyboard. One to eliminate
also these painting, but we previously locked it. To unlock it, we go to
Object, Unlock All. And now we can select it and
hit Delete on our keyboard. I select my painting and I move it aside because
I might need it. I will keep this because I will use these to create my path. I will also keep
my color palette, but we'll move it
outside my art board. I like to work with
that clean art board. And remember that the
size of our Albert is the size of an A4 sheet. The starting point to create a repeating pattern is
to create the tile. To do that, you select the
rectangles and squares tool and you drag it on your
art board to create a shape. It can be a rectangular
shape or R-square. For this time I will create
a rectangular shape. Alright? Take the selection tool
here on the top bar you can see the size of
your rectangular. You can also choose here
the measurement unit. And I like to work with centimeters because I'm
more familiar with it. Here you can read the width measure and
the height measure. I usually make it around number. To make my work flow easily. From the width I choose
to transform it to 18 centimeters and the
height I want it to be ten. Alright? Now, the size of my
rectangular shape, that is my repeating tile, is ten centimeters height and 18 centimeters
for the width.
8. Design Your Repeating Tile: The next step is about bringing my element into
my repeating tile and repeat it inside it. I bring it in my repeating tile. And as you can see, it's on the bottom and I want
to bring it to the top, so it come here and I select
race selection to talk. But if you don't have it here, you can always go to
object and rest. Good job. We see that now they highlight
shape is an empty shape. And that means that
we see the color of our repeating tile. I don't like it. Honestly, I would like to
see light yellow color here. To do that, I move
my Lemma outside the repeating tile and create
a shape to put behind. I choose the circle shape. And I create our ellipse or circle shape that
covers my highlight. Like this. Now I choose the selection tool and I move this shape behind. And I choose a
color that I like, as I said before, I want a
bright yellow to be there. So I come and choose one
of the colors that are here on the bottom are
the Enscape working area. I actually liked this light yellow and I think
I will keep that. But you can try and play with the different colors and see what colors
you like the most. But at this point, the shape of dilemma
is a separate shape from the circle I created. And this means that if I mistakenly move the lemon
and not the shape behind, to avoid that, I want to select lemon and circle, group them. Do remember how to do it. Object, Group. Now they are all one only shape. And this makes it
easier for me to work. So after I am completely
happy with my element, that is the element
I will repeat. I can start positioning
it in my repeating tile. The particularity of
this process is that every element that
comes outside one of the edges needs to be repeated
exactly on the other. In this case, the size
of my repeating tile is eight centimeters
to the right. So the width is
eight centimeters. It's ten centimeters height. This means that a position
is this lemon here. It's part of it goes
outside the left edge. So I have to
duplicate and move it exactly 18 centimeters
to the right. To do that, I selected, I right-click and choose, duplicate it, duplicate it. Another lemon exactly on
top of the first one. In fact, if a movie, you will see that the first
lemma is still there. I hit control Z on my keyboard, so Enscape position it again, my lemon exactly on
the first lemma. And now I want to move it exactly 18 centimeters
to the right. To do that, I selected
object, Transform and Move. And once I open this window, I want to move it exactly 18
centimeters to the right. First, I noticed that it changed the measurement unit and I
want it to be in centimeters. Then I type the value of 18 centimeters to
the right vertical. I don't want it to be moved, so I keep the 0 and
then I hit apply. And it moved my lemon
exactly as I told him to do. Alright. Then I will duplicate
again my lemon and position it somewhere else in the space
that I have left to give a bit of
variety to my repeat. I will flip these. Come here, keep select,
selected objects horizontally. And then since I position it on the top edge and this element
goes outside the edge, it will have to be
exactly repeated here. If you forget the size
of your repeating tile, you just click it. You select European tile and
come to check here the size. So I want to repeat it
exactly ten centimeters down. To do that, I selected
Right-click duplicate. Come to the same window. If for some reason you
don't find it anymore, you can always find it again in Object, Transform, select Move. We want to move it 0
centimeters horizontally, but we want to move it ten centimeters vertically
and you hit Apply. What happened is
that it escaped, moved it vertically but
because it was plus ten, but we want to move it down. So. To do that, we do control
that in this way. We still have the duplicate
on top of the first lemon. And here we add the
value minus ten. We hit Apply. And now you see lemon was
moved ten centimeters down. Perfect. Now in then, remember
always to save your work. The next thing I want to do is to put other two lemons here. To do that, I set up this lemon, right-click Duplicate
and then move it here to the button
to give a bit. More interesting, I
will turn the lemon. And I want this lemon to be also here because it goes
outside the top edge. Don't worry if you don't understand why I'm
doing this later, I will show you why
these passages are useful and are very important. So as before, we create
a duplicate on top of it and we move it ten
centimeters down, Apply. Now I see that they have a
bit of empty space here, so I want to put
another lemon there. I select these lemon. You can choose any
level that you want. I duplicate it and move it here. Since it doesn't go
outside any of the edges, it doesn't need to be
duplicated anywhere. I can just position
it where I want. Turn it where I want. I want to tell you something
that is very important. If by mistake, you move any of the lemma that are
on one of the edges. For example, by mistake
you more of these. What you can do is contra-asset. So you move it back to
the previous position. Or to be sure, if you move it by mistake, you can delete it
and move again. One of the lemon that
is on the edges. This means that if
by mistake you, you move DCM on, you can steal, delete this one, select the other lemon that it's still
in the original position. Duplicate, and move it exactly 18 centimeters
to the left. So it will be 18 centimeters, but since it's to the left, I add the value minus. But we don't want to
move it vertically. So we put 0 as value
and then hit Apply. So anytime that by mistake
you move one of the lemon. What you can do is just
delayed the one you're moved and do again the process of duplicating and
move the lemon. What I want to do now is
to change the color of the leaves to make the
pattern more interesting. If you remember, we grouped all the elements
that create a lemma. That means that this lemon, these element is created by the leaving group
together with this term, the lemon and the color
behind the highlight. If I had to ungroup every single vectorized lemon and select the leaves unchanged, the color that will
take a long time. But instead, I want
this to be grouped, to stay grouped, so I select everything and leave it grouped. What I can do is to
take the node tool, select only the leaf. Be careful to not click
on any of the notes. You just want to click on the leaf to select
more than one leaf. You hold Shift on your
keyboard like that. Since these lemon repeats
also on the bottom end, I have to change also the
color of these leaves. I think I will choose
some darker hues. To do that. I can go to the Fill
and Stroke window. If you don't have it here, you can always falling
objects fill and stroke here, and choose the color from here. Now, I suggest to always make a copy of these part
of the process. So select everything,
Right-click duplicate, and move it outside
your art board, but always have it there. Because if you will
need to go back and edit something in
repeating pattern, you can do it only from
these repeating tile. Always make a copy
and leave it aside. Right now we continue working with this copy of
the repeating tile.
9. The Final Repeating Pattern: What do we do now is
that we want to clip, that means cut away everything that goes out from
the repeating tile. To do that, you select the repeating tile
and make a duplicate. So right-click duplicate. It automatically puts it in
on top of averaging effect. If you move it, you will
see that behind you have the other
repeating tile and my lemon elements controls
that contra-asset and it puts it again on top
of the original. Repeating. What you do now is to
select everything. If you go to Object, clip set, what he did eat that
he clipped it, he cuts it. Everything that goes out from the original repeating
tile effect. If I select the amount,
you can see now that this part has
been corrected. But what you don't want to
do is to accidentally move any of the items that
are near the edges. You will soon understand
why to avoid that mistake, I always suggest to select
everything and group it. Object, group. Now we are ready to see how
our repeating tile will work. You select it and make
a duplicate and move it outside the art board
when you have more space. First, we want to see
how they are repeating. Tile duplicate and
move horizontally. To do that, we click it, duplicate it, and move
it exactly tenths, and we move it exactly 18
centimeters to the right because the size of my
repeating tile is 18. So here I put the value 18 centimeters and
centimeters vertically, one just to move it
horizontally applied. Now, here you see why we copied these lemon exactly
18 centimeters to the right. If you zoom in, you
can see that it perfectly matches
With the left lemon. These white line is just
a way that Enscape, renders these tiles. But don't worry, it's just a
rendering of the computer. If you wouldn't have mood, your lemon exactly
18 centimeters to the right and 0
centimeters vertically. You might see a mistake like this where the lemon
wouldn't match with itself. So that's why I always use
this tool that Enscape has, that is the Transform
and Move tool. Now, I want to see how my repeating tile reproduce or duplicates vertical to see if I like it or if I need
to do any edits. So I select both of the tiles. I duplicate hitting
Control D on my keyboard and move them 0
centimeters horizontally, but minus ten down. So apply. I think I'm quite happy and
I think I'm ready to see my repeating tile transformation
in a repeating pattern. To do that, I go back to the
original tile I selected. I come here to object pattern. And it has firms might object
to a repeating pattern because this shape is still made of objects that I
just grouped together. So Object, Pattern, I'll just do pattern
to see if it works. I'll come here to take the rectangle tool,
create a shape. It doesn't matter which shape. And I want to feel
it not with a color, but with a pattern. So you go into window
fill and stroke. If you don't have it there, you can always go to
object, Fill and Stroke. And for the field, instead of choosing a slight
color you choose, but then escape automatically
added your new pattern. And it's the first
one you will see when you try to fill a
shape with a pattern. If you open these
drop-down menu, you will see that Enscape
has already saved pattern. Here on the top, you
will always find yours. So we just created our
repeating impacting. Another thing I want to
show you before we go to the next lesson is how to reduce the size of
your repeating pattern. If you wanted to use this
pattern for a smaller area, you might want to have
it in a smaller scale. It means that instead
of being like this, it will be these big. So to do that first and
suggest you to make a copy of this because this is the repeating tile that
created this pattern. So right-click
duplicate and put it here next to your original tile. Zoom-in pressing plus
on your keyboard and make these a bit smaller. To be precise, I like to reduce it using the tools
that escaped offers. I go to object transform
and instead of moving, we choose k. I like it because you can choose the percentage
that you want to scale it. I want to scale it down, for example, 50 per cent. And I want be scaled
proportionally. So if I scan down the
width of 50 per cent, I want to also the height to
be scaled down 50 per cent. So I keep these selected. Now, I inserted the
value and I have to, what I have to do now is
just to click apply and automatically produce
it of 50 per cent. Here you can still see the values of the size
of my repeating tile that are nine centimeters
by five centimeters. Now that I reduce
the repeating tile, I do again the step where I transform the objects
into some out. I select again my
shape I created, and I fill it with the new pattern that
it's going to be here. The last one I created. And as you can see,
it, it became smaller. I can duplicate this one aside and fill it with the
first pattern I created. With this one, you can
see now the difference, this is half size of this. Alright? Well now congratulation Because we learned a
lot in this lesson. So don't worry if you feel
like you have to watch this class twice or three times
or come back to it later. I think it takes time to remember all these
passages and it's good for you that you
can come back to this class whenever
you will need it. So see you in the next
class where we will create a mockup and fill
it with our pattern. I will show you how to
prepare the project, the final project
for this class.
10. What Are Mock-Ups?: Welcome to lesson four. In the previous class, we created our first
repeating pattern, and now we will learn how
to create a mockup of an object of a product and fill it with
our pattern design. First, I will explain
you what a mock-up is. To show you an example. I will go on Pinterest. So if you go on Pinterest
and you look for mockups, you will see pictures of objects on which you could
add your own design. It can be a place print, it can be graphic design. Layout could lead
frame about art. If you scroll down, you can see more example, for example, here. These are mockups for packaging
where our brand could add its own brand name,
logo, or graphics. But in this case,
these are picture, while we will create
mockups on Enscape, creating shapes that we
will fill with our design. Those kind of mockups are
called digital mock-ups. And here will show
you some example. Gives us an example where
the technical drawing of a garment was created and
filled with a pattern. Another research you can do on Pinterest is fashion
technical drawings. As you can see, these are
technical drawings of garment and you can use these to help you design your product. I hope this will help you.
11. Choose Your Mock-Up Product: I wish you an example of
what I did for this project. I created the shape
of two simple to others for children and I fill them with some
of my patterns. To do that, I suggest you to do a short research about a product that you
would like to design. In my case, I would like to see my lemon repeating bacteria
on a garment for children. So what I will do is to go
on Pinterest, for example, make a research about
children's wear and collect some
inspiration once you find a garment
that you like, what you can do, for example, I will choose one of
these dresses for girls. You can download
the image and CBT, your folder and
then import it in Enscape and use it
as a reference. For example, you could
do these File Import, Choose your defy yellow, selected previously downloaded, and use these as a reference, as an inspiration to
design your own mockup. I suggest you to just use it as an inspiration and not
to copy it exactly, but to add some personalized
details and elements. What I did, for example, was just to design something that I imagining myself and
fill it with my pattern. And in this class, I will
show you how I design it, these sweaters and how I
apply my pattern to them.
12. Design Your Mock-Up: To start, as always, I like to clean up
my working area. I already saved a
copy of this file. So we'll delete the things
that I don't need anymore. Here. My pattern has been saved. I will find it here so I can
relate the other elements. Even thought. I will keep
the original repeating tile. I think I will also keep
my palette to start. I will start creating
the shape of the garment I like to use as
mock-up for my design. And I will speed up this
part and not q. At the end. I wanted to show you another way you could
use your patent. For example, you can use it to design our customized
greeting card. To do that, save
your fight first. We will use these for our board to create
our greeting card, but I want to turn
it 90 degrees, so we'll go File, Document Properties
and rotate it. And to do that, I
choose landscape. And then I can close the window. So we know this is an A4 size. We want to first create a shape. It's okay if it
goes a little bit outside the edges
of the art board, you cannot see that word, but you can just go in there, Align and Distribute
window and choose page and align it vertically and horizontally to the page so
it's perfectly centered. What I want to do is
to feel or this or external part of
the reading card with my factor are
going to Fill and Stroke Window and choose
my pattern as a field. I would prefer to
use the medium size, let's say like this. Remember that if you
want to change the size, you can also take the
note to the squares, hold control and change
the scale of your pattern. I think this is nice actually. These could be your greeting
cards, for example, that you can print on a
normal A4 paper size. And then you can fold it in the middle and right
on the inside. The last thing I'm
going to teach you in this lesson is how to export this file as a PNG file in case you
wanted to print it. Okay. Let's say I want to print these greeting card and
just designed to save it, you go to File Export PNG image. The window will appear, you select page
because we want to export everything
that is on the page. And then you hit Export As and you choose the folder
where you want to save it. We save it in less than four. Less than four greeting card. The format is PNG
and you hit Save. And the last thing to export it completely is to
hit Export here, don't forget to do it. Then if you go into your folder, you will find it here. Export as a PNG file
that you can print on an A4 sheet of paper
in the same way, you can choose to export
only what is selected. For example, if I
wanted to export only the text with the frame, I select them, I go to File, Export PNG image, and
instead of selecting page, I choose selection in this way escaped me to export
only what I selected.
13. Mock-Up Design and Final Project: The show now how you can prepare your final
class project. So to do that, I clean
again my working area. That is my art board. I save my file. I zoom-in to visualize better my art board or my page to create the
project for this class, you can create a
file where you show your final repeating pattern
and one of your mockups. Example. What you can do is this. Bring your mock-up here. Group ID, so that you don't accidentally move any
part of the mock-up. Reduce it a bit, and then put your
factor on the left. For example, you can
create a rectangular and feel maybe a smaller
version of it. Or you can put your
final repeating pattern. Then your original illustration
will import it month and bring it here so that we can all see how you
decided to vectorize your illustration and transform it in our repeating
pattern to export these as a PNG file to upload on the Skillshare
project area, like we did before. We want to explore the warpage. So we go to File
Export PNG image. We choose page as export area. We hit Export F in our folder. We save it as final project. Or you can give any
name you prefer, hit Save and then export. Then again, here we will
find our final project. Alright, congratulation and
see you in the last video.
14. Congratulations and Welcome: Congratulations and welcome to the world or surface
pattern design in Enscape. In this class, we learn
to use Enscape to create a repeating pattern starting from our paintings and drawings. We also learn to create a
mockup to showcase our pot. Now for your class project, I would like you to
create a path and a new mockup as I showed
you in the last lesson. Later, share it in
the project section. This class. I'm curious to
see what you come up with. If you post it on Instagram. Tag me with Azure. In summary, I need design
is my first online class, so I will appreciate it. If you could leave a
review with your feedback. If you want, you can find me here on Skillshare
and follow me. Or you can visit my website
for more of my links. You can visit my Instagram page. Thank you for taking this class. I hope you liked it
and found it useful.
 Fiorenza Marani, Surface Pattern Designer