Transcripts
1. Welcome!: You and I agree that we use our hands all the time. Whether you're an artist, designer, writer, craftsmen, computer programmer. We use our hands all the time. Your hands might be tighter than you think. And tight hands can add attention to your already stressful lives. In this class, we will learn stretches that are 22nd song for your fingers, risks for arms, shoulders, and neck. Hello, I'm Stella. And let's talk about the spreadsheet. I'm a certified comprehension pilates teacher trainer, registered yoga instructor, professional dancer in New York City. And can museology and biomechanics teacher. Basically, I'm a functional movement analyst. I hope that these classes will help you find the most efficient and functional way to move tension free. Let's get to creating.
2. Posture-Spinal Alignment: Okay, let's get started. Beginning with posture is the beginning of everything. Why? Because the very nerves that make your fingers able to do all of the craftsmanship and artistry that you do, begin in your neck. So we can't find our entire spinal alignment. The spinal cord is not in its optimum position. So beginning at the very beginning, a very good place to start. Beginning with the posture of the pelvis. As you know, you have things called sit bones to sit on. Their built like rocking chairs, materials on the back side or the freight. You want to sit right in the middle of that rocking chair shape of your sit bones. Once that is set, check your ribcage matures not forward or back. Or if you have a tendency to lean on one side, make sure it's not left-sided and your torso. Checking the ribcage for alignment directly above the sit bones. From here, the best thing to do is shoulders, collarbones being wide, shoulder blades being wide at the widest place possible. Then check out the neck. Right? We often look down at our phones or computers. Or if you wear glasses, you may be looking forward. Instead of bringing what you're looking at closer to you. You move closer to it. So be careful about all of those things. Whenever possible. Keep your eye line horizontal to where your eyes actually are. Because that is where your spine actually finishes, way up high under your skull. So keeping the eye level, we have the pelvis alignment, the ribcage alignment, collarbone alignment, the scroll alignment. A lot of people say to pretend you have elf ears lifting straight up to the ceiling, like someone's pulling out ears or Vulcan is and lifting straight up to the sky. I liked the image of a helium balloon. A helium balloon effortlessly lifts up. That is your skull. Effortlessly lifting up. And that spiraled beautiful ribbon hanging from that helium balloon is your spine. So if you think about the head floating up gently and the rest of the spine maintains all of its natural curves and is totally vertical. A plumb line, if you will. With all of the spinal natural curves, the cervical curve and the lumbar curve should match your neck and your low back curves should match. That being said, take a notice what happens when we're a normal posture. This lumbar curve is going the opposite way. And I've flattened and forwarded my head and neck. So beginning at the beginning, a very good place to start. The pelvis, right on top of those rocking chair sit bones. The ribcage floating above the pelvis, the collarbones hung up nice and wide on the wire. And then the helium balloon of your skull lifting straight up to the ceiling and the spine hanging down effortlessly from that helium balloon. Filling verticality and weightlessness, a freedom and a floating in your spine. This is how we began to learn about stretching.
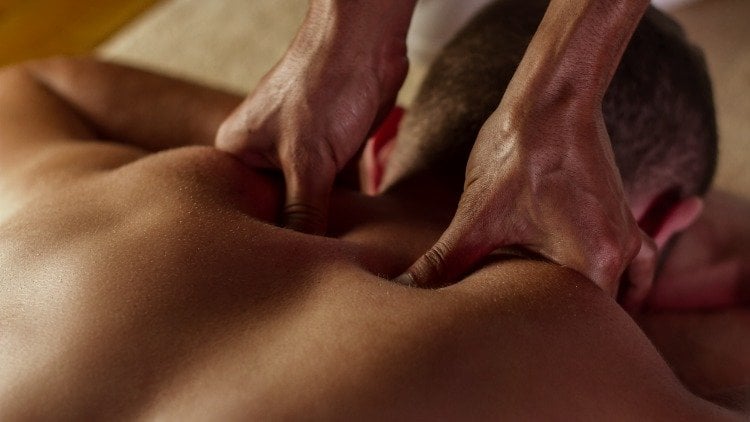
3. The Hands & Fingers: The hands. Let's start with the fingers. Beginning with all fingers at the same time, gently press the fingers away from the hand. Definition would be these would be fingers, the digits themselves and the center part would be the hand, if that's if that makes sense to you. So beginning with our perfect posture, pelvis, ribcage, shoulders, collarbones wide with a floating skull. That being said, begin with the fingers. I'm pressing into a stretch and at the same time so it's evenly distributed. And then you may begin stretching 12 or three seconds. Two or three seconds with each stretch, gentle, gentle, gentle. Notice if you've already curled forward or if you're holding your breath because of concentration, widen those collarbones, took a full inhale and exhale. When you breed, try not to breathe on your shoulders because that can restrict your neck position. Try to breathe y for the rib cage like so. Allowing the ribs to widen like an accordion pulling apart and then gently softening down. After you've stretched our individual fingers, you'll notice there's a difference. There's a muscle that crosses this joint and a muscle that crosses this joint. Those all need to be stretched. How do we do that? Let's do that individually. You can pull it through the center part to stretch and you can pull to that last digit part to strike. Now notice, I'm very mobile and my hands, which causes other issues. But I encourage you not to compare yourself with anyone inside of your body. What's happening? You should not put more than 30 to 50% of your string into these stretches. These are tiny muscles. They don't need to feel like a Birkby. Make sure you're not doing finger herpes or finger pushups right now. So pulling on each finger individually through the center knuckle and through the part by the fingernail. Once we stretch that out, we have our hand. Now you can always massage with your hand. However, the thumb has its own pulse. So generally in release work, we never use our thumb. We use the center of the other hand. So that would look like resting your hand on a flat surface in front of you. Taking this part, this corner of that hand and pressing into the center of the other hand, the meat, where it's the thumb that joins in that meat area and then sending energy out. So I'm not doing it with pressure but I'm pressing and releasing. So posture. Check your shoulders. Take it ADL to set your hand position. And then for Sing Out gently, 30-50 percent. Inhale prepares, set your hand exhale, pressing out. In-house, set your hand. Exhale pressing count. Now I promised you these stretches would be 20 seconds. I highly encourage you to hold each finger stretching for 20 seconds. Again with all the fingers together, holding for 20 seconds. And then individual fingers one at a time. Very gentle, just enough to fill out stretch. Then let's talk about the digits between the hands.
4. The Thumbs: Continuing with the hands, the palm, and the thumb. The thumb is very busy all day long, so try to hide it for a moment. Let it take a break and then cover it with the other fingers. You do not need to hold tightly just enough. Extended out to the side of you. Make sure your collarbones are wide and then lengthen your wrist. What that looks like is here as my normal fist and then I'm lengthening my wrist, holding and breathing now for your neck just got typed. Release it. Flow. Goal. Once again, how vertical is your spine right now? Right from the pelvis all the way to the crown of your head, keep the spaciousness of your spine were holding this for about 20 seconds right now. It could be very intense, especially if it's your writing hand or your dominant hand. You may feel a stretch from the thumb through the wrist into the forearm space. You may feel that stretch. And that's okay. It's good. Take one more inhale Y3 ribcage and exhale. Good. Shake out that thumb. That's a fabulous thumb stretch.
5. The Wrists & Forearms: Now let's talk about the wrist. The wrist actually does not contain muscles. The wrist has tendons and ligaments passing through it. Everyone has a carpal tunnel. It's if you have carpal tunnel syndrome is the issue. The carpal tunnel is a tunnel that your tendons and ligaments go through. Especially the tendons that move the phalanges, move the digits of your hand. From that, you wanna keep no pressure here. And we actually should not stretch the wrist. Although I promised you stretches, we actually will not stretch the risks. There are no muscles there to stretch. And stretching ligaments and tendons can be very dangerous. So we will stick with the muscles on either side, the hand muscles and the forearm muscles. There are many muscles there and that is what determines the fluidity of the transition of your risks, the muscles in your forearm. We will begin by doing the open hand. So if you were saying Howdy for offering someone a platter, food on a platter. This is the palm up idea. If you could set your forearm completely flat on a surface and then take the blade side of your opposite forearm and press it down. Now I do not suggest crossing your body because as you can tell, my shoulders just went up. I'm twisted in my spine and my neck is doing something funny. You really want this form to be inline with the arm bone and the posture to be upright and as wide collarbone as possible. That being said, trying to take this across, you will feel robotic. But I promise it will keep us safer in the end. From here, take an inhale to find and set forearm X. How would the pinky side of your hand, the blade side of your hand slowly progressing towards the wrist. As soon as you get to the wrist, release the tension. And once again, it's 30 to 50% of your strengths inhale to widen your collarbones, exhale to progress. Let your fingers kind of curl. It reminds me of Star Wars when he's has a new hand, if you will. And they press on each individual tendons and his fingers curl one at a time. That's because that's where these come from. So I'll that Star Wars Take a deep inhale with wide columns, setting the position. Relax your fingers, let them do whatever they do and exhale slide. Let them curl as soon as you get to the wrist. Relax the top side of the forearm. This side, often people have tennis elbow. And this addresses some things that help with the tennis elbow, palm down on a flat surface in front of you. I suggest horizontal, just like so on a flat surface in front of you, you want your hand to be relaxed. So minus drooping, just because I don't have a flat surface to show you, but I promise you'll understand. Wherever you're sitting at your desk, place this there as long as you don't have to crouch to do so, find something, stack up some books and have your forearm supported. It's okay if the fingers droop off from here, take your opposite elbow across to this little meaty part right by your elbow. From there you're going to ADL to set the position x Hill to send the energy out. Again as soon as you hit the wrist, we're going to release. So these release methods that again could be 22nd. However, always feel free to begin at 30% of your strength on that release for 20 seconds and then increase it to 40% of your strict pressing down on that forearm. And then maybe increase it to 50. Being very kind sending all that tension you can even move this elbow around are really dig in deep inhale to relax the shoulders and set the position of the elbow and then exhale, pressing out, shake out those four arms and hands.
6. The Upper Arms & Shoulders: The upper arm and shoulder. There are many ways to stretch your upper arm and shoulder region. Let's begin with some. You might already know. This one is a common PE, class exercise or stretch, I shouldn't say. From here it stretches the posterior capsule of your arm of the shoulder joint. There are actually four joints in the shoulder. I don't know if you knew that. But nonetheless, there's 3 fourth false joint. So this is a great stretch to hole for 20 seconds. Check those shoulders. Everyone taken inhale, exhale, holding for 20 seconds. Next you can reach the arm up, like you're waving to a friend or saying Pick me teacher, I know the answer. And then touch behind your shoulder blades at the base of your neck. All ready, your ribcage may have flared in front of you and your chin we have gone in front of you. So just be careful, make sure that rib cages directly about the palace and the schools directly above as well. You're free arm may help out that stretch and the handmade may be able to reach a little deeper, further down back, but not at the expense of your chin going forward in space. This is stretching underneath. Here. Take another inhale and exhale. Remember that we always breathe through our ribcage sideways and exhale.
7. The Chest : Stretching your chest. Stretching her chest is a very interesting concept because you may think you're never tight here because it's always so closed off. Working on things, focusing on things typing and cell phones. But what happens is the muscles maintain a short position on the muscles, think that is normal. So my arm bone is so far forward to my chest and sternum that it thinks this is normal. It's actually a short almost like an extra tight rubber band there. And so you do want to expand it, stretch it so it can find its happy medium, flexibility, its proper length. So it can find its proper straight, nice white collar bones. To start already, you may feel stretch in your chest. That's fine. And then if you make arms like a sorrow cactus and then press them behind you, you may notice once again that your ribcage or your head maybe protruding forward to help with the stretch? Tried to lift straight up with that spine, verticality and the spine and why the elbows to the size of the room and then back. So keeping your goalpost OR cactus position y and then press back. There's an option to increase this. If you'd like to find a wall, place your shoulder, chest, elbow, and arm 90 degrees on the wall and then turn your body away from it. So I'm pulling my heart away from the arm bone. And again, this is only to your own discretion. Another option for a chest stretch is defined your vertical posture all the way through your spine. May once where a cactus arm face the wall for a brief moment and then turn away from the wall. So you'll notice my heart is pulling away from shoulder, twisting as much as I can without lifting my head, go forward or my hips. And my body B is that alignment. So keeping a spine outbreaks and cooling the heart away from that bone. If he'll stay exhale, sit for 20 seconds. In how stay exhales day solely face the wealth and release.
8. The Neck: Let's stretch the neck. Place one hand under the chair that you're sitting in. If you're not sitting on a chair, then find one or you can hold underneath a knee. And his hold on nice and tight as if you're doing a quadriceps stretch. One of these where you're holding on to the back, but you're going to flex your foot and hold down with it. Holding that position, you should feel how your arm is relaxed and being pulled down to the floor because your foot is dropping it down. I'm gonna do the chair version. Wherever your hand is holding on, hold on. Tight finder, spinal alignment totally vertical. Find that vertical spine collagen is why. Hold on tight with the hand but relax the arm and then listen to the ceiling or listen to the clouds. If you're doing a plain AIR hold and breed, you may feel a stretch from the tip of your shoulder up through the side of the neck, up underneath your skull. The upper trapezius is a very, very tight muscle. So keeping her collarbone wide and actively listening UP with that IRR is very important. Stay, bring inhale and exhale. 20 seconds is ideal here. Make sure that you're not only making notice how just sake and lead to the side. You really do want to keep your spine up bright and then lift the ear to the ceiling. From here, part two. Part two, twisting the nose down to the opposite armpit, allowing your breadth to soften that stretch. You may notice that when you twist your head, it stretches differently. We now have a little bit of scaling, a little bit of levator SCAP, and upper trapezius involved. All three muscles hold tension and restrict blood flow to your brain. Let's have as much blood flow to her brain as possible. Maintaining this spur, another inhale, and another exhale. You may begin to play lifting your chin, dropping a chin, turning your gates, looking down, whatever works for you. Slowly take an eight eHealth to drop your chin back down through the center of your body. Release your pressure in the hands and sack your spine to vertical. Tested out rollers, shoulders around. Do you have less tension or less crackles or pops in one side than the other. Another test, do little head circle ahead role. Does one side of your neck find more? Does one side of your neck have more mobility and free movement than the other? And then let's do a final test with our hands, the posture from the pelvis, the ribcage, the collar bones, and the school gentle fist just let the fingers folded, however, in much as natural and keep those elbows in line with the arm bones not too narrow not to you. I just in line as if you're here typing on your computer. Yes. From here just to a wrist role is one significantly less crackly or more mobile than the other? I've done both sides, so minor, pretty even now.
9. Recap: So recap of everything. We begin with the pasture because our spine houses are spinal court, which are the nerves that even tell our muscles to fire. We're trying to find more links in our muscles, beginning with all four fingers and then individual fingers and different sections of the fingers. Next, we stretch the hand itself against all fingers at the same time. Next, we stretch our forearm. You can do the posterior side or the anterior side. Remember you're going for with forearm each way. Next posterior capsule stretch and trisect lat stretch. And then Chest Stretch. Turning away if needed, holding underneath a chair or holding on to your foot, rolling the cardboard opened with a nice tossed spine, lifting the ear to the ceiling first, another inhale to state x held to twist the nose down. Inhale to stay, exhale to explore. So recover. Always draw your chin down to your chest, release of pressure and then find your verticality to test it out loud. Shoulder rolls had roles, wrist roles, and see how it feels. I invite you to hold a pen or pencil or a paint brush or your mouse, someone that computer. One more time and see how you feel. Do you feel free? Do you feel like your pain has been alleviated? Let blood flow, flow all the way through the body, breathe deeply, and be creative. Best to you.
10. So What Now?: So we've stretched out. What next? We've created all of this amazing space, putting air into the joints, fluidity of functional movement and efficiency of movement. But now we need to strengthen the space. Strengthening with spaces, incredibly important. So let's begin again with the fingers. Take any hair band or rubber band that's around the broccoli you bought and put your fingers inside, beginning to stretch out those fingers. Slowly opening so we're working the muscles on the back of the fingers and the back of the hand to keep our space in the front of our hand so our fingers won't curl. From writing so much a holding anything or thumbing on the phone too much, it will open. Now make sure that you're not dominating just the two. You want to even out the work through all five. See if you can even out the work. Keep the wrist as wrinkle-free as possible in doing so. And really began to open out that position. I suggest ten, keeping your collarbones wide across the body. I suggest ten in front of the body with the arm bone hanging straight down. And then ten as if you're doing anything. So if you're holding your cell phone here and we're normally here, but not anymore. Fine here, spinal alignment and you're holding your cell phone up, then try to do so where your cell phone would be just to build hand strength and the opposite form than it usually is. Continuing with strengthening the space. One of the main places we need space are, are pecks. They get so close off because of posture that they can restrict your breathing and your lung capacity. So let's create strength in the space. Finding our sorrow cactus goalpost position, keeping the ribcage in alignment and the skull in alignment. Gently press back. You'll notice they might want to round forward, See if your elbows could be more forward, then your hands external wrote here. So it's one of the main rotator cuff. You actually have two muscles that do dysfunction, but we also are connecting them to the shoulder blades. Now this is different than squeezing your shoulder blades on your back. You want the shoulder blades just as wide as your collarbones are, finding the most space and width across your chest. But then pressing back from the arm bone toward the shoulder blade, if you will, reaching out with the elbows and back. This creates more space in the front and strengthens the posterior lie that will keep you more open for a longer. This is a hidden trick to maintaining posture for a longer amount of time. This also will help the pecks not take over, which causes the torso to round. And if you're keeping your head at an idea level, then it can cause headaches up in the sub occipital. So show us from releasing the pecks, finding that width across the pecks and collarbone, and then the head floating, you can release a lot of tension headaches simply by releasing your pecks.
 Stella Almblade