Transcripts
1. Introduction: Thank you, E. Welcome back to you guys. If you follow me on skill share, you might have seen my first photography workshop. Street photography. The quiet moments Today we're doing a follow up. I'm going to show you specific techniques that I use when I work in the streets.
2. Course Overview: Hi, guys. Welcome back. This is my second photography tutorial. This one focuses on specific techniques I used in the streets and here in this section, I would like to give you a quick overview off the course. So chapters one and two are for shy photographers. One of the most common questions I get from you guys or people who follow my work is how do you overcome your shyness, or how do you go unnoticed? If you know my work, then you know that most of my photographs people actually know that they're being photographed very often, they will look straight into the camera and engage on its because a. I'm not really trying to be self about it and be ivory. Often shoot with a DSLR, which, as we all know, it's so big that people just tend to notice Anderson as you put it to your eye. That being said, there will be some situations where you will want to go unnoticed, for example, a dangerous situation. Or let's just say particularly delicate situation for those kind of occasions. And for all of those people who are really shy about shooting people in the streets, I D View Chapters one and 22 very quick tricks that will help you to overcome that hurdle. Chapter three is all about working the scene. Most of us street for the other fares. We are mostly on the run. We take a photo and we go. It's more comfortable, it's more convenient, and I like it more that way. However, every once in a while you'll happen upon a scene that simply deserves to be worked and those kind of situations. It's good for you to stop and work to see photograph the person from different angles in different lines with different lenses. Be quiet. Be still. Lead the scene develop just like a film on previous workshop. I don't know if you remember. I've seen it. I told you to work a street corner. This was our project for that class. In this tutorial, we were filming the workshop and all of a sudden, unplanned and spontaneously. There's this guy who enters the scene, as I called it, and he positions himself in the perfect light spot and hangs out there for 10 or 15 minutes . His dark skin, his wrinkled skin and the sun was so intense I immediately turned to my where the scene mode stopped recording the workshop and photographed him from all possible angles. Ah, but tactfully and respectfully, because that's very important to this is working the scene. It's not as comfortable. It's a challenge to stand still, Be quiet and let the scene develop, and you're still there with your camera. I know it's more challenging, but just like with everything else in life, whatever is more challenging. Ah, yields better results. Chapter four, shooting sequins. This chapter is connected to the previous one because shooting a sequence is, in a way, also working. A scene shooting sequence is interesting because it gives your scenes more life. You get a mini story, if you will, instead of just one still photo. I came up with this technique because initially I was afraid to lose some important shots. But it quickly became much more than that. And right now I use it very often. Chapter five panning the longest one in this tutorial with chapters 123 I didn't really want to waste your time because I had already mentioned working with the flip screen and working the scene in my previous tutorial. But this is something completely new. Panning is one of my favorite techniques in all of the genres of photography that I do from Portrait's through Travel to ST It gives your photos that extra look. It gives them a poetic feel and perhaps most importantly for me, as a fine art photographer, it brings photography closer to painting. And finally, Chapter seven, which is all about going against the grain. I know what you've heard about ST and documentary photography. If your photos they're not good enough, they're simply not close enough. And I'm here to tell you that it doesn't have to be true or not. Always, Bresson shut most of his work on the 15 millimetre lands, ideo you to go even further and grab an 85 see what happens. Your photos will be more poetic. You will naturally gravitate more towards Portrait's, and you will get a different look. He will get a different field, but also you will experience a different process off taking pictures. Some of my favorite street photographs that I've ever taken were shot on an 85 millimeter lens and let that be enough to say that it's actually worth to experiment with a zoom lens , which is something that you will never hear from anyone, any other street photographer except for me. So enjoy. Lastly, I'd like to apologize for some shakiness and exposure issues with the footage. We tried our best. I did my best in editing and we were trying a new camera. Eso it maybe wasn't perfect. But that being said, I actually like the way it turned out because I wanted to take you right with me into the streets and feel how messy and how chaotic it is. So despite this not being really planned, it actually that's a pretty good job of showing you what shooting in the streets of Manhattan is. And now, without further ado, let's move to chapters one and two fed rhymes.
3. Chapter I&II - For Shy Photographers: So this is for photographers. There are two ways you can deal with your shyness. One is using the flip screams, something I already showed you in previous workshops. And so you look down your screen and it looks like maybe you're looking at something on your screen, but you're actually taking pictures. It's it's more obvious you're taking, um, different angles, like the high angle. It's obviously quite visible that you're taking pictures, and another technique is that you put the camera Teoh. Just don't put it down. Keep holding like you're taking pictures off someone else, someone behind, like you're not taking pictures of events. Just put the camera Teoh on, keep shooting, and they probably will know that you're shooting them. But since you're not putting your camera down, there's no way for them to engage or even know for sure that you actually think this is just the shy people. I do it sometimes it's, uh, it works for some people
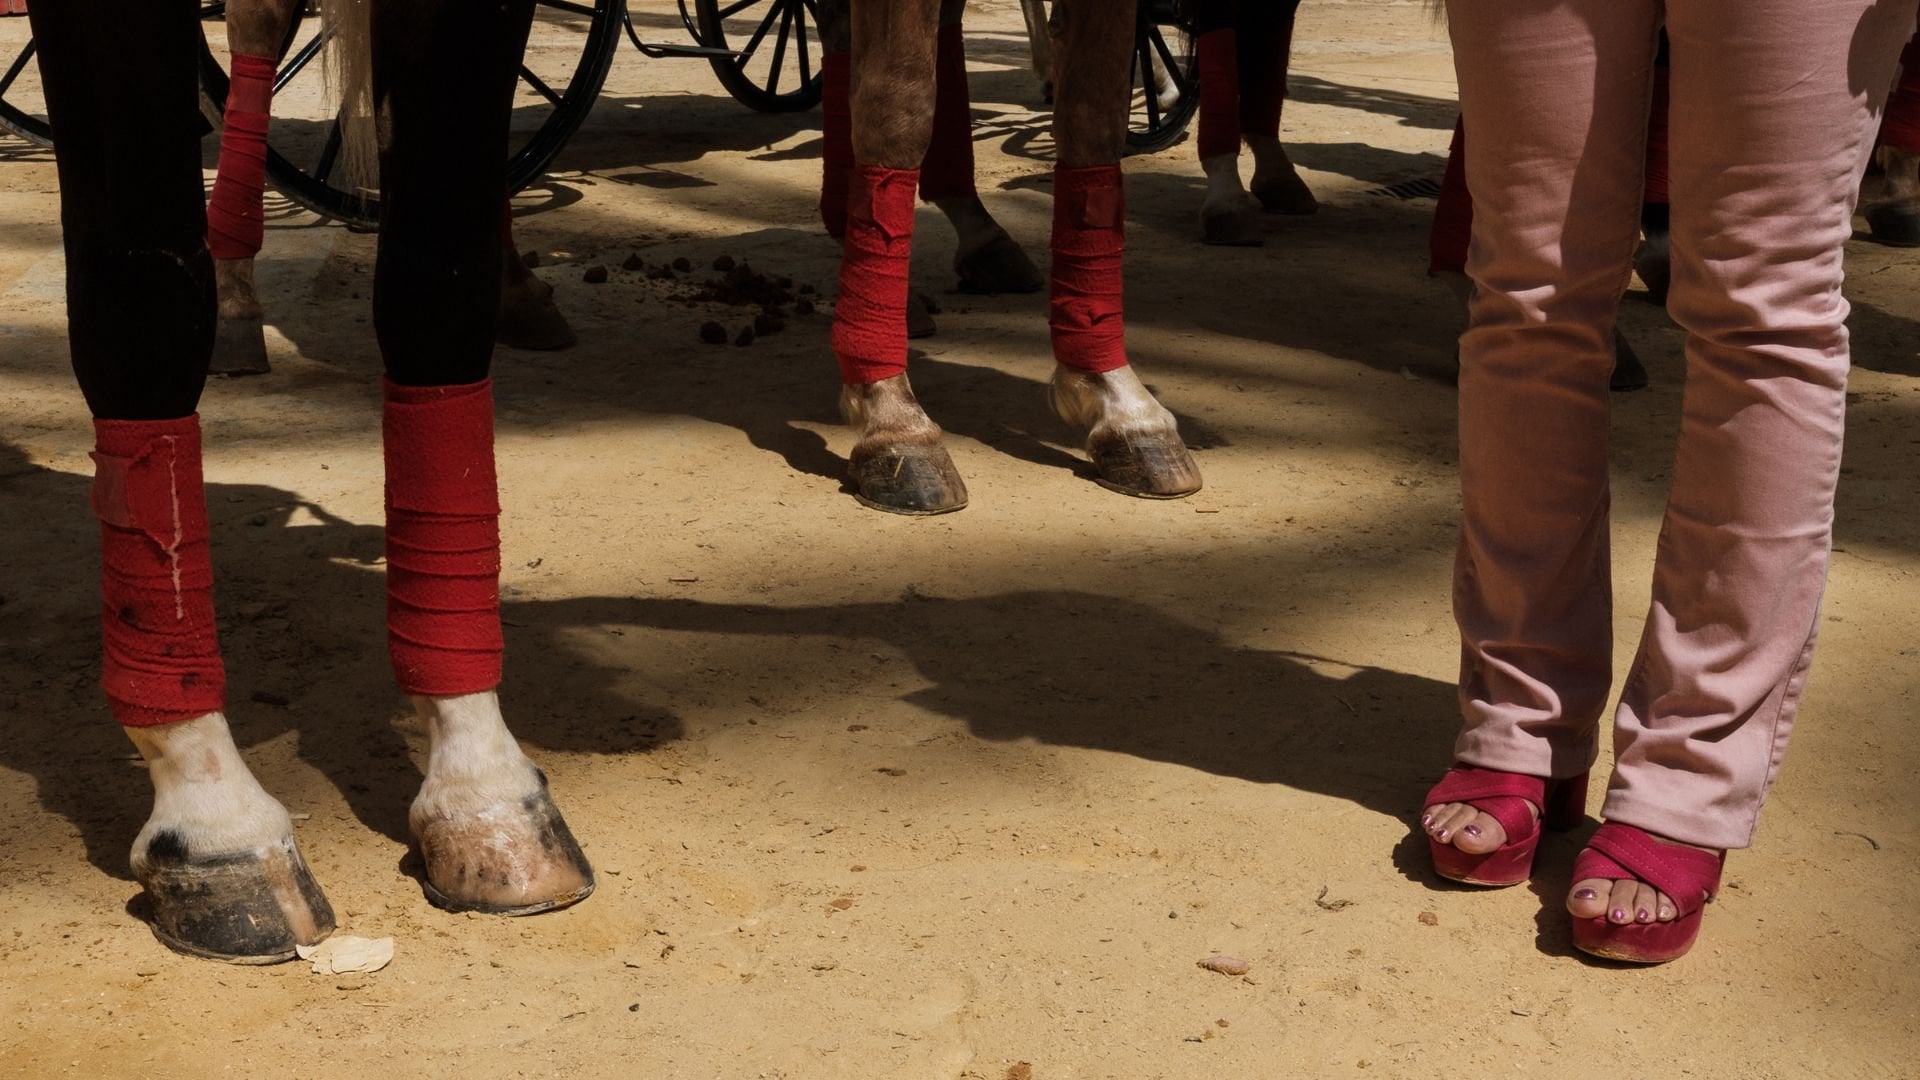
4. Chapter III - Work The Scene: And also, if you're, um, in a city like there you go. No, If you're in the city like New York or any other C, really, you want to look for life because they create interesting contrast and interesting compositions as well? Way all right, that's interesting.
5. Chapter IV - Sequence: I'm gonna show you, I'm going to illustrate one of the techniques, which is sequence. I'll explain what sequins is. Basically, if you see something interesting happening in the background, but you were too far. What I usually do is I'll take the what I call a safe shots better than nothing shot. Even if the subjects are too small, then it's too far away. But still something interesting is happening in the background and I want to get it on. Then I will try to move closer and closer and closer while I'm shooting. So I'm shooting at the same time and each shot is closer, closer, closer And that's what I call a sequence. And in that case, usually what happens is that the last shot is the most interesting shot because it's the shot where you were the closest. But what it does for you is you're not risking losing a shatter situation totally because, you know, things haven't very quickly in the street and someone might be doing something weird. But just for a split second and then it's gone and you missed that shot. So where you do, what I do is I start shooting So we have this guy. Someone is taking this portrait, drawing sports and on I keep shooting and I get closer. It still can see me working different angles, say, and that's it. Sequence doesn't have to be shot on ago, as I did in Times Square. Sometimes all you have to do is sit on the subway. Here's a good example. I was writing a train from Coney Island in the middle of a hot summer and look what I witnessed life at its best. Those photos were all taken on a knife phone.
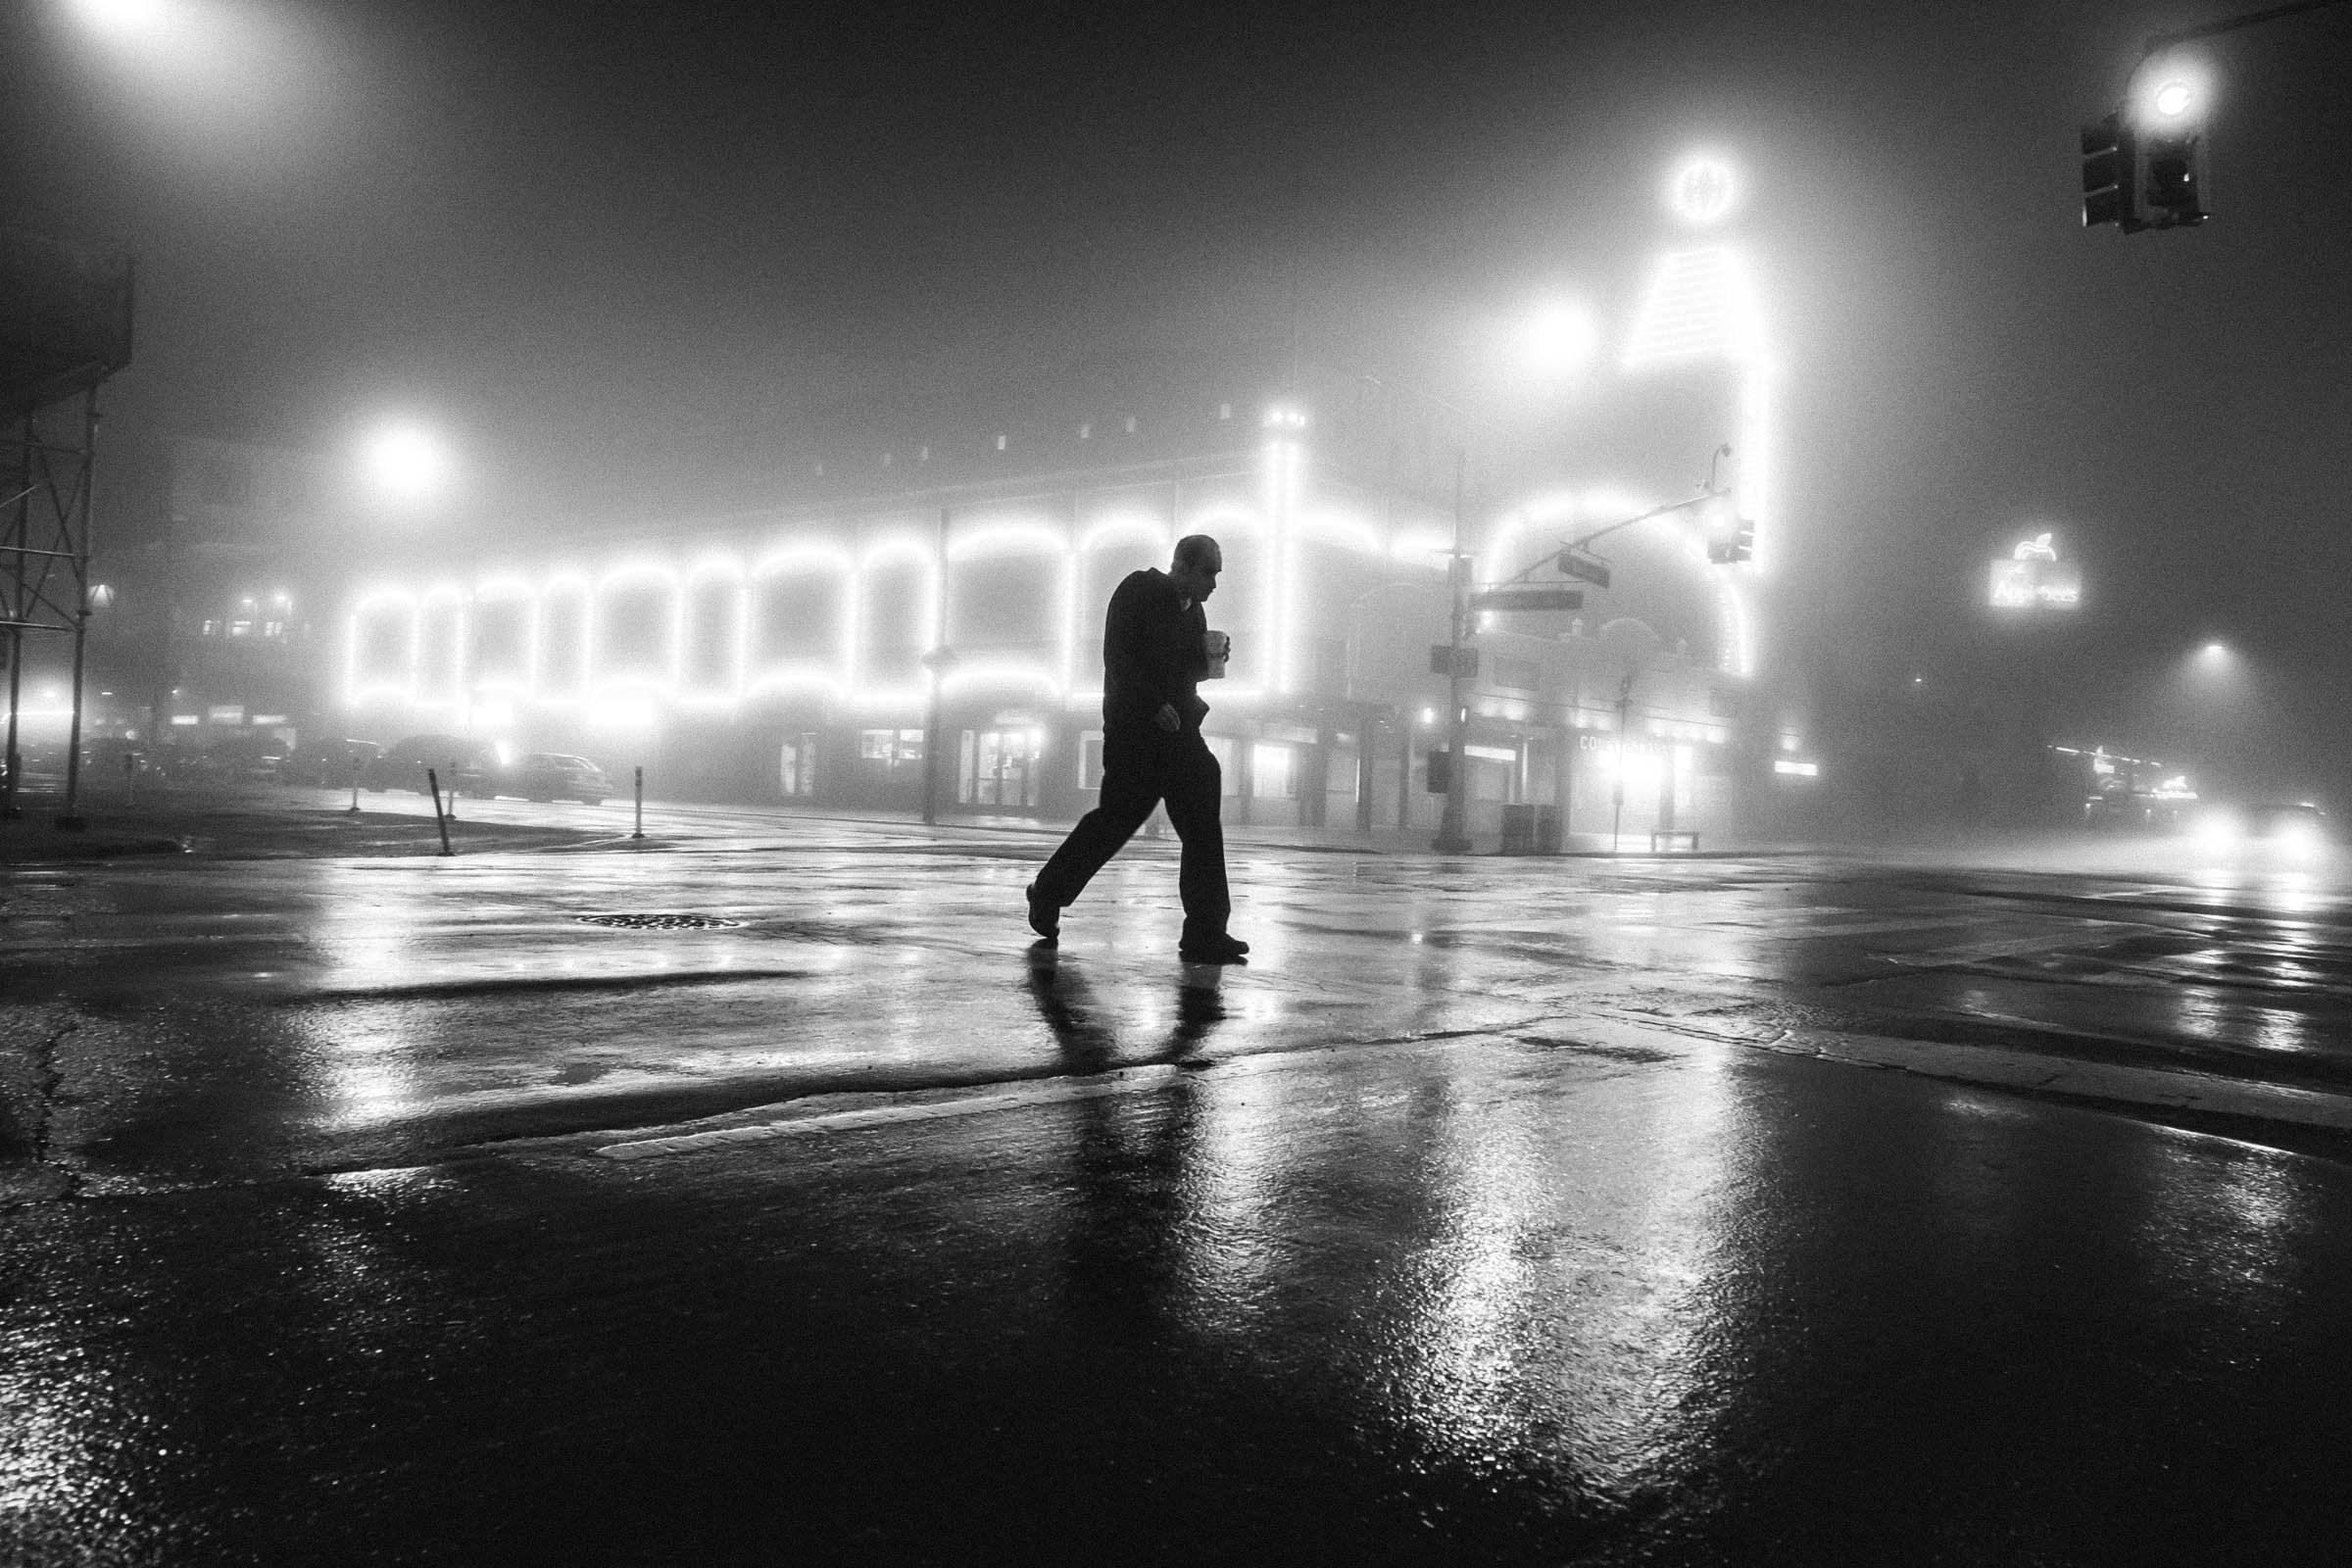
6. Chapter V - Panning: Yeah, all right, guys. One of my favorite techniques, which isn't a typically street photography technique. Uh, it's mostly used in sports. Photography is panning. What is panning pending is when you use longer shutter speeds in order to blur in the background. But keep one person or a fragment of a frame in focus. So for this technique, I'm going to use my DSLR camera, this cannon, my favorite camera. I use it because it's more reliable. You saw it in the previous workshop in Coney Island. It is heavy in big, but a guarantees good results, good quality, and it's very fast. So what happens here is that normally, if you want to get a sharp picture, you shouldn't normally go below 125th of a second, maybe 1/60 of a second if you want to keep your pictures sharp. But this technique is trying to do something exactly opposite, so you're going to blur most of the picture and keep one part of it and focus, and the way to do it is to slow down your shutter speed. I normally go anywhere between one of 20th of a second and one of 1/80 may be off a second anywhere in that range. And if you have a moving object like you'll see the second, there is a bike coming. So you track it, you track and you move along with it and then you press the shutter at some point on that way, the cyclist is in focus, but everything else isn't with this technique issues. Play with the shutter speed. You should play with the aperture I would recommend going into manual mode. So the mode where you control both to shutter speed and the aperture don't let the camera do anything for you Just in order to have full control, you want to go into manual mode and play with it. I'm gonna go down to 1 40 and do that and get a bigger Blair. It also depends how that's a decent picture. It also depends how fast the object is moving. I usually use it for people who are walking sometimes cyclists. Actually, one of my first pictures ever taken was with this technique, cause I saw it somewhere. I thought it was interesting. Not a lot of street photographers use it, but I use it for my portrait. Sometimes to get a fine art kind of feeling more poetic. Look, and I also transferred that technique to ST and every once in a while it works. It's great. It also works at dusk and at night with neon lights. New York is a great spot for that. Try it out. I guarantee you'll have fun and you'll get the hang of it pretty quickly. So usually when I should like this, I usually try to put the camera toe my right eye and keep the left eye open. It kind of works like a range finder, which it isn't, but, um, but you kind of you kind of see what's happening here. Although it's blurry. Uh, do you know, See you just tracking those track your object and then seamlessly pressed the shutter at some point? I don't know if I told you that, but I don't shoot people with white headphones is just I don't like it, so I try to avoid it which, as you probably know, eliminates 50% of the people in the streets these days. But I just can't get over it. I don't shoot people with white apple headphones, which is a shame. Consent lines to get a really good shot with This person is wearing headphones, and it's just not gonna work for me. Yeah, yeah, I just told you that I never shoot people in White Apple had phones, but I just did that. I made an exception. It doesn't look great. Were on a corner of 34th and Broadway PM roughly in March. It's plenty of people here, which is great for you as a street photographer, because you don't get noticed that much. Even if you're working with DSLR like I'm doing right now, look at all those crowds. Things like Perry. That's for a street photographer. But the problem with shooting in winter is that, uh, that it's cold and my hands are freezing. Right now. We've got a guy with a really good tattoo here. My hands are freezing. Of course, it's easier. I think it's easier to be a street photographer in New York because there's so many interesting people here on so many things happening at the same time. So if you live somewhere else, you might need a little bit more of patients. But that's what it is. That's part of the game in winter. My patients, it's much shorter, though I gotta say way have a baby in the stroller. It's looking kind of weird. Really cold, Thank you, four shots. That's a good thing about that. DSLR This cannon is really fast, focuses really fast. I'm using autofocus. By the way on. It's perfectly fine. You don't have to worry about zone focusing or anything like that. Um, yeah. So depending technique is really is really good at dusk or even at night. And if you can find a spot like the time skirt, which is where we are right now, um, you'll see that all of the lights, all of the reflections play to your advantage. So panning is good for during the day, and painting is good at night, maybe even better at night. Finding it's great for everything. She turned her head away. It's a shame. Would have been good shot. Some things. You can catch someone in the cab. Sometimes you get reflections, and sometimes you can actually get a person that's in a cab or in the car, and it's interesting you can play with switch angles with this camera. I don't have ah flip screen. So I can't really do what I do with the other Fuji camera. But I can kneel, and I can still do this. Shoot from the hip. It's not bad. E cool. They're They're actually a lot of cyclists here, so that's good. I'm gonna shoot them. Track. This one's going really fast. Maybe I got it. Depending on the shutter speed.
7. Chapter VI - PROJECT: class project for this'll class project. I would like to give you two options. Option number one. You shoot a beautiful sequence for me. Option number to show me your best panning skills. Whether you choose one or the other or whether you choose to do both with would be fantastic. Always remember to be tactful and respectful when working a scene. Because while we're trying to document life as it is, we're not trying to make anyone uncomfortable And remember that if you upload your work here to skill shirt, I will 100% give you feedback. I always do. So let me see your work.
8. Chapter VII - Zoom In: Okay, guys, Another technique. Eyes basically changing your lens. I know what you're gonna hear from most of teachers, and street photographer is telling you that street photography is only down with a wide angle lens. I'm here to tell you that it's not. It's not necessary. I have an 85 millimeter lens right now, which is actually one of my favorite lenses to shoot. Mostly portrait, but sometimes street and one of my favorite. Many of my favorite pictures were shot with this very blends with an 85 millimeter lens. But when you should with a zoom lens because that's what it is, you need to adjust your technique because you're not gonna be looking directly in front of you. You're gonna be looking 30 meters ahead of you looking for your subject, because that's where this lens goes. So never mind the immediate surroundings. Look for your subjects 50 meters ahead. 60 meters had maybe 100. Maybe it's a little bit of exaggeration, but you need to look ahead because that's what this lens does. Um, I'm back to my, um, aperture priority. I have a fairly wide open at 2.8 right now, because that's how I like it. A lot of Fashion Street photographers use zoom lenses to get really close because that's exactly what they want. They want one motto in the frame, maybe two on. They want everything else a little bit of time to get accustomed to shooting with longer lens, mainly because your subjects will need to be spotted way ahead. And you'll need to be a little bit faster as well, because there isn't as much room for errors. It's getting dark now, so I'm going up with my I S O. K. So all the way to 1600. It's all good. Camera. 85 millimeter is cool for finding interesting people in the crowd and taking those kind of cinematic shots. My fingers are half frozen now.
9. Chapter VIII - Till Next Time: Okay, guys, this is it for this workshop. I hope you learn new techniques and that you enjoyed it. If you want the general overview of what street photography is for me, like in New York, go check out my first workshop. Street photography. The quiet moments on bond. That's it for today. It's really cold. So we need to get out of here until next time.
10. Chapter IX - EXTRA SCENES: I'm sure ing think temperature is going down, - right ? Uh, right now wait. Elegant Jacqueline people. So if you're shy and if you're not quite comfortable with people noticing that you're taking pictures, you could just keep the camera to your eye and maybe make it look like you are shooting past something in the distance. Okay, there we go. We have a fashion show right there. Yeah. Why is it so cold in the middle of March? It's just not fair.
 Luc Kordas, shoot what it feels like