Transcripts
1. Trailer: Hi, I'm Ryan Falkner. I'm a professional storyboarder and I'm going to be teaching a course for Skillshare on visual storyboarding. We'll talk a little bit about cinematography, about what storyboarding is, and general kind of filmmaking concepts. The most important thing is, you don't have to be a professional artist or a professional illustrator, you don't have to be a designer to be able to do storyboards. All you need is a pencil and paper, and some imagination and creativity. This class will walk through the process of how I storyboard for film, but it will be useful for anybody who wishes to illustrate a concept or put a visual idea together. A storyboard is a sequence of illustrations or photograph used to pre-visualize a film, TV show or concept, before a large resources are put towards producing it. We're going to work with a short script that I've created exclusively for Skillshare students. I'll basically be going through this script, storyboarding it, and as I go through it I'll talk about different techniques. By the end you'll be able to storyboard a script or concept all of your own. You might take your morning commute for example, anything that inspires you, sit down and visually draw it out in a series of frames to see if you can tell that story. What was that like?
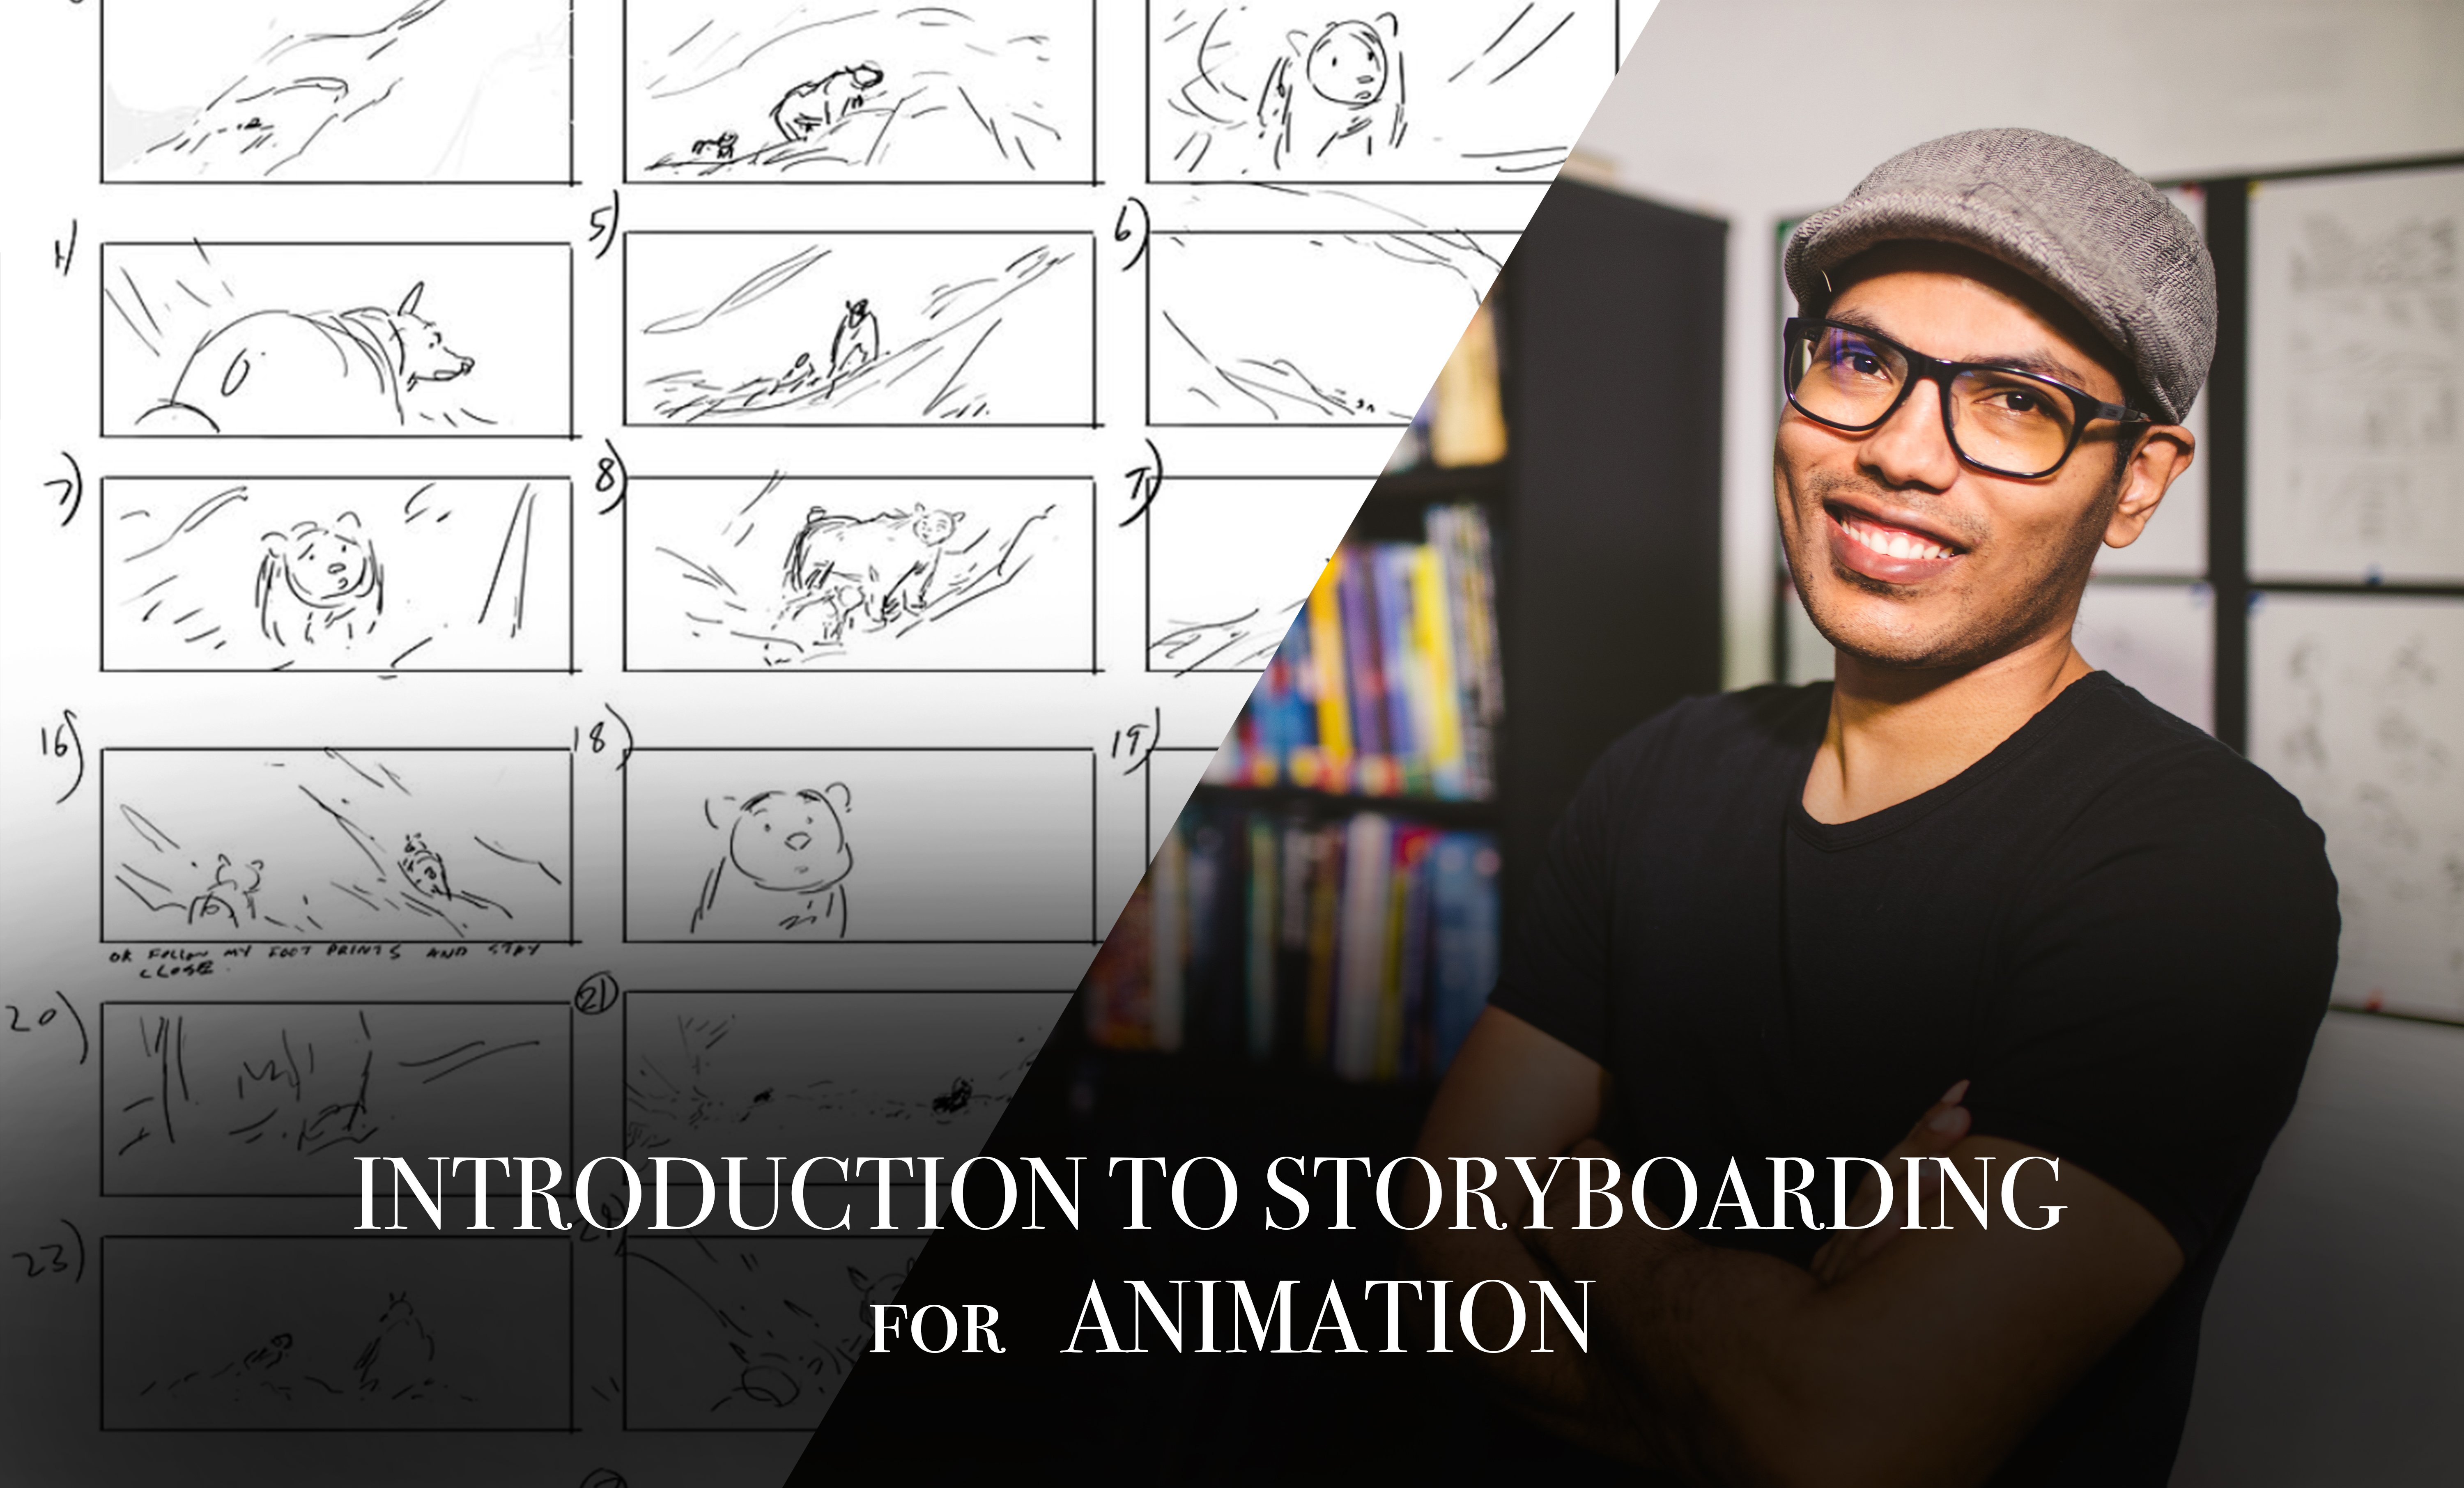
2. Introduction: Hi, I'm Ryan Faulkner. I'm a professional storyboard artist, and I'm going to be teaching a course for Skillshare on visual storyboarding. We'll talk a little bit about cinematography, about what storyboarding is, and general filmmaking concepts. The most important thing is you don't have to be a professional artist, or a great artist, or professional illustrator. You don't have to be a designer to be able to do storyboards. All you need is a pencil and paper, and some imagination and creativity. This class will walk through the process of how I storyboard for film, but it will be useful for anybody who wishes to illustrate a concept or put a visual idea together. A storyboard is a sequence of illustrations or photographs used to pre-visualize a film, TV show or concept before large resources are put towards producing it. We're going to work with a short script that I've created exclusively for Skillshare students. I've titled it "A Lady's Intuition". It's western. I'll basically be going through this script, storyboarding it, and as I go through it, I'll talk about different techniques. By the end, you'll be able to storyboard a script or concept all of your own. You might take your morning commute, for example. Anything that inspires you, sit down and visually draw it out in a series of frames to see if you can tell that story. What was that like? So, I've been a storyboard artist for going on 14 years. I basically grew up drawing making my own comics being very interested in telling a story. Just growing up drawing a lot, when I discovered what storyboarding was, I decided that was a good fit for me. Well, storyboarding is useful not just for filmmakers, but for anyone who wants to visually put an idea down and organize an idea. When you're storyboarding, you're thinking like a camera and you're drawing shots. That's what storyboards are. They're shots of camera. The goal for storyboarding for film and TV is, ultimately, efficiently putting down a visual concept, telling the story succinctly and clearly. Being a storyboard artist in Hollywood, I've worked on several films, most notably, I would say are, well, popular films like Pineapple Express, The Three Stooges, a movie called Harold and Kumar Go To White Castle. That was some time ago. But more recently, a movie called Burt Wonderstone. For the ladies out there, who like Zac Efron, I did Charlie St. Cloud, and most recently, I've been working for Disney on The Jungle Book. So, when I was working on Harold and Kumar Go To White Castle, the first one, the script had a scene. There was a scene where Harold and Kumar are hang gliding, and they look down, and according to the script, they saw what was described as like a playground. When I came across that, I decided to try to make more of a visual gag out of that. So, I drew a crop circle in the form of, basically, a male genitalia. According to the director of that, I always got the biggest laugh in any screening of the film. He even credited that to me in the DVD extras. But I think he actually says that, I didn't want him to credit me because I was embarrassed by the fact that was like my contribution. When I first started out as a storyboard artist, I didn't go to film school or art school. Certainly, I looked at films, and I think that's key, is studying the masters, the great directors throughout film history. Ultimately, I just went out and started doing. I started volunteering to do student films and independent films, and that's really how the Skillshare course is going to be structured as well. It is the idea that you just get out and do and you learn by doing. What I'm going to teach is going to be some general concepts conventions, and we'll call them rules. I might call them rules, but at the end of the day, rules are meant to be broken in any art form, and film making is no different.
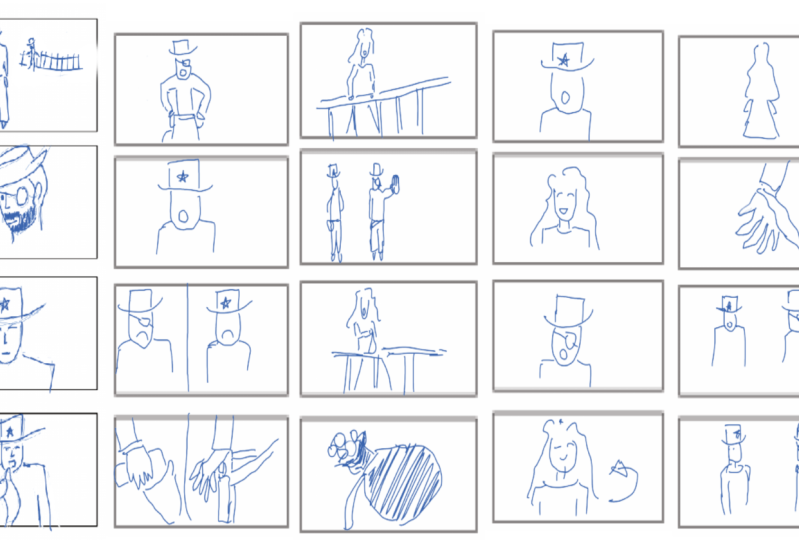
3. Warm-Up: Storyboard a Tweet: A tweet by Jackie Collins and the tweet goes as follows: "She smiled. He smiled back. It was lust at first sight but then she discovered he was married. Too bad it couldn't go anywhere." That's the tweet. So, what I did was I broke that down into bits and basically drew four shots that would tell that tweet, that story. And what I started with was: She smiled. So, I drew a picture of a woman smiling. Then the next line is: He smiled back. It was lust at first sight. So, I've drawn him with this male figure and you'll notice that I've drawn her looking from left to right and he's looking right to left so we can kind of infer that they're looking at one another. And the third shot or bit that I've kind of broken it into is: But then she discovered he was married. Well, I've drawn a picture of this man, his wedding ring on his left hand and he's holding a coffee cup. So, we're kind of getting a sense of the space of where these people might be. And then the final shot, the fourth shot is widening out to really see where they are. So, the first shots have kind of ideas like a little bit more mysterious like where are they? Like who are these people? And in the last shot, we get this resolution where- Oh, we see that they're out of this coffee shop, they've shared this moment of kind of flirting with one another. But now we see the expression on the woman's face, instead of smiling, her lips are now a little downturn and she's looking little confused or almost frustrated. She's kind of turned away and she's reaching just for coffee cup. Too bad it couldn't go anywhere. So, that's my tweet, and that's the tweet I picked, and that's how I storyboarded it. I hope this might help you in your choice or in your endeavor. So, go ahead and pick a tweet and try in three or four frames to convey that story in some sort of visual way.
4. Core Concepts: Storyboards: So, primarily as a storyboard artist, I work for and with the director. I'm part of the creative team that includes the DP or a cinematographer, producer, production designer, who are really visualizing the story. The focus of a screenplay is never really to be super visual. It really is up to the director and the creative train team around that person to flush out the visuals and provide that additional visual to the script. Storyboards equal camera shots, and storyboards are meant to replicate what the camera sees. There are two fundamental problems with that. One is, storyboards on a camera, so they're not moving, and two, they're done on a 2D surface, they're not in 3D. We're going to be talking about the two basic approaches to film-making from an editorial standpoint; one being coverage, and the other in-camera cutting. In-camera cutting essentially refers to the idea of really planning your shots out and shooting them in a very specific way that how they will be edited later. Storyboards will be extremely useful in that process because it's all part of the process of really preparing and pre-visualizing what it is exactly that you're going to shoot in order to get what you need in the editing room. The other approach is coverage, which is more redundant and has room for being less innovative, because you're not sort of pre-thinking all of your set-ups. You're actually using pretty conventional setups, but the advantage to coverage is that you're giving your editor, or yourself and post plenty of room to cut and tell this story because you're capturing it from set conventional angles, that again are kind of redundant with one another, but allow for more choices. There's limit with storyboards with how much prep and planning you can do. Storyboards are part of that process that's gets about as prepped and planned as you can. But when you're going onto the set, certain directors rely very heavily on storyboards. Hitchcock was famous for relying very heavily on storyboards. There's an expression in film-making that if something can go wrong, it will. Storyboards can help that process of being prepared for, and that the goal of storyboards is really helping to uncover the pitfalls or challenges that you're going to face when you're actually shooting a film. Storyboards are commonly used, or are at their best when they're used to describe very specific shots. Often times, shots that involve a high degree of difficulty to executing them like a stunt. For example, or visual effects shots where there's a green screen, we don't know what's behind the actor, but they don't know what's behind the actor, but in the finished film, there's going to be a dragon behind the actor. It helps to have a reference to what exactly they're going to see, and what the animators or visual effects artists have to actually create. Storyboards can also be not as useful if you're using coverage, or a conventional storytelling platform. So, oftentimes, you'll find like a movie, or like a romantic comedy, or comedy movies. The meat and potatoes of those movies is performance, and the comedy of the actors themselves unless about the actual structure of the shots. So, as a storyboard artist, a lot of times I'm asked to come up with creative solutions to visual problems. For example, I may be asked to shoot an entire sequence, how could we do this in one shot? Then it becomes up to me to really figure out a way to block a scene out putting all the important props, and characters people in the right place, the right time, and do this in an innovative and somehow, a different way. Some way that's not a conventional or hasn't been done a million times before.
5. Core Concepts: Scripts: Now, for our first real lesson of the course, we're going to look at a script that I threw together. I should start by saying as a storyboard or as typically on my job, is that when I first arrive on the job, I'm given something that looks like this. I'm given usually a script or treatment. But oftentimes, it's a script and my initial step is to read it and then I will sit down with the director and begin to discuss it, shot list it, maybe draw a camera diagrams, and thumbnail sketches, and we'll do all that and only then will I began to storyboard it out. What we have here is the Scene heading, Exterior Mining Towns Circa 1890 Day. A tall and intimidating figure steps into a deserted, dusty street. This is Sheriff Barber. He stares at a man leaning against a fence rail. This is Rex, a suspicious character with an eye patch. "I'm looking for the man who robbed the stagecoach yesterday." "Don't know nothing about it, Sheriff." Barber holds up a torn handkerchief. "This your handkerchief, son? You left it at the scene of the crime." Rex straightens and walks out in front of the Sheriff. "You accusing me of burglary? Why? Because I'm dressed all in black and I got an eye patch? That's discrimination." Barber stares at Rex stupefied. The two men face off, their hands twitching beside the handles of their six shooters tucked in their holsters. "Hold it right there, boys." A woman cries from off-screen. The two men turn their heads to see Margaret, standing on a porch of a nearby building. "I can handle this, Margaret," Rex says. Margaret speaking to the Sheriff, "You're looking for this, ain't you, Sheriff?" Margaret tosses a bag into the street. It lands and tears spilling silver coins into the dust. Sheriff barber stares at the money, "How'd you come by this?" Margaret says, "Guess, I just found it." Margaret winks at Rex, who looks at her dumbfounded. She turns to go. Angle on Margaret's wrist, she's wearing the other half of the torn handkerchief. She turns and walks away leaving the two men staring mutely after her and one another. So, that's our scene and that's what we're going to begin beating. Well, what we'd like to call beating out. We're going to look at the story beats and then we'll start to thumbnail it, sketch it out and maybe draw a camera diagram to help us in that, and then ultimately do some storyboards. So, in this we see tall, intimidating figure steps into deserted, dusty street. That's one beat right there. We've got this character, who says intimidating figure, he's tall. So, I'm going to file that into my mind, as this is a character description of this character and something that may play in how we draw that and articulate who this character might be. He stares at a man leaning against a fence rail. This is our second real beat, which is this second character. This is Rex, a suspicious character with an eye patch. So, that's tells us he's suspicious, looking eye patch and again, we have this description of a fence rail. Barber, "I'm looking at the man who robbed the stagecoach yesterday." Rex, "Don't know nothing about it, Sheriff." So, when we talk about dialogue, typically when a character is speaking, you're going to want to see that character speaking. So, that's probably going to involve shots for each of those characters in that moment. Barber holds up a torn handkerchief. So, the handkerchief is important and it's torn. Barber is holding up a torn handkerchief, then were already probably showing Barber, who probably speak as he says that. Rex straightens and walks out in front of the sheriff. Okay, this is a new beat and he says, "You accusing me of burglary? Why? Because I'm all dressed in black and I got an eye patch? That's discrimination." Barber kind of stare at this, this is the next beat. Barber stares at Rex stupefied, this being my little play on modern ideas of social justice and political correctness. Now, the two men are facing off. So, this is kind of another beat. Their hands twitching besides the handles of their six shooters. So, I'm going to underline face off, their hands twitching beside the handles of their six shooters, is kind of another possible moment or shot. Then as their sort of preparing to draw on one another, we we hear from off-screen, a woman say, "Hold it right there, boys." So, that's its own beat as well. We have the two men in that moment, turn their heads to see Margaret standing on the porch nearby. I'm going to say that's probably the same beat really, as this reaction of the two men turning their heads to see her. Because we're kind of, we're focused on these two men, she's off screen. So, we're actually not cutting to her or specifically showing her. We're still with these two men but her saying that is a specific beat. Then, we see Margaret standing on a porch of a nearby building. So, that's beat two. Then Rex speaks, Margaret speaks again. Margaret tosses a bag into the street and lands and tears. So, that's one moment and second is seeing the result of that which is the coins spilling out into the dust. Sheriff Barber stares at the money, that's another beat. Barber, "How'd you come by this?" Margaret responds, this is her moment, "I guess, I just found it." Then Margaret winks at Rex, that's another beat, specific moment of looking at Margaret's wrist, that she's wearing the other half of the torn handkerchief. This is very important, right? Because this tells us something. Well, again, it doesn't explicitly tell us that she robbed the stagecoach, but she's probably involved in some manner. Then finally, she turns and walks away, leaving the two men staring mutely after her and that's another beat. So, that's how you break down the script and gives you a sense of probably, where there's going to be specific camera angles.
6. Cinematography: Camera Shots: Now, I'm going to talk about the fundamentals of storyboarding. It's also the fundamentals of cinematography, and these are just basic shots. Our first shot is an extreme close up, or in other words, the acronym would be ECU. That's basically anything that is a very close shot like an eyeball, then moving sort of further from that close further out is a close up. And a close up is typically of someone, a character's face. Typically, I would say this drawing is a little tight. Close up can also sort of, you can kind of see the beginning of like the shoulders. And then, as this kind of diagram shows there's kind of between the medium shot and a close up commonly used as a medium close up or MCU, and this is about like chest level up or so and then, a medium shot is more from the waist up. And then, there's a fun kind of rare shot called a cowboy shot, which we're actually going to use in our script because it is a western. The cowboy shot is basically a medium shot but it's a little bit wider specifically so that you can see the guns which would hang lower than the belt. Per this diagram we have wide shot which is WS, and that is any shot that basically shows pretty much the scene could be characterized as a wide shot. You know, a shot that's going to include details of the location, like where the- it's really going to show us the environment of where this is, where these characters are. And it will probably end up showing us most of the characters, if not all of them. There's a full shot, which just means basically seeing somebody from the feet to their head, and within the full shot you could have terminology like a two shot, or three shot. That's probably going to be in a full but it could also be in a medium shot where because the frame size is wider than it is tall, in a shot like a full shot or a medium shot, you might be able to sort of have a number of characters within that shot, typically like two or three, so you might call it like a two or three shot. Then a long shot is specifically when you see characters in the distance, in the far distance but in a way to me how you separate a wide shot and a long shot also kind of, well, wide shot doesn't necessarily mean things are in the distance. That's really what a long shot is, characters are in the distance. An extreme long shot might be seen in other far distance on the horizon or mountains in the background would be an extreme long shot. When you're talking about the difference between like a wide shot and a long shot, it shouldn't really be confused with lens sizes. Other shots are over the shoulder shots or OTS. It establishes a relationship between two characters. So, you're keeping one character in the frame and this gets into again kind of sequential sort of storytelling or narrative storytelling, but sometimes that over the shoulder shot is important. You're maintaining or establishing a relationship between two characters with that over the shoulder shot. And then, this diagram shows us a shot just called it high shot, which you could call that, I have go shot or an aerial shot, or a bird's-eye view, maybe don't confuse that with an overhead. An overhead would be more directly over. The way this is drawn it kind of looks as though it's, you know, again like a high angle but we're not necessarily directly overhead. And then, the other thing that this mentions is a dutch angle. In this instance this this example is already Dutch. Dutching is a term for essentially skewing the camera a little bit so that the subject of in the shot is not perpendicular to the frame, they're not directly up or down, or left or right, they're at a diagonal and the reason that sometimes is used is in suspense or horror movies. The dutching of the camera kind excuse gravity a little bit, and it tends to give the audience a feeling of insecurity, a little uneven footing, right? So, it can kind of help create some tension.
7. Cinematography: Camera Angles and Thumbnail Sketches: So now that we've talked about the script, we've read through the script, and we've isolated certain beats, and we've now talked about types of shots themselves, basic shots. First, I'll take a step back and I'll talk a little bit about a general concept of film making, a way of stringing shots together to keep the story interesting and dynamic. When you're filming something, you want to go from a steady stream of either wide to close, and then back, close to wide, or vice versa, but at all times, you are moving the camera in, and moving the camera out in an effort to keep the audience interested and engaged by mixing it up. So, you never want to just stick with the same framing, the same shot over and over and over again. You want to move in closer, and you want to move, and moving out can always reestablish the relationships, the environment, remind us where we are, who we're talking to, and then you move in closer and closer to get into some of the details and things like that. So with that in mind, we'll start with this tall, intimidating figure steps in a dusty street. Well, that tells me that we're really focused on this one character. One thing I haven't really talked about so far is, I touched on it a little bit the high angle shot. There's also such things as low angle shots, where you bring the camera down low and maybe look up, and not oftentimes is used especially when we're shooting superheroes, to give them very heroic or very larger-than-life feel and stature. So, this tall and intimidating figure, we might try a low angle. So, I might write low in my little shorthand for an angle, angle sign. This could be a full shot of the character. I'm going to go ahead and just make it like a medium shot, and that's our introduction of Sheriff Barber. He stares at a man leaning into the fence rail. Now, one other approach we could take to this, like I said, starting wide so that you see all of these elements. So, this first shot could also be a wide shot of this deserted, dusty street. That will also serve as our master shot. What a master shot is, is a shot that will play out through the entire length of the scene. This is kind of referring to that idea of coverage as well, and that will give us the ability to always be able to cut back to that because the scene will be entirely encapsulated in this one shot, and that's the master shot. So, we have to introduce Rex, so this could very well be like an over-the-shoulder shot because we're still establishing this environment and still setting up who these characters are and their relationship. So, I might have an over-the-shoulder of the Sheriff Barber. I'm going to just put B for Barber on R for Rex. So, it's an over-the-shoulder, over Barber's shoulder on Rex. Well, if we already have a medium shot, maybe this is an over-the-shoulder of Rex on Barber, and then we'll cut to a close up of Rex. Again, keep in mind, I'm basically going from a wide shot closer and closer into this close up of Rex. These are just general ideas or conventions, not a hard and fast rule to live by. So now, we have this Barber holds up a torn handkerchief. "Is this your handkerchief son?" Maybe this is a misprint. So, let's make that a close up of Barber now. Now, we have Rex straightens and walks out in front of the Sheriff. That might take some space for him to do that, and now that we've kind of been in close already with a couple of shots that are close of the action, maybe this is a good time to move back out to reestablish where we are, and their relationship, because Rex is now going to change that relationship by moving. So, we'll cut out to maybe back to that master shot or maybe another angle, but we'll cut out to a wide shot. Then we can cut back to Barber, maybe this is like a full shot of Barber. So, somewhere in here, like the two men face off, that again could be a wide shot or it could be an over-the-shoulder but for now, we'll just say it's a wide shot or we'll actually make this on over-the-shoulders, since we already just had the wide shot, so I'll make this this an over-the-shoulder. Their hands twitching beside the handle of their six shooters. Well, this is a good place for an ECU, extreme close up, of the hands and guns. That's a scary detail. We'll hear a, "Hold it right there, boys." and the two men turned their heads to see Margaret standing on a porch nearby. So, first, we have the beat of the two men turning their heads. So, from the extreme close up of the hands and guns, cut back to a reverse over. A reverse shot is just basically, you have one setup, and the reverse of it would be from the other side of that. So, this first over-the-shoulder. I'm sorry, I'll go ahead and say, this is over Barber on Rex because he's the one moving into a new position, and then the next one will be over-the-shoulder Rex on Barber, that will be our reverse. Then they'll turn their heads, and I'll make a note of that. Turn their heads. Then we reveal Margaret, who's standing on the porch. This would be a good place to maybe cut back to our wide shot to establish where she is in relationship to the two men. Now, we have Rex say, "I can handle this, Margaret." Maybe this is an over-the-shoulder of Margaret on Rex and Margaret says, ''You're looking for this, ain't you, Sheriff?" and Margaret tosses a bag out into the street. So, in here, we'll put a medium shot of Margaret to really establish her and say, you know I'm going to put that before the over-the-shoulder of Margaret on Rex, just to introduce her. So, then we have the over-the-shoulder Margaret on Rex when he says, "I can handle this, Margaret." It's establishing their relationship. Then Margaret, maybe tosses a bag into the screen or speaks to the Sheriff and tosses a bag into the street. So, I'm going to go over-the-shoulder Barber on Margaret, and we'll see her toss this bag and then an extreme close up of the bag landing and spilling the coins. Then we'll have, let's go to a close up of Barber staring at the money, and he says, ''How'd you come by this?" Margaret, we might go back to, we've had a medium shot of her, maybe now we have a close up of her. Then how about we cut to a close up or ECU of her wrist, which maybe she's disguising from, so Barber can't see them. That she has on her, tied to her wrist the the missing handkerchief or the second half of the handkerchief. Now, maybe we'll cut back out wide as she turns and walks away leaving the two men staring mutely after her and one another. So, we've started wide, we moved in for all of the details of the scene, and the action and then ultimately we end with that same shot and makes a nice like bookend to the scene. These two men are are left hanging, basically. When I'm breaking down a script and working with the director to shot list it, I oftentimes will draw a little thumbnail sketches. This is another copy of the script, and you'll see that I've already drawn these these very small, very rough like stick figureish sketches of the shots themselves. This is what I call thumbnailing. I'm going to go ahead and draw some of these out. So, this low angle medium shot, Sheriff Barber look like he's kind of tall. Here, I'm using this sort of hash marks to just get a sense of where he's looking, as the general sort of face. So, he steps up and in stepping up, I might even use an arrow. This is commonly used in storyboards or the use of arrows, and I'll get more into that later as well. Maybe, he actually kind of steps in from off frame. So, this might even be like, maybe I just see the first shot could just be a picture of the sun, but I could easily start this off with the wide shot as well. So, I'm going to go ahead and draw that here now, just with little stick figures, and the guy who's leaning against Rex is going to be leaning against this. We'll establish that they're at this building and maybe it's like a salon, with a door, some stairs, some windows and a rail. So, Rex is leaning against the rail and the Sheriff steps into this frame. He's maybe big in the frame because he's closer to the camera, maybe we're like low to the ground. So, we have a shot like that where, moving forward I would do this out with the entire script as just another degree of organizing your thoughts and figuring out what you're going to do. Sometimes, all it takes is thumbnails like this, people work off of these.
8. Cinematography: Camera Diagrams and Frame Sizes: Now, I'm going to show another technique to this initial process of organizing the shots and figuring out, how you're going to shoot the scene by doing a camera diagram. I have the script, the shot list on the side, and I'm going to look at that shot list from the perspective of a camera diagram, which is like an overhead view of the scene. So, for our scene, I'm going to basically do a little drawing here of the saloon, stairs, rail. This is like a porch up here. So, I'm in going to put sheriff Barber here, he enters the scene. We'll put Rex and I draw just a little form of a head and some feet to show which direction they're pointing. The first shot, well, we know we're going to have a wide shot of the whole thing. So, I might move the camera back here. Call this number one and this is your wide angle that gets the entire scene. So, we have Barber enter and then maybe we see, we're talking about maybe inter-playing this with an entry shot of him. That's a medium shot or so of him stepping in. Then over the shoulder, we'll put a camera here and we're seeing now over his shoulder on Rex. So, I would number these as I go, there's two and here's the over the shoulder, which is again over Barber on Rex, so we're seeing that. You'll notice that what I've basically done right here, I'm already positioning my cameras or my camera, so that they fall in this line. Then I'm going to draw in dotted line between these two characters because once he's entered the scene, you've set up a relationship between them. What you do is you basically, and this is the 180 degree access or 180 degree rule. There's an invisible line that connects these two guys, these two characters. You want the camera to be on one side or the other and consistently of that line. So, once I've established the line being on this side of them, all of my camera positions are basically on this side of that line. The reason is, is if I go from shot three that's over the shoulder, to then swapping the line and it being an over the shoulder her because this is now on the other side of the line, if I were to do that, then you have to imagine you're looking over, you would see his right side and he's looking at Rex, is on the left side of the frame. If I did that, all of a sudden Rex is on the right side and he's on the left. So, it gets very confusing. Back to back those shots would look the same but they're of the two different characters, so that would be very confusing to the audience. So, the reverse angle of this over the shoulder is not jumping this line but staying on this side of the line. So, his over the shoulder, Rex would still be on the left looking right while Barber is on the right looking left. So, we have the over to the shoulder of Rex on Barber now. We have the close up of Rex. So, that might be somewhere here, there's five. We have a close up of Barber, just like this tube, but maybe we're a little closer now. Remember, we're moving in, we're always moving the camera from wide to close, and from close to wide. So, we're now moving in closer to Barber. That's him holding up the torn handkerchief, then a wide shot. So now, we can cut back to here and I might actually note this is shot seven as well. So, we know that we're cover a couple of shots with that one shot. Then I might show, maybe in a solid line not to confuse it with the 180 degree line, have Rex step out here. He's been insulted and he's now going to face off with the sheriff. Now, you'll notice that because he's moved, the line has moved to here and actually as he's moving, the camera could be anywhere in here because we haven't actually reestablished that line yet, when we see Barber's reaction. So, maybe we'll go here for, this would be shot eight. So, we're back with this over the shoulder and it's just a slight camera adjustment but it's basically the same shot. You could just move forward through the scene and you'll get all of these. I'll just quickly go through them all now just to get an ECU of the hand, maybe we will do that there on the gun. I might write that in, just so I know what that is. Reverse over the shoulder, Rex on. So we'll now put this over the shoulder here. These guys turn their heads when they hear the voice of Margaret, who we'll put here. Now, this gets a little bit more advanced because now we have a third character. I'm going to put her in a dress and make it look like that. So, Margaret's here. With Margaret, we established this line between her and these guys. So, they'll be almost like a triangle here. But our line really hasn't changed. We're still facing this direction and all of the camera setups are basically on this side of that. So, we can see her, and reveal her again in this master shot, this wide shot. If you're at all familiar with storyboards, you realize they're done in frames. Well, those frames aren't arbitrary sizes. They meet specific sizes, or they follow what we call aspect ratio, which is the width and the height, times the height. That aspect ratio is determined by basically standards of film projection and television projection that have existed ever since the beginning of film and television. Here's a sheet of the basic aspect ratios commonly used one, three, three to one, or four by three is an old TV set, 1.66 to one, we don't really use. That's more European film projection standard. But what's common now that we're going to be using for ours, is 16 by nine. It's the aspect ratio for high definition video. So this frame size is what your TV looks, like if you have an HDTV. 1.85 to one is the US theatrical presentation. This would be the size of a movie theatre screen. This aspect ratio was developed by certain lenses called anamorphic widescreen lenses and for showing on this wider format.
9. Storyboarding: Page One: So now, we've gone through a lot of technical stuff. I hope I haven't bored you. So now, we're going to start storyboarding. As I go, I'm going to talk about some varying concepts like perspective, composition, and then as we go, we'll be talking more about cinematography and shots flowing one into other, transitions, and then we will also start to incorporate perhaps some camera movement. The first shot being either or we could establish Sheriff Barber entering the scene in a close shot, and what we're doing now, this becomes the question of the greater story point, which is whose perspective is this, or at least in this scene, is one of these characters the dominant character? The way I've shot listed it and gone about it so far is to not make one character primarily the centerpiece of the story. Sheriff Barber, just reading the script, he seems to be perhaps the lead because he causes the change, he causes the action in the scene, he enters the scene, he provokes a reaction from Rex and from Margaret. So, he seems to be our lead. If he is our center character, I may start with a shot of him, and that's kind of what dictates that choice. That also gets into a conversation about subjective versus objective storytelling. Subjective being of the viewpoint of a character in the story, objective being more removed from a central character and maybe just the view of the audience. If I start with that wide shot like I shot listed, that's a pretty objective view of the story. If I start with a shot of Barber, I'm sort of establishing that he is the main character. He's the first one entering; we're going to make him kind of intimidating and strong looking, so a little bit more subjective of a story. For our purposes right now because I mentioned the idea of starting wide and moving in, carrying through with that principle and also the idea of coverage, I'm going to start with a wide shot and that's this shot of the saloon and the street. Now, another thing I'm going to talk about in making this shot is perspective. It's important as a storyboard artist that you be able to indicate some form of perspective because you are drawing the shots. The first thing I'm doing here, and it's not very clean, but I'm making a grid. The grid will help articulate where things are so that you can keep things within perspective. So, this is also one point perspective I'm dealing with. I've angled the grid because I've got this thing kind of going away, but the grid really should be these perpendicular lines, is the idea. So, if that line's there and I draw another line here, I can get a sense of, this line following to that, all lines will converge at that horizon point in order to get a sense of perspective. Then I have this building, I'm actually going to use that to draw this building. So, even the rails, you'll see will converge to that horizon point if I were to draw them through. He's going to be hanging out at the old saloon. Then, from off camera, in steps, Sheriff Barber. Now I'm using this arrow to indicate that he has come in from out of frame. I might even clarify that by saying this is Barber coming in. It's a dynamic shot. We're low to the ground. This character is kind of intimidating. Maybe we would first even see his shadow on the ground. That'd be pretty nice, and it makes him larger than life because you've got this long shadow coming. That would lead us to then the next shot of Sheriff Barber, the intimidating Sheriff, give him kind of a scowl. So now, I'm going to go to the next shot which is this over the shoulder of Barber on Rex. Over the shoulder could be looser, so you're seeing more of his back or less of them, and sometimes you have a single shot, could be just a shot of him, but if you feel a little piece of the other person in it, of another character, you would call that dirtying the shot up, it's a dirty single. In this instance, this is a pretty straight over the shoulder shot of Rex who's leaning and he's maybe picking his teeth, like got his hat down, keep him kind of mysterious too. But again, these are very crude storyboards, very basic, which is perfectly fine. It's showing you the story, giving you a sense of what's going on. You see I'm constructing these figures and give a shape to his back. According to my shortlist, I've got an over the shoulder of Rex. We've already established the geography, so it's not really going to be confusing to an audience. What would help this is to first see Rex look up, so he's looking left to right at Barber in this shot. So, in this instance, what I often will do is use A and B frames, where I will redraw this and move his head up, or I'll use an arrow to show his head coming up. But the idea is that by the time we get to this shot, he's looking the right direction, the correct direction, which is towards Sheriff Barber. Horizon line is typically at the eye level of wherever the camera is, and if we are directly behind this character, you can just use his eye line to see where the horizon line would be. We are a little lower because he's leaning, and we've established that Sheriff Barber may actually be taller than him, so the horizon line is kind of lower. We still are using this grid to form our perspective lines, and this can show his head turning up, but we're already kind of establishing his head turning up here. Again, I could use an A and B frame if I redrew this, so it's like this is the A-frame. So now, what's great about doing these storyboards in a computer is I don't have to redraw them, with one click of a button, I can duplicate this frame. So now, we have him with his head looking down in this shot, and now we have his head turned up to face Barber. Then going from there, it cuts well with this because his head is now facing, it has already turned the right way. This is our first page, shot one, two, three A, and three B, and four. All very static, static shots. We're living the action to the characters.
10. Storyboarding: Page Two: The next on the shot list is this close-up shot of Rex. Now, keeping in line with this idea of starting wide and moving closer, we're going to a close up of Rex. It says, "Don't know nothing about it." He's now in a close up. So we have the reverse shot. In doing storyboards for film and television, sometimes your boards can influence, but not usually, things like the production design and, well certainly production design but not like wardrobe styling and stuff like that. So you can sometimes really be a blueprint for multiple levels of the film. Primarily, as a storyboard artist, you're focused on natural shots and how the shots flow and less about the details that you draw, although it's good to have details, may or may not have much influence when it comes to the other artists on the film like the costume designer and the production designer, art directors. They're going to have their own sort of take on the material and be focused on those aspects of the film. "Is this your handkerchief son? You left it at the scene of the crime." Now we can basically go back to something like this first shot. How I initially envisioned the wide shot, for this I want to talk a little bit about perspective or about composition. I have this center door and this perspective lines are leading us to that, would mean to suggest this is a focal place. Well, with these characters, the Sheriff Barber are standing here. What I'm doing here is creating this little bit of a triangle and breaking this up into thirds. You basically want your primary compositions or your subject to never be smacked out in the center of the frame because that ends up looking very stilted, very flat just like you also never want this character should never be standing in front of post or some sort of object that is roughly similar in his size and in the same position, say like vertical. It'll look like he's holding up the building if a post were to come in right behind his head. I'm going to talk a little bit of composition. I have Rex who's leaning here, stand up, he's going to move over here and stand facing Sheriff Barber. This becomes interesting because we also have the camera seems it's smacked out in the middle with the stairs leading into the saloon. I divided the frame into these three sections which form because this spotless doorway is a little bit higher, it's forming this thing called a triangle and I think it's referred to as the Golden Triangle. Where you want to, when you can, balance the composition out by creating these three points that form an actual triangle that move the eye through the frame and keep a sense of flow and rhythm to the composition. So that's what I'm trying to achieve here when I have the two men on either side of the frame, not too far out of the frame, not way over here but in this section which is also part of this idea of thirds. Because I've been doing it for a long time, I just inherently put the character not in the middle of the frame. His head is not in the middle of the frame and his eyes aren't in the middle frame. If you look at his eyes, his eyes are in that upper third. Right there, and vertically, he's over here on this side on this, so in this golden rule and same with the Sheriff. Sheriff's eyes are a little high. But they're basically there. Our focal point is here which is also part of the thirds. We have not centered in the frame but in this place where we have the eye focuses there and on him. So we keep the eye moving, keep the frame dynamic.
11. Storyboarding: Page Three: The next thing I want to talk about is the 180 degree line. That's coming back in, we've already discussed that a little bit. But I want to talk about how you can actually move the 180 degree axis. The way you do that is either by physically moving the camera from one side of the line to the other, so that you're actually showing the audience that we are crossing over the line, and re-establishing the line or by having a character move through cross the line. I'm going to move Rex across a line so I can show you how that's reestablished. So, Rex, saying all the way, he has a good degree of dialogue. So, I'm using this moment of him talking to get Barbra's reaction to him talking. He saying, "You're accusing me of burglary. Why? Because I'm dressed all in black, and I got this iPad?" He maybe points his eyes. Barbra has so far been the aggressor. He's entered the scene, barked out about this guy robbing a stage coach, and he's after him, and then Rex fights back by accusing Barbra of discrimination and what not. Was an opportunity to kind of show through the storyboard the difference in tone that Rex has taken the upper hand. So, Rex is now bigger in the frame because he's in the foreground and he's going to walk cross the line, and changed the line for us and meanwhile Barbra's just watching him go. So, his head is kind of go from looking right to left to go looking left or right. In this instance, I'm actually putting Barbra intentionally in the middle of the frame, to really highlight he is now the target. In the middle of the frame and all of that will translate to the audience that he's now exposed. He's in the middle and Rex is almost like a shark, like moving around him. Of course Rex is only just moving left to right here. Drawing something like this will really give us the sense that the beat has changed, the tone has changed, the nature of the relationship has changed. That creates for dynamic storytelling. Here's that shot, it's sort of more articulated, where Rex is crossing over the frame and we have now Barbra frames so that he looks shorter, smaller, meeker and he's like, "What are you talking about?" So, he's confused. This is Rex saying, "You're accusing me of burglary. Why? Because I'm dressed in black and I got an iPad that's discrimination." So now Barbra is on the left. Rex squares off as we go over the shoulder again. Rex is here. Actually in this moment, we might be better look on Barbra phase in a close-up, and actually, I'm going to now draw an extreme close-up. This can be my A frame and then Barbra get's his wits back about him. Now we duplicate this frame. Now, Barbra squints. His head turns a little bit because he's following him. Using A and B frames again is a good way through storyboarding to show continuity, to show a change in attitude, change in action, like if a character moves from point A to point B using A and B frame to show action, to show movement. Another thing I should mention about this move, not only are we moving the line but it's a good use of depth to have this foreground in a larger form and then a smaller figure. What Rex is doing here, he's also kind of what we call wiping the frame, can often times make a good transition between one shot to another. So, anyway, we have Rex move across, we have Barbra looking after him. So now, we might get like an extreme close-up of a hand and this would be a natural cut from the previous shot of Barbra. As his perspective change, we're essentially cutting from the extreme close up of his face to a close up of his hand over his gun. So, now we have now Rex on this side then we hear offscreen, "Hold it right there." So, this will be the A frame and B frame of these guys turning their heads and since this is the introduction of the third character, this would be a good opportunity to bring in some camera movement to bring in a new element. This new element is this new camera move will help signify the introduction of a new character. Typically speaking, when you're telling a narrative story, you want the audience to remain inside the story, remain transfixed by the characters, you don't want to take them out of the story what's called take them out of the store where they realize they're watching a TV show or a movie and not like really invested in the reality of these characters lives. So, you never want to expose the fact that there's a camera showing these characters and one way to hide this camera is to motivate its movement. So, it's not just arbitrarily moving. They've looked, so because they've looked, we can look, the audience can look. So, camera moves I'll talk about as pan and tilt and for our purposes, this is a camera pan. There's maybe a slight tilt. So, pan is when the camera remains on sticks or tripod, we call it sticks. The camera is on a tripod and it swivels but the camera itself is not moving it's still in a stationary place but it swivels left to right. Tilting is also basically swiveling or tilting up and down but in both of those terms, the camera remains stationary, it's just swiveling. So we're going to pan left, and one way to do this is to add frame because now the frame is lengthened because we're actually moving the camera. So, this would be the C frame. It's the same shot continued and I might actually write shot continue. So, this is basically that shot. So, we pan over and so, if you recall the salon. Now we see who said the line, "Hold it right their boys," and we pan over and see her. Here is Margaret, has entered the scene. Maybe behind her, we see the swiveling doors of the salon.
12. Storyboarding: Final Pages: Now, we're going to use another camera move as I introduce the boom down. I'm going to use the frame, combine these two. Just as with the pan, I added a frame. In this instance. I'm going to draw these arrows. I can also indicate it by like an arrow on the outside saying, "Camera, Boom. Down." Now, what you're going to see is because this is the big reveal that she was involved in this robbery. She's holding on this handkerchief behind her back. When you move the camera, that horizon line changes. Well, in this instance, it is because you're actually booming down, we're booming down, and finding that. So Barberwill now not be as low in the frame, or as, will be about the same place but the horizon line changes behind in perspective changes. In this frame, you could do a C frame, kind of indicating that she's starting to turn away. Animation used to be different in the sense that you had different departments doing different things. So a storyboard artist didn't have to really, in animation perhaps focus as much on the whole shot sort of craft. It was more about piecing together the action described in character and stuff like that, less layout and stuff. But now in animation, my understanding is they do a lot of that as well, layout as well of the animation rather than have arrows indicating certain things. You would pretty much draw it all out in effort to really sort of explain what's happening because it is all going to be drawn at the end of the day or generated in a computer anyway. So, we have her turning. Let me use another one of these sort of arching arrows, circular arrows to show her turning almost like a wheel, turning and turning this direction, lowering her hand so that as she turns, she's not exposing handkerchief, C, D. So this is all one shot. Camera booms down, settles here, showing us the handkerchief, torn handkerchief and she turns so the audience is aware but Sheriff Barber is not. Then a nice bookend as she disappears into the celling leaving these two guys staring. There may be a shot missing in here that I didn't do of Rex's reaction of the bag dropping. So you would want to get that. That's what storyboards are for. They're for working these things out, realizing, "Oh, I'm missing a shot," or "I have too many shots," which I probably have to. The way you draw storyboards is editorially, so you're telling the story. It's not how you'll shoot them. How they'll be shot is usually very different. So, in this instance, we're left with roughly the same shot. Every scene should have kind of a beginning, middle and end and really have a clear statement. You are welcome to take this same script and do it your way. Try exploring different shots or apply the same kind of ideas and techniques to your own story, or a dream, or your morning commute. Have fun, and that's the most important thing. Have fun with that
13. Final Touches: Transitions and Advice for Aspiring Artists: So, we've wrapped up the last shot of the scene as I prepared to storyboard it. Now, really just becomes an exercise in reworking these. It could be tidying up, it could be adding or dropping some frames. The goal is to have organized by doing this, by getting this out of your head. It allows the filmmaker to really understand what they need to do to tell the story, humble with it shot setups, how many setups, et cetera, et cetera. One more thing I wanted to mention is the idea of transitions. One thing that is used is a dissolve, and a good transition shot, say, we extended the script and we're going into the next scene and maybe Sheriff Barber is riding his horse to the next town not sure who the train robber is, still searching. We might have this long shot as was illustrated by my- So, that's a good transitional shot between two scenes. Some other more advanced camera moves which we didn't employ is the tracking shot, which can be indicated with arrows coming out or going in. When we would use this is if we're, say we're following Barber as he's being chased by a grizzly bear. Then, we can also track with him. So, those are just a couple of other camera nomenclature or symbol using arrows symbols to show track out. So this is tracking out. I went ahead and illustrated these out a little bit clearer. These were actually done on my computer and a tool that I tend to use is the same Tiq tablet. We have again this foreground change of the 180-degree line, use of arrow showing Rex leaving the frame. Here's a recap of Sheriff Barber watching him, his change of expression from an A to a B frame. The new line; now, Barber on the left, Rex on the right. Etching by these pistols, we see Rex, his mouth set, his hand by his pistol, so we're building tension cutting between this very tense moment of these two guys about to draw on one another. Then, we have this shot once again in A and B frame as they hear, "Hold it, boys." They both turn their heads. Now, in this iteration, rather than panning, I've cut to back to the wide master shot. It's a beautiful composition of the three of them close to between a full and a medium shot. Those are just to show you some of these frames done in a slightly tighter version. We ended up with a scene, this is a very left like a cliffhanger where Margaret clearly has either been involved in some capacity maybe even made the robberies since she had the money to give back and seemed to be protecting Rex, who she, again, has some sort of relationship with. We don't really know that at this point. Another take on this could be, for example, an opening shot where we see her wearing the torn handkerchief, or we see her maybe at the saloon talking to Rex. Then we find Sheriff Barber entering the scene and asking Rex about the handkerchief. What that does depending on how you string these shots together will determine all sorts of things. It's basically what's called a Q and A pattern, which is essentially the idea that that context is everything. You can show the same shot, but depending on what shot comes before or after, completely changes the meaning of that shot. So, if we were to see Margaret first with the handkerchief, we would then may be set the audience up knowing, oh, Sheriff Barber is looking for the handkerchief, Margaret has the handkerchief, is she going to get found out or not? The version we did, it was more of a reveal at the end. But again, revealing it at the beginning could change the entire tone of the piece. I think it's useful to play around with that as you experiment with storyboards and with storytelling in general, to play around with those Q and A patterns. What would happen then is we would take this scene, I would deliver it to the director and he or she would then go over it, give me any revisions, any notes or changes that I'm to make, and then I would make those revisions and we would go through that process. Once that's finished, I might actually clean them up a little bit more, turn them in, and those then go on to the production crew or whatever purpose the director has for them. They could even just end up in the trash. So, for the aspiring storyboard artist or those of you who are interested in it becoming a career, I would suggest learning your craft as best as you possibly can, whether at art school, film school, books, and by doing, you know, start by volunteering to storyboard your friends, student films, or look for independent films, take free work if you have to and learn the craft. Get work in art departments as well to learn that process of working in an art department with other designers and learn from other artists. Oh, and one other thing I would say is study films. Really look at films and even a good exercise would be to storyboard, draw what you're seeing on the film, like analyze a scene and draw it out how it was shot. Then, once you've compiled some work and you feel pretty good about your work, then, there are storyboard agencies, there's agents who represent storyboard artist, follow the trades and IMDBpro, get a subscription to IMDBpro to see films that are being produced. Ultimately, you'll run into barriers with the unions and guilds being able to get big movie work. But, if you're lucky like I was, maybe start working for a director who ends up going from non-union work to union work, who can maybe bring you along. That was my experience.
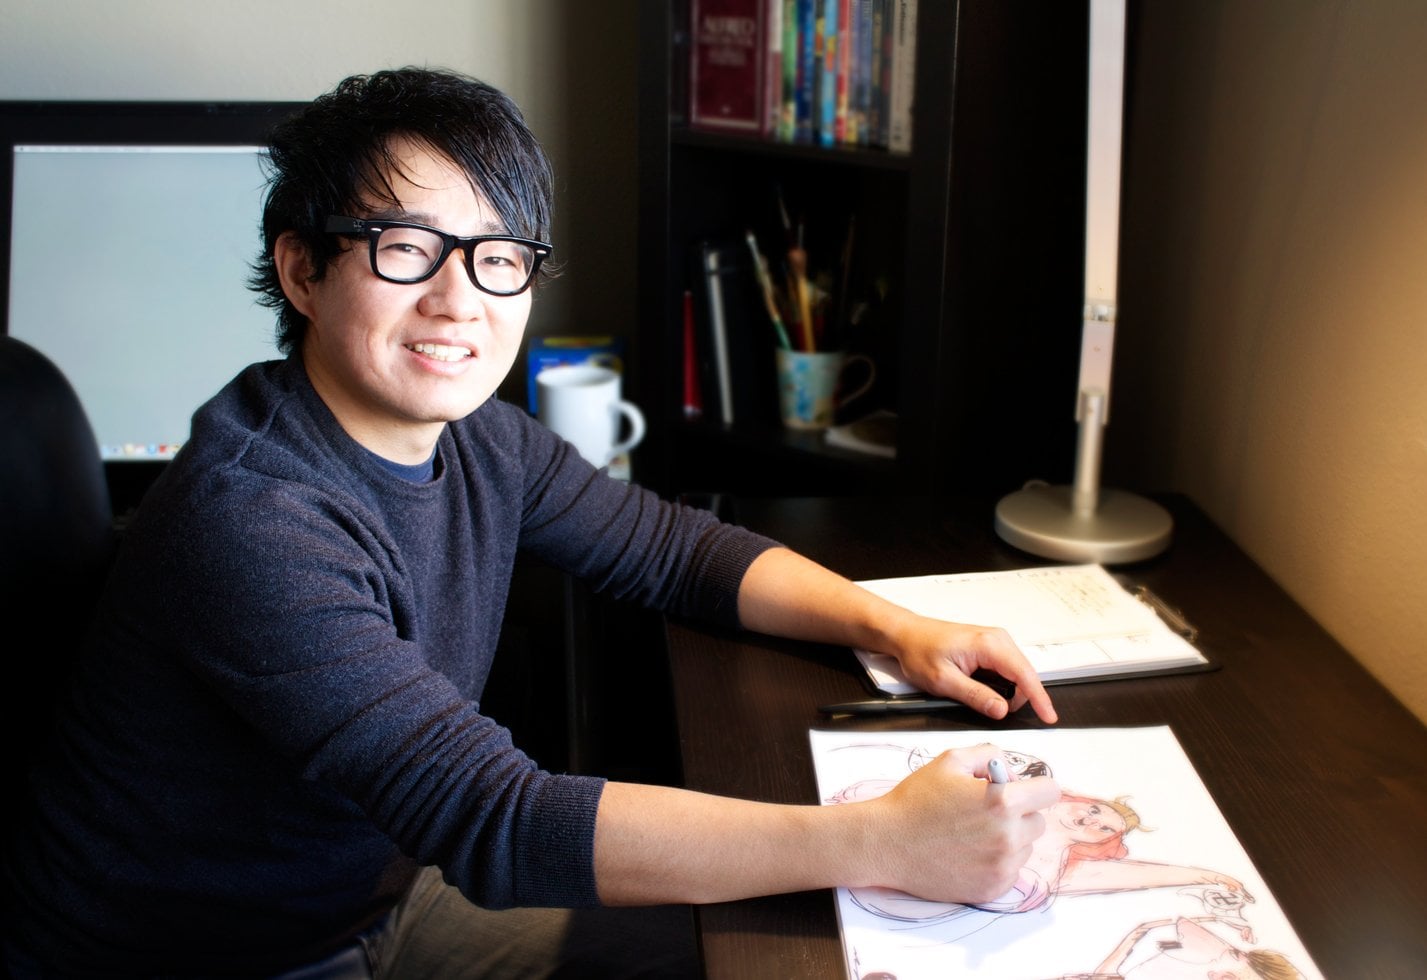
 Ryan Falkner, Filmmaker and Storyboard Artist