Transcripts
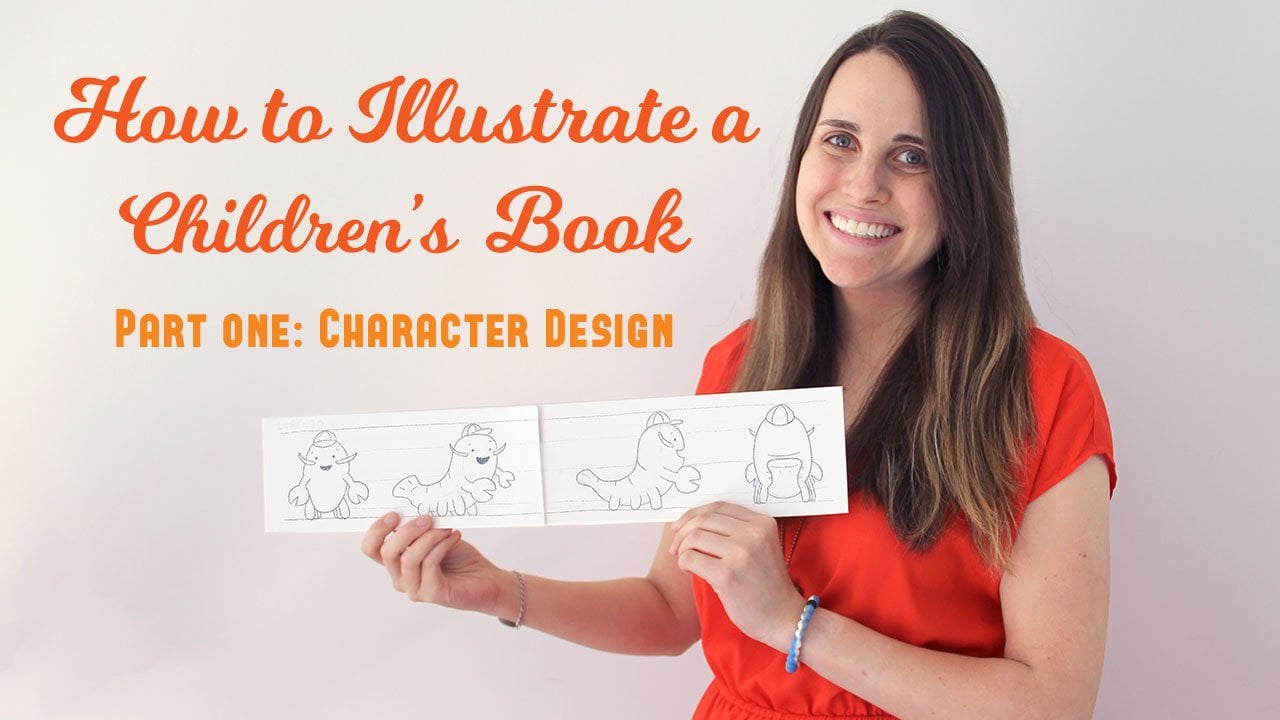
1. Introduction: Hello and welcome. How to illustrate Children's picture book Part two. Don't nailing a storyboard. You're gonna need characters for this class. And although you didn't have to take part one of this course, you're going to find it extremely helpful. Toe have some character study for your story that we're gonna thumbnail into a storyboard. So this course is going to go over learning the structure of picture books. Had a passionate and manuscript how to create a storyboard and finally sketching thumbnails for a storyboard. Some nailing is one of my favorite parts of creating a picture book, and I'm excited to share my knowledge with you. Let's get started.
2. The Story: hi again. So the story that we're going to use in this class to create our thumbnails and eventually are booked at me, which is like a rough draft, is the story of the tortoise and the hare. This just this is the same story that used to create our characters. In part one of this series. I have her in the version of the Tortoise and the Hare, and it's available in the class material section. You are also welcome to use your own stories as long as their original and don't infringe on anyone's rights. So if you're gonna use my version of the tortoise and the hare, take the time right now to look in the class material section and read over the story, and I'll see you in the next video.
3. Materials: hi again. So besides your creative machination, there are a few other material she will need for this class. I also want to take this time to go over some terms I'm gonna be using. A spread is two pages that are facing each other. A thumb now is the smallest gets spread on a storyboard, and a storyboard is a collection of thumbnails that outline and show the pacing of a picture. As far as materials goes here says that some supplies that you only only at pencil and a pencil sharpener you will need any researcher to you will need a preacher. Access to one will need. Masking tape doesn't matter the woods or color as well as scissors. He will also need to download a few materials in class material section. Depending on your printer, there are few files to choose from. If you have a large format, creatures that prick up to 11 inches by 17 inches, you are going to download the file titled Storyboard 11 x 17. If you have a standard partner that can print 8.5 inches by 11 inches, you download the file titled Storyboard 8.5 X 11 that look eighth East to pages. No matter what should be above you're going to use, you will need to download 2 to 3 copies. Download and print 2 to 3 copies of the file titled Extra Stress. This file is for it, and 1/2 inch by 11 inch paper has extra spreads and frames from it. You will need to cut these out and have a good supply on hand. I would like to use paper that is, um, a little bit thicker than your standard paper. But center paper's gonna work to whatever you have. Not now that we have our supplies. You can move on to the next video. See you then.
4. The Structure of Picture Books: e again. So before we dive deep in the looking into our manuscripts, we need to go over the structure of picture books. I'm gonna be using My Lorenzo, the pizza loving lobster book throughout this class. For examples, most standard picture books are 32 pages. This includes the cover and the papers. There are picture books out there, however, that even 40 or 48 pages, but the most common is 32. The structure that we're going to use is called a 32 page self and the book. You're probably wondering what self ended means in the effects that the end papers are part of those 32 pages, and the papers are at the very front and the very end of the book. These air pasted down to the cover, and sometimes they have art on them. Or sometimes they're just a plain color. Just so you know, there's something called a 32 page separate and the book where the and papers are not in that 32 pitch count. It's a little bit less common and a little bit more confusing, so we're just going to stick to the 32 page self edit book. Okay, so in the picture book, besides the story, what holds doing you to make room for? I already mentioned the n papers, but we also need to make room for a dedication and a copyright page, which there usually on the same page. We also need make room for a title page in picture book. She'll find that sometimes these have different pages that you can find them on. Sometimes you find a dedication back, but for our book, we're just gonna put it in the front, which is where you usually find it. There are also different kinds of illustration to use. There are spot illustrations, full bleed, single page illustrations and full bleed double page spreads. I'll talk more about this later. There's also a relationship between the text and pictures. The tax should, in most cases, not tell everything that's going on, an illustration that would be kind of boring. The tax should be a stimulus to what the illustration is. The text should tell half the story, and the other half of the story should be told in an illustration. This way they make a nice, complete whole. That's kind of like balancing each other out, for example, the story of the tortoise and the hare. In the one I wrote. I left much room for interpretation and room for you to bring something extra to the illustrations. It could be interpreted in many different ways. You also need to keep in mind what type of illustration is going on. It spread. You can choose a spot illustration, which is an illustration that is cut out or has a white space behind it. You can also choose a full bleed single page, a restriction, which takes up one page or half of this bread. Here's an example of this. The last option is a full spread, which is one illustration that takes up two facing pages. Ah, full bleed illustration means that the illustration goes toe all four corners of the single page or the spread. Now that we know more about the structure of picture books, that's all for this video. In the next video, we're going to talk about more about the pagination with an example script going off what we learned in this video. See you then
5. Pagination with an Example Manuscript: hi again in this video. I'm going to show you how I catch it In my book. Lorenzo, the pizza loving, lobster paginated ing, means dividing the text in the course, spotting pages on the storyboard. Just a side note the text I'm sharing if you are copyrighted and cannot be used in whole or in part and any form. Also, let's just talk about something magical about picture books. It's pay insurance. Patients are these magical happenings that reveal surprised, create a pause and more patriots are super important and picture books, for example, Imagine routing the text. The rocket ship was about to take off 321 blastoff. Sure, you could show these onto a single page illustrations facing each other. But think about how much for powerful and exciting with me. If that read, the rocket ship was about to take off 3 to 1 on one page. Then you have a full page turn and it's a full page, Brother says. Blast off the pacing of the but could help determine where to make patients. Does the scene check suddenly is the locations at different is their heightened drama, and you want to be careful where you make a patient because where it's place can make it the peace and feel kind of offered. So after Captain for the Cover, which is Page one and papers just two and three and the dedication of copyright pages as well the title pages pages four and five. The story can really only take place between pages six and 29 pages. 30 and 32 are the back and papers as well as the back cover. At this point, I was pointing out my manuscript and start grouping things together. Keeping pace hers and mine. I just used to money is to create a less that design to group thinks together, but he could do whatever works best for you. I don't worry about page numbers right now, or how many of these group is I have, because I will go back later to edit and revise. I usually started to be getting and go from there. Maybe you can even imagine with the art might look like on each page. Once I had everything groups, I go back and revisit the pacing, how it's working or not working after this is when I start a sighting page numbers. I usually have to race and regroup a lot before I have a final version I'm happy with. Take your time on this And don't rush. Take a look in the class Michiko section at the file titled Lorenzo Without Pagination. Make sure you don't look at the one with pagination yet. That's what Later. The 90 script without pagination is not my manuscript that looked like when I was writing the story before it was published. This was before I decided what text at accompanying illustration would go on each page. I'd like you, Teoh. Take some time right now to read through this. What areas? Mickey, pause. Where do you see lots of action? Where is it? More slow. Go ahead. Possibly video and come back after you've read it. Now have you read it? You get an idea of the pacing of the story. You will need to know the pacing of a story to paginated. Well, after you've looked at it and analyse the Lorenzo without pagination pile, you can now look at the file titled Lorenzo with Passion Ation. This shows you the pagination I find life Before I went to my storyboard take a look and examine where Group things together and put the page shirts in the next video. We're gonna look at your manuscript or the one I provided, and you're gonna paginated it. See you then.
6. Paginating Your Manuscript: Okay, so now that we've gone over the example of how to patch in eight a manuscript, it's your turn. Use the file in the class material section titled Tortoise and the Hare Are East. Your own original manuscript. I've had the version of the tortoise and the hare to be very flexible. It's pagination. There's no right or wrong way to do it. Because there are multiple approaches. I recommend putting it out and then reading over a few times. Then take your pencil and start to group Bunches of text together. Go back and edit and rise it until you're happy. Use the tips I shared in the last video. You may want to go back and watch it again. Once you have grouped the texts into a version that you like, you can start adding the page numbers. Remember, you really only have pages 6 to 29 to work with after you taking camp for the cover and pages title page, etcetera. Once your script is pageant it, you can probably move to the story war, which I will cover in the next video. See you then
7. Putting Text onto Storyboard: Okay, so now you know what text goes on each page. Let's add it to our storyboard. But before you can do that, we need to set it up. Take the materials that we gathered back in video three. The first thing you want to dio is toe use your masking tape and make a bunch of little loops like this so little like that bringing a bunch of these, Then you're gonna need to take the file title, extra spreads. And if you haven't already, you want to cut out each of the spreads like this. You're gonna take each spread and put a little piece of tape behind it and put it on. You're corresponding, storyboard. So let this. If you use 8.5 and 11 paper, you're gonna have your store aboard look like this. So you're gonna need to cut out each side and then you see how there's a little bit overlap . Overlap it and then you'll have your full storyboard that day. So once you have done this, you need to do it for the rest of the story board. Just remember that pages one and 32 are only half spreads so I'll catch up with the use of it As I finish all this and through the magic A TV. I have all my spreads attached to my storyboard. So next you're going to start writing a little phrase or text underneath what's going on in that pager spread. So I already did this, um, using my handy paginated manuscript to help me out. So, like page one is going to be cover pay just 2 to 3 as well as pages 32. 31 are going to be your pages. They just 32 page 32 is gonna be your back cover. So page four is gonna be your copyright and education, and Page five is going to be your title page. So, um, after I did these basic ones, I just started filling in. If what? I had paginated on my manuscript. Here are some examples of phrases I put underneath my pages. They don't have to be very detailed. Just a little something to jog your memory about what's going to go on each page or spread and feel free to play around with something. If it isn't working. Store boarding. Is this great part in the process where you can, you know, play around the things, switch things up. You know, just see how, um they kind of work in different ways. Um, So I want you to go through, put your text underneath all your different spreads. And once you've done that, we can move on to the next video where we can start sketching. Okay, CNN.
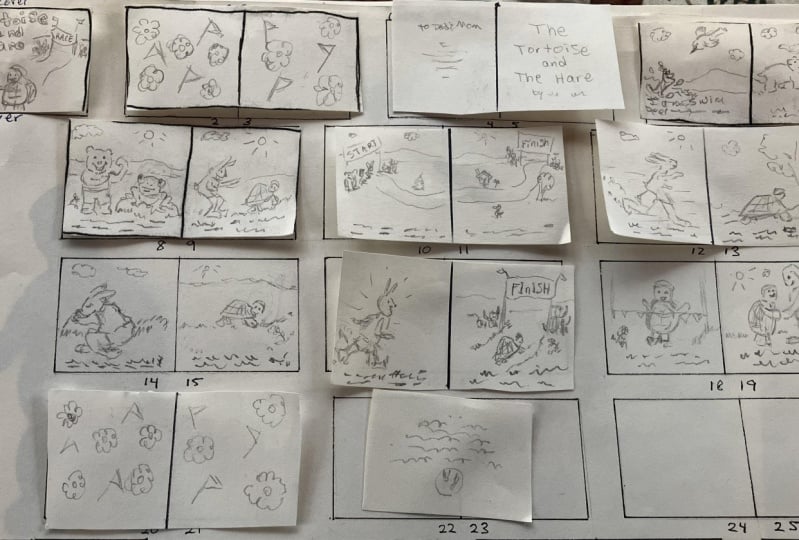
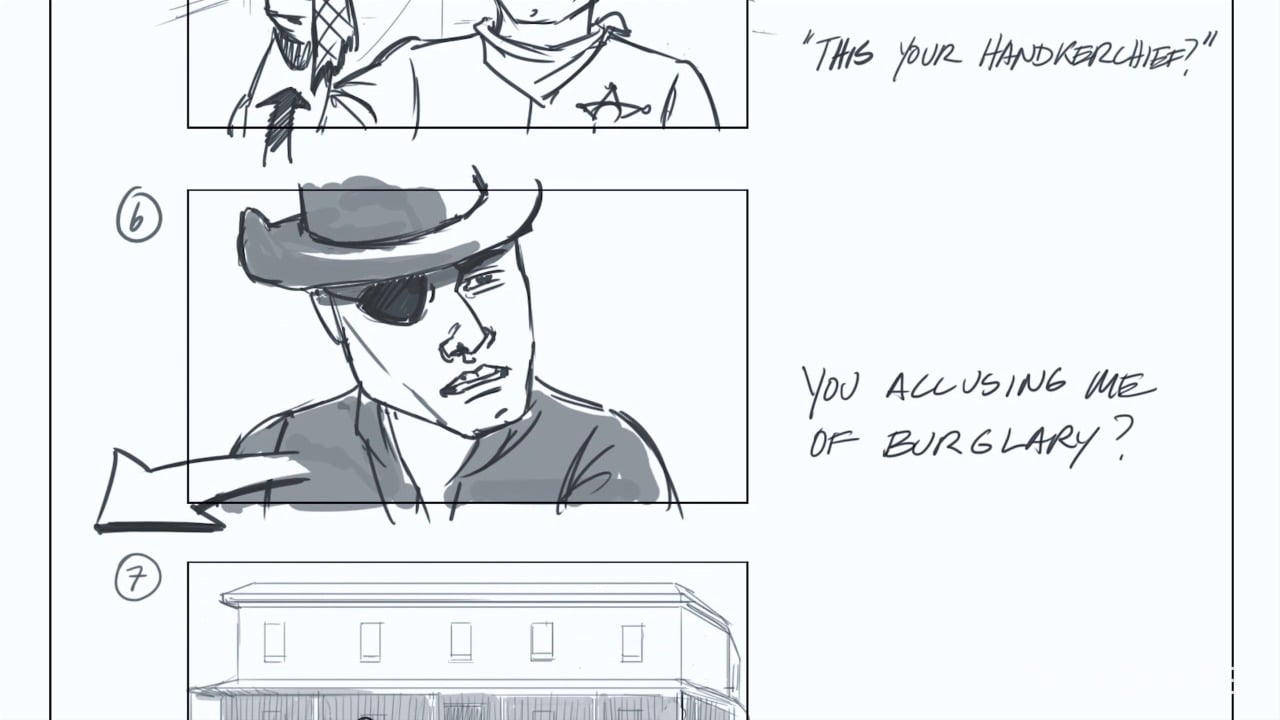
8. Sketching: Okay, so this lessons all of that sketching we're gonna finally start sketching or thumbnails. This is one of my favorite parts of creating a picture book. It's so much fun, and I hope you enjoy it. One of the nice things about working at this stage is you don't have to start sketching an order. You can start sketching and using that appeals to you. But before you do that, there are a few things I want to go over when illustrating a spread. Want to make room for the middle of the spread? Um, this is known as the gutter. You want to make sure that there's no important information crossing in the middle of the after gutter like no middle of the faces. Nothing important. No text there. Nothing too close to the government. I like about 1/2 inch of safety on either side. Um, and here's an example. I asked, want to go over how pages should show movement and progressive and a left to right side manner? Um, because this is how the book is going to be experienced. This includes text as well as a illustrations. Here's an example of that. As you can see in the illustration. On the top, the movement goes from the left to the right, following the path on the illustration on the bottom. You can see that the start of the illustration, really you enter it on the right and you go towards the left. Usually you want to go from left to right, cause that's the way that the book is going to be experienced. There are always exceptions to the rules, such as a pause, but usually most of the time you go left to right. You also want to make sure that you just leaves in space for the text. Just have a rough idea of where you want to put the tax within the illustration. Just no planning for it at the stage is really helpful. For example, just having a rough idea of where the text goes is gonna help you when you move on to our dummy. Another thing you want to keep in mind when you're creating your thumbnail compositions is the perspective and where your character, here's our are your characters close up or far away. What's the angle that you're viewing from? Is it from above? Is an eye level. Is it from below, or is it from something more unique, like inside and oven? Consider changing your perspective or point of view throughout the pages of your book. This way, it'll be a bit more dynamic and a little bit less monotonous. Another thing you want to keep in mind is when you're designing your bigger spreads or even some of your smaller ones, you want to make sure you have, um, three different kinds of elements within the help give, you know, balance and the show, distance and scale. You want some item within the composition to be really close up. In this case, this is the big mom penguin on the left, as well as the bush on the bottom. You also want something in the middle distance. This is the penguin that's walking along the path with big backpack, and you also want something further away. So this is the mail box as well as the bus, and you can also include the back bushes in This is well, this helps, you know, bring it all together rather than it feeling too far away. This feels that you're just right there, um, also before sketching. It's important to know what your characters are gonna look like. If you join me in Class one already have those, right? If you don't ever characters ready, I'd do that. Now, before you move on the sketching your thumbnails so much happier characters ready? Let's get started sketching. So what? I start sketching my storyboard. I usually skip the cover and pages and copyright slash title page just cause I just want to dive into the story and do these at the end after I know how. My story is kind of looking visually and you can just go in any order you like. So here's my sketch for the first spread. Um, I just want to show you that you want to be nice and loose at this stage. Don't get caught up in the details. Um, you want to show movement, and you also want to make sure that your sketches have life to them. By this point, you might be wondering why these spreads have tape on them. Well, it's to give you flexibility in case you want Teoh replace it with a new spread. Let's say you messed up and you don't like it or let's say Hey, you know, this isn't really working on this spread. I should move. Ah, you know, a little bit over. So this. What? You don't have to redraw it again. I came up with this system myself, and it saved me so much time. So I really hope I helped you. Basically, you continue sketching and rearranging things until everything has played, has sketched and has a nice pace to it. Don't rush the stage. It could take me days, weeks or even months to finally get a sort board that I'm happy with. Take the time to look in the class material section at my finished storyboard of the tortoise and the hare. This could give you some idea of what your storyboard might look like. This finish your board will be very critical for creating your final book. Donny, once you've reached that stage, were you happy with your thumbnails and your storyboard? Join me in the next video where I go over some final thoughts and the next steps. See you then
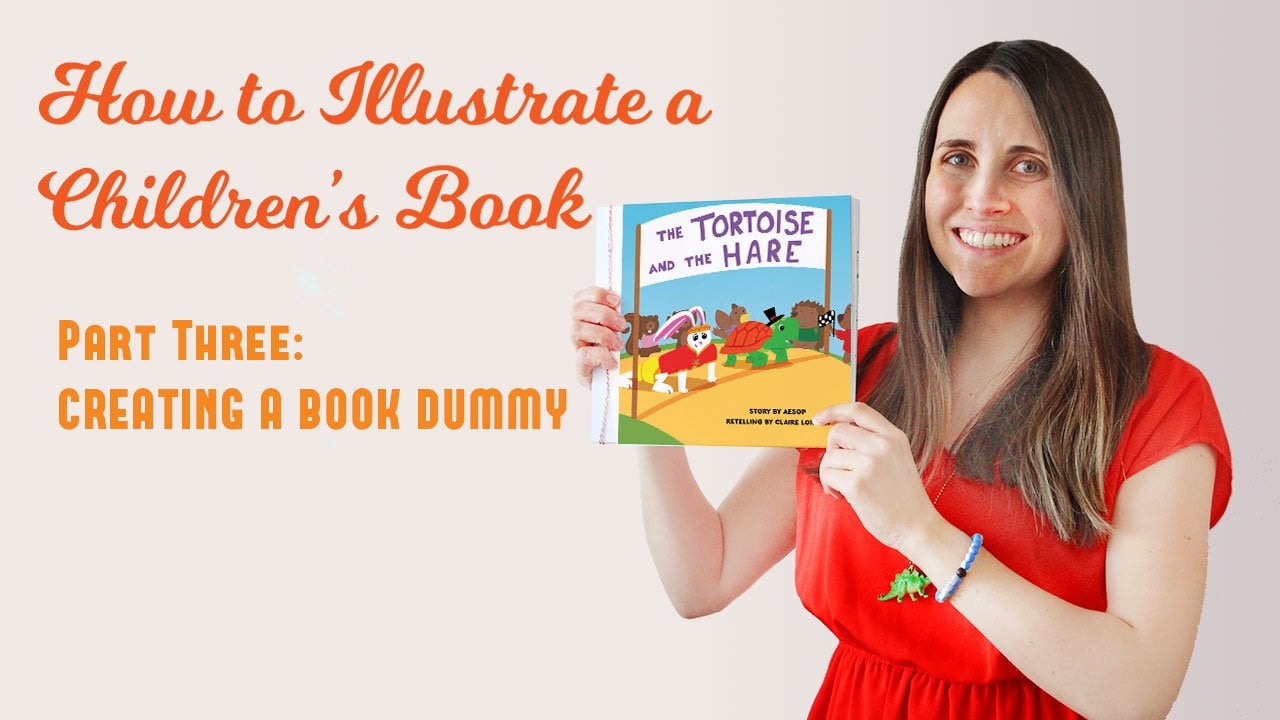
9. Final Thoughts: I just wanted to say thank you for joining me in this classic. I hope you learn so much in his class and had some funds to worry boarding and someday Ling Teoh. When you're having fun, it really shows in your work story boarding and some nailing some of my favorite parts of creating a picture. But and the final part of this class is to upload a photo of your storyboard. I want to see your projects, I really do, whether it's a storyboard of the tortoise and the hare by your own original story in Part three, the final class of the Siri's I'm going to go over how to create a Children's picture book , Danny, which is like a rough draft of the picture book you'll be using your finished the right board from this class to create your dummy, which will be a great addition to any illustration. For four years. I hope to see you in Part three, creating a Children's picture book that me thanks season
 Claire Lordon, Author-Illustrator