Transcripts
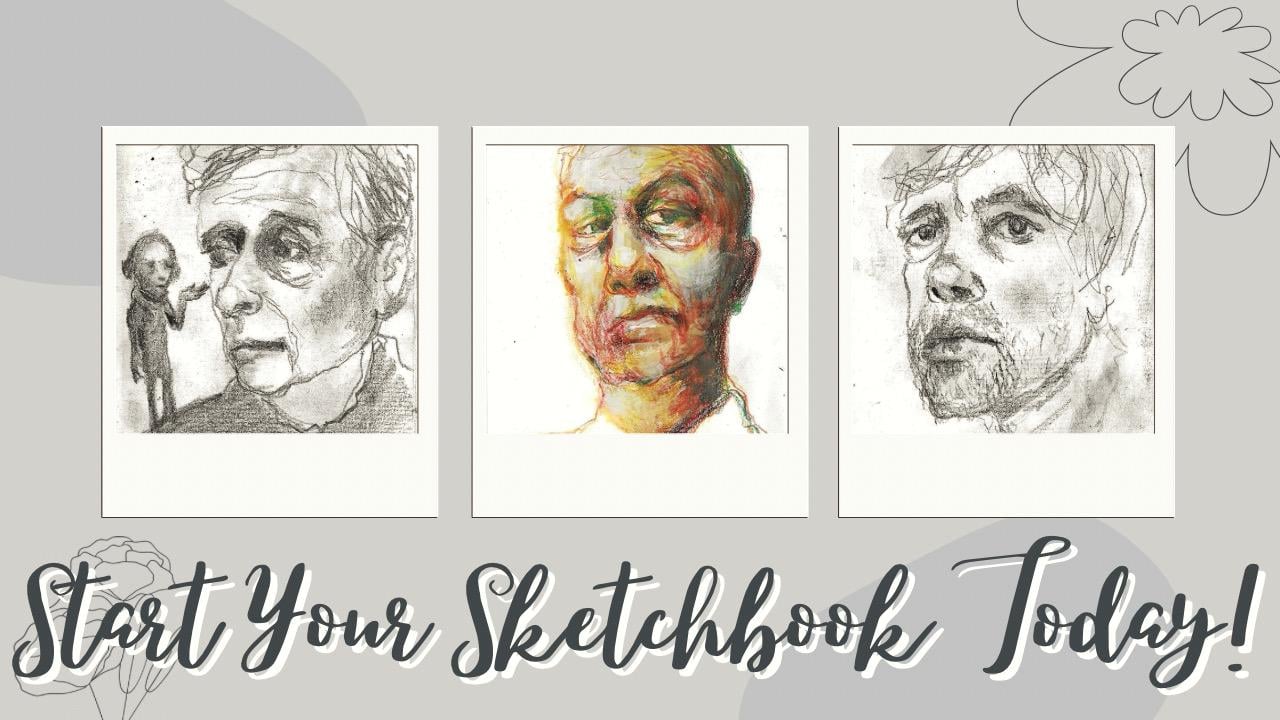
1. Small Portraits, Big Progress: Get better at drawing
portraits without all the pressure and getting
stuck in perfectionism. In case you don't know me yet, my name is Jerney Marisha. I'm a Dutch art teacher
living in Antwerp, and my favorite thing to do is to get you to create without being paralyzed by things like your failure or perfectionism, and that is why I want to
give you a creative habit today that can help you to improve your porto
skills over time. So if you or drawing
something that, you know, you're not a fan of right now, that's
perfectly fine. Just move on to a
second portrait or maybe a third and see how you will start to understand the face a little bit better with each
time that you draw. So don't put any
pressure on yourself. Just have some fun observing
and trying out things. Laugh at the wonkies. You know, they are
going to appear. I still draw wonky eyes
and noses and, you know, just keep drawing because if you actually
continue your portrait, instead of thinking, Oh,
no, I can't do this. I'm going to put it aside
and forget about it. But if you're going to
continue with your portrait, even though it's not
perfect or something, then you will see that
it has character, and it's fun to
see them develop. So yeah, just give it a chance. If you are fascinated by
the human face and you want to become a little bit better
than you were last week, then I think this class
will be up your alley. If that sounds good, too, then take my hand and let's go.
2. Welcome to Class: Welcome to class. I'm
so happy you joined in. Now, let me explain the
goal of this class. The goal is to make
lots of mistakes. In fact, we even will
massacre some portraits, and that's absolutely fine. In fact, that is what's supposed to
happen because we need those portraits to
get to the cool art when we persevere and
just keep drawing anyway. Every artist has lots
of failed portraits, yours truly, as well. If anyone tells you, no, I'm only drawing all the
perfect portraits all the time. They are a liar. We only post our most successful
projects on our Instagram. No, so don't worry about that. Just keep going, keep
them short and sweet, so we can progress
at a nice speed. You know, if we're going to get stuck in perfectionism and
spend hours on a portrait, that's wasted time, you know? We can spend more time on the portraits when we
feel comfortable with them. And I know there are quite
some lessons in this class, and you don't need to do
them all in one sitting. You know, you can
watch them so that you can see where it's going to. But just start with one little
portrait, and that's it. And see where that goes. Do you want to do
one more? Then fine. Are you so enthusiastic
that you'll keep on drawing
for the next hour. That's awesome as well, but we have to be realistic. We don't have an
infinite amount of time. So see what fits in your
schedule and your energy level. And your desire as well. And let's see what happens. To improve, it is
important that you will pull out your sketchbook
on a regular basis, whether that's every day or once a week,
that's up to you. But this is a creative habit, after all, and you will only improve if you
put in the time. So let's make a
deal that we will actually use the sketchbook
in any way that you want to. And I'm going to
give you lots of options how you can make it fun because that's the
most important thing. As long as you are
having fun with it, you will keep creating. And for the class project,
it's the same thing. You know, it's up to you
if you want to share. That's awesome. I
really love that. And the other students will
be inspired by that, as well. But if you want to keep it to yourself, you know, I know that, especially in the beginning, it's kind of hard
to share our art. And that's totally
fine, as well. If at a later point
in your exercises, you get something that
you want to share, there's no pressure at all. So be gentle with yourself. Now, let me show you what
you'll need for class.
3. Supplies: Let me show you my
little portrait kit. I have some graphite powder. This helps me to map
out the face before I dive in with my graphite pencil. You don't need this
to do this class, but it can be very handy if you're a little bit
anxious to get started. This is a nice bonus. And to apply my graphic powder, I have this brush. It has soft bristles, but thick bristles will
work fine as well. In fact, I also really
like to use that. And I have little sketchbook
that I like to use. It has cheap paper, and it doesn't really matter, you know, something that is rather small and
you like to work in. You can go a little bit bigger, as well, I'm comfortable
drawing this small, but don't go too big because these need to
be quick portraits, and the smaller you can manage, the quicker you can learn. Later on in class, I will also bring in some color. I'm using my ink tans pencils. These are water soluble
and very big minutes. But you can use anything. You can use watercolor
pencils, just color pencils. You can use something
like markers, you know, crayons,
whatever you like to use. And that's it.
That's all you need when it comes to
your art supplies. Now let's talk about
our reference photos. You can choose anyone you like, but it is easiest if they are black and white
and high in contrast. That just makes it a
little bit easier to observe the shadows
and the highlights. And if you go to my Pintrs page, you will find a
whole bunch of them. My favorite board is called
Faces and Expressions, and you can find all
the reference photos that I used in this class there. My name is Joni
Marisha there as well. So come and find me. Now, let's go to the next video.
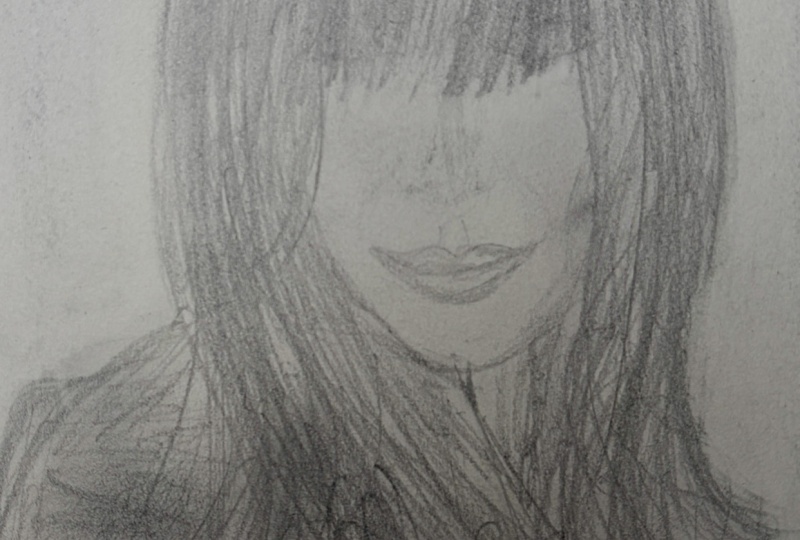
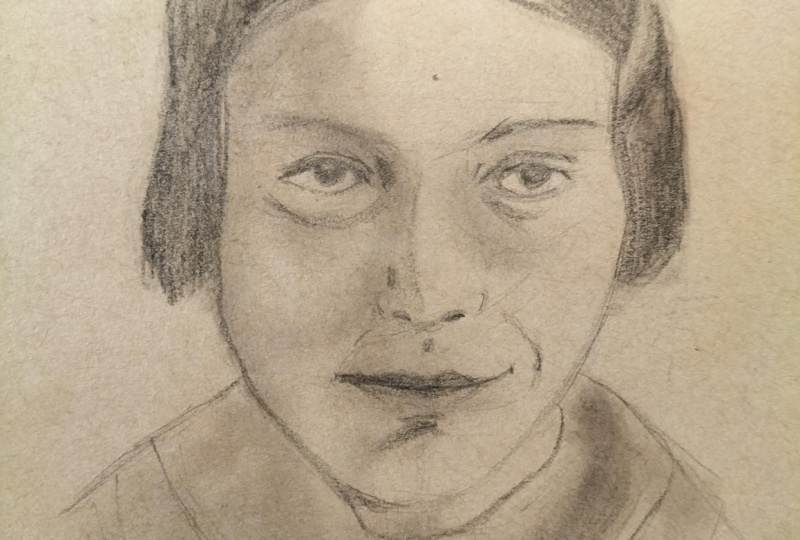
4. Tight vs Loose: For our first lesson, I would like to demonstrate the difference between working tightly and working loosely. So I have this reference photo. I'm using my iPad so that I don't need to print
out all the photos. So if you have one, it's ideal, but otherwise, you can
just print them out. That's okay, or use a
magazine or something, something that you
would like to draw. And I am going to show you the
difference between holding your pencil near the
back or at least here and using this death grip, you know, like you were writing, so let's get started. First, I'm going
to take my brush. I'm going to dip it in
my graphite powder, and I am going to
map out the face. Oh, yeah, death grip. Okay, so here I am doing things in a way
that's less ideal. So I can see this eye socket
there than the other one. I'm going to loosely observe these shadows the mouth
will be here, more or less. So shadow here. A bit more of that
graphite powder. So there's a shadow
here, here's the chin, and we have some
hair here. There. Now, let's do the second one. Going to do the same thing. But I'm going to be a
little looser, I hope. Here, the eye socket, the nose, mouth,
some of the hair. There. I'm going to very gently blow while avoiding my graphite
powder in my container. And already you can see that
this is very tight and this is more loosely. Okay. Let's do the drawing part
with the death grip. So I'm trying to
observe that face. Here's that eye. I'm putting
on constant pressure, pretty harsh pressure
to show you. And then I'm going to
observe that eyelid. Something like this. And we're going to draw everything in relation
to each other so that we don't need
to do schematic, you know, face because of the times you will end up with very similar
faces and expressions, and they're not that expressive. But now that I have this eye, I will look at this eyebrow. And I can see that it's fairly low and goes
something like this. Okay? There. Could
be lower still, but, you know, we're not
going for a perfection. Now that I have this eye, I'm I'm moving on a little bit towards left
and put in that nose. And I'm going to divide that in a couple of shapes so I can see the bridge
of the nose here. And here's the tip of the nose. And there are some
nostrils here. So again, my death grip, nostrils, right about here. I'm trying to stay
out of the weights harder with this grip. And then I have the
nose swings here there. It's a little V
shape in between. Then I can see the filtr here. So I'm putting that right here underneath the
middle part of the nose. And here I can see
that the separation of the lips is rather straight
and it's not too wide. She has a very narrow mouth. So that's what I'm
going to do right here. Goes a little bit beyond that
nosewing. Can you see that? Not much. So somewhere
around here, maybe. Then I can see the
upper dip here. I need to move this
a little bit because remember that filter
is here there. And then here is
that bottom lip. Okay. So I'm moving
over to Let's see. To this part. I'm
going for nutter. I. Again, we're not
going for perfection. And I forgot to explain there. You can see a little bit of the white underneath the iris, so I'm putting that in there. Then again, we have this eyelid. And right above it, we have a very straight eyebrow. Okay, so now, somewhere
around here is the chin. First, it starts
pretty straight. Then we have jaw line there, and here as well. So something like that. Then we have this hair here. Okay, so this is a slightly
wonky, very tight face. Now, let's do another
one right here. I'm just going to take a little bit more
graphite powder because I went over
it with my wrist. Something like this. Okay.
Yeah, that's better. Okay, now let's
take that pencil. And instead of doing
these harsh lines, I'm going to be more sketchy. So I can see that. See my
touch is way softer now. This goes up, then a little bit straight and
then it goes down. There's this pupil right here. I'm just doing little circles, light circles until I have
something that I kind of like. And again, I'm trying
to observe the shape. Okay. Go to do the eyelid. Observe it best as we can, but no need for perfection. Go to repeat this
until you believe me. Then we have this eyebrow
right here. There. There's a lot of
emotion in the eyebrow, so the slightest tilt is
going to give you an emotion. Okay, so going to I'm just going to space this out a little bit, so I won't put the nose in too much to the right because
there's a little bit of space between the bridge of the nose and the
corner of the eye. And again, I'm going to put in the bridge of
the nose very lightly. You can hardly see
it right here. It will help me to
establish the length of it better than if I would just start drawing that
tip of the nose here. So here's the tip of the nose. Let's put in a
little circle there. And then we can put in the nose wings,
again, very lightly. Start out very lightly, and later on, you can go over
it again if you want to. Then we have these
nose wings right here. Let's tackle that
other eye, as well. So a little bit to left here. I'm doing my best to observe
the shape of that eye. Not going to get stuck
in perfectionism. He's looking straight at us. So I'm trying to do that. And let's try and give her the bottom lash line. Go to put in the eyelid. And that straight eyebrow. A little bit bend it
downwards at the end. Putting in the filtrm right here directly
underneath the nose there going to put in the separation of the
mouth, rather straight. We were being very
sketching a little bit past the nose swing there. And then we slightly put in the upper ive there. Not going to go as
strongly as we did there. We're thinking in
blocks of value, so dark light and
not harsh lines. Then I'm going to put
in the bottom lip here. And this is a little bit
too straight for me. I'm going to do
little circles right here at the corners
of that mouth. Because it's not really a
line there. That's better. Then she has this
chin right here. It's a little bit straight
here at the bottom. Then she has this nice jaw line. We don't even need
to put in the hair. If you want to,
you can suggest it by putting down a
bit of graphite. But even that, it's going
to make it more tight. You see the difference
between right and left. If you did that accidentally, you can take a blending
stump and just go over it. So it's not there.
That's better, right? M. Now look at your portrait
and see if it makes sense. I can see that my
mouth is a little bit too much to left there. Oh, well, let's see if
we can correct that. Go over, that's harsh
separation between her lips because it's a little bit too
tight for me there. Et's put in a little
bit of shadow here. We can see some shadow here. We think of a face in lines, but there's a whole lot
of shadow going on. And that will bring some
form to your faces. Try not to push too
hard on your pencil. It's better to go over
it a couple of times. Okay. So now that we look at the two pass drawn from the same reference
photo, of course, I exaggerated this
one a whole bunch, but you can clearly see which one is way more
loose than the other one. The more often that we practice, the looser they will get. A couple of squiggly lines here and there is always
fun to play with. A try to reshape your
features bit by bit. This one can be a
little bit more messy. So now that we know how
to hold our pencil, if this is too hard for you, you can move to the middle here and just try to
draw sideways like this, and that will also give
you some nice loose lines. So now that you know, let's
move on to the next liston.
5. Adding Emotion: Let's take the same angle and try to up the
emotions a little bit. She has a similar expression, but because of that corner of the mouth that
is slightly tilted, she gets a rather
sinister look, I think. I think I don't
want to know what is going through her mind,
and I'm here for it. So let's give this a try. Okay, so Our nose is around here, maybe a little bit longer. Our mouth will be here. Something like that. Just so that I can
see it better. Okay. I'm going to
exaggerate the shape of her eyelid there
a little bit. Going to indicate her nose there. Am I doing a great job at it? No, and it doesn't
matter. Keep going. I can see that her left nostril is less visible than the
one on the right. And if I go upwards
from her nostril there, then I'll get the corner
of her eye there. Okay. It's the same shape as the previous one
more or less. Okay. That's put in those irises. I can still just a little bit. The eyelid is starting in the corner of her eye and then it goes upwards
a little bit. Her eyebrow is slightly raised, so I'm going to put that in. Same thing over here. And this one is a
little bit less raised, but it still goes upward there. Okay. Again, there is some
white of the eye visible. And just keep going over that line until
you're satisfied. There. Okay, that's
good enough for now. Maybe this needs to be
a little bit longer because there's white
of the eye there. It's better. It's
wonky, but it's fine. Her nose should have been a
little bit more to that side, but maybe I can elongate
this corner of her eye, and that's going to look
a little bit better. Okay? The filtrum
is rather short. This time, the
separation of the mouth is a little bit bent. So let's do that. Whoops. We can exaggerate
it a little bit. Something like that. You
can see this line here. There. That's where the evil
smell comes from, I think. See, I also forget that I want to keep my pencil
at the end there. So don't beat yourself
up if you have difficulty with that
in the beginning. Then the shadow
underneath her mouth. It goes a little bit
in a triangle here. She has a tiny chin, and it goes a little
bit like this. Okay. Not my best work, but
that is not the point. Point is to put in the work. And you can see some bags
underneath her eyes. We can put it in lightly there. We tend to photoshop
to get rid of that, but it's going to add
to your portrait. I'm going to push a
little bit harder right here to put some
focus on the eyes. If you make everything
as important, then your portrait is
going to look less alive. So try to play with that. The mouth and the eyes are most important. For the expression. So play with that. See,
the nose is not perfect, but it's still
emotive because of those eyes and the mouth here. Okay. That's enough time spent
on this little portrait. Let's go on to the next. Another thing that
is really emotive is when our characters
look away from the camera. That is why I do that to my figures a lot of the time.
I just like that. And we can try to really get it as close
as we can to this, or we can move them a little bit further.
Let's play with that. Okay. So It's a
little bit tilted. I'm just looking for
the angle, you know, because you'll see it
more clearly when you put your pencil or your brush there. It's way less white
than I made it, so I can still do
something like this. Okay. Um Okay. Let's go. This time, the eyes are
squinting a bit more so they are more narrow and they seem
a little bit longer. Let's Let's play with that. Again, hmm. Serve the eyebrow. Okay. I want to do the
same thing over here. Putting in the Iris. She's looking a little bit
more upwards, and that's fine. I just want to
play with emotion. Same thing here. See, I'm not making
perfect circles. It's not necessary. Okay. Nostrl nostril with a
little bit of shadow, so that's a good
excuse to be messy. There. Okay. Filtrm so you can see that the angles are not
perfect, and that's fine. Just use it as inspiration. I'm going to keep telling you because it's so easy to get
stuck in perfectionism. We're only looking to get
better and we're trying to observe emotions
and expressions. So as long as we're doing that, this is a success. Let's see. So this part is rather straight. It goes a little bit
upwards and then down. Okay. And this is enough. You don't need to put in all the details. You don't need to put in
the hair or anything. We are mainly going
to focus on the eyes and on the mouth because those are the most
important features. Still looking a little bit
too much towards us there. That's better. If that happens, you can make this part a little
bit longer, see? That helps. Okay. Going to put a little bit more
effort into that nose. Going to up the contrast here because as you can
see this is darker. It's going to create some form. If you don't want to
do that, that's fine. But it is fun to experiment with and really observe
your reference photo. There a little bit here as well. See it's not in the same
places in both eyes. Keep observing. H there. If this bothers
you, you can just put in that little circle again. See, it doesn't matter that there are some
graphite powder underneath. There's a little
bit of shadow here. You can put that
in if you want to. So you can experiment
with creating form without being overwhelmed
by the whole thing. Just focus on this
part of the face. There. Done. Let's move on
to the next lesson.
6. Evaluate Your Little Mistakes: Even though we're not going to get stuck in our perfectionism, it is important for you to evaluate your portraits
after you've drawn them. And then you can
see what you might, um, pay more attention to
for the next portraits. For example, in this lesson, I didn't really pay attention to the space
between the eyes. So the one on the left is a little bit too close
to the other one. And I will show you
how I deal with that so that I can still
make this portrait work. This is just for some
extra inspiration. You don't need to do that
if you don't want to. But, you know, if
you're interested, then let me show you. Now let's go for a slightly
more challenging angle. Let's see. So something like this. See how I'm looking for
the angle and I'm trying to replicate it here without
moving my brush too much. Okay. Then there's nose there. And the mouth is like this. Okay. Let's put in
some of that hair. Why not? A little
bit of it anyway. Okay. I think I'll bring these down a
little bit. Okay. I'm going to start with this e. I think that's put
in nose as well. Here, will be the tip of the nose or less nostril. And no swing. Okay, so that helps. Now I can see that
I want a little bit more down downwards
at the end there, putting in the eyelid. The iris is somewhere
around here. Okay. I like that eye.
Okay. Let's move on. So it's a little
bit closer towards the bridge of the
nose than what I initially marked, and it's fine. And see how that line of the eyelash will go
down a bit right here. You want to put that in there. Okay. Another iris. Let's not forget that
eyelid right here. I want to close it
a little bit more. There. That looks better. Okay. You need to not only look
at your reference photo, but you need to look
at your portrait more because we're
sketching rather intuitively it needs to make
sense on this page. Okay. Let's put in a little
bit of that shadow. And again, the eyebrow
starts rather low, then goes up and it goes
down again, a little bit. And this one is raised way more. So going to respect that, and it goes down a
little bit right here. Then we connect the
eyebrow with eyelid, more or less this goes upwards. Let's tackle that mouth. We're going to start with
a short filtrm right here. It's always underneath the
middle part of the nose, the tip of the nose,
where it starts. Okay. Then a little bit lower. Going to start with the
separation of the mouth. Again, it has a
slight bend to it. Going past the noswing would
be something like this. Mine is more angry. That's fine. Okay. That's sketching that upper lip. See how that dip is underneath the filtrm little bit more to the right
than we would think. And there's the bottom lip. Left part is darker
than the right part. Going to separate
the lips more to create some depth there. Okay. I like that. It goes a little. You can
see her cheekbone here and then goes
something like this. She has a pointy chin
and some jaw line. I wish I had a jaw line. Okay. Then we have that neck here goes a little bit
towards the right. Then next below her mouth. It's the other part of her neck, shoulder somewhere around
here and this goes down. There, that's accurate enough. A little bit of shadow
underneath her chin there. Don't even need to put that in, but to help you to understand what brings features more to the foreground
than others. Okay. Yeah, that's fine. Okay. Let's emphasize some of the features going to
go over that lash line. Is that a word lash line? There. And again, here's a
little bit darker. I don't need to get
everything right. I'll keep repeating myself. And you see that here, it's a little bit
of shadow as well. That's because the eyes round. Same thing over here. Little by little,
you'll get there. So again, is this a
realistic portrait? Nope? Did we get an
interesting expression? Yeah, we did. That is
what we keep focusing on. Just try to make small
improvements at a time. Sometimes you go too far
with it, and it's fine. Just go to the next page. Let's play with that
hair a little bit. There. Just some
faint lines are fine. What also helps is to take a moment to see
what you can do better. So next time I can
see I will want to nudge that eye a little
bit more to that side. Now, I'm not a fan
of correcting, per se, but let's see. Let's see if we
can still do that. If you really want to. I'm
going to get my needed eraser, warm it up a little bit. Okay. Now, let's make this the shadow that
we're seeing right here. Again, this is totally optional. Then we will put Iris right here and we'll just make this
a little bit longer. So this way, you can
practice improving your portraits without
too much interventions. And see, it looks way better. Let's see if I can smudge this
a little bit because it's a water soluble pencil
that I'm drawing with there. That's it. I'm not going to fuss over it. Maybe I want to elongate
that eyebrow, and that's it. Let's move on to the next one.
7. Drawing the Profile: Now, let's do a profile. These can often be a
little bit intimidating, but as with everything else, everything is hard
until it becomes easy. For this one, I'm taking larger brush with the bristly
brush with thick bristles. I like that more than this one, but this one was
easier to teach, so I'm going to switch. Okay. Let's wing it. I can see is eye right here. Then the nose should be
somewhere, something like this. Upper lip double chin. Something like this. Okay. Okay, see how much more
expressive that is because of the thick bristles and you
have a bit more to play with. Okay, I'm looking at that
nose right now and I see that I want to make it a
little bit longer. Okay. So there's my template. And I'm going to start
with his eye there. Just start with whatever feels easiest to
you in the moment. It can change depending on
the portrait and the angle. There. Then we have this this part right here. This is going downwards
in a straight line. So I'm going to
put that in there. Then we have kind of
triangle right here. Something like this. Let's put in some of those faults
in his eye lid there. I can see that I was a little bit too
high with my eyebrow. And the eyebrows very short. Goes a little bit downwards
right here, and that's it. Okay. There is back underneath his eye right here,
more or less. There. There's a little rounded edge right here and then goes
back up again and down. Then there's rather
straight nowing but maybe I'll wait
a second to put that in and focus on
the mouth right now. So about halfway could be a little bit more straight or whatever, it doesn't matter. So halfway This is going
downwards rather straight. There it goes a little
bit back in here. Now, his bottom lip is ticking out goes a
little bit like this. He has a little chubby
chin right here, and then Then it
goes down like that. Okay, so where does his
corner of the mouth stop? A little bit near the end
of his nostril, so here. Oh, it was rather, okay? It goes downwards with
that shadow here. And there's some shadow. I don't really want to
observe that right now, so I'm just going to
indicate that there's something going
on here and here. Otherwise, we're going
to get too fussy. That's fine. Nobody knows what that reference
photo looks like. Okay, so now, this
one is going up. There's this fold right here. It shadow here. And let's give him. This is all black and
you can do it like that, but I want to give
him an expression. You know what? As the artist, we are in control, not
a reference photo. It gets easier to make
these kinds of decisions, the more that you
practice your faces. So if you don't want to do that right now, I totally understand. But no, that is a totally valid option
to tweak your portraits. I don't know if you can hear
my sphinx, but I'm sorry. Sometimes he yells at me when
I'm filming for too long. Ears can be intimidating, but in the end, it's
the same thing. As with the faces, you just observe the shadows
more or less. There's a little bit here. And there's some shadow. Behind the ear lobe. You don't need to put it in, but it's good
practice, you know? What better way to practice
hard stuff than in your little book where it doesn't matter
how things turn out. It's all about the experience. Okay, something like that. If you want to, you can
take your eraser again and Put some of the highlights in there. If it bot or show
that the nose is so dark, you know, there. And that will also help
you to create that form. Mm See, there are no strict
rules for your faces. Just use these as a playground where you can
experiment with things, new things that you
haven't done before and see if you can find your own style of
drawing faces over time. There's no pressure
to rush that, but it will happen the
longer that you are drawing. I'm really enjoying all these little squiggly
lines right now. Here, I forgot to
observe this part. So it was too high. And now I'm correcting that just by drawing on top of
what was there before. That creates a nice
history and layers. That is what will make
a portrait interesting. Okay. I forgot about
his lip there, so let's put it in. Upper lip, nice and messy. I'm going to separate
slips a little bit more. Maybe you want to
observe the shadow. And I'm done. Let's move
on to the next exercise.
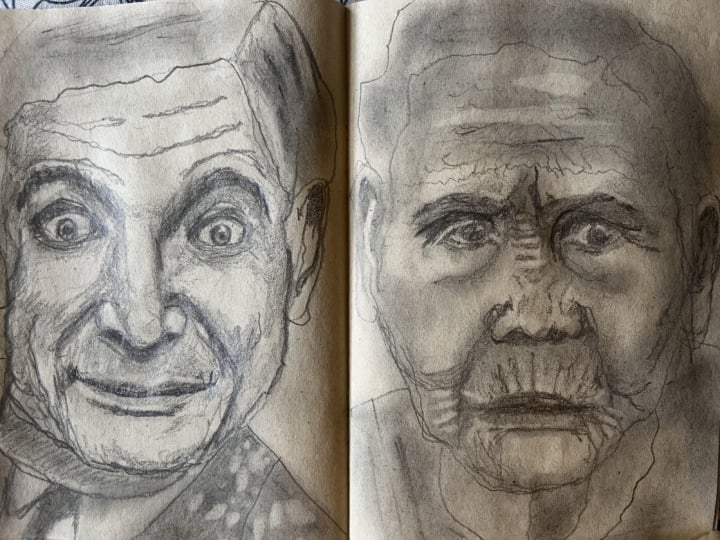
8. Speed Up: I'd like to show you something. We just did this profile here, and I do like it, but I did this one before from
the same reference photo, and this one is so
much more loose, and that is because I
was working in silence, first of all, this was just
practicing for this class. And I was working way faster than I did here because I was
explaining as I was going. So now that we see what kind of impact the speed of the drawing has, let's
practice with that. If it helps you, you
can set a timer for one or 2 minutes or
three, whatever you want. But if that stresses you out, then just try to work
a little bit quicker than you did before,
whatever helps you. So I am going to take this reference
photo from David Lynch, and I'm going to try and
keep it rather quick. So let's see. There nose. I can see shadow here, and let's put his
hair right here. Okay. I'm going to stop talking now because that's going to make it harder for me. Okay, so now that I have
his face right here, I'm just going to
put in some ice. Also very quickly while
I'm twisting my my pencil, putting in some bags
underneath his eyes, and maybe those creases here. And in his forehead as well, he has experience. That's it. Now, because his
nose is fairly dark, I'm also going to putting
a highlight here. And maybe here as well. And see how much looser Ivette is than the ones we did here. Just a bit of sloppiness. Let's Let's try another one. Okay. So there. Again, I'm trying to
hold it at the end here. It's going to create
looser lines. Let's emphasize some of these. Still holding my
pencil near the end. Don't be afraid to go
over the lines again. H. Something like this. Going to just touch the tip of the nose
again with my razor. Now, let's compare, maybe
that eye here as well. There. Let's compare. So here's our latest one, and here is the first one. This one is more accurate and it's also a great
drawing, you know. But I really do like
the energy of this one. So try to experiment with
that and see what kind of impact it has on your
drawings and which you like better because we all have
different preferences, right? Okay, let's go to
the next lesson.
9. Practice, Practice, Practice (& Repeat): As you could see in
the previous lesson, I tend to repeat my reference photos throughout
this little sketchbook. And that is for good reason
because repetition really helps with learning and getting familiar
with these faces, the angles, the expressions, and that is what you
really want to accomplish because the more you do this, the more you will
be able to do this intuitively as well without the need of a reference photo. And it's really helpful to build some muscle memory and understanding of
how the face works. So let's practice with that. I'm going to take this
new reference photo, and I'm going to do three
versions of that in a row. And again, the goal is not to make the most accurate
drawing of the person. But to really focus on the expression,
emotion, the shapes, you know, don't put too
much pressure on yourself, but have fun practicing and over time, you
will get better. You know, I keep
repeating myself. Let's start out the right
way or the easiest way. And, As you can see, with each portrait, I take a little bit more time to observe some more details
that I've missed before. In my opinion, it really
speeds up the process if you don't waste a lot of time with the first
couple of tries. Just quickly observe
the shapes and the placement of the features
without overthinking it. And you'll see that the
repetition of this action will familiarize yourself
with a face without getting frustrated and spending way too much time on them. And like in one of
our previous lessons, let's take a little
bit of time to evaluate after each
attempt and see what you did well and what maybe in the future one you will pay a little bit
more attention to. For example, this eyebrow on the right is a
little bit too high. It's really just
above that eye there. So if I would go
for a fourth one, then I would really pay attention to that and
try to improve that. Because even when our goal
isn't to get likeness, you will learn a lot
about expression and emotion when you
do this exercise. Remember, with each drawing, we get a little bit closer
to where we want to be. And over time, we will
get better at portraits, maybe not today,
maybe not tomorrow, maybe not even next week, but with some perseverance, I promise you we'll get there. And in the following lessons, I will give you some
inspiration to keep the process fun and inspired because that's how we're going to
stick to our habit. Okay. So obviously, I took a little bit more
time with this one, but you can clearly see evolution of me trying
to understand his face. I'm not used to drawing
realistically or anything. So yeah, here, it's
still kind of a mess. Here, I catch a little bit of his likeness and expression. And then here I think this
is pretty close to him. I loved him in Game of
Thrones, by the way. But I hope that I demonstrated through this exercise that the more time you spent
on a portrait, not particularly
within one session, but the more often you draw it, the more you understand
the face of that person, you know, all the
shapes, little nuances. And if I will draw him
maybe ten more times. I think I will become pretty close to the
reference photo. But personally,
that's not my goal. I'm just into an
interesting portrait and an interesting expression. So I'm happy. So, practice, practice, practice, and
let's go to the next video.
10. Goofing off to keep engaged: That you understand the basics, let's make some time to goof off because that is
what's going to make it fun and we'll help you to
come back to your sketchbook. I'm going to give
you some prompts and some ideas to
work with color, and I hope you will
enjoy it. Let's jump in.
11. Unusual Faces: Let's switch it up. We are not going to create a whole sketchbook full
with serious faces. No, we're going to add
some weird ones to the mix and challenge ourselves
to try and draw them. Okay, so I found this lady, and I thought she
was interesting. So I can see that her right
eye is a little bit lower. Then the other one,
her nose is also a little bit to blow croced then she has this mouth here. Something like that. Okay. Maybe I want there. Okay, let's start with her eyes. I'm going to start
with this one, so I can see that it
goes a little bit down. There's an eyelid here. Putting in whoops. I'm making her look
towards the side. Well, things happen. This one is a little
bit more upwards. Maybe I'll No, I want to make her
look more towards us. Okay. Let's give her goofy eyes there. Then her eyebrows
are really raised. So let's put those in there. Something like that she has huge bags
underneath her eyes. There. Okay. I can see the shape right here. There is a nostril right here. You can see a lot of it. There's another
round right here. It's a little bit
more to this side. There. Let's put in those nostrils. This one's a little bit thinner. Um, something like that. Now her mouth, how are we
going to break this down? So I can see. I'll start with the
inside of the mouth. Her bottom lip is pretty thin. Then her upper lip has a
little bit more volume. I'm going to get
my eraser there. Let's put on her
front teeth there and lots of little ones. There. Don't need to count
them or anything. Her corners of the mouth
are going a little bit upwards more on the left
so than on the right. A Now, let's see
about the chins. Somewhere around here, there
are a couple of creases. Slide crease here and a
little bit of shadow here. Let's see how high her ears. Her ear is a little bit
lower than that eye. Let's put in her curls. First. There. Okay. Let's put it here. And the ear lobe goes a little bit higher
than her mouth there. Let's see. A little bit of her ear lobe here and her neck goes
a little bit inwards. Let's put in that color. There. I like her. I can put in her earring or
something like it there. Doesn't need to be correct. And there she is our
wonky little lady. I hope you'll try to draw her. It doesn't matter how
she will turn out. It's just some practice. Having some fun,
keeping it interesting. Is going to get rid of that graphite powder here
to make her more dramatic. Can I still I want those
reflected slides in there, so I'll just darken
up some parts of her Iris there. Okay. I hope you'll join in
drawing goofy faces, and I'll see you in
the next lesson.
12. Give Them Some Clothes: Now, for this exercise, let's zoom in on the
clothes a little bit. Let's start out by
napping her out. Nose is a little
bit to the right. I'll do the closes later. Okay. Okay. Again, ether me wonky. It's going to be fun. Keep paying attention
to the shapes. A Okay. So her bridge of the
nose is rather short, then there is this tip
of the nose right here. You can see this shape
for her right nostril. Then the other one is a little
bit more round and lower. And there's this noswing here. Okay, and the other one is
also thinner. Like that. Okay. Now, we have this shape
of the shadow right here, and that can help
me to know where her other eye is right there. This eyebrows a little bit raised and goes a
little like this. Don't overthink it.
Just keep drawing. I'm going to pull this
one a little bit more to this side to make her look
well, not cross eyed. Something like this. Okay. Now, I'm going to
pull this up because I made the mouth shadow
a little bit too low. Although it is
still kind of low. She has a large space between
her nose and her upper lip, so I'm going to put in
the filter right here. Then her mouth is a
little bit droopy there. She has in a thin upper lip. Her bottom lip is a
little bit more plump. Let's put in a separation here. Something like this. Okay, she has kind of a squared. Let's start with her
chin right here. Something like this. And then she has this
kind of I'm exaggerating. That's fine. She has a
full jaw line. There. Her ear starts approximately here with her eyebrow, there. Okay. Something like this. I made her mouth a little bit
too low, and that's fine. Okay. Now, let's give
her some clothes. So I can see
something like this. And her jacket is
going this way. I'm just going to break
it up with the face. We're going to
simplify it because, you know, I'm no expert at
clothes, and it's fine. Let's put in that pattern. I don't need to be correct, through the repetition,
it will look nice. We have a broader
band right here. Just going to do a couple lines and then we have more of
these marks on each side. Don't need to space
them out very neatly. Here I can see a
couple of those marks. It's not all the way up here, and then we're going
to do the same thing. The very regular. Next, I can see
another bend here, it starts out a
little bit broader than here because there's
a crease somewhere. And now we're going to
just keep it at one side. Here, it's more
like little dots, and then they will get wider. Another one kind of here. And we're going to
do the same thing. Okay. Let's get
some of the powder. It doesn't need to
be black black, but we're going to
give it some volume. There. There she is. I can go over that line here to
make her less like a doll. Make it a little bit
wobbly and more fun. Going to go over her yes again because I was a
little bit tight with them. M. There we have a moody portraits
with some clothes on. Whenever you have a reference
photo and the clothes, they interest you,
just put them in. Don't need to do it
for all of them. Only whenever it
seems fun to you. These are your projects
and you do what you think is interesting.
Let's go to the next one.
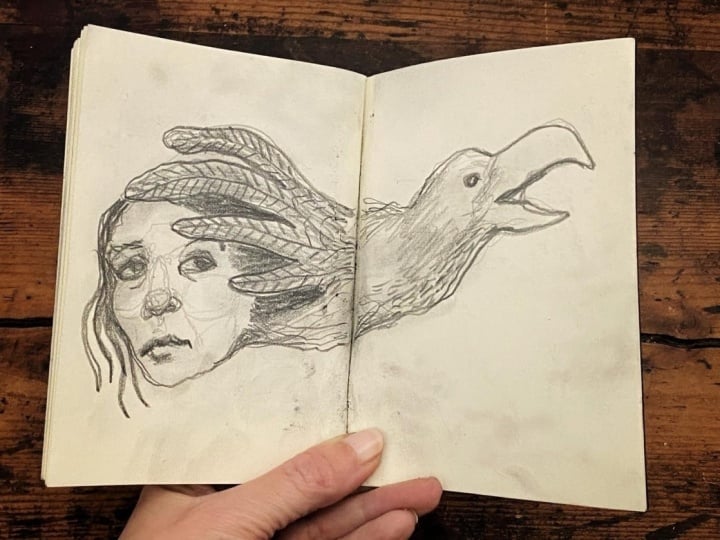
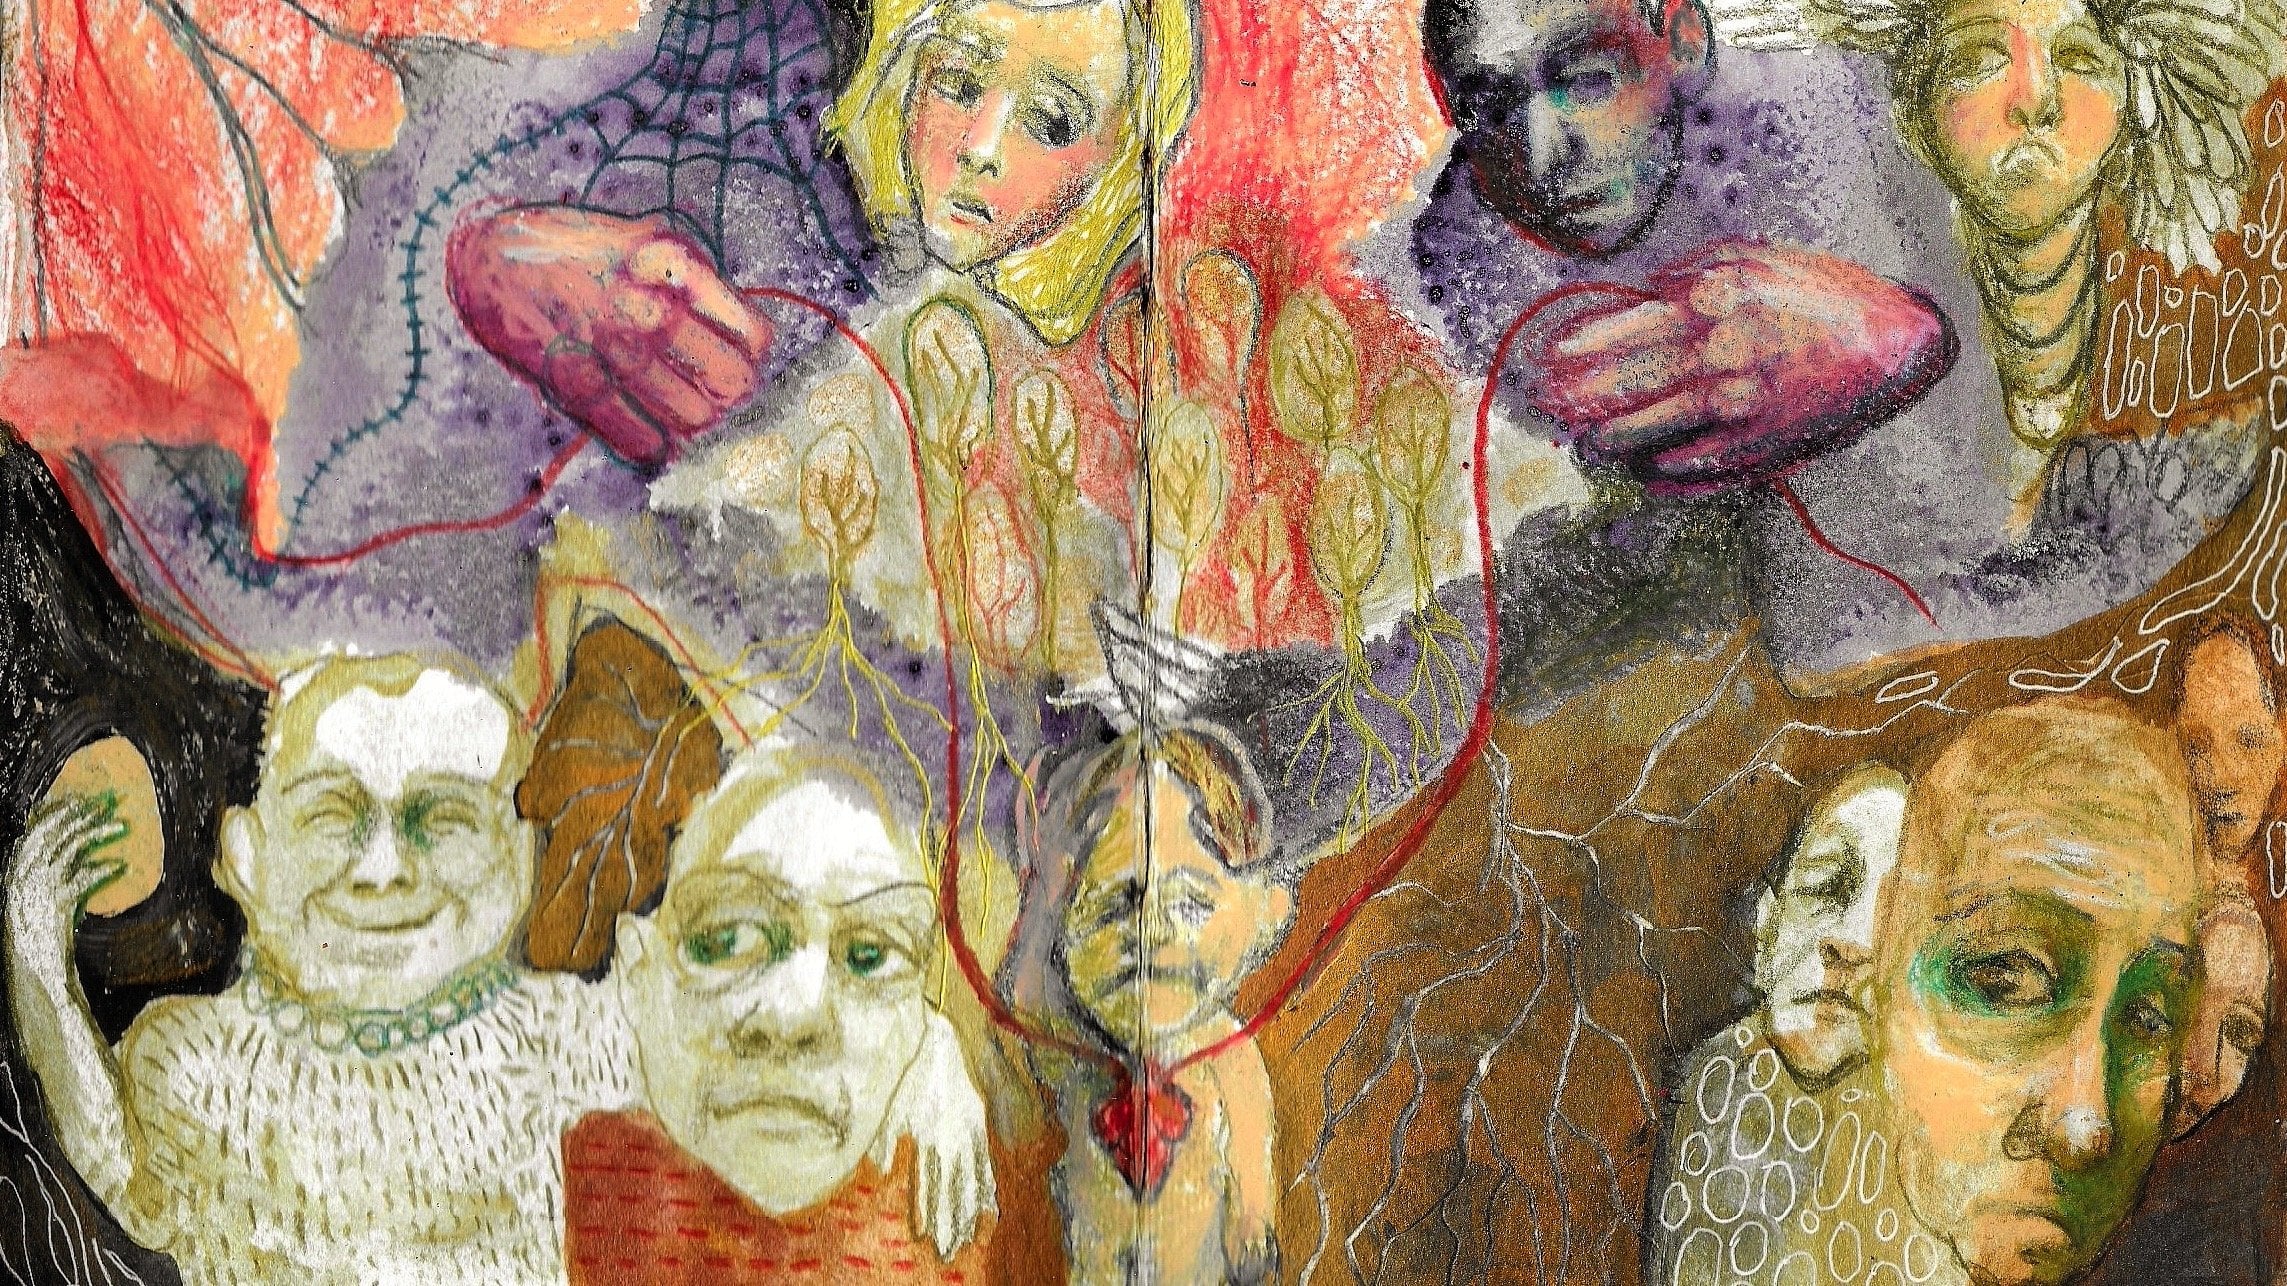
13. Storytelling: In this exercise, let's
explore storytelling. So, in addition to your
portrait practice, you're going to add one or more elements that
could tell a story about it. It doesn't need to be very
detailed or realistic. You don't even have to know
how to draw something. Just follow your gut and, you know, mess
about a little bit. And if you notice that you
get a little bit anxious about drawing something without exactly knowing
what it looks like, I suggest that you spend
a little time on Pintras, look at some cool artists, and see how they go about it because a lot of them
just draw things, you know, from their gut and they don't really
care about realism. Illustrators are also
very good at this. So that's another option
if that's more your thing. And just spend some time with
their art and ask yourself, how do I feel about
this? Do I like this? Would I like to explore this? Then maybe it will become a
bit easier to just let go and draw things from memory and maybe a little bit
schematic and exaggerated, you know, have some fun with it. You can draw certain objects or animals way larger or way
smaller than they actually are. And that can also tell a story about what's going
on in that portrait. You can distort your portraits or the thing that you
have added to it. For example, you can make one
eye really big or something or the ear and maybe have someone whisper
into it or shout or, you know, add
something that makes you chuckle or makes
you think, you know? Maybe you want to express a view that you have and you wish
more people would understand. You can be political about it. Anything that gets you excited about creating,
try to explore that. And notice how I'm building this little figure
on a shoulder. It's more sculpting
than drawing, really, and I'm not going
to go in too much detail. I just want to find the shape, put in two little eye sockets, shed underneath the nos. And I'm just going to focus on the gestural
part more than the details because body
language is way more important than the right
proportions and realism. No, they can be perfectly wonky. But if their body language
is more or less clear, then the story will
still come through. See, I'm creating a little hand there without actually
drawing a hand. Our brain will fill it
in this must be a hand. So don't worry about that. You can keep it like that or add a couple of marks
to suggest fingers, especially since you're
drawing so small, this will look way
better than trying to draw all the fingers
separately. You know. Just be expressive about it. And sometimes we have a clear story in mind
before we get started, and we can approach
it like that. But you can also just pick any subject and try to
think how you can add that to your portraits and just
draw it that way because often of the times we will take things too seriously
and we make it too heavy. So if that is the case for you, then just add something random and maybe just maybe
as you're drawing, your mind will link some
kind of meaning to it, and then you can react to
that while you're drawing. Sometimes our
creativity just needs a little kick start
without overthinking it, and then our intuition can take over or not, and
that's fine, as well. Just see this as playful
exploration instead of having to produce something
that has lots of meaning, you know, that will suck the fun out of creating and I don't want that for you. So if it helps, let's be random. Let's be messy. Let's not give a
single you know what about how it will look
and what it will mean. Just draw and have
fun and explore. Now, let me get off
of my soap box. I'm going to put on some music, and you can see me drawing a couple more examples of
how you could tell story. I hope my examples
were helpful to you. Just relax, be weird, and have some fun with it. There's no pressure. If you feel like you
want to bring in some color or maybe even paint, I say, go for it. This is your sketchbook and you get to make
the decisions. And if you don't
know what to do, then just scroll through
some art, maybe on Pintrest, maybe somewhere else,
and find yourself a little story that you enjoy
and just copy that one. Now, we have to start somewhere. Now, let's go to the next video.
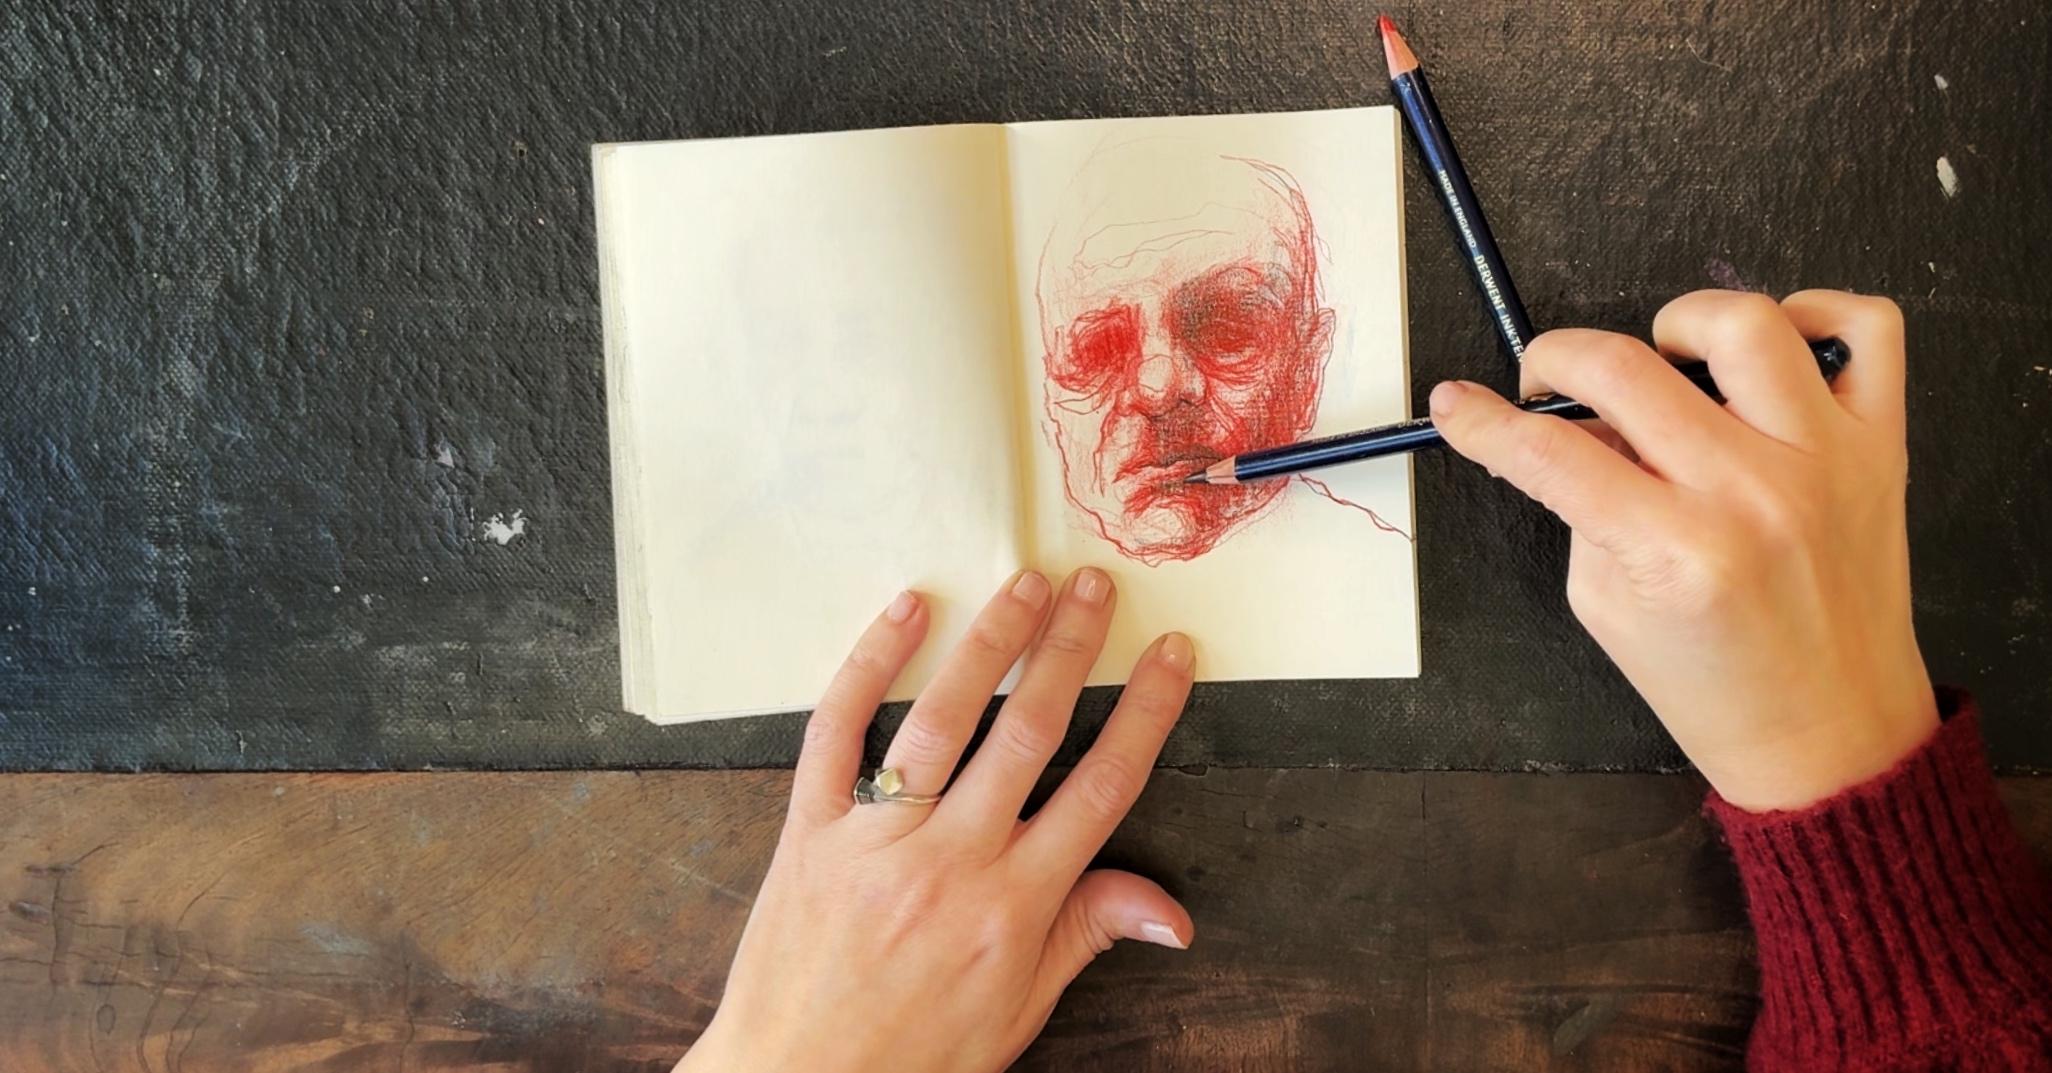
14. One Accent Color: For our next portrait, let's add in a little bit of
color to again, mix it up. I'm going to do another
challenging portrait, just for the fun of it. This guy with his demonize
and let's map him out. His mouth isn't that white. His attom lip is thinner
than his upper lip. And there's this
crease right here. Just try to observe
as much as you can without getting too fussy. Has this fun has right
here. Let's see. Oops. There. There's an ear right about here, but you can't really see, so let's cover that up. Okay. Let's see, am I
going to give him demonize or maybe I'm just going to give him some eyes
that I'm making up. When you do enough faces, it's not going to be a problem. Now, let's get color pencil
or my neo Color cream? What is this ruby red? I like scarlet. So, here is the middle piece, then this goes
something like this. Again, make it wobbly. So much more fun than
trying to make it straight. This is a nice little exercise to experiment with
just a hint of color. And see what kind of effect
it has on your drawing. You can experiment with
different attributes or you can maybe color
in part of the face or, you know, experiment with
different colors as well. Just try what you can
do with this There. I wish you lots of fun
with adding your colors. And yeah, I'm very curious
what you will come up with. So, you know, if you have
something that you like, upload your class project
to the classroom, and I will go take a
look and cheer you on. Okay, let's go to
the next lesson.
15. Double the Fun, Stack Your Portraits: Et's do another experiment. Okay. I'm taking two colors. This is seabreeze and Fuxia. And we're going to
experiment with drawing two faces
on the same space. Just going to do loose faces, loose and wonky
faces. It's all fine. Okay. So we're just
going to go over it. Oh This is not so much trying to
create perfect faces again. This is just a fun little
experiment while we are practicing our drawing so we don't get bored, you know? Getting bored is
not a good idea. Oh I really like this exercise
because it seems to connect the two random
portraits and tell a story. Maybe she's thinking about
her mom or something. You can try out two totally
random portraits or you can pick out two people who seem to have a
relation to each other. Just play with this concept and see what's going to show up. I hope you like this exercise. Now, let's move on
to the next video.
16. Exploring Form: B For this lesson, let's pay a little
bit more attention to creating form in our faces. When we only use lines
to draw our faces, they will look flat. But when we observe the shadows and the lights and we try to work
them in our drawing, then our faces will come to
life and we will create form. Don't worry about doing it exactly like in the
reference photo. You know, we talked about this perfectionism is overrated. Just try to use your photo as inspiration and allow yourself to not get it 100% correctly. It will still look amazing, and let's not overthink
things and just draw. For this exercise, let's use color to observe
the shadows. I think this portrait
is suitable. It has a lot of shadow
and you can't really see the details in
his eyes too clearly. I'm just going to
put the pencil on its side so I can work
in blocks of value. Here is his eye
that's closest to us. I'm going to observe
eyebrow shape and I'm going to go
a little bit heavier where his eye would be then there's this
bag underneath his eye. I'm going lighter here. There's his eyebrow. Let's move on to his nose. Here would be the bridge
of his nose more or less than he has a big
tip of the nose. Putting in a circle like
this, barely hidden paper. There is a nosewing right here, and here as well. He has a shadow here
underneath his nose. Then M. He has this mouth, left one left side is a little bit shorter,
goes downwards. There's this shadow underneath
his bottom lip right here. Then he has chin
somewhere around here. Here's also some shadow. I'm going to put in the back underneath his eye a
little bit stronger. Then his ear starts
here more or less. There. Let's move over to
his second eye. It's a little bit
lower than this one and goes downwards like this. We can make up lines
as we go as well. Don't need to get
everything correctly. Let's press a little bit
harder now, not too hard. Just want to create some
more form and contrast. There's more shadow
here, shadow stronger. Let's see. There's
this crease here. Just keep observing. There's a crease here as well. Let's put some more darkness
here with his mouth. There. This side is darker. See so slowly you are
really sculpting his face. Let's make his nose a
little bit stronger. There. See, instead of we've just taken it piece by piece. We're not going into detail. This is a great way to make
a portrait more anonymous. Okay. Also, to not let yourself be distracted
by all the details, observing the shadows here. And by doing that, you'll get an
interesting portrait. You can put in a
couple of lines, but don't overdo it. Okay Okay. So now that we've
found his face, let's take this deep indigo or another darker color
and this Persian red. And let's see. I want to pick one side. I think I will pick this side, and I will emphasize
parts of this. I want you to look at this eye I'm going to put a
focal point there by just coloring on top of that. There. I just want to put in a bit more shadow on
this side of the face. A I just want to see what this does
to the portrait. Did it make it more interesting
or did I like it before? Kind of like it before, but did look a bit flat before
I continue with this step. Okay, so I like this, but I miss some of that red, so I'm just going over it again. And this way, it will mix in with that layer underneath. Try to see each portraits
a little experiment and do things to your portraits
just out of curiosity, here I'm trying to bring that nose to the
foreground a bit more. Oh, yeah, that's
better. That's better. See that shadow goes
over its mouth here. Let's see. See, you can put in some lines, but start by really
observing those shadows. And then you can play. Just play with your
portrait until you like what's happening
or until you destroy it, because let's face it,
that happens sometimes. But we don't get to
the interesting part without our failed portraits. So don't be afraid to do something that
you're not sure about. See, he's getting
an eye right now, the one and not too defined. Because we're still mainly
focusing on the shadows, even when we're
putting in line work. We need a little bit of linework to make it more interesting,
more expressive. Otherwise, it's
just going to look like smudged attempt
at a portrait. No, we're going to be bold and going to take risks. Going to make scratchy little
marks interrupted lines. Bottom line is that we're
going to have some fun with it without worrying too
much about the outcome. Now that I have that red here, I also want to put it on his ear there without putting
too much detail in it. I don't want to make
this into an actual eye. There. Let's see. Going to put a bit more
focus on his nose right here on his mouth. And Just listen to your gut. Take the time to observe your portrait
every now and then. Just stop for a couple
of seconds, look at it, and ask yourself, what do I want to do right
now and then do it. And I think I think I'm done with my
play session for now. And I hope you will try this two pencils and a bit of playtime while
you're observing the shadows, and you can exaggerate
them like I did here and just see what it is that you like to
do in your portraits. Have fun experimenting. Now let's move on
to the next lesson.
17. Dynamic Portrait in 4 Colors: Let's play a bit more with color or maybe rather
with a bit more color. I have a couple of
colored pencils. I have a very light yellow. This is sun yellow. I have two red, Persian red and a
darker chili red. And I have sea blue, and I'm going to build up the portrait with a
layer of each color. So my yellow one, I'm just going to move these. My yellow one will basically
be my graphite powder. So I will map out face
with that more or less, observing the
features and shadows. And you will barely see it, but you know what
I'm doing, right? I'm observing that nose here goes a little
bit off to the side. Then there is some kind
of triangle happening. And the beauty of
this yellow is so bright that even when you're
making some mistakes, you feel hardly you will
not notice in the end. So just take a
little bit of time. This is his wild hair. Take a little bit of
time to get to know his face in a very
low pressure way. He has this cheekbone here and then it goes
rather straight. He has his mouth here. Something like this. Shadow underneath his bottom lip and then he has this chin, put it on this way. There's a lot of shadow here underneath his
cheekbone on the other side. His ear is rather high. The something like that. Now I have a good idea of what
this face will look like. I can even be more confident
with my linework now. I can see that I need
to pull this downwards. It's a great way to position all the features without
having to deal with anything. I'm going to create
some loose lines, especially with his hair there. Yeah. Okay. Okay. Let's go to the second
color, my Persian red. I'm making thin cribbly lines. While I'm still
observing his face. But the pressures off, because we already sketched
out his face there. Something like this. There
are some wrinkles here. I did something weird
here with this eye, but we have colors,
just keep moving. Okay. Remember, you don't need to nail his
expression exactly. It's just practice. Can now see that here is the
darkest spot in his hair. There's some darkness
here as well. We have some hair
going this direction. That's enough. Let's see. We have this crease
here next to his lip. And we have some
shadow right here. Looks like a butterfly
tie at a well. I think that this looks
a little bit boring. I'll just take my
first color again and fill this area up. There are no rules. If
you forgot something, then just go back in
and have some fun. Make bold marks there. Okay. There's a little bit of shadow
here underneath his neck. There. Okay, let's take a red. Okay, let's press a
little bit harder now. Because I needed to
fix his eye there. There. Going to the same thing here with his nostril or rather the shadow
underneath his nose. It's a little more
shadow right here. See, because of these
layers of color, it's going to look
very interesting. We don't need to
trace everything. I can leave eye eye, his ear here very faint because who is
looking at ears anyway? It's all about the expression. Okay. And now let's take the blue one. I'm going to use
this one sparingly, I think, but I do want to
emphasize his eyes there. His eyebrows. So you can still make some subtle differences
in the eyebrows by just putting a
couple of marks. This is a really fun
way to play with color. And marks. If you're doing this
exercise and you don't like, it goes for any exercise
in this class, of course. But if you don't like
what you've done, then try a couple more
because it just takes time, you know, to get used
to a way of drawing, to see if there is
a way that you like We tried to offset some
of the lines as well. I really like that
for the buttons here. And let's tackle that hair as well. A little bit. See, I'm choosing
where I'm going to put that color and there is
no right or wrong choice. There's only your vision. Just experiment. Okay. I can have a really light touch as well
like I'm doing right here. I want to put in
some of the shadow, but I don't want to have very dark marks because
I want a layered face. So wrinkles. Let's put them
in there very lightly. There. He has a bit of fun. Um, I hope you will take your time
playing with this. You can choose a couple of
colors and switch them up, see which combination
you like best. Maybe you just want three
colors. That's fine as well. But make sure that
there's a light one, kind of mid tone, and a dark
one to put as final layer. Let's move on to
the next lesson.
18. Bless The Uglies, Use Them as a Playground: Whenever you do an exercise and you don't like the outcome, I would like to invite
you to see it as an opportunity to play
instead of a failure. Because what better
place is there to experiment on than something you don't like anyway, right? You could collage on top of
the parts that you don't like and leave the bits that you
are satisfied with uncovered. You could paint over the features that
you really dislike. So for example, you paint over the eyes to convey that you are blind to the truth or
something or you can cover up the mouth to express
that you feel silenced, you can then put some
text over that paint. You know, whatever comes
to mind, just do it. What do you have to lose? Drawing that you already
didn't like. So go for it. These surprise projects
are a great way to discover new mixed
media techniques or something that you would love
to explore on purpose in a whole new different portraits
or other kind of project. So relax and just draw and know that even when it doesn't
work out as you wanted to, you can always do
something exciting to it. Or, you know, you can be
underwhelmed with that, as well. But it doesn't really matter. It is not about the end result. It's about the experience. And that's the whole point of
this creative habit anyway. It's about gathering experience, finding out what you
like, finding your way. It's not about making a perfect little
sketchbook that you could put in a library in an
exposition or something. Or maybe you could because
it's cool to see our progress, you know, even if it's your own little library
and private collection. It's really fun to look back at these sketchbooks and see where you came from
and where you are now. Now, let me tell you
what I'm doing here. I'm mostly observing
shadows here for this face. First, I'm building it up by volume rather
than a lot of lines. Here I'm observing
the shadow underneath the mouth and the chin
there with dimple in it. And when I think I
have his expression, I am pressing harder
where I can see stronger shadows on
his face like this. I'm trying to find that ear, so I'm comparing the position with the features that
I've already drawn, and that is how I establish
its size and position. And I actually rather like this stage of
the portrait with just the one color and
different pressures that I put on my pencil. Things go south when I introduce
different colors to it. It's just not to my liking, but I continue anyway because
I'm a curious person, and I would like to see where it goes even when I don't
particularly like it. I also don't like that I
put a line around that ear. Immediately, it really
stands out in a bad way. I'm creating his shirt
with very loose lines. And I'm going to observe him
for a little while longer. By the way, this portrait
looks nothing like the reference photo when it comes to where
his features are. So there's no likeness, but I did catch his expression and his contempt that I really liked in
the reference photo. And that is what you want to accomplish in your
little portraits. Just catch their expression. And when you're ready
for it and you want to, you can always go
for more likeness. And if you want to do that, you really need to pay attention to where all the features
are on the face, the exact distance between
them, and all the angles. And I am just not really interested in doing that because that doesn't matter to me. But if it matters to
you, then go for it. But first, let's get
used to portraits before we set such
goals for ourselves. Just play for a little while. I'm already starting to
like him a little bit less. I thought red would
look better on there. But I just keep on
going. You never know. Sometimes you dislike something in the beginning and later on, it will pull together. So if halfway through, you are not liking what you're
doing, don't give up yet. Just keep practicing
and hope for the best. I think that this might
work better if I would do some hatching to create the shadows with the red
on top of that yellow. So that might be something to try out with a
different portraits. You know, don't give up
on an idea just yet. Try different
approaches and see if that can change up the vibe of your
portrait in a good way. Just keep searching
with an open mind to find ways of drawing
that you enjoy. It might take a while before you figured it out,
but, you know, it's no time lost because on
the way you will just keep drawing and figure out the face a bit more with
each and every drawing. Once again, I'm pressing a little bit harder
there at the end around the features that I
want you to look at most. So the mouth and the eyes, and here is where it
starts to go wrong. Right now, there's
you know, it's right. I'm putting more focus on those
eyes. Nothing weird here. I do notice that my
sea blue is making a green there where it touches the yellow,
which makes sense. But I ended up not really
liking that shade of green. Separating her lips. All good. Nothing horrible so far. But now I'm starting
to go overboard. I don't really like
that line on his jaw, on the ear as well. I'm trying to fix it by going over it with red
which doesn't really help later on you'll see me go really heavy in the
shadow area with my blue. Then I was really unhappy
with it. You'll see. H Okay, time to play. Let's see if we can
rescue this guy. I am taking some acrylic paint, my Titan green pill, fluid acrylics from Golden. And I can tell that this
is not the right value. It is not light enough. I was hoping it
would be, but no, but have no fear because
titanium white is here. I didn't have that in
the fluid acrylics, so I, I'm just taking
my heavy body acrylics. And I'm putting it on there because I want
some highlights. And it's very strong. So what I'm doing is I'm carefully dipping
my brush in the water, and I'm trying to move
around that paint. And it's alright, I guess, but I'm deciding to dip it some more because I always
have to take it too far. And now the Stab al pencil is moving and mixing
in with each other. And the colors will
be a bit muddy, but, you know, I don't care.
Let's see what happens. I'm moving my brush with the direction the skin would go, if that makes sense. See, so I'm going over
that whole portraits, mixing all those colors,
see what happens. I'm going to dip it
again in my water, and I'm going over everything. And this lack of control
is really liberating, and it can give you
expressive results. So if you are using
ink tense pencils or maybe watercolor pencils for
your portraits and they feel a little bit stiff
or overworked, I hope you will try this. And if you don't like it, you can go back in with the paint like I'm
doing in a minute. And if you don't like that, you can go back with pencils
again on top of that. And you can just layer
and layer until either you're happy with it or
completely done with it. It doesn't matter. Again, it's about the experience
and trying out stuff. Right now I'm going in with a very watery acrylic paint to put the highlights
back in there. And I rather enjoy that. I think it has really
loosened up my portraits, and there's a certain energy to it right now that
I'd lost before. So whenever you are really disappointed in one
of your portraits, just use it as a playground
and have some fun. I hope that you enjoy
this inspiration. Let's go to the next video.
19. Your Turn: I hope you enjoyed all lessons, and I wish you lots
of fun exploring them and filling up your
brand new sketchbook. If you would like to explore portraits and drawing
loosely further, you can check out
my profile and have a couple of interesting
classes for you. I have some charcoal classes on portraits and drawing loosely
that I think you'll enjoy. And I even have one where I teach you how to create
portraits with jelly plate. So if you have that at
home gathering dust, then that would be a great
way to get into it again. If you want to,
you can share with me what you thought about this
class by leaving a review. You can tell me what you
enjoyed about the class or what you maybe missed
and you would need some more explanation for. And that really helps me
to improve my classes and to maybe create some
mini classes along the way. You know, I'm always
willing to accommodate you. If you tell me what you
would like to learn, then I can see what
I can do for you. But for now, I wish
you happy creating.
 Jerney Marisha, Helping You Create With Freedom