Transcripts
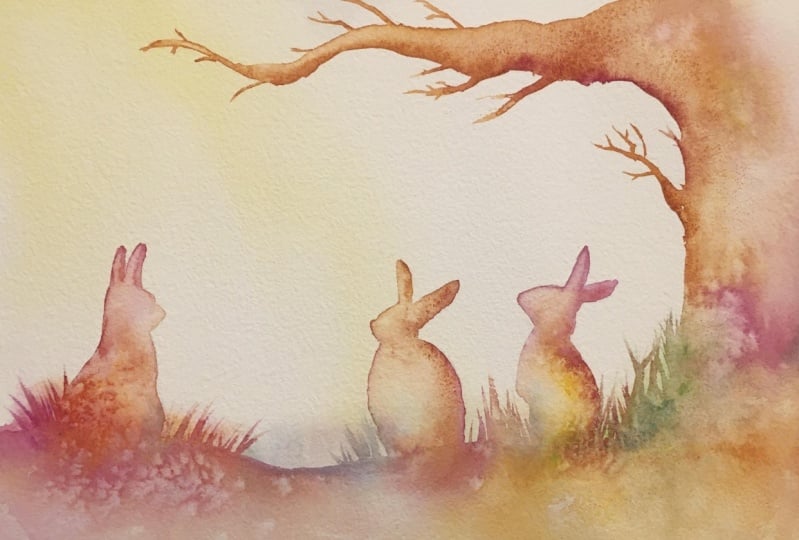
1. Introduction: [MUSIC] Hello. Welcome along to this all
levels watercolor class. We're going to show
you how to paint these cute bunnies
chilling in the sunshine. This is a wonderful class
to get your creative juices flowing and to remind you that water color is
a huge amount of fun, and that you just need to relax and bring out
your inner child. The one that lacks
inhibition to simply play. If you're just starting out
on your watercolor journey, this lovely simple class
is perfect for you. It will introduce you
to a lovely way of painting in a loose,
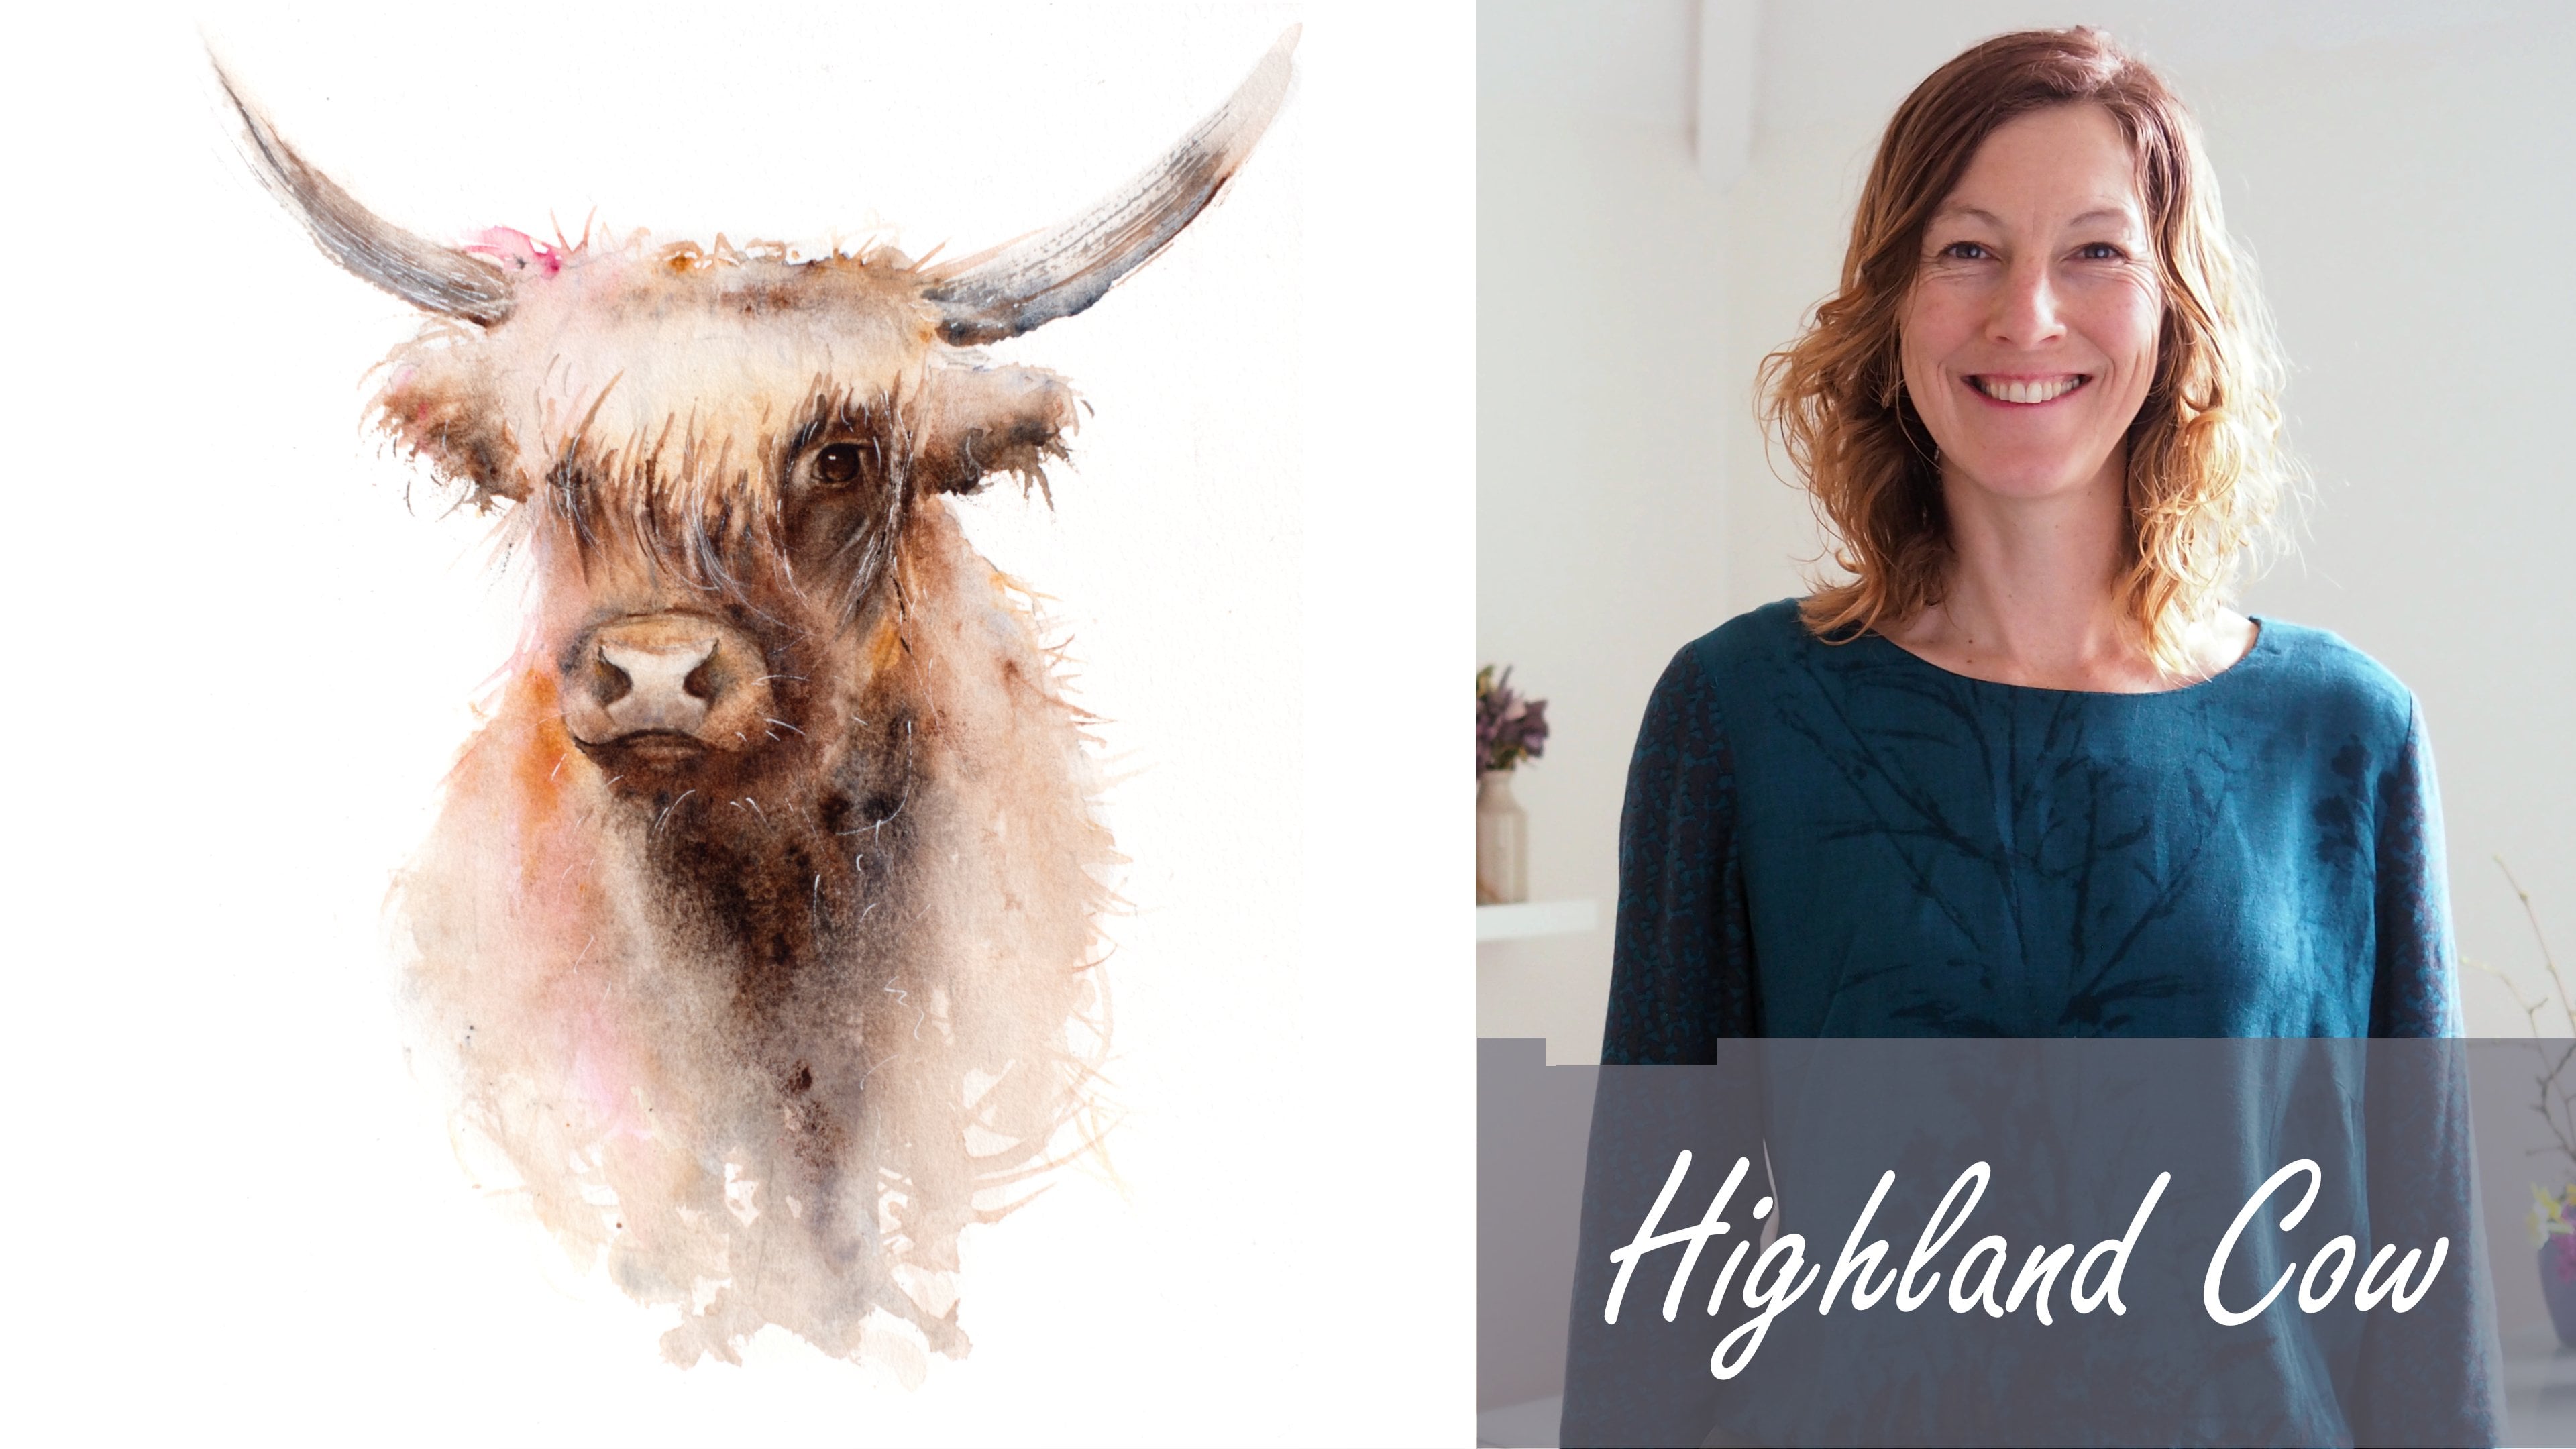
free-flowing style. I'm Jane Davies. I live, paint, teach, and walk my
lovely spaniel in the beautiful South Downs
National Park, England. Over the last 10 years, I've taught myself
the watercolor technique that you see today. Not having been to art school, finding my own way has been
fun and sometimes daunting, but it has allowed me to
develop my own style. This has led me to
teaching others, either on a one-to-one
basis or as part of a group in a wonderful studio in the heart of the South Downs. I also run a successful
commission-based business, painting pet portraits and wildlife art in my
own home studio. In all my classes, you will follow
along in real-time. Or I can guide you
to keeping your work loose and fresh
without ever fussing. I'll be sharing lots of tips and tricks along the way too. I'll guide you through adding that lovely
sun-beamed background and how much water you need
to keep it all flowing. I'll show you how to create
that beautiful textured, light-filled ground and tree and how those seamless
bunnies sit amongst it. Of course I'll share my tips, tricks and musings at
the end that will add the finishing touches to
this cheery little painting. If you'd like to learn
more about me or my work, please pop over to my website at janedaviswatercolors.co.uk. This can be found on
my profile along with links to my Instagram
and Facebook pages. I'm very active on my
social media pages. I love sharing my art, especially on stories
with many ideas, works in progress and
tales of studio life. I really hope you will share all your paintings on
the projects pages. As I love seeing
your masterpieces. Don't forget, I'm here
to help if you get stuck or have any questions. I want you to experience
that buzz of painting in this liberating,
wet-on-wet, loose style. Come and join me. [MUSIC]
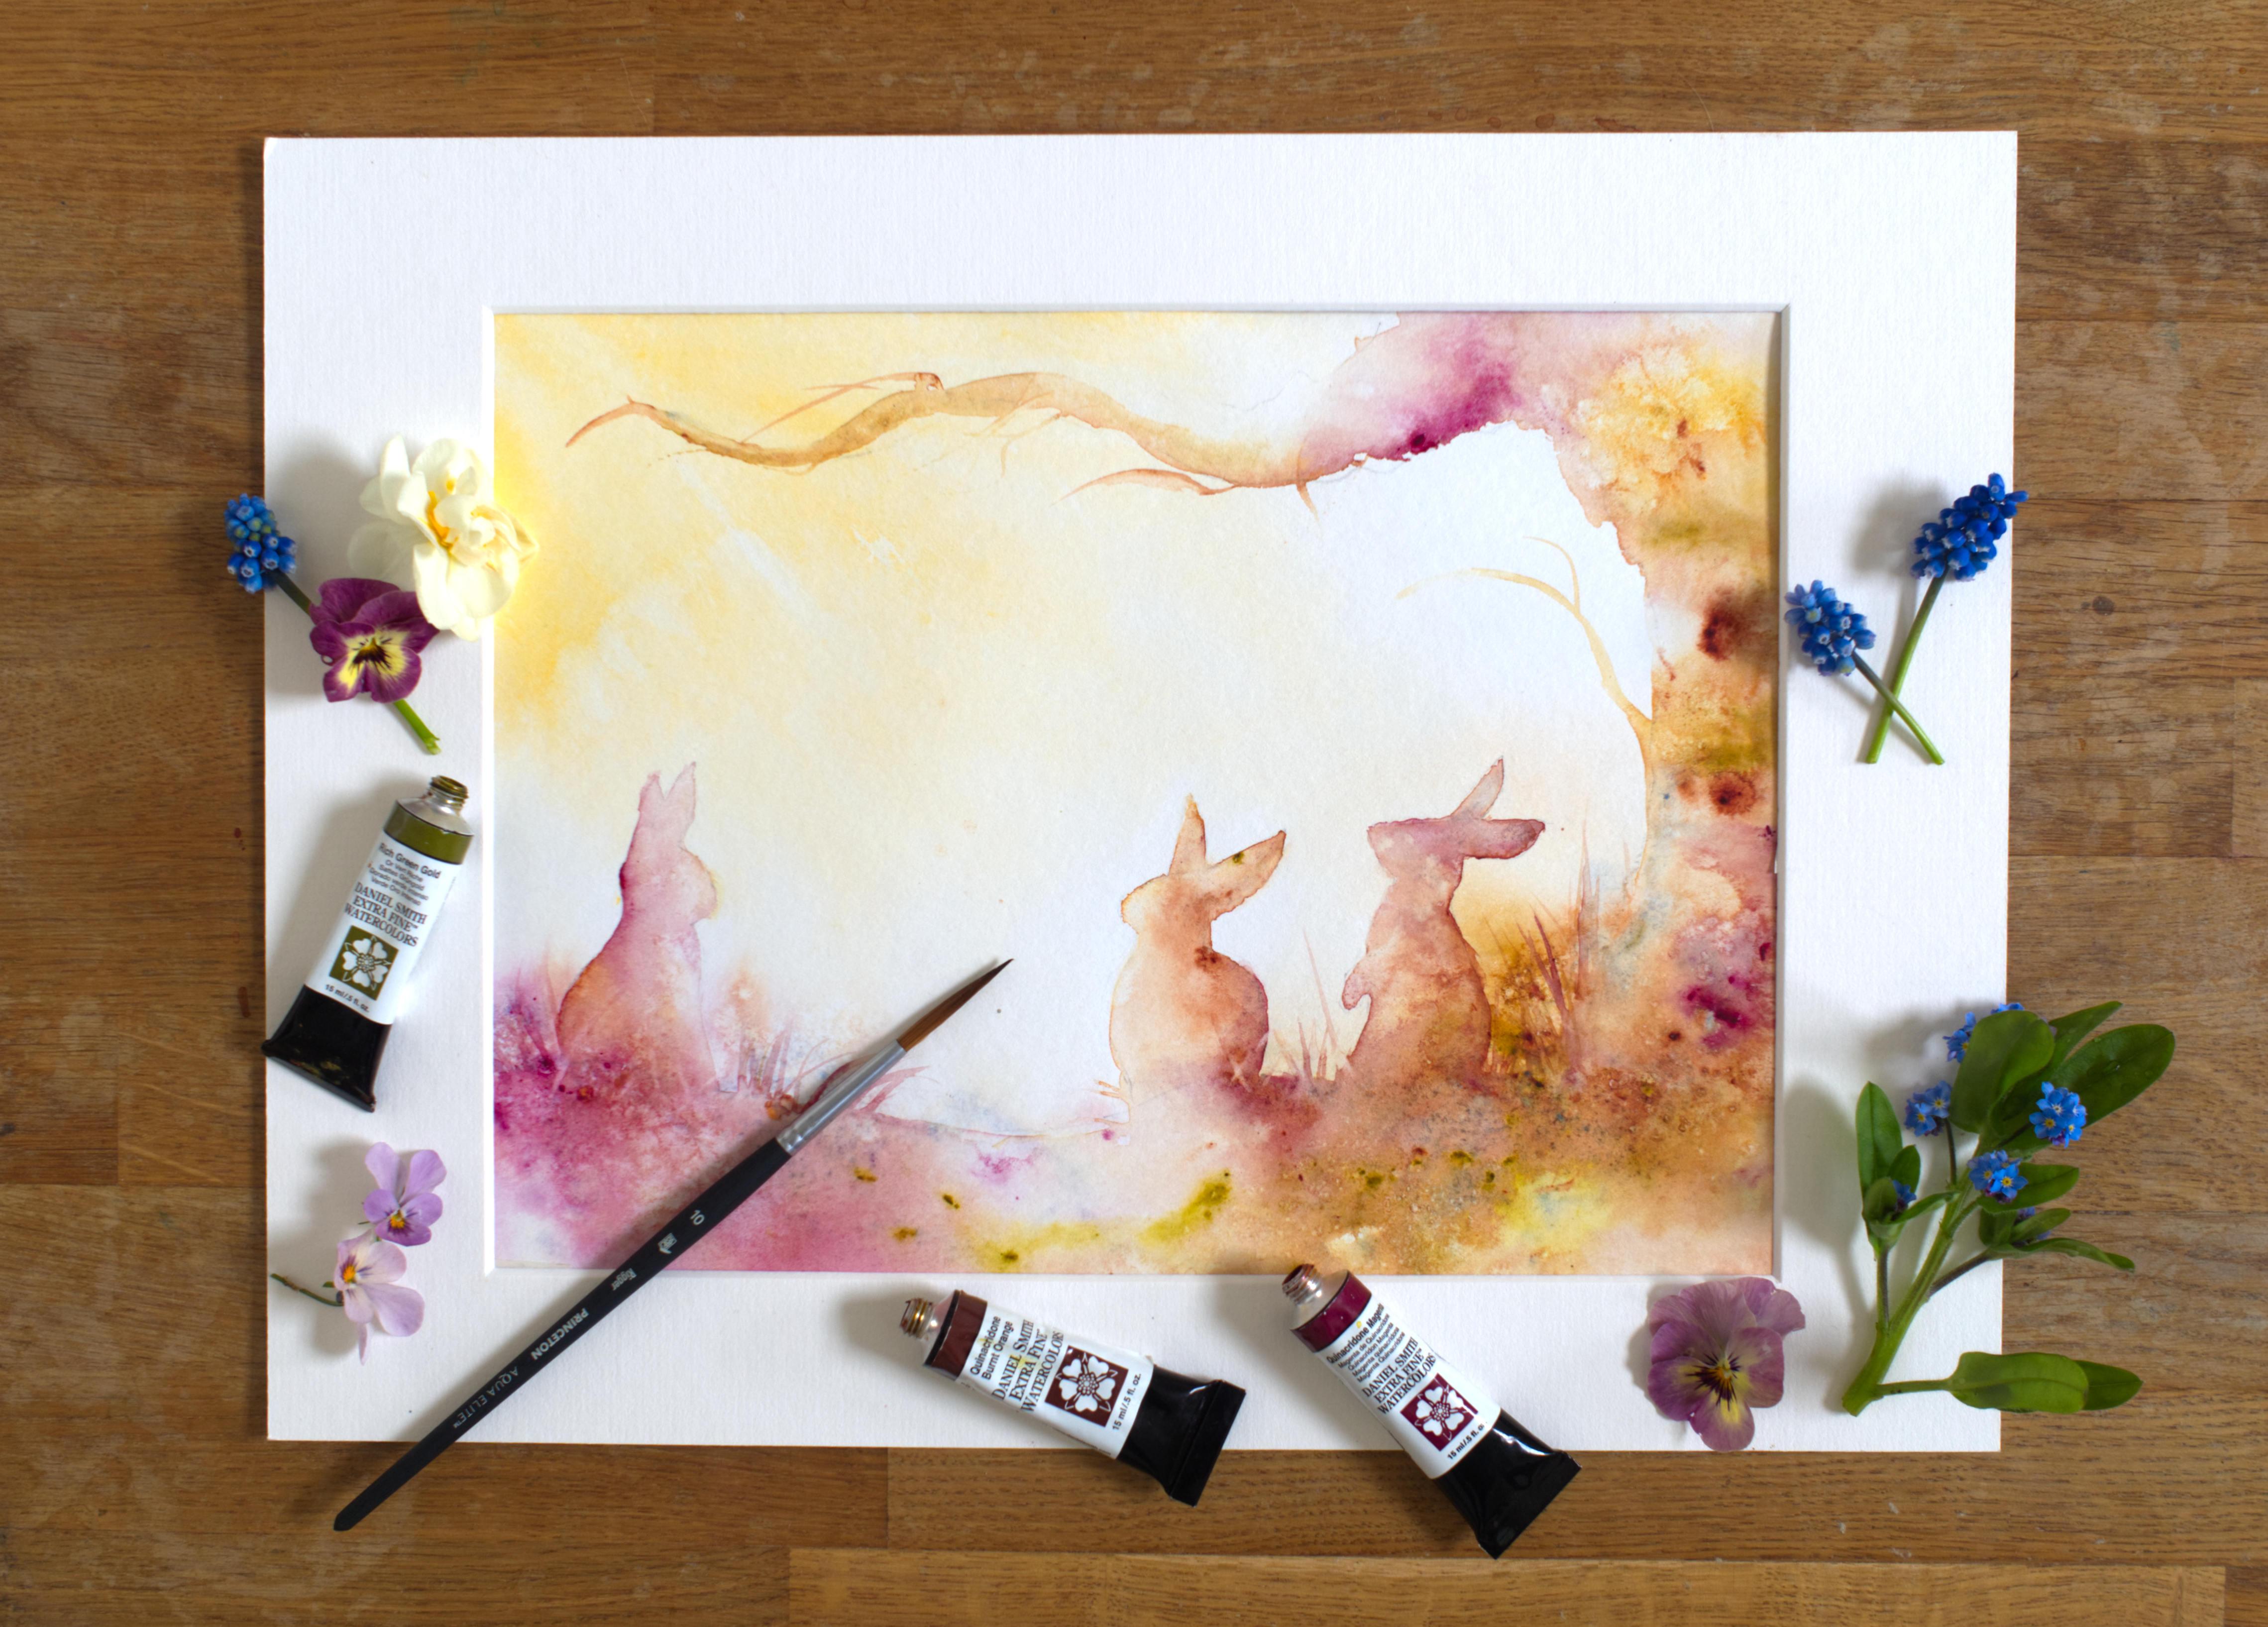
2. Materials: Welcome along to this lovely loose flowing
watercolor class. Hopefully, it's
going to give you some inspiration because this can be done in many
different variations. But anyway, I'm going to run through my
materials to start with. I have a lovely collection
of Daniel Smith paints. All these can be found on a list in the Projects
and Resources pages. No need to scribble them down
or try to memorize them. I'm going to start from the top. I have a cadmium
yellow deep hue. I have a Quinacridone magenta. I have a rich gold green. That's a nice color if
you're looking to invest. These little spots here, lovely, very nice. I got a lapis lazuli
genuine, which is the blue, and I love that, it's a very soft
blue but very nice. I got a Quinacridone
burnt orange. Now, regarding your
color choices, this is open to so much interpretation and
so many color choices. I would probably look for four or five paints and
just have a rummage, see what you like. I've done this in mixed CPs, it's quite dark, I've done it in blues, I've done it all sorts. This felt spring-like, I'm actually filming this
at the beginning of spring. I pumped for this, but there's absolutely no rules for this, so let your
imagination run wild. With the paper I'm
using, I flip this over. [NOISE] You can see, I've got that in the camera. I got Hahnemule's agave
watercolor paper. It's nice, it's got
a good texture. Well, the paint
texture's well on it. Salt marks come up really well. So find something, a paper
that you know marks well, give you some of
that water marks. That's the paper that will
be ideal for this class, but any other paper
will be fine, so don't be limited
by that either. Our pot of water there, I got some salt because we
sprinkle some salt on here. I'll just got a little, it's actually a little paperweight
heart my husband made me, and those who follow me
know Digital Heart well, but it's just that in
each eye is just enough for me to tilt the paper and allow water
and paint to run. Strike to that from there. I've obviously got
a paper towel, kitchen roll, I got
a little rubber, a pencil and I've
got two brushes, but it could easily be
done with just one. My first one is it'll eradicator and that just
takes out some of the ledges. But to be honest with
you, you could quite happily do it with one brush. I've got a rigger here, and it's a size 10,
quite like a rigger, they hold a nice source of water because I tend to
paint out of the tubes. Here, I can get my
bristles nicely down in, then we scoop up lots of paint. I do use a rigger quite
a lot in my own work, so it's worth having a play and this class is
all about playing. I do have a hairdryer. Don't use it a lot,
if I'm honest, because it's nice to let these layers dry
naturally on their own because there's going
to be quite a lot of water and salt. Hairdryer's handy,
if you've got one, but if you haven't,
really don't worry. Think that's it
with the materials, so I think we should go and sketchy these little cuties out.
3. Sketching Out: I've already sketched out my three little bunnies
using the templates. Again, you can use these
wherever you wish. You may choose to have just the one little bunny
so don't feel you have to use these templates or even
these number of rabbits. It's up to you really, this class is hopefully going to get your creative juices flowing a little bit and leave the painting a little bit
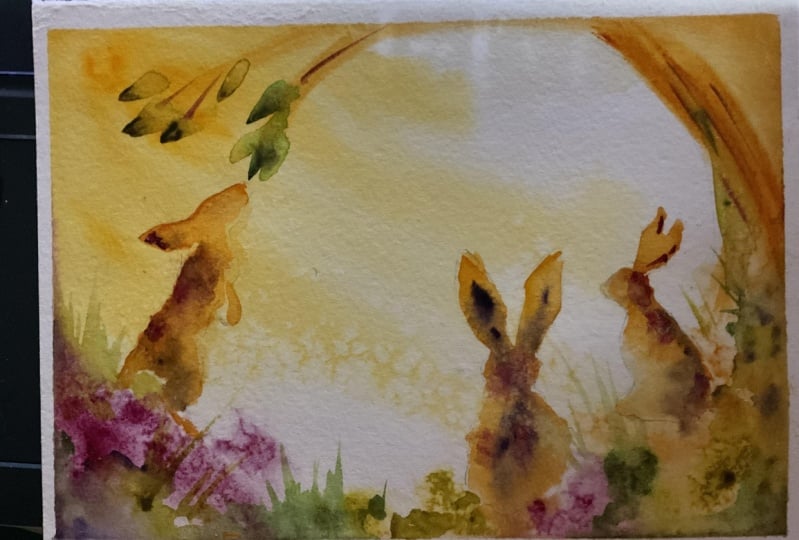
up to your interpretation. If I show you some of my other practice ideas
pieces, see that? It's a little rough
and ready because it was quickly done out in
the garden actually, but you can see
it's a little dog and it's been done
in a portrait style. You can do it that way around. There's another little bunny, just a single bunny,
again portrait, and also put a little
hill line in here and that was just done by
wetting this area and just dropping a tiny little
bit of color up here. I had so many ideas
[LAUGHTER] You could have done a sofa and had your cat sitting on
the arm or the sofa, the lampshade and the
light coming down. It really is limitless so although I'm going to
show you how I paint this, I think it will give
you the ideas and the tools to then change things around a
bit if you wanted to. It's a nice class, just get us into the flow and this thinking could
be outside the box. There's not many little tips really for sketching
out apart from, let me just move
the digital chips, apart from keeping
your pencil marks really lovely and light, specially because we've
got this light source, you're going to be coming
down from the corner. On the left-hand side are
these two little rabbits. My pencil marks are
a little harder, just so you can see for this lesson that you
want to keep this. You can also draw
them in and then just very gently with the eraser, just rub them out
and soften them. You don't want to
rub too much on any water color paper because you can take the surface off. But you just want to very gently soften those pencil marks. There's enough for you to see, to paint into but you don't
want that to be too strong. Again, I like this line to disappear as well
because it's nice. We just lose a little
bit of ground. It just gives that
lovely softness. Trunk, just try and imagine
a big old gnarly trunk turn. I'm saying shut
your eyes but just let your imagination
run away with you. This is a lovely
piece where you can, interpret it or disappear into another little
world, I suppose. Another gnarly old oak branch
there, sitting beneath. I don't think there's
many other tips really to give you other
than don't get too involved. Don't start doing little lots of little branches and very
detailed bits because this is a really lovely flowy class and I think if we put
too much detail in, it stops it from
flowing, I think, just mentally stops it from
being lovely and loose so just enough to
guide you but no more. I think with that, we should start
doing some painting.
4. Back Wash: This onto the fun bit. Pick up you just one brush. If you've got to
hand a big brush you can wet a lot of paper down within,
obviously, pick that up. But really you could just do this with just the one brush. I'm going to do majority
with my one brush. We need this to be
lovely and wet the whole paper to put that
lovely backwashing. This you don't
necessarily need to do if you're wanting to do
these quite quick, we maybe you've got children and you're doing this with and they don't want to hang
around for it to dry, then you could easily just miss this chapter out
as those are lesson and just go straight on
to painting the bunnies but I'm going to do a backwash and show
you how I do that. This is just this could be
little bit more interest, I think to the overall painting. Hopefully, I've got
a smallish brushes is taking a bit longer. Although my paper is gummed. I can see it starting
to buckle already, but almost in this, it doesn't matter because
I think that then gives us a bit more texture and interest where that water
and paint puddles and pools, we can just allow it
to dry and give you some quite unusual texture. Is a lovey cars is
to keep everything lovely and loose and just enjoy how beautiful
watercolor is. When you don't need
to overfit sometimes to get fun results. Make sure this is lovely and wet because sometimes when
you started on a corner, this corner will dry a little bit if you're
in a warm climate. Just once it's all wet just
bobbing a head up and down, make sure it's all covered. You don't want any
little dry patches because that paint
around that dry patch. Make sure it's good and wet. I'm going to pick up my cadmium
yellow. Wake it up a bit. I'm going to dot that
just tapping nice amount because that's got to go
to cover right down here. We need to be generous. Going to tap in
enough a bit water so you can keep this
lovely and wet. Feel like I've got enough. That's quite a nice
strength on there. I'm going to tilt the paper, so I'm going to pick up
my little trustee heart. If you're joining us
for the first time. This heart gets
shown quite a lot, gets a lot of outings
is just a nice height. It gives me a little bit
of a paper nice tilt. Just the right amount and that should just flow
across your paper. If it doesn't, I'm just
tilting a little bit more. It's just not be saying
it's just a perfect height. Obviously needs a little
bit more elevations to get that running. If you find it's all sitting on the top here and not moving, load your brush with
water and then just drop. Just let that run. The minute you've got something
looks like nice raise. Then don't overfill because it's very easy to continue,
you'll lose it. I'm going to pop back
straight back down there and there's just a little bit. I've still got that
on a slight tilt so I can continue moving down there. I'm just going to do just
a little bit of ground. I'm not going to worry
that it's going over. This is just giving a very edge. Just a nice. Once that's dry
and you've finished piece, you put barely see
this other harmonies, but again it just gives you a little bit more another
dimension really. Pop a little bit yellow
on there like that. Again keep it ever need
lovely loose on the rigors. Nice because it's just
a little point so it can be really delicate with it. I'm just letting the brush fall and letting the gravity and the amount of water to create me something
unusual and different. I'm going to pick up a
little bit of the green. I'm just going to go this side. Unless you grow up some of the orange
and at the same time, I just stop betting. Try not to worry
where it's going. Just let it be loose. See how it's moving. Colors on top of one another. Don't be afraid to do that. I love this green, lovely green. That green. [LAUGHTER] Rich green
gold. It's a nice color. The quinacridone, burnt
orange is a new favorite. Actually, I'm not going
to get to use it a lot and on book pet portraits, but it's a nice color. I'm just going to see on the edges just pooling a
little bit on the edge. I'm just going to work that down and allow that to run off. You can see where
my papers buckling here but it really
doesn't matter. Just I think it will create
little areas, little notches. The thing is just
to not to overfill. I think that's almost enough
for this very first layer. Down. Just actually just
famous last words I always do. Let's pick up a bit of
that lop-sided letter. I put a little bit of that in there because this is
almost wet this up a bit. This tube has been sitting on my desk for a little
bit. That's better. The very soft color, but I love it, it's so yummy. Just beautiful. I want to pop a little bit
in that corner as well. Say whatever colors you've got to have a little play with them. I think that's enough. I don't want to do
anymore to that, so I'm going to let that
it just needs to dry, but we need to pop
some of these salt in. Now salt was very kindly
emailed by one of the lovely skillshare folks and explained a little more
about the salt process. She was actually a probably
going to before we relate, give her the wrong job title, but I think she was a chemist. She understood the process
of salt and what salt did. But it is basically the thing is to get
the timing just right. This is probably a nice piece
to have an experiment with. It just needs to be going
off that's why haven't had the best results
with my salt. I was just putting on
a little bit too wet. If I twist my head, I can see this area I think
just about ready to go. I'm going to sprinkle some. Have an experiment. Even if you don't
want little paper this worth having a go because once you hit
that sweet spot, it really does work. Obviously, some paints work better and some
papers work better. I'm just going to sprinkle
some of that in there and hope it does its own
magic this time. Fingers crossed. I think I've
got the timing about right. Then that needs to just
dry probably a bit wet but we'll see how that goes. That there needs
to dry completely. So just allow it
to do its magic. Once it's dry here,
we can then continue. Just a little note. Sorry,
I'm being annoying. If you've got a hairdryer, once it starts to go off, you could give it
a little blast, but I think it's quite nice, just allow this to dry
really on its own. I can see that I've got
a big old puddle here, but that will
hopefully create me some interest and just
something a little bit unusual. It might be worth
just hanging fire, letting it dry almost
completely on its own. Maybe just if you've
got tiny areas a bit damp with a hairdryer over it, then better. Stop gabbling. [LAUGHTER]
5. Main Painting: I'm really pleased with
how this has dried. My salt ta-da, has
actually worked. It's just about getting
the timing right. Thank you very much. I'm really sorry I can't
remember your name offhand, but that's worked well. I'm going to take
my little art away. Let's just get it out
of the way for a sec. I'm just going to brush
this salt off now. If this hasn't sat
for a couple hours, make sure it is really dry
before you brush it off. Just get rid of
that, just gently. You can see that's
already pretty effective. In a lot of this, we're
going to do another wash, so some of that will get lost, but you'll still get
that texture underneath. We can put some
more salt on top. Lovely. Pick up your brush, get that nice and wet. First, you're going to wet
down each little rabbit, and then we're going to
wet down the ground up to the trunk. Let's start. Now, when you're
wetting it down, there's no hurry, so take your time and we
may have to go back and just re-wet them a little bit once we've actually gone round. But make sure because this
piece is going to be loose, make sure you try and
keep within those lines, especially if you're backwash
has been quite strong, because then it
quite hard if you go over your edges, right
at the very end, it's harder to then tidy
the edges up because you're going to wash away some of the backwash, if
that makes sense. It will make more sense at the end when I add the finishing off of here if you weren't
sure what I'm trying to say. Add a little body and
keep everything light. We've created some
nice texture there. Keep everything light, nothing needs to be heavy. Number 2 bunny, nice and wet and
just keep your eye. If you've just given
it a little brush with a hairdryer just at the end before you restart this, then you'll find your
paper will be warm. Then it will dry quicker. Just keep an eye on one of
these bits you've wet down. All you have to do, just drop a little bit
more water that gives you more time to play. Add a little bit more there. We go on to the third bunny. There are so many
ideas for this class. There are so many possibilities. If you follow me along
on this one and go, oh, I could have done that and I could have incorporated that, then I'm really
looking forward to seeing the projects
on this one because I think you're going to have some fabulous ideas because it really is open to
interpretation. They are nice and wet
and then I'm just going to wet again, keeping it really
lovely and light, I'm going to wet the
whole ground just up to what would be the
base of the trunk. It is a really windy day today
and if you're hearing that on the back of the audio, it's a North wind and it blowing yet too much
through the window. Put a little bit
more water in there, cause I can see it just dry
a little bit. Just tapping. Quick look to make sure
I've got everything covered and we're going
to be lovely and light. We are going to firstly, grab your little
whatever you've got with a height riser, just put back onto one corner. Slide it down in the
middle a little bit , it's a bit better. I'm going to pick up the
yellow and the magenta. We're going to again just
to keep everything light. I'm just going to pop
some out down there. Pop it on top of one
another. Let it run. Just be free, just let everything
to be loose and just enjoy watching it move about. Also be with something around. Obviously, it dries
a lot lighter than when you first apply it and all this will
soften and move around. Just have a splay
and let's pick up a bit with the upside
laser as well. I do love this color. It's so strong, but it's very pretty. When you've got something
that just looks pleasing, I said isn't it absolutely
no right or wrong to this. It's just you're creating
pretty patterns. If you created a nice
pretty pattern already, then leave it, let it do its
thing, let it move around. They're in there, let pop those down before I overfill it, easy to overfill it, so just pop and
allow and move on. I'm going to take that away. Just going to lay it flat again. Yeah. Again, you may decide you want to keep it
tilted for a bit longer. A little bit open to, trying not to repeat
it too many times. It's open to your imagination. Try and get that to make sure it runs off the page so it's
not sitting in a big bubble. I'm going to pick up the orange. I'm going to have my
rich green gold as well. [inaudible]. I'm
just going to put something just blob color
on top one another. You can give it a
tilt in a minute. Just keep an eye
on those rabbits. I'm just going to drop a little bit more water just
to keep them nice and wet. Some of these paint will
just start running up the bunnies and that's
just what we want. Just have a little wiggle, have a little bit of
yellow clutching. We're going to keep over
that because I'm going to stop running out of
the rabbit in a minute. A bit of blue, brush
is a bit dirty. Try and keep your
brush clean in-between if you're using
the tubes already. If however you're working, try and wash your
brush in-between or it starts to get a
little bit murky otherwise. I'm going to try and work up
these rabbits a little bit. I'm going to put blue down. I'm going to keep
holder the orange. I'm going to cap the
magenta, I think. I just have the yellow as well. Those colors in my hand. We want to keep this area, the left-hand side, I think my left and right. We don't really want
to wear too much paint on those because it will spread on its own. We want to keep that
really lovely contrast if you've done the hare class, but that was a very
simple popping one deep heavy color on one side and allowing
it to move over. Gazing into the
sunshine on they say, we don't want all that contrast. Again same on the other side. [inaudible] colors
around because we're not putting any detail, they are just silhouettes. It's whatever color
you like really. We are going to get
technical about light and dark and cool
and all that jazz. Just keeping this solution,
having a bit of fun. It does work well. He's having
one side very light and on one side with a heavy color. You don't really need to add. You can see how that's
moved over on its own. Just going to pick up a
little bit of the blue. Just put a little
bit of blue there. Just going to do a
little bit of mix. If you don't like the color, I'm sure I liked that and
she's got blue in their ear. Just almost take it
straight out again because it works being mixed. Look, if you're sitting, try and stand
because this will be a lovely time to have
a goat standing if you haven't tried that because I find standing really
keeps me nice and loose. I always stand for my
work but if you've not been too confident enough to do that in a more
complex classes, have a goal now, except this
is a nice class to just play and experiment with maybe things you wouldn't have
thought you would try. Keep an eye on this
bunny, make sure he doesn't dry out or she. Pour a little bit more water, it doesn't matter if that water runs down and makes
you funny patterns. That's what we're
after in this class. Just giving yourself an
excuse to play really. Put a little bit of yellow with a
little bit of magenta. Just stay within those lines because this piece
is really loose. If you start getting a bit
scrappy with your edges, it will almost be too
open to interpretation. You do need to keep
the lines crispy, is probably the only thing. Being random is my usual self disappearing off
to another rabbit. I just saw that was beginning to add mist a
little bit on the top. That's enough color
definitely on that one, so I'm just going to make sure I don't get too much color on that right-hand
edge because what was lovely I did as I always do. Many practice base is better. The ones I did quite heavy,
I didn't like as much. I loved the ones that
didn't have that much color and it kept them nice and soft. But again, you might want to try doing the heavier
and see what you think. Before it dries too much, we need to flick up
somewhere like grass. We need to keep
just an eye-opener. Watercolor is all about timing, saying this is good. Welcome class to focus on some aspects you maybe you wouldn't have done on
more complex ones. They are looking
good, so I'll just sit away from it a little bit. I'm liking that. I'm pleased. This is looking
quite sweet which is popping up a little
yellow in there. Because, in theory, this little rabbit is
looking into the sunshine. Keep his own eyes in jolly. A little bit of strength there. They'll look away.
Put a little bit of strength at the bottom. As this begins to dry, then try adding a
little bit of color, see what that looks like
when this starting to dry. See what that looks like. What that result
gives you in the end. I'll pop a little
bit more blue here. I could put a fancy
little bit more blue there and also I need to
keep an eye over there. It's getting determined
by that salt as well, but mine is all quite
wet at the moment. I'm okay on that
aspect at the moment. The grass, again, it can
be done with this brush. I don't start right on the edge because you can quite easily
in that very tall grass. If you start it a little
bit further down, it gives you a
lovely free action but doesn't make
the grass too long. Obviously, our trunks coming down here so I'm going to try and pull some of
that up from there. I want we did at the
trunk layer as well. Just a little bit here because
it's beginning to dry. If you leave it too long, if it starts to dry and
you do these flicks, it makes like the
grass is stuck. You stuck the grass on
so that the trick is to pull this out when
that paper's still wet. One of the things is I like doing is and
before you know it, the wall is too much grass. I'm going to leave it at that. Put some of these colors down. I'm going to bubble my head up and down
and see how we're doing, and taking some color water
that's sitting on the edge, and [inaudible] it off the page. I can see this little
area would be ideal time, I think for some sort. I'm just going to drop a
little bit of water here, and give a little bit of a tilt. I catch the edge of the paint on my
hand, put it at that. Go up the edge of my pad. I'm going to load up my
brush with some water. I'm just going to drop
and see what happens. We can create a little bit of movement almost
off the something that's going to make a
bit of a miss, or mist. I'm just going to give
you some interest. I like that light in the middle, so I probably now washed, [inaudible] I should put
some water over it now. What do I need? Sorry, crossing the self. The old arm in the way. Just put that on a little
slight tilt for a minute to let that carry on moving. I'm just having a
look at my little bunnies as they begin to dry, make sure I've got all
the edges nice and neat. I'm just going to go round them. Some are starting to dry, so I'm just going to
neaten up the edge if they may need a little bit of neatening because really I said we're not doing
any more layers. It's nice to get
untidy at this stage. If you leave until they're dry, it's going to look like
you stuck them on. It's not going to give
you a very soft look. Actually, I'm going to draw
a little bit pour water on that with this little chappies. Almost not enough
paint their I've lost a little bit of edge. I actually can't see her shape. It's not even features,
it's just her shape. You've got to look at
your own piece really. Some of these green
are going to wobbly. It can fix the area is looking, I think, ready for
a bit of salt. Sprinkle a bit more
salt on there. I think it's about ready. You could use cling film. Many of you may not come across cling film,
you may have done. I don't think I've actually
got any to hand, I haven't. I lied. I'm not
going to put this on actually because I don't
want the cling film, but you can lay this
over the top and you just crinkle
it and leave it. But it takes a long time to dry so if you're wanting to do this in a hurry to get fun
results quite quickly. It's not ideal because
you need to let that dry for at least an hour
because it takes a while. But it gives you an
interesting texture. Seeing if I had a
sample piece with, I haven't actually to hand. But it's a nice technique. Just having a look
at this again. That's looking quite
pretty actually. I just want to show you
can just do a few wiggles. Maybe put there a strong
color in somewhere you thought would work maybe. This area now is beginning
to take a little bit, dodgy is this probably
not the best word. That is almost dry.
This is quite wet. I tend to stay away
from anything that's beginning to go off
at different times. But this is all still wet. I'm just going to put a
bit strong color in here. See if I can create a little bit of shadow and interest again. I might pick up that left side as I put a little
bit of that in there. I think I need to stop filling. This is just about
still wet here. We're going to go and
do this lovely trunk. I found if I started at
this end it's the best. Just very lightly, just run, still got a little bit of paint on
there but it doesn't matter. Just fill in your branch. Then wet down your trunk. I found it's best to run your trunk right off
the edge of the page. I'm going to right to the edge. I'm going to lay
these plots again. Just a bit wiggling
around if nothing else. Then we're just going
to join this up. Obviously, it's going
to run straight into here and straight
into the ground, but could you give us
some unusual patterns? Make sure that's
nice and wet here, because I'm going to
drop a little bit of paint along that branch. I'm going to use the orange, and I'm going to use
the green, I think. It don't really matter. I'm just going to dots
a little bit there. A bit of the orange down
and then tilt the paper. I'm going to just added another little bit of
water on my brush and you can see that making
a branch for you. Just tied it, it's got a little bit
stumpy at the end so just a little wiggle. You can wiggle a
few bits off here. You can do your fingernail. Fingernail is quite fun. It really does give you
something a little bit more natural, I think. Again, like the grass
don't go too crazy. I'm just going to lay
that flat again as it's has done its job. Just picked up the orange
and spotted a lump there. Just a bit about
orange and the green. Don't need again. I'll get
rid of that. Some yellow. I have a little dibble. I don't have to deal
with the trunk. We'll see it will spread, and if you've got dips like me, probably the paint
will sit into depth. Try and keep everything loose. Just let that brush
drop on its own. I'm going to come down here and a bit more and I'm sputtering all over the place. Let me just splash this on here. Let's go for all five
of them in my hand. Well, look at that, a nice handful. Wiggle that in there. A bit of blue. Do
you love this blue? I wouldn't go into
this area now. I will probably
leave this to dry. Just concentrate on your trunk. Pink there, it's a bit boring,
doesn't look better now. A little bit of something. The minute you say you
get something you think, yeah, that looks
quite interesting, it's just best to leave it, because I think this
is going to sit into quite it's buckled here and other paintings that
wouldn't really be ideal. But for this class it's quite fun because
that's going to dry and give us some quite
nobly textured trunk. Just put a bit of really
strong burnt orange. It could be not. I'm going to pull out a little wiggly
branch there. Why not? I'm just going to put a
little bit more grass. Just put a tiny little
bit of paint on my brush because there's
not a lot down here. You know what guys, I think
that's about it for that. I'm just going to
allow it all to dry. But before I do, I'd like to put some salt in. I might put a little
bit here that looks like it's
just about ready, but it's just getting a
tiny amount of that salt. I think that's about right. This one looks about
ready as well. Sprinkle a little bit there. Let me see how that goes. I'm thinking it might be a
little wet up there still. Again, it's nice to have this heaviness at the
bottom rather than the top. If yours is a little
bit mono colored, then you can tilt the paper. I don't want to tilt at moment, because I've got this puddling, but you can tilt
the paper and that will obviously allow
your paint to run to the bottom of the
branch and give you that shadow impression. I'm liking the way that's drying actually. I'm going to leave it. I'm going to put my brush down, and take my own advice, and let it dry on its own.
6. Finishing Off: So I've left this to dry for a good couple of hours so that all this salt has dried well, and my paper is good and dry. So what I'm going to do now is to [NOISE] just
brush the salt off, but make sure yours is
[NOISE] good and dry. It's very easy to
[NOISE] realize your salt isn't dry
and you scrape away then you find your paper
still damp underneath it, and that can ruin your painting. It's a bit annoying. I'm just going to sweep
this onto the floor, get it out of the way. You can see now what
I've got now underneath. And this double layer of salt worked quite
well, hasn't it? It's given us a little
bit of texture, really. So I'm not going to do much more than this
because I quite like the real simplicity and I'm not going to put
any eyes in there. It's just going to be a
nice with silhouette. I really don't want to make
this class too complicated. So while this is
all nice and dry, I'm going to get my little
rubber and I'm going to carefully rub out some
of these pencil marks. If you've got a very
strong backwash, be really careful
because you can then actually see rub
lines in your wash. I'll just go round
this little one. I've got quite a
simple backwash there. Rub that out there. Got a little bit
up on the trees, and I'm going to have to
be careful to say because of that wash behind. I can just gently go. [NOISE] A bit of salt up there still. Probably just enough. That's why you ideally
you want to keep the pencil marks as
light as possible, especially for this class. I think that's all gone. [NOISE] Clean away, straightening the painting up. So what I'm going to do is just to take out little bits of color just to give
that sense of light. I've got my little trustee
eraser brush here. I grab my kitchen
roll very carefully. Just going to take out
that edge and you see that very hard edge where
this is lovely and wet. The paints pushed up
against the edge of the gyp between the dry and the wet and left a little line. I'm just going to gently
take that out, top that out. I'm going to have to
go all the way around, just little bits of it, and you'll see I've been
a little bit tatty here. I haven't stayed in
my lines very well. I'm just going to tidy some
of this little bits up. As I say, go careful
if you've got your backwash has gone
all the way down. You don't want to leave holes in your wash. You don't want
to wash your backwash away. See here a little bit. I'm going to put a little line down here. Obviously you've probably
done a better job than me staying in your lines. It's going to run a little bit down here just to
make that ear look like that's the
nearer ear to us. Just a little bit. So
I don't want to get carried away and start
adding detail really. I just want to keep
this as a silhouette. Also hopefully,
you get the idea. You just need to go
round your little bunny. This one is going a
little bit tatty. Actually, I haven't got the contrast probably
I would have liked. Obviously, when you switch
your paper up and down, you've got light this
side, and light this side, so we'll see that it's not ideal when you start
tilting your paper, you're looking to lose the
strength on one side and [NOISE] one of the bunnies is going to have it
going the wrong way. Hope that makes sense. So I've lost a little bit of
the darkness this side. So I'm going to try
and lighten the side. I'm going to put that one down. It's quite a hard little brush, brilliant for getting
stuff out but it's a bit hard if I just want to soften. So with the other brushes, I'm just wetting the paper really and then just
going to try and take a little bit of color out. Just fractional. I don't
want to wash it away, these colors are quite soft. And the actual paints
are quite soft, they will come out quite easily. If you step away,
I can just see it just give me just enough light. It's just going
round your own piece really and tinkering, you may have found
when your salts are dried and you came
back and looked at it. It all look good and you don't
need to do anything else. Yeah, I think
that's just enough. I'm going to put that
bigger brush down, pick up [inaudible] brush
and I'm just going to take this little line here to see if you can see that front paw. Here it's actually attached to the body and just
give it a little bit of sense of light. Just rubbing it out. It's enough, definitely enough. I don't think I want to
do too much more to that. I think that that looks fine. This little guy over
here, almost done. I don't think want to do too much and now I've
got a little bit of a funny dot on the
end of the nose. That's just me need to
seem to tidying it up. Again, always step away, especially with this piece, because if you're looking
very closely at it, you just can't get that sense of what it would look
like from a distance. These lines worked out
okay on previous pieces. I quite like taking a little bit of light and ground out here, just to give that lovely
sense of looseness and light. Just looking around really, I might just swap brushes and just take a little bit of
color out of the top of those, a bit off the top of that
branch, just a little bit. I'll just dab with
a kitchen roll, you can see it just gets
it ping a little bit more. Such a great little technique. A little bit up here. And I say don't be tempted
to go all the way around, it makes it too uniform. So just little bits. That little bow
looks a little odd. So I might just
neaten that up a bit. You know what? I think
I'm there if I'm honest. There's nothing else
I really want to say. I don't want to add
too much more detail. I don't want to take
anymore light out. I've looked at it. I've
stepped away and I've looked at it from a distance
and I'm pleased with it. I like the simplicity, and hopefully that's given
you some food for thought and some inspiration of
so many ways you could use this technique to do something a
little bit different. I almost contemplate doing a moon here and then having
these backwashes quite dark, sprinkling some salt and maybe leaving the silhouette
as a lot lighter. So that might be a
really fun idea. I was inundated
with lots of ideas, so I had to stick with one, and I thought, if
I show you this, then hopefully you can go
where you'd obviously do this and maybe have
some other thoughts or ideas of what might be fun to just gives you a nice excuse to play and come up
with some ideas. So I really hope you enjoyed
this little easy class and please as always do share these projects with me
because it's my favorite bit. [LAUGHTER]
7. Final Thoughts: [MUSIC] I hope you enjoy painting
these bunnies in the sunshine. I don't think we allow ourselves enough time to simply
play with our paints. [MUSIC] Did you enjoy adding
the background? Remember, if your paint
didn't move as much as mine, your paper might not
have been wet enough or your brush could've done
with a touch more water. Wasn't it fun just placing
that paint onto wet paper. It's such a simple joy. But try to keep your
touch lovely and light with a nice amount
of paint on your brush. The finishing off bit
didn't need too much doing. But try not to fall into the
trap of over-fiddling as you would lose that loose
and lovely sense of light and simplicity. We look forward to seeing
you in the next class. [MUSIC]
 Jane Davies, Professional Artist and Teacher