Transcripts
1. Introduction: Hi, I'm Mike Anderson and osteopathy registered massage therapists in yoga teacher in Halifax, Canada. And I've worked with top-level athletes from all over the world. In this course, we're going to be looking at what I think are the most effective techniques for the entire body all the way from the foot up to the neck. And as we go, we're going to be talking about common problems that athletes have and making interesting connections. So whether you're a massage therapists, personal trainer, or a physiotherapist. Not only will this allow you to work with top-level athletes, but it's also going to help you grow within your practice. So join me for the sports massage technique masterclass.
2. Foot: As we start in on the techniques or the foot, There's a lot of things to consider here. If someone has plantar fasciitis, is it truly that or could it be tibialis posterior tendonitis? And if they do have a lot of pain on the plantar surface of the foot. What's causing that? How do we work around that? And that's what we're going to explore in this chapter of the course. We're going to start from the ground up. So first we're going to look at the foot and with sports massage, you have to consider pre and post event. So pre-event you wanna do more stimulatory techniques. Rather to do is kind of reenact my old tie reflex, ology moose. So just doing some nice wipes. Doing some rolling on the foot. And you can even knock down the lower leg. And this just helps to wake everything up, wake up the nervous system, and make sure that the athlete is ready to go for the event. A common condition that athletes might have, especially runners is plantar fasciitis. There's a couple of ways to go about this. I mean, some people react differently. If you treat the area, some people will get inflamed and be more sore. But some also get better when you're just like go on that surface and do some techniques. So that's about communicating with the client and getting to know them over time. Which is something that will just happen naturally. But it's good to test those things and see what works. Like to start off by treating the angle. So along the Achilles tendon, lot of the times the tissue here it can get really tight and that actually causes the plantar fasciitis. So with that, I'll get them to raise their leg of a bit. I'll take two knuckles, go on either side of the surface and then spread down. And as I'm doing that, I'm just slowly moving has angles well, and you're just moving down into the heel. And for the heel, you can take one knuckle and go on the lateral side and then just spread the tissue down and open everything up around there. And it's nice to work on the foot because you can create a lot of movement yourself, which keeps the client more at ease. And just make sure to get both sides. You can even go right over the heel, take two knuckles and then just spread down. Before I work on the plantar surface of the foot, I actually like to work on the dorsal side. And here I'd like to focus on the extensor retinaculum. If anyone's a dancer or does any type of ballet, things like that, or even hockey players. This is something where right here in the tailless it can get really. Bombed up or just like really stuck. So for this type of maneuver, what I like to do is I'm going to get jeremy to bring his toes back, bring his foot back like this. And then what I'm doing here is I'm spreading out along the dorsal surface of the foot. And then I'm going to get jeremy to slowly bring his toes down and then bring his foot down. As I spread out into the ankle. And I'm just going to get you to stretch even more down like that. And this feels fantastic for anyone who has any tightness around the ankle or even plantar fasciitis. This is something that can indirectly affect the foot. I'm gonna show you guys a little mobilization or attraction to. This is more of an osteopathic technique. So what I'm doing here is I'm interlacing my fingers around the tailless. And then so as I do that, I'm taking my thumbs and I'm bringing his foot up. And then with my elbows straight, I use my body weight to pull back and traction the tailless down. So bring him back, backup. And then traction as you pull with your body weight back. This is a really great technique. It's good to get some nice joint mobilizations in this area and something that some therapists forget to do. And I know in certain states there are not allowed to do them. But if you are in your particular state or wherever you live, something you want to add into your treatments. I also like to do these kind of mobilizations just along the foot in the arch. And you can go onto the lateral aspect. You're definitely gonna get more movement here. And as you move into the middle of the dorsal surface, you're going to get a little less. And that's definitely what you want to feel. And how a healthy foot fields. Okay, so now that we've worked on the dorsal side, we've done some nice mobilizations and the tailless. After that, I like to get into this area on the plantar side of the foot. And first, I like to work on the lateral side of the foot, just opening everything up around here and around the toes. So I'll take two knuckles. And once again all create the movement with my hand. And I'm just spreading down the lateral side, stretching everything out. And you can use it a little bit of facial cream right now I'm actually just using my knuckles. No cream. And you're just looking at hydrating all the tissue around the lateral side of the foot. Just so you get a nice complete treatment. After that, I'd like to take the toes, spread them back. And then I'll take one NOCl and just cross over along the metatarsal heads. This is also one that feels really, really nice. And if you are working with someone indirectly and they can't take any pressure here with plantar fasciitis. These are all the techniques that you're going to want to do. So after that, for the plantar surface of the foot, you can warm it up with some nice thumbs, just get some nice circulation going in that area. This area tends to be really tough, so it's something that you want to warm up, make sure that the person is comfortable. And then once again, I like to use knuckles and I'll take the toes and create movement and then spread down the planar surface. You can go at different angles. So start here, move down this area. And they go down into the kind of meal slash lateral side. And you're just looking at these kind of active releases. So I'm gonna take note with the foot is that sciatica can actually be the result of the tibialis posterior. So the tib posterior tendon actually runs up the leg. And if you look under dissection, the sciatic nerve actually runs through with the nerve of the tibialis posterior. So one way to treat this is kind of locate the area here. It'll be quite a sensitive area. So you're definitely don't want to communicate with the client and make sure that they're comfortable. And you could use one fingertip or you could use a NOCl if that's more comfortable. I tend to use a fingertip because I like to kind of feel everything that's going on in the area and I've strong fingers, you're just trying to release the tendon. So this is called the GTO or Golgi tendon organ release. And you'll hold this for about 15 seconds to 90 and just waiting till you feel a little bit of release. And you'll know once the tissue kinda softens under your fingertip.
3. Calf Stretch: I'm going to show you guys my preferred method of stretching the gas strokes and soleus. So we'd like to do is bring the clients like up, place my knee under their leg, and then you wanna make sure you lock out the knees so that you get the stretch targeted in the calf muscle, the gastrocnemius. And then what you can do is place your palm on their calcaneus and then their foot is on your arm. And what you're gonna do is kinda raise the leg up, lock out the knee, and then Jeremy, I'm gonna get you to press your foot into my arm for ten seconds and relax. And then what you can do here is make sure the knees locked and then move your arm into the stretch so you're bringing them down to the point to bind and then bring them back slightly. And then this time, Jeremy, I'll get you to contract for 10 seconds with ten to 20 percent effort. And relax, deep breath in through the nose, slowly out through the nose, and then bring them into the stretch. Now, for soleus, good way to target it is that you want to get them to bend their leg. Once again, your knee and leg is supporting their leg. And then once their foot's like this, you follow the same kind of protocol with your palm on the calcaneus. And then Jeremy, This time, I'm going to get you to once again press up into my arm and we're targeting the soleus here. So 10 seconds, I'll get you to contract and relax. And deep breath in. And on the out-breath, move them into the stretch. And I think you'll notice with this one that you won't get a crazy amount of range of motion when you're pushing them into the stretch. But you're getting a really targeted effect for the soleus, which is a very important muscle, especially on athletes to stretch. And then after it's done, bring them back down.
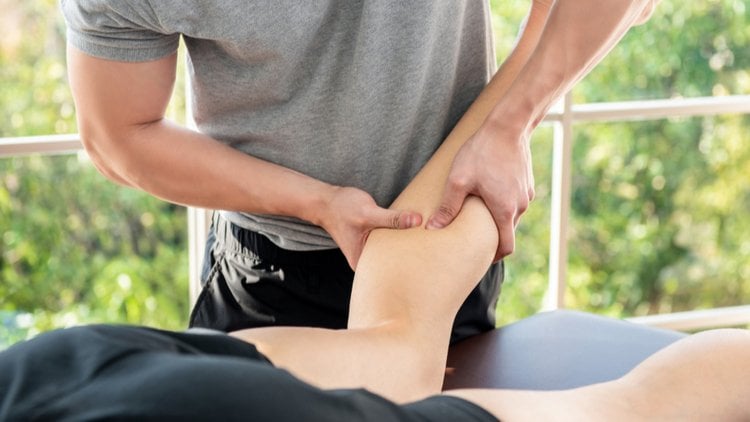
4. Hamstrings/Calves: Minister, you guys kind of an untypical technique for the hamstrings here. So what I'm doing is bringing his leg onto my shoulder and there's a reason for that. The reason why I'm doing that is because I want to do a muscle energy technique with Jeremy pushing down into my shoulder. So Jeremy pushed down into my shoulder. And he does that for ten seconds and that fires the hamstrings right there. And then I'll get him to relax. And then there's a couple of things you can do here. So there is the tendons right here and here. And what you're doing is that the hamstring muscles, the semi sisters and the biceps femoris can become bound together. They've shown it under dissection. So what I like to do is take both my thumbs and then I anchor in on either side. And then I will stretch down. And as I'm doing that, I'm separating the hamstring muscles. And I find that this one is quite effective for anyone who has chronic tight hamstrings. Because you're loosening up and you're getting very specific with what you're doing. And then after you've done that, what I can do to make this technique even more useful is that I can get jeremy to straighten his leg. If sorry to bring it back. Bring your hips are back. I'm just going to get you to lift like a lever like that. So I lock in on either side of the hamstrings and then Jeremy lifts his legs as I stretch down the muscle and then bring your leg down. And if that is uncomfortable for clients, what you can do is a couple of things. So I can take his leg, I can place my hand on his quad and then place the flood of my hand on his hamstrings. So it's more of a broad contact. And you can do that after the specific technique as well. And then I will do the work here. So Jeremy, relax, she will actually like and so I'm going to squad and what does hamstring? And then I just lift up and create a stretch down the hamstring. And if they're tight, you're going to have to do this many times, so bring him back down. And then as you guys can see, I'm a little bit lower here. And then I can lengthen, bring them up, lengthen the tissue down slowly. And this could also get the quads and the hamstrings at the same time because I'm using my other hand to glide along the quadricep muscle. Now, another thing you could do here, adding even more to this entire sequence is that I can lift up. I can simply take his leg and then I can come over here. And then I can go down the adductors into the medial hamstring attachments and vice versa. I can bring them this way. And if he has a tight biceps femoris, I'll show you guys from another angle here. From this angle, his leg is on my shoulder and then you can work down the biceps femoris on this side. So a lock in. And then I'll just move my body down. And you're getting the lateral hamstrings. And this is also useful for anyone who has that type of patellofemoral syndrome or any type of issue down this line into the tibialis anterior. So once again, shorten the muscle, rotate the leg and then rotate the leg in. Bring the leg in. You can even then just move off. And then you're working down the biceps femoris. And this is a really, really great technique that I love using. I use it all the time. Okay, Now we're going to work on the calves. What I like to do is take a couple of Roll towels and it'll get the client to drop their foot off the table, which creates a lot of different opportunities for working on this area. What I like to do first is I will work on the entirety of the muscle. So what I'm going to get jeremy to do as I work through is to take his foot like this and this dorsiflex plantar flex and that will help to stretch out the tissue so I'll lock in just above the Achilles tendon. And then Jeremy, I'll get you to plantar flex, dorsiflex. Plantar flex. And dorsiflex. Germany is doing the opposite of what I'm saying right now, but that does not matter because we're working up the muscle. So after we've worked up the calf, what I like to do is go on the sides here in the soleus and those muscles important for its role that it plays in returning blood from the light to the heart. So what we'll do here is I'll drop down, I'll lift up. And then. I'll move down. And I'm opening it up superficially. And we'll do a couple of strokes like this. And once again, if you wanting get the client to plant our and dorsiflex, which creates more of a stretch. And also what you can do is get more specific so you can roll the muscle up. And I'm, what I'm doing there is I'm grabbing the tissue, sinking then down and in, and then I'm stretching up after you've opened superficially. So sink in, grabbed the muscle. And then I will find where the soleus is. And then I will move down. And I'll usually do this segue and mentally. And that's just a little more specific to get into this area. I'm going to show you guys a technique that is good. If you're having someone who has quite a bit of tension in the hamstrings and calves. And you can't seem to figure it out. This is a nice one. If there is a lot of inflammation in the area, maybe not one that you wanna do. But here it is. I bring Jeremy's like up. And then what you're gonna do here is you're going to find the tendons here. And what you do is you gather the tissue up along the tendons to make sure that you don't pinch nerve. And then I'm gonna get Germany to drop his leg. And as he drops his leg, I'm stretching out along that attachment point. In the gastrocnemius heads were breaking up all of that soft tissue around that area. I'm going to get jeremy to bring his like up and then I'll just roll this up a bit. And as you guys can see right here, here you'll see the tendons and he has quite a bit more of a visual presentation of the tendon that is more medial. So what I'm doing here is I'm rolling my fingertips. I'm gathering tissue. I'm bringing all of that tissue up above into the gastrocnemius heads. And then I'm going to get Germany to drop his leg down. And then as he drops his leg down, I'm going off the tendons and I'm lengthening all of that tissue in that area into the quad, into the hamstring. I'm going to show you guys two techniques to work around the Achilles tendon. And I want to do this before I work on the feet and I'm going to explain why in a minute. So what you do here is take the flats, your knuckles on either side of the Achilles tendon. You lock in like this, get the client is shorten, lock in. And then Jeremy, I'm gonna get you to dorsiflex your foot. And as he does that, I slowly come down the foot along the Achilles tendon. And you're being sensitive in this area, I'll usually transition to one knuckle on each side. And you make sure that you follow that right in to the calcaneus. And that's a really nice one. Another one you can do here is to take a reinforced fingertip on this side, thumb on the other side. And then once again Jeremy shorten. And then this time instead of going down, I'm going to go up. So you start at the calcaneus and then Jeremy, I'll get you to dorsiflex your foot and then bring your foot down and to dorsi flexion. As I work up beside the Achilles tendon. I'll show you guys one more time here. Reinforce fingertip. Jeremy's photos like this. I have my reinforce fingertip on this side than on the other side. And then I'll get jeremy to bring his foot down into dorsi flexion as I work through. Beside the Achilles tendon. And other really great thing about having the client in this position is what you can do is Jeremy, I'm just going to get you to bring your leg out. And then you can get them to roll their leg out like this. And you can Jeremy, I'm actually just going to get you to kinda bring your leg yes. Like this. And then guys, What's great about this is that he can bring IV or an invert his foot off the table as I worked through the peroneal. So you can get him to shorten the tissue. And then he goes off and he inverts his ankle as I worked through the peroneal. Then once again get him to bring it back, shorten the tissue, lock in, and then get him to invert. He can even do some circumduction. So just do some like circles with your ankle, Jeremy. And he could do some circles with his ankle. As I worked through these tough perennials. And this is just a really nice one that you can do when the client is coming out of that position of working on the calf. We're finally going to finish off on the foot. And the reason why we did all that calf work and worked in the soleus and the gastrocnemius heads is because we want the Achilles tendon around that area to be relaxed to work on the plantar surface of the foot. It's shown that the Achilles tendon will actually cause more tension in this triangle, that is the plantar aponeurosis. So anyone who has plantar fasciitis, it could be caused by being pulled by the Achilles tendon, pulling this down, making it tight. And what I like to do here is a work around the triangle to begin any treatment they've shown under the section that actually along the triangle, the tissue will be kinda stuck and bound to that plantar aponeurosis. And I'm going to leave a resource for you guys so you can check out a dissection of it. Super interesting. But with the techniques, what I'm gonna do is it'll take his toes. I'll bring them back. And then I'll use my knuckles, which is just comment along that area. And I'll stretch that all out, income higher and stretch all of that tissue out. And then all the way to the edge. And then to work down here, you can take your fingertips and you can spread and kind of ease and come out that tissue along the triangle. And you can bring that down into the bottom of it towards the calcaneus. And the same thing on the opposite side is you can come in and you can take your fingertips, find the edge there. And then you can break up all of that specific tissue along the triangle before you start on the foot. And I could even feel with him. And you'll notice with a lot of clients, especially here, that they're going to have a lot of little scar tissue bound up here. And with the foot you can go quite deep to break everything up. And after that's done. And you've broken up all that tissue, you can come in. And that's when you can kind of move down the middle of the plantar aponeurosis and stretch everything out in that area. Feel so good. Shorten the tissue and stretch the tissue and you can put quite a bit of pressure in this area. It's a great way to open up the foot, shorten and then stretch everything out. Then you can also follow that down. I like to use my thumbs and you can work around the heel, break everything up there as well, and come down with their knuckles and stretch down the heel. And if you guys want more specifics on foot massage, I have a tie reflex all GE course it gets really, really specific. It's about an hour and a half of how to just solely work on the foot and leg. But for now, those are the techniques that really work well in the foot. You can spread it out. So even nice to put some nice heat on the foot, depending if they have plantar fasciitis. Some people will also do kind of like an ice cube massaged and that's an option, but usually I do neither. And I just work the foot with my hands and my techniques and knowledge of the body.
5. Tight Hamstring Stretch: Now we're going to look at how to stretch tight hamstrings. For this. I'm going to get you to bring the clients like up. And what you wanna do here is you want to get them to 90 degrees. And if you do, everything's fine with Jeremy. He can't get to 98 degrees. Some other tasks you can do here is to see how resistive the foot is. Now if the foot is resistive in this position, it can mean a tight gas rocks. The other thing you could do is get him to slightly bend his knee. And if the foot is still resistive in this positioning, then, you know, it could be the soleus That's tape. Or there could be something stuck in the talocrural joint. To do a nice stretch here. You can come up on the table and then place your shoulder underneath their calf and then lock out the knee. And then Jeremy, I'm going to get you to push into my shoulder. And as he does that, tell the client that you want them to focus on contracting the entire hamstring. 10 seconds and relax, deep breath in and slowly out. And sometimes I like to do this nice little rocking motion just to help relax the client into the stretch. So I'll just do a little bit of rocking and then after the out-breath, bring them into the stretch just by lifting your body. And then once again, you found the point of Bind. You've stretched them, bring it back slightly and then 10 to 20 percent good jeremy to contract into my shoulder. For ten seconds. Relax, deep breath in and out, and then bring them back. You can even bring your hands interlaced them around their quad to lock out the knee and then stretch them, bringing them to the new pointer bind. And finally, holding for 20 to 30 seconds at the end range. Bring them back down slowly. To get more specific with the hamstrings, there's a couple of alternatives. It's Jeremy and when it would get you to bring your leg up again. And this time, once again, I'm up on the table, but I'll actually get him to bend his knee. And then this time what I want him to do is to push down on my shoulder, contracting the insertion point of the hamstring near the knee. Jeremy, I'll get you to push down on my shoulder and then relax. And that will target this area specifically in Germany. I'm actually just going to get you to contract against what people can see. So contract, you guys can probably see that this muscle here near the insertion point is contracting. And then relax the lock out the knee and continue with the stretch. Another way of doing this is to target specific fibers of the hamstrings. So on the outside will be the biceps femoris. On the inside is the semitendinosus and semimembranosus. So to get the biceps femoris, well you can do is get them to bring their leg like this. So you want to internally rotate and adduct. And then I'm gonna get jeremy to contract pulling the leg this way. And as he's pulling the leg this way, I'll get him to relax. And then do a little bit of a little wiggle here just to get the client comfortable. And then you can stabilize, internally, rotate. And then you're looking to stretch out specifically in this area, bring them to the point of bind and make sure that they're feeling a stretch right here. Alternatively, to get the inside of the leg in the semitendinosus semimembranosus. You can externally rotate the leg. And then what you can get them to do is, well, I'm going to come on this side of the camera. Just show you guys so you can externally rotate the leg and then bring them out. And then Jeremy, what I'm going to get you to do is to contract pulling this way using these muscles. And it's good practice to place your hand here not too high obviously for client comfort. And you want to make sure that they are contracting in that area. And then relax. And then you can just slowly bring them to the point of Bind, stretching out around the semitendinosus and semimembranosus. And once again, follow the protocol. Hold the last one for 20 to 30 seconds.
6. Quads: Now we're going to focus on the quads. What I like to do is I get the client to come to the edge of the table. I'll place a pillow underneath their leg and I'll get their leg to be hanging off the table. And there's a reason for that. What you can do here is you can get them to do a muscle energy technique to help relax this area. So I can just come down and then I get jeremy to try to lift his leg up as I resist with my hand. And he did that for 10 seconds. You guys can see that quad muscles firing and then relax. And then what I can do is I can get him instruct him to bring his leg up and then I can lock in with my hand and then get him to drop his leg off the table. And as he does that, I'm not doing much, just moving up the middle of the quads and stretching out the quotes. What you can also do is I can take his leg and I can move it at different angles so I can roll his leg out as I worked through that tissue. And this is especially useful for anyone who has a lateral tracking issue. I can then lock in, roll the leg out, and stretch up that side of the quad. Which feels really nice. Another thing you could do here is because the IT band is coming down. You can kinda lock in and you can get the client to bring their leg up. And then you're rolling over feeling where the band is. And then bring your fingertips just off the band and there's usually some scar tissue that builds up there. So I'm rolling off of it. I'm locking in and then I'm gonna get jeremy to slowly bring his leg down. And that's a pin and stretch to alleviate some of the scar tissue off of the IT band. And this will be fantastic for anyone who's a runner. And it's really going to help them break up that tissue. So this is a really nice positioning for release on the quadricep muscles. Okay guys, this is a nice positional technique for the adductors and see how his leg is like this. And then I'll place two pillows and then bent his leg over like this, just so he's comfortable and it opens up this entire area. A couple of techniques I'm going to show you here, is that if you work the adductors, and this can be quite a sensitive area. So you want to communicate with the client, make sure that they're comfortable with it. But a nice way to work the adductors, especially if someone has a knock need. This is going to be techniques that can be very useful for that condition. So you can anchor down here and then you can spread the tissue out on either side. And you're going to move in towards the quads and hamstrings. And you're taking your fingertips and you're moving out and you're going up the adductor muscles and it's going to get quite sensitive as you go up. So just be conscious of that. And the other thing you can do here is working over the pes anserinus. So someone's knock need, they're going to be, the tissue is going to lift up like this. And then it's gonna go down like this on this part of the knee. So what you can do here is take the floss your hand. And this is not a lot of pressure because there can be bursa in this area. You want to be very sensitive to that. But I do think that if someone does have a knock need condition, that this is a worthy technique to lift the tissue up and back away from where it's naturally going. So take the flood your hand, roll over this area and this is not a lot of pressure at all. So you're just getting that tissue and then as you get into the adductors, you dropped down a little bit more into the body. And that's when you can place a little more pressure and a little more stretch which helps to lift this tissue on the knee up and where you would want it to be. In an ideal situation for someone who has knock knees. Now, what else can we do with the adductors? You can get the client to bring their leg like this. And then as they do that, you can work up creating an activation style muscle release. So good jeremy to come back like this. I come over onto this side of the table just outside his leg. And then with one fist, I anchor down and then Jeremy, I'll get you to activate and stretch that out. And then you can move up the middle of the adductors, making sure not to put too much pressure once again on this area. You're just creating that stretch up the muscle. Once again, this is great for anyone who has knock knees and then bring his leg down. And you could do it at different angles. You can work more in towards the quad, in towards the hamstring. So once again, you going to anchor down there. You can even do both at the same time. So I'm anchoring on both sides. And then Jeremy, I'm gonna get you to once again bring your leg into that activation muscle style release. As you guys can see, I've locked into the quad and the hamstring. And I'm moving up both sides. And this is a really, really nice technique. Another technique that's nice here is that you can kinda roll off. So the quad tendons right here. And what you can do is to work the knee, you can kinda go over top of the knee, fingertips, gathered that tissue and they can kind of sink in and just spread the tissue out around the knee, which feels really nice. And then you can do more of a superficial technique where you kinda grasp with the flatter your knuckles around this area so you're just off the quad tendon. And then you can cut our roll off. And you're opening up superficially around this area and be very sensitive around the knee, but you're gathering that tissue and then you're bringing it down around the knee. And that's a nice little technique. Just if they have a lot of tension around this area, most likely they're going to be pulled to this side with patellofemoral syndrome. So you can even if that is the case, lock-in with this part of your hand, so it's very comfy and you're just off the quad tendon and then I can roll what I'm gonna do Jeremy's, I'm gonna roll your leg in. So I lock in. I roll his leg in. And then as I roll his leg in, I move down and stretch out that tissue and I can bring it back, roll and then again and then stretch that out. Role of men. Stretch it all out superficially, all the way down. And just helping to open up that superficial cylinder around the knee. After we've done those kind of more intense techniques around the IT band. And as we're gonna get into, in a second around the tibialis anterior as we're moving down this line. One thing I want to show you guys is that when someone dorsiflex their foot in any activity, what first happens is that this fires. Then you get a firing along this line and then you get a very strong contraction up just at the top of the tibialis anterior. So to me, biomechanically, what I think is that this area fires. This area can get bound along the tail curl joint. And then this area at the top where the tibialis anterior is can also take a lot of brown to the abuse. And while this does get very tense and tight and it is worthy to work on, these two are my focus to relax this area if someone has shin splints. So here's what we're going to do. I'm going to place my fingertips just underneath this part of the foot. And then I'm going to get jeremy to shorten the tissue so he's bringing his toes back like this. His foot is like this. And then we're working in along the Terrell curl joint and the extensor retinaculum on either side of the shin bone. So Jeremy will slowly bring his foot down and then curl his toes and then get them to maximally stretched this area as you work through. And this is really amazing at opening up all the tissue along this area that has such a strong role in the contraction during dorsi flexion. So Jeremy shortens the tissue. I lock in, not a lot of pressure and then get him to stretch his foot out. Now as he does, stretch along the extensor retinaculum and just create a really nice stretch there where he is quite locked. Once again, bring it back, shorten, lock-in, Jeremy, you go off, lengthen as I lengthen the muscle. Okay, so we just opened in this area. Now we want to work along the tibialis anterior before we get to the upper portion. What you can do there is this can be a little bit sensitive. So you're rolling off of the bone. And then what you're trying to do is kind of wedge your fingertips in between and kinda comb that tissue off of the bone and just easing all of that tissue because when someone has shins, ones in there, a runner, this tissue gets bound to the bone. And we want to make sure that we're loosening and creating space. So what I'm doing here is I'm taking all my fingers and this is good because you get to work. Lastly, we'll take you not as long to get this technique done. And so you're using all of your fingertips. And then you're getting in just right beside the bone and then you're just curling your fingertips out and creating space. So in just along the bone there. And then create space, pulling the tissue off of the bone. And this can be sensitive. So what you can do here is move very subtly. Move even slower than I was showing you guys on camera. And just hold the tissue. They're away from the bone for a bit and allow everything to stretch out and relax. You want to make sure that if you have a client that has quite a bit of hair to put a nice amount of motion, but not too much. And then once again, you can follow that down the entirety of the leg. Like I said, this is a very strong contraction point. And there can often be an acupressure point or trigger point at the top of the tibialis anterior. And that can create a fullness in the knee. So what you can do there is pretty simple technique. I like to shorten the muscle. So try to get him to leave the top side of his leg the stable. And then I'll sink in off the bone once again. And I like to use two fingertips for this and you're just right here on the tip ant. And you can ask the client if they have any discomfort in this area, if they feel anything or fullness in the knee. And then once you've short like curl the leg over and shorten the tissue, that should allow it to relax a lot faster and ease off that acupressure point and trigger point. Hold it for 30 to 90 seconds, keep communication with the client and that should release. And guys, I've actually had clients who have had knee pain for years and just this one simple technique, decrease that fullness feeling in their knee and worked really, really well.
7. A Better Way With The Psoas: When we look at this, so as we need to see how closely related it is to the kidneys, to low back pain. And if the psoas is really tight, it could be causing a displacement at the hip. And while it is quite a reactive muscle, I prefer to use muscle energy techniques to treat this. You need to consider that if it is really tight, it could be causing inhibition in the glutes to fire. So if we do loosen up that one side, it will allow the athlete to fire their glutes more and stabilize their core, which is what you want to have that nice balance and good reciprocal relationship in the hips as they're doing their sport. Alright, so we're gonna talk about the hip now. And the psoas is a muscle that goes right here. And it can be a really reactive muscles. So before I go in with hands-on techniques, which I rarely do, I like to do a muscle energy technique. So for this one, what I'm going to get jeremy to do is I'm going to get him to take this leg and then I'm going to get you to put your hands around your knee. And we can already tell that by doing this that Jeremy has a really tight so as on this side. But what I'm gonna do is I'm going to get him to place his foot along my hip. And then I'm going to raise this leg up and I'm gonna get him to do just a little bit of a bend in the knee. And then for the muscle energy technique, I'm going to get him to contract right here. So I'm gonna get you to contract and I'm going to get you to hold your leg up as you do that. And he's contracting for 10, He's activating this area. He's activating as Quad. But the target and focus is on making sure that this is activating. And after the 10 seconds, I'll get him to relax so you can gently bring his leg down. And then as he does that, you can provide a little bit of over pressure after he's relaxed and push his lie down. And Jeremy do feel a stretch in your so as with that. And once again, because this is such a reactive muscle, you don't want to do anything that's too abrasive. You don't want to force the leg down. All you really need is these kinda fingertips and to push the leg down a bit. And that will be a different range of motion for different people. So it's all about communication with the client at this point. And then you can bring it back up. And I'd like to do this about three times. So a hold is like there and they'll get him to contract and his focus is on this area in the psoas. And then I'll get him to relax, bring his leg down, you can hold it and then stretch it out. He can also increase the stretch himself if he wants to buy pulling his leg closer into his body, which stretches out that muscle even more. But with Jeremy, he's struggling a bit here. So we're just going to get him to bring that back and places foot along the side of my body. And then you'll notice that after the second or third passive doing this technique, that the client will have a little bit more range of motion and be able to move a little farther. So I'm once again going to press down, provide a little bit of over pressure. And as I do that and communicating with Jeremy, How does that feel good? And I can feel now that he's actually getting a little more range after that second pass. This isn't my favorite way of treating the psoas. And one thing about the Soyuz too, is that this is something that I haven't heard a lot about and I don't know if it's been talked about, is that in the iliacus and psoas, though oftentimes be a trigger point which can relate to knee pain. So if you release in this area where we're going to go next, you'll notice that sometimes clients will feel kind of a fullness in their knee. And as that relaxes and you move into the muscle and press down on that trigger point, it will start to release after about 10 seconds. So let's get into that net. You're gonna get your client to bring their leg up first, that creates a little bit at ease and the tissue here, then I'll just kind of roller showed up here. And so for this technique, we can kinda get on the table here. And so there's two things to consider. There's the iliacus and the psoas. And they've oftentimes shown under dissection that the iliacus and psoas actually get bound together, especially if you're someone who works out a lot. So with this, you're just kind of sliding your fingertips around the hip here. So you're just kind of curling in. And the motion here is kinda more of a, kinda a little thing. Your fingertips in. There's not a lot of pressure. And with Jeremy, I can tell that it's just so tight that it's hard to get in here. And as you guys can see right now, I'm just trying to get into the iliacus. And if you get someone, a case like this where it is quite difficult to get in, well, you can do here is I'll place my hands on his quadricep and then I'll get him to contract into my hands right now. So get you to do a little contraction here and hold that for ten seconds and get them to relax and relax this area. And you can do this as a precursor to doing this technique because it is quite contentious and hard to get into this area. But as you get in, one thing you're doing here is you're kind of flicking your fingertips to get to the so as. But before you do that, when you're sliding in, you're creating this kind of gap between the iliacus and the psoas. As are kinda like flicking. You're flicking your fingertips like this. And to know you're on the muscle all actually get jeremy to contract his quadricep. And there I can feel that I'm on the psoas right now. And I'll get you to relax. And this is kind of a delicate art to work on the Soyuz. So as you're doing this, you want to make sure that the clients relaxed. There's a pillow under their head. You're working with the breath. So get the client to take a deep breath in through the nose and then slowly out through the nose. And as they breathe out, you can slide your fingertips in just a little bit more. And you're creating that space between the iliacus and the so as in the case of someone with knee pain, you'd be looking for trigger points. So once again, this would be communication with the client as I'm going into this area and pressing down and I'm communicating with Jeremy or whoever my client may be. And you're seeing if they feel a bit attention as you're pressing in that area into the NAEP. And if they do, you actually want to provide a bit more pressure, which is going to make the client wanted jump off the table. But if you hold that for about 10 seconds, you're kind of resetting the muscle and you're allowing the tension in the knee or down the quadricep to relax. I'm sliding over the iliac crest. And then as I do that, I'm dropping into the iliacus muscle and then I'm looking out slowly to create the space in-between the two. And then as I get more comfortable, I move more into the so as with us. So as also one thing is that you want to make sure that you treat both sides. Because treating one side will leave the client doing lop-sided, kinda disoriented. And in Jeremy's case, should we found something interesting where pressing down on the So as on this side actually related to pain on this side. So these are all things to take note of and to make sure that you're communicating the whole time with your client as they're going on through the treatment sessions.
8. Psoas Magic: Another alternative way of getting at the psoas and probably the best hands-on way of doing this. First of all, start by warming the area. I'll just roll out the leg and that just helps to relax everything down this chain. You just do that for a little bit. And then once you've done that, get the client to bring their leg up. And you can come on the table and just take their leg. And then what we're doing here is similar to what I showed earlier. So you're finding the iliac crest and you're just sliding off that into the psoas muscle. And this works really great. It's a string counter streaming technique. So what I'm doing here is I'm just bringing her into the direction of 0s, which helps to take the slack off the muscle there and helps it to relax so you can get into the muscle a lot easier. And as you're doing this technique, you want to work with the breath. So Kristen, I'm just going to get you to take a nice deep breath in through the nose and slowly out through the nose. And on the out-breath, bring the leg a little bit closer into her body, creating more slack and more 0s in the muscle. And then once again, deep breath in through the nose and slowly out through the nose. And then here you can actually do a little bit of external rotation. And then dive in a little bit more. And deep breath in through the nose and slowly out through the nose. And then finally just a little bit more external rotation. Just hold this, communicate with the client. See how the muscles feeling. Usually it'll start at about an eight out of 10. And as time goes on, after a minute, a couple of minutes, you'll notice that the muscle will soften. And this technique works really, really well. And you want to make sure when you come out of this technique to really ease out of it. Let them sit here for a bit and then just gently bring their leg down.
9. Low Back Pain Relief: I'm gonna show you guys a technique for if the client has a stuck SI joint. Oftentimes they're going to complain about having some numbness or a little bit of tingling. And this is a great technique to muscle energy technique. So I'm going to get Kristin do is keep this leg straight and then we can get her to wrap her leg around the side of my body. And then I'm getting her to contract right here into me for 10 seconds. Relax, and then just allow her to hang out for a second, let her rest, and then bring her up slightly to end range. And then you can go around like this and place your hand on the SI joint and just create a little bit of movement there. And how does that feel, Kristen? New feel stretch. And then I'll bring her back just slightly and then I'll get rid of contract again for ten seconds. And then I'll get her to relax. I bring her a little bit farther this time. And then once again and on the SI joint and just create a little more traction into the stretch. Hold that for about 30 seconds, and then bring her back. Once again contract into my side body. Do that for ten seconds. Relax. And then for the final attempt, you're going to go to the maximum and range. Place your hand down, create more traction. And this is fantastic at and sticking the SI joint. And you can also tell clients at home if they want to do this themselves. Christian, I'm just going to get you to place your hand around your leg. And they could do this at home so she can contract into her hand. Relax and then just bring your leg up. And this is a great stretch for homecare. Another great way to unstick a really stuck SI joint is to do this kind of chiropractic osteopathic technique. So we're gonna get kristen to come pretty close to the edge of the table. Her bottom leg is straight and then I'm getting her to bend her leg and place your foot underneath her knee like that. And then what I'm doing is I'm using my leg as a lever and then I'm getting her to twist and I'm placing her hand over her shoulder. And typically this technique would be done with a thrust. As a massage therapist, this works incredibly well as just a really great stretch and to help create some movement if there is any nerve compression or anything in the area that's causing numbness down the leg. This is great for transitioning that area. So what you can do is place for like this. And then to create a little more tension, you're pushing down with this leg and pushing with this hand. And that creates a little more tension in the area. And then you can place your forearm down. And instead of thrusting, you just hold them in this position. And once again, this is a great stretch and a great way of getting at any type of SI, joint stuckness.
10. QL: This is a really nice technique for the QL and also show you kind of a hands-on technique that you can work into this one. So I'm gonna get Kate to do is come towards the edge of the table here. And then this leg is knee is bent. We're going to get this leg straight. And basically here you're going to get the client to do most of the work for you. So many bring Kate's like up, I'm going to bring it off the table. And then let me get her to actually hold it in place right here for 10 seconds. And then once again, relax. And then you can grab the leg with your hand and then bring her down the table. And for this one, you actually don't need to do much. You can let gravity kind of take her leg and pull her into the stretch. It k does it okay if I roll this up in the QL. But a nice thing you can also do here is provide a slight over pressure with your hand on her leg, bringing it down, increasing the stretch in this area. Once again, bring the leg up, get her to contract and hold her leg and space. You know, it's kinda nice. You do nothing. They do all the work and you get paid. You know, it's not a bad acts technique. Then I'll get her to relax, bring her leg down. And then once again, slight overpressure. And what you can do here too, as well as place your hand just over this area and the lower ribs and create a bit of a fascicle stretch as you're pulling the leg down. This is a particularly good technique because lot of the times trigger points in the QL can relate to hip pain. It can relate to pain in the pelvis. So any type of pelvic pain could be related to trigger point there. And here's a really nice hands-on technique that you can do. So you bring the leg up. And then what you're gonna do is place your hand just underneath the adductors, just over the knee. And then what I'm going to get k to do this time is specifically in this area, pull down. And I'm going to let allow her to kind of track down with my hand. And as you do that, you can take your fingertips, place it in the QL, and then slowly just follow her down as you press in that area. And I find that this really works well at releasing the trigger points in this space. And then once again, you can get them to come back up and go a little bit higher. And then as they're a bit higher in space, the muscle actually is shortened. So it's easier to get your fingertips in along the QL. And with Kate, I can feel that it's quite tight. So as we're here, I'm just going to sit here for a moment, allow my fingertips to sink into the shorten tissue. And I'll just do some nice concentric, It's hard to say concentric circles in this area. There's working it out. And then now I'm going to get Kate to slightly pushed down into my hand, not a lot of force. And as she does that, I maintain the pressure with my fingertips in the Q0. And because she's doing that, it causes a reciprocal inhibition in this area. And as she lowers, I can feel the muscles softening underneath my fingertips. Bring them back up. And yeah, I find that that's one of my favorites for the queue up.
11. Low Back: With a low back, it's important to look at the SI joint. Is there a mutation, a counter nutation. And could that be caused by a tight QL which is referring pain into the low back or glutes. Where could it be the psoas or could it be a combination of the QL, the psoas, and the quads. These are all things to explore and you're gonna have to work with and communicate with the client over time. Really nice technique to kind of combine what we've been talking about and moving more if the body is to work around the iliac crest. Now I like to do this in sideline. And as I noted earlier with fascia, it oftentimes gets bound to the bone and we're taught not to work over the bone and massage therapy. But I actually think that if you work over the bone, you're going to release some of these adhesions and create more range of motion in this area. The way I like to do this is all kind of curl my fingertips just into the iliac crest here. So I'm just going to change the camera angle for you guys. Okay? So what I'm doing here is I'm curling my fingertips into the iliac crest. And then I'm spreading down into the lower back and into the front of the hip, into the psoas. And you can kinda do it in three ways. So you can start here above the hip and just kinda like more of a superficial technique. So you're not technically underneath the bone, you're just moving the tissue that is above the iliac crest will start there. That's number one. Number two, curl your fingertips into the iliac crest and you're getting below the bone here. And then you're carving out and just spreading the tissue laterally and creating space. And then third is that you go right over the crest. So with this one, I like to take my knuckles and I'll get a nice broad contact right here. And then I'm spreading out. And after you've done that, creating space, hydrogen in the connective tissue in this area. And you're releasing everything that gets really tight around the hip, which actually helps to release the psoas. And once again, we're looking down the kinetic chain. So as you release things here, the psoas will also be released. The lower back, the tension is the ease off there and also paying down into the knee, which can be related to this entire area is relieved. Now, there's a couple of reasons why I like to treat the QL inside lining. One of them is that by the client being in this position, it allows the tissue to be in a position of ys. So when you get into the muscle, which I'll show you guys here, basically, I take my fingertips and you're just looking in this area here. You can use your thumb. But I'd just like to use my fingertips. And you're kinda just slowly gliding into the muscle. The QL is once again, a pretty sensitive muscle. So you don't want to kind of aggressively go in and you just press down, work with the clients breath. And here's why I liked this positioning. What I can get jeremy to do now is to move his leg straight. So Jeremy, I'm just going to get you move your leg straight. And as he does that, you can create a nice movement and active style release here. So I'll get you to bring your leg back. Brings us like back. I slide into the queue all muscle. And as I do that, I'm just waiting for the muscle belly to feel like it's relaxing. And then when it does, I'll get him to move his leg, slide it straight. And as he does that, I'm going down and towards his SI joint. And once again, I'll get you bring your leg up. Another variation of this is that you can actually get you bring your arm like that, is that you can actually use your form here so I can sink in like this. And I prefer my hand because I just feel like I can feel more and feel at the tissues doing. But this works as well and can save your fingertips. So once again, I'll get you to bring your leg straight. And as he does that, I slowly slide my arm down the QL muscle.
12. Piriformis Stretch: Let me show you guys a couple of alternatives and stretches for the piriformis. This is a really important one. So I'm going to get jeremy to do is bring his leg up. And this could actually be a good place to test. So you bring both legs up and then you get them to bring both legs out. And I can see in Jeremy that he has more range of motion on this side and this head. So bring this leg down. I know that this is the head that I want to treat. Now the way to do a muscle energy technique here is that I'm going to stabilize his pelvis and I'm going to resist him pushing out this way. So he's contracting the piriformis. And then I get him to relax. After the 10 seconds, you can do a nice little bit of rocking here, stabilize the pelvis, and then bring him in to the stretch. And then once again bring them back and get him to contract and relax. And then bring him in to the stretch. You want to make sure that after you've done this three times, that you do retest and see how both sides are doing. Gonna bring his leg back down. And now we're just gonna do a little retest here. So I'll get him to bring his legs. And there you go. Just offer that a little bit. He's back to even. I'm gonna show you guys two alternatives to stretch the piriformis. Ones that I really like. This leg straight, bring it more to the center, get the client to bend their leg and then crossover. And this is a really nice, simple way of doing it and really comfortable as a therapist. It's wanna do is wrap my arm around his leg, stabilize at the hip. And then I'm going to get him to press out. Working the piriformis muscle. 10 seconds. Stop. Deep breath in and out. And then stabilize the hip with your palm. Be gentle and this area because it can be quite sensitive. And then you're bringing the hip stretching in the piriformis and then straight. Another alternative you can do here is to bring the leg up, get them into kind of a figure four position. Some people, this is going to be a little more difficult, but it will work on some clients. And then you can use your body weight, so place your body weight right here and then get them to contract into firing the piriformis muscle and relax. And then you can use your body weight to bring them into the stretch. So you can stabilize the pelvis and then bring them into the stretch. Those are just two nice alternatives that can work well depending on how you like to work and what is more comfortable for you as a therapist.
13. Lats Stretch: Here's one of my favorite techniques for the latissimus dorsi. So I'm going to do is roll up a towel place in our Jeremy's had for comfort. Then I'll get him to bring his arm up. And what you can do is their bus here is to reach around and then grab and contact his elbow. And then what I want jeremy to do here is to contract, pulling down this way. So he's contracting. And as he does that, this one is very easy to palpate and feel that his latissimus dorsi is contracting. And then I'll get him to relax. And what's nice about this technique is you can do it at different segments. You can anchor down at the hip and create a nice big, long stretch that way. Or you can go on the lower ribs, which is cause for a soft, very relaxed hand here. And you don't want to put too much pressure there. But you can stretch and anchor down there. You can also, if you want to target more in the middle, you can place your hand there and then bring them back into the stretch at that segment. Or you can even go into the teres if that's more of your concern. And you can anchor down and then bring them into the stretch, which is also kind of an active release technique. Once again, follow the protocol. So Jeremy, I'm gonna get you to contract into my hand. You're going down that way for ten seconds and relax, bring him into the stretch. And here I want to target this particular segment. So I'm going to anchor down here. And then I'm going to bring him to the point of mind. This is definitely one of my favorite techniques. And if you watched my first sports massage course, he talked about how in sideline it's so dynamic. You can go at different ranges. I can bring him this way and get him to target more of this area. I can bring him here and target specific fibers that I want to get to. This is a really, really fantastic technique. You can get really specific. And it's definitely extremely beneficial.
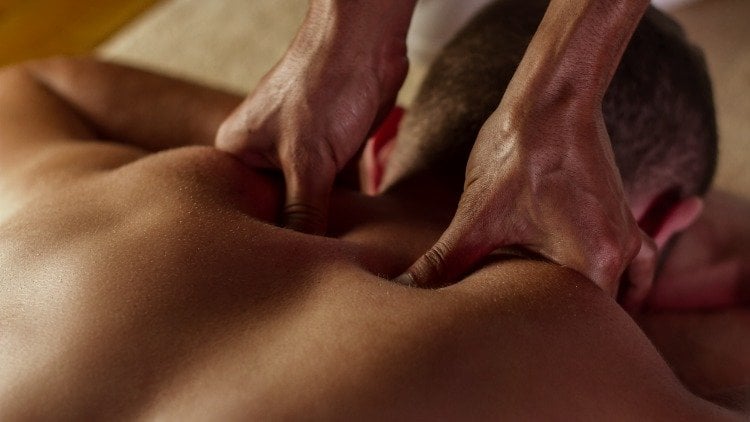
14. Upper Back Moves: When we look at the back and you look at the spine, and the most common thing that you're going to see is a kyphotic posture. Now, in the rhomboids, they're often overstretched, so we need to bring that tissue in. And then as we travel down the back into the lower back, that tissue is going to be stuck in along the spine. And we need to bring that tissue out and create a healthy curve in the entirety of the spine. So now we're going to talk about the back. I like to start the treatment off by doing a nice fascicle, pull down the spine on either side. So I'll take my first I'll sink in. And then my focus here is on pulling the tissue down and back. So in the rhomboids where typically the tissue is kind of spread and overstretched. I like to gather and bring the tissue in. So what I'm doing here is I'm placing my fest down. I'm sinking into the tissue, working with the clients breath. And then I'll pull and gather the tissue right in towards the spine. And then as you move down, you're oftentimes going to get stuck in the thoracic spine because that's where all the tensions held, especially with the modern-day posture. And as you get into this area here, so the tissue here is overstretched, but this tissue is actually gathered and tight along the spine. So you want to spread it outward to decrease the tension in that area. So bringing the tissue here and gathering it, then pulling it in towards the spine. And then when you get down here, what you wanna do is take fingertips and you want to pull the tissue away from the spine. And one way to enhance that is to take a pillow and Jeremy, I'm just going to place this underneath your abdomen, so I'm just going to get you to do they'll push up here. And now, and what that does is it helps to push everything up so that when you do push and stretch the tissue laterally, you're getting more of an effect and helping to ease off the muscles in the area. So here I'm taking my fingertips and I'm spreading the tissue out laterally. Just putting as much pressure as you feel that the client needs. So here you have to use your intuition. And you can also communicate with the client and see if this is comfortable for them. And basically what we're trying to do is to decrease the tension and overstretch in this area and decrease the tension and pull towards the spine in this area. One thing you'll notice with athletes and maybe any human being in the world is that they're going to have a lot of tension in the thoracic spine. I like to work in the laminar groove, but when I worked in that area, I actually don't provide too much pressure. What I do is I'll take the tissue. Move it and I'll use all my fingertips of both hands. And I'll sink in. And you're just creating space between the tissue and the bone. And the reason why we do this is to take pressure off this area because when the tissue does it get really tight and adhered anywhere along the spine that can create havoc in the nervous system. All the neurovascular bundles that move off of the spine can be irritated and that can cause numbness, tension. So once again, I'll just gathered the tissue, move laterally off of the spine. And then I'll just slowly move down with my fingertips. And you're kind of creating this little well in the laminar groove between the laminar groove and the musculature that is just off of the spine. Another thing I'm going to show you guys, and I know that in many states people aren't allowed to do joint mobilizations. But there are a lot of places in the world where massage therapists can. And this is one that if I'm gonna do any joint mobilization in the entire body besides the one at the foot that I showed earlier, this is the one that I do. So what we're gonna do here, His, you're on either side of the spine. And you're taking your PZ form on either side of the spine and you're gathering the tissue, you're taking out the skin slack. So here I'm taking out the skin Slack. And I'm getting jeremy to take a nice deep breath in. I spread out. And then on the out-breath I push in and then I push down. And you're just mobilizing in the TV IEPs and the ribs in the thoracic spine. I'll show you guys one more time because this one can be a little hard to pick up. So once again, Jeremy, I'll get you take a nice deep breath in. And then on the out-breath, I twist, lock and push down. And the important distinction here is that with a chiropractor, they're allowed to do a thrust. But what we're doing here is we're twisting, locking, and simply pushing down, which is a grade 3 or 4 mobilization. Another thing you can do here is some nice rib walking. And once again, you could do this in a grade three or grade four manner. And when you're doing the rib walking, you're just moving really slightly down each time. So you can start here. You have this kind of butterfly handshape and your arms are straight and you're using your body weight to slowly pull them laterally and then push down. And then you gather the tissue on the other side, take out the skin Slack, push laterally, and then push down, go down one more step, push laterally, and then pushed down and continue that process. And push down. I really like mobilizing the ribs. I think it once again helps after you've worked on the diaphragm and the anterior scaling, it just links everything together and it allows the client to just have that ease of breath. I'm going to show you guys another alternative, zones of fun, one to Germany. I'm gonna get you to bring your arms off the side of the table like this. And I call this the Superman. And you could do it two ways. So here we're going to get you to do is to bring your arms up and go into a Superman like that. But you're going to start here. And this is the first way you can do it, is to gather the tissue and the lats. And then I'll get you to create the movement Jeremy. So we'll get you to do the Superman. And as he does that, I'm pinning and stretching the tissue. And I'll get you to bring your arms back. And the second way to do this is as opposed to moving down like this, you can pull up. So once again, gather the tissue and the intercostals and then Jeremy, I'll get you to pull up. And as he does that, I'm pushing and pulling and stretching out along the intercostals and into the shoulder blade is another great stretch that works really well.
15. Relaxing the Neck: Okay, so we're going to start it on releasing the neck. So the Jeremy here, what I'm going to get them to do is keep his chin and then I'm going to get him to rotate his head, making sure they stay on the table. These rotating 90 degrees. And we're going to open up around the superficial cylinder of the neck. Is Jeremy, I'm going to bring you back chin in. And then I'm going to anchor down here. And with this technique, you can do it at three angles. So you can start lower, go to the metal and they go up higher. So we're going to start lower. And I'm taking the tissue and just grabbing it and you can see a little bit of a pole there. You want to communicate with the client and make sure that they're comfortable during this technique. But I'm gonna get you to slowly bring your head to the side 90 degrees. And I'm anchoring down into the tissue. And then I'm not doing much here. I'm just holding my fist there and he's doing the movement. And then I stretch down into the upper traps that he can bring it back and go to more of the middle. And once again, I'm bringing my hand there, I'm anchoring down, creating a little bit of a stretch here, making sure he's comfortable with that technique. And then chin and then rotate the head 90 degrees. And then as he does that and he gets to about there, I can go a little bit deeper now into the tissue, into the upper traps and move through that area. And then once again, you can do it a little bit higher. So I'll grip in here just underneath the mastoid process, grabbing the tissue. And that once again he moves to the side and I'm moving up more of the upper portion of the neck. And this one just continue with more of a lighter pressure because you're going around the top of the neck where it's more sensitive in the cervical vertebrae. Going forward from that technique, what I'm going to get jeremy to do here is to bring his head 90 degrees. Once again, you guys will see that the SEM pops up there. Now a lot of massage therapists, they like to do this technique where they grasp the SCM. But to me I find this a little bit nauseating. So I prefer this technique because what it does is it stretches and spreads out all the tissue along this line, which will help to ease everything off. So if there is any vertigo trigger points, they're eventually going to dissipate with you doing this technique. What you can do to start is a gentle muscle energy techniques so you can get jeremy to bring his head into my hand and he's trying to bring rotate his head and relax, give him a couple of seconds, deep breath in, bringing the shoulder down. And then with a loose fist, you're going up the SCM muscle. Communicate with the client, makes sure that they're comfortable. Jeremy has that feeling. And I'm pulling the tissue and I'm just going off the ear into the mastoid process, making sure to go over the mastoid process to get that area as well. And then just pull laterally. So once again, we're looking at this area, dropping the shoulder, creating the stretch up this area. And this is just a fantastic technique to bring the neck down and back and also to ease off all the tension in this area. Most people with a kyphotic posture are going to have tension in this area. And this is really, really beautiful technique. And I would say one of my favorite techniques. You can also, as you're going through the technique, kind of anchor down at the top of his head and just bring his head down and back a little bit. It's subtle, but it allows the stretch to be just a little bit better. And then you're going into the mastoid process, loosening your pressure and just working over the area around the ear. Here's another nice little superficial technique is you can dip your hand under. And then we're focusing on the splenius capitis muscles here. And what I'm doing is I'm anchoring down around here with my fingertips. And then I'm getting jeremy to bring his chin in and rotate 90 degrees. And you're working along this line right here. Into the suboccipital, down into the cervical spine. This feels really nice and bring it back. Once again. Chin in 90 degrees. And you're creating a stretch in all of this tissue opening up along the nuchal line towards the cervical spine and the suboccipital. Here's an alternative technique for the splenius capitus and services. So I'm just going to dip my hand under here, place it comfortably underneath Jeremy's head. And then what I'm doing here is I'm anchoring down once again just above the just under or you can start just above actually the mastoid process. And then he's going 90 degrees. So bring your head 90 degrees. And then with this one, I'm just going down the muscle more so you're going down the sleeve. And then I'm dipping down in in once I reach this area and I'm going towards the cervical spine, just into and dipping under into the thoracic spine. Show you one more time. This time. I'm not going to place my hand underneath his head. Once again, you can kind of grip in just above the mastoid process. And then Jeremy, I'm going to get you to bring your head slowly to the side 90 degrees. And then as I do that, my fingertips go down into the cervical spine and then I dip down and under getting a little bit of the sky, the upper traps and then I'm going underneath into the thoracic vertebrae just to the side. And it's a really nice technique for opening up this entire sleeve. This is a really nice technique for the laminar groove. What I'm gonna do here, I'll show you guys, but by turning Germany's head. So for my hand, is your funding the cervical spine and then right off it with your fingertips, you're locking in. And then you're, as we go through this technique, what you're doing is you're pulling up right into the suboccipital. And this is a really nice technique for lengthening out all the tissue. Because when you think of someone with a kyphotic posture, just going to shorten your neck here. This area of the neck gets extremely shortened, so we're trying to lengthen that out. This helps with a lot of things, especially more comfort within the neck and also can help with proprioception and different things like that. So I'm going to get jeremy to come back like this. And then what I'm doing with this hand is I'm dipping down and around. And I'm just at the top of the thoracic vertebrae. His head's down like that. And now I'm pulling up just along the laminar groove in the cervical spine. And a nice way to make this technique better is that as I'm doing that and get jeremy to bring his chin in towards his chest. So Jeremy come back and then my hands there. And then Jeremy brings his chin and towards his chest as I'm bringing my fingertips up the cervical spine and then even more, a little bit more of their journey. And we're lengthening ALL OUT in that shortened area right there. And then once you've done it with this hand switch, hands go to the other hand, dip down and under your under the thoracic vertebrae. And then same goes, I'm rolling up the laminar groove on this side. And Jeremy brings his chin towards his chest. And then I'm stretching out all the shortened tissue in the cervical spine. And we're gonna come back to this side and I'm just going to show you with his neck, which is a little bit rotated more so, so you can see a little bit what's going on here. So right here, you guys can see my fingertips are moving up. Then he brings his chin in towards the chest. And you can even do the technique at this angle. And then just opening up and stretching and lengthening out all of that tissue. And this feels really fantastic. And such a nice technique. Here's one for the suboccipital, these guys, and this is just continuing forward from that laminar groove. Left SCAP technique is, as I'm moving through this, I'm going to bring his tissue down, drop into the table, and then lift up and creating a nice stretch around the suboccipital. So I'm dipping down and under, raising his head up just a bit. And then Jeremy, just relax your head into my fingertips, into my arms. And then here guys, you're slowly moving up either side of the cervical spine. And this is definitely a massage classic and just putting a little little bit of twist on it. So right as I go up, I'm getting up towards the Slovak suppose here. And then guys, what you do here is you drop CI, dropped down into the table. You drop and then lift and pull. And you're going all the way up. And this is just this is one that's going to keep the clients coming back. It feels so nice, is definitely one of my favorite techniques. So once again, dip under client relaxes their head on your arms. And then we'll show it one more time. Because I would love to have this done. I'm sure if you guys are watching this at home, you're thinking the same. So moving up the tissue and I'm stretching, I'm as I'm feeling the barrier, I'm waiting for that tissue to relax underneath my fingertips. And then I'm moving up slowly into the suboccipital. And then I'm dropping down and I can even get jeremy to slowly, very gently bring his chin and towards his chest as I dropped down into the table. And then we're working together to create a really nice lengthening in through the cervical spine and stretching up through the suboccipital. And relax. I'm going to show you guys techniques for the middle and posterior scalene and the anterior scaling. And these are very important ones do to get in this neck massage sequence. So what I'm doing here is you don't need a lot of pressure, but you're pinning the muscle down. And then what I'm going to get jeremy to do is I'm going to get him to side bend to stretch out the scalene muscles. You can also get the client to do a muscle energy techniques so I can get resist him side bending into my hand. You can place your fingers over the year just to make sure that he's comfortable there and just bring it back and then the stem focus more like side bending like that into my head. And just using 20 percent pressure for 10 seconds. And then he relaxes. And then I pin this muscle down so I gather the tissue, I pin it down. And then we're creating a movement as he side bends. And we're stretching out the middle and the posterior scalene. You can even move more down and pin it down like this. And that's another nice way of doing it. And he moves to the side. As we stretch down that muscle. We can even go down like this, more against the ribs. And then you're stretching, pinning and stretching. And this feels really nice. And now I'm going to show you guys a technique for the anterior scaling, which is a little more of a difficult one to master. So what I'm going to get Germany to do here is to bring his knees up. So as you guys can see, Jeremy has got his knee is bent, his legs are up on the table. And now we're going to get into the anterior scaling technique. So for the anterior scaling, What do you want to do is you want to find where the SCM would be so you can turn your client over and then this would be where the SEM is. Then what you can do is place your fingertips down just off of the muscle. Make sure that the client is comfortable because this can be quite discomforting. Then what you're looking for here is like this little guitar string muscle. And what I'm gonna do here is I just found it right there. And you're gonna go on either side and you're going to lift, lift the SAM up to get underneath into that little guitar string that attaches to the first rib and make sure the client is comfortable. Jeremy, are you comfortable arena? And then what I'm going to get him to do is to press his feet into the table. And then he's going to bring his chin towards his chest. And as he does that, I'm spreading down in towards the clavicle into the first rib. And once again lift up the tissue and get him to take a nice deep breath in and out. Just so you can make certain that you're on the anterior scaling. And then get him to step down and bring his chin to his chest. And then you're spreading that muscle down into the first rib. And this is a really important muscle for any respiratory condition. And I would say that this is actually a muscle that really keeps the neck fixated in this kind of forward posture, sort of bring that tissue just subtly down in and then stretch it out is probably the most important part of the sequence. And it also is what we're kinda building to throughout the entirety of this neck massage release. So guys, after you've done that technique, you can start going in and just relaxing everything around the neck, just doing some nice soothing kinda Swedish massage. It's important to note that that last anterior scaling technique is probably the hardest of the sequence. So if you're not comfortable doing it, then you don't have to do it. But I do think it is worthwhile practicing and trying on other friend or someone that you have at home, maybe a client that's interested. Because it is just such a great technique and can really, really help people who have any type of respiratory issue or some sort of first rib fixation. But just make sure to give a little sweet topology at the end, give them a nice little neck massage and do all this kind of soothing, classic Swedish massage techniques that someone would expect. You can even take your fist and the girl along the upper traps as more of a kind of deep tissue Swedish technique. And then you can come to, to spread the tissue out like that and that feels really nice. And make sure to continuously flow. So as you're going towards the shoulders and kinda open up all that tissue along the bone there as well. All right guys, let's move on to the next sequence of the course.
16. Arm and Neck Sequence: I'm gonna show you guys a nice technique for the anterior deltoid and down the arm into the extensors. So many Christian to place her arm down like this. And then what you're gonna do is we're going to place your, the flat of your hand down on the anterior deltoid. And you're just going to push it down slightly so the shoulder is back where you want it. And as you can see that raises upper arm. So what we're gonna do is anchor down here and then anchor down right over the extensors. And then with this technique, you're slowly pulling down and you're moving at the same rate with both hands. And this is a great way to stretch out in through the top of the arm, the extensors. It's a great way to bring the anterior deltoid down. So once again, anchor down and anchor down here. And you're slowly stretching. And your mind is on bringing this down and then pulling all of this fascia and connective tissue down this way and creating a stretch and lengthening of everything in the area. And just move it the rate at which the tissue allows your hands to move. And as you move down into the wrist, you can soften your touch. And you can even pull in through the elbow here and just get a nice stretch over this area as well. Continuing forth after you've done the arm and stretch everything out down this area is to work underneath the clavicle and in this area. So basically what I'm doing here is I'm bringing my fingertips underneath the clavicle and I'm breaking up any adhesions. And you're just slowly carving everything out here. You can stretch. We'll just do a nice connective tissue fascicle stretch into the anterior deltoid and down farther into the pack. And you're just working with sequencing here. So we're loosening up this entire chain and we're trying to drop the shoulder down. And this is also good for anyone with TMJ pain. So I'm just going to show you an osteopathic technique. I'm going to bring this hand out of frame. So you just pinch the clavicle and you're finding the direction of ease. And with Kristen, I can tell that this is where the clavicle wants to be. So I'm keeping it there. And as I'm doing this, everything is just unwinding. The nervous system. The soft tissue. You can even work with the breath, so deep breath in. And slowly out. And how does that feel, Kristen? Sometimes these holes are really good and just allows everything in the area to relax. Continuous movement can actually disrupt the mechano receptors and can be irritating. So you need to know when to move and when to stay. Okay. So to round out the sequence for the anterior deltoid TMJ pain. We're going to continue into the sternocleidomastoid. So we've lengthen this area, we stretch this out, we've eased off the clavicle. Now after this, a really amazing thing to do to drop the neck down and out of that kyphotic posture is I'm going to get kristen to turn her head 90 degrees. And as you guys can see, the SCM pops up, we can see it. And then I'm going to get her to gently press up into my hand for 10 seconds, really gently. We just want to trigger this muscle. And then I'll get her to relax. Take a deep breath in through the nose. And what I'm doing here is I'm not putting pressure down in this area. I'm using a soft fist, I'm using this part of my knuckles. And then I'm anchoring down at her shoulder. And then I'm stretching up all of the connective tissue and fascia. And I'm moving it up just past the mastoid process. And your lightening your touch as you get into this area. But I'm going to say that you want to move up into the scalp over the bone. And it's really important because everything's connected. This is all continuous. The scalp, the mastoid process, SCM clavicle, and that's why we're doing it in this sequence. So once again, when you're doing this, you're pulling up and your focus is on pulling everything up. Superficially, you're not pressing down into the neck. That would be not good. So basically, once again, you can even combine a muscle energy technique with it. So I'm going to get kristen to press up into my hand just gently. And do that for about 10 seconds. Relax. Deep breath in through the nose and slowly out through the nose, anchor down the shoulder. On the out-breath. You're focus is on pulling the tissue up into the mastoid process and just passed it. You lighten your touch a little bit here. And you go right up into the scalp. And this technique is fabulous because it helps to drop the anterior neck down and create a nice stretch here. Anyone with vertigo, this is also incredible because things get so tight and bound up in this area. And you just want to make sure that you do it on both sides. Okay, I guess. So I'm going to show you a different angle here. So I'm going to get Kristen turn her neck 90 degrees. And then once again, I'll get her place my hand on her head and get her to gently press up. And I'm just getting her to fire this SEM right here. We'll get her to relax and then get her to take a deep breath in. I'm anchoring down her shoulder. And then on the out-breath, I slowly and pulling up the length of the SCM. And then in past the mastoid process into the scalp.
17. Conclusion: Hope you guys enjoyed this class. Give me a follow for any future courses that I put out. And if there's one thing I want to leave you with, it's to always be practicing, always be cultivating your skill. The one mindset that allowed me to be very successful in my career is to be so good that I can't be denied. So what are you waiting for? A friend? Get out there, get practicing, and I'll see you guys in the next one.
 Mike Everson, Instructor + YouTuber