Transcripts
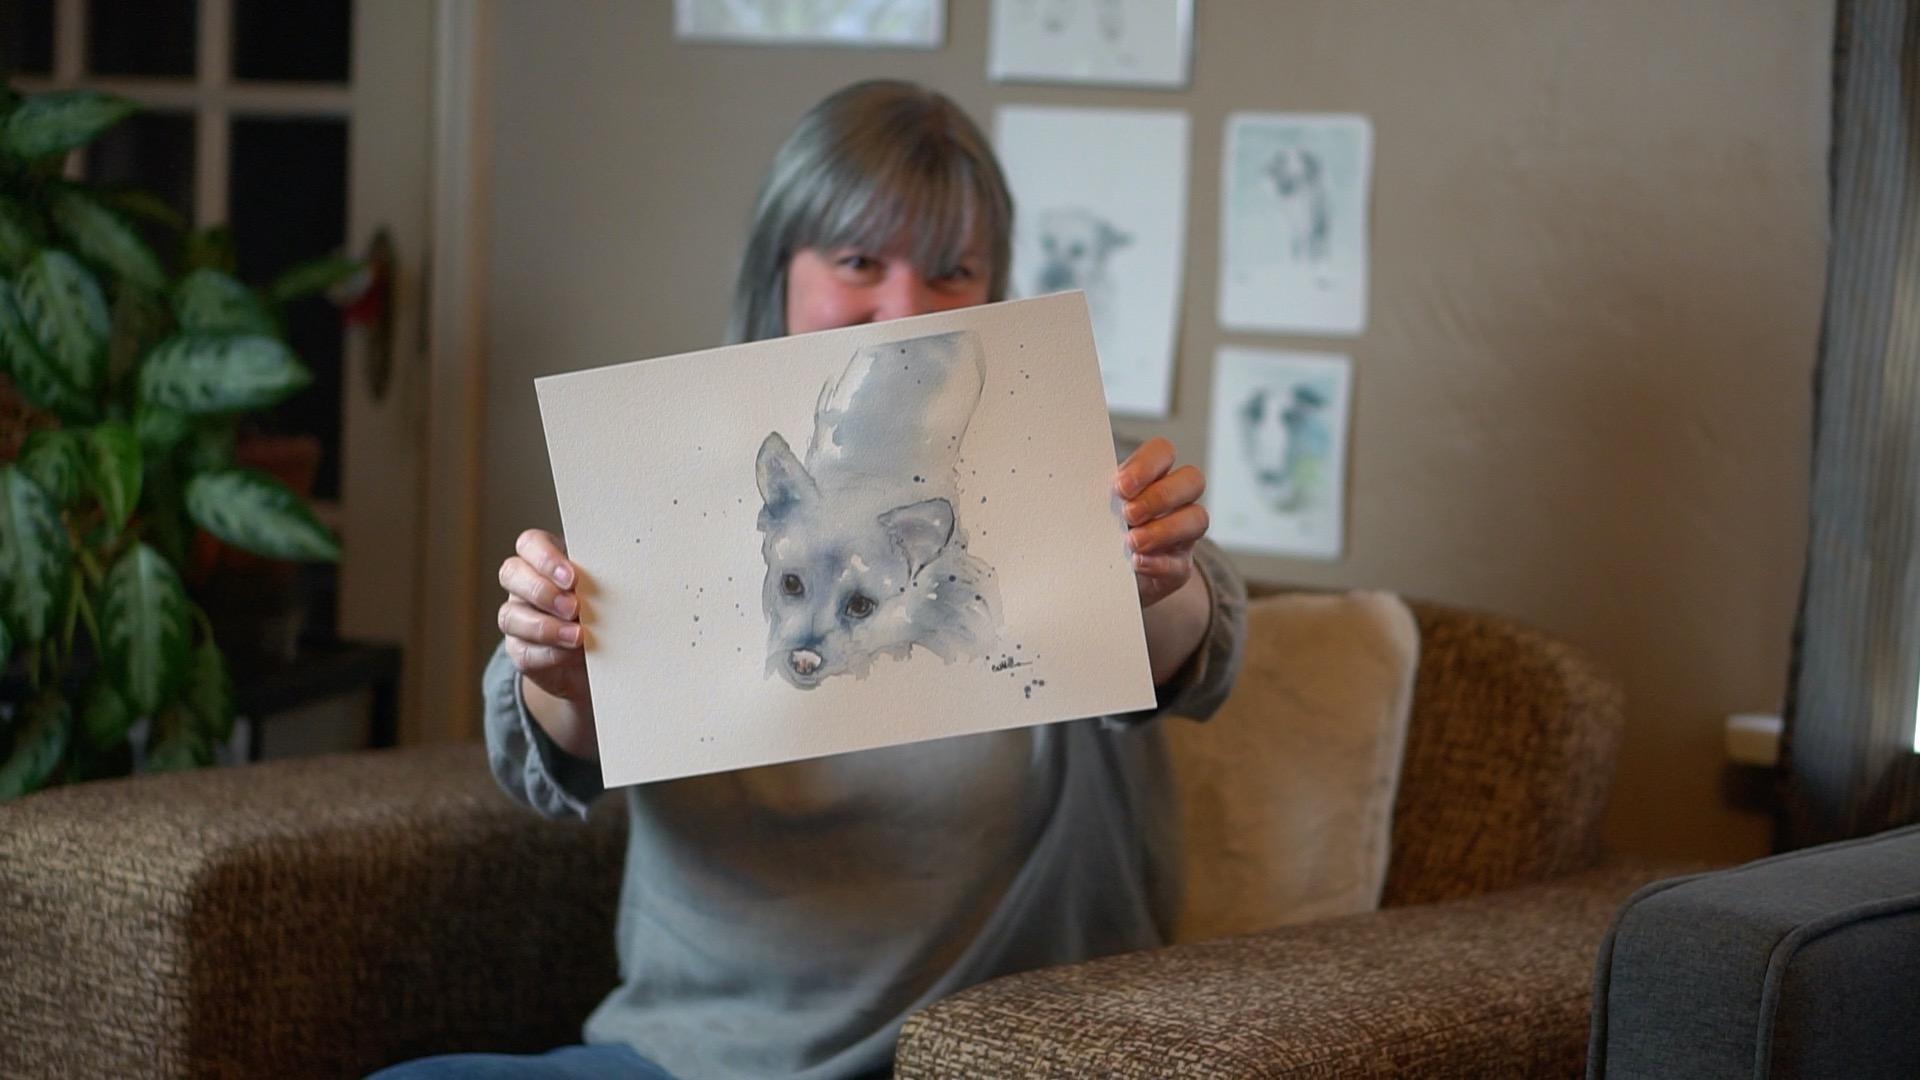
1. Introduction: How awesome would it be to paint a fun
portrait of your pet. Or perhaps your dog, uncle, or auntie and they would
love to gift a portrait. Well, in this class, I'll show you how fun and
easy it can be to capture the personality of your furry
friend with watercolors. My name is Beth Dohman and I'm a professional artist
and animal lover. In fact, I used to
get into trouble in school for drawing horses
all over my homework. I'm commissioned regularly
to paint pet portraits, and it's so fulfilling to see the reactions I get
from the owners. One more thing about me, I'm impatient so I don't
like to fuss over paintings. For me, this
spontaneous style that I'm going to be
teaching you is best. This class is for beginners
and intermediate painters. By the end of the class, you'll have a fun portrait of your friend you can keep
for many years to come. You'll understand how
the wet-in-wet technique works and how to make
animal eyes come alive. You'll need a gummed eraser, masking tape,
non-permanent ink, pencil, two sizes of brushes, your favorite tubed paints, and some good quality
watercolor paper. Let's go paint an awesome pet.
2. Project: Your project will be a
finished pet portrait done in watercolor. You'll be painting along with me using a source photo I provide, or you can choose
a similar photo of your own special pet. Here are the steps
we'll be taking. First, you'll be practicing
some watercolor techniques, such as wet-in-wet painting. This way you can
work quickly and confidently on the final piece. You'll be either
transferring, tracing, or drawing the photo
onto watercolor paper, and then you'll ink the outline. I'll explain all the
different options. Using the techniques we
learned in the first lesson, you'll quickly and confidently
paint the main areas. You'll paint the animal's eye and make it come alive
with a catch line, I'll show you how to do that. Once you've signed your piece, it's ready to upload to
the project gallery. I'll comment on every
piece that's uploaded and give gentle but
constructive feedback. Your classmates can also support each other with feedback
and encouragement. I'll also include a
materials list in the resources section. Let's go.
3. Materials: [MUSIC] For materials,
we are going to first want a gummed eraser, we're going to want a pencil. I use an H. This is
my favorite brush. It's a da Vinci Casaneo
and it's a number 2. It's synthetic fibers. It's called a mop brush because it holds a
lot of water here. Then for small details, I have this two slash zero Galiano synthetic brush
from a local art store. Then we're going to need a
fountain pen or an ink pen. The most important thing is
that it is not permanent. You do not want permanent ink. For paints, we're going to need some white
gouache for the eyes. This is Cotman's potter's pink, indigo, my very favorite color. This is Winsor and
Newton Cotman. We've got some black and then
we've got some raw umber. You'll need some
regular painter's tape. The paper that I use is Arches from France
and it's 140 pounds. You're going to want
quite thick paper for this so it doesn't buckle. Then, of course, you'll
need [NOISE] some water. I usually have two mason
jars full of water. One, you need to
keep fairly clean, the other one is for
the messy stuff. [NOISE] I use a
ceramic pan like this, but you could just use a white, anything like a little ramekin
or a little white plate. Then you'll need some paper
towel, nice thick stuff. That's it. Let's
get going. [MUSIC]
4. Practice: For the practice run, what we're going to do is
just do some random shapes, doesn't have to be too fancy. What we're just trying to
understand is how the ink runs. Maybe just make a circle and then make a couple of
sweeping lines like that, for the fur, and then maybe we'll do an eye, then a square, then small lines. I'm going to be taking
my Casaneo brush here. We're going to get the
brush nice and wet, and then the first
thing we're going to do is make the ink run. I just want to show you in here, and this ink does
dry quite quickly. You can see that's already
dry it a little bit. You're going to want
quite a bit of water, and you can see how it runs, and then I'm going to just grab quite a bit of water here. Then what you now want to
do is just dab the paint. You don't want it even. Variety is always good. What I'm doing here
is I'm loading up quite saturated
paint right here. I'm just going to just dab, you don't want to
push the brush, you just want to just tap it. Then we're going
to try this side, just get loose with the brush. I'm going to try this
little guy here, I think it's just important
just to get a feel for the paint and
how to just dab it. Then for contrast, you
just load up your brush with quite saturated paint here. You can always just go right in and do it all at once as
well if you're confident. You can melt the ink
and paint at once. It's up to you. But just make sure you
don't make things uniform. That's the beauty of watercolor. It can make things
look really different. Just experiment, have fun. Very important thing
to remember here is, if you're going to do the eye, you have to wait for
the outside to dry. I'm just going to show you what this bleeding
could look like if you don't dry it. See how this is. See it's just
bleeding everywhere outside the margins here
and you don't want that. Another trick you can try. It's really important to not
let the watercolor pool, so what you can do is you
can either use a brush, so you'll just dry it
gently on some paper towel and then suck it up
anything that's puddling. Because you're going
to get a bloom. You usually don't want that. You can see that these
dry a little bit lighter, and this actually
don't look too bad. What I would do if
I wanted to save this eye is do a second layer, and watercolors
often multilayer, so don't worry about
that too much. If you're using good paper, it shouldn't fall
apart to too much. I think we're ready to get
started with the portrait. Have fun experimenting
in the meantime.
5. Drawing or Tracing: [MUSIC] Because this is not
a drawing class and there's lots of really good drawing
classes on Skillshare, if you just want to skip
straight to the painting, what you can do is just use this template outline that I have provided in
the resource section. What you want to do is
just print this out, you'll trace the outline and then what
you'll do is you'll flip it over on top of
your watercolor paper, make sure it's secured down. I will use this little
white poster tax stuff, use the end of
something like this and then just rub it and then it should and you can keep checking the transfer
and it should transfer the outline
onto your paper. [MUSIC]
6. Drawing Ink Outline: [MUSIC] I've done the
outline in pencil, so what I'm going
to do now is take my fountain pen and very
loosely draw an outline. It's really important to
remain spontaneous with this. I'm just going to really quickly just scratch out the outline here and then I'm just doing some scratchy
movements for the fur. I think I do prefer doing long-haired dogs over
short because there's a lot more opportunity
for some fun lines. A little bit more careful around the eyes because that's where
the personality comes out. A couple of lines there, a little nose, and a little mouth right there. Let this dry for a minute and
then we're going to erase the pencil lines because
we don't want them showing, water
seals in graphite. Once you've painted
over it in water, you can't get it up again, which is probably
something you don't want. I did take a
hairdryer to the ink because this eraser can smear it if it's not completely dry. It looks like it's behaving itself right now, which is good. We can see how nice
and clean it is now without the pencil lines. There. That's better. [MUSIC]
7. Painting First Layer: [MUSIC] So we're ready to paint. What I'm going to do is
grab my mop brush here, my number 2 da Vinci Casaneo. We're going to do this
mostly all in one go other than the
eyes and the nose. Are you ready? What we're
going to do is we're going to just wet the whole dog and around the edges
where there's the fur. Actually, let's just
leave the ears for now. When you're doing the edges, we're going to do this out. It's nice and furry,
so the fur pops out. Again on this side, we're going to pop the fur out. We're going to avoid the
nose and the ears for now. The eyes. Just going to do the inside. Fur on the ears a
little bit here. It's okay to live a little
bit of white space, that should makes things a
little bit more interesting. I'll just move this over here. I'm going to grab
some of this indigo. I'm just going to
pop it in a darker, so the darker areas, she's got a little bit of dark around her nose. Let me grab a little
bit more saturated. Sometimes it gets
a little wet here. A little dark. There we go. Right in the middle. Sometimes if you don't mix
the paint up properly you get these splotches
which are not great. Let's just outline the
eyes here a little bit. The ears, inside the ears, I'm going to paint it like that. We're just going to make
sure we work really quickly because the
paint does tend to dry quite quickly and you
don't want any harsh lines. The dark around the muzzle here, we're going to pop some. Let's get them a bit wet. What I'm doing is I'm just
cleaning off my brush, dipping it on the paper towel, and then carry on. That's her shoulder right there. We're just going to make sure we delineate down a little bit. Then her back might've
gotten a little bit dry. I'm just going to
hint a little bit. She's got some little
fat rolls here, so we're just going to
delineate those a little bit. I think that's good
for the first layer. What I think I need to do a
little bit here is pick up, its peddling a little bit. You can see that here, you don't want that. I'm just dipping
my paintbrush onto a paper towel and then
picking up the pooling water. You don't want any
pooling water. I'm going to let this dry and then we can do
the second layer. [MUSIC]
8. Painting Second Layer: [MUSIC] We're going
to do her ears now. I don't want to overdo it, but they do need a little
bit of attention here. I'm just going to wet
just the inside bit here, make it a little darker. Get some indigo. Some indigo happening
at the bottom here. Maybe introduce a little bit of brown just for a
little bit of color. Looks like actually she's got a little bit of
pink in there too. Let me just dip a
tiny little bit of potters pink in there. Then to avoid any harsh lines, what we want to do is
just pull in this. I'm just drying my brush here, so I'm just drawing
it up like that, avoiding any harsh lines. I'm going to use the
paper towel actually. [NOISE] I'll do the same with the other ear here. A little more pink. Looks like we're getting a little bit of a
harsh line here, so I'm just going to dab this a little bit more
with the paper towel. [NOISE] I guess we can
move onto the nose now. I can see a little bit
of pink in her nose too. Just a little bit of pink, a little bit of brown, I think. There's the delicate
little dabs here, a tiny little bit of brown
maybe in the bottom. We're going to let that dry
and then a second layer we'll delineate the nostrils
a little bit better. [MUSIC]
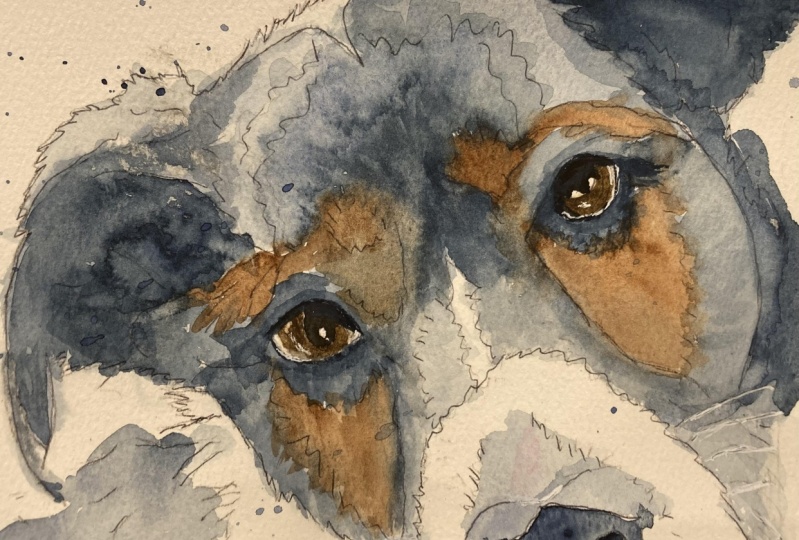
9. Painting the Eyes: [MUSIC] What I'm
doing now is I'll just wet the brush a little bit. I'm just painting some water in here so we can do the
wet-on-wet technique again. I'm grabbing just a little
bit of the dark brown. I'm just going to dab it
checking the reference photo. I'm doing the same
with the other eye. You'll notice that
there's a little bit of brown left on the brush, and that's totally fine because we'll be
doing a second layer. I've got the base color
down for the eye, but it's quite a bit
darker than that. What I'm going to do is I'm
going to wet the eye again. Then I'm going to drop some
black in there for the pupil. Just really carefully dab it. Then the pupils more and
then this center area up in the top corner. I'm just going to really
carefully just continue to slowly drop that in there. Then again on the other side, paint the whole eye. I'm continuing to drop
in more black paint, and in the next lesson, we're going to outline the eyes which makes them
pop a little bit. [MUSIC]
10. Painting the Eyes 2: [MUSIC] Now the trick
with making eyes really pop is to paint
around the outside. Most animals, unless
they're albinos, do have an outline. I've loaded the small
brush up with indigo. You'll see here
it's a little dark, so I've added some
water to my brush and I'm smearing the paint. You're going to want
to work quickly and use random strokes
rather than uniform ones. This tends to dry
really quickly, so make sure you don't
have any harsh lines. You can soften the edges
with a wet clean brush. That's it for this lesson. Next lesson we're
going to learn how to do the catch light and make
the eye come alive. [MUSIC]
11. Painting the Catchlight: [MUSIC] For this step we'll need the white gouache to
paint the catch light. Toba has a little white
room under her eye. Like that. Just give him
the puppy dog eye and then there's a catch light right there and then another
one right there. Another one underneath. It's not quite as strong. I'm just going to pick
that second one up. I'll make it a little
bit less obvious here and then it feels a little too strong so I'm just going
to lift some of that up. A little bit of white underneath,
little puppy dog eyes. I'm just going to line
that out just a bit. It's a bit too strong. There you go. In the top here, it's quite watery right here. Pop in just one little thing
right at the top there, a little brighter. [MUSIC]
12. Fixing the nose: [MUSIC] I'm going to fix
up the nose now. Just little hints at
the nostrils here, that's probably too dark. Maybe just a little painting around the rim a
little bit here, so the hints of color. There you go, that's it,
just a few little touch ups can make quite a
bit of difference. [MUSIC]
13. Background Splatters: [MUSIC] For the very last
thing we're going to do, we're just going to
add some splatters. I usually test them
on a little piece of paper first off to the side. What I do is I load the brush up fairly wet but
quite strong paint. Then I'll take a paintbrush here and then very gently tap. You don't want to overdo it. The one thing I
forgot to do is cover up her eyes but luckily I didn't get
anything on her eyes, there you go. Here's
your painting. [MUSIC]
14. Signing Your Painting: [MUSIC] Congratulations on
finishing your pet portrait. The last thing that you
should do and I recommend you always do is sign your work. I have this cute
little brush pen but you don't need
anything as fancy as that. You could use pencil or a
nice pen anyway, at least. I practice my
signature a few times because I can get out of control sometimes I do find that. Then the scale of the signature should match the
scale of the piece. Then I always think
about framing, so this is a 9 by
12 piece of paper. If someone wanted to
frame this 8 by 10, you're going to want
to sign it fairly close like not off in the corner here because the framing
might cover it up. I'm going to sign it maybe
somewhere around here. Nice and slow. Here we go. That's pretty small. I don't do a huge
signature, but again, up to you, the fun part
is taking the tape off. Just be careful here because
it can tear the paper. Then I usually like to peel
it like this on an angle. Less likely to tear. There you go. There is
your pet portrait. [MUSIC]
15. Congratulations and Final Thoughts: [MUSIC] Congratulations. You made it to the end and
painted a pet portrait. We learned about the
wet and wet technique and how to incorporate
ink outlines. We learned how to make the
eyes come alive and the importance of taking pride in your work by signing
your pieces. The most important thing
I want you to remember is to stay loose in your
drawing and painting. The watercolor will do
its own amazing thing. You just have to nudge it
in the right direction. I'd like to say a
word about practice. The thing about art
is that you can watch all the classes you want. But until you practice the skills and make lots
of things you don't like, you won't get better. The mistake in one piece informs
the success of the next. You will always learn
something even if you don't love it so please
keep practicing. I often watch a
class all the way through and then go back
and do the exercise. I encourage you to go ahead, give it a shot and then
upload the project to the project gallery
on the class page. This way I can give gentle
and constructive feedback. Please leave a review and follow my account if you
enjoy this class. Thanks for coming along
for the journey and I hope to see you in
future classes. [MUSIC]
 Beth Doman, Creative Professional