Transcripts
1. Class Introduction: Video editing can sometimes be a tedious and long process. And that's why in this class, I'm going to show you some
editing techniques that will optimize your editing so that
it's as fast as possible. Hi, my name is Scott Lu and I'm a video creator on YouTube. I've edited in Premier
Pro for five years now, and I've created over 200
videos on Premiere Pro. And when you've edited
that many videos, your bounds are continuously
try to optimize the process to be as
fast as possible. So I'm here to
share my knowledge on how I personally speed at it. In this class, you'll go
through the primary steps in the editing process for Adobe Premiere Pro while
focusing on speed. So that includes learning about the optimization
principle, which will be the
foundation of every method. Learning how to set up a
custom workspace and Premier Pro and setting up shortcuts
to edit more efficiently. Next, I'll help you optimize for our organization and
sequence settings. Then I'll go through how to
create proxies and how to cut footage with the
least amount of clicks. And then I'll go over
how to work with colors, graphics, titles, and even
audio with just a few clicks. And finally, it
will go over how to export your video and how to efficiently reuse assets by
creating timeline templates. So who is this class for? Ideally, you already
know the basics of editing since I don't spend much time covering the basic
settings in depth hover. If you're a beginner,
this class is still great watch because you'll learn how to avoid developing bad
habits of slow editing. Also, I will say that
there is a lot of different types of editing
out there in this class, I'll primarily be focusing on how I edit videos
that are mainly talking head videos with
some B-roll added hover. A lot of techniques I
mentioned we'll still translate to any type of
editing in Premiere Pro. I do want to make it clear that this class is not going to cover the basics of working
with colors, graphics, and audio, but instead will
be highly focused on how to create systems to edit in
the fastest way possible. The type of editing I'm going
to cover is more for people who create the same type
of video very frequently. Once you get through the
editing process as fast as possible while still
producing quality work. With that said, the class
project will be to create your own optimized
workspace and workflow. In Premier Pro, there'll be instructions in each
lesson at guiding you. So be sure to follow along
and do lesson assignments at the end of each lesson if you want to make the
best out of this class, There's also a worksheet
available for download that outlines the class
and class resources. Editing can be a laborious
process sometimes, but it doesn't have to be. You can optimize the
process to the point where certain steps that used
to take a few hours now takes a few clicks to finish so that you
can focus on parts of the process that you
actually feel more passionate about and
that you want to do more of if that
sounds like something you want to learn how to
do, Let's get started.
2. Optimization Principles: Before we jump
into Premiere Pro, I want to highlight the core
principles of optimization. They are time, energy,
and complexity. Time is the easiest
to understand if there's a choice
between two methods. One that will take five-minutes and another that
will take 1 min. The woman at choice will be the more optimal option hover. We also need to consider energy. Let's say that you want to add subtitles to certain
part of your video. The two simplest
options are Option a, auto-generated
subtitles using Premier Pro's at transcription tool, which might take
around five-minutes, degenerate, or option B, create subtitles from scratch specifically for that
part in about 2 min, option a and might take longer. But because Premiere does, do the work for you, that is the more optimal
choice for energy. Lastly, complexity. This is usually measured by
observing how many steps it takes to accomplish a task and how difficult
those steps are. Ideally, we want to find the method with the
least amount of steps. As an example, I
see a lot of people cutting clips together
in the timeline by using two different tools and multiple clicks when you really only need
one keyboard click. So the most optimal
method when it comes to complexity is the one with
the least amount of steps. However, all three
principles are intertwined and usually the method that takes the
least amount of time, we will also have the
least amount of steps and we'll also save the most
energy, but not always. Take note that none of these are hard rules and are just concepts that I thought up to help you understand how to optimize
your workflow better. You're free to use
whatever methods suit your needs the most. But ideally, your
methods should factor in the framework of
trying to minimize time, energy, and complexity. With that said, let's go
ahead and open Premiere Pro. You'll get the usual
loading screen. And once the main
window pops up, go ahead and click New Project and name it whatever you want. In terms of setting the
default ones are fine for now. After your project opens, head straight to the tabs on the top-left and hover
over Premier Pro, you'll find the
location of one of the most important tools
here, keyboard shortcuts. Throughout the next lessons, I'll be showing you guys new keyboard shortcuts
that will be very important to making your
workflow smooth and fast. If you're not editing
with keyboard shortcuts, you're definitely not optimizing
your time and energy. They are a must. You can see the different
shortcuts I have here. But I also attached a file to the class with my personal
keyboard shortcuts. In order to create
new shortcuts, search for the name of the tool, window or action, and
then click on the space right here and press the
keyboard shortcut you want. It'll be assigned and
then just click Save. Take note that a lot
of these shortcuts are used in combination
with my mouse, which is a Logitech
MX Master three. I've assigned certain keys
to some of the buttons, so I basically never need to move my right hand
away from my mouse. Here are the button assignments
minus n equal sign, or on the side, Enter or Return
is on the bottom button. Delete is the top scroll button. And then I have the key
L as the top button. I highly recommend
buying a mouse like the Logitech MX Master because it makes the
editing process a whole lot easier since you
don't ever have to move your hands away from their
respective locations. It'll help with optimizing
time and energy, even if it does seem a
little complicated at first, to conclude this lesson, just keep in mind the optimization principles
and you should be able to adapt
your methods to fit them regardless of
what your editing, I believe these principles also apply to much more
than just editing. But for now, let's
continue on by optimizing your workspace.
In the next lesson
3. Workspace Manipulation: One of the most important
elements in having a streamline workflow is
your Premiere workspace. The workspace is essentially
just the arrangement of all the window panels that
you see in front of you. The way you structure
your workspace will have a huge impact on how fast
you're able to edit. At the moment, we're on the default workspace
for assembly. Premiere Pro comes with premade layouts for different
parts of the editing phase. And they can
definitely be useful when you're just starting out. But once you have a good grasp of what kind
of video you're making, I find that creating a single custom workspace
that's extremely versatile, that fits your particular
editing style, is the faster method to
customize your workspace. Click and drag the tabs to
the location of your liking. I'll show you how I
personally created my custom workspace. I started off on the editing
layout that's pre-made. From here, I move the project panel up
to the top left area. And it pretty much
repeat the same step for other panels that
I use very often. For the panels that I don't use, I just close them by clicking on the three lines and
clicking Close Panel. And don't worry, if you
close one of by accident, you can always go
to the Window tab and reopen that panel. I'll actually also open Lumetri
Scopes and Lumetri color. Sometimes they pop
up in spots I don't want so I just move it to the
area that I do want it at. I also prefer the toolbox to be on the right side
of the timeline. So in order to do this, I'll just move the timeline
panel to the left. And that's pretty
much close to what my custom workspace looks like. I may add more panels later
when they become relevant. Just make sure that you go to the right top corner and
click on save layout, and then you can name your
layout whatever you want. Okay, with all the windows
and panels adjusted. Now, I'll explain why
habit the way that I do. So first off, the top
left area contains a lot of the major panels that
the premade layouts have. For instance, assembly is just a larger version
of the project panel, which you can achieve something
similar by just pressing the Tilde key while hovering
over the project panel. It's the squiggly line key. You can make any
panel fit the screen by hovering over it and
pressing the Tilde key. It's a very useful trick for
our workspace manipulation. You just need to press it
again to minimize that panel. So that fulfills the purpose
of the Assembly layout. Next is the editing layout, which my custom layout
is pretty much based on. The editing layout,
is known for having the source monitor or Source
Window on the top left. And the reason that
the editing layout has the source
monitor on the left, while also having the timeline
preview on the right, is so that you can see both at the same time and
make precise edits. And anytime you
double-click a video, this window will pop up. And the purpose of the
source window is essentially to add footage
into the timeline. But I personally
don't really use the source window
to edit that often. So that's why I move
it to the right. I'll explain more about
the source window later. But for now, we're mainly
going to focus on how this particular custom layout fulfills the purpose
of each layout. Because we're not really going to use this source monitor, the editing layout
becomes irrelevant. Next is color. I have
lumetri color added to the top left and Lumetri Scopes
added to the bottom-left. Which achieves a very similar
thing as the color layout. Just let the windows are a bit smaller for
the next layouts, I also have the
central graphics and Essential Sound panels
on the top-left. And finally, for
the audio layout, I have the clip mixer and track mixer in the
top-left as well. As you can tell by now,
I basically shoved every important window panel
into the top-left area. And the reason this works
is because I assigned keyboard shortcuts to
each of these panels. I'll go ahead and list out
the keyboard shortcuts. With these keyboard shortcuts, I can quickly shift between every important panel
in the blink of an eye, where otherwise, you'll be
clicking between the panels, trying to find them, or clicking the Saved Layouts, which can take a long
time to load some times, that few extra seconds required every time you
want to change panels, bricks, flow, and anything that increases time
and complexity. As against the
optimization principles, it will take some practice
to get used to the keyboard shortcuts
that I came up with, but I tried to use a
simplistic pattern. Shift is one of the
easiest keys to press with your left hand and z is
the closest key to shift. So that'll bring up
the project panel, which is probably one of
the most used panels. Shift X is the next one, which is the effects control
and is also used frequently. See is for color and so on. It also only requires
your left hand to operate so you can keep your
right hand on your mouse. So that's how I created my custom workspace and the
workflow that surrounds it. Hopefully this gives you
some ideas on how you might want to approach
your own custom workspace. You don't have to use the
same exact layout as me or the same shortcuts as
long as you follow the principles of minimizing
unnecessary clicks, movements, and loading time, you'll have an
optimal workspace. I'll also be displaying the shortcuts that I
use as the lessons continue so that
you can familiarize yourself with them if you
decide to adopt them. Adjusting and customizing
your space is a very underestimated step to streamlining your
editing process. Do it as early as you can
and get used to it sooner. And you'll find yourself never losing momentum between edits. Alright, so the action
step for this lesson is to organize your workspace. If you're a complete
beginner who doesn't really understand what each panel does, feel free to just copy
my layout for now. After you gain more
experience editing, you'll discover which panels are the most useful and
important to you. And from there you
can adjust and customize your own workspace
4. File Organization: The first step of
the editing process begins with file organization. It's not the coolest topic, but it's important
in most situations. If you want to streamline
the editing process. The situations where it's
not actually necessary to do file organization is if you have less than 15 video and
audio assets to handle. In cases like those, you can just drag
and drop them in premier projects panel
and just start editing. You can also double-click on an empty area on the project
panel to import footage. Another situation where
it's not actually necessary is if
you're working with multiple videos and audio files that are gonna be
succinct based on audio. For instance, a podcast
session with three videos and for audio files can simply
be dropped into Premiere, highlighted, and
then sync it up with Premier pose
multi-camera function. It will move all the process
falls into a folder. So in a way, multi-camera pretty much organizes
everything for you. If you want to learn more
about how to do that, you can check out my class all about using premiers
multichannel. So in those instances, you don't really need
to organize your files. But let's say we're working with a talking head video that has
over 50 videos of B-roll. The primary goal is
to be able to easily locate the specific footage
that you're looking for. The best way to do
that is the first understand what your
tools are in Premier Pro. So let's look at
the project panel, which basically looks like
any other file window. I'll go ahead and open
a project that has some stuff in it to
use as an example. There are three types of views. The ListView, which you
are seeing right now, the icon view and
the Free Form View. And each of these
views, you can change the size using the slider. I operate mostly
in the list view, but Icon View comes in handy when you're looking
for specific videos. With the icon view open, you can see the first
instance of the video you recorded and sort
your footage in bins. You can create a
bin it by clicking this icon here, or Command B. It's up to you how you
want to sort the footage. I tend to divide bins by
the subject or location. Ideally, during the
shooting process, you should things one subject
or location at a time. So it shouldn't be
too hard to sort. So that's one option. However, if you plan on
reusing these assets for different projects or
keeping them long term, I do recommend organizing the files outside
of Premiere Pro. The idea is the same. Create folders in
Finder and organize the footage they're
using that icon view. From there, you can just drag in each folder and it
gets imported as bins. This way you're organizing
both your project files on your computer and the premier
bins at the same time. Another way to locate
assets quickly is to use the search
bar at the top. It'll allow you to filter
content in many ways. For instance, you can
filter by file type, by typing in movie
for video files, audio for audio files, video for other video types
like from GoPro is and so on. You can also access folders and files with their exact name. So be sure to name your folder is something that's
easy to type. And remember, if you're
feeling more advanced, you can use the find function. Just make sure you click
on the project window and hit Command F. I'm on a Mac. If you're on Windows,
you'll need to basically translate
command to control. The simplest way to use
this window is to make both columns name and
the operators contain. And then just type in the name of the file
you're looking for. Unlike the search
bar, this will lock onto a specific bin or asset, which can be more
useful in some cases. The last thing that can
be helpful in helping you find footage or the
metadata columns. You can adjust them
by right-clicking at the top row and then clicking
on metadata display. From there you can
add what you like. I find that the most useful
ones, our frame rate, video info, creation date, and these checkboxes
that say good and hide. Checking these
boxes after adding a video or audio file to the timeline can seriously
help with keeping track of which assets
I've already used. Log notes can also be
helpful if you want to make notes on specific files
to reorganize it, you can click, hold and drag the metadata columns to
the spot that you want. Looking at the metadata can
help in situations where, you know, you've shot
things in a certain way. For instance, slow-mo videos will have a higher frame rate and you can easily find them thanks to the
metadata information. As a summary, the
simplest and quickest way to find footage is to start your project by dividing footage into
categorical folders, dropping them in, and then using the find or search
functions to locate items, as well as using the icon view. After you add the video, you're looking forward to the timeline. I recommend checking
the good box and perhaps the
hide box as well, so that it's easier to sift through the rest of the footage. I sometimes also close bins
that I double-clicked on. If I know I'm not going to
be using it for awhile. Back then, I didn't really utilize the search
or affine function. I didn't utilize icon view and I would continuously
run into footage I already used because I didn't use the good or
hide boxes either. So hopefully, these
tips can help you. Of course, in the end, this
organizational process is highly dependent on what type of video you're trying to edit. But I hope this example
can help highlight certain editing tools
in Premiere that are useful in finding
footage quickly and help inform you on how you might
organize your footage
5. Sequence Settings: The next step after
the organization is knowing how to
create a sequence. Since the idea is to
optimize the process and make it faster each time. We'll also create sequence
presets in this lesson. So a sequence is where we do all the cutting and assembly
video and audio assets. In order to create one quickly, simply right-click
your video footage and click on New
Sequence From Clip. I set this shortcut
as command return. This will create a sequence with settings based on the
highlighted footage. If you shot in for K and 24 FPS, the sequence created will
also be in for K and 24 FPS. Makes sure to use
the footage that is representative of what you want your final
edited video to be. That's the fastest way
to create a sequence. But there may be other cases
where you want to create a brand new sequence that's not necessarily based on any
footage that you have. In those cases, you can create
a new sequence by clicking Command N or going to
File New and sequence. Of course, I highly recommend using the keyboard shortcuts. Instead of doing
it the slow way, after you bring up your
new sequence window, you can either choose
a sequence that's pre-made or create your own, which is what I did. My custom ones are
basically named by the resolution and it
frames per second. In order to create your own
custom sequence preset, go to the Settings tab and start filling in
inputs to your liking. I personally just use
for K resolutions and 24 FPS or 30 FPS. The other settings are pretty
much the same as sequences that were created from the new
sequence from clip option. You can look at the details
of an existing sequence by right-clicking on it and then clicking on
sequence settings. I also created a
keyboard shortcut to access sequence
settings quickly, which is Command Shift L. For me, l is the top
of my mouse button, so it makes it very
easy to access. Anyways, once you finish up, hit Save named the preset, and it will appear in
the custom folder below. Now, every time
you need to create a new sequence without using
it new sequence from clip, you can just click on
one of these presets. Now it's time to begin editing. The action step for this
lesson is to create the presets you plan
on using the most
6. Auto-Saving: Okay, Before we begin editing, Let's take a look at how to change the auto save settings. Go to the top bar where
it says Premier Pro. And in the settings and
general, select autosave. I set mine to every
five-minutes. It's up to you how often you
want autosave to fire off. But just note that it does slow down to workflow
a little bit. If you set it to go
off very frequently, because while it's auto saving, you can't really do
anything for a few seconds. And depending on how large
your project file is, it might actually
be up to like 5 s. And having that every minute can slow things down and
disrupt a momentum. Either way, be sure to set
this up because I know some friends who have lost 2 h of work because Premiere
crashed on them. And nothing is more
lacking in optimization than having to do the work
completely over again. With autosave working,
if it does crash, all you need to do is go
into the auto save folder, which is at the same location as your Premiere project file
and open the latest project. Or you can try opening
up the original project and see if it's saved
before crashing. And oftentimes does for me
7. Speed Cutting: In this lesson, we'll
cover how to navigate the timeline and cut your footage in the
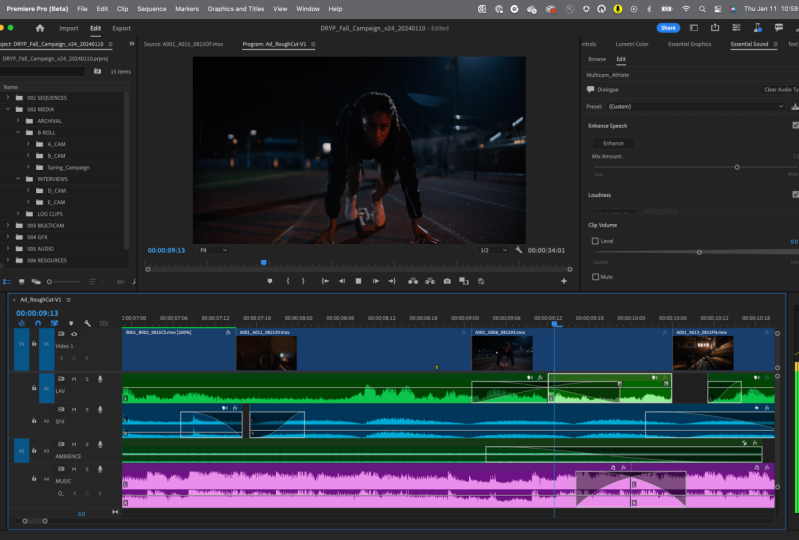
most optimized way. Firstly, let's take a moment to look at the timeline panel. On the left side
of the timeline, you'll see some
boxes that say v1, v2, and A1 and A2 and so on. These are the video and audio layers that you'll be
working with while editing. Beyond those boxes, even
further to the left, you'll find a glowing blue box for only one video
and audio layer. You can click on these boxes to toggle the blue on and off. And if only the
video box is blue, the asset that you drag
in will only come in as video and vice
versa for audio. So let's make sure for now
that both of them are blue. Another thing related
to these boxes is the source monitor which
we touched on before. Once again, you can access it by double-clicking on footage. From here you can use the transport controls to
make in and out points and then add footage
into the timeline by clicking on
Insert or overwrite. The layer that the footage
will be added to will be whichever layer has the
left-most blue box checked. So if I click on the
second video layer and the third audio layer, you'll see that
this is how they're added from the source monitor. Once again, I don't really use the source monitor
method very much. So I normally just keep the left-most blue boxes
left at layer one. But I wanted to point this
out because it might be more optimal for you guys
to use in your workflow. From here, let's actually
drag in some footage. Once again, the example is
gonna be a talking head video. So the first step is to
cut out the bad ticks. I've actually discussed this in my Skillshare class about how to create a
talking head videos. And I've talked about
the optimized method for cutting out bad tanks. So I'll play the clip here. The way that I cut
is very simple. I use the audio waveform to just indicate where
I should be cutting. Right here it looks
like a phrase, right here it looks
like a phrase. And basically, I
start from the end if it's scripted content,
because it's easier, in my opinion to just
know that the last take, like for me personally,
the last Tech is usually the best take
most of the time. So if it sounds good and
I hear the same thing, I can essentially just not
I'll just cut it instantly. Versus like if I were to
start from the beginning, I will listen to a bad tag, listen to another biotech, listen to finally
the good tech and then erase like to bad takes. But I listened to two of them. So it takes up more
time versus just listening to the good Take and
then cutting the bad ones. And an easy way to do it even quicker as you can
transcribe the sequence. This is in the text
window right here. And you just find
texts and open it up. Transcripts sequence, and then hit that
transcribed button. Adobe Addition will create basically like a
captions for you. So if you see repeating texts, then it's clear that it's
basically the same thing. That way you don't even
have to listen at all. You can just use your eyes. So after that's created, you can hit create captions. And I leave everything
as default, especially since I'm not
actually really going to use it. And the shortcuts that I'm
using are the native Q and W. So basically what these do if you have a cut point
right here and you use w, it erases everything
from wherever your timeline cursor
is to that cut point. So I'll make it obvious
by making this read. This area right here is gonna be deleted in-between the blue
cursor and this cut point. If I hit W and then I undid, and then if I hit Q, it's going to go to
the cut point from the left side to the
blue cursor like that. So that is essentially a really, really fast way of editing
and my preferred way. Just make sure that you
have these toggled on, otherwise it won't work. So video channel 12.3,
just make it all blue. It's the fastest and
easiest way to do it. And basically these points
right here where there's just no audio or no talking. I just cut them. It's clear that these two
are the same as these two. So I'm just going to
go ahead and cut it. This is the same right here. So I can cut that as well. So that's essentially
how I optimize the cutting process for
talking head videos. To reiterate the most essential
elements of that video, I basically use the
shortcut E as add edit, which creates a cut where the
cursor is at every layer. And then I use Q
and W to cut off the edges of those clips. Similar to how you
would use the in and out methods for the
source monitor. Except this method eliminates the extra step of needing to
bring in the footage from the source monitor to the
timeline while adding B-roll for the
talking head video, I do something similar. I find that B-roll
I want to use in the project panel and then
place it into the timeline. For this instance, I can uncheck the audio blue box to add only the video
since I don't need the audio for most
B-roll in most cases. From there. Since I'm done editing
the talking head aspect, I lock layers 1.2, so then my edits don't
affect those clips. And then I use the same q and w method to cut where I need to. This method is much faster
than hitting the Cut tool, creating a cut point and then
it moving the footage over, which is sort of the method
that has been standardized. And that I see a
lot of editors at all levels doing the
toolbox on the left side, it does have good tools to
use to make edits faster, but they also have keyboard
shortcut alternatives. Also to make the best
use out of E, W, and Q. Make sure to go to sequence and hit Selection Follows playhead. This just means
wherever you move, the timeline cursor
or the playhead, a selection will be made
according to where you are. The lesson assignment
is to practice using the Add, Edit shortcut, as well as q and w.
These three shortcuts can help speed up your cutting
workflow tremendously, but it'll take some
time to get used to. And that's why you're
going to need to practice
8. Walkthrough of Cutting: In this lesson, I'm
going to do a walk through of my cutting process. This way you guys can see more of the different types
of tools that I use. Instead of just the E, W, and Q. It's also going to
somewhat be more of a meta sort of
walk through since the cutting that I'm about
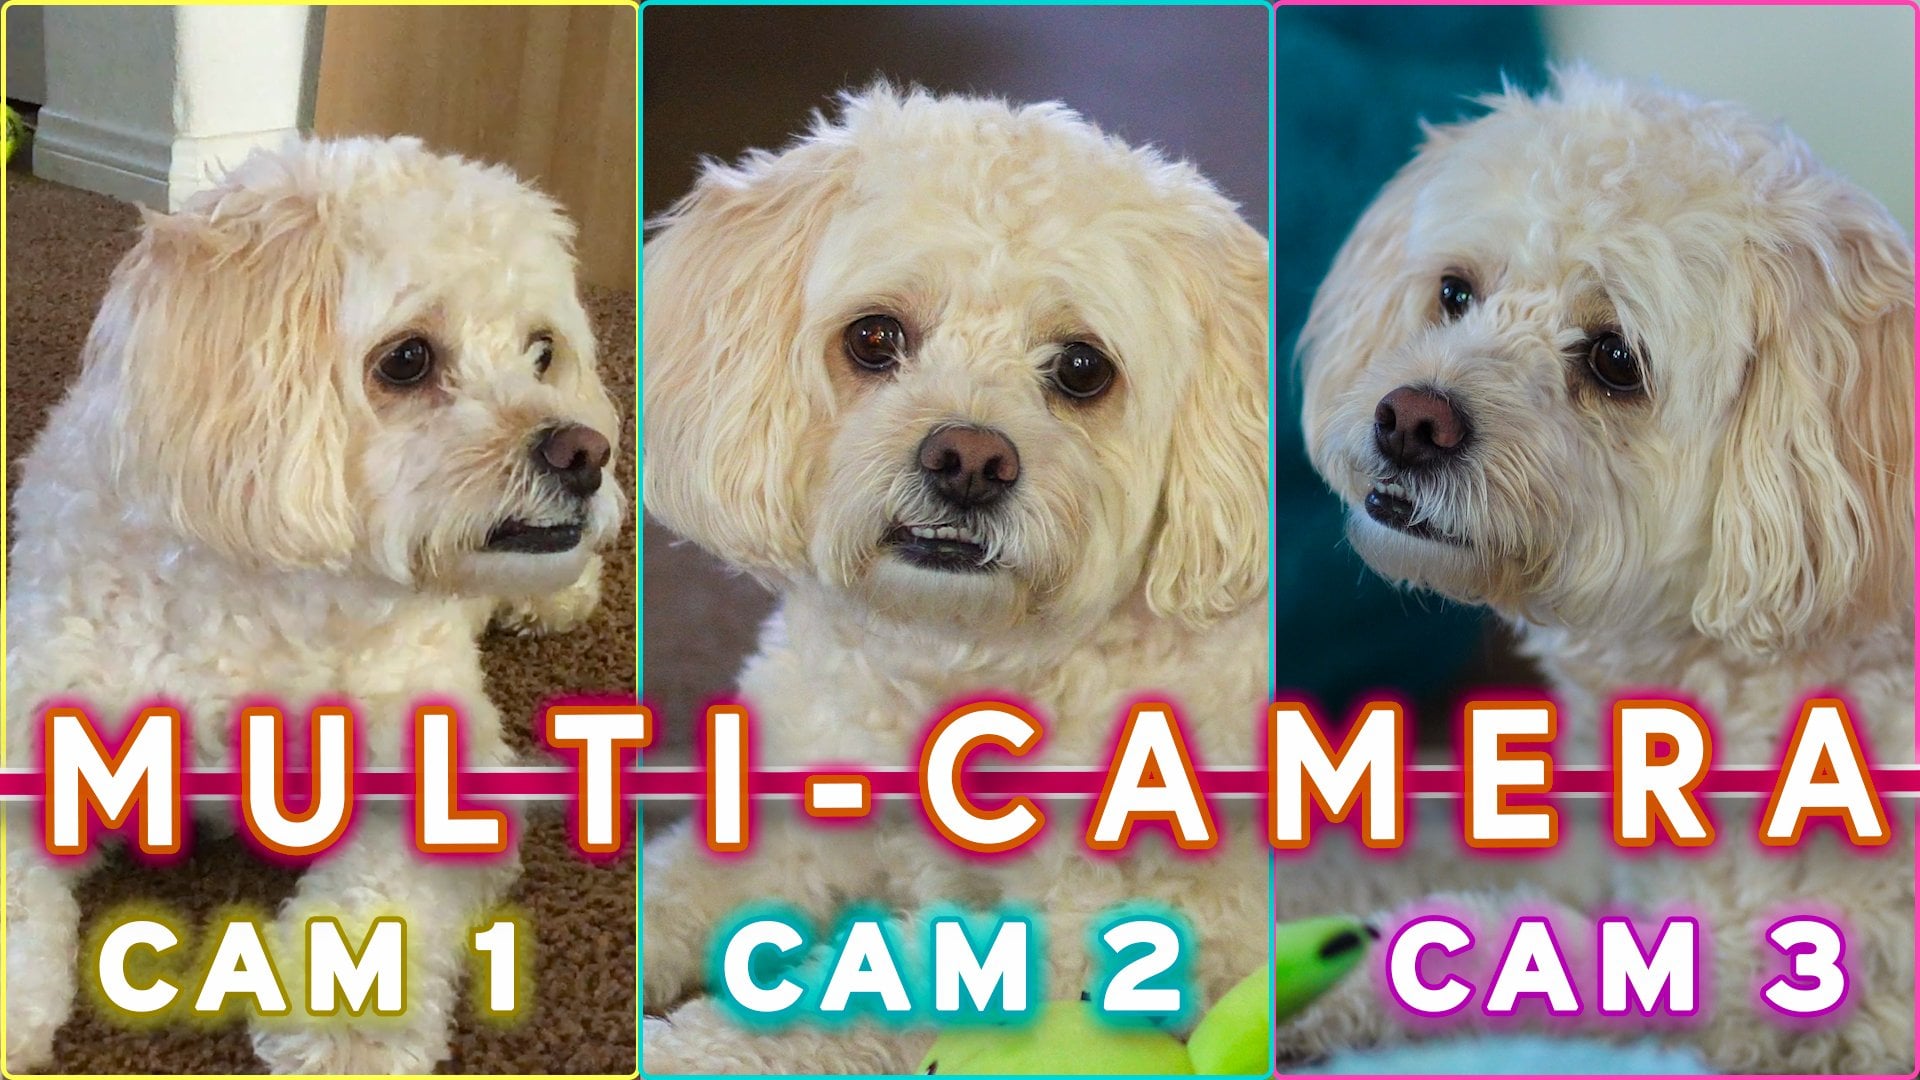
to do is going to be on the class footage itself. This is the conclusion. So you'll be able to watch it at the end to see the final result. So, so far all I did was Use the multi-camera function to
sync up the video and audio. You can simply do
that by highlighting all your videos and also
highlighting all your audio, right-clicking, create
multi-camera, sequence, sink it using the audio.
I've already done this. So after you do that, this is what was generated right here are the
multichannel timelines and a processed clips been has been created with everything
that's been synced up. So that's what I meant before when I said you don't
really have to organize it because it pretty much
organizes it for you because I have the sync up footage
right here and from here, this is what I do. This is the multi-camera
timeline i'm, I'm working with, but I'd like to just create a timeline based on
the clip itself. So I go to this one, I have a shortcut which
I'll show you right now, brings me to the exact footage that I want in this timeline. So it's Control Z for me. So let me go ahead and just press this and you'll
see what it's called. It's reveal in project. So if you want to
add that just have been revealed in projects
and add the shortcut here. So I find this to be quite
useful because I can just, whenever I'm in
the timeline and I want to go to a
particular asset, all I need to do is press that and it highlights it for me. So let's do that again.
And I'm going to create a new sequence from clip. As you can see, this has
a proxy attached to it. And then let's go ahead and move everything right
here to the new timeline. I do this because
multi-camera has some weird audio issues where the audio only
comes in from the left. So I like putting it in here
and it just fixes the issue. That is pretty easy. Alright, so now let's go
ahead and start cutting. This part is simple. Just click E and there's a
tool called Track Select. And you can see it right here. Track Select backwards tool. I have it as Control a, and there's also the
other side which is everything to the left, everything to the right. So originally everything
to the right is just a, that's why I made
Control a to the left. And when you
highlight everything, just click Shift F for me. I set that as ripple delete. Ripple delete is one of the most common types
of deletes that I use. So Shift F to me, it
just feels right. As you can see, I've
missed a little bit. There's a lot of space here, so I can just click Q and minus and plus are how
I zoom in and out. This is easy when
there's less footage, there's only 2 min
of footage here. But when you have
a longer timeline, like let's say one of my
last projects right here, which is about 12 min long. Sometimes it takes
a lot of clicks before you get to the zoomed
amount that you want. It's not too bad, like it
doesn't take up too much time. But the easier way to
do it is to just click Z and then highlight the
section that you want. Sort of just like create
the square where you want to cut or create your edit. And then for me, I have
command Shift Minus, and that zooms all the way out. You can see the Zoom
shortcuts here. So the zoom tool zoom to sequence is what I said
as zoom all the way out. So now that I have imported or move the footage over
to the normal timeline, I will just work with the normal timeline and
close off the other one. I don't need the extra audio because this is the good audio. So in order to it only the audio because most of the
time these things are linked. Just hold Option and then highlight what you want to
delete and then delete. And another very
useful trick is to use Command while I
set it as command minus m plus or a equal sign. So go to previous edit
points on any track, go to next edit
points on any track. Once again, you just
need to type it in and you'll find it. And you'll see that you can just add the keyboard
shortcut there. I find that this one
is a very useful one. So I'm going to just
hit W right here, a delete, actually a
faster way of doing that. What has just been E, a, and then Delete W and Q are
not always the fastest route, but there you go. Oftentimes, if
you're used to like the different methods e and e and w in this case
is almost the same. It's the same amount of clicks. So either way would have worked. But it takes some getting
used to just like use all these shortcut keys in combination to just
make things fast, okay, from here, since this
is a pretty short one, I don't really need to use the
transcription tool method. This thing is less
than 2 min long. So let's go ahead
and just cut it normally without the
automated transcription. So e, move to the next
point and then just w And what I'd like to do after that is listened
to it just to see, just to make sure that it
sounds good. Scotty loop. Anyways, best of luck with your projects at the
sign of fine to me. And I also have the alternative
footage right here, which is just a side
profile. For now. I won't do anything with that. So E W, So basically
just two clicks, E W. It's been fun showing you how to implement you. I personally
didn't want high. And oftentimes when I
edit things quickly, I press L twice. But the question, that way, I don't have to listen
through like a fun one. I can edit things at
two times speed or even faster just to make the
edit as fast as possible. And fun. It's been fun showing
you this class. It's been fun. Show
you something orange. One class I appreciated
games cost with you. Anytime if you've just got one. Yeah, So that's pretty
much how you can edit it. However, there's
actually a faster way. And let me go ahead
and show you guys that faster way with
a different one. Let's go with this
one right here. So I recorded all the
intros and outros of this class pretty much
all at the same time. Right now we are in a
multi-camera timeline. So I'm gonna go
ahead and copy over this footage into a new one so that there's no audio issues, then I'll get rid of this one. What I'm gonna do from here is actually export the footage, export the audio actually. So I'm going to
not do any video, and I'm just going to call
this audio export it, it shouldn't take long
since it's just audio. I'm gonna go to
Finder. And now you can see that the
audio is right here. And then I'm going to use a
program called time bolt. This is a PE program. Unfortunately it's not free, but it is one of
the fastest ways to make quick edits when you want to just get
rid of silences. So I just drag and drop
the audio into Tom boats. These are the
parameters I have set. Anything below negative 40 db will essentially be cut
out of the footage, like you can see, the red
zones save timeline cuts. It creates a file right here. Let's go back into Premier
and you will need to download the extension for this if
you want to actually use it. In order to use it with two
separate things like this, I have to create a
nested sequence. In order to do that, I
made a shortcut for it, which is just called nest. So let's go ahead and
create that first. And from here, we make sure
we highlight it selected json file and delete
the excess footage. And now you can see that all those silences
have been deleted. And that's pretty much the
fastest way you can approach editing out to silences
is by using time bolts. Of course, I still have
to sift through this and remove the mistakes, but at the very least,
I don't have to go into each silence area and
hit E and W like this. It's already done for me. These days. I primarily use time bolt to get rid of those
islands areas. And then I just listened
through either what the transcription or just listen through depending on how
many mistakes I made. I don't always use the
transcript from method, but that is essentially how
I cut things really quickly. Add graphics and
these principles are then we got into
how quickly the color. But this is essentially
the process of cutting talking head video material as
quickly as possible, how to use hybrid policies and how conflicts with
the least amount. Obviously they can hydrate
process and to create proxies, how to create proxies
and auto saving, and how to create
proxies and how to cut footage with the
least amount of clicks. Then we got a lot of
zooming in and out, hitting E, hitting W, e q. And learned about the short,
and learned about the short. Sometimes I highlight
a full area and just do ripple,
delete like that. And Premier Pro and learned about the shortcuts distance
between towns quickly. But a lot of times is just
E and q are w. And you could do like the cutting method that other people do as well. Right now what I'm
doing is I hold Shift while using the Cut tool. I made two points like that. You can highlight it
and then ripple delete, but ideally never actually just delete and fill in
the space like that. That's just, that's just two
extra steps you do not need. And it looks like I'm
pretty much done.
9. Using Proxies: In this lesson,
I'll show you guys how to create proxies for large video files to ensure that you are
able to edit smoothly. So what is a proxy? Essentially, a proxy is just a lower resolution version of your footage that you took. Sometimes footage with
really high bit rate, like for k footage or
aka footage will play back on the preview
window with a lot of lag. In these instances, you either need a stronger
computer with more RAM or you can create
proxies to eliminate the lag. Some cameras like the Sony
A7 for have an option to record footage while creating
proxies of that footage. At the same time, I have a
Sony A7 for and basically it just creates an extra folder with the same footage
that's lower resolution. For these proxy files. I rename all of them by using
finders rename function, and I add a proxy
to the end of it. From there I imported
the normal footage, highlight all the footage, and then right-click and
look for attach proxies. From here, I just need to
select one of them and the rest should be automatically found after the proxies are attached, I click on this symbol
on my transport control, which turns on at the proxies. If you don't see it on
your transport control, then you might need to add it. Now, the footage from
before that used to lag and cause issues will
playback smoothly. If you don't have a camera
that creates proxies, you can create proxies
using Media Encoder. To do this, highlight the footage you want
to create proxies for, and then right-click and
find it, create proxies. From here, you can choose
the format you want and how low of a resolution that you
want your proxies to be. I go with the lowest
resolution and keep everything else as default,
and then hit Okay. From there, Media Encoder will open and start
creating the proxies. Once it's done,
you'll find that you have some properties
that are attached. Proxies are very useful if
you're encountering a lag on your preview window
and can help speed up your workflow tremendously
under those circumstances. If you need to create
a lot of proxies, I recommend just
adding them all to Media Encoder at night
before you sleep. That way, you don't technically lose any time on the edits.
10. Using Color Presets: In this lesson,
I'll talk about how I personally work with color. Alright, It's firstly,
I want to make it clear that this is
not going to be an in-depth lesson on color theory or how
to use lumetri color. I'm just going to cover
my personal method. Alright, so lumetri color is the primary coloring
tool and Premier Pro. And you can find it in a window and then it finding
Lumetri color. Again, I have a shortcut for
this panel that is Shift C. Firstly, I go to my
footage which is shot in Sony's S log three
on my Sony A7 four. Then I go into creative and then look and then add the
luck that I normally use. And sometimes that's it. You might be thinking
seriously and yeah, seriously. It's really up to you how much you want
to color, correct. And color grade your footage. And for me, I like the look of a neutral lots on the
Sony S log three footage. This lot in particular is the phantom LUT for
the Sony A7 S3. But there's also a
free lots from Sony themselves that also
do a great job for me. My goals for a
talking head videos are usually to just get my point across with dialogue and add-on supplementary footage to
enhance what I'm talking about. If this is also your goal, using the default color of
your footage is totally fine. Don't feel pressure to add on a whole extra massive step to your workflow if it's not really supporting
the goal that much. I want to mention all of
this to really point out the pitfalls that I fell into when I first
started editing. I watched a lot of videos
about coloring and I also felt very
compelled to do it, even though it
didn't really change the final product all that much. That's why these
days I try to stick to the optimization principle. And all I do is add a lot and adjust a few basic parameters, which I will now get into. So let's take a look at
the basic corrections. Firstly, you can change
the white balance by using the eyedropper tool and clicking on something
white in the preview. For me personally,
I just really don't like the green color
all that much. So I tend to head
towards the magenta, even if the eyedropper tool
moves it towards the green. And in terms of orange and blue, I don't really mind either, as long as my skin
tones look natural. From there I opened
Lumetri Scopes where I have the waveform
luma graph open. You can open this graph
by right-clicking the area and selecting
the waveform. And using this tool I adjust exposure highlights and shadows. The goal is to make sure
that the highlights, which are the brighter
parts of the Preview, don't get above 100. And likewise, you want to
make sure that the shadows, which are the darker areas, don't go below zero. For me most of the time. What I do is just adjust
the exposure and highlights to make sure that I'm utilizing
the most dynamic range, which basically just
means to brighten the footage to the point
where it's near 100. In the end, a lot
of these changes and how you want it to look, It's up to your tastes. I generally don't change
too much unless it's to achieve a certain look
for that specific video. Another thing that
I do sometimes is increased vibrance
and saturation a bit in the Creative section. And that's pretty much it. If you have a look
that you like, you can go to the Effects
panel and right-click on the metric color and create
a preset from there, as long as you match
the lighting and have similar colors
in the footage, you can just drop your preset on the rest of your footage
and the coloring is done. I understand that
I'm oversimplifying a massive aspect of the editing process
for many filmmakers. But I just wanted to
offer what I believe to be the fastest and
most optimized way to approach coloring
footage when it isn't a very important factor
in the final product. I will say that I do not
regret spending time to learn about how to actually
manipulate colors, color correct, and color grade. It's always good to know
that if you want to do more, you can do more. But in terms of an optimized
workflow when working with a large number of videos that are shot
in the same way, It's best to optimize
the process by creating a preset or
LUT and dropping it in. The lesson assignment
is to look for a let that suits your needs or to create a color preset that makes her coloring job as quick
and easy as possible.
11. The Best Graphics Plugin: In this lesson, I
share with you how I personally create
graphics and titles. Once again, this is not gonna be an in-depth look at how to
create graphics and titles. Because to be quite
honest with you, I actually almost never really need to create
them these days. Instead of creating
things from scratch, I use a plugin called
premier composer, which is free to use. There are paid packages that you can buy and that I have bought. But I do think they're free. Starter pack has a
lot of nice graphics and titles that really
helps speed things up. So you can go to Mr. horse.com to download
their product manager, which will have an option to
install Premier composer. You'll need to have from
your close to download it. And from there, open
Premiere Pro again, go to Window Extensions and you'll find premier
composer there. I attach it to the
left window area. And then from here you can
explore the starter pack. It comes with pre-made
text graphics, sound effects,
transition effects, and other graphics which you can add it to the
timeline by selecting it and then hitting Add wherever your cursor
is on the timeline. That's where the graphics
layer will be added to. As you can see now, there is now a new graphics layer that you can edit by going into
the premier Composer window. For this specific one, you
can change the text position, scale, colors, and so on. This part is pretty similar
to essential graphics, except a lot of the work has
already been done for you. In fact, you can
actually go into central graphics and change
things up in there as well. It's based on the
same framework. After you adjust things
the way you like it, you can save it to a new
preset and from then on, whenever you add that graphic, you can choose that
preset to bring back up the changes
you made previously. From my experience, this is the fastest way to add
graphics that do the job. In fact, pretty much all my Skillshare classes
use graphics from Premiere composer because it's just so much faster to use. Once again, this is a big subject that
I'm oversimplifying, since it's true
that if you want to achieve a very specific
graphics animation, you can't really do that unless, you know the ins and outs of a central graphics or better
yet, Adobe After Effects. But for me, adding graphics is a supplementary action to
highlight the transition between big points or to
supplement what I'm saying and the graphics and premier composer do
the job quite well. So that is how I work
with graphics and titles. Despite not getting into how to use the essential
graphics panel. I believe that if
your goals are simply to use graphics to
support your points, you'll find that
premier composer is the most optimized way to
add graphics and titled. The lesson assignment is
to go ahead and download the free version of Premiere
composer and try it out. It's very intuitive and can save you a lot of time
moving forward.
12. Creating Audio Presets: In this lesson, I discussed
the fastest way I've come up with to edit and enhance
audio in Premier Pro. So ideally you actually edit any voice-overs or audio
in Adobe Audition. I have a dedicated
class on that. And at the end of the class, I have a bonus lesson
where I mentioned my automated method of enhancing audio that takes
just a few clicks. But if you don't have
access to Adobe Audition or you just don't want to
use it for whatever reason. Here's how you can achieve something similar
in Premiere Pro. The first step is to go into
effects and find dynamics. Drag and drop this onto
your dialog audio and then go into the effects control
panel and click on Edit. From here, check all the boxes, auto gate, compressor,
expander and limiter. You can pretty much just
copy the settings I have, but I'll go ahead
and explain them. Watergate is a tool
that eliminates all audio that is below
a certain volume. Right now that
threshold value is negative 60 db,
which is very low. So for the most part, it'll
just eliminate noise. Next is the most important
element, the compressor. For this one, I'll
play an explanation from my addition class. The most important settings
are the threshold and ratio. Whatever you set
as the threshold, the audio that is above
that decibel level will be the audio that you
are lowering in volume. So let's take this
waveform as an example. If I were to set that
threshold to negative 20 db, the audio that is affected
by the compressor will be the portion
that you see as read. The rest of it will
be unaffected. If we were to set the
threshold to negative 10 db, then that area goes up. And the way that
area is affected is determined by the ratio. So if you were to set the
ratio two to, for instance, the audio above
the threshold gets divided by two in terms
of decibel levels. So now the volume is softer and the loudest parts are
closer to the softer parts, therefore, evening out the
value generally for ratio. I set it to three and
I just keep it there. I think four is still a safe
ratio for dialog audio. But if you go past that, depending on what
microphone you have, your voice might start to
sound overly processed. Personally, I really don't
like that type of sound, but if it's your thing, then feel free to compress
as much as you want. The main goal for
when I compress is to try and keep my voice sounding natural while still bringing up the quieter parts. So I always try to set it at a reasonable
threshold right below what I perceive to be the average peak by looking
at the audio waveform. Without explained,
I set the makeup to 10 db since the volume
will be decreased. The compressor. Next
we have the expander, which is essentially just doing the opposite thing
as the compressor. Whatever is below the threshold, I said will be decreased in volume according to
the ratio I said, it's just to
eliminate more noise and it's not fully
necessary to use. It's just a lighter version of the auto gate that
doesn't just chop out the audio completely and instead softens it by the ratio. So it might actually be a better option than the auto gate. Finally, the limiter. This is a tool to just prevent audio from going over 0 db, which essentially means
that the audio has clipped and that it
will be distorted. So in order to prevent
that and just set it to negative one decibels and no
cutoff, anything above that. From there I hit Okay, then right-click on dynamics
and create a preset from it. From hereon, all I
need to do is ensure that I record audio
at a similar level, which is ideally
audio that peaks in-between negative 12
db and negative 18 db. And then I apply the
preset to optimize it. Of course, this isn't as
precise as Adobe Audition. So it's a good idea to
listen to the audio being played back and adjust
the volume accordingly. But that's pretty much
all you need to do to edit and enhanced dialog audio. The lesson assignment is to
create the dynamics preset. Be sure to adjust it
according to how you personally record
your audio levels.
13. Exporting: In this lesson,
we'll talk about how to export your videos. Alright, so the first
step is to go to File and then Export, and then click on Media. The keyboard shortcut
is Command M. If for whatever
reason isn't working, make sure that you click on the timeline first
and then try again. Once the Export window opens, make sure to check that the time matches up with what
you're expecting. I've had times where
I accidentally left a B-roll clip somewhere
beyond the end of the video. And so I exported a much longer video
than I needed to and had to trim
the video afterwards. Another case of bad exports is when I accidentally
hit I or 0, which is in and out. This makes it so that you export only the n to the L
point in the timeline. In order to clear this, just
go back to the timeline and hit the shortcut for
clear in and out, which is Option X for me. And those are just
two instances I've encountered a lot in the
past that caused me to export incorrect
sections of the timeline which resulted in extra
time spent on the export. With those things cleared up. If you're uploading to YouTube, select H 0.264 as your format
and choose Match Source, High adaptive bit rate. Then go into the video
section and check render at maximum depth and use
maximum render quality. This ensures that after
YouTube compression, your video will still look good. But take note that
it will result in a larger file size,
longer exporting time. If you're not concerned
with compression and only care about file
size and speed, you can choose adaptive
low bit rate or go down to the video section and lower your target bit rate. You can see that as I
lower the target bit rate, the file size also decreases. However, here's a list for
what your target bit rate should be around it depending on the resolution of your
video and frame rate. Personally, I've actually gone lower than the
recommended amounts. And the videos end up
still looking pretty good. So I wouldn't stress
too much if you need to save and file space or
speed up the export. Ideally though you export your videos at night
before you sleep. So the expert time, should
it matter unless you're exploiting hours of
footage at high bit rates? Anyways, as a final check, just make sure that you're
exporting to the location that you want and that you
name the file what you want, and then check that the output details are
what you expect it to be. Then if everything looks good, hit Export and you finish
editing your video
14. Creating Timeline Templates: So now that we have finished
a project with graphics, some sound effects,
and perhaps some music tracks that were
added at some point. Instead of just dumping
that Premiere project and never using it again, we're going to recycle
some of the elements, create a new timeline that
will serve as a template for these items and start moving over things that you feel like
you're going to use again, like the title
cards or graphics. Personally for me, I
have a title card that I use pretty frequently that I created using
Premiere composer. I have transition layer is
also grouped together with it. In order to do this,
you can highlight whatever you want to
group and hit Command G. Now every time I want to use that title card with
the transitions, I just need to open the
timeline template sequence, copy the groups layers, and then paste it
on to where I want it and change the text. This is also what I do for
some texts that pops up with some sound effects
and some music that's already adjusted
in terms of its levels. At the layer level,
what we're doing is essentially creating
a sequence filled with are mostly used
assets that we can quickly copy and paste over to a new project
that we're working on. In my opinion, this is a
faster way of doing things. Instead of going into
Premiere composer again, I'm looking for
the same asset and waiting for it to load after
we add it to the timeline. This also means that every time you work on a new project, you're adding to the list of assets that you use
frequently from your past work and getting faster every single time for the assets that I keep and
use over and over again, I create a folder called
assets that I put them in. And whenever I start
a new project, I make sure to open the
same Premiere project file. Just make sure to
clear any footage that you have no useful anymore in the project because
your project file can get cluttered and grow and
file size if you don t. And that is how to utilize timeline templates to speed
up your editing even more
15. Class Conclusion: Congratulations on making it
to the end of this class. Here's a summary of
what you've learned. First, we learned about the
optimization principle, which talks about
how we're basing all our actions on minimizing time, energy, and complexity. Next, you learned how to set up a custom workspace and Premier Pro and learned
about the shortcuts to sift between panels quickly. After that, we covered the file organization,
sequence settings, auto saving, and how
to create proxies, and how to cut footage with
the least amount of clicks. Then we got into how
to quickly edit color, add graphics and titles
using Premiere composer, how to optimize audio
using a preset. Finally, we went over how
to export your video and then reuse assets by creating
a timeline template. That was a summary
of the lessons. And I hope you were able to finish the class
project by optimizing your workspace and creating
all the presets and necessary to create a
blazing fast workflow. Finally, I want to thank you for making it to the
end of this class. It's been fun showing
you how I personally edit when time is
of the essence. If you learn something
or enjoyed the class, I'd appreciate it
if you gave this class a review and
hit that follow. But in the meantime,
if you'd like to check out what I'm up to and you
can find me on YouTube. My channels are called dreamland
and Scottie Lu anyways, best of luck with your projects, and I hope to see you
in the next class.
 Scott Luu, Video Creator