Transcripts
1. What is this class?: It has never been easier to release your own original music. In this class, I want
to show you how in just seven days with Logic
Pro Ten and a microphone, you can take your song idea from a voice memo all the way to a finished file that you can upload to streaming
services like Spotify. My name is Solo Ray. I've been making music
professionally for 15 years, producing, mixing,
and songwriting. I've also toured across the country performing
and music directing. Whether you're brand new
to music production, or you just struggle with
taking your ideas past that first stage of inspiration and bringing that
out into the world. This class is for you. We'll go over songwriting
arrangements, the basics of mixing
and mastering what does and doesn't
matter about loudness. As well as how to publish your music without the
need of a record label. So come along with me on
the seven day journey. I cannot wait to see what you
create. Let's get started.
2. What do I need?: Welcome to song idea to
Spotify in seven days. In this class, we're going to go over everything you need to know from the initial
spark of an idea, up to uploading something to Spotify and sharing
it with the world. You can view this video
kind of as a syllabus for everything that
you're going to need in order to make that happen. But honestly, you
don't need that much. You'll need a computer, and specifically, you'll
need software called a DAW or a Daw. It stands for
Digital Audio Workstation, and there's a lot of different
ones floating around. You've probably heard
of some of them. Ableton Logic Pro, that's what I'm going to be using
in this class, Logic Pro. If you're going to
want to release a song with singing lyrics, you'll need some sort of
microphone to do that. There are so many
microphones to choose from, and we'll go into that
in a later video about the different types
of microphones and why you might choose
one over another. But if you don't have
a microphone and you want to start singing and
start recording yourself, at the bottom tier of this is the lowest
in price you can go and still get a acceptable,
good sounding vocal. I would put the SM 58. The Sure. Sm 58. You've seen this
mic 1 million times in every live performance
you've ever seen. It's built like a
tank brand new. I think they're about 100 bucks. I would definitely
search on ebay, reverb, even your local Craigs list, you'll probably have
some 58 floating around. It's just a very
useful Mic to have because of how durable it is, and it's really good
at sound rejections. So it'll only capture
what's directly in front and not
your noisy room, or your kids running around
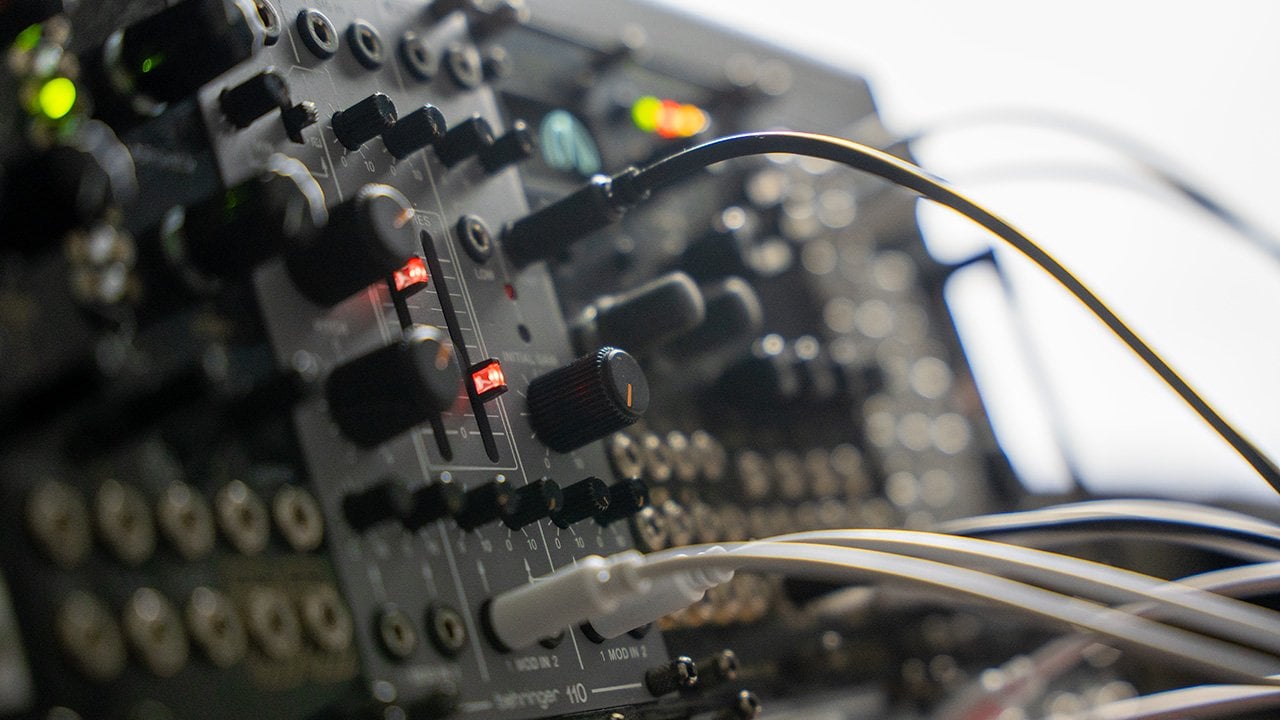
upstairs, stuff like that. You'll also need
an audio interface that's something that you plug the microphone into that brings that sound
into your computer. If you're just starting
out and you're wondering which audio interface do I
buy, I don't have anything. I would recommend you go with one of the universal
audio volts. There are a couple
different options about how many channels you want
available at any one time. But if you just want
one microphone input, I really think the volt for the amount of
value that you get, just the quality
of the hardware, and also they throw
in some really great software in there as well. I think it's just very,
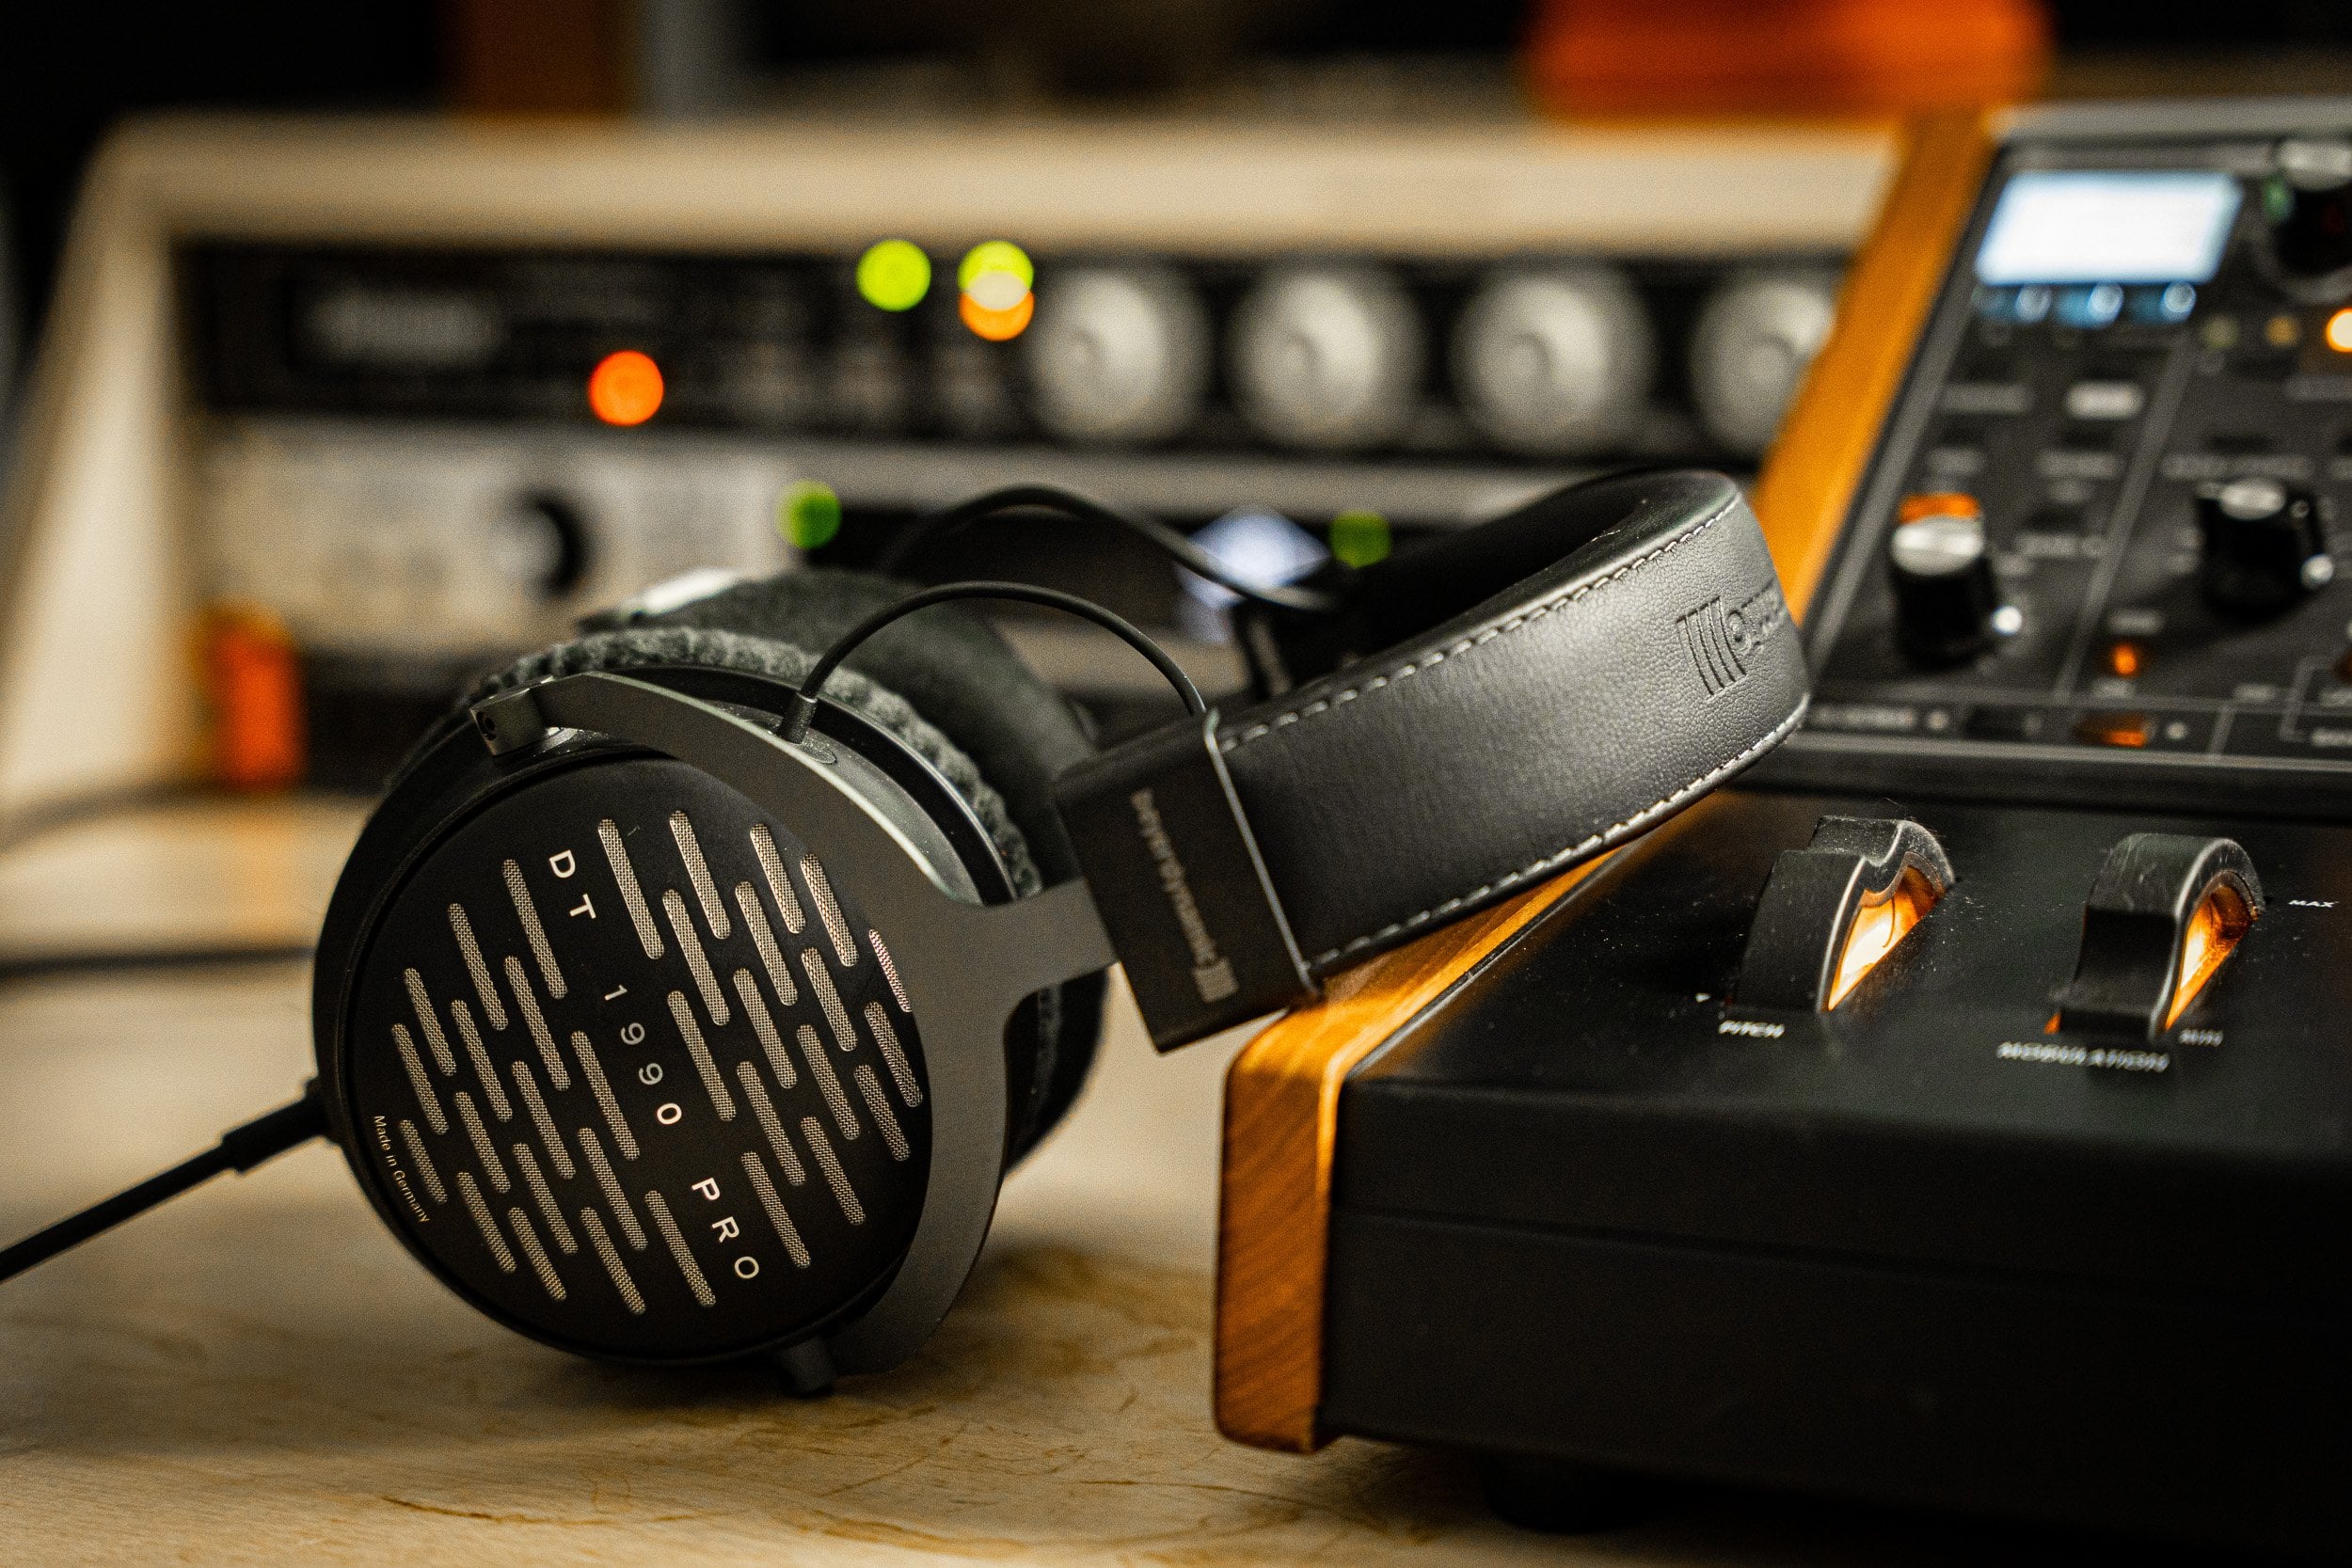
very hard to beat. Lastly, because
we're probably going to be working with
microphones and recording, you should have some pair
of headphones to be able to listen to sound and not have that picked
up by the microphone. So generally, over ear
headphones are better for this, that are closed back, that don't like
leak sound a lot or Apple ear beds probably
are not best just because those can leak sound pretty easily If you have the music going through those
as you're singing, the microphone probably
is going to pick that up. So make sure you have a pair of closed backheadphones to be
able to capture clean audio. Once you have those things
in front of you and you're ready to use them,
let's make some music.
3. Record everything: The number one key
for songwriting, in my opinion is to
just record everything. I think that the
iphone, and I'm sure Android has equivalents
of this as well, but I use iphone,
the voice memos app. That's been the most
fundamentally useful thing for me as a songwriter. I think that
recording everything, if there's just ever
fleeting little idea, grab it while you can. You know, you're taking
advantage of those inspiration. Moments that seem uncontrolled, that just seem to
come and go on their own when they happen, grab them. So that on another day
when you're feeling dry, you can go back and you can
have all these catalogs and these moments that
you can look back on as, wow, I felt that at
that moment and I recorded what that little
melody thing sounded like. So I just have my phone here. These are my personal
voice memos. And so I'm just going to kind
of show you how unformed some of this stuff can be and it still works and it's
still totally fine. So, you know, if we just go to, I don't
know what this is. So that's me trying to play a little melody idea
thing I had and my kids helping along and adding some awesome
notes to that. You know, here's another
little something, another great contribution for my son there, which is awesome. But yeah, like they
don't need to be lyrics, they don't need to even be
fully fleshed out melodies. It's just little things, little flickers of ideas. Oh, and then here's
another thing where we were writing with some
friends and so I just set my phone down to record
and just had it going the whole time so
that I can kind of revisit and see the
evolution of the idea. And maybe pull some
things from, oh, we had an idea earlier that was really great then we kind
of moved away from it. Let's go back to and
revisit that again. I can just scroll
back and find it. So maybe you need to
tell that story about. The reason this is so powerful
is you're taking these raw, unformed emotional things. Whether they're
stories in your life, things that have
happened to you, ideas that come through you, you're just cataloguing it all. And those become the paint
colors that you're going to use to tell a story. You're going to use
those things to create a viewpoint
that is uniquely you. How you see something, and you're going to then
share that with the world. So I think that's the first
step to songwriting is just gathering as much raw
material as you can, as much raw emotion,
stories, experiences. Get all that stuff
in and then we can mold it into something
that we want to say. That's what we're going
to talk about next.
4. Choosing your theme: After we've gathered
all our material, we've got our stories and experiences and song ideas and all these different
kind of things. We've created this little
galaxy of information. I think the best
thing we can do is choose a theme, choose an idea. Something that we want
to actually write about. And I think as specific as
you can be, the better. Let me give you an example. So if you're writing a
song about having a great time tonight and
it's kind of this pop, happy dance tune,
mention where you are, mention who you're with, mention what you're doing, you know the time that it is like down to those
details where you can really allow us into your world so that we can see the world
through your eyes. Like I think that is what
is really powerful about music is it allows us to kind
of enter into this place. And I think that your job as the artist is to supply
that creative vision, to have something to say, to have a viewpoint that
is very clearly defined. That even if I haven't experienced what
you've experienced, your viewpoint is so well defined that I can
enter into it. And it's interesting and I'm learning
something about you. I'm connecting to
you in that way. So don't feel afraid to whittle down the theme
to something super, super specific and then look through that material
that you've collected. Your voice memos, your song
ideas of little melodies, stories that happened
to you, whatever. Gather the things that scratch that same itch as that theme
that you've established. Now you have a
smaller collection of ideas that all are
saying the same thing. And we can jigsaw those together and make a song out of that. And we'll develop those into different song structures,
different sections. And that's what we're going to talk about in the next video, is how to actually take
this amalgamation of ideas and distill it down
into unique song sections.
5. Song structure: All right, we're really
writing songs now. We got a guitar out and
everything, it's the real deal. So I'm going to take one
of the ideas that I've had for a while and kind
of been iterating on. And I want to try and distill
it down into structures, so I want to try and have
a verse progression, something that we can kind
of intro the song with. And I want to have somewhere
to go to from there. So whether that's a chorus or a pre chorus or some
sort of interlude or I just kind of want to
play around and find different song structures
that we can go to. I have this section that I've kind of been
messing around with. I I don't want to fight and I
don't want to lose my mind. I don't want to lose my mind. I fight. You're lucky at all, mind? Lucky mind. Just that bouncing back and forth between those two chords. Some lyrics about that. Some of them I have picked out, some of them not
quite picked out yet. I want to go
somewhere from there. Where could I go from
that second chord? And I'm going to try and
avoid this becoming like a super deep dive into music
theory if you want that. I have a course
available on that. But in this, I'm trying to guide it more towards the
songwriting specifics of it. But if I mention a term that
is unfamiliar or something, I probably go into that in more detail in a
different course. No, no, no, no. Lose my mind. So from there, maybe I could go, you know, we haven't
done that chord yet, so I'll pick it all the time. I want you go. I don't want to fight anymore, so I've kind of got those
two different ideas that I like, both of those. And obviously lyrics are
still very nebulous, the melody can still be workshopped a bit to be
more specific, I'm sure. But those are kind of, you know, the building blocks
that feel pretty good. Good enough to kind of
start recording stuff on just for kicks. I'm going to try
kind of coming up with a third section
that maybe could be sort of bridge
or I don't know, just another option to have. So I'm doing this on the fly. So I'll purposely want you
to hear some bad things, things that I don't like, so
that you can kind of hear how we just kind of stumble
upon something that works. I don't fine and I don't fine. My my your Mr. I'm getting old side. Going to get in all the time. In mind time. Love. Yeah. Something like.
That's cool. I like that. So maybe there's are
three sections, you know, we kind of have
our verse sort of deal a little precourse thing and then that could be a
little breakdown interlude, bridge section between
choruses potentially. So that's a good intro into
this world of songwriting. You know, this theme is
pretty well fleshed out. There are still lyrics
that need to be done. There are still melody issues. You know, the chords
aren't final, the vibe is, you
know, could change. But we have a
relatively clear idea of what this song
is going to be. So this is the perfect
time to kind of move on to the next step of getting
some stuff down on paper, on paper, digital paper. The computer start
recording some scratches and start to see kind of how it sounds when we
listen back to it. And that might inform
where we go from there. But yeah, let's
call it for today. Great job on day one. You made it. Let's
go on to day two.
6. Setting up your project at 48k 24bit: All right, let's
talk about files. Music files fall
into two categories. You have compressed and
uncompressed compressed files. And this compression is not audio compression that we'll talk about later on another day, but it's specifically a
data type of compression. So think P three is a compressed audio
file for recording. We are pretty much always
going to be working with wave filesv because they're the most common and
it's uncompressed. You're able to do whatever
you want with it. Aiff is specific to Apple, it's what logic uses. By default under the hood, it'll use AIF files a lot. But when we're
talking about like exporting something
for mastering or, you know, uploading something to Spotify, something like that. We're always going to
be using wave files. So when we're setting up
our project in our Da, this will look different
depending on what you're using. We need to make sure
that we're using these settings for the file format that
we're going to use. We're going to record in 48 K and we're going to
record in 24 bit depth. Now what these terms
actually mean, kilohertz is the amount
of samples per second. So 48 K is 48,000
little clips of audio per second that make up a sound. This sound that you're
listening to right now is at 48 K. Most videos operate at 48
K. Most CD's are 4041, and there's lots of technical reasons for that, but trust me, set it at 48 and don't
look back, thank me later. Bit depth is how low
something can go. It's the threshold of
audio, 16 bit depths. Something can get this quiet
and if it gets below that, it'll just turn off, it'll
just fade into nothing. 24 bit depth will go
that much quieter, so it's not going to get louder. It's just creating
more head room so that our mix can exist. Down here, we kind of have
a little more head room and then in mastering it, will master it and it'll
dither it down to 16 bit, but we'll retain all the
detail that we mixed at. Again, it gets really
complicated but just 48 K 24 bit,
never look back. You'll be able to upload it anywhere you want if
you use those settings.
7. Solutions for click track bleed: All right, so we're going
to start recording stuff. Now, as we start recording, there's something
called the grid that we need to be aware of. The grid is what
everything aligns to. And if I pop up in logic here, these lines here
are our friends. I can zoom in. I don't know if you can see that
or not. Yeah, you can. These little lines
are our friends. We love them. Really 99% of the time you're going to be recording to a click track. That introduces some
other problems with, now your timing becomes very important because
you're playing along to something that
is completely perfect. It's really critical that you have good timing and good tempo. Also, another problem is bleed. If I just play the click
coming straight out of the computer, you can
hear that clear as day. By the time we start adding compression and effects
and everything, that click is going to be
very audible in the mix. There are a couple
things we can do to mitigate that
headphone bleed. One of them is
actually affecting what the click sounds like. If we pop over into Logic, and I'm going to press
X to open up my mixer. Here you'll see I don't see
the click, we can play that. We can hear the click, and
we see the volume here, but we don't actually see
where it's coming from. You'll notice in the little
middle section here, it says tracks single or all. If we click all now, it'll show us
everything going on, even if we never really have
a good reason to look at it, most of the time, we never
need to look at a click track. But if we want to adjust
the sound of it, oh, and I just double clicked
this little square here and it automatically
added an EQ. We'll go into EQ in
another video later, but for now, I'm just going to start messing with the
sound of this click. Because you'll notice when
headphone bleed happens, it's really the high frequencies
that bleed in first. The low end doesn't really bleed into the
microphone that much. We can use that
to our advantage. If we just take away just
the high frequencies and leave the low ones in there, then we'll be able
to have a nice loud click that doesn't really get into
the mic that much. I'm going to turn on this
filter and just take away all that high stuff until it
becomes like a low pulse. Then I can just turn that way up and that's not
going to bleed at all. If I mute logic here, now this click is just coming
through my headphones. Let's see if you can
hear that bleed. I mean, this is
perfectly silent. It's barely barely in there. That's a good way to get rid
of some of that click track. You can sing to that and
that's totally fine. Another way is just to have some rhythmic element going on. That way the bleed doesn't
really matter as much because you can just
turn off the click and just listen to
that rhythmic element. If we just wanted to drop like
some shaker loop in there, actually we could use
Logic drummer thing here. I just created a new track and I'm going to have it
be a percussion track. I'm just going to have this
be very simple and turn off everything but the shaker.
Now let's listen to that. Yeah, I could sing
to that just fine. That's an option
to all these are ways to just mitigate
the headphone bleed or at least make it
make sense so that we can sing rhythmically
along to the click, stay in sync with
everything else. But also we are not getting a bunch of extra information into the mic that we don't want.
8. Setting a mood with loops: At this point in the
process, I think it's a pretty good time to
start talking about loops. Loops can be used
unwisely or lazily, or you just drop a loop and let it loop through
the whole thing. But sometimes that's a
vibe and that's the point, and that's not a bad thing. I think whatever inspires you, if you think it's D, go for it. Just because you're
using a loop does not make it less of an
expression in my opinion. I think there's perfectly
good examples of this, probably the most
high profile one, It's just in biber track, run and over, Okay, go. It's just this splice
slot, that's all it is. Just slowed down a little bit, even the same key
and everything. So it's like everybody
is doing this. This is not something that
is only lazy musicians do. This is something that is
utilized by everybody. I think take advantage of it
as great jumping off points. You know, they built
a whole track out of that one little sample that basically loves the entire song. If you find something
that you love, go for it, use it,
You're totally fine. If it's legally cool, as long as you have the
rights to use it, if it's royalty
free or whatever, then yeah, you're golden. What I'm going to do,
I have a couple ideas. I know where I want
to take this song. I want to put some loop in there just to set the tone as
I'm recording a scratch. And I'll probably go
in and edit it later. But I want to find a
loop that doesn't have too much going on as far as
like a chord progression, I just want to set the tone. Oh, okay, cool. So this is in a different key and the timing is
not quite right, But I like sonically
what it's doing. So I'm just going to see
if we can get this to fit. I'm just going to, okay, this sample was at 4041, but remember from
our file types, it's really important that
we're having everything at 48 K. When we send stuff
off to mastering, I'm going to convert file so
that it brings it in as 48. Get rid of the little
percussion layer that we had. Now I want to make sure that
our tempo is locked in. I was imagining nine somewhere around there, so that'd be like 70 maybe. Oh, maybe a little faster. Yeah, something like,
let's try that. Maybe 78. Okay. This is at 80. So I'm just going to
slow this down a little bit, depending on your Daw. There are probably a lot
of different ways to slow something down in logic. The least destructive way to
do it that allows you to, to go back and change
things later and it's not a big deal, is editing. There's like this
little flex button here and this allows you to manipulate audio
a little bit better. There's all these
different algorithms, these different ways that
it's manipulating the audio. Basically 90% of the time, polyphonic will do it. It's just the most complex
way to stretch the audio. There are other reasons
why you might do this, like if it's a bass
sound or a vocal or something that is like
a monophonic signal, then monophonic helps it
be a little more accurate. But most of the time,
if you used to do polyphonic, it'll
probably be fine. I'm just going to hover the mouse over here and
then I can stretch it, I'm going to boom,
make it there. Then I'll probably
also switch the key. I think I was playing A earlier. This is in D sharp. Just
pulling on my keyboard here. If I go from D sharp
up to a 1234566, I go up six or down six. Let's see what six sounds
like versus down six. I, I like both. I think I'm probably
gonna do down just so that I don't have too many high frequencies kind of
getting in the way.
9. Recording scratch tracks: So I have an audio track
here for my voice. I can see the level
coming in there. Hello? Hello? I've got a mini
track here for my keyboard. I'm going to go
ahead and just pick a preset of piano that
I've made earlier. You can bring up the preset
window thing by pressing Y, there it goes O if you're going to get one plug in on the sphere
is the one to get, It can do anything
you want to do. It's always useful.
It's so flexible. Yeah, I've been using
it for ten years now. Still my go to still works, I'm still finding new
things you can do with it. Yeah, it's incredible. I'm just going to let
this loop play and just try and find a vibe
here in the sections. I'm going to add just a
little bit of reverb to this loop and just pull it down, just to kind of put it a little bit more
in the background. If you're ever recording
a Midi instrument, one thing that might
be helpful is to turn on low latency mode. This tells logic,
whatever track you have selected to put some
extra processing power on that so that it will
prioritize making that as snappy as possible and responsive as possible
when you're playing. Otherwise you might get
a little bit of latency. I'm going to turn that on
in my control bar here, you can see there's
a low latency mode, low latency monitoring mode. If you don't see this or if this bar looks different
for you up here, you can customize
what this looks like. Customize control
bar and display. It gives you all
sorts of options. Um, or you can just choose one of the default
ones and that's totally fine, but if for whatever
reason you don't see the low latency monitoring mode, you can just have it show
up if you just customize. And just kind of check it right here if
you want to see it. Okay, let's see
what happens here. I don't want to fight and I
don't want to lose my mind. I don't want to lose my
mind when you walk over me. Just want to make you happy. If you need a little
runway to be clean fee, I just want to see you smile. Cool. So we're still
working on the melody, we're still working on
lyrics and everything, but just getting some
stuff down on paper and then listening back to it
can kind of help identify. Oh, okay, that was
a magic moment. That kind of felt cool versus we're still kind of searching. I don't want to, I just want to see you smile. Okay, cool. This is
giving me some ideas. I'm gonna try another take
and I'm just going to go forward after what we recorded and just
kind of keep going. I'm just kind of like
putting down a bunch of ideas and I'll come back
and clean it up later. If you need a little time I'll be int there and I
just want to see you smile. It's getting closer still. Not exactly what I had in mind. I'm going to start
writing lyrics down, so I like to just keep it in
the logic project itself. But a lot of times if you're collaborating or
whatever, not p, you know, pages
document or document, whatever works for you. I like keeping it in the
logic project. There we go. Okay. I don't want to fight and I don't
want to lose my mind. Nails. You want me all the time? I guess Lucky. I guess
lucky. I don't mind.
10. Scratch drums and overdubs: So I'm going to try this again now that I've sung
it a couple times, has kind of solidified a
verse and a pre course thing. Just after singing it,
you kind of start to figure out what it
actually is and it's kind of getting
like a kind of a cut vibe, which
I think is fun. I'm going to drop
some drums in there, just a loop that will just kind of help me sing a little more rhythmically. And that might inform some other decisions
down the road of, you know, how long to have certain sections and
stuff like that. Let's see, my tempo
is 78 right now. I mean, I could slow that down and that
could be kind a vibe. We could try that. Let's see
what this sounds like here. If we just kind of brute force
this into the right tempo, and then if I quantize
it so that it's not swung, I think that's kind of fun. That's kind of a fun vibe. Okay, let's try that. And I'll kind of start
playing along with that. And let's see what happens here. You need a little bubble of
your own Lay down, read. I'll get the kids
to school on time. I just want to see you smile. Okay, cool. So I'm going to take that and now that kind of, I'm starting to get more of a picture of what the
song is going to be. Now I'm just going to kind of go back in and try sections again. So, you know, I like
this piano part. I don't need to
record that again, but I flubbed the line. So I'm just going to record the vocal and go back
in and it's called punching in where I'm
just going to over dub that one line
that I missed and I don't want to lose my mind right there, so let's grab that. I'm going to hit play
then as soon as it's time for me to start
singing as it's playing, going to press R and that's
going to start recording. I'll still hear
the original take. If I don't want to hear
the original take, then I'll press N, which is going to
mute that track, R to start recording, and then to mute that
original track. If you press R as you're playing, then
you'll still hear it. If you just press right
now as it's stopped, then you won't hear it. Just in logic, little
quirks about how the program works but
now, you know, fight. I don't want to lose my mind. I don't want to lose my mind. Okay. And then is
there anything else? Run in my heads
along your spine. Yeah, I could do that
cleaner. Let's try. Lucky mind. Run in my heads
along your spine. All right. Let's take
a listen to that. I don't want to. Right. And I don't want
to lose my mind. I don't want to lose my mind. Males, you want me? All the time? I guess I'm lucky. Out a mind running
my hands along your side and you need a
little bubble of your own. Lay down, read. I'll get the kids
to school on time. I just want to see you smile. Cool. This is a good scratch. There's that other section
that we kind of came up with. I don't totally know where
that would fit here, but it might start
to present itself later if I start to realize as we start to
build the track out, oh, that other section
would fit great here. We have that in our back
pocket if we need it. But for now, I think
this is a good scratch. And now we can kind of move on to the next part of the process.
11. Cut and paste time: Welcome to day three.
We're going to be talking about arrangement today. The structure of the song, how many verses, how many
choruses, that sort of thing, as well as what
instruments are playing, the construction of the song. This is the real meat
and potatoes stuff. After sleeping on it, I am starting to get a better idea of where I
want to take this song. I do think it'd be
nice to bring in that little bridge
idea thing we had, but I'm not going to worry
about that right now. What I'm going to
just do is this take right here is what we
ended up liking the most, this felt, the most complete
fishing a little bit here. Still not 100% on these
lyrics, but that's okay. I'm going to take all of this earlier stuff and I'm selecting it by
using this cycle here. So if you just drag
anywhere on these markers, it'll create this
yellow bar, right? Normally what this
yellow bar does is it just loops a section. So if I wanted to just loop
this four bar section here, I could just do that drag there. And then it would just loop
the section over and over. And every time I hit space bar, it'll go to the start
of that section. Another thing you can do with
this cycle length here is choose which parts of
the project are affected by certain parameters,
certain functions. Because I have these
selected here, this cycle, if I go into the edit menu, these options will be applied to what are
within these locators. If I cut section
between locators, it'll snip that
little piece there. Also, if I command that,
I can also duplicate it. Let's say if I wanted to
just do two choruses, I could find a chorus here, go over, just want
to make you happy. It was this 4 bars,
that was the chorus. I could go repeat section, and then it would
automatically make all those edits for me
and duplicate that, shifting everything after it forwards a little
runway to be clean. I feel you might need to go back and kind of fix some edits that don't totally make sense. Like it's cutting this word
right in the middle because it kind of bled over into the downbeat of
the next measure. So we can just
really easily kind of make those changes
just by moving, you know, the regions
over getting that full, complete word, you
know, et cetera. But for now, because this section is what
we were happy with, I just kind of want to get rid of all this stuff
that came before it. So I'm going to select
all of this with the cycle kind of going up to where that
drum loop starts. I'm going to cut section, boom. Completely get rid of all of it. That's how we cut
and insert time. Duplicate time. Now
let's start editing the stuff and get it into an arrangement that
we're happy with.
12. Intro to editing : A quick word on keyboard
shortcuts my rule of thumb. If I use the same function, like two or three
times in the session, that probably tells
me I should just make a keyboard shortcut
for that thing. I'm a big believer
in just creating your own keybindings
because you'll remember them a lot easier than looking up a manual
and seeing what they are. If you just decide, hey, I'm just going to
have this function, this key, I don't know, I feel like that's just
a little bit stickier. That's the way that my
brain works anyway. I've also bound
the scissor tools manually to be the number three. When I hit three, it'll
switch my tool to scissors, and then if I want to go to something else, I
can hit Escape. And it'll bring up my
whole tool bar there, so I can just click whatever
tool I want at the moment, which 99% of the time is
going to be a pointer tool. But that's just a quick
aside. We're here to edit the arrangement. So let's cut out a verse and an intro and start
assembling stuff together here. So I'm going to use my marquee tool and
just kind of select this whole verse section
and it's going to ask me, hey, there's a note
Overlapping here. What do you want
to do with that? Do you want to split it in half? Do you want to just keep it
or shorten it or whatever? So I'm just going to keep it. I don't mind. And let me make
sure that this kind of starts on a downbeat here. Yeah, so this kind
is a downbeat, even though there's
no note here. I'm just going to
move this over here. I do a little move where this
is actually the downbeat. So I'm going to use my marquee tool and just delete all of this because I'm deleting
this, any overlapping notes. I do want to keep those, I want them in
this other region. So I'm going to split this so that it doesn't accidentally delete any notes that
I want that way here. It didn't remove it, it just cut it where
that marquee was. All right, so now I've got
this little verse progression here which we can also
use as an intro to, let's say I want the
drums to come in probably right away
this will have here. But maybe I want a bar of
this before it starts. I'll copy this over by
option dragging this region. Then I'll move my
mouse here and it creates this little
tool that I can drag. I'm going to have
this just be here. It's just a bar. Maybe
if I want to also add a fade if I move
my mouse in the upper, let me turn off flex
editing here in the upper left, now it's a fade. If flex is on, then it'll
be like if I want to stretch it around but I don't
want to do that right now. I want to fade it in. I can co over here bring
in that cross fade. If that option doesn't
show up for you when you mouse over
a region like that, you'll need to enable
fade tool click zones. If you just go to
Settings General Editing, fade tool click zones
right here, boom. Just make sure that's
enabled if it's not. Okay, so now we've got a
little intro here. Cool. I might go in and
edit those drums. I'm not totally loving what
that's doing right now, but for now we can just move on. Let's get our verse here and where does our
chorus section come in? I guess I'm lucky, out of mind, running my heads along your spine and in
right there, downbeat. Let's cut this here. When I say cut, I
just mean split. Now we have this little
chorus here that we can add somewhere. And then it repeats. I just want to see
that's the downbeat. I'm going to get
rid of this now. We can start using these
as building blocks. I'll have this be
a little reintro, Also move these around too so that they all start together. I'm going to grab,
I'm going to grab this whole thing here.
Bring this over. Don't want to. That'd
be cool actually, to bring drums in here, proper need a little bubble of your own as I just
want to see you smile. So this could be a
cool spot to bring in that bridge progression we were working with the other day. Let me just plug
that in real quick. Is to school on time as I
just want to see you smile. Give that a little
bit of quantizing. Select all and just maybe
not 100% but yeah, like 50. Just to tighten up the
timing a little bit, maybe I'll want some sort of other drum thing going on there. Let me see it one more time. Okay, Right here, I think
is where we should go back to either the
chorus or the verse. Let's see what this sounds like. If we go into a
chorus from there, a minute and you need a
little bubble of your own. Drop it down. Drop it down here. Read. I'll get the
kids to school on time 'cause I just want to
see you smile, re, intro, and then you end. Maybe you to. All I'm really doing
with this is getting a roadmap of where we're
going in the song. When I start actually messing
with production specifics, I know where I'm going, I know how to leave something in the tank for when we get to
that last chorus or whatever. This kind of gives me
a good mental picture of where the whole
song is going. Now let's go back
and let's start replacing some of
these looped elements. Let's start embellishing things. Let's start to really
make this a song.
13. Drums: So let's talk about drums. There's a lot of different ways that we can approach drums. It's a very deep
subject right now. We just have some
loops going on, so everything feels pretty static and we're
changing it a bit. We're stretching it
to meet our tempo and that's creating some
interesting effects, but it's still very, very
samy throughout the song. One thing we can do to kind
of breathe some life into it is convert this loop
into a sampler track. So that we can play
our own rhythms in using these sounds
depending on your dog. This process might look
different, but for logic, I can just right
click on the region and convert to new
sampler track. If I do that off of this, because we're like
stretching that audio, it's going to take the
original audio file and convert that
into a sample track. I can show you what that'll do. I'm going to use it off
of transient markers, so every time it
is a hit in there, it's going to slice that audio. Here it goes. It gives
me this region here. If I play all these notes now, right, just like pseudo randomly took all these hits and mapped them
across the keyboard. If I play that
region that it made, it should sound like the
original loop, right? You can understand
what it's doing. That can be cool, but
I like it stretched. That sounds a little
more interesting to me because I want it to affect that audio and that's what I
want sampled to it. I'm going to bounce in place. Just right click
bounce in place. This is going to render
this as a new audio file. The difference between
this file and this file, this one is not being stretched by that
flex audio editing. This is just how it sounds now. It just created a
new audio file, now if I convert this
to a new sampler track, it should sound a
little different. Yeah. Have a lot
more space between the notes and stuff.
Yeah, I like it. Sounds cool. So I'm going to punch in a rhythm
by using a pattern. If I write, click on
this Midi track here, anywhere in this space, anywhere in here, I can
create a pattern region. And it gives me this menu here. Now it's by default just
selected a C major scale. And here, all these notes I can create a using
this sequencer, which depending on the style of music, can be really helpful. I got a little kick here, if I want to add some
more notes here. Say I want this other sample that's not in the
sequencer right now. I can hit this plus sign, learn, add, now it's turned red. It's learning now it's listening to all the notes that I play. I'm going to play in this note, added that little guy there. Then there's also a whole
bunch of other options. If you do a dropdown here, you can do other things like not repeating and stuff like that,
which can be really fun. Get a little repeat action here that feels interesting to me. That's kind of cool. I'm going to add a
little bit of delay. I think that could be
interesting to this. I really like using the
sound toys plug ins. I feel like they're just inspiring and I like
how simple they are. Yeah, they're cool company. I'm going to filter down some of the highs just to make
it a little bit darker and the lows too nice. L'll slan it some compression. So I think that feels
cool. I'm going to add like just some kick to it. Logic has a lot of
great built in drums, so I'm just going to use one of those just to keep it fast. I'm going to open
up my library here. And then I've clicked on, or you could also do that just by clicking on this
little triangle. This tiny little
triangle right there. See it? And that will open
up my little library of preset sounds here. I'm going to go to
electronic drum kit and just grab like 88 deal. We can start with that.
Let's just play it in. I want to put on a
little distortion. Yeah, think it's
a little better. Cool, so now we can start making variations on these patterns. I have this one that I like, but we want to have this like start
halfway through like that. And then maybe this one
we get rid of some of those trills or
one thing we could do is add a chance on this little G. We could do it
50% half of the time, it'll do it half of the
time, it won't cool. And then for like
these sections, I kind of wanted to
like super straight 'cause I just want
to see you smile. And so one thing
that's cool, just because I have a
pattern region here, I can still play in
notes just fine. And I'm going to copy
this onto a new thing. And this one's
going to be exactly the same, just with no delay. Smile. Cool. I'm gonna leave that one a
little bit looser. Yeah. Is it just a
little bit ooh smile. I kind of want just
a very simple kind of shaker thing on 16th, so let me grab a lin, my lin. Drum. Manuel Miranda, we go. Yeah, there we go. So pattern. What's name? Jager. Lose my mind. I don't want to lose my mind. Nails. You want me all the time? I guess. I'm lucky, mind. It could be cool to kind
of start with drums too and then take them
out for the first verse. Maybe this intro lasts
a little bit longer. I want to just the, I don't want to fight. Cool. I like how that's feeling. You know, all of this can
take a really long time. You know, every 4
bars or something, have something else happen. Either introducing a
new element or taking something away or having
something change a little bit. You know, the goal is that
that's gonna feel very engaging to listen
to and enjoyable. That is a not so brief
overview on drums.
14. Keeping low end clean with sub bass: All right, let's
talk about base. Base is really difficult to translate from different places, from the car to your
phone whatever. So there's a couple
things that we can keep in mind
to make sure that our low end A is not
too loud or too quiet. That it's the right level, it's sitting where
we want it to sit, in an ideal listening
environment. And then also we need to
balance that with what are we giving the listener
something to hold onto for the base that allows them to
identify what the note is. So that it's not
just all sub like if you wanted the cleanest,
loudest, base possible. Technically, it'd
just be a sine wave and put it at whatever
frequency you want. Super, super low. Crank it up, that's going to sound the
biggest in like a system. Just massive low end. And you can get it
super loud because it's like there's very low
information in it. But obviously if you
did that on a phone, you wouldn't even
be able to hear it. Let's take those one at a time. Let's first talk about
how to get your base to sit where you want
it to sit in the mix. And then we'll talk about how to get that to translate
everywhere. But before I show
you something here, you know, not every song needs a ton of super loud clear bass. If it's an acoustic thing, you might not need any. So, you know, take us
with the grain of salt. This is just if you
want your bass to be loud, clear, punchy. This is kind of how I've found
success with doing that. I have an EQ here just on
the master channel to be able to show you
what is going on. So I'm just going to
have this display the frequencies of
this part of the song. I don't want to fight. Okay, cool. So there's
no basin here right now. It's just the kick drum
and then, you know, piano, some light drum
things, whatever, vocal, this is not a
very full mix at all. But I wanted to pull
this up to be able to show you the low end. The kick drum is kind
of hitting around here, and then our vocals are kind of floating around somewhere over here or whatever. But you can see 50 Hertz is where our kick
drum is living. The distance 50-150 hurts,
not that much, right? But as we go up, those distances become
closer and closer together. Okay? So when we're
at like two K, 1003 K sounds a
little different. But 1001 K and zero could
not be further apart, right? It exponentially gets
closer and closer together. Why this matters is because as frequencies
get lower and lower, they get closer and
closer together. There's less differentiation between those low frequencies. A kick drum that
has a lot of base and an actual synth
that has a lot of bass. It's harder for those things
to live together than it is for two guitars that are
both in the one K range, but you can carve pockets
for them pretty easily. Okay, We'll feature this one at one K and this one at 1.5 Like, you have a lot more room
to carve out spaces, but when things are that low, you got to be really careful about what things
you're going to feature and what low end you're going to allow to be
prominent in the mix. A technique that I've found that is really
helpful in getting loud clear base is to split the base into a
couple different sections. We're going to have
one instrument that's really going to focus on
just that sub information, the stuff that's
really difficult to hear that lives super low, it's only job is to carry
the weight of that note. And then the actual
definition of the bass can be something else. And we'll tuck some
of that low end down on our actual base, whether that's a bass guitar
or a synth bass or whatever, that's where all the
character lives, that's what actually
sounds like a base. But the super clear sub
information will be on something separate
that its only job is to have that super solid sub. There are 1 million different
synths that can do this. I like using atmosphere
just because I'm familiar with it and it has a lot of the waves that
I think sound good, like this sub 37 square wave,
which sounds like this. Obviously, I don't want
that high information. This is just for the
sub super low stuff. So I'm going to
turn on the filter and I don't want like any
animation or anything on it. By default, I think it has
a short little envelope. Yeah. So I don't
want that at all. I'm literally just
wanting the low end. And then I'll just put, make
it mono, only one voice. So that if I play two notes, it'll just go to the one
using those techniques. Let's go through and let's
start adding some base to this arrangement and start
to flesh out that low end.
15. Recording sub bass: All right. So I've
got a little sub pulled up and I'm just
going to go through and start punching parts in that I've been
hearing in my head. I know I want. And then
we'll probably come up with some other stuff as we're
recording too, right? So I'm just going to hit
R to record and start punching in some notes
here on your spine. And if you need a little
bubble of your own read, I'll get the kids
to school on site. I just want to see you smile. Okay, cool. Let's come in here and quantize to yeah, 16th. And I had an idea here. I kind of want that base
to follow the kick, but bump don't so I'm going to add this right here and then this
note but bump. I want this one to be
a little bit quieter. I hit escape to bring up
my tools, hit velocity. I could also just grab that by up top here of
this little panel. And I could grab my
tool that way too. I also want that during those other kicks
don't. Same thing. So I'm going to grab
this quieter note and option, drag it, grab the, copy these over, trim this and set that
to loop with L mind. Yeah, we can do one more
and copy this over. And let's also get
rid of this last hit. Okay, bye. Copy or pre chorus
progression over or chorus, whatever it is, All of
your own eat out, read. I'll get the kids
to school on site. This one carries over through
the end on this region. I'm going to just
copy these notes. Option drag, bring these over. I want to see you smile
for this bridge section, I want the base to start a little bit higher
and then get lower. Whatever flavor base
we end up using, that's really going to
set the tone for it. Maybe that can do some of
the heavy lifting here. And then the sub
stuff will really come in when it
drops down lower, I'll play the sub in, but I'm probably not
going to use it just there to set the notes and then I'll have the other base carry over go.
16. Helping the bass cut through: I'm going to add in
some real base or at least a sample
library of a real base. And I'm going to blend
that with the sub so that the base that you here is
going to be this sample. But the actual weight
of the low end is coming from this
sub thing that's really going to be
felt more than heard. If you'll pardon the cliche
all here we have our base. All right, so with that sound, let's start tracking base. We could just copy
that base over. How would that sound?
Too low to here. A quick way just to transpose
notes up an octave. If you just command a, select all those guys
option shift arrow, we'll bring them
all up an octave. You can also just
do option arrow up and down and that will
move them in semitones. If you want to go up
or down an octave, it's option shift arrow. Let's listen to how
that sounds together. And also before I do that, let me pop an EQ onto
our real base here. And I'm just going to carve
out some of this low, the super low stuff, a little bubble of your own. I'll get the kids
to school on time. I just want to see you smile. Oh yeah. I want this to
actually happen here. Oh, yeah. Great. Let's do that. Same move on the sub as well, and then let's also copy these over here since we
made that adjustment. Lastly, let's just do
some quick EQ compression on the real base. Real base. I'm going to add a compressor. My favorite compressor
ever, Percolabs Distressor. I'm speaking to you now
through a distressor. One of my favorite
settings is the opto mode. You go to opt and then
it tells you opto ten, Opto zero, okay, 100. It basically just becomes
this very squishy thing. Yeah, it sounds really lovely.
I'll swallow this out. One thing that's nice
about the distressor is that it has a
built in high pass. If I click that on, it will shelve off some of
the low frequencies. Which in this case is good
for us. We want that. I'll also add a
little distortion to cool. Then let's get some EQ going. I want to add a base amp. I just want the sound
not quite as dry. Okay, now let's just
do a little bit EQ. So one thing that sounds a lot like low end on phone
speakers, small speakers, for whatever reason,
the mid range, around 800 to one, maybe 700 to one K.
Anywhere in that range, the base can be
emphasized there. When you listen
to it on a phone, your brain just thinks, oh, that sounds like low.
I don't know why. It just kind of has an effect. So I can demonstrate that here. I'll use just a very simple
EQ, just a three band EQ. And I'm going to just pump up this 700 region and you'll kind of hear what that does to the character of it. W neat, Kind of like Hong, hong. Kind of that sort of sound Cool. So that's kind of
a look at base and how to get that sub
information in there. And also how to make
it come through on small speakers so that you can actually hear what
that low end is doing.
17. Keys and synths presets vs sound design: Keys and synthes, I think out of all instrument categories, these are probably the
hardest to define, because it can
literally be anything. But that's what makes it cool. There's the sound design part of keys and then there's the
actual playing part of it. Those don't always overlap. Sometimes something is
completely unplayable, it's just entirely sound design
even though it's musical. Whereas other times there'll be a keyboard part that
is no sound design, it's just a piano that's
totally valid as well. I'm going to go over
a little bit of both. I think with the
instrument side of things, it's basically just, hey, if you can record a real piano, I would encourage you to
pursue that as an option, because even the best
piano sample library really can't compare to
the sound of a real piano. There's something about
just the way that all the strings
interact with each other is so complex and
it just sounds beautiful. I would always encourage you, if you can, to go
for a real piano. And I recognize the irony of me talking about
how great it is to record piano when there's
a piano right there. And I didn't record
it for this song. If I could spend more
time and not have to worry about recording a
video at the same time, I definitely would record
real piano instead of this. But for the purpose of the
video, it's totally fine. There are 1 million
piano libraries out there and they
all sound good, they're all totally workable. You know, on the
other side of things, like kind of the sound
designer sort of world, I think that there are kind of two types
of synth plug ins. Like I'm mainly talking
about software here, I'm assuming you don't have a bunch of hardware
sys lying around. There are the plug ins
that are basically just preset machines that you pick a sound
and it sounds good, you might have a
little bit of control over the filter or something, but that's all that
they really do. Then the other types of plug ins are real workhorse machines. They are almost platforms where you can design
something inside of. Not everybody needs to be
a master of everything. If learning how to
sound design and you come up with these crazy
cinematic synth things, is not exciting to you. If that seems daunting,
you don't need to do it. There are other people that
are very good that have made a lot of this
stuff for you to use. So I don't think there's
any shame in recognizing, hey, this is not my area, I'm just going to stick to the preset machines because
those sound really good and I know how
to pick the sound that's appropriate
for the moment. I think that's totally valid
if you want to get more into sound design and
that's something that does excite you
and interest you. I have a course
available on that where I go into that
in more detail. But for this lesson I'm
just going to talk about kind of more the preset
style approaches and how to tailor things to fit into the track that
you're working on.
18. Arranging and recording piano: When I'm using sounds,
I kind of fall into sort of both
camps a little bit. I enjoy sound designing and making my own
sounds and stuff, but I will often save those as presets to use later
as jumping off points. So here's a patch that
I made for a song, you know, years ago that I
just liked the vibe of it. And so I'll often grab it when I kind of want this
sort of sound. And then I'll go
from there to get it to fit into the
specific track. But it's a great
starting off point, you know. If I want some sort
of atmospheric bell thing, I got my atmospheric bell sort of sound that
I always go to. And then I might, you know, oh, for this song the
delay might be a bit much or the panning
might be a bit much. You know, you tweak it as you
need it. I like the sound. I have an idea for kind
of a music box sort of feel for this and let's
see what that sounds like. Cool, I like that
little line in there. I'm just going to quantize it. Cut out the part
that I like just, yeah, I didn't really
play it right that time. This felt cool. But that there, yeah, we can have
it in there for that section for looping. Got our pre steel, then the bridge probably
out for the bridge, probably only coming
back really on the outro and leaving it. Is that okay? Cool.
So that's that, Laird, I want something a
little more consistent. I think I am going to
want to redo this piano. I think it's just a little
too soft and so it's kind of pulling
everything in the sleepy direction which is okay, but I'm picturing it
a little more up. Okay. I've got just a
basic, clean piano. It's the Alicia's keys piano. If you're interested. I'm just going to play through a
couple sections here. I, I don't want to fade out me get the kids
to school on time. I just want to see you smile. Oh, okay. Maybe there you
bring in the felt one. Before that you have this piano and then
it goes into here. Yeah. And that could be a cool
sort of transition moment. Maybe even stay there for the
rest of the song, actually. Because if we switched
to this piano, we will not have heard the felt by the time we get over here. So this will all feel new. Yeah, that's pretty
cool. I wasn't crazy about how the
verses feel still. I like the intro.
Like that feels fun. But this stuff, I think I just want to find
a better way to do it. Yeah, let's try that.
Something softer. I, I don't want to fight and I don't
want to lose my mind. I don't want to
lose my mind nail. Yeah, cool. There we go.
And then this pause I like, and I want to emphasize
that on the drums as well, so I don't want to lose my mind. Nails. You want me? Yeah, that's fun.
19. Synth pads: Let's get like a pad thing, going into kind of
like widen stuff. And this could be cool. What
if I had a tremolo on here? Let's see, I want
these both in unison. Faster, Faster, faster. So I'm mainly thinking
about back chorus when it hits and a few, I kind of want things to, ooh, open up a little bit there. So I'm going to add this
little tremolo thing that we come up with on your spine and a little
bubble of your own. I'll get the kids
to school outside, I just want to see you smile. Let's add that for here. And then probably not
on that down version. Okay, that original sample
that we were using. And just put a bot of
reverb on and stretch it out with the tremolo
in the chorus. What if we did a really
exaggerated version of that here to help keep things choppy on that
rhythm on quarter notes. If we did that post verb after the reverb, what would
that sound like? You don't have LFO tool. It's been around for years. I'm sure there are
probably better versions now of different companies
that do the same basic idea. It's basically just an LFO that you can just map
to different things. For example, I want this to just be like the interface doesn't even work on
my computer, Okay? So I'm going to just adjust
the shape of this here. Okay. Now that we're
getting that, I want to clean up some of
these frequencies, get rid of some of the base, and I want to emphasize some
of that high stuff if we can. That's what
that sounds like. Yeah. In the
background. Maybe I'll automate it so
that it only turns on when everything
else comes in. I'll pop up an automation, go to Elpho tool and the volume is what
is going to do that. Let me put this at
close to zero, Fine. We get a nice steady fade
in and then the lo kick in. Oh, we don't have bass
here. I was like, man, why does this
feel so small? That'll do it. Okay. Okay. The verses definitely do need some
sort of pad or something to help kind of fill out
some of the stuff. It can sit below the piano, but it's a little bit too empty. I, I don't want to fight
and I don't want to lose my mind and feel need a
little bubble of your own. Read out, read. Cool. I'll take this verse
here. Bring that over. Bring over our pre chorus. Chop it here. Maybe this is the one that will bring over
into this bridge section. See you, smile. We'll let our piano
have its moment. Then we can maybe bring it in
like creep it in over here. Need cool. And then lastly, a
little bit intro stuff because I just want
to see you smile. So that's kind of the workflow for adding keys and synths. It's basically just,
you know, adding, adding, adding, taking away, taking away, kind of back
and forth until the song gets to a point where cool it feels like how
you want it to feel. I think this is in a pretty good spot
to wrap up for today and we'll get vocals
tomorrow, so we'll see then.
20. Getting a good vocal space: Today we're going to be
talking about vocals. Recording vocals, commping
tuning, all that good stuff. The most important
part of this is just getting a good vocal sound. And there are a couple
components that go into that. The first one being the room
that you're recording in. The room that you
are recording in, the space that you're
recording in is going to have a huge impact on what the
vocal actually sounds like. I think the easiest way to
get a handle on this is just to record in
different spaces. Try it in your bedroom, try it in the living room. Vocal booths are a thing
because people are trying to eliminate the impact
of the room on the vocal. They want just as dry
a signal as possible. If you want to try
and do that yourself, I would caution against just going in the
smallest room you can. Because unless it's
treated really well, you're going to get
all those reflections from all those close walls
really close together. That's going to get more
of an impact on the vocal. And you'll hear it if you record in that space and listen back, it'll sound boxy and
muffled and not natural. A lot of the times
I've found that the most natural vocal
sound you can get is to do it in a larger space
that's not a super small room, but that's not really
reflective treatment. As much as you can
get will help. Furniture is great, carpets are good for
this sort of thing. Just trying to minimize
those reflections without completely deadening and making it sound like this. 90% of you watching. I think this is probably going
to be the best approach. Have a vocal mic, right? And then some shield thing here. This is not quite like
a full vocal room, but it's doing the same idea. It's trying to catch those reflections before they hit the wall and start
bouncing around. It's going to limit the
impact of the room, but not so much
where you're boxing it in and creating all
these reflections. It's just stopping them
before they hit the wall. That's the idea. Anyway, this is the actual microphone itself, and we'll talk
about those when we talk about microphone types. This is, it's called a popper, or a windscreen or windshield, a lot of different
names for them, but what it does is it stops
plosives from happening. Those big like puffs of wind
that blow out the mike. This is dispersing the air
that's coming from my mouth. When I have A sound or a B
sound or anything like that, there's a large pocket
of air that comes out. The windscreen helps diffuse that air so that it doesn't
hit directly into the mic. It hits it on an
area so it's not overloading the mic and it distorts and gets
this gross sound. So those are some
tips to how to get a good clean vocal sound regardless of the
space that you're in, make sure to be aware of the reflections
that are happening. Try and stop them if
there's a problem. And make sure that
you're not adding more reflections with whatever treatment
that you're doing, you want to make sure that
vocal is nice, and natural, and clean to get as accurate
representation as possible.
21. Comparing microphone types: Next let's talk about
microphone types. There are three categories
of microphones. We have dynamic microphones, condenser microphones,
and ribbon microphones. So we'll go through
those one at a time. Dynamic microphones are
the work horse microphone. They don't need any
power to operate, you just plug them
in and they work. They're very good at
rejecting surrounding noise. They're great for live use on vocals and drums and
all sorts of stuff. How you're hearing my
voice right now is with a dynamic microphone. I'm
speaking through this. Sure. Seven B. If you've ever
watched any podcasts, I'm sure seen this microphone. Now if you're recording
in a space that is a little nicer or pretty quiet, where you can get
away with accepting some more room tone and accepting more audio
into the signal. Then a condenser mic
is step up in quality. A condenser microphone does require phantom
power to operate. It requires 48 volts, so a lot of times you'll see
a little 48 volt button on. A lot of interfaces or
micro prize or something, What that does is send an
electrical current back through that microphone cable to the microphone that
will allow it to work. That microphone there that I
was shown in the last video, that's a 87 that does require phantom power to
run. It sounds incredible. There's a clarity and
a crispness to it. You know what, I'll just
show you. I'm speaking to you now on the SM seven. Now I'm going to unplug it. Plug in the U 87
and listen to that. I'll try and level match
as much as possible to get them as close
as possible and level, but it'll probably
change a little bit. This is what the
U 87 sounds like. Massive difference in tone. This is a completely
different world. And even in level two,
it's so much hotter. I'm having to turn
down so much of my gear here compared
to the seven B, just because of how much volume it's putting out.
It sounds great. Famously, Billy Ish
when recording a lot of those earlier songs would just sing holding a condenser mic just like this and sing into it. And not even a popper or anything for the
plosives that happen, not even worrying
about that, just singing a little bit off center and then the plosives
just go above the mice. But yeah, that's a sound
of a condenser mic, which brings us to
the last category, microphone, ribbon microphones. I have here ribbon microphone. And they come in a lot of
different shapes and sizes. This has a little ribbon inside of it that wiggles
back and forth. This microphone is
bi directional. It will record out of this
side and also this side. And the tones sound
slightly different. This will be a
little darker, and this will sound a
little bit brighter. Great on guitars, acoustic and electric, all sorts things. Ribbons tend to have a
vintage quality to them. This sounds like. Let's
listen to the royer. Okay, so this is the
royer you can hear. It's a little bit
smoother, kind of velvety. Ooh, I'm getting the low end
stuff and it feels very, you know, old school
in a fun way. So that's this side of the
microphone with the logo. If I flip it over now, if I'm talking into this side, it sounds a little
bit different. Sounds a little bit
more Mm, mysterious. A little smokier or something. Yeah, it's just a
really cool character. It's got a really cool flavor to it. Very, very cool Mike. There are exceptions to all of these categories and rules, and there's new microphones
coming out all the time. But that's kind of a
basic approach for how people use those categories. When in doubt, reach for a condenser first that's
going to give you, I think, the highest quality
audio for the budget. You know, it's not
that expensive to kind of get that sound that tone and I think that's probably going to be the
most beneficial for you. It never hurts to have some dynamic microphones
lying around. They'll always find
something to be useful for, so they're great to have. But if you're going to
invest in a microphone, get one really nice
condenser that you can really use on a lot of different things and it's always going to work and sound good. And then maybe get one dynamic
microphone that you can also have as kind of a
fail safe, a backup thing. You can throw it anywhere, it's a tank, it's never
going to break. But anyway, enough about
talking about microphones, let's sing through some and let's start tracking the stuff. You know, I was actually
really impressed with the sound of the Royer on vocal stuff
going through my chain here. I think I'm going to sing
with that in the next video. Let's give that a try
and see how that works.
22. Recording and comping vocals: All right, let's
record some vocals. I've got the R 121 here and
you can hear even then, Plosive came up, so I'm
going to have to be really careful about how I'm
singing into the microphone. You're probably thinking
solo. Why don't you just go grab a
microphone clip and, you know a popper and
just do this properly? You know, I can't be bothered. It's in the other room
and I'm just going to hold it and I'm just going to be careful. I'm just going to go. I just think that
sometimes creatively, whatever's going to
get the idea done fastest is best for me. I'm right here. I've got
the microphone on my desk. I'm just going to hold it.
I'm just going to sing and hold it and whatever sum,
it's not a big deal. Here we go. Let's
go through this. I've got the scratch vocal
lined up here for reference. If I want to listen
to that back, I'm just going to
leave that muted. We're going to go in. I've got my lyrics here in the project. If I can pop those
open. There we go. All right, let's record.
Let's give this a shot. I've got low latency
mode turned on. Hit R and let's do it. I don't want to fight and I
don't want to lose my mind. I don't want to lose my mind. You want the side? Cool. Good. First
take, let's go again. I ran out of breath, kind of halfway through there, kind of figuring out how
I want to phrase things. Let's go again and I'm just
going to record over the top of it and if you need a little bubble of your own cool, that's
feeling better. I noticed there was one line in here that I wasn't
a huge fan of. You want me all
the time, I guess? Lucky. Mind running
my heads along? Yeah, that could be
a little stronger. That hands line. I'm just
gonna grab that again. Lucky. Mine. Running my
heads along your spine. Cool. That very last line I think could be stronger.
I'm gonna grab that again. I just want to see you smile. Okay, cool. We got in that process of what I have been doing is kind of
comping as we go. I've got the main take down and just kind of as
I think about it, I'll go through and grab either a whole other take or specific little lines
that bothered me. And what happens is
that automatically created a comp folder
so I can go in here. This is really cumbersome
holding this microphone, I'm going to swap back to
the S seven, both hands. Excellent. Okay, now
let's comp this bad boy. So we have two full takes and then we have a couple
individual things. Let's listen through here. I don't want to fight. I can hear a little bit of
plosive action on fight. So let's listen to the
other take of that. I, I don't want to fight. Oh, it was a little bit
before on that one, so let's maybe do
the first word here and then cut to fight there. I don't want to fight. Yeah, it's on both
of them a little bit. Let's grab it again. I don't want to fight. There we go. It sounds better. Now, we can make
that confidene and tidy to where we're just
grabbing that new take. I, I don't want to fight and I don't
want to lose my mind. Ducky, I don't mind. Make this compo
tighter so we're not cutting in between
words or breaths. Editing around
breaths and stuff. This is similar to video editing if
you've ever done that, but we basically don't want to ever cut in the
middle of a breath. We can either cut before or after using this little
waveform button up here. In logic, I can actually just
make the waveforms bigger. It's not adjusting how they sound, it's
just how they look. And that makes it easier for
me to tell what's happening. So if I just boost this up as much as it'll
go just for this, I can kind of see
where the breaths are. So I want to make sure
that my cut is either happening before I breathe
or after I breathe, but before the word
happens. Right? Like there are multiple
ways that I can make this edit. I just
don't want to do this. I don't want to
cut in the middle of a breath because you'll hear it running, hear that. And then it kind of
cuts up abruptly. So I'm going to move
this edit right before the word run in my heads. See that sounds a
lot more natural and you need same as before, where that line ended is kind of in the
middle of a breath. So I'm going to, you know, I'm just going to
take this whole word here and if you need All right. This is a solid comp. I like these different sections. I like the different
takes that we have. This feels clean, and then
we just repeat this process. For each section of the song, you record a lot of
different takes you record, go back to get specific things that you might be worried
about getting right. Then you can kind of go back and comp and then you
might discover, oh, you know what, we never got a really solid
take of this word. Let's go back in and get
another verse of that. You'll probably discover stuff
like that. That's normal. Yeah, just get a bunch
of takes, comp them, and then you got a
good solid vocal take, which brings us to the
most critical part of vocal editing, and
that is the pitch. That's all we're going to
talk about in the next video.
23. Tuning vocals: You need to tune your vocals. I mean, I'm going to say
that 90% of the stuff, that 99% of the stuff that
you're either going to work on or listen to
has tuned vocals. And when I say tuned vocals, that doesn't necessarily
mean auto tune, auto tune. It's going to just pull that
note to the nearest pitch. That's not slamming auto tune. I love auto tune. I
think it's very cool. I use it all the time. It does have a sound to it
that I think sounds good. We're just so used to
how that sounds now that when you hear that tone
of Antera's auto tune, the tone that brings
to the vocal. In my completely
subjective opinion, I think it sounds cool. However, I think the
more valuable way of tuning is manually placing
notes where you want them. That's just a way of making
the vocal sound intentional, where it sounds like what
you want it to sound like. There are a couple tools for
using that type of tuning. You can do that in
Tera's Autotune. They have a graph mode
Logic has some built in stuff for flex pitch where
you can drag notes around. The industry standard for doing this is a software
called Melodine. It's been around
for a long time. It's notoriously janky, but
it's really, really powerful. I like using melodine for
manually tuning the vocals. And then after that, I'll
put the auto tune on subtly, just mainly for tone. It just gives it the
feel of autotune. But I'm still manually moving
notes around so that I can control what it's doing and when it's doing it, I'll use both. I'll throw Autotune on and I'll make sure that
it's in the proper key. And it's not just pulling it to any random
note that it wants but that it's doing it to
the actual notes in key. I don't want autotune to
make my voice sound worse, so I'm going to pick a
major and the retune speed, I'm going to set it
a little bit slower. That's it, that's the only
setting I'm going to do. Then before autotune, I'm
going to add melodine. Here's what melodine looks like, You have to import
the audio into it. There's this little
transfer button. So I click that button and now it's listening
to the audio. And I'll play it, my audio, and I'll say, hey, this is
what we want to work on. I, I just want to see you smile. Okay, cool. Here
is all that audio. Now we're going to go
through this and make sure that it's doing
what we want it to do. If I write Click inside
the melodine window, it'll give me all the tools that are specific to this program, such as the zoom tool to
be able to zip around. Okay, let's make sure that it's doing what
we want it to do. I'm going to grab my Pitch tool and here's where I can
move notes around. I turned off the auditune.
We can really hear what it's doing, right? You can get super,
super specific with it. That line is the specific pitch that that note is hitting. What I can do is if I
just double click it, it'll just set the
average to be perfect. So it'll just move
the average pitch of this to be around C sharp. But let's say that you had
kind of a fall off and pitch at the end of the
note on your spine. Well, in that case, the
average would be way lower than the pitch of that note that I'm really
caring about, you know. So you still have to use your
ears and make good judgment calls on where you want
the pitch to be happening. There's no like magic,
make good button, you know, like you
have to sing it well, you have to sing
it intentionally. You have to edit
it intentionally. You can't just
like blindly throw something on and expect
it to sound natural. So that's the pitch
tool of just moving, of moving that blob up and down, that average up and down. I can also edit the
pitch information inside the blob by the pitch
modulation tool. If 100% is normal, I normally start to go 50. I feel like that's fine. Anything beyond that's going
to sound very processed. I don't want to, this is a good example of this. I don't want to part that
note of how it starts. There's a little scoop up to it. The important part of
the pitch is this note. Oh, don't, right? So if I just pitched
this to the average, this is going to
be too sharp now. Don't wanna, it's not quite the note that
I wanted to hit, so I'm gonna be using the Pitch Drift tool which just kind of
brings it so that, well, I mean, you'll
see what it does. Uh, see that how it's kind of flattening
it out a little bit. It's just kind of bringing the curves more in
line with each other. Uh, and then maybe I'll also bring the
movement down a little bit. Uh, now let's listen to
what that sounds like. I don't want, right? It's getting to that note. I don't want to really fast. I don't wanna, but
in this instance, I kind of think it sounds better if we're not
doing anything to it. I don't want to. I like that step that
feels more natural to me. So I'm going to pitch the second note and bring that down. We can, you know,
mess with these. But this one, Ajanta,
that feels better to me. Let's bring that note down. Do'anta. Yeah, that sounds
better. So, we're kind of going through listening to different notes and just kind of grabbing the stuff
that bothers us. I'm not saying all
this to try and pressure you into
tuning your vocals. I just want to make
you aware of the fact that tuning is not
something that, you know, only pop, really heavily
produced things, only those guys tune vocals, everyone else is
kind of natural. The reality is, everyone
is tuning vocals. So if you don't want
to tune your vocals, I think that's cool. But it's, you know, I
want to make sure that you're making the
conscious choice to not tune your vocals and not just kind of blindly go there because you're not
thinking about it. Just want to make sure
that you're really giving proper thought to the most
important part of your song, which is your voice. You know that is the carrier
of the identity, the theme. Everything is resting on your
vocal, your performance. So to make sure
that it is exactly how you want it to
sound is critical.
24. Video 24 EQ: Today we're talking
about the Mix. By the time we get
to this stage in the production process,
the songs written, we've got everything recorded
that we want to record, all our parts are
in, and we're just focusing on balancing
things together. If that's something
that interests you. I have a course that I
go really in depth in more details on
mixing for right now. I'm just going to go over the basic fundamental tools that mixers use to balance a song out and make sure that everything is kind of
in its right place. The primary method we have for this is something called EQ. And we've talked about
EQ a little bit already, and you've probably
heard that term thrown around to understand
really what it's doing. We have to understand
frequencies. We've talked about
frequencies a little bit, especially in the sub
base video where, you know it was the low end and kick drums are kind of hard
to play together, right? It's hard for them to
find space together. Take that concept that's
I think most easily seen when it's that super low stuff and apply that through
the whole mix. You know, if you have two things playing the same note, well, we got to emphasize
one part of the sound here and another part of the sound here on the
other instruments. So that they both have a
space where they can exist, they can't both be existing
at the same frequency. Otherwise, you're just going to hear whichever one is louder. And you're just not going to
hear the one that's quieter. If we play our song back and listen to this chorus
section, for example, I'm just going to solo
through different sections so that we can identify what
these different things are. And then listen to where
frequencies are sitting. Try, when you listen to this to identify areas
that are the same, whether in the synths
or drums or vocal. Try and identify
areas that, okay, there seems to be a lot
happening in that sort of sound. And then we'll maybe try and focus in some of
those instruments. So I'll play through the
track solo, things out, be listening for the
things that sound the same on your spine. And if you need your own theta, I'll get the kids to school. I want to see you. I'm gonna turn the
cycle on here. Just left to right up
top. So we can loop this. You need to get the kids to school on time. I want to see you
little bubble beto. I just want to see you smile. You need okay. So you probably heard a
couple of areas in there. I'm noticing a lot of the
low mids are building up two to 300 range in a lot of the sense
starting to overlap a bit. There's also some
of that energy, maybe a little bit higher
and like 500 or something on the kick that is just not totally necessary,
adding some clutter. You'll notice if I
play back the track, we're clipping a little bit, There's no audible clipping. It's not that bad, but it's
enough that it needs to be managed all the level of
these tracks as they add up. It's starting to be
a little bit too much volume need, right? You can see we're hitting
the ceiling there. As long as it's not audibly clipping, it's not a big deal. But it is something
that we should try and help if we by using EQ, cut away frequencies and
then help everything sit in the right spot because we're
using cuts to do that, our actual volume will go down. Let's try and gain some
head room with EQ cuts. I think the easiest
way to do that first is with the low end. We've already talked
about that with the sub base and the real base. Let's do the same
thing with the drums. Now with this kick drum, we probably don't need a
ton of super low sub stuff. Let me pop open a
nice big EQ here. Let's see what
frequencies the kick is doing, that kick drum, not the loudest peak
that we see in that EQ, that is the fundamental
frequency of that note. That's what that
term means, it's the most important part. That is the note that
that kick drum is. I'm going to high pass everything
below that fundamental, because it's not important. The fundamental is
really what's going to identify itself as that note. Everything below that
is not totally needed, it's not as important
as that fundamental. Cool, that's good. Now let's go over
to our little hit, drum hit thing. Same thing. Let's look on our EQ and see what frequencies
are happening. You see most of that sound. That's not a low
end sound, right? That's a very high sound. But if we look on the graph, we can see there is some
stuff happening down here. Because that's like so low,
I can't even really hear it. I'm going to cut it away
so that I don't have those random frequencies eating
up my precious head room. You know, I don't need to waste any information on that low
stuff that I can't even hear. All right. So already
just with those, a couple little tweaks, we're starting to get more head room. And we just kind of
repeat this process and go up the frequency spectrum to really identify what things need to be
there and what don't.
25. Overlapping frequencies: Let's look at the things
that are overlapping, which are all these
keys, Things here. Let's focus in on these
two paths and how we can use EQ to separate
them away from each other. We have this is one of them and the other
one is this guy. I'm thinking there seems to be a little more high
end information on this one then on
the pigment pad. Let's just emphasize
that a little bit more. Let's maybe cut
away some of the. Let's look and see if we can find a spot
to identify here. Yeah, let's say that
for the massive pad, we're going to cut away like this region,
like 200 region. And then on the pigment
pad we're going to cut away slightly higher around here. Okay, let's
listen to that. Yeah, let's make it a little more obvious what we're doing. So now we kind of have the high pulsing thing
kind of sitting above the lower pad that's kind of blooming
out underneath it. Just by those couple EQ moves, we're just kind of pushing them more in the direction of
where we want them to be. But there's another
thing that we can do to separate
things even further, and that's using the
stereo field panning. That's what we're going
to talk about next.
26. Panning vs balancing: You are probably listening
to this video right now on a stereo set up. You have either a left
speaker and a right speaker. Left headphone and
right head phone. Or even if you're
watching it on a phone, you probably have two speakers
somewhere on your phone. An exclusively mono system with just one speaker is
pretty rare nowadays. They do happen, they are there. But when we talk about stereo, we're basically meaning two audio signals playing at once, a left channel and a. We can use this to
our advantage by placing things in
this stereo field. Because my voice sounds like it's in the middle
to you right now. It is coming through
both the left and the right speakers
at the same volume. We can make things
sound wider if we are only sending
them down one part. And that's what panning is. We're basically taking a signal and we're sending it
over to one side. This is really easy to
demonstrate with panning a vocal. If I take this vocal here, you need a little
bubble of your own, that's a hundredercent lay down. Read, get the kids
to school on side, that's 100% Right now that's
panning a mono signal. But if we're panning
a stereo signal, it's not quite as simple as that what is
actually happening. And I brought a little es patch here to kind of
demonstrate that we have in this patch just
a girl saying 1212. You can hear one is 100%
left and two is 100% right. Two, now if I pan this using this pan knob,
watch what happens. 12121222. We don't hear the left channel at all, it's completely gone. Because what this pan
is doing when it's a stereo signal by default, is it is emphasizing the
balance of those two channels. It's saying, how
much do you want to emphasize one
channel over the other? So I pan it the other way. Then we'll start to emphasize
the left channel and we'll eventually completely remove
the right channel, 121211. Pretty interesting. It's
something to keep in mind. If I was going to pan this pad here and I was going to pan it to the left, I can do that, but when I'm just
panting this way, what I'm really doing is turning the right channel down
most of the time, this is totally fine and you don't even really need
to worry about it. But if something really important is happening
on the left and the right channels, it's
something to be aware of. If you just pan, normally you are turning down
one of those channels. So you're potentially cutting out half of the information
of that signal. You can actually change
how logic pans things. If you right click
on this pan pot, you can switch between balance, which is what we've been
doing, or stereo pan. Now, stereo pan,
visually it does a really good job of
representing what it's doing. You can see here's
the left channel, here's the right channel. If I pan it, see
that how it's taking the right channel and moving the right channel in the
stereo field over to the left. Now it's basically taking the
left and the right channel, playing them at the same time. If I go back to our
little example here, 121-212-1212 now it's
brought both 1.2 together, So now we're not emphasizing one over the other, we're
bringing them both. So there are pros
and cons to this and it's just important
to know that you have extra tools in your disposal when
it comes to panning. Again, 99% of the time, keeping your pan in balance
mode is going to be fine, but it is nice to know occasionally that might
cause issues and if it does, that's how you pan something
in a different way. Is you can switch
to stereo pan mode, so that you're actually grabbing both channels at once when
you're panning them around.
27. Widening the mix: Now to get something sounded really big and wide and huge, and to really separate things so that they're living
in their own space. Those are pretty much the
same goal most of the time. It's a little bit counterintuitive because
you might think, if I want the whole mix to sound really wide
and really big, I want my whole
track to feel huge, Then I should make everything
really big, right? And everything really wide. Well, if you make
everything wide, it doesn't really
sound wide anymore. It just sounds small. What makes things sound really wide is the difference between the left and
the right channel. The more different they are, the further apart
they're going to seem. So for example, we have
these two paths, right? If I really want to separate these and have these
live in their own space, what I can do is I'm going to switch these to
the stereo pan mode, and I'm just going
to let them live in their own space in
the stereo field. I'm going to pan this massive
eternity one to the right. I'm going to pan the
pigment one to the left. See, that sounds so much wider than if they're
both in the middle. If I'm listening to both
of them at the same time, let's see what it sounds like if instead of using the stereo pan, if I'm just using
the balance mode. I mean, arguably that
sounds even wider because I'm just turning
those other channels down so there's
less in the middle. There's no information really
existing in the middle. It's just all in the
right. All in the left. So that could be pretty
cool if we, you know, pan that stuff
around to the sides, which allows the vocal to
kind of live in the middle. Like listen to what
that sounds like, now you need a little bubble of your own if that
sounds like too empty. If we don't like how
separated that is, we can go to the stereo pan and that gives it a little
bit more support. You need a little
bubble of your own. Lay down panning is an amazing
tool for creating space. You can really start
to push things around to make room for the most important
parts of your mix, which are probably your vocal, your drums, those things that are really going to
define your song. Panning can create
an environment for those things to exist in. It's incredibly effective tool.
28. Compression: Compression. Okay,
compression is a tool that we use to lower the dynamics of something which sounds weird. It sounds, why would you
want to lower the dynamics? Don't you want
things more dynamic? You know, exciting Dynamic
dynamics in this context means the distance between the quietest moment and
the loudest moment. So a lot of times in certain
sounds you actually kind of want lower dynamics because
it makes it easier to mix. It makes it easier to identify where this thing is existing, so you can place
it more reliably. And it also just makes things
sound cooler a lot of times a good place to show this
is on a group of drums, I think it'll be really clear what the
compression is doing. So I'm going to take all
of our drum layers here and I'm going to select
them all and right click. And I'm going to create a stack which is just going to put
them in a big old group, I'll call this Drums. Here we go. Okay, so now I can sell this group and it'll have
all our drums in it. I'm going to start out with
just logic stock compressor because this graph
mode in it I think is really helpful for showing what the compressor is doing and why it's sounding the
way that it does. Let's play through the audio. And you'll be able to see it on here, right? This is our audio. And you'll notice this little white line and this meter here, that's the gain reduction. That's how much logic
is turning it down, how much the compressor is
working when it hears audio. If it gets above a
certain threshold, then it will turn
the audio down. This graph here is showing, hey, if the audio goes above this, turn it down by how much
do we turn it down? By the amount of this ratio. You can see as I
switch some settings, as I'm moving stuff around, look at the graph
and what it's doing, and you'll start to get a feel for why the compressor
does what it does. When the compressor
really gets going, it creates this pumping
breathing kind of thing. Very, very cool on
large groups of things, when you want that
sort of effect, that's the basics of
what compression does. You set your threshold
that determines how loud something has to be for the compressor to
start hitting it. The ratio is how much it's going to hit it once it
hits that threshold. And then the attack and release determine kind of
the flavor of that. The attack is how quickly
it's going to pull it down. The release is how
quickly it goes back up. So you can kind of tweak those to get things to feel
a little different. But what I'm going to do is I'm going to take a
different compressor. Now let's try the same thing, but using a nice
compressor that I like, the tone of which
is this distressor. So without, so that's the basics
of compression. Each compressor
works differently. Sounds different if you're
running into a wall where your compression settings
don't really sound that good and you're not really
sure what's going on. It just sounds small or you're trying to make
something sound small and it just keeps slapping too hard. Try a different
compressor. You know, they all have
different characters and a lot of times just
having the same settings, But just on a
different compressor, we'll give it a
certain character and a certain edge that
you know you're like, oh, that's actually
really interesting, let me follow that, let
me pursue that further. So don't be afraid to try even the same settings, but
just on a different thing. And you'll probably find
something pretty cool out of it.
29. Creating dimension with reverb: Reverb and delay. So when we talk about effects, this is like the
sauce for a mix. You know, this is
really what gives it a three D sort of feel. When people talk about
things having depth, a lot of times they're referring
to the space that reverb can achieve where it can make things feel far away or close. For a vocal, if we
have no reverb, no effects know anything on it, it'll feel very close like it's, it's just like right
up here in your face, Adding reverb puts it in a
space, in an environment. Especially if we start putting
reverb on multiple things, everything can feel like
it's part of the same world. What I'm going to do
here is have one reverb that is going to be the
world that things live in. And I'm going to send a
lot of different things to this reverb to
function as a stage, so this will be where all the instruments
are existing in. Then I'm also going to
give another reverb and delay just for the vocal
to really put a spotlight on that and to really
sell the point that the vocal is the thing that you should be
paying attention to. Let's set up this reverb. The way that we can have one reverb and send multiple
different things to it, apply that same setting to multiple instruments is
by utilizing something called sends us or ox sends. These are all similar
terms for the same thing. I have my vocal here, I'm
going to create a send. And I can do that just
by clicking send. I'm going to send it to a bus. Now, logic has already
created some buses for me, as I've been doing other things. I'm just going to grab
an empty one here. You'll notice that this
channel on the right here now has become this send. It's sending to bus eight. I see the input for
this ox is bus eight. I'm just going to label this
that it's not confusing. I can click 08. I want to just call this room. This is
going to be our room. Let me pop a reverb on here. This is a plug in that
is designed around being just a room
reverb sort of deal, it's got some other
modes and stuff, but what I'm really interested
is just having it be a room reverb that I can
send other things to and make them sound like they're being played in the same space. So for example,
it's got a bunch of different presets and
they're all cool. Like if I want to know
acoustic guitar ambience Live, great. Let's see what
that sounds like. So I just want to see you and if you need so with
those setting set, I'm going to send the
vocal to our room here. And I'm going to also, let's send the piano there. I can just click up on the
send to send more or less. I can option click to
just send it zero. That'll reset it to
just like full volume. I'll just go in and
set that to be zero. I can go through one
by one and do this. Or if I know I just want to
send everything to this room, I can click all the things that I want to send to the room, then boom, it'll
send them all there. I can adjust them all equally
or I can option click them. It'll send them all
there. All right. Now let's listen back to
that B of your own so I can turn that effect
up and down with this fable of your own. I'll get the kids to school. That's cool, I feel like the low end is getting
a little boomy. Now with that kick, what I'm going to
do is just send a little bit less of the drums. But what I'm also
going to do is add an EQ to that room reverb. I'm going to add an EQ after
this room reverb plug in. I'm just going to take away
some of this super low stuff. You need a little
bubble of your own. Well, maybe I'll send a little
bit less of the vocal for the actual vocal
reverb use Valhalla, again, it's just an amazing
reverb thing's 50 bucks. It's insane and you need a
little bubble of your home. He, we'll get the kids
to school on time. Cool and same as before. I'm going to chop away some
of this low end actually. Invahal, there's built
in tools inside the plug in to do that, so I
could just use this. You need a little
bubble of your own. Cool, that's good. Let me call vocal verb.
30. Vocal delay: Let's add another
send on the vocal. This one's going to be
our delay for delay. Love. Good old echo boy. Echo boy is amazing. Okay, so yeah, this is the first time where this
is not 100% wet by default. So a lot of times plug ins
will have a dry wet thing, right, for a delay. How
much of the dry signal? How much of the wet
signal? Well, because this is on an ox send, I already have dry on
this channel, right? If I'm sending it
somewhere else, then this dry wet
doesn't really make any sense because the
way that it is now, as I send more delay, the
vocal is just going to get louder in addition to
getting more delay. Because I have a dry
unaffected signal being duplicated
in this channel. Right? So when you have
an effect on a send, make sure it's 100% wet. So that when you're sending
signal to that effect, you're only getting
back the actual effect. You're not getting any
of just a dry duplicate fed back to you for no reason. And if you need
let's just pop open. Yeah, like a slap.
That'd be cool. And if you need a little bubble of your
own, you don't read. I'll get the kids
to school on time. I want a dark thing, I
just want to see you. And if you need a little
bubble of your own, lay out, cool, same as before. Let's chop off some low end. A little bubble of
your own to okay, let's listen to that
now in context. Need a little bubble of
your own with no effects, Bbb of your own effects on to. We'll get the kids
to school on time. Yeah, it just adds a
whole lot of filling in all those gaps and it
just makes it feel alive. Yeah, the reverb and
delay really add a ton. And it's easy to wash things out because as you
start to add reverb, you are losing definition. It is blurring things together. So you have to be careful to
make sure that you're not completely losing out all detail unless that's what
you're trying to do. But yeah, very effective. Reverb and delay are amazing. So those are the tools
that mixers use. Once the mix is in a good spot
and you're happy with it, go ahead and go to bed, wake up the next morning and then come back
and then, ooh, you'll have some mixed
weeks and you'll see nine things that
you missed, you know? So once you get those
nine things and fix that, then we can move
on to mastering. That's what we'll do tomorrow.
31. The master bus: Mastering is what happens
to your finished mix. You have your finished mix, now we're going to add
additional processing to that final mix file. You can master your own. Once you have your
mix, you can go in and start adding plug ins
to start mastering it, or you can send it off to a
specific mastering engineer. You get your mix back
from your mix engineer. Cool. It sounds good. Love
it. Great, thank you. You send it off to a mastering engineer and they
do their stuff, or your mixer and your master. They can work together or a lot of guys will mix and master. There's a whole lot
of ways to do it, but mastering is essentially the processing applied
to that final mix. As a part of your mix, you can have plug
ins on your mix bus, like on your main
master channel, and that could be
considered mixing. There's nothing wrong
with that. Generally, I try and keep my mix bus channel, my master channel, clean without anything on
it during the mix. Then once I'm happy
with the mix, then I can go through
and start adding stuff. It's pretty expensive to get a really good mixer
to mix your songs. It is not expensive at all to get a really good
master on your songs. So if you're going to invest
anything, throw 50 bucks, 100 bucks at a song
to get it mastered, and I think that you
will get really, really, really good results. But okay, so let's worry about our mix bus and let's pretend that we're mastering
our own song here. I first like to start with dynamics, just where
things are sitting. I feel like that's
kind of the easiest way to manage things, so I'm going to throw a
compressor on our master, so this is compressing the
entire song altogether. I know this kind of looks
like 1 million knobs, but it's really
just a compressor, technically two compressors
going on at once. If we start reading
some of the knobs, we can see threshold gain
ratio attack recover. That sounds like release. We can start to
see that there are basically two compressors here. Here's one, the
discrete compressor and then the optical compressor. Okay, so what we're going to do is I'm going
to play this back. It's going to hit the
optical compressor first, and then the
discrete compressor. So I'm going to start lowering the optical threshold to
where it just starts. Taking a little bit back
here on this meter, I can see how much the optical compressor
is taking it down. This one, how much the discrete compressor is taking it down. I just want to touch it. I just want the compressor
to be working a little bit. I'm looking for it 2-5
DB, anywhere in there. If it's anything beyond that that's going
to start squishing the mix a little too much to where it might not
sound natural. Then once this is feeling good, then I'll start worrying about the discrete compressor and a little babble of your own to I'll get the kids
to school on time. I just want to see you in a little Bible of
your own to cool. I'm going to lower the attack a little bit of the discrete. I feel like it's pumping
a little too much for me and you need a little
bubble of your own. With this parallel, I'm
going to blend some of the original uncompressed
signal back in and you need a little
bubble of your own. Most of the EQ work. When you
get to the mastering stage, we're just making little
changes that are going to subtly affect
the whole track. This is an EQ and I am
going to boost here. I'm just going to
add some low end just all across the board. The entire low end, I'm
going to come up a little bit and then I'm going
to cut some of the mids, again, keeping the
curve nice and wide. And I'm just going to cut, I don't know, something
out of 500 there. I'm wanting a little
bit more presence, more bite out of stuff
out of this two K region. I'm going to boost
that a little bit. Then maybe at the
end of the high, high end stuff, I'm going
to boost that as well. If you need a little
bubble of your own, get the kids to school. I just want to see you in the net needle
bubble of your own. Just a little extra presence, a little extra clarity. It's just clearing a
little bit of that mud up. Okay, now we got some
compression, we got some EQ. Now we can start getting into
a little more fancy stuff, so AI might be a boogie
man into some things, but for plug ins, it's amazing. I don't even know
if they would even claim this is AI golfo. But it's basically the
same sort of idea. It has a template
of sound that it views as like this is balanced. And so as you run
stuff through it, it'll dynamically
start to turn stuff up and down to get it
in the right range. And it just kind of
does stuff on its own. It's very, I'm not
sure what it's doing, but here if we just turn stuff up, I want to
boost the low end. I want to brighten a little
bit, recover and tame. Kind of show how it's
grabbing frequencies, you'll see you need a
needle bubble of your own to get the kids
to school on time. I just want to see you in using a lot of fancy
algorithms and stuff or whatever, it's kind of doing
the same thing that my other EQ is doing. It's clarifying
things a little bit, it's adding a little bit of top, It's kind of taking
away some mids, it's adding some, a lot of
low end, it looks like. Yeah. All these little
adjustments that it's doing dynamically based on what's happening
at the moment. So really cool tool, really cool, big fan of golf. So now that we have our
master sounding, good, it's at the stage where we
have to worry about loudness. How loud do we actually
export this thing at? And that's what we're
going to talk about next. Loudness standards. It can be confusing, but it
doesn't have to be. It's actually really simple. So I'll explain that
all in the next.
32. What are LUFS and do they matter or not: All right. Loudness, right? How loud should
stuff actually be? This is what can sometimes
be a little confusing. Spotify says this is
on their website. We adjust tracks to
negative 14 DB luffs, okay? And they have information
on how they're doing that and finding that number
and all this stuff, okay? If we look here, these are some songs that are
recorded directly out of Spotify, into logic. We can see they are making
adjustments, right? This Civil War song, just
looking at the waveform, it is louder than this
Radiohead song, right? That peak is wildly different. The luff reading is going to be, according to Spotify,
negative 14. If we actually look
at the number, it's not negative 14. This Radiohead song, I mean, negative 12.3 Negative
12.4 it's louder than 14. Let's check the Civil Wars.
Let's see what that said. 20 years old. Thank you. Same. You know, it's above negative 14. It's negative 13.
So what's the deal? So what's weird is they are turning stuff
up and down, right? But it definitely
is a bit louder. It's not like a hard rule. If you're not exactly
at this number, you're going to get
punished and it's going to get turned
down like crazy. Because if we were to like
level this out to zero, like what this
radiohead track was actually mastered at, right? Because we can tell based
off of the wave form, it wasn't mastered
this, they didn't like set a limeter at
what is the true peak? Negative 6.6 You'd
have to turn this up 6.2 DB to get this to what
they would master it at. We can tell what the
lefts they actually had. If we apply that to
this track and we'll, I'll leave 0.1 DB of head room. Now, this will be what
the actual master of this sounded like when
they delivered it to Spotify. I mean, that's crazy. Loud, negative five luffs. That's insane, right?
They don't care. They're like, yeah,
we'll just, yeah, Well oh, negative 14. Now let's do negative five
and submit that instead. And it goes through and you
know what, It sounds fine. It totally exists alongside
these other songs. It doesn't sound out of
place, sounds totally normal. So that's why this
negative 14 thing. It is true that they are moving the volumes around of the
songs, but it doesn't matter. What matters is what
it sounds like. If you need to
smash it that hard to get it aggressive and sounding like how you
want it to sound like, then do it and Spotify. We'll worry about making it
balance with everything else. So this how they adjust the loudness thing,
it's not a bad thing. It doesn't really matter
or affect anything. Because even if they
turn it down six B, 6.2 DB, that's a huge penalty. That's crazy. And
it's, you know, lower. It's so much lower than
these other songs, but it doesn't sound
like it, you know, So that's why no one really masters to negative 14 is because it doesn't
make any sense. Why would I, I'd have to cut so much away to have it that quiet. It's just not going to compete. You know, this is the song
that we've been working on. If I just put a limiter on here so that we can see
how loud we actually are. So we would already be
getting penalized by Spotify because we were hitting
negative 13 or something. So obviously that's ridiculous. We have plenty of head
room to be able to add gain and add limiting and
make it more exciting. Don't worry about the
negative 14 number, just master it to what feels
good to you and make it, you know, exciting
but not crunchy.
33. Limiting with headroom: I have pro L two, this
is my favorite limiter. I think it sounds
really nice. It's got all sorts of presets in here. One of the ones I
really like is this wide and open 11 thing
that's really important when you're mastering
with a limiter is to leave headroom
for conversion. When something gets
converted from a wave file into
an NP three file, there are things that happen in there that are imperceptible. You can't hear them,
but they do add a tiny bit of volume
if you're mastered, right to the ceiling
right at zero. Then when it gets converted
into an MP three, it'll distort because it's getting pushed just
over the edge. We have to leave a little
bit of extra room at the top so that when it
gets converted into an MP three, it doesn't distort. And that number that
you have to leave is 0.1 That's what people will
tell you because it's true. But what you can do
instead of having it be negative 0.1 you can it be negative 0.06 as long
as it's just free gain. At that point you may as well take it just extra loudness. If you leave that
extra tiny little bit, it will still read
out as negative 0.1 And when it gets
converted it will not clip. I've tested this,
It totally works. It's just a little bit of extra gain that you
can get for free. You may as well grab it.
So what I'm going to do is I set my ceiling there so I know I'm not going to clip. I'm going to let the track
play and I'm going to bring up the gain till I see it
start to take stuff away. And then I'm going to start to, okay, push it a little more. Okay, That's getting
a little too much. I'm going to push
it back and just kind of find the sweet spot. And you need a little
bottle of your own here. I'll get the kids
to school on time. That's probably
what I would master it to, somewhere around there. Generally, negative eight,
negative eight loves is considered like a
good loud master. I don't know if I'd push
it that hard on this song, just it seems a
little bit sleepier, a little more atmospheric. I'd be okay with it sitting a little bit quieter than that and just a little bit softer. But yeah, if you wanted to push it hard and get it to
that negative eight, which that's kind
of the standard, then you could do that. And if you need a
little bubble of your own somewhere in there, it would be like
industry standard, whatever that even means. But yeah, generally, if you pay to get
something mastered, you'll probably get it
back at negative eight. To sum up, don't worry
about the negative 14. Just master your
stuff up to negative 0.1 If you want to cheat
a little bit extra gain, you can do negative 0.06
and you'll be okay, then you're off to the races.
34. Proper export settings: When it actually comes down to exporting your final master. Here's what we do. So far we've been operating in 24 bit and recording at 48 K. We went over this and how to set up our
project at the beginning, if I hit command B to bounce what I have currently selected
with those locators. Remember the locators are
these left to right guys here, this little yellow section indicates what we're
going to export. I'm just going to
grab our entire song here from start to finish. And then command B is going to bring up
the bounce window. Here is where we can select all the formats that
we want to send. Pcm is uncompressed audio, so this is a wave file, IF that sort of thing. This is what you're going
to upload to Spotify. I always bounce an identical MP three just to have as reference. If I want to check
the mix on my phone, I can check the MP three
version and know that that is exactly the same
as the wave version, it's just an easier
version to share. What formats do we actually to deliver to Spotify or our
distributor or whatever? Well, we want to
export a wave file and we want to export 16 bit. We want to export 4041
for the sample rate. Then you want to make
sure that normalize is set to off because we already have our
limiter doing that for us. Head room that we left. We don't want logic to get rid of that by bumping
it up to the ceiling. That's what normalizing does. Is it basically do you
want us to turn it as loud as possible
without clipping? No, we don't want
you to do that. We are in control of how much clipping we have.
Thank you very much. We'll leave normalize of
wave file 16 bit 4041. These are the typical
CD quality standard that all streaming
services still run off of. So once we have our settings
all set, we'll hit okay. You call it what you
want to call it. And then you hit Go.
And there it goes, it'll start bouncing down. Depending on the size
of your project, how much processing you have. This could take a couple minutes or it could take 30 seconds. It really depends on
what you have going on. Once you have that file, you are good to copyright upload whatever you
want to do with it. That is your finished song. Big, big day. Yeah, let's celebrate. Let's
have a good time. Tomorrow we're going
to actually go through all the logistics of how do we actually get this
thing out into the world? How complicated is that? It's not as complicated
as you think. It's pretty easy, actually. We'll talk about that
tomorrow though.
35. Distribution: You got your song done,
great, that's awesome. So now that you have
your master file, that 404124 bit wave file, that's what we can upload to all these streaming services
and get your song out there. If you were on a label, then they would just handle
this process for you. They would have
relationships with all these streaming services and, you know, get it out there. How you can do that
on your own though is by partnering
with a distributor. All that they're doing is taking your song and putting it on
these different platforms. Putting it on Spotify, putting
it on Tiktok, yada, yada. One of the most popular ones
is probably Distro Kid. You've probably seen ads for him on Youtube and stuff like that. I personally use
Distro kid and I've, you know, recommended District Kid to other artists and stuff. I think they're
great the way that Distro Kids business
model works. You pay a yearly fee and then
you're able to just upload as much music as you want
and that will live on the platform as long as
you're subscribed to it. If you want your song to
live on there forever, even if you're not paying, you just want to pay one time and have your song
live up there. You can do that through
district kid as well. It's $30 $29.01 time fee. And then your song will
just live on there. So that's a pretty
solid option and I think depends how often you're going to be
releasing music. What would make
most sense for you? Sometimes it makes
most sense just to subscribe because you're going to consistently
put out new music. Other times, if you
know, you know what, I really just want to
put these two songs out as kind of this
personal thing for me. Then maybe it makes more sense
just to do a one time fee, you know, and not have to worry about the annual subscription. Amuse is another platform that
I haven't personally used, but I'm recommending
them because their bottom tier
is actually free. So if you just want to sign
up and release a song, you can do that for
free through Amuse. So that's worth
looking into tune. Core is another
player in the space. They don't do any
subscription models. As far as I'm aware,
it's only one time fees. And they are more
expensive than Distro Kid. And you know, I'm
only mentioning them because they're such
a big player in the space and they've
been around for so long, they're so established that
it's pretty safe with that. Like they're not going
to go anywhere and all of a sudden your
music goes away. So they're reliable
in that sense. But I would recommend
Distro Kid. I feel like Distro Kid
is established enough. They have the options for one time or for an
annual subscription. I think it's just
kind of the way to go for your album art. You can just honestly
use anything, generate something with AI, grab something with your phone, whatever, or you can have
a friend that you love and trust make something for you. I think that'd
be really cool. Once you have your album
art that you like and your 404124 bit wave file, that's all you need
for a distributor to put your music out
there on Spotify. The very last thing we'll
talk about in this week of this process is how to actually get people to
listen to your music. That's what we'll briefly
go over in the next video.
36. Promote your music: The number one mistake
I see artists make all the time on social
media trying to get people to listen to their music is to treat everything
as content. I think there's a
real hunger for authenticity and
vulnerability that if you just are open and honest in the stuff that you're talking about as you're
posting your music, I think that's attractive
to people, you know. I think there's something that really draws people in with that of you just laying
your soul out there. I think you'll find
more success with trying to bring people
into your world. Bring people into
your perspective, just to see from
your point of view. You're not trying to convince
anybody of anything, You're just trying to show
what's important to you. You know, I think that
level of vulnerability and realism is really
attractive to people. Not everything needs to
be super highly produced. You know, not at this stage in the
production and the mix. Yeah, For sure we're focusing on making things as
quality as possible. Quality doesn't
matter as much here. Here, the most important thing is repeatability
and consistency. So don't spend a ton of time
making all these really sick, cool Instagram videos that you're going to use
to promote your song. I mean, you can make one of
those, run an Instagram ad. Sure. But you're going to
have far more success with just whatever is a good
rhythm that you can get into. That's going to be
a consistent flow of stuff coming out from you, whether that's your
songwriting process, and you talk about that
at the park or whatever, You find the thing that
is authentically you, that is easy to
have a lot of that, you can just work into
the rhythms of your life. And I think you'll find the
right people by doing that. The people that are going
to like your stuff. That's the stuff that's
going to reach out to them. Thank you so much for
watching this class. I hope it was helpful. I hope you learned
something by kind of seeing this work flow of getting
a song done in a week. And if you recorded a song and uploaded it during this week,
I would love to hear it. Make a post on Instagram with your song as the music
and tag me in it. I'd love to see it. I think
it'd be so cool and you can give me a follow in Instagram as well as here on skill share. Also, if you would leave
a review for this class, it really helps out this
class reach more people. I would really,
really appreciate that negative feedback
too. I welcome it all. I want to become
a better teacher, so please leave review. Let me know how I can improve. And what else do you
want to learn from me? If there's another part
of the process that you want expanded on and more
info on, let me know. I'd love to create that
for you in the future. Lastly, I have a
newsletter you can sign up for in my
bio that I have some free sounds that I'll
give out from time to time and announcements on new
courses and that sort of stuff. No spam, very infrequent. But if you want to stay
up to date on kind of what I've been doing, that's
the best way to do that. Again, thank you so much for your time watching this class. I hope that you make
some amazing music. I can't wait to hear it.
 Solo Ray, Music Producer + Music Director