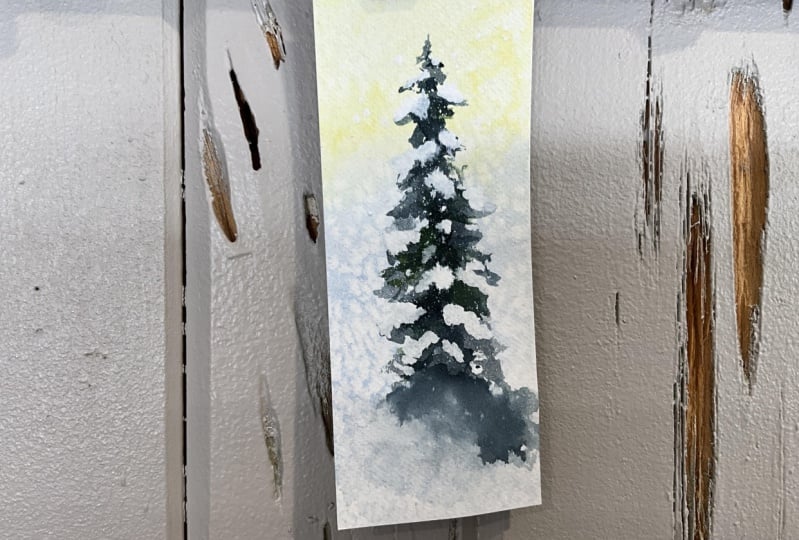
Snowy Tree Bookmarks in Watercolor
 Beth Doman, Creative Professional
Watch this class and thousands more
Watch this class and thousands more
Lessons in This Class
-
-
1.
Intro
1:37
-
2.
Materials
1:59
-
3.
Painting the Background
3:35
-
4.
Cutting and Prepping
2:30
-
5.
Painting the tree
1:51
-
6.
Painting the Snow
2:33
-
7.
Finishing
1:18
-
8.
Conclusion
0:59
-
-
- --
- Beginner level
- Intermediate level
- Advanced level
- All levels
Community Generated
The level is determined by a majority opinion of students who have reviewed this class. The teacher's recommendation is shown until at least 5 student responses are collected.
109
Students
3
Projects
About This Class
Why take this class?
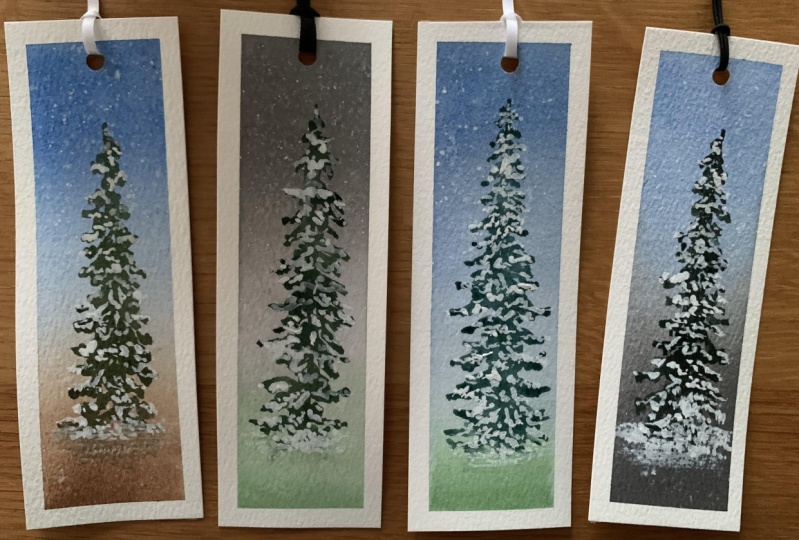
Learn how to paint a snow-covered evergreen tree bookmark featuring a fun wintery background! This class is structured as a tutorial on bookmarks; however, you can take these skills to create a regular painting if you wish.
What will you learn?
- How to paint an evergreen tree with convincing snow on the boughs
- How to use salt to make a beautiful wintery background
- How to cut up the pieces and embellish to create a beautiful bookmark
Who is this class for?
This class is for beginner and intermediate watercolor painters. Even if you’ve never tried watercolors before, this class will teach you some important basics and fun techniques you can incorporate into your future works.
Class overview
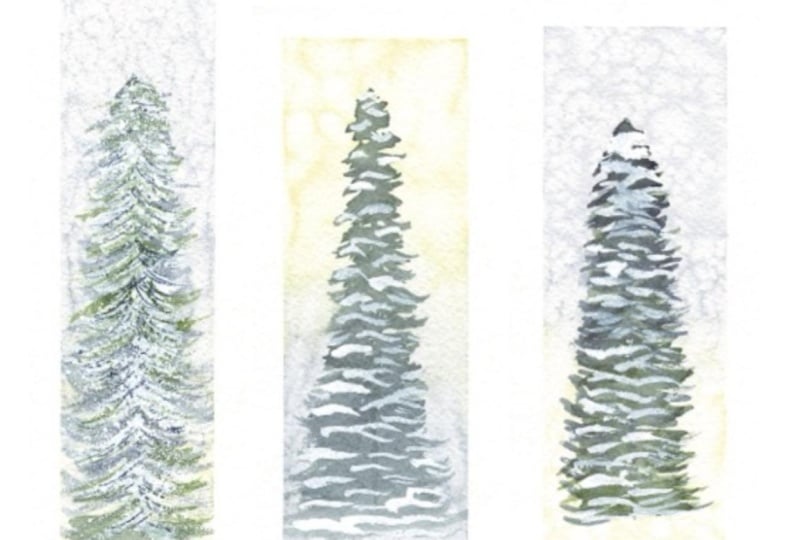
This class will demonstrate how to create a unique hand painted watercolour snowy tree bookmark.
You’ll use table salt and watercolour paint to create a beautiful, unique background.
Materials and resources
You’ll need:
- Cold press good quality 140lb watercolor paper (6” x 7”)
- White poster board (6” x 7”)
- Glue stick
- Cutting board & knife / paper cutter
- Ideally a “mop” watercolor brush, medium size
- Smaller watercolour brush for snow
- Large flat watercolour brush
- Blue, green & yellow watercolor (recommended Windsor Newton or Daniel Smith)
- White gouache
- Masking tape
- Paper cutter
- Hole punch
- Jute string
- Two cups of clean water
Meet Your Teacher

I was born and raised on beautiful Vancouver Island and grew up on horseback in a rural area. I was lucky to be raised in an art-filled home, as my father is an artist and makes art every day. I was encouraged to experiment and explore different mediums which led me in a round-about way to art college across the country in Nova Scotia. After a very long hiatus from making art (when I picked up filmmaking and photography along the way), I have picked up a new medium - watercolours. Currently my subject matter is the West Coast and the creatures that live in it. I also do pet portraits.
See full profileHands-on Class Project
Your project will be three snowy tree bookmarks!! You’ll be learning about using salt for interesting backgrounds, plus learning how to paint a convincing snow-covered evergreen tree.
Steps:
- First we paint the background
- Then we use salt to produce an interesting pattern
- Once it’s dried, we paint the tree.
- Then comes the snow on the tree using white gouache
- Glue the poster board onto the back for support
- Cut the bookmarks
- Add a ribbon and sign our work
- Upload your project for feedback
Class Ratings
Why Join Skillshare?
Take award-winning Skillshare Original Classes
Each class has short lessons, hands-on projects
Your membership supports Skillshare teachers
Learn From Anywhere
Take classes on the go with the Skillshare app. Stream or download to watch on the plane, the subway, or wherever you learn best.