Transcripts
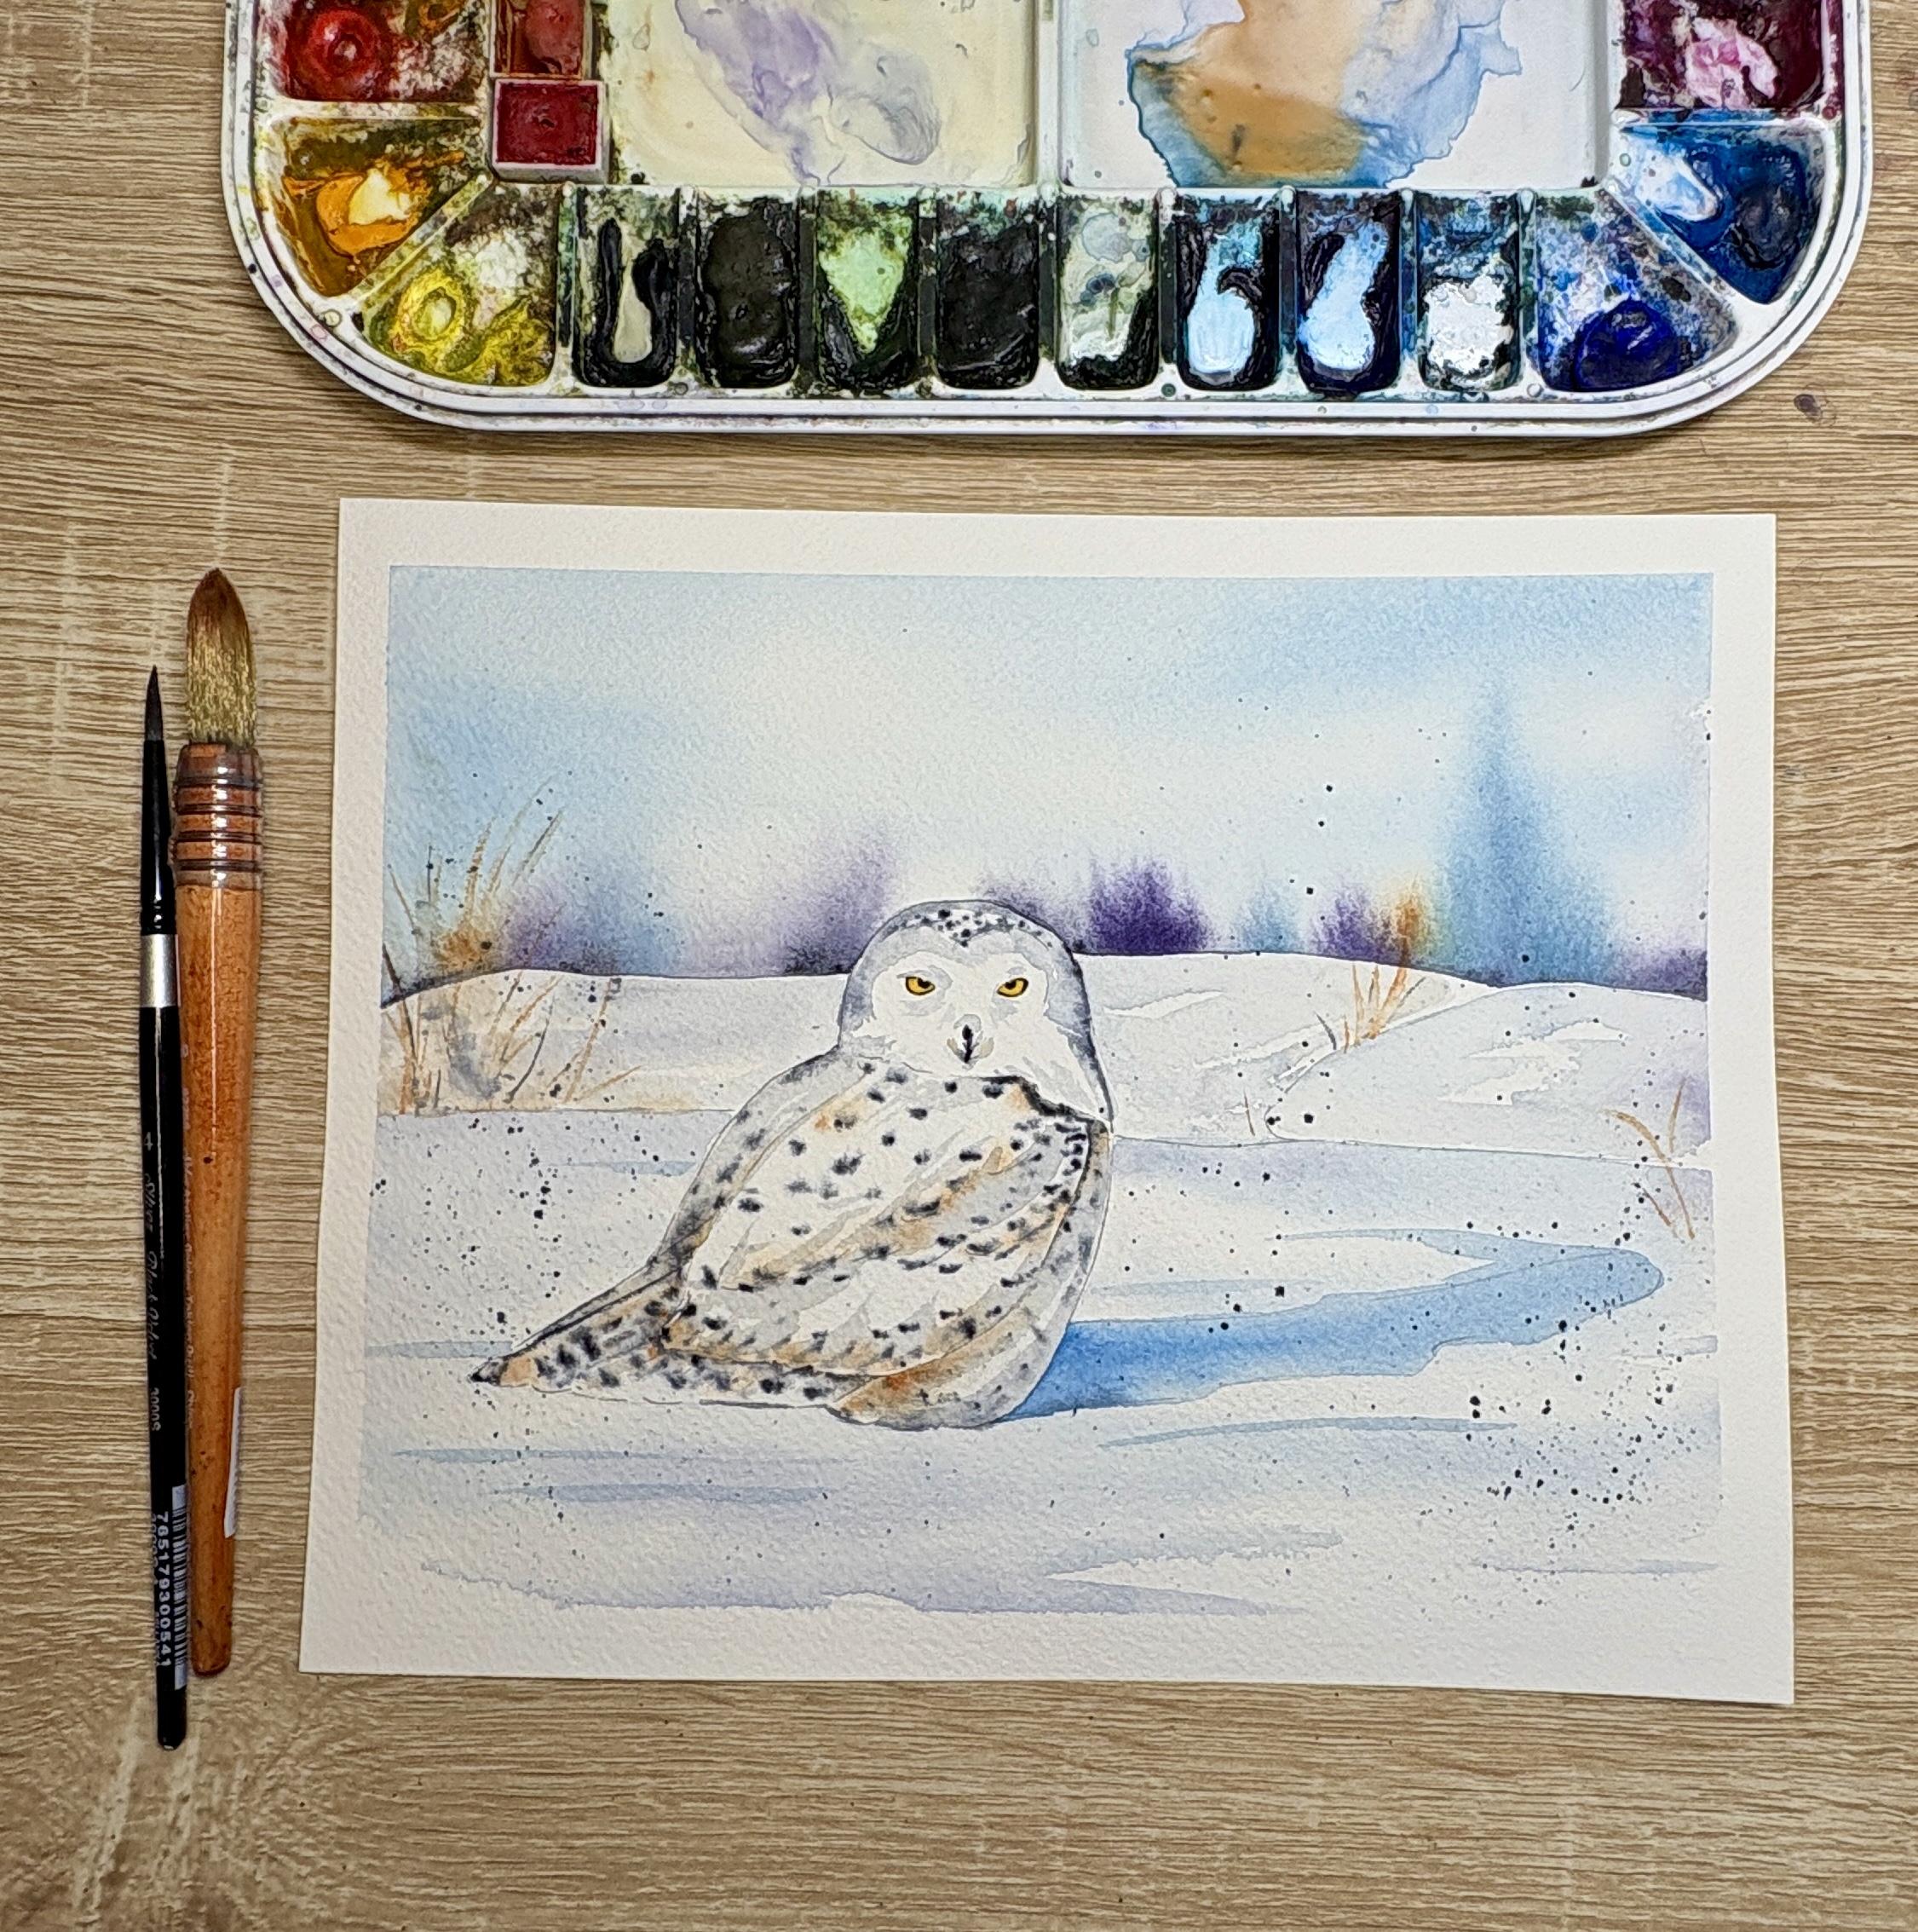
1. Intro: Snowy Owl in Watercolors: Hello, and welcome
to my home studio. I'm Emily, and in today's
Skillshare class, our goal is to relax and have fun while painting
with watercolors. This snowy owl Skillshare
tutorial is designed for all skill levels and only
takes 40 minutes to complete. It's the perfect short
painting project for any busy artist. You'll have access to a printable template
that you can use to either trace using
a light box or window or to sketch
out on your own. And you'll also have access to an instruction sheet that has picture references and
written instructions to help guide you
throughout the tutorial. In the step by step
video tutorial, you'll learn how to use a wet
on wet technique to create a textured feather look that doesn't require painting
individual feathers. We'll then layer a wet on dry shadow and tie it all together at the end
with some splatter. So get your paints, paper, and brushes ready, and let's get started painting a snowy owl using watercolors.
2. Wet-on-wet Sky: Alright, so the first
step in painting our snowy owl is
to paint our sky. I'm using a large quill
brush to wet the sky area. So I'm only wetting up
to the horizon line, and then I'm going
to really carefully wet around our snowy owl. Remember that wherever
our water is touching, that our pigment is
going to go there. So we do want to
take a little bit of caution and care
at this stage. Uh, now, I'm really making sure that this sky is nice and wet. So you'll notice I'm continuously
grabbing more water, and I'm going over the
same area multiple times. Now, doing this will allow the water to actually
soak into the paper, and it'll give me a little
bit more time to paint. I'm then grabbing a
little palo blue. I'm mixing it slightly, um, on my palette just
so that I don't get any really dark sections. And I'm coming in from the edges of my painting and dragging
some of that blue inwards. As you can see, I am leaving a little bit of the white of
the paper to shine through, and that's going to
mimic some clouds here. Once this blue is in the position that
I want it to be in, I'm going to switch brushes. I'm going to start using
a smaller size brush. This is a round size four. I'll wet it and I'll grab some pigment directly
from my palette. Now, I'm using a
carbizol violet here, and then I'm also going to mix it with a little bit of indigo. At times, there'll be
some indigo on my brush. At times, there'll
be some violet. I'm going to paint along
the horizon line here. Once again, I don't have that
much liquid on my brush. If you're noticing that your colors are going all over the place and they're
spreading way too far, two things might be happening. One, you might have
too much liquid on your brush or you might have too much
liquid on your paper. We really want a
concentrated color when we're adding this
colorful skyline. We want to make sure
that we're doing this while the sky is still wet. You notice that
I'm working fairly quickly. That's on purpose. If my sky starts to dry, I don't get this really
nice seeping color. I'm going back now that I have that little line work done, I'm going back and I'm dotting some color to create
little blooms of trees. Most of the color, most
of the blooms that I'm creating are with either
that purple or indigo. But I did add a little
bit of turquoise as well, and now I'm adding a little
bit of quinocadon gold. You can use any colors
you'd like for this sky. I just wanted to keep it
in these jewel tones. Now that I have the
color where I want it, I'm actually going to tip
my board upside down, and I'm going to
allow the colors from that horizon to
slightly pull downward. Now, you might not
need to do this at home if your colors
have already expanded, but you can use this trick to create more tree like shapes. We do want to keep these
shapes to be very soft, and we can only do that
while it's still wet. Now, before I finish
working on my sky, I'm going back to that
horizon line and I'm making sure that the horizon line
is really nice and crisp. So I'm going around
the snowy owl head. I'm going over
that horizon line. I'm making sure that my
edge is really clean. I need to make sure
that I clean the edges before I let my sky dry. And then the very last step is if I have any pooling that's happening around the tape line and the edge of my
painting there, I do want to clean that off. The reason being is if it
when it starts drying, I might have that
color or that water push back into the sky
and create a nasty bloom.
3. Snowy Foreground and Yellow Eyes: Alright, so now that
I'm done with the sky, I'm going to move on to the
foreground with the snow. I am going to switch
back to my quill brush, and I'll do a fairly
similar technique. It's still going
to be wet on wet. I'll wet my quill brush. I'll make sure it's
nice and clean. This time, I'm going to
wet around my snowy owl. Since my snowy owl is white, I do want to make sure
that the color around my snowy owl is something
other than white. Now, you'll notice
that I'm only wetting the area up to that
little mid horizon line. I don't want to reach
my water all the way up to the horizon line since
my sky is still drying. So I'm kind of stopping
at that midline. And then you'll also notice
that I'm not painting water all the way to the
bottom of my painting. I'm just kind of painting
in that mid level. Now, whatever colors
are on my palette, they're all the
colors from my sky. Now I'm going to go in
and just add a little bit of shadow to that wet area. So I'll make sure
that I'm leaving some of the paper
to shine through. You'll notice I'm using
horizontal lines for this. And I also want to kind of
have the color butt up against my snowy awl as I draw my color down to
the bottom of my paper, that area is dry, and so I'll have a harder edge at the bottom of the
paper, and that's okay. When we're painting snow, we do want a combination of soft edges from our wet on wet and hard edges
from our wet on dry. Now, watercolors is all about
babing your drying times. And so as I'm looking
back at the sky, I'm realizing that I want
some sections to be slightly darker than what this
horizon line is looking, and I know that it's still wet, so I still have that glossiness. And so I'm grabbing some
indigo and dropping in just a little hint of
indigo along the horizon. Now, if your sky has already started
drying at this point, I do not suggest that
you add any color. This is only if you're
noticing that your sky is still wet and you want to
make some little changes. And then before I start working on the body
of my snowy owl, I'm grabbing a little yellow. This is a gamboge yellow, and I will be painting the eyes. Now I want that
first layer to dry, and so I'm painting
these eyes wet on dry. My paper is dry, and I'm just
painting my first layer.
4. Wet-on-wet body and shadows in the Snow: Alright, now it's time to
start painting our snowy owl. I'm using my medium size brush, so this is my round size four. And I am starting with the wing that is the little
kind of cutlet of wing. It looks almost like
a chicken breast. I'm painting that with water. So I'm going to be
painting each section of my snowy owl using a
wet on wet technique. My water can be slightly
tinged at this point. If your water if you're noticing your water is
looking a little dirty, I suggest switching it out, getting some clean water. And like I said, I'm
taking some real time and patience to make sure that every section of this
wing is nice and wet. Now I'll take some of
that quinacridone gold. If you don't have this color, make sure to check out my
list of alternatives to use. And I'm making sure that
my brush doesn't have a whole lot of water
on it because I want this pigment to stay
where I'm placing it. You'll notice that I'm
taking this pigment directly from my palette
with a wet brush. I'm not adding more water to it. I'm not mixing it on my plate. And I'm just dropping in this quinocrton
gold along some of these edges to give it
a little bit of color. Now I'll wash my brush, and I'll grab some indigo
directly from my palette. I do have a little bit
of water on my brush. It's a damp brush. It's not a wet sopping brush because I need that indigo
to stay where I put it. Now this concentrated indigo, I'm going to be making
little dots along the wing. Now, if your dots that
you're making are looking way too jaguar, I would suggest to
make little U shapes. Make sure these dots
aren't too perfect. You notice you're watching me
make some of these shapes. They're starting to
bloom a little bit. The pigment is
starting to expand. Some of the shapes
are little swishes. And because I'm working
from a reference photo, I'm just trying to look
at where are the most concentrated of these darker
spots of the feathers. I don't want to actually paint
each individual feather. I just want to give the illusion that the
feathers are there. And when I do this wet on wet, my pigment is going
to automatically expand and give me that
soft feathery look. Now, where you see
on the template that there are some lines
along the template, these diagonal lines
along that wing, I do want to make sure that I'm concentrating the indigo
along those lines. And then along the base
of that wing there, I'm making a few more
almost vertical dashes, and that's going to mimic
some wing some feather looks. Alright, I'll do this
same technique for the little section above my snowy owl on
top of their head. I do want to make sure, though, that my sky is dry enough for this since I'm touching and
budding up against the sky. If your sky is still
really wet and dry and you notice
that glossy shine, I would wait a little bit
until that sky dries enough. I'll wet that little section
on top of the head first, and then I don't
actually I'm not gonna add any of that
quinacridone gold. I'm just adding a
few dots of indigo. So the top of the head by this little shape is
where these dots are. Alright, so since I need to give a little time for
those two sections on my snowy yll to dry, I'm going to start working on
that last section of snow. I added a little
water to some of those original colors
that I used for the snow. And now with my round
size four brush, I'll start by painting
wet on dry this time, just along the edge of
those little snow hills. Now, I'm painting on
dry paper this time and leaving a few sections
of this dry paper to shine through only
because I don't want to It's a small section and I don't feel like I really need
to wet it ahead of time. Um, I am using the
edge of my brush, and so I'm making sure that these snow hills are looking
really nice and fluffy. If I use the tip of my brush, it might look a little bit
too much like linework. After I paint a
section of the snow, I can always go back and drop in some darker pigment wherever
I think I need more shadow. Now, once again, I'm
making sure that the area that's butted
up against the snowy owl is that I have
color there so that it contrasts with the
body of the snowy owl. Now that we have
our soft background done on our snow that
we did wet on wet. Now we want our second
layer to be wet on dry. So I mixed a little
of my halo blue in that watery section that
I used for the snow. And now I'm painting a hard edged shadow going along this right
side of my snowy owl. Now, I'm kind of keeping this shadow in
between the template, the little lines that you
see on your template. But then I'm also adding a few little additional
lines off of that. The key to painting
this shadow here is try not to make your
shadow look too perfect. So you notice that
I have some kind of edges that are a
little bit more squiggly. It's not a completely
straight line. And then once I
paint that shadow, while it's still wet, I'll drop in some of
that more intense thalo blue closest to the
body of my snowy owl. Now, you can always use
a different color here. I do find that that
really bright thalo blue works really well
for shadows in snow. It makes it seem I brightens
up the painting a lot. It makes it seem
like the sunlight is reflecting off of the snow, but you can always use a
darker tone like an indigo. Now, I'll also add
a few wet on dry. Remember this is dry paper. I'll add a few dry shadows and lines along the foreground. I'm kind of adding these
randomly in the foreground, and the only reason
I'm doing this is to add just a little extra
texture almost to the snow. By adding these little shadows, I'm just giving it a little bit more detail in
the foreground.
5. Shadows in the Face and Finishing the Body: Alright, so while we wait
for the snow to dry, we're going to finish up
painting the body of the owl. Remember, we'll
continue painting the rest of the body wet on wet. And I am breaking it down
into manageable sections, so you see I'm starting to paint this left side of the body. So I'll wet it first
with clean water, and then I'll go and I'll grab just a little bit of
that quinocradon gold, and I'll add just a little
hint of color here. So it looks like I
accidentally used the indigo instead on
the upper neck area, and I really do want to do
the quinacdon gold first, because it is the lighter
of the two colors, and it's more of a shadow
that you see on owl's body. So I cleaned my brush, grabbed the quinacradon gold, and now I'm adding it to
that left side of the wing. And then after I add that gold, now, I'll go back without
washing my brush. I'm just grabbing indigo
directly from my pan, and that's going
to make sure that my indigo is really
nice and opaque, and I'll dot it on that
left side of the wing. Now, because this wing is sitting underneath
the wing on top, it is going to be a
little bit darker. However, I'm being
very careful to not blend my indigo and with
the water behind it. That's really important. We
don't want a gray color. We want those dark indigo dots. So I need to let
that section dry, and so I'll start
working on some of the shadows on the
head of my snowy owl. I'm just adding a
little bit of water to my indigo that I
had on my palate, and I'll start by adding some shadow around the
outer edge of the head. I'm going to try to keep the same shape of the
head that you see here. So you've got that little
M on the forehead. And so I'll try to keep that
shape as much as possible. I'm going to add a little bit
of shadow around the eye. Making I'm trying
to keep that shadow more towards the inner
edge of the eye. And remember, if it gets too
dark, you dry your brush, and you pull some of that
color off with a dry brush. Now I'll also while
this section is wet, I'll grab a little bit darker of indigo
directly from my pan, and I'll drop it in mainly
around the outer edge here. I want to really
create the illusion that this head is
three dimensional, and so it's going to be
darkest on the outermost edge. And I'll continue
the same shadow, that lighter shadow
on the right side. So once again, extending
that shape into the head and then adding
a few little lines down along the neck to
resemble some feathers there. And then I'll add a little bit of shadow
at the top of the head, as well as on the inner
edge of that eye. Now, when we get to
painting the beak, I'll still start off with
that really light indigo, and I'll start by
painting a little bit of a V at the bottom of that line. This is going to
help to have some of that white that's
kind of hiding the beak. There's some white
plumage around the beak and it's hiding it. And so adding that shadow on the lower V there is going to indicate that there's
some plumage there. I'll then grab some more
concentrated indigo, and I'll come back and I'll add that concentrated indigo along the outer edge and
then add some more of that concentrated
indigo to the beak. Alright, so while we leave
the head of our owl dry, let's continue
working on the body. So once again, I am going to wet this under section
here of our snowy owl. Now, this is the only
section that's going to look just slightly
different as we paint, and that's mainly
because we will be using a lot more vertical hash
marks to show those feathers. And you'll be able to follow the guidelines that
I drew out for you. So after we wet the
area, just like before, we continue adding just a
little bit of that gold color, that burnt orange or
quinacridone gold. And that's just going
to help us to you know, have a little bit more
of that golden color that snowy owls sometimes have. And then we'll take our
indigo directly from the pan, and we'll start at the back by adding a few vertical lines, well, kind of diagonal lines along the back to indicate
those tail feathers. And then we'll keep adding our dots to the bottom
of our snowy owl. One thing that you
do want to make sure to do in this section is to slightly outline the bottom
of the wing with your indigo. It's going to make sure
that that top wing is going to really come
out from the body. So we need to make
sure that there's just more of a shadow there. So this lowest section of your snowy owl should
really be the darkest. Remember, we want to
refrain from over mixing our colors into our water and really allow
those dots to sit. Now, I did wash my brush
and I dried it off. And now I'm just making a few
color corrections where I'm lifting a little bit of that indigo where it
got a little too dark. Alright, so the last section
here that we're painting, of course, we
started when on wet. We'll add just a
little bit more of that burnt orange color to closest to the underside
of the wing here. And now, make sure that this little section
of your snowy owl is going to be the lightest
that you've painted so far. And so I'm using barely
any of that indigo. And my little spots
are more dashes, and they're kind of
dashes at a diagonal. I think that's
pretty important to help with the shape
of your snowy owl. And then we're also going to
add a little bit extra of that indigo along
the top here and kind of slicing it down
under that wing to show that that wing is
sitting on top of the body.
6. Black Details in the Face, Grasses, and Splatter: Alright, so the last details, I'll add with a really
small detail brush. I'm using a black color and adding a little bit
of black detail into that center pupil. And then I'll pull a
little of that black along the upper outer
edge of the eye, as well as underneath the eye. I'm not completely
outlining in a full circle. Like I said, just pulling
a little black to the outside edge on the top of the eye and
then around the bottom. Reason why I'm not adding black along the inside of the eye on the top is because
I just want to avoid it looking too
much like makeup. By adding the darker
section along the bottom, it's going to really give this bright bold staring effect. Then I'll also grab some
black and I'll quickly outline the line
down the beak there, and that's going
to help the beak to stand out a little
bit more as well. Alright, so now that
our owl is done, we'll focus on our background. Now, this step is
completely optional, but you can always try to add a few little strands of
grass in the background. Now, instead of using a green, which I haven't used at
all yet in my painting, I'm going to stick with
some of the colors that I have already used. And so my grasses are going to be this burnt orange color. And so I grabbed a
little burnt orange. I added some water, and I mixed it into kind of a
medium transparency. I'm using a round
size four brush. But if you have a smaller
detail brush for fineer lines, you can also use that one. And so I'm going to
add grasses into clumps of four strands, three or four strands, maybe three to five strands in just a few different
sections of my painting. Now, to add a little bit of depth and color
to these grasses, I decided to add a little bit of grass shape and extra grasses
with the indigo, as well. And so I grabbed a little
bit of that indigo, and I'm adding a few
grasses using my indigo. Now, as I was looking
at these grasses, they're kind of a little
bit too perfect to me. They're a little
bit too in focus. And so I'm grabbing a
slightly larger brush. This is my round size six. I added some water
onto my brush, and I'm just going over
these grasses with water. And my goal here is to just
blend those out a little bit so that I have some hard
edges in those grasses, but then also some
soft edges, too. Um, this is just kind of a last minute decision because as I looked
at the piece, I noticed that these grasses were kind of taking away from my snowy owl and I wanted the focal point to continue
to stay on my snowy owl. So I just decided to add a little bit of water to
kind of tone those down. Now you see that I'm taking my paper towel and I'm
just dabbing away. If any of that color
got too intense, if I wanted to make it seem a little bit
more transparent, I can grab some of that color up and lift some of it
up using my paper towel. Alright, so the final
steps of this painting, we're just going to
add a few shadows to the body of our owl. So we already added some of
these shadows to the head. So I'll add a little water to a little pile of indigo
I had on my palette. And I'm going to start by adding a diagonal stroke of shadow
along the front wing. And then from that shadow, I'll pull a few strands up, add a diagonal, and
this is going to help create a look like there
are feathers there. And then I'm going to come
around the sides of the body, and I'm also going to
add a little shadow to the left side of the body, a few little extra wisps of
shadow to indicate feathers. And then adding a little bit
more shadow to the tail. Now, this all depends
on how dark your body, the body of your snowy ell got. If your indigo really spread a lot during that
wet on wet stage, you might not need
this extra shadow, or you might just need a little extra shadow around
the outer edge of the body. Alright, and lastly, to
add just a little bit of motion and movement
to this painting. I'm going to add a
little indigo splatter. First, I'll cover the body, mainly the face and the lightest areas of the owl with a scrap sheet of paper. And then I'll load up my brush with indigo with
a water down indigo. I'll hold it in my
non dominant hand. And then I'll use a
different brush to hit that loaded brush on top. So I'm keeping the splatter
down on the snowy area. I'm not having a ton of
splatter up in the sky, but I just want to add a
little bit of extra texture, a little bit of extra
motion to the painting. And that's it. We're all
done with our snowy owl.
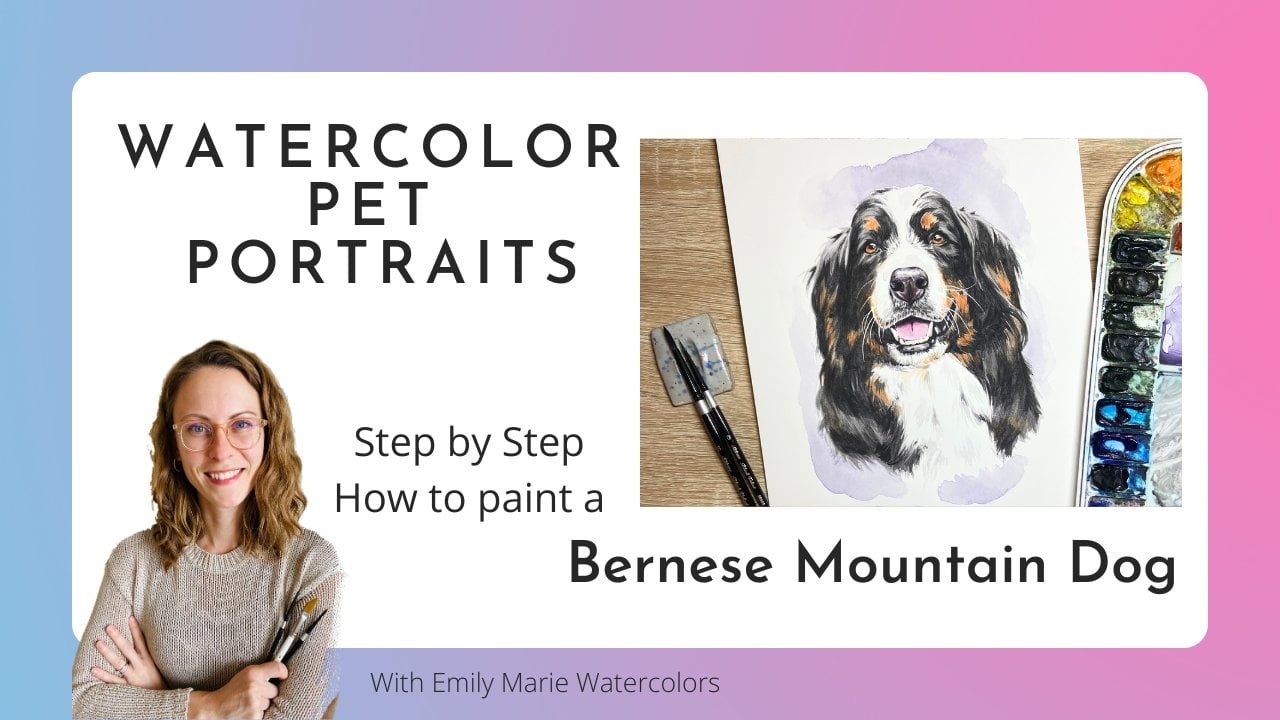
7. Follow me on Socials and Skillshare!: If you enjoyed this video, I also have a variety of online
tutorials on my website, emilymarwatercolors.com, as well as Skillshare
for Skillshare members. And I do sell completed
physical watercolor kits where it comes with everything
you need to paint at home. Visit emilymarwatercolors.com.
 Emily Marie Watercolors, Watercolor Artist and Dog Lover