Transcripts
1. Introduction: [MUSIC] Beyond the positive environmental impacts
of natural dyes, they also carry a message
for us to slow down, release control,
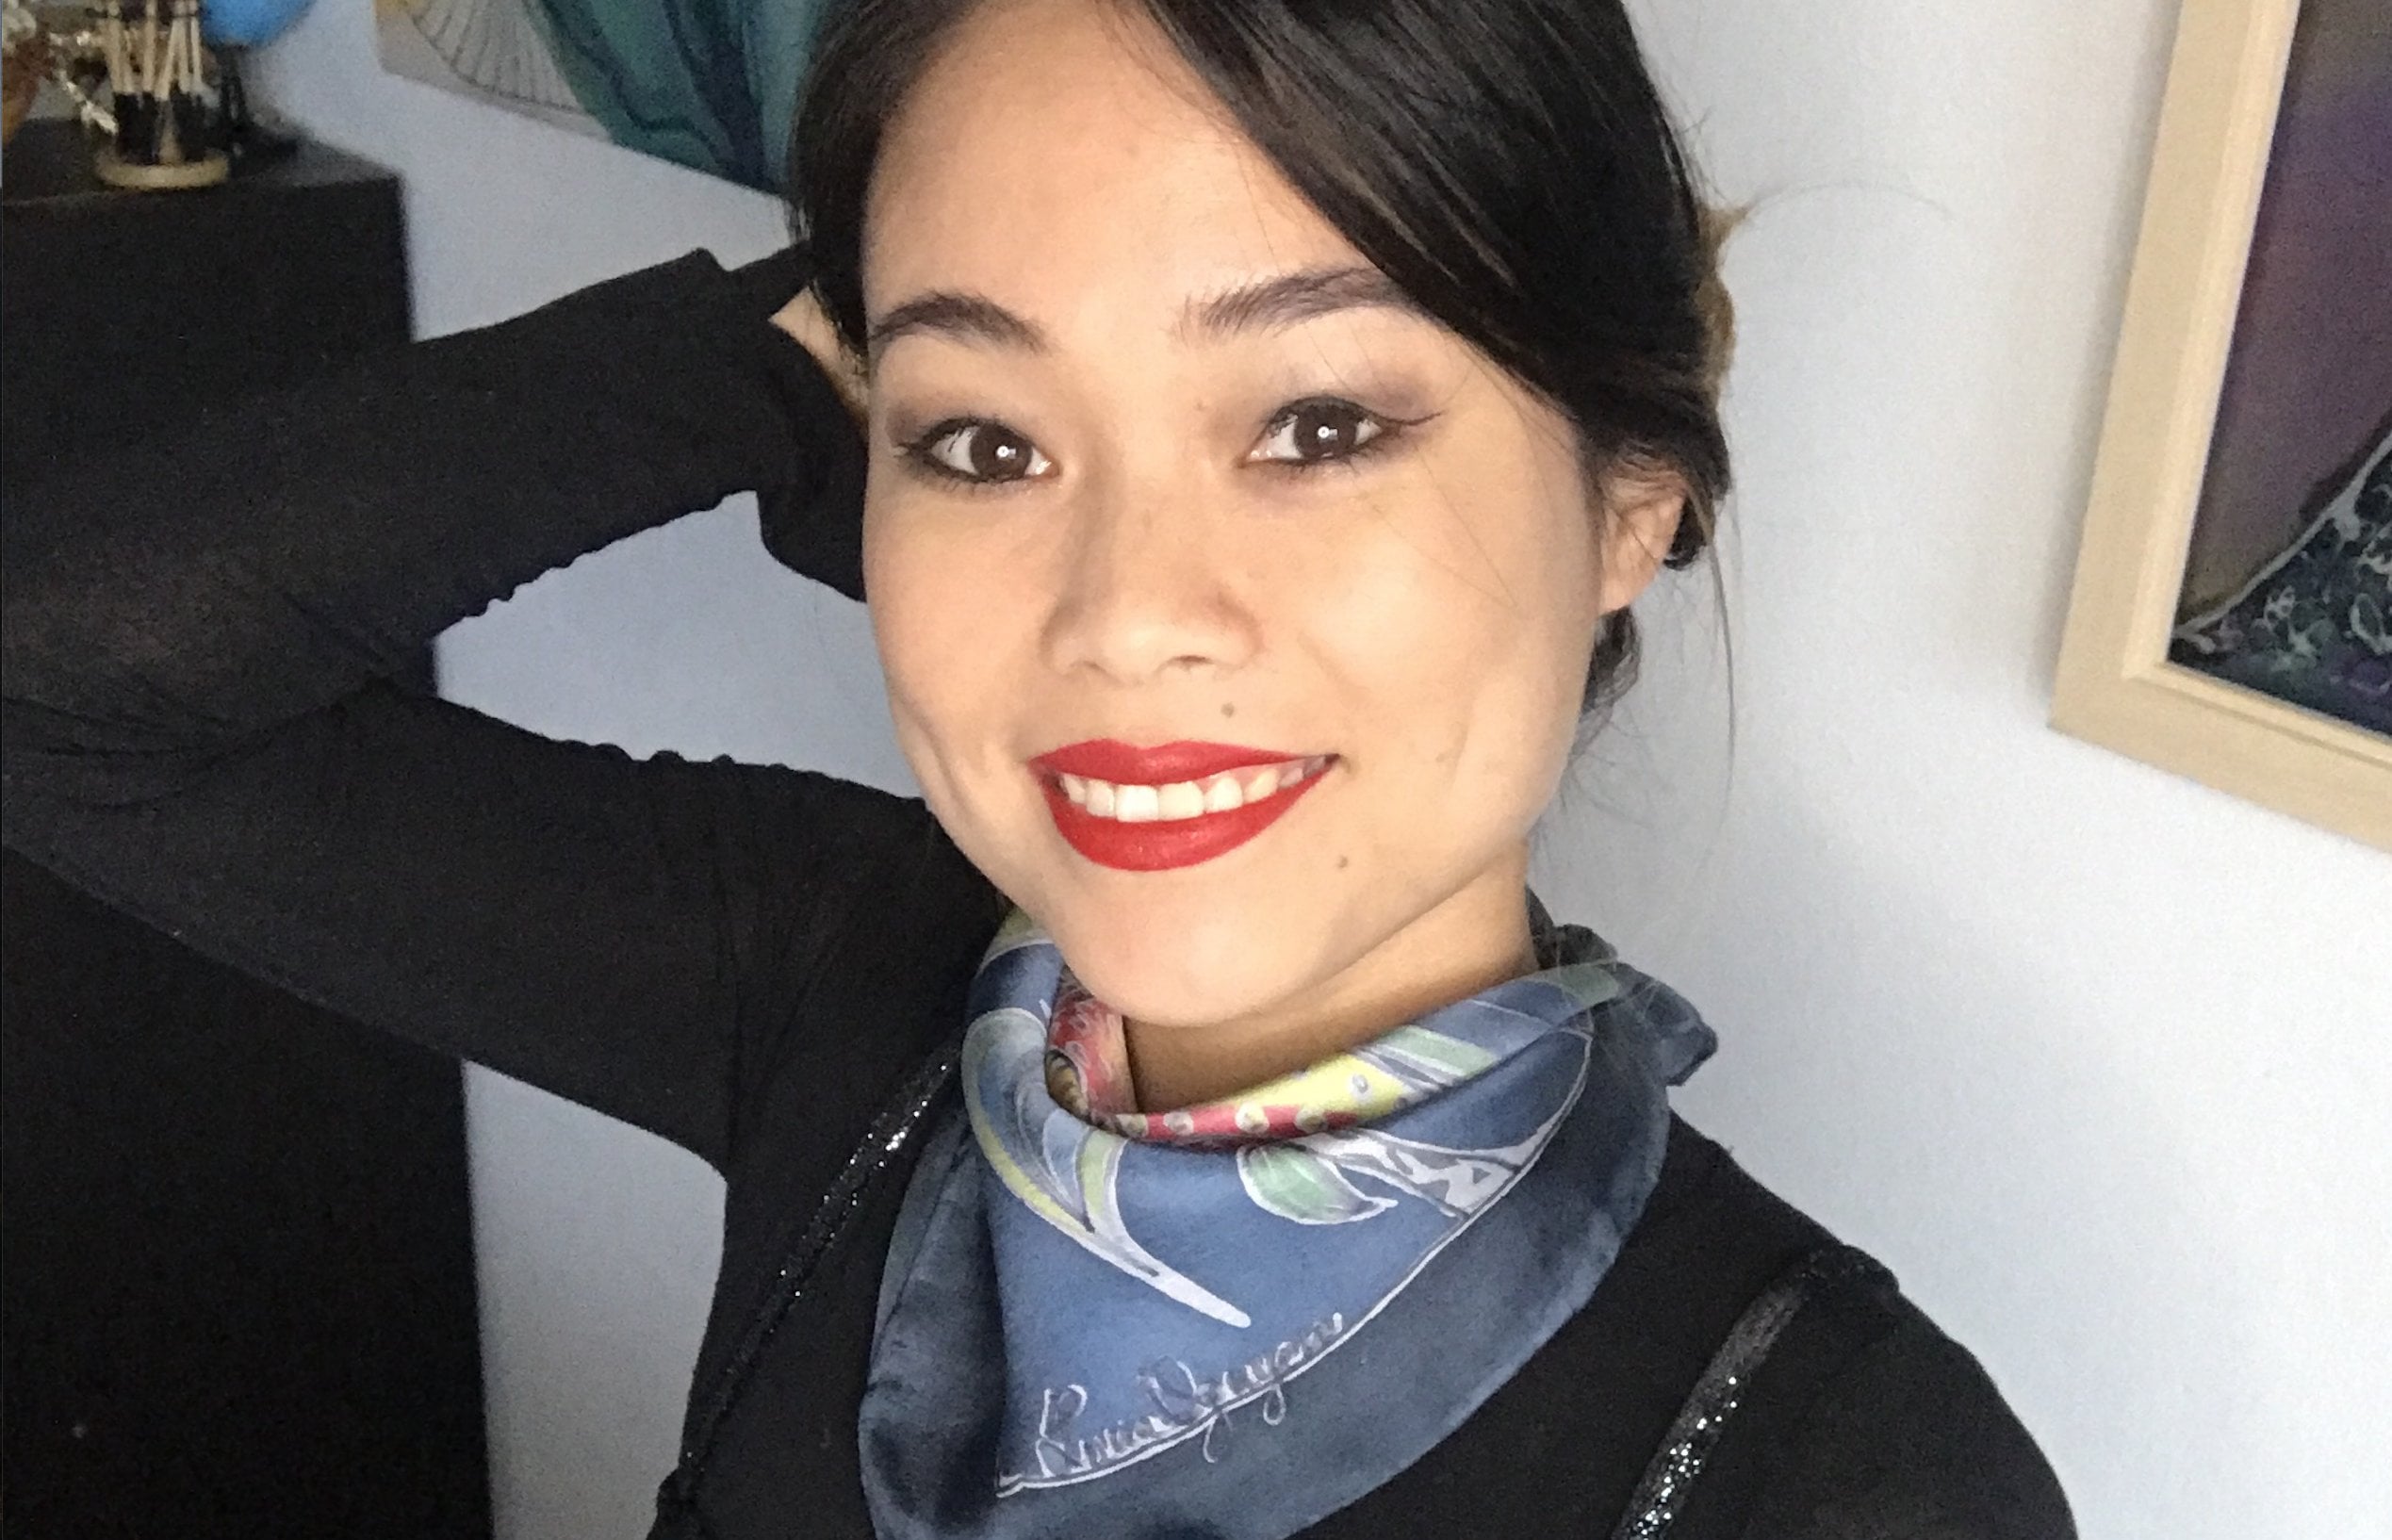
and get more in touch with nature. Welcome to the lab. My name is Hannah, also known as Hanoux. I'm a textile artist, fashion designer,
and plant enthusiast. I currently work out of my barns studio
in Hudson, New York, making one clothing,
homewares, art pieces. I also do custom collaborations with other artists, brands, and designers, with all-natural dyes
and all-natural materials. Something that I learned
on this journey of making my own clothing
from start to finish and seeing all aspects
of production, was that the whole supply chain
is actually hidden, and it's on purpose,
because it's ugly. Textile dyeing
and finishing is actually the number 2 polluter
of our waters on this earth, after agriculture, and it causes a lot of harm
to the people creating the textiles, the Earth, it's a huge impact
on our resources, and all synthetic color is actually derived
from petroleum. It's so important
to me to educate, host workshops in my studio, make classes like this, and just have
my entire collection and ethos as an artist be based
around using upcycled materials, all-natural stuff,
and just stuff that you can find in your house
and around where you live. In this class,
I'll be taking you step-by-step through the whole process of natural dyeing
and upcycling your clothing. Starting with sourcing
and selecting, what to look for out there for thrifted garments
and vintage garments, the natural dyeing process, preparation, washing and dyeing, and then stitching,
a little bit of hand stitching, a little bit on the machine, and how to make garments
fit your own body. I'm so excited
to teach you these skills, to transform something in your wardrobe into something that's inspiring
and unique to you. I hope that in
taking this class, that it's an inspiration for you to join
the sustainable fashion movement, and buy less, create more, and be more aware. Let's get into the lab
and get started.
2. Project Overview: In this class,
we're going to be taking two old white cotton garments and transforming them
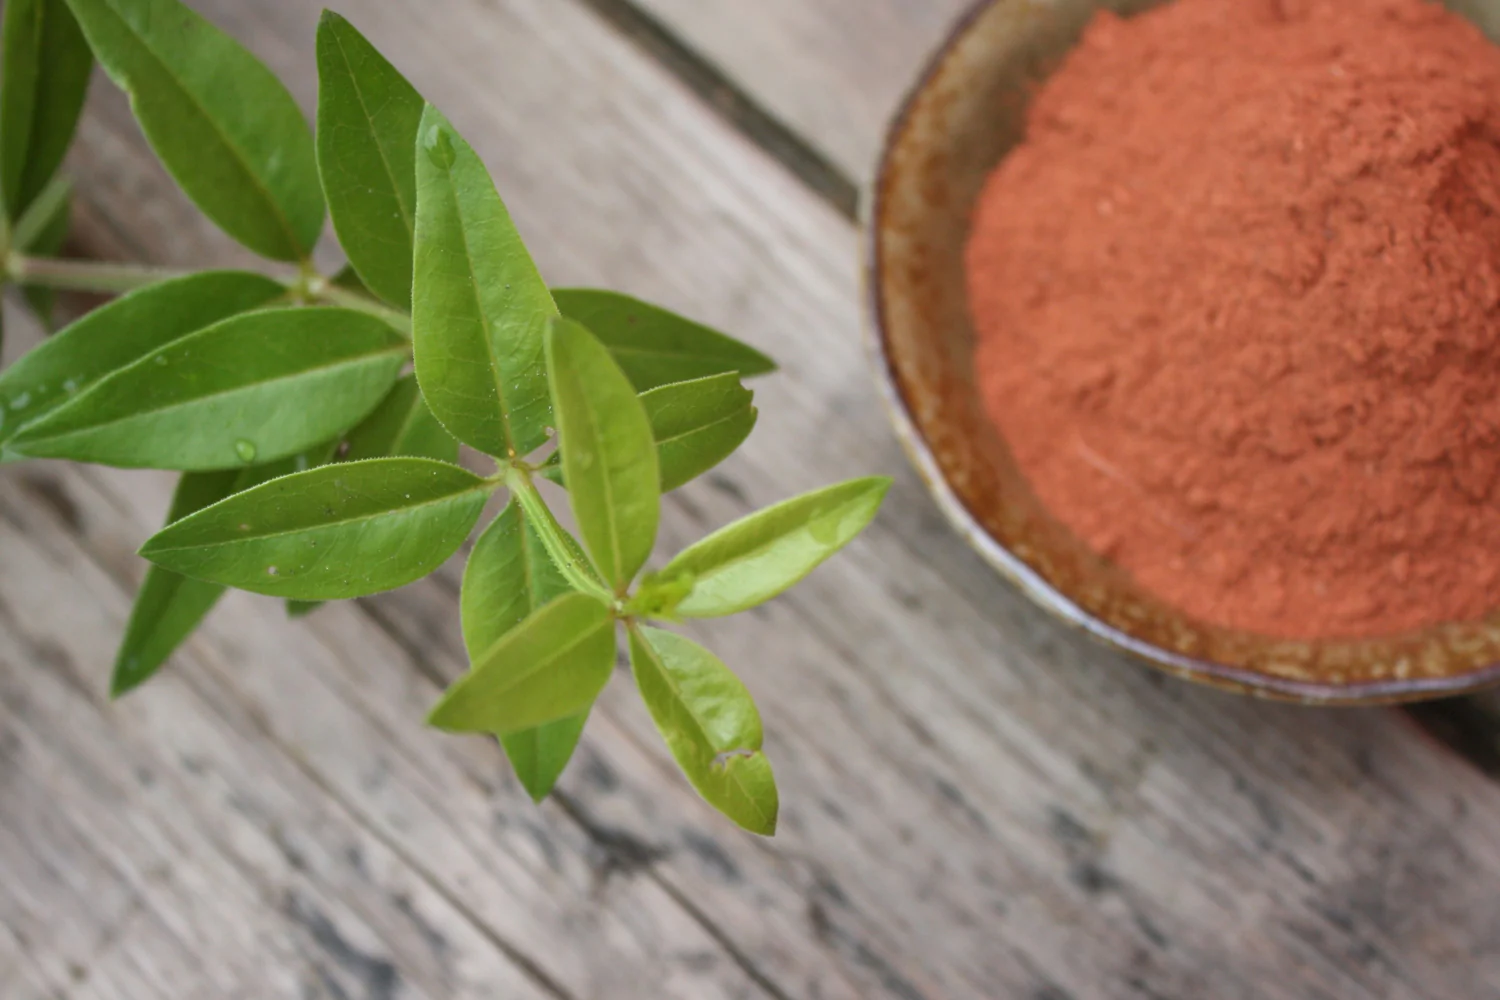
using a natural dye bath of madder root, red, orange,
beautiful purple shades. Then using
some quick hand stitching or machine stitching techniques, we are going to tailor the garment
to fit your body. You can take bits and
pieces of this class and apply it to anything
you might have in your wardrobe, something you might find
that the thrift store, or just your own beginning stages of starting
your own sustainable fashion collection. You can take these skills, mix and match them
and make them your own. This is a practice of care and it's a way
that we can get more connected
to what's already in our wardrobe and have them for much longer, and have them
as pieces of art that we treasure that really reflect
our own personal style. I hope that you can take
this class and apply it in your own way to make your garments
completely unique to you. This class is for everyone. It's for anyone that wants
to take their first step into stitching
or dyeing clothing at all, or maybe someone
that's a little farther along, that you already have
your own collection, but you just want
to dive in and learn a little about
natural dyeing and sewing. The skills we're going to go over: We have natural dyeing. That includes
washing your fabric, mordanting your fabric, caring, and changing the color a little bit, and sewing. We'll be going over
some simple hand-sewing techniques as well as a little bit
of machine sewing. Just unique ways to tailor and think about a garment
in a new unique way. [MUSIC] For our class, you are going to
need a mixture of natural dyeing and sewing materials. I'm going to go over
the full list in detail, all the resources
and where you can find these materials. Don't be deterred
if you don't have all of them. It's no problem
to mix and match or use the materials that you already have in your house
and make the class come to life. You will need
one or two stainless steel pots. A hot plate or a heat source
to heat up your dyes, tongs or spoons to stir the pot, a water source, madder root, natural dye,
or another material of your choice. These can be found
at botanical colors. Alum,
which is our mordant of the class. It can be purchased
at your local grocery store or also on botanical colors' website. Six avocado pits
or tanning powder, a Dr. Bronner's unscented soap
or Dawn dish soap or another textile soap that doesn't have a scent and is pH neutral. Some optional color changers, citric acid or lemon juice,
and washing soda. Also, natural fiber garments. Lighter colors work best. Needle and thread
or your sewing machine, scissors, safety pins, a tape measure or a ruler,
and a pencil. Botanical colors
is an amazing resource for all natural dye supplies. Visit their website and use our discount code
to purchase the madder root for this class or choose another natural dye material
from the variety of options. [MUSIC] Make sure you have a well-ventilated
working area that is not your kitchen. Make sure to use tools that are designated just for the dye lab. Don't use
your culinary pots, please. Also, you can stick to this exercise exactly
as I've laid it out or choose to be creative
in the process by adding other dye materials
into the mix. Now that we've gone
over the whole project, let's dive in and make
some color magic together. [MUSIC]
3. Sourcing and Selecting: [MUSIC] For today's class, we are dyeing two garments. An oversize cotton button up,
and some jeans. Today I have Kisha,
she is helping us out modeling, our oversized button up
and some white denim jeans. As you can see,
they really don't fit her. There are these unisex pieces. There's actually a few stains, and a few moments. I'm really excited
to give you a whole new luck. To bring some color
into these garments, to tailor them to fit your body. Thank you Kisha,
for being our model today. Welcome [LAUGHTER] [MUSIC] When you're sourcing your materials
for this class, you're going to need
natural fiber garments. I've chosen 100% cotton, button up Levi shirt, and jeans to match. It's the best to use 100% natural fiber, but you can also use a mix. If there's a little bit
of synthetic in the clothing,
that's also fine. You can have
up to 50% natural fiber. The little synthetic moment, we'll just make
the clothing a bit more pastel. There are two types of fibers
out there in the world. There is plant fiber, like we're working with today,
cotton, jute, tencel, rayon,
hemp, and more. There is also animal fiber, cashmere, silk, wool. All of these fibers
take natural dyes so well. They also really work well
with tailoring. It becomes
really challenging to work with polyester or synthetic fabrics when you're tailoring. Taking out the stitches
ends up ripping the fabric, or pressing it
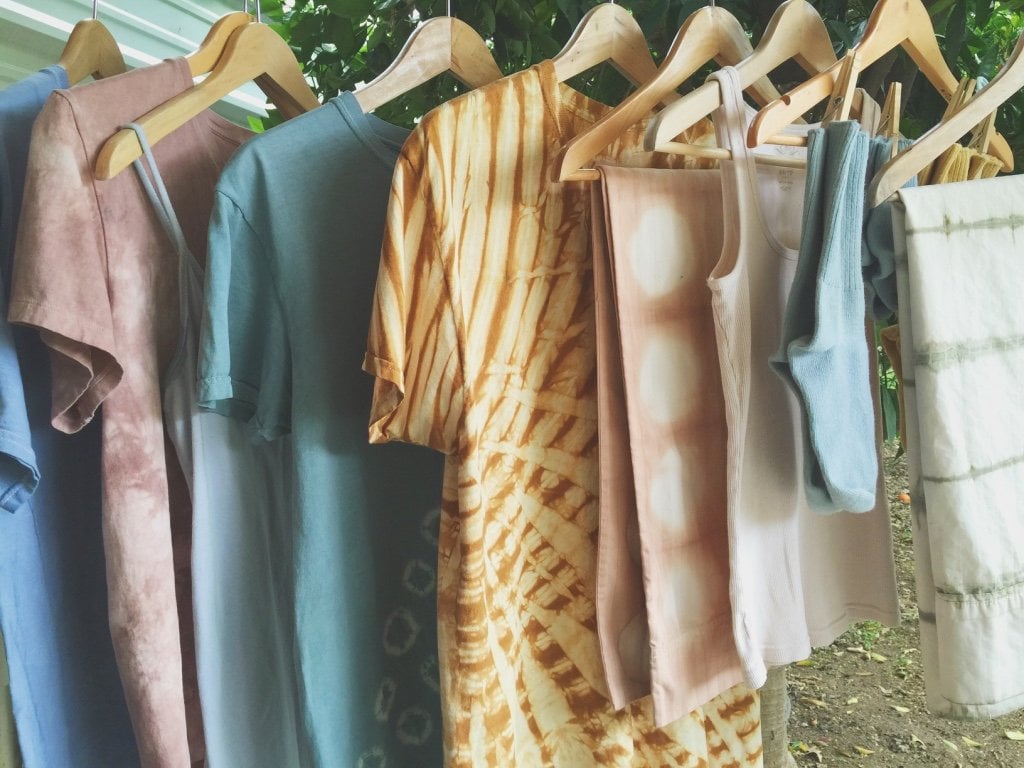
is really challenging. Natural fibers in general are just way better to work with. They are better for our health, and in the end they biodegrade. This is a rack
of upcycled garments, with natural color and some edits to make them
fit my personal style. All of these garments
were white to start, and I've added different bands of color to give them a refresh. When you're looking for garments, you can also look for
really oversize button ups, and then completely
transform them. I cut off this neck, I cut off these sleeves, I took it in a little bit, and now
it's a completely different garment than just what it used to be. This has a little bit
of a muddled effect. When you're sourcing garments, you can also look
for thicker cottons, ones that will last longer. It's really important in the whole process
to just choose fabrics that, you know will last a long time. But you can put through
a dye bath three or four times and they're still going
to hold their resiliency. Silk has an amazing affinity
for natural dye. This was dyed with acorns, that I found in the Hudson Valley. I just needed
a handful of acorns to make this really beautiful taupe color, and to give a little patterning. I love the natural palette
that nature offers us. It's always stunning together. You really can't dye one color
that doesn't go with the other. The nature has offered us this full spectrum of pigments that end up
just being really cohesive. In today's class,
we're using madder root, which is a wonderful plant that dyes warm shades of orange, red, terracotta,
sometimes even purple. This is an example
of a shirt dyed with madder root. I use lemons
to create this modeling effect. This shirt was also bundle-dyed
with madder root, a little bit of cochineal, and some onion skins. It creates a really lovely texture. Bundle dyeing is super fun. But today
we're going to be creating a vat to dye one solid color. I also really love indigo. It's an amazing plant, that dyes
these really stunning shades of blue. It is a very rare plant. Indigo takes a lot of water, a lot of resources, a lot of labor to create
this beautiful blue pigment. Today we're focusing on a plant, madder root,
which takes a lot less water. It's a bit more sustainable. As much as I love indigo, the more I researched about it, the more I realized
that it's better to try out some different options like dyeing with food wastes, or dyeing with other plants that don't take up
so much resource in our world. With all the skills
we're going to learn in this class, you can totally renew your wardrobe. Give yourself some time to dive into natural dyes and soon you can have
a full rainbow wardrobe. Upcycling your wardrobe will not only give you more connection
to what you're wearing, allow you to care more deeply about the clothing
you have in your closet. Spark conversations
with others who compliment you, but it will also spread rainbows and happiness into the world without saying a word. [MUSIC]
4. Preparing the Fabric: [MUSIC] Welcome to the first steps of preparing your garment
for the natural color. These three steps
are really important to ensure that your colors
last a really long time. The question I always get are, does natural dyes fade? It's true that
there is some fading occurring with sunlight
and constant washing. But if you do
these three preparation steps, it will really make your colors
last a lot longer. First, we have our wash, which will be washing
our fabric in boiling water with
a soap free of fragrance. Second, we have a tannin soak. We're going to use
a material high in tannins. I've chosen avocado pits. You can also choose any other material
that tannins are present in. You can see our resources
for more information. Third, we have aluminum. Alum you can buy
at your local grocery store, you can find it in
the grocery section, or you can purchase
at Botanical Colors. It's the third
and really important step. It's called a mordant. A mordant is a binding agent
that fixes to the cloth in the boiling process that allows a magnetic connection with the natural color and the alum, making sure
that the color stays in there and your colors
are vibrant and long-lasting. Let's get started. [MUSIC] Now we're going to
wash our garments. First, fill up your pot
with normal water. Make sure you're using
a stainless steel pot and you really don't want it
to be used for your kitchen. This is just for the dye lab. First you're going to
add your garments. I'm adding my shirt and pants
into the pot of water. [NOISE] Make sure your garments
are free of any tags. [NOISE] You want to leave all the garments
just enough room to float around so make sure your pot is big enough to have
your garments move freely. If you need to use two pots,
that's fine. Just make sure they can move freely and they're fully submerged. Great.
Next you're going to add your soap. This is
a Dr. Bronner's unscented soap. You can use pretty much
any neutral textile detergent. You can use Dawn dish detergent, just something
that has no scent, no additives, no extra stuff
that's going to get stuck to the garment
and interfere in the dyeing process. In the textile world, it's called a pH neutral soap. [NOISE] I'm adding one big tablespoon
for each garment. [NOISE] Make sure
you stir your garments. Then cover them with a lid and place them
on your heat source. [MUSIC]. Now that you've washed out
any grease or dirt and grime
on your natural fiber garments, they're ready for the tannin soak. In this pot,
I have boiled six avocado pits, three for each garment
for about 30 minutes to an hour. The color really started to come out. The water will start to look
a little tan and beige, maybe even a little pink. That means it's ready and that means the tannins have been immersed into the water
and they are ready for your garments. You want to remove
all avocado pits so they don't stain your garments. If you leave them in,
they'll end up just leaving little marks
on your garments here and there. It can be cool. But for our project, we're going to take them out. One more. Perfect. Now, add your natural fibers garments into the tannin soak one by one. [NOISE]. Make sure there's enough room for your garments to move around freely and that all of the fabric
is submerged under the water. [NOISE] These have been boiling
for a little bit, so the water is pretty hot. Make sure you're careful
when you are putting your garments in the tannin soak. [NOISE] Doing the tannin soak is really just going
above and beyond. It's semi optional. You don't have
to do the tannin soak, your garment will still receive color if you skip this step, but it'll make sure
that your color is vivid
and really long-lasting. It creates a bond
with the alum in the next step to make sure that your pigment locks inside of the fiber
and doesn't rinse out. Now that your garments
are fully submerged, let them sit a minimum of one hour. But if you want to, they can sit overnight and you can revisit the project
in the morning. [MUSIC]. The last step of preparation is boiling
the alum into your garments. You will need about 20 grams of alum per 100 grams of fabric. That works out to about one eighth of a cup per large garment. I have here one fourth of a cup. I'm going to add this to my pot of hot water
until it is completely dissolved. [NOISE] Once your alum is completely dissolved, it's ready for your garments and to go back on the hot plate. After an hour of my garments
sitting in the tannin bath, the water has cooled down
so I can pull them out, give them a gentle squeeze [NOISE] and add them directly in my pot with the dissolved alum. Make sure to add them
one by one, and that there's enough space for them to move freely in the pot. [NOISE] Now that your garments
are fully submerged, the alum is in, you're going to put your lid on
and move it over to the hot plate. After one hour, you can switch off
the hotplate and let your garment cool
in the alum bath, then it is fully ready
for the natural color. This is the final step for the preparation
of our garments. What's so great about
natural dyeing is that these garments
will be fully prepared, no matter how many baths you want to do with these garments. So yes, we're going to dye them with madder root in this class, but they're prepared
to do an over dye of yellow or an over dye of
purple in the future. There's no need to repeat these steps
on these garments ever again. The alum and the tannin
is locked into the fiber, so it will always
attract natural color going forward. That applies to all garments
that you want to upcycle. You can do this preparation, let your garment dry
and put it on the shelf for later. It will always be ready
for the natural color. That's it. We completed all the preparation
for our upcycle natural dye project. One, we washed in boiling water, two, we did a tannin soak
using these leftover avocado pits. Three, we used alum to boil into our fiber as the mordant to prepare it
for the natural dyeing. In our next lesson, we're going to jump into
making the color. We're going to use
madder root to make a dye to submerge our garments.
[MUSIC]
5. Adding the Color: [MUSIC] Welcome to the lesson all about making your dye bath. You will need
your natural fiber garments that are pre-washed
and pre-mordanted. You'll also need
your natural dye material. In our class,
we'll be using madder root, which makes
really beautiful shades of pink, lighter pink, and sometimes red. You also need a measuring cup, something to stir, and a pot. In this lesson,
I've also included some extra really fun
color-changing additives. You don't have to use them at all. You can just use one pot, your madder root,
and your natural fiber garments. But if you want to shift the color a little bit away from pink, you can try to use
soda ash or citric acid. Soda ash or washing soda is a common household cleaning product. Basically, it shifts the color
to be a bit more purple. Citric acid
or lemons is basically a acidic additive to the bath that makes the color shift from pink to more orange
and Terracotta. I've mixed two tablespoons
of each in with a little warm water
so I can add them to the dye bath as I'd like.
Let's get started. The first step is to measure out your madder root
and heat up your pot of boiling water. For each garment, you will need about one cup
of madder root that will give you a really beautiful
medium shade of the madder. If you wanted to use
a little bit more, you can go darker. Or if you want to use
a little bit less, that's fine too. You just get a lighter shade. For our recipe today. I'm just going to measure out one cup for the first pot and one cup
for the second pot [MUSIC]. Now that you have
your natural dye material in both of your pots, you can bring the water up to a simmer, stirring occasionally. The bath is preparing itself
[MUSIC]. After the madder root
has had a chance to cook, and the color starts
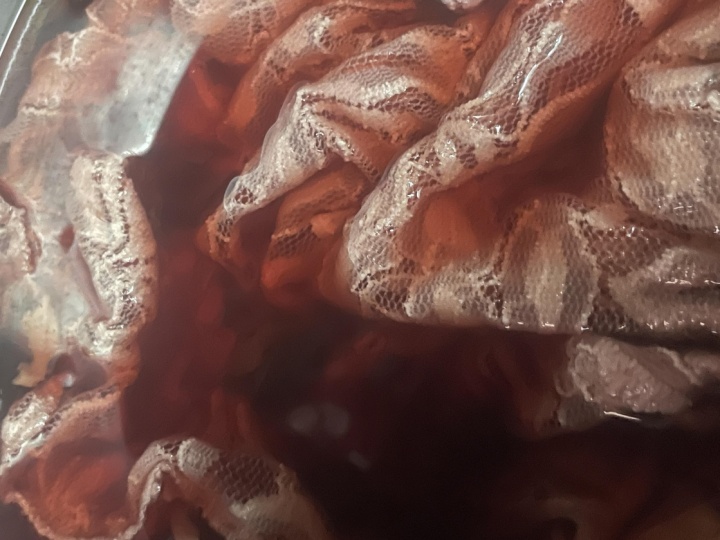
revealing itself. It's time to add the garment. Slowly add your garment
into the dye bath, stirring occasionally and making sure your garment floats freely. You'll start to see
the color develop right away. The smell is amazing. Stir thoroughly to make sure
every part of the garment is fully saturated
[MUSIC]. Push all the air bubbles
out of your garment. Make sure the dye bath
is completely covering every part [MUSIC]. After your garment has achieved
the color that you want, it's fully saturated
with the beautiful red, you can start to add
your color changers. I'm going to add
my citric acid solution into this pot
to shift the color. Citric acid is found
in all citrus fruits. If you don't have citric acid
to mix with a little water, you can just squeeze
four to five lemons to create the same effect. Move the garment over a little bit and add the citric acid
to the dye bath. You don't want to pour it
directly on the garment because it will start
to shift right away. You can already see
that the color has changed to a beautiful pumpkin orange. Continue to stir your garment and watch the color change
before your eyes. Now our garment has transformed
into a peachy orange color. Now, I'm going to add
the washing soda or soda ash
into the other pot of color. This will shift
into a purple-muted hue. You can already see
a subtle change in the dye bath
immediately when you pour in the soda ash. Even if you don't see
the change right away. Let your garments sit in this new solution
for up to an hour to let the change take place [MUSIC]. Some tips in setting
up your dye lab. One, make sure you have designated tools
for the dyeing process. Don't use your kitchen stuff. Everything we're using
is non-toxic, but in large amounts, it can just become abrasive and you really don't want to eat madder root. You don't want to eat citric acid. It's not necessarily edible, but it is all nontoxic. Just make sure you have your space, your designated tools, and always use
stainless steel utensils to stir, or wooden. That's because
any other metal might react with the natural dye bath and totally change the color. If you perhaps have
a tin spoon or a copper spoon, there'll be a reaction in the pot. Your pink might quickly shift to gray. You want to make sure
you use non-reactive tools, like your stainless steel pot, your stainless steel
stirring utensils, or a wooden spoon. More time yields a darker shade. The madder root will start out
like a really light pink and over the next hour
or 2 hours or even three, the color will start to develop and you'll get richer
and richer shades. If you really want a deep color make sure to leave your pot overnight and just stir
your garments occasionally, you can turn the heat off
after about an hour, but just let them sit. The color will continue to deepen. More time equals a richer color, but too much time
equals a moldy dye bath. Make sure to take them out before five or six days
because you will start to get
a little bit of a smell. It is a natural material. Now that your garments are simmering in the madder root bath, we're going to move on
to the next lesson, which is about taking your
garments out of the bath, washing them, and how to care for your naturally dyed garments
[MUSIC].
6. Wash & Care for Natural Dyed Clothing: Welcome to this section
all about washing your garments. In the last lesson, we naturally dyed both of our upcycled pieces and now we're going
to rinse out any excess dye. You have two options. One, you can hand wash your clothing
in a cold to lukewarm water using a pH neutral scent-free soap
or two, you can throw them
in the washing machine for two cold cycles. I will be hand washing the garments. I prefer this process
because you really get to know where out with the color if you wanted to do
another dye bath, so you go a little bit deeper
and get a deeper shade. You could do it right then and really know
what the garment looks like. But if you are trusting in the process
and you're little short in time, throwing it in the washing machine
with the same soap, pH neutral and scent free
is a great option. I choose to use this soap, mine is a Dr. Bronner's unscented. But basically you can use any textile detergent that comes without any dyes
or any perfumes in it. You can even use
dawn dish detergent, which doesn't have
any scent and it's actually really neutral and perfect
for natural dyeing. It's important to use the soap
because as we know, natural dyeing
is sensitive to the pH of the dye bath
and it can change the colors. Our naturally dyed clothing
will forever be sensitive to a shift in acid or a little splash of soap that
might throw off the pH level. Overall, for your laundry
and care of your garments, it's best to use soap that doesn't have perfume
or dyes in it. It's best for your health and it helps your clothing
last longer. I like to use
one full tablespoon of soap per garment. Caring for your clothing overall is the most sustainable practice. It's so important to choose the cold cycle
on the washing machine, hot water one, will make your naturally dyed garments
fade faster and two, clothing overall will degrade much quicker
if you're using hot water cycles. It doesn't only use
a ton of energy, but it also makes your clothing
degrade faster. Try to use the cold cycle and two think about
hanging your clothing to dry. Whether it's outside
or in your home near your heater it really increases the longevity
of your clothing. Not only
you're naturally dyed garments in this class, but clothing overall. Let's start the process. It's super simple, I'm going to bring
both of my garments over to the sink, dump out the excess dye
and give them a rinse. [MUSIC] That's it.
Our clothing is hanging to dry and remember, if you are short on time,
don't worry, after clothing is fully rinsed, just throw it in the dryer. [MUSIC]
Now our garments are completely dry. You can see we have two stunning shades that were both created from the madder root. The top was in the pot
where we added the citric acid, also lemon juice and then the pants were in the pot
that we added the washing soda. You can see the huge variety of color that you can get from just one dye material
by shifting the pH of the dye bath. If you wanted to get
really intricate with this process, you could even buy pH strips and record the exact pH
of each dye bath. But it's not necessary when you're just having fun and you're looking to explore
new colors and get started. Our next lesson, we are going
to dive into hand stitching techniques to apply to our governments
to make them fit your style. [MUSIC]
7. Stitch it Up: Straight Stitch: Welcome to stitch me up. In this section,
we're going to go over some simple hand sewing techniques to transform oversized garments into something that fits your style. For this class, you will need some simple sewing materials
to get started, a tape measure or a ruler, a pen or pencil, some sharp scissors
to cut your fabric, optional, some small scissors
to cut the thread, a few safety pins for the fitting,
some thread. You can use
either a thin thread if you're using a lightweight garment
or for this class, I've chosen to use
embroidery thread because both of my garments
are a little bit more thick. Some assorted needles,
you can purchase a pack of these at craft store
or even a pharmacy, or your local bodega, will have a pack of needles. I've chosen to use ones from the craft store
that are a little bit thicker. It's easier to learn with a larger needle and it works really well
with the embroidery thread. In this lesson,
before we get into the real grommets, I'm going to teach you
two simple hand sewing techniques that you can apply to anything in your wardrobe to change the style. First, the straight stitch, and second, the magic invisible stitch
or the ladder stitch. [MUSIC] Here we are
at our sewing station. Make sure you have
all of your materials, you're in a well-lit space, and you have
two pieces of fabric to test out your hand sewing techniques. First we will start with the straight stitch
on our first fabric. You're going to take your ruler and draw a simple straight line where you would like your stitch. Next we're going to fold
your fabric in half. [NOISE] This stitch is mimicking what happens
on a sewing machine. We are stitching
two pieces of fabric together in order to make a seam. Now take your needle
and thread and thread your needle. Some tips
with threading your needle. First wet the end of your thread. Next, use your very sharp scissors to cut the thread
on a slight diagonal. This helps push the thread
through the needle. If you just have a blunt end, it's really hard
for the thread to go into the needle. Hold your thread
at the very end, so you're just having a little centimeter
of the threads sticking out and slowly push the thread towards yourself
and through the head of the needle. Now that you have your thread, thread into the needle, you want to make sure to pull maybe two or three inches of a tail so your thread doesn't slip back
through the other end. Now you keep that top loose and you want to tie a knot at the end. For this exercise,
your thread only needs to be about 12 inches, maybe 14 inches long. [NOISE] Now you want to simply make a knot
at the end of your thread. You can do that by simply tying one and then another knot. You want a double knot here. Or you can use this method which takes
a little bit longer, but with practice
[NOISE] you can get it. It's the easiest [NOISE]
way to tie the knot. You take two fingers, wrap the thread
around the two fingers, roll your thumb over your index, move your middle finger
out of the equation, and then you carry
a loop like this with a twisted thread,
loop, loop, loop, and then pull the tail
through pull and you'll create a double knot
and that'll be thick enough
to not go through your fabric. Great.
Now that you have your thread, it's longer than the amount of sewing that you want to do. You want to start by putting your needle into the fabric and pulling through,
just like that. Your knot will be big enough, so it's not going through, and then you want to use the line
that you've drawn to just go in and out of the fabric
all the way up your seam. You can do two
or three stitches at a time. Just make sure your stitches are about
one centimeter or less. That will make sure your seam is tight and you don't have
any holes in your garment. Use both hands in the process to feed the needle
in and out of the fabric. You always want to sew
away from your body. It becomes a little
bit more comfortable if the needle is facing directly away from you instead of trying to sew
towards yourself, and l'm also more comfortable
on an angle, a little bit angled
away from my body. You want to pull the thread
tight but not too tight, so it starts to gather. You want to make sure
the fabric is always smooth, but your thread is tight
and not making any loops. As I get to the end of my line, I'm going to finish off
this seam with a knot. I've stitched
all the way up the line and now I'm going
to create a knot at the end of the fabric by grabbing both pieces
of the fabric in one place, pulling it through, and then inserting the needle
into the loop that I've made. That will be one knot
and you just do that again
in the exact same place. Pick up some fabric, go through with your needle, put your needle
through the loop and pull tight. Now I've created
a double knot at the end of the fabric
that won't come out. From here,
you can snip the thread [NOISE] and you've created
your hands stitch seam. You can open it up, and will bring it over
to the iron to give it a press. Now that we've done
our straight stitch, we're going to move on
to the ladder stitch.
8. Stitch it Up: Ladder Stitch: [MUSIC] Start with a new piece
of fabric and you want to make sure
that your fabric is around the same weight of the project
that you're working on. I've chosen a cotton canvas
because I'm working on denim and I'm working on
a thick cotton button up. It's a great practice to just use the same fabric that you're going to get into
on the real project. Then you know
that your tools are the right ones, your needle is the right size, and it will look the best. It's called the ladder stitch or a nickname
is the magic invisible stitch. We're going to start
with our needle. It's already threaded. For this stitch, we'll only need about again
12 inches or so of thread. I'm [NOISE] going to cut mine
a little shorter and I'm going to again
tie a knot at the bottom. Great. For this stitch, I'm going to be using
a two inch measurement. This would be
for example if you wanted to take in your garment
by two inches. I'm going to start at the top
and measure out two inches. I'm also going to draw a line
in the middle at one inch. Great. Now from here, I'm going to draw a line down the center
indicating the center line, my stopping point, and then I'm going to connect the two outer lines
to the bottom. Basically this technique
is like sewing a dart. A dart is a tuck of fabric
that makes your garment fit better. There are darts
found at the breast, there are darts found
sometimes at your waist, anywhere where the garment needs to be tucked in a little bit. It's just a little pinch of fabric that you'll see
come to life very soon. I'm going to connect
these top measurements to the bottom and you'll see I now have a triangle
and I'm going to stitch the two outer lines together to pinch in
this amount of fabric. We will start from the bottom and stitch
all the way up to the top. I have my thread
with the knot at the bottom. For this, this will be
the outside of the garment, this will be the inside. That's why
this magic invisible stitch is so handy because you can stitch on the outside
of the garment without seeing the stitch.
Let's get started. First, I'm going to, from the inside of the fabric, put my needle and come up
right at the bottom point. Now, I have my knot
on the inside and I have my needle coming out
on the outside of this fabric. [NOISE] You're going
to start by taking one stitch on the right side and then the second stitch
on the left. I'm going to continue this rhythm where I'm taking one stitch on the outer line and then the second stitch
on the left outer line. You want to make sure
you're going in at the exact area
on either side of the line. You'll start to understand
as I stitch a little bit more. You're not pulling
this stitch tight yet. Basically you're just creating a ladder
all the way up this triangle. You're creating lines of thread that we're eventually
going to pull tight, but at first
you're just going back and forth, making sure I go into the right line
at the same exact spot that I go into the left doing one stitch
and then to the next. The smaller you do your stitches the more tight
that this will become. But as long as they are
about one or two centimeters long,
the stitch will look great. You can see my ladder threads
are starting to get a little longer because they're filling in
the whole triangle. You just continue this method all the way up the triangle. [MUSIC] Now we've reached a point where our thread
is getting really short and it's time
to pull through the stitches. Two lines of stitches
on the back and on the front, we have our ladder stitch going all the way up
in and out both sides. Now I'm going to pull this thread, I'm going to hold the bottom, and I'm going to pull
the thread through. It's starting to bring
those two areas together. Pulling, pulling, pulling.
You can see it's creating a seam
all the way up those two lines. This is what the front looks like and this is
what the back looks like. It's pulling out that amount of fabric in the little dart. Now that you've pulled through, we're going to continue on with our same stitching method, where you came out of the right side, you're moving into the left side. [NOISE] Now with this technique now that you've pulled
through your thread, you want to make sure
you're only picking up one layer of fabric out of time. You're not sewing through two layers. [MUSIC] Again, it's time to pull through. We pull the thread through. You want to do this
every so often. It gets really hard to pull the whole thread through at the end. I actually just broke
the thread because I pulled on it
a little bit too hard. That's really important.
In the ladder stitch, you don't want
to pull your thread too hard that your thread breaks. But it's okay. We can just undo it a little bit and we're going to tie it off at certain points
where we have enough thread
and continue our project. I'm going to get
a little bit more thread to continue our stitching. [NOISE] Again,
I'm going to thread my needle. We're going to make sure
our thread is nice and tight all the way up to the point
where our thread broke. Here you just want
to tie off your thread. At the end of this thread, you attach it
to the other open thread, one, two. I'm going to try a double knot. Great. [NOISE] You want to snip the ends and then continue your practice. Continue to sew all the way up. We are at the end
of our ladder stitch and we have a few more stitches at the top to pull through. I'm just going to pull. If they get a little bit stuck, you can go back in there, the other end of the needle,
pull them up. You just want
to make sure all of them are tight, pulling this through. Great. You can even go towards the other side and see
where we've stitched the dart, [NOISE] on the side as well. This is what your final seam
will look like. You'd bring this over to the iron to give it
a good flat press. You're all set.
You've sown your first dart. Make sure you tie off your thread
at the final points, the same as the other. You just run through once, put your needle through the loop,
pull tight, and pick up a little fabric, run it through another time,
pull it through. That is a double knot, so you can snip it. [NOISE] You're good to go. [NOISE] These two hand sewing techniques
that we just learned can be adapted
for your sewing machine. I'm really excited
to now take what we just learned and apply it
to our real garments. [MUSIC]
9. Taking Measurements: Everyone knows
that shopping second-hand is great for your budget
and great for the environment. But a lot of the times
you can't find something that truly fits your style
or even your body. I'm really excited to just go into some simple alterations, measuring tricks and tools that you can apply
to your own clothing and be able to expand what's possible when you're thrifting and looking
for a secondhand garments. I like to do my measuring
with a measuring tape, but if you don't have one at home, you can also use a ruler or just a piece of string
to get the measurement. Also, when you're measuring, make sure
you're in front of a mirror, you are in a well-lit environment and you're not squeezing
your clothes too tight. Give yourself a little bit
of breathing room and don't stress out too much about having the perfect measurement. A few alterations can go along way. You don't need to tear apart the whole garment
and put it back together, make it completely new. There can just be really simple measurements you can take, even taking in the side seam one inch
or taking up two inches on the pants can really make a huge difference
in your proportions. Make sure you take your time, really study the garment
in the mirror or take photos of yourself wearing the garment so you can make sure to fit it to your style
and make it unique. [MUSIC]
In this section is a class, we're going to go over
some key measurements to take
when you are tailoring your clothes. We are going to start with the shirt
and then move down to the pants. I already love the way
the shirt is fitting Kisha, but I feel like the collar is just a little bit too classic
for her style, so I'm going to chop the collar off
and distress the top. That is just one detail that doesn't need
any stitching at all. It's just like a little flare that I think will really match your style. We're going to take up the hem on Kisha's shirt
about four or five inches, so the whole hem of the shirt
will become a high-low hem. We're going to get rid
of this logo right here and stop just about two inches
from the bottom button. I'm going to put
a safety pin at that mark. Now I'm also going
to take in the side scenes. Just a little bit, Keisha, hold up your arm here. Perfect. There's just
a little bit too much fabric here. We're going to take it in
about two inches here, and then for the other side. I'm making sure to line up with the new hem
of the garment. [MUSIC] Those are
our three simple alterations on Kisha's shirt today, we're going to cut off the collar, take up the hem
and take in the side seams. Now let's move on to the pants. The pants are really not fitted. We are going to keep the loose. Look, but we're going
to take in the sides. Basically, you can turn around. The back of the pant
also has a lot of room, and the first idea
you might have is to take in the pants
from the center back. That's actually going
to make the pants fit, not so well. You're going to get bunching in the back
and it's not the best place. We need to take the pants in
on the side seams. Turn to the side.
Right here on the side, we're going to pinch in and safety pin up until it fits our waist. Putting one safety pin
on the side, turn around to the other. Great. We're going to put
one safety pin on this side. Great. We have
a nice fitted waist here, we don't have any extra. We're going to use
a simple hand stitching technique down the side to zip in the waist. The next measurement will be
on the inseam of the path. I love to show a little ankle. I always think
when you're wearing cute sneakers, why not just show off
the top and maybe hem up just a little shorter
than you would think. I'm going to measure the inseam. Would you mind opening
your legs a little bit. Starting at the crotch of the pants, all the way down
to where I want the bottom, which will be 26 inches. Great. I'm going to mark
26 inches for the inseam. Here on the sides we have two inches and inch and a half. I didn't pin the sides equally, but we're just going
to split the difference, so once I just pinned at two inches and one side
is pinned at an inch and a half. That means we will take an inch and three-quarters of both sides of the jeans.
[MUSIC]
10. Alterations: Hand Sewing: [MUSIC] Now that we've had
our fitting with Keisha, we know exactly
where we want to stitch our garments. I have the safety pins
where we pinned taking in the shirt
on both sides. I'm going to button up
the shirt to make sure everything is even and move over
to our first side seam. [MUSIC] In our class, we've learned two types of stitches, the ladder stitch
and the straight stitch. I'll be using
the straight stitch on the shirt because it's a simple seam that I want to recreate and it can be done
from the inside out. Right now I have the shirt
completely inside out. I've drawn one line and I'm able to sew through
two layers of fabric at once, to just create the seam. It's a simple stitch that's basically recreating
a sewing machine. [MUSIC] The second stitch that
we'll be applying to our pants, the latter stitch, it's great for pants
because you don't have to flip it inside out and do the guesswork
of where the pocket is or where the zipper is because you can't stitch
over the zipper. You can't stitch over
a grommet that are in the jeans. Use the ladder stitch
to stitch from the outside of the garment
so you can see what's going on and you don't have
to flip it inside out. [MUSIC]
11. Alterations: Machine Sewing: [MUSIC] [LAUGHTER] We both look great, right? Head to toe,
natural dyes, thrift finds. We are fresh out of the dye pot
and tailored to fit. Love the way the collar looks,
it's really simple. You just cut off the pointed collar
and remove the small buttons, but it makes such a difference. It really shows off her face, looks more modern, little bit of unisex flare. The high-to-low hem really works
for this outfit. Looks great on your frame. It shows off the full length
of your legs, so you look long. And then we have the hem shows off a little flare
with the socks. The hem here with the raw edges and the pants are now tailored to fit the waist.
You want to show the back? Now we don't have a gap, we just have a little loose fit. They fit nice. That's it for stitch me up. That's it for our sewing tutorial. Very simple alterations that can make your outfit
look completely new. [MUSIC]
12. Conclusion: We did it.
We fully transformed these garments. We went from an oversize, stained white button up shirt and some big Levi jeans
to a fully new, unique, colorful, organic outfit. I'm really excited
to see how you take all of these different skills
and tricks and tools and apply them
to something in your closet or something
you find at the thrift store. Make sure that you upload your whole project
to the resources and the project folder on Skillshare and please send me any questions
that you might have along the way. I know we covered a lot, but it's possible
that you can even just take one small piece of this class and make a project
completely unique to you. Please follow me
@hanoux_ on Instagram, or go to my website, hanoux.com, sign up
for my newsletter to find out all about my new creations, workshops, and tutorials. I'm so excited for you
to start your journey, jumping into making color magic, and upcycle possibilities. [MUSIC]
 Hannah Ross, Natural Dye Artist & Fashion Designer