Transcripts
1. Introduction: Hello and welcome to this
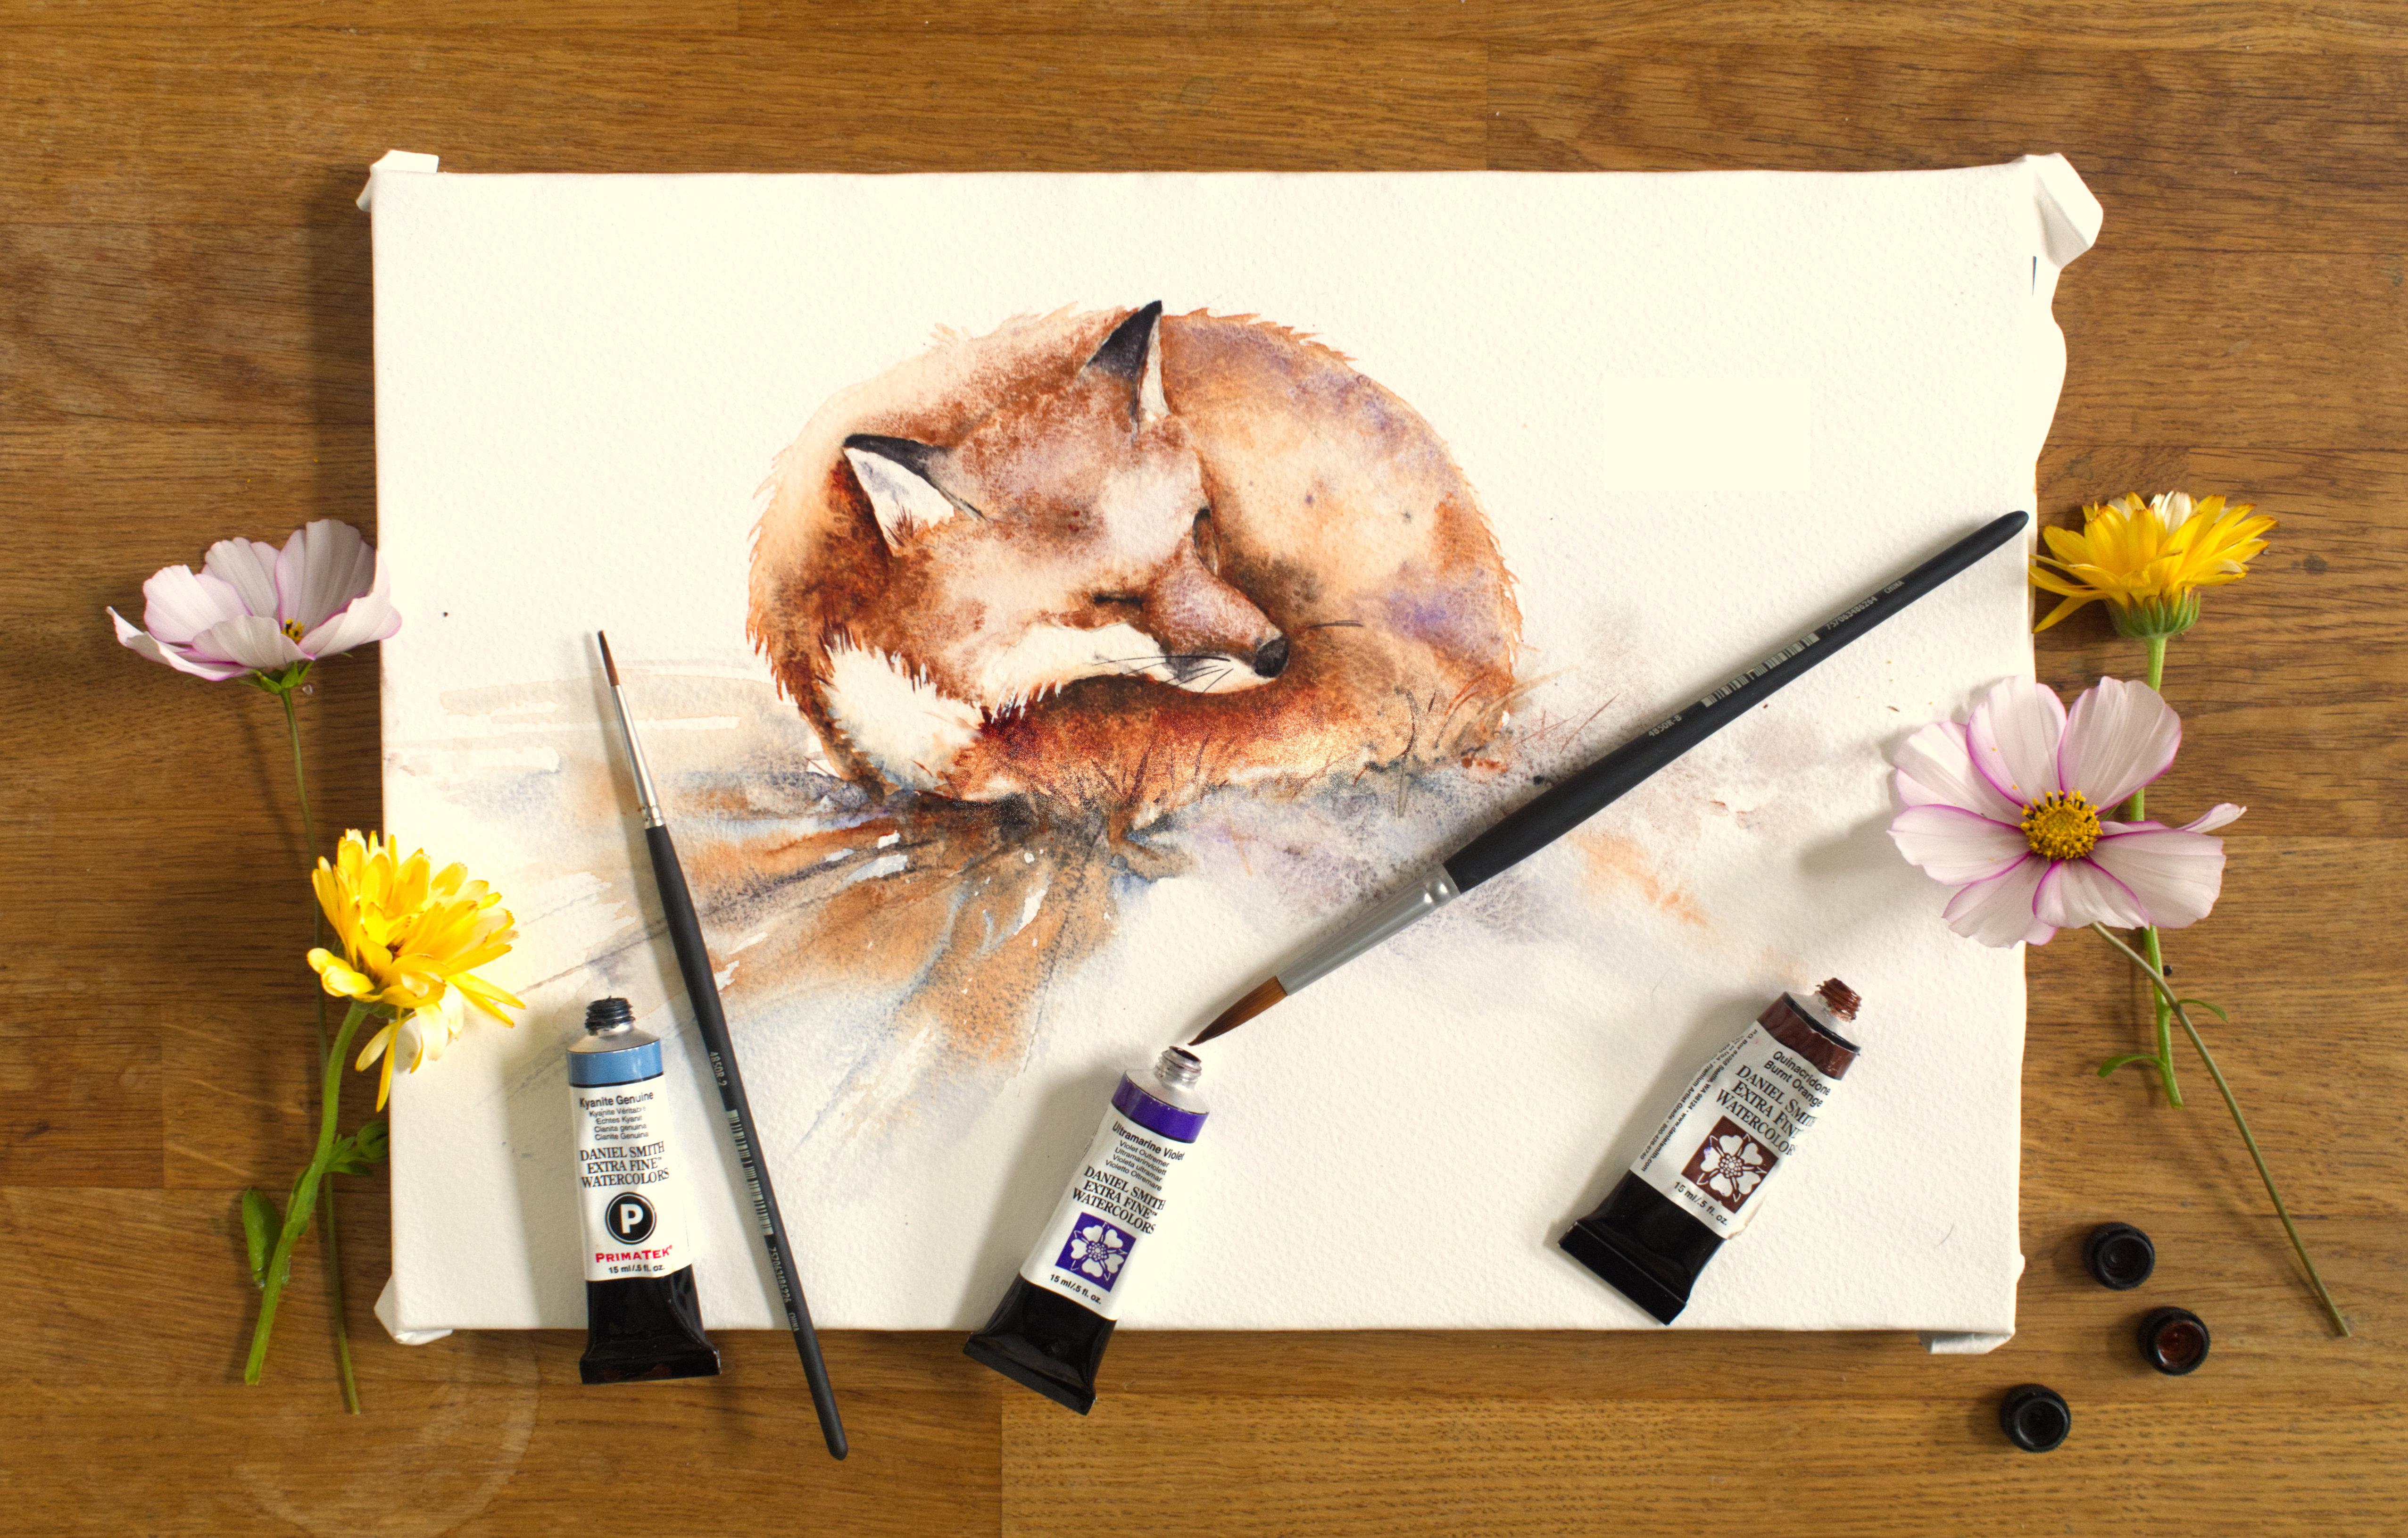
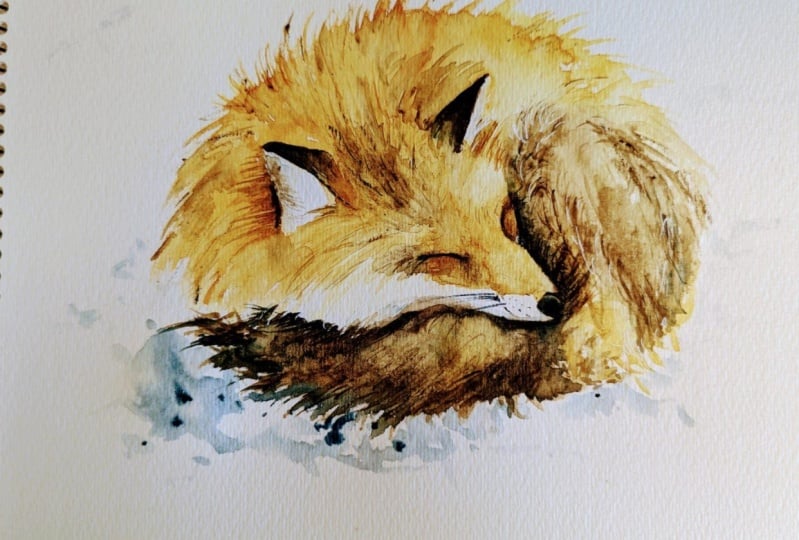
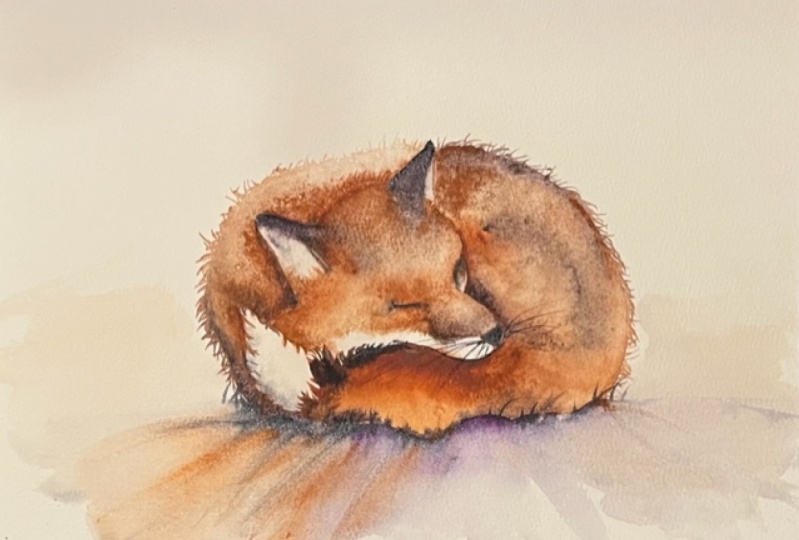
intermediate watercolour class. Today we're going to be painting this peaceful
sleeping fox together. I know you're going
to love painting her. There's a lovely
tranquillity about her. I'm Jane Davies. I live, paint, teach, and walk my lovely spaniels in the beautiful South Downs
National Park, England. Over the last 15 years I've taught myself the
free flow techniques that you see today. Not having been to art school, finding my own way has been
fun and sometimes daunting, but it has allowed me to
develop my own style. This has led me to teaching others either on a
one-to-one basis or as part of a group in a wonderful studio in the
heart of the South Downs. I also run a successful
commission-based business, painting pet portraits and wildlife art in my
own home studio. In all my classes, you will follow
along in real-time where I can guide you
to keeping your work loose and fresh
without over fussing. I have over 20 classes on
Skillshare now. If you're
just starting out, my three beginner
classes will guide you. Then you'll find over
20 masterclasses covering a wide range
of beautiful subjects. In each one, I'll share the techniques that I use in
my own professional work. We'll have a lot of fun together and you'll gain the
understanding and confidence to
incorporate everything you learned into your own work. Plus I'll share a few of
my tips and tricks along the way too As ever, I have provided you with
A fabulous reference photo of her along with the downloadable template
for you to print out. The template gives you a stress-free drawing so you
can just enjoy painting. I'll show you the joy and
simplicity of placing multiple colours
onto the wet paper all in just one layer. There's a lovely,
easy technique I'm going to show you to create that mixed textured foreground. I'll be guiding you through
adding strength and detail while still
working wet on wet. Of course, I'll share many
of my professional tips, tricks and musings as we work our way through
this class together. If you'd like to learn more
about me, all my work, please pop over to my website at janedavieswatercolours.co.uk This can be found
on my profile page, along with links to my
Instagram and Facebook pages. I'm very active on my
social media pages where I love sharing my art, especially on stories,
with many ideas, works in progress and
tales of studio life. I really hope you will share all your paintings on the
Projects and Resources page. As I love seeing you masterpieces And don't forget,
I'm here to help if you get stuck or
have any questions. I want you to experience
that buzz of painting in his liberating wet on
wet, loose style. So come and join me.
2. Materials: Well, welcome along
to this little peaceful Fox. Look at her snugged up. So I'll show you the
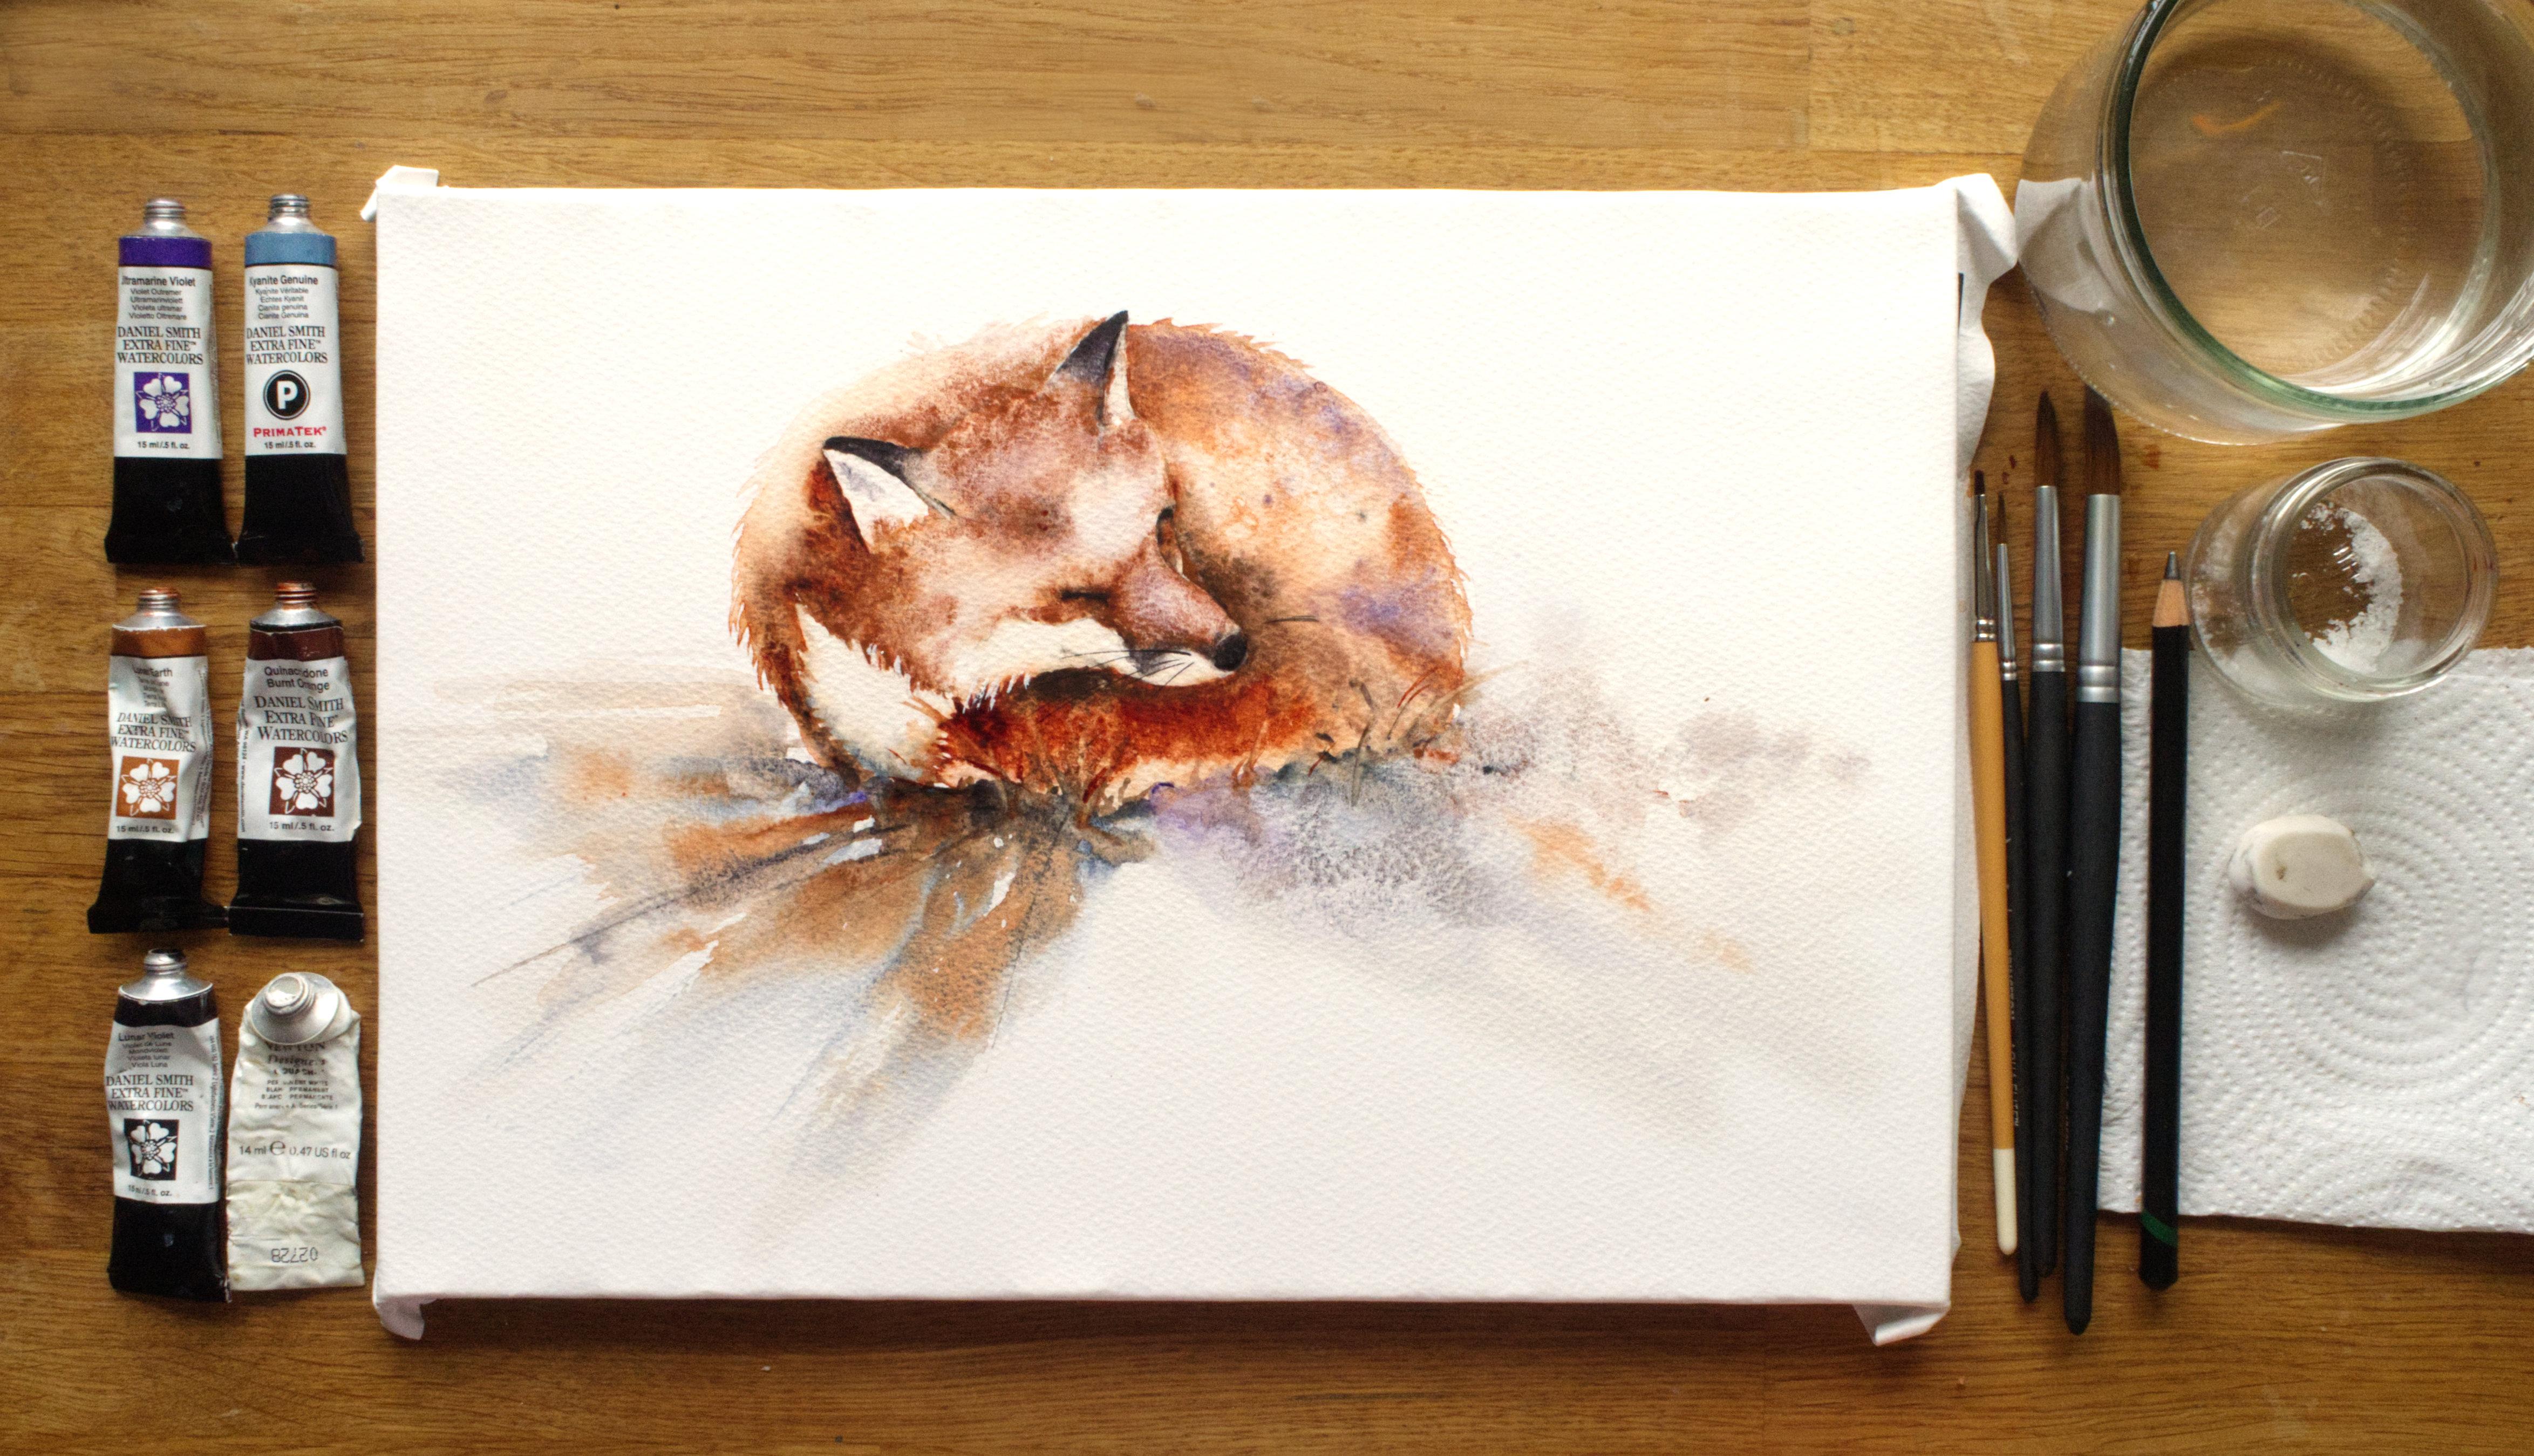
materials I'm using today. And as usual, I
shall start with my collection of
Daniel Smith paints. I've got Ultramarine Violet,
Kyanite Genuine I have Luna Earth I have Quinacridone
Burnt Orange I have Lunar Violet And I've got a tiny little
bit of white gouache, but actually I barely used it, but it's quite useful
to have if things go a little awry and
you need to do a few more little
flicks it is helpful. Now obviously, if you
haven't got these colours, then please don't panic. Have a look what
colours you have. A lot of people ask
me for substitutes and particularly other
brands of substitutes. And because I've used
Daniel Smith for so long, I've got very little
knowledge of other brands. So the best thing to do is to pull out the colours you think
would be suitable Have a little test, finds a nice Foxy
colours you like, and particularly the ground
really doesn't matter. That's entirely up to you on the colours you
choose. I like these. The
Luna Earth has worked well and I like
quinacridone burnt orange. It gave a really
nice reddy colour, but you could have used burnt sienna that would have been another good substitute. I haven't got burnt sienna
as a Daniel Smith paint. So I used the quinacridone
burnt orange. Again, I'm using
colours that I have. So I hope that helps you
to choose your own colours. So don't be a slave. Don't feel you
can't do this class because you haven't got
what I have So the paper is Bockingford and I have
actually stretched it, although it does warp during
the class a little bit. So I haven't done a
hugely great job, but it's useful if you can stretch it, it leaves you a nice, hopefully flat
surface to work on. Its 140lb NOT And again, all
these materials can be found in the Projects
and Resources page. She's its all
there listed for you. I have my pot of water. I have a little bit of salt, goodness, am I going to be able to show you this I have ground some of
it up so I can have some smaller parts
to sprinkle in certain parts so it might be worth grinding a little bit up. I have a paper towel, kitchen roll, a little
rathe manky rubber, but it's a rubber. A pencil. And I've got four brushes. Let me gather them up for you. I've got a large number 12. That's just for the ground. It just gives me a little bit more volume to do
those sweeps with. I have a number
eight which I use predominantly
for the body. I have a number two, which I use for the
smaller detail, especially around the head. And as ever, I have my little eradicator brush just for taking bits of colour
out and little lines. There is a reference photo and little template
which you can use, and it's a downloadable,
printable downloadable. And you can obviously
cut that out and get your template so you have a nice, a nice
shape to work with. What else? I have a hairdryer
which I have used. It's quite helpful in
this class because it just dries the layers
a little bit quicker. But again, it's really not
necessarily in if I'm honest, it might even be better
if you didn't have one because I'm often drawn to using it and regret
using it because I've dried the painting too
quickly and haven't left it to dry naturally. I'm looking around
to see if there's anything else I need to mention. I don't think there is, so let's go and sketch her out.
3. Sketching Out: I'm just going to give you a
few tips on the best way to, to sketch out this
lovely little sleepy Fox. To start with, I've used my
template that can be found in the projects and resources pages as a downloadable template. So the first thing is
just to make sure you get this nice round curve. And I've actually, if you
look at your reference photo, the tail comes out a little bit. I've curved it into the body. It just helps make a bit
more sense of the painting. So that's a little alteration from the reference photo to
get that nice nicely in. And actually, the tail is
tucked under her, the tails tucked under her
little white bit of fur here. So get that sort of drawn in as well, so you
can see that obviously. Again, just take your
time getting that shape really right because it's
a lovely loose please. So again, the looser
the piece of work, the crisper the actual
sketch needs to be. So you can just let everything
sort of move around. But you know you're
constrained by a really nice, accurate sketch. The little eye is quite nice
to get in the right place, although we put quite a
lot of paint in here, it's still quite nice
to get a nice picture, sorry a sketch, you're pleased with before you start because
it kind of lifts your morale, I think. Not sure if… Oh I do know… As you can see in
the reference photo, there's quite a lot of…
she's obviously a little bit damp and
there's a lot of spiky coat or hair or fluff, however you
want to say it But I don't do a lot of it. I just put little hints in. So when you sketch
her out and make sure you sketch out the actual
body, not the hair. So if I if I do that, that would be her sticky out hair. That's her actual body. So you want to
sketch in her body, not the sticky out hair,
or else you might find you've got a rather
large fox on your hands. I do do a little
bit, but not a lot, so I don't sketch
that in, that will just be a few little flicks. I don't think there's
anything else really. I have put the little
nose in there. I'm looking at my
reference photo thinking if there's any
other little hints. Don't think there is. Just make sure you've
got a nice little accurate sketch you're pleased with
and then we can get on and paint her.
4. Body: Righty, Whoa, he's
on with the fun bit. So I'm just going to get
rid of my bigger number, size 12 because I don't
need that at the moment. I'm going to pick up
my number size eight. Get it nice and wet. And we're going to wet
this little area in here. So I'll tell you what I'll do
if I put a tiny little bit, Don't do this is just for
you to see why I've I've wet the area down. It's
a bit hard to see. I'm clear water, isn't it? So I'm going to wet
tail all the way round. Make sure you keep
within these lines. Don't, don't try and
do that fluff line. Always you find you're,
you're gonna get a rather large fox appearing
that violence, isn't it? This is just for me
to show you what I've what I've wet down. Make sure there's no gaps. It's all nice and wet. And you can kinda duck your head up and down
then you can see if you've if you've missed anything or it looks
a little bit dry, make sure it's nice if
you really need it. Nice and wet naught, naught so that the water
is actually sitting in puddles but pretty close of otherwise our
paints not going to move my head up and down. I can see that's nice. So I'm going to pick up my orange lunar earth connected own burnt
orange being correct. And a little bit of the Lunar Violet going to be using mainly the lunar Earth
and the blue and the orange. So I get a bit of
a switch. Spencer. Nice amount. You put two colors on your
brush at the same time. That's absolutely fine
and we're just going to touch right
underneath her chin. Plenty of paint. You
can see it occur. That's almost doing
it all for you. And that's a case of just having your paper wet enough and then you've got enough
paint on your brush. It all I'm gonna do
is just keep adding color to this little area
underneath her chin. If we've got this
nice and wet enough, we have a little bit of time so you can pick up
my smaller brush. I'm just gonna pop. He says, If you haven't gotten enough paint to use than just pop a little
bit on your brush, but we're just going to go
inside that white tail. So we've got the illusion
of the white fluff going into the tail or the
base of the other tail. Click a couple little bits
up into the head area. Try your best to
really hard. I know. But try your best not to do
too much more than that. Really see if it's
not strong enough. We can always put
a little bit more. Um, so here we can add a little
bit of the Lunar Violet. Because ideally we just
want to do one layer. So we have to be quite bold. Just move that around. Big, really careful
just to stay. Don't try and go into
this into her head area. Just make sure you keep within the nice area that
you've worked down. Same, same as we did underneath the chin
with a lunar Earth. And the orange, which is
going to carry on doubling. Mine, might actually
be a tiny bit wet. You can see it's
not moving as much as just getting
that timing right. It's a little bit you can see
how much is sitting here. So just going to clean my brush, take the excess
water off and just try and draw a little bit of that exit extra water off a
Goldilocks thing, isn't it? Just that just the right
amount as what you need it just to trial and error and exit of
experience of painting. No great secret. So just use a little bit of the too many
Luna's here, Lunar Violet. And I can pull up
a little bit Luna thin air because
that's a great color. It sort of pushes
other pigments. You see how that's moving. That's encouraging
stuff to move out. Kinda pop a little bit of
line here because we're not, I'm not doing a black tail. I'm just sticking to the, what I would call them
more traditional color. I think of a fox was being
read with the white tail. So if you want to do a black tail,
that's absolutely fine. All the, all the rules
would apply the same. Now I want to I can see I've
got a bit of a dip here. My papers probably although
I've stretched it, It's got a bit of a
dip going on here. See if this is the
case with you and you're working with
maybe unstretched paper, then just trying to
find the areas that are probably higher
ed aren't paddled. So I'm gonna go back
up to the top here. Probably using mainly the
lunar Earth fashion and might have the full paint
sets have the violet as well. I'm going to use a little bit
of violet, little bit Luna. I'm going to just again tap that along the top of her back. Say i'd I'd like to do
this in one layer and it would be nice. It keeps it lovely and fresh. Then. Can we keep your eye on
the reference photo? You can see this is the arc of her of her back leg really, it's not very obvious, but we want to try and keep that little area without
too much paint on, which we're running down
a little bit further. I'd like to put a
little bit of salt, so I'm going to try and keep an eye open here because this is drawing a little bit more
quickly than up here. So it's a bit of
multitasking and keeping your eye
on little areas. And again, we want to do a
little few flicks outwards. And that needs to be done. That's a little bit too wet. I need it to dry a
little bit more. So again, I'm going
to have to keep my open eye-opener for all
the little areas that it's a bit of keeping a bit
of a multitasking. Just going to put a little, unlike a little bit of violet in the quiet the base is it just on her back and just
push that in a little bit. Just happening. I'm not I'm not doing
any brushstrokes. I'm picking my paint up
and I'm just tapping. And then look away. Sometimes, sometimes you can. I am standing while
I'm painting this. But if you're sitting,
especially if you're sitting, you can almost look
too closely at it. So either either stand up and just have a
look above it and see, see how you're doing,
whether you need a little bit more
color somewhere else. So I quite like to incorporate some of the
oranges onto a back. Actually just got
a tiny little bit. I feel I haven't just
helps draw the I think wanted to bear in mind, I've got that sort of
arc of lighter further. So I was like looking a little
bit on their chest again, just to sort of incorporate
all the colors in. I quite like the way it
is he's drawing here, although I have got a puddle, I'm probably going to leave it because I can see that's gonna give me some sort of nicely. How about I say
it's not an error, but it's going to
dry quite nicely. I think I can see how
the patents working. So I'm going to take a bit of a punch and hope
without sucking, could suck some of these,
some more of this water up, down and think I'm going
to leave it as doing okay. I can see, I'm just, it's just about sort of tacky. You can see this, it's
painting a little bit. You put these down
and clutching these. But I want to put a
little bit of salt there because it's just about the right stage,
you're drawing it. So it's just to say I can see
the glinting a little bit. No, Or is it just table salt
but I've crushed it a bit. So hopefully smaller grained,
although they look a bit. I also want to put
a little bit here, but that's again, a
little bit too wet. I needed to get to that stage. They're going to hold
off for a minute. While that's drying. We can carry on and do the kinda the back
of her neck area. So again, clean your brush, make sure you haven't got any excess or old color on there. And we're going to
do exactly the same. I'm going to wet it down
around the back of the ear. Around the top of the head. Swing it right down to the tail. This is what I mean when
when we sketched it out, I flipped a tail up a little bit higher because Esau sticking out the side of the body on
the reference photo. But it worked out
better that we can put a little bit of color
down the side here. It makes sense in a minute. Hopefully. Okay. Just make sure
this is nice and wet. Again, not too wet. Giraffes, that
nice middle stage. Perfect. I'm going to pick
up my same colors as I've used this side. We're going to put just a little bit darker on the bottom. So I've got the Lunar
Violet and the orange. And again, we're just going to tap and just allow
that to run-up. Little bit orange is
going a little bit dark. Around the base,
base, around the tip. And around the ear. Try not to obscure it for you. Twist my arm around a bit. Lovely. And while that is
still nice and wet, I'm going to pick
up my bigger brush. Brush on getting them
the size is wrong here. Little brush. And I'm just going to draw little bit color into that tail. Yes, they will flexi. It looks like the white tail. You're making the
white fluffy tail. It was nice. Too much. Don't get too carried away. And you can see that's
working its way round perfectly for us. So I'm just going to put a
little bit of the lunar earth. I think I've got quite
a lot orange on there. That's better. Then just again working
around the edge. Just allowing that to
run into the wet paper. Again tapping. It's quite nice having
the lunar Earth predominantly on the top here. This will travel, so don't, don't worry too much, don't, don't get too carried away. Wanting to get that
right to the age that should on its own,
travel to the edge. And we want that to be quite
nice and loose and light. So it gives us a nice sort of fresh look without
covering everything. And then I'm just
going to put those down and have a look,
see how are we doing. I think that's
looking quite good. Now. Still want to get a little
bit of salt in then it's probably about
the right time. So let's draw a little
bit of salt in there. Don't seem to be picking
up the big lumps. Enough. Also, I want to do just a
few little bits of flicks of coach just to give
an illusion of some, but I don't want to
go all the way round. I did in some of
them might practice pieces and it just
looked a little odd. But you may find you want to do that and
see how you go with it. But I'm just going to have a little few hints here and there rather than going
all the way around. So if you're on the top, on the bottom here, and be careful if you are doing
going all the way around. Just don't get too
carried away with doing lots and making her too big. Again, I want to put
a few other side just because it's
appealing, isn't it? When you look at the photo and
that's what drew it to me, I must admit originally, but when I started doing
lots of fluffy bits, it was looking a little odd. I think I'm about there because it's very satisfying
to do them, isn't it? But again, with the flicks, you need to do them
while the paint is still quite wet here
I have noticed if a few of the projects where you've if you allow this to dry and then
you put the flicks on, they look very stuck on. So the, the trick to
making it look very natural and as it
belongs to the coat, is to flick them out while the paper and the paint and
the paper is still wet. So I think the best
thing to do at this stage is to let
her completely dry, especially with the salt. It's going to take a little
bit, a little bit longer. So it's really, it's worth
stepping away, leaving it. And you can, as
it begins to dry, you can almost fully dry. You can pop a little
hairdryer over it if you want to do a quick
And the the process up, but it's well-worth and save
you if you if you're like me and haven't got very
nicely stretched paper, you can see how wonky that is. I've got a lot of
water sitting here, so that's going to take
a bit of time to dry. So be patient. I'm going to do something else, step away from it a bit, maybe have another practice. You'll, you could
do another fox. You could do two at
the same time and it stops you wanting to overfill the one
piece of us have found that sometimes
quite useful. Anyway, I'm waffling. Let's let it dry.
5. Head First Layer: Okay, now, once it's
all lovely and dry, we can get on with
doing the head, but I'm pleased the way she sees dried is at quite a bit
of texture in there. A nice bit of color combination. So it's kind of always,
what I'm looking for is something just a bit more
unusual and textured. And I think it's why I love
the purple Was it just, just just a nice gives you
a nice look, doesn't it? I can't quite explain it, but there's certain
colors you're drawn to on any new light can
always loved putting little bits of purple
and blue in and assist. Just nice. Anyway. Light. So we need to wet down the head. So I'm going to use my
number eight brush, actually going to put a little
bit of that violet down so you can see where I'm wetting. This isn't for you to
do is you're just, you're just wetting
the fox down, but we're going to miss
out the white areas. So we're going to draw
a little line here, so we're going to miss
out inside of the ears. And the white I'm
muzzle, white muscle. So let's get that nice
and wet up there. Say try and keep in. In those lovely, crisp lines. Stay within your pencil lines. I'm going to try my best
to my weird angles. I'm working too. She can't see any violet there. Can you being very helpful? More on there? Okay. Hopefully you see where
I've wet down now around. We'll push some code
up into those years. I don't worry too much, just, just don't go into
the main part. And again, we're going to pour some little bits
down into the tail. So just to almost draw
or watch your area. Sort of line if
that makes sense. So then you've got
room to pull down. I hope that makes sense. Make it look a bit more obvious. Hopefully. Just carry
on writing down, wetting around because they
missing out that white area, the muzzle and actually the white it's not whited it at all. The right-hand side of the
eye and that sort of socket. We're going to go
around that for there just for the time being, we'll join that up quite
quickly afterwards. But for the time being, just by doing that, I'm not really putting a lot
of water into this area. I'm going to wait
until all this head areas a little bit drier
and then we join it up. And that gives me a bit more
control if I was to wet it, it will be quite
hard to try and get that distinct sort of area in. Hopefully it all makes sense
once we start painting. Right up to the edge. Lovely. Again, just keep
your head up and down, make sure it's all wet. You may find where you started
wetting down has gone dry. Suggest maybe just
pop your brush into some water and just tap
a little bit more in there just to make sure
it's nice and wet. And put my violet as young
and hang onto my violet. I'm going to pick
up my lunar Earth. And let's have the burnt orange in my hand at the same time. So I'm going to start
with a lunar Earth. I'm just going to tap the color
into the top of her head, just allow that. So running. Just keep your eye on
that reference photo. We're working on
the darker areas, so just keep that in
mind. Try not to go. You can see she's got some
nice lighter areas above her. I try not to go into that area. All should blend in. So goes a theory. I've just popped a little bit of violet on my brush as well, just to there's a
nice dark area, isn't it above her sort of above Hawaii on her
forehead, I suppose. So try and start
getting that in. I'm going to swing it around
to the right-hand side. Just again, just tapping
cup, it's a coloring. Then it all blend. Being random as I do, I'm going back down to the
left-hand side of the ear. Let's have a little
bit of the orange tap, somebody that's in together. Stronger color. I want a little bit
of paint down here so I can then move it down
into that white tail. So we're making this up a little bit because it's not exactly the same as
the reference photo. Sometimes you have to do that to make the picture
make a bit more cent. Although the photo works fine, it didn't work quite as
well as the painting. It's a little bit
wet at the moment. I just want to hang on a minute so I'm going to carry on down to the muzzle and I'm going to use the lunate Earth and the violet. I'm actually going to put
a little.in there and I'm actually going to switch around a little bit just so it becomes
very blended, right? Go over the nose,
could have a popper, a nice blob, other Luna
virus in there in a minute. But I want that to be almost
all covered and strengthen the lower bit of the muzzle color with a
little bit a lunate earth. And this is where we need start building up the eye color. You have to gauge
it a little bit because we want it
to be quite strong. So it needs to be needs to start
going off a little bit so it's not really wet, so we'll probably
just carry on working around other areas that I need. The paint to flow a bit more. Let's push pop a little bit more from the top of
my list, my forehead. I need a little bit
more paint there. So I'm trying to avoid going into the lighter
areas above her eye. Smoking. All right. Actually, let me just step away. Do a tiny bit of orange side. Always draw your eyes. Take a breath and put your, put your head up
above the parapet. Or they might say, have a look CC where you see
where we're headed. So easy you become focused. Way you're doubling that
paint and you almost don't see the bigger picture. Maybe that's where the
savings come from. Probably not. Just a little bit more strength
there I can see there's a really nice strong
sense of color, just going off her left
ear, the left and right. I can see now this little area that's going to go into
hotel he starts and the joy, that white light amount
of drawing this. I'm not sure if that's
a technical term. Might just put those down. I'm going to pop my
bigger brush down, pick up my number two. I'm just going to have a
little bit a lunar earth and my hand because if there's
not enough paint here, I can, it's probably enough, but hopefully I can share. You see, you're just
pulling a little bit down, same as we did with the body. Just putting some little
bits into the tail to create the fluff
of the white tail. Soften anything if it's looking a little bit stuck just you can always put a little
bit of water on your brush to soften it. Let me have a look now. Again, I think I can
start trying to put a little bit of heavier
color around the eye. Actually. Let's do this ear here as well. While we're here. It's going to flick
little bit up. Again. This is not a very obvious hair
going into the air, but it's quite nice
to do so again, we'd sort of living
a little bit, right? I'm going to pick
up my crack codon orange and the lunar earth. And then you have
the violet as well. So it via the Lunar Violet, not the ultramarine violet. It's too many, too
many mix them. Similar, similar
sounding painters. And so I've got a quite
a nice consistency of the Lunar Violet,
chronic cardamom orange. And I'm just going to
touch along that I align. It should hopefully spread
quite nicely at this stage, you just want it with starting
to, it's not flooded, but it's nice and wet still
or maybe not really wet, but it's got a nice sort of, I like to think
that there's nice, workable stage where
you can put color down, it blend, but it's
not going to widths. It's a nice, nice stage. We just want to darken the area. We're not actually
putting the line of the eye and we're just
talking in the area, pop a little bit of
earth in there because I know that will help push
some of that paint out. And it, sometimes you
use the paints for their qualities and
what they actually do. You can see how much that
spread almost bread too much. So my little brush again, I'm just going to encourage it down because actually
she's got quite a white whereas eyebrow hasn't she just about controlling it. So don't be scared. Just you can always
suck paint up and it almost comes up too easy
with some of these paints. So be careful. Yeah, that's looking quite nice. Dark area. My burnt orange and
I'm trying to get to, I want to start building up a little bit of strength again. Tapping a little bit of
color, a little bit. We're going to do
another layer over this, so it doesn't matter too much. But we're just starting to get some of the
heavier areas in. Swing that little bit over
that right eye socket, we're not going into it still feels a little
bit wet, still. I'm just looking
around my painting. I think that's looking
pretty good actually, it's worked worked quite well with paint sort of
fall in the right places. Sometimes it just flows and you get the right to mount that. If you feel you've
lost this white area, you can always be a little
brush or larger brush, clean it off. Take the equity. What you don't want to do
is add any more water. So if you have a
clean your brush, makes sure you deeply off on
your kitchen roll and then you can just gently I won't take any more off because
mine's okay. But you can just gently
stroke a little bit of that paint off to create
that white or lighter area. Now, the E is it gonna be
a good time there again, they're just starting to go off. Just getting to that nice sort of the time you'd
add the salt in, it's wet but it's not, it's not so keen by any means. So Lunar Violet. And I'm going to go
start at the tip of the ears and just almost paint. Just run it down
that should blend quite nicely at Lunar Violet
is quite a soft color. I'm actually going to
go a little bit of a maybe but a little bit of the lunar there just to blend that. Jin Li. That's good. Then again with the left ear. Just why it starts at the
tip and then work down. If for any reason you'll
find it starting to dry, you can always again,
the new brush. Take a tiny little bit of water
off in your kitchen roll, and then you can add just
a little bit more water if you if you're working in
a warmer climate, lucky you, It's going
cold here now in the UK. As I to this class, feeling a bit TV now that if you're working
somewhere warm and you're, you're you're painting
starting to dry. You can always if he's all wet like this is I can
still see it's all wet. I couldn't clear if I wanted to just add a little
bit of water somewhere. If I'm working on that ear. As as I showed you, I can just put a
little bit more water and it gives me a bit
more time to play. Making sure look at
your reference photo, just make sure you've got the
ear shape right hopefully by having done the drawing
rights, this is what I mean. If you've got the
drawing nice and crisp, then it allows you, when you get to the more
trickier stage of painting, it gives you the, you know,
your boundaries are right. I think, I think she
really nice to just draw on her own and
say we're going to do another little
layer over here. So I'm going to be inclined
to put on my paints down. Some of the times
I've put little bits of salt in above her eyes. Let's do I'm gonna do one
on quite liked how she, how it's dried at the moment. But in some of my
practice pieces I did and it created
quite a nice effect. So we'll put a little
bit of salt there. I've managed to pick
up a nice little bit of most dust so
it's not too big. And that's just above
those white areas. And yes, she needs
to dry completely. And then we can do
that second layer.
6. Head Second Layer: Okay. So she's dried of the
head to dry really well. Although I have to confess, I did put the hair dryer or less at the salt hasn't really worked very
well because I didn't, didn't really give it the time a bit to bit too eager there. So what I was going to
mention on the last layer, I have left the salt on
the body because again, I've put the hairdryer
over it and the salt. Although the painting, the
paper and the paint is dry, sometimes assaults deadly wet. So hence, why it's
still on there. But I am going to get rid
of a little bit of salt on the head because we are
going to do another layer. So very gently brush it off. And hopefully you've had some nice textures
and marks from yours. But if not, don't worry,
you'll be like me. Now if I look at her head, I've been quite,
it's quite violet. So I'm not going to use
the violet on this layer, but again, be a little bit of
a judge on your own piece. If you if you find you
haven't put enough violet on there
and you want it to be a little bit
volatile and warm, then use the ball a little bit more and whatever color
you feel you needed, then work on that. And if you've
popped a little bit too much of one another
color on there, then don't use that. That makes it. So we're going to wet put
that down for a minute. We're going to wet
exactly what we did on the very first
layer on the head. So again, up to the
ears and go really gentle when you doing
wetting a second layer down. Go ever so gentle
because what you don't want to do is to disturb. You're going to
talk a little bit, but you don't want to
disturb that first layer. So try just to let your
brush almost fall. And it will create more puddles. Put more water on your area. But we can always suck that up. It's better than
to scrape around and I'm disturbed those
light layer underneath. So erisa, gentle, say we're going to still
miss out that right socket. I'm gonna go carefully again, carefully around
that white muzzle. Right up to the tail. Say, Bobby, your
head up and down, make sure you've covered
it all and you can always double the King. Alright? Don't worry too much if this, if the ears aren't too wet because we don't want
really too much of this Lunar Violet rushing
down into the head. We're going to do
with a second layer. Layers all about
just building up. I tend to work on
the darker areas. So again, I will leave the
light areas because the paint will gently blend into
those light areas. So I always look for the dark. And again, you can
take color out if you feel an area has gotten a
little bit heavy with paint. And because we swindled
color around on the muzzle, it hasn't allowed any
area to be light, so I can just gently
with my brush. Just pull some of that off. And that's what you would do
if you were a little bit too heavy handed putting the
water down on that layer. Okay, So I'm gonna look at my
piece and see where I need the strength and
the sort of color. Again, if I want to
avoid using the violet, so I'm going to
use predominantly the lunar for the time being. So I'd like a little bit
more brown on the muzzle. And I I will I will work around
that lighter area on top. That little bit on the very
tip of her her muddle, little bit underneath. And I will pick up, Let's see that Lunar Violet because it's
a nice little dark patch. There isn't a black patch
where the whiskers go. I want to almost
strengthen again is that dark dark area
above her head. Just going to tap a little bit. Tiny little Bella Luna
worth it, Lunar Violet. With the lunate Earth. A little bit on the top
and going around the ear. So you can squint your eyes. It's always a good trick. It always seems a bit of a query trick to do as an artist, but it does work. A little bit more strength. Sound on this left-hand ear hair that's coming off
the left-hand ij. Ij or you just say
just trying to strengthen the dark areas and create some sort of darkness
and sort of contours. Flipkey, I always find it's
really helpful if you get your reference photo quite
close to the work and flick your eyes back and
forth between the tea. They almost, almost
superimpose themselves. He can kinda see
where you think you need that strength, right? I'm going to pop
my big brush down. Let's get rid of
that lunar Earth. Pick up my smaller brush, just give them quickly
and to make sure there's no no paint on there, take the excess moisture off of a squid to the violet and
we're gonna do the nose. And again, that's a really nice, It's just starting to dry, but it's got a little bit
of moisture on this too. It gives me a nice
soft knows without being if I was to
paint this on dry, it would be quite stuck
on it a little bit damp. It should just blend
just a tiny amount, give you a bit of softness. Going under here, a little bit. Dark patch anywhere
around the ear. Let's just pop a little bit,
little bit heavy in it. A little bit more strength. Ear. Again, it's looking
at your own pace at this stage where you
think you may need a little bit more color. Pick up that quinacridone. Orange still using
my little brush. It's only a little picture so I can work with a small brush. Too much water. Again, you don't
want to be adding too much water unless
it's starting to dry and where you feel you
need to add a bit more to continue, continue on. I'm still keeping
an eye on this. It's a little bit wet still. This is still too this area still too wet to blend
into that at the moment. So I'm Let's do a little bit. This is starting to
get a little bit dry here around the eye. So I'm just going to
strengthen that eye area. If again, if yours is nice and strong, don't continue
strengthening. It is say, once we get a little bit
further into the painting, you have to be a guide
and see how yours is. He's looking. Hope these classes a bit more of a guide for you
and you have to be brave and figure
out better, yeah, and see how yours is
looking to be a judge of how wave you need strength
in places and not okay. Flicking my eyes,
looking away from it, keeps looking alright, somehow got a little
bit of a line here. Quite sure where
that's come from. Jenny, touch that up. Still. I still want
to get into there, but it's a little bit too, little bit too wet. Um, these white areas
we're going to do later, so we're not going to
we're not going to combine that to
the other classes I may have done where we've, on the second layer,
we've we've been wet this to allow let
me get this right. So we've we've wet This
areas to allow what? The second way to blend in. But it's because it's so
crisp, crisp and white, it's really nice to keep that
nice and crisp and white and not allow these color of the head to run into the white. Okay. I'm think I'm about there. So what I'm going
to do little bit of get rid of that for a
minute and pick up my lunar. So I got Lunar Violet
and lunar Earth. With the Lunar Violet. Gonna do right on the edge, I'm just gonna do a little line. Almost helps to stop the
head colour running in. Like making little
dam as it were. Remember the lunar earth, you just kinda fill
in that little area. It's very gently,
almost painting. She's got a tiny lady. You see a tiny speck of white. So he wants to try and keep that just right at the bottom. Yeah. That looks okay. We can always in the finishing off bits where we sort of tinker
with a little bit. So we can always just make that a little bit different
shape, but we need to. But idea is to well,
that's still damp. It were wetting this area and just again little
bit like the nose, it just creates a
little bit of softness. To do this. When it
was entirely dry. It looks a little bit stuck. Okay. I'm going to stop fiddling
because I actually looks okay. She says, we surprised.
So it's always, there's always some little
tricky part to a painting. And for me, that's
been the tricky part. But yeah, I think
that looks all right. This is still a little
bit too wet to put that little line of iron, but actually where I've
put a lot of color, I have you can see an I there, can't you actually,
for the time being, I may I may leave that actually
just didn't want to take a little bit of color out
the top edge of that eye. Because you can see in the reference photo
that's where the Pope at the top of the eye
socket is coming in. Sometimes you just that
you may have a plan and just like this that's
worked at that eye, looks like an item
me I was going to paint it in separately,
make that stronger. But if something has worked
and then just go with it, look at your piece
of paper and if you're painting,
share say and if, if what you see is pleasing, then count that as done this it, as it were with watercolor. A lot of it all moves
around and it's not as he's just maybe have this
cap to go with a float. So what we wanna do, it just, I've got
this little bit of a line here where the
head meets the body. So I'm going to very
gently wet the back of this body just to join
the head up with a back. Very gently. Just joined. I'm not gonna do any more. Just just so we don't
end up with that line. I'm just going to
pop up a little bit more little bit more color in the shoe. Again. He come when you
have these plans for how you're going to work it and things just
change a little bit. So you have to go with, uh, like I said, you have
to go with the flow. Okay. I stepped away again. Lets me have a look. Yeah,
I'm pretty pleased with that. I can carry on tinkering, but you can get to a, a tricky stage where it starts to dry and you'll
find little areas of drawing and some are still wet and that's when you can
get yourself into trouble. So it's it's sometimes
best to leave it, let it completely dry and
you can then re-weight. You can do another
layer if it's, if it's points that
you haven't gotten around to doing or
you think all know, I like to have put a
bit more color there. And you've got to
this stage and think, Oh no, that's dry, that's wet. Leave it, let it completely dry and then re-wet
that area again, you can re-wet the whole
thing the whole year, the whole area with wet
on this this little part. And then you can
continue on again. But for time being,
I like how that's drying and how that's
how we've added color. So I'm pleased. So I'm going to let that dry.
7. Ground: Right, pick up your big brush. Make sure your water is
nice and clean as well. So if it's a bit murky, give it a give it
a change of water. It's nice and clean. And we're going to do this
very quick, loose ground. So be brave. Be bold. So pick up your kyanite. Why go pick up my kyanite? So whichever color you've
decided the ground. I've just picked these because
I like, I like the color. But again, they can
be you could have chosen any sort of
any color you wish. But we're going to do
a nice thick line. We get a little bit
up into that tail. So it looks like she sort
of snuggle down amongst the leaves or ground or however
we're going to call this. And I've put a little bit
of the ultramarine violet, little bit more kyanite, so mix it up a bit. But the same colors on the
brush at the same time. But we've got a nice line. Need to work quite quickly. You don't want this drawing. Let the paint dry,
clean your brush. And we're going to do some
really lovely big sweeps out on the left-hand side, the right-hand side,
we're going to move a little bit different. But for the left-hand side, toy lefts and rights
are my strong point. Right? So touchy, touchy paint and just move outwards really quick. Big bowl to sweeps. Hold your brush towards the end to just get
that nice sweep. Always add a little
bit more color if you don't feel
you have enough. One a little bit
along the top here. We're going to add
a little bit of the burnt orange in a minute, but just get that swept out. Not too much. Be careful. It's very easy to do
too much on this. And a lot of my practice
PTs got a little bit, a little bit carried away. Now I've picked up my
Quinacridone, orange, and I'm going to
put a little bit of strong color right at the base and allow that to
run few little sweeps out. We want this to work quite quickly because you
don't want this to be too dry. Pop a little bit of Lunar
Violet right on there as well, just to give a little
bit more strength. Tucks them up. If you feel you haven't got
enough going on in the tail. You can use your fingernail, just draw some out. So you're going to
excuse the track. I've got attracted that
to go passively here. You'll have to have to
apologize for that. No, Maybe he's gone past right. Now. For this side, we're going to gain weight
back the layer down. I'm going to let that be
really loving your software, going to pull it right up, right out, touched
him with that. Just let that be
nice and soft again, do a few sweeps. You can take that color. Wet up for whiteout. Light up. Don't don't go into the body. So it's nice and soft. I've actually almost lost
a little bit too much now. So I'm going to pop a
little bit of a loon worth. To summing, I don't
want this side to be as strong and wanted to
be a little bit softer. Careful, these don't become
the color underneath her doesn't become too stuck in a line to give it
a little bit of a wiggle. This is where you have to be
brave and just allow that to kind of do its own thing, which it will. I'm going to do. Let's see, big brush again. Pick a little bit casual
into just a little bit of a uracil just to run a little
bit of color up behind. Just so she doesn't
look like she's sitting on a on a
sort of pinnacle. Right? Big brush down, little brush up. And hopefully we still got a little bit of
color to work with. If not, I found the
orange the most useful. And we're going to flick
a little bit of grass. So C will say she's laying in snow on
the reference photo, but I'm a little bit of something coming up as just broke the line up
a little bit again. But like for their
fluff on her back, don't do too much. Let's have a bit of
kyanite as well. Just a few bits here and there. Careful you don't put your
hand in that nice wet paper. Just to break this sort of
line and we put there, we go. Into the tail. I
think that's enough. I'm going to get, I can see
what's going to happen. Do these little tiny,
little careful bits of grass and it can look
a little bit stage to try to avoid that. Just trying to wiggling, trying to break some of these little lines
up a little bit so they're not too stuck. At this stage. You really need
to let it dry on its own. Try, try, try your
best not to fiddle. It's very tempting. But trust me, it can go
pear shaped very quickly. The idea is to do some
lovely quick sweeps. Nice softness is sine and
just allow if you're feeling, before you start
eating, you're feeling a little bit unsure. Try it on a piece of paper, do a sweep of maybe her, it just a little
stripy of orange, and then just try
doing that ground just to give yourself a
little bit of practice, a little bit of knowledge
to see how it feels and how the brush feels
and the paints field. But again, we're going
to need to let that dry. You can pop a little
bit of salt in. I'm not going to I have in
some of the other ones, but I like how that's drying. I don't think the
soaps going to add anything particular, but again, if you feel you want salt, then obviously you
put some salt in. But we're going to let that dry.
8. Finishing Off: Fabulous. I'm really
pleased with how that ground has dried
and I like the texture. Gain. All the practice
pieces I've done have been always, they've
all been different. So you can do this many, many times and the effect
will be slightly different. But hey, that's the joy
of watercolor, right? So we're just going to do the nice little sort
of tin critical bits. So to begin with, I'm going
to take this software, but just be careful
that this is completely dry before you start
sweeping stuff away at round and
rubbing line down. Get rid of that. Save
us, had much effect. Has given us a little
bit of texture. I think kids, the paints are
quite granulating anyway. It doesn't have the same quite the same effective as if I'd use other
some other paints. Non granulating paints. All right, let's pick
up my little rubber. I'm going to get a rub
any pencil lines out. Hopefully you've kept them as
light as you can. That way. You don't have to try
and rob lines out from underneath layers,
which will work. It's nice if the lines are being kept light in the
first place, right? So we're just going
to gay again, go round and tinker. But I think the first thing
we need to talk about is the white areas on her. So I'm going to try
and be methodical. I'm going to start with
the insides of the ears. So actually, I'm going to use my very little brush because
it's quite small area. I'm going to wet the
inside of the ear. I've already got outside. Me being a bit for not
being very careful there. Say, I'll probably
say this every time, but how I'm filming, I'm always a little bit away, away from my work. So it's always a
little bit hard to see exactly where I'm
putting my brush. Okay? Now that might
be just enough. Just by touching the edge of that ear and the
surrounding color, you find somebody that
will blend anyway, I'm just going to put
a little bit of lunar, tiny little bit
along the ear line, the black, the
edge of the black. And that will be enough,
definitely enough. Clean your brush. And
we're going to do the other ear to try and make a better job of wetting it down, just inside but
touching the edges of the color because that will
just allow some of that to soften. You don't need a lot. Just to stop that paper
looking to stock. I'm going to put again, using
the lunar earth is going to be fixed a little bit
up inside the ER already. I'm just going to
touch a little bit at the bottom there
and just allow some that to blend upwards. A little bit of the violet and we're just going
to pop a little bit. Towards the top. You can see
there's a darker area there. It looks a bit too,
but I think it might be a bit too volatile. Let's actually get rid of that. And they say, you can't get
rid of watercolor gone. Let's try the violet. Only want a tiny
bit just to give an idea that the inside of
that EFS better violet was, you could see that was
suddenly pinging all that. Violet's up on her. A bit too much. I think I generally are being quite heavy
handed with a violet, so I don't want to be
add any more this stage. Okay. That looks okay. So we're going to go
onto the muzzle area. Again. We're going to
wet that down touching the edges of the paint. So touching touching the
edges, sorry, Pauser. Just to allow that
to blend in again. And that will probably be enough because it's
very easy to lose that lovely crisp
whiteness in a solid gets very murky and very
hard to get that back again. But we are going to give it a
little bit of a muscle that just that edge up against the tail and just go into the head
area little bit and we've got a very damped soggy
bit of paper towel here, but called a fresher piece here. I'm just going to give
that a little vivid a dab. You can see how that's
sort of blending in current year on
the reference photo. We just want to try and do the same without taking
too much color out, which is easy done. A really good little line. Let's pay for just about dried. So I say I don't want to use too much to the violet or mind, particularly because I've
been quite volatile. But there's a nice little
line here that just runs up from the muzzle
and goes into her face, isn't it? You see
that line there? Yeah, that's a good
line that one maybe certain parts of the painting, certainly bits that will the important parts that
sort of define an area. So you just need to find those. I've just put a little
bit of Lunar Violet on the edge where that black area that we painted
here on the head area. I just wanted to put a
little bit underneath on the where the white Muslims, hoping that makes sense. There. You see where, I mean, again, it's just to help soften. And again, the nose
looks a little bit just so that it's gone. This is almost dry now actually, I just wanted to round that. I'll put a little bit. I felt that line
was running round. Wasn't really given
me a nose shape. Just trying to round
the nose a little bit. Okay. Now we're going to do,
let's put that down. I'm going to do
that tail as well. So we're going to do
exactly the same. I'm going to still hold my
hang onto my number two, brush and wet that down
again, touch the edges. They gently blend.
And we may find, depending, might even be enough. I suspect we might need
a little bit of color. But I'm not going to, I'm going to use just a tiny bit and I want to use
a bit of kyanite, actually deletes the
bits on the base of the the white tail. Again, I say I don't
want to use violet, but you might find the
violet suit your painting. Again, it's a little bit looking at
your own piece and seeing what you
think but suit it. And that's enough. You can easily become muddy
and they're quite hard to reclaim that
sort of crispness, which is nice and nice contrast. Okay, now I'm just
going to revisit this area here because
I like I said, it's been always a tricky part for painting and
this has been mine. So I just wanted to sweet, This isn't just a
fraction of people that dark and that little
tiny little bit more. Just use my fingers to squish
some of the paint around. Yeah, I think that's
looking alright. Again, I will, with
every painting, it is definitely
worth leaving it for a couple of hours
a day and coming back and re-looking
at it before you say, I'm going to say sound like
I'm reading from a script, but before you say
it's completed, it's always worth just coming back with a
fresh pair of eyes. And these little
areas become really obvious when you step away from them to see whether
they're right or wrong? Yeah. I think that's okay. Now, mine has worked
actually okay. On this particular fox, but some of my practice pieces, I got lost the shape
of this muzzle. So you can always
just reclaim that. You would just very
gently take them in that body color out just to
reclaim that sort of sweep. And the nose is a little
bit rounded, isn't it? So that's a point
that I found I had to do and some of my other
pieces going back to my eye. Now I I still want
as that's dried, I can see it hasn't left me with such a defined line
as maybe I wanted. So although I will fold saying I think I'm done, I
don't think I am. So although it's
definitely a nice straight and a nice dark area, just want to put that little line in a
little bit more on it. If it curves a little
bit, It's quite nice. So you almost want, I can show you obviously not that obvious, but are a little bit
of a swing down and around having a good
reference photo and and get that shape right, it makes a lot of difference. Yeah, That looks better.
Now, we just need to do some whiskers with the
pickup Lunar Violet again, and you could even
use a smaller brush. I have got a number
which I have used. So if you feel you
need a smaller brush, obviously go smaller or a
pencil if you're feeling a bit, if you're not sure on doing whiskeys bit,
sometimes it's worth. Doing a practice piece, just getting that
nice little sweep. And it's one of
those silly things right at the end, it's
quite hard to do. So have a little practice if you're not feeling confident,
but let's go for it. Just do a few little sweeps. Great color whiskers, aren't
they? Yeah, that's enough. Again, don't do
too many of those. There's a tiny little bit which I actually have
managed to keep, but there's a little
bit of white right underneath the nose. And that's sometimes
worth reclaiming. Just take it off the squeegee, the finger and you can see
it just lifted it enough. Is going to just put that down. Let's pick up the other
had much of an outing yet. So my little eradicated
brush, white kid it up. Take any excess moisture off. Now there's a nice line off this left ear that just goes into the body a little bit
and we did head-turn body. Tiny little things. They're only little details. You can if if when you wet this right here
down or even the left ear, if the color from the ear
blended a little bit too much, you can then take
it back out again. Just reclaim some of
that nice sharp edge. I, the colors perfect hear sounds very big
headed, doesn't it? But I liked, I liked
the softness there. So I've I've managed to not
put too much paint on there. But somewhere. Again,
keep going back to my reference vote must
sway my practice PTs. And I've done quite a few. And they got a little
bit heavy on this top. I quite like that light. So you can always
very gently with your number size eight, brush. And very gently I won't take it out because I will be
left with nothing. But you can just
gently pull some of that color out and just very gently with your kitchen roll. Better. Yeah, that's worked. Okay. I would I wouldn't do any at this stage if
you can avoid it, do any more of these
little bits of coat, they are really best done on one or you're not on
that first layer. Otherwise they're
going to look like they've been painted on, which obviously they have. But they make them
look a bit stuck. Don't think there's many
other little bits I need to take out regarding
sort of light. This area again, like I say, I think I managed to take enough out on that second
layer over the head, but that's quite a nice
area to take color out, just the top along the top
of that line of the eye. And actually when you scroll
and you can see what would be her eyebrow hair. So I'm just actually
going to take that little bit of color out there. Be careful because these say we've used the
same colors of me. They lift out ever so easy. Just go gently and using your finger just squishes
it rather than the sucking the color up so you can get
a softer, softer appearance. One other place is just, let's swap brushes as used that eradicated brush cross the nose. You can see this white
area, their current use it. Let's, let's reclaim
that as well. Probably just use my finger. Let's better. Some of the grass
this can be taken out with a brush or
eradicated brush. You can just do a few little
sweeps. Again, be careful. You can end up
taking too much out, but you can just do a few right angle. It's pizza one out. I
think that's enough. I was I can see it's going
to get a little bit muddy. Some of my fixed could have
been a little bit more. Little bit nicer. They could have been
a bit full fresher. I I probably pulled this color
up a little bit too late, so I've hasn't given me let
me show you what I mean. I would have liked
something a little bit stronger like that. If we can make them look
like they're stuck on here, they're looking a bit
stuck on, aren't they? So I'm not sure if
I like those much. So let's get rid of those
that are quite like that one. Right? This is this is where you can easily overfeed or could you just try to get
things right and you can just keep fiddling? So always the best thing
to do and I should take my own advice is to
leave it, go back, look at it with fresh pair of eyes in a couple of hours and the little little details will ping out a ping out at
you if it's not right. So I think I think she's
done is a bit bizarre, using any or little catch
lights, the noise, isn't it? I have actually kept
a little bit of white gouache which you
could use to reclaim some, um, some of her white head. What would you call
it? I suppose if they're sort of
rough isn't almost. So let me do this up. I've managed to
keep most of mine. But you could put with the white just pings
some of that into the sea that they're
just pop it in. It's going on top of the tail. But it's not, it's nicer to
be able to have sort of kept. The white paper is always
a nicer look if you can, but if you haven't
managed to keep that, there's always a it's
a it's another way of doing it. Okay. Before I do fiddle, I should take my own advice. Pop my page down. And yeah, she's done. She's done for the time being. I would always look at Essay, look at the, look at it. Look at her again
a few hours later and do any any little
bits of tinkering. But I'm pleased and I hope you've enjoyed this
class because it's been, Yeah, she's been an
interesting subject and I have enjoyed doing her. So again, as I always say, please, please share
these projects. Is my repeat this every time, but it is one of my
favorite bits is he's seeing your work pop up. And I'm always if you
have any problems, any little questions you think. Oh, Did she didn't make that quite clear enough
or I'd like to know that. Then just pop that
either your pop, pop that in the discussions of this class or on your
project that you post up. So thank you for joining me.
9. Final Thoughts: I hope you enjoyed painting her. I found a very calming to paint. Isn't it amazing that by
being bold with your paint, you can create such
depth in just one layer. And all the while keeping
that one full light. Did you enjoy painting
that dramatic foreground? If he found it tricky, try playing with
different brush sizes and the amount of water you use. How did adding the detail around the head guy is getting
the timing right. Not too wet and not too dry. It's always worth stepping
away for a couple of hours, looking at her with a
fresh pair of eyes. It's truly amazing what you see. So we look forward to seeing
you in the next class.
 Jane Davies, Professional Artist and Teacher