Transcripts
1. Welcome to class! : Hi, I'm Elaine, an
illustrator and surface designer living
in Auckland, New Zealand. In this course, I'm
going to show you my art process and
take you through the main steps which have been helping me to create
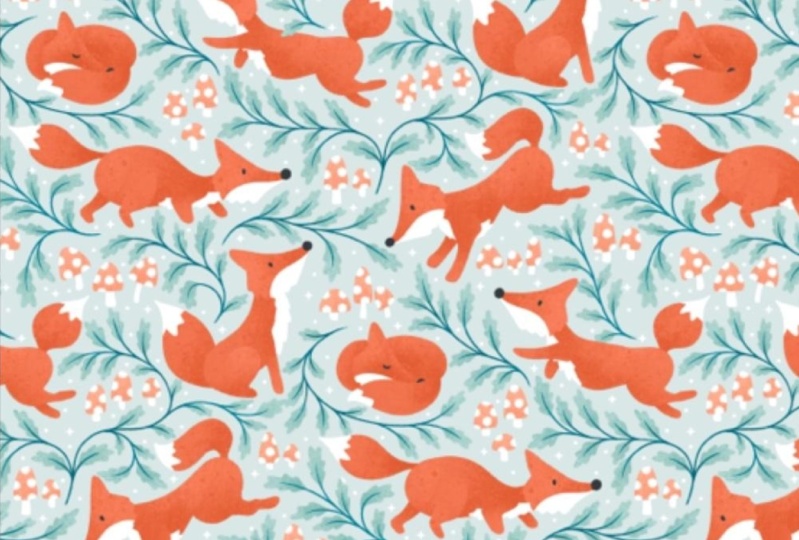
dynamic patterns. I'm mostly known for
my playful animals in characters patterns from
my print on demand shops, such as Spoonflower and
do the where New Zealand. I started my creative business
IPO says to deal in 2019, thanks to all the
Skillshare classes and as a part-time artist, blaming my project and finding ways to keep
my hand-drawn looking. While providing designs with a flexible format for the design industry is
extremely important. Then I create this
course because I hope I can help you
save a lot of time when you draw your
pattern collection and at the same time still
keep developing your art style by
Jean of this course, you will be able to apply
these techniques to your work. Developed what I call
a sketch book library full of illustrations for
your future collections. Last but not least, because it is my first
Skillshare class, and I've been recording
it in November. The theme of this is more collection is
inspired by Christmas. So see you in class.
2. Class project: These are the supplies that
we'll be using in this class. You can of course, follow along with the class with your favorite materials
and software. However, basic
knowledge of drawing and surface pattern
design will be helpful. Actually, this technique is also used for developing characters. I love it so much
that I decided to apply it when I'm
creating my patterns. So you can apply them to any idea of illustration or
patterns that you might have. Feel free to incorporate any of these exercises into
your drawing practice. And I'm leaving a few links with my favorite classes of my favorite teachers
here in Skillshare. Your project after that will be one or more of your sketches, even one pattern or
a small collection. I'm really curious to
see your art process and how far you can take this
very simple exercises. Also, if you want to take full
advantage of this course, download the checklists
and exercise files that you can find in
the project resources. So that's it. Let's get started.
3. Sketching Time!: Drawing something
every day and even if I only had 15 min even eat, it was just a sketch. I was drawing something in
posting it on Instagram. At that time, I didn't
realize that I was actually creating my own
illustrations library for my future patterns. During this exercise,
I just draw all the motifs and ideas
without judging anything. Then it is always messy
and sometimes ugly. And things don't make any sense. While I'm sketching. I trained myself to draw as many things as I
can within 30 min. And it helped me to not overthink or get
lost in the details. While I'm sketching, I only
focus on what comes to mind. E.g. I. Tend to use circles
for the head in lines or arrows showing a flow directions
for the future pattern. Then later, I will refine the drawings and choose
a color palette. When I need references, e.g. I usually search for
them in the next step. First, I want to connect to
my memories and imagination. What matters here is that you allow yourself to explore
and enjoy drawing. And this is the
main reason that I don't start a mood board
on Pinterest right away. In the next lesson, we're going to start
planning a mini collection. See you there.
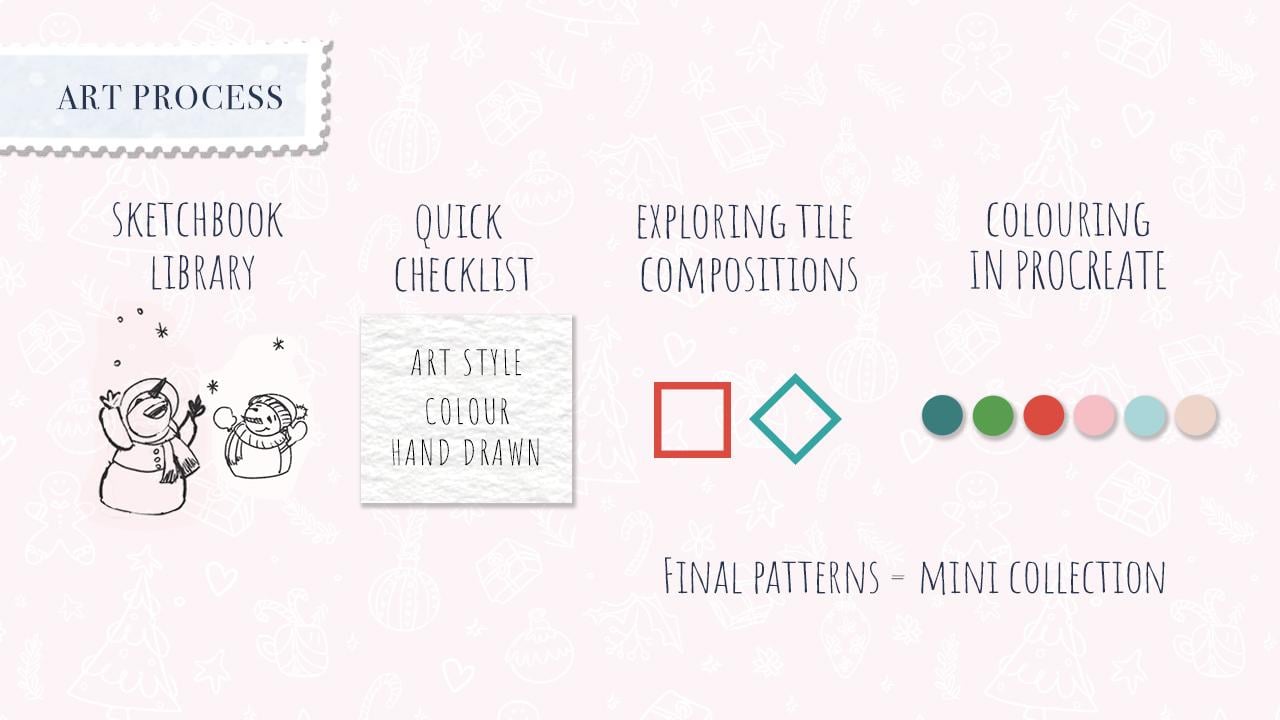
4. Sketchbook library - exercise 1: You might be thinking, why do I call this step of my
process sketchbook library? Well, because from a simple
shape or a silhouette, I can create new motifs in different positions
with new expressions. And as a result, I have lots of elements for my coordinating and
blending pattern. In my opinion, another
advantage is that you want to have just one element repeating over and over again. Although it can be
one of the patterns, I still want them to be interesting and add some
value to the collection. And maybe it can be sold
on its own as well. This is the agenda and take
me too long as you saw it. But it's an excellent
exercise to both your creativity and see
what your imagination shows. Once I'm happy with a few sketches or we'll try them in the pattern
compositions. And remember that there is no actual formula
for any collection. You can do. What you want. A class project you can do
is actually what I'm doing, tracing over my sketches and
using a circle and a cross, defining what direction
the elements are looking at and then changing
them to other motifs. For instance, I use
there is no main and the Christmas boots and a child and I turned
them into birds. If you don't know what to draw, I created a list for you. Food, clothes, snowman,
birds, bears, kids, gifts, phases,
fingerings, dinosaurs, ornament, unicorn,
maybe three and leaps. Well, I picked three between leaves,
snowman in ornaments. Please publish it
this exercise as your class project for
your mini collection. To the class project section. I would love to see
your process of sketching and planning
out your collection. In the next class, I will show you how I create
my pattern tile.
5. Quick Checklist - exercise 2: Okay, Let's start
planning our first style. I usually have
multiple ideas in, I think is a collection
is straight away. However, it can be
really confusing. So this is how I
organize my ideas. I think I will never stop
learning things about art. So I consider my art style have relates to the drawings and sketching the motifs
they already done. About trends. I need them, I need to adapt a few designs for my
printer demand shops. Colors I can use my favorite
combination of colors, are trying to explore new combinations related
to media in their way, digital or traditional,
I always use the watercolor
textures for software. My favorite automate
favorite is Photoshop, exactly because I can add textures and also
fabric textures. And there is no limit of layers. File size, I usually
draw and color the motifs in Procreate
and Photoshop. I use Adobe Fresco when I
want a vector logo design. And I can also add
watercolor textures. Last but not least, I'm going to look at the
websites and see if there's any colored trend or motifs that I can add
to my collection. And there's a section
on Spoonflower shop, the categories and
colors that you can also check how they
organize all the designs. See what category
your design would be. An even using these
words is a keyword tag. Now I have all the information necessary to keep working
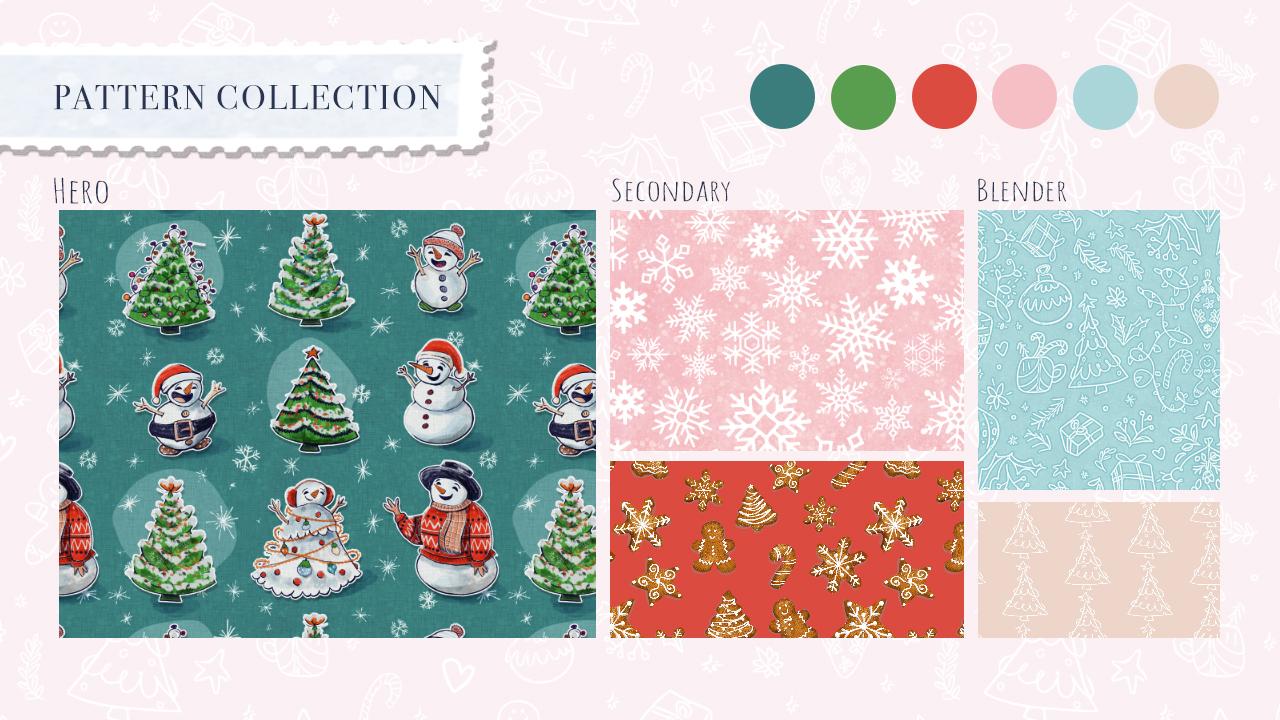
on my collection. Next step is drawing thumbnails and
deciding which one will be the hero pattern, secondary and blender pattern. And of course,
playing with colors. See you there.
6. Exploring tile compositions - exercise 3: In this lesson, I decided to show you how I draw my tiles, where I placed the motifs in what is the best
flow for that theme. First, I took pictures
of my schedule and I organize them by topics. And then before I started
refining the drawings, I'm going to do some tiles
compositions exercise. I'm not sure which one
I really like the most. So this is, again, this is why I draw
multiple tiles and TOO I finally decide which
one is gonna be the hero, the secondary and the blenders. For this lesson, I'd like to use the basic repeat and half drop, repeat and
multi-directional. We can leave the other types of compositions for another class. Although I work in Photoshop, in procreate, is using
a basic repeat tile. I like to decide what is the
focal point of the design. It can be in the
middle of the tile or it can be an interaction between the motifs instead of just relying on the tire
composition itself. And by doing these sketches before I start
creating the tile, I already have a structure
of a dynamic composition. This is the step-by-step from
when I started sketching. I finish out the
design in Photoshop.
7. Colouring in Procreate - exercise 4: In this lesson, I want
to share with you my chaotic color
exploration process. It might sound silly, but it is true. I imagined everything
in black and white. I know it is crazy, but my imagination is
exactly like an old movie. I can see colors. I just cannot imagine them. Even dream in black and white. I know you might be
laughing right now. Anyway, as a visual person, I used my struggle
as an advantage. The solution I had was to start with the background color, which is the dominant color. And keep trying
different motifs, focusing on a balanced design
in value and contrast. But if you're doing
thumbnails a wave the motifs many times and changing
the background color. And it works for you. Great. Keep doing it. Talking about layers. I have one for a sketch, one for the final linework. I color block below that, and a clipping mask layer for coloring and
shading between them. Edging a multiply layer is
excellent for me because I use textured brushes for a
shading in my art style. And the last one is a
background color layer. Once I'm happy with
the overall look, I save this design as a
PSD file because I went to keep all these layers and I finished this
design out in Photoshop. The reason for that
is the design doesn't get cropped like
we talked before. And also I can add fabric
or paper textures easily. So I would love to know what your favorite
coloring process is. Let's finish this design
out in Photoshop. You in the next class.
8. Final patterns : We're here in Photoshop and
I want to show you how I use the Adobe Photoshop plugging
view, pattern view. And you can see in the
motives repeating. In blue is the Canvas. Limit is always going
to be a basic repeat. You can work in a bigger
size file and repeat it. Making your own half drop. Repeat. If you upload
it for insect e.g. in, into Spoonflower, you're gonna choose the
basic mode, okay, another way that you can
work with is the simple way is creating a background guide
and use the diamond shape. This is why I always draw inside a diamond shape when
it's easier for me when I'm working in Photoshop
to organize my motifs. So e.g. here I have a motif is just Command T to activate the transform tool
or continuity for busy. And you place it inside this
background just as a guide. So you just go and copy, click and hold and
coffee one more time. And you come over here
and place where you want is another way
of fake half drop. Repeat. If you turn it
off the pattern view, you have your title. You're going Files, Save As or In New Choose JPEG or a PNG. The only thing that
I don't like about this technique is that
the motifs get cropped. All of them are on
the same layer. So what I'm going to do
is using the technique which you copied the motifs that are out of the canvas area. For instance, this one
will be on the top, so I'm going to copy it and
place it at the bottom. So first I'm going to
duplicate this motif. Then I need to
change the y axis, which we'll move this
motif down vertically. Because the canvas that
I'm working on is 2000. By 2000, I just need to
add 2000 pixels to that. Then I'm going to
repeat the same thing. On the left side. Then I grab one motif. Or if you have more than one
to read them all, duplicate, then Command T to activate the transform tool and
add 2000 pixels to the, this time x exists. So there you have it. If you want to know how to do
more complex repeats, I recommend Mel Armstrong
classes about how to create simple and half-drop
repeats in Photoshop. For the second pattern. Although I created in
Procreate the whole tile, I also use the same
pattern view as a tool, which I can check if the
time is repeating perfectly. And if you want
to know how to do easy half drop
patterns in Procreate, I recommend Rebecca
flighty is class. I'll show you how I work. I just turn it on. Turn you turn it on my guide. During the opacity coping, common teacher
activate command T and move to the other area. We can see that the
empty areas here, which I can copy the same motifs or draw
directly in Photoshop, starting off that pattern view. And then you have the repeat
is another way you select. Go edit, define pattern. So they style Sketch, test. Okay? You got to test it. File. You choose one. Sorry for I like working
in pixels by four. Here is my button. Does engage in this
another way did I? You can also do it. Is going layers. Double-click on the pattern view and you can move them around. You can move the tile. So when it comes to drawing, Let's get in and brush
no drama on the brush. And you keep drawing
here, whatever you want. Coffee. Control C or Command C. Let's go back to
our tile. Nearly. Control-v. Select
Command T to activate. And then place where he went. If you cannot see your
attorney view, pattern view. And then this is
our sketch test. Come over here, place where
you want. Copy again. Command D. And this
is the final pattern. All the edges are perfect and all the drawings, I like that. And also a texture, as I said before. So here I have fabric texture. I like to play with the blending modes so you
use your favorite one. And when it comes
to change the color of the line work or background, we can add a layer
with a solid color. This is why I love saving
the file that I worked in, procreate as a BSD, Fill Layer, Solid Color, Fill Color, and choose some beach. And click, Okay.
This is my sketch. On top of days or
create one more layer. You can't see anything right? Then we've right-click. And then you create
a clipping mask, double-click and
change the color. And there you have it. This
is how I create my patterns.
9. Final thoughts !: Thank you so much for taking
this class with me today. If you're really liked this
class and found it helpful. I really appreciate if you leave it a like and a quick review. It really helps me to be more
visible on the platform. And other students can
also find this class. If you are happy to share
your work on Instagram, please tag EvoS a studio. And if you want to know
more about me and my work, you can visit my website. He was just a geo.com
or my Instagram. Remember to upload
your class project to the project gallery. It can be one of the sketches
or one of the exercises, one of your patterns, or a small collection. If you would like feedback
from me or other students. I'm available by
the Discussion tab. And remember, be kind
with yourself and respect your art
journey process. And thank you so
much for watching. And last but not least, Merry Christmas
and Happy New Year to you and your family.
 Elaine Bozza, Illustrator & Surface Designer