Transcripts
1. Welcome to Class: [MUSIC] When I think of
the quintessential artist, I think of that person who's
always carrying around a sketchbook creating
art from cafes, parks, or in the subway. I always wanted to be
that kind of artist but I could never figure out
what to do in my sketchbook, so I gave up the
practice for many years. Is that your story too? Thankfully I took
it back up again a couple of years ago
this time for good. I'm obsessed with my
sketchbook practice, and I can't wait to share all that I have
learned with you. Instead of my sketchbook being a visual journal of my life I've preferred to use
my sketchbook as a tool to improve
my illustrations, develop new ideas, into to. In this class, in
three-part series, I'm going to be
helping you to start a sketchbook practice
from the ground up. We will be starting
with small steps of drawing simple objects
and making collections of character features to really develop the groundwork of
your illustrative style, and then from there we'll be learning how to create
your own inspiring drawing prompts for character
development and building up to gradually being able to put together large
illustrations. A huge bonus is that
you will also be developing your style in the process in a
very organic way. Hello everyone, and
welcome back to another classroom and
meet Christina Hopkins. I'm an Illustrator and Surface Designer from
[inaudible], Sweden. As I said I gave up my
sketchbook practice nearly 20 years ago
because I never really figured out what I was supposed to do with
the sketchbook. I had already found my style; I thought and I
knew how to draw, so what was the point?
But I was wrong. Two years ago on a whim, I picked up a sketchbook
again and now I'm hooked. I finally learned
what I was missing. A sketchbook is a
place to learn, and grow, and
discover new things. Because you can easily go
back and reference what you created at the beginning
and see improvement, at the end you get really
motivated by your progress. I could just kick
myself for dropping the practice nearly 20 years ago when I went to art school. I feel like my art and
creative practice has developed and gotten so
much better in two years. Imagine how far I
would have come in 20. I'm so excited to share my process of starting a sketchbook practice
that's sustainable, and fun, and playful, and I hope that you
get as much out of this practice as I feel
like I have gotten. So let's get started. [MUSIC]
2. Your Class Project: [MUSIC] In this class the first part of this
sketch book series, we're going to be starting
with the groundwork. We're going to be starting
simple with objects, and we're going to be creating
collections of pages of character features and
characteristics that we can later use to build
up large illustrations. When you start small, it becomes a little bit less overwhelming than jumping straight into
a final illustration. Even though I've been drawing
for a very long time, I find these practices
going back to the basics really
helpful because you start to hone in in how
you actually do like to do things and you start to
learn and process things. I love being analytical and
nerdy about drawing as well, and I really do think that it
helps to develop your style further and just
make sure that it's constantly evolving
and getting better. As an illustrator
for the most part if you're working in
traditional illustration, you are required to tell
stories and create characters whether that is humans,
animals, children, objects. You're telling a story or a story line about
something that's happening. This class is going to be very character-based and
working on creating characters that you
can illustrate so you can illustrate stories
for your children's books, or editorial articles,
anything like that. It is the quintessential thing that you need to do
as an illustrator, be able to tell a story
using characters. Again, that doesn't have
to be always humans, you can talk about characters
and objects as well. This sketch book
series of classes is inspired by my red
sketchbook that I have here, I'll show you that
in a little bit. I started that in November 2020, and I had the intention of finding my children's
book style. I've been working as a
freelance illustrator for over a decade, but I haven't really
jumped into the world of children's illustration
and since having children I've been really
inspired to do so. I got this sketchbook and I sat down with those
white scary pages, and I figured out a process of making it easier to develop my character style and
I really broke it down. That's what we're going
to be doing in class. The class project is going to be to start a
sketchbook practice. I'm going to be sharing
several different exercises, and lists of objects, and characteristics that you can draw in your sketch book
of your class project. What I would like
you to upload to the gallery are a couple of photos of your favorite spreads of these simple exercises. Feel free to update your project in the
Skillshare gallery by uploading other spreads
as you move along in your sketchbook and
you feel like you're developing and getting better. It's always fun
with a sketchbook being able to flip through
and see your progress. Maybe at the beginning you feel a little bit unconfident, but by the end like I did
in my grad sketch book by page 200 I felt
that I had really gotten somewhere and I was a lot more confident in my lines and how I was developing my characters and
things like that. Uploading your project to the Project Gallery is
an incredible way to get some encouragement and feedback
from me or your peers. Please be brave and
upload your work, it's going to really help
you to grow and give you a little bit more importance
to sketchbook practice.
3. My Sketchbook Tour: [MUSIC] Here's my
special red notebook and when I was
just starting out, I did feel a little
bit shaky about where I was going with this. Wasn't really sure how
to use sketch book. But as I continued
and push myself and brought this sketchbook
everywhere I went by, kids were playing outside
of the park I brought it. Even if you manage to do
just a couple of sketches or a couple of scribbles or
even just some writing, I think it just helps
you to always have this creative mind going. Like I said, by the
end of the sketchbook, even though by when there's
only a few pages left, I really just want to fill it up and move
on to the next thing. I did feel like I was
getting somewhere and I was really excited about
having a sketchbook again, and I couldn't wait to
open up my next one. Personally, it took me about a year to get
comfortable with my style for this
new direction that I wanted to take my career with children's
book illustration. I wanted to add another
thing to what I can do. Having a sketchbook
practice has been vital to moving in
that direction. Not only as just the practice, but also as a reference whenever
I create illustrations, I have pages upon pages
of objects and hands, and faces and expressions
so that I can reference for future
illustrations to make them really neat and unique and that is paramount when you are an
illustrator you have to create unique work that is original. [MUSIC]
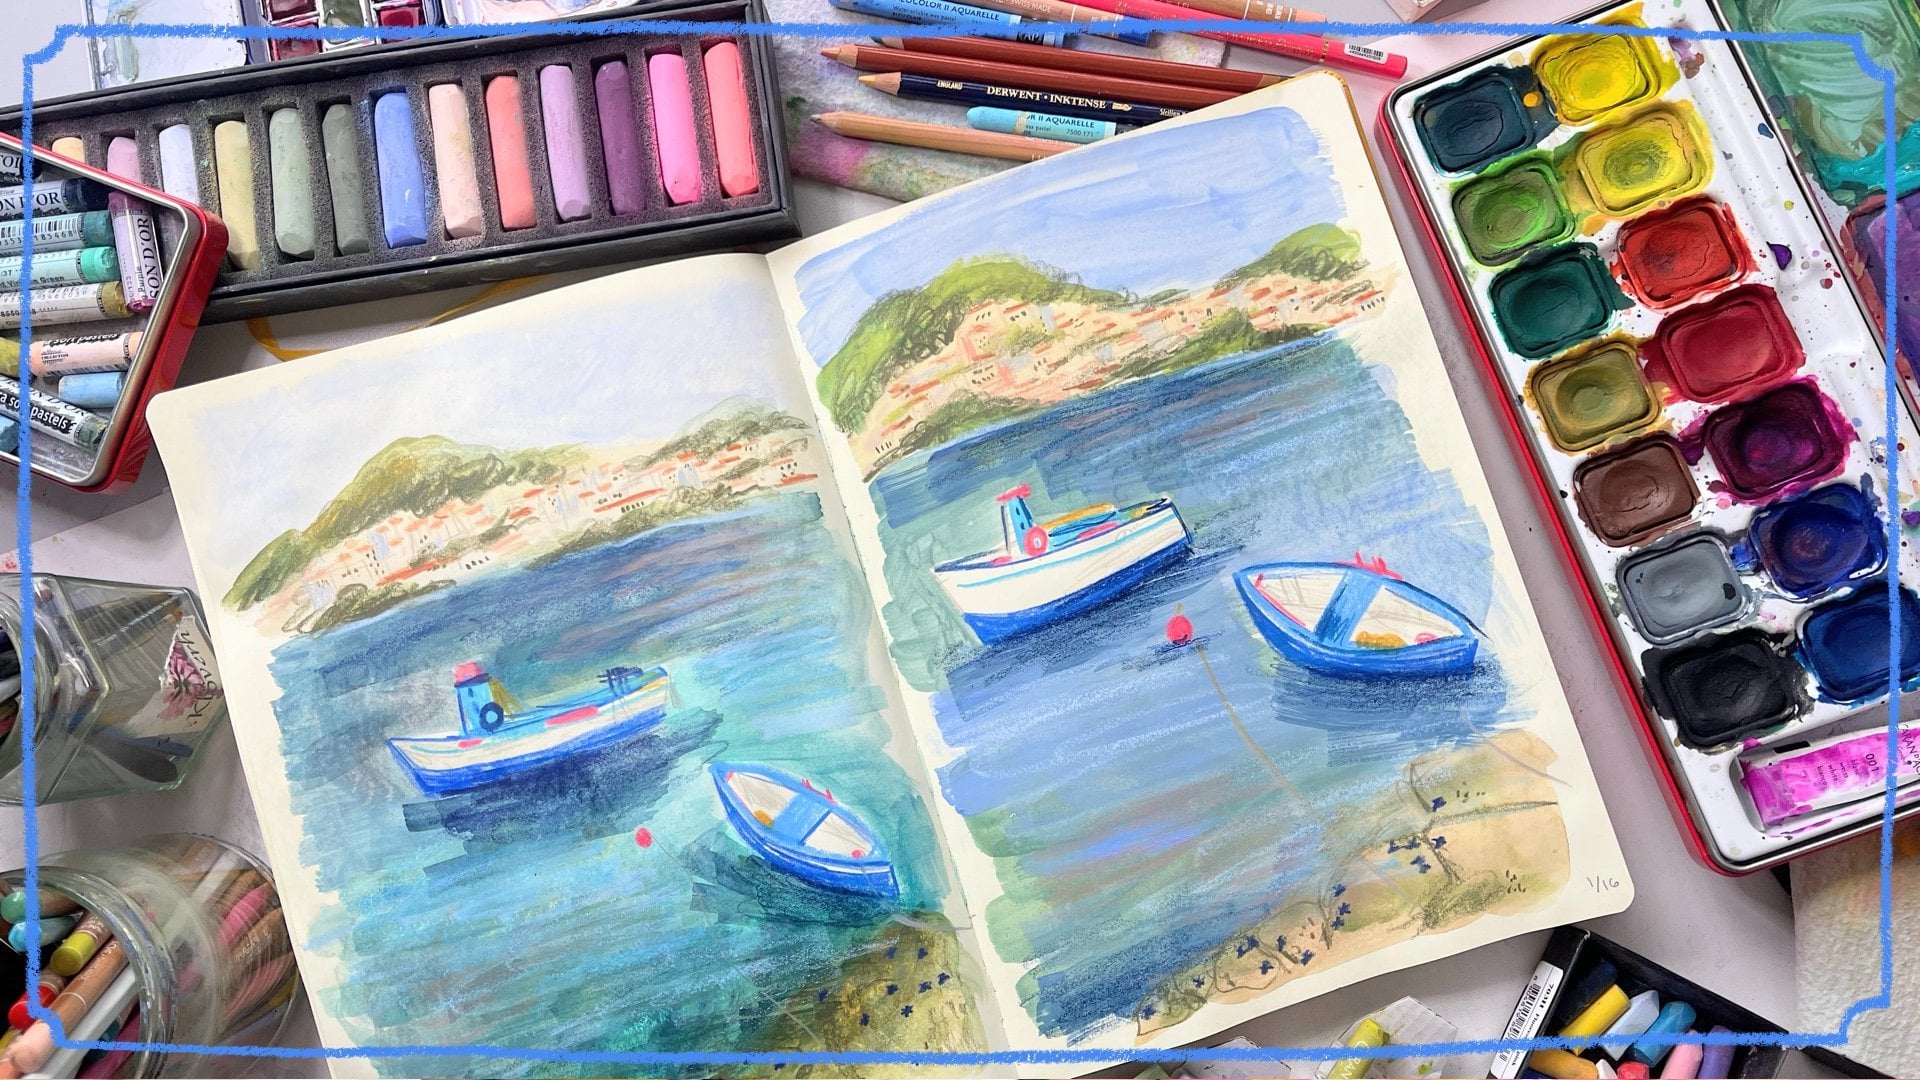
4. Sketchbook Supplies: [MUSIC] The supplies that you need for this class
are pretty basic. You need a sketchbook and you need something
to draw with. For me, for this class when we're
doing our basic drawings, I'm going to use this
sketchbook which is an A5, regular it has cream pages. They're quite thin probably
80 or 90 gram paper. It doesn't handle paint
or anything like that, or very heavy markers
and something like that. I prefer almost to
just work in pencil, just a regular pencil
it can be mechanical, use just a regular traditional
pencil and that's it. But if you prefer
to sketch in pen or colored pencil or something like that of course works as well. I also work in other slightly more
precious sketchbooks. I have paper that are little bit thicker and this is
when I am working with more mixed
media such as squash or pastel pencils
or colored pencils, and I'm creating more work. We will get into that in
the rest of the series. I just wanted to mention
that I do jump between different sketchbooks
just because I have different uses for them. Some sketchbooks I want to be a little bit more finished
and some I want you to just be scribbles and open to being
able to write something, to notes and also take some traditional sketches
and then figure out ideas. Just figure out
what works for you. I like these ones that have
a hard back and I could [inaudible] their their because
it fits nice keeps safe, you can have it on your
shelf and fold them a lot. But if you still feel that's
a little bit too precious, you can of course use
traditional spiral bound sketchbooks that have very thin recycle paper
and things like that, even scrap paper, loose papers, and you can bind
them together in some notebook or folder later. But I really like this kind of notebook that has thin pages. This particular notebook comes from a brand called
United office. I've also used the Loish
Drum regular notebook as well that has 80 gram paper, and I really liked
that one as well. My more fancy one, this is the Loish drum, that with the art paper, art edition,
something like that. Then the paper is 140 grams. It does take a lot of it can be painted on
and things like that. Another recommendation
I'm going to go through everything
is I really like these ones by Royal Talens and
the Art Creation notebook. I feel like it's somewhere in between the Loish Drum that has that crisp white,
beautiful thick paper. This one's ivory and
it's still quite thick, so it does handle a
little bit of paint, but it's not too precious as the crisp white perfect pages. I think this is a good
in between plus it comes in light pink,
which is adorable. Other supplies that I sometimes use in a simple
sketchbook like this, it can handle a little
bit of colored pencils, so I have a selection
of my favorite colors. I really like the
brand pattern dash, so I use their Pablo
pencils and luminance. If you're wondering, these are the current new
pastel number two, so they're water soluble. They are fun to play with too. All right, now that we've
talked about some supplies and seriously only need
paper and a pencil. But if you will have, which I assume because everybody has waiting [inaudible]
art supplies, you can use whatever you like.
5. Where to Start?: [MUSIC] Before we get started, I think it's really
important that you set some intention with
your sketch book. What is this sketchbook
going to be for? Is it going to be a place
that you can be free to create lots of
sketches and notes, and it's not perfect, or do you want that
Instagram-ready, portfolio-ready
sketchbook that is beautiful piece after piece? I highly suggest, if you're just starting
out with sketchbooks, that you choose
the first option. You are a little bit more free, and you don't feel
crippled by having to create a perfect piece every time you just switch the page. Also, it could be
interesting to have some plan or intention
with your sketchbook. Previously, I've had sketchbooks that I only paint happy florals. I have a class on
Skillshare about that, if you'd like to check it out. Like I did told you, my red sketchbook was about developing my children's
book illustration styles. Then I would create
sketches for my other work, for surface pattern design, etc. Just having these
little ground rules and things that you're
thinking about help you to get started as well so you don't feel blocked by the white page. If you're lacking in
ideas and inspiration, it might mean that you're
lacking outside influences. You need to get out
more, essentially. When you are getting out, just have this intention of
trying to gather inspiration. Be a total creeper, and eavesdrop on people that you're walking
paths towards, sit next to on a park bench. Watch different series that
you normally wouldn't, and pay attention
to the details of people's clothing or
the way that they build up a scene with
composition and color. Go to a different cafe
than you usually go to. Sit in a seat
that's a little bit different than where
you usually sit. Just start to do things a little bit out
of the ordinary that you usually do so that you start to build up different experiences. They don't have to
be revolutionary, but you just start to see
and notice different things. You see some funny dude
with crazy socks walk past, as you're sitting
on a park bench. Remember that and add that to your arsenal of things to draw, or in movies or something that you
wouldn't typically watch. Look for international movie from a country that you've
never watched movies from. I would also like you to consider a couple
more things such as, when are you going to be
using your sketchbook? Is it going to be a daily
practice that you set out at 30 minutes before
you start your day? Every day to do some
warm-up sketches and to figure out things, or is it going to be something that you take with
you all the time? You're always sketching in
between on lunch break, when you're on the subway, or any chance that you get, or are you going to set
out maybe an entire day? I have shared before, I always have fun Fridays, where I use that time, an entire workday, to explore and try
new materials, take classes, and usually spend a lot of time
in my sketchbook. Consider when you're going
to be using your sketchbook. Then you could also
consider writing a list of the things that
you'd like to improve. What was your intention for this sketchbook in
which you need to work on? Create a list inside your sketchbook of the things
that you'd like to work on. Whenever you feel like you don't really know your direction, again you can go
back to this list. Remember that, "Yeah, I should be working
on expressions, etc." Lastly, I would love
for you to check out 5-10 of your
favorite artists. I just really study
them and see what it is about them that you
really enjoy or don't. Not just those
typical things like, "I just love their work
because it's so pretty." You have to dig in a little bit deeper,
and think about, "I love the way that this artist creates such graphic shapes," or their color palette is
so strong and individual. They always have crazy
pops of color," or "I love the way that this person captures expressions with
just a couple of lines." When you start to
notice these things in other artists
that you admire, you can start to figure out what you would like
to develop as well. It's not about copying. That's bad, don't do that. It's just about mindfully going through what your
preferences for art are. Once you've done all that, you have set in an intention
for your sketchbook, you're ready to get
going and drawing. It's just a matter of picking up a pencil and getting started.
6. Project: Small Objects: [MUSIC] In this first section, we're going to start small. We're going to
start with objects. I think that this
is a great way of just taking the pressure out of having to draw hands right away or eye shapes
or expressions. We're just going to
draw simple objects like cups, vases, house plants and
really get loose and have tons of pages
of reference for later. Let's get drawing. We're
starting with simple objects. I wanted to show you from my
red sketchbook a couple of examples of this and why I
think it's a great practice. We have here a
spread with tons of different bottles and cups and vases and I haven't drawn
them very detailed. I haven't done any shadows. I've mainly just done outlines. Why I love the practice of
doing this is just to come up with different shapes than what you'd
normally come up with. Maybe you start off by doing a normal vase shape
or normal cup shape. But then if you start to
research and you start to think about different
forms and you start to create your own forms, then you start to make more interesting cup shapes
and choose something that may be a little bit unique rather than always
doing the same thing. I love having pages like this in my sketchbook as
reference later. If you take the time when you're feeling like you
have a little extra time, you want some sketchbook
time and you create pages of reference
images like this. Now when you sit down later
to create an illustration, you can reference
your sketchbook rather than going
to the Internet for every single item
that you're thinking of drawing so it
goes much quicker. I also have house plants. This again, it just makes it easier later when you
go to do some drawings, you've already spent time
researching shapes and forms. When you sit down and you
make another illustration, you'll remember something that you created that you really liked and you can use that
in your illustration. Here's some chairs as well. Because when I sit down
to do an illustration, maybe I'll always
choose the same kind of regular chair that I think of
but when I did my research, you could do lots of vintage chair research or
modern or look just scour the Internet and find lots
of different cool shapes and tweak them to make them your own so that you're always
trying to be unique. But I think it's also okay to do certain forms and
things like that. This is obviously
a butterfly chair. I think it's okay to use in the illustration.
But things like that. When you start drawing
different shapes, you start to understand
how the legs can be formed then you can start to design your own types of chairs. Here I did lots of frames. If you've framed artwork in the background of
your illustration, rather than just doing
a square frame around, imagine if you had
all these ideas lined up of different elaborate frames that you could add in. I just think this is a nice, easy exercise to where you
sit down to your sketchbook. You can have lists of
different things that you can draw like frames, house plants, chairs. What else do I have in here? Shoes. Rugs are really fun to draw so that you have
different patterns going. You could have pages of patterns that you could add
to your artwork. Here's another page
of house plants. I think this is an
excellent space and place to start your sketchbook because
you're just drawing. Either you can
start with drawing things around your house, then you can start to
draw things that you're finding on Pinterest or Google. You can search different
house plants and mix them together with different pots and try to make your own designs. Then once you've done a couple of pages of
different house plants, you can start to draw your own house plants
and come up with things, and that applies to any object
that you choose to draw. [NOISE] Here I've done
windows. That's another thing. When I go to sit down
and draw a house, I will just draw the
regular one window with a cross wherever those
windows slats are called. Here a traditional
window like this. But there's so many
different kinds of windows that you can draw. Just having this
reference is incredible. I want that for you as well. We're going to move over to my new orchid-colored
sketchbook. A friend gifted this
to me, so thank you. [NOISE] Here I've already started a few pages of drawings, but here I wanted to
show you that I started to do some more objects. In here, on this one side, I do my simple outlines of different jars and
jugs and things. I started to add a couple of designs on them just to
get some ideas going and then I did a couple
of larger sketches in some scribbly color
just for fun like this. I don't think that
they're revolutionary, but it's just fun time to create and play
with color as well. This is your sketchbook, this supposed to be fun as well. It's not just about learning
about different shapes. I thought we could
draw some objects together and I'll
show you my process. [NOISE] A blank page here. For this class, I've created
a reference for you. I've created a list of objects to draw so that if
you're having a total blank, you don't know what to draw. I've created that for you. I have written it here in my sketchbook and that's something that you
could do as well. You could take a
look at my list and then write it in
your sketchbook so that you have a reference page. Here my collections
of objects could be things like bottles, vases, jars, wall art, cups, glasses, teapots, pitchers, house plants and
pots, art supplies, kid stuff, kitchen
stuff, bathroom stuff, windows, trees, flowers,
furniture, rugs. Anything that you
have in your homes, anything that you
would depict in an illustration in
the background. Just like all those
funnel things and I think they're
really enjoyable to draw and it's a lot less daunting
to draw those kinds of things and jumping straight
into drawing people. We've already done some bottles and jugs and things like that. What should we do this time? Should we do more house plants because those are really fun. Let's do house plants. We'll
just get right into it. I think it's great to
just start off with drawing something that you have in your house
or from memory. Because you'll start
to notice like, oh, maybe you made that a
little bit generic. I can draw a plant that I
have here in my studio and it has that very
normal-looking pot like this. Like one of those
mini monstera plant. As I'm drawing it, I'm trying
to make it look a little bit nicer than what it
actually looks like. It now looks a little
bit mangled but I've tried to make it look balanced here, something like that. This is, I think, something that I could
have drawn from memory. It's not very exciting really but it still
gives you an idea. You don't always have to be so revolutionary
everything you draw. One thing about this pot, it has a pink ombre, which is really
pretty so it's pink at the top then
it goes to white. I can mimic that by just giving
you a little shadow here. You guys continue like this. You can draw a couple
of more things from your house or from memory. Here we'll do another
jar like this, we can do another cactus that I have and
he's falling over, that's squiggles on him. We need to get bigger. I'm going to get
this pot some legs because I think that looks cute. You can have a little
pattern on this for fun. Now I've done a couple
of from my room here. What do you do when
we want to start referencing? Here's
my cute little kid. We will write house plants. When I use reference images, even if it's a plant like this, it's not like a famous
photographer's photo. It's still important to make
it your own and not just copy it exactly
photo-realistically. Take what you can from it or just what you need
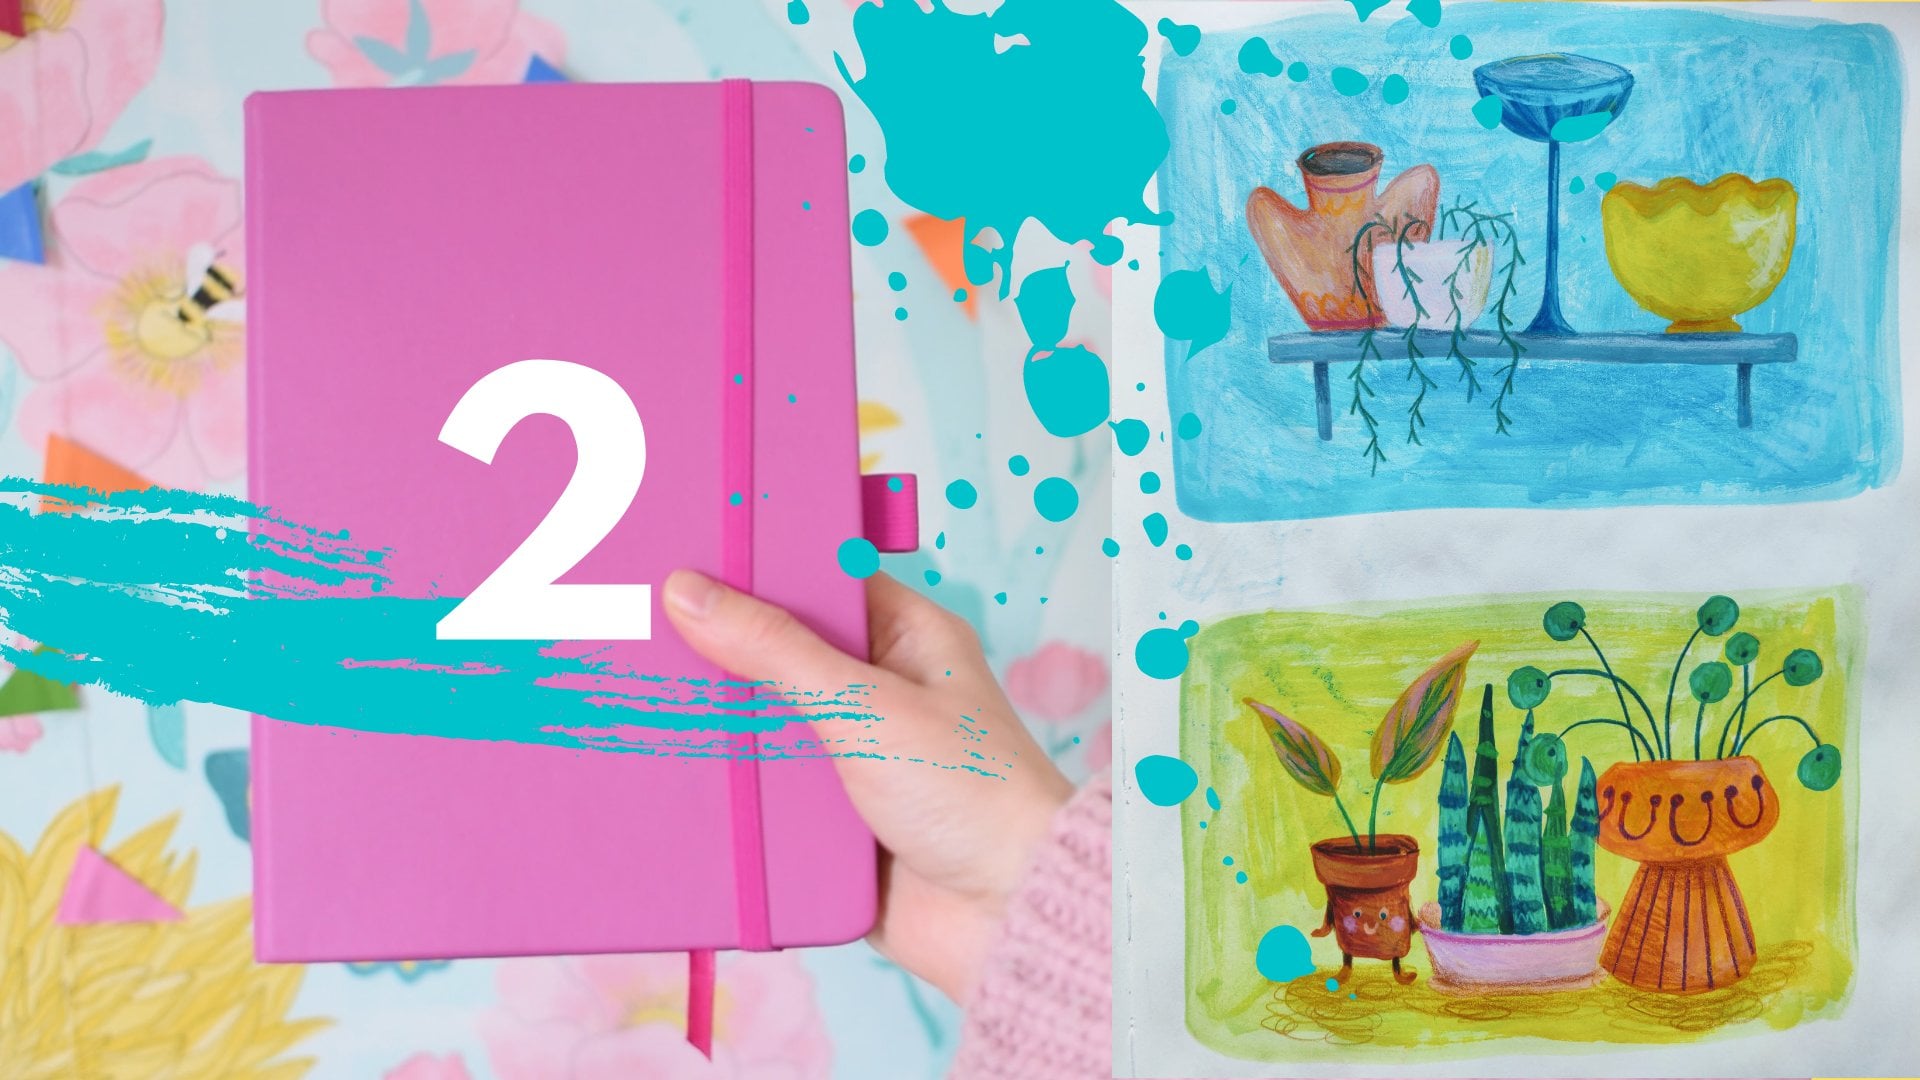
from it if that makes sense. Here's a nice shelf with different plants
that are hanging. It's interesting with
a plant like this, because its rye is hanging down. This seems to have a part
that looks like this, which is interesting
and you could put some stripes on it and
then it has dangles. [NOISE] At the same time as I am
gathering inspiration like this I'm making it my own so when I do go
back to reference these, I'm 100 percent sure
that I can use it. That these are my ideas because that is important to be unique. There's another idea and you
just keep going through. Now I'm getting ideas for
different planter shapes. That looks interesting.
It looks like a basket. These are just sketches to
me. They're just ideas. I'm gathering ideas,
so I'm not trying to work on my shading or
anything like that. But if that's something that
you are trying to work on, then feel free to add
way more details. But I just want to
think about shapes and use my brain to come
up with different ideas. Maybe it should be some
palmish thing that has lots of cool green shades. I'm just making this up. I didn't see anything like this. Maybe it has weird squiggly, scratchy looking palm
tree stem thing. [LAUGHTER] Then we're
just going to keep going, just keep googling,
mismatching different items. If you see one
plant pot that you like mix it with a
different plant, come up with your own plants and then the same thing goes. If we were to switch
maybe on this page, we can do the same exercise
but thinking about glasses. When I think of a regular cup, I would draw
something like this. It'll be pretty
boring illustration. But if we look up some
other vintage ones, I like the look of
vintage things. We can look at modern
things as well. Just remember not to draw something that's really recognizable as a certain brand. I have something like
that looking wonky. Here's an interesting shape. It has a pattern on
the glass as well. This one has some pattern. That's fine. Again, these have bubbles
almost all over it. How do you depict that? It can come off the side. Here we have the lid. You get the idea, so I'm
just going to keep going, creating my little objects
and you can too to fill out as many pages as you want
with houseplants or cups. You can refer to
my list of objects to draw and just fill up
pages and pages and pages. Whenever you feel like you
don't know what to draw, you can always refer
and you can redo, do another page of houseplants, do another page of rugs or cups. Redo pages that you've
done before and pick out a few and create a little bit more
detailed sketch of those. You're never going
to run out of ideas. There's so many different
objects that you can draw. You can redraw them over and over again so
you get better and better and you learn new things and you figure out
different ways of drawing. I also haven't mentioned, you can check out other
illustrators' work and see how they depict different items if
you want to figure out different ways of
depicting things. But just remember
to not straight up copy 100 percent
somebody else's work. You need to make it
your own in some way. Let's try to figure
out an example and we can try to find some
plant depicted somewhere. If we look at this illustration they have a plant like this. That's interesting. But I think it's very
important not to just straight up copy this
illustrator's idea, but we can take some
things from it. I really like the idea of having huge leaves with
a smaller plant. That was a fun idea. I'm going to do a
different plant pot. Let's see. I love the
idea of big leaves, so I'll do leaves like this. I like the stripes in there too, so we can take that as well. Then we need another flower. Let's do a daisy looking flower. Now we can be sure that we haven't stolen
somebody else's idea, but we have moved on from that
idea by making it our own. Plant pot, I'll just
make it a nice long, skinny squared and I put
a nice pattern on there, so we can think of a different
pattern to put on there. I like when it like
this, drips of paint. There we can even give it a
place to stand. There you go. That's how I use
reference to get other ideas of how
people create leaves. But you can't draw
this exact plant. That's somebody else's
thought process. But you can reinterpret
it in a different way. That can help you to learn
different ways of creating. The same thing with this. It's very simple. It's a vase. You can do your own type of vase here and put some
sticks in here. There we go. There again, we use that idea but
made it our own. But I highly suggest to use photographs rather
than somebody else's artwork. But if you are inspired by
somebody else's artwork I just wanted to mention that
you have that in mind, that you're always making
sure to make it your own. Like this cup, print was cute so I do some stripes here at
the top. There you go. You can even make some balls at the top of my plant to give
it a little bit better shape. I added in a few more of my plant pots here
and then I'm going to continue and create some more glasses and
things like that. [MUSIC] Now I filled up two pages of even more houseplants and
even more vintage modern, who knows, cups versus bowls. Next time I sit down to
draw illustration and I'm going to add
different items like this I have so many
things to look from. That illustration
is going to take a lot less time
because I've sat down to practice these shapes
and get ideas going. I can continue to work
on things like this. It's just a nice
pass time, I feel. Then again, you can go in and work on a couple
and sketch them out in color or add some shadowing to them so that you work a little
bit more on that. That's completely up to you. Pages and pages of
objects are so much fun and really useful because you can go back and reference them. It's not just about drawing them and getting used to creating
different shapes and trying to think of things and reinterpreting what
you see on Google. It is a great reference. I hope you enjoy
creating lots of pages of your own reference objects.
7. Project: Character Features: All right, in this section, we're going to be starting to create some
character features. If you've never
drawn people before, this is a perfect
place to start. I think by just picking one
item to focus on, just eyes, just hands, just noses, you really get to figure
out what style you like. Let's jump in to that, creating characters isn't scary as long as you break
it up and start small. All right, now that
we have worked on many pages of incredible
objects for reference, it's time to move
on to developing our characters and
starting simply by researching different
eye forms and noses and hands that instead of working directly on a character, we're going to create the building blocks of
this as well to make this process a lot more
simple and also do it again, create a reference library of different eye shapes and
ways of creating eyes. Here in my red sketchbook, I have a page of faces
that I put together creating different ways of drawing noses and
mouths and eyes. I'm starting to figure out
which look I like the best. Because in this sketch book, I was trying to figure
out my character style. I've done a couple of reference artist studies of how other artists
create faces just to get an idea of how
other artists. I love David Sierra Liston. The way that he creates
forms of faces that are very misshapen and they have very dramatically large eyes. That's something
that I really like. But I, of course, don't
want to mimic his style. I have to make it my own. This is just exploring different shapes and
things like that. For this section I
have a whole list in my sketchbook to do draw list. I have the collections of characteristics that you can start to collect such as eyes, nose, ears, mouth, hair, head shape, hands, feet, clothing, and everything
that goes with clothing, accessories like pages of hats and scarves and
shoes and gloves. Again, pages for
you to, first off, just have fun, have something simple to focus on and draw. Then second off, you
can start to focus, just build up a
reference library. I've created a couple
of pages here. Here I did some hands and feet because hands and feet
are difficult to draw, especially if we want to
make them simplified. I also did some hair. Again with hands
and feet like this, I go in and how would
I want to draw first. I want to do it quite simply, and then I've also thought, looked at referenced other
artists and how they do hands. Just do simple lines like this just to mimic a
hand with the fingers, which is a very simple way, especially if you have
a blob of color that is the hand and then
you added a couple of lines like that can be really expressive
and work as a hand. You don't always have to
draw every single finger, and fingernail and
every thing like that. That's just exploring that. Feet are also really
funny to draw and weird. Do you want to just always just draw your feet in shoes or socks to make it simple for
you and you can create different shapes for feet? I love the idea of
a fat foot with just a tiny little
toe sticking out. Or you can do really long, which is going to
be fun and skinny. When you are creating
your own characters, you can create them
exactly how you want to. Also from character to character
that can be different. It would be really weird
if you're a world of people who would all
have the same feet and hands and eyes and
things like that when the world for real has
so much diversity. Again here just exploring different feet shapes
and how to do feet. I'm not sure what I
have landed on yet, but I just like a regular here. This was funny, I saw a picture, I don't remember what
artist I saw it with. Just a couple of
toes and a heel on that gives off the look of a foot even though
it's quite square. Maybe I would prefer it to look a little bit more natural. How does a foot look? It's like look at your foot, it's a little bit
more ankle, maybe. Something like that. Something
that you're working on. Hairstyles and how to
depict hair is also very interesting to
figure out and play with. Do you want it just
to be just flat forms that cover a head? It can be really
graphic like this. Just some lines attached to the head or really flowy lines or is it going to be
made up of just a bunch of scribbles to
mimic curly hair? There's so much to play with. Or just expressive
lines coming off of the head to do like
really expressive, long, straight hair like that. I thought together we
could do some pages of eyes, nose, and mouth. I'll break this up, and we can do eyes, nose, mouth and ears. We're going to come up with different ways of creating eyes. To do that first step, I'm just going to come up
with what I can think of. Then we'll start to
look at the Internet and how other illustrators have depicted eyes and how
I can use that in some way. Also, there are many artists
that do the same things, so sometimes it's okay. For eyes, you can start
off with just simple dots. You can do circles, you can do almond shape. Something more realistic. Some artist create pointy eyes with just a little pupils, bigger, rounder with
a little pupils. I think that gives
off a little scary, so those are my favorite. Could do smaller little eyes. It depends also if you draw, them slightly close together, you can have more comical look. But if you draw farther apart, for me I think it makes a character look a little
bit more innocent and sweet. It's something you
can play with. You can add eyelashes. Okay, underneath. Others, you can add eye lids
going on as well. This gives some more expression. It's almost like
adding eyebrows. Also, if we started
adding eyebrows here, our little center would be
very expressive as well. Eye shape more like
this, just a loop. Also just playing around with the placement of the eyeball, having it really fill
out the whole thing. Large pupils just like
a line work like this. Little dots again, but with
a little bit of expression, a little defining
and they're curved. There's so many ways
of drawing eyeball, so just keep going with that. If we move on to noses, we can do this. Again, there's so many
ways of drawing a nose. There's pointy noses, snow button noses or
[inaudible] three. Looks like a dog foot. I've seen it depict just a
rectangle or oval as a nose. You can make them
really long nose. You can even make the
tip red or roundish, tiny little nose like
this point to the side, with a long nose like this. What about more
graphic like this? It depends. I also like when you add in the eyebrow as a
part of the nose, as if the eyes were here. I do like that. The rounded nose. Again, it depends on
your character I feel. But if we start to
get some ideas, we can just do nostrils instead. Just do nostrils, really long nose, I think
it's also impactful. You have some face in
there so you understand. Again, the idea of including the eyebrows
as a part of the nose, I really like that. Again, if you want to
reference other artists, it's completely fine to
do that as long as you're not stealing an entire look
that somebody has created. You're not drawing the
exact same eyes as them, nose, ears, hair, everything. But if you decide that you like a way that a person
creates a nose, and you see other artists doing
that as well it should be fine as long as you're bringing your own
thing to it always. Again we can go into Pinterest
and look like David here. He has very expressive
noses like that. It gives a funny
shaped in his work. Let's see here what else we can find and working with really long nose and different
shapes at the bottom. Really fun to work with. It's really sloping. Looks like it's a little foot. Very triangular nose. Not my favorite thing. I don't really like that look. I'll level this expressive
lines and just simple things. It depends on the character. Again, just keep
going through that. Now we can move on to mouths, and mouths there's tons
of ways of drawing. We can do the simple smile, little smile with little
smile lines for just one. You could do
circles, open mouth. You can open the mouth and
add some teeth, a tongue. I personally love to make
especially with kids making something
like a gap. So cute. They're small shapes
you can hardly see tiny little smiles like that. Sometimes a little face
because sometimes it's hard to see what they look like. Later on, once you've done this, you can start to
create other pages like I have done
here and combine them to see what it looks like when you put it altogether, but I think it's
a great exercise. You just create pages of tons of different eyes, and noses. When you do go and
figure out that, then you have to
go back and forth. You're just found
another nose idea with like the nose up turn, like this, like
little peaky nose. It could look really cute. Same thing. You can
have it connected too at the bridge of
the nose a little bit. Nose. I'm not getting
as many ideas for now. It feels like you just
either do the line where you create some shape within. You can start to do lips. I'm just going to form that just like [inaudible] circles. Circle like this can be cute, slightly bigger upper
lip, and lower lip. Depends on your character again. Moving onto ears. Let's see. You do really
round ears like this. Different shapes
within to define the ear like that. Here's some different
shapes if you do that and then you
could do it with a more shape like
this. Same thing. Something like that. Also again, I'm not getting as
many ideas for ears. For me, maybe it's easier
and then also ears can have a big impact depending on how
you place them on the head. So we can do a couple of heads here because I feel like ears just by themselves look weird. You can have teeny little ears. Really big ears like
Rebecca Green does. She has very big ears like this. I think my personal favorite is in-between the shape better, I'm trying to understand
what inner shape I like. I like this simple list
or this one. What else? Other artists I've seen
do ears like this. [inaudible] not my
favorite ear shape, but it's still something
that you can play with. I think this is it. There we go. You can just keep going yourself and create
different eye shapes, mouth research a little bit from other artists
how they depict eyes and nose shapes
and mouths and see if there's any
combination that you like. Then we can move on
to creating a couple of reference heads which can be fun to mix and match all of these things
that you've learned. We didn't do eyebrows. You can add in a
little bit here, but on the eyes, do really bushy eyebrows
which could be really fun. You can do scribbles like this. You could do hair. Just do little lines. What else can you do? Really bushy lines like that could be expressive. Think about eyebrows as well. We'll move on to creating a couple of faces and
these can be so much fun. We're just going to do
startup with ovals. But feel free to do different
head shapes as well. That's another
thing that you can start to play with
different head shapes. I always keep
different head shapes. Create a character with a really squarish or roundish head or really round, really long. Start to work with shapes
like ridiculous shapes. You can get really fun
characters in that way. There's so many
beautiful classes on here on Skillshare about character development that
you should check out so just look at those
also for some ideas. It's great to explore yourself, but also take some classes that are specifically
on that because I'm not going to touch on basics of human anatomy and
things like that, but creating characters is
supposed to be fun and you can make them however you want. Let's create a couple
more ovals over here. Let me get some weird
shapes over here. If there is a certain feature that you really
like you can start with ears if I've decided
I really like small ears. That could be something
and do all of these characters
with small ears. Because it's characters
and you're creating them, you can just change how things are supposed to
sit on the head so you can create a character that has eyes really low on their face or a
little bit too high, like making a really long nose, and their ears are way
too low for their face. Or somewhere in the middle
where it's supposed to be. Just keep going mixing and
matching here we'll do some of these pointy ears that I like. We're still keeping
these quite simple, but you can play around with all the different options and keep referencing like what nose do I want
here, and try. I really like how
that one turn out. [NOISE] You start to see how the features affect what
age they look like. Because I made the features
a little bit bigger, like the nose bigger this guy looks more like an older man. Because I made the features
a little bit smaller, wider, apart and made this character
look a lot younger. Those are the things that
you're going to start to find and it's really fun. We could start to add some
hair if we wanted to. But these ones, I just
wanted to mainly be about finding different ratios and combinations of face features
that you really like. Some of [NOISE]. Here
are some eyelids. Looks a little bit angry. Looks like he's up
to no good this one. Then what else? There we go. Here is this endless possibilities
for creating characters in different
character expressions. You can just go to
town you could fill an entire sketchbook
just with things like this before when
you're developing different characters and
how you want them to look. You can start to figure out
what you like and you can start to add them to forms that are a
little bit differently. We can make this one
really long ears and a really long nose. This one has really big
features and ears like this. Blocky teeth like
that bushy eyebrows. It's just a matter of playing. Because you've referenced
lots of eyeballs and different mouth shapes
and ears and noses. You're sitting and
not looking at a blank page like
completely blank. That's why I like doing this. This is why I like creating
a process like this. I need a couple more
characters here. They look a little bit
funny because they don't have any hair. This could be like
a little baby. This one look like a really
stern teacher or something. You can even test out, looks like you
don't really like, really close up
that looks funny. Or what else do you
like or not like? Not really into the whole shape, or nose like this. Doesn't do it for me. It has eyeballs. You can give him the mustache. Here we go. Here's just
some quick look at creating reference images for different
character features. This is going to be something that you keep building
on and you're going to start to think
about what kind of look that you like
for your characters. Of course, remember that
you can always mix it up. I always feel like you can
have worlds with people that look different because the world is made up of different
looking people. Just remember that and
have fun with this. Just do as many pages of different eyes and eye shapes and things and
things like that. Pages and pages of different
just simple faces like that, just to get to know what
you like and then reference my characteristic
drawing to-do list here. I've added in all the other
things we can of course, jump into doing clothing and
all that fun stuff as well. Have fun in your sketchbook. Possibilities are endless with
these characters' studies.
8. Project: Character Expressions: [MUSIC] Now that we've started with
those small basic things, I think that we're definitely
ready to move on to character expressions
and start to look at poses and how
characters built up. In this section, we're going
to look at character poses, even animals and
anthropomorphic animal poses, and we're going to
keep building on all these small
illustrative features that we created before. Again, these are going to be incredible pages for
reference later. Now that we have gotten
comfortable with drawing some characters
and starting to play with the forums and how to
make little cute people, we're going to start to build onto that
and we can talk about adding bodies and poses and
we can do facial expressions. Because this class isn't
about character development, this is about working
in a sketchbook, I'm not going to
cover how to do this. There are many classes here on Skillshare that I
suggest you take, and take notes and do that
in your sketchbook to learn about how body types, and human anatomy, how that's all set up. I can link a couple of classes that I really
like here on Skillshare so that you can check
those out to get to know that process of how you can first understand how a
human body is made up, and how you can play with the proportions to make characters that are
really unique and fun. It's really important
to understand how the body is made up so
that you can play with it, also with age, how
a person develops. It's really important to
understand how as artists how when the child
is really small, their head is a lot bigger
in comparison to their body, and soon as they get older, their head is the same size but with longer and longer limbs. I highly suggest that you
take lots of classes, and take notes in
your sketchbook of everything that
you've learned, and test it out and
learn how to do these breaking up anatomy so
that you can create characters and play
with body types. However, I thought
that we could go over emotions because
that is also fun. As we play with our faces, we notice that it's
depending on how you draw the eyebrows or eye
in a certain way, you can create
different emotions. Here here we have
happiness, sadness, surprise, anger, overwhelm, and delight or super happy. These are ones that I've previously done
in my sketchbook, and I can't even tell
you how many times I've referenced these for my
characters and illustrations; because having a reference
like this is really important. It is difficult to come up with faces like this yourself, it is easier to have
something to reference. I can show you on a
place like Pinterest, you see if you look up face
emotions in photography, you can see lots of facial features like
this face right here, it's really interesting
to draw how he is holding down his eyebrows, one is like this and one is like this and is looking to the side, give him a little side, here's specific nose and
we've got stirring mouth. What emotion is that? You can do that and try to
figure out emotions yourself. There is also a lot
of different sheets with cartoonists especially
are really good at this. We can use faces like
this that are very simplified to understand how to create some
different emotions. There's tons of different ways, and they're drawn in
different styles. But if you use that and then use a style that you feel
most comfortable with, you can make it your
own like I always say. Using references like this, you can build up a library
of your own emotions. Let's quickly do
some emotions here. Again, I'll break up
my page into four. We can do happy, sad, mad, surprise, overwhelmed or most so scared. I'll do three for each for you. You draw a simple ovalish head, I can do my ears that I like. This is very simple. I'm going to reference the ones that I've previously done, and you're happy to use
these expressions as well. For happy, the
traditional cartoony closed eyes looking up, lifted eyebrows also make
someone look really happy, and a big smile. We also have really bright eyes, really round open eyes, again, slightly lifted eyebrows and open mouth, looks quite happy. You can do start to play
with eye shape as well, view that really
like use half moons because your base gets
squished up when you're happy. It's really happy. If
we move on to sad, we have the traditional course, just the downturned mouth, and just doing that
really makes someone sad. Again, similar to the eyes, with the eyes it's like the
lids well up with tears, so you can do the tears
are taking over the eyes. Just by having the mouth
turned down, you look sad. You can have the eyebrows pointing up in the
a worried sad face. We can do a mouth like
this, downturned again and eyes to this side. This could be a little angry, but if we add the
eyebrows again, it's sadness rather than anger. If the eyebrows are
pointing downwards, inwards, then it would
be an angry face. You can do quite a
very sad anguish like a little child screaming
or something like that, there we go, so really squinty
eyes totally yelling. There's so many more
that we could do, and you can create a
library like I did with a whole full page of happiness, because there's so many
ways of depicting happy. You could also test this out
in different eye shapes, and how do to use the eyes and the different features
that you've been playing with for previously. Moving on, we'll go on to anger. Again, if we have the eyes and eyebrows
pointing inwards and downwards, we get anger. Mouth can almost do anything, it could be just nothing or it could be a wider
yelling as well. We have something almost like
a sinister look as well, we've got the traditional
villains in cartoons, we can have upturned mouth up and downturned
eyebrows and eyes to get that sinister look in there, use subtle angry, eyes look like this, have side-eye here, subtle anger, contempt. Moving on to
overwhelmed or scared. You can make the
eyes look a little wary by curving
them a little bit. Also moving the pupils
so they're looking to the side gives that
unconfident look. Just very overwhelmed,
scared, anxious. You can do a mouth like this, the eyes looking down
like this. He's sad. Nothing's going right.
I could've said that. You can use some wrinkles
as well through the eyes. Scared and overwhelmed look. Very weary looking upwards. This is something that you
can really play with a lot. There's so much
very subtle things that you can do by just
moving an eyebrow, or the way that the eyeball
is looking in order to. This is how we're going
to play with for pages. I also suggest that you
take anatomy classes, and character development
classes so you can understand how the
body moves as we won't be covering that in my class. I want to share with
you how you can move on from creating
expressions like this. You can create your
own characters, and I create lots of
character sheets. I like to create
character sheets once I have created a
face that I really like. I think that's the
best move first, is to think about how to interpret that face in
different expressions, rather than moving
directly to the body, which can be difficult
to draw sometimes. I can show some examples. Here, for example,
is my daughter, Tilly, that I have explored. I did do her body as well. She's three, and I did
some poses with her, but I also played with
it using reference. I gave her a surprised feeling, really sad faces, and disgusted faces,
and silly faces. It was fun to play with
a character in this way. Also how you move the
face up and down, it's interesting to
help with emotion. I did my son Stark as well. He's five. Just having lots of playtime with
a certain character. It can be somebody you know, or somebody that you've made up. Maybe one of the characters
that you created, just playing around, you
can continue to work with. If you really liked this guy, or this person, you want to keep working on. Find somebody that
you really like in your sketchbook and
continue exploring, creating faces for them. Here's another
example I was trying to come up with a character, and I did different
versions of this character. What I landed on finally, I thought that this was the
look that I liked the best. You can just tweak small
things until you figure out the look that
you want to go for. As you get more comfortable
drawing very simply, and figuring out the shapes of eyes and things that
you really like, then you can move on to making
a little bit more details. Here I drew elderly people. People that had a little bit
more wrinkles and things, and that was really fun
to capture even drawings. I really liked how this one
turned out, and this one, so I created character
studies of them as well with my body proportions
that I prefer to use. Here's another example where
I've done also with animals. I've done this to show expressions using
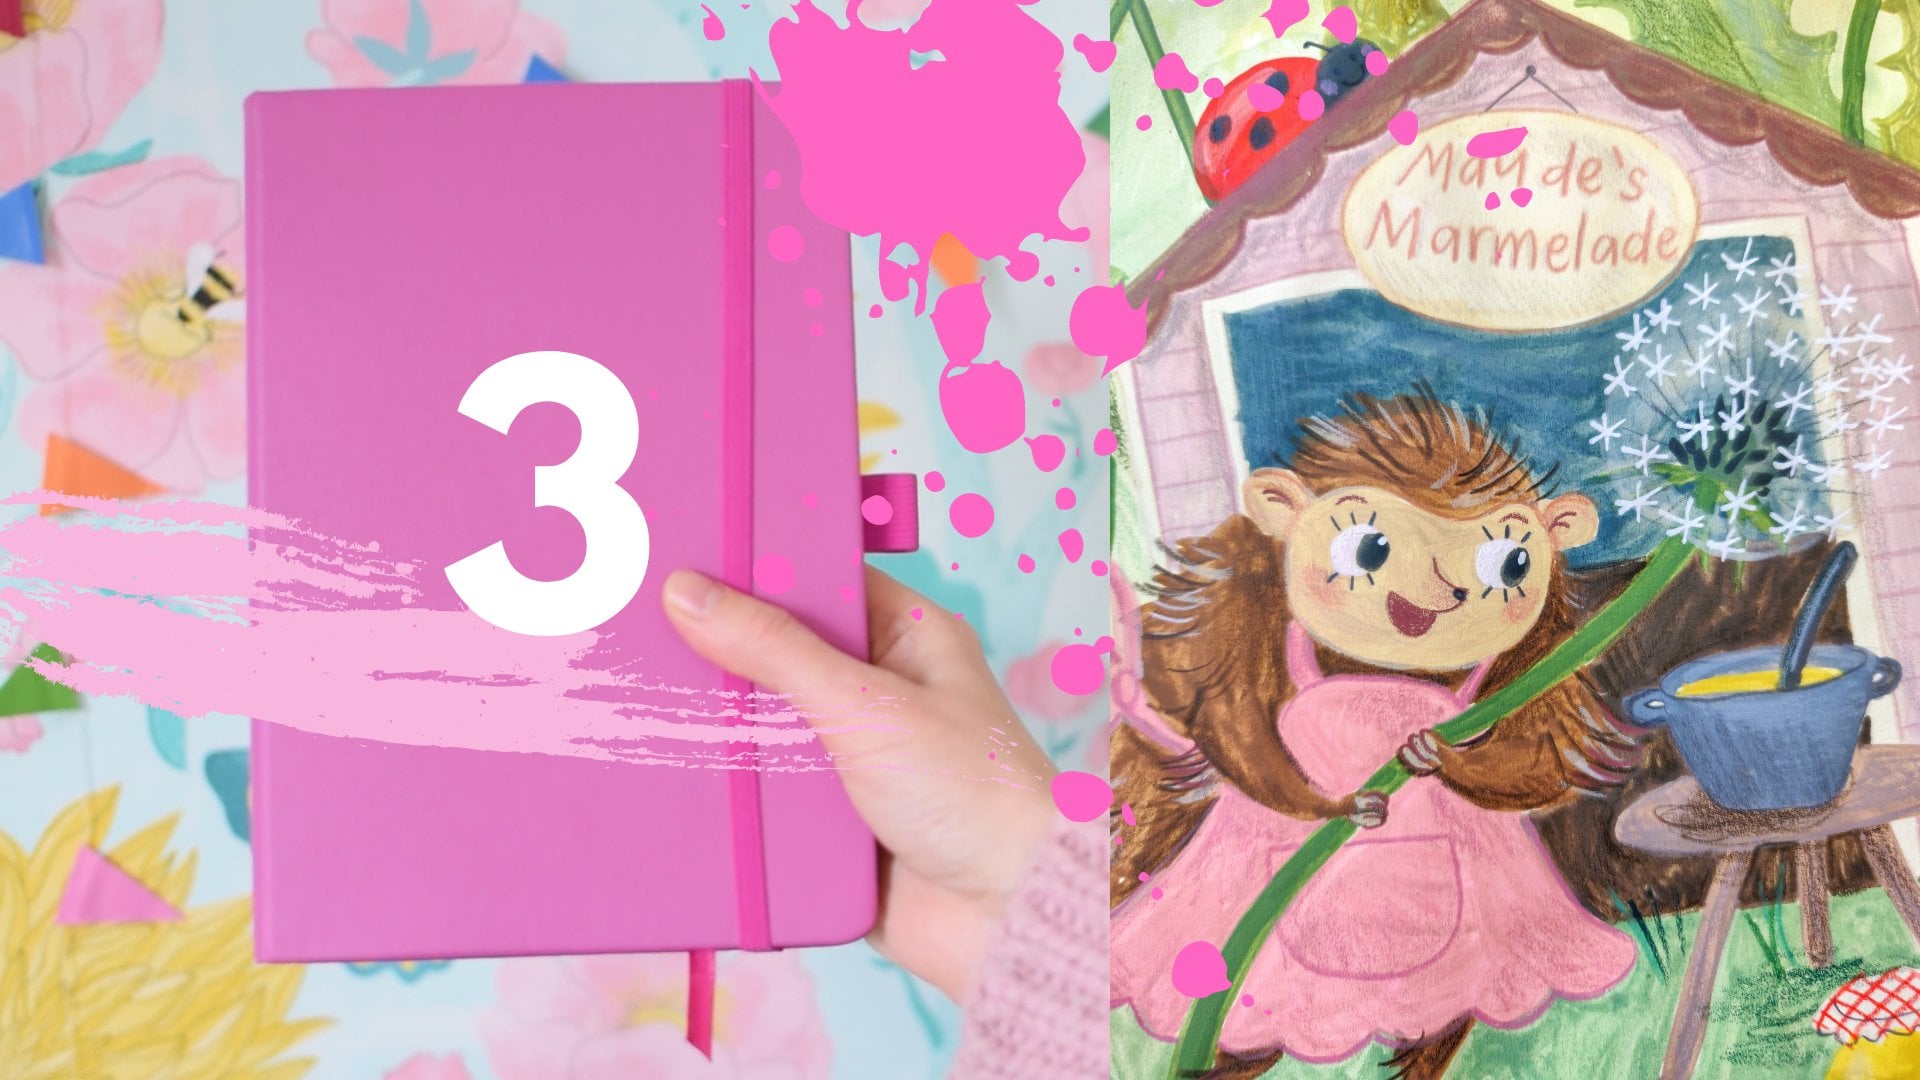
an animal's head rather than just a human. Here's a young girl
and her monkey. It's really good practice
to create sheets like this. It's really simple because
you're just using a head, but they're very impactful. Then trying to move the head and show different angles
is quite challenging, but you can totally do it. I just want to show a
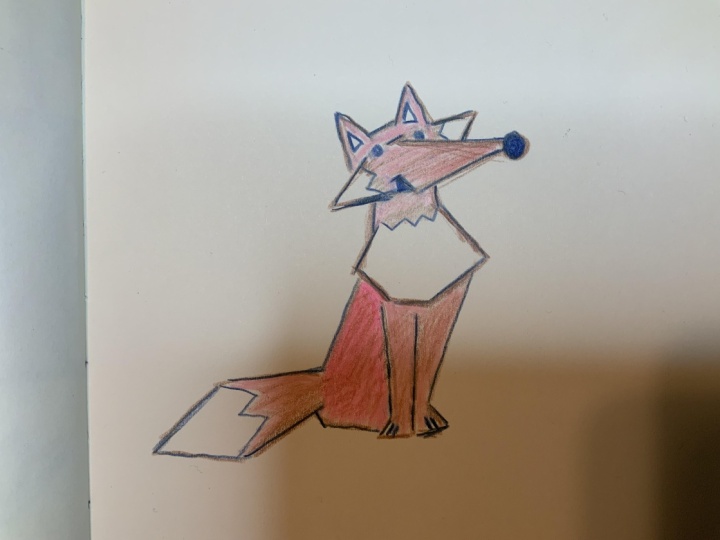
couple more examples. I do this with animals as well. I'm not going to show
that in this class, but I created some animal
heads to test out what a fox, a raccoon, and a cat
would look like. As you can see, I went through quite a few different styles, I guess, until I figured out something that I really liked. Sometimes it takes a few tries to figure out the proportion, especially with animals
that you can play with a little bit more with
different shapes. Then moved on to adding bodies, but also expressions
with their faces. I'm here with my
raccoon character, playing with different
expressions, and body poses. There's so much that you
can do with characters, and character development
that in your sketchbook. We will continue on in
the rest of the series to move forward with these ideas. But I just wanted to
introduce that as well if you wanted to focus
on animals as well, it's totally an option. Here last but not
least is my cat. I wanted to get some inspiration
for cat expressions, and how I've been working
on things like that. Besides incredible emotions, reference images on
Pinterest you can find for body poses as well, and I found those
really helpful. They're just simple
stick figures, but they give you an idea
of how the body is moving as it uses a framework to put your character into with your proportions
that you've created. There's tons of reference
images like this of little stick figures running, or jumping, or walking. It's going to be much easier
to use that reference. Also these little
stick figure guys I find really helpful
for funny poses. Because they're so simple, you can adapt that to any
character in any body type. That's how what I do when I
am creating my characters. I will find a reference
image like this, one of these little
stick figure guys then I can add onto it. It can be a cat, it can be a little monkey, it can be whatever I want. I wanted to mention that. Also, before we go, I just want to mention
one more reference, and that is a website
called FILMGRAB. FILMGRAB has tons of stores from tons of
different movies. Movies, you know, they have a huge budget for
cinematographers, and photographers, and lighting. You can find really
interesting images from so many different movies. These are great practice to draw from because they're
usually a little bit more, and less posed. This is quite posed, but it still feels like
it could be anytime, just someone peeling potatoes. You can look by genre,
and by countries. You can look at old Italian
movies, or French movies, and you can get different
styles and ideas for posing and characters. I highly recommend
that you check out FILMGRAB to get some
photo reference. Again, when we
mentioned that this is somebody else's artistry, even though it's in
photo film form, so you still have to make sure that you're making it your own. You're drawing this
person right here, make sure to change
his sunglasses, and change the
background a little bit, give them a different hairstyle,
a different body type. You can use him as
a reference for how the body is formed in the head, and how that all sits, but make sure to always
make it your own. I hope that you've
enjoyed [NOISE] having fun with me
in your sketchbook. Getting to know how to start
a sketchbook practice, especially within
character development and finding your style. I'm really excited to see all of your pages
of what you come up with for your first starts of characters and
things like that. It's going to be
great. [NOISE] Again, I'd love to mention
my sketchbook drawing to-do list where
I've listed out tons of things for you to
go through and draw. We had our collections
of objects, and then our characteristics
that we worked on. Then we started to work
on facial expressions, but there's all kinds of other things that you
can also work on, on your own time, such as
body types, poses in action. You could copy some of those stick figure people in
action in your sketchbook. You can reference that rather
than always having to go to your phone or a computer
to look at things. You can do animals, realistic, and anthropomorphic. Anthropomorphic meaning
that they're humanized, that they have clothes
and things like that. Usually standing upright
rather than on four legs. You could play with
aliens and monsters. You can do character development by showing a character
from the front, from the side, and the back. It's going to be great
for when we move on to creating a scene with a
character doing something, but just having these
basic illustrations of a flat character can really
help as a starting point. Then characters in action, characters doing things, and then of course,
characters together. That is your to-do list. Hopefully you'll find that
inspiring and you'll never have nothing to do. You'll always have
something to work on, and that was my hope
with this class. Thank you so much for
watching with me, and I can't wait to hear about
your sketchbook journey.
9. How to Keep Going?: [MUSIC] That's it for this first section of
this sketchbook series. I can't wait for you
to see number 2 and 3. Look out for those. Before I leave you, I
just want to make sure that you're really excited about this sketchbook practice. Does it feel like
something you can maintain that you're
excited about building up? Even if you have been
sketch booking for a while, if you feel like going back to the basics and
really honing in on hands or eye shapes has
helped you in some way. I really want to keep
this momentum going. There's a few things that
I want you to think about. One, did you get a little
obsessed? Was this fun? That's the important
part and art is supposed to be fun
and it's supposed to be a part of your practice, but it's not supposed
to feel like work. I really want you to find the things in your sketchbook
practice that bring you joy and make it feel like a hobby so that you will want
to maintain and keep going. Was it really motivating to see the first sketches if
you go back and look at the first few pages and then compare them to the last
pages that you just did? Focus on that energy. Number 2, I'd love
for you to check out my drawing to do list. I've created a whole list
of drawing prompts and objects and character
features for you to draw so that you have
something to go by. You can print out the list that I've created for you or you can transfer it into your
sketchbook so you always have it there when you're not
really sure what to draw. Then lastly, I just want you to keep going.
You can do this. Sketch booking is fun, drawing is fun, being an
illustrator is incredible. As long as you're drawing,
you're going to be learning all that cliche stuff, but it's true and I
know it personally. Even though I've been
doing this for a while, I feel like now I'm just
starting to get momentum, I'm starting to get good or I can noticeably see that I'm getting better
as an illustrator, especially when I'm
pushing myself to draw and try new things. Please just keep going.
10. Final Thoughts: [MUSIC] It was that fun. How many pages did you get
into your sketch book, did you fill 10 or
did you fill 100? I will be so excited
to see that, and I can't wait to see
what you're going to be publishing in the gallery. Remember, this is just sketches, they're, nothing spectacular. Maybe it is spectacular to you because you started on page one, and you did some doodles that you weren't really happy with, and by page 100, you have now developed an
eye shape that you love, and a way of creating poses in an animal character
that you developed, and you're just totally in love. So make sure to post your progress in
the project gallery so that we can all see, and be inspired by how
helpful sketch booking, and working on your
drawing skills is. That's it. Thank you so much for watching this class with me, Christina Hopkins, I
love having you here, and I appreciate
you as a student, and I can't wait to see your first sketchbook spreads
in the project gallery, make sure that you
upload your projects. Also, please make sure that you are subscribed
to me on Skillshare, so that you'll be notified
when I publish new classes, and also check out my profile
page where I have all of my other 20-plus classes
available in this platform. If you'd like to hang out with
me outside of Skillshare, I'd love for you to follow me on Instagram @emmachristina ,or my website at
@emmachristina.com. I've also created a
private Facebook community where you can get
to know me better, and I have a lot more free, beautiful content there, I look forward to
see you as well. Thanks so much
again for watching, I can't wait to see you
in my next classes, bye.
 Kristina Hultkrantz, Illustrator & Surface Pattern Designer