Transcripts
1. Welcome to Class: [BACKGROUND] Sketchbooking
is supposed to be fun. For me personally, my sketchbook is a place to learn more about my illustrative style and also just a place to
have a good time. I work digitally as an
illustrator and spending hours on my iPad or computer can take a toll on my eyes and my brain. It's incredible to
be able to take out my traditional art supplies and draw an actual
paper sometimes. Though I don't use these
sketchbook illustrations as final artwork, I still find this practice
really beneficial. In this class, I'll be sharing
a few exercises that you can do to inject some fun into
your sketchbook practice, to push yourself out
of your comfort zone, and to continue to think
about evolving your style. I personally noticed that my relationship to my
digital brushes and my digital illustrations
has changed a bit since I started playing again with my pencils and paints
and my sketchbook. My hand is looser. I've discovered new
textures that I like, and I feel overall more
creative and free. Sketchbooking is my hobby, but it is also helping me
to be a better illustrator. Hello everyone and
welcome back to another class from me,
Kristina Hultkrantz. I'm an illustrator and surface designer for
Mariefred here at Sweden. As I said in my intro,
I've decided to use sketchbooking as my hobby. I create art for a living, but that doesn't
mean that I have to not have fun when
I'm creating art. Every piece that
I create doesn't mean it has to be a professional illustration
for my portfolio. Having fun in a sketchbook
means a lot to me. I love taking a full workday, fun Friday usually, to work on exploring in my
sketchbook and having fun, because that's just as
important as working on your craft and creating
important portfolio pieces. I'm really excited to
share my process of adding a little play into
your sketchbook practice. This is part 2 and 3 parts
sketchbook class series. Make sure to check out
part 1 to get a rundown in sketchbook basics before
getting started in this class, if you'd like.
Let's get started.
2. Your Class Project: [MUSIC] This class in this series is all about starting a sketchbook
practice that you can maintain that you will
find inspiring and fun. This class in particular
is all about playing. We're going to have
so much fun in this class playing
with mixed media, different colors, different exercise to just
get your brain going. For your class project, the final project
will be to illustrate a small vignette or a
little scene of a shelf. We'll see what happens. Before that, we'll do
different exercises. You can choose if
you're not ready yet, just to share your exercises and the fun that you had doing those or if you do feel ready, you can show your final
illustrated vignette. I really urge you to upload something to the
class project area, just because it pushes you to get yourself out
of your comfort zone, you have to be a little bit
brave to upload your work. It's also an incredible
opportunity to get your work in front
of me, my eyes, so that I can give you
some encouragement or feedback if you'd like, as well as your peers. Please be brave and
upload your work. You can also feel free
to upload something now, and then as you work and play
more in your sketchbook, you can update your
Skillshare project to show your progress.
3. Sketchbook Supplies: [MUSIC] In the previous class, I went over a
sketchbook basics and I talked about the different
notebooks that I use. In this class, I will most
likely be working more in my sketchbook that has slightly better
paper rather than my really sketchy sketchbook. Because this notebook in
particular has very thin pages, it's not going to hold up
with the paints and pencils, and things that I would
like to play around with. I highly recommend if you
do have a sketchbook, or just scrap pieces of paper, add more weight to them. This particular notebook
has 120 grams grand paper. It will hold up to the different exercises
that we'll be doing. This particular notebook
is from Royal Talens. It's called the art creation notebook and I really like it. Besides the sketchbook of your choice that
you'd like to use, in this class, I'm going
to use colored pencils. I really like the
brand python dash, and I use the Pablo
and Luminance pencils. I also [NOISE] recently
invested in a couple of their Neopastel version II water-soluble crayons and that are really fun to play with because you can play with water as well
and loosen them up. That's what I will
be playing with. [NOISE] It also could be fun to take out a watercolor set
or gouache if you have it. But just use what
you have at home. All supplies will work for the exercises
that we'll be using.
4. Warmups: [MUSIC] Back when I
went to art school, I took all the
traditional classes from charcoal drawing
to oil painting. The teachers always suggested warm-ups before we got started, so that's exactly what we're
going to do in this section. A couple of warm-up exercises
to get our hand going, get our inspiration going, and getting our
creativity flowing. Welcome to my pink
sketch book that I use for play and exploration and
we're going to get started. To get started, I think
it's always a great idea. If we are going to be using traditional materials to do
a little bit of a warm-up. Especially, I'm a digital
artist and I'm constantly in the digital world
and just remembering how my actual tools work, is a great idea. Also back when I
was in art school, I was taking tons of classes
from charcoal drawing to oil painting and we always
started with some warm-up. There is so many different
kinds that we can do. You can just play with your materials and see
what happens, experiment. You can give yourself
a time limit and create little sketches or drawings in your materials really quickly for 30
seconds, one minute. Or you can limit your materials just using two colors
or something like that. Let's just get some play out of our system and start to really have fun
in our sketchbook. Here is one example,
here's just swatches. This is really simple. I find it really
soothing to just do some swatches in
your sketchbook, especially if you
buy new materials. These are the calendar's
neo color to wax pesto. Watercolors in these
become really beautiful, stunning vivid colors
and you can use them as watercolor
and as crayons. Here's explorations
with layering different watercolor,
gouache colored pencil, these neo color crayons
on top of things, doing different layer exercises with watercolor and
gouache and everything. It's just playing with
your materials and see what happens and
discovering new things. Here's with salt,
it's always been a favorite of mine
since college. [NOISE] I like to go into small little
just drawings and scribbles and doodles, but in material rather than just pencil like we did
in my other sketchbook. Here I did just
squiggles and lines and layering effects and
small little images like a mushroom and things, but just nothing too serious, nothing that's supposed to
be like a final artwork. Then I did two
studies here as well. Find a new page. Here we go, new page, we're just going to
start making marks. I don't have anything
really in mind. I think I'm just going
to use blobs of color. I'm going to layer,
I'm going to play with my different materials. I'm going to bring up
my colored pencils here to the side as well. Hopefully, you can
see my setup here, I'm going to be using my
current dash gouache pan set, which I really think
is really fun. Let's just jump into it. I'm just going to
start drawing stuff. I don't know, experimenting. I have a palette here
as well that I've been using for
these experiments. I should just use
what I already have to see what colors and
things I can make. Let's start with
some blobs of color. [MUSIC]. Now that I have laid
out some basic, I don't know, what
do we call this? Form, shapes, background colors, I'm going to start to
add in other details and see how these materials
play with each other. Again, I'm just going to do doodles and things just to get my creative juices
flowing, just play. It's difficult to describe
what I'm doing here, I'm just playing around adding different layers
of different things, seeing how they interact
with each other. It's great to know how your pencils go on to
your different materials. I've found since these wax
crayons are indeed still wax, even though they're
water-soluble, they're more difficult to color on top with colored pencils. It's always good to
know how things work. If you start working on
your final illustration, you've already
discovered those things that might be an obstacle. Otherwise you might
get frustrated that you had planned on
drawing in a certain way. That's something that
I have definitely struggled with since using more traditional materials
that I'm so used to just being able to
in a digital document, open up another layer and I can just draw on top of
anything and I don't want to think about opacity and how things show up or not, it just automatically works. [LAUGHTER] But here when you're using
traditional materials, some work better than others. Just have fun with all the materials that you have at home. We don't necessarily, of course have to use the
same things that I am using. I want just to see subtle textures like
this is already green, but adding another layer of texture makes it
more interesting. To keep this exercise a warm-up, I would suggest limiting
how long you do this. Max an hour, maybe ten
minutes is good enough. Just so that you get your
creative juices going. You're excited about
your materials [NOISE]. [MUSIC] That was really fun. I feel like I'm not afraid to
start layering, do things. That was the point
of this exercise. Now we can get into
some other fun things.
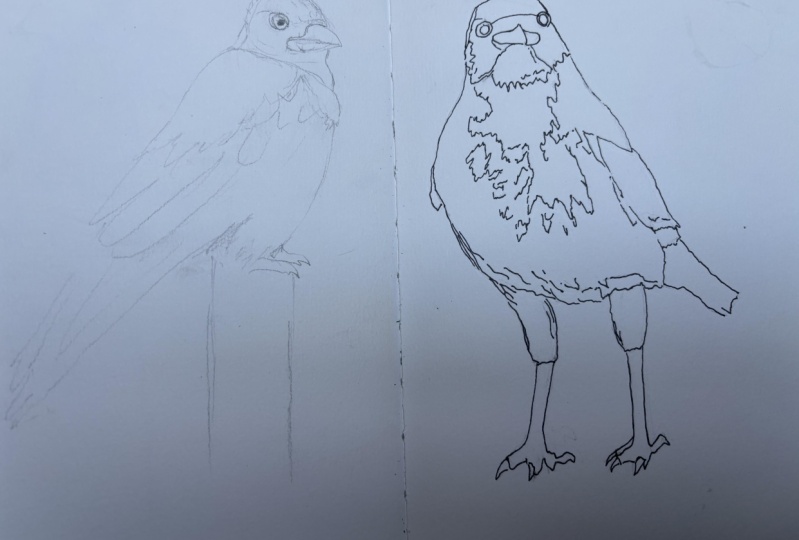
5. Objects in Different Styles: All right, so if you remember the exercises from
my previous class, the about sketchbook basics, you will remember all
the different objects that we drew to get used to creating
different shapes and testing out
different styles. But in this class, we're going to start
playing with those objects. So using those objects that
you drew as reference, we're going to now play
with them even further. We're going to play with
texture, color, and style. This is going to be a
really fun exercise to get even more ideas going and different ways of
interpreting simple objects. So if you took the first part
of the sketchbook series, we spent a lot of
time drawing objects, and now we're going to
put those into good use. If you remember, I created
pages of objects such as houseplants in vases and
cups and things like that. Now we're going to start to add color to them and
play with style and play with some of these parameters that I was
talking about previously. In my sketchbook here I have [NOISE] lightly
sketched it out, you cannot see it. First lets get just
some of my house plants created quadrants here. I've created very
light sketches in brown colored pencil of houseplants that I'm
going to be playing with, and I've created 1, 2, 3, 4, 5, 6 little squares
and I filled them with one of the bowls
that I have drawn. I'm going to play with
some style and layering, and again just have
fun with my materials. This is just an exercise
to see if you can discover anything
that you really like. We're going to try to draw these in slightly
different styles, they're still your style
because you're drawing it, and your style can evolve and change and be a little bit different from
project to project. We're going to try
that. [NOISE] We're just going to jump straight in and get drawing on some
of these houseplants. To begin with, I'm just going to try to do a good job I guess. Kind of realistic, but
a little bit loose. I'm trying to get a little
bit looser with my style, I think I draw things a
little bit too tight always, that's my go-to is
to draw quite tight, so I'm trying to loosen up, but we'll see how that goes. I'm going to try to be messier when I'm
drawing but its so hard. I'm so tightly perfect
with everything. [MUSIC] [BACKGROUND] In this
pan-gouache set. I do quite like using the
gouache lighter or more watery than regular gouache that would become a little bit more creamy in consistency. For my sketchbook, I find
that easier and more freeing than using
very thick paint. Since I'm not working
on paper or something that's not inside my sketchbook and can easily crack
and things like that. [NOISE] Another thing that I'm personally trying
to work on within my getting better at
drawing traditionally to-do list is that I want to add more color variation
into my work. When I draw like this, I often use one color and
I do things really flat, so I'm trying to introduce
different variations because I think that that
really brings out the life into your work. When you work with
traditional media, it's a lot easier to add in different
tones because I have a palette like this that's full of different tones that
I can easily pick up. It becomes kind of
accidental sometimes. [NOISE] When working digitally, everything's a lot more
planned out and you don't have too many happy mistakes
that can happen. I'm trying my best to
embrace that quality. [MUSIC] Well, my first house
plant is drying. Before I add in
other details with the new color pastels
or colored pencil, I can now move on
to my other stuff. I can start working
on these ones. Again, mainly I'm picking
colors mainly from what I have already on my palette
and just going with it, and I'm not planning
out anything. Just do all on the fly. [MUSIC] Next one, let's just try to do everything
in the neo color crayons. One thing that's
interesting about these is they do
really feel like you're drawing with a crayon because they don't sharpen into a perfect point unless
you sharpen it of course, so I feels like less
[inaudible] against the point of [inaudible]
Let's do this [inaudible] sheets [inaudible] [NOISE]
five different shades of blue that I'm going to
mix to create this one. [MUSIC] [inaudible] colors, scribbles with billy blues. Because they are water-soluble, it could be a little
bit fun to do so. Blending with water,
but not too much. [NOISE] So that
you don't see the [BACKGROUND] It's not horrible, but not my favorite look. Anyways, that's the
whole point of this. Hope we can go back
to this one now. [MUSIC] [NOISE] For this one, I
think I'm just going to add a wash to
the background in really light and then we'll do all the details in
colored pencil. Just give it a wash, and then draw the details
in another color. For this one, let's do
a bold painted bowl, and then we can do all the other details in colored pencil
to do the opposite. [MUSIC] There we go. I am going to test out the neo color again and see
how we can manage this time. I thought it was
a little bit too sloppy that time around. I'm going to try using them
a little bit more elegantly. [MUSIC] While that dries, I'll do another wash of
color on the last one just because I like it. [inaudible] colors into. Details can we add to this one. I love how colored pencil
looks on top of gouache. I would just scratches
on top of that. I'm going to add more
texture to this shadow underneath this picture
the last thing. Again, I'm trying to use [NOISE] different layers and trying to be a little bit elusic that
you like the idea of that. By just adding some colored
pencil lines on top, it brings the gouache out
more, try to describe. It just gives it
more live character. The handles of this picture are too close to that
background colors. I'm going to go over that
area with a darker blue. Adding some subtle shadow. Now with the loose
colored pencil, I brought this messy gouache underpainting a
little bit more to life and is a lot more
appealing to me what I like. Before I was thinking
that it was a lost cause, this one I feel like
is the lost cause, I will just ignore that one. That one didn't turn
out pretty well. This one I thought we'd just
do something fun and simple. I have a beautiful gouache wash of the background and
I'm just going to simply do a line drawing on top. [MUSIC] That outlines, but I'm thinking
like drawing need some light shading in some way. I could do some lines here to
experimental shadows maybe. Not in love with
that one either. My beautiful yellow bowl here, let's see if I can add some
details to this without it going over to becoming
ugly, it really sucks. I really like how it's looking now. [MUSIC] We can do
for the tablecloth, you can do a simple tablecloth. The tablecloth I
liked just dark blue. We'll do some
standard check part. Then I think about shadow, if this is going to mess
it up it has always. The same thing I want to give some dimension
to the sides of this bowl. Another one, that's quite fun. We have two more. Now that this one is dry, I can go into this one. I can do another stripy version a little bit more crude thick. That looks nice. Maybe wet
this tablecloth slightly, just to melt it together
a little bit without it. Then we have our last one here, which we do for that. Sometime that looks
a little bit more glass-like, I can try. [MUSIC] Very simple. Then finally, let's just give some last
details to our plant over here. This one is definitely dry, so this one is going to be
really easy to work on. [MUSIC] Here is my final
play with objects in different styles and
materials and techniques. None of them, I'm a 100
percent in love with, but it was still fun to
play like this, and try. We have some interesting
textures going on here with all the
different types of pink. If I practiced and did this
exercise so many more times, I would finally get to a
point where I know what I was doing and really
enjoy the process. This one I think I
got close to how I want my traditional
work to look, and I enjoy working like this. This felt really outside
of my comfort zone. This one was also close to how I like to work about comfortable. Again, these were
just experiments and I enjoyed doing them. Continue to do the same
thing in your sketchbook, and take some of the
objects that you sketched in our first
sketchbook class, in your pencil sketches and transfer them into
a world of color.
6. How to Do Artist Studies: [MUSIC] It's really difficult as an artist to work in a
complete bubble where you have outside influences
from different artists, different photographers,
movies, films. We're all looking at same
images a lot of the time, either on Netflix or Pinterest so we're being
influenced by many different of the
same things together at the same time but
we are all individual. But I still want
to bring this up because in this section
we're going to be doing artist studies and that
means copying with the intent of
educational purposes, another artist's work. This isn't about stealing someone else's work and
making it your own, or saying it's your own. This is about learning from other artists who
have gone before you that have techniques
and styles that you admire. Now, this exercise isn't about
becoming a copy of them. It is about learning different techniques that
you can bring to your work. By doing several different
artist studies of different artists you can
fast forward the process of learning more about
your style and what you like and developing that
style and making it your own. If we do studies of
different artists, you can take little tidbits of different things that you've learned from different artists
and bring it to your work. It's really important
that you learn not to fully copy everything
from one artist. You can't steal
their color palette, the way that they render, the way that they
create shadows, but if from several
different artists you're taking different pieces and
then interpreting it in your own way because
this exercise also is very open for making a copy of someone else's
artwork where you don't have a step-by-step tutorial
of their process. You are open to make your
own decisions of how that artist possibly made
those lines and marks. You are in the process
of doing this, making the work your own with a process
your own in some ways. This exercise is
really important and it really helps you to
learn new things but again, I need to stress that
is very important that you're not sharing
these works as your own, crediting yourself
as the artist. Is best to keep these just in your sketchbook as an
educational exercise. I want to talk to you
about artist studies and I think this is a
really important exercise, but it also comes with some instructions because it's
really important that you understand what this
exercise is all about and don't
misconstrue this. I think it's insanely
difficult working in a complete bubble with
no outside influences. It's just impossible. We're constantly looking
at other artist's work and we're subconsciously
or consciously taking little things that you see
like how somebody draws fur or hair or face and you
bring that to your own work, hopefully filtering it through your own experiences and your own hand and you're
making it your own. Reference is really important. You just have to understand
how to properly do this. This exercise is great because if there is a certain
technique that you like, you can look at an
artist that has that specific technique
and learn from that. You'll love this exercise because you're doing
it on your own. You're just copying what you see in a image from an artist. We don't necessarily know how
they created that artwork, or what their steps were, or what materials
they were using so you're also at the same time as you are using in a reference
and trying to mimic it, you are coming up with your
own ways of doing something. That's why I love this exercise
and every time I do this, I learn something new and
bring something to my work. Again, it has nothing
to do with trying to become a counterfeit artist
for a certain artist. This, for example,
is Marta Altes. I love her expressive artwork
and her funny characters. I don't want my artwork to
look exactly like hers, but I'm hoping by doing
these exercises I loosen up and I learn
things about how I can incorporate
more fun for action into my work if I were to create a fluffy character,
something like that. When you're doing this exercise, don't just copy what you see, but you can also figure out
at the exact same time, how you can make it your own. This usually comes naturally because to me like just cooking, I have such a difficult
time following a recipe, I have to do my own thing. Same thing in artwork, you're going to
notice some things in another artist's work that
you just don't like and you're just going to
change it and that's okay. Again, this is a
sketchbook exercise and it's important that this exercise stays in your sketchbook for
educational purposes. For this section, I have
done a artist study of Rebecca Green's artwork
because I really love her expressive use of gouache and the way that
it feels so loose, but then she tightens it
up with colored pencil. In this case, this
was for her book, Loujain Dreams of Sunflowers and she did really loose gouache with black colored
pencil details and I just want to test
that out how it felt. Like this doesn't feel like me, that's not how I want to work. I think it's too
contrasty for my work, but that's something that
I learned in the process. After doing a few studies,
what did you learn? What features are you
going to bring to your own artwork and what
are you going to leave? It's important to
think about what you learnt after doing
these exercises, about what you want to
bring to your work, but what also you didn't like. I think knowing what you don't like to do in your
artwork is just as important as understanding how you do like to
make your artwork. Also, make sure to
mark the pages in your sketchbook that
you have copied another artist's work so
that if you do reference your artwork that you're creating in the future
and go back to like, I loved how I mix this. Just make sure that
you directly copy this from another artist and it would be
important for you to switch it up and try
to make it your own. Also, after doing this exercise, you could think about
going back [NOISE] and doing this exercise again, but thinking about
trying to do a vase or object in Rebecca Green style or another artist
that you admire, etc, and see how you
will learn in that way. Then you're not directly copying something that
they have created, but you're mimicking
their style. How does that look? Do that become a way for
you to make it your own? I really am excited for this
exercise for you to test out and see what you learn by mimicking several different
artists that you admire. I would definitely not focus on one artist because it
could become subconscious that you start to mimic them
without realizing that. I think it's important to
look at many artists' work, it's important to learn from
many different teachers, and it's important that you are tweaking everything
and making it your own and getting references
and ideas from tons of different places so that
your work is uniquely yours. Again, I really hope that
you enjoy this exercise. It's really freeing to just try to copy something
and figure it out. No, it doesn't always look
exactly like the original. Here's a time lapse of how I created these artworks
of Rebecca Green. [MUSIC]
7. Project: Sketching: [MUSIC] Now that we have worked on these different
exercise to warm up and then we've done some studies and we've been playing
in our sketch book, it's time to use all that
information that we've gathered and create an
illustration of our own. We're not going to
jump right into creating a character right away. So in this class we're just going to create a little scene, a little vignette of shelf or a still-life or
something of that matter, which is some objects using
the objects that we have collected and referenced from
our sketchbook practice. Now I'm going to take
you through my process of creating my own vignette. Now it's time to get started
on our class project. For the class project, again, we're going to be painting a small little
vignette of objects. If you remember from the first section of
this sketchbook class, in our regular sketchbook we did a lot of different studies and drawings of regular
household objects such as house plants, cups and vases and
things like that. Now you have lots of information and reference
material to draw from. We're going to use our drawings and figure out a
little vignette. A vignette is just a grouping of a couple of objects
that look nice. Let's think about some of the items that we
have drawn here. You also may have
sketched them in color in your sketchbook as
well such as I did. Some of my house
plants in colors, so you can choose to
use some of those as references as well or one of these studies that we did
to add on to this to make a vignette if there
is something that really stood out to you
that you thought worked. I like this yellow
and blue scheme, so maybe I will work on that. I've also painted some
quick backgrounds to use that I could
use for this. I think I will because
I think they look nice. I just did some messy
gouache backgrounds with some colors
that I had leftover. Since I did two, you might as well do two. But back to the sketching, we take a look at my
images that I drew. Which one would I want to
include in my vignette? I think a shelf could
be interesting, maybe. Shelf or floor. I can do different things. If I thought of I have two vignettes like
this that I can draw, one maybe can be a floor
with lots of plants. This can be that one and
this one can be a shelf. Maybe not have the
shelf in the middle. A little bit lower shelf. On top of the shelf we can
figure out different things. I should move back and forth. Here we have some ideas. I like the shape of this vase. I think I will pick that. I think I can some plant. I really like this plant
[inaudible] drawing. Something that may be
hangs a little bit. If I did a smaller plant in
front like this that did the hanging like that. We need something else, something a little bit bigger. Something on a foot maybe. Also this vase I
have done lots of patterns. [inaudible]
Then some free leaf vase. I like the one that I did
before with the scalloped edge. There we go. That's
a very simple sketch for a very simple vignette. Then we can figure out
another version for this one. I thought would just be like a little grouping
of houseplants. I really like this one guys, so I think it'll be
the main attraction. Slightly difficult to reference things in your sketchbook, but it's okay to
flip back and forth. Maybe we'll do three. The other one. It's big. I'm going to do
[inaudible] different. It just has a couple
of leaves like this. That composition, I hope that I can make
it a little bit better. This one should be
smaller, I feel. Something low that overlaps
a little bit here. Like this plant. Something like that. We at least I have some ideas. We've drawn them in
a regular sketchbook so we don't mess
up this too much. Now I can start to
sketch out my designs here on my prepared gouache
page, which is fine. I'll just go ahead and do that using other
sketches like reference. We'll put it over here. [NOISE] Regular pencil can get a little bit smudgy and brown-looking when you
mix it with paint, so I'm going to use a
colored pencil instead. You can use one of these
erasable colored pencils in brown colors so it doesn't show up too
much and doesn't really affect my frame. [MUSIC] [inaudible]
8. Project: Paint/Color: [MUSIC] Now I'm going to get started on adding all of the first layers of color. When I'm doing my
experiments and when I have worked with
traditional media, I have figured out that
I like the gouache or watercolor as a base
and then I like adding colored pencil on top, but that's just my
personal preference. You can choose to work in the
way that you like to work. But I'm just going to
show you the way that I feel most comfortable and I feel like my work comes out the best. [NOISE] I can take a look at my examples
that I did previously. I'd started with layers
of paint and then I add build up details and shadows and things like
that in the pencil. That's what I'm
going to be doing. [MUSIC] Now I've added the first
layer of gouache paint, and now I can add
all the details to bring this illustration, these little vineyards to life.
9. Project: Final Details : [MUSIC] Now that my
paint has fully dried, I can easily go over
with colored pencil and adding all the
detailing and shadows. I'm just going to jump right in. First I like adding a little
structure to the paint. Then I go in with different
colors and add details. There's no rhyme or reason here, just doing whatever makes
it feel like it becomes more done to me. [MUSIC] Those are my final
vignettes in gouache, and I think they
turned out quite cute. There's some details
that I really like. It was a good little
practice session, getting used to my
traditional media again and just having fun. This whole class is about
having fun in your sketchbook. It's about breaking out of your regular art practice and just doing some
simple things. Because even though
it's a simple project, you can still get
a lot out of this. I also want to share
[NOISE] with you how you can take this
exercise further. You could try to draw the exact same vignette in different styles or in different media to
see how that works. You can choose to use
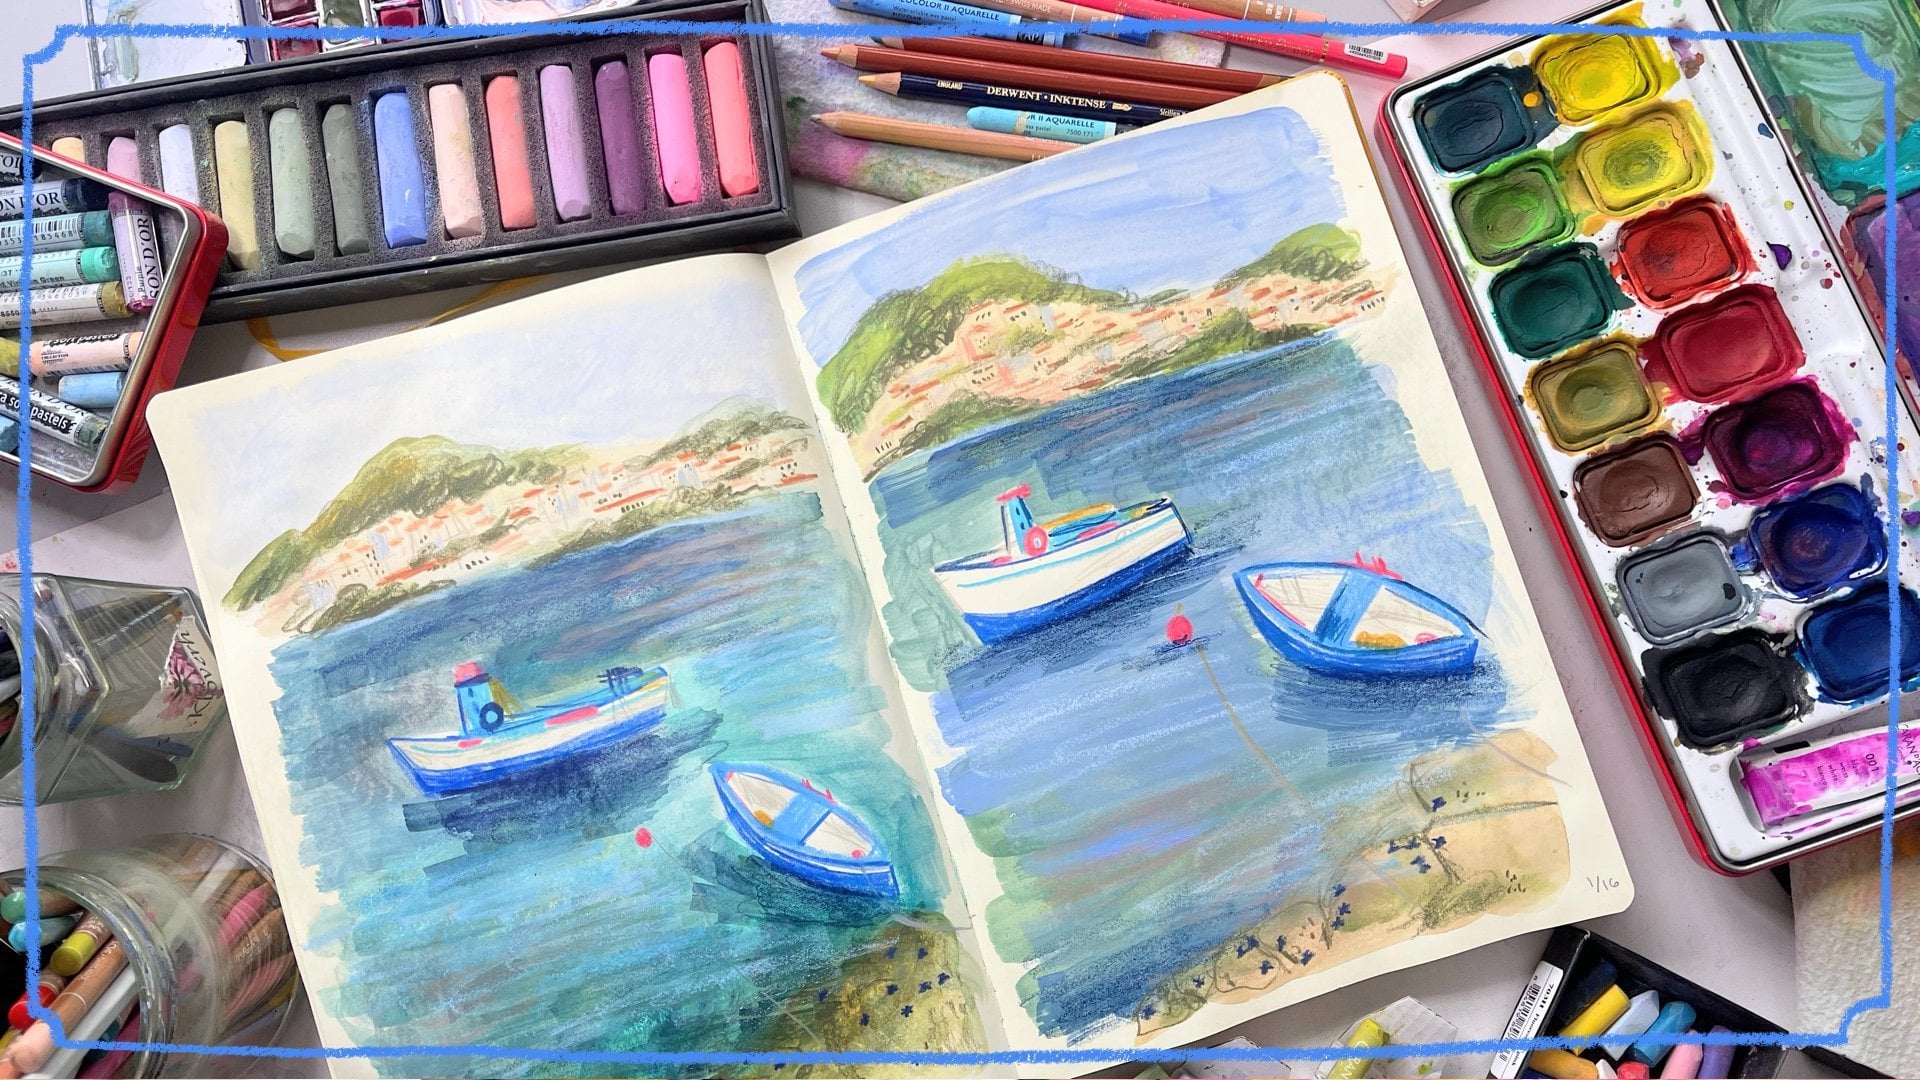
photo references, such as I did with these to create landscapes or other kinds of vignettes or to start drawing people or other characters
as you come up with. You can continue to do artist studies and
then think about creating a vignette in
that artist's style. Then also see how
you can interpret somebody else's style
but make it your own. You can continue to do
exercises like this with small objects and test out different variations of
your style to have more fun playing with your
materials and your sketchbook. I hope all those extra
little ideas gave you some more ideas of how to
fill your fun sketchbook. You can also, like in
my previous class, look at my sketchbook to-do list where I have
written out tons of different prompts and
things for you to think about and draw
so that you never have a question mark when you open up your sketchbook
to a blank page. Thanks so much
again for following along in this class and
this class project. I really look forward to
seeing your projects as well.
10. How to Keep Going: [MUSIC] All right so that's the second part
of this series finished. I hope that you
really enjoyed having some playtime in
your sketchbook. I just want to mention, how do you keep this
momentum going? I think it's
important to revisit these fun exercises even if
they feel a little basic, especially going back
to your materials, maybe you've played with
your materials before. But you can always
add onto it and learn new things as you go because art-making is
limitless, I don't know. It's constantly evolving
the way that you use your hand and your brain
and your creativity, so you can constantly
learn new things. Again, I'd like to
mention that you should check out my drawing, sketchbook drawing to do list where I have
listed out tons of different objects and
character characteristics that you can draw from. You always have something
to draw and you never have that question of what
to do on a blank page. Then again, I just want
to say just keep going. As you create more art, your art will evolve and you're going to see huge difference. As you fill your sketchbook with different pages and
pages and pages, those first pages might
be shaky, but by the end, it's going to start
looking better and better, and that's so exciting. I can't wait for you to do
that final flip through and feel that achievement
that you've done.
11. Final Thoughts: That's it. Thank you so much for watching this class with me. I really appreciate
having you as a student and I
can't wait to see your projects in the
project gallery. Please make sure to
upload something. This class is really
open and free, so just take a few photos of your favorite spreads that
you did while playing in this class or your
final vignette if you thought that it
turned out lovely and you learned something. I can't wait to see that. Make sure that you're following me here on Skillshare as well that you'll be notified when
I upload future classes. If you'd like to hang out with
me outside of Skillshare, the best places
to do that are on Instagram @emmakisstina, my
website emmakisstina.com. I also have created a Facebook group community that's private and
really beautiful. If you want a little
bit more attention for me and get to know me better, and I have a lot of extra teaching content
there for free as well. I look forward to seeing
you there as well, and I'll see you in
my next class. Bye.
 Kristina Hultkrantz, Illustrator & Surface Pattern Designer