Transcripts
1. Introduction to Smooth Painting with Watercolors: Are you frustrated because
your watercolors dry it in the middle of painting and now you have a line in it. Or your watercolors drying
up, splotchy, irregular. Then fear no more because I've created this class just for you. I've created a series
of watercolor classes to give you tools to
overcome your obstacles. In this mini class, you'll learn how to become a smooth operator when
it comes to our colors, you'll learn how to
paint large areas of color without
swatches and lines, and how to create areas
with soft digits. These techniques
work well on wet, on dry painting when you are layering colors
to create depth, richness in your painting and to create smooth shading effects. Hi, my name is America, and I'm an illustrator, author, a printmaker, and an educator. I've been painting with
watercolors for over 30 years and used it as a medium to create illustrations
for a picture books, puzzles, home goods, greeting
cards, and fine art. In this class, you'll learn
how to create smooth areas of color and soft transition using the wet on dry
painting technique. I created this whole
series because I want you to approach watercolor
with an open mindset. Forget judging yourself
and just have fun. The reason why I love smooth
painting techniques is because it enables me to
add nice backgrounds, Richard, undertones, and smooth
shading to my paintings. Sometimes having
sharp edges looks nice in a watercolor painting. It's part of its charm
and the look of it. But it's nice to
have these kinds of smooth painting techniques in your toolbox to enable you to paint in a
wider variety of ways. So we're going to warm
up with a couple of simple exercises to get
comfortable with new techniques. And then we're going to
do some troubleshooting. And then we're
going to move on to the final project of the
class where we're going to put those new skills
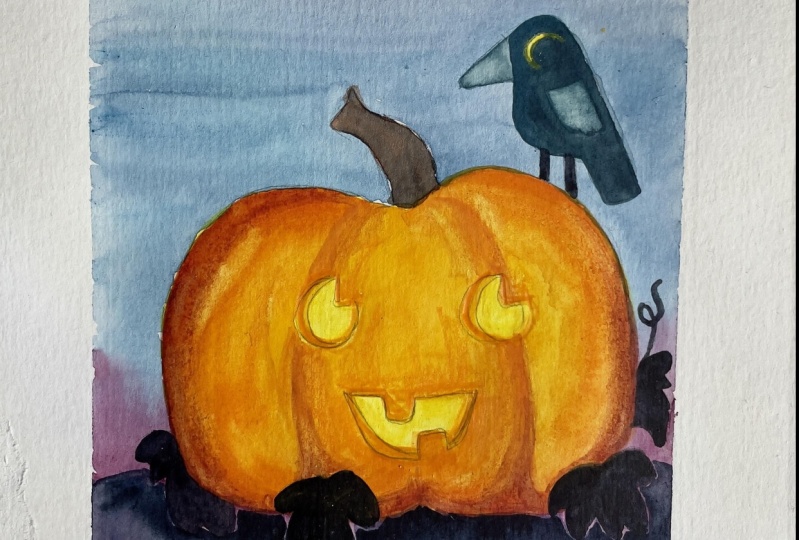
to the test and paint a font, fall
themed pumpkin. You can pick from one
of the two sketches that I have provided
for you in this class. This class is easy
enough for beginners, but if you already have some
experience in watercolor, you can use these skills to
create your own compositions. Either way, everyone
is going to be able to walk away
feeling more confident in their painting
skills and adding smooth areas of color and shading into their
watercolor paintings. Are you ready to have
fun with watercolors? Join me in simplifying
watercolor painting, smooth surfaces and
soft transitions. I'll see you in class. Bye.
2. Orientation: [MUSIC] Welcome to the class. In today's class, we
are going to learn how to paint smooth
areas of color, without swatches
or lines in them, and then transitioning colors
from one color to another, or transitioning colors
from darker to light. We're going to do some
simple exercises to get warmed up and used to
this new technique, and then we're going to
jump into our main project, which is a fine fall
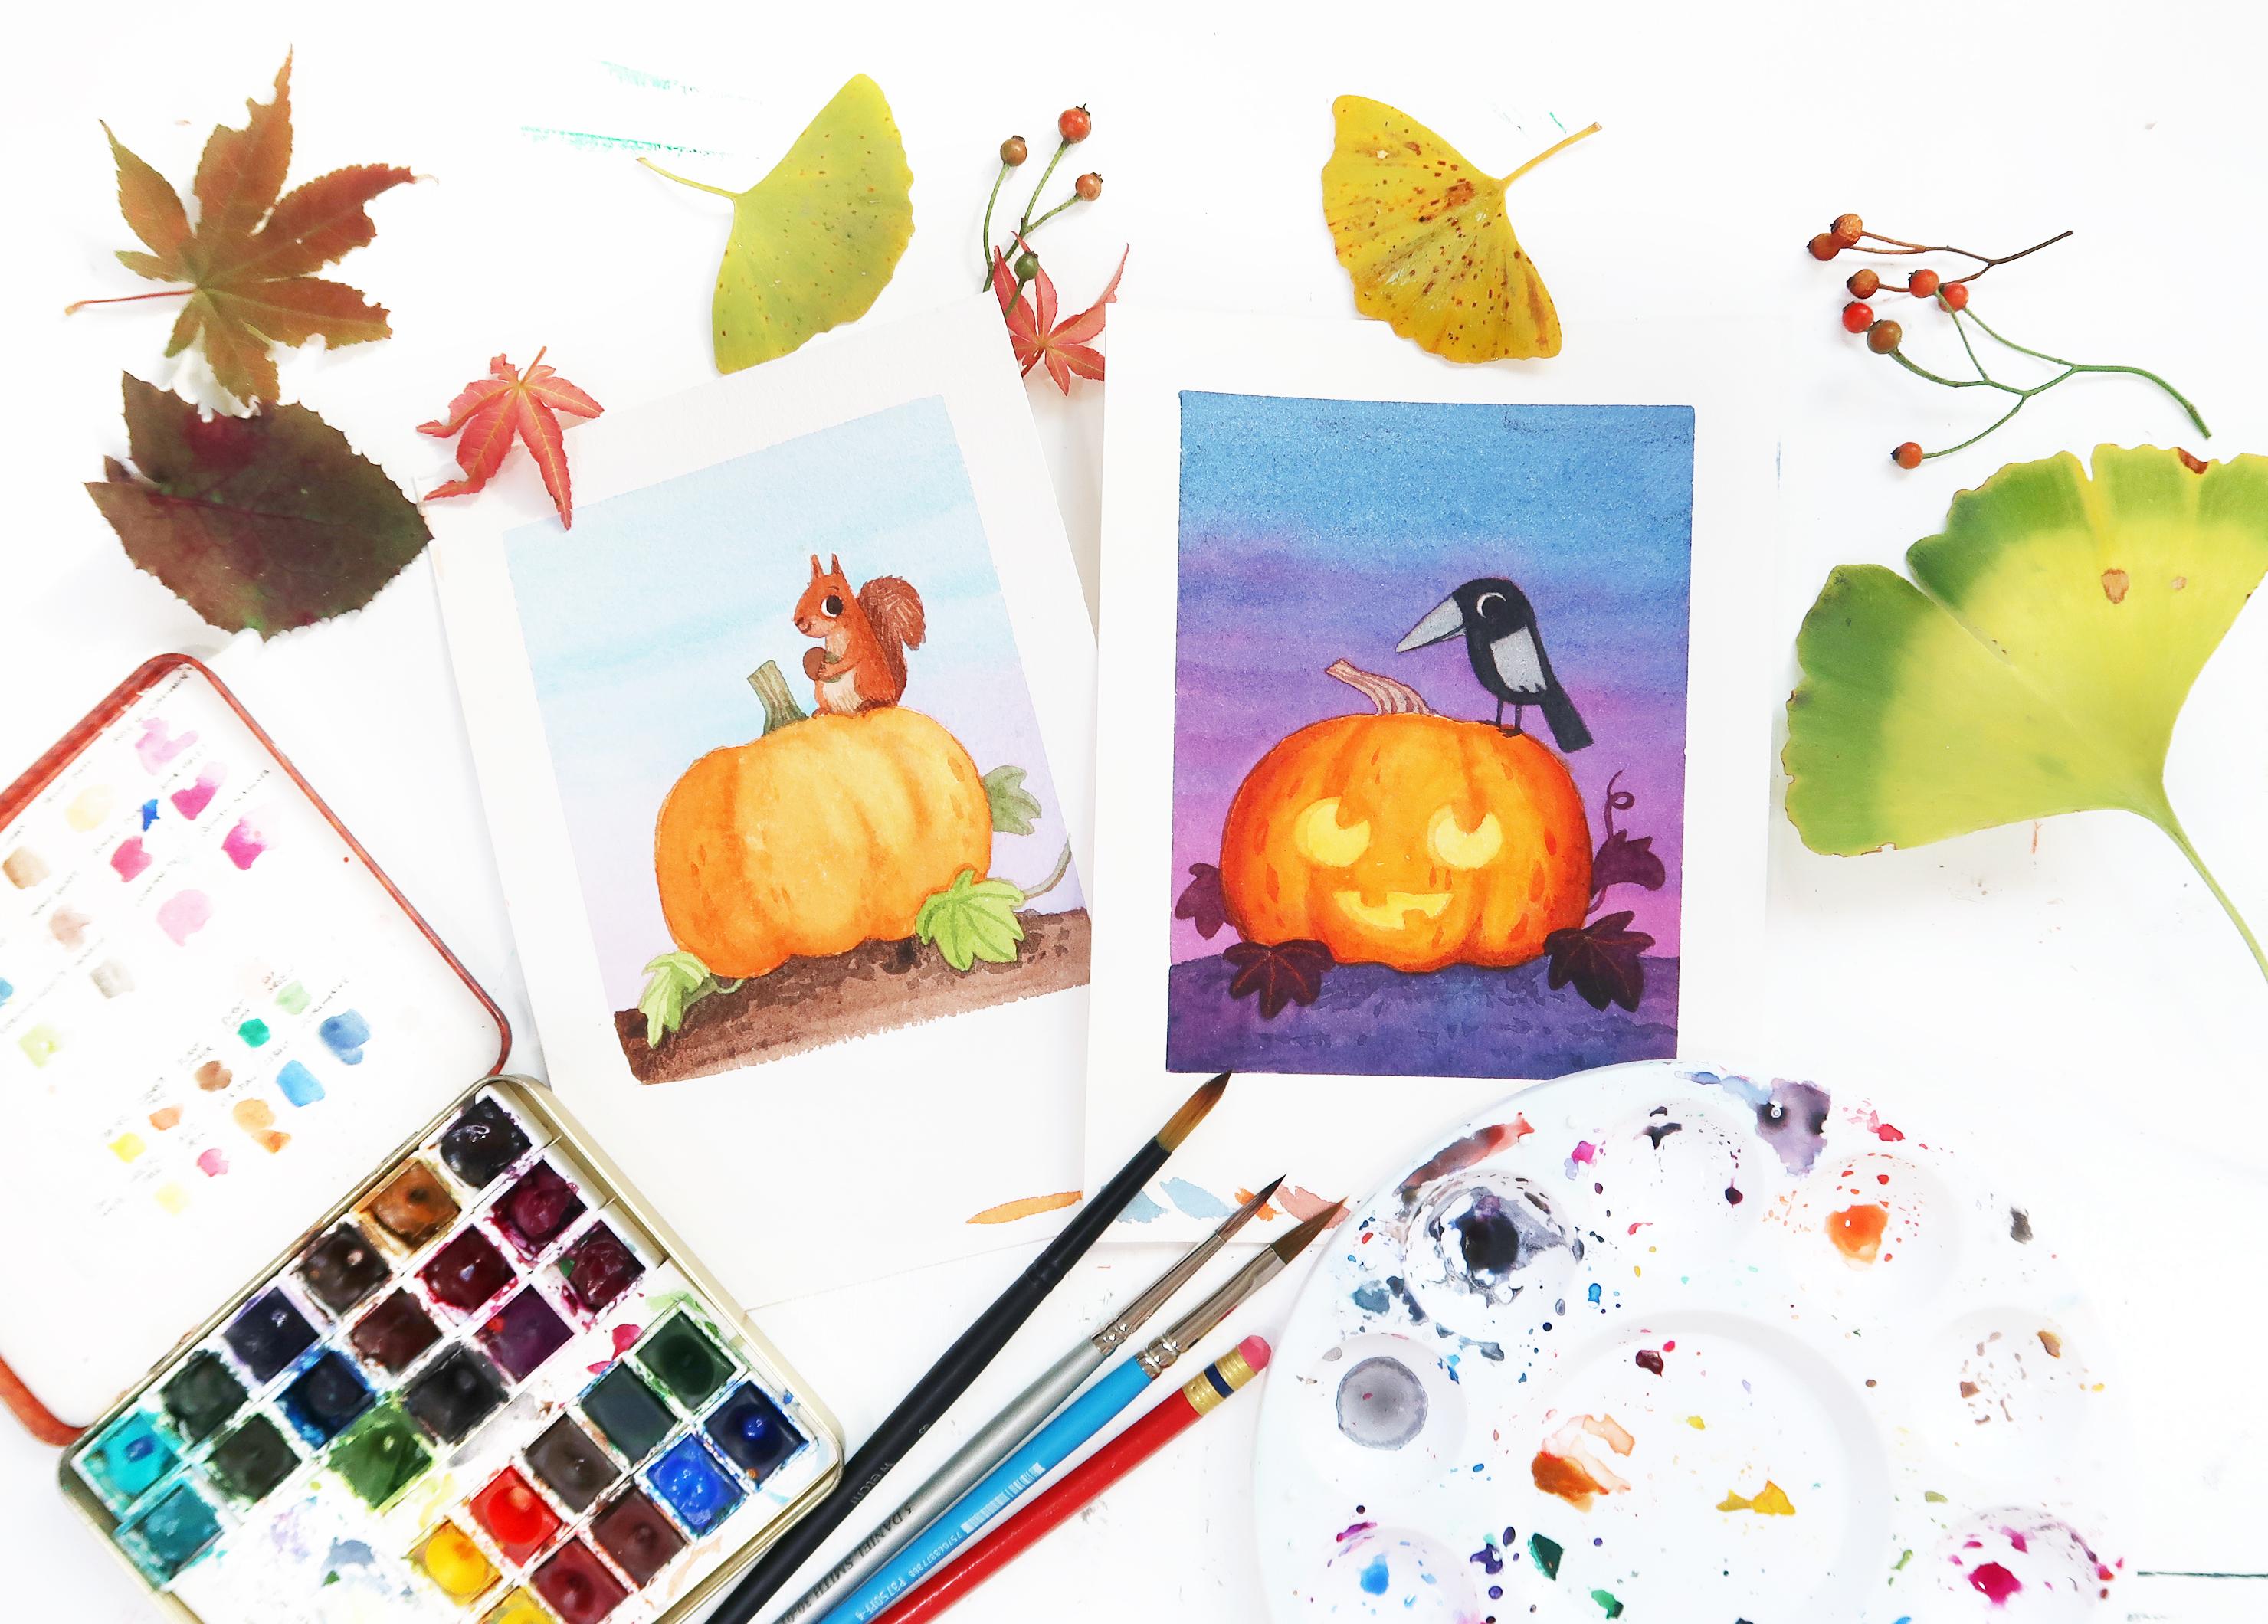
themed illustration. The reason I chose this
project is because it's a quick and simple way to learn the smooth and soft
painting techniques, and the end result is
a fun little painting that you can keep as a gift
or use as a greeting card, or use it as little fall
decoration in your house. Watercolors can feel like an unforgiving
medium in many ways. When you're painting
large areas out, they can dry out in the middle, and then they leave marks and lines where you
didn't want them. Because watercolors are
transparent additive medium, once you've painted the area, it's hard to erase to make
areas lighter without damaging the surface of your paper or the layers
of paint underneath. So in general, you should
think about only adding layers of paint and
making areas darker, instead of trying to
make something lighter. For this reason,
it's important to plan your painting
before you start. You can even make a loose, small-scale painting
to try the colors, and make mistakes on, and then that way once you've
painted something once, it's easy to learn from the
experience and try again. That's one of the big
reasons why I like to paint small paintings
in my classes. So that way you're encouraged to try the techniques again, and you don't feel too
invested in your painting. I always think it's
great to make mistakes, because then if we
don't make mistakes, how are we ever going to learn? Let's look at the supplies
we need for this class before we dive into
our exercises. [MUSIC]
3. Supplies: In my previous Skillshare class, wet-on-wet rainbow technique, I go over all my choices of tools for watercolor in detail. If you're brand
new to watercolor, it's a great warm-up class for this one to get comfortable
with your supplies. Today, we're going to be using our regular set of
watercolors supplies. I have a big jug of water that's filled up
pretty much to the brim, then I have a pan
for mixing paints, I have a set of watercolors, and then I'll be using three
different brushes. I'll be using a big one, this is a size 12 round, a size four pointed filbert. It's getting on one side and
thicker on the other side. Then, this is also a size 4, this is a round brush and you can tell both
of these are size four, but the round one is quite a lot smaller
than the bigger one so the medium one. I basically have a big and a medium-size and a
small brush for details. Just those things, and then I'm using
300 gram Arches, cold pressed watercolor paper. A lot of times I use
hot press and if you have a pad of
that, that works just as well for this project. But I had this pad
of cold press, so I just needed to get rid
of it and that's why I'm using that for this project. [NOISE] Then on top of those, I use kitchen just paper towels, I reuse mine after they dry, I just keep reusing it
until they fall apart. So that way you're not
going through rolls and rolls of paper towels just drying your brushes in between. For optional supply, if you wanted to use colored pencils for your
detail for your leaves, you can do that. So for example, I decided to use
colored pencils for my leaf veins instead
of using the dark. Then, your other option, you could just use
watercolors and use those for the black
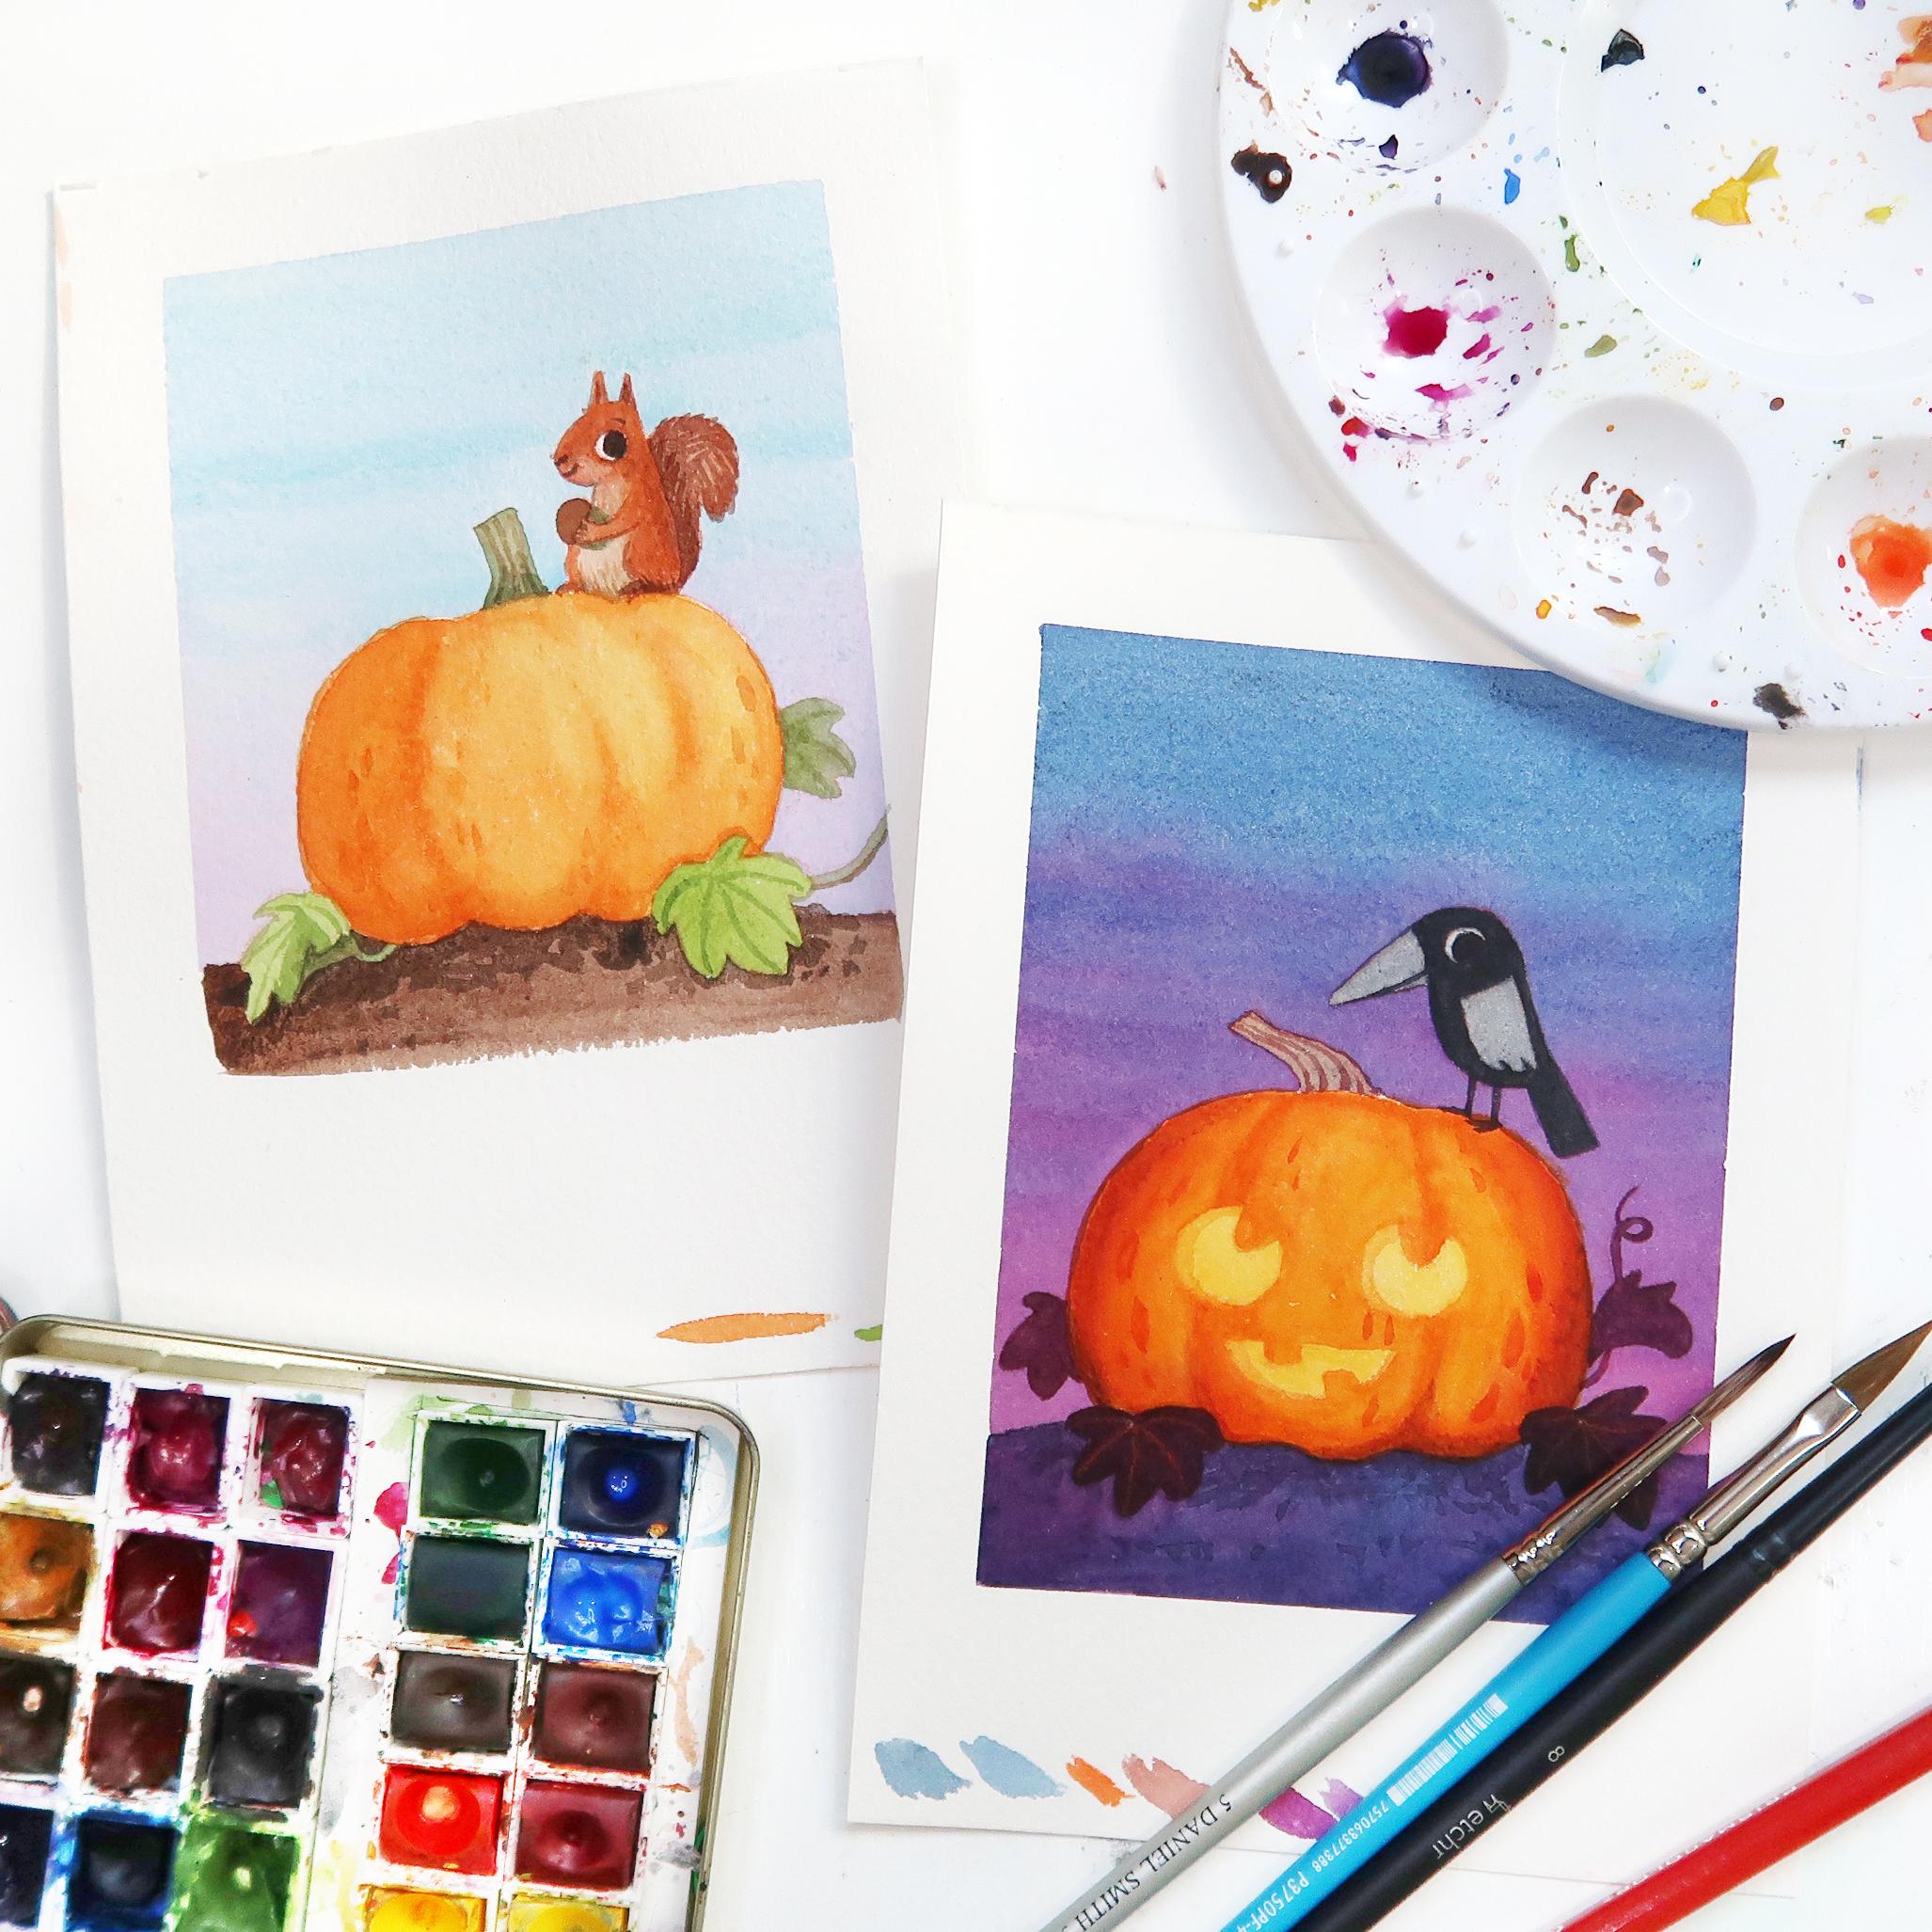
lines for your leaves. Then lastly, this is the image that we're going
to be painting today, and that is on a five by seven
piece of watercolor paper. I cut it from a larger sheet, and I had a larger
paper and I cut it into quarters and so it made
five by seven sheets. I've masked it off
with some Washi tape, you can do that if you want, but it's not necessary. You can either paint a
whole five by seven, or you can make this
composition into a square, or this is in between
both of those, like a four by six or so format. Then you need either a pencil or a colored pencil to draw
your outlines and the sketches provided in the class
you can print it out and use either a light
table or a window to draw through to transfer
your drawing onto your paper. Let's get to our first exercises to warm up with our
new technique. [MUSIC]
4. Warmup Exercise 1: [MUSIC] Now that we have
all of our supplies set up, let's get ready to paint
our first exercise. For the exercises or
for the warm-ups, I just cut a one large
sheet that I had into smaller sheets because it's just
easier to manage. This is a five-by-seven
sheet of paper. On this one, we are
going to practice just painting an even color
from one end to the other. If you wanted to
practice a gradation, you can start with one color. In our final project, we're going to be
fading from blue to a pinky purple,
so if you want to, you can practice that or any other color of the
rainbow that you feel like. Maybe we'll do that. We'll
start with the blue and we'll end with the pink just to
practice that over here. To get going on that, what you need to do
is you need to have, I'm just grabbing a bunch
of color or bunch of water. I need to mix two pots of pink. For the blue, a lot of times, I really like mixing my colors. I'm going to grab,
this is ultramarine, I'm going to grab
a bunch of this. Then I have some Prussian
blue up on the top over here. I'm going to grab some of this. They don't have to be
super dark for right now. Just enough to practice. I think I'm going to go with
that just so you can see, it's about that dark right now. Then I'm going to wash my brush and we're going
to get some pink. I still had some
blue left on there, so let's make it
a little purple. That's okay. Just
practicing for right now. We're going to start with this. The general idea
when you're trying to work on large areas, is to have a bead
of paint running at the bottom of wherever you're
painting at all times. So that's why I wanted to work on a smaller piece of paper because it's just easier
to control the paint and work on getting
that solid area. If you have trouble
with a five-by-seven, you could even just do a half
a strip and practice with a smaller piece first before
you practice a whole sheet. Let's get going. I'm going to grab a
bunch of my blue paint and I'm just painting
it on the top and I'm grabbing
more from my pot. If you can tell, I'm holding my paper a
little bit of an angle, that's why it's nice to have
a small piece of paper too, it's easier for you to turn it. Now there's a bead of water running or painting
running on the top. Now we're just going
to be moving that bead of paint down the page. You keep getting more
paint so you can just keep going lower and lower. You just keep moving
that bead of paint. If you wanted to fade it out, if you wanted a nice sky, you could start adding
water over here and then just fade it out to
clear water afterwards but we'll make the fun
little fade with the pink, since that's what our
main project is about. If you start running
out of paint, just make sure you add. As you can tell
as we keep going, it's just making a
nice bead of paint. Then it's up to you to decide where you want
that fade to go. Maybe at this point, I'll start grabbing a
little bit of pink, bead it all the way across. Still grabbing a
little bit of my, making sure I have that bead
of paint sticking over here. There we go. We just
keep going down. Just keep your
paper at an angle. You can tell the
color is starting to slowly transition as we're
moving down the page. It's important to do
this all in one go, have everything ready, and then just keep
going down your page. I feel like I want a little
bit more of a transition. While I have that thick
bead of paint over there, I'm just going to grab
a little bit more pink so that I can get a little bit more of a transition going over here. You can tell that I disturb
my paper a little bit, [NOISE] so there's a little
bit of a line over there, so I ended up getting
a little bit of a line because I
stopped in the middle. I think it'll be all right. For me, it always
works best if I can just do it all in one go. There we go, all the way down to the bottom. You can see it looks like a really nice fade,
nighttime sky. Now if you wanted to draw anything in a silhouette
on top over here, like a tree or a forest or if it's a close up,
it could be mushrooms. Then when you get
to the very end, before I get carried
away with my ideas, I'm going to wash my brush
and I'm going to clean it. Now because I have
a clean dry brush, you can tell how it's
picking that water up. With my dry brush, I'm just going over here
and just picking that up and once it stops picking
it up then there you go. There we have our nice fade
from top to the bottom. Then when we get to our
actual final project, I'll show you how I paint going down and then
how we're going to paint around objects as we
keep moving down our page. This was our first exercise, and you can practice
this a few times. If yours ended up
a little spotchy, try it a few times and
see how you like it. Now let's move on to our second
warm-up exercise. [MUSIC]
5. Warmup Exercise 2: Now that we have our
nice fade painted, let's work on shading
some smaller areas. I have a little bit of this
paint left over over here, and I'll leave a little bit
of space up on the top, just so we can practice some
shading from light to dark. Then let's draw some paint
or paint some circles. We'll just use
these to practice, just so you could
just do a blob. If you wanted to practice
your pumpkin shape, you could practice your
pumpkin shape too. While these are
drying over here, let's just work on our fades up on the other
side of the paper. For the next part, I'm
going to be just changing my brush to the
middle-sized one. For this first one, let's just practice some lines
and just fading them out. You can start with a fairly, this is about as dark as
this color is going to go. I'm going to wash my brush, dry it a little bit so
it's not sopping wet, and then with this
semi-clean brush, I`ll start teasing that out. Now it's halfway. You don't want to
use too much water. If you use too much
water, then it'll end up pulling too much of
the paint with it. I'm now at this point I
almost have like a dry brush. You can practice a few of these. You can do different colors. Different colors behave
in different ways. You can practice this
with different colors. I find that when I'm working
on the cold press paper, my colors bleed a little differently than when I'm
working on my hot press. Just whichever one
you're more used to, just work on that. Then let's do one where we're
fading it on both sides. You can see there's
a big puddle. I'm going to dry
that up just a hair. But you don't want to do
this with too dry of a paint either because if your paint is completely dry when
you put it on, then it's going to dry before
you have time to fade it. As what we were doing
on the other side, just fading this out. I'm going to flip my
paper before it dries, and then teasing
this side out too. When I'm working on
fades like this, what I usually do
is I'll sit with it until it's completely dry. A lot of times, once you have it faded out and then
you wait for it, sometimes you'll start seeing little edges forming and then it's just nice to
be able to fix those. There was not an edge forming, but I feel like this
is a rounded shape. I'm just trying to make it more into a straighter
fade over here. If it ends up being a little splotchy here in the middle now that I'm going in here
and disturbing my paint, I can always go back
in there and add. Once it's dry, then it's easy to add more pigment in there later. I was getting a
little bit of an edge there, so fade that out. There we go and we'll
try another one. How about with red color? Maybe we'll do an S-shape and then we'll fade on one side. You can see it was starting to dry over here a little bit. I'm just trying to re-wet
that area and make sure I can get it to bleed. In those kinds of cases a lot of times I'll
have to go back in with a little bit more
pigment later and fix that. I feel like whenever
I'm doing this, it's a little bit like crisis
management as you're trying to make sure that
everything is all drying out and go in evenly. But I always suggest
starting out a little bit lighter and you can always go back and make things darker. It's probably better
left just like that. I'm getting a little
bit of edges over here, so I'm going in here
and scrubbing it. Then how about we
could also just try our rectangle over here. Let it dry and then shade
it a little bit more. Come back to it in a little bit once it's dry and then shade it, or you could even make
a cylinder shape if I shaded it from one end
and then the other end. Let's go back to
working on these. For the first one,
we can just do a very simple shading on it. Just paint on the edge and
do like a half a moon. We're going to shade. Then also making sure I don't
have a crease over here, not a crease but a sharp edge. There's one maybe. Keep moving this, shuffling
this paint around just a little bit to
soften these edges. Now we have a soft
light over there. Then maybe we'll make it
a little bit less over here and just be a
little bit of a lighter, more like a little cat, maybe its shadow, maybe it's on a purple
sheet of paper, and so its casting this a
purply light over here. That's much of a softer shadow where we faded it on both sides. This kind of drawing, I can
see that we painted this side, we didn't really
paint this side. What I would do is
once this is dry, I could go and add a little
bit more paint over here. Then I would add a little bit more darker paint over here just to give it a nice
illusion of roundness. Now let's go to our
odd shape over here. Maybe there's a
crease that comes in. Who knows? Maybe it's like a little cloudy
shape or something. I could do around
the whole thing. But then I'd have to really rush to try to fade
everything out. It's better to do it in smaller increments
and go slow rather than try to do everything
at the same time. There's that. That
was fairly easy. Then to our pumpkin, over here, we'll start by just creating
the edge of the pumpkin. The pumpkin has those folds. The folds will be like
what we did over here. First fading this in. I'm thinking that the light
is hitting the pumpkin from this side or maybe
from around here. That's why there's darker
along this end over here, making sure all my
things are dry. As you can see, this
one as it's drying, it's creating some
more edges over here. I'm going to go in here and soften some of
these up a little bit. While that's drying, let's
work on our little square. I think this is dry over here. Starting out with
the dark color, straight edges are
always much easier than trying to do curves
or multiple areas. Now everything is wet, so I'm going to
grab my blow dryer and just dry it really quick. [NOISE] There we go. As I said, I feel like it's instead of trying to
get everything at once, I always feel better doing
things little by little. Now I'll try to fix this
spot just a little bit. Dropping in that paint. Then I'm also doing
my very gentle fade. You have to be gentle
once you're adding extra layers of
paint just so you don't disturb the
layers underneath. Just teasing it in there. That's a little bit wet already, so I'm trying not to
add too much water. Then let's get a little
bit of a darker. We'll, again, this
is just a dark blue. We'll just add a really
dark layer over here. If your color underneath
starts lifting up, then I usually just
stop working on it and just let it sit and
then come back to it after it's dry and then try
to fix those areas up, if you've been disturbing
it for too long. This one's good as it is. I don't know if we need
to add anything to that. Then we could add another really dark just to add more
drama over here. I use this technique a lot
of times also for animals. If I have a bird and the color fades from
one to the other, then this is a nice
technique to fade one color into another too. It's not always
just for shading, you can use it for
other things too. Maybe it's like a rock and there's pits in it or something. Maybe there's a sharp edge
on one and then softer. Some of the edges
are a little bit softer. That will give it. That's just some little
ways to add texture. Then let's work on our
practice pumpkin over here. We'll do one at a time
just to keep it easy. Now we just want to
fade it both sides. Maybe a little bit less
on this side if there's a little bit more of a
cast shadow on this side and then it's coming around
more around this way. There's one lobe
of our pumpkin and then same thing over here
so it's going to go. I'm thinking it's going to be a little bit of a
sharper shadow and then a softer shadow maybe this
way. You could leave it sharp. It looks nice, but
I'm just going to soften it just very gently. Then same thing over here. If we just wanted to
darken that a little bit, I'm going to make
it more dramatic by just adding that darker
highlight on there. Maybe there's a little bit of a bend like your cylinder shape. If you wanted to, we could even practice
adding just even maybe it's a lighter shade, shadow down at this end. Now this is our practice shape. If you wanted to practice more, you could make more swatches or practice just shading
just on white paper. Then when you feel
competent in that, grab your next piece of paper, transfer your sketch onto it, and then we will start painting our project
for the class.
6. Troubleshooting: [MUSIC] So in-between painting
our warm-up exercises and our final Halloween
pumpkins I wanted to just take a moment and look at some different ways to
troubleshoot if you run into issues when you are working on your
watercolor piece. Some of the issues I try
to replicate over here , on these pieces. Most of the time your
issues or any problems that you might encounter
during painting might come from either
using, in my opinion, too much water, or at least when I'm painting, and then the other time when
you run into issues is I like to work in layers and
so then you start lifting up the paint underneath
and then you start getting very splotchy paints. Then I guess the third issue
you could say is getting these edges on
your paintings and so how to fix those once
those things happen. Let's go one at a time. Over here on this splotch, I was trying to blend
these two colors, but I ended up using
too much water. Instead of then trying to
work and work and work, and mixing everything up
where I would have just ended up with a big
splotch of green, I let everything dry, and so you can see
where I'm at right now. In this case it's
better to just stop, and take a break and then come back to it
after it's been dry. [NOISE] Just getting
my blue little tub ready over here so I'll mix
a little bit more paint, and then you can
come in here and try to fix a little bit of that, so using those skills
that we learned. Then also fade it, maybe add a little
bit more color. In general you just
want to make sure you're working fairly quick, you don't want to hang
out in a location. Everything is wet
so it's easy for me to drop in a little
bit more color, just to fade that out. As my blue color is creeping in here on
this end, again, this is a fairly dry brush, I'm going to go in here and just erase a little
bit of it off. You can pull the color off
with a dry clean brush. I'm just pushing my edge back a little bit and
then fading this one, and then I'm going
to let this dry, and then once this is dry. Then I can come back over here and paint a little
bit more yellow. If there's still a
little bit too much of a gradation right here I could
come back after it's dry, and I would add a little
bit more blue over here just to give it a
more gradual fade. But that way letting things dry and then coming and
working on it after it's dry, that usually works
pretty well for me. Then, the second issue
a lot of times is, as I just said you want to put your layers
down fairly fast. [NOISE] Let me just
grab some purple here. This is a dark purple. Let's clean it up a bit. [NOISE] Brighter purple in here. Let's say I'm trying to go
in here and I'm trying to do another layer of pink. But if you sit in one
area long enough, you start lifting the color up instead of actually
putting color down. As you can tell, after I scrubbed it
a few times instead of getting brighter, I'm actually getting
a light area because I've been using my
brush to scrub the area up. If you start noticing
that paint is starting to scrub off underneath especially if you already have
several layers down then, that can be a problem. The best way to combat
that is to work fast so the layers underneath don't have time to hydrate
and pull backup, and so you want to work fast. Then if you're working slow and you see that
starting to happen, then you just want to stop, and let everything dry, and then once this area is dry then just in the
same way over here, I would come back and
then fix that area with another layer of paint. Now we messed with
that one but I have this other one so over here, accidentally I put
too much water so I ended up getting a dark and then a light
and then a dark. I would fix this first by adding some more paint in this area, and then we have
this edge over here. Just in the same way
as we can scrub, you can gently try
to erase, and scrub. You can usually at least
fade the edge a little bit. You just want to make
sure you don't have too much water, you want to have a
fairly dry brush just enough water in there. But a lot of times when
you start scrubbing then all the layers
start moving. This is my pointed filbert, and so with this brush
I'm able to just scrub. That takes the heaviest
edge off of it. Now it's not as
visible as was before. You can fix some of those edges, just with that or make them a
little bit less noticeable. Now that really sharp edge that I had along
over here is gone. What I want to do next would be then to just add a
little bit more paint to round everything up, [NOISE] and make
everything the same. [NOISE] Same shade as we're
retroactively [NOISE] mixing. Now if I go back
in here and I work on painting some of this out, everything that I
had over there, you wouldn't even be able
to notice it anymore. [NOISE] Then some other ideas to fix mistake areas
or problem areas. Before we actually get to that, so with this one, let's say I wanted to have a
highlight right here. In some cases, some colors lift better
than others but in a lot of cases you are able to retroactively add a little
bit or you can never get your color all the
way to paper white. But you can certainly
lighten areas up if you go around and you
scrub it a little bit. That's a way to lighten areas if you wanted
to add highlights. But let's say you're working on an animal and you
just wanted to add little highlights for the
hair, what you could do is, preemptively you could
add masking fluid and just mask things out and
then take the mask off, or you could use
just gel roller pens or white colored pencils. If I draw over here you
can see a white line. If I was working on an animal, I could add highlights for
the eyes or for other areas. The gel pens, they don't end
up drawing a perfect white, but it's a possibility
to add some highlights, and then another
option is usually your watercolor sets will
come with white paint. Mine is dirty right now. But this is actually
an opaque color. If I just hydrate it I
could get a really thick. It's going to go on
very white and as it dries you'll notice it
won't be as white anymore. But you can always add [NOISE]
details with white paint. Then another option
is to just use white gouache and you could use this spreading white
highlights too. [NOISE] Yet another option that I show you in some
of my other videos as well I really like having
texture in my artwork. Let's say for example you
have the sky over here and it bothers you that there's some splotchiness and
it's not quite even. What you could do
in that case is you could get your color pencils out and add some highlights or some texture with
the colored pencils. Let's see. You could either just go in there
and just add color, [NOISE] and you could
just do one solid area of color if you wanted
to color that in and if you wanted
it to be a little bit. [NOISE] You could go
in areas and add, just colored pencils to
add some texture to them, and in some ways mask
some of those areas. But a lot of times like let's
say if this was a apple or something it's really fun to add a little highlight on textures
or even on the pumpkins. You could just mix a few things in [NOISE] to add visual interest and
this is a light yellow. Then that completely masks
what is underneath over here. Or you notice the color
pencils more than any of this. The stuff that's underneath. [NOISE] This is just more of an even application but using several
different colors, and then since
it's a light area, I would add white on top just
to lighten everything up. [NOISE] My marks can be as big as you want them to be or as small as
you want them to be. Now you don't notice any
of that splotchiness that was going on between
these two areas. That's just some ideas
with what you can do and [NOISE] ways that you can fix problem areas in your paintings that might arise while
you're working on it. I guess same thing
would go over here if I really wanted to
work on this part, since we didn't
work on this yet. [NOISE] I could try to
scrub a little bit in the middle and see if I could
pull any of this paint off. I'm not going to
be able to fix it completely but I can make
it at least a little bit less [NOISE] noticeable perhaps. Now I just made it worse. I was just going to say then
I would stop working in that exact spot if I see the paint just completely
starting to pull up. Some of these paints will
pull off differently. Some will come off
better than others, and so I would work on
the whole area at once, and maybe even make it a
little bit lighter than what it needs to be and then
I would go back in there, and add a little bit more paint. This is almost completely
scrubbing off to white. But I'm also trying
to be mindful not to leave really hard
edges in there, so I would rather get
things a little bit, maybe lighter if need be. [NOISE] This is a little
bit more for advanced. If it's a piece that you're
working on that's going to be scanned in that
you want to sell as prints for example, then some of these areas are perfect to just leave as it is, and then once you scan it
in and you're working on photoshop then you could use the stamp tool and
stamp from here, and apply it over here. We're fairly dry over here. Then I could just
add just a wash here so that evened
everything out. Then we could do the same thing, as we were working
over here earlier. Now, this was fixed
and this one, it's still wet so it's looking
a little different color. Then here you can see
our gouache as well. Those are just some tips
for troubleshooting. I hope they were helpful, and now let's get to our main project for
the day. [MUSIC]
7. Halloween Pumpkin: Background: [MUSIC] Before we start
painting our final project, if you are out of ideas, how to transfer your
drawing onto your paper I show you three different
ways in my previous video. Option 1, is you can use pencil and then color the
back of the printout, and then use that
to draw through your printout paper onto
your watercolor paper. This works well if your
paper is attached to a pad and you don't
want to peel it off. Then Option 2 is you can use
a light table or a window, and you put your printout
behind your watercolor paper, and then you draw
your sketch through. Then Option 3 is, if you have an inkjet printer that can handle a
thick paper like this, you can actually also just print your sketch directly onto
your watercolor paper. When I do this, I set
my transparency to around 15 percent, and that
way I get very light lines on my paper, and
then that way it doesn't show through
my final paintings. For little pieces like this, it's easy just so you
could also just free hand the drawing on here because
it's not very complicated. I usually use the inkjet
printer technique when I need to print very large sheets
of paper that have very complicated
drawings on them. Hopefully, you can find one of those ways useful for you, and then once you're ready, you can tape the
edges if you want. I taped mine, but you
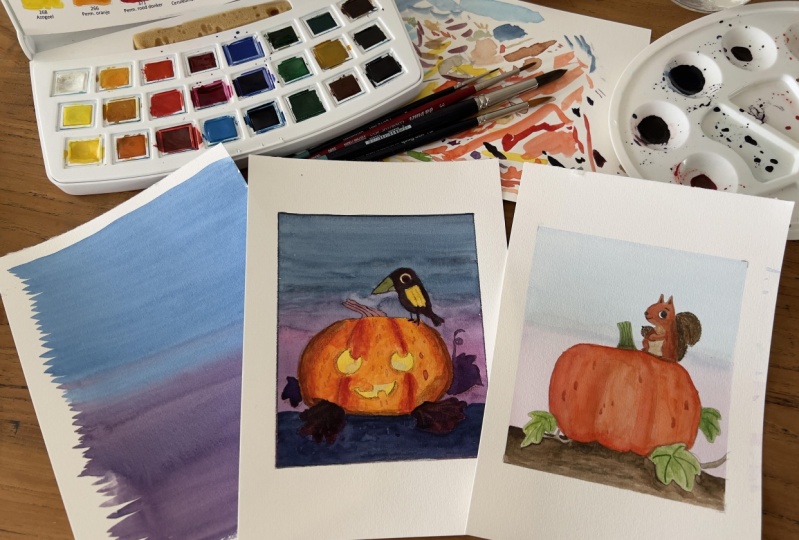
definitely don't have to. On this other practice
piece that I did, I did not tape the edges,
and it's just up to you. For this one, I painted the whole sheet and so then
if I wanted to scan this in I can scan this
in and then write Happy Halloween on the top or some fun greeting if
I wanted to do that. But then for this one, if you just want to keep it as illustration itself and you don't want to have
any text on the top, then you can make it a little
bit more short and square, so that's what I chose
to do over here. To start, we're going to paint our background and
we're going to do that exactly the same way as we
did on our practice piece. I'm going to make my cuddle of blue water and then pink water. Just grabbing some water here, water on this one. You don't need as much for
this one because there's much less area to paint. [NOISE] Just getting my blues [MUSIC] using some Prussian
and some ultramarine. [MUSIC] Then I'm
just going to add, I have a little bit
of this dark brown, it's a color called hematite, and that's from deep lick. I have a little bit
of that just to make this a little bit darker since we're looking for more
of a nighttime scene. If you have this little
extra paper on the bottom, you can check your
paint consistency or if you have a
scrap piece of paper, you could try that on
scrap piece of paper too. I just want to pink. My pink going over here. This is Quinacridone pink. A color I've also purchased from Daniel Smith. I
think that's enough. You don't need as much
pink. It's going to be a very small area down
to the bottom over here. [inaudible] wash my
brush one more time. Just like in our practice piece, what we're going to do is
start at the top and have our big feet of paint and we're going to just keep
painting it down, and when we get to our
first object over here, we'll just keep painting
up to the object and then paint
around the object. We'll do that until we
get all the way down. Let's get started. Lifting up so I can
[inaudible] my angle. If you wanted to, you could
have a third part of paint that had an in-between if you wanted it to
be a little bit more gradual than what
we did last time. I'm going to keep going.
I think I want to start adding my pink here
in just a little bit. I'm just quickly, spoke
without trying to pick up too much pink paint or trying
to mix the paints too much. Now I'm at my crow down around. I think we just round brush comes to a pretty
nice little point, so I'm just trying to
paint around the crow. I have a large puddle
of paint here, so I'm just going around. I also want to control my paint to make sure that
I don't get any drips. A little bit uneven
as you can tell, but I'm just going
to keep going. I'm still grabbing
a tittle of my ink. As I'm coming up to this crow. [inaudible] this stuff. Then I'm going to
end up combining. Whenever I stop, I just
want to make sure that there's no bead of paint
sitting over there. That way it's not drying. It's okay if you get a
little lumpy and bumpy. The pumpkin is a little
lumpy and bumpy anyways. The crows feet are
black, so I don't mind. I'm just painting over that so I can just combine this
two around here. You can say I'm not in like
a super I'm just taking my time and working
down as I'm going. Because we're
painting these leaves with the darker color too. Well, you can either paint
right over it if you want. I'm going to leave this
other one unpainted. I'm going to start bringing
this other one down. Grab a little bit more
concentrated ink here. Since we have a ground, the ground is going to be black, so if you wanted to I'm going
to use my leftover paint. Here, combine this two. Then I have my crow,
and then my pumpkin left, and now everything is sopping wet like
it was before. What we're going
to do is just take our blow dryer and blow
dry everything dry. If you have a puddle of water, just like we did
in the exercise, just make sure you get that
puddle of water dried up. Otherwise, once you put
the blow dryer on it, then it's going to splatter
all over your painting. Just make sure that's dry or that's gone before you
start blow drying it up. When you're working
with watercolor, it's always nice to work
from lights to darks. I know you can't
see it on camera. I can still see my red
outlines over here. If you lost them a little bit, you can always go in
right now and add. You can take a pencil or colored pencil or a
regular pencil and just go in and draw those
in if you can't see yours [NOISE] right now. But let's work on. Like I said, from lights to dark so let's
work on our lights next. With our pumpkin,
as you can see, you want there to be
yellow for the eyes. I liked having just everything
yellow to begin with. If you took my other classes, some of this is very much
what we've done for that. Some of it you can work a
little bit with wet on wet, but we'll try to work on the skills that we've
practiced in this class. We'll go little by little. I'm going to paint my whole pumpkin with
this yellow just to have a solid color underneath. If you have a little bit of
that pink color leftover from your previous
paint if you want it to be that a little bit
of pink to the edges over here just to give it a
bit of an undertone. [NOISE] You can try
it if you have solid, if not no biggie
since there's a pink. Let me make it a little bit more brownish but running
a little bit on wet. But not on the eyes because the eyes we want
those two [inaudible]. That's fine. While that's drying, we can just start on our
little crow over here. I'm just make sure
you're not paying the crows eyes because we
want that to be visible. For the crow since that's a little bit
more detailed stuff. [NOISE] Right now you can see there's where I was painting my second layer is starting to granulate a little
bit, but that's okay. We're going to be painting
orange on top of that any way. I'm just making sure I don t get really big
splotches anywhere. Softening things
up a little bit. Just doing my palette so
I can just mix a dark. Because the background is bluish color I wanted the crow
to be a bluish black too, and so I'm grabbing some of my hematite, and then my
blue that I had leftover here. The first round you want
to just do a medium gray and then we're just
going to paint over the whole
except for the eye. At any point if you feel like you can't see your underlying painting then just stop what you're doing. Make sure your painting is dry
and just go back in there, and make it a little bit darker so you can see
what you're doing. That's our first layer. We'll let that dry. Then now that everything is
wet over here we're going to grab hair blow dryer and
[NOISE] blow dry it again. After you have blow
dried your piece, then it's time to move on to some layering and
details. [MUSIC]
8. Halloween Pumpkin: Details: Now let's continue with our pumpkin.This one's
going to be dark, I'm going to leave that last to be one of the
last things we paint. Now let's paint
our main pumpkin. I'm grabbing that cadmium yellow , and then grab. This is cadmium red, pale from Winsor and Newton. These colors on the
bottom are actually from the Winsor and Newton
little travel case that they have and I feel like mixing these
two together make a pretty little pumpkin color Obviously we are going to be painting around the eyes
and actually let me make one color come in between
with this color first. This is the color of the pumpkin and so painting the same way as what we were doing
with this guy. I'm just trying to keep a wet edge as I'm
going around over here and trying to move fairly quickly before
things dry out too much. Paint it over my eye
just a little bit, so just if you have a mistake and you
overpaint something, I'm just wetting my brush
and then just fixing it up and I just realized that I
forgot to paint the eyes. I've tried it before,
that's completely dry. Trying to go in there
and fix that too. Now our fading
practice. There we go. I didn't notice that
there's a swatch over here, so trying to clean that up, so I'm just lifting some of
this paint up over here. It's just massaging, massaging everything
into places. I'm going to sharpen
many edges a little bit. I think that's
looking pretty good. Sharp edges. It
was wet over here, so I'm just softening
those up too, now everything looks pretty
nice even if there's a little bit of a
area right here, but I think I'm okay with that. It's not a big area. Now again, we've got to
make sure things are drying and while this
whole area is drying, we can go and work
on our crow again. Now I want to mix just the
same dark black-blue again, and I want my crow to be darker. If you wanted it to be
lighter than your background, you could do that
depending on how bright your background is but I want the beak to be lighter than
the background and then I want the crow
itself to be black. Then the wing is also
going to be lighter. I'm going to paint one layer
and then I'll see how it dries.Then if I need to paint
another layer on top of it, then I might need to do that just to make sure
that this is dark enough. Like I said a few times before, I would rather paint lighter
layers and then go back and paint it again and make
it darker a second time, than painting everything too dark and then you're
stuck with it. You can't it's hard to go
back and lighten colors up, and the legs also, I'm going to do those
at the very end. I don't want to worry
about those right now. We go to do that again. Now we're ready to move on to the next part and for that one, we're getting that darker purple or the darker orange
that we mixed. We're going to be painting around over
here and then fading it, then we'll paint a little bit
of the shadows back behind here and around here
and then the lobes. I don't want the
lobes to be too dark, so we will paint those
a little bit lighter, but we just want
there to be dark areas all the way around. I'm going to start that and
just go little by little. I changed to my smallest brush just to have a little
bit more control. Between these, when you're
working on your layers. Different brushes are, some of them are softer
than the others. My Princeton brush, this
is a synthetic brush and it's a little bit more
coarse, that's great. It scrubs the surface of the
paper a little bit more. Then this is a
Kolinsky sable brush though it's made with
animal hair.This one is a little bit softer in
hand and it doesn't scrub the underlying layers as
much as the other one. For the extra layers on the top, if you do happen to
have a sable brush, then it always makes it a little bit easier to blend
stuff without scrubbing. I just like to go one area
at a time and then once I'm done with one place like
before I start the lobes, I feel like it's good to dry everything up
just to make sure I don't disturb everything
else that I just painted. Then we'll work on our lobes
after these runs are dry. Then going to grab my dark
paint again and paint another layer on my birdie. I think I'm going to add a
mouth to my crow to there. I might have to make
it a little bit darker on the next round. Blow dry really quick again. [NOISE] Let's move
on to the lobes so still using the same
paint that I painted before and if you
really wanted to, you could just leave it as
a line to honestly.That would be just fine if you feel like you don't want
to mess your painting up. Since we're working on shading, I'm going to soften
them out a little bit. Then we're going
to go around here. For the second one. Then I feel like I
need a little bit more shadow around over here. So while I have that orange out, I'm going to add this one
just feels a little weak so I'm going to add a
wash of that over here. I'm assessing as I'm going, keeping everything nice
and nice and soft. Then once again, it's
about time to drop blow dry and I think to
really pop everything up, we'll end up adding one more
layer of dark over here just to really make everything pop. While we have the right areas should be pretty dry right now. The pumpkin has dimension, the eyes have dimensions, so we're going to add that
dimension in there and so I'm going to make just
a darker orange just with the hair of that. Then I'm going to
add, and these ones will be sharp lines. There we go and then I'll
do it for the mouse. It might eyeball, it looks
a little bit washed out, so I'm just getting
a little bit of just pure cadmium yellow and just adding a little bit more
just in some of these areas. There you go. It's
just a little bit brighter now and the same
thing for the mouth. Just felt a little washed out. Then at this point, it's time
to assess your painting. If everything looks good to you. For me, I feel like this line
is not quite dark enough, so I'm going to add
more shading over here. I think. Just added
a more dimension. Soften that up a little bit. Softening them out.
Then let's add our shades and right now it looks a little funny because
it's just floating in space. Once we add our leaves
around over there, then it will look a
lot better so let's do our last shading and
then we'll move on to other areas of the
painting to finish it off. For the shading. I figure
since we have the oranges, is the local color
of the pumpkin and then we have the pinkie. It's going to grab,
it ends up making a little bit of a I
guess you could say the brownish color and then I don't want to do it
all the way at the other end. I just want to do it
partially but just having these little extra shadows over here really
help pop things up. This is rounded around over
here and that might even look nice as just a straight line without shading it
out or fading it out. Actually, I like that
being a solid line. It gives it a little bit
of an intro right here. Let's do the same thing. Same thing over here. Now you can see as it's drying, this is starting to
look ugly so just staying on that before
it's drawing ugly. Then once this is dry, you can see that there's
a darker edge right here, and then it gets
to lighter ones. I'm going to leave it
like that and then once it's actually dry, then I can add a
little bit more of pigment down here
just to fix that up. Let me show you how to do that. Just let me dry it. Then lets and I also feel like
we need darker. Things are getting
a little bit too. I add water as I go along. Just need to darken this up a little bit and just
filling those out. I feel like this edge needs
that to just touch of dark. Sounding a little bit wet on wet because it was being
temperamental on me see how that starts trying. I don't want to make it too dark because if I make it too dark then my leaves
aren't going to be. The leaves will really
pop it out in there. We'll let that beat
and start moving on to our other areas so I have this nice brown color now
that I used for the shading, I'll just add a little
bit water to wash it out or lighten it up. Then we can use that for a
little pumpkin top over here. That orange with a little bit of that purple color added
in and let's see, I need it to be a little
bit darker at the bottom. I just grab that color that I had made for the crow and I'm
just adding that in there. I wanted to do one
more layer of gray for my make micro even
darker than what it is. I'm just making these areas a little bit darker
so that they don't, it's not such a big contrast. Now at this point,
let it dry again. Use your hair blow dryer, and then let's work
on our leaves.
9. Halloween Pumpkin: Leaves and Ground: [MUSIC] Now that we have our pumpkin and our crow
is just about done. Now let's make some really
deep purple for those leaves. I'm going to just start
grabbing my colors over here. Just my pink and I just
want it to be a fairly deep then ultramarine and I know that gives us a fairly and I still
need it to be darker. Then I'm going to add a
little bit of brown to it so that brings it more into
a maroon color over there. Let's start painting.
Since I'm right-handed, it's easy for me to move from left to right so I don't mess up nice things so then I'm just carefully
going to paint this. Reef is going to be behind my pumpkin so I just
want to be mindful not to paint on my pumpkin. I'm thinking I'll
probably have to paint twice around over here. We'll see how dark this ends up being
after the first round. The pumpkins have
these ginormous, these lobed leaves with
these little, protrusions. They're fun leaves to paint. I just wanted to have one little twisty tourney
thing over here too. I thought that would be fine. There we go. While
those are drying, we also need to paint the bottom but I don't want
to be painting that when I have all these are
still wet over here because then my
color is going to bleed. What we're going to do is we can work on our crow while we're doing that and then
we'll come back. Hopefully, this will
be the last layer that I'm going to
paint on this crow. Since we have our
pumpkin painted, we're also going to
be painting the legs. I'm going to add the
legs for the crow now. I felt like I didn't need any toes for the crow but if
you want toes for your crow, you could add maybe
just two toes for it, and then maybe just one
up on the top over here. I think I'm pretty
happy with my crow and then the little stem
of the pumpkin has little lines in it too so I'm just grabbing
that color that I was using for the leaves and just lightening
it up a little bit, just to draw my little
lines over here. There we go, that adds a fun little element and
then these are still wet. If your elements on the bottom are still wet
after painting the top, then grab your blow dryer and
dry them off really quick. Now just for our last little
highlights for our painting. For the ground over here, I grabbed on the purple that I used for the
leaves and some of the blue that I had mixed up for the sky earlier and
I'm just going to paint that along over here and mine it's a little bit lighter
than what my leaves are. I guess I could have
used a bigger brush, but this is fine for now. In the same way as before when we were painting the sky since this
is a big area too, I'm just trying to
keep a wet front going over here as I'm moving over from one
corner to the other. Then we can give the
pumpkin a little bit of a shadow too but
for that to happen, then we need to wait
for this to dry. Just adding some more
pigment around over here. There it's looking pretty good. Let's dry this yet again and then we'll add our last
little details to it. Now with the same color,
I was using before, I am just going to add a little bit of
what you would imagine. There's going to be dirt
on the ground and stuff. This is just dry on dry and
it'll be I like to make it a little bit speckly
and that way that just gives us a little bit
added texture in there. Then I wanted to
work and make my, grabbing some of my black
from my crow just to darken my purple for my leaves and these leaves that
are in the front, I wanted these to
be really dark. It's not about them
being really realistic. It's just pushing things in the front or in the back
and having these dark, you don't bring these up to, it brings these in front
of everything and up and up to the front there. I'm leaving the two back
one's a little bit lighter, but these front
ones I want it to be darkest ones at all and
then once they're dry, if you wanted to add veins
with the darkest of dark, you could do that and then
we're pretty much done. I'm just adding a little
bit more interest since, after the stride, this
wasn't really that dark, so just adding a few
things over here. Sometimes it's
always dark when you put it on and then
once it dries, it dries a lot lighter than what you thought it was going
to be there. Dry again. Now just to add the final
little details to our painting. As I said, I like to add the
little veins to the leaves. If you have two options, you can either add it with the black and add black veins
or you could add it with a lighter color if you had a lighter pencil like I
have this light gray. I could add the lines with that, so it's up to you, which look you like better
so today let's see. Let me add, or I have
this orangey color. Maybe we'll use
the orange and so use this to add the veins. It's nice because it's orange and that way it
matches my pumpkin. In my practice piece that
I had done for this class, I had made the
veins with a black. It's up to you if you
wanted to try that too and then I do like the idea of the pumpkin having a
little bit more texture. Let's mix just a little bit
more of that orange color. I just have a little bit
too much water to it. I just wanted to add a little bit more texture to my pumpkin, so it's not quite dark
enough, you can't see it. It's a little bit dark so I'm just lightning in this
spot up a little bit. Just adding some little
texture things is just, it just adds a visual
interest since pumpkins aren't perfect things
that grow up there. They might have little
beauty spots and things so it's nice
to add that in there. You don't want to add too many, just a few and then
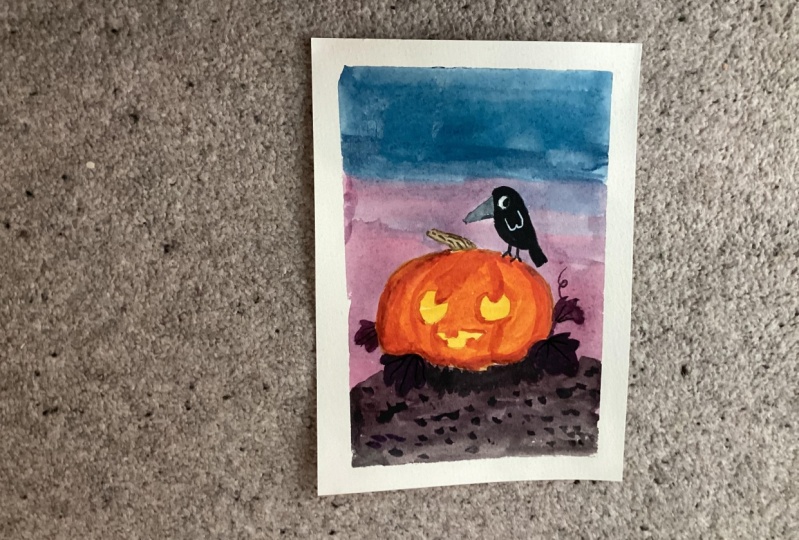
I think we're done. What do you think? Our happy
little Halloween pumpkin. We have to do our tape peel
because that's always very satisfying at the end. I hope you enjoyed
painting with me. Now I know that you might
not be watching this during fall and Halloween season or you might not
celebrate Halloween. I have completely
different second project that will be in the next video
that you can paint just the regular
fall-themed pumpkin with a little square on the top. I'll see you in
that video. [MUSIC]
10. Alternative Pumpkin Painting: [MUSIC] For a little bonus video and project for you guys, I know that you might not be watching this video when
it's right before Halloween, and so I wanted to include a second option for
a painting for you. This is a daytime one,
and for this one, we're still going to be
practicing the same thing with painting the gradation
for the background, but we're going to be using just a lighter blue
and a lighter pink, and then we're going
to be painting the pumpkin during the daytime. For this painting, I'm just including a time-lapse
video for you to watch. It's very similar to what we did for our first painting
for the main project, but if you would rather paint just a fall pumpkin
with a little squirrel, then this is included
in your sketches too, and I hope you enjoy
the time-lapse. [NOISE] [MUSIC] [NOISE] [MUSIC] I hope you've
picked up some fun tips from watching that video. Now, let's look at some advanced applications of how to use the smooth
painting technique.
11. Advanced Applications: [MUSIC] As I mentioned
in the video when we were painting our pumpkins, that I use this technique especially when I'm
drawing animals. I just wanted to
show a few examples of what I've done in the past. Over here, I've used
the fading technique to paint the nose and the cheek red
as you can tell. On the second example, I've obviously used
it for the sky. Then you can also
tell if you look at the little mouse
on the bottom, how it has a color fade from a reddish brown to
a lighter brown down towards the middle of the
ball and off this fall, so there's fades
in the snow over here and around over here. Then a lot of times when
I'm painting birds, birds will have a lot of those gradations from
one area to another. You can see some softer
shading over here, and on the back of the waxwing around over
here and around over here. A lot of times [MUSIC]
I'll start with the fade on the bottom, and then I'll add texture to it, then I'll add a wet on dry technique to add
the feathers to it. This technique is really useful for a lot
of different ways. You can also see it here
on the hummingbird, how it's got lighter and
then darker on the edges. This is a really useful
technique to use when you're using it with other
types of techniques. Actually what I plan to do, is for the next video
following this one, we are going to be putting everything that we've
learned into use, and we're going to be practicing fur and feather textures
on animals and birds. That will be our subject
for the next class. [MUSIC]
12. Final Thoughts: [MUSIC] Congratulations
for finishing the class. I hope you had fun and
feel more confident in creating smooth areas of
color and nice soft shading. If you haven't checked out
my other watercolor classes, I teach you all the
basics in watercolor. We go over negative painting, wet on wet painting, we talk about compositions, and which supplies are
best for watercolors. I hope that this class spiced
up some fun ideas for fall themed illustrations that
you can use as decorations, as cards, and to give
as little gifts. [MUSIC] All the files
that you need to complete the illustrations
in the projects in this class are in
the Projects and Resources section of this page. They are easiest to access and print out from a
desktop computer. If you feel brave, I hope that you will upload a
photo of your final project into the Projects and
Resources page of this class. I love seeing all of them. Especially if you need
any help or you want some comments or critique
on it or you had a problem, feel free to write that
in your comments and I'll be happy to respond
to all your questions. If you are on social media, you can tag me at Mirka Hokkanen and use the hashtag
MirkaSkillshare. Remember to follow me
here on Skillshare, so that way you'll be notified of all my upcoming classes. Take care, happy painting, and I'll see you in
the next class. Bye.
 Mirka Hokkanen, Illustrator/Author/Printmaker/Educator